
Dallinger Documentation...Dallinger Documentation, Release 5.1.0 Dallinger is a tool to automate...
136
Dallinger Documentation Release 6.0.0 Dallinger Development Team Mar 25, 2020
Transcript of Dallinger Documentation...Dallinger Documentation, Release 5.1.0 Dallinger is a tool to automate...
Dallinger DocumentationRelease 6.0.0
Dallinger Development Team
Mar 25, 2020

User Documentation
1 User Documentation 3
2 Beginner Documentation 35
3 Dallinger Demos 37
4 Experiment Author Documentation 43
5 Core Contribution Documentation 121
6 General Information 125
Python Module Index 127
Index 129
i

ii

Dallinger Documentation, Release 6.0.0
Dallinger is a tool to automate experiments that use combinations of automated bots and human subjects recruited onplatforms like Mechanical Turk.
Dallinger allows crowd sourced experiments to be abstracted into single function calls that can be inserted into higher-order algorithms. It fully automates the process of recruiting participants, obtaining informed consent, arrangingparticipants into a network, running the experiment, coordinating communication, recording and managing the data,and paying the participants.
The Dallinger technology stack consists of: Python, Redis, Web Sockets, Heroku, AWS, Mechanical Turk, boto, Flask,PostgreSQL, SQLAlchemy, Gunicorn, Pytest and gevent among others.
User Documentation 1

Dallinger Documentation, Release 6.0.0
2 User Documentation
CHAPTER 1
User Documentation
These documentation topics are intended to assist people who are attempting to launch experiments and analyse theirdata. They cover the basics of installing and setting up Dallinger, as well as use of the command line tools.
1.1 Installation
If you would like to contribute to Dallinger, please follow these alternative install instructions.
1.1.1 Installation Options
Dallinger is tested with Ubuntu 18.04 LTS, 16.04 LTS, 14.04 LTS and Mac OS X locally. We do not recommendedrunning Dallinger with Microsoft Windows, however if you do, running Ubuntu in a virtual machine is the recommendmethod.
1.1.2 Using Dallinger with Docker
Docker is a containerization tool used for developing isolated software environments. Read more about using Dallingerwith Docker here.
1.1.3 Mac OS X
Install Python
Dallinger is written in the language Python. For it to work, you will need to have Python 2.7 installed, or alternativelyPython 3.6 or higher. Python 3 is the preferred option. You can check what version of Python you have by running:
python --version
3
Dallinger Documentation, Release 6.0.0
Note: You will also need to have pip installed. It is included in some of the later versions of Python 3, but not all.(pip is a package manager for Python packages, or modules if you like.) If you are using Python 3, you may find thatyou may need to use the pip3 command instead of pip where applicable in the instructions that follow.
Using Homebrew will install the latest version of Python and pip by default.
brew install python
This will install the latest Python3 and pip3.
You can also use the preinstalled Python in Mac OS X, currently Python 2.7 as of writing.
If you installed Python 3 with Homebrew, you should now be able to run the python3 command from the terminal.If the command cannot be found, check the Homebrew installation log to see if there were any errors. Sometimesthere are problems symlinking Python 3 to the python3 command. If this is the case for you, look here for clues toassist you.
With the preinstalled Python in Mac OS X, you will need to install pip yourself. You can use:
sudo easy_install pip
Should that not work for whatever reason, you can search here for more clues.
Install Postgresql
On Mac OS X, we recommend installing using Homebrew:
brew install postgresql
Postgresql can then be started and stopped using:
brew services start postgresqlbrew services stop postgresql
Create the databases
After installing Postgres, you will need to create two databases: one for your experiments to use, and a second tosupport importing saved experiments. It is recommended that you also create a database user.
Naviagate to a terminal and type:
createuser -P dallinger --createdb(Password: dallinger)createdb -O dallinger dallingercreatedb -O dallinger dallinger-import
The first command will create a user named dallinger and prompt you for a password. The second and thirdcommand will create the dallinger and dallinger-import databases, setting the newly created user as theowner.
You can optionally inspect your databases by entering psql dallinger. Inside psql you can use commands to seethe roles and database tables:
\du\l
4 Chapter 1. User Documentation

Dallinger Documentation, Release 6.0.0
To quit:
\q
If you get an error like the following:
createuser: could not connect to database postgres: could not connect to server:Is the server running locally and acceptingconnections on Unix domain socket "/tmp/.s.PGSQL.5432"?
then postgres is not running. Start postgres as described in the Install Postgresql section above.
Install Heroku
To run experiments locally or on the internet, you will need the Heroku Command Line Interface installed, version3.28.0 or better. If you want to launch experiments on the internet, then you will also need a Heroku.com account,however this is not needed for local debugging.
To check which version of the Heroku CLI you have installed, run:
heroku --version
To install:
brew install heroku/brew/heroku
More information on the Heroku CLI is available at heroku.com along with alternative installation instructions, ifneeded.
Install Redis
Debugging experiments requires you to have Redis installed and the Redis server running.
brew install redis
Start Redis on Mac OS X with:
brew services start redis
You can find more details and other installation instructions at redis.com.
Install Git
Dallinger uses Git, a distributed version control system, for version control of its code. If you do not have it installed,you can install it as follows:
brew install git
You will need to configure your Git name and email:
git config --global user.email "[email protected]"git config --global user.name "Your Name"
Replace [email protected] and Your Name with your email and name to set your account’s default identity.Omit –global to set the identity only in this repository. You can read more about configuring Git here.
1.1. Installation 5

Dallinger Documentation, Release 6.0.0
Set up a virtual environment
Why use virtualenv?
Virtualenv solves a very specific problem: it allows multiple Python projects that have different (and often conflicting)requirements, to coexist on the same computer. If you want to understand this in detail, you can read more about ithere.
Now let’s set up a virtual environment by running the following commands:
If using Python 2.7 and pip:
pip install virtualenvpip install virtualenvwrapperexport WORKON_HOME=$HOME/.virtualenvsmkdir -p $WORKON_HOMEexport VIRTUALENVWRAPPER_PYTHON=$(which python)source $(which virtualenvwrapper.sh)
If using Python 3.x and pip3 (Python 3.7 in this example):
pip3 install virtualenvpip3 install virtualenvwrapperexport WORKON_HOME=$HOME/.virtualenvsmkdir -p $WORKON_HOMEexport VIRTUALENVWRAPPER_PYTHON=$(which python3.7)source $(which virtualenvwrapper.sh)
Now create the virtual environment using:
mkvirtualenv dlgr_env --python <specify_your_python_path_here>
Examples:
Using homebrew installed Python 3.7:
mkvirtualenv dlgr_env --python /usr/local/bin/python3.7
Using Python 2.7:
mkvirtualenv dlgr_env --python /usr/bin/python
Virtualenvwrapper provides an easy way to switch between virtual environments by simply typing: workon[virtual environment name].
The technical details:
These commands use pip/pip3, the Python package manager, to install two packages virtualenv andvirtualenvwrapper. They set up an environmental variable named WORKON_HOMEwith a string that gives a pathto a subfolder of your home directory (~) called Envs, which the next command (mkdir) then makes according to thepath described in $WORKON_HOME (recursively, due to the -p flag). That is where your environments will be stored.The source command will run the command that follows, which in this case locates the virtualenvwrapper.sh shell script, the contents of which are beyond the scope of this setup tutorial. If you want to know what it does, amore in depth description can be found on the documentation site for virtualenvwrapper.
Finally, the mkvirtualenv makes your first virtual environment which you’ve named dlgr_env. We have explic-itly passed it the location of the Python that the virtualenv should use. This Python has been mapped to the pythoncommand inside the virtual environment.
The how-to:
6 Chapter 1. User Documentation
Dallinger Documentation, Release 6.0.0
In the future, you can work on your virtual environment by running: Python 2.7
export VIRTUALENVWRAPPER_PYTHON=$(which python)source $(which virtualenvwrapper.sh)workon dlgr_env
Python 3.x
export VIRTUALENVWRAPPER_PYTHON=$(which python3.7)source $(which virtualenvwrapper.sh)workon dlgr_env
NB: To stop working in the virtual environment, run deactivate. To list all available virtual environments, runworkon with no arguments.
If you plan to do a lot of work with Dallinger, you can make your shell execute the virtualenvwrapper.shscript everytime you open a terminal. To do that type:
Python 2.7
echo "export VIRTUALENVWRAPPER_PYTHON=$(which python)" >> ~/.bash_profileecho "source $(which virtualenvwrapper.sh)" >> ~/.bash_profile
Python 3.x
echo "export VIRTUALENVWRAPPER_PYTHON=$(which python3.7)" >> ~/.bash_profileecho "source $(which virtualenvwrapper.sh)" >> ~/.bash_profile
From then on, you only need to use the workon command before starting.
Install Dallinger
Install Dallinger from the terminal by running
pip install dallinger[data]
Test that your installation works by running:
dallinger --version
Next, you’ll need access keys for AWS, Heroku, etc..
1.1.4 Ubuntu
Install Python
Dallinger is written in the language Python. For it to work, you will need to have Python 2.7 installed, or alternativelyPython 3.6 or higher. Python 3 is the preferred option. You can check what version of Python you have by running:
python --version
Ubuntu 18.04 LTS ships with Python 3.6.
Ubuntu 16.04 LTS ships with Python 3.5, while Ubuntu 14.04 LTS ships with Python 3.4. In case you are using one ofthese distributions of Ubuntu, you can use Dallinger with Python 2.7 or upgrade to the latest Python 3.x on your own.
(All three of these Ubuntu versions also provide a version of Python 2.7)
1.1. Installation 7

Dallinger Documentation, Release 6.0.0
If you do not have Python 3 installed, you can install it from the Python website.
Also make sure you have the python headers installed. The python-dev package contains the header files you need tobuild Python extensions appropriate to the Python version you will be using.
Note: You will also need to have pip installed. It is included in some of the later versions of Python 3, but not all.(pip is a package manager for Python packages, or modules if you like.) If you are using Python 3, you may find thatyou may need to use the pip3 command instead of pip where applicable in the instructions that follow.
If using Python 2.7.x:
sudo apt-get install python-devsudo apt install -y python-pip
If using Python 3.x:
sudo apt-get install python3-devsudo apt install -y python3-pip
Install Postgresql
The lowest version of Postgresql that Dallinger v5 supports is 9.4.
This is fine for Ubuntu 18.04 LTS and 16.04 LTS as they ship with Postgresql 10.4 and 9.5 respectively, howeverUbuntu 14.04 LTS ships with Postgresql 9.3
Postgres can be installed using the following instructions:
Ubuntu 18.04 LTS or Ubuntu 16.04 LTS:
sudo apt-get update && sudo apt-get install -y postgresql postgresql-contrib libpq-dev
To run postgres, use the following command:
sudo service postgresql start
Ubuntu 14.04 LTS:
Create the file /etc/apt/sources.list.d/pgdg.list and add a line for the repository:
sudo sh -c 'echo "deb http://apt.postgresql.org/pub/repos/apt/ `lsb_release -cs`-pgdg→˓main" >> /etc/apt/sources.list.d/pgdg.list'
Import the repository signing key, update the package lists and install postgresql:
wget -q https://www.postgresql.org/media/keys/ACCC4CF8.asc -O - | sudo apt-key add -sudo apt-get update && sudo apt-get install -y postgresql postgresql-contrib
To run postgres, use the following command:
sudo service postgresql start
Create the databases
Make sure that postgres is running. Switch to the postgres user:
8 Chapter 1. User Documentation

Dallinger Documentation, Release 6.0.0
sudo -u postgres -i
Run the following commands:
createuser -P dallinger --createdb(Password: dallinger)createdb -O dallinger dallingercreatedb -O dallinger dallinger-importexit
The second command will create a user named dallinger and prompt you for a password. The third and fourthcommands will create the dallinger and dallinger-import databases, setting the newly created user as theowner.
Finally restart postgresql:
sudo service postgresql reload
Install Heroku
To run experiments locally or on the internet, you will need the Heroku Command Line Interface installed, version3.28.0 or better. If you want to launch experiments on the internet, then you will also need a Heroku.com account,however this is not needed for local debugging.
To check which version of the Heroku CLI you have installed, run:
heroku --version
To install:
sudo apt-get install curlcurl https://cli-assets.heroku.com/install.sh | sh
More information on the Heroku CLI is available at heroku.com along with alternative installation instructions, ifneeded.
Install Redis
Debugging experiments requires you to have Redis installed and the Redis server running.
sudo apt-get install -y redis-server
Start Redis on Ubuntu with:
sudo service redis-server start
You can find more details and other installation instructions at redis.com.
Install Git
Dallinger uses Git, a distributed version control system, for version control of its code. If you do not have it installed,you can install it as follows:
1.1. Installation 9
Dallinger Documentation, Release 6.0.0
sudo apt install git
You will need to configure your Git name and email:
git config --global user.email "[email protected]"git config --global user.name "Your Name"
Replace [email protected] and Your Name with your email and name to set your account’s default identity.Omit –global to set the identity only in this repository. You can read more about configuring Git here.
Set up a virtual environment
Why use virtualenv?
Virtualenv solves a very specific problem: it allows multiple Python projects that have different (and often conflicting)requirements, to coexist on the same computer. If you want to understand this in detail, you can read more about ithere.
Now let’s set up a virtual environment by running the following commands:
If using Python 2.7 and pip:
sudo pip install virtualenvsudo pip install virtualenvwrapperexport WORKON_HOME=$HOME/.virtualenvsmkdir -p $WORKON_HOMEsource /usr/share/virtualenvwrapper/virtualenvwrapper.sh
Note: If the last line failed with “No such file or directory”. Try using source /usr/local/bin/virtualenvwrapper.sh instead. Pip installs virtualenvwrapper.sh to different locations depending on theUbuntu version.
If using Python 3.x and pip3:
sudo pip3 install virtualenvsudo pip3 install virtualenvwrapperexport WORKON_HOME=$HOME/.virtualenvsmkdir -p $WORKON_HOMEexport VIRTUALENVWRAPPER_PYTHON=/usr/bin/python3source /usr/local/bin/virtualenvwrapper.sh
Now create the virtualenv using the mkvirtualenv command as follows:
If you are using Python 3 that is part of your Ubuntu installation (Ubuntu 18.04):
mkvirtualenv dlgr_env --python /usr/bin/python3
If you are using Python 2 that is part of your Ubuntu installation:
mkvirtualenv dlgr_env --python /usr/bin/python
If you are using another Python version (eg. custom installed Python 3.x on Ubuntu 16.04 or Ubuntu 14.04):
mkvirtualenv dlgr_env --python <specify_your_python_path_here>
10 Chapter 1. User Documentation

Dallinger Documentation, Release 6.0.0
Virtualenvwrapper provides an easy way to switch between virtual environments by simply typing: workon[virtual environment name].
The technical details:
These commands use pip, the Python package manager, to install two packages virtualenv andvirtualenvwrapper. They set up an environmental variable named WORKON_HOMEwith a string that gives a pathto a subfolder of your home directory (~) called Envs, which the next command (mkdir) then makes according to thepath described in $WORKON_HOME (recursively, due to the -p flag). That is where your environments will be stored.The source command will run the command that follows, which in this case locates the virtualenvwrapper.sh shell script, the contents of which are beyond the scope of this setup tutorial. If you want to know what it does, amore in depth description can be found on the documentation site for virtualenvwrapper.
Finally, the mkvirtualenv makes your first virtual environment which you’ve named dlgr_env. We have explic-itly passed it the location of the Python that the virtualenv should use. This Python has been mapped to the pythoncommand inside the virtual environment.
The how-to:
In the future, you can work on your virtual environment by running: If using Python 2.7 and pip:
source /usr/share/virtualenvwrapper/virtualenvwrapper.shworkon dlgr_env
If using Python 3.x and pip3:
source /usr/local/bin/virtualenvwrapper.shworkon dlgr_env
NB: To stop working in the virtual environment, run deactivate. To list all available virtual environments, runworkon with no arguments.
If you plan to do a lot of work with Dallinger, you can make your shell execute the virtualenvwrapper.shscript everytime you open a terminal. To do that:
If using Python 2.7 and pip:
echo "source /usr/share/virtualenvwrapper/virtualenvwrapper.sh" >> ~/.bashrc
If using Python 3.x and pip3:
echo "source /usr/local/bin/virtualenvwrapper.sh" >> ~/.bashrc
From then on, you only need to use the workon command before starting.
Install Dallinger
Install Dallinger from the terminal by running
pip install dallinger[data]
Test that your installation works by running:
dallinger --version
Next, you’ll need access keys for AWS, Heroku, etc..
1.1. Installation 11
Dallinger Documentation, Release 6.0.0
1.2 Setting Up AWS, Mechanical Turk, and Heroku
Before you can use Dallinger, you will need accounts with Amazon Web Services, Amazon Mechanical Turk, andHeroku. You will then need to create a configuration file and set up your environment so that Dallinger can accessyour accounts.
1.2.1 Create the configuration file
The first step is to create the Dallinger configuration file in your home directory. You can do this using the Dallingercommand-line utility through
dallinger setup
which will prepopulate a hidden file .dallingerconfig in your home directory. Alternatively, you can create thisfile yourself and fill it in like so:
[AWS Access]aws_access_key_id = ???aws_secret_access_key = ???aws_region = us-east-1
In the next steps, we’ll fill in your config file with keys.
Note: The .dallingerconfig can be configured with many different parameters, see Configuration for detailedexplanation of each configuration option.
1.2.2 Amazon Web Services API Keys
There are two ways to get API keys for Amazon Web Services. If you are the only user in your AWS account, thesimplest thing to do is generate root user access keys, by following these instructions. You might be presented a dialogbox with options to continue to security credentials, or get started with IAM users. If you are the only user, or you areotherwise certain that this is what you want to do (see the following note), choose “Continue to Security Credentials”.
N.B. One feature of AWS API keys is that they are only displayed once, and though they can be regenerated, doing sowill render invalid previously generated keys. If you are running experiments using a laboratory account (or any otherkind of group-owned account), regenerating keys will stop other users who have previously generated keys from beingable to use the AWS account. Unless you are sure that you will not be interrupting others’ workflows, it is advised thatyou do not generate new API keys. If you are not the primary user of the account, see if you can obtain these keysfrom others who have successfully used AWS.
If you are not the primary user of your AWS account, or are part of a working group that shares the account, therecommended way to create the access keys is by creating AIM users and generating keys for them. If someone elsemanages the AWS account, ask them to generate the user and keys for you. If you need to manage the users and keysby yourself, follow these instructions.
After you have generated and saved your AWS access keys, fill in the following lines of .dallingerconfig,replacing ??? with your keys:
[AWS Access]aws_access_key_id = ???aws_secret_access_key = ???
12 Chapter 1. User Documentation
Dallinger Documentation, Release 6.0.0
1.2.3 Amazon Mechanical Turk
It’s worth signing up for Amazon Mechanical Turk (perhaps using your AWS account from above), both as a requesterand as a worker. You’ll use this to test and monitor experiments. You should also sign in to each sandbox, requesterand worker using the same account. Store this account and password somewhere, but you don’t need to tell it toDallinger.
1.2.4 Heroku
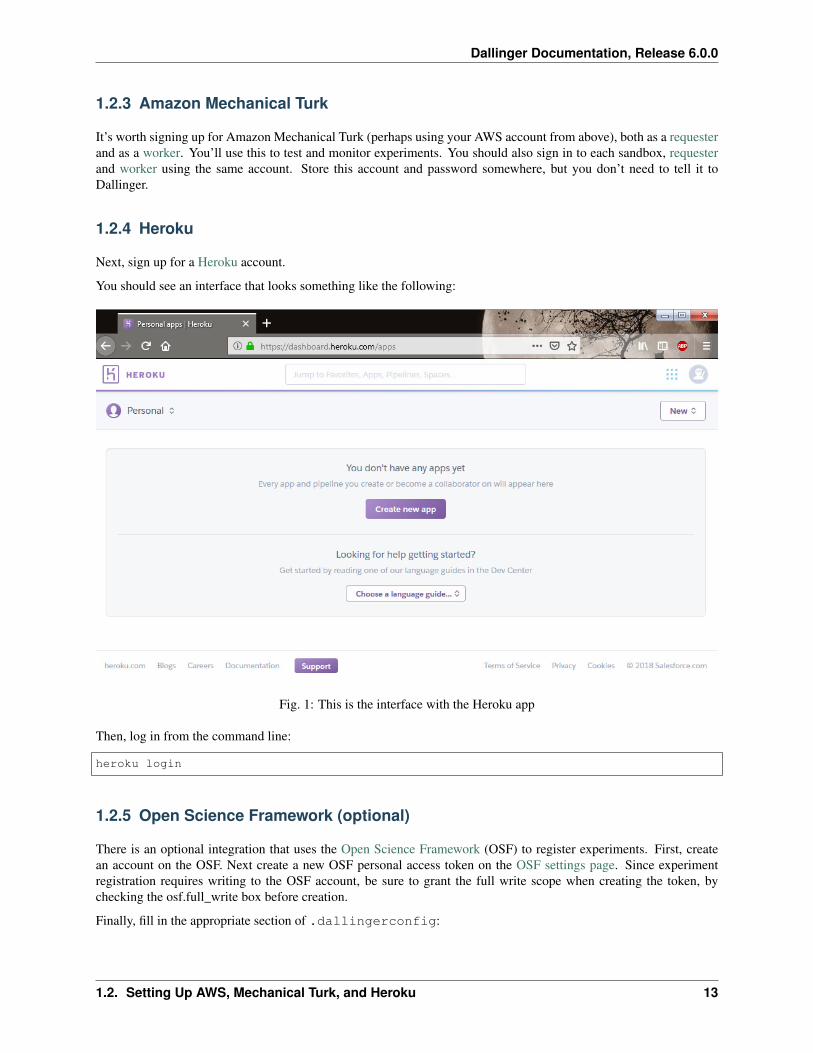
Next, sign up for a Heroku account.
You should see an interface that looks something like the following:
Fig. 1: This is the interface with the Heroku app
Then, log in from the command line:
heroku login
1.2.5 Open Science Framework (optional)
There is an optional integration that uses the Open Science Framework (OSF) to register experiments. First, createan account on the OSF. Next create a new OSF personal access token on the OSF settings page. Since experimentregistration requires writing to the OSF account, be sure to grant the full write scope when creating the token, bychecking the osf.full_write box before creation.
Finally, fill in the appropriate section of .dallingerconfig:
1.2. Setting Up AWS, Mechanical Turk, and Heroku 13
Dallinger Documentation, Release 6.0.0
[OSF]osf_access_token = ???
1.2.6 Done?
Done. You’re now all set up with the tools you need to work with Dallinger.
Next, we’ll test Dallinger to make sure it’s working on your system.
1.3 Demoing Dallinger
First, make sure you have Dallinger installed:
• Installation
• Developer Installation
To test out Dallinger, we’ll run a demo experiment in “debug” mode.
Note: Running the demo in “sandbox” mode as opposed to “debug” mode will require a Heroku account. Moreinformation for running in “sandbox” mode.
You can read more about this experiment here: Bartlett (1932) demo.
The experiment files can be found here. Extract them to a location of your choice, then from there, navigate to thebartlett1932 directory and run:
dallinger debug --verbose
If applicable, make sure that your virtualenv is enabled so that the dallinger command is available to you. AllDallinger command options are explained in the Command-line Utility” section.
Note: In the command above, we use the “–verbose” option to show more detailed logs in the terminal. This is a goodbest practice when creating and running your own experiments and gives more insight into errors when they occur.
You will see some output as Dallinger loads. When it is finished, you will see something that looks like:
12:00:00 PM web.1 | 2017-01-01 12:00:00,000 New participant requested: http://0.0.→˓0.0:5000/ad?assignmentId=debug9TXPFF&hitId=P8UTMZ&workerId=SP7HJ4&mode=debug
and your browser should automatically open to this URL. You can start interacting as the first participant in theexperiment.
In the terminal, press Ctrl+C to exit the server.
Help, the experiment page is blank! This may happen if you are using an ad-blocker. Try disabling your ad-blockerand refresh the page.
It is worth noting here that occasionally if an experiment does not exit gracefully, one maybe required to manuallycleanup some left over python processes, before running the same or another experiment with dallinger. See Trou-bleshooting for details.
14 Chapter 1. User Documentation
Dallinger Documentation, Release 6.0.0
1.4 Command-Line Utility
Dallinger is executed from the command line within the experiment directory with the following commands:
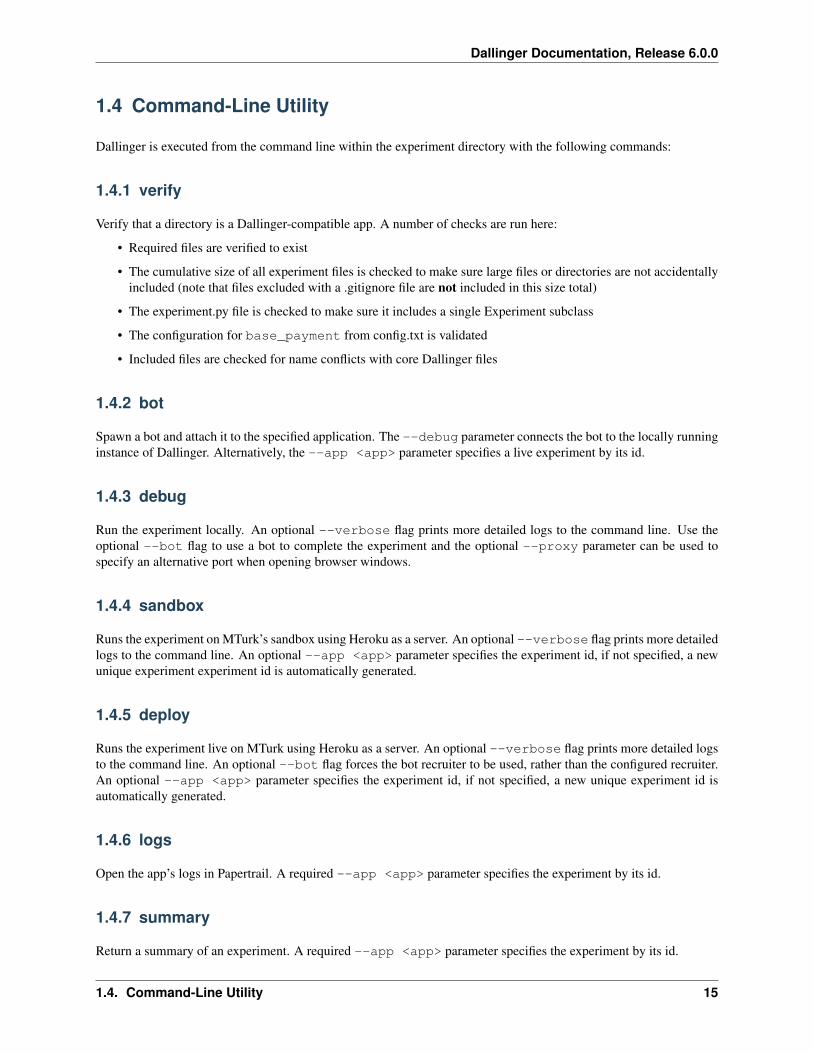
1.4.1 verify
Verify that a directory is a Dallinger-compatible app. A number of checks are run here:
• Required files are verified to exist
• The cumulative size of all experiment files is checked to make sure large files or directories are not accidentallyincluded (note that files excluded with a .gitignore file are not included in this size total)
• The experiment.py file is checked to make sure it includes a single Experiment subclass
• The configuration for base_payment from config.txt is validated
• Included files are checked for name conflicts with core Dallinger files
1.4.2 bot
Spawn a bot and attach it to the specified application. The --debug parameter connects the bot to the locally runninginstance of Dallinger. Alternatively, the --app <app> parameter specifies a live experiment by its id.
1.4.3 debug
Run the experiment locally. An optional --verbose flag prints more detailed logs to the command line. Use theoptional --bot flag to use a bot to complete the experiment and the optional --proxy parameter can be used tospecify an alternative port when opening browser windows.
1.4.4 sandbox
Runs the experiment on MTurk’s sandbox using Heroku as a server. An optional --verbose flag prints more detailedlogs to the command line. An optional --app <app> parameter specifies the experiment id, if not specified, a newunique experiment experiment id is automatically generated.
1.4.5 deploy
Runs the experiment live on MTurk using Heroku as a server. An optional --verbose flag prints more detailed logsto the command line. An optional --bot flag forces the bot recruiter to be used, rather than the configured recruiter.An optional --app <app> parameter specifies the experiment id, if not specified, a new unique experiment id isautomatically generated.
1.4.6 logs
Open the app’s logs in Papertrail. A required --app <app> parameter specifies the experiment by its id.
1.4.7 summary
Return a summary of an experiment. A required --app <app> parameter specifies the experiment by its id.
1.4. Command-Line Utility 15

Dallinger Documentation, Release 6.0.0
1.4.8 export
Download the database and partial server logs to a zipped folder within the data directory of the experimental folder.Databases are stored in CSV format. A required --app <app> parameter specifies the experiment by its id. Use theoptional --local flag if exporting a local experiment data. An optional --no-scrub flag will stop the scrubbingof personally identifiable information in the export. The scrubbing of PII is enabled by default.
1.4.9 qualify
Assign a Mechanical Turk qualification to one or more workers. This is useful when compensating workers if some-thing goes wrong with the experiment. Requires a --qualification parameter, which is a qualification ID, (or,if the --by_name is used, a qualification name), value --value parameter, and a list of one or more worker IDs,passed at the end of the command. The optional --notify flag can be used to notify workers via email. You canalso optionally specify the --sandbox flag to use the MTurk sandbox.
1.4.10 revoke
Revoke a Mechanical Turk qualification for one or more workers. This is useful when developing an experiment with“insider” participants, who would otherwise be prevented from accepting a HIT for an experiment they’ve alreadyparticipated in. Requires a --qualification, which is a qualification ID, (or, if the --by_name is used, aqualification name), an optional --reason string, and a list of one or more MTurk worker IDs. You can alsooptionally specify the --sandbox flag to use the MTurk sandbox.
1.4.11 hibernate
Temporarily scales down the specified app to save money. All dynos are removed and so are many of the add-ons.Hibernating apps are non-functional. It is likely that the app will not be entirely free while hibernating. To restore theapp use awaken. A required --app <app> parameter specifies the experiment by its id.
1.4.12 awaken
Restore a hibernating app. A required --app <app> parameter specifies the experiment by its id.
1.4.13 destroy
Tear down an experiment server. A required --app <app> parameter specifies the experiment by its id.Optional --expire-hit flag can be provided to force expiration of MTurk HITs associated with the app(--no-expire-hit can be used to disable HIT expiration). If app is sandboxed, you will need to use the--sandbox flag to expire HITs from the MTurk sandbox.
1.4.14 hits
List all MTurk HITs for a dallinger app. A required --app <app> parameter specifies the experiment by its id. Anoptional --sandbox flag indicates to look for HITs in the MTurk sandbox.
16 Chapter 1. User Documentation
Dallinger Documentation, Release 6.0.0
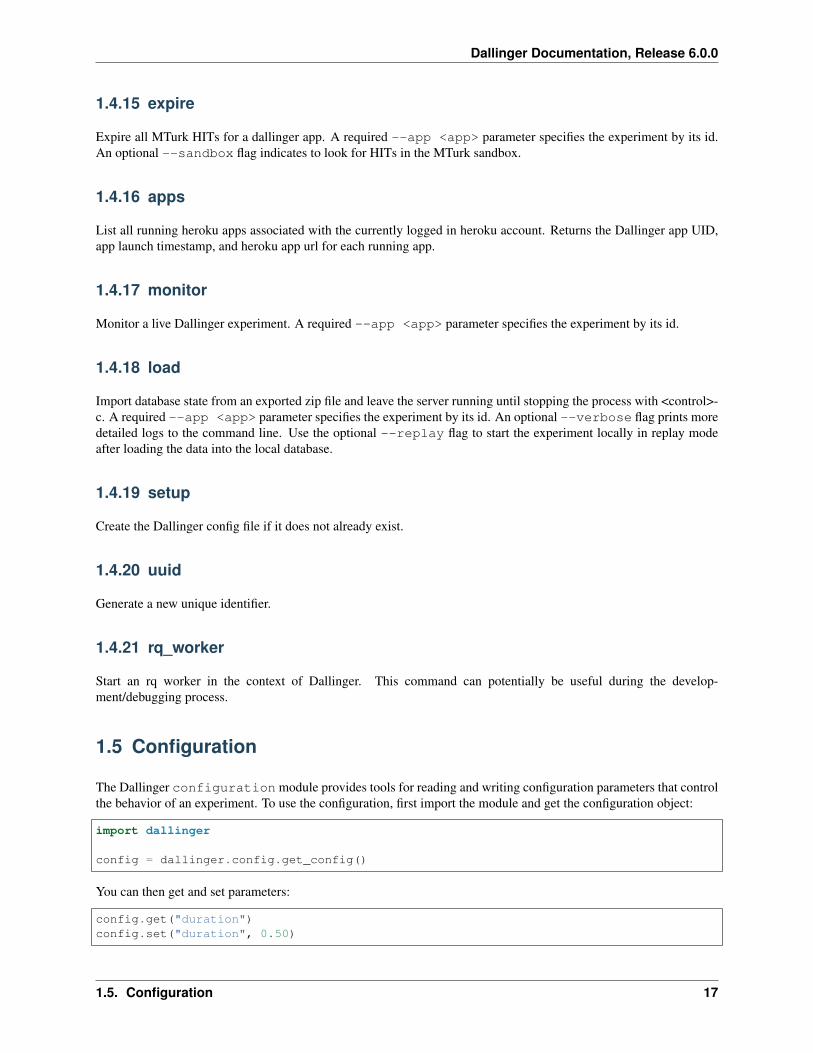
1.4.15 expire
Expire all MTurk HITs for a dallinger app. A required --app <app> parameter specifies the experiment by its id.An optional --sandbox flag indicates to look for HITs in the MTurk sandbox.
1.4.16 apps
List all running heroku apps associated with the currently logged in heroku account. Returns the Dallinger app UID,app launch timestamp, and heroku app url for each running app.
1.4.17 monitor
Monitor a live Dallinger experiment. A required --app <app> parameter specifies the experiment by its id.
1.4.18 load
Import database state from an exported zip file and leave the server running until stopping the process with <control>-c. A required --app <app> parameter specifies the experiment by its id. An optional --verbose flag prints moredetailed logs to the command line. Use the optional --replay flag to start the experiment locally in replay modeafter loading the data into the local database.
1.4.19 setup
Create the Dallinger config file if it does not already exist.
1.4.20 uuid
Generate a new unique identifier.
1.4.21 rq_worker
Start an rq worker in the context of Dallinger. This command can potentially be useful during the develop-ment/debugging process.
1.5 Configuration
The Dallinger configuration module provides tools for reading and writing configuration parameters that controlthe behavior of an experiment. To use the configuration, first import the module and get the configuration object:
import dallinger
config = dallinger.config.get_config()
You can then get and set parameters:
config.get("duration")config.set("duration", 0.50)
1.5. Configuration 17
Dallinger Documentation, Release 6.0.0
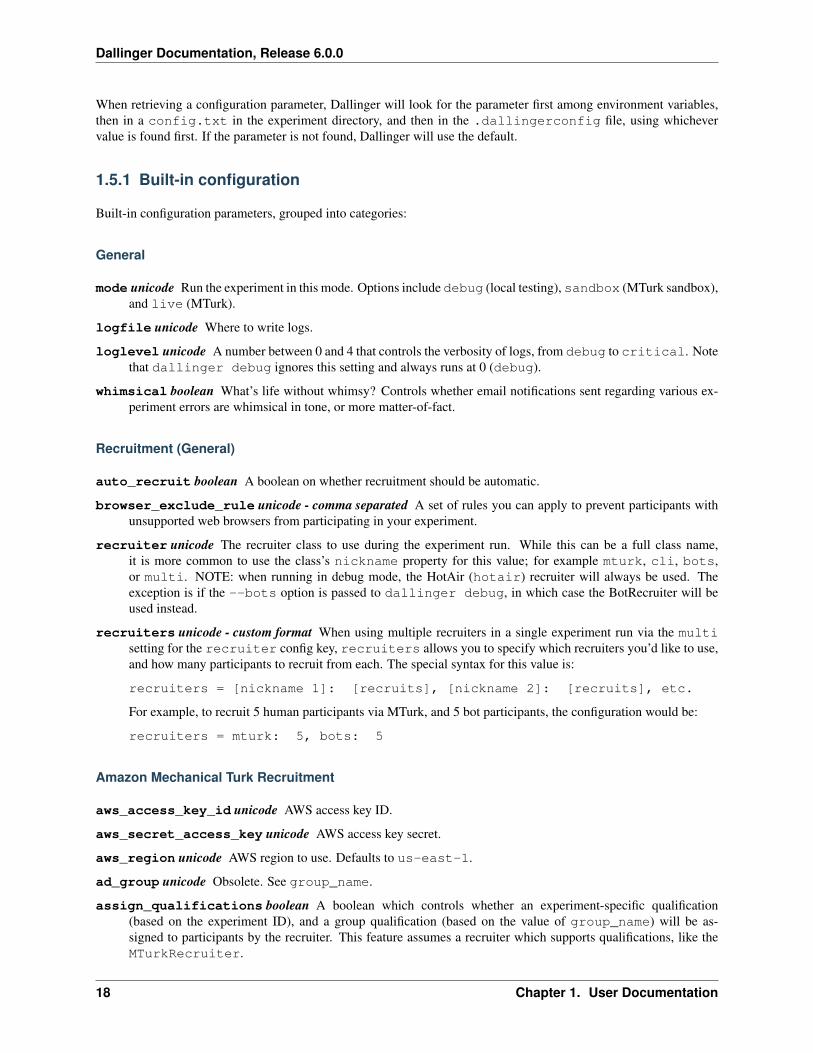
When retrieving a configuration parameter, Dallinger will look for the parameter first among environment variables,then in a config.txt in the experiment directory, and then in the .dallingerconfig file, using whichevervalue is found first. If the parameter is not found, Dallinger will use the default.
1.5.1 Built-in configuration
Built-in configuration parameters, grouped into categories:
General
mode unicode Run the experiment in this mode. Options include debug (local testing), sandbox (MTurk sandbox),and live (MTurk).
logfile unicode Where to write logs.
loglevel unicode A number between 0 and 4 that controls the verbosity of logs, from debug to critical. Notethat dallinger debug ignores this setting and always runs at 0 (debug).
whimsical boolean What’s life without whimsy? Controls whether email notifications sent regarding various ex-periment errors are whimsical in tone, or more matter-of-fact.
Recruitment (General)
auto_recruit boolean A boolean on whether recruitment should be automatic.
browser_exclude_rule unicode - comma separated A set of rules you can apply to prevent participants withunsupported web browsers from participating in your experiment.
recruiter unicode The recruiter class to use during the experiment run. While this can be a full class name,it is more common to use the class’s nickname property for this value; for example mturk, cli, bots,or multi. NOTE: when running in debug mode, the HotAir (hotair) recruiter will always be used. Theexception is if the --bots option is passed to dallinger debug, in which case the BotRecruiter will beused instead.
recruiters unicode - custom format When using multiple recruiters in a single experiment run via the multisetting for the recruiter config key, recruiters allows you to specify which recruiters you’d like to use,and how many participants to recruit from each. The special syntax for this value is:
recruiters = [nickname 1]: [recruits], [nickname 2]: [recruits], etc.
For example, to recruit 5 human participants via MTurk, and 5 bot participants, the configuration would be:
recruiters = mturk: 5, bots: 5
Amazon Mechanical Turk Recruitment
aws_access_key_id unicode AWS access key ID.
aws_secret_access_key unicode AWS access key secret.
aws_region unicode AWS region to use. Defaults to us-east-1.
ad_group unicode Obsolete. See group_name.
assign_qualifications boolean A boolean which controls whether an experiment-specific qualification(based on the experiment ID), and a group qualification (based on the value of group_name) will be as-signed to participants by the recruiter. This feature assumes a recruiter which supports qualifications, like theMTurkRecruiter.
18 Chapter 1. User Documentation
Dallinger Documentation, Release 6.0.0
group_name unicode Assign a named qualification to workers who complete a HIT.
qualification_blacklist unicode - comma seperated Comma-separated list of qualification names. Work-ers with qualifications in this list will be prevented from viewing and accepting the HIT.
title unicode The title of the HIT on Amazon Mechanical Turk.
description unicode The description of the HIT on Amazon Mechanical Turk.
keywords unicode A comma-separated list of keywords to use on Amazon Mechanical Turk.
lifetime integer How long in hours that your HIT remains visible to workers.
duration float How long in hours participants have until the HIT will time out.
us_only boolean Controls whether this HIT is available only to MTurk workers in the U.S.
base_payment float Base payment in U.S. dollars. All workers who accept the HIT are guaranteed this muchcompensation.
approve_requirement integer The percentage of past MTurk HITs that must have been approved for a workerto qualify to participate in your experiment. 1-100.
organization_name unicode Obsolete.
Preventing Repeat Participants
If you set a group_name and assign_qualifications is also set to true, workers who complete your HITwill be given an MTurk qualification for your group_name. In the future, you can prevent these workers fromparticipating in a HIT with the same group_name by including that name in the qualification_blacklistconfiguration. These four configuration keys work together to create a system to prevent recuiting workers who havealready completed a prior run of the same experiment.
Email Notifications
See Email Notification Setup for a much more detailed explanation of these values and their use.
contact_email_on_error unicode The email address used as the recipient for error report emails, and theemail displayed to workers when there is an error.
dallinger_email_address unicode An email address for use by Dallinger to send status emails.
smtp_host unicode Hostname and port of a mail server for outgoing mail. Defaults to smtp.gmail.com:587
smtp_username unicode Username for outgoing mail host.
smtp_password unicode Password for the outgoing mail host.
Deployment Configuration
database_url unicode URI of the Postgres database.
database_size unicode Size of the database on Heroku. See Heroku Postgres plans.
dyno_type unicode Heroku dyno type to use. See Heroku dynos types.
redis_size unicode Size of the redis server on Heroku. See Heroku Redis.
num_dynos_web integer Number of Heroku dynos to use for processing incoming HTTP requests. It is recom-mended that you use at least two.
num_dynos_worker integer Number of Heroku dynos to use for performing other computations.
1.5. Configuration 19
Dallinger Documentation, Release 6.0.0
host unicode IP address of the host.
port unicode Port of the host.
clock_on boolean If the clock process is on, it will perform a series of checks that ensure the integrity of thedatabase.
heroku_python_version unicode The python version to be used on Heroku deployments. The version spec-ification will be deployed to Heroku in a runtime.txt file in accordance with Heroku’s deployment API. Notethat only the version number should be provided (eg: “2.7.14”) and not the “python-” prefix included in thefinal runtime.txt format. See Dallinger’s global_config_defaults.txt for the current default version. See Herokusupported runtimes.
heroku_team unicode The name of the Heroku team to which all applications will be assigned. This is useful forcentralized billing. Note, however, that it will prevent you from using free-tier dynos.
worker_multiplier float Multiplier used to determine the number of gunicorn web worker processes started perHeroku CPU count. Reduce this if you see Heroku warnings about memory limits for your experiment. Defaultis 1.5
1.5.2 Choosing configuration values
When running real experiments it is important to pick configuration variables that result in a deployment that performsappropriately.
The number of Heroku dynos that are required and their specifications can make a very large difference to how theapplication behaves.
num_dynos_web This configuration variable determines how many dynos are run to deal with web traffic. Theywill be transparently load-balanced, so the more web dynos are started the more simultaneous HTTP requeststhe stack can handle. If an experiment defines the channel variable to subscribe to websocket events thenall of these callbacks happen on the dyno that handles the initial /launch POST, so experiments that use thisfunctionality heavily receive significantly less benefit from increasing num_dynos_web. The optimum valuediffers between experiments, but a good rule of thumb is 1 web dyno for every 10-20 simultaneous human users.
num_dynos_worker Workers are dynos that pull tasks from a queue and execute them in the background. Theyare optimized for many short tasks, but they are also used to run bots which are very long-lived. Each workercan run up to 20 concurrent tasks, however they are co-operatively multitasked so a poorly behaving taskcan cause all others sharing its host to block. When running with bots, you should always pick a value ofnum_dynos_worker` that is at least ``0.05*number_of_bots, otherwise it is guaranteedto fail. In practice, there may well be experiment-specific tasks that also need to execute, and bots are moreperformant on underloaded dynos, so a better heuristic is 0.25*number_of_bots.
dyno_type This determines how powerful the heroku dyno that’s started is. It applies to both web and workerdyno types. The minimum recommended is standard-1x, which should be sufficient for experiments thatdo not rely on real-time coordination, such as Bartlett (1932), stories. Experiments that require significantpower to process websocket events should consider the higher levels, standard-2x, performance-m andperformance-l. In all but the most intensive experiments, either dyno_type or num_dynos_web shouldbe increased, not both.
redis_size A larger value for this increases the number of connections available on the redis dyno. This should beincreased for experiments that make substantial use of websockets. Values are premium-0 to premium-14.It is very unlikely that values higher than premium-5 are useful.
duration The duration parameter determines the number of hours that an MTurk worker has to complete the ex-periment. Choosing numbers that are too short can cause people to refuse to work on a HIT. A deadline that istoo long may give people pause for thought as it may make the task seem underpaid. Set this to be significantlyabove the total time from start to finish that you’d expect a user to take in the worst case.
20 Chapter 1. User Documentation

Dallinger Documentation, Release 6.0.0
base_payment The amount of US dollars to pay for completion of the experiment. The higher this is, the easier itwill be to attract workers.
1.6 Email Notification Setup
Dallinger can be configured to send email messages when errors occur during a running experiment. If this configura-tion is skipped, messages which would otherwise be emailed will be written to the experiment logs instead.
1.6.1 Instructions
Sending email from Dallinger requires 5 configuration settings, described in turn below. Like all configuration settings,they can be set up in either .dallingerconfig in your home directory, or in config.txt in the root directory of yourexperiment.
The Config Settings
smtp_host The hostname and port of the SMTP (outgoing email) server through which all email will be sent. Thisdefaults to smtp.gmail.com:587, the Google SMTP server. If you want to send email from a Gmail address, or acustom domain set up to use Gmail for email, this default setting is what you want.
smtp_username The username with which to log into the SMTP server, which will very likely be an email address(if you are using a Gmail address to send email, you will use that address for this value).
smtp_password The password associated with the smtp_username.
NOTE If you are using two-factor authentication, see Two-Factor Authentication, below.
dallinger_email_address The email address to be used as the “from” address outgoing email notifications.For Gmail accounts, this address is likely to be overwritten by the Google SMTP server. See Gmail “From”address rewriting below.
contact_email_on_error Also an email address, and used in two ways:
1. It serves as the recipient address for outgoing notifications
2. It is displayed to experiment participants on the error page, so that they can make inquiries about compen-sation
Pitfalls and Solutions
A few other things which may get in the way of sending email successfully, or cause things to behave differently thanexpected:
Two-Factor Authentication
Having two-factor authentication enabled for the outgoing email account will prevent Dallinger from sending emailwithout some additional steps. Detailed instructions are provided for Gmail, below. Other email services whichsupport two-factor authentication may provide equivalent solutions.
1.6. Email Notification Setup 21

Dallinger Documentation, Release 6.0.0
Working with Google/Gmail Two-factor Authentication
If you are using Gmail with two-factor authentication, we recommend that you set up an application-specific pass-word (what Google short-hands as “App password”) specifically for Dallinger. You can set one up following theseinstructions (adapted from here):
1. Log into your Gmail web interface as usual, using two-factor authentication if necessary.
2. Click your name or photo near your Gmail inbox’s top right corner.
3. Follow the Google Account link in the drop-down/overlay that appears.
4. Click Signing in to Google in the Sign-in & security section.
5. Under the Password & sign-in method section, click App passwords. (If prompted for your Gmail password,enter it and click Next.)
6. Select Other (custom name) in the Select app drop-down menu. Enter Dallinger outgoing mail or anotherdescriptive name so you’ll recognize what it’s for when you view these settings in the future.
7. Click Generate.
8. Find and immediately copy the password under Your app passwords. Type or paste the password into the.dallingerconfig file in your home directory. You will not be able to view the password again, so if you miss it,you’ll need to delete the one you just created and create a new one.
9. Click Done.
Firewall/antivirus
When developing locally, antivirus or firewall software may prevent outgoing email from being sent, and causeDallinger to raise a socket.timeout error. Temporarily disabling these tools is the easiest workaround.
Google “Less secure apps”
If you do not have two-factor authentication enabled, Gmail may require that you enable “less secure apps” in order tosend email from Dallinger. You will likely know you are encountering this problem because you will receive warningemail messages from Google regarding “blocked sign-in attempts”. To enable this, sign into Gmail, go to the Lesssecure apps section under Google Account, and turn on Allow less secure apps.
Gmail “From” address rewriting
Google automatically rewrites the From line of any email you send via its SMTP server to the default Send mailas address in your Gmail or Google Apps email account setting. This will result in the dallinger_email_addressvalue being ignored, and the smtp_username appearing in the “From” header instead. A possible workaround: inyour Google email under Settings, go to the Accounts tab/section and make “default” an account other than yourGmail/Google Apps account. This will cause Google’s SMTP server to re-write the From field with this addressinstead.
Debug Mode
Email notifications are never sent when Dallinger is running in “debug” mode. The text of messages which wouldhave been emailed will appear in the logging output instead.
22 Chapter 1. User Documentation
Dallinger Documentation, Release 6.0.0
1.7 Running Experiments Programmatically
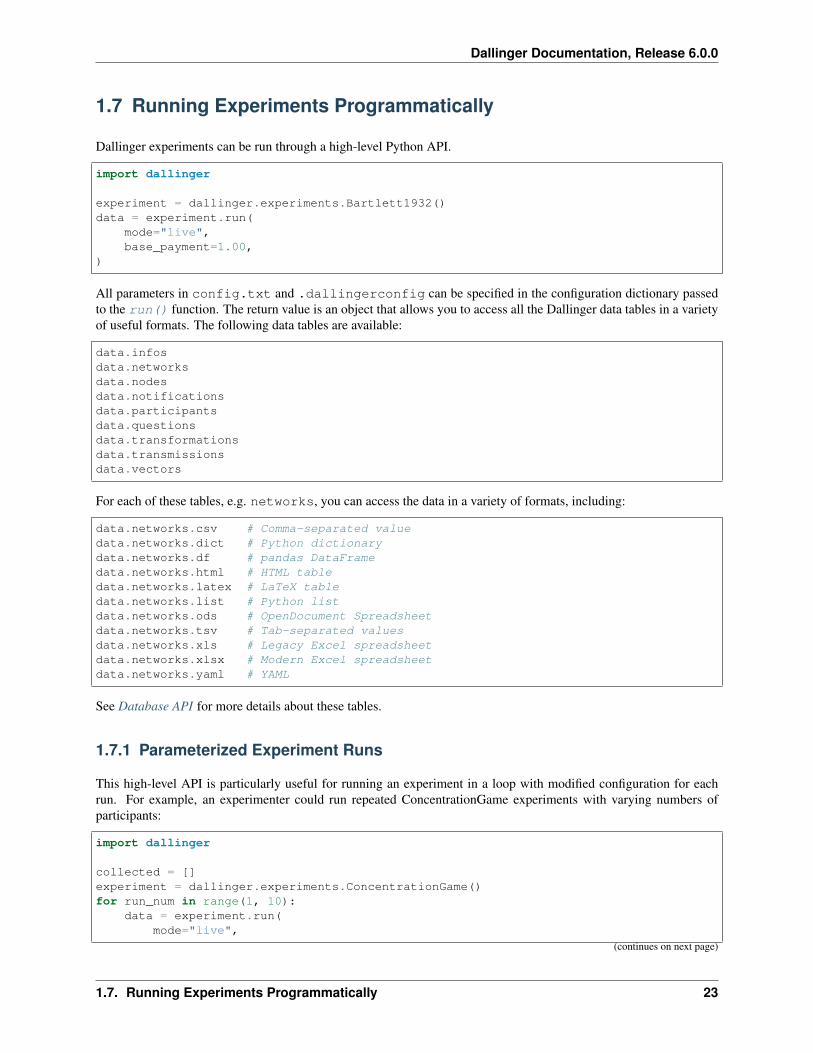
Dallinger experiments can be run through a high-level Python API.
import dallinger
experiment = dallinger.experiments.Bartlett1932()data = experiment.run(
mode="live",base_payment=1.00,
)
All parameters in config.txt and .dallingerconfig can be specified in the configuration dictionary passedto the run() function. The return value is an object that allows you to access all the Dallinger data tables in a varietyof useful formats. The following data tables are available:
data.infosdata.networksdata.nodesdata.notificationsdata.participantsdata.questionsdata.transformationsdata.transmissionsdata.vectors
For each of these tables, e.g. networks, you can access the data in a variety of formats, including:
data.networks.csv # Comma-separated valuedata.networks.dict # Python dictionarydata.networks.df # pandas DataFramedata.networks.html # HTML tabledata.networks.latex # LaTeX tabledata.networks.list # Python listdata.networks.ods # OpenDocument Spreadsheetdata.networks.tsv # Tab-separated valuesdata.networks.xls # Legacy Excel spreadsheetdata.networks.xlsx # Modern Excel spreadsheetdata.networks.yaml # YAML
See Database API for more details about these tables.
1.7.1 Parameterized Experiment Runs
This high-level API is particularly useful for running an experiment in a loop with modified configuration for eachrun. For example, an experimenter could run repeated ConcentrationGame experiments with varying numbers ofparticipants:
import dallinger
collected = []experiment = dallinger.experiments.ConcentrationGame()for run_num in range(1, 10):
data = experiment.run(mode="live",
(continues on next page)
1.7. Running Experiments Programmatically 23

Dallinger Documentation, Release 6.0.0
(continued from previous page)
num_participants=run_num,)collected.append(data)
With this technique, an experimenter can use data from prior runs to modify the configuration for subsequent experi-ment runs.
1.7.2 Repeatability
It is often useful to share the code used to run an experiment in a way that ensures that re-running it will retrieve thesame results. Dallinger provides a special method for that purpose: collect(). This method is similar to run()but it requires an app_id parameter. When that app_id corresponds to existing experiment data that can be retrieved(from either a local export or stored remotely), that data will be loaded. Otherwise, the experiment is run and the datais saved under the provided app_id so that subsequent calls to collect() with that app_id will retrieve the datainstead of re-running the experiment.
For example, an experimenter could pre-generate a UUID using dallinger uuid, then collect data using that UUID:
import dallinger
my_app_id = "68f73876-48f3-d1e2-4df7-25e46c99ce28"experiment = dallinger.experiments.Bartlett1932()data = experiment.collect(my_app_id,
mode="live",base_payment=1.00,
)
The first run of the above code will run a live experiment and collect data. Subsequent runs will retrieve the datacollected during the first run.
1.7.3 Importing Your Experiment
You can use this API directly on an imported experiment class if it is available in your python path:
from mypackage.experiment import MyFancyExperimentdata = MyFancyExperiment().run(...)
Alternatively, an experiment installed as a python package can register itself with Dallinger and appear in the experi-ments module. This is done by including a dallinger.experiments item in the entry_points argument in the call to setupin an experiment’s setup.py. For example:
...setup(
...,entry_points={'dallinger.experiments': ['mypackage.MyFancyExperiment']},...
)
An experiment package registered in this manner can be imported from dallinger.experiments:
import dallinger
experiment = dallinger.experiments.MyFancyExperiment()experiment.run(...)
24 Chapter 1. User Documentation

Dallinger Documentation, Release 6.0.0
See the setup.py from dlgr.demos for more examples.
1.8 Monitoring a Live Experiment
There are a number of ways that you can monitor a live experiment:
1.8.1 Command line tools
dallinger summary --app {#id}, where {#id} is the id (w...) of the application.
This will print a summary showing the number of participants with each status code, as well as the overall yield:
status | count----------------1 | 26101 | 80103 | 43104 | 2
Yield: 64.00%
1.8.2 Papertrail
You can use Papertrail to view and search the live logs of your experiment. You can access the logs either throughthe Heroku dashboard’s Resources panel (https://dashboard.heroku.com/apps/{#id}/resources), where {#id} is the idof your experiment, or directly through Papertrail.com (https://papertrailapp.com/systems/{#id}/events).
Setting up alerts
You can set up Papertrail to send error notifications to Slack or another communications platform.
0. Take a deep breath.
1. Open the Papertrail logs.
2. Search for the term error.
3. To the right of the search bar, you will see a button titled “+ Save Search”. Click it. Name the search “Errors”.Then click “Save & Setup an Alert”, which is to the right of “Save Search”.
4. You will be directed to a page with a list of services that you can use to set up an alert.
5. Click, e.g., Slack.
6. Choose the desired frequency of alert. We recommend the minimum, 1 minute.
7. Under the heading “Slack details”, open (in a new tab or window) the link new Papertrail integration.
8. This will bring you to a Slack page where you will choose a channel to post to. You may need to log in.
9. Select the desired channel.
10. Click “Add Papertrail Integration”.
11. You will be brought to a page with more information about the integration.
1.8. Monitoring a Live Experiment 25
Dallinger Documentation, Release 6.0.0
12. Scroll down to Step 3 to get the Webhook URL. It should look something like https://hooks.slack.com/services/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.
13. Copy this link to your clipboard.
14. Change anything else you want and then scroll to the bottom and click “Save integration”.
15. Go back to Papertrail page that you left in Step 7.
16. Paste the copied URL into the input text box labeled “Integration’s Webhook URL” under the “Slack Details”heading.
17. Click “Create Alert” on the same page.
18. Victory.
1.9 Experiment Data
Dallinger keeps track of experiment data using the database. All generated data about Dallinger constructs, likenetworks, nodes, and participants, is tracked by the system. In addition, experiment specific data, such as questionsand infos, can be stored.
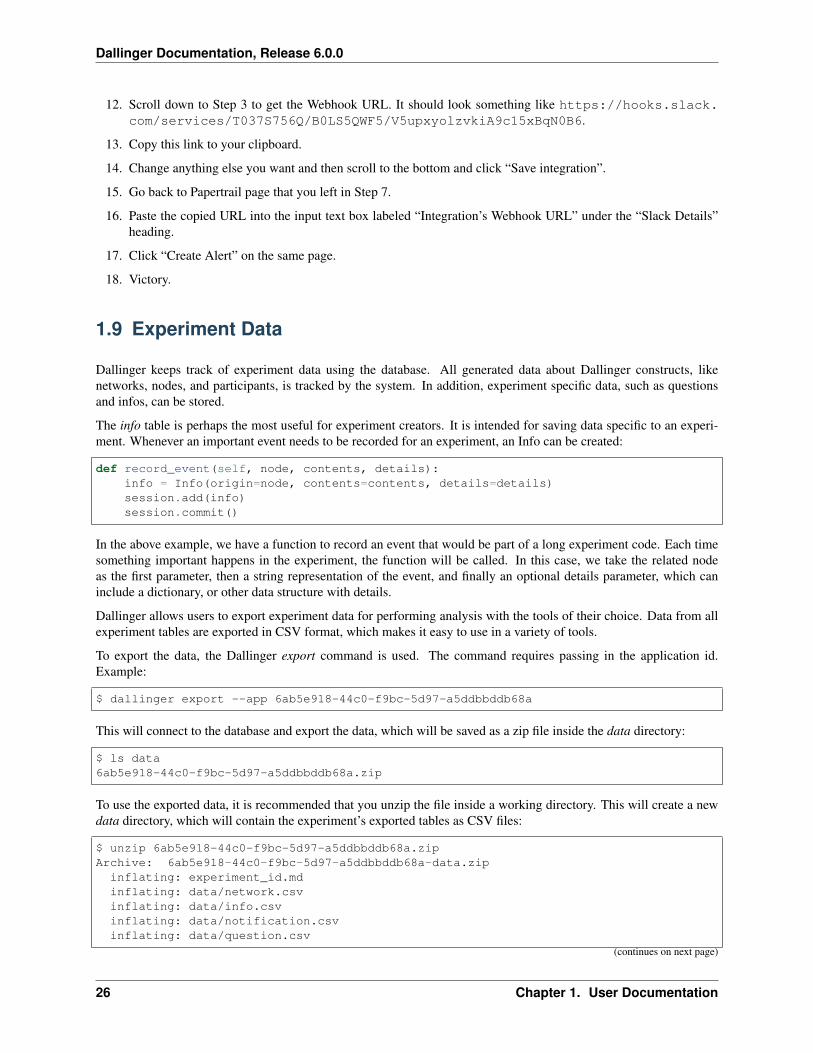
The info table is perhaps the most useful for experiment creators. It is intended for saving data specific to an experi-ment. Whenever an important event needs to be recorded for an experiment, an Info can be created:
def record_event(self, node, contents, details):info = Info(origin=node, contents=contents, details=details)session.add(info)session.commit()
In the above example, we have a function to record an event that would be part of a long experiment code. Each timesomething important happens in the experiment, the function will be called. In this case, we take the related nodeas the first parameter, then a string representation of the event, and finally an optional details parameter, which caninclude a dictionary, or other data structure with details.
Dallinger allows users to export experiment data for performing analysis with the tools of their choice. Data from allexperiment tables are exported in CSV format, which makes it easy to use in a variety of tools.
To export the data, the Dallinger export command is used. The command requires passing in the application id.Example:
$ dallinger export --app 6ab5e918-44c0-f9bc-5d97-a5ddbbddb68a
This will connect to the database and export the data, which will be saved as a zip file inside the data directory:
$ ls data6ab5e918-44c0-f9bc-5d97-a5ddbbddb68a.zip
To use the exported data, it is recommended that you unzip the file inside a working directory. This will create a newdata directory, which will contain the experiment’s exported tables as CSV files:
$ unzip 6ab5e918-44c0-f9bc-5d97-a5ddbbddb68a.zipArchive: 6ab5e918-44c0-f9bc-5d97-a5ddbbddb68a-data.zip
inflating: experiment_id.mdinflating: data/network.csvinflating: data/info.csvinflating: data/notification.csvinflating: data/question.csv
(continues on next page)
26 Chapter 1. User Documentation
Dallinger Documentation, Release 6.0.0
(continued from previous page)
inflating: data/transformation.csvinflating: data/vector.csvinflating: data/transmission.csvinflating: data/participant.csvinflating: data/node.csv
Once the data is uncompressed, you can analyze it using many different applications. Excel, for example, will easilyimport the data, just by double clicking on one of the files.
In Python, pandas are a popular way of manipulating data. The library is required by Dallinger, so if you already haveDallinger running you can begin using it right away:
$ python>>> import pandas>>> df = pandas.read_csv('question.csv')
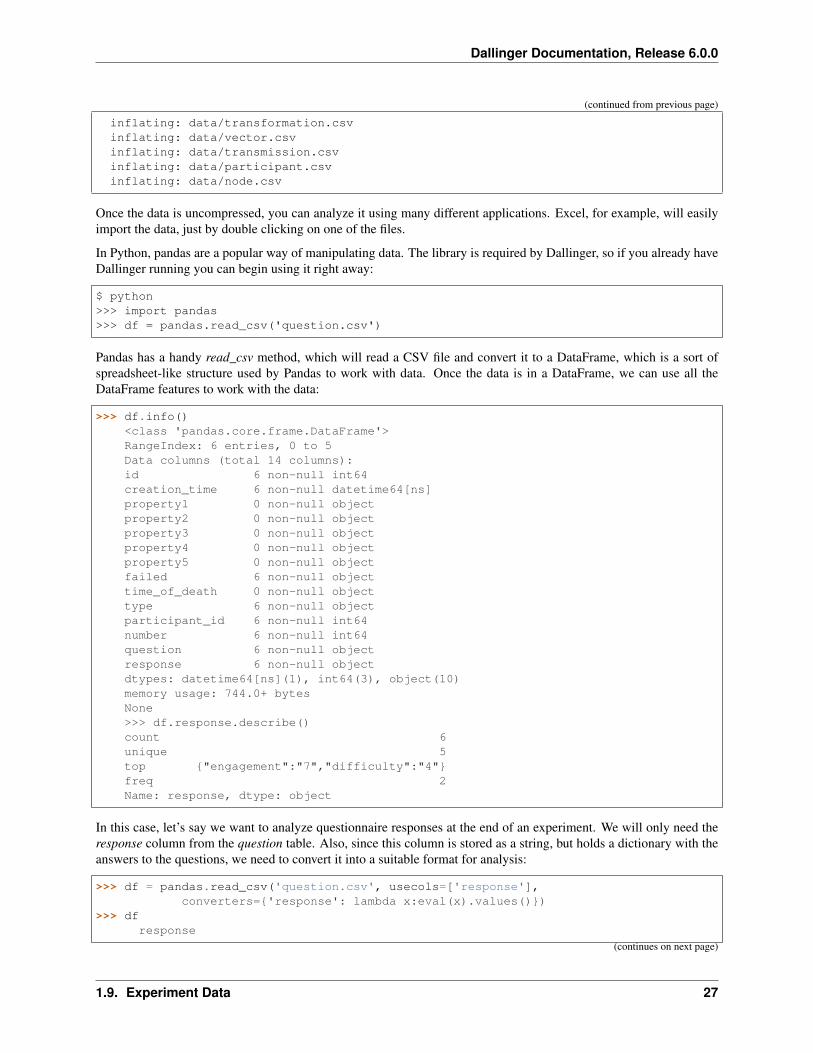
Pandas has a handy read_csv method, which will read a CSV file and convert it to a DataFrame, which is a sort ofspreadsheet-like structure used by Pandas to work with data. Once the data is in a DataFrame, we can use all theDataFrame features to work with the data:
>>> df.info()<class 'pandas.core.frame.DataFrame'>RangeIndex: 6 entries, 0 to 5Data columns (total 14 columns):id 6 non-null int64creation_time 6 non-null datetime64[ns]property1 0 non-null objectproperty2 0 non-null objectproperty3 0 non-null objectproperty4 0 non-null objectproperty5 0 non-null objectfailed 6 non-null objecttime_of_death 0 non-null objecttype 6 non-null objectparticipant_id 6 non-null int64number 6 non-null int64question 6 non-null objectresponse 6 non-null objectdtypes: datetime64[ns](1), int64(3), object(10)memory usage: 744.0+ bytesNone>>> df.response.describe()count 6unique 5top {"engagement":"7","difficulty":"4"}freq 2Name: response, dtype: object
In this case, let’s say we want to analyze questionnaire responses at the end of an experiment. We will only need theresponse column from the question table. Also, since this column is stored as a string, but holds a dictionary with theanswers to the questions, we need to convert it into a suitable format for analysis:
>>> df = pandas.read_csv('question.csv', usecols=['response'],converters={'response': lambda x:eval(x).values()})
>>> dfresponse
(continues on next page)
1.9. Experiment Data 27

Dallinger Documentation, Release 6.0.0
(continued from previous page)
0 [4, 7]1 [1, 6]2 [4, 7]3 [7, 7]4 [3, 6]5 [0, 3]
>>> responses=pandas.DataFrame(df['response'].values.tolist(),columns=['engagement', 'difficulty'], dtype='int64')
>>> responsesengagement difficulty
0 4 71 1 62 4 73 7 74 3 65 0 3
First we create a DataFrame using read_csv as before, but this time, we specify which columns to use using the usecolsparameter. To get the numeric values for the responses, we use a converter to convert the string back into a dictionaryand extract the values.
At this point, we have both values in the response column. We really want to have one column for each value, so wecreate a new dataframe, converting the response values to a list and assigning each to a named column. We also makesure the values are integers, with the dtype parameter. This makes them plottable.
We can now make a simple bar chart of the responses using plot:
>>> responses.plot(kind='bar')<matplotlib.axes._subplots.AxesSubplot at 0x7f7f0092dc90>
If you are running this in a Jupyter notebook, this would be the result:
Of course these are very simple examples. Pandas are a powerful library, and offer many analysis and visualizationmethods, but this should at least give an idea of what can be achieved.
28 Chapter 1. User Documentation
Dallinger Documentation, Release 6.0.0
Dallinger also has a helper class that allows us to handle experiment data in different formats. You can get theDataFrame using this, as well:
$ python>>> from dallinger.data import Table>>> data = Table('info.csv')>>> df = data.df
It might seem like a roundabout way to get the DataFrame, but the table class has the advantage that the data can easilybe converted to many other formats. All of these formats are accessed as properties of the Table instance, like data.dfabove. Supported formats are:
• csv. Comma-separated values.
• dict. A python dictionary.
• df. A pandas DataFrame.
• html. An html table.
• latex. A LaTex table.
• list. A python list.
• ods. An open document spreadsheet.
• tsv. Tab separated values.
• xls. Legacy Excel spreadsheet.
• xlsx. Excel spreadsheet.
• yaml. YAML format.
From the list above dict, df, and list can be used to handle the data inside a python interpreter or program, and the restare better suited for display or analysis using other tools.
1.10 Viewing the PostgreSQL Database
1.10.1 Mac OS X
Postico is a nice tool for examining Postgres databases on Mac OS X. We use it to connect to live experiment databases.Here are the steps needed to do this:
1. Download Postico and place it in your Applications folder.
2. Open Postico.
3. Press the “New Favorite” button in the bottom left corner to access a new database.
4. Get the database credentials from the Heroku dashboard:
• Go to https://dashboard.heroku.com/apps/{app_id}/resources
• Under the Add-ons subheading, go to “Heroku Postgres :: Database”
• Note the database credentials under the subheading “Connection Settings”. You’ll use these in step 5.
5. Fill in the database settings in Postico. You’ll need to include the:
• Host
• Port
1.10. Viewing the PostgreSQL Database 29

Dallinger Documentation, Release 6.0.0
• User
• Password
• Database
6. Connect to the database.
• You may see a dialog box pop up saying that Postico cannot verify the identity of the server. Click“Connect” to proceed.
1.10.2 Ubuntu
pgAdmin4 can be used to inspect the contents of the database. Read more about it here.
1.11 Running bots as participants
Dallinger supports running simulated experiments using bots that participate in the experiment automatically.
Note: Not all experiments will have bots available. The Bartlett (1932), stories demo does have bots available.
1.11.1 Running an experiment locally with bots
To run the experiment in debug mode using bots, use the –bot flag:
$ dallinger debug --bot
This overrides the recruiter configuration key to use the BotRecruiter. Instead of printing the URL for a partici-pant or recruiting participants using Mechanical Turk, the bot recruiter will start running bots.
You may also set the configuration value recruiter='bots' in local or global configurations, as an environmentvariable or as a keyword argument to run().
Note: Bots are run by worker processes. If the experiment recruits many bots at the same time, you may need toincrease the num_dynos_worker config setting to run additional worker processes. Each worker process can runup to 20 bots (though if the bots are implemented using selenium to run a real browser, you’ll probably hit resourcelimits before that).
1.11.2 Running an experiment with a mix of bots and real participants
It’s also possible to run an experiment that mixes bot participants with real participants. To do this, edit the experi-ment’s config.txt to specify recruiter configuration like this:
recruiter = multirecruiters = bots: 2, cli: 1
The recruiters config setting is a specification of how many participants to recruit from which recruiters in whatorder. This example says to use the bot recruiter the first 2 times that the experiment requests a participant to berecruited, followed by the CLI recruiter the third time. (The CLI recruiter writes the participant’s URL to the log,which triggers opening it in your browser if you are running in debug mode.)
30 Chapter 1. User Documentation
Dallinger Documentation, Release 6.0.0
To start the experiment with this configuration, run:
$ dallinger debug
1.11.3 Running a single bot
If you want to run a single bot as part of an ongoing experiment, you can use the bot command. This is usefulfor testing a single bot’s behavior as part of a longer-running experiment, and allows easy access to the Python pdbdebugger.
1.12 Registration on the OSF
Dallinger integrates with the Open Science Framework (OSF), creating a new OSF project and uploading your ex-periment code to the project on launch. To enable, specify a personal access token osf_access_token in your.dallingerconfig file. You can generate a new OSF personal access token on the OSF settings page.
1.13 Troubleshooting
A few common issues are reported when trying to run Dallinger. Always run with the –verbose flag for full logs
1.13.1 Python Processes Kept Alive
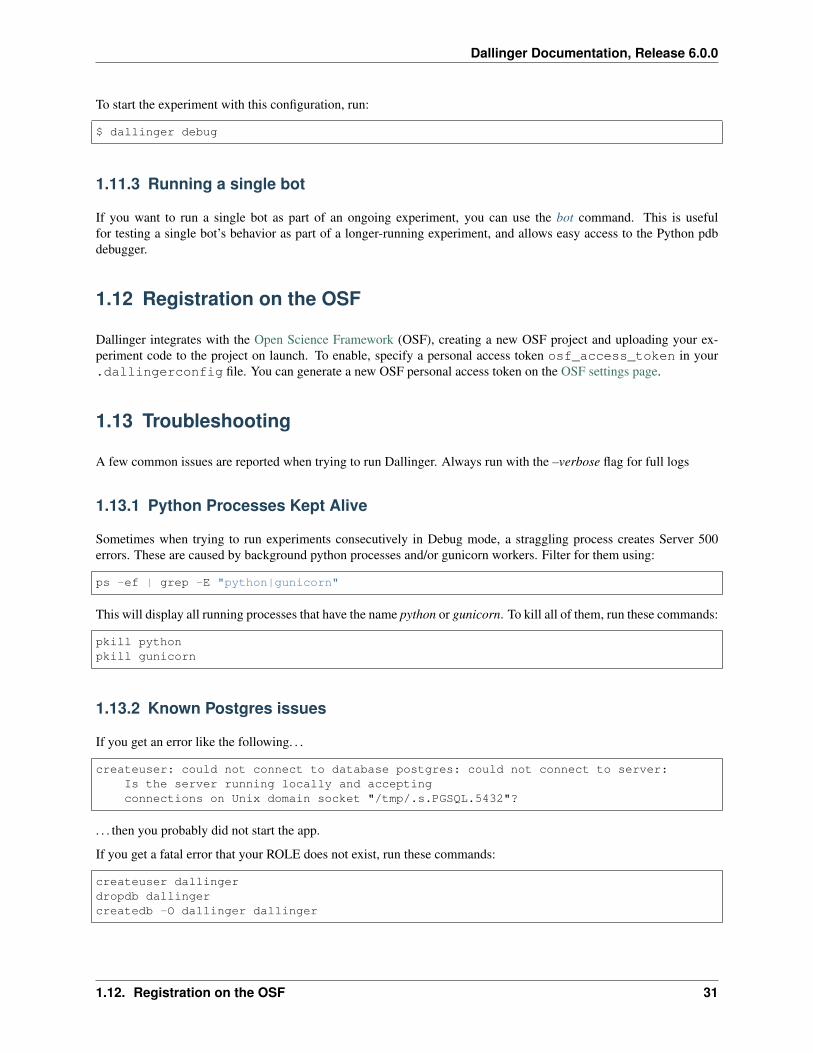
Sometimes when trying to run experiments consecutively in Debug mode, a straggling process creates Server 500errors. These are caused by background python processes and/or gunicorn workers. Filter for them using:
ps -ef | grep -E "python|gunicorn"
This will display all running processes that have the name python or gunicorn. To kill all of them, run these commands:
pkill pythonpkill gunicorn
1.13.2 Known Postgres issues
If you get an error like the following. . .
createuser: could not connect to database postgres: could not connect to server:Is the server running locally and acceptingconnections on Unix domain socket "/tmp/.s.PGSQL.5432"?
. . . then you probably did not start the app.
If you get a fatal error that your ROLE does not exist, run these commands:
createuser dallingerdropdb dallingercreatedb -O dallinger dallinger
1.12. Registration on the OSF 31
Dallinger Documentation, Release 6.0.0
1.13.3 Common Sandbox Error
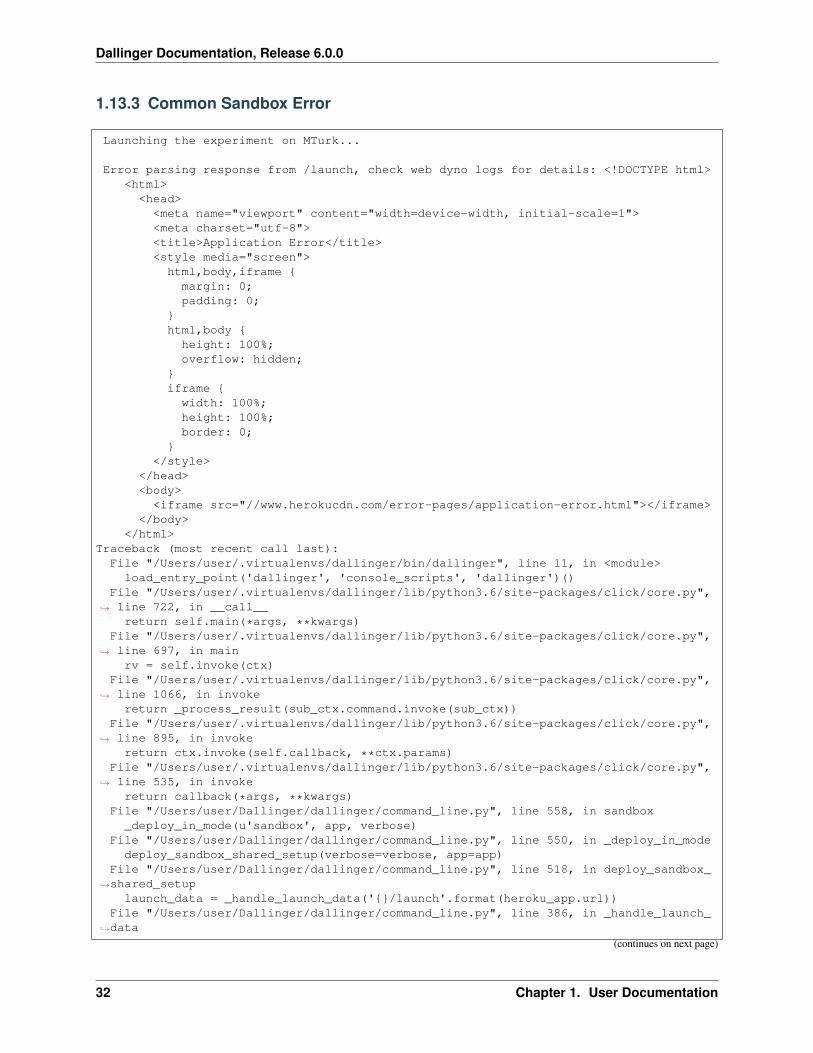
Launching the experiment on MTurk...
Error parsing response from /launch, check web dyno logs for details: <!DOCTYPE html><html>
<head><meta name="viewport" content="width=device-width, initial-scale=1"><meta charset="utf-8"><title>Application Error</title><style media="screen">html,body,iframe {margin: 0;padding: 0;
}html,body {
height: 100%;overflow: hidden;
}iframe {
width: 100%;height: 100%;border: 0;
}</style>
</head><body>
<iframe src="//www.herokucdn.com/error-pages/application-error.html"></iframe></body>
</html>Traceback (most recent call last):
File "/Users/user/.virtualenvs/dallinger/bin/dallinger", line 11, in <module>load_entry_point('dallinger', 'console_scripts', 'dallinger')()
File "/Users/user/.virtualenvs/dallinger/lib/python3.6/site-packages/click/core.py",→˓ line 722, in __call__
return self.main(*args, **kwargs)File "/Users/user/.virtualenvs/dallinger/lib/python3.6/site-packages/click/core.py",
→˓ line 697, in mainrv = self.invoke(ctx)
File "/Users/user/.virtualenvs/dallinger/lib/python3.6/site-packages/click/core.py",→˓ line 1066, in invoke
return _process_result(sub_ctx.command.invoke(sub_ctx))File "/Users/user/.virtualenvs/dallinger/lib/python3.6/site-packages/click/core.py",
→˓ line 895, in invokereturn ctx.invoke(self.callback, **ctx.params)
File "/Users/user/.virtualenvs/dallinger/lib/python3.6/site-packages/click/core.py",→˓ line 535, in invoke
return callback(*args, **kwargs)File "/Users/user/Dallinger/dallinger/command_line.py", line 558, in sandbox_deploy_in_mode(u'sandbox', app, verbose)
File "/Users/user/Dallinger/dallinger/command_line.py", line 550, in _deploy_in_modedeploy_sandbox_shared_setup(verbose=verbose, app=app)
File "/Users/user/Dallinger/dallinger/command_line.py", line 518, in deploy_sandbox_→˓shared_setup
launch_data = _handle_launch_data('{}/launch'.format(heroku_app.url))File "/Users/user/Dallinger/dallinger/command_line.py", line 386, in _handle_launch_
→˓data
(continues on next page)
32 Chapter 1. User Documentation
Dallinger Documentation, Release 6.0.0
(continued from previous page)
launch_data = launch_request.json()File "/Users/user/.virtualenvs/dallinger/lib/python3.6/site-packages/requests/
→˓models.py", line 892, in jsonreturn complexjson.loads(self.text, **kwargs)
File "/Library/Frameworks/Python.framework/Versions/3.6/lib/python3.6/json/__init__.→˓py", line 339, in loads
return _default_decoder.decode(s)File "/Library/Frameworks/Python.framework/Versions/3.6/lib/python3.6/json/decoder.
→˓py", line 364, in decodeobj, end = self.raw_decode(s, idx=_w(s, 0).end())
File "/Library/Frameworks/Python.framework/Versions/3.6/lib/python3.6/json/decoder.→˓py", line 382, in raw_decode
raise ValueError("No JSON object could be decoded")
If you get this from the sandbox, this usually means there’s a deeper issue that requires dallinger logs –app XXXXXX.Usually this could be a requirements.txt file error (missing dependency or reference to an incorrect branch).
1.13.4 Combining Dallinger core development and running experiments
A common pitfall while doing development on the dallinger codebase while also working on external experimentswhich include dallinger as a dependency: you pip install a demo experiment in your active virtual environment, and itoverwrites the dallinger.egg-link file in that environment’s site-packages directory with an actual copy of the dallingerpackage.
When installing dallinger with the intent to work on dallinger, the recommended way to install dallinger itself is withpip’s “editable mode”, by passing the -e or –editable flag to pip install:
pip install -e .[data]
This creates a form of symbolic link in the active python’s site-packages directory to the working copy of dallingeryou’re sitting in. This allows you to make changes to python files in the dallinger working copy and have themimmediately active when using dallinger commands or any other actions that invoke the active python interpreter.
Running pip install without the -e flag, either while installing dallinger directly, or while installing a separate experi-ment which includes dallinger as a dependency, will instead place a copy of the dallinger package in the site-packagesdirectory. These files will then be executed when the active python is running, and any changes to the files you’reworking on will be ignored.
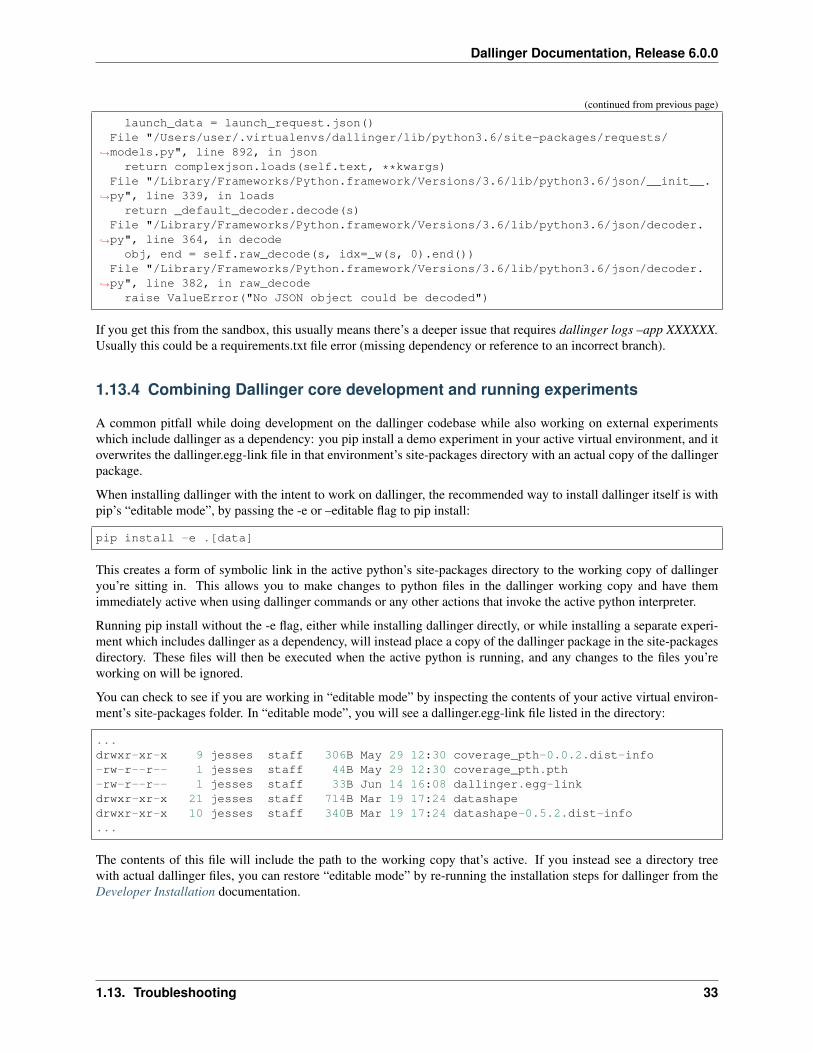
You can check to see if you are working in “editable mode” by inspecting the contents of your active virtual environ-ment’s site-packages folder. In “editable mode”, you will see a dallinger.egg-link file listed in the directory:
...drwxr-xr-x 9 jesses staff 306B May 29 12:30 coverage_pth-0.0.2.dist-info-rw-r--r-- 1 jesses staff 44B May 29 12:30 coverage_pth.pth-rw-r--r-- 1 jesses staff 33B Jun 14 16:08 dallinger.egg-linkdrwxr-xr-x 21 jesses staff 714B Mar 19 17:24 datashapedrwxr-xr-x 10 jesses staff 340B Mar 19 17:24 datashape-0.5.2.dist-info...
The contents of this file will include the path to the working copy that’s active. If you instead see a directory treewith actual dallinger files, you can restore “editable mode” by re-running the installation steps for dallinger from theDeveloper Installation documentation.
1.13. Troubleshooting 33

Dallinger Documentation, Release 6.0.0
34 Chapter 1. User Documentation
CHAPTER 2
Beginner Documentation
Many Dallinger users may not have lots of programming experience, and might want a bit more information about theinner workings of Dallinger in a beginner-friendly format. Thomas Morgan has started such a project: “Dallinger forProgramming Novices”. Every Dallinger user is encouraged to take a look at this guide, which is a nice complementto the documentation presented here.
35

Dallinger Documentation, Release 6.0.0
36 Chapter 2. Beginner Documentation
CHAPTER 3
Dallinger Demos
Several demos demonstrate Dallinger in action:
3.1 Dallinger Demos
The demos can be run locally on your machine in “debug” mode. Running the demos in “sandbox” mode will requirea Heroku account.
More information for running in “sandbox” mode.
3.1.1 Bartlett (1932), stories
Frederic Bartlett’s 1932 book Remembering documents early experiments that explore how using and transmitting amemory can affect the memory’s contents. Bartlett wanted to understand how culture shapes memory. Inspired byPhilippe (1897), he performed a series of experiments that asked participants to repeatedly recall a memory or to passit down a chain of people, from one to the next. Bartlett showed that the process of reproduction alters memories overtime, causing them to take on features from an individual’s culture. More generally, the methods he developed exposecumulative effects of the forces that reshape and degrade memories and how they impact the structure and veracity ofwhat we remember.
Bartlett, F. C. (1932). Remembering. Cambridge: Cambridge University Press.
In this demo, a story is passed down a chain.
Download the demo.
3.1.2 Networked chatroom
This is a networked chatroom where players broadcast messages to each other.
Note that this demo has an additional dependency on the nltk library.
37
Dallinger Documentation, Release 6.0.0
You will need to run: pip install -r requirements.txt from the experiment directory before runningthe demo.
Download the demo.
3.1.3 Concentration
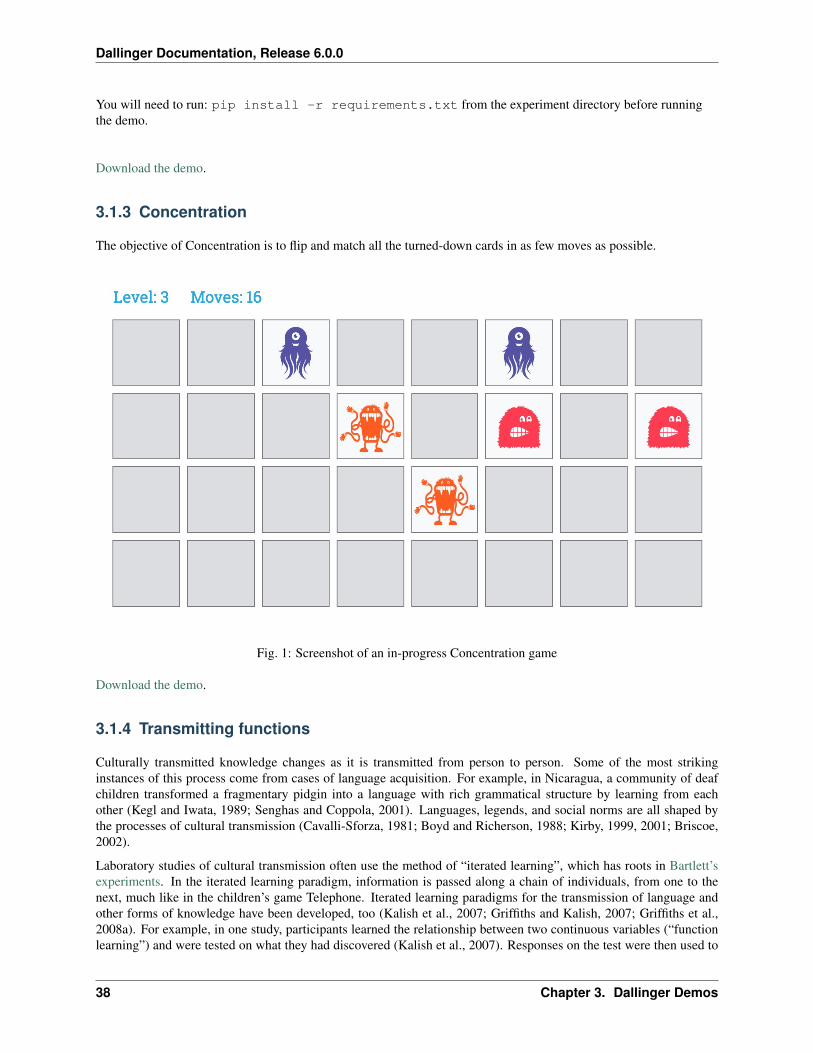
The objective of Concentration is to flip and match all the turned-down cards in as few moves as possible.
Fig. 1: Screenshot of an in-progress Concentration game
Download the demo.
3.1.4 Transmitting functions
Culturally transmitted knowledge changes as it is transmitted from person to person. Some of the most strikinginstances of this process come from cases of language acquisition. For example, in Nicaragua, a community of deafchildren transformed a fragmentary pidgin into a language with rich grammatical structure by learning from eachother (Kegl and Iwata, 1989; Senghas and Coppola, 2001). Languages, legends, and social norms are all shaped bythe processes of cultural transmission (Cavalli-Sforza, 1981; Boyd and Richerson, 1988; Kirby, 1999, 2001; Briscoe,2002).
Laboratory studies of cultural transmission often use the method of “iterated learning”, which has roots in Bartlett’sexperiments. In the iterated learning paradigm, information is passed along a chain of individuals, from one to thenext, much like in the children’s game Telephone. Iterated learning paradigms for the transmission of language andother forms of knowledge have been developed, too (Kalish et al., 2007; Griffiths and Kalish, 2007; Griffiths et al.,2008a). For example, in one study, participants learned the relationship between two continuous variables (“functionlearning”) and were tested on what they had discovered (Kalish et al., 2007). Responses on the test were then used to
38 Chapter 3. Dallinger Demos
Dallinger Documentation, Release 6.0.0
train the next participant in the chain. Kalish et al. (2007) found that, over time, knowledge transmitted through thechain reverts to the prior beliefs of the individual learners.
Kalish, M. L., Griffiths, T. L., & Lewandowsky, S. (2007). Iterated learning: Intergenerational knowledge transmissionreveals inductive biases. Psychonomic Bulletin and Review, 14, 288-294.
Download the demo.
3.1.5 Bartlett (1932), drawings
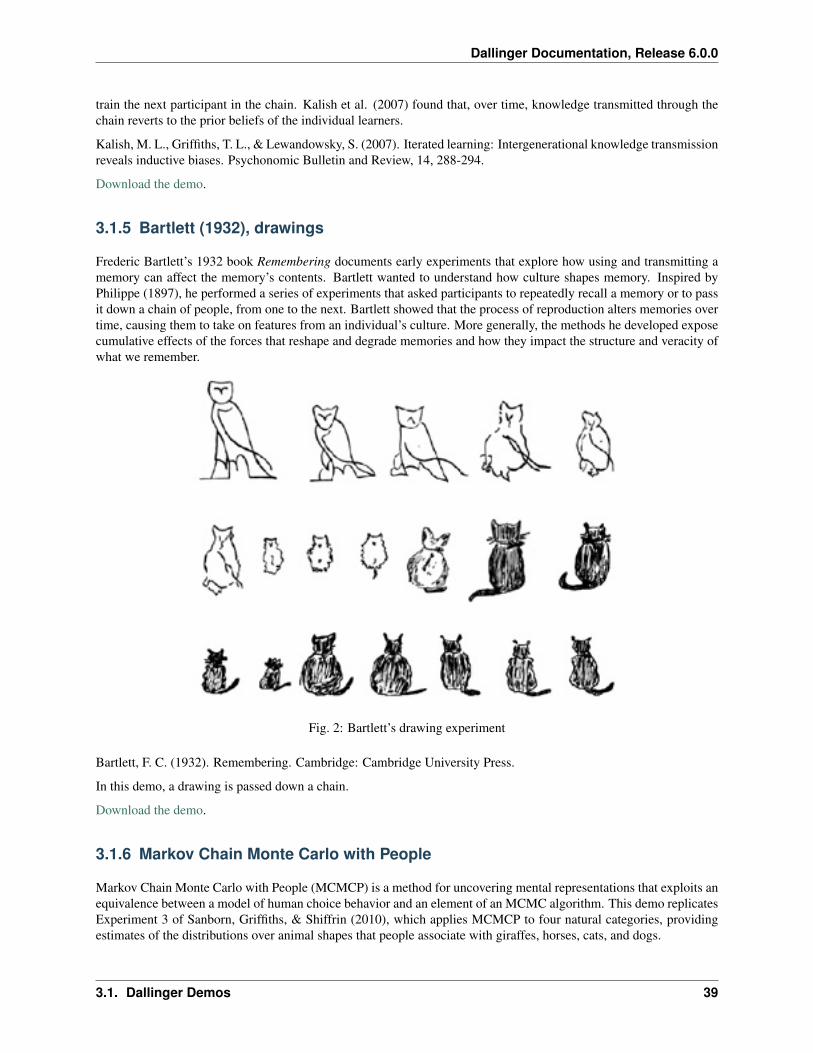
Frederic Bartlett’s 1932 book Remembering documents early experiments that explore how using and transmitting amemory can affect the memory’s contents. Bartlett wanted to understand how culture shapes memory. Inspired byPhilippe (1897), he performed a series of experiments that asked participants to repeatedly recall a memory or to passit down a chain of people, from one to the next. Bartlett showed that the process of reproduction alters memories overtime, causing them to take on features from an individual’s culture. More generally, the methods he developed exposecumulative effects of the forces that reshape and degrade memories and how they impact the structure and veracity ofwhat we remember.
Fig. 2: Bartlett’s drawing experiment
Bartlett, F. C. (1932). Remembering. Cambridge: Cambridge University Press.
In this demo, a drawing is passed down a chain.
Download the demo.
3.1.6 Markov Chain Monte Carlo with People
Markov Chain Monte Carlo with People (MCMCP) is a method for uncovering mental representations that exploits anequivalence between a model of human choice behavior and an element of an MCMC algorithm. This demo replicatesExperiment 3 of Sanborn, Griffiths, & Shiffrin (2010), which applies MCMCP to four natural categories, providingestimates of the distributions over animal shapes that people associate with giraffes, horses, cats, and dogs.
3.1. Dallinger Demos 39

Dallinger Documentation, Release 6.0.0
Sanborn, A. N., Griffiths, T. L., & Shiffrin, R. M. (2010). Uncovering mental representations with Markov chainMonte Carlo. Cognitive Psychology, 60(2), 63-106.
Download the demo.
3.1.7 Rogers’ Paradox
This experiment, which demonstrates Rogers paradox, explores the evolution of asocial learning and unguided sociallearning in the context of a numerical discrimination task.
Configuration
The experiment parameters can be configured using Dallinger configuration files. In addition to the built-in Dallingerconfiguration parameters, the Rogers’ experiment supports the following additional configuration parameters:
• experiment_repeats: An integer defining the number of experiment rounds each participant will see.defaults to ‘‘0‘‘
• practice_repeats: An integer defining the number of practice rounds each participant will see beforestarting the experiment. defaults to ‘‘10‘‘
• catch_repeats: An integer defining the number of experiment rounds which are intended to “catch” partic-ipant inattention. These rounds should have a much lower difficulty than the actual experiment rounds. defaultsto ‘‘0‘‘
• practice_difficulty: A number between 0.5 and 1.0 indicating the relative difficulty of the practicerounds (i.e. what proportion of the 80 dots are of the majority color, 0.5=hardest, 1.0=easiest). defaults to‘‘0.8‘‘
• catch_difficulty: A number between 0.5 and 1.0 indicating the relative difficulty of the “catch” rounds(i.e. what proportion of the 80 dots are of the majority color, 0.5=hardest, 1.0=easiest). defaults to ‘‘0.8‘‘
• difficulties: A string of comma separated numbers between 0.5 and 1.0 defining a range of relativedifficulties for the normal experiment rounds (i.e. what proportions of the 80 dots are of the majority color,0.5=hardest, 1.0=easiest). defaults to ‘“0.525, 0.5625, 0.65’‘‘
• min_acceptable_performance: A number between 0.0 and 1.0 defining the proportion of “catch”rounds that need to be correctly chosen for the particpation to be considered successful. defaults to ‘‘0.833‘‘
• generations: An integer describing how many “generations” of participants to recruit over the course of theexperiment. defaults to ‘‘4‘‘
• generation_size: An integer describing how many participants to recruit in each “generation”. defaults to‘‘4‘‘
• bonus_payment: A number defining the maximum bonus payment for successful participation in dollars.defaults to ‘‘1.0‘‘
Download the demo.
3.1.8 The Sheep Market
“The Sheep Market is a collection of 10,000 sheep created by workers on Amazon’s Mechanical Turk. Each workerwas paid $.02 (US) to “draw a sheep facing left.”
http://www.aaronkoblin.com/project/the-sheep-market/
Download the demo.
40 Chapter 3. Dallinger Demos

Dallinger Documentation, Release 6.0.0
3.1.9 Snake
This is the video game Snake, in which the player maneuvers a line which grows in length within the bounds of a box,with the line itself being a primary obstacle.
Download the demo.
3.1.10 2048
2048 is a sliding-block puzzle game by the Italian web developer Gabriele Cirulli. The goal is to slide numbered tileson a grid, combining them to create a tile with a value of 2048.
Fig. 3: Screenshot of an in-progress 2048 game
3.1. Dallinger Demos 41

Dallinger Documentation, Release 6.0.0
Download the demo.
3.1.11 Vox Populi (Wisdom of the crowd)
https://en.wikipedia.org/wiki/Wisdom_of_the_crowd
Download the demo.
42 Chapter 3. Dallinger Demos

CHAPTER 4
Experiment Author Documentation
These documentation topics build on the previous set to include help with designing new experiments for others touse.
4.1 Developer Installation
Dallinger is tested with Ubuntu 18.04 LTS, 16.04 LTS, 14.04 LTS and Mac OS X locally. If you are attempting to useDallinger on Microsoft Windows, running Ubuntu in a virtual machine is the recommend method.
If you are interested in using Dallinger with Docker, read more here.
4.1.1 Mac OS X
Install Python
Dallinger is written in the language Python. For it to work, you will need to have Python 2.7 installed, or alternativelyPython 3.6 or higher. Python 3 is the preferred option. You can check what version of Python you have by running:
python --version
Note: You will also need to have pip installed. It is included in some of the later versions of Python 3, but not all.(pip is a package manager for Python packages, or modules if you like.) If you are using Python 3, you may find thatyou may need to use the pip3 command instead of pip where applicable in the instructions that follow.
Using Homebrew will install the latest version of Python and pip by default.
brew install python
This will install the latest Python3 and pip3.
You can also use the preinstalled Python in Mac OS X, currently Python 2.7 as of writing.
43
Dallinger Documentation, Release 6.0.0
If you installed Python 3 with Homebrew, you should now be able to run the python3 command from the terminal.If the command cannot be found, check the Homebrew installation log to see if there were any errors. Sometimesthere are problems symlinking Python 3 to the python3 command. If this is the case for you, look here for clues toassist you.
With the preinstalled Python in Mac OS X, you will need to install pip yourself. You can use:
sudo easy_install pip
Should that not work for whatever reason, you can search here for more clues.
Install Postgresql
On Mac OS X, we recommend installing using Homebrew:
brew install postgresql
Postgresql can then be started and stopped using:
brew services start postgresqlbrew services stop postgresql
Create the databases
After installing Postgres, you will need to create two databases: one for your experiments to use, and a second tosupport importing saved experiments. It is recommended that you also create a database user.
Naviagate to a terminal and type:
createuser -P dallinger --createdb(Password: dallinger)createdb -O dallinger dallingercreatedb -O dallinger dallinger-import
The first command will create a user named dallinger and prompt you for a password. The second and thirdcommand will create the dallinger and dallinger-import databases, setting the newly created user as theowner.
You can optionally inspect your databases by entering psql dallinger. Inside psql you can use commands to seethe roles and database tables:
\du\l
To quit:
\q
If you get an error like the following:
createuser: could not connect to database postgres: could not connect to server:Is the server running locally and acceptingconnections on Unix domain socket "/tmp/.s.PGSQL.5432"?
then postgres is not running. Start postgres as described in the Install Postgresql section above.
44 Chapter 4. Experiment Author Documentation
Dallinger Documentation, Release 6.0.0
Install Heroku
To run experiments locally or on the internet, you will need the Heroku Command Line Interface installed, version3.28.0 or better. If you want to launch experiments on the internet, then you will also need a Heroku.com account,however this is not needed for local debugging.
To check which version of the Heroku CLI you have installed, run:
heroku --version
To install:
brew install heroku/brew/heroku
More information on the Heroku CLI is available at heroku.com along with alternative installation instructions, ifneeded.
Install Redis
Debugging experiments requires you to have Redis installed and the Redis server running.
brew install redis
Start Redis on Mac OS X with:
brew services start redis
You can find more details and other installation instructions at redis.com.
Install Git
Dallinger uses Git, a distributed version control system, for version control of its code. If you do not have it installed,you can install it as follows:
brew install git
You will need to configure your Git name and email:
git config --global user.email "[email protected]"git config --global user.name "Your Name"
Replace [email protected] and Your Name with your email and name to set your account’s default identity.Omit –global to set the identity only in this repository. You can read more about configuring Git here.
Set up a virtual environment
Why use virtualenv?
Virtualenv solves a very specific problem: it allows multiple Python projects that have different (and often conflicting)requirements, to coexist on the same computer. If you want to understand this in detail, you can read more about ithere.
Now let’s set up a virtual environment by running the following commands:
If using Python 2.7 and pip:
4.1. Developer Installation 45
Dallinger Documentation, Release 6.0.0
pip install virtualenvpip install virtualenvwrapperexport WORKON_HOME=$HOME/.virtualenvsmkdir -p $WORKON_HOMEexport VIRTUALENVWRAPPER_PYTHON=$(which python)source $(which virtualenvwrapper.sh)
If using Python 3.x and pip3 (Python 3.7 in this example):
pip3 install virtualenvpip3 install virtualenvwrapperexport WORKON_HOME=$HOME/.virtualenvsmkdir -p $WORKON_HOMEexport VIRTUALENVWRAPPER_PYTHON=$(which python3.7)source $(which virtualenvwrapper.sh)
Now create the virtual environment using:
mkvirtualenv dlgr_env --python <specify_your_python_path_here>
Examples:
Using homebrew installed Python 3.7:
mkvirtualenv dlgr_env --python /usr/local/bin/python3.7
Using Python 2.7:
mkvirtualenv dlgr_env --python /usr/bin/python
Virtualenvwrapper provides an easy way to switch between virtual environments by simply typing: workon[virtual environment name].
The technical details:
These commands use pip/pip3, the Python package manager, to install two packages virtualenv andvirtualenvwrapper. They set up an environmental variable named WORKON_HOMEwith a string that gives a pathto a subfolder of your home directory (~) called Envs, which the next command (mkdir) then makes according to thepath described in $WORKON_HOME (recursively, due to the -p flag). That is where your environments will be stored.The source command will run the command that follows, which in this case locates the virtualenvwrapper.sh shell script, the contents of which are beyond the scope of this setup tutorial. If you want to know what it does, amore in depth description can be found on the documentation site for virtualenvwrapper.
Finally, the mkvirtualenv makes your first virtual environment which you’ve named dlgr_env. We have explic-itly passed it the location of the Python that the virtualenv should use. This Python has been mapped to the pythoncommand inside the virtual environment.
The how-to:
In the future, you can work on your virtual environment by running: Python 2.7
export VIRTUALENVWRAPPER_PYTHON=$(which python)source $(which virtualenvwrapper.sh)workon dlgr_env
Python 3.x
46 Chapter 4. Experiment Author Documentation
Dallinger Documentation, Release 6.0.0
export VIRTUALENVWRAPPER_PYTHON=$(which python3.7)source $(which virtualenvwrapper.sh)workon dlgr_env
NB: To stop working in the virtual environment, run deactivate. To list all available virtual environments, runworkon with no arguments.
If you plan to do a lot of work with Dallinger, you can make your shell execute the virtualenvwrapper.shscript everytime you open a terminal. To do that type:
Python 2.7
echo "export VIRTUALENVWRAPPER_PYTHON=$(which python)" >> ~/.bash_profileecho "source $(which virtualenvwrapper.sh)" >> ~/.bash_profile
Python 3.x
echo "export VIRTUALENVWRAPPER_PYTHON=$(which python3.7)" >> ~/.bash_profileecho "source $(which virtualenvwrapper.sh)" >> ~/.bash_profile
From then on, you only need to use the workon command before starting.
Install prerequisites for building documentation
To be able to build the documentation, you will need yarn.
Please follow the instructions here to install it.
Install Dallinger
Next, navigate to the directory where you want to house your development work on Dallinger. Once there, clone theGit repository using:
git clone https://github.com/Dallinger/Dallinger
This will create a directory called Dallinger in your current directory.
Change into your the new directory and make sure you are still in your virtual environment before installing thedependencies. If you want to be extra careful, run the command workon dlgr_env, which will ensure that you arein the right virtual environment.
cd Dallinger
Now we need to install the dependencies using pip:
pip install -r dev-requirements.txt
Next, install the Dallinger development directory as an editable package, and include the data “extra”:
pip install --editable .[data]
Test that your installation works by running:
dallinger --version
4.1. Developer Installation 47
Dallinger Documentation, Release 6.0.0
Install the Git pre-commit hook
With the virtual environment still activated:
pip install pre-commit
This will install the pre-commit package into the virtual environment. With that in place, each git clone of Dallingeryou create will need to have the pre-commit hook installed with:
pre-commit install
This will install a pre-commit hook to check for flake8 violations, and enforce a standard Python source code formatvia black. You can run the black code formatter and flake8 checks manually at any time by running:
pre-commit run --all-files
You may also want to install a black plugin for your own code editor, though this is not strictly necessary, since thepre-commit hook will run black for you on commit.
Install the dlgr.demos sub-package
Both the test suite and the included demo experiments require installing the dlgr.demos sub-package in order torun. Install this in “develop mode” with the -e option, so that any changes you make to a demo will be immediatelyreflected on your next test or debug session.
From the root Dallinger directory you created in the previous step, run the installation command:
pip install -e demos
Next, you’ll need access keys for AWS, Heroku, etc..
4.1.2 Ubuntu
Install Python
Dallinger is written in the language Python. For it to work, you will need to have Python 2.7 installed, or alternativelyPython 3.6 or higher. Python 3 is the preferred option. You can check what version of Python you have by running:
python --version
Ubuntu 18.04 LTS ships with Python 3.6.
Ubuntu 16.04 LTS ships with Python 3.5, while Ubuntu 14.04 LTS ships with Python 3.4. In case you are using one ofthese distributions of Ubuntu, you can use dallinger with Python 2.7 or upgrade to the latest Python 3.x on your own.
(All three of these Ubuntu versions also provide a version of Python 2.7)
If you do not have Python 3 installed, you can install it from the Python website.
Also make sure you have the python headers installed. The python-dev package contains the header files you need tobuild Python extensions appropriate to the Python version you will be using.
Note: You will also need to have pip installed. It is included in some of the later versions of Python 3, but not all.(pip is a package manager for Python packages, or modules if you like.) If you are using Python 3, you may find thatyou may need to use the pip3 command instead of pip where applicable in the instructions that follow.
48 Chapter 4. Experiment Author Documentation
Dallinger Documentation, Release 6.0.0
If using Python 2.7.x:
sudo apt-get install python-devsudo apt install -y python-pip
If using Python 3.x:
sudo apt-get install python3-devsudo apt install -y python3-pip
Install Postgresql
The lowest version of Postgresql that Dallinger v5 supports is 9.4.
This is fine for Ubuntu 18.04 LTS and 16.04 LTS as they ship with Postgresql 10.4 and 9.5 respectively, howeverUbuntu 14.04 LTS ships with Postgresql 9.3
Postgres can be installed using the following instructions:
Ubuntu 18.04 LTS or Ubuntu 16.04 LTS:
sudo apt-get update && sudo apt-get install -y postgresql postgresql-contrib
To run postgres, use the following command:
sudo service postgresql start
Ubuntu 14.04 LTS:
Create the file /etc/apt/sources.list.d/pgdg.list and add a line for the repository:
sudo sh -c 'echo "deb http://apt.postgresql.org/pub/repos/apt/ `lsb_release -cs`-pgdg→˓main" >> /etc/apt/sources.list.d/pgdg.list'
Import the repository signing key, update the package lists and install postgresql:
wget -q https://www.postgresql.org/media/keys/ACCC4CF8.asc -O - | sudo apt-key add -sudo apt-get update && sudo apt-get install -y postgresql postgresql-contrib
To run postgres, use the following command:
sudo service postgresql start
Create the databases
Make sure that postgres is running. Switch to the postgres user:
sudo -u postgres -i
Run the following commands:
createuser -P dallinger --createdb(Password: dallinger)createdb -O dallinger dallingercreatedb -O dallinger dallinger-importexit
4.1. Developer Installation 49
Dallinger Documentation, Release 6.0.0
The second command will create a user named dallinger and prompt you for a password. The third and fourthcommands will create the dallinger and dallinger-import databases, setting the newly created user as theowner.
Finally restart postgresql:
sudo service postgresql reload
Install Heroku
To run experiments locally or on the internet, you will need the Heroku Command Line Interface installed, version3.28.0 or better. If you want to launch experiments on the internet, then you will also need a Heroku.com account,however this is not needed for local debugging.
To check which version of the Heroku CLI you have installed, run:
heroku --version
To install:
sudo apt-get install curlcurl https://cli-assets.heroku.com/install.sh | sh
More information on the Heroku CLI is available at heroku.com along with alternative installation instructions, ifneeded.
Install Redis
Debugging experiments requires you to have Redis installed and the Redis server running.
sudo apt-get install -y redis-server
Start Redis on Ubuntu with:
sudo service redis-server start
You can find more details and other installation instructions at redis.com.
Install Git
Dallinger uses Git, a distributed version control system, for version control of its code. If you do not have it installed,you can install it as follows:
sudo apt install git
You will need to configure your Git name and email:
git config --global user.email "[email protected]"git config --global user.name "Your Name"
Replace [email protected] and Your Name with your email and name to set your account’s default identity.Omit –global to set the identity only in this repository. You can read more about configuring Git here.
50 Chapter 4. Experiment Author Documentation
Dallinger Documentation, Release 6.0.0
Set up a virtual environment
Why use virtualenv?
Virtualenv solves a very specific problem: it allows multiple Python projects that have different (and often conflicting)requirements, to coexist on the same computer. If you want to understand this in detail, you can read more about ithere.
Now let’s set up a virtual environment by running the following commands:
If using Python 2.7 and pip:
sudo pip install virtualenvsudo pip install virtualenvwrapperexport WORKON_HOME=$HOME/.virtualenvsmkdir -p $WORKON_HOMEsource /usr/share/virtualenvwrapper/virtualenvwrapper.sh
Note: If the last line failed with “No such file or directory”. Try using source /usr/local/bin/virtualenvwrapper.sh instead. Pip installs virtualenvwrapper.sh to different locations depending on theUbuntu version.
If using Python 3.x and pip3:
sudo pip3 install virtualenvsudo pip3 install virtualenvwrapperexport WORKON_HOME=$HOME/.virtualenvsmkdir -p $WORKON_HOMEexport VIRTUALENVWRAPPER_PYTHON=/usr/bin/python3source /usr/local/bin/virtualenvwrapper.sh
Now create the virtualenv using the mkvirtualenv command as follows:
If you are using Python 3 that is part of your Ubuntu installation (Ubuntu 18.04):
mkvirtualenv dlgr_env --python /usr/bin/python3
If you are using Python 2 that is part of your Ubuntu installation:
mkvirtualenv dlgr_env --python /usr/bin/python
If you are using another Python version (eg. custom installed Python 3.x on Ubuntu 16.04 or Ubuntu 14.04):
mkvirtualenv dlgr_env --python <specify_your_python_path_here>
Virtualenvwrapper provides an easy way to switch between virtual environments by simply typing: workon[virtual environment name].
The technical details:
These commands use pip, the Python package manager, to install two packages virtualenv andvirtualenvwrapper. They set up an environmental variable named WORKON_HOMEwith a string that gives a pathto a subfolder of your home directory (~) called Envs, which the next command (mkdir) then makes according to thepath described in $WORKON_HOME (recursively, due to the -p flag). That is where your environments will be stored.The source command will run the command that follows, which in this case locates the virtualenvwrapper.sh shell script, the contents of which are beyond the scope of this setup tutorial. If you want to know what it does, amore in depth description can be found on the documentation site for virtualenvwrapper.
4.1. Developer Installation 51
Dallinger Documentation, Release 6.0.0
Finally, the mkvirtualenv makes your first virtual environment which you’ve named dlgr_env. We have explic-itly passed it the location of the Python that the virtualenv should use. This Python has been mapped to the pythoncommand inside the virtual environment.
The how-to:
In the future, you can work on your virtual environment by running: If using Python 2.7 and pip:
source /usr/share/virtualenvwrapper/virtualenvwrapper.shworkon dlgr_env
If using Python 3.x and pip3:
source /usr/local/bin/virtualenvwrapper.shworkon dlgr_env
NB: To stop working in the virtual environment, run deactivate. To list all available virtual environments, runworkon with no arguments.
If you plan to do a lot of work with Dallinger, you can make your shell execute the virtualenvwrapper.shscript everytime you open a terminal. To do that:
If using Python 2.7 and pip:
echo "source /usr/share/virtualenvwrapper/virtualenvwrapper.sh" >> ~/.bashrc
If using Python 3.x and pip3:
echo "source /usr/local/bin/virtualenvwrapper.sh" >> ~/.bashrc
From then on, you only need to use the workon command before starting.
Install prerequisites for building documentation
To be able to build the documentation, you will need yarn.
Please follow the instructions here to install it.
Install Dallinger
Next, navigate to the directory where you want to house your development work on Dallinger. Once there, clone theGit repository using:
git clone https://github.com/Dallinger/Dallinger
This will create a directory called Dallinger in your current directory.
Change into your the new directory and make sure you are still in your virtual environment before installing thedependencies. If you want to be extra careful, run the command workon dlgr_env, which will ensure that you arein the right virtual environment.
cd Dallinger
Now we need to install the dependencies using pip:
pip install -r dev-requirements.txt
Next, install the Dallinger development directory as an editable package, and include the data “extra”:
52 Chapter 4. Experiment Author Documentation

Dallinger Documentation, Release 6.0.0
pip install --editable .[data]
Test that your installation works by running:
dallinger --version
Install the Git pre-commit hook
With the virtual environment still activated:
pip install pre-commit
This will install the pre-commit package into the virtual environment. With that in place, each git clone of Dallingeryou create will need to have the pre-commit hook installed with:
pre-commit install
This will install a pre-commit hook to check for flake8 violations, and enforce a standard Python source code formatvia black. You can run the black code formatter and flake8 checks manually at any time by running:
pre-commit run --all-files
You may also want to install a black plugin for your own code editor, though this is not strictly necessary, since thepre-commit hook will run black for you on commit.
Install the dlgr.demos sub-package
Both the test suite and the included demo experiments require installing the dlgr.demos sub-package in order torun. Install this in “develop mode” with the -e option, so that any changes you make to a demo will be immediatelyreflected on your next test or debug session.
From the root Dallinger directory you created in the previous step, run the installation command:
pip install -e demos
Next, you’ll need access keys for AWS, Heroku, etc..
4.2 Creating an Experiment
The easiest way to create an experiment is to use the Dallinger Cookiecutter template. Cookiecutter is a tool thatcreates projects from project templates. There is a Dallinger template available for this tool.
The first step is to get Cookiecutter itself installed. Like Dallinger, Cookiecutter uses Python, so it can be installedin the same way that Dallinger was installed. If you haven’t installed Dallinger yet, please consult the installationinstructions first.
In most cases, you can install Cookiecutter using Python’s pip installer:
pip install cookiecutter
After that, you can use the cookiecutter command to create a new experiment in your current directory:
4.2. Creating an Experiment 53
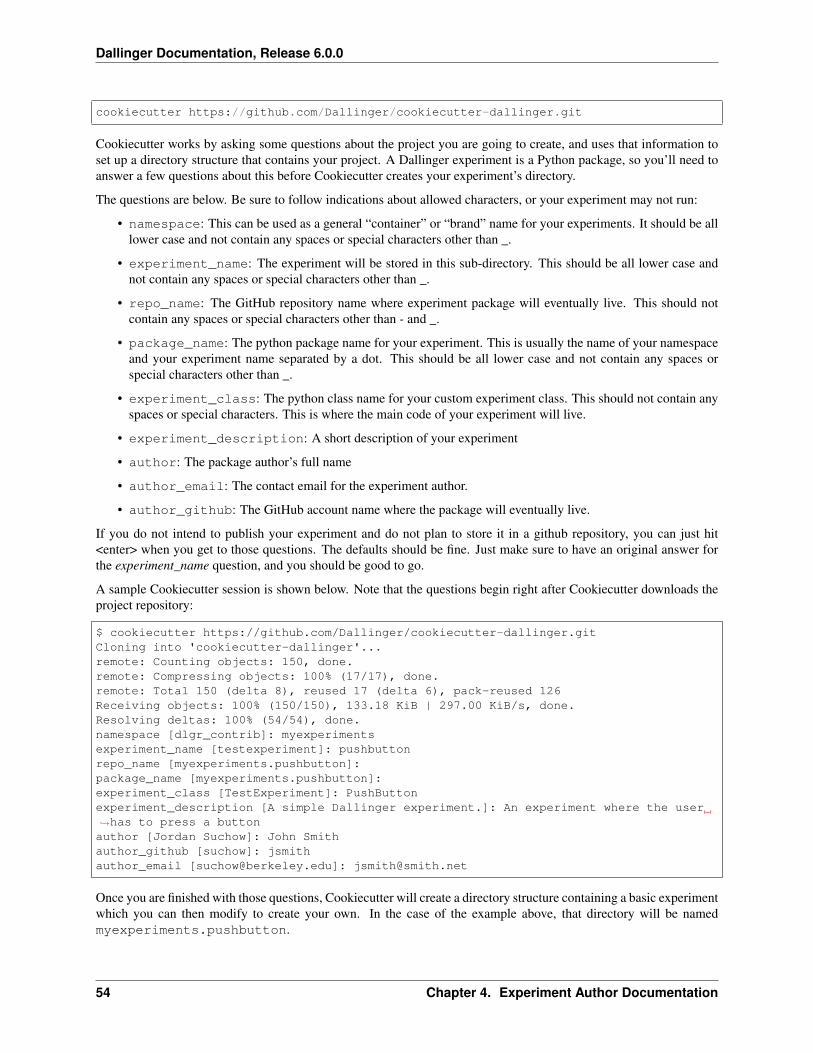
Dallinger Documentation, Release 6.0.0
cookiecutter https://github.com/Dallinger/cookiecutter-dallinger.git
Cookiecutter works by asking some questions about the project you are going to create, and uses that information toset up a directory structure that contains your project. A Dallinger experiment is a Python package, so you’ll need toanswer a few questions about this before Cookiecutter creates your experiment’s directory.
The questions are below. Be sure to follow indications about allowed characters, or your experiment may not run:
• namespace: This can be used as a general “container” or “brand” name for your experiments. It should be alllower case and not contain any spaces or special characters other than _.
• experiment_name: The experiment will be stored in this sub-directory. This should be all lower case andnot contain any spaces or special characters other than _.
• repo_name: The GitHub repository name where experiment package will eventually live. This should notcontain any spaces or special characters other than - and _.
• package_name: The python package name for your experiment. This is usually the name of your namespaceand your experiment name separated by a dot. This should be all lower case and not contain any spaces orspecial characters other than _.
• experiment_class: The python class name for your custom experiment class. This should not contain anyspaces or special characters. This is where the main code of your experiment will live.
• experiment_description: A short description of your experiment
• author: The package author’s full name
• author_email: The contact email for the experiment author.
• author_github: The GitHub account name where the package will eventually live.
If you do not intend to publish your experiment and do not plan to store it in a github repository, you can just hit<enter> when you get to those questions. The defaults should be fine. Just make sure to have an original answer forthe experiment_name question, and you should be good to go.
A sample Cookiecutter session is shown below. Note that the questions begin right after Cookiecutter downloads theproject repository:
$ cookiecutter https://github.com/Dallinger/cookiecutter-dallinger.gitCloning into 'cookiecutter-dallinger'...remote: Counting objects: 150, done.remote: Compressing objects: 100% (17/17), done.remote: Total 150 (delta 8), reused 17 (delta 6), pack-reused 126Receiving objects: 100% (150/150), 133.18 KiB | 297.00 KiB/s, done.Resolving deltas: 100% (54/54), done.namespace [dlgr_contrib]: myexperimentsexperiment_name [testexperiment]: pushbuttonrepo_name [myexperiments.pushbutton]:package_name [myexperiments.pushbutton]:experiment_class [TestExperiment]: PushButtonexperiment_description [A simple Dallinger experiment.]: An experiment where the user→˓has to press a buttonauthor [Jordan Suchow]: John Smithauthor_github [suchow]: jsmithauthor_email [[email protected]]: [email protected]
Once you are finished with those questions, Cookiecutter will create a directory structure containing a basic experimentwhich you can then modify to create your own. In the case of the example above, that directory will be namedmyexperiments.pushbutton.
54 Chapter 4. Experiment Author Documentation

Dallinger Documentation, Release 6.0.0
When you clone the cookiecutter template from a GitHub repository, as we did here, cookiecutter saves the downloadedtemplate inside your home directory, in the .cookiecutter sub-directory. The next time you run it, cookiecuttercan use the stored template, or you can update it to the latest version. The default behavior is to ask you what youwant to do. If you see a question like the following, just press <enter> to get the latest version:
You've downloaded /home/jsmith/.cookiecutters/cookiecutter-dallingerbefore. Is it okay to delete and re-download it? [yes]:
If you answer no, cookiecutter will use the saved version. This can be useful if you are working off-line and need tostart a project.
The template creates a runnable experiment, so you could change into the newly created directory right away andinstall your package:
$ cd myexperiments.pushbutton$ pip install -e .
This command will allow you to run the experiment using Dallinger. You just need to change to the directory namedfor your experiment:
$ cd myexperiments/pushbutton$ dallinger debug
This is enough to run the experiment, but to actually begin developing your experiment, you’ll need to install thedevelopment requirements, like this:
$ pip install -r dev-requirements.txt
Make sure you run this command from the initial directory created by Cookiecutter. In this case the directory ismyexperiments.pushbutton.
4.2.1 The Experiment Package
There are several files and directories that are created with the cookiecutter command. Let’s start with a generaloverview before going into each file in detail.
The directory structure of the package is the following:
- myexperiments.pushbutton- myexperiments- pushbutton
- static- css- images- scripts
- templates- tests- docs- source
- _static- _templates
- licenses
4.2. Creating an Experiment 55

Dallinger Documentation, Release 6.0.0
myexperiments.pushbutton
The main package directory contains files required to define the experiment as a Python package. Other than addingrequirements and keeping the README up to date, you probably won’t need to touch these files a lot after initialsetup.
myexperiments.pushbutton/myexperiments
This is what is know in Python as a namespace directory. Its only purpose is marking itself as a container of severalpackages under a common name. The idea is that using a namespace, you can have many related but independentpackages under one name, but you don’t need to have all of them inside a single project.
myexperiments.pushbutton/myexperiments/pushbutton
Contains the code and resources (images, styles, scripts) for your experiment. This is where your main work will beperformed.
myexperiments.pushbutton/tests
This is where the automated tests for your experiment go.
myexperiments.pushbutton/docs
The files stored here are the source files for your experiment’s documentation. Dallinger uses Sphinx for documentingthe project, and it’s recommended that you use the same system for documenting your experiment.
myexperiments.pushbutton/licenses
This directory contains the experiment’s license for distribution. Dallinger uses the MIT license, and it’s encouraged,but not required, that you use the same.
4.2.2 Detailed Description for Support Files
Now that you are familiar with the main project structure, let’s go over the details for the most important files in thepackage. Once you know what each file is for, you will be ready to begin developing your experiment. In this sectionwe’ll deal with the support files, which include tests, documentation and Python packaging files.
myexperiments.pushbutton/setup.py
This is a Python file that contains the package information, which is used by Python to setup the package, but also topublish it to the Python Package Repository (PYPI). Most of the questions you answered when creating the packagewith Cookiecutter are used here. As you develop your experiment, you might need to update the version variabledefined here, which starts as “0.1.0”. You may also wish to edit the keywords and classifiers, to help with yourpackage’s classification. Other than that, the file can be left untouched.
56 Chapter 4. Experiment Author Documentation
Dallinger Documentation, Release 6.0.0
myexperiments.pushbutton/constraints.txt
This text file contains the minimal version requirements for some of the Python dependencies used by the experiment.Out of the box, this includes Dallinger and development support packages. If you add any dependencies to yourexperiment, it would be a good idea to enter the package version here, to avoid any surprises down the line.
myexperiments.pushbutton/requirements.txt
The Python packages required by your experiment should be listed here. Do not include versions, just the packagename. Versions are handled in constraints.txt, discussed above. The file looks like this:
-c constraints.txtdallingerrequests
The first line is what tells the installer which versions to use, and then the dependencies go below, one on each line byitself. The experiment template includes just two dependencies, dallinger and requests.
myexperiments.pushbutton/dev-requirements.txt
Similar to requirements.txt above, but contains the development dependencies. You should only change this ifyou add a development specific tool to your package. The format is the same as for the other requirements.
myexperiments.pushbutton/README.md
This is where the name and purpose of your experiment are explained, along with minimal installation instructions.More detailed documentation should go in the docs directory.
Other files in myexperiments.pushbutton
There are a few more files in the myexperiments.pushbutton directory. Here is a quick description of each:
• .gitignore. Used by git to keep track of which files to ignore when looking for changes in your project.Files ignored by git will also be ignored both when deploying your experiment, and when testing it in debugmode.
• .travis.yml. Travis is a continuous integration service, which can run your experiment’s tests each timeyou push some changes. This is the configuration file where this is set up.
• CHANGELOG.md. This is where you should keep track of changes to your experiment. It is appended toREADME.md to form your experiment’s basic description.
• CONTRIBUTING.md. Guidelines for collaborating with your project.
• MANIFEST.in. Used by the installer to determine which files and directories to include in uploads of yourpackage.
• setup.cfg. Used by the installer to define metadata and settings for some development extensions.
• tox.ini. Sets up the testing environment.
4.2. Creating an Experiment 57
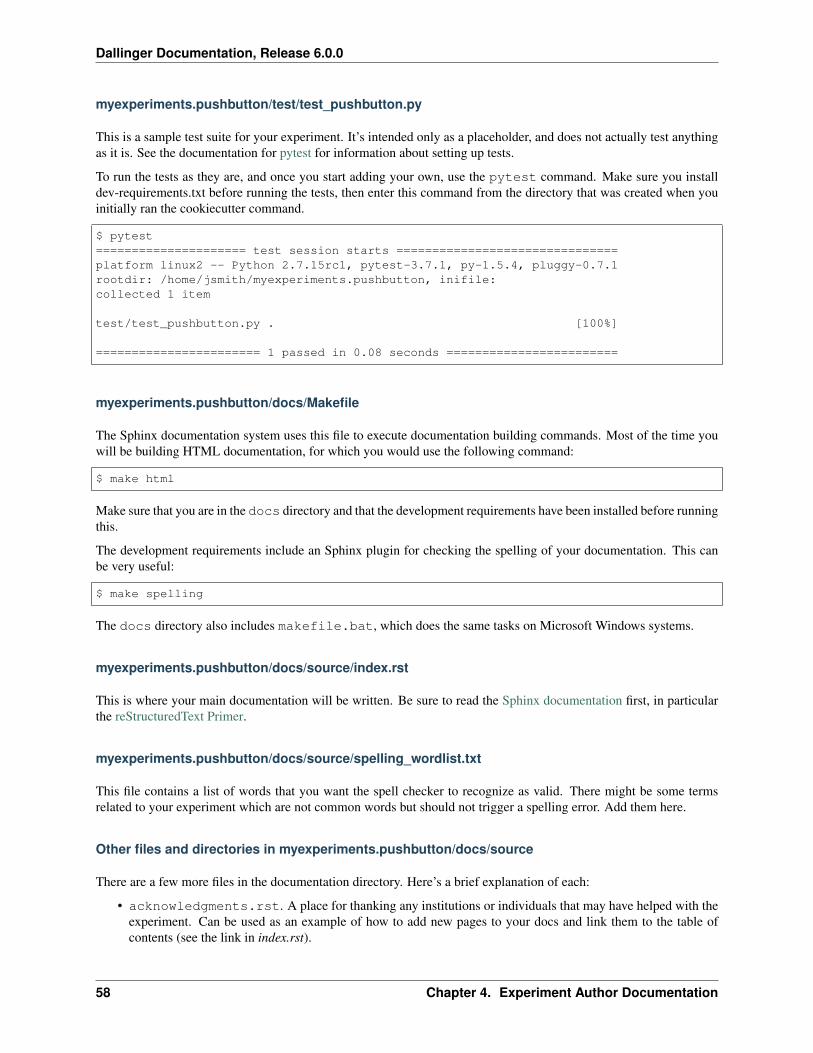
Dallinger Documentation, Release 6.0.0
myexperiments.pushbutton/test/test_pushbutton.py
This is a sample test suite for your experiment. It’s intended only as a placeholder, and does not actually test anythingas it is. See the documentation for pytest for information about setting up tests.
To run the tests as they are, and once you start adding your own, use the pytest command. Make sure you installdev-requirements.txt before running the tests, then enter this command from the directory that was created when youinitially ran the cookiecutter command.
$ pytest===================== test session starts ===============================platform linux2 -- Python 2.7.15rc1, pytest-3.7.1, py-1.5.4, pluggy-0.7.1rootdir: /home/jsmith/myexperiments.pushbutton, inifile:collected 1 item
test/test_pushbutton.py . [100%]
======================= 1 passed in 0.08 seconds ========================
myexperiments.pushbutton/docs/Makefile
The Sphinx documentation system uses this file to execute documentation building commands. Most of the time youwill be building HTML documentation, for which you would use the following command:
$ make html
Make sure that you are in the docs directory and that the development requirements have been installed before runningthis.
The development requirements include an Sphinx plugin for checking the spelling of your documentation. This canbe very useful:
$ make spelling
The docs directory also includes makefile.bat, which does the same tasks on Microsoft Windows systems.
myexperiments.pushbutton/docs/source/index.rst
This is where your main documentation will be written. Be sure to read the Sphinx documentation first, in particularthe reStructuredText Primer.
myexperiments.pushbutton/docs/source/spelling_wordlist.txt
This file contains a list of words that you want the spell checker to recognize as valid. There might be some termsrelated to your experiment which are not common words but should not trigger a spelling error. Add them here.
Other files and directories in myexperiments.pushbutton/docs/source
There are a few more files in the documentation directory. Here’s a brief explanation of each:
• acknowledgments.rst. A place for thanking any institutions or individuals that may have helped with theexperiment. Can be used as an example of how to add new pages to your docs and link them to the table ofcontents (see the link in index.rst).
58 Chapter 4. Experiment Author Documentation
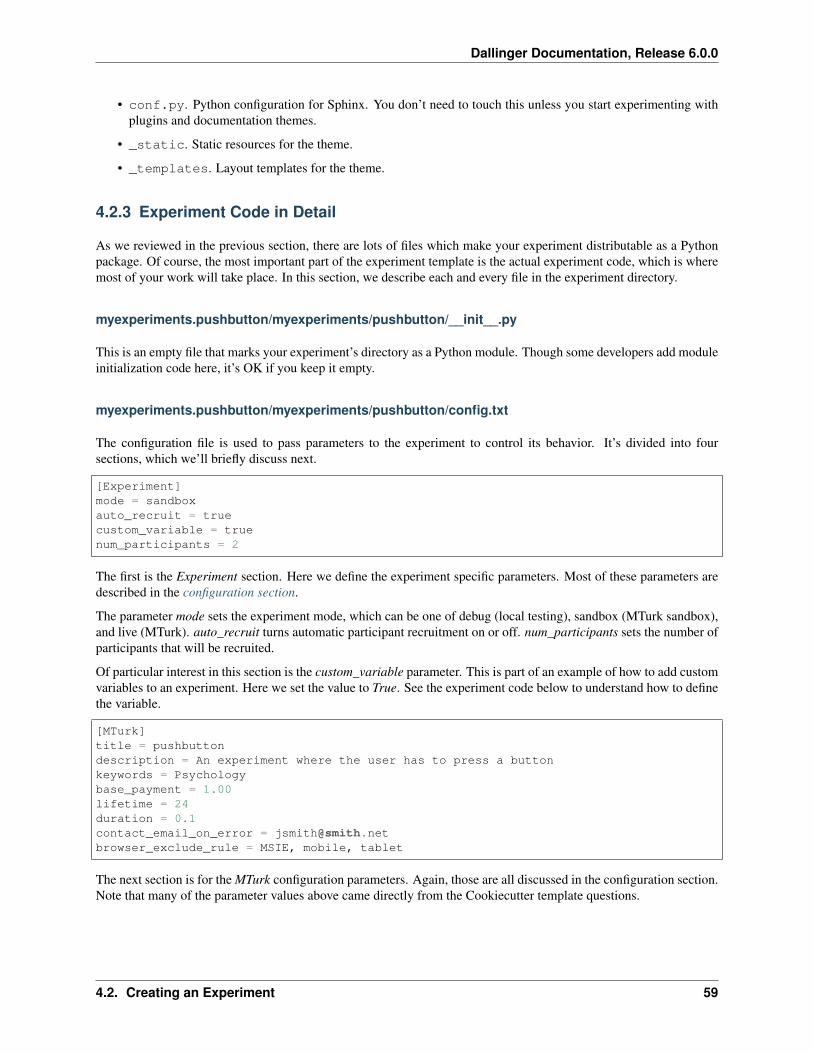
Dallinger Documentation, Release 6.0.0
• conf.py. Python configuration for Sphinx. You don’t need to touch this unless you start experimenting withplugins and documentation themes.
• _static. Static resources for the theme.
• _templates. Layout templates for the theme.
4.2.3 Experiment Code in Detail
As we reviewed in the previous section, there are lots of files which make your experiment distributable as a Pythonpackage. Of course, the most important part of the experiment template is the actual experiment code, which is wheremost of your work will take place. In this section, we describe each and every file in the experiment directory.
myexperiments.pushbutton/myexperiments/pushbutton/__init__.py
This is an empty file that marks your experiment’s directory as a Python module. Though some developers add moduleinitialization code here, it’s OK if you keep it empty.
myexperiments.pushbutton/myexperiments/pushbutton/config.txt
The configuration file is used to pass parameters to the experiment to control its behavior. It’s divided into foursections, which we’ll briefly discuss next.
[Experiment]mode = sandboxauto_recruit = truecustom_variable = truenum_participants = 2
The first is the Experiment section. Here we define the experiment specific parameters. Most of these parameters aredescribed in the configuration section.
The parameter mode sets the experiment mode, which can be one of debug (local testing), sandbox (MTurk sandbox),and live (MTurk). auto_recruit turns automatic participant recruitment on or off. num_participants sets the number ofparticipants that will be recruited.
Of particular interest in this section is the custom_variable parameter. This is part of an example of how to add customvariables to an experiment. Here we set the value to True. See the experiment code below to understand how to definethe variable.
[MTurk]title = pushbuttondescription = An experiment where the user has to press a buttonkeywords = Psychologybase_payment = 1.00lifetime = 24duration = 0.1contact_email_on_error = [email protected]_exclude_rule = MSIE, mobile, tablet
The next section is for the MTurk configuration parameters. Again, those are all discussed in the configuration section.Note that many of the parameter values above came directly from the Cookiecutter template questions.
4.2. Creating an Experiment 59

Dallinger Documentation, Release 6.0.0
[Database]database_url = postgresql://postgres@localhost/dallingerdatabase_size = standard-0
The Database section contains just the database URL and size parameters. These should only be changed if you haveyour database in a non standard location.
[Server]dyno_type = freenum_dynos_web = 1num_dynos_worker = 1host = 0.0.0.0clock_on = falselogfile = -
Finally, the Server section contains Heroku related parameters. Depending on the number of participants and size ofthe experiment, you might need to set the dyno_type and num_dynos_web parameters to something else, but be awarethat most dyno types require a paid account. For more information about dyno types, please take a look at the herokuguide.
myexperiments.pushbutton/myexperiments/pushbutton/experiment.py
At last, we get to the experiment code. This is where most of your effort will take place. The pushbutton experimentis simple and the code is short, but it’s important that you understand everything that happens here.
from dallinger.config import get_configfrom dallinger.experiments import Experimentfrom dallinger.networks import Emptytry:
from bots import BotBot = Bot
except ImportError:pass
The first section of the code consists of some import statements to get the Dallinger framework parts ready.
After the Dallinger imports we try to import a bot from within the experiment directory. If none are defined, we simplyskip this step. See the next section for more about bots.
config = get_config()
def extra_parameters():
types = {'custom_variable': bool,'num_participants': int,
}
for key in types:config.register(key, types[key])
Next, we get the experiment configuration, which includes parsing the config.txt file shown above. Theget_config() call also looks for an extra_parameters function, which is used to register the custom_variable andnum_participants parameters discussed in the configuration section above.
60 Chapter 4. Experiment Author Documentation

Dallinger Documentation, Release 6.0.0
class PushButton(Experiment):"""Define the structure of the experiment."""num_participants = 1
def __init__(self, session=None):"""Call the same parent constructor, then call setup() if we have a
→˓session."""super(PushButton, self).__init__(session)if session:
self.setup()
def configure(self):super(PushButton, self).configure()self.experiment_repeats = 1self.custom_variable = config.get('custom_variable')self.num_participants = config.get('num_participants', 1)
def create_network(self):"""Return a new network."""return Empty(max_size=self.num_participants)
Finally, we have the PushButton class, which contains the main experiment code. It inherits its behavior fromDallinger’s Experiment class, which we imported before. Since this is a very simple experiment, we don’t have alot of custom code here, other than setting up initial values for our custom parameters in the configure method.
If you had a class defined somewhere else representing some objects in your experiment, the place to initialize aninstance would be the __init__ method, which is called by Python on experiment initialization. The best place to dothat would be the line after the self.setup() call, right after we are sure that we have a session.
Your experiment can do whatever you want, and use any dependencies that you need. The Python code is used mainlyfor backend tasks, while most interactivity depends on Javascript and HTML pages, which are discussed below.
myexperiments.pushbutton/myexperiments/pushbutton/bots.py
One of Dallinger’s features is the ability to have automated experiment participants, or bots. These allow the experi-menter to perform simulated runs of an experiment using hundreds or even thousands of participants easily. To supportbots, an experiment needs to have a bots.py file that defines at least one bot. Our sample experiment has one, whichif you recall was imported at the top of the experiment code.
There are two kinds of bots. The first, or regular bot, uses a webdriver to simulate all the browser interactions that areal human would have with the experiment. The other bot type is the high performance bot, which skips the browsersimulation and interacts directly with the server.
import loggingimport requests
from selenium.webdriver.common.by import Byfrom selenium.common.exceptions import TimeoutExceptionfrom selenium.webdriver.support.ui import WebDriverWaitfrom selenium.webdriver.support import expected_conditions as EC
from dallinger.bots import BotBase, HighPerformanceBotBase
logger = logging.getLogger(__file__)
4.2. Creating an Experiment 61
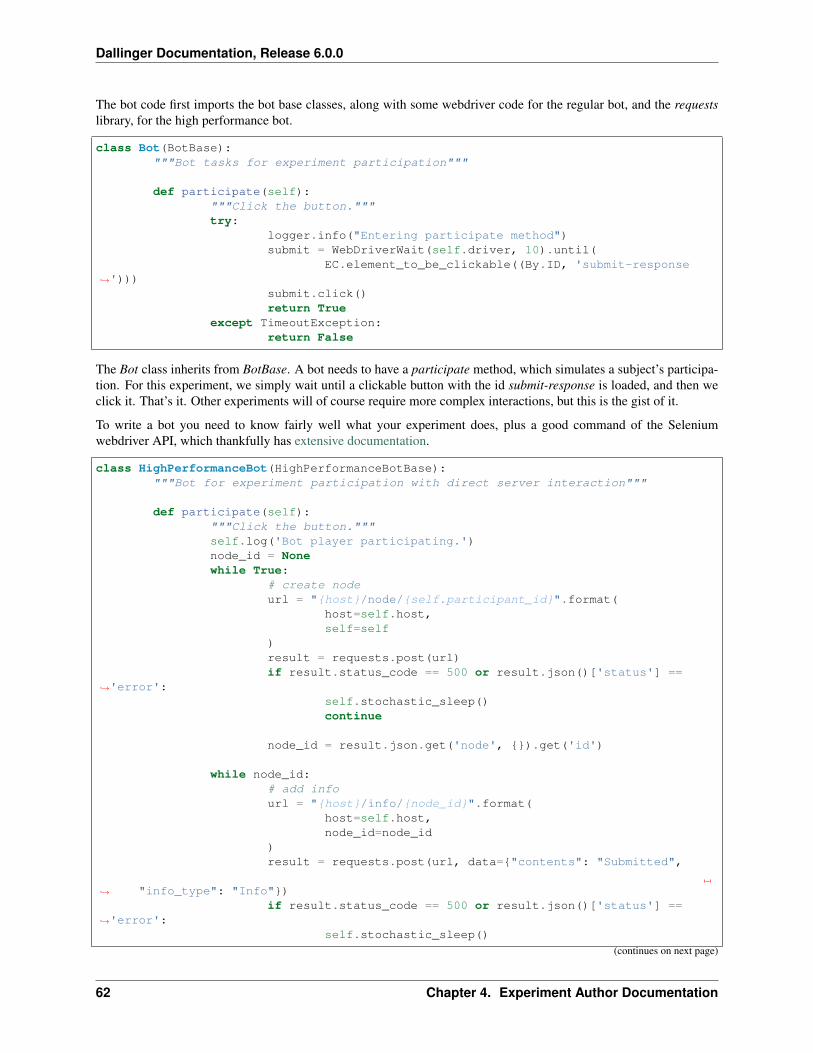
Dallinger Documentation, Release 6.0.0
The bot code first imports the bot base classes, along with some webdriver code for the regular bot, and the requestslibrary, for the high performance bot.
class Bot(BotBase):"""Bot tasks for experiment participation"""
def participate(self):"""Click the button."""try:
logger.info("Entering participate method")submit = WebDriverWait(self.driver, 10).until(
EC.element_to_be_clickable((By.ID, 'submit-response→˓')))
submit.click()return True
except TimeoutException:return False
The Bot class inherits from BotBase. A bot needs to have a participate method, which simulates a subject’s participa-tion. For this experiment, we simply wait until a clickable button with the id submit-response is loaded, and then weclick it. That’s it. Other experiments will of course require more complex interactions, but this is the gist of it.
To write a bot you need to know fairly well what your experiment does, plus a good command of the Seleniumwebdriver API, which thankfully has extensive documentation.
class HighPerformanceBot(HighPerformanceBotBase):"""Bot for experiment participation with direct server interaction"""
def participate(self):"""Click the button."""self.log('Bot player participating.')node_id = Nonewhile True:
# create nodeurl = "{host}/node/{self.participant_id}".format(
host=self.host,self=self
)result = requests.post(url)if result.status_code == 500 or result.json()['status'] ==
→˓'error':self.stochastic_sleep()continue
node_id = result.json.get('node', {}).get('id')
while node_id:# add infourl = "{host}/info/{node_id}".format(
host=self.host,node_id=node_id
)result = requests.post(url, data={"contents": "Submitted",
→˓ "info_type": "Info"})if result.status_code == 500 or result.json()['status'] ==
→˓'error':self.stochastic_sleep()
(continues on next page)
62 Chapter 4. Experiment Author Documentation
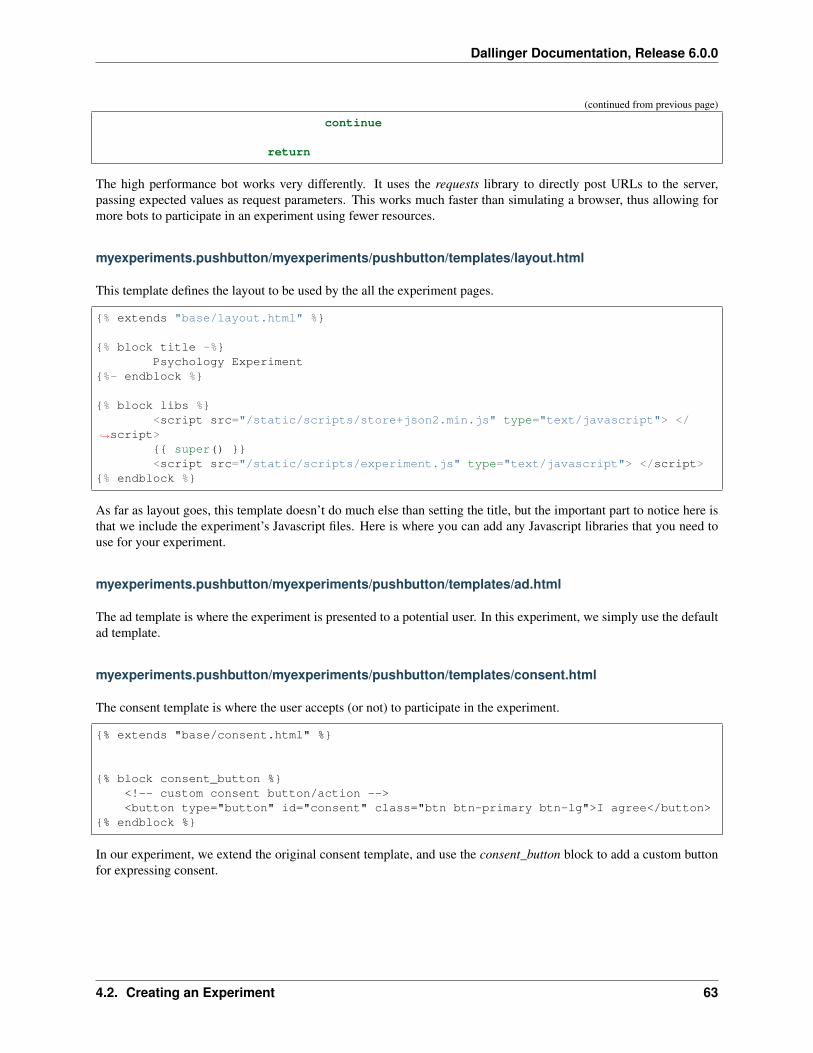
Dallinger Documentation, Release 6.0.0
(continued from previous page)
continue
return
The high performance bot works very differently. It uses the requests library to directly post URLs to the server,passing expected values as request parameters. This works much faster than simulating a browser, thus allowing formore bots to participate in an experiment using fewer resources.
myexperiments.pushbutton/myexperiments/pushbutton/templates/layout.html
This template defines the layout to be used by the all the experiment pages.
{% extends "base/layout.html" %}
{% block title -%}Psychology Experiment
{%- endblock %}
{% block libs %}<script src="/static/scripts/store+json2.min.js" type="text/javascript"> </
→˓script>{{ super() }}<script src="/static/scripts/experiment.js" type="text/javascript"> </script>
{% endblock %}
As far as layout goes, this template doesn’t do much else than setting the title, but the important part to notice here isthat we include the experiment’s Javascript files. Here is where you can add any Javascript libraries that you need touse for your experiment.
myexperiments.pushbutton/myexperiments/pushbutton/templates/ad.html
The ad template is where the experiment is presented to a potential user. In this experiment, we simply use the defaultad template.
myexperiments.pushbutton/myexperiments/pushbutton/templates/consent.html
The consent template is where the user accepts (or not) to participate in the experiment.
{% extends "base/consent.html" %}
{% block consent_button %}<!-- custom consent button/action --><button type="button" id="consent" class="btn btn-primary btn-lg">I agree</button>
{% endblock %}
In our experiment, we extend the original consent template, and use the consent_button block to add a custom buttonfor expressing consent.
4.2. Creating an Experiment 63

Dallinger Documentation, Release 6.0.0
myexperiments.pushbutton/myexperiments/pushbutton/templates/instructions.html
Next come the instructions for the experiment. For our instructions template, notice how we don’t extend an “in-structions” template, but rather the more generic layout template, because instructions are much more particular to theexperiment objectives and interaction mechanisms.
{% extends "layout.html" %}
{% block body %}<div class="main_div">
<hr>
<p>In this experiment, you will click a button.</p>
<hr>
<div><div class="row">
<div class="col-xs-10"></div><div class="col-xs-2">
<button type="button" class="btn btn-success btn-lg"onClick="dallinger.allowExit(); dallinger.goToPage('exp');">
Begin</button></div>
</div></div>
</div>{% endblock %}
The instructions are the last stop before beginning the actual experiment, so we have to direct the user to the exper-iment page. This is done by using the dallinger.goToPage method in the button’s onClick handler. Notice the call todallinger.allowExit right before the page change. This is needed because Dallinger is designed to prevent users fromaccidentally leaving the experiment by closing the browser window before it’s finished. The allowExit call means thatin this case it’s fine to leave the page, since we are going to the experiment page.
{% block scripts %}<script>
dallinger.createParticipant();</script>
{% endblock %}
A Dallinger experiment requires a participant to be created before beginning. Sometimes this is done conditionallyor at a specific event in the experiment flow. Since this experiment just requires pushing the button, we create theparticipant on page load by calling the dallinger.createParticipant method.
myexperiments.pushbutton/myexperiments/pushbutton/templates/exp.html
The exp.html template is where the main experiment action happens. In this case, there’s not a lot of action, though.
{% extends "layout.html" %}
{% block body %}<div class="main_div">
<div id="stimulus"><h1>Click the button</h1><button id="submit-response" type="button" class="btn btn-
→˓primary">Submit</button> (continues on next page)
64 Chapter 4. Experiment Author Documentation
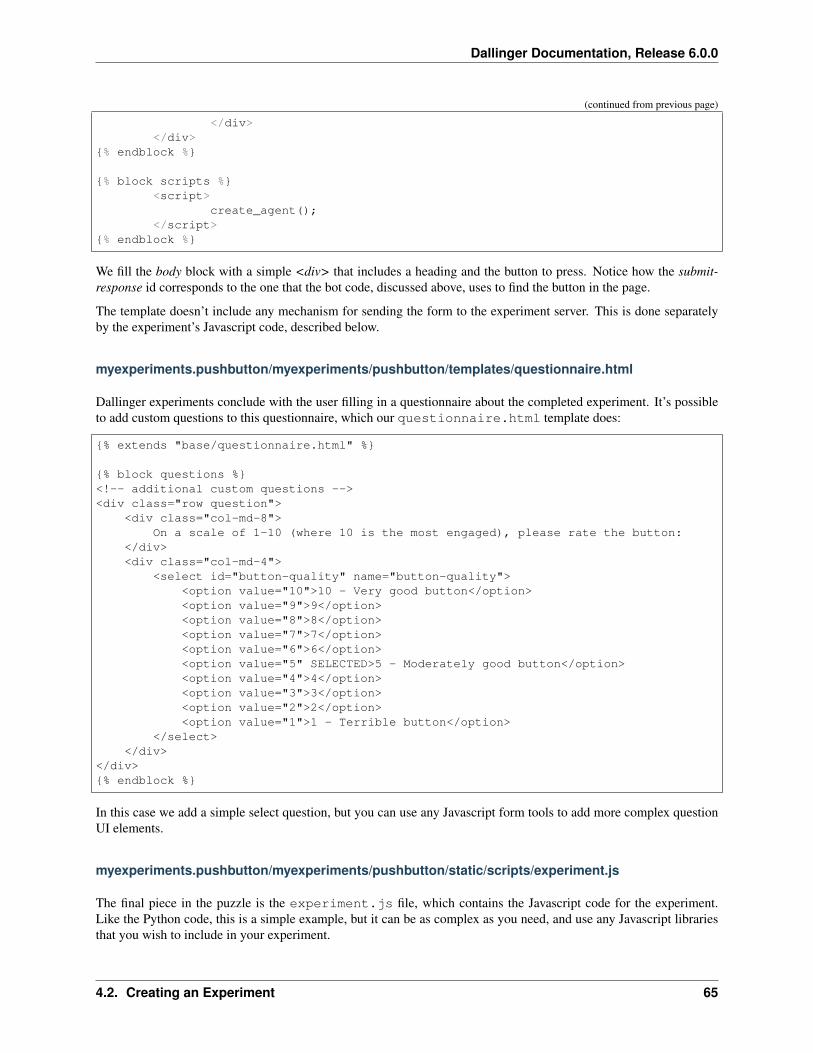
Dallinger Documentation, Release 6.0.0
(continued from previous page)
</div></div>
{% endblock %}
{% block scripts %}<script>
create_agent();</script>
{% endblock %}
We fill the body block with a simple <div> that includes a heading and the button to press. Notice how the submit-response id corresponds to the one that the bot code, discussed above, uses to find the button in the page.
The template doesn’t include any mechanism for sending the form to the experiment server. This is done separatelyby the experiment’s Javascript code, described below.
myexperiments.pushbutton/myexperiments/pushbutton/templates/questionnaire.html
Dallinger experiments conclude with the user filling in a questionnaire about the completed experiment. It’s possibleto add custom questions to this questionnaire, which our questionnaire.html template does:
{% extends "base/questionnaire.html" %}
{% block questions %}<!-- additional custom questions --><div class="row question">
<div class="col-md-8">On a scale of 1-10 (where 10 is the most engaged), please rate the button:
</div><div class="col-md-4">
<select id="button-quality" name="button-quality"><option value="10">10 - Very good button</option><option value="9">9</option><option value="8">8</option><option value="7">7</option><option value="6">6</option><option value="5" SELECTED>5 - Moderately good button</option><option value="4">4</option><option value="3">3</option><option value="2">2</option><option value="1">1 - Terrible button</option>
</select></div>
</div>{% endblock %}
In this case we add a simple select question, but you can use any Javascript form tools to add more complex questionUI elements.
myexperiments.pushbutton/myexperiments/pushbutton/static/scripts/experiment.js
The final piece in the puzzle is the experiment.js file, which contains the Javascript code for the experiment.Like the Python code, this is a simple example, but it can be as complex as you need, and use any Javascript librariesthat you wish to include in your experiment.
4.2. Creating an Experiment 65
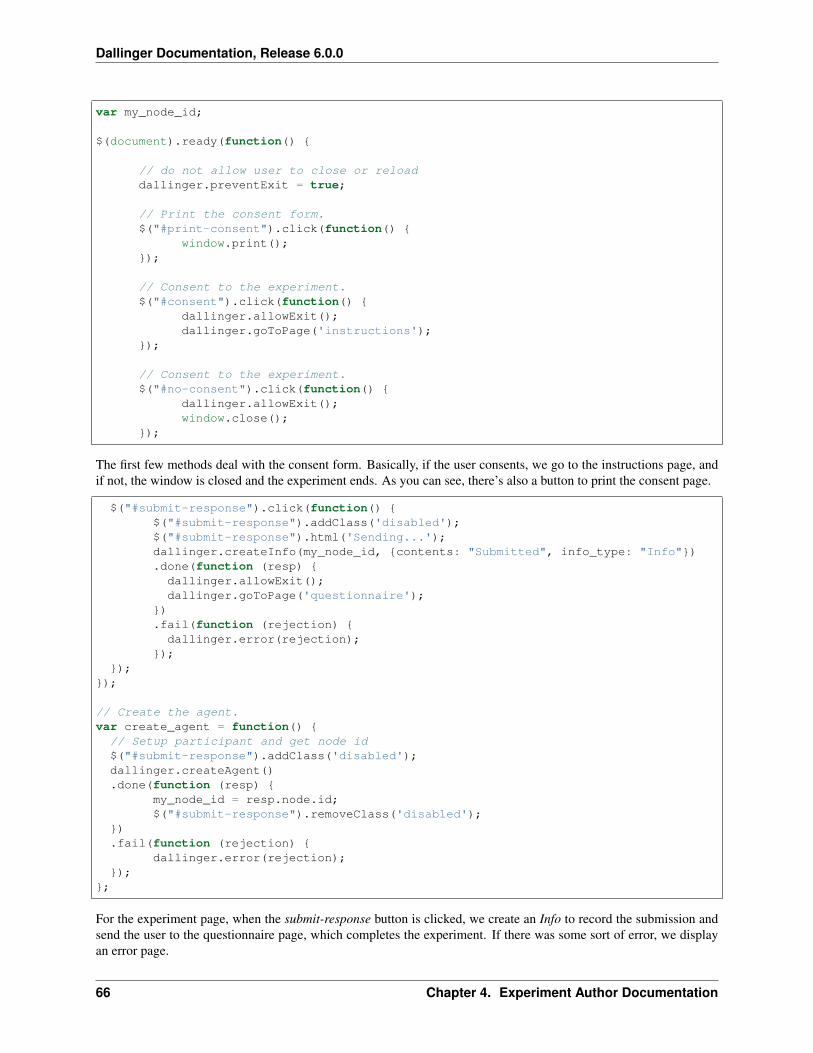
Dallinger Documentation, Release 6.0.0
var my_node_id;
$(document).ready(function() {
// do not allow user to close or reloaddallinger.preventExit = true;
// Print the consent form.$("#print-consent").click(function() {
window.print();});
// Consent to the experiment.$("#consent").click(function() {
dallinger.allowExit();dallinger.goToPage('instructions');
});
// Consent to the experiment.$("#no-consent").click(function() {
dallinger.allowExit();window.close();
});
The first few methods deal with the consent form. Basically, if the user consents, we go to the instructions page, andif not, the window is closed and the experiment ends. As you can see, there’s also a button to print the consent page.
$("#submit-response").click(function() {$("#submit-response").addClass('disabled');$("#submit-response").html('Sending...');dallinger.createInfo(my_node_id, {contents: "Submitted", info_type: "Info"}).done(function (resp) {dallinger.allowExit();dallinger.goToPage('questionnaire');
}).fail(function (rejection) {dallinger.error(rejection);
});});
});
// Create the agent.var create_agent = function() {// Setup participant and get node id$("#submit-response").addClass('disabled');dallinger.createAgent().done(function (resp) {
my_node_id = resp.node.id;$("#submit-response").removeClass('disabled');
}).fail(function (rejection) {
dallinger.error(rejection);});
};
For the experiment page, when the submit-response button is clicked, we create an Info to record the submission andsend the user to the questionnaire page, which completes the experiment. If there was some sort of error, we displayan error page.
66 Chapter 4. Experiment Author Documentation

Dallinger Documentation, Release 6.0.0
The create_agent function is called when the experiment page loads, to make sure the button is not enabled untilDallinger is fully setup for the experiment.
4.2.4 Extending the Template
Understanding the experiment files is one thing, but how do we go from template to new experiment? In this section,we’ll extend the cookiecutter template to create a full experiment. This way, the most common points of extension anduser requirements will be discussed, thus making it easier to think about creating original experiments.
The Bartlett 1932 Experiment
Sir Frederic Charles Bartlett was a British psychologist and the first professor of experimental psychology at theUniversity of Cambridge. His most important work was Remembering (1932) which consisted of experimental studieson remembering, imaging, and perceiving.
For our work in this section, we will take one of Bartlett’s experiments and turn it into a Dallinger experiment. Ourexperiment will be simple: participants will be given a text, and then they will have to recreate that text word for wordas best as they can.
Starting the Cookiecutter template
First, we need to create our experiment template, using cookiecutter. If you recall, the initial section of this tutorialshowed how to do this:
cookiecutter https://github.com/Dallinger/cookiecutter-dallinger.git
Make sure to answer “bartlett1932” to the experiment_name question. You can use the default values for the rest.
Setting Up the Network
The first thing to decide is how participants will interact with the experiment and with each other. Some experimentsmight just need participants to individually interact with the experiment, while others may require groups of peoplecommunicating with each other as well.
Dallinger organizes all experiment participants in networks. A network can include various kinds of nodes. Mostnodes are associated with participants, but there are other kinds of nodes, like sources, which are used to transmitinformation. Nodes are connected to other nodes in different ways, depending on the type of network that is definedfor the experiment.
Sources are an important kind of node, because many times the information (stimulus) required for conducting theexperiment will come from one. A source can only transmit information, never receive it. For this experiment, we willuse a source to send the text that the user must read and recreate.
Dallinger supports various kinds of networks out of the box, and you can create your own too. The most commonnetworks are:
• Chain. A network where each new node is connected to the most recently added node. The top node of thechain can be a source.
• FullyConnected. A network in which each node is connected to every other node. This includes sources.
• Empty. A network where every node is isolated from the rest. It can include a source, in which case it will beconnected to the nodes.
4.2. Creating an Experiment 67
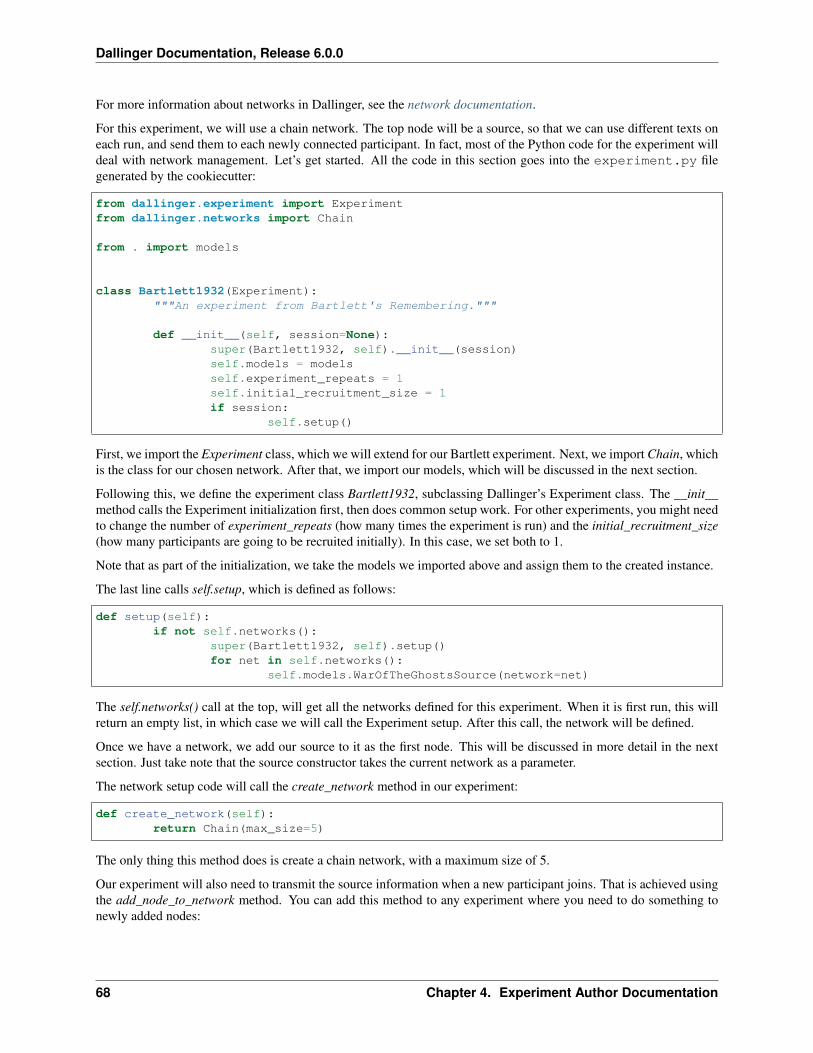
Dallinger Documentation, Release 6.0.0
For more information about networks in Dallinger, see the network documentation.
For this experiment, we will use a chain network. The top node will be a source, so that we can use different texts oneach run, and send them to each newly connected participant. In fact, most of the Python code for the experiment willdeal with network management. Let’s get started. All the code in this section goes into the experiment.py filegenerated by the cookiecutter:
from dallinger.experiment import Experimentfrom dallinger.networks import Chain
from . import models
class Bartlett1932(Experiment):"""An experiment from Bartlett's Remembering."""
def __init__(self, session=None):super(Bartlett1932, self).__init__(session)self.models = modelsself.experiment_repeats = 1self.initial_recruitment_size = 1if session:
self.setup()
First, we import the Experiment class, which we will extend for our Bartlett experiment. Next, we import Chain, whichis the class for our chosen network. After that, we import our models, which will be discussed in the next section.
Following this, we define the experiment class Bartlett1932, subclassing Dallinger’s Experiment class. The __init__method calls the Experiment initialization first, then does common setup work. For other experiments, you might needto change the number of experiment_repeats (how many times the experiment is run) and the initial_recruitment_size(how many participants are going to be recruited initially). In this case, we set both to 1.
Note that as part of the initialization, we take the models we imported above and assign them to the created instance.
The last line calls self.setup, which is defined as follows:
def setup(self):if not self.networks():
super(Bartlett1932, self).setup()for net in self.networks():
self.models.WarOfTheGhostsSource(network=net)
The self.networks() call at the top, will get all the networks defined for this experiment. When it is first run, this willreturn an empty list, in which case we will call the Experiment setup. After this call, the network will be defined.
Once we have a network, we add our source to it as the first node. This will be discussed in more detail in the nextsection. Just take note that the source constructor takes the current network as a parameter.
The network setup code will call the create_network method in our experiment:
def create_network(self):return Chain(max_size=5)
The only thing this method does is create a chain network, with a maximum size of 5.
Our experiment will also need to transmit the source information when a new participant joins. That is achieved usingthe add_node_to_network method. You can add this method to any experiment where you need to do something tonewly added nodes:
68 Chapter 4. Experiment Author Documentation

Dallinger Documentation, Release 6.0.0
def add_node_to_network(self, node, network):network.add_node(node)parents = node.neighbors(direction="from")if len(parents):
parent = parents[0]parent.transmit()
node.receive()
The method will get as parameters the new node and the network to which it is being added. The first thing to do is notforgetting to add the node to the network. Once that is safely behind, we get the node’s parents using the neighborsmethod. The parents are any nodes that the current node is connecting from, so we use the direction=”from” parameterin the call.
If there are any parents (and in this case, there will be). We get the first one, and call its transmit method. Finally, thenode’s receive method is called, to receive the transmission.
Recruitment
Closely connected to the experiment network structure, recruitment is the method by which we get experiment par-ticipants. For this, Dallinger uses a Recruiter subclass. Among other things, a recruiter is responsible for openingrecruitment, closing recruitment, and recruiting new participants for the experiment.
As you might already know, Dallinger works closely with Amazon’s Mechanical Turk, which for the purposes ofour experiments, you can think of as a crowdsourcing marketplace for experiment participants. The default Dallingerrecruiter knows how to make experiments available for MTurk users, and how to recruit those users into an experiment.
An experiment’s recruit method communicates with the recruiter to get the participants into its network:
def recruit(self):if self.networks(full=False):
self.recruiter.recruit(n=1)else:
self.recruiter.close_recruitment()
In our case, we only need to get participants one by one. We first check if the experiment networks are already full, inwhich case we skip the recruitment call (full=False will only return non-full networks). If there is space, we call therecruit method of the recruiter. Otherwise, we call close_recruiment, to end recruitment for this run.
It is important to note that recruitment will only start automatically if the experiment is configured to do so, bu settingauto_recruit to true in the config.txt file. The template that we created already has this variable set up like this.
Sources and Models
Earlier, we mentioned that we needed a source of information that could send new participants the text to be read andrecalled for our experiment. In fact, we assumed that this already existed, and proceeded to add the from . importmodels line in our code in the previous section.
To make this work, we need to create a models.py file inside our experiment, and add this code:
from dallinger.nodes import Sourceimport random
class WarOfTheGhostsSource(Source):
__mapper_args__ = {
(continues on next page)
4.2. Creating an Experiment 69
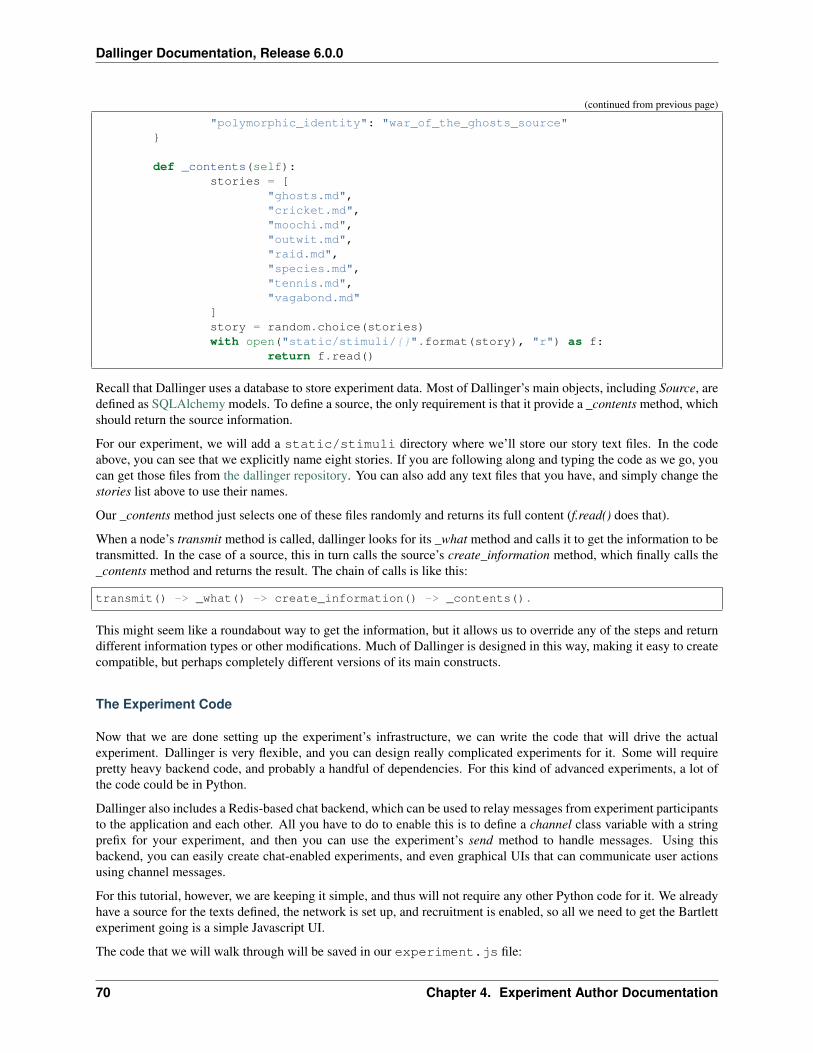
Dallinger Documentation, Release 6.0.0
(continued from previous page)
"polymorphic_identity": "war_of_the_ghosts_source"}
def _contents(self):stories = [
"ghosts.md","cricket.md","moochi.md","outwit.md","raid.md","species.md","tennis.md","vagabond.md"
]story = random.choice(stories)with open("static/stimuli/{}".format(story), "r") as f:
return f.read()
Recall that Dallinger uses a database to store experiment data. Most of Dallinger’s main objects, including Source, aredefined as SQLAlchemy models. To define a source, the only requirement is that it provide a _contents method, whichshould return the source information.
For our experiment, we will add a static/stimuli directory where we’ll store our story text files. In the codeabove, you can see that we explicitly name eight stories. If you are following along and typing the code as we go, youcan get those files from the dallinger repository. You can also add any text files that you have, and simply change thestories list above to use their names.
Our _contents method just selects one of these files randomly and returns its full content (f.read() does that).
When a node’s transmit method is called, dallinger looks for its _what method and calls it to get the information to betransmitted. In the case of a source, this in turn calls the source’s create_information method, which finally calls the_contents method and returns the result. The chain of calls is like this:
transmit() -> _what() -> create_information() -> _contents().
This might seem like a roundabout way to get the information, but it allows us to override any of the steps and returndifferent information types or other modifications. Much of Dallinger is designed in this way, making it easy to createcompatible, but perhaps completely different versions of its main constructs.
The Experiment Code
Now that we are done setting up the experiment’s infrastructure, we can write the code that will drive the actualexperiment. Dallinger is very flexible, and you can design really complicated experiments for it. Some will requirepretty heavy backend code, and probably a handful of dependencies. For this kind of advanced experiments, a lot ofthe code could be in Python.
Dallinger also includes a Redis-based chat backend, which can be used to relay messages from experiment participantsto the application and each other. All you have to do to enable this is to define a channel class variable with a stringprefix for your experiment, and then you can use the experiment’s send method to handle messages. Using thisbackend, you can easily create chat-enabled experiments, and even graphical UIs that can communicate user actionsusing channel messages.
For this tutorial, however, we are keeping it simple, and thus will not require any other Python code for it. We alreadyhave a source for the texts defined, the network is set up, and recruitment is enabled, so all we need to get the Bartlettexperiment going is a simple Javascript UI.
The code that we will walk through will be saved in our experiment.js file:
70 Chapter 4. Experiment Author Documentation
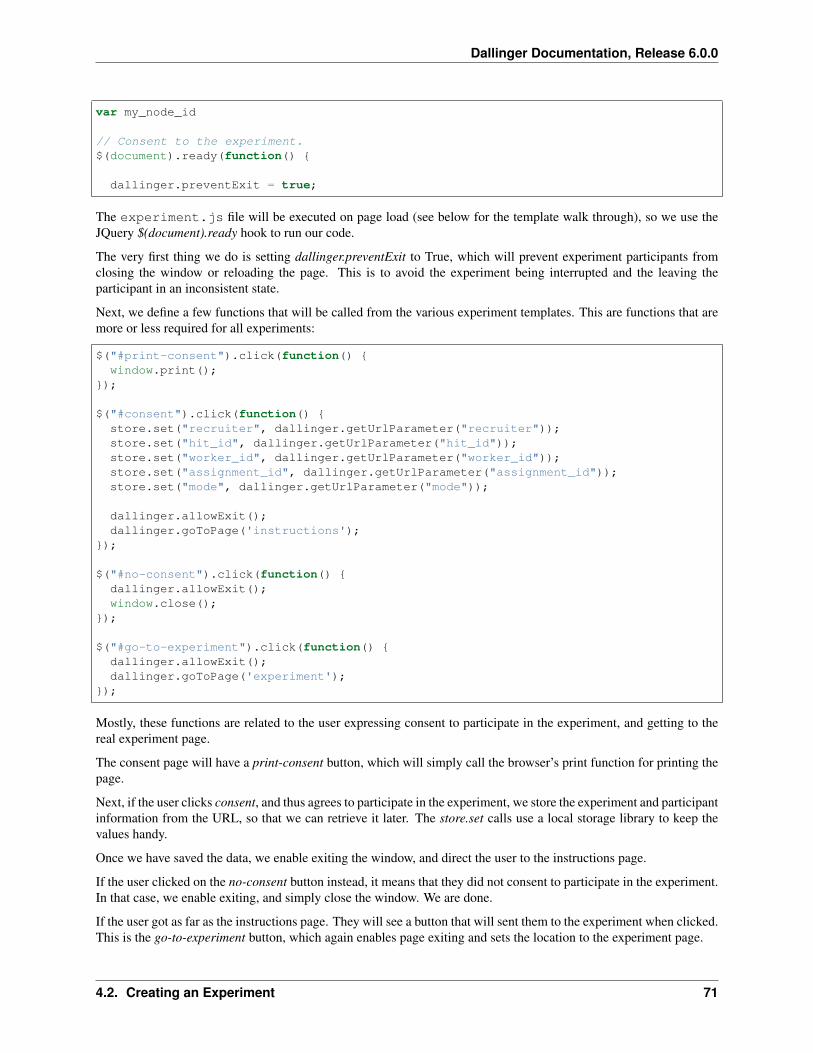
Dallinger Documentation, Release 6.0.0
var my_node_id
// Consent to the experiment.$(document).ready(function() {
dallinger.preventExit = true;
The experiment.js file will be executed on page load (see below for the template walk through), so we use theJQuery $(document).ready hook to run our code.
The very first thing we do is setting dallinger.preventExit to True, which will prevent experiment participants fromclosing the window or reloading the page. This is to avoid the experiment being interrupted and the leaving theparticipant in an inconsistent state.
Next, we define a few functions that will be called from the various experiment templates. This are functions that aremore or less required for all experiments:
$("#print-consent").click(function() {window.print();
});
$("#consent").click(function() {store.set("recruiter", dallinger.getUrlParameter("recruiter"));store.set("hit_id", dallinger.getUrlParameter("hit_id"));store.set("worker_id", dallinger.getUrlParameter("worker_id"));store.set("assignment_id", dallinger.getUrlParameter("assignment_id"));store.set("mode", dallinger.getUrlParameter("mode"));
dallinger.allowExit();dallinger.goToPage('instructions');
});
$("#no-consent").click(function() {dallinger.allowExit();window.close();
});
$("#go-to-experiment").click(function() {dallinger.allowExit();dallinger.goToPage('experiment');
});
Mostly, these functions are related to the user expressing consent to participate in the experiment, and getting to thereal experiment page.
The consent page will have a print-consent button, which will simply call the browser’s print function for printing thepage.
Next, if the user clicks consent, and thus agrees to participate in the experiment, we store the experiment and participantinformation from the URL, so that we can retrieve it later. The store.set calls use a local storage library to keep thevalues handy.
Once we have saved the data, we enable exiting the window, and direct the user to the instructions page.
If the user clicked on the no-consent button instead, it means that they did not consent to participate in the experiment.In that case, we enable exiting, and simply close the window. We are done.
If the user got as far as the instructions page. They will see a button that will sent them to the experiment when clicked.This is the go-to-experiment button, which again enables page exiting and sets the location to the experiment page.
4.2. Creating an Experiment 71

Dallinger Documentation, Release 6.0.0
We now come to our experiment specific code. The plan for our UI is like this: we will have a page displaying thetext, and a text area widget to write the text that the user can recall after reading it. We will have both in a single page,but only show one at a time. When the page loads, the user will see the text, followed by a finish-reading button:
$("#finish-reading").click(function() {$("#stimulus").hide();$("#response-form").show();$("#submit-response").removeClass('disabled');$("#submit-response").html('Submit');
});
When the user finishes reading, and clicks on the button, we hide the text and show the response form. This form willhave a submit-response button, which we enable. Finally, the text of the button is changed to read “Submit”.
This, and all the Javascript code in this section, uses the JQuery Javascript library, so check the JQuery documentationif you need more information.
Now for the submit-response button code:
$("#submit-response").click(function() {$("#submit-response").addClass('disabled');$("#submit-response").html('Sending...');
var response = $("#reproduction").val();
$("#reproduction").val("");
dallinger.createInfo(my_node_id, {contents: response,info_type: 'Info'
}).done(function (resp) {create_agent();
});});
});
When the user is done typing the text and clicks on the submit-response button, we disable the button and set the textto “Sending. . . ”. Next, we get the typed text from the reproduction text area, and wipe out the text.
The dallinger.createInfo function calls the Dallinger Python backend, which creates a Dallinger Info object associatedwith the current participant. This info will store the recalled text. If the info creation succeeds, the create_agentfunction will be called:
var create_agent = function() {$('#finish-reading').prop('disabled', true);dallinger.createAgent().done(function (resp) {$('#finish-reading').prop('disabled', false);my_node_id = resp.node.id;get_info();
}).fail(function (rejection) {if (rejection.status === 403) {
dallinger.allowExit();dallinger.goToPage('questionnaire');
} else {dallinger.error(rejection);
(continues on next page)
72 Chapter 4. Experiment Author Documentation
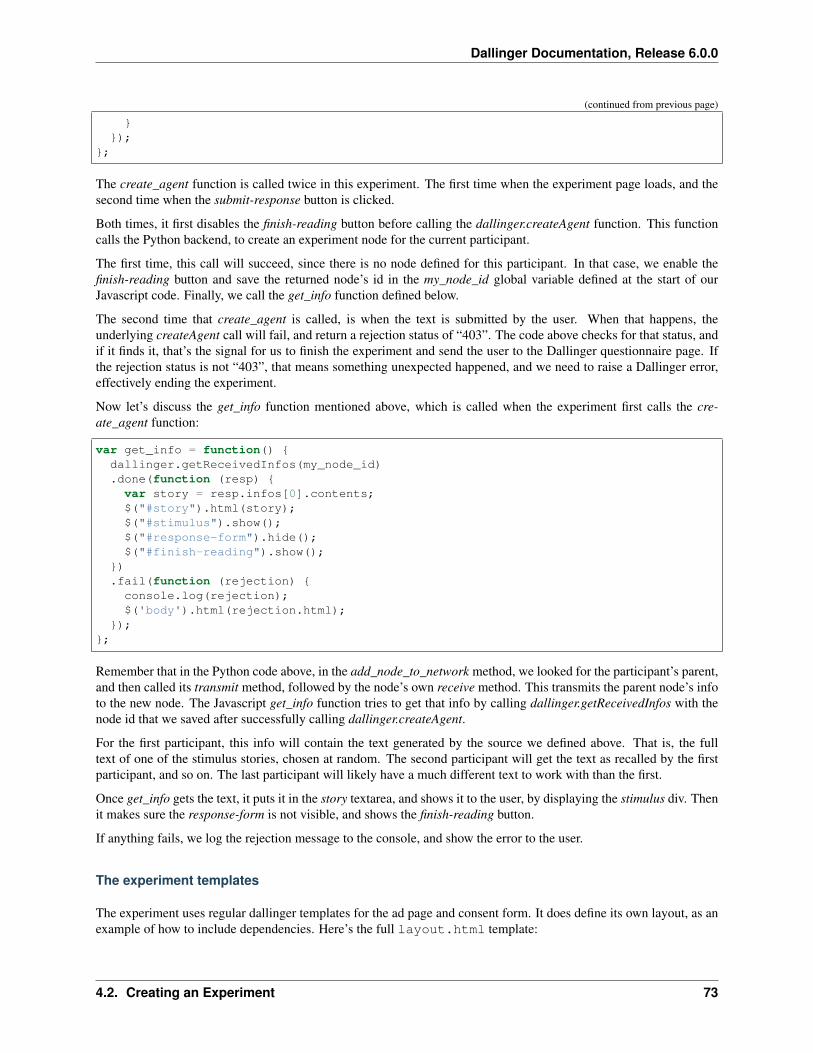
Dallinger Documentation, Release 6.0.0
(continued from previous page)
}});
};
The create_agent function is called twice in this experiment. The first time when the experiment page loads, and thesecond time when the submit-response button is clicked.
Both times, it first disables the finish-reading button before calling the dallinger.createAgent function. This functioncalls the Python backend, to create an experiment node for the current participant.
The first time, this call will succeed, since there is no node defined for this participant. In that case, we enable thefinish-reading button and save the returned node’s id in the my_node_id global variable defined at the start of ourJavascript code. Finally, we call the get_info function defined below.
The second time that create_agent is called, is when the text is submitted by the user. When that happens, theunderlying createAgent call will fail, and return a rejection status of “403”. The code above checks for that status, andif it finds it, that’s the signal for us to finish the experiment and send the user to the Dallinger questionnaire page. Ifthe rejection status is not “403”, that means something unexpected happened, and we need to raise a Dallinger error,effectively ending the experiment.
Now let’s discuss the get_info function mentioned above, which is called when the experiment first calls the cre-ate_agent function:
var get_info = function() {dallinger.getReceivedInfos(my_node_id).done(function (resp) {var story = resp.infos[0].contents;$("#story").html(story);$("#stimulus").show();$("#response-form").hide();$("#finish-reading").show();
}).fail(function (rejection) {console.log(rejection);$('body').html(rejection.html);
});};
Remember that in the Python code above, in the add_node_to_network method, we looked for the participant’s parent,and then called its transmit method, followed by the node’s own receive method. This transmits the parent node’s infoto the new node. The Javascript get_info function tries to get that info by calling dallinger.getReceivedInfos with thenode id that we saved after successfully calling dallinger.createAgent.
For the first participant, this info will contain the text generated by the source we defined above. That is, the fulltext of one of the stimulus stories, chosen at random. The second participant will get the text as recalled by the firstparticipant, and so on. The last participant will likely have a much different text to work with than the first.
Once get_info gets the text, it puts it in the story textarea, and shows it to the user, by displaying the stimulus div. Thenit makes sure the response-form is not visible, and shows the finish-reading button.
If anything fails, we log the rejection message to the console, and show the error to the user.
The experiment templates
The experiment uses regular dallinger templates for the ad page and consent form. It does define its own layout, as anexample of how to include dependencies. Here’s the full layout.html template:
4.2. Creating an Experiment 73
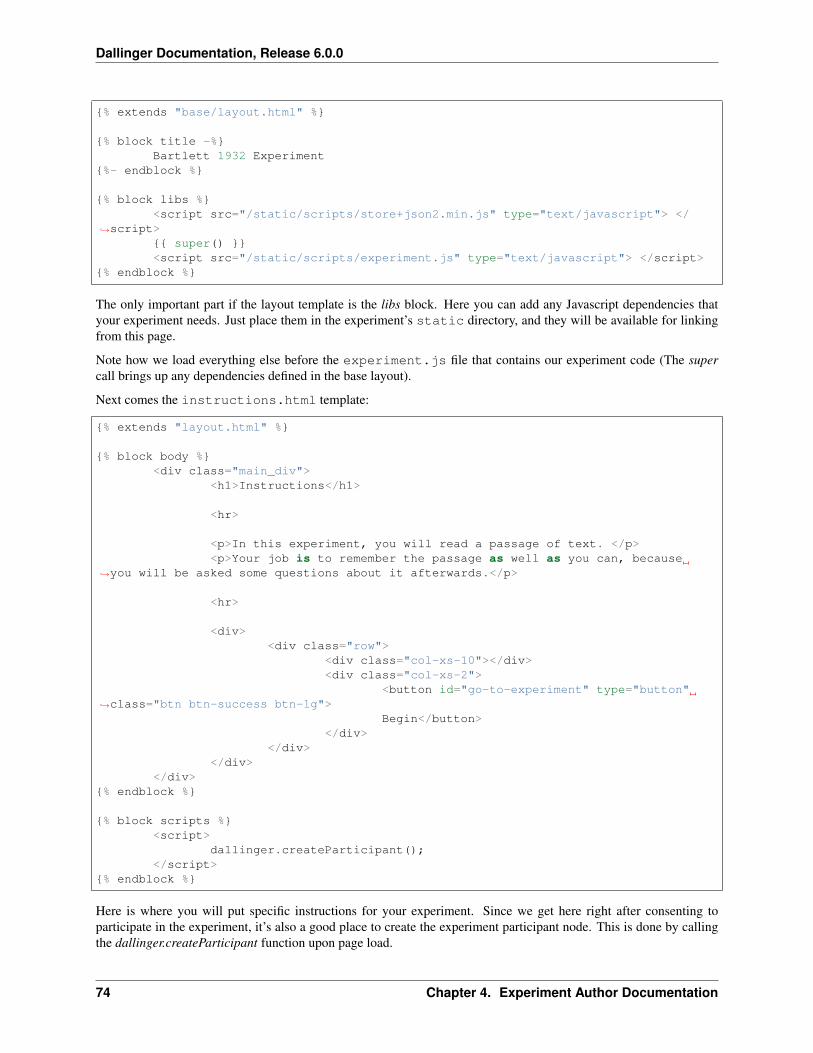
Dallinger Documentation, Release 6.0.0
{% extends "base/layout.html" %}
{% block title -%}Bartlett 1932 Experiment
{%- endblock %}
{% block libs %}<script src="/static/scripts/store+json2.min.js" type="text/javascript"> </
→˓script>{{ super() }}<script src="/static/scripts/experiment.js" type="text/javascript"> </script>
{% endblock %}
The only important part if the layout template is the libs block. Here you can add any Javascript dependencies thatyour experiment needs. Just place them in the experiment’s static directory, and they will be available for linkingfrom this page.
Note how we load everything else before the experiment.js file that contains our experiment code (The supercall brings up any dependencies defined in the base layout).
Next comes the instructions.html template:
{% extends "layout.html" %}
{% block body %}<div class="main_div">
<h1>Instructions</h1>
<hr>
<p>In this experiment, you will read a passage of text. </p><p>Your job is to remember the passage as well as you can, because
→˓you will be asked some questions about it afterwards.</p>
<hr>
<div><div class="row">
<div class="col-xs-10"></div><div class="col-xs-2">
<button id="go-to-experiment" type="button"→˓class="btn btn-success btn-lg">
Begin</button></div>
</div></div>
</div>{% endblock %}
{% block scripts %}<script>
dallinger.createParticipant();</script>
{% endblock %}
Here is where you will put specific instructions for your experiment. Since we get here right after consenting toparticipate in the experiment, it’s also a good place to create the experiment participant node. This is done by callingthe dallinger.createParticipant function upon page load.
74 Chapter 4. Experiment Author Documentation
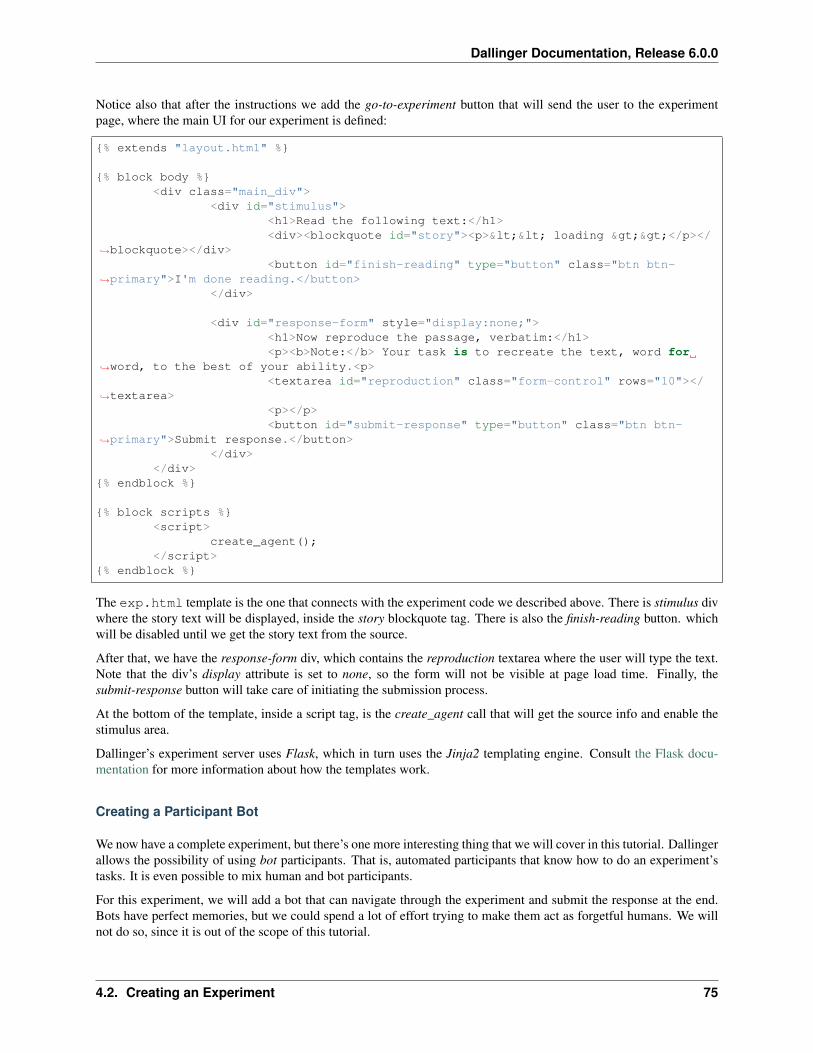
Dallinger Documentation, Release 6.0.0
Notice also that after the instructions we add the go-to-experiment button that will send the user to the experimentpage, where the main UI for our experiment is defined:
{% extends "layout.html" %}
{% block body %}<div class="main_div">
<div id="stimulus"><h1>Read the following text:</h1><div><blockquote id="story"><p><< loading >></p></
→˓blockquote></div><button id="finish-reading" type="button" class="btn btn-
→˓primary">I'm done reading.</button></div>
<div id="response-form" style="display:none;"><h1>Now reproduce the passage, verbatim:</h1><p><b>Note:</b> Your task is to recreate the text, word for
→˓word, to the best of your ability.<p><textarea id="reproduction" class="form-control" rows="10"></
→˓textarea><p></p><button id="submit-response" type="button" class="btn btn-
→˓primary">Submit response.</button></div>
</div>{% endblock %}
{% block scripts %}<script>
create_agent();</script>
{% endblock %}
The exp.html template is the one that connects with the experiment code we described above. There is stimulus divwhere the story text will be displayed, inside the story blockquote tag. There is also the finish-reading button. whichwill be disabled until we get the story text from the source.
After that, we have the response-form div, which contains the reproduction textarea where the user will type the text.Note that the div’s display attribute is set to none, so the form will not be visible at page load time. Finally, thesubmit-response button will take care of initiating the submission process.
At the bottom of the template, inside a script tag, is the create_agent call that will get the source info and enable thestimulus area.
Dallinger’s experiment server uses Flask, which in turn uses the Jinja2 templating engine. Consult the Flask docu-mentation for more information about how the templates work.
Creating a Participant Bot
We now have a complete experiment, but there’s one more interesting thing that we will cover in this tutorial. Dallingerallows the possibility of using bot participants. That is, automated participants that know how to do an experiment’stasks. It is even possible to mix human and bot participants.
For this experiment, we will add a bot that can navigate through the experiment and submit the response at the end.Bots have perfect memories, but we could spend a lot of effort trying to make them act as forgetful humans. We willnot do so, since it is out of the scope of this tutorial.
4.2. Creating an Experiment 75

Dallinger Documentation, Release 6.0.0
A basic bot gets the same exact pages that a human would, and needs to use a webdriver to go from page to page.Dallinger bots use the selenium webdrivers, which need a few imports to begin (add this to experiment.py):
from selenium.webdriver.common.by import Byfrom selenium.common.exceptions import TimeoutExceptionfrom selenium.webdriver.support.ui import WebDriverWaitfrom selenium.webdriver.support import expected_conditions as EC
from dallinger.bots import BotBase
After the selenium imports, we import BotBase from dallinger, which our bot will subclass. The only required methodfor a bot is the participate method, which is called by the bot framework when the bot is recruited.
Here is the bot code:
class Bot(BotBase):
def participate(self):try:
ready = WebDriverWait(self.driver, 10).until(EC.element_to_be_clickable((By.ID, 'finish-reading')))
stimulus = self.driver.find_element_by_id('stimulus')story = stimulus.find_element_by_id('story')story_text = story.textready.click()submit = WebDriverWait(self.driver, 10).until(
EC.element_to_be_clickable((By.ID, 'submit-response→˓')))
textarea = WebDriverWait(self.driver, 10).until(EC.element_to_be_clickable((By.ID, 'reproduction')))
textarea.clear()text = self.transform_text(story_text)textarea.send_keys(text)submit.click()return True
except TimeoutException:return False
def transform_text(self, text):return "Some transformation...and %s" % text
The participate method needs to return True if the participation was successful, and False otherwise. Since the web-driver could fail at getting the correct page in time, we wrap the whole participation sequence in a try clause. Combinedwith the WebDiverWait method of the webdriver, this will raise a TimeoutException if anything fails and the bot can’tproceed after the specified timeout. In this example, we use 10 seconds for the timeout.
The rest is simple: the bot waits until it can see the finish-reading button and assigns it to the ready variable. It thenfinds the stimulus div and the story inside of that, and extracts the story text. Once it gets the text, the bot “clicks” theready button.
The bot next waits for the submit-response div to be active, and the reproduction textarea activated. Just to do some-thing with it for this example, the bot calls the transform_text method, which just adds a few words to the story text. Itthen sends the text to the textarea element, using its send_keys method. After that, the task is complete, and the formis submitted (submit.click). Finally, the bot returns True to signal success.
76 Chapter 4. Experiment Author Documentation

Dallinger Documentation, Release 6.0.0
4.2.5 Developing Your Own Experiment
Now that you are more familiar with the full experiment contents, and have seen how to go from template to finishedexperiment, you are in position to begin extending the code to create your first experiment. Dallinger has an extensiveAPI, so you will probably need to refer to the documentation constantly as you go along. Here are some resourceswithin the documentation that should prove to be very useful while you develop your experiment further:
• The Web API
• The Javascript API
• The Database API
• The Experiment Class
• Writing Bots
4.3 Networks
Depending on an experiment’s objectives, there are different ways that experiment participants can interact with eachother and with the experiment’s stimuli. For some experiments, participants may receive the same initial stimuli andprocess it individually. For other experiments, they may sequentially interact with the stimuli. Some experiments mayrequire participants to interact among themselves in various ways.
In Dallinger, these interactions among participants and stimuli are represented using networks. Each participant andeach stimulus represent a node in a network. The way these nodes are connected to each other is known as a networktopology. For brevity, we will use the term network from now on when discussing Dallinger network topologies.
Dallinger comes with a variety of networks that can be used by experimenters, and it’s possible both to extend thesenetworks or create completely new ones as well. The networks included in Dallinger are:
• Empty
• Chain
• DelayedChain
• Star
• Burst
• FullyConnected
• DiscreteGenerational
• ScaleFree
• SequentialMicrosociety
• SplitSampleNetwork
4.3.1 Nodes and Sources
In these networks, each participant is considered as a node. There is also a special kind of node, known as a source,which transmits information to other nodes. Sources are used in Dallinger as a means to send the stimuli to theparticipants. Not all experiments have sources, though. A chatroom experiment, for example, could just rely on userinteractions and not require any other stimuli.
4.3. Networks 77
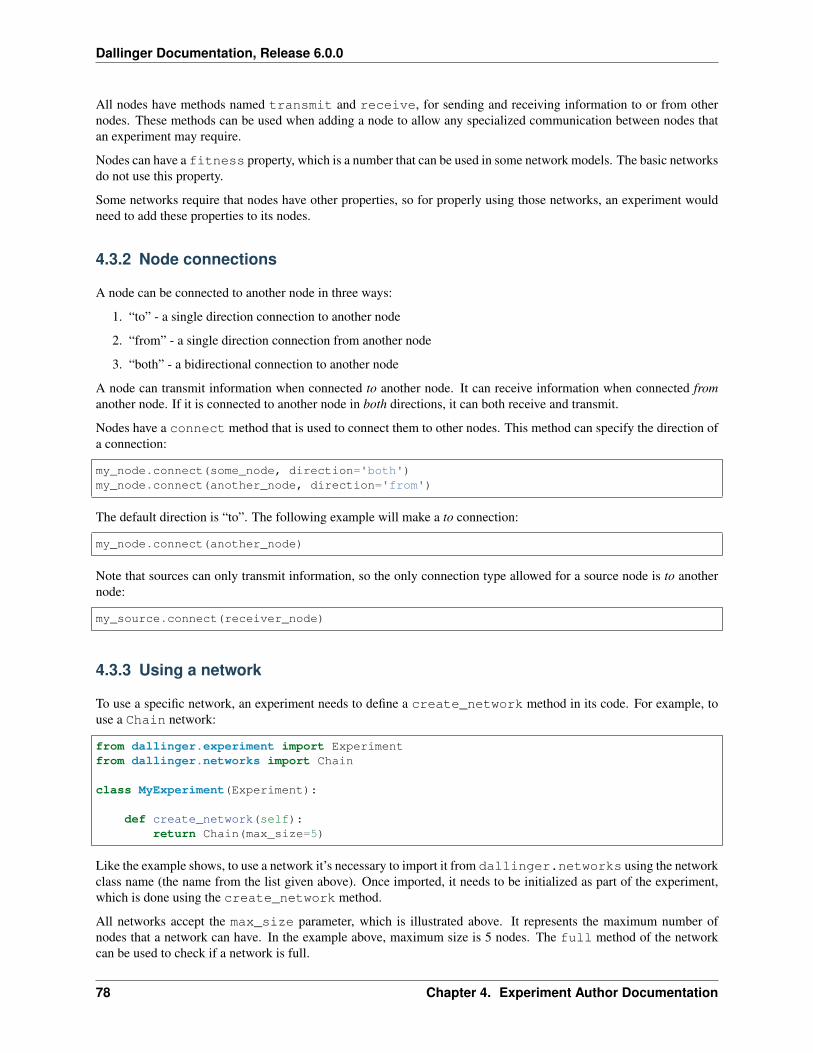
Dallinger Documentation, Release 6.0.0
All nodes have methods named transmit and receive, for sending and receiving information to or from othernodes. These methods can be used when adding a node to allow any specialized communication between nodes thatan experiment may require.
Nodes can have a fitness property, which is a number that can be used in some network models. The basic networksdo not use this property.
Some networks require that nodes have other properties, so for properly using those networks, an experiment wouldneed to add these properties to its nodes.
4.3.2 Node connections
A node can be connected to another node in three ways:
1. “to” - a single direction connection to another node
2. “from” - a single direction connection from another node
3. “both” - a bidirectional connection to another node
A node can transmit information when connected to another node. It can receive information when connected fromanother node. If it is connected to another node in both directions, it can both receive and transmit.
Nodes have a connect method that is used to connect them to other nodes. This method can specify the direction ofa connection:
my_node.connect(some_node, direction='both')my_node.connect(another_node, direction='from')
The default direction is “to”. The following example will make a to connection:
my_node.connect(another_node)
Note that sources can only transmit information, so the only connection type allowed for a source node is to anothernode:
my_source.connect(receiver_node)
4.3.3 Using a network
To use a specific network, an experiment needs to define a create_network method in its code. For example, touse a Chain network:
from dallinger.experiment import Experimentfrom dallinger.networks import Chain
class MyExperiment(Experiment):
def create_network(self):return Chain(max_size=5)
Like the example shows, to use a network it’s necessary to import it from dallinger.networks using the networkclass name (the name from the list given above). Once imported, it needs to be initialized as part of the experiment,which is done using the create_network method.
All networks accept the max_size parameter, which is illustrated above. It represents the maximum number ofnodes that a network can have. In the example above, maximum size is 5 nodes. The full method of the networkcan be used to check if a network is full.
78 Chapter 4. Experiment Author Documentation

Dallinger Documentation, Release 6.0.0
Multiple networks
In experiments configured for a number of practice_repeats or experiment_repeats higher than one, thecreate_network method is called multiple times, once for every repeat. This means that an experiment can havemultiple networks at the same time.
The experiment setup code assigns each network a role of practice or experiment, depending on how it was created.The experiment class allows experiment developers to query networks by role (practice, experiment), or by state (full,not full). For example:
all_networks = exp.networks()full_networks = exp.networks(full=True)not_full_networks = exp.networks(full=False)practice_networks = exp.networks(role='practice')full_experiment_networks = exp.networks(role='experiment', full=True)
Generally, the networks created at experiment setup will all be of the same type, but there’s nothing to stop an imag-inative experimenter from creating a different network type based on some condition, thus having multiple networksof different types.
4.3.4 Common networks in Dallinger
Many experiments will be able to just use one of Dallinger’s existing networks, rather than defining their own. Letslook at the basic networks that can be used out of the box.
Empty
There are experiments where participants do not need to interact with each other at all. Generally, in this case, a sourcewill be required. The Empty network does not connect any nodes with each other, which results in a series of isolatednodes. The only exception is, if a source node is added, it will be connected to all existing nodes, which means thatit’s possible to send a stimulus to all network nodes, regardless of their isolation.
Chain
A Chain network, also known as line network, connects each new node to the previous one, so that nodes can receiveinformation from their parent, but cannot send information back. In other words, it’s a one way transmission chain. Ingeneral, it’s useful to have a source as the first node, so that an initial experiment stimulus is transmitted to the eachnode through the chain. Note that this network explicitly prohibits a source to be added after any node, so the sourcehas to come first.
This network can be useful for experiments where some piece of information, for example, a text, needs to be modifiedor interpreted by each participant in succession.
DelayedChain
DelayedChain is a special Chain network designed to work within the limits of MTurk configuration, which sometimesrequires at least 10 participants from the start. In this case, for a Chain network, it would be impractical to makeparticipants sign on from the beginning and then wait for their turn in the Chain for a long time. To avoid this,DelayedChain basically ignores the first 9 participants, and then starts the Chain from the 10th participant on.
This is intended to be used with a source, in order to form a long running chain where participants are recruited assoon as the previous participant has finished. If there’s no source, the first eleven nodes have no parent.
4.3. Networks 79
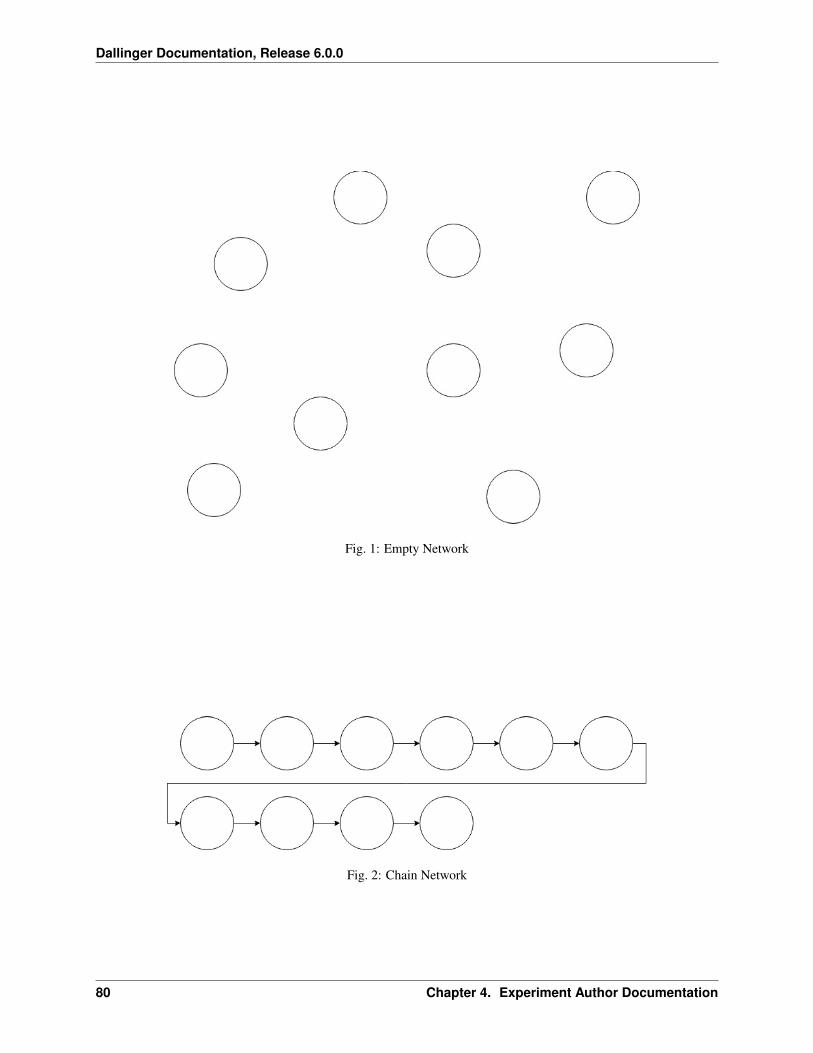
Dallinger Documentation, Release 6.0.0
Fig. 1: Empty Network
Fig. 2: Chain Network
80 Chapter 4. Experiment Author Documentation
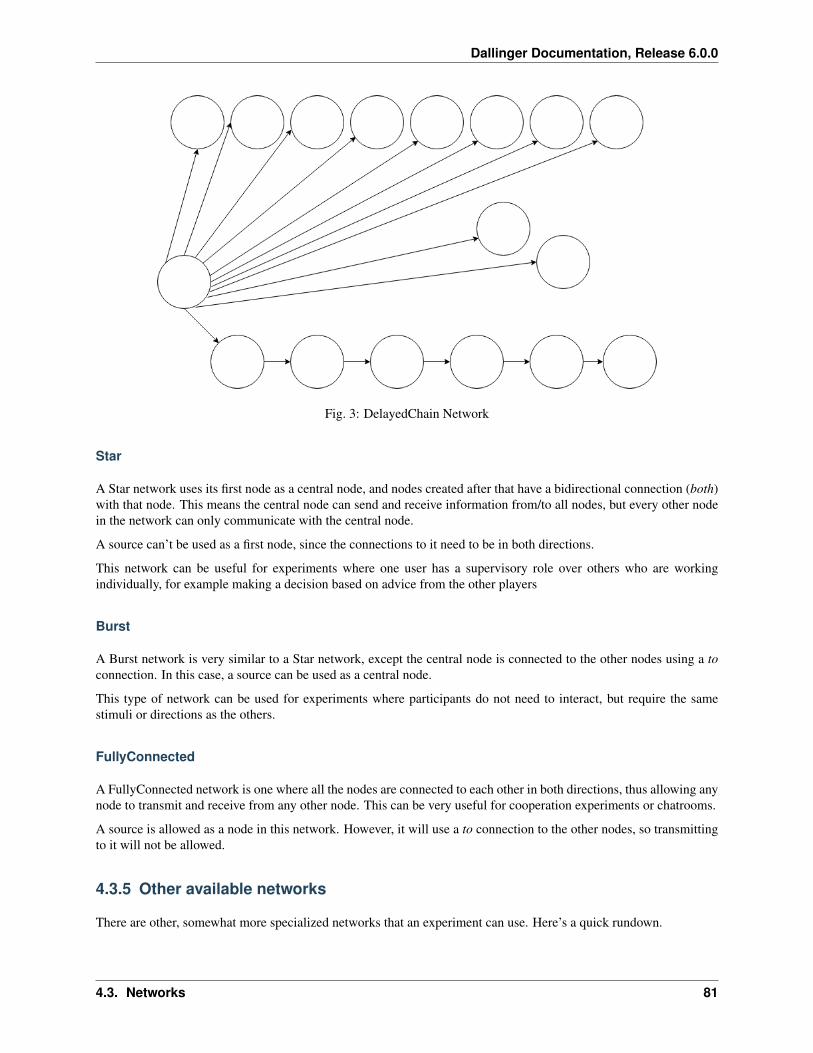
Dallinger Documentation, Release 6.0.0
Fig. 3: DelayedChain Network
Star
A Star network uses its first node as a central node, and nodes created after that have a bidirectional connection (both)with that node. This means the central node can send and receive information from/to all nodes, but every other nodein the network can only communicate with the central node.
A source can’t be used as a first node, since the connections to it need to be in both directions.
This network can be useful for experiments where one user has a supervisory role over others who are workingindividually, for example making a decision based on advice from the other players
Burst
A Burst network is very similar to a Star network, except the central node is connected to the other nodes using a toconnection. In this case, a source can be used as a central node.
This type of network can be used for experiments where participants do not need to interact, but require the samestimuli or directions as the others.
FullyConnected
A FullyConnected network is one where all the nodes are connected to each other in both directions, thus allowing anynode to transmit and receive from any other node. This can be very useful for cooperation experiments or chatrooms.
A source is allowed as a node in this network. However, it will use a to connection to the other nodes, so transmittingto it will not be allowed.
4.3.5 Other available networks
There are other, somewhat more specialized networks that an experiment can use. Here’s a quick rundown.
4.3. Networks 81
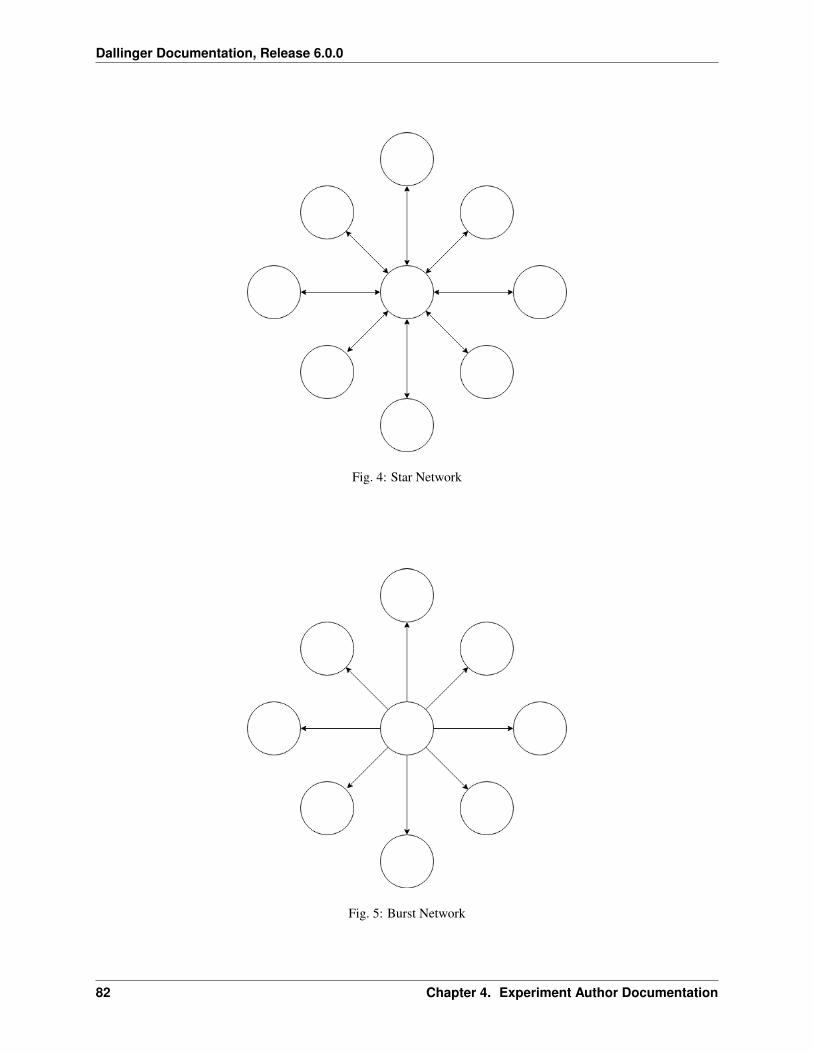
Dallinger Documentation, Release 6.0.0
Fig. 4: Star Network
Fig. 5: Burst Network
82 Chapter 4. Experiment Author Documentation
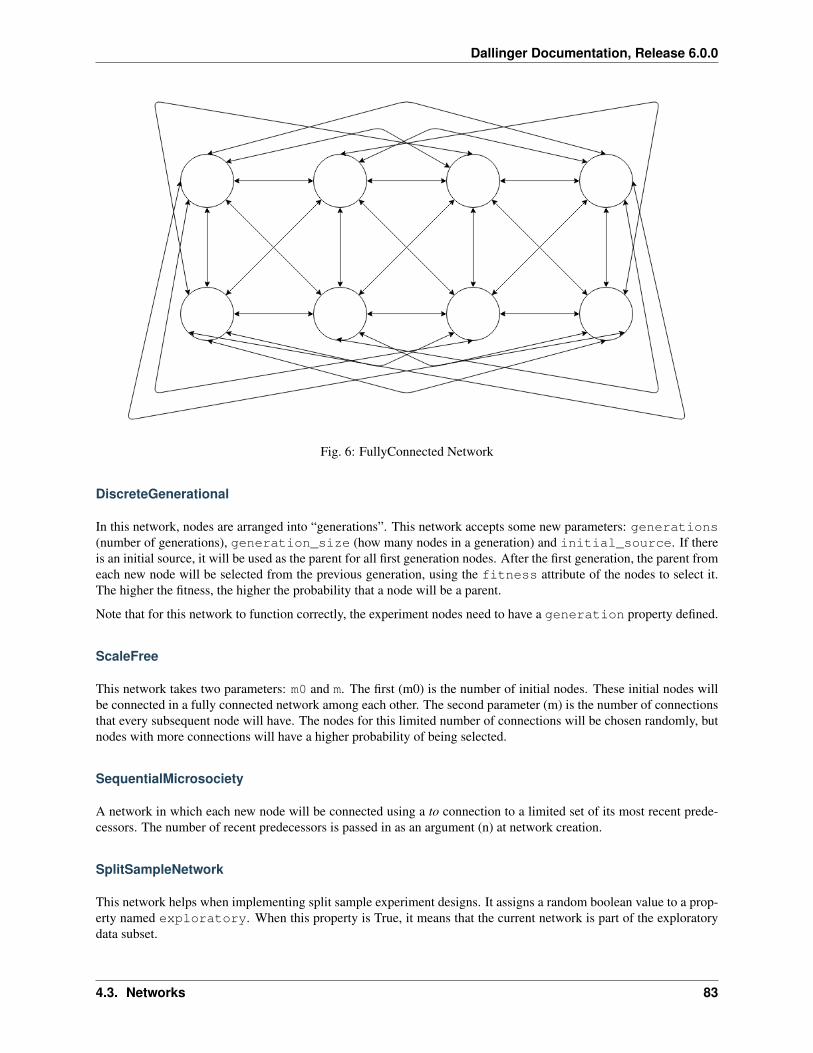
Dallinger Documentation, Release 6.0.0
Fig. 6: FullyConnected Network
DiscreteGenerational
In this network, nodes are arranged into “generations”. This network accepts some new parameters: generations(number of generations), generation_size (how many nodes in a generation) and initial_source. If thereis an initial source, it will be used as the parent for all first generation nodes. After the first generation, the parent fromeach new node will be selected from the previous generation, using the fitness attribute of the nodes to select it.The higher the fitness, the higher the probability that a node will be a parent.
Note that for this network to function correctly, the experiment nodes need to have a generation property defined.
ScaleFree
This network takes two parameters: m0 and m. The first (m0) is the number of initial nodes. These initial nodes willbe connected in a fully connected network among each other. The second parameter (m) is the number of connectionsthat every subsequent node will have. The nodes for this limited number of connections will be chosen randomly, butnodes with more connections will have a higher probability of being selected.
SequentialMicrosociety
A network in which each new node will be connected using a to connection to a limited set of its most recent prede-cessors. The number of recent predecessors is passed in as an argument (n) at network creation.
SplitSampleNetwork
This network helps when implementing split sample experiment designs. It assigns a random boolean value to a prop-erty named exploratory. When this property is True, it means that the current network is part of the exploratorydata subset.
4.3. Networks 83

Dallinger Documentation, Release 6.0.0
4.3.6 Creating a network
In addition to the available networks, it’s fairly simple to create a custom network, in case an experiment design callsfor different node interconnections. To create one, we can subclass from the Network model:
from dallinger.models import Networkfrom dallinger.nodes import Source
class Ring(Network):
__mapper_args__ = {"polymorphic_identity": "ring"}
def add_node(self, node):other_nodes = [n for n in self.nodes() if n.id != node.id]
if isinstance(node, Source):raise Exception(
"Ring network cannot contain sources.")
if other_nodes:parent = max(other_nodes, key=attrgetter('creation_time'))parent.connect(whom=node)
if len(self.nodes) == self.max_size:parent = min(other_nodes, key=attrgetter('creation_time'))node.connect(whom=parent)
In the above example, we create a simple ring network, where each node is connected in chain to the next one, untilwe get to the last one, which is connected back to the first, making a full circle (thus, the ‘ring’ name).
Our Ring network is a subclass of dallinger.models.Network, which contains the basic network model andimplementation. The __mapper_args__ assignment at the top is for differentiating this network from others, sothat data exports don’t give incorrect results. Usually the safe thing is to use the same name as the subclass, to avoidconfusion.
Most simple networks will only need to override the add_node method. This method is called after a node is added,with the added node as a parameter. This method then can decide how and when to connect this node to other nodesin the network.
In our code, we first get all nodes in the network (except the new one). If the new node is a source, we raise an excep-tion, because due to the circular nature of our network, there can be no sources (they don’t accept from connectionsand can only transmit).
After that, we take the most recent node and connect it to the new node. At this point, this is almost the same as a chainnetwork, but when we get to the last node, we connect the new node to the first node, in addition to its connection tothe previous node.
The code in the add_node method can be as complex as needed, so very complex networks are possible. In mostcases, to create a more advanced network it will be necessary to add custom properties to it. This is done by overridingthe __init__ method of the network to add the properties. The following example shows how to do that:
def __init__(self, new_property1, new_property2):self.property1 = repr(new_property1)self.property2 = repr(new_property2)
The properties are added as parameters to the network on creation. A custom property need not be persistent, butin general it’s better to save it as part of the network using the persistent custom properties available in all Dallinger
84 Chapter 4. Experiment Author Documentation

Dallinger Documentation, Release 6.0.0
models. If they are not stored, any calculations that rely on them have to be performed at initialization time. Once theyare stored, they can be used in any part of the network code, like in the add_node method.
In the code above, we use repr when storing the property value. This is because Dallinger custom properties are allof the text type, so even if a custom property represents a number, it has to be stored as a string. If the property is astring to begin with, it’s not necessary to convert it.
4.4 Dallinger with Docker
With the release of Dallinger version 5.0.0, we have created a Python script that uses docker-compose to provide anautomated installation and configuration of Dallinger to run experiments.
The code and detailed instructions can be found in this github repository.
Please note that we consider this to be a working yet experimental method of running Dallinger. It adds an extra levelof complexity which can potentially get in the way when trying to create and debug a new experiment as debuggingis more diffcult than when using Dallinger natively or in a virtual machine. Having said that, there are can be certainadvantages to this method, since Docker can install everything required to run Dallinger quickly in comparison toinstalling all the requirements yourself, and on platforms such as Microsoft Windows where a native installation is notpossible.
4.5 The Experiment Class
Experiments are designed in Dallinger by creating a custom subclass of the base Experiment class. The code for theExperiment class is in experiments.py. Unlike the other classes, each experiment involves only a single Experimentobject and it is not stored as an entry in a corresponding table, rather each Experiment is a set of instructions that tellthe server what to do with the database when the server receives requests from outside.
class dallinger.experiment.Experiment(session=None)Define the structure of an experiment.
verboseBoolean, determines whether the experiment logs output when running. Default is True.
taskString, the name of the experiment. Default is “Experiment title”.
sessionsession, the experiment’s connection to the database.
practice_repeatsint, the number of practice networks (see role). Default is 0.
experiment_repeatsint, the number of non practice networks (see role). Default is 0.
recruiter
initial_recruitment_sizeint, the number of participants requested when the experiment first starts. Default is 1.
known_classesdictionary, the classes Dallinger can make in response to front-end requests. Experiments can add newclasses to this dictionary.
public_properties
4.4. Dallinger with Docker 85

Dallinger Documentation, Release 6.0.0
__init__(session=None)Create the experiment class. Sets the default value of attributes.
add_node_to_network(node, network)Add a node to a network.
This passes node to add_node().
assignment_abandoned(participant)What to do if a participant abandons the hit.
This runs when a notification from AWS is received indicating that participant has run out of time. Callsfail_participant().
assignment_reassigned(participant)What to do if the assignment assigned to a participant is reassigned to another participant while the firstparticipant is still working.
This runs when a participant is created with the same assignment_id as another participant if the earlierparticipant still has the status “working”. Calls fail_participant().
assignment_returned(participant)What to do if a participant returns the hit.
This runs when a notification from AWS is received indicating that participant has returned the experimentassignment. Calls fail_participant().
attention_check(participant)Check if participant performed adequately.
Return a boolean value indicating whether the participant’s data is acceptable. This is mean to check theparticipant’s data to determine that they paid attention. This check will run once the participant completesthe experiment. By default performs no checks and returns True. See also data_check().
attention_check_failed(participant)What to do if a participant fails the attention check.
Runs when participant has failed the attention_check(). By default callsfail_participant().
bonus(participant)The bonus to be awarded to the given participant.
Return the value of the bonus to be paid to participant. By default returns 0.
bonus_reason()The reason offered to the participant for giving the bonus.
Return a string that will be included in an email sent to the participant receiving a bonus. By default it is“Thank you for participating! Here is your bonus.”
collect(app_id, exp_config=None, bot=False, **kwargs)Collect data for the provided experiment id.
The app_id parameter must be a valid UUID. If an existing data file is found for the UUID it will bereturned, otherwise - if the UUID is not already registered - the experiment will be run and data collected.
See run() method for other parameters.
create_network()Return a new network.
create_node(participant, network)Create a node for a participant.
86 Chapter 4. Experiment Author Documentation
Dallinger Documentation, Release 6.0.0
data_check(participant)Check that the data are acceptable.
Return a boolean value indicating whether the participant’s data is acceptable. This is meant to check formissing or invalid data. This check will be run once the participant completes the experiment. By defaultperforms no checks and returns True. See also, attention_check().
data_check_failed(participant)What to do if a participant fails the data check.
Runs when participant has failed data_check(). By default calls fail_participant().
events_for_replay(session=None, target=None)Returns an ordered list of “events” for replaying. Experiments may override this method to provide customreplay logic. The “events” returned by this method will be passed to replay_event(). The defaultimplementation simply returns all Info objects in the order they were created.
fail_participant(participant)Fail all the nodes of a participant.
get_network_for_participant(participant)Find a network for a participant.
If no networks are available, None will be returned. By default participants can participate only oncein each network and participants first complete networks with role=”practice” before doing all othernetworks in a random order.
info_get_request(node, infos)Run when a request to get infos is complete.
info_post_request(node, info)Run when a request to create an info is complete.
is_complete()Method for custom determination of experiment completion. Experiments should override this to providecustom experiment completion logic. Returns None to use the experiment server default logic, otherwiseshould return True or False.
is_overrecruited(waiting_count)Returns True if the number of people waiting is in excess of the total number expected, indicating that thisand subsequent users should skip the experiment. A quorum value of 0 means we don’t limit recruitment,and always return False.
log(text, key=’?????’, force=False)Print a string to the logs.
log_summary()Log a summary of all the participants’ status codes.
classmethod make_uuid(app_id=None)Generates a new UUID. This is a class method and can be called as Experiment.make_uuid(). Takes anoptional app_id which is converted to a string and, if it is a valid UUID, returned.
networks(role=’all’, full=’all’)All the networks in the experiment.
node_get_request(node=None, nodes=None)Run when a request to get nodes is complete.
node_post_request(participant, node)Run when a request to make a node is complete.
4.5. The Experiment Class 87
Dallinger Documentation, Release 6.0.0
recruit()Recruit participants to the experiment as needed.
This method runs whenever a participant successfully completes the experiment (participants who failto finish successfully are automatically replaced). By default it recruits 1 participant at a time until allnetworks are full.
replay_event(event)Stub method to replay an event returned by events_for_replay(). Experiments must override thismethod to provide replay support.
replay_start()Stub method for starting an experiment replay. Experiments must override this method to provide replaysupport.
replay_finish()Stub method for ending an experiment replay. Experiments must override this method to provide replaysupport.
replay_started()Returns True if an experiment replay has started.
run(exp_config=None, app_id=None, bot=False, **kwargs)Deploy and run an experiment.
The exp_config object is either a dictionary or a localconfig.LocalConfig object with parametersspecific to the experiment run grouped by section.
save(*objects)Add all the objects to the session and commit them.
This only needs to be done for networks and participants.
setup()Create the networks if they don’t already exist.
submission_successful(participant)Run when a participant submits successfully.
transformation_get_request(node, transformations)Run when a request to get transformations is complete.
transformation_post_request(node, transformation)Run when a request to transform an info is complete.
transmission_get_request(node, transmissions)Run when a request to get transmissions is complete.
transmission_post_request(node, transmissions)Run when a request to transmit is complete.
vector_get_request(node, vectors)Run when a request to get vectors is complete.
vector_post_request(node, vectors)Run when a request to connect is complete.
4.6 Database API
The classes involved in a Dallinger experiment are: Network, Node, Vector, Info, Transmission,Transformation, Participant, and Question. The code for all these classes can be seen in models.
88 Chapter 4. Experiment Author Documentation
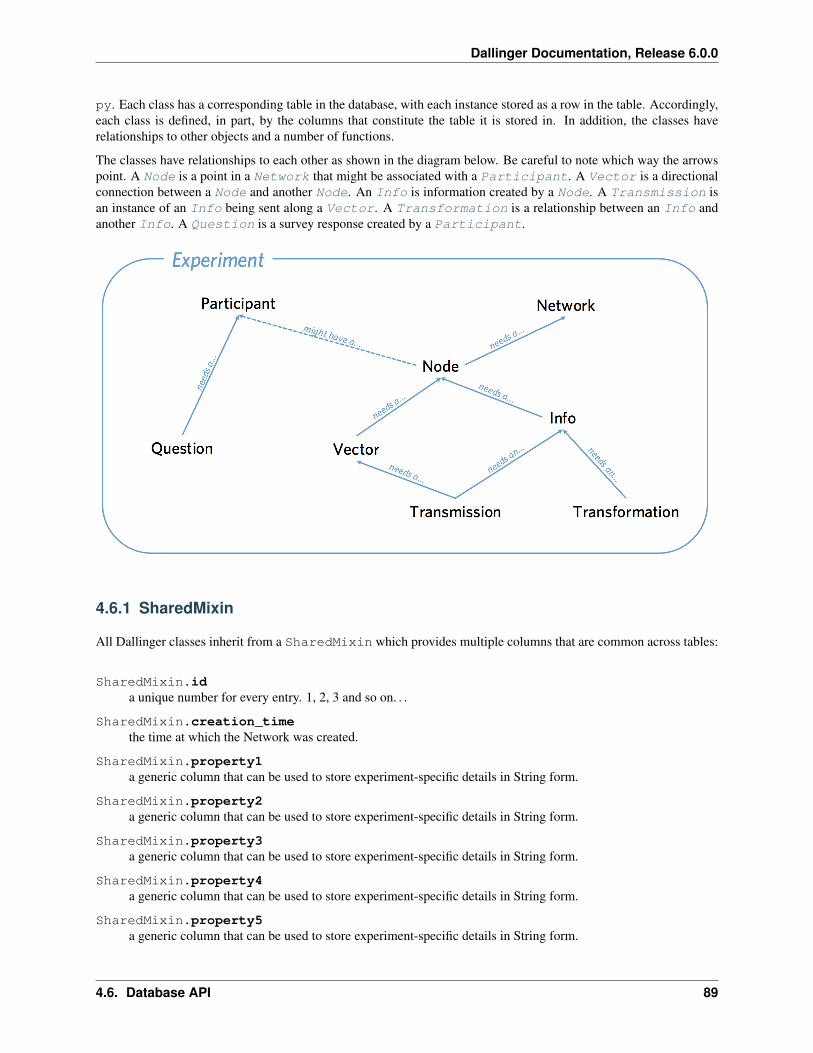
Dallinger Documentation, Release 6.0.0
py. Each class has a corresponding table in the database, with each instance stored as a row in the table. Accordingly,each class is defined, in part, by the columns that constitute the table it is stored in. In addition, the classes haverelationships to other objects and a number of functions.
The classes have relationships to each other as shown in the diagram below. Be careful to note which way the arrowspoint. A Node is a point in a Network that might be associated with a Participant. A Vector is a directionalconnection between a Node and another Node. An Info is information created by a Node. A Transmission isan instance of an Info being sent along a Vector. A Transformation is a relationship between an Info andanother Info. A Question is a survey response created by a Participant.
4.6.1 SharedMixin
All Dallinger classes inherit from a SharedMixin which provides multiple columns that are common across tables:
SharedMixin.ida unique number for every entry. 1, 2, 3 and so on. . .
SharedMixin.creation_timethe time at which the Network was created.
SharedMixin.property1a generic column that can be used to store experiment-specific details in String form.
SharedMixin.property2a generic column that can be used to store experiment-specific details in String form.
SharedMixin.property3a generic column that can be used to store experiment-specific details in String form.
SharedMixin.property4a generic column that can be used to store experiment-specific details in String form.
SharedMixin.property5a generic column that can be used to store experiment-specific details in String form.
4.6. Database API 89
Dallinger Documentation, Release 6.0.0
SharedMixin.detailsa generic column for storing structured JSON data
SharedMixin.failedboolean indicating whether the Network has failed which prompts Dallinger to ignore it unless specified other-wise. Objects are usually failed to indicate something has gone wrong.
SharedMixin.time_of_deaththe time at which failing occurred
4.6.2 Network
The Network object can be imagined as a set of other objects with some functions that perform operations over thoseobjects. The objects that Network’s have direct access to are all the Node’s in the network, the Vector’s betweenthose Nodes, Infos created by those Nodes, Transmissions sent along the Vectors by those Nodes and Transforma-tions of those Infos. Participants and Questions do not exist within Networks. An experiment may involve multipleNetworks, Transmissions can only occur within networks, not between them.
class dallinger.models.Network(**kwargs)Contains and manages a set of Nodes and Vectors etc.
Columns
Network.typeA String giving the name of the class. Defaults to “network”. This allows subclassing.
Network.max_sizeHow big the network can get, this number is used by the full() method to decide whether the network is full
Network.fullWhether the network is currently full
Network.roleThe role of the network. By default dallinger initializes all networks as either “practice” or “experiment”
Relationships
dallinger.models.Network.all_nodesAll the Nodes in the network.
dallinger.models.Network.all_vectorsAll the vectors in the network.
dallinger.models.Network.all_infosAll the infos in the network.
dallinger.models.Network.networks_transmissionsAll the transmissions int he network.
dallinger.models.Network.networks_transformationsAll the transformations in the network.
Methods
Network.__repr__()The string representation of a network.
90 Chapter 4. Experiment Author Documentation
Dallinger Documentation, Release 6.0.0
Network.__json__()Return json description of a participant.
Network.calculate_full()Set whether the network is full.
Network.fail()Fail an entire network.
Network.infos(type=None, failed=False)Get infos in the network.
type specifies the type of info (defaults to Info). failed { False, True, “all” } specifies the failed state of the infos.To get infos from a specific node, see the infos() method in class Node.
Network.latest_transmission_recipient()Get the node that most recently received a transmission.
Network.nodes(type=None, failed=False, participant_id=None)Get nodes in the network.
type specifies the type of Node. Failed can be “all”, False (default) or True. If a participant_id is passed onlynodes with that participant_id will be returned.
Network.print_verbose()Print a verbose representation of a network.
Network.size(type=None, failed=False)How many nodes in a network.
type specifies the class of node, failed can be True/False/all.
Network.transformations(type=None, failed=False)Get transformations in the network.
type specifies the type of transformation (default = Transformation). failed = { False, True, “all” }
To get transformations from a specific node, see Node.transformations().
Network.transmissions(status=’all’, failed=False)Get transmissions in the network.
status { “all”, “received”, “pending” } failed { False, True, “all” } To get transmissions from a specific vector,see the transmissions() method in class Vector.
Network.vectors(failed=False)Get vectors in the network.
failed = { False, True, “all” } To get the vectors to/from to a specific node, see Node.vectors().
4.6.3 Node
Each Node represents a single point in a single network. A Node must be within a Network and may also be associatedwith a Participant.
class dallinger.models.Node(network, participant=None)A point in a network.
4.6. Database API 91

Dallinger Documentation, Release 6.0.0
Columns
Node.typeA String giving the name of the class. Defaults to node. This allows subclassing.
Node.network_idthe id of the network that this node is a part of
Node.participant_idthe id of the participant whose node this is
Relationships
Node.networkthe network the node is in
Node.participantthe participant the node is associated with
dallinger.models.Node.all_outgoing_vectorsAll the vectors going out from this Node.
dallinger.models.Node.all_incoming_vectorsAll the vectors coming in to this Node.
dallinger.models.Node.all_infosAll Infos created by this Node.
dallinger.models.Node.all_outgoing_transmissionsAll Transmissions sent from this Node.
dallinger.models.Node.all_incoming_transmissionsAll Transmissions sent to this Node.
dallinger.models.Node.transformations_hereAll transformations that took place at this Node.
Methods
Node.__repr__()The string representation of a node.
Node.__json__()Return json description of a participant.
Node._to_whom()To whom to transmit if to_whom is not specified.
Return the default value of to_whom for transmit(). Should not return None or a list containing None.
Node._what()What to transmit if what is not specified.
Return the default value of what for transmit(). Should not return None or a list containing None.
Node.connect(whom, direction=’to’)Create a vector from self to/from whom.
Return a list of newly created vector between the node and whom. whom can be a specific node or a (nested)list of nodes. Nodes can only connect with nodes in the same network. In addition nodes cannot connect with
92 Chapter 4. Experiment Author Documentation
Dallinger Documentation, Release 6.0.0
themselves or with Sources. direction specifies the direction of the connection it can be “to” (node ->whom), “from” (whom -> node) or both (node <-> whom). The default is “to”.
Whom may be a (nested) list of nodes.
Will raise an error if:
1. whom is not a node or list of nodes
2. whom is/contains a source if direction is to or both
3. whom is/contains self
4. whom is/contains a node in a different network
If self is already connected to/from whom a Warning is raised and nothing happens.
This method returns a list of the vectors created (even if there is only one).
Node.fail()Fail a node, setting its status to “failed”.
Also fails all vectors that connect to or from the node. You cannot fail a node that has already failed, but youcan fail a dead node.
Set node.failed to True and time_of_death to now. Instruct all not-failed vectors connected to this node,infos made by this node, transmissions to or from this node and transformations made by this node to fail.
Node.is_connected(whom, direction=’to’, failed=None)Check whether this node is connected [to/from] whom.
whom can be a list of nodes or a single node. direction can be “to” (default), “from”, “both” or “either”.
If whom is a single node this method returns a boolean, otherwise it returns a list of booleans
Node.infos(type=None, failed=False)Get infos that originate from this node.
Type must be a subclass of Info, the default is Info. Failed can be True, False or “all”.
Node.mutate(info_in)Replicate an info + mutation.
To mutate an info, that info must have a method called _mutated_contents.
Node.neighbors(type=None, direction=’to’, failed=None)Get a node’s neighbors - nodes that are directly connected to it.
Type specifies the class of neighbour and must be a subclass of Node (default is Node). Connection is thedirection of the connections and can be “to” (default), “from”, “either”, or “both”.
Node.receive(what=None)Receive some transmissions.
Received transmissions are marked as received, then their infos are passed to update().
“what” can be:
1. None (the default) in which case all pending transmissions are received.
2. a specific transmission.
Will raise an error if the node is told to receive a transmission it has not been sent.
Node.received_infos(type=None, failed=None)Get infos that have been sent to this node.
Type must be a subclass of info, the default is Info.
4.6. Database API 93
Dallinger Documentation, Release 6.0.0
Node.replicate(info_in)Replicate an info.
Node.transformations(type=None, failed=False)Get Transformations done by this Node.
type must be a type of Transformation (defaults to Transformation) Failed can be True, False or “all”
Node.transmissions(direction=’outgoing’, status=’all’, failed=False)Get transmissions sent to or from this node.
Direction can be “all”, “incoming” or “outgoing” (default). Status can be “all” (default), “pending”, or “re-ceived”. failed can be True, False or “all”
Node.transmit(what=None, to_whom=None)Transmit one or more infos from one node to another.
“what” dictates which infos are sent, it can be:
1. None (in which case the node’s _what method is called).
2. an Info (in which case the node transmits the info)
3. a subclass of Info (in which case the node transmits all its infos of that type)
4. a list of any combination of the above
“to_whom” dictates which node(s) the infos are sent to, it can be:
1. None (in which case the node’s _to_whom method is called)
2. a Node (in which case the node transmits to that node)
3. a subclass of Node (in which case the node transmits to all nodes of that type it is connected to)
4. a list of any combination of the above
Will additionally raise an error if:
1. _what() or _to_whom() returns None or a list containing None.
2. what is/contains an info that does not originate from the transmitting node
3. to_whom is/contains a node that the transmitting node does not have a not-failed connection with.
Node.update(infos)Process received infos.
Update controls the default behavior of a node when it receives infos. By default it does nothing.
Node.vectors(direction=’all’, failed=False)Get vectors that connect at this node.
Direction can be “incoming”, “outgoing” or “all” (default). Failed can be True, False or all
4.6.4 Vector
A vector is a directional link between two nodes. Nodes connected by a vector can send Transmissions to each other,but because Vectors have a direction, two Vectors are needed for bi-directional Transmissions.
class dallinger.models.Vector(origin, destination)A directed path that links two Nodes.
Nodes can only send each other information if they are linked by a Vector.
94 Chapter 4. Experiment Author Documentation
Dallinger Documentation, Release 6.0.0
Columns
Vector.origin_idthe id of the Node at which the vector originates
Vector.destination_idthe id of the Node at which the vector terminates.
Vector.network_idthe id of the network the vector is in.
Relationships
Vector.originthe Node at which the vector originates.
Vector.destinationthe Node at which the vector terminates.
Vector.networkthe network the vector is in.
dallinger.models.Vector.all_transmissionsAll Transmissions sent along the Vector.
Methods
Vector.__repr__()The string representation of a vector.
Vector.__json__()Return json description of a participant.
Vector.fail()Fail a vector.
Vector.transmissions(status=’all’)Get transmissions sent along this Vector.
Status can be “all” (the default), “pending”, or “received”.
4.6.5 Info
An Info is a piece of information created by a Node. It can be sent along Vectors as part of a Transmission.
class dallinger.models.Info(origin, contents=None, details=None, failed=False)A unit of information.
Columns
Info.id
Info.creation_time
Info.property1
Info.property2
4.6. Database API 95

Dallinger Documentation, Release 6.0.0
Info.property3
Info.property4
Info.property5
Info.details
Info.failed
Info.time_of_death
Info.typea String giving the name of the class. Defaults to “info”. This allows subclassing.
Info.origin_idthe id of the Node that created the info
Info.network_idthe id of the network the info is in
Info.contentsthe contents of the info. Must be stored as a String.
Relationships
Info.originthe Node that created the info.
Info.networkthe network the info is in
dallinger.models.Info.all_transmissionsAll Transmissions of this Info.
dallinger.models.Info.transformation_applied_toAll Transformations of which this info is the info_in
dallinger.models.Info.transformation_whenceAll Transformations of which this info is the info_out
Methods
Info.__repr__()The string representation of an info.
Info.__json__()Return json description of a participant.
Info._mutated_contents()The mutated contents of an info.
When an info is asked to mutate, this method will be executed in order to determine the contents of the new infocreated.
The base class function raises an error and so must be overwritten to be used.
Info.fail()Fail an info.
Set info.failed to True and time_of_death to now. Instruct all transmissions and transformations involvingthis info to fail.
96 Chapter 4. Experiment Author Documentation
Dallinger Documentation, Release 6.0.0
Info.transformations(relationship=’all’)Get all the transformations of this info.
Return a list of transformations involving this info. relationship can be “parent” (in which case onlytransformations where the info is the info_in are returned), “child” (in which case only transformationswhere the info is the info_out are returned) or all (in which case any transformations where the info is theinfo_out or the info_in are returned). The default is all
Info.transmissions(status=’all’)Get all the transmissions of this info.
status can be all/pending/received.
4.6.6 Transmission
A transmission represents an instance of an Info being sent along a Vector. Transmissions are not necessarily receivedwhen they are sent (like an email) and must also be received by the Node they are sent to.
class dallinger.models.Transmission(vector, info)An instance of an Info being sent along a Vector.
Columns
Transmission.origin_idthe id of the Node that sent the transmission
Transmission.destination_idthe id of the Node that the transmission was sent to
Transmission.vector_idthe id of the vector the info was sent along
Transmission.network_idthe id of the network the transmission is in
Transmission.info_idthe id of the info that was transmitted
Transmission.receive_timethe time at which the transmission was received
Transmission.statusthe status of the transmission, can be “pending”, which means the transmission has been sent, but not received;or “received”, which means the transmission has been sent and received
Relationships
Transmission.originthe Node that sent the transmission.
Transmission.destinationthe Node that the transmission was sent to.
Transmission.vectorthe vector the info was sent along.
Transmission.networkthe network the transmission is in.
4.6. Database API 97
Dallinger Documentation, Release 6.0.0
Transmission.infothe info that was transmitted.
Methods
Transmission.__repr__()The string representation of a transmission.
Transmission.__json__()Return json description of a participant.
Transmission.fail()Fail a transmission.
Transmission.mark_received()Mark a transmission as having been received.
4.6.7 Transformation
A Transformation is a relationship between two Infos. It is similar to how a Vector indicates a relationship betweentwo Nodes, but whereas a Vector allows Nodes to Transmit to each other, Transformations don’t allow Infos to doanything new. Instead they are a form of book-keeping allowing you to keep track of relationships between variousInfos.
class dallinger.models.Transformation(info_in, info_out)An instance of one info being transformed into another.
Columns
Transformation.typea String giving the name of the class. Defaults to “transformation”. This allows subclassing.
Transformation.node_idthe id of the Node that did the transformation.
Transformation.network_idthe id of the network the transformation is in.
Transformation.info_in_idthe id of the info that was transformed.
Transformation.info_out_idthe id of the info produced by the transformation.
Relationships
Transformation.nodethe Node that did the transformation.
Transformation.networkthe network the transmission is in.
Transformation.info_inthe info that was transformed.
Transformation.info_outthe info produced by the transformation.
98 Chapter 4. Experiment Author Documentation
Dallinger Documentation, Release 6.0.0
Methods
Transformation.__repr__()The string representation of a transformation.
Transformation.__json__()Return json description of a participant.
Transformation.fail()Fail a transformation.
4.6.8 Participant
The Participant object corresponds to a real world participant. Each person who takes part will have a correspondingentry in the Participant table. Participants can be associated with Nodes and Questions.
class dallinger.models.Participant(recruiter_id, worker_id, assignment_id, hit_id, mode, fin-gerprint_hash=None)
An ex silico participant.
Columns
Participant.typea String giving the name of the class. Defaults to “participant”. This allows subclassing.
Participant.worker_idA String, the worker id of the participant.
Participant.assignment_idA String, the assignment id of the participant.
Participant.unique_idA String, a concatenation of worker_id and assignment_id
Participant.hit_idA String, the id of the hit the participant is working on
Participant.modeA String, the mode in which Dallinger is running – live, sandbox or debug.
Participant.end_timeThe time at which the participant finished.
Participant.base_payThe amount the participant was paid for finishing the experiment.
Participant.bonusthe amount the participant was paid as a bonus.
Participant.statusString representing the current status of the participant, can be –
• working - participant is working
• submitted - participant has submitted their work
• approved - their work has been approved and they have been paid
• rejected - their work has been rejected
• returned - they returned the hit before finishing
4.6. Database API 99

Dallinger Documentation, Release 6.0.0
• abandoned - they ran out of time
• did_not_attend - the participant finished, but failed the attention check
• bad_data - the participant finished, but their data was malformed
• missing_notification - this indicates that Dallinger has inferred that a Mechanical Turk notifica-tion corresponding to this participant failed to arrive. This is an uncommon, but potentially serious issue.
Relationships
dallinger.models.Participant.all_questionsAll the questions associated with this participant.
dallinger.models.Participant.all_nodesAll the Nodes associated with this participant.
Methods
Participant.__json__()Return json description of a participant.
Participant.fail()Fail a participant.
Set failed to True and time_of_death to now. Instruct all not-failed nodes associated with the partici-pant to fail.
Participant.infos(type=None, failed=False)Get all infos created by the participants nodes.
Return a list of infos produced by nodes associated with the participant. If specified, type filters by class.By default, failed infos are excluded, to include only failed nodes use failed=True, for all nodes usefailed=all. Note that failed filters the infos, not the nodes - infos from all nodes (whether failed or not) canbe returned.
Participant.nodes(type=None, failed=False)Get nodes associated with this participant.
Return a list of nodes associated with the participant. If specified, type filters by class. By default failed nodesare excluded, to include only failed nodes use failed=True, for all nodes use failed=all.
Participant.questions(type=None)Get questions associated with this participant.
Return a list of questions associated with the participant. If specified, type filters by class.
4.6.9 Question
A Question is a way to store information associated with a Participant as opposed to a Node (Infos are made by Nodes,not Participants). Questions are generally useful for storing responses debriefing questions etc.
class dallinger.models.Question(participant, question, response, number)Responses of a participant to debriefing questions.
100 Chapter 4. Experiment Author Documentation

Dallinger Documentation, Release 6.0.0
Columns
Question.typea String giving the name of the class. Defaults to “question”. This allows subclassing.
Question.participant_idthe participant who made the response
Question.numberA number identifying the question. e.g., each participant might complete three questions numbered 1, 2, and 3.
Question.questionthe text of the question
Question.responsethe participant’s response. Stored as a string.
Relationships
Question.participantthe participant who answered the question
Methods
Question.__json__()Return json description of a participant.
Question.fail()Fail a question.
Set failed to True and time_of_death to now.
4.7 Web API
The Dallinger API allows the experiment frontend to communicate with the backend. Many of these routes correspondto specific functions of Dallinger’s classes, particularly dallinger.models.Node. For example, nodes have aconnect method that creates new vectors between nodes and there is a corresponding connect/ route that allowsthe frontend to call this method.
4.7.1 Miscellaneous routes
GET /ad_address/<mode>/<hit_id>
Used to get the address of the experiment on the gunicorn server and to return participants to Mechanical Turkupon completion of the experiment. This route is pinged automatically by the function submitAssignment indallinger2.js.
GET /<directory>/<page>
Returns the html page with the name <page> from the directory called <directory>.
GET /summary
4.7. Web API 101

Dallinger Documentation, Release 6.0.0
Returns a summary of the statuses of Participants.
GET /<page>
Returns the html page with the name <page>.
4.7.2 Experiment routes
GET /experiment/<property>
Returns the value of the requested property as a JSON <property>. The property must be a key in theexperiment.public_properties mapping and be JSON serializable. Experiments have no public proper-ties by default.
GET /info/<node_id>/<info_id>
Returns a JSON description of the requested info as info. node_id must be specified to ensure the requesting nodehas access to the requested info. Calls experiment method ‘info_get_request(node, info).
POST /info/<node_id>
Create an info with its origin set to the specified node. contents must be passed as data. info_typecan be passed as data and will cause the info to be of the specified type. Also calls experiment methodinfo_post_request(node, info).
If the specified node is failed then this will fail unless failed is also passed with the value True. This will create afailed Info on the node.
POST /launch
Initializes the experiment and opens recruitment. This route is automatically pinged by Dallinger.
GET /network/<network_id>
Returns a JSON description of the requested network as network.
POST /node/<node_id>/connect/<other_node_id>
Create vector(s) between the node and other_node by calling node.connect(whom=other_node).Direction can be passed as data and will be forwarded as an argument. Calls experiment methodvector_post_request(node, vectors). Returns a list of JSON descriptions of the created vectors asvectors.
GET /node/<node_id>/infos
Returns a list of JSON descriptions of the infos created by the node as infos. Infos are identified by calling node.infos(). info_type can be passed as data and will be forwarded as an argument. Requesting node and the list ofinfos are also passed to experiment method info_get_request(node, infos).
GET /node/<node_id>/neighbors
Returns a list of JSON descriptions of the node’s neighbors as nodes. Neighbors are identified by calling node.neighbors(). node_type and connection can be passed as data and will be forwarded as arguments. Re-questing node and list of neighbors are also passed to experiment method node_get_request(node, nodes).
102 Chapter 4. Experiment Author Documentation
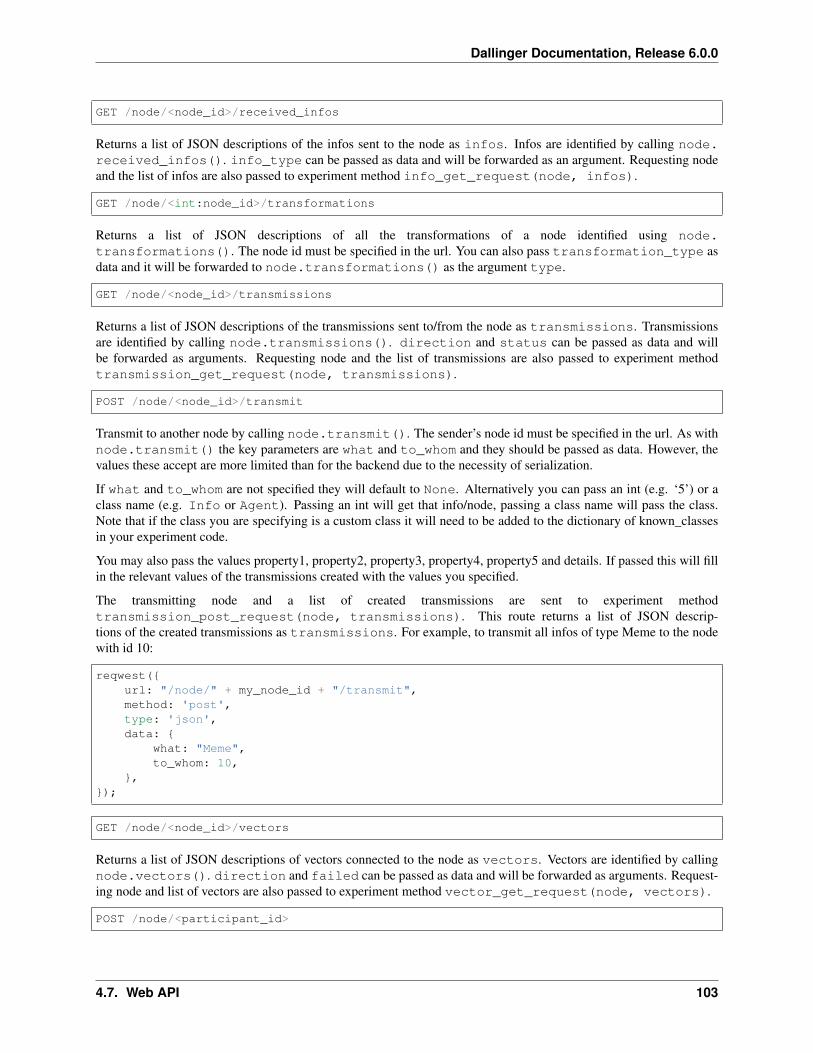
Dallinger Documentation, Release 6.0.0
GET /node/<node_id>/received_infos
Returns a list of JSON descriptions of the infos sent to the node as infos. Infos are identified by calling node.received_infos(). info_type can be passed as data and will be forwarded as an argument. Requesting nodeand the list of infos are also passed to experiment method info_get_request(node, infos).
GET /node/<int:node_id>/transformations
Returns a list of JSON descriptions of all the transformations of a node identified using node.transformations(). The node id must be specified in the url. You can also pass transformation_type asdata and it will be forwarded to node.transformations() as the argument type.
GET /node/<node_id>/transmissions
Returns a list of JSON descriptions of the transmissions sent to/from the node as transmissions. Transmissionsare identified by calling node.transmissions(). direction and status can be passed as data and willbe forwarded as arguments. Requesting node and the list of transmissions are also passed to experiment methodtransmission_get_request(node, transmissions).
POST /node/<node_id>/transmit
Transmit to another node by calling node.transmit(). The sender’s node id must be specified in the url. As withnode.transmit() the key parameters are what and to_whom and they should be passed as data. However, thevalues these accept are more limited than for the backend due to the necessity of serialization.
If what and to_whom are not specified they will default to None. Alternatively you can pass an int (e.g. ‘5’) or aclass name (e.g. Info or Agent). Passing an int will get that info/node, passing a class name will pass the class.Note that if the class you are specifying is a custom class it will need to be added to the dictionary of known_classesin your experiment code.
You may also pass the values property1, property2, property3, property4, property5 and details. If passed this will fillin the relevant values of the transmissions created with the values you specified.
The transmitting node and a list of created transmissions are sent to experiment methodtransmission_post_request(node, transmissions). This route returns a list of JSON descrip-tions of the created transmissions as transmissions. For example, to transmit all infos of type Meme to the nodewith id 10:
reqwest({url: "/node/" + my_node_id + "/transmit",method: 'post',type: 'json',data: {
what: "Meme",to_whom: 10,
},});
GET /node/<node_id>/vectors
Returns a list of JSON descriptions of vectors connected to the node as vectors. Vectors are identified by callingnode.vectors(). direction and failed can be passed as data and will be forwarded as arguments. Request-ing node and list of vectors are also passed to experiment method vector_get_request(node, vectors).
POST /node/<participant_id>
4.7. Web API 103

Dallinger Documentation, Release 6.0.0
Create a node for the specified participant. The route calls the following experiment methods:get_network_for_participant(participant), create_node(network, participant),add_node_to_network(node, network), and node_post_request(participant, node).Returns a JSON description of the created node as node.
POST /notificationsGET /notifications
This is the route to which notifications from AWS are sent. It is also possible to send your own notifications to thisroute, thereby simulating notifications from AWS. Necessary arguments are Event.1.EventType, which can beAssignmentAccepted, AssignmentAbandoned, AssignmentReturned or AssignmentSubmitted,and Event.1.AssignmentId, which is the id of the relevant assignment. In addition, Dallinger uses a customevent type of NotificationMissing.
GET /participant/<participant_id>
Returns a JSON description of the requested participant as participant.
POST /participant/<worker_id>/<hit_id>/<assignment_id>/<mode>
Create a participant. Returns a JSON description of the participant as participant.
POST /question/<participant_id>
Create a question. question, response and question_id should be passed as data. Does not return anything.
POST /transformation/<int:node_id>/<int:info_in_id>/<int:info_out_id>
Create a transformation from info_in to info_out at the specified node. transformation_type can bepassed as data and the transformation will be of that class if it is a known class. Returns a JSON description of thecreated transformation.
4.8 Communicating With the Server
When an experiment is running, the database and the experiment class (i.e. the instructions for what to do with thedatabase) will be hosted on a server, the server is also known as the “back-end”. However, participants will take partin experiments via an interactive web-site (the “front-end”). Accordingly for an experiment to proceed there must bea means of communication between the front and back ends. This is achieved with routes:
Routes are specific web addresses on the server that respond to requests from the front-end. Routes have direct accessto the database, though most of the time they will pass requests to the experiment which will in turn access the database.As such, changing the behavior of the experiment class is the easiest way to create a new experiment. However it isalso possible to change the behavior of the routes or add new routes entirely.
Requests generally come in two types: “get” requests, which ask for information from the database, and “post” requestswhich send new information to be added to the database. Once a request is complete the back-end sends a responseback to the front-end. Minimally, this will include a notification that the request was successfully processed, but oftenit will also include additional information.
As long as requests are properly formatted and correctly addressed to routes, the back-end will send the appropriateresponse. This means that the front-end could take any form. For instance requests could come from a standardHTML/CSS/JS webpage, a more sophisticated web-app, or even from the experiment itself.
104 Chapter 4. Experiment Author Documentation
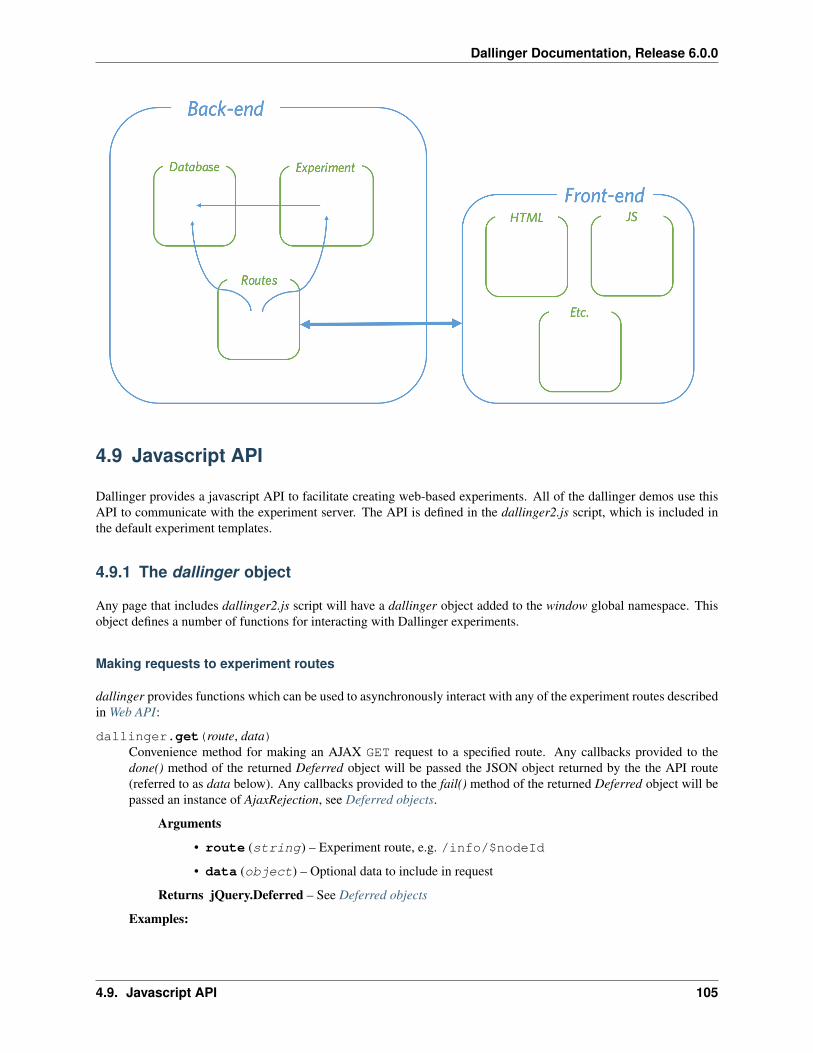
Dallinger Documentation, Release 6.0.0
4.9 Javascript API
Dallinger provides a javascript API to facilitate creating web-based experiments. All of the dallinger demos use thisAPI to communicate with the experiment server. The API is defined in the dallinger2.js script, which is included inthe default experiment templates.
4.9.1 The dallinger object
Any page that includes dallinger2.js script will have a dallinger object added to the window global namespace. Thisobject defines a number of functions for interacting with Dallinger experiments.
Making requests to experiment routes
dallinger provides functions which can be used to asynchronously interact with any of the experiment routes describedin Web API:
dallinger.get(route, data)Convenience method for making an AJAX GET request to a specified route. Any callbacks provided to thedone() method of the returned Deferred object will be passed the JSON object returned by the the API route(referred to as data below). Any callbacks provided to the fail() method of the returned Deferred object will bepassed an instance of AjaxRejection, see Deferred objects.
Arguments
• route (string) – Experiment route, e.g. /info/$nodeId
• data (object) – Optional data to include in request
Returns jQuery.Deferred – See Deferred objects
Examples:
4.9. Javascript API 105
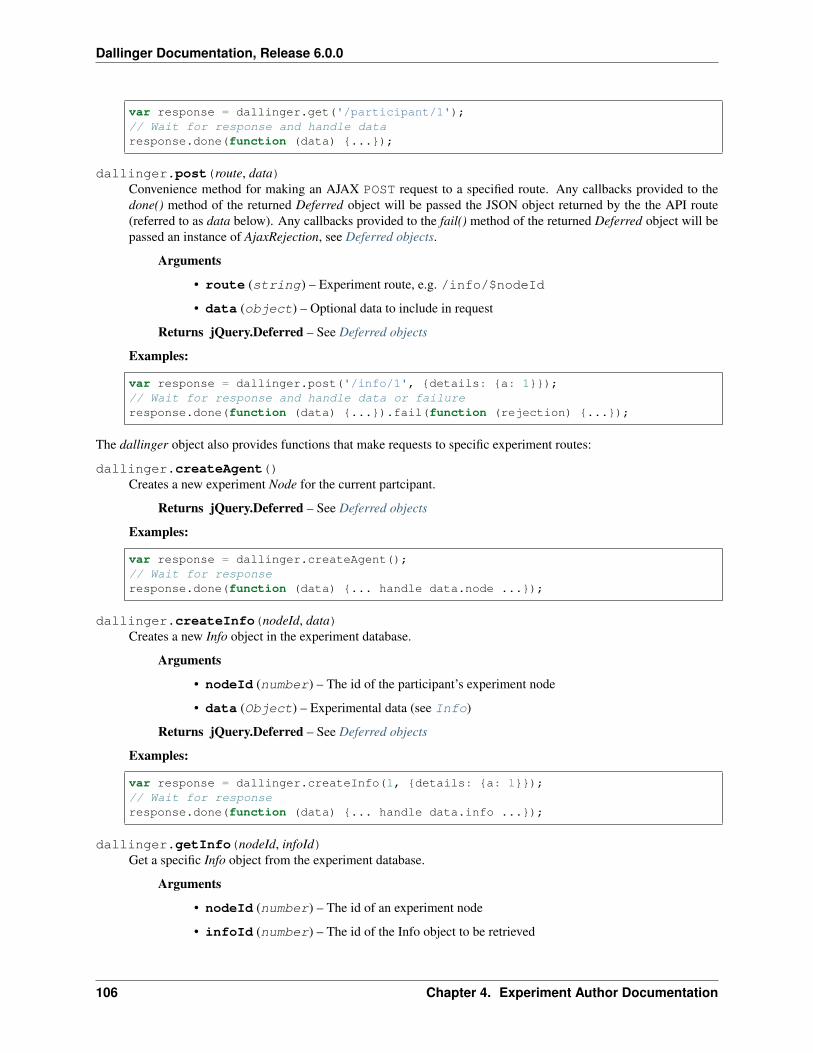
Dallinger Documentation, Release 6.0.0
var response = dallinger.get('/participant/1');// Wait for response and handle dataresponse.done(function (data) {...});
dallinger.post(route, data)Convenience method for making an AJAX POST request to a specified route. Any callbacks provided to thedone() method of the returned Deferred object will be passed the JSON object returned by the the API route(referred to as data below). Any callbacks provided to the fail() method of the returned Deferred object will bepassed an instance of AjaxRejection, see Deferred objects.
Arguments
• route (string) – Experiment route, e.g. /info/$nodeId
• data (object) – Optional data to include in request
Returns jQuery.Deferred – See Deferred objects
Examples:
var response = dallinger.post('/info/1', {details: {a: 1}});// Wait for response and handle data or failureresponse.done(function (data) {...}).fail(function (rejection) {...});
The dallinger object also provides functions that make requests to specific experiment routes:
dallinger.createAgent()Creates a new experiment Node for the current partcipant.
Returns jQuery.Deferred – See Deferred objects
Examples:
var response = dallinger.createAgent();// Wait for responseresponse.done(function (data) {... handle data.node ...});
dallinger.createInfo(nodeId, data)Creates a new Info object in the experiment database.
Arguments
• nodeId (number) – The id of the participant’s experiment node
• data (Object) – Experimental data (see Info)
Returns jQuery.Deferred – See Deferred objects
Examples:
var response = dallinger.createInfo(1, {details: {a: 1}});// Wait for responseresponse.done(function (data) {... handle data.info ...});
dallinger.getInfo(nodeId, infoId)Get a specific Info object from the experiment database.
Arguments
• nodeId (number) – The id of an experiment node
• infoId (number) – The id of the Info object to be retrieved
106 Chapter 4. Experiment Author Documentation
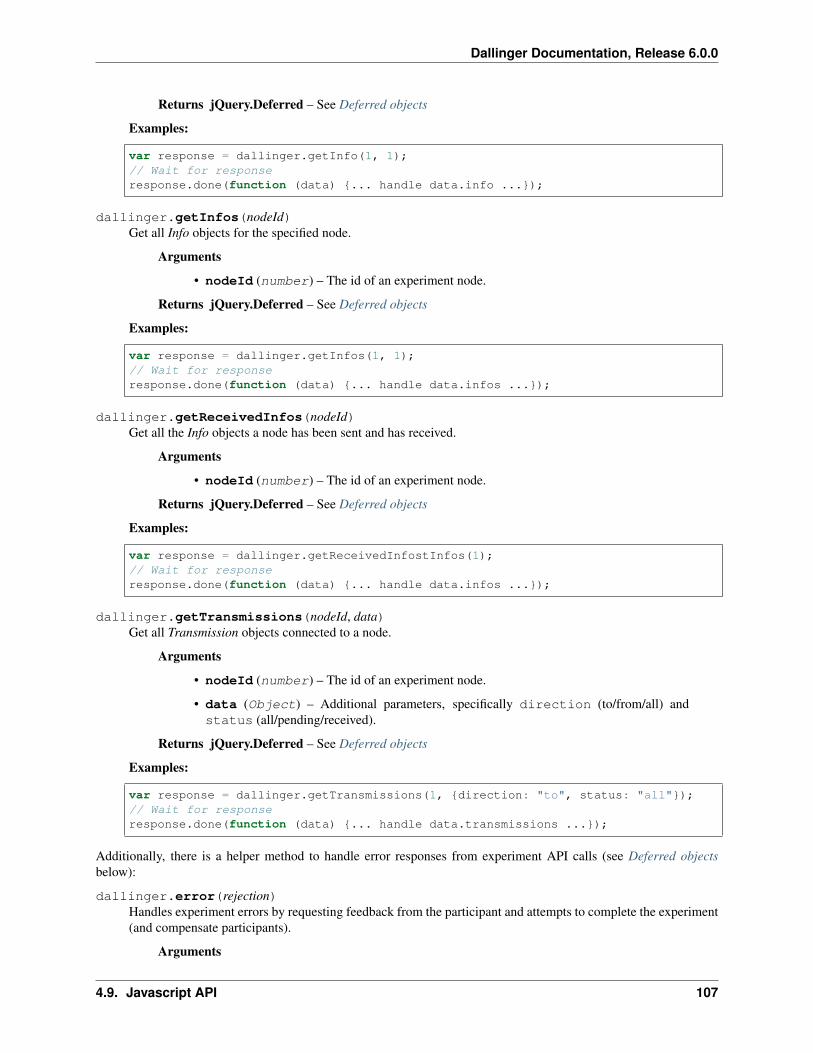
Dallinger Documentation, Release 6.0.0
Returns jQuery.Deferred – See Deferred objects
Examples:
var response = dallinger.getInfo(1, 1);// Wait for responseresponse.done(function (data) {... handle data.info ...});
dallinger.getInfos(nodeId)Get all Info objects for the specified node.
Arguments
• nodeId (number) – The id of an experiment node.
Returns jQuery.Deferred – See Deferred objects
Examples:
var response = dallinger.getInfos(1, 1);// Wait for responseresponse.done(function (data) {... handle data.infos ...});
dallinger.getReceivedInfos(nodeId)Get all the Info objects a node has been sent and has received.
Arguments
• nodeId (number) – The id of an experiment node.
Returns jQuery.Deferred – See Deferred objects
Examples:
var response = dallinger.getReceivedInfostInfos(1);// Wait for responseresponse.done(function (data) {... handle data.infos ...});
dallinger.getTransmissions(nodeId, data)Get all Transmission objects connected to a node.
Arguments
• nodeId (number) – The id of an experiment node.
• data (Object) – Additional parameters, specifically direction (to/from/all) andstatus (all/pending/received).
Returns jQuery.Deferred – See Deferred objects
Examples:
var response = dallinger.getTransmissions(1, {direction: "to", status: "all"});// Wait for responseresponse.done(function (data) {... handle data.transmissions ...});
Additionally, there is a helper method to handle error responses from experiment API calls (see Deferred objectsbelow):
dallinger.error(rejection)Handles experiment errors by requesting feedback from the participant and attempts to complete the experiment(and compensate participants).
Arguments
4.9. Javascript API 107
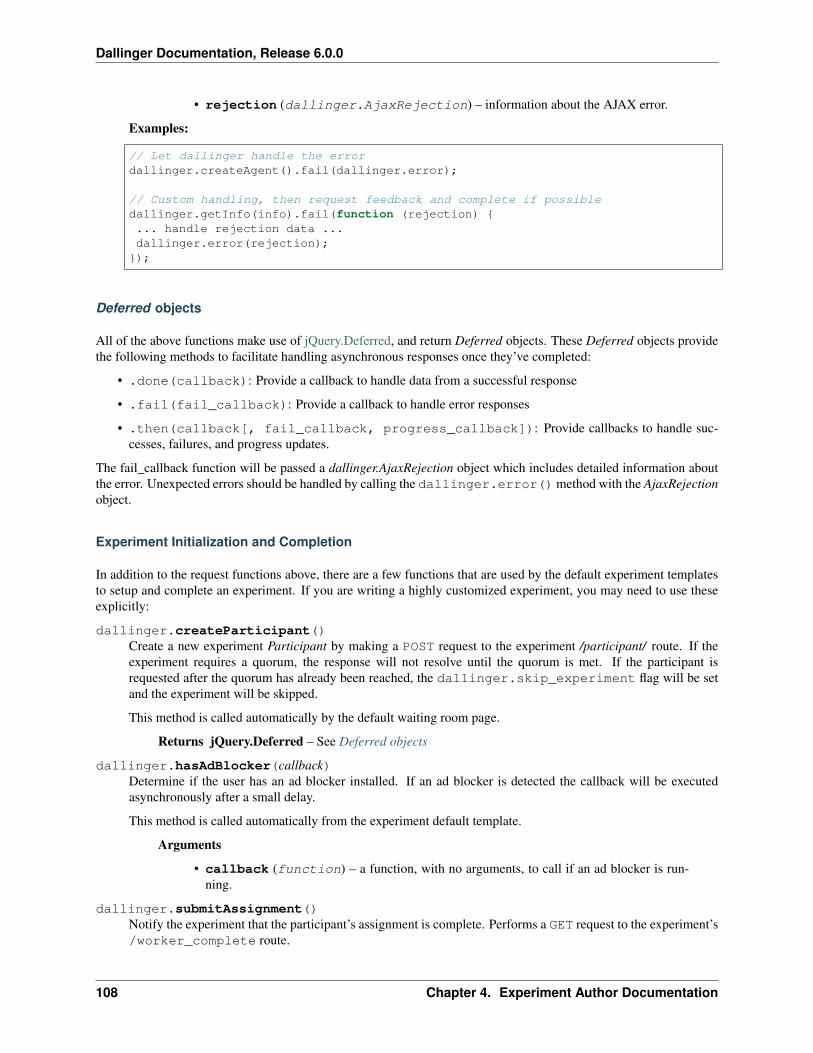
Dallinger Documentation, Release 6.0.0
• rejection (dallinger.AjaxRejection) – information about the AJAX error.
Examples:
// Let dallinger handle the errordallinger.createAgent().fail(dallinger.error);
// Custom handling, then request feedback and complete if possibledallinger.getInfo(info).fail(function (rejection) {... handle rejection data ...dallinger.error(rejection);});
Deferred objects
All of the above functions make use of jQuery.Deferred, and return Deferred objects. These Deferred objects providethe following methods to facilitate handling asynchronous responses once they’ve completed:
• .done(callback): Provide a callback to handle data from a successful response
• .fail(fail_callback): Provide a callback to handle error responses
• .then(callback[, fail_callback, progress_callback]): Provide callbacks to handle suc-cesses, failures, and progress updates.
The fail_callback function will be passed a dallinger.AjaxRejection object which includes detailed information aboutthe error. Unexpected errors should be handled by calling the dallinger.error()method with the AjaxRejectionobject.
Experiment Initialization and Completion
In addition to the request functions above, there are a few functions that are used by the default experiment templatesto setup and complete an experiment. If you are writing a highly customized experiment, you may need to use theseexplicitly:
dallinger.createParticipant()Create a new experiment Participant by making a POST request to the experiment /participant/ route. If theexperiment requires a quorum, the response will not resolve until the quorum is met. If the participant isrequested after the quorum has already been reached, the dallinger.skip_experiment flag will be setand the experiment will be skipped.
This method is called automatically by the default waiting room page.
Returns jQuery.Deferred – See Deferred objects
dallinger.hasAdBlocker(callback)Determine if the user has an ad blocker installed. If an ad blocker is detected the callback will be executedasynchronously after a small delay.
This method is called automatically from the experiment default template.
Arguments
• callback (function) – a function, with no arguments, to call if an ad blocker is run-ning.
dallinger.submitAssignment()Notify the experiment that the participant’s assignment is complete. Performs a GET request to the experiment’s/worker_complete route.
108 Chapter 4. Experiment Author Documentation

Dallinger Documentation, Release 6.0.0
Returns jQuery.Deferred – See Deferred objects
Examples:
// Mark the assignment complete and perform a custom function when successfulresult = dallinger.submitAssignment();result.done(function (data) {... handle ``data.status`` ...}).fail(
dallinger.error);
dallinger.submitQuestionnaire(name="questionnaire")Submits a Question object to the experiment server. This method is called automatically from the default ques-tionnaire page.
Arguments
• name (string) – optional questionnaire name
dallinger.waitForQuorum()Waits for a WebSocket message indicating that quorum has been reached.
This method is called automatically within createParticipant() and the default waiting room page.
Returns jQuery.Deferred – See Deferred objects
Helper functions and properties
Finally, there are a few miscellaneous utility functions and properties which are useful when writing a custom experi-ment:
dallinger.getUrlParameter(sParam)Returns a url query string value given the parameter name.
Arguments
• sParam (string) – name of url parameter
Returns string|boolean – the parameter value if available; true if parameter is in the url but hasno value;
Examples:
// Given a url with ``?param1=aaa¶m2``, the following returns "aaa"dallinger.getUrlParameter("param1");// this returns truedallinger.getUrlParameter("param2");// and this returns nulldallinger.getUrlParameter("param3");
dallinger.goToPage(page)Advance the participant to a given html page; the participant_id will be included in the url query string.
Arguments
• page (string) – Name of page to load, the .html extension should not be included.
dallinger.identitydallinger.identity provides information about the participant. It has the following string properties:
recruiter - Type of recruiter
hitId - MTurk HIT Id
4.9. Javascript API 109
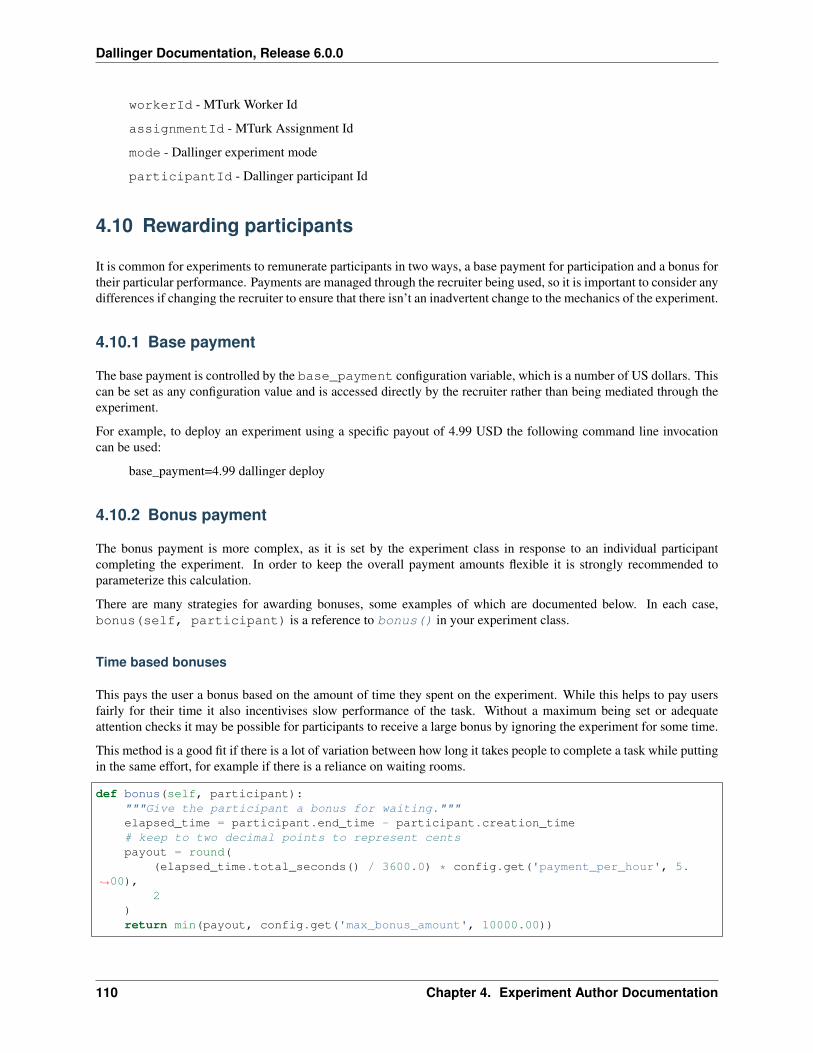
Dallinger Documentation, Release 6.0.0
workerId - MTurk Worker Id
assignmentId - MTurk Assignment Id
mode - Dallinger experiment mode
participantId - Dallinger participant Id
4.10 Rewarding participants
It is common for experiments to remunerate participants in two ways, a base payment for participation and a bonus fortheir particular performance. Payments are managed through the recruiter being used, so it is important to consider anydifferences if changing the recruiter to ensure that there isn’t an inadvertent change to the mechanics of the experiment.
4.10.1 Base payment
The base payment is controlled by the base_payment configuration variable, which is a number of US dollars. Thiscan be set as any configuration value and is accessed directly by the recruiter rather than being mediated through theexperiment.
For example, to deploy an experiment using a specific payout of 4.99 USD the following command line invocationcan be used:
base_payment=4.99 dallinger deploy
4.10.2 Bonus payment
The bonus payment is more complex, as it is set by the experiment class in response to an individual participantcompleting the experiment. In order to keep the overall payment amounts flexible it is strongly recommended toparameterize this calculation.
There are many strategies for awarding bonuses, some examples of which are documented below. In each case,bonus(self, participant) is a reference to bonus() in your experiment class.
Time based bonuses
This pays the user a bonus based on the amount of time they spent on the experiment. While this helps to pay usersfairly for their time it also incentivises slow performance of the task. Without a maximum being set or adequateattention checks it may be possible for participants to receive a large bonus by ignoring the experiment for some time.
This method is a good fit if there is a lot of variation between how long it takes people to complete a task while puttingin the same effort, for example if there is a reliance on waiting rooms.
def bonus(self, participant):"""Give the participant a bonus for waiting."""elapsed_time = participant.end_time - participant.creation_time# keep to two decimal points to represent centspayout = round(
(elapsed_time.total_seconds() / 3600.0) * config.get('payment_per_hour', 5.→˓00),
2)return min(payout, config.get('max_bonus_amount', 10000.00))
110 Chapter 4. Experiment Author Documentation
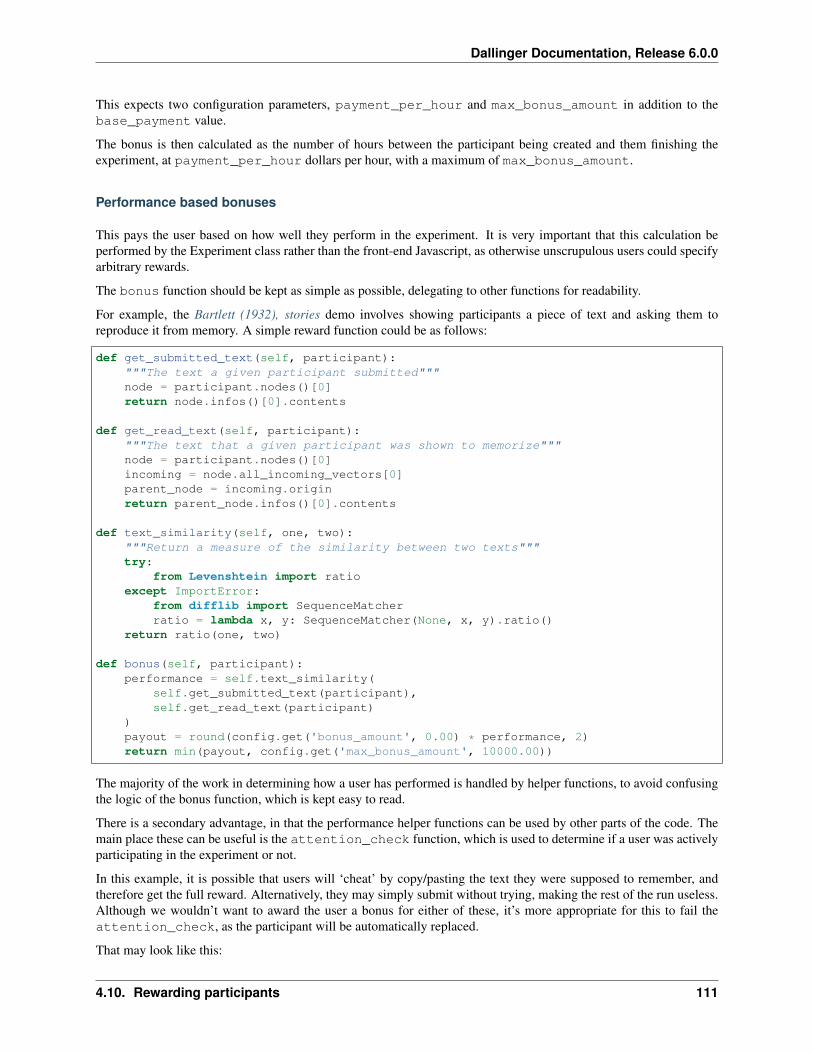
Dallinger Documentation, Release 6.0.0
This expects two configuration parameters, payment_per_hour and max_bonus_amount in addition to thebase_payment value.
The bonus is then calculated as the number of hours between the participant being created and them finishing theexperiment, at payment_per_hour dollars per hour, with a maximum of max_bonus_amount.
Performance based bonuses
This pays the user based on how well they perform in the experiment. It is very important that this calculation beperformed by the Experiment class rather than the front-end Javascript, as otherwise unscrupulous users could specifyarbitrary rewards.
The bonus function should be kept as simple as possible, delegating to other functions for readability.
For example, the Bartlett (1932), stories demo involves showing participants a piece of text and asking them toreproduce it from memory. A simple reward function could be as follows:
def get_submitted_text(self, participant):"""The text a given participant submitted"""node = participant.nodes()[0]return node.infos()[0].contents
def get_read_text(self, participant):"""The text that a given participant was shown to memorize"""node = participant.nodes()[0]incoming = node.all_incoming_vectors[0]parent_node = incoming.originreturn parent_node.infos()[0].contents
def text_similarity(self, one, two):"""Return a measure of the similarity between two texts"""try:
from Levenshtein import ratioexcept ImportError:
from difflib import SequenceMatcherratio = lambda x, y: SequenceMatcher(None, x, y).ratio()
return ratio(one, two)
def bonus(self, participant):performance = self.text_similarity(
self.get_submitted_text(participant),self.get_read_text(participant)
)payout = round(config.get('bonus_amount', 0.00) * performance, 2)return min(payout, config.get('max_bonus_amount', 10000.00))
The majority of the work in determining how a user has performed is handled by helper functions, to avoid confusingthe logic of the bonus function, which is kept easy to read.
There is a secondary advantage, in that the performance helper functions can be used by other parts of the code. Themain place these can be useful is the attention_check function, which is used to determine if a user was activelyparticipating in the experiment or not.
In this example, it is possible that users will ‘cheat’ by copy/pasting the text they were supposed to remember, andtherefore get the full reward. Alternatively, they may simply submit without trying, making the rest of the run useless.Although we wouldn’t want to award the user a bonus for either of these, it’s more appropriate for this to fail theattention_check, as the participant will be automatically replaced.
That may look like this:
4.10. Rewarding participants 111
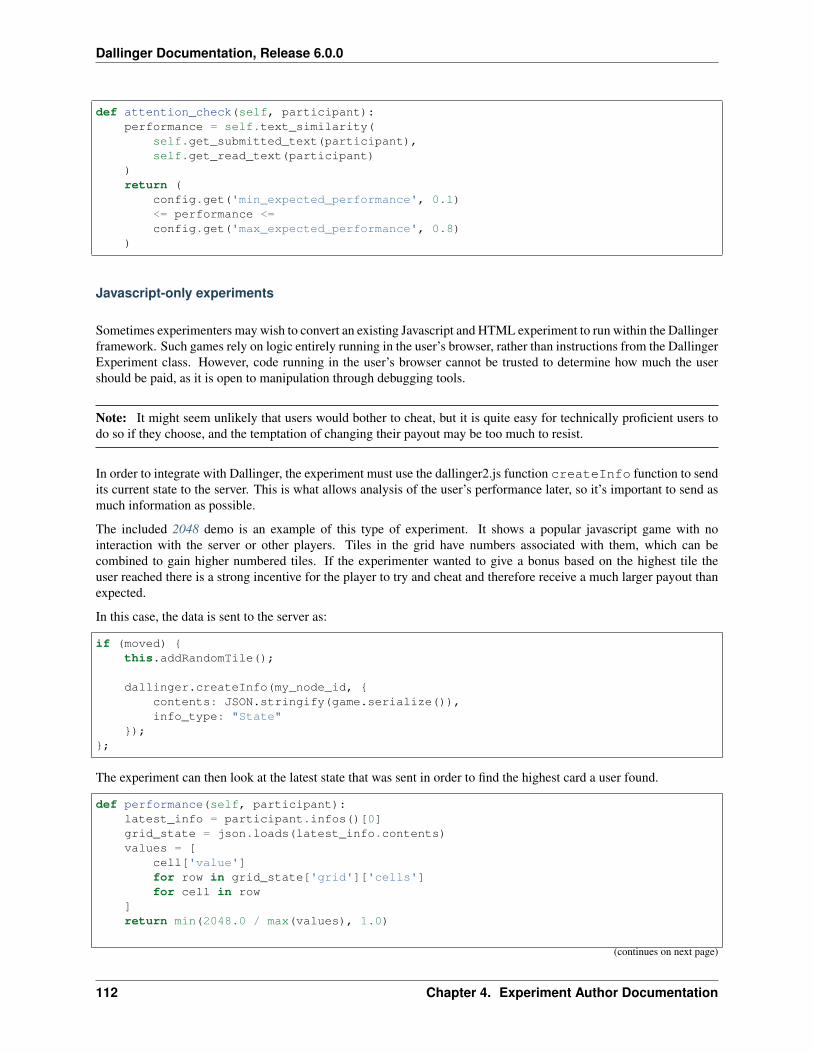
Dallinger Documentation, Release 6.0.0
def attention_check(self, participant):performance = self.text_similarity(
self.get_submitted_text(participant),self.get_read_text(participant)
)return (
config.get('min_expected_performance', 0.1)<= performance <=config.get('max_expected_performance', 0.8)
)
Javascript-only experiments
Sometimes experimenters may wish to convert an existing Javascript and HTML experiment to run within the Dallingerframework. Such games rely on logic entirely running in the user’s browser, rather than instructions from the DallingerExperiment class. However, code running in the user’s browser cannot be trusted to determine how much the usershould be paid, as it is open to manipulation through debugging tools.
Note: It might seem unlikely that users would bother to cheat, but it is quite easy for technically proficient users todo so if they choose, and the temptation of changing their payout may be too much to resist.
In order to integrate with Dallinger, the experiment must use the dallinger2.js function createInfo function to sendits current state to the server. This is what allows analysis of the user’s performance later, so it’s important to send asmuch information as possible.
The included 2048 demo is an example of this type of experiment. It shows a popular javascript game with nointeraction with the server or other players. Tiles in the grid have numbers associated with them, which can becombined to gain higher numbered tiles. If the experimenter wanted to give a bonus based on the highest tile theuser reached there is a strong incentive for the player to try and cheat and therefore receive a much larger payout thanexpected.
In this case, the data is sent to the server as:
if (moved) {this.addRandomTile();
dallinger.createInfo(my_node_id, {contents: JSON.stringify(game.serialize()),info_type: "State"
});};
The experiment can then look at the latest state that was sent in order to find the highest card a user found.
def performance(self, participant):latest_info = participant.infos()[0]grid_state = json.loads(latest_info.contents)values = [
cell['value']for row in grid_state['grid']['cells']for cell in row
]return min(2048.0 / max(values), 1.0)
(continues on next page)
112 Chapter 4. Experiment Author Documentation

Dallinger Documentation, Release 6.0.0
(continued from previous page)
def bonus(self, participant):performance = self.performance(participant)payout = round(config.get('bonus_amount', 0.00) * performance, 2)return min(payout, config.get('max_bonus_amount', 10000.00))
However, the states the experiment is looking at are still supplied by the user’s browser, so although cheating wouldbe more complex than simply changing a score it is still possible for them to cause a fraudulent state to be sent.
For this reason, we need to implement the game’s logic in Python so that the attention_check can check that theuser’s play history is consistent. Again, this has the advantage that a user who cheats is removed from the experimentrather than simply receiving a diminished reward.
This may look something like:
def is_possible_transition(self, old, new):"""Check if it is possible to get from the old state to the new state in one step"
→˓""...return True
def attention_check(self, participant):"""Find all pairs of grid states and check they are all legitimate successors"""states = []for info in reversed(participant.infos()):
states.append(json.loads(info.contents))pairs = zip(states, states[1:])return all(self.is_possible_transition(old, new) for (old, new) in pairs)
where is_possible_transition would be a rather complex function implementing the game’s rules.
Note: In all these cases, it is strongly recommended to set a maximum bonus and return the minimum value betweenthe bonus calculated and the maximum bonus, ensuring that no bugs or unexpected cheating cause a larger bonus tobe awarded than expected.
4.11 Waiting rooms
By default, Dallinger begins an experiment as soon as a user agrees to the informed consent form and has read theinstructions. However, some experiment designs require multiple users to be synchronized.
For this reason, Dallinger includes a waiting room implementation, which will hold users between instructions and theexperiment until a certain number are ready.
4.11.1 Using the waiting room
To use the waiting room, users must first be directed into it rather than the experiment.
Your instructions.html should call dallinger.goToPage('waiting') and should not calldallinger.createParticipant.
You will also need to define how many users should be held together before progressing. This is done through thequorum global variable. The waiting room will call a javascript function called getQuorum which should setquorum to be the appropriate value for your experiment.
4.11. Waiting rooms 113
Dallinger Documentation, Release 6.0.0
4.12 Writing bots
When you run an experiment using the bot recruiter, it will look for a class named Bot in your experiment.pymodule.
The Bot class should typically be a subclass of either BotBase (for bots that interact with the experiment by control-ling a real browser using selenium) or HighPerformanceBotBase (for bots that interact with the experimentserver directly via HTTP or websockets).
The interaction of the base bots with the experiment takes place in several phases:
1. Signup (including creating a Participant)
2. Participation in the experiment
3. Signoff (including completing the questionnaire)
4. Recording completion (complete or failed)
To build a bot, you will definitely need to implement the participate method which will be called once the bothas navigated to the main experiment page. If the structure of your ad, consent, instructions or questionnaire pagesdiffers significantly from the demo experiments, you may need to override other methods too.
4.12.1 High-performance bots
The HighPerformanceBotBase can be used as a basis for a bot that interacts with the experiment server directlyover HTTP rather than using a real browser. This scales better than using Selenium bots, but requires expressing thebot’s behavior in terms of HTTP requests rather than in terms of DOM interactions.
For a guide to Dallinger’s web API, see Web API.
For an example of a high-performance bot implementation, see the Griduniverse bots. These bots interact primarilyvia websockets rather than HTTP.
API documentation
class dallinger.bots.HighPerformanceBotBase(URL, assignment_id=”, worker_id=”, par-ticipant_id=”, hit_id=”)
A base class for bots that do not interact using a real browser.
Instead, this kind of bot makes requests directly to the experiment server.
complete_experiment(status)Record worker completion status to the experiment server.
This is done using a GET request to the /worker_complete or /worker_failed endpoints.
complete_questionnaire()Complete the standard debriefing form.
Answers the questions in the base questionnaire.
driverReturns a Selenium WebDriver instance of the type requested in the configuration.
on_signup(data)Take any needed action on response from /participant call.
114 Chapter 4. Experiment Author Documentation
Dallinger Documentation, Release 6.0.0
run_experiment()Runs the phases of interacting with the experiment including signup, participation, signoff, and recordingcompletion.
sign_off()Submit questionnaire and finish.
This is done using a POST request to the /question/ endpoint.
sign_up()Signs up a participant for the experiment.
This is done using a POST request to the /participant/ endpoint.
subscribe_to_quorum_channel()In case the experiment enforces a quorum, listen for notifications before creating Partipant objects.
4.12.2 Selenium bots
The BotBase provides a basis for a bot that interacts with an experiment using Selenium, which means that a separate,real browser session is controlled by each bot. This approach does not scale very well because there is a lot of overheadto running a browser, but it does allow for interacting with the experiment in a way similar to real participants.
By default, Selenium will try to run PhantomJS, a headless browser meant for scripting. However, it also supportsusing Firefox and Chrome through configuration variables.
webdriver_type = firefox
We recommend using Firefox when writing bots, as it allows you to visually see its output and allows you to attachthe development console directly to the bot’s browser session.
For an example of a selenium bot implementation, see the Bartlett1932 bots.
For documentation of the Python Selenium WebDriver API, see Selenium with Python.
API documentation
class dallinger.bots.BotBase(URL, assignment_id=”, worker_id=”, participant_id=”,hit_id=”)
A base class for bots that works with the built-in demos.
This kind of bot uses Selenium to interact with the experiment using a real browser.
complete_experiment(status)Sends worker status (‘worker_complete’ or ‘worker_failed’) to the experiment server.
complete_questionnaire()Complete the standard debriefing form.
Answers the questions in the base questionnaire.
driverReturns a Selenium WebDriver instance of the type requested in the configuration.
participate()Participate in the experiment.
This method must be implemented by subclasses of BotBase.
run_experiment()Sign up, run the participate method, then sign off and close the driver.
4.12. Writing bots 115

Dallinger Documentation, Release 6.0.0
sign_off()Submit questionnaire and finish.
This uses Selenium to click the submit button on the questionnaire and return to the original window.
sign_up()Accept HIT, give consent and start experiment.
This uses Selenium to click through buttons on the ad, consent, and instruction pages.
Scaling Selenium bots
For example you may want to run a dedicated computer on your lab network to host bots, without slowing downexperimenter computers. It is recommended that you run Selenium in a hub configuration, as a single Seleniuminstance will limit the number of concurrent sessions.
You can also provide a URL to a Selenium WebDriver instance using the webdriver_url configuration setting.This is required if you’re running Selenium in a hub configuration. The hub does not need to be on the same computeras Dallinger, but it does need to be able to access the computer running Dallinger directly by its IP address.
On Apple macOS, we recommend using Homebrew to install and run selenium, using:
brew install selenium-server-standaloneselenium-server -port 4444
On other platforms, download the latest selenium-server-standalone.jar file from SeleniumHQ and runa hub using:
java -jar selenium-server-standalone-3.3.1.jar -role hub
and attach multiple nodes by running:
java -jar selenium-server-standalone-3.3.1.jar -role node -hub http://hubcomputer.→˓example.com:4444/grid/register
These nodes may be on other computers on the local network or on the same host machine. If they are on the samehost you will need to add -port 4446 (for some port number) such that each Selenium node on the same server islistening on a different port.
You will also need to set up the browser interfaces on each computer that’s running a node. This requires being ableto run the browser and having the correct driver available in the system path, so the Selenium server can run it.
We recommend using Chrome when running large numbers of bots, as it is more feature-complete than PhantomJS butwith better performance at scale than Firefox. It is best to run at most three Firefox sessions on commodity hardware,so for best results 16 bots should be run over 6 Selenium servers. This will depend on how processor intensive yourexperiment is. It may be possible to run more sessions without performance degradation.
4.13 Extra Configuration
To create a new experiment-specific configuration variable, define extra_parameters in your experiment.pyfile:
def extra_parameters():config.register('n', int, [], False)
116 Chapter 4. Experiment Author Documentation
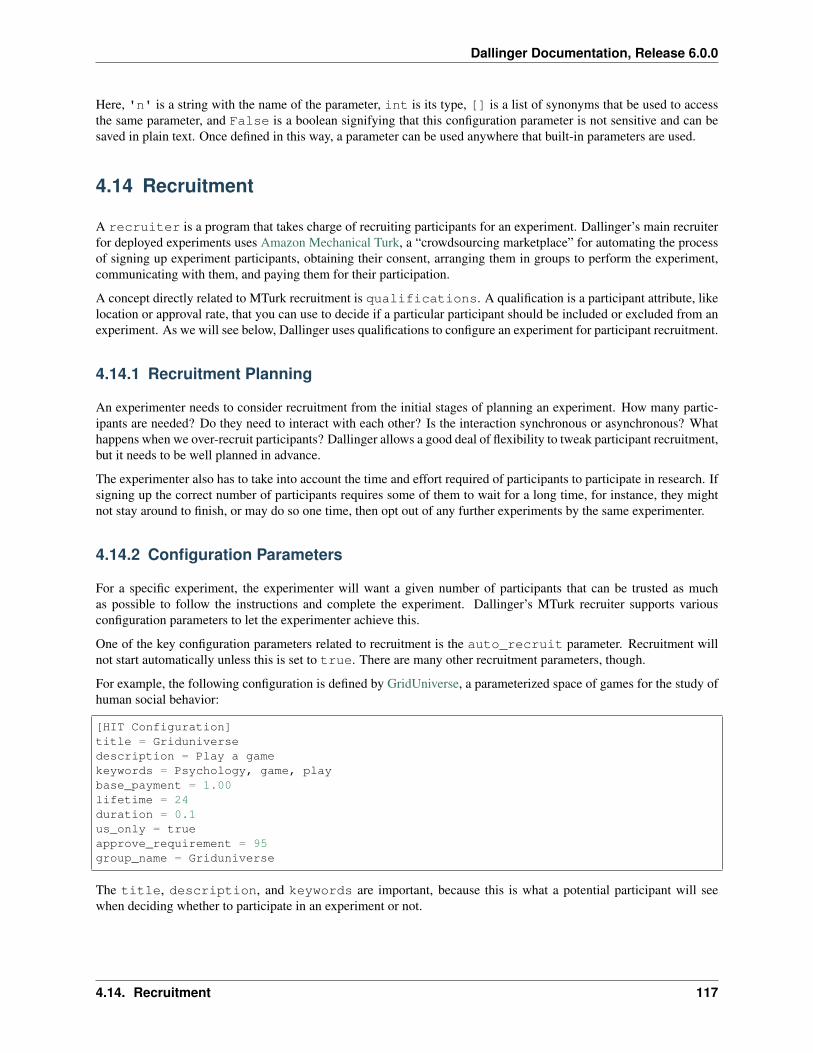
Dallinger Documentation, Release 6.0.0
Here, 'n' is a string with the name of the parameter, int is its type, [] is a list of synonyms that be used to accessthe same parameter, and False is a boolean signifying that this configuration parameter is not sensitive and can besaved in plain text. Once defined in this way, a parameter can be used anywhere that built-in parameters are used.
4.14 Recruitment
A recruiter is a program that takes charge of recruiting participants for an experiment. Dallinger’s main recruiterfor deployed experiments uses Amazon Mechanical Turk, a “crowdsourcing marketplace” for automating the processof signing up experiment participants, obtaining their consent, arranging them in groups to perform the experiment,communicating with them, and paying them for their participation.
A concept directly related to MTurk recruitment is qualifications. A qualification is a participant attribute, likelocation or approval rate, that you can use to decide if a particular participant should be included or excluded from anexperiment. As we will see below, Dallinger uses qualifications to configure an experiment for participant recruitment.
4.14.1 Recruitment Planning
An experimenter needs to consider recruitment from the initial stages of planning an experiment. How many partic-ipants are needed? Do they need to interact with each other? Is the interaction synchronous or asynchronous? Whathappens when we over-recruit participants? Dallinger allows a good deal of flexibility to tweak participant recruitment,but it needs to be well planned in advance.
The experimenter also has to take into account the time and effort required of participants to participate in research. Ifsigning up the correct number of participants requires some of them to wait for a long time, for instance, they mightnot stay around to finish, or may do so one time, then opt out of any further experiments by the same experimenter.
4.14.2 Configuration Parameters
For a specific experiment, the experimenter will want a given number of participants that can be trusted as muchas possible to follow the instructions and complete the experiment. Dallinger’s MTurk recruiter supports variousconfiguration parameters to let the experimenter achieve this.
One of the key configuration parameters related to recruitment is the auto_recruit parameter. Recruitment willnot start automatically unless this is set to true. There are many other recruitment parameters, though.
For example, the following configuration is defined by GridUniverse, a parameterized space of games for the study ofhuman social behavior:
[HIT Configuration]title = Griduniversedescription = Play a gamekeywords = Psychology, game, playbase_payment = 1.00lifetime = 24duration = 0.1us_only = trueapprove_requirement = 95group_name = Griduniverse
The title, description, and keywords are important, because this is what a potential participant will seewhen deciding whether to participate in an experiment or not.
4.14. Recruitment 117
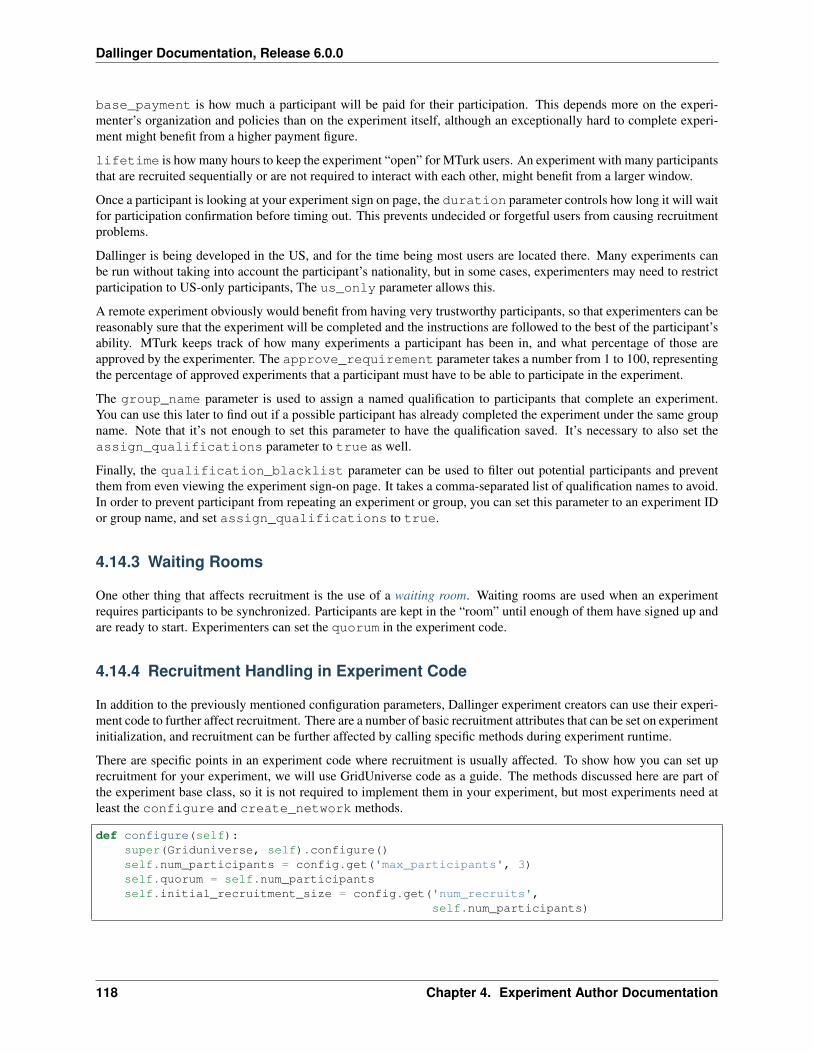
Dallinger Documentation, Release 6.0.0
base_payment is how much a participant will be paid for their participation. This depends more on the experi-menter’s organization and policies than on the experiment itself, although an exceptionally hard to complete experi-ment might benefit from a higher payment figure.
lifetime is how many hours to keep the experiment “open” for MTurk users. An experiment with many participantsthat are recruited sequentially or are not required to interact with each other, might benefit from a larger window.
Once a participant is looking at your experiment sign on page, the duration parameter controls how long it will waitfor participation confirmation before timing out. This prevents undecided or forgetful users from causing recruitmentproblems.
Dallinger is being developed in the US, and for the time being most users are located there. Many experiments canbe run without taking into account the participant’s nationality, but in some cases, experimenters may need to restrictparticipation to US-only participants, The us_only parameter allows this.
A remote experiment obviously would benefit from having very trustworthy participants, so that experimenters can bereasonably sure that the experiment will be completed and the instructions are followed to the best of the participant’sability. MTurk keeps track of how many experiments a participant has been in, and what percentage of those areapproved by the experimenter. The approve_requirement parameter takes a number from 1 to 100, representingthe percentage of approved experiments that a participant must have to be able to participate in the experiment.
The group_name parameter is used to assign a named qualification to participants that complete an experiment.You can use this later to find out if a possible participant has already completed the experiment under the same groupname. Note that it’s not enough to set this parameter to have the qualification saved. It’s necessary to also set theassign_qualifications parameter to true as well.
Finally, the qualification_blacklist parameter can be used to filter out potential participants and preventthem from even viewing the experiment sign-on page. It takes a comma-separated list of qualification names to avoid.In order to prevent participant from repeating an experiment or group, you can set this parameter to an experiment IDor group name, and set assign_qualifications to true.
4.14.3 Waiting Rooms
One other thing that affects recruitment is the use of a waiting room. Waiting rooms are used when an experimentrequires participants to be synchronized. Participants are kept in the “room” until enough of them have signed up andare ready to start. Experimenters can set the quorum in the experiment code.
4.14.4 Recruitment Handling in Experiment Code
In addition to the previously mentioned configuration parameters, Dallinger experiment creators can use their experi-ment code to further affect recruitment. There are a number of basic recruitment attributes that can be set on experimentinitialization, and recruitment can be further affected by calling specific methods during experiment runtime.
There are specific points in an experiment code where recruitment is usually affected. To show how you can set uprecruitment for your experiment, we will use GridUniverse code as a guide. The methods discussed here are part ofthe experiment base class, so it is not required to implement them in your experiment, but most experiments need atleast the configure and create_network methods.
def configure(self):super(Griduniverse, self).configure()self.num_participants = config.get('max_participants', 3)self.quorum = self.num_participantsself.initial_recruitment_size = config.get('num_recruits',
self.num_participants)
118 Chapter 4. Experiment Author Documentation

Dallinger Documentation, Release 6.0.0
The configure method is called during experiment initialization, and is where experiment specific configurationtakes place. Many times, configuration parameters from the experiment config.txt file are used here.
GridUniverse defines max_participants and num_recruits parameters. They are used in thismethod to set experiment.num_participants, experiment.quorum and experiment.initial_recruitment_size. The first of these is only used in GridUniverse code, so we can ignoreit.
In its configure method, GridUniverse sets experiment_quorum to be the same as the configured number ofparticipants. This means that the participants will be held in the waiting room until all participants have been recruited.Other experiment designs might not need all of the participants to be ready at the same time, but only a fraction of them.This attribute only applies to experiments that use a waiting room. The default value for experiment.quorum iszero (no waiting room).
experiment.initial_recruitment_size is the number of participants required at the beginning of theexperiment. This is used during the experiment’s launch phase to start the recruitment process.
def create_network(self):"""Create a new network by reading the configuration file."""class_ = getattr(
dallinger.networks,self.network_factory
)return class_(max_size=self.num_participants + 1)
The create_network method is where the experiment network is created, usually setting the initial number ofusers to the number defined in experiment.initial_recruitment_size. Most experiments will have aspecific network defined in their code, and call that network explicitly. In the case of GridUniverse, the experimentallows the use of any network defined by Dallinger, which is passed in as a configuration parameter. Regardless of theselected network class, it’s called with max_size set to the number of participants configured, plus one.
A simpler experiment might use something like this instead:
def create_network(self):return Chain(max_size=self.initial_recruitment_size)
4.14.5 Over-recruitment
It’s common for recruited participants to join and leave an experiment before it starts. This is difficult in experimentswhere multiple participants are needed in order to start the experiment. To prevent this from disrupting an experiment,experimenters can over-recruit participants to ensure that they have the correct amount of participants at the start ofthe experiment. The participants who are over-recruited, but not needed for the experiment, still receive a base payoutand are sent to the end of the experiment.
Over-recruitment occurs when an experiment has a quorum other than zero and the number of participants in thewaiting room is larger than the quorum. As mentioned above, because users in the waiting room have already beenrecruited, Dallinger has to treat them as having completed the experiment, and they have to be paid.
There are a couple of strategies that can be used to limit over-recruitment. It is best for an experiment to close recruit-ment as soon as possible after the intended quorum is full. GridUinverse overrides the experiment’s create_nodemethod to do this.
def create_node(self, participant, network):try:
return dallinger.models.Node(network=network, participant=participant
(continues on next page)
4.14. Recruitment 119
Dallinger Documentation, Release 6.0.0
(continued from previous page)
)finally:
if not self.networks(full=False):# If there are no spaces left in our networks we can close# recruitment, to alleviate problems of over-recruitmentself.recruiter().close_recruitment()
This method is called when a participant is added, so GridUniverse uses it to try to detect as soon as possible if theexperiment networks are full (all participants are in). It does this by getting all networks that are not full. If there arenone, it calls its recruiter’s close_recruitment method.
GridUniverse also overrides the experiment’s recruit method to unconditionally close recruitment if it is called.This method is called whenever a participant successfully completes an experiment. Since GridUniverse uses a quorumand never requires adding new participants after experiment start, it’s safe to just go ahead and close recruitment here.
def recruit(self):self.recruiter().close_recruitment()
120 Chapter 4. Experiment Author Documentation
CHAPTER 5
Core Contribution Documentation
This section covers extra topics relevant to those wishing to contribute to the development of Dallinger itself. This isnot needed in order to develop new experiments. Follow the Developer Installation process from the previous sectionto get started.
5.1 Running the tests
If you push a commit to a branch in the Dallinger organization on GitHub, or open a pull request from your own fork,Dallinger’s automated code tests will be run on Travis.
Current build status:
The tests include:
• Making sure that a source distribution of the Python package can be created.
• Running flake8 to make sure Python code conforms to the PEP 8 style guide.
• Running the tests for the Python code using pytest and making sure they pass in Python 2.7 and 3.6.
• Making sure that code coverage for the Python code is above the desired threshold.
• Making sure the docs build without error.
If you see ImportErrors related to demo packages, this most likely means you have not installed the dlgr.demossub-package. See the Dallinger development installation instructions for details.
5.1.1 Amazon Mechanical Turk Integration Tests
You can also run all these tests locally, with some additional requirements:
• The Amazon Web Services credentials set in .dallingerconfig must correspond to a valid MTurk Sandbox Re-quester account.
• Some tests require access to an MTurk Sandbox Worker account, so you should create this account (probablyusing the same AWS account as above).
121
Dallinger Documentation, Release 6.0.0
• The Worker ID from the Worker account (visible on the dashboard) needs to be set in tests/config.py,which should be created by making a copy of tests/config.py.in before setting the value. tests/config.py is excluded from version control, so your Id will not be pushed to a remote repository.
5.1.2 Commands
Tests
You can run all tests locally, simply by running:
tox
To run just the fastest Python tests (it’s recommended to run these tests first):
pytest
To run include slower Python tests:
pytest --runslow
To run the Python tests excluding those that interact with Amazon Mechanical Turk, run:
pytest -m "not mturk"
To run all tests except those that require a MTurk Worker ID, run:
pytest -m "not mturkworker"
To run the complete, comprehensive suite of tests which interact Mechanical Turk, add the mturkfull option whenrunning the tests:
pytest --mturkfull --runslow
Linting
To run black:
black dallinger
To run flake8:
flake8
5.2 Contributing to Dallinger Documentation
Dallinger’s documentation is written using reStructuredText markup, and transformed into HTML markup usingSphinx.
The formal narrative documentation source lives in .rst files inside dallinger/docs/source/. These are the filesthat should be edited (or added to) when updating documentation. The build directory holds the output generatedby Sphinx, and should not be edited directly.
122 Chapter 5. Core Contribution Documentation
Dallinger Documentation, Release 6.0.0
Sphinx also builds automatic documentation for Python and Javascript code based on inline docstring and jsdoc insource files.
5.2.1 Building Documentation Locally
Sphinx and reStructuredText can be tricky to get right without some trial and error, so you will probably want to builddocumentation locally after making additions or changes, so you can preview the generated, styled HTML. There aretwo ways to do this.
Tox (aka “The Big Hammer”)
Running tox to build documentation will download the current release of Dallinger, install all dependencies, and builddocumentation based on this. If you’re working on a proposed change, this is probably not what you want to do:
tox -e docs
Building from Your Current Local Source
To build your working copy of the documentation using your already installed development verison of Dallinger, you’llfirst need to run yarn to install Javascript dependencies from npm. From the root of the main Dallinger directory:
yarn
You can then generate the documentation:
make -C docs html
If you’ve made syntactical errors in your reStructuredText, you’ll get warnings and/or errors:
/Users/you/Dallinger/docs/source/running_the_tests.rst:84: WARNING: Title underline→˓too short.
When complete, you can open the root index.html page in a web browser:
open docs/build/html/index.html
5.3 Releasing a new version of Dallinger
The Dallinger branch master features the latest official release for 3.X.X, and 2.x-maintenance features the latestofficial 2.X.X release.
1. After you’ve merged the changes you want into both master and 2.x-maintenance, the branches are ready forthe version upgrade. We’re using semantic versioning, so there are three parts to the version number. when making arelease you need to decide which parts should get bumped, which determines what command you give to bumpversion.major is for breaking changes, minor for features, patch for bug fixes. Example: Running bumpversion patch, whichwill change every mention of the current version in the codebase and increase it by 0.0.1.
2. Log your updates by editing the CHANGELOG.md, where you’ll link to your version’s tree using:https://github.com/dallinger/dallinger/tree/vX.X.X. Mark the PR with the release label.
3. Merge this release with the commit “Release version X.X.X.”
5.3. Releasing a new version of Dallinger 123
Dallinger Documentation, Release 6.0.0
4. After that’s merged, you’ll want to tag the merge commit with git tag vX.X.X and do git push origin –tags. PyPIreleases versions based on the tags via .travis.yml.
5. If you are releasing an upgrade to an old version, revert the PyPI change and make it show the highest versionnumber. We do this because PyPI shows the last updated version to be the latest version which may be incorrect.
124 Chapter 5. Core Contribution Documentation
CHAPTER 6
General Information
6.1 Acknowledgments
Dallinger is sponsored by the Defense Advanced Research Projects Agency through the NGS2 program. The con-tents of this documentation does not necessarily reflect the position or the policy of the Government and no officialendorsement should be inferred.
Dallinger’s predecessor, Wallace, was supported in part by the National Science Foundation through grants 1456709and 1408652.
6.2 Dallinger’s incubator
Dallinger was one of the first scientists to perform experimental evolution. See his Wikipedia article for the specificsof his incubation experiments.
125

Dallinger Documentation, Release 6.0.0
126 Chapter 6. General Information

Python Module Index
ddallinger.experiment, 85dallinger.models, 88
127

Dallinger Documentation, Release 6.0.0
128 Python Module Index
Index
Symbols__init__() (dallinger.experiment.Experiment method), 85__json__() (dallinger.models.Info method), 96__json__() (dallinger.models.Network method), 90__json__() (dallinger.models.Node method), 92__json__() (dallinger.models.Participant method), 100__json__() (dallinger.models.Question method), 101__json__() (dallinger.models.Transformation method), 99__json__() (dallinger.models.Transmission method), 98__json__() (dallinger.models.Vector method), 95__repr__() (dallinger.models.Info method), 96__repr__() (dallinger.models.Network method), 90__repr__() (dallinger.models.Node method), 92__repr__() (dallinger.models.Transformation method), 99__repr__() (dallinger.models.Transmission method), 98__repr__() (dallinger.models.Vector method), 95_mutated_contents() (dallinger.models.Info method), 96_to_whom() (dallinger.models.Node method), 92_what() (dallinger.models.Node method), 92
Aadd_node_to_network() (dallinger.experiment.Experiment
method), 86all_incoming_transmissions
(dallinger.models.dallinger.models.Nodeattribute), 92
all_incoming_vectors (dallinger.models.dallinger.models.Nodeattribute), 92
all_infos (dallinger.models.dallinger.models.Network at-tribute), 90
all_infos (dallinger.models.dallinger.models.Node at-tribute), 92
all_nodes (dallinger.models.dallinger.models.Network at-tribute), 90
all_nodes (dallinger.models.dallinger.models.Participantattribute), 100
all_outgoing_transmissions(dallinger.models.dallinger.models.Nodeattribute), 92
all_outgoing_vectors (dallinger.models.dallinger.models.Nodeattribute), 92
all_questions (dallinger.models.dallinger.models.Participantattribute), 100
all_transmissions (dallinger.models.dallinger.models.Infoattribute), 96
all_transmissions (dallinger.models.dallinger.models.Vectorattribute), 95
all_vectors (dallinger.models.dallinger.models.Networkattribute), 90
assignment_abandoned()(dallinger.experiment.Experiment method),86
assignment_id (dallinger.models.Participant attribute), 99assignment_reassigned() (dallinger.experiment.Experiment
method), 86assignment_returned() (dallinger.experiment.Experiment
method), 86attention_check() (dallinger.experiment.Experiment
method), 86attention_check_failed() (dallinger.experiment.Experiment
method), 86
Bbase_pay (dallinger.models.Participant attribute), 99bonus (dallinger.models.Participant attribute), 99bonus() (dallinger.experiment.Experiment method), 86bonus_reason() (dallinger.experiment.Experiment
method), 86BotBase (class in dallinger.bots), 115
Ccalculate_full() (dallinger.models.Network method), 91collect() (dallinger.experiment.Experiment method), 86complete_experiment() (dallinger.bots.BotBase method),
115complete_experiment() (dallinger.bots.HighPerformanceBotBase
method), 114complete_questionnaire() (dallinger.bots.BotBase
method), 115
129
Dallinger Documentation, Release 6.0.0
complete_questionnaire()(dallinger.bots.HighPerformanceBotBasemethod), 114
connect() (dallinger.models.Node method), 92contents (dallinger.models.Info attribute), 96create_network() (dallinger.experiment.Experiment
method), 86create_node() (dallinger.experiment.Experiment method),
86creation_time (dallinger.models.Info attribute), 95creation_time (dallinger.models.SharedMixin attribute),
89
Ddallinger.createAgent() (dallinger method), 106dallinger.createInfo() (dallinger method), 106dallinger.createParticipant() (dallinger method), 108dallinger.error() (dallinger method), 107dallinger.experiment (module), 85dallinger.get() (dallinger method), 105dallinger.getInfo() (dallinger method), 106dallinger.getInfos() (dallinger method), 107dallinger.getReceivedInfos() (dallinger method), 107dallinger.getTransmissions() (dallinger method), 107dallinger.getUrlParameter() (dallinger method), 109dallinger.goToPage() (dallinger method), 109dallinger.hasAdBlocker() (dallinger method), 108dallinger.identity (dallinger attribute), 109dallinger.models (module), 88dallinger.post() (dallinger method), 106dallinger.submitAssignment() (dallinger method), 108dallinger.submitQuestionnaire() (dallinger method), 109dallinger.waitForQuorum() (dallinger method), 109data_check() (dallinger.experiment.Experiment method),
86data_check_failed() (dallinger.experiment.Experiment
method), 87destination (dallinger.models.Transmission attribute), 97destination (dallinger.models.Vector attribute), 95destination_id (dallinger.models.Transmission attribute),
97destination_id (dallinger.models.Vector attribute), 95details (dallinger.models.Info attribute), 96details (dallinger.models.SharedMixin attribute), 89driver (dallinger.bots.BotBase attribute), 115driver (dallinger.bots.HighPerformanceBotBase at-
tribute), 114
Eend_time (dallinger.models.Participant attribute), 99events_for_replay() (dallinger.experiment.Experiment
method), 87Experiment (class in dallinger.experiment), 85
experiment_repeats (dallinger.experiment.Experiment at-tribute), 85
Ffail() (dallinger.models.Info method), 96fail() (dallinger.models.Network method), 91fail() (dallinger.models.Node method), 93fail() (dallinger.models.Participant method), 100fail() (dallinger.models.Question method), 101fail() (dallinger.models.Transformation method), 99fail() (dallinger.models.Transmission method), 98fail() (dallinger.models.Vector method), 95fail_participant() (dallinger.experiment.Experiment
method), 87failed (dallinger.models.Info attribute), 96failed (dallinger.models.SharedMixin attribute), 90full (dallinger.models.Network attribute), 90
Gget_network_for_participant()
(dallinger.experiment.Experiment method),87
HHighPerformanceBotBase (class in dallinger.bots), 114hit_id (dallinger.models.Participant attribute), 99
Iid (dallinger.models.Info attribute), 95id (dallinger.models.SharedMixin attribute), 89Info (class in dallinger.models), 95info (dallinger.models.Transmission attribute), 97info_get_request() (dallinger.experiment.Experiment
method), 87info_id (dallinger.models.Transmission attribute), 97info_in (dallinger.models.Transformation attribute), 98info_in_id (dallinger.models.Transformation attribute),
98info_out (dallinger.models.Transformation attribute), 98info_out_id (dallinger.models.Transformation attribute),
98info_post_request() (dallinger.experiment.Experiment
method), 87infos() (dallinger.models.Network method), 91infos() (dallinger.models.Node method), 93infos() (dallinger.models.Participant method), 100initial_recruitment_size (dallinger.experiment.Experiment
attribute), 85is_complete() (dallinger.experiment.Experiment method),
87is_connected() (dallinger.models.Node method), 93is_overrecruited() (dallinger.experiment.Experiment
method), 87
130 Index

Dallinger Documentation, Release 6.0.0
Kknown_classes (dallinger.experiment.Experiment at-
tribute), 85
Llatest_transmission_recipient()
(dallinger.models.Network method), 91log() (dallinger.experiment.Experiment method), 87log_summary() (dallinger.experiment.Experiment
method), 87
Mmake_uuid() (dallinger.experiment.Experiment class
method), 87mark_received() (dallinger.models.Transmission
method), 98max_size (dallinger.models.Network attribute), 90mode (dallinger.models.Participant attribute), 99mutate() (dallinger.models.Node method), 93
Nneighbors() (dallinger.models.Node method), 93Network (class in dallinger.models), 90network (dallinger.models.Info attribute), 96network (dallinger.models.Node attribute), 92network (dallinger.models.Transformation attribute), 98network (dallinger.models.Transmission attribute), 97network (dallinger.models.Vector attribute), 95network_id (dallinger.models.Info attribute), 96network_id (dallinger.models.Node attribute), 92network_id (dallinger.models.Transformation attribute),
98network_id (dallinger.models.Transmission attribute), 97network_id (dallinger.models.Vector attribute), 95networks() (dallinger.experiment.Experiment method), 87networks_transformations
(dallinger.models.dallinger.models.Networkattribute), 90
networks_transmissions (dallinger.models.dallinger.models.Networkattribute), 90
Node (class in dallinger.models), 91node (dallinger.models.Transformation attribute), 98node_get_request() (dallinger.experiment.Experiment
method), 87node_id (dallinger.models.Transformation attribute), 98node_post_request() (dallinger.experiment.Experiment
method), 87nodes() (dallinger.models.Network method), 91nodes() (dallinger.models.Participant method), 100number (dallinger.models.Question attribute), 101
Oon_signup() (dallinger.bots.HighPerformanceBotBase
method), 114
origin (dallinger.models.Info attribute), 96origin (dallinger.models.Transmission attribute), 97origin (dallinger.models.Vector attribute), 95origin_id (dallinger.models.Info attribute), 96origin_id (dallinger.models.Transmission attribute), 97origin_id (dallinger.models.Vector attribute), 95
PParticipant (class in dallinger.models), 99participant (dallinger.models.Node attribute), 92participant (dallinger.models.Question attribute), 101participant_id (dallinger.models.Node attribute), 92participant_id (dallinger.models.Question attribute), 101participate() (dallinger.bots.BotBase method), 115practice_repeats (dallinger.experiment.Experiment
attribute), 85print_verbose() (dallinger.models.Network method), 91property1 (dallinger.models.Info attribute), 95property1 (dallinger.models.SharedMixin attribute), 89property2 (dallinger.models.Info attribute), 95property2 (dallinger.models.SharedMixin attribute), 89property3 (dallinger.models.Info attribute), 95property3 (dallinger.models.SharedMixin attribute), 89property4 (dallinger.models.Info attribute), 96property4 (dallinger.models.SharedMixin attribute), 89property5 (dallinger.models.Info attribute), 96property5 (dallinger.models.SharedMixin attribute), 89public_properties (dallinger.experiment.Experiment at-
tribute), 85
QQuestion (class in dallinger.models), 100question (dallinger.models.Question attribute), 101questions() (dallinger.models.Participant method), 100
Rreceive() (dallinger.models.Node method), 93receive_time (dallinger.models.Transmission attribute),
97received_infos() (dallinger.models.Node method), 93recruit() (dallinger.experiment.Experiment method), 87recruiter (dallinger.experiment.Experiment attribute), 85replay_event() (dallinger.experiment.Experiment
method), 88replay_finish() (dallinger.experiment.Experiment
method), 88replay_start() (dallinger.experiment.Experiment method),
88replay_started() (dallinger.experiment.Experiment
method), 88replicate() (dallinger.models.Node method), 93response (dallinger.models.Question attribute), 101role (dallinger.models.Network attribute), 90run() (dallinger.experiment.Experiment method), 88
Index 131
Dallinger Documentation, Release 6.0.0
run_experiment() (dallinger.bots.BotBase method), 115run_experiment() (dallinger.bots.HighPerformanceBotBase
method), 114
Ssave() (dallinger.experiment.Experiment method), 88session (dallinger.experiment.Experiment attribute), 85setup() (dallinger.experiment.Experiment method), 88sign_off() (dallinger.bots.BotBase method), 115sign_off() (dallinger.bots.HighPerformanceBotBase
method), 115sign_up() (dallinger.bots.BotBase method), 116sign_up() (dallinger.bots.HighPerformanceBotBase
method), 115size() (dallinger.models.Network method), 91status (dallinger.models.Participant attribute), 99status (dallinger.models.Transmission attribute), 97submission_successful() (dallinger.experiment.Experiment
method), 88subscribe_to_quorum_channel()
(dallinger.bots.HighPerformanceBotBasemethod), 115
Ttask (dallinger.experiment.Experiment attribute), 85time_of_death (dallinger.models.Info attribute), 96time_of_death (dallinger.models.SharedMixin attribute),
90Transformation (class in dallinger.models), 98transformation_applied_to
(dallinger.models.dallinger.models.Info at-tribute), 96
transformation_get_request()(dallinger.experiment.Experiment method),88
transformation_post_request()(dallinger.experiment.Experiment method),88
transformation_whence (dallinger.models.dallinger.models.Infoattribute), 96
transformations() (dallinger.models.Info method), 96transformations() (dallinger.models.Network method), 91transformations() (dallinger.models.Node method), 94transformations_here (dallinger.models.dallinger.models.Node
attribute), 92Transmission (class in dallinger.models), 97transmission_get_request()
(dallinger.experiment.Experiment method),88
transmission_post_request()(dallinger.experiment.Experiment method),88
transmissions() (dallinger.models.Info method), 97transmissions() (dallinger.models.Network method), 91
transmissions() (dallinger.models.Node method), 94transmissions() (dallinger.models.Vector method), 95transmit() (dallinger.models.Node method), 94type (dallinger.models.Info attribute), 96type (dallinger.models.Network attribute), 90type (dallinger.models.Node attribute), 92type (dallinger.models.Participant attribute), 99type (dallinger.models.Question attribute), 101type (dallinger.models.Transformation attribute), 98
Uunique_id (dallinger.models.Participant attribute), 99update() (dallinger.models.Node method), 94
VVector (class in dallinger.models), 94vector (dallinger.models.Transmission attribute), 97vector_get_request() (dallinger.experiment.Experiment
method), 88vector_id (dallinger.models.Transmission attribute), 97vector_post_request() (dallinger.experiment.Experiment
method), 88vectors() (dallinger.models.Network method), 91vectors() (dallinger.models.Node method), 94verbose (dallinger.experiment.Experiment attribute), 85
Wworker_id (dallinger.models.Participant attribute), 99
132 Index


![z/VM: Migration Guide · REXX Work Area for Applications [5.1.0].....71 Server-Requester Programming Interface [5.1.0].....71 System Diagnosis.....71 FST and ADT Macro Changes to](https://static.fdocuments.us/doc/165x107/5b94305209d3f2a65f8c6c84/zvm-migration-rexx-work-area-for-applications-51071-server-requester.jpg)


