
CUTTER SUCTION DREDGES HYPACK 2013. Screen Capture of Working Cutter-Suction Dredge.
8
CUTTER SUCTION DREDGES CUTTER SUCTION DREDGES HYPACK 2013 HYPACK 2013
-
Upload
jaylynn-tustin -
Category
Documents
-
view
224 -
download
4
Transcript of CUTTER SUCTION DREDGES HYPACK 2013. Screen Capture of Working Cutter-Suction Dredge.

CUTTER SUCTION CUTTER SUCTION DREDGESDREDGES
HYPACK 2013HYPACK 2013
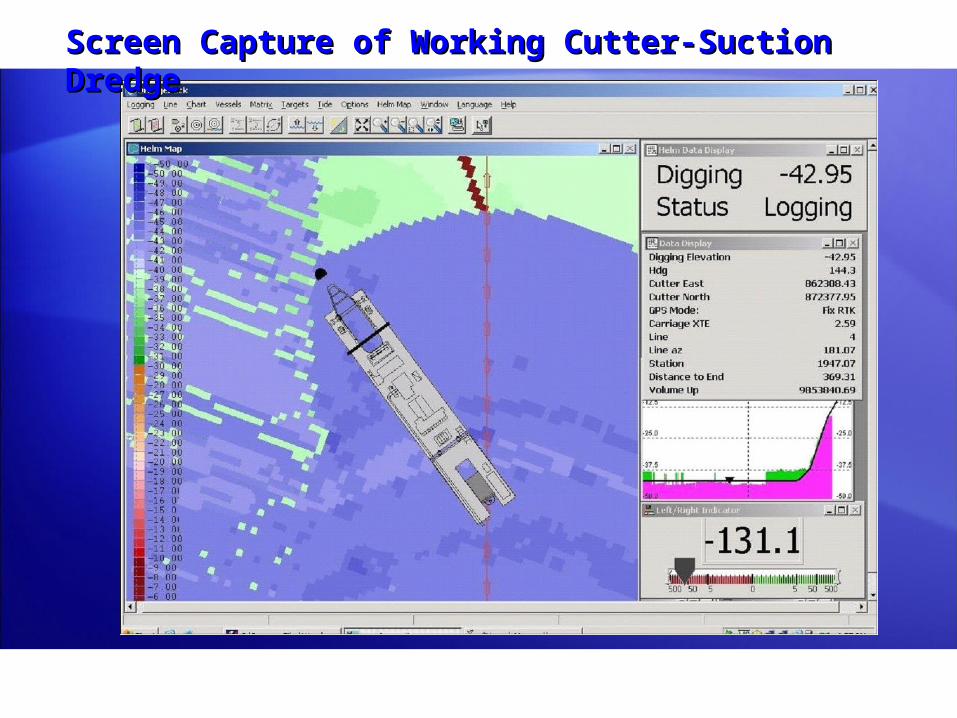
Screen Capture of Working Cutter-Suction DredgeScreen Capture of Working Cutter-Suction Dredge
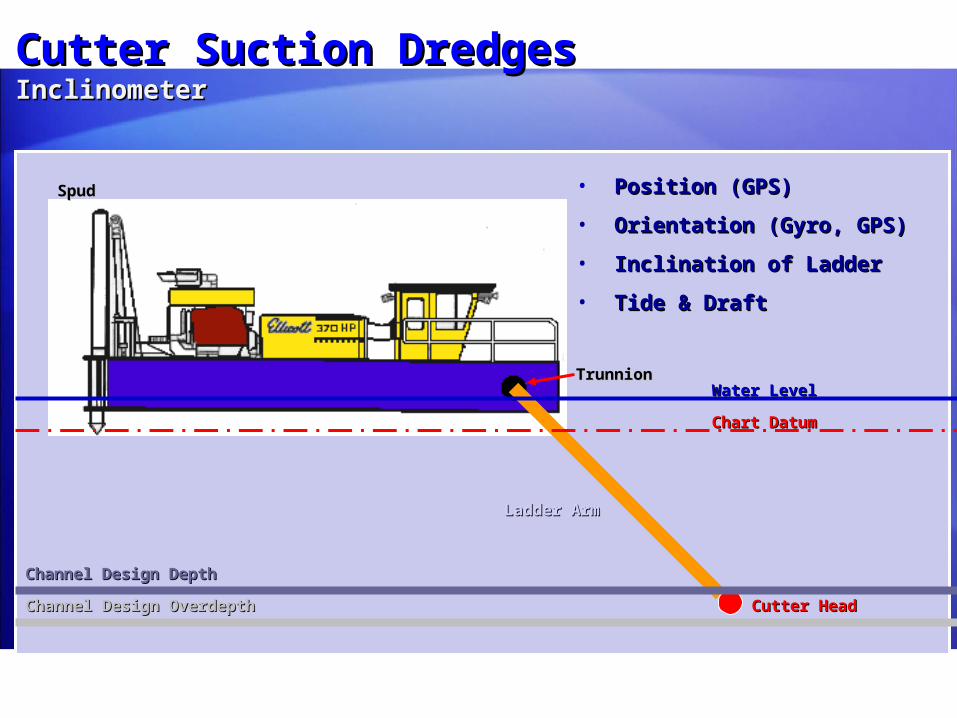
Cutter Suction DredgesCutter Suction DredgesInclinometerInclinometer
Water LevelWater Level
Chart DatumChart Datum
Channel Design DepthChannel Design Depth
Channel Design OverdepthChannel Design Overdepth
SpudSpud
Ladder ArmLadder Arm
Cutter HeadCutter Head
TrunnionTrunnion
• Position (GPS)Position (GPS)
• Orientation (Gyro, GPS)Orientation (Gyro, GPS)
• Inclination of LadderInclination of Ladder
• Tide & DraftTide & Draft

Cutter Suction ConfigurationCutter Suction Configuration
Needed:Needed: Dredge PositionDredge Position Cutter Head Cutter Head PositionPosition DredgeDredge Orientation Orientation Cutter Cutter Head DepthHead Depth
Mobile = MainMobile = Main Mobile = Digging ToolMobile = Digging Tool

ConfigurationConfiguration
• Add the GPS.DLL to your ‘Boat’ mobile.
• Create a 2nd mobile and name it ‘Cutter’.
• Add the Inclinometer.DLL to the 2nd mobile.
• For swing-ladder dredges, add the HD25A.DLL to the 2nd mobile.
Zimwit Dredging
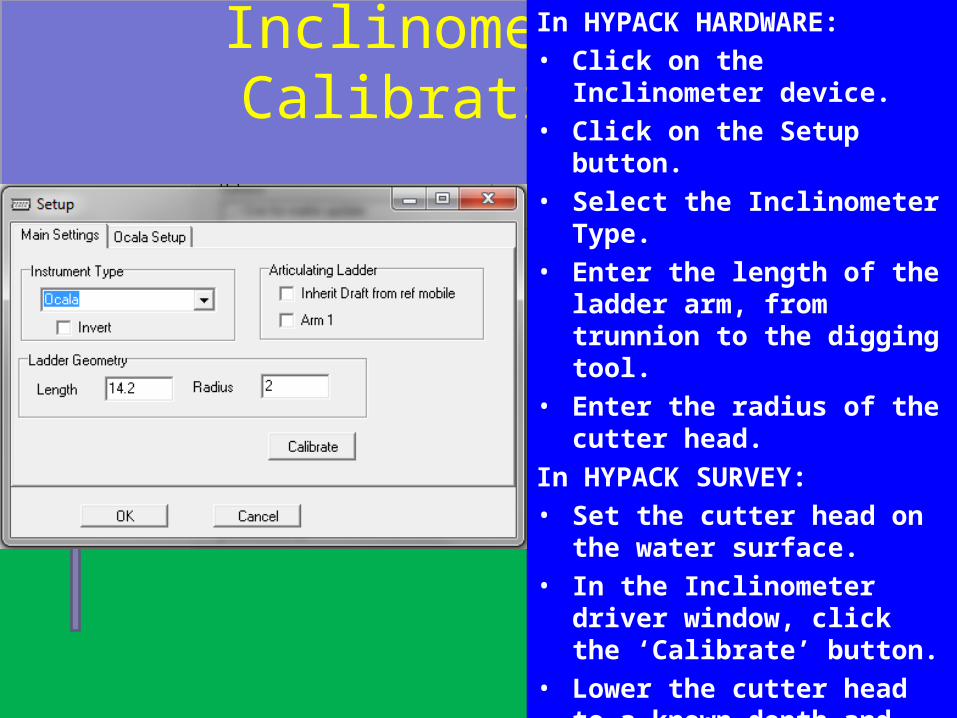
Inclinometer CalibrationIn HYPACK HARDWARE:• Click on the Inclinometer
device.• Click on the Setup button.• Select the Inclinometer Type.• Enter the length of the ladder
arm, from trunnion to the digging tool.
• Enter the radius of the cutter head.
In HYPACK SURVEY:• Set the cutter head on the
water surface.• In the Inclinometer driver
window, click the ‘Calibrate’ button.
• Lower the cutter head to a known depth and compare it with the depth shown in the SURVEY program.
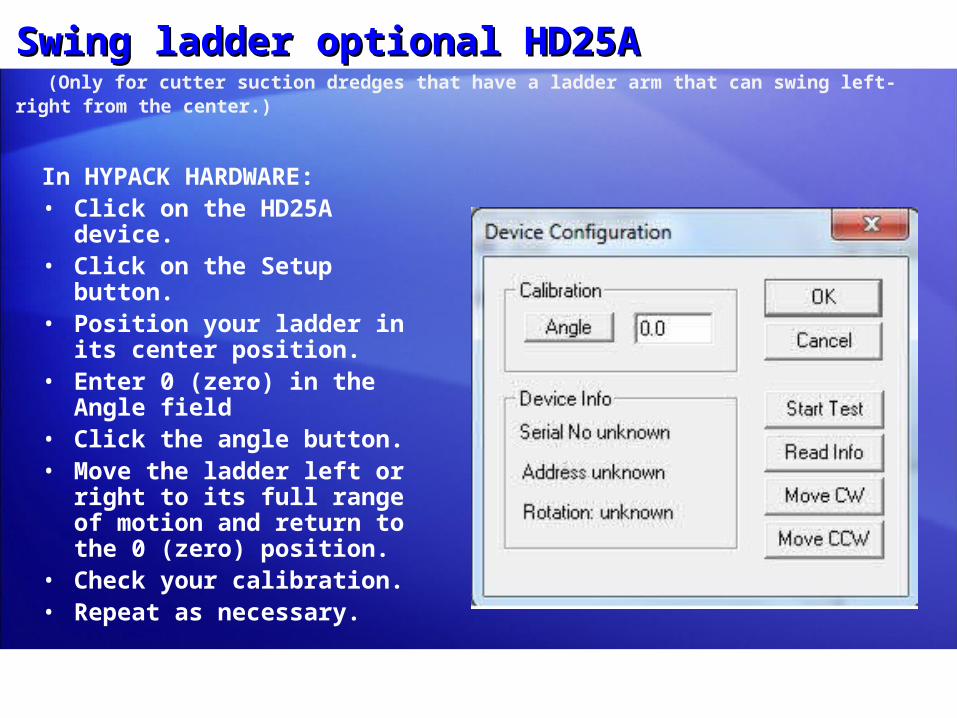
Swing ladder optional HD25ASwing ladder optional HD25A (Only for cutter suction dredges that have a ladder arm that can swing left-right from the center.)
In HYPACK HARDWARE:• Click on the HD25A device.• Click on the Setup button.• Position your ladder in its
center position.• Enter 0 (zero) in the Angle
field• Click the angle button.• Move the ladder left or right
to its full range of motion and return to the 0 (zero) position.
• Check your calibration.• Repeat as necessary.
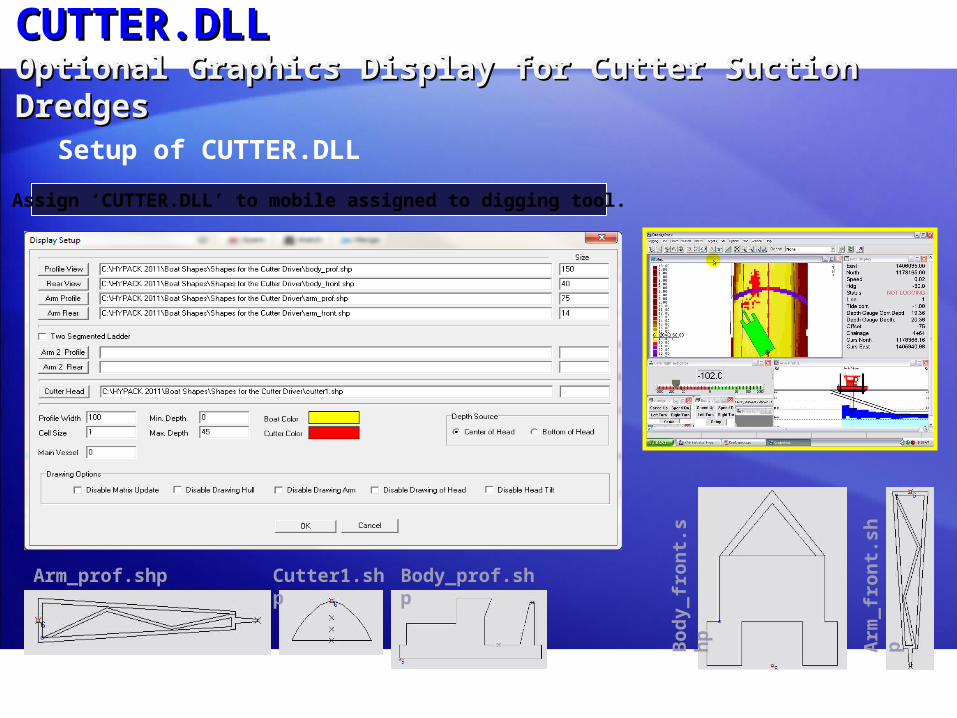
CUTTER.DLLCUTTER.DLLOptional Graphics Display for Cutter Suction DredgesOptional Graphics Display for Cutter Suction Dredges
Setup of CUTTER.DLL
Arm_prof.shp Cutter1.shp Body_prof.shp
Bo
dy_
fro
nt.
shp
Arm
_fro
nt.
shp
Assign ‘CUTTER.DLL’ to mobile assigned to digging tool.