Curry Mouse EE296 Final Presentation Wednesday, May 10, 2006.
23
Curry Mouse EE296 Final Presentation Wednesday, May 10, 2006
-
date post
22-Dec-2015 -
Category
Documents
-
view
216 -
download
3
Transcript of Curry Mouse EE296 Final Presentation Wednesday, May 10, 2006.

Curry MouseEE296 Final Presentation
Wednesday, May 10, 2006

Team
• Judy Lee
• Amy Maruyama
• Mindy Wong

Micromouse
• Design and build an autonomous robotic “mouse” that can travel to the center of a maze in the quickest amount of time

Initial Goals
• To go forward• To turn left & right• To track forward• To track turns• Get to the center of
the maze• Don’t crash• Don’t murder the
rabbit

Design
Hardware Software
2nd Layer:Sensors Circuits,Rabbit
1st Layer:Chassis
3rd Layer:Motor
Circuits
Algorithm
Programming..

Design
Hardware Software
2nd Layer:Sensors CircuitsRabbit
1st Layer:Chassis
3rd Layer:Motor
Circuits
Algorithm
Programming..

Chassis
Material: Aluminum
Design: Wheelchair
Mounts: Wheels, motor and batteries
Batteries: 8 NiMh
Battery Total Voltage : 9.6V
Expected Total Voltage: 12.0 V
Projected diagonal: 15.8cm
For balance: Sliders

Design
Hardware Software
2nd Layer:Sensorcircuits,Rabbit
1st Layer:Chassis
3rd Layer:Motor Circuits
Algorithm
Programming..

Sensors • Top down sensors • Total number of sensors
– 9 sensors
• Resistor combination – 150 ohms and 20k ohms
• Total possible sensing distance – About 7mm between sensor and object – Projected height of sensors: 5.6 cm above the ground
• Checking the sensors – Leds above each sensor

Sensors Placement
8
1 2 3 5 6 7
4
9
Sensor Purpose
•Sensor 2, 6, 8, 9 detect walls constantly
4.5cm2.5 cm

Sensor Placement
8
1 2 3 5 6 7
4
9
4.5cm2.5 cm
Sensor Purpose
•Sensor 2, 6, 8, 9 detect walls constantly
•Sensors 1, 3, 5, 7 detect
misalignment

Sensor Placement
8
1 2 3 5 6 7
4
9
4.5cm2.5 cm
Sensor Purpose
•Sensor 2, 6, 8, 9 detect walls constantly
•Sensors 1, 3, 5, 7 detect
misalignment
• Sensors 4 detect dead ends

Sensor Placement
8
1 2 3 5 6 7
4
9
4.5cm2.5 cm
Sensor Purpose
•Sensor 2, 6, 8, 9 detect walls constantly
•Sensors 1, 3, 5, 7 detect
misalignment
• Sensors 4 detect dead ends
•Sensor 8 & 9 makes sure walls are cleared when
turning

Pivot Turning
8
1 2 3 5 6 74
9

Turning Corners • After sensors 4 detect there is no wall,
mouse needs to stop and turn.
• To left turn – Left wheel goes backward & right wheel goes
forward with equal number of phase steps
• To right turn – Right wheel goes backward & left wheel goes
forward with equal number of phase steps

Design
Hardware Software
2nd Layer:SensorsCircuits, Rabbit
1st Layer:Chassis
3rd Layer:Motor
Circuits
Algorithm
Programming..

Algorithm (right wall hugger)
• Go forward– Check alignment
• If not aligned adjust speeds to do so.– Check for dead end
• If dead end and left and right wall– Turn around and go straight
• If dead end and no right wall– Stop and turn right
• If dead end and right wall– Stop and turn left
• If dead end and no left and right wall– Stop and turn right
– Check for right wall• If no right wall
– Turn right• If right wall
– Go straight
• Loop
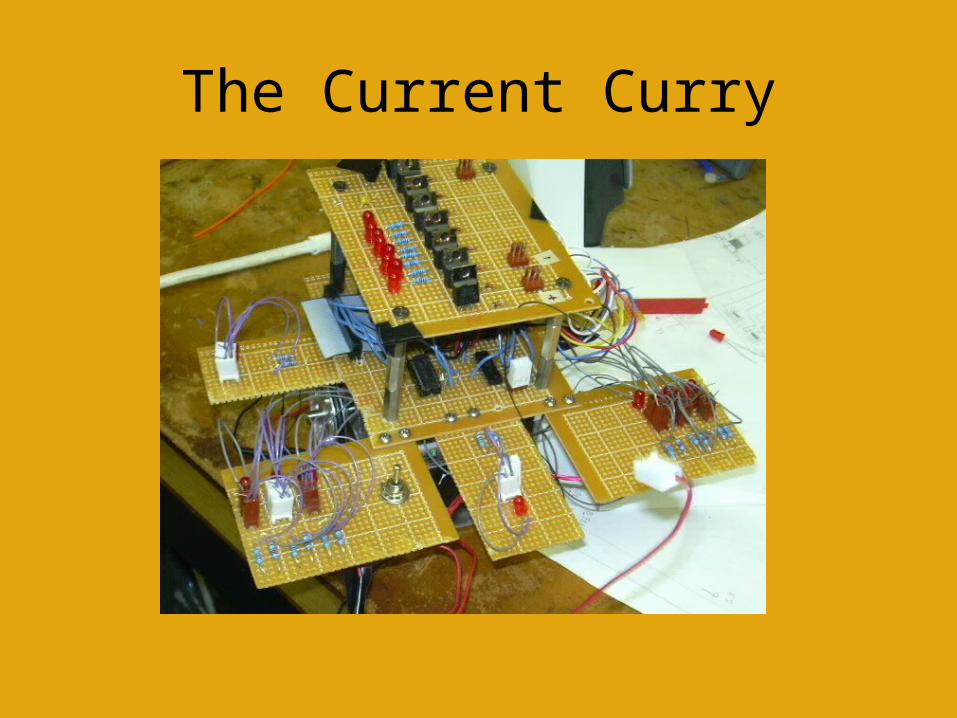
The Current Curry

Problems!!!
• Overall, Curry is a temperamental mouse • Bad connections
– Many wires– Solder blobs
• Shorting• Some of the ports in the rabbit died• Programming and debugging• Tools• Time

Solutions
• Too many solder blobs and wires– Tape everything down with electric tape
• Shorting– Debug where it was caused by
• Less ports to use– Make use of others
• Tools– Get our own
• Programming and debugging– Keep on trying!

Future improvements?
• Etch boards
• Seats and connectors on everything
• Better design and programming
• Treat the rabbit better

What we learned this semester…
• Soldering
• Circuits and design– THINK FIRST!
• Programming– Dynamic C
• Debugging– circuit and code

Any questions?