Crestron Touch Panel Classroom - Missouri State … Crestron Touch Panel Classroom The Crestron...
5
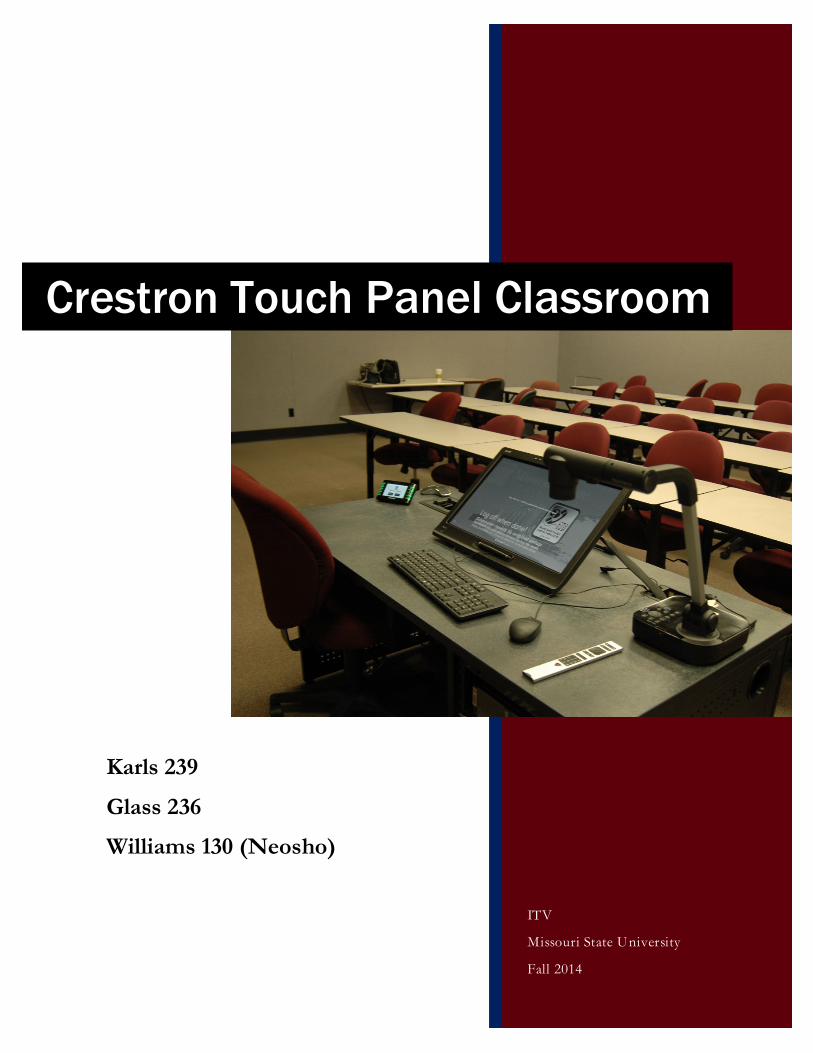
ITV Missouri State University Fall 2014 Crestron Touch Panel Classroom Karls 239 Glass 236 Williams 130 (Neosho)
Transcript of Crestron Touch Panel Classroom - Missouri State … Crestron Touch Panel Classroom The Crestron...
ITV
Missouri State University
Fall 2014
Crestron Touch Panel Classroom
Karls 239
Glass 236
Williams 130 (Neosho)
1
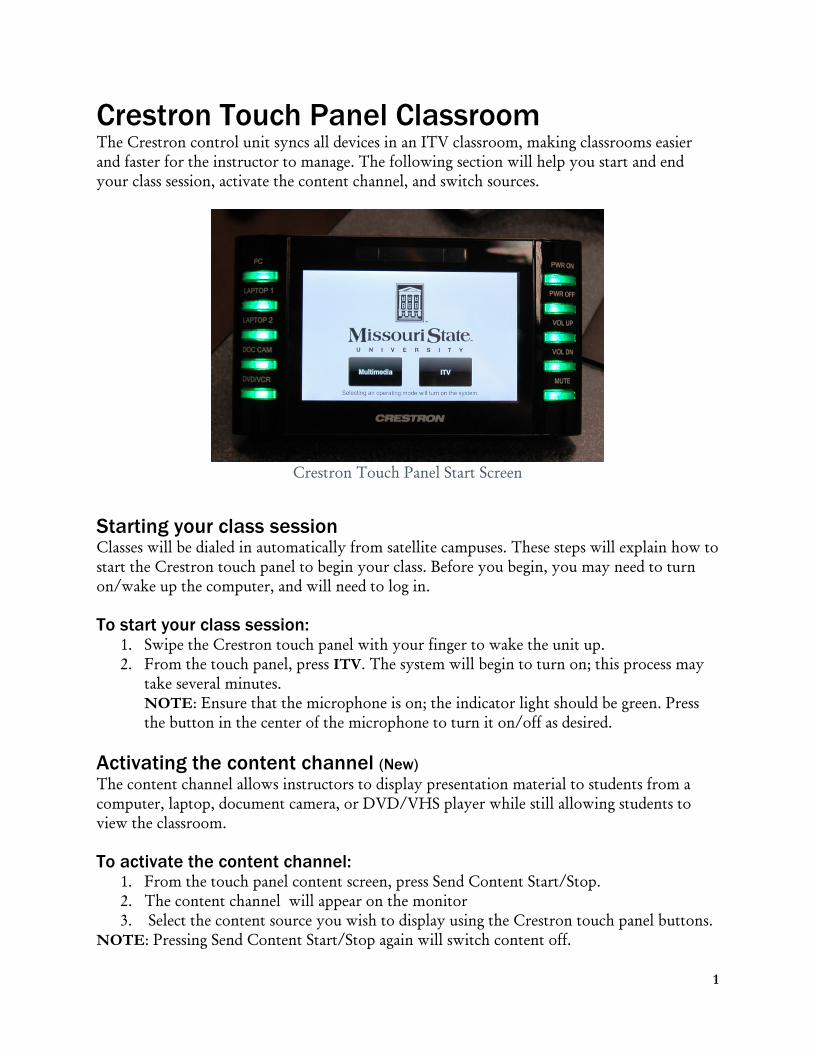
Crestron Touch Panel Classroom The Crestron control unit syncs all devices in an ITV classroom, making classrooms easier and faster for the instructor to manage. The following section will help you start and end your class session, activate the content channel, and switch sources.
Crestron Touch Panel Start Screen
Starting your class session Classes will be dialed in automatically from satellite campuses. These steps will explain how to start the Crestron touch panel to begin your class. Before you begin, you may need to turn on/wake up the computer, and will need to log in. To start your class session:
1. Swipe the Crestron touch panel with your finger to wake the unit up. 2. From the touch panel, press ITV. The system will begin to turn on; this process may
take several minutes. NOTE: Ensure that the microphone is on; the indicator light should be green. Press the button in the center of the microphone to turn it on/off as desired.
Activating the content channel (New) The content channel allows instructors to display presentation material to students from a computer, laptop, document camera, or DVD/VHS player while still allowing students to view the classroom. To activate the content channel:
1. From the touch panel content screen, press Send Content Start/Stop. 2. The content channel will appear on the monitor 3. Select the content source you wish to display using the Crestron touch panel buttons.
NOTE: Pressing Send Content Start/Stop again will switch content off.

2
Switching between sources The Crestron touch panel allows you to switch between multiple methods of presentation content. NOTE: It may take several seconds for content to load. To use a laptop:
1. Ensure your laptop is plugged into the proper interface (HDMI, VGA, and audio connections are provided).
2. From the Crestron touch panel, press Laptop 1 (for HDMI connection) or Laptop 2 (for VGA connection).
3. To return to the main PC screen, press PC. To use the DVD/VCR player:
1. Ensure the DVD player/VCR is powered on. 2. From the Crestron touch panel, press DVD/VCR. 3. To return to the main PC screen, press PC.
To use the document camera:
1. Ensure the document camera is powered on. 2. From the Crestron touch panel, press DOC CAM. 3. To return to the main PC screen, press PC.
Ending your class session There is no need to shut off individual units to end your session. The Crestron touch panel will shut off connected monitors and devices for you. (Not Applicable to Williams 130) To end your class session:
1. Log out of the computer. 2. On the Crestron touch panel, press System off, then Yes, continue. The system will
begin to shut down.
Customizing your classroom settings The Crestron touch panel screen has several options for customization of camera views and angles, as well as sound. The next section will assist you with customization of your classroom settings. To increase the volume in your classroom: From the Crestron touch panel, press VOL UP to increase the volume. (Not Applicable to Williams 130) To decrease the volume in your classroom:
3
From the Crestron touch panel, press VOL DN to decrease the volume. (Not Applicable to Williams 130) To mute the microphone in your classroom: On the microphone press the center button. The red light will indicate sound is muted. Or on the touch panel content screen press Microphone Mute.
Advanced Options
Switching camera views in your classroom By default, the Crestron system will display the instructor and content to far students. You can further customize this by switching camera views and changing camera angles. To switch camera views:
1. From the Crestron touch panel ITV-Content screen, press More. 2. For far end students to see the instructor, press Instructor Camera. This is the default
setting. 3. For far end students to see local students, press Student Camera. 4. To go to the home screen, press Back.
To adjust camera angles/zoom:
1. From the camera selection screen, choose the desired camera, then press More. 2. Use + or – to control zoom. 3. Use arrow keys to adjust pan/tilt.
4
Technical Support Contact Information Our engineers are available to assist you if you have a technical problem. Please contact the representative corresponding to your course time. Be sure to report any problems so issues can be resolved efficiently. Day Classes Joe Strong 836-6421 [email protected] Evening Classes Carl Sartin 836-6078 [email protected]