Final countdown: Rod Cross The Final Countdown – Summer 1967
COUNTDOWN TEMPLATE … … by Begin Bound LLC
John Heinrichs
Associate Professor
Information Systems Management

Students are expected to …
• Have access to a designer HubSpot account • You'll need to first sign up for a free Designer account here:
http://offers.hubspot.com/hubspot-developers-and-designers-free-hubspot-account
• Possess a working knowledge of HTML5/CSS3
• Possess an understanding of jQuery
Important links …
• Brought to you by …
Begin Bound LLC … http://beginbound.com/
• We’ll also be using this …
https://marketplace.hubspot.com/templates/site-pages/flexhub-free-countdown
EXPECTATIONS + IMPORTANT LINKS
1. Introduction to Countdown
2. Resources
3. Update Template
4. Update Landing Page
5. Tips
AGENDA
1 INTRODUCTION TO COUNTDOWN

WHAT IS COUNTDOWN?This FREE FlexHUB Countdown Template will allow any Hubspot user to take control of their design and branding with custom style, color, and layout options available right in the Hubspot Editor.
Set your date and build anticipation for your next event!
MORE DETAILS: http://beginbound.com/flexhub-hubspot-templates
LIVE DEMO: http://beginbound.hs-sites.com/flexhub-free-hubspot-template-countdown
PREMIUM VERSION DEMO: http://beginbound.hs-sites.com/flexhub-premium-countdown
Please contact support with any questions at: [email protected]

Template
• Header
• Body
• Universal Customizations
• Content Wrapper
• Countdown HubL
• Form
• Footer
Choosing Countdown Options
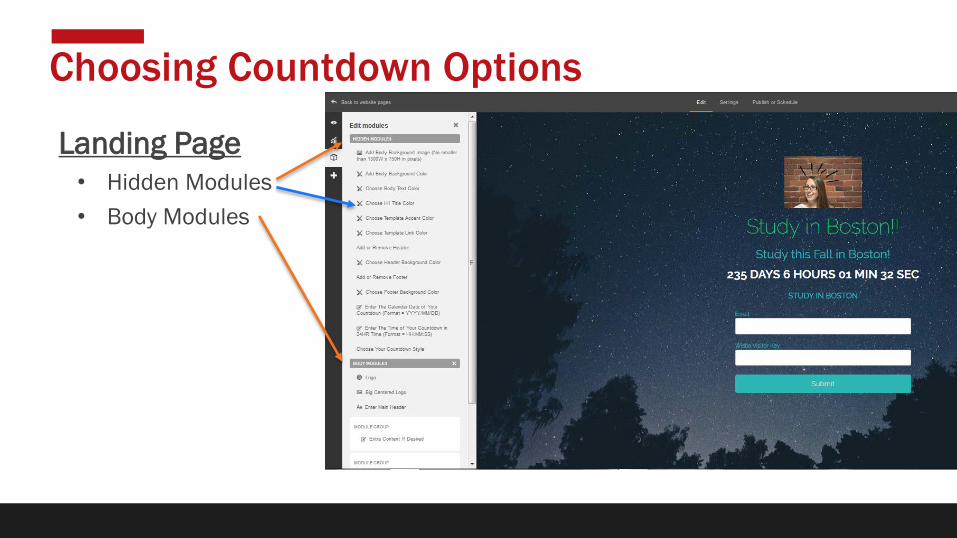
Landing Page
• Hidden Modules
• Body Modules
Choosing Countdown Options
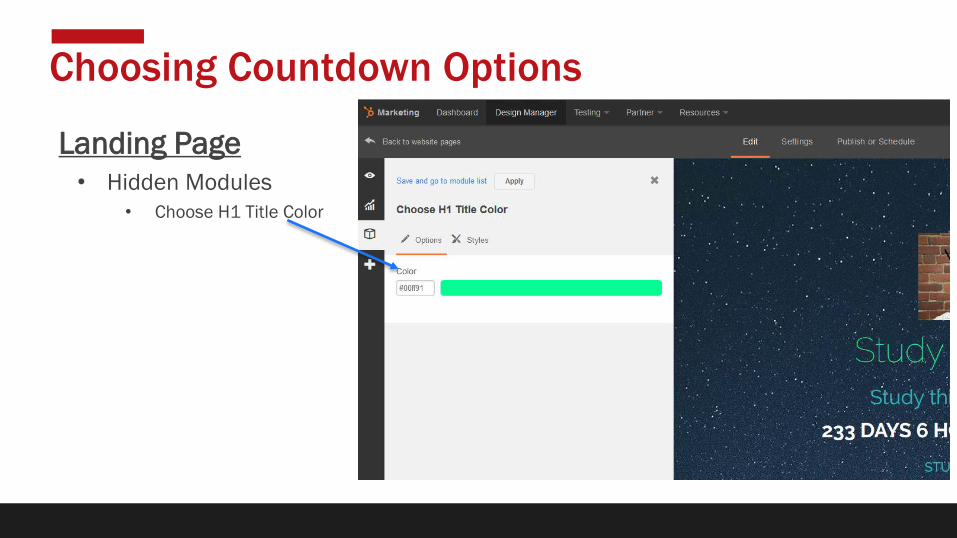
Landing Page
• Hidden Modules
• Choose H1 Title Color
Choosing Countdown Options
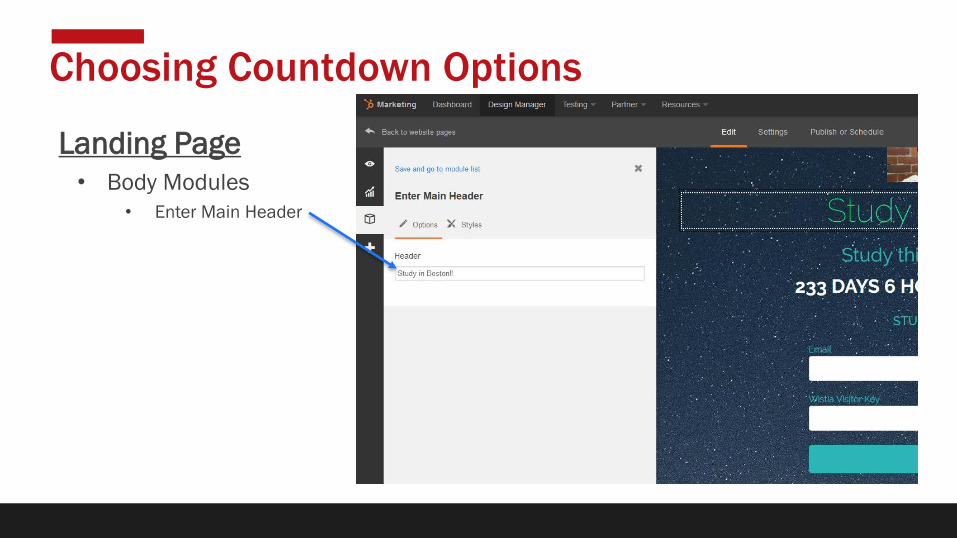
Landing Page
• Body Modules
• Enter Main Header
Choosing Countdown Options
2 RESOURCES
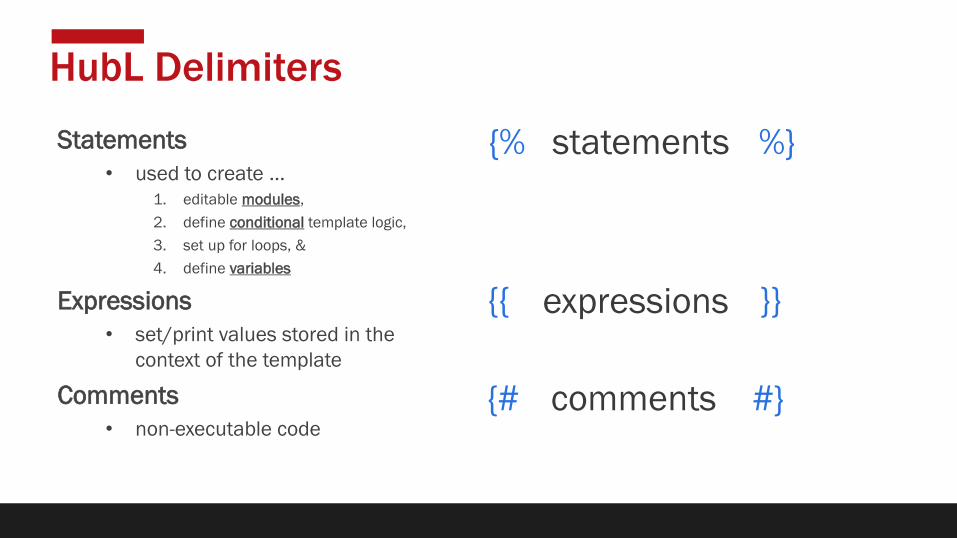
Statements
• used to create …
1. editable modules,
2. define conditional template logic,
3. set up for loops, &
4. define variables
Expressions
• set/print values stored in the
context of the template
Comments
• non-executable code
HubL Delimiters
{# #}comments
{% %}statements
{{ }}expressions

Universal Customizations• <!-- Body Background Image and Color -->
• {% image
• <!-- Color Styles -->• {% color
• <!-- Header and Footer -->• {% choice
• <!-- HUBL STYLE OPTIONS -->
• /* Main Body Styles */
• /* Restrict Form Width and Center so it looks good
on the Splash Page */
• /*------| HUBL STRUCTURE OPTIONS |------*/
• /* Header On or Off */• {% if widget_data.header_option.value == 'On' %}
• /* Footer On or Off */• {% if widget_data.footer_option.value == 'On' %}
Universal Customizations

Modules
• Dynamic areas of a template that can
be customized by the end user in the
content editor
• Made up of the following components
1. Type of module
2. Unique name
3. Parameters
HubL Modules
http://designers.hubspot.com/docs/hubl/hubl-supported-modules
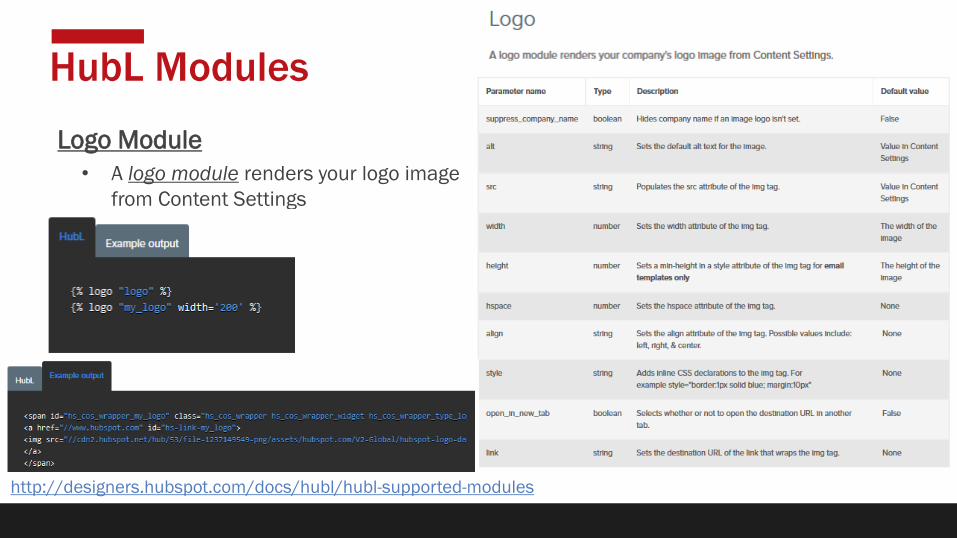
Logo Module
• A logo module renders your logo image
from Content Settings
HubL Modules
http://designers.hubspot.com/docs/hubl/hubl-supported-modules

Variables
• either a single word in an expression or
an attribute of a dictionary
• a common usage is to use variables to define
common CSS values in your stylesheet
• for example, if you have a color that you use
over & over again throughout your CSS file
• HubSpot uses the dictionary “content”
to hold many attributes that pertain to
the content created with that template
HubL Variables
http://designers.hubspot.com/docs/hubl/hubl-variables-and-macros-syntax
http://designers.hubspot.com/docs/hubl/hubl-supported-variables
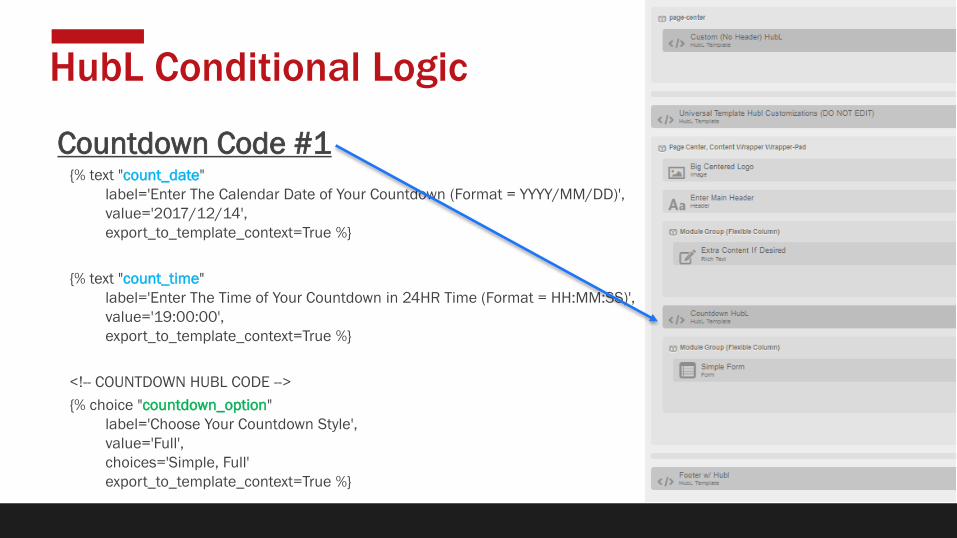
Countdown Code #1{% text "count_date"
label='Enter The Calendar Date of Your Countdown (Format = YYYY/MM/DD)',
value='2017/12/14',
export_to_template_context=True %}
{% text "count_time"
label='Enter The Time of Your Countdown in 24HR Time (Format = HH:MM:SS)',
value='19:00:00',
export_to_template_context=True %}
<!-- COUNTDOWN HUBL CODE -->
{% choice "countdown_option"
label='Choose Your Countdown Style',
value='Full',
choices='Simple, Full'
export_to_template_context=True %}
HubL Conditional Logic
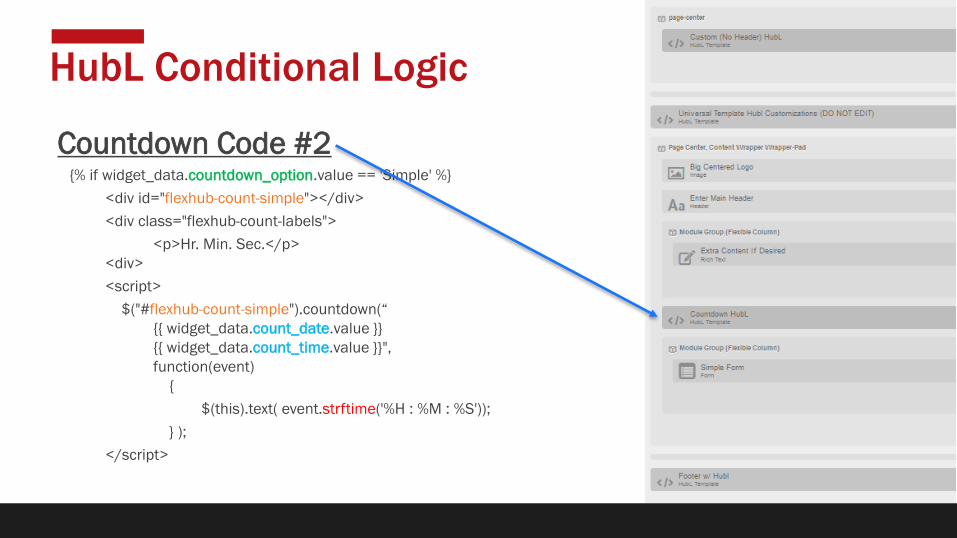
Countdown Code #2{% if widget_data.countdown_option.value == 'Simple' %}
<div id="flexhub-count-simple"></div>
<div class="flexhub-count-labels">
<p>Hr. Min. Sec.</p>
<div>
<script>
$("#flexhub-count-simple").countdown(“
{{ widget_data.count_date.value }}
{{ widget_data.count_time.value }}",
function(event)
{
$(this).text( event.strftime('%H : %M : %S'));
} );
</script>
HubL Conditional Logic

Countdown Code #3{% elif widget_data.countdown_option.value == 'Full' %}
<div id="flexhub-count-full"></div>
<script>
$("#flexhub-count-full").countdown(“
{{ widget_data.count_date.value }}
{{ widget_data.count_time.value }}",
function(event)
{
$(this).text(
event.strftime('%D days %-H hours %M min %S sec')
);
} );
</script>
{% endif %}
HubL Conditional Logic
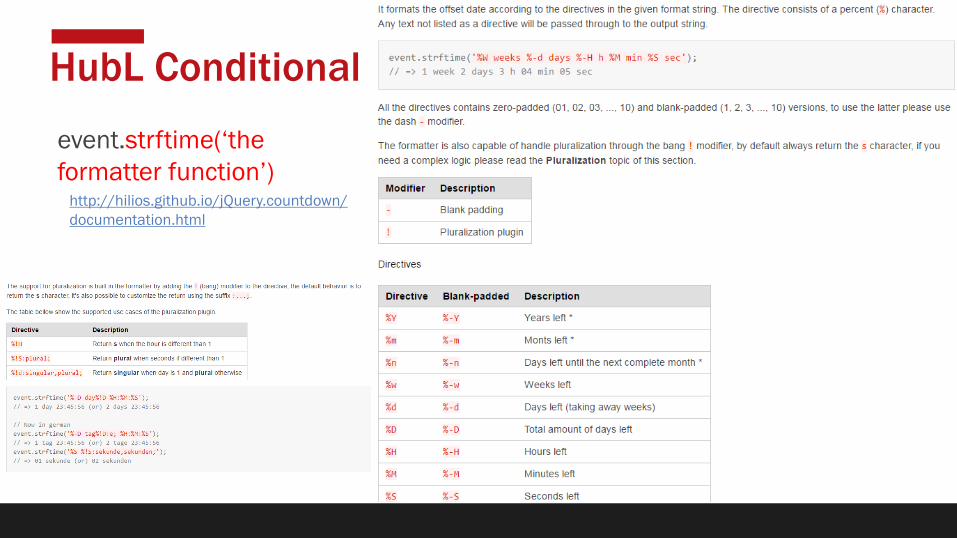
event.strftime(‘the
formatter function’)http://hilios.github.io/jQuery.countdown/
documentation.html
HubL Conditional Logic
3 UPDATE TEMPLATE

1. Download the free template … https://marketplace.hubspot.com/templates/
site-pages/flexhub-free-countdown
2. Open Design Manager
3. Open …
Template
Purchased
FlexHUB FREE Countdown
Step 1: Download Template

1. Select the “Edit Options” gear icon
2. Update the “Label” Description
3. Update the “HTML”
• select the correct “src” that
belongs to your portal
Step 2: Edit Header HTML Module
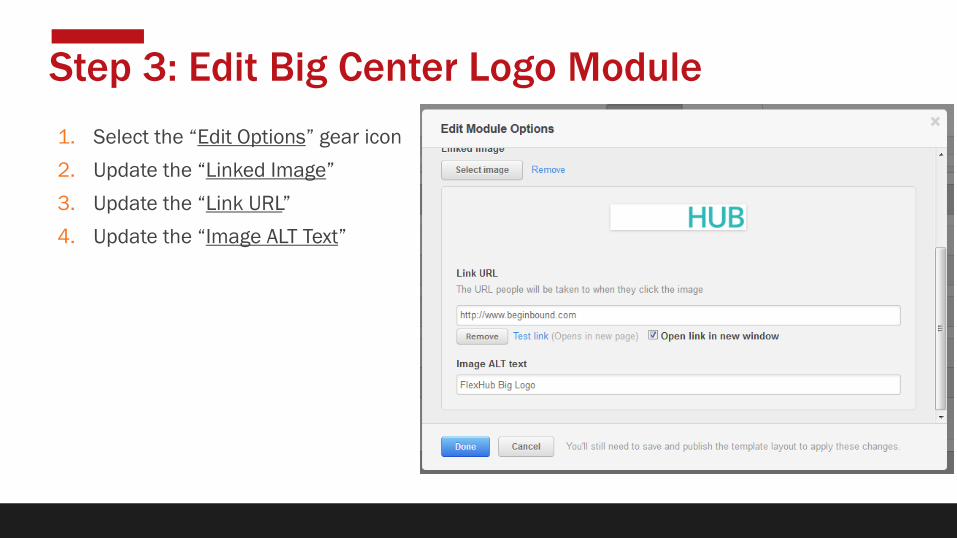
1. Select the “Edit Options” gear icon
2. Update the “Linked Image”
3. Update the “Link URL”
4. Update the “Image ALT Text”
Step 3: Edit Big Center Logo Module

1. Select the “Edit Options” gear
icon
2. Update the “FooterLogo”
3. Update the “Template Created
by”
Step 4: Edit Footer Module

1. Select “Design Manager”
2. Select …
“Coded Files”
Custom
system
CSS
flexhub.css
Step 5: Edit the Stylesheet
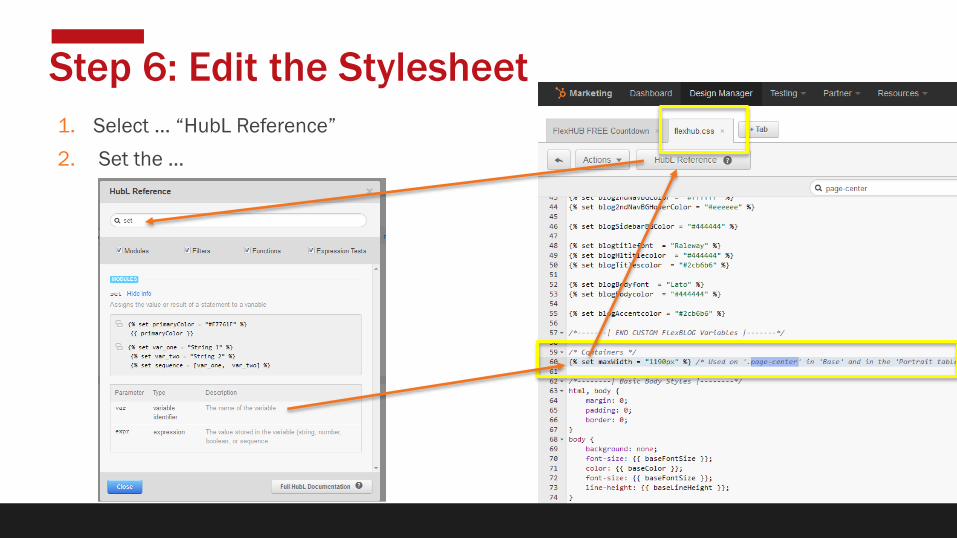
1. Select … “HubL Reference”
2. Set the …
Step 6: Edit the Stylesheet

4 UPDATE LANDING PAGE

1. Select …
Testing
Website Pages
2. Select …
Create a new website page
3. Select the template …
FlexHUB FREE Countdown
4. Name the page
Step 1: Create a Website Page

1. Update …
• Page Title
• Meta Description
• Campaign
Step 2: Update Settings

1. Edit Hidden Modules …
2. Edit Body Modules …
Step 3: Edit Page
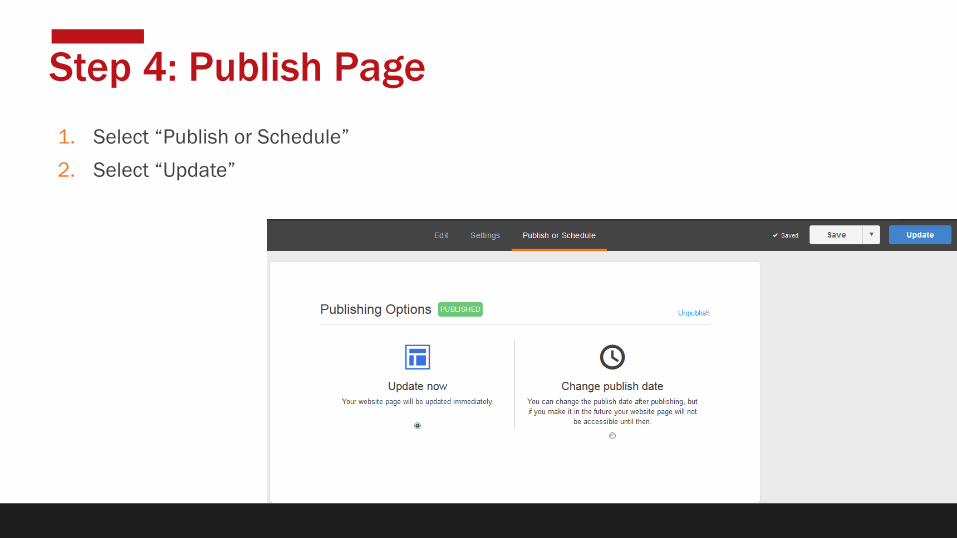
1. Select “Publish or Schedule”
2. Select “Update”
Step 4: Publish Page

5 TIPS
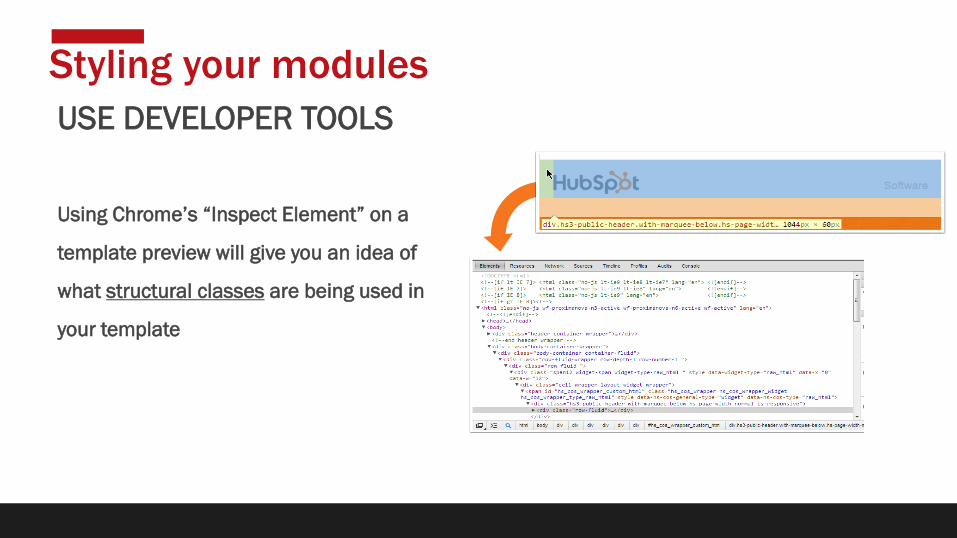
USE DEVELOPER TOOLS
Using Chrome’s “Inspect Element” on a
template preview will give you an idea of
what structural classes are being used in
your template
Styling your modules
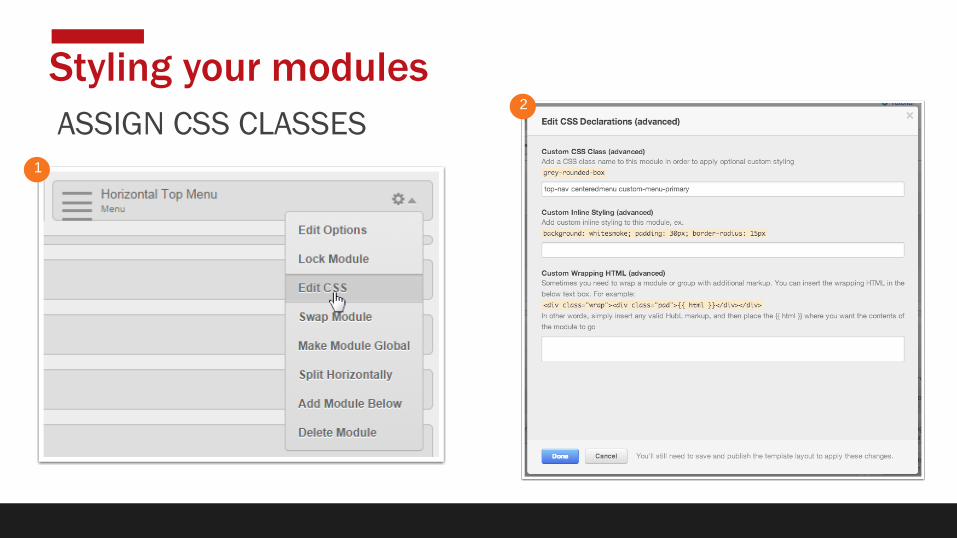
ASSIGN CSS CLASSES
Styling your modules
1
2
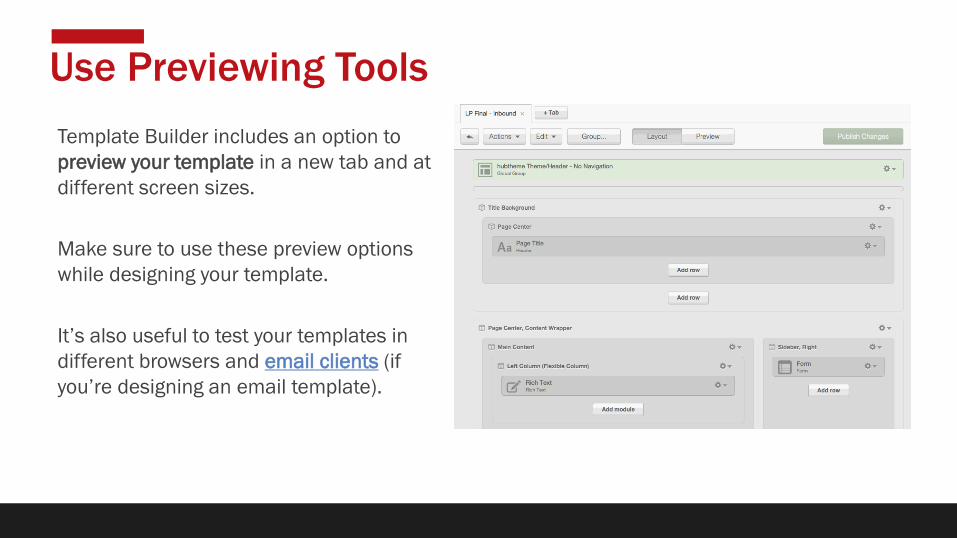
Use Previewing Tools
Template Builder includes an option to
preview your template in a new tab and at
different screen sizes.
Make sure to use these preview options
while designing your template.
It’s also useful to test your templates in
different browsers and email clients (if
you’re designing an email template).

COUNTDOWN RESOURCES
1 HubSpot Designer Documentation (and HubL Resource)
2 Odometer
http://github.hubspot.com/odometer/
3 Facewall
http://github.hubspot.com/facewall/
4 API
http://developers.hubspot.com/docs/overview
5 Free Template
1 https://marketplace.hubspot.com/templates/site-pages/flexhub-free-countdown
2
QUESTIONS?