
Fall & Winter Gardening in the Pacific Northwest, Gardening Guidebook
description
The Revolutionary Way to Grow More In LessSpace
Mel Bartholomew
MINNEAPOLIS, MINNESOTA

Contents1 Introduction
2 SFG, Newer and More Improved
3 Plan Your Garden
4 Building Boxes and Structures
5 Mel’s Mix, Essential for Square Foot Gardening Success
6 How to Plant Your All New Square Foot Garden
7 Growing and Harvesting
8 Vertical Gardening
9 Extending the Seasons
10 Special Gardens & Gardeners
11 Appendix
At A Glance Vegetables
At A Glance Herbs & Flowers
Basil and Beyond
Plant Profiles
Planting Charts
Index
Meet Mel Bartholomew

1

1Introduction
Welcome to the newly revised All New Square FootGardening. In the years since the first edition was published,I’ve continued to refine the SFG method. That’s why you’llfind more information on things like how to include children(and grandchildren!) in your SFG, how to prevent pest and
disease problems, and how to get the most of your SFG.New pictures show you SFG techniques in stunning detailand we’ve taken pains to make sure any and all questionsyou might have will be answered—even before you ask
them!

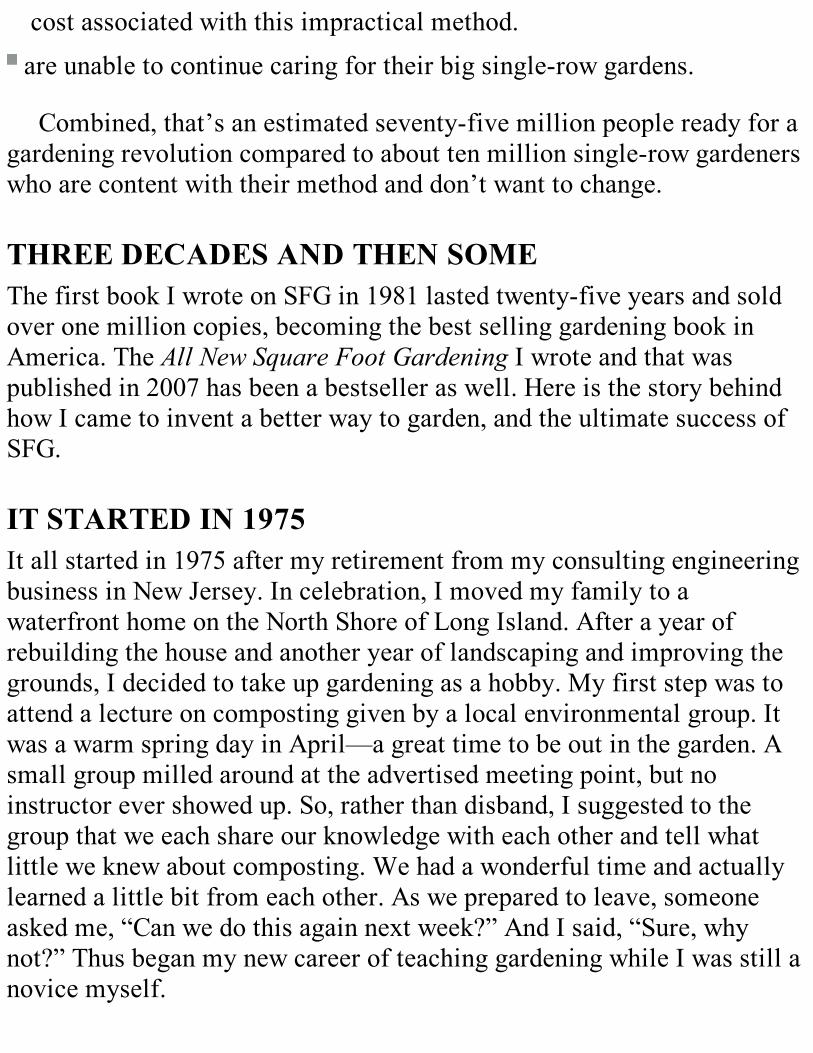
Leaf lettuce is one of the most popular SFG crops—great tasting, easy to grow, and lots of varietiesto choose from!
IntroductionThe improvements to the Square Foot Gardening method thatI’ve outlined in this book are going to save you time and effort,and ensure the success of anything you grow in your SFG box!
Why revise one of the best selling gardening books of all time? The oldsaying goes, “If it ain’t broke, don’t fix it.” Well, Square Foot Gardeningisn’t broken, but I felt that we could improve many aspects of the
Mel Bartholomew
method, explain the processes better with moredetailed photography and illustrations, make thebook more readable with a clean, updated design, andaddress issues that gardeners constantly ask me aboutsuch proper (and safe) pest control methods andgetting children involved in SFG.
In this updated book on Square Foot Gardening,you can learn, as millions of others already have,how to become a successful gardener the simple andpainless way. This easy-to-understand method willrevolutionize the way you think about gardening; and
the refinements I’ve included in this revised edition will inspire to geteven more out of SFG.
FOR EXPERTS ONLYA reporter once asked me if I thought I had invented “gardening fordummies,” referring, of course, to the popular Square Foot Gardeningmethod I developed in 1976. “No,” I answered.
Actually, when I invented the Square Foot Gardening (SFG) method, Ithought it would be for expert gardeners. My method was very preciseand detailed, yet very simple and easy to understand, and it provided allthe conditions necessary for successfully growing a broad variety ofplants in a very different way. It also eliminated all of the wasteful,inefficient practices of traditional single-row gardening. I thought theexperts would shout “Eureka!” and immediately bless all of the new ideasand advantages of this new home gardening method.
BEGINNERS UNDERSTOODAs it turned out, the experts never understood this unique method.Apparently it was too simple and easy. But the beginning gardener, andthose discouraged by previous failed attempts, understood it completely.They immediately saw the simplicity of SFG. The beginner’s instant

response was “I can do this!” while the experts continued to questionevery aspect of this revolutionary gardening method. They just couldn’tadmit that home gardening could be that easy.
TWO HOURS OR TWO WEEKSIn my lectures, I like to reassure audiences that if they are new atgardening, or perhaps afraid or overwhelmed by the idea of starting agarden, they will be able to learn this simple method of gardening in justan hour or two. However, if they are already “expert” gardeners, it willprobably take them about two weeks! After the laughter dies down, Iremind my audience that beginners readily accept the minimal amount oftechnical information needed to become successful gardeners becausethey want to know how to successfully garden.
The “experts,” on the other hand, are so entrenched with the idea ofsingle-row gardening as used in farming, with all of its wasteful methods,that they just can’t see it any other way. You might say, “They are stuckin a rut.” As a result, I’ve learned to leave the experts alone andconcentrate on the beginner, or the tried-but-failed, gardener, and eventhe afraid-to-start person.
SFG appeals to other large groups of would-be gardeners. Years ago, Iread some very interesting statistics (and I’m sure the percentages aresimilar today) about these gardeners.
75 Million vs. 10 MillionEvery year there are about fifteen million people each who:
would like to begin gardening.
tried the traditional single-row gardening method, but failed.
don’t want to begin gardening because they have heard of all the hardwork, time, and cost associated with gardening.
are doing single-row gardening but are tired of the hard work, time, and
cost associated with this impractical method.
are unable to continue caring for their big single-row gardens.
Combined, that’s an estimated seventy-five million people ready for agardening revolution compared to about ten million single-row gardenerswho are content with their method and don’t want to change.
THREE DECADES AND THEN SOMEThe first book I wrote on SFG in 1981 lasted twenty-five years and soldover one million copies, becoming the best selling gardening book inAmerica. The All New Square Foot Gardening I wrote and that waspublished in 2007 has been a bestseller as well. Here is the story behindhow I came to invent a better way to garden, and the ultimate success ofSFG.
IT STARTED IN 1975It all started in 1975 after my retirement from my consulting engineeringbusiness in New Jersey. In celebration, I moved my family to awaterfront home on the North Shore of Long Island. After a year ofrebuilding the house and another year of landscaping and improving thegrounds, I decided to take up gardening as a hobby. My first step was toattend a lecture on composting given by a local environmental group. Itwas a warm spring day in April—a great time to be out in the garden. Asmall group milled around at the advertised meeting point, but noinstructor ever showed up. So, rather than disband, I suggested to thegroup that we each share our knowledge with each other and tell whatlittle we knew about composting. We had a wonderful time and actuallylearned a little bit from each other. As we prepared to leave, someoneasked me, “Can we do this again next week?” And I said, “Sure, whynot?” Thus began my new career of teaching gardening while I was still anovice myself.
COMMUNITY GARDENThe next step was organizing a community garden for this sameenvironmental group. I found some land and convinced the town to cutdown all the weeds and fence it in. A local farmer delivered twotruckloads of well-rotted manure, and, after the ground was all fertilizedand plowed up, we laid out plots and aisles and opened for business. Allof the spaces were quickly taken by people in the community, andeveryone started with great enthusiasm. Since most of the participantsdidn’t have a garden at home and were novices, they were enthusiasticabout obtaining instruction and insights on gardening.
So I initiated a Saturday morning gardening workshop and presentedinformation on a different subject each week while everyone sat aroundon bales of hay listening. I was teaching basic single-row gardeningbecause that’s all anyone knew back then. I was busy studying andlearning gardening myself, trying to keep ahead of everyone’s questions!The local county agricultural agent helped out and everything went welluntil about midsummer. It was about then that our once-enthusiasticgardeners stopped coming out to the garden. However, the weeds keptcoming—and growing! Pretty soon the place was overgrown and looked amess.
FIRST RED FLAGI was discouraged and thought I had better do some research to figure outwhy we had failed, so I visited many backyard gardens. What I found wasa big space way out in the farthest corner of the yard, about as close to theneighbor’s property line as possible. In most cases, these individualgardens were also filled with overgrown weeds. The first red flag went upin my mind, indicating that there was something wrong with traditionalsingle-row gardening. I began to think about all the conventionalgardening practices we’d been taught and began to question the efficiencyof each.
THREE-FOOT AISLESI questioned why fertilizer is spread over the entire garden area, but theplants are only placed in long, skinny rows with 3-foot wide aisles onboth sides. I wondered why you were supposed to till up all the soil in anentire garden area when those 3-foot wide aisles consume over 80 percentof a garden area, although plants in rows require less than 20 percent ofthe garden space. Then I wondered why you would walk all over the restof the garden area again, packing down all that newly tilled soil? And,why is an entire garden area watered when plants are only located in a 6-inch wide row in the center of a 6-foot wide strip?
TOO MANY, TOO MUCHAs I analyzed these traditional gardening methods, I realized that there isonly one outcome you can expect when you fertilize and water a 3-footwide aisle with nothing planted in it—weeds!
The following is a conversation I had with a friend of mine who wasan agricultural agent.
“Why a 3-foot wide aisle on both sides of the planted row?” I asked.“So you have room to get into the garden to hoe the weeds,” he
replied.
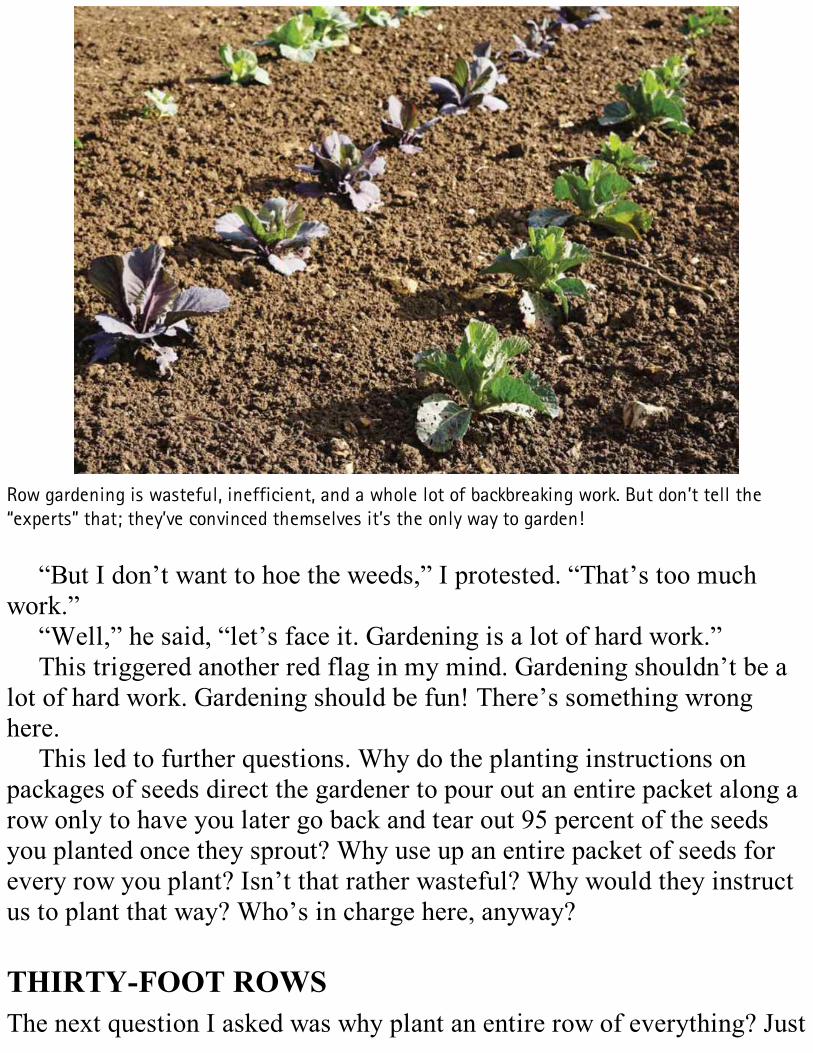
Row gardening is wasteful, inefficient, and a whole lot of backbreaking work. But don’t tell the“experts” that; they’ve convinced themselves it’s the only way to garden!
“But I don’t want to hoe the weeds,” I protested. “That’s too muchwork.”
“Well,” he said, “let’s face it. Gardening is a lot of hard work.”This triggered another red flag in my mind. Gardening shouldn’t be a
lot of hard work. Gardening should be fun! There’s something wronghere.
This led to further questions. Why do the planting instructions onpackages of seeds direct the gardener to pour out an entire packet along arow only to have you later go back and tear out 95 percent of the seedsyou planted once they sprout? Why use up an entire packet of seeds forevery row you plant? Isn’t that rather wasteful? Why would they instructus to plant that way? Who’s in charge here, anyway?
THIRTY-FOOT ROWSThe next question I asked was why plant an entire row of everything? Just
because my garden is 30 feet long, for example, do I really want or need awhole row of cabbages? That would be thirty cabbages spaced 12 inchesapart. This brings me to another commonsense revelation that no oneseems to have thought about. Why would I want thirty cabbages to ripenall at the same time? If everything is planted at one time, won’t it also beready to harvest all at once? It sounds like farming to me, but that’s toomuch to enjoy at the same time for a homeowner. How many people go tothe grocery store and buy thirty heads of cabbage once a year? Do you?So why grow it that way? There must be a better way to stagger theharvest, and the obvious solution is to stagger the time of plantingwhenever possible and to plant less.
BECAUSE THAT’S THE WAYI soon realized that I had a lot of questions with very few answers, so Itraveled all over the country seeking out the best experts: agriculturalcollege professors, county agricultural agents, garden writers, radio andTV gardening personalities, gardening publishers, book writers, gardenclubs—all those who were supposedly knowledgeable people in the fieldof gardening. I sought answers to all the gardening questions I had and,no matter where I traveled throughout the country from Maine toCalifornia, I kept receiving the same answer. Can you imagine what thatanswer was? It soon became apparent that the only reason traditionalsingle-row gardening methods continued to exist was, “Because that’s theway we’ve always done it!” Right then and there I said, “I’m going toinvent a better way to garden.”
FARMINGPart of the problem, I realized, was that single-row gardening wasnothing but a hand-me-down technique from large-field crop farming.Single rows make sense when you depend upon a mule or a tractor toplow up the soil and tend the crops because those big hooves or wheelstake up a lot of room. But why had no one ever realized that in a home
garden, there is no longer a need for all that wasted space? There onlyneeds to be room for two feet—yours! Yet, every single direction forhome gardening still instructs, “Space rows 3 feet apart.” Perhaps that’sreally the gardening method for dummies!
EFFICIENCYThe next step I took was to list all of the ineffective, inefficient, andunnecessary steps that have been consistently taught for traditionalsingle-row gardening and then find a better and more efficient way toaccomplish the same task. I should mention here that besides being acivil engineer, I was also an efficiency expert. Before I sold myengineering company, my job was to travel to construction sites ormanufacturing facilities to analyze current processes in order to identifyand correct inefficiencies in facility operations. In other words, to find abetter way. Thus, the challenge of inventing a new way to garden wasright up my alley. The sequence of questions I asked and simple solutionsI developed was actually very easy and straightforward, but it involved alittle out-of-the-box thinking. Follow me along now.
ONE THOUSAND SEEDSI have fun when teaching a class or seminar by asking, “How many seedsdo you think are in a packet of leaf lettuce?” Some guess fifty, onehundred, two hundred, and some even venture a guess as high as fivehundred seeds. I then astound them by saying that I once opened a packetand counted them, and there were well over one thousand seeds! Whyplant hundreds of seeds in one long row, and then turn around when theysprout and thin them out to one plant for every 6 inches? It doesn’t makesense, does it? It’s a terrible waste of seeds and time and work—alluseless, unnecessary work. My first solution was to lay down a yardstickand plant one seed every 6 inches. Then, I had nothing further to do andno wasted seeds. The next thought was, if you’re growing, for example,lettuce, and the seed packet says to thin plants to 6 inches apart in the

row, how far away does the next row really need to be? The answer, ofcourse, is 6 inches—not 3 feet!
SINGLE ROW, DOUBLE ROW, TRIPLE ROWEager to test my reasoning, I planted two rows, 6 inches apart, to see howwell the plants would do. It worked! The plants grew just as well in tworows as they did in a single row, as long as each plant had 6 inches allaround. Next I tried a triple row—three rows where I placed all the plants6 inches apart in all directions. Again, it worked! How wide could I makethis, I asked? The answer is, as wide as you can reach in to maintain yourgarden; in other words, as long as your arms. But I still had a harvest toolarge to utilize.
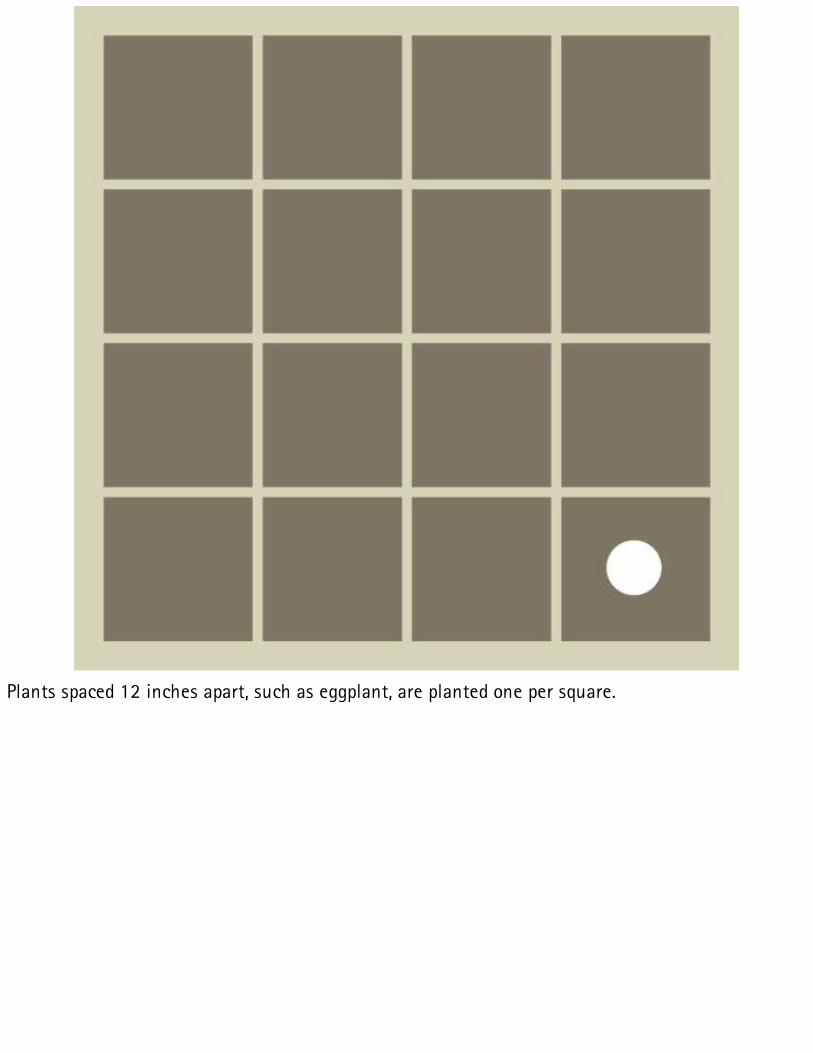
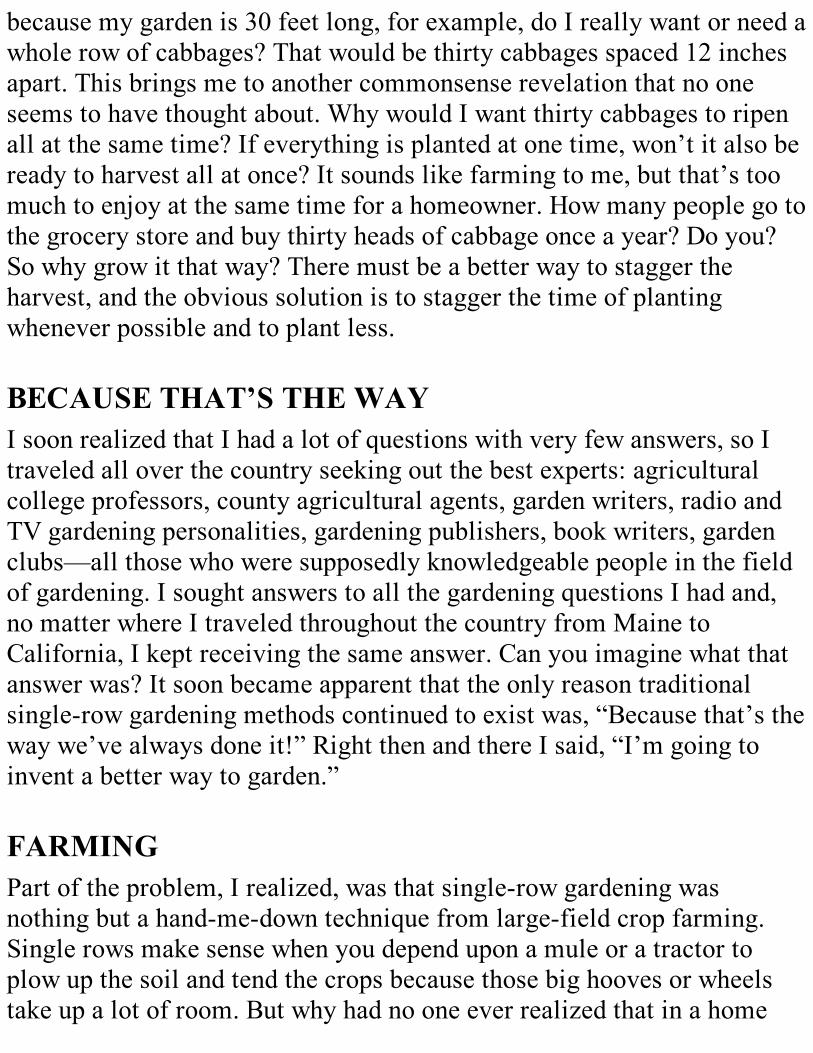
Plants spaced 12 inches apart, such as eggplant, are planted one per square.
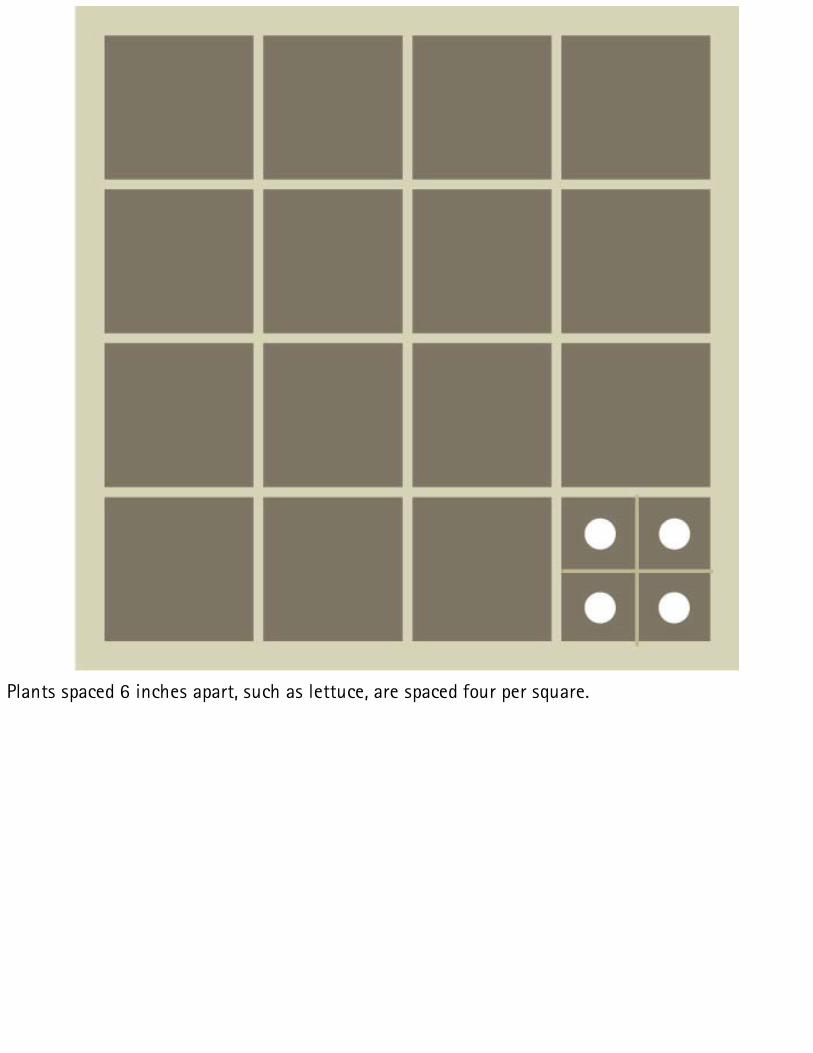
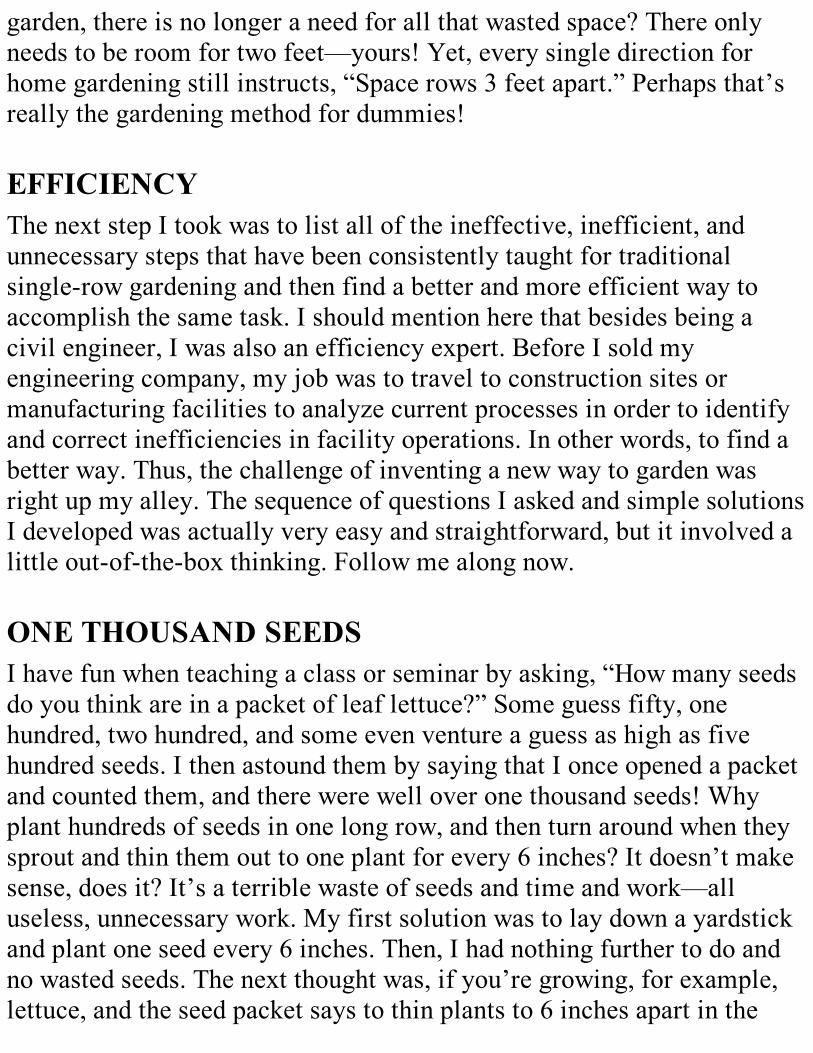
Plants spaced 6 inches apart, such as lettuce, are spaced four per square.
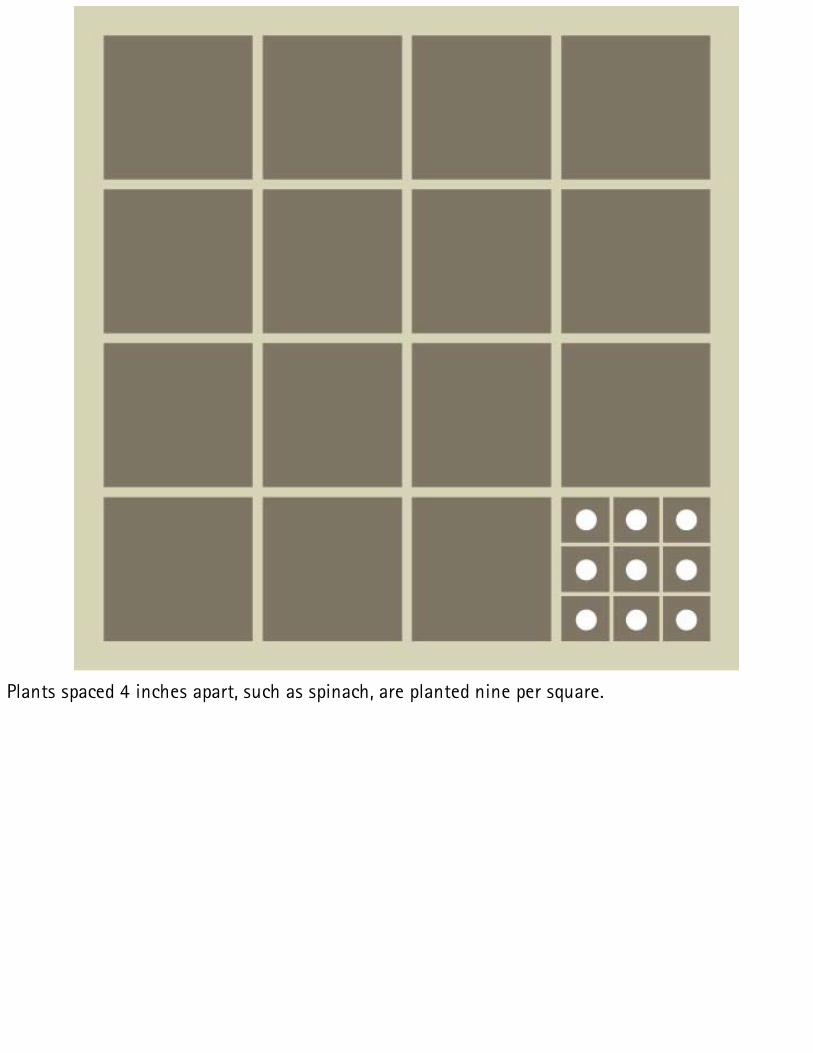
Plants spaced 4 inches apart, such as spinach, are planted nine per square.
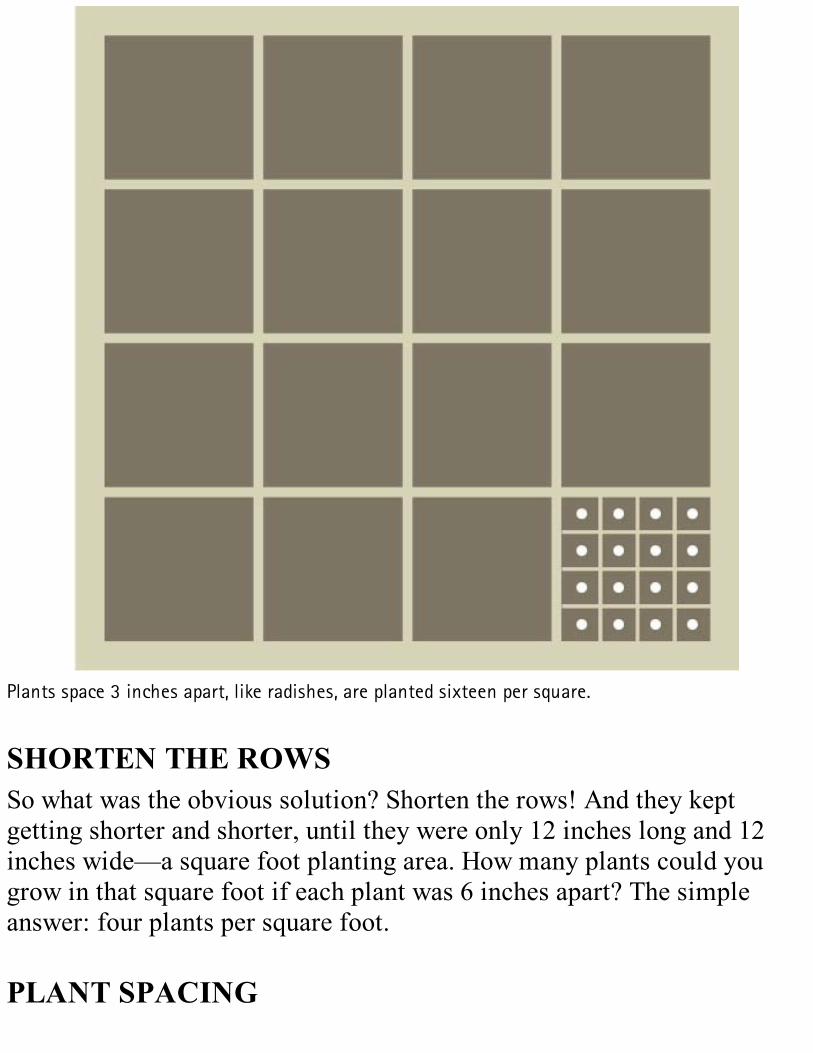
Plants space 3 inches apart, like radishes, are planted sixteen per square.
SHORTEN THE ROWSSo what was the obvious solution? Shorten the rows! And they keptgetting shorter and shorter, until they were only 12 inches long and 12inches wide—a square foot planting area. How many plants could yougrow in that square foot if each plant was 6 inches apart? The simpleanswer: four plants per square foot.
PLANT SPACING

So, in summary, if plants should be thinned to 12 inches apart, plant oneper square foot. If plants should be thinned to 6 inches apart, plant fourper square foot. If plants should be thinned to 4 inches apart then you cangrow nine within the space of that 1 square foot. If plants are thinned to 3inches apart, you can grow sixteen in that same square foot. Doesn’t it allmake sense and seem easy enough?
NEVER WALK ON SOILI then wondered just how far someone could reach in to maintain a gardenwithout compacting the soil by walking all over it. So, I got a little oldlady and a big husky man and measured how far they could easily reach. Ifound that both could comfortably reach in 2 feet without losing balance.In order to reach in 2 feet and walk all the way around your garden, youend up having a 4 × 4-foot area. Now, the only soil that needs to be dugup, improved, watered, and fertilized is a 4 × 4-foot garden area and notall the aisles. That reduced the actual growing area in the garden by 80percent. And, an added benefit is the growing soil in the 4 × 4-foot area isnever packed down, so you don’t have to hoe or dig up the ground to keeploosening the planting soil.
SOIL IMPROVEMENTThe next step was how to improve the soil. After listening to agriculturalagents and reading books on soil improvement and conditioning, the onlyoption seemed to require a great deal of work, time, and money. Myresearch indicated that average soil conditions around the country werenot well-suited for growing healthy vegetables and beautiful flowers.Thus, in most areas soils had to be greatly improved to obtain the bestgardening results.
HORSE MANUREMost soils only contain about 3 or 4 percent organic material. Thus, thetraditional first step for improving soil in preparation for gardening was
to dig or till up the soil in the entire garden as deep as you could and thenadd soil enhancers such as compost or well-rotted manure followed laterby commercial fertilizers. This initial step rang a bell with me because,as a teenager, I was the one who had to turn over my mother’s garden,digging the whole thing up every year. My father had to bring homebushel baskets full of horse manure in his brand new Chrysler. After wedumped it into the garden area, I had to do all of the spreading, mixing,and turning. As laborers in Mom’s garden every spring, my dad and Iwere not happy campers, although she was thrilled with the results.
THE SEVEN-YEAR ITCHI once conducted a survey, asking gardeners how long it took them toimprove their soil until they got it just the way they wanted it. Theaverage answer was about seven years—seven years of hard work toproperly condition the soil for gardening! And do you know whatstatistics say the average homeowner does after seven years? They move!And guess who buys that home? Someone who doesn’t even garden!
You can probably imagine the conversation between the newhomeowners. “Henry, let’s pave over that garden area; it would make agreat place to park the trailer.” Seven years worth of effort lost. There’ssomething definitely wrong with this scenario.
START RIGHT IN A SINGLE DAYI started thinking, “Why not have great soil during the first year of yourgarden, and every year thereafter, no matter where you live?” Of course,with traditional big garden areas, having the best soil conditions rightaway may be too costly and entail too much time and effort. Rememberthat after I did the math, I found that by switching from a traditionalsingle-row garden to a 4 × 4-foot layout—which will produce the sameharvest—80 percent of the garden area could be completely eliminated.This means that you can grow 100 percent of the harvest in only 20percent of the space. That 80 percent of a single-row garden is wasted
space—space that doesn’t need to be fertilized, watered, or improved, butit does have to be weeded. Think of it. With the SFG method, seven yearsworth of work can suddenly be condensed into as little as a single daywithout all the effort!
THE 4 × 4-FOOT GARDENMy first book showed how you could reduce the work by laying out a 4 ×4-foot area, then digging out 6 inches of existing soil and mixing in 2inches of peat moss, 2 inches of vermiculite, and 2 inches of compost.These ingredients are available at any nursery. Many gardeners evenmake their own compost at home from kitchen scraps and other plantmaterial. Mixing the ingredients together with the soil that you removed,you now have 12 inches of 50 percent improved soil. My thinking wasthat 12 inches of improved existing soil would be all that new plantswould need to thrive with the plant roots staying within these 12 inches ofimproved soil. But the experts I consulted said that most vegetable plantroots need to keep growing downward, searching for water and nutrientsmany, many feet below the surface of the soil. “But,” I thought, “if plantsare provided a good growing soil composed of more than 15 percentorganic matter, and if vermiculite and peat moss are mixed in, helping toretain water in the soil, plant roots would no longer need to continuegrowing downward in search of additional moisture and nutrients.”Besides that, I wondered if they were right about the roots needing togrow deeper than 12 inches, how come most rototillers dig down less than6 inches? Well, it turned out they were wrong. Our gardens thrived withless than 12 inches of improved soil and that was just the beginning! Waituntil you read Chapter 2, which describes the latest advances in this “outof the box” type of thinking.
STAGGER THE HARVESTI also realized that if each square foot could be planted with a differentcrop containing either one, four, nine, or sixteen plants, all properly
spaced, it wouldn’t be necessary to plant a whole row of just one crop. So,why not stagger your vegetable plantings, so that your harvest is alsostaggered? Makes sense, doesn’t it? Yet we’ve been taught all our lives toplant everything all at once in long rows—another hand-me-downtechnique from large-field crop farming. If you’re farming forcommercial purposes, you want everything to ripen at once so it can beharvested together and taken to market. But with home gardening, youwant to stagger your produce so you can use it throughout the season fordaily consumption.
Of course, I’m not talking about canning, freezing, and other home-storage measures, although SFG is a practical gardening method for thesepurposes also. However, I’ve found that people are not storinghomegrown produce to the extent they did in the past. Remember, I grewup in the days of the “victory garden,” a result of World War II whenAmericans were encouraged by the government and by society to have abig garden that used the old single-row planting methods. Most peoplewho grew up during those years hated gardening because of all theweeding and hard work it entailed. That carried over into a wholegeneration of people who stayed away from gardening just because of thenegative memories associated with maintaining a large traditionalgarden. And, I might add, also from all the work of canning and freezing.So why does the government still teach the same old system more thansixty years later?
STOP PLANTING SO MUCHI meet many mature couples where the husband proudly states, “I have abig single-row garden, and I grow a lot of produce.” And the womanresponds, “Oh, but I wish he’d stop. He grows all this produce that wereally don’t need anymore. Then I have to can and freeze it. I’m tired anddon’t want to do it anymore. We don’t need it but he just keeps growingit!” With SFG, you don’t have to grow so much at a time that it becomesoverwhelming.
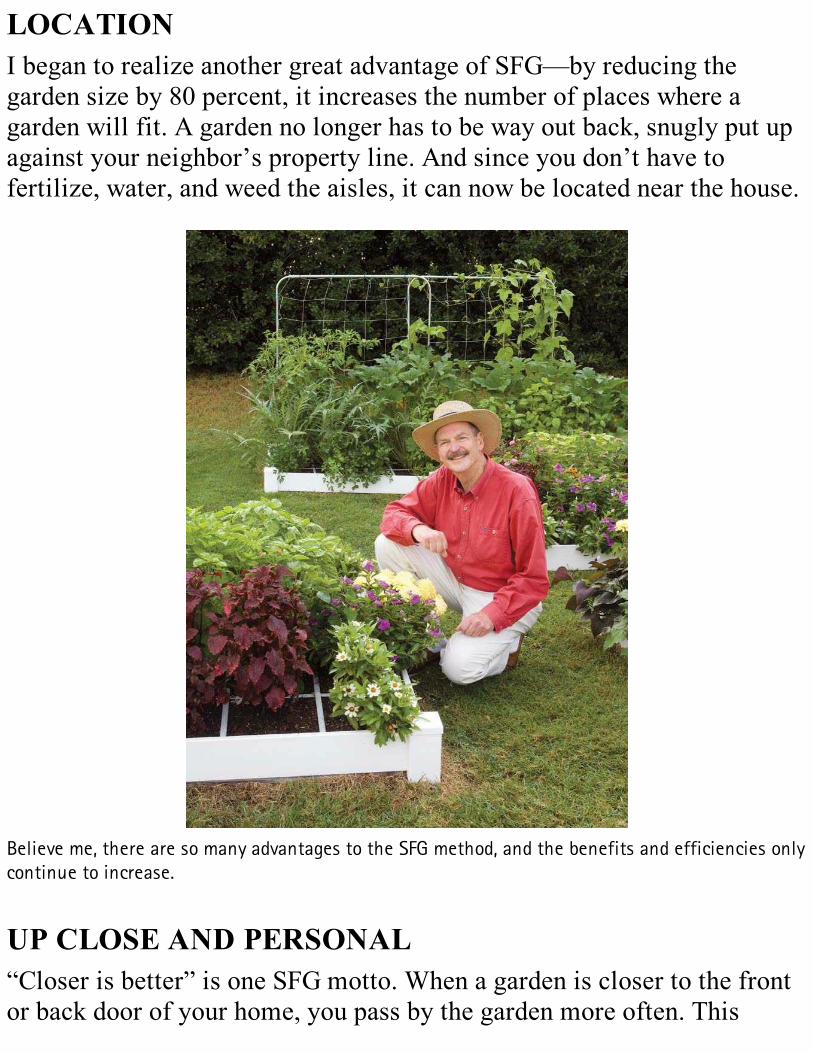
LOCATIONI began to realize another great advantage of SFG—by reducing thegarden size by 80 percent, it increases the number of places where agarden will fit. A garden no longer has to be way out back, snugly put upagainst your neighbor’s property line. And since you don’t have tofertilize, water, and weed the aisles, it can now be located near the house.
Believe me, there are so many advantages to the SFG method, and the benefits and efficiencies onlycontinue to increase.
UP CLOSE AND PERSONAL“Closer is better” is one SFG motto. When a garden is closer to the frontor back door of your home, you pass by the garden more often. This
means it is easier to take care of and can be more readily enjoyed, all ofwhich results in a better garden and a happier gardener. The wholepackage fits together nicely. There are so many advantages to SquareFoot Gardening, and the benefits and efficiencies of the concept onlycontinue to increase.
THE SQUARE FOOT GARDENING STORYCommunity GardenWell, we tried all these new ideas in the community garden the next year,and, guess what? They worked! Everyone understood and grasped theSquare Foot Gardening concepts quickly and easily, and since most of theparticipants were beginning gardeners who were well acquainted with thedisastrous experience from the previous year—including the overgrownweeds and mounds of zucchini and rows of cabbage that ripened all atonce—they were very willing to try another option. That next year, 1976,we were able to enjoy a very attractive and well-run community gardenusing the newly developed Square Foot method. The Bicentennial year of1976 was a huge celebration across the country and we also celebratedmy youngest son’s July Fourth birthday. I decided to do three things: onefor my country, one for my family, and one for myself. The officialpresentation of Square Foot Gardening was made at a hometown eventthat included a school project that I had organized. All the schools grewsunflowers, which were planted along Main Street as a beautificationproject. We had an all-day celebration of displays, talks, booths, anddemonstrations on the new Square Foot Gardening method I haddeveloped. I announced this was my gift to the country—a better way togarden.
Sharing Ideas, 1978 to 1980Because of the overwhelming success of the project and the unique SFGmethod, many people encouraged me to write a book sharing my ideas.First, the local newspaper asked me to write a garden column. Then I
began writing and producing pamphlets. Soon, magazine representativesstarted coming out to photograph my home garden and to write storiesabout my new ideas and the SFG method. The media attention grew andgrew, so I thought, “Why not write a book?” I drafted an outline and sentit to two publishers, which both accepted the “how to” book on successfulgardening using the new SFG method.
Garden Consulting, 1981 to 1984At the same time, I also began doing gardening consulting work forseveral companies. You can imagine how “retired” I was now. One was afence company, and, using their products, I began to develop verticalgardening methods, originally for tomatoes but later for all vine crops.Another company wanted to start a gardening tool catalog. So my job wasto search the world for unique and unusual tools, test and evaluate them,make recommendations, and then arrange the writing of sampledescriptions for the catalog. During this time, I wondered why we neededso much stuff just to garden. And, as you’ll learn, I discovered that youdon’t.
PBS One Minute, 1981 to 1986My publisher’s predictions for my book were very modest, so they didn’tpromote my book the way I had hoped or even send me out for talks andappearances. Fortunately, some of the companies I was consulting for didsend me on tours and allowed me to show the book and talk about SquareFoot Gardening if I also explained and demonstrated their products. Thisproved to be a very valuable and rewarding period, and it wasn’t longbefore a local PBS television station asked if they could send theircamera crew out to my garden to shoot “A Minute in Mel’s Garden”segment for the evening news. I was delighted to have the opportunity toshare the SFG method. The response to that short segment was explosive.The television station received so much mail and so many telephone callsthat they wanted to tape a show for broadcast every weeknight. So, once a

week they came to my garden and taped five different segments. Thatagain proved so popular that later they asked if I would be interested in a30-minute national show. You bet I was!
Thirty-Minute PBS TV Series, 1982 to 1986To make a long story short, my show aired the following year on PBS andwas picked up by enough stations along the East Coast to pay for itself.The following year I started my own production company and distributedthe 30-minute Square Foot Gardening show throughout the entire PBSsystem. Within three years it was picked up by every PBS station in thecountry and received the highest rating of any garden show. This involveda lot of travel, but it was all very exciting. My oldest son, Steve, becamethe show director, and we traveled around the country to differentviewers’ gardens that were particularly worthy of sharing with ouraudience. We were also invited to Disney World to shoot during thewinter, an opportunity we couldn’t pass up. All of this excitement andactivity made it a very rewarding and exciting period of my life.
“Your method has given me the confidence to try veggiesagain after a few feeble attempts.”– Anne from Florida
More Television OpportunitiesIn addition to all the above activity and travel, many other opportunitiesoccurred with TV networks like CNN out of Atlanta, Georgia, CBN inVirginia Beach, Virginia, and several appearances on ABC, GoodMorning Boston, Good Morning Philly, and many other TV spots allaround the country. All of that brought in a ton of mail (whoever hadheard of e-mail back then?) and activities with companies interested in

developing SFG products including some big companies such asRubbermaid. This was exciting and eventful, yet at times stressful andexhausting. Since such a big part of gardening is in the harvest and foodpreparation, I convinced PBS to let us have the first cooking segment on agarden show. Now, of course, they all do that.
TV Book TagI originally offered the program to PBS free of charge if they would giveme a one-minute book tag at the end of each show. At that time, PBS wascommercial-free and had no corporate sponsors. But they were finallyconvinced that it would be worthwhile, allowing me to be the first personto have a book tag on a PBS show. As a result, a tremendous number oforders for the SFG book were received. We had to set up a toll-freenumber and a fulfillment company to process these orders. After sixyears, the operation became fairly routine and the challenge of creatingsomething new was over. At the same time, some PBS stations startedtalking like they should share in the profits of the book sales, yet theystill wanted the show free. Rather than compromise the initial agreement,I decided to take the show off the air and retire for the second time. Thistime, my retirement was “for sure.”
Discovery Network 1989 to 1991A few years later, an agent came to me and said that he could get the TVshow back on the air. I didn’t want anything to do with it; I was happilyretired. But when he offered to do all the work and take care of all thedetails, I thought, “Well, what harm could there be?” (We never learn, dowe?) I finally agreed, and he sold the show to the Discovery Networkwhere it ran for two years and then on The Learning Channel for anotheryear. I again took the show off the air. I decided that that was it—I reallywas retiring for good! (Yeah, sure!)
California Schools, 1996
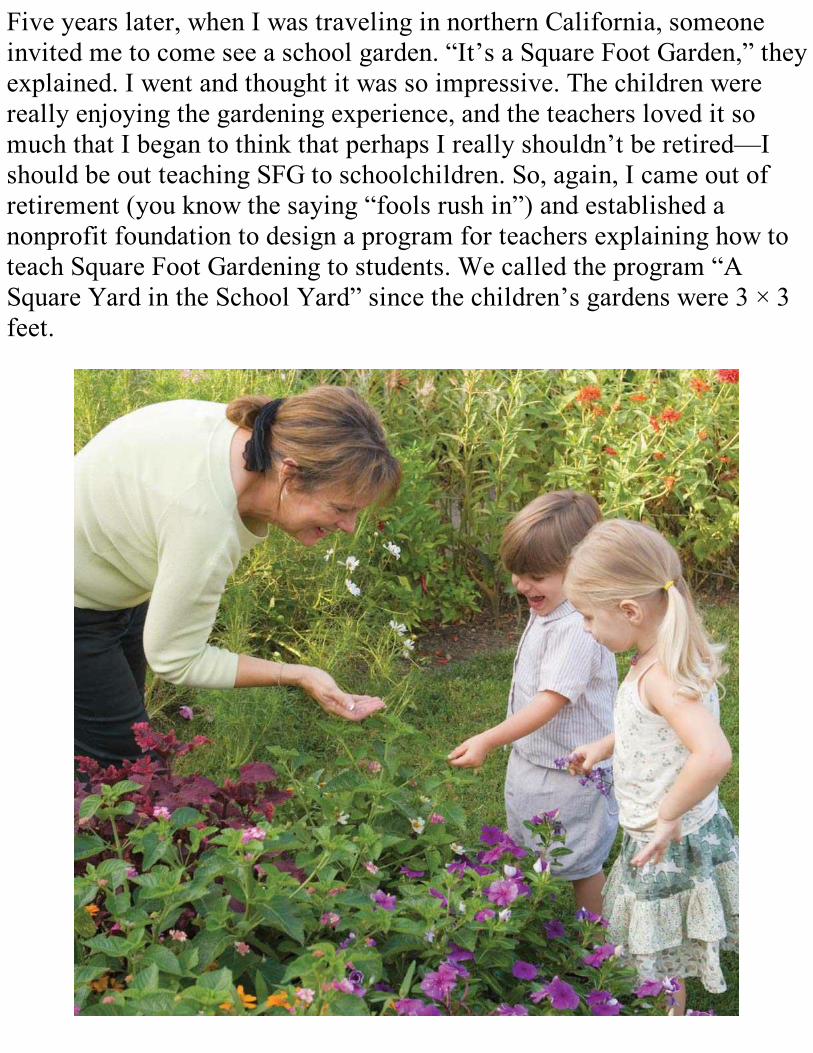
Five years later, when I was traveling in northern California, someoneinvited me to come see a school garden. “It’s a Square Foot Garden,” theyexplained. I went and thought it was so impressive. The children werereally enjoying the gardening experience, and the teachers loved it somuch that I began to think that perhaps I really shouldn’t be retired—Ishould be out teaching SFG to schoolchildren. So, again, I came out ofretirement (you know the saying “fools rush in”) and established anonprofit foundation to design a program for teachers explaining how toteach Square Foot Gardening to students. We called the program “ASquare Yard in the School Yard” since the children’s gardens were 3 × 3feet.

One of the great features of SFG is how easy it is for children (of all ages!) to participate.
Utah Schools, 1998This phase of my life also involved a lot of travel. As I developed newstaff members, we went from school to school donating gardens all theway from Maine to Florida and on to the California coast. When offeringSquare Foot Gardening to schools in Utah, we tried something new.Rather than going from teacher to teacher and school to school, we wentstraight to the state board of education. They liked our idea so much thatthey said, “We’ll take a garden for every single grammar school in thestate of Utah.” We gulped and said, “Well, let’s see what we can do.”
Thanksgiving Point, 1999 to 2001Over the next two years, we were able to do just that. Next, the schoolboard asked if I would write a lesson plan for Utah teachers and students.I did, and it has now been modified for home schooling as well. We werethen invited to put up a public display Square Foot Garden atThanksgiving Point near Salt Lake City. Thousands visited the gardenand, since Salt Lake City is home to the Church of Jesus Christ of Latter-day Saints (the LDS church or Mormons), SFG gained the attention ofmany LDS church leaders. They invited the foundation to teach SFG atthe LDS Missionary Training Center in Provo, Utah. We showedmissionaries how to instruct people living in Third World countries touse the Square Meter Gardening method, which we had converted fromthe Square Foot Gardening method.
Opportunities for the SFG foundation just kept on growing as webecame involved with additional humanitarian organizations that sent aidoverseas, many of which began including the Square Meter Gardeningsystem in their programs. SMG was designed to appeal to families inThird World countries and improve nutrition by adding fresh vegetablesto their diets. It is something that can be readily done, as the soil that isused in this program is pure compost since peat moss and vermiculite is

either unavailable or too expensive to obtain overseas. An addedadvantage is that making compost cleans up the environment and gets allthe family members involved.
SFG International Training Center in Homestead, FloridaBecause gardening in Utah is at a standstill all winter, the logicaldirection to go that time of year is south. Through our work with severalinternational organizations headquartered in Washington, D.C., theopportunity came to spend the winter in southern Florida where we set upan SFG International Training Center in Homestead. This proved veryeducational for us because the weather, plants, and techniques were muchmore like Central and South America. We provided a three-day trainingseminar for the people heading to those countries as representatives ofvarious humanitarian organizations. This enabled Square MeterGardening to be taken to quite a variety of people and places.
OverseasWhen working with people overseas, the first step is to teach themcomposting. Since most Third World countries are located in tropicalregions of the world, it’s very easy to find materials that can be used togenerate compost. One of the biggest successes in Square MeterGardening is a project developed in India. It illustrates how easy it is tooffer meaningful foreign aid to countries without spending millions ofdollars. This success story began after a priest named Father Abrahamreceived the Square Foot Gardening book. He read it and said, “We cando this!” As a result, he now operates a sizeable, well-organized 6-acretraining center where hundreds—perhaps thousands— of people havecome to learn the Square Meter Gardening method. The people arelearning to successfully grow crops they can not only use at home but cantake to market where they earn twenty times more than they didpreviously growing crops the traditional single-row way.

Single Rows Throughout the WorldBelieve it or not, many people around the world still garden and growcrops in single rows. When I was in the mountains of Nepal, I observedthe farmers growing corn one spindly stalk spaced 1 meter(approximately 3 feet) apart from the next spindly stalk, with the nextrow 1 meter away. Through the interpreter I asked why they space andplant their crops this way. The answer, as you can probably guess, was“That’s the way we’ve always done it. My father taught me, and that’s theway his father taught him.”
Just think of all the good that will be accomplished when SMG isadopted all over the world. It will allow families to improve their healththrough better nutrition. The woman of the family is our primary targetfor this project, as she is most concerned with the children’s nutrition.
Certified SFG InstructorsWe hold workshops to train SFG instructors and people who want to helpothers learn this simple, easy, inexpensive method that anyone, anywherein the world can do. Just think—what if every woman in the world startedjust one SMG? Those nine crops could improve the nutrition of herchildren; many could even expand by planting more gardens for largerharvests and even to grow cash crops. One of our trainees who took ourcourse for certification then went on a mission to teach schoolchildrenmusic at orphanages in an African country. At the same time, she startedmany SFG projects; her stories of success were heartwarming andinspiring.
Garden of EdenAfter enjoying three very productive years with our SFG Display Gardensat Thanksgiving Point, Utah, we had to make a decision becausedevelopers were going to build a new building where our gardens werelocated. Rather than move the gardens to another location, I decided itwas time to get away for a sabbatical to do some planning and writing
and discovered the beautiful, small mountain community of Eden, Utah. Iintended to only stay and write for a few months. Knowing I would needsome clerical help, I placed an ad in the local newspaper and received anoverwhelming response from people wanting to help with SFG. Thoseinitial few months stretched into years, and Eden became anappropriately named home base for spreading SFG throughout the world.
SFG, ImprovedBy 2005, I had made enough changes to the SFG method that it merited awhole new book. I subsequently collected those improvements to themethod in the All New Square Foot Gardening book, published in 2007.This meant training a whole new crop of teacher/instructors in the newmethods, and getting the word out about the changes. I developed waysfor the disabled and elderly to have their own Square Foot Gardens, tomake your SFG even easier to tend, and other substantial improvements.
I’ve traveled far and wide, both in America and abroad, to spread theword of the new and improved Square Foot Gardening. And there’s a lotleft to do.
Most recently, we’ve expanded the line of readymade SFG productswe’re offering through the Square Foot Foundation’s website andretailers nationwide. These products—such as pre-fabricated boxes andpremixed Mel’s Mix—make it easier than ever to start your SFG.
Now it’s come time to refine SFG. We’ve introduced a whole newlook to the book with pictures that better illustrate the fine points ofbuilding and working with your Square Foot Garden. I’ve addedinformation on Square Foot Gardening with children, and some greatpointers on how to deal with pests and diseases in your SFG. This fine-tuning makes sure that the SFG method just keeps getting better andbetter.
Victoria Boudman
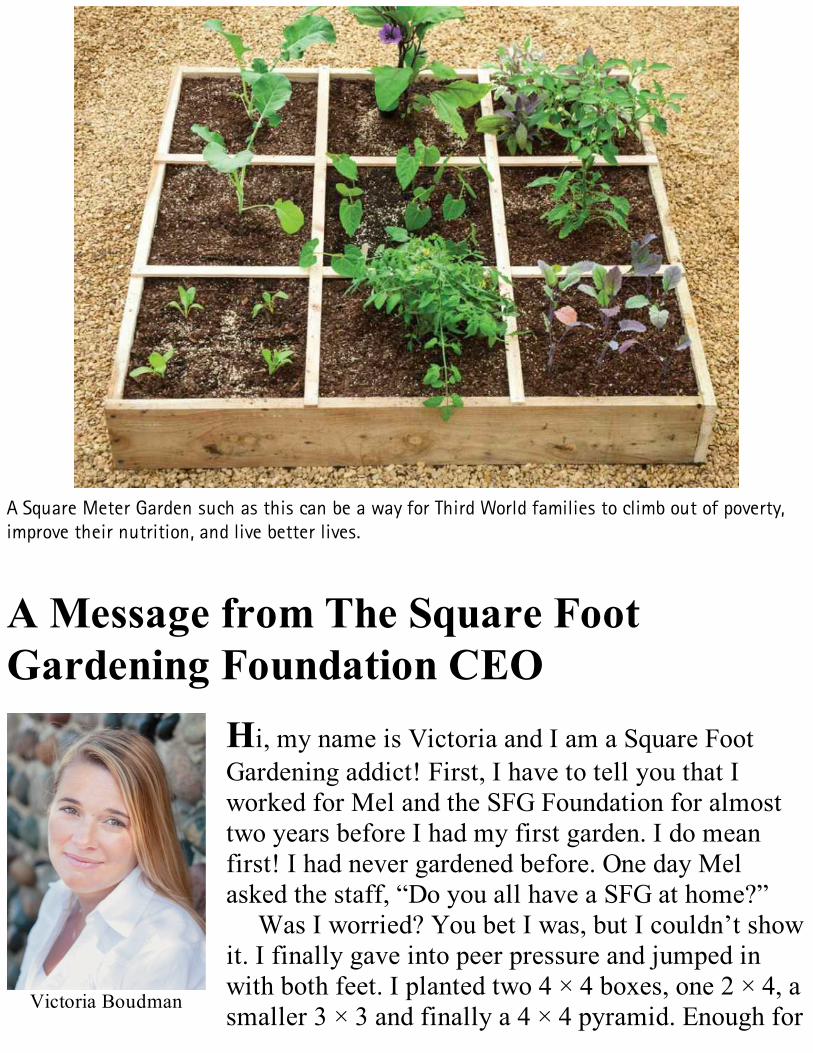
A Square Meter Garden such as this can be a way for Third World families to climb out of poverty,improve their nutrition, and live better lives.
A Message from The Square FootGardening Foundation CEO
Hi, my name is Victoria and I am a Square FootGardening addict! First, I have to tell you that Iworked for Mel and the SFG Foundation for almosttwo years before I had my first garden. I do meanfirst! I had never gardened before. One day Melasked the staff, “Do you all have a SFG at home?”
Was I worried? You bet I was, but I couldn’t showit. I finally gave into peer pressure and jumped inwith both feet. I planted two 4 × 4 boxes, one 2 × 4, asmaller 3 × 3 and finally a 4 × 4 pyramid. Enough for

my whole family. I went hog wild, and laid down a weed mat and placedthe boxes down. I filled them all with the prebagged Mel’s Mix andadded my grids. It was that simple and I was now hooked. It was so easy.Of course I had no idea what I was doing. I was nervous. Would I be ableto grow anything? What would people say if they found out that Mel’srighthand gal could not grow anything?
Oh the horror of it all! It kept me awake that first spring season.Not to worry—everything produced. The tomatoes and green peppers,
the strawberries and radishes, the chiles and flowers. I even grew heads oflettuce, not just the leaf varieties. That fall I was able to show off mySFG to a class of our Certified Instructors in training. The thrill and rushof the success was astonishing. It just about grew itself. It was then that Irealized that anyone could grow a Square Foot Garden. If you have anydoubts whatsoever, read this book and you will join millions of otherswho say, “I can do this.” After all, this is the largest selling garden bookin America.
Victoria BoudmanCEOThe Square Foot Gardening FoundationSFG Foundation
THE SFG FOUNDATION AND MEL’S MISSIONMel Bartholomew founded the Square Foot Gardening Foundation, a501(c)3 nonprofit in 1996 to pursue the mission of solving world hungerby teaching people around the globe how grow enough food forthemselves and their families, with limited resources, expertise, time andeffort. Mel and the Foundation have executed that mission with zeal sincethe opening of this century. They began by developing the school-basedprogram “A Square Yard in the School Yard,” and the Foundationcontinues to promote and spread Square Foot Gardening in schools acrossthe country. The method serves as an excellent way for students andyoung people everywhere to learn about math, science, botany, nutrition,and other academic subjects, as well as discovering how to become

independent.But Mel and Foundation didn’t stop there. They have traveled to
Africa, South America, India, and beyond. The idea has been to teach andspread the “Square Metre Gardening” method, an international adaptationof the Square Foot Gardening method.
This has involved a twofold approach, including teaching and trainingindividuals as instructors who can spread the SMG method throughoutthe world, and working directly with non-governmental organizations andother nonprofits to go right to where we’re needed most. Mel himself hastaught large groups in El Salvador, India, and Europe among many otherinternational locations.
SMG instructors have made their way to Mexico, where they put in akitchen garden for an orphanage teaching the children there how to beself-sufficient and eat well despite having few resources. One instructorwent with her daughter to Kenya, where they launched the SMG methodwith a church garden. Others traveled to Peru to work with governmentofficials in spreading the method among villages there. The stories go onand on, and many of these instructors travel on their own dime, withoutmuch in the way of acknowledgment or reward other than knowing thatthey are changing the world.
The Square Foot Foundation’s programs aren’t focused just overseas.As effective and helpful as SMG has been in foreign countries, thefoundation also spreads the word of Square Foot Gardening throughoutAmerica, in communities where the poor can learn to help themselves,feed their families nutritious and delicious meals, and possibly even earnmoney from their own SFGs. Mel and the Foundation have worked withcommunities across America to launch community gardens and teachindividuals from the homeless to the impoverished the benefits of SquareFoot Gardening.
And it’s not just the people the Foundation is helping. The SquareMetre and Square Foot Gardening methods save precious resources andhelp in the fight against climate change. These are low-cost, low-effort,space-saving methods of gardening that can be instituted just aboutanywhere, with a bare modicum of resources.

Because of its rapid expansion and extensive humanitarian programs,SFGF now reaches out to partnerships, individual and corporate donors,and grants as sources of additional funding to help sustain its global andlocal initiatives. Although the Foundation has many achievements to itscredit already, it looks to a future full of opportunities to fulfill itsultimate goal of ending—not just reducing—World Hunger. You canlearn more about the Foundation, its work and programs on the websitehttp://www.squarefootgardening.org/.

2
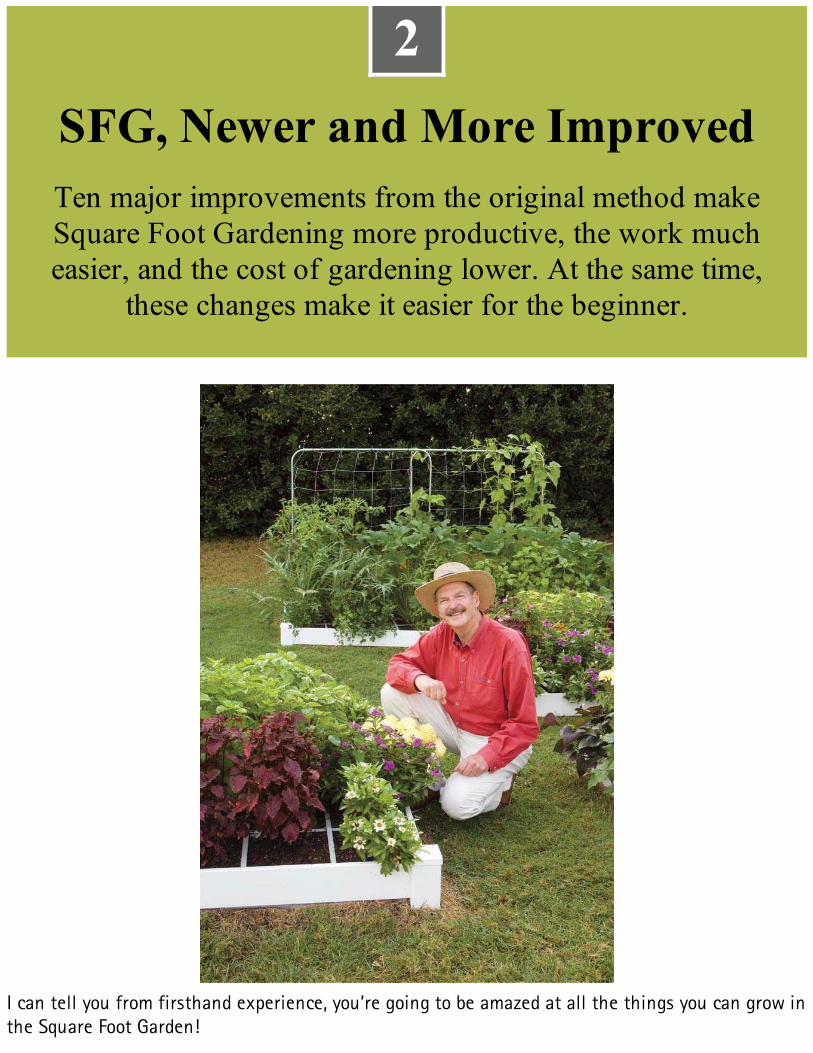
2SFG, Newer and More ImprovedTen major improvements from the original method makeSquare Foot Gardening more productive, the work mucheasier, and the cost of gardening lower. At the same time,
these changes make it easier for the beginner.
I can tell you from firsthand experience, you’re going to be amazed at all the things you can grow inthe Square Foot Garden!
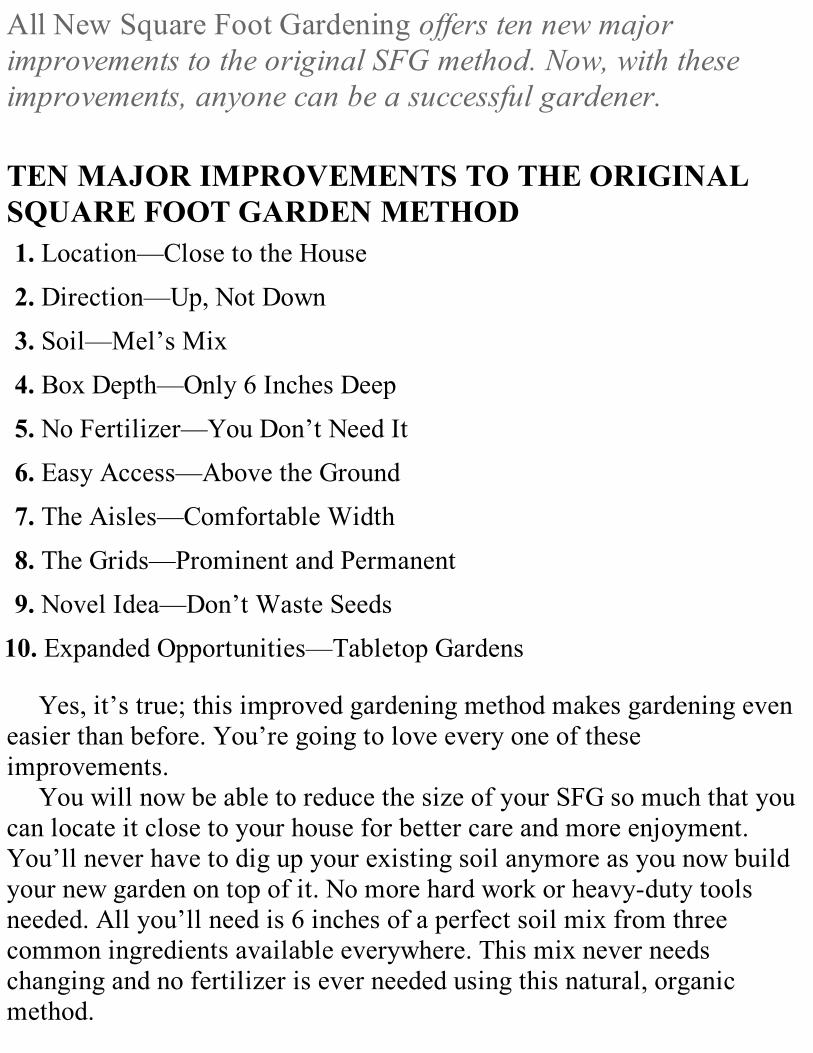
All New Square Foot Gardening offers ten new majorimprovements to the original SFG method. Now, with theseimprovements, anyone can be a successful gardener.
TEN MAJOR IMPROVEMENTS TO THE ORIGINALSQUARE FOOT GARDEN METHOD1. Location—Close to the House
2. Direction—Up, Not Down
3. Soil—Mel’s Mix
4. Box Depth—Only 6 Inches Deep
5. No Fertilizer—You Don’t Need It
6. Easy Access—Above the Ground
7. The Aisles—Comfortable Width
8. The Grids—Prominent and Permanent
9. Novel Idea—Don’t Waste Seeds
10. Expanded Opportunities—Tabletop Gardens
Yes, it’s true; this improved gardening method makes gardening eveneasier than before. You’re going to love every one of theseimprovements.
You will now be able to reduce the size of your SFG so much that youcan locate it close to your house for better care and more enjoyment.You’ll never have to dig up your existing soil anymore as you now buildyour new garden on top of it. No more hard work or heavy-duty toolsneeded. All you’ll need is 6 inches of a perfect soil mix from threecommon ingredients available everywhere. This mix never needschanging and no fertilizer is ever needed using this natural, organicmethod.
You’ll use bottomless boxes made from common lumber, have aislesthat are wide enough to comfortably move about in, and each box willhave a permanent grid for that unique SFG look and use. You’ll use aminimum of seeds, so you won’t have to buy new packets every year.Best of all, some of your boxes can have bottoms so you can move themor place them at tabletop or railing heights for easier care and uniquelocations.
1 LOCATION—CLOSE TO THE HOUSESingle-Row Gardens Are Too BigOne of the biggest problems of single-row and bed gardens is their size.They’re big! They take up so much room that they are usually locatedway out back. That usually meant it was out of sight, resulting in out ofmind. It became less and less tended as the year went on. But, guess whatstill grew? Weeds! And these pesky plants can quickly inundate andchoke out your crops. Without your attention they’ll take over the garden.
No MoreAll that has been changed for the better. SFG takes only 20 percent of thespace of a single-row garden. That means it can be located much closer tothe house where it will get more attention and care, resulting in a better-looking garden and a more usable harvest.
Split It Up for Best LocationIn addition, your garden doesn’t have to be all in one place. You nolonger have to rototill or water one big garden area all at once. You cansplit up your SFG so that a box or two are located next to the kitchendoor, while more boxes can be located elsewhere in the yard. Small,individual garden boxes allow you much more flexibility in determininglocation. Now your garden can be located near where you walk and sit, orwhere you can view it from the house. It can even be located in a patio or
pool setting, where you relax. Your SFG becomes a companion ratherthan a burden.
2 DIRECTION—UP, NOT DOWN!Build Up, Don’t Dig DownThe second improvement involves locating your garden on top of yourexisting soil rather than digging down. Most of our readers complainabout the terrible soil in their areas. In fact, as I lecture around thecountry and the world, the question I hear most is, “What can we do aboutour local soil? It is so hard to work and garden in.” The first Square FootGardening book I ever wrote directed gardeners to dig down 6 inches andimprove their existing soil by adding equal amounts of really goodingredients. Even though you had to do that only the first year and itproduced a fairly good soil, people complained that it was still a lot ofwork involving heavy tools and a great deal of effort. Everyone wants asimple, easy way to garden. So, back to the drawing board.
This got me to thinking. Could I find a better way? So, I asked myself,why do we really need to improve our existing soil if it’s so bad?Couldn’t we just start with a perfect soil mix aboveground and eliminatethe need to ever dig up or improve our existing backyard soil? Youprobably could if your garden wasn’t so big . . . but hey, SFG isn’t big. Infact, it’s one-fifth the size of conventional gardens. So, if we could find aperfect soil mix, there would be no more digging and no more tilling.Doesn’t that make a lot of sense? It became possible with All New SquareFoot Gardening to have a very condensed no-work gardening method andnever have to be concerned again about what kind of soil you have inyour yard. Wow!
No SweatJust think of the implications if you forget about trying to improve yourexisting soil. It no longer matters what kind of soil you have! Use thetime you save to start a compost pile instead. If you start with a perfect
soil mix, it will save a lot of time and money. You don’t have to haveyour soil analyzed anymore, and you don’t have to have a pH test made . .. you don’t even have to know what pH is! You don’t have to buy anyheavy tools or go to the expense of having someone rototill your gardenevery single year. You don’t have to buy special ingredients to loosenyour clay soil or solidify your sandy soil. And most importantly, you nolonger have to do any hard work. You’ll have to find another way to getsome exercise—so go mow the lawn. This major advance in homegardening changes all of the rules of gardening and eliminates all of thehard work and undesirable parts of single-row gardens. Hey, gardeningcan be fun now!
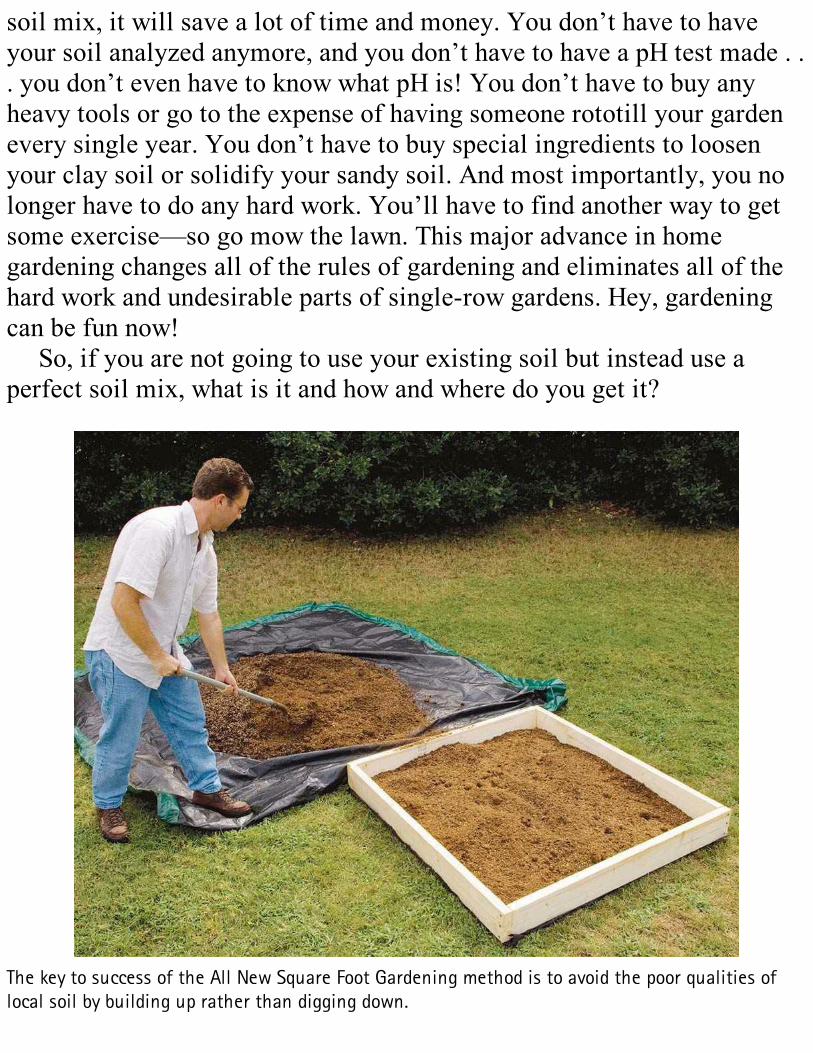
So, if you are not going to use your existing soil but instead use aperfect soil mix, what is it and how and where do you get it?
The key to success of the All New Square Foot Gardening method is to avoid the poor qualities oflocal soil by building up rather than digging down.

3 SOIL—MEL’S MIXWhat’s In It?There are three characteristics of a perfect growing mix. First of all, it’slightweight, so it is easy to work with and easy for plants to grow in.Next, it is nutrient-rich and has all the minerals and trace elements thatplants need without adding fertilizers. Finally, it holds moisture, yetdrains well.
After many experiments, I found that three of my favorite ingredientsmade the perfect mix when combined in equal portions:
1/3 Peat Moss—Available at any garden center or supermarket.
1/3 Vermiculite—Buy the coarse grade in large 4-cubic-foot bags at anygarden center or home improvement store. Phone ahead to be sure it’savailable in that size.
1/3 Blended Compost—If you don’t have your own compost operation,then buy bags of compost at the garden center to get started. Then, startyour own compost pile as soon as possible. I’ll explain some simplesteps for foolproof composting later in the book. However, one word ofcaution here: You must have a blended compost, so don’t buy all thesame kind. Pick out one bag of this and one bag of that. But, moreabout that in Chapter 5.
What Do These Ingredients Do?All three of these ingredients are natural—not manufactured. They alldrain well, so there are no puddles to waterlog the plant roots; but theyalso hold large amounts of moisture so the plants will grow well. Thismix is a pleasure to work with, has a light fluffy texture, and smells good.
The first two ingredients have no nutrients, but the last—compost—isloaded with all the nutrients and minerals that you could imagine.Compost is the most important ingredient of the three, and making yourown is good for both the environment and the garden. This is about as
organic as you can get.If you don’t think this perfect soil mix will work in the garden, ask
yourself, “What do professional greenhouse growers use for growingcrops on their benches? Do they go out and dig up the fields for soil?” Ofcourse not. Professional growers mix up a perfect potting soil fromseveral other ingredients and never use local outside soil.
When you buy a windowbox at the store, what do you fill it with—your yard soil? Of course not. You buy a bag of perfect potting soil. Sowhy can’t we do the same for our vegetable garden? Well, there are tworeasons:
One, no one ever thought of it—and two, it would be prohibitivelyexpensive for the typical single-row garden that everyone has been usingall of these years.
So, how can we do it now? Because SFG reduces the garden size downto only 20 percent (that’s one-fifth as large), so it is now possible toconsider using a perfect soil from the very start. An additional reason isfound in the next major improvement to Square Foot Gardening.
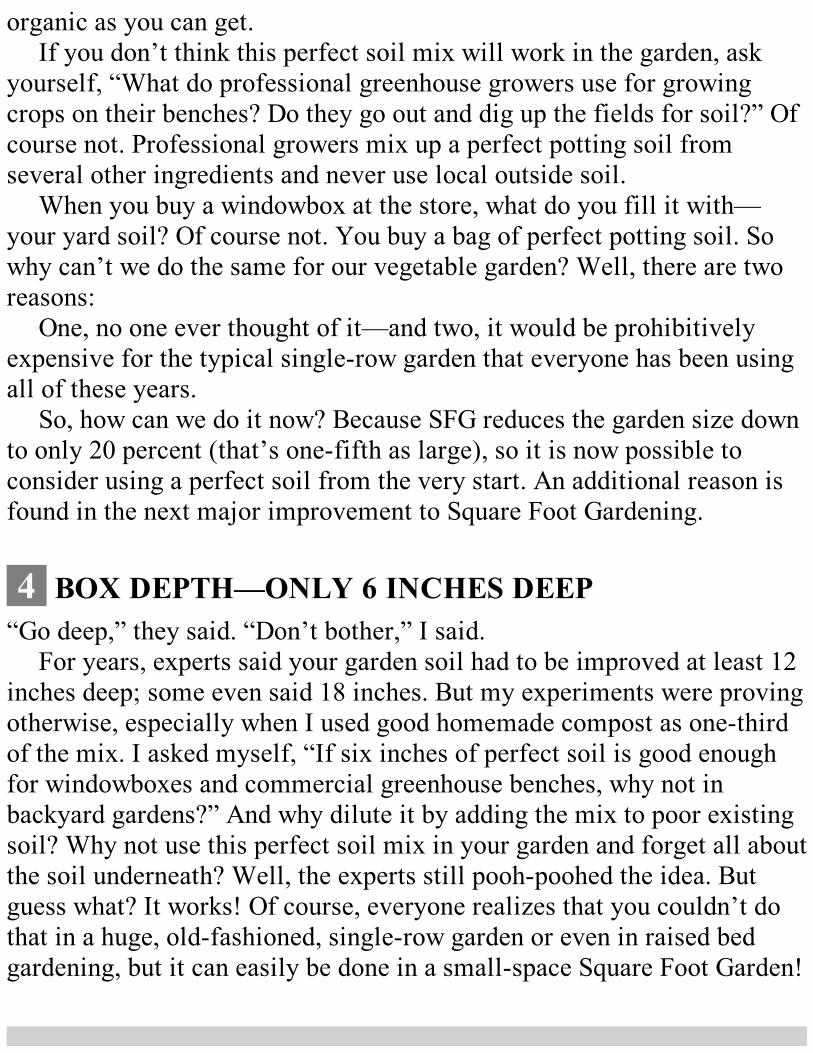
4 BOX DEPTH—ONLY 6 INCHES DEEP“Go deep,” they said. “Don’t bother,” I said.
For years, experts said your garden soil had to be improved at least 12inches deep; some even said 18 inches. But my experiments were provingotherwise, especially when I used good homemade compost as one-thirdof the mix. I asked myself, “If six inches of perfect soil is good enoughfor windowboxes and commercial greenhouse benches, why not inbackyard gardens?” And why dilute it by adding the mix to poor existingsoil? Why not use this perfect soil mix in your garden and forget all aboutthe soil underneath? Well, the experts still pooh-poohed the idea. Butguess what? It works! Of course, everyone realizes that you couldn’t dothat in a huge, old-fashioned, single-row garden or even in raised bedgardening, but it can easily be done in a small-space Square Foot Garden!
“We owe much of our love of gardening to the simplicity ofSFG.”– Manja from Oregon
Can you really grow vegetables and flowers in only 6 inches of soilregardless of how good it is? I’ve been doing it for the last ten years inmy display and home garden, and it really works. Of course in mylectures when I mention the 6 inches, I can see the audience squirming intheir seats, heads shaking and hands rising with the usual question, “Howcan you grow long carrots or potatoes in just 6 inches of soil?” It’s a goodquestion, so we developed a special feature of SFG where you build a 1-foot × 1-foot box one foot tall for long root crops.
Why only 6 inches deep? Why not be safer and go 12 inches deep? Themain reason is there is no need to do so. In addition, it is much cheaper,easier, and less work. Just think—it is one-half of the cost and one-half ofthe work, so why double the depth? But if you’re still skeptical go aheadand use your time and money to go 12 inches deep, but it’s really notnecessary.
The next question is, “How come all of the experts have been so wrongfor so long?” It is not that they were wrong, it is just everyone in thegarden industry had trouble thinking outside the box or even questioningall the traditional methods. Stuck in a rut they were, and in a single-rowrut at that!
Here’s another startling revelation I am going to make. It is going toshock and dismay the gardening world, but you are going to love it.
5 NO FERTILIZER—YOU DON’T NEED ITSquare Foot Gardening needs no fertilizer ever! How can that be? Afterall, the gardening industry is built on using fertilizer. When I firstdeveloped SFG, I dealt with all the information about fertilizer—organic
and chemical types—how to measure and rate it; all about NPK and whatthat means; and the list goes on and on. That was necessary because atthat time we were just improving our existing soils, and they still neededfertilizer. All the experts agreed. But my own experiments and thoughtsabout an all new out-of-the-box idea of not improving your existing soilbut rather of starting with a perfect soil mix was working so well that Ibegan to consider another new idea—that you don’t need to add fertilizer.The compost was providing all of the nutrients and trace elements theplants needed. Besides, compost was all-natural and couldn’t burn orharm the plants. The proof of the pudding was to just look at my garden.It was one of the best gardens I have ever had and has remained so eversince.
This was when I was able to simplify my original book’s formula forthe perfect soil mix to only three ingredients: one-third each of peatmoss, vermiculite, and blended compost, and completely eliminate theuse and expense of fertilizer. So much simpler!
Well, again, all the experts pooh-poohed the idea and still do, butguess what? It works! I haven’t used any kind of fertilizer in my home,display, or demonstration gardens for more than a decade. If you go toour website at www.squarefootgardening.com, you’ll see how bountifuland beautiful the gardens look. And this is not just gardening the firstyear but year after year after year. Just think—no more tilling, no moredigging, and no more fertilizer! The only thing we ever add to our soil isa little more compost. Is this great or what?
Now all we need is some way to hold or contain our aboveground 6inches of perfect soil mix. So, how about a box?
6 EASY ACCESS—ABOVE THE GROUNDI think having your garden contained in a box adds uniformity andstructure, not only to your garden but to your life. Once limits are placedon almost anything, you will find it much easier to take care of andtherefore you will be more comfortable with it and enjoy it more.
The basic 4 × 4-foot bottomless boxes are easy to build out of common
lumber, bricks, blocks, or even stone. These small boxes, filled with theperfect soil mix, will grow five times as much as the same space in asingle-row garden. So, you don’t need many of the boxes. There are noweeds to hoe. No existing soil to till. Why, once your boxes are built andyour perfect soil is added, there is virtually no work at all.
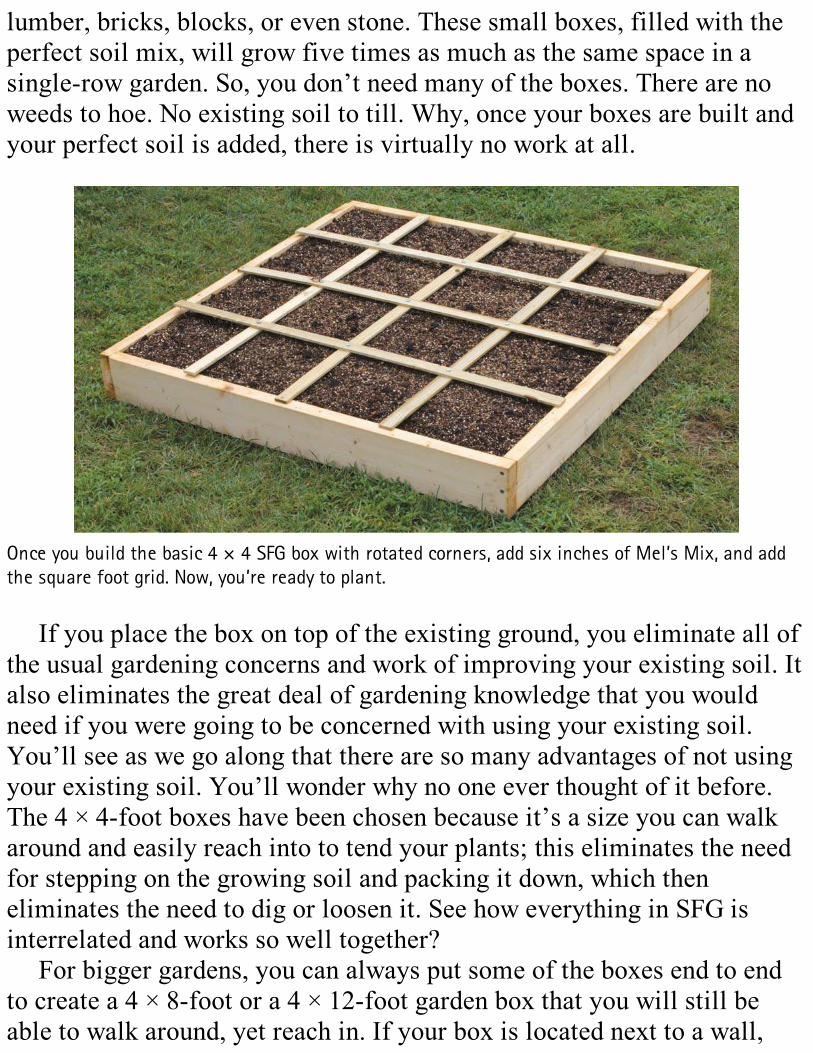
Once you build the basic 4 × 4 SFG box with rotated corners, add six inches of Mel’s Mix, and addthe square foot grid. Now, you’re ready to plant.
If you place the box on top of the existing ground, you eliminate all ofthe usual gardening concerns and work of improving your existing soil. Italso eliminates the great deal of gardening knowledge that you wouldneed if you were going to be concerned with using your existing soil.You’ll see as we go along that there are so many advantages of not usingyour existing soil. You’ll wonder why no one ever thought of it before.The 4 × 4-foot boxes have been chosen because it’s a size you can walkaround and easily reach into to tend your plants; this eliminates the needfor stepping on the growing soil and packing it down, which theneliminates the need to dig or loosen it. See how everything in SFG isinterrelated and works so well together?
For bigger gardens, you can always put some of the boxes end to endto create a 4 × 8-foot or a 4 × 12-foot garden box that you will still beable to walk around, yet reach in. If your box is located next to a wall,
fence, or building, keep the boxes only two feet wide so you can reach allthe way to the back. They can be any length. Boxes can be made from anytype of wood. The best is free wood that is found at a construction site.Just ask the foreman of the project if you can have the scrap 2 × 6-inchboards. If you are going to buy your lumber, boxes can be made frompine or fir for the least cost, or cedar or redwood for longer lasting use. Ifyou decide to treat or paint the wood, be careful not to paint inside theboxes where the Mel’s Mix comes into contact with the wood; you don’twant anything harmful to leach into the soil. I do not recommend usingpretreated wood for the same reason.
7 THE AISLES—COMFORTABLE WIDTHThe width of your aisles is another improvement I have made for the AllNew Square Foot Gardening method. This is more important for comfort,safety, and looks, than for efficiency. If you notice the garden on thecover of the original Square Foot Gardening book, there were no boxesand the aisles were 1 × 12-inch boards separating the 4 × 4-foot areas. Idesigned it that way to be the most space-efficient but, as someone oncesaid, “This is one time when Mel was too efficient!” But the wood wasfree, so hey, can you blame me?
Straight and NarrowThe 12-inch wide board was difficult to maneuver on, and you had tokeep a pretty good balance to stay upright. I found that the averagegardener needs to have more room to move about on than those 12 inches.In addition, you couldn’t get close to each 4 × 4-foot planting area if youwanted to use a wheelbarrow, garden cart, or harvest basket. Can you justpicture two people working in that garden with 12-inch wide paths, andone says to the other, “Excuse me, I need to get through.” Can youimagine the answer to that?
The Ideal Width
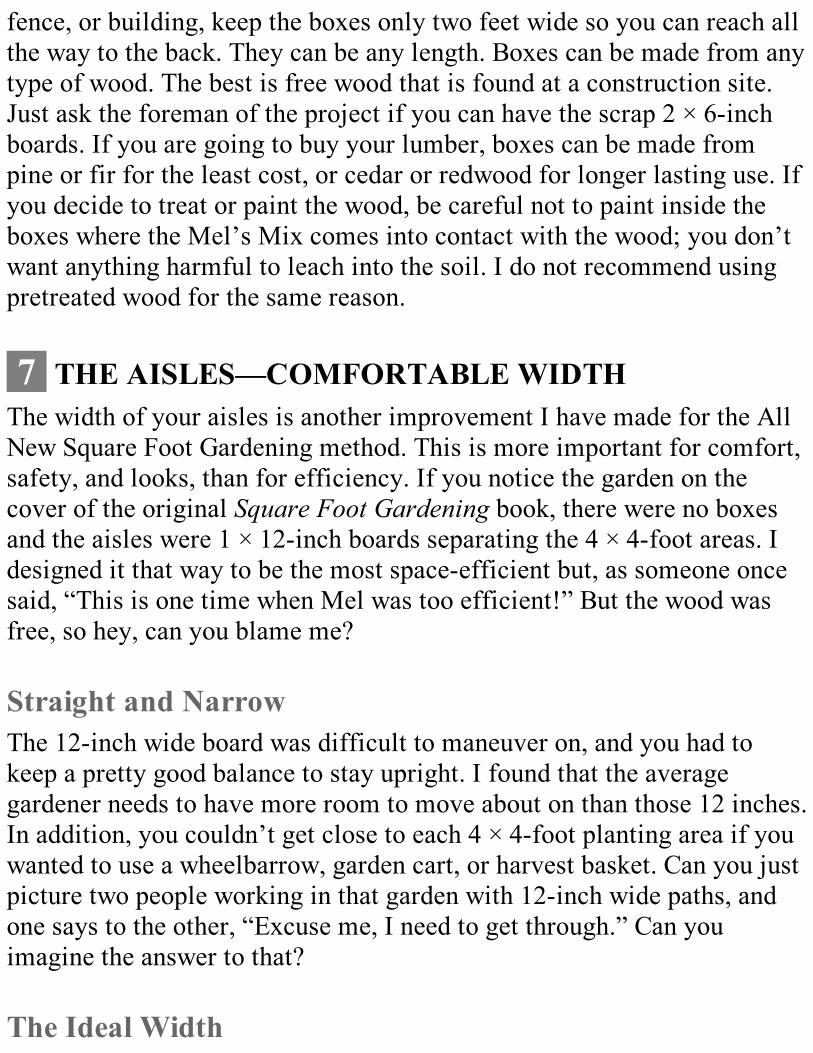
So what is the ideal aisle width? Two feet is still a little tight, so Irecommend a minimum of three feet between your boxes. It turned outthat for accessibility, kneeling, working, and harvesting, the idealdistance was 3 or even 4 feet between boxes. In fact, if your garden hasseveral boxes, you can vary the aisles. Play around with some ideas onpaper—then, once your boxes are built (and before you fill them withsoil, I should add), you can move them about until you get them justright. Think of it as arranging furniture in your yard.
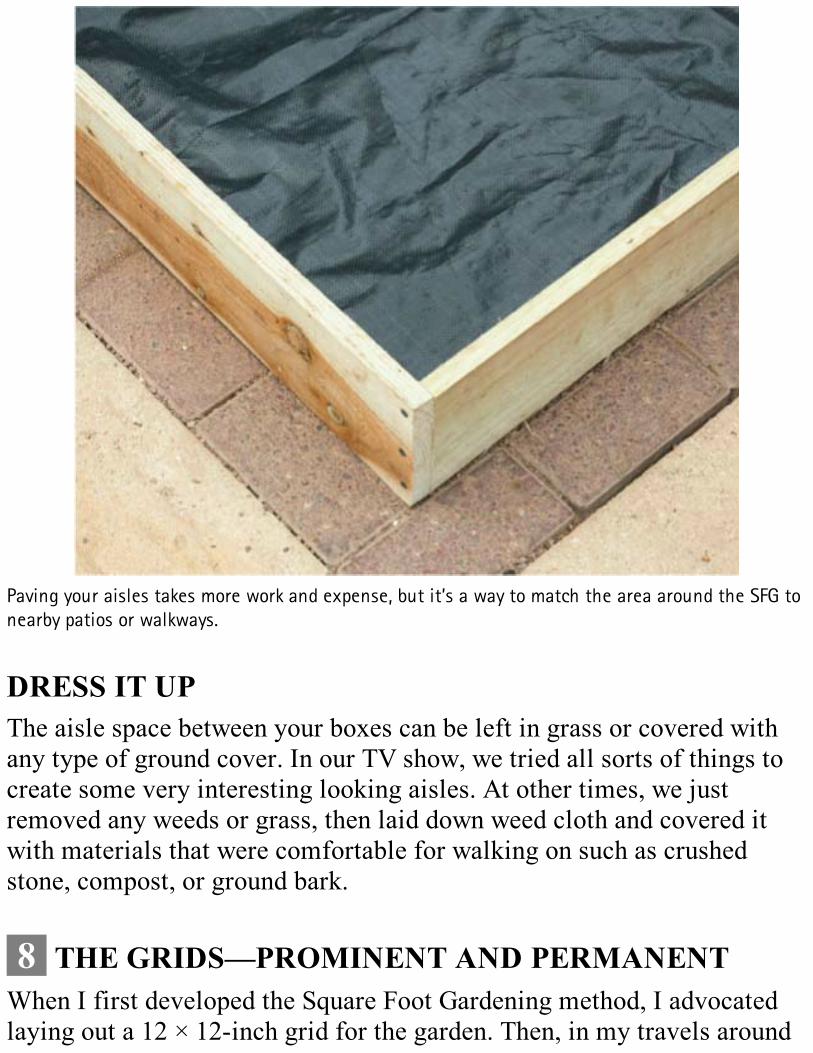
If you’ve placed your SFG boxes on top of lawn, you can leave the grass but you’ll need to mow.
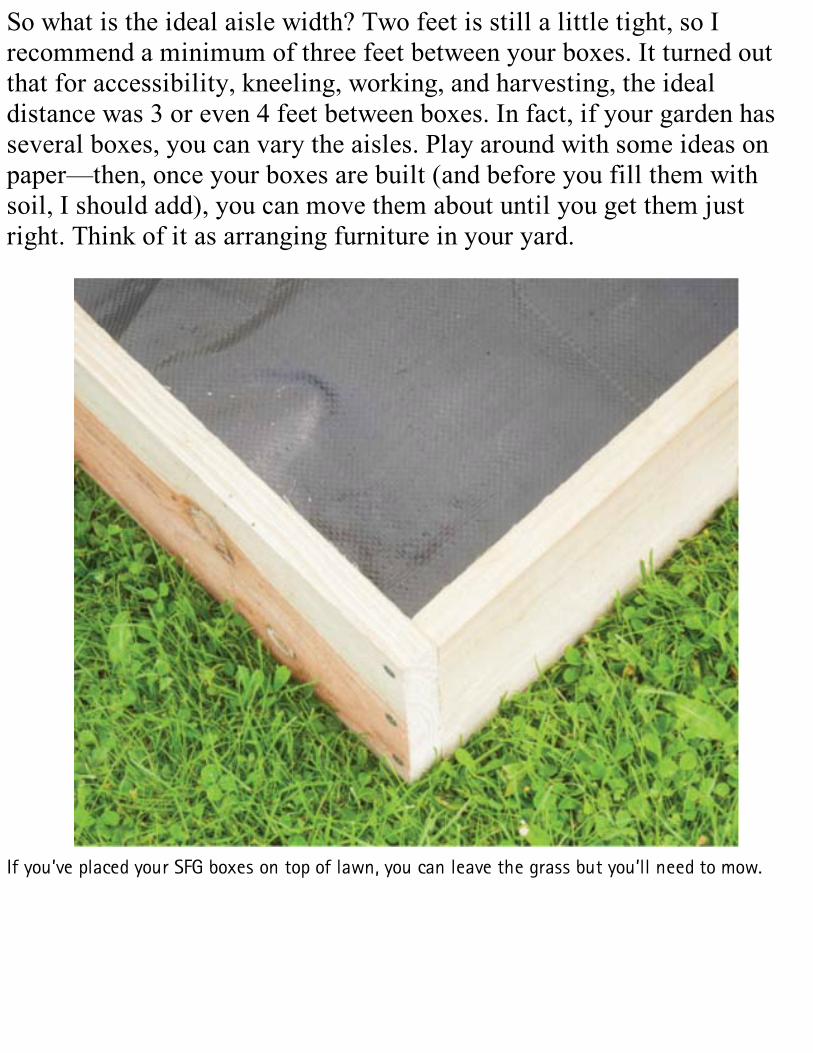
Shredded bark placed over landscaping fabric eliminates the need for any maintenance or dealingwith weeds in your aisles.
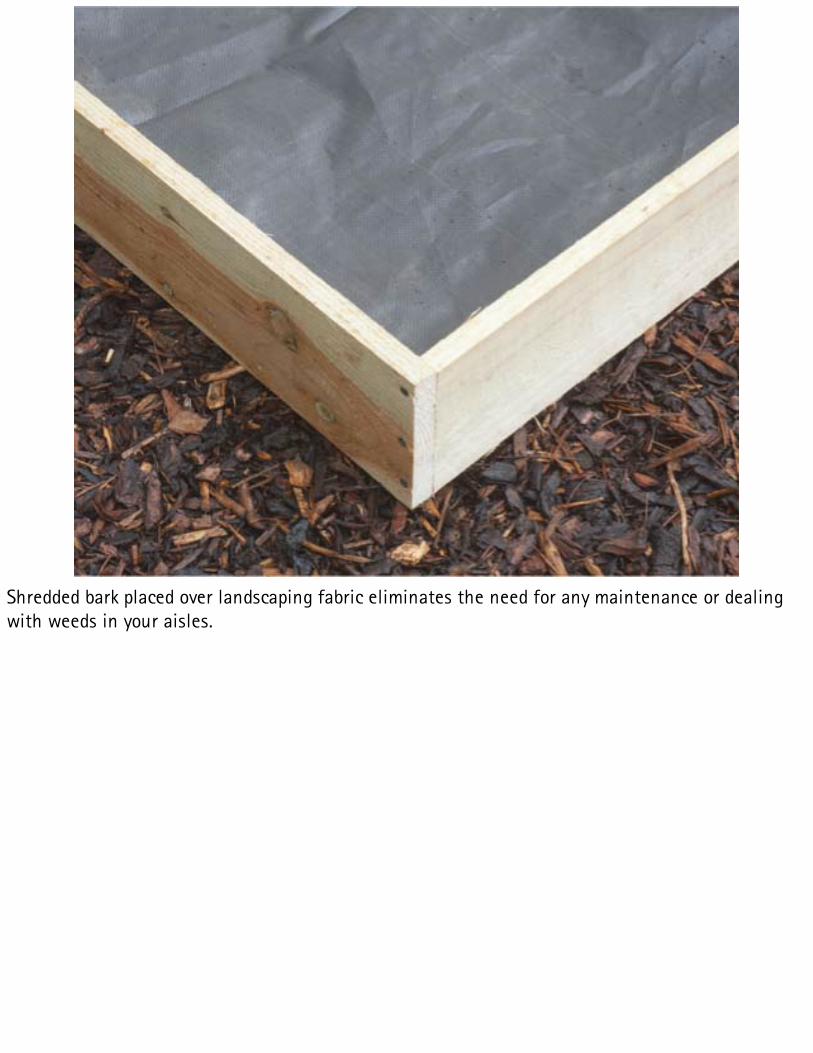
Paving your aisles takes more work and expense, but it’s a way to match the area around the SFG tonearby patios or walkways.
DRESS IT UPThe aisle space between your boxes can be left in grass or covered withany type of ground cover. In our TV show, we tried all sorts of things tocreate some very interesting looking aisles. At other times, we justremoved any weeds or grass, then laid down weed cloth and covered itwith materials that were comfortable for walking on such as crushedstone, compost, or ground bark.
8 THE GRIDS—PROMINENT AND PERMANENTWhen I first developed the Square Foot Gardening method, I advocatedlaying out a 12 × 12-inch grid for the garden. Then, in my travels around
the country, I heard a lot of people say, “Oh, I do Square FootGardening,” or “I have a Square Foot Garden.” But when I went to seethem, the size was right but they had no grid!
In our introductory film, we show the people in our class how a 4 × 4-foot garden looks without a grid and ask them, “How many plants couldyou plant there? How many different crops?” They draw a blank becauseit looks like a small area that isn’t going to contain very much. As soonas we lay down the grid, they suddenly light up and say, “Aha! I see!Sixteen spaces, so it’ll take sixteen different crops! Later, as soon as onesquare is harvested, I can add a trowel full of compost and replant thatsquare foot with a different crop without disturbing anything else aroundit.” Bingo! They see the light.
There are many, many interrelated reasons for the “different crop inevery Square Foot” rule, and you will see and understand these as we goalong. They deal with nutrients used, limiting over-ambitious planting,staggered harvests, weed and pest control, beauty of the garden,companion planting, simplification of crop rotation, cutting planting timein half, and many more factors that result in a very unusual andinnovative gardening system. When you have no grid, your garden has nocharacter. If you’re having visitors over, they may not even notice yourgarden if it’s laid out in plain beds. But if it’s a Square Foot Garden withvery prominent and visible grids, they will say, “Hey, what’s that in youryard? It looks great!”
Grid MaterialsIn the past, whenever I used string or twine as a grid, it eventually gotdirty, rotted, and finally broke. In addition, you had to drive in nails to tiethe string to, and it just never looked good. I talked with many others whohad the same bad experience so I experimented with all kinds of differentmaterials for making grids. If I could condense thirty years of experienceinto my current advice, it would be—don’t use string or any other floppymaterial. A firm, rigid, prominent, and visual grid permanently laid onevery one of your boxes will make all the difference in the world as
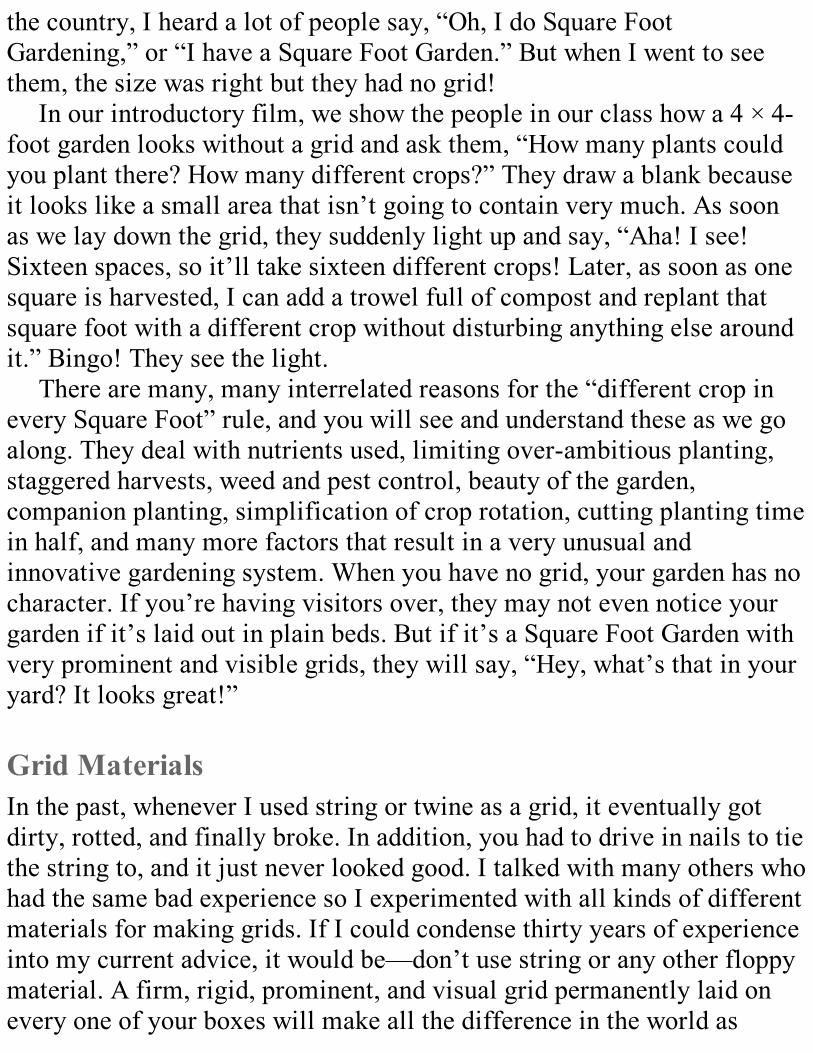
others see it but mostly in how you use and enjoy your garden.With a very visible grid, your garden takes on a unique character. It
will not only look spectacular, but you’ll be able to immediately visualizeyour planting squares. Without a grid, your garden is not a Square FootGarden.
See how the grid defines a Square Foot Garden? Without a grid, it’s hard to visualize the harvest.
9 NOVEL IDEA—DON’T WASTE SEEDSNew Seed Planting IdeaWhen I first started gardening, I found the traditional method of pouringout an entire packet of seeds along a single row was so wasteful that Icouldn’t believe that’s the way we’ve always done it. Why would anyonetell us to waste a whole packet of seeds along a long, lonely, single row,especially knowing that we would have to go back and thin out 95 percentof the sprouted plants in order to leave only one plant every few inches.
Did no one ever think, “Let’s just plant a few seeds every 3, 4, or 6inches?” I guess it took someone outside of the garden industry to thinkof it.
At first, I advocated single seed planting at the proper spacing for thatparticular plant, but many people found it tedious and even difficult,especially with small, unusually shaped seeds. Besides, as someone onceteased me and said, “If a packet of leaf lettuce contains one thousandseeds and I only plant four in each square foot, how old will I be before itis time to buy another packet?” She’ll have to leave her seeds in her will!
So back to the drawing board I went. How about just a few seeds ineach hole—just a pinch of seeds? After testing this idea with manypeople and checking their dexterity and ability to pick up just a pinch(two or three seeds), this seemed to be the answer.
A Snip, Not a TugBut I was against thinning—that’s when you pull out all the seedlingsexcept the one plant you want to grow to maturity. Thinning is a lot ofwork and also seems to disturb the roots of the remaining plant, andthat’s not good. But then I thought of an absolutely perfect solution. Ifyou plant just a few seeds—a pinch—in each hole and two or threeseedlings come up, you just take a pair of scissors and snip off all but thestrongest one. That eliminates any disturbance of the plant you want tokeep, and you’re not tempted to replant the others. The only thing youneed to do is just muster the courage to make that initial snip and it’s allover.
So now we’ve been able to improve the single-seed planting and, at thesame time, end up with one strong plant in each location, which is justwhat we wanted. At the same time we’re not wasting a lot of seeds. Afterplanting that square foot, put the packet in safe storage, and if storedproperly that packet will be good next year, and the year after, and theyear after. Many seeds last up to five years if stored properly. (So, howcome no one ever told us that before?)
10 EXPANDED OPPORTUNITIES—TABLETOPGARDENS
Make Them PortableNow that we no longer need to improve our existing soil—and SFG takesup only 20 percent of the space for 100 percent of the harvest—and weneed only 6 inches of lightweight soil mix, we can build a 4 × 4-foot box,and add a plywood bottom drilled with drainage holes. This means youcan carry it to any location you want, even moving it to suit weather,climate, an event, a situation, or even a person’s needs, abilities, ordisabilities. If the size or weight seems too much for you to handle, thinkabout using a 3 × 3-foot, a 2 × 2-foot, or even a 2 × 4-foot box for ease inmoving.
James, Bring Out the Good BoxesSmaller sized SFG boxes can become wonderful patio boxes, and it’seven possible to plant several so there is always one or two with flowersin full bloom or salad crops ready for harvest. The rest can be keptsomewhere less visible. With a system of rotation, there will always be afew garden boxes ready to bring out to show off. There’s nothing like thevisual impact of a beautifully planted box filled with vegetables, flowers,and/or herbs. If you’re giving a talk or doing a presentation on gardening,the “seeing is believing” technique will cinch your talk. And just think,you won’t have to answer the usual question about SFG, like “How onearth can you grow a garden in only 6 inches of soil?” Or, “How can yougrow without fertilizer?” Now, you just point and smile!
BEST OF ALLI think Square Foot Gardening’s best feature is that it now makesgardening available to just about anyone you can think of, regardless oftheir age, circumstance, location, ability, or disability—anyone,anywhere, can now garden using the All New Square Foot Gardeningmethod.
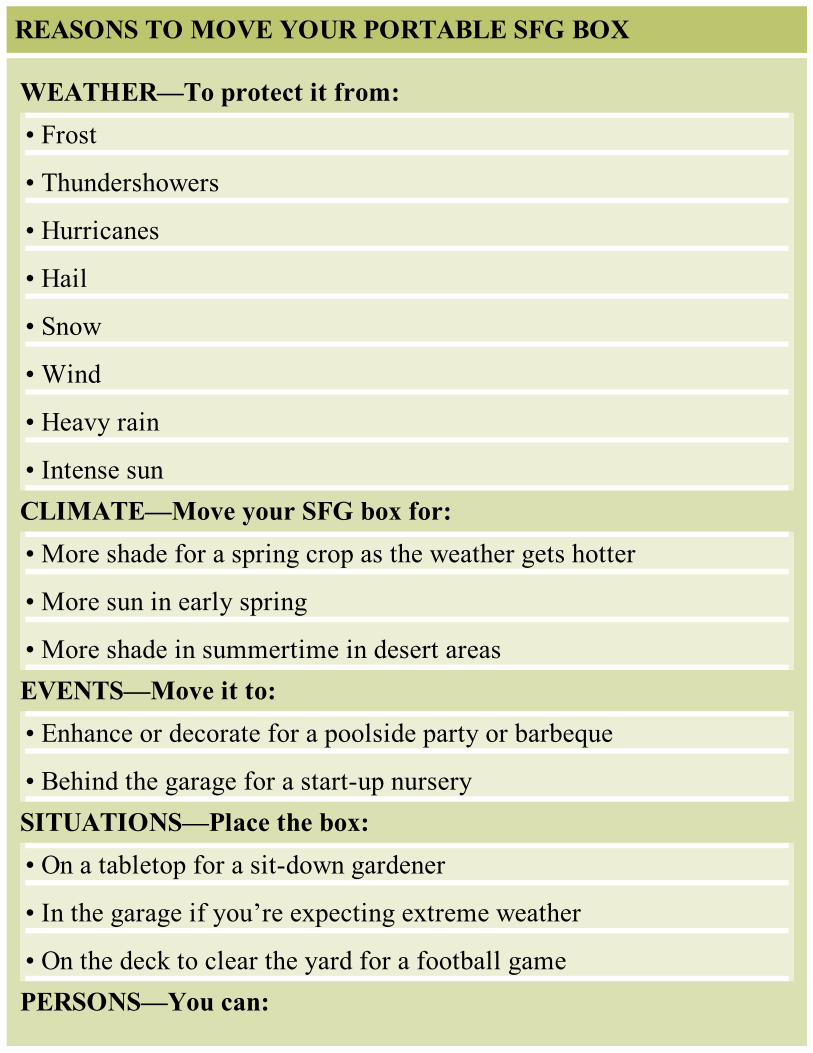
REASONS TO MOVE YOUR PORTABLE SFG BOX
WEATHER—To protect it from:• Frost
• Thundershowers
• Hurricanes
• Hail
• Snow
• Wind
• Heavy rain
• Intense sunCLIMATE—Move your SFG box for:• More shade for a spring crop as the weather gets hotter
• More sun in early spring
• More shade in summertime in desert areasEVENTS—Move it to:• Enhance or decorate for a poolside party or barbeque
• Behind the garage for a start-up nurserySITUATIONS—Place the box:• On a tabletop for a sit-down gardener
• In the garage if you’re expecting extreme weather
• On the deck to clear the yard for a football gamePERSONS—You can:

• Take it to Grandma’s for a birthday gift
• Take it to school for show-and-tell
• Take it to class for teaching SFG
• Take it to school for the science fair

3
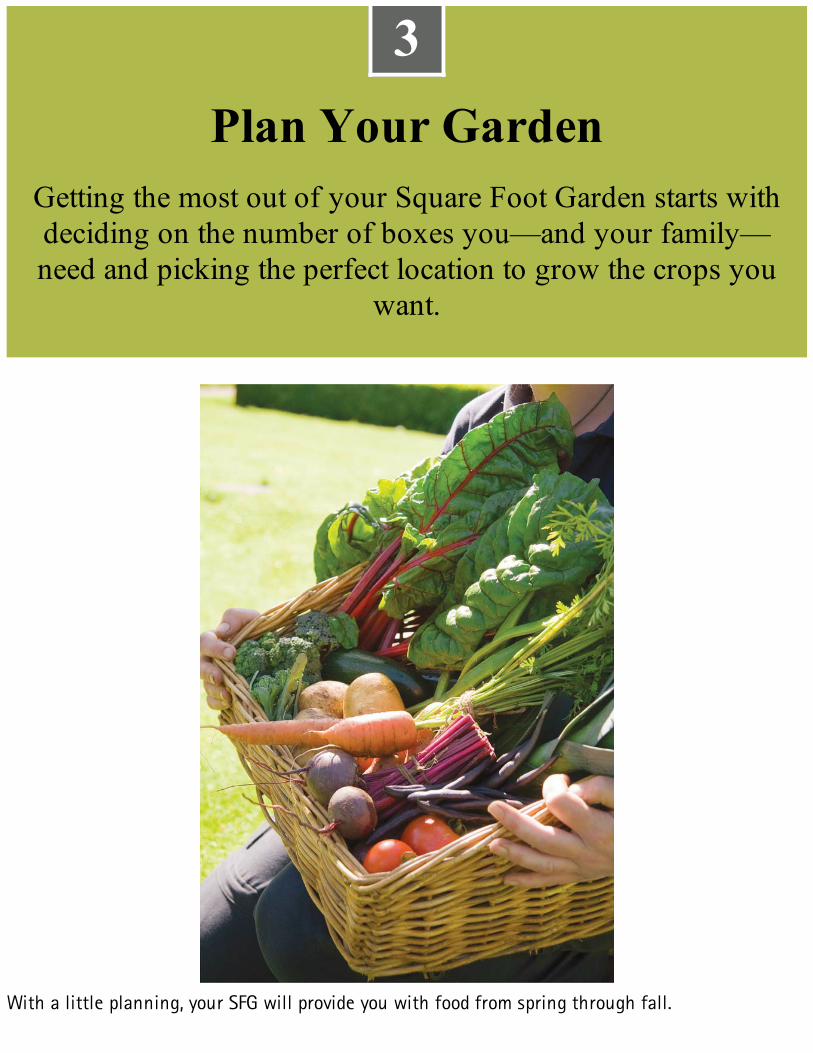
3Plan Your Garden
Getting the most out of your Square Foot Garden starts withdeciding on the number of boxes you—and your family—need and picking the perfect location to grow the crops you
want.
With a little planning, your SFG will provide you with food from spring through fall.
The big dilemma is, should you first design the layout for yourgarden, then try to find a spot where it will fit? Or, should youfirst find the best spot for a garden, then design a layout thatwill fit into that spot?
This chapter solves that dilemma by addressing the three components ofSquare Foot Gardening.
Size Location Design
SIZEYour garden will be laid out in square or rectangular boxes separated bywalking aisles. Build your boxes from materials like wood, bricks, orblocks. If you don’t like the idea of common wood, which will eventuallyrot or be eaten by termites, use a more expensive wood like cedar orredwood. You can even use some of the manmade composite “wood” orrecycled plastic or vinyl. The wood I like best is free wood. You canusually get it from any construction site, but always ask the foreman first.
If you decide to use lumber, you’ll be happy to know the advantage of4 × 4 gardens is that all lumber comes in 8-foot lengths. Most homeimprovement centers will cut it in half for you at little or no cost. Yourboxes can be made from just about any material except treated woodbecause the chemicals used to treat the wood are not something you wantleaching into your garden.
How Much Is Enough?If you’re figuring a SFG for an adult, remember that:
1. One 4 × 4 Square Foot Garden box (equal to 16 square feet) will
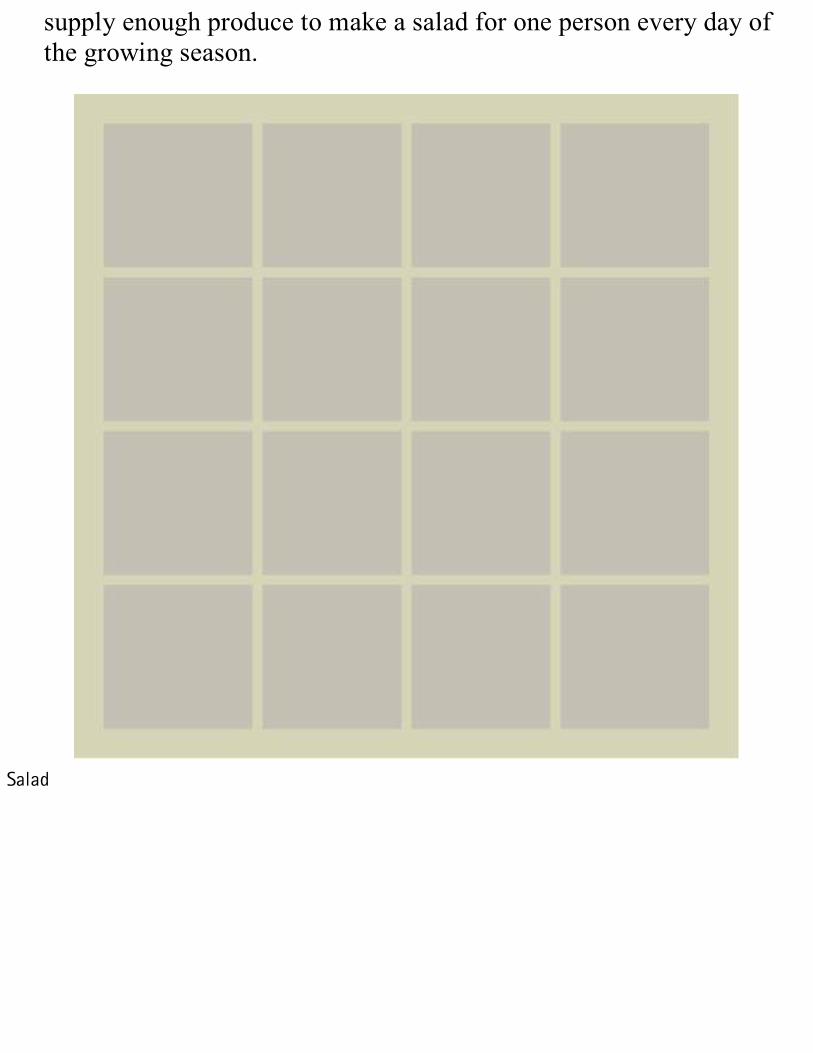
supply enough produce to make a salad for one person every day ofthe growing season.
Salad

Daily Vegetables
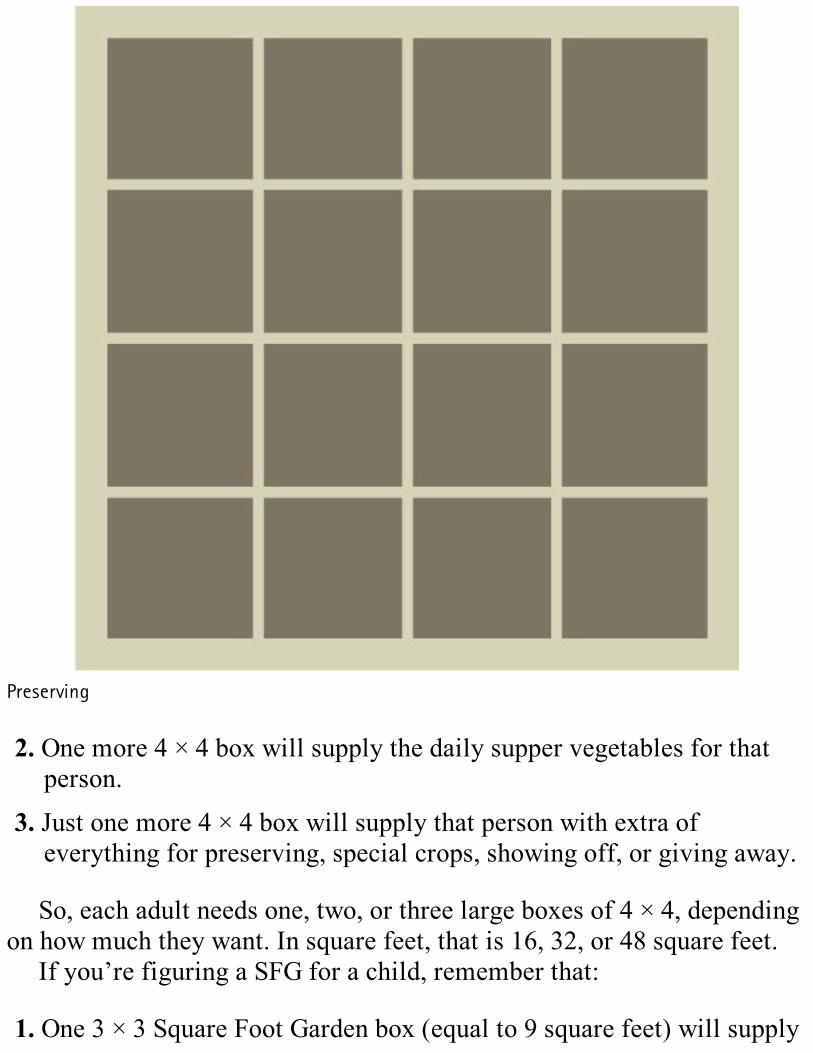
Preserving
2. One more 4 × 4 box will supply the daily supper vegetables for thatperson.
3. Just one more 4 × 4 box will supply that person with extra ofeverything for preserving, special crops, showing off, or giving away.
So, each adult needs one, two, or three large boxes of 4 × 4, dependingon how much they want. In square feet, that is 16, 32, or 48 square feet.
If you’re figuring a SFG for a child, remember that:
1. One 3 × 3 Square Foot Garden box (equal to 9 square feet) will supply
enough produce to make a salad for one child every day of thegrowing season.
2. One more 3 × 3 box will supply supper vegetables for that child everyday.
3. Just one more 3 × 3 box will supply the child with extra of everythingfor show-and-tell or science projects at school, special crops, showingoff, or giving away. So, each child needs one, two, or three smallboxes of 3 × 3, depending on how much they will eat. In square feet,that’s 9, 18, or 27 square feet.
Suggestion: Since the kids will grow into teenagers, you may just wantto make everyone’s box a 4 × 4. On the other hand, different sizes makethe garden look interesting and more personable. The 3 × 3 can later onbe stacked on top of a 4 × 4 to start a pyramid garden—but more aboutdesigning your garden later.
YOUR FAMILY—YOUR GARDENAccording to surveys of homeowners, the average conventional single-row garden measures 20 feet wide by 35 feet long, which equals 700square feet. To grow the same amount, a Square Foot Garden will needonly 20 percent or one-fifth of that growing space to equal 140 squarefeet. That’s quite a difference isn’t it?
DOWN TO SIZEWhenever I’m giving a lecture I like to illustrate the difference between aconventional garden and a Square Foot Garden. I’ll walk down the middleof whatever room we’re in and, standing in the center, stretch out myarms sideways, as I say, “If this whole room were our garden, when youswitch to Square Foot Gardening, you’ll no longer need everything onthis side.” That cuts the room in half.
Then I turn to the side that remains, cut it in half with my arms again, and

say, “Everything on that side we don’t need.” That cuts that half in halfagain. And then I add, “That’s still too much room. We can still cut downthis remaining corner even more so we end up with only 20 percent of thetotal room. We can grow as much in this size of a Square Foot Garden aswe previously could in this entire room.” You suddenly begin to think ofthe reduced amount of work, equipment, supplies, and fencing. Then youbegin to see many of the advantages of being able to locate the gardenwhere you wish and all the possibilities in your yard. Visualizing thegreat difference of space needed for a Square Foot Garden is really thefirst step in learning and appreciating the entire system. Then you canbegin to take advantage of all the other attributes you will discover withSFG.
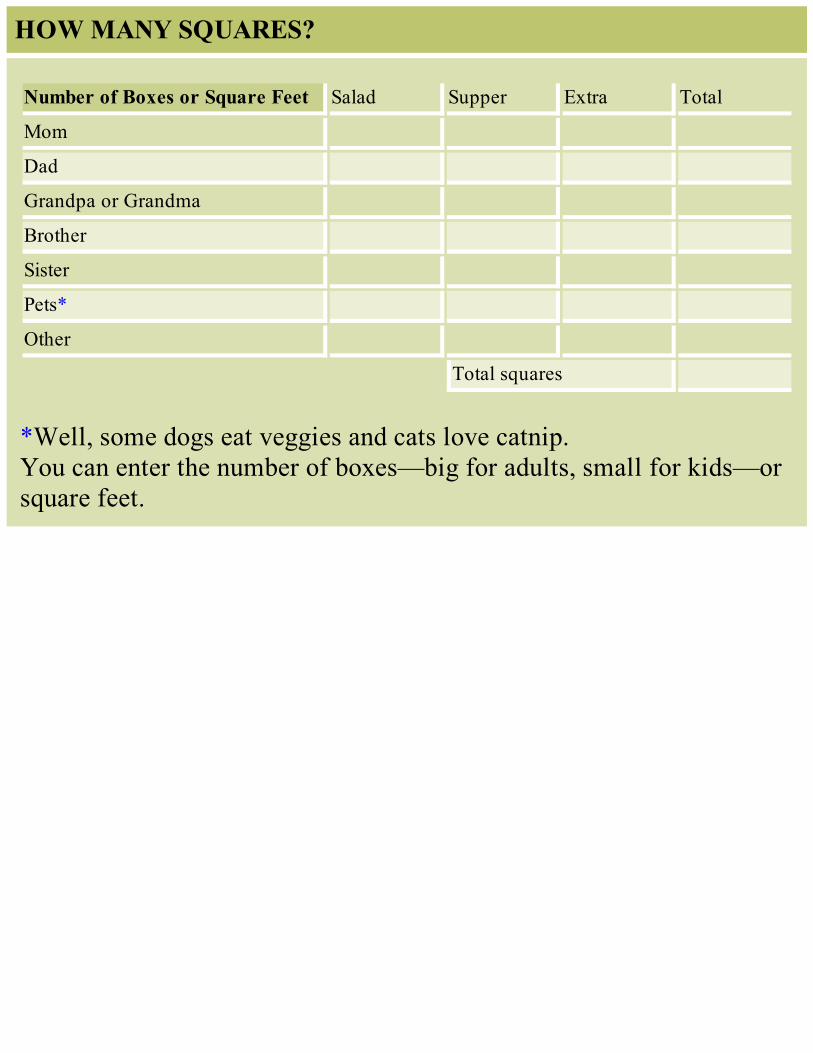
HOW MANY SQUARES?
Number of Boxes or Square Feet Salad Supper Extra Total
Mom
Dad
Grandpa or Grandma
Brother
Sister
Pets*
Other
Total squares
*Well, some dogs eat veggies and cats love catnip.You can enter the number of boxes—big for adults, small for kids—orsquare feet.
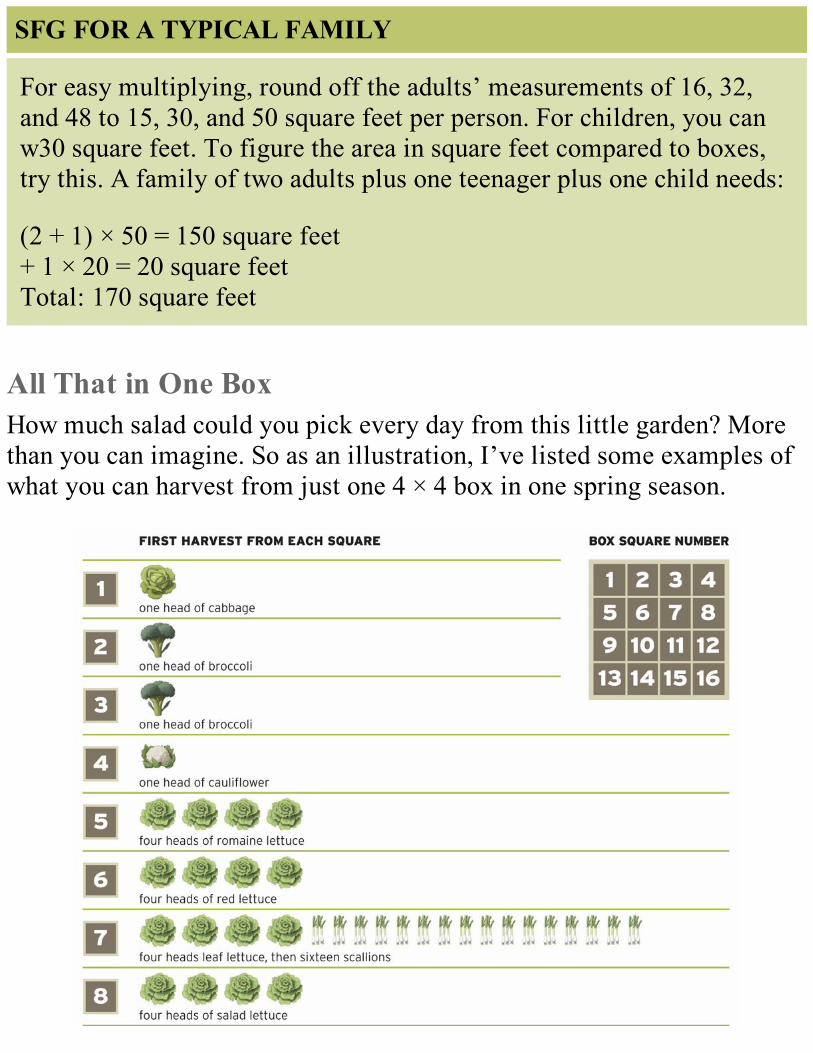
SFG FOR A TYPICAL FAMILY
For easy multiplying, round off the adults’ measurements of 16, 32,and 48 to 15, 30, and 50 square feet per person. For children, you canw30 square feet. To figure the area in square feet compared to boxes,try this. A family of two adults plus one teenager plus one child needs:
(2 + 1) × 50 = 150 square feet+ 1 × 20 = 20 square feetTotal: 170 square feet
All That in One BoxHow much salad could you pick every day from this little garden? Morethan you can imagine. So as an illustration, I’ve listed some examples ofwhat you can harvest from just one 4 × 4 box in one spring season.
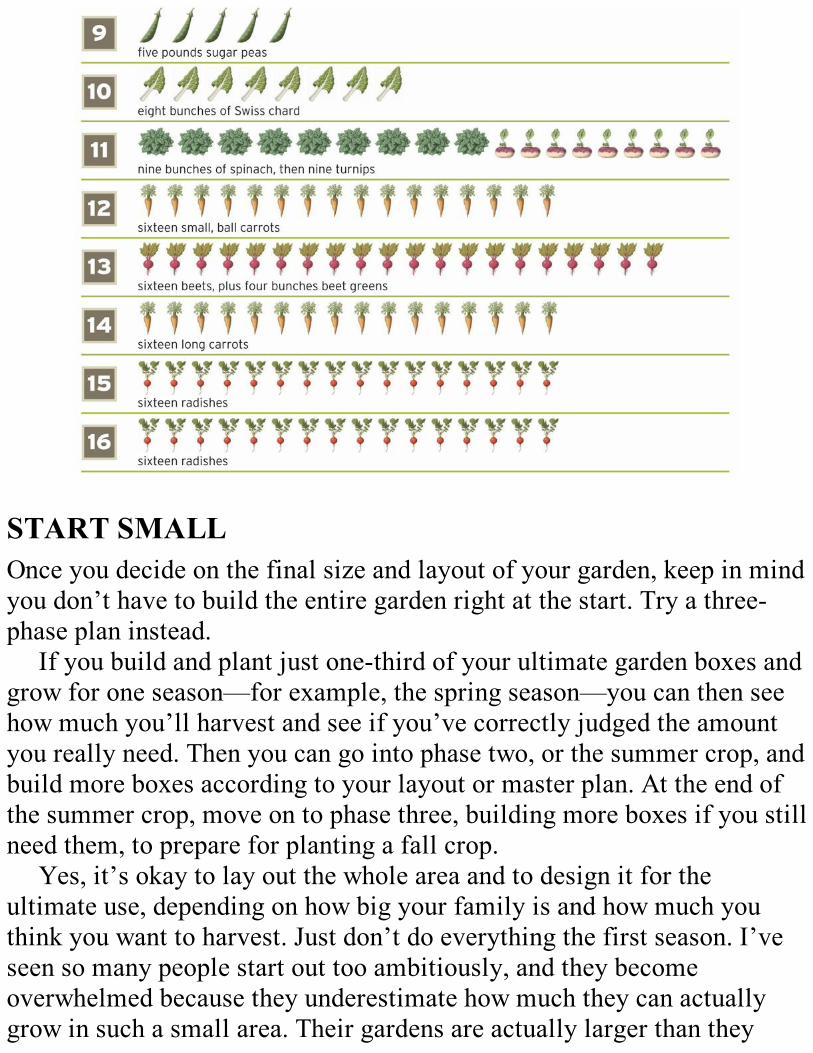
START SMALLOnce you decide on the final size and layout of your garden, keep in mindyou don’t have to build the entire garden right at the start. Try a three-phase plan instead.
If you build and plant just one-third of your ultimate garden boxes andgrow for one season—for example, the spring season—you can then seehow much you’ll harvest and see if you’ve correctly judged the amountyou really need. Then you can go into phase two, or the summer crop, andbuild more boxes according to your layout or master plan. At the end ofthe summer crop, move on to phase three, building more boxes if you stillneed them, to prepare for planting a fall crop.
Yes, it’s okay to lay out the whole area and to design it for theultimate use, depending on how big your family is and how much youthink you want to harvest. Just don’t do everything the first season. I’veseen so many people start out too ambitiously, and they becomeoverwhelmed because they underestimate how much they can actuallygrow in such a small area. Their gardens are actually larger than they
need so there is more to take care of—and all while they’re learning anew system. Take it easy and start small.
If you have a single-row garden and don’t really want to give it up yet,I suggest taking one small corner of your old-fashioned garden andplanting it in just one or two 4 × 4 boxes, mix the correct soil (don’t justshovel your existing soil into the boxes no matter how good you think itis), put down the grid, and try planting this way. Next year, I’ll bet you’llprobably be ready to convert your entire garden into a SFG.
Overall Size of the BoxesOnce you decide on the overall size and number of boxes, the next step isto determine the dimension of the aisles. We’ll cover this in more detaillater, but for now you can figure on a 3-foot aisle between all 4-footboxes. You could also decide now if you want to join several boxestogether end to end to create a rectangular box of 4 × 8, or 4 × 12. Thiswill save a lot of yard space but you may not like the look or you mayfind walking around a long box inconvenient. I would never make a boxlonger than 16 feet or you’ll end up trying to cross it in the middle andthen—whoops!—there you are, stepping in your garden. I hope no onesaw you! If you are going to be putting some boxes against a fence orwall and can’t walk all around to reach in, those boxes should be only 2feet wide. Everyone wants to make them 3 feet wide (I will never knowwhy) but then they always come back and complain it was too widebecause they couldn’t reach in that far.
Don’t Forget the AislesThe whole idea of Square Foot Gardening is to walk around your gardenboxes and reach in to tend your plants. This way, the soil never getspacked down and you eliminate digging it up to loosen it again. In fact,the only tool you really need once you fill your boxes with Mel’s Mix is asmall hand trowel. (It doesn’t have to be the strong, expensive kind fromSweden. The one dollar variety works just fine and can last a lifetime.)
So how wide should your aisles be? It depends a lot on how muchroom you have and what kind of a look you want for your garden. Ifyou’re going to have many boxes—remember, we suggest you beginusing only a small number because you can always add more later—youmay want to have, for example, a center aisle that is 4 feet wide so youcan easily get in with a garden cart or wheelbarrow, or so several peoplecan walk down the aisle at once. (Hey, how about a garden party or awedding?)
I would suggest you make aisles no narrower than 3 feet; 2-foot wideaisles will seem crowded once plants grow and some cascade over thesides of the boxes. A 2-foot aisle can shrink down to 18 or even 12inches. Since SFG takes up so little room, why crowd all your boxestogether? The more spacious your all-new SFG is, the more time you arelikely to spend there enjoying it.
Draw It UpOnce you get a rough idea of how much space you’ll need, make a quicksketch more or less to scale. You don’t need graph paper (unless you’re adesigner or want to use it); just draw the 3-foot aisles slightly smallerthan the 4-foot boxes. Now you’re ready to tour your property looking fornice open areas near the house. Later in this chapter we’ll discuss designin more detail.
“Gardening has always seemed too overwhelming. Now withyour method, I can’t wait to start.”– Alejiendra from Venezuela
LOCATIONThere are five major things to look for when touring your property for a
SFG location. Use these as a test for the area you’re considering for yourAll New Square Foot Garden. (Remember, convenience is king so makesure you follow Rule 1.)
1. Place it close to the house for convenience.
2. Pick an area that gets six to eight hours of sunshine daily.
3. Stay clear of trees and shrubs where roots and shade may interfere.
4. The area should not puddle after a heavy rain.
5. The existing soil is not really important, since you won’t be using it.
1 CLOSE TO THE HOUSEWith the All New Square Foot Gardening Method, you have so manymore places to put your garden than ever before. Keep in mind foottraffic and sites where you will often notice and enjoy your garden. Ifyour SFG is near traffic paths, you’ll walk past the garden more often,hence take better care of it (remember—no need to change into gardeningclothes, or run and get some tools). This means it will always look niceand the end result will be that you’ll enjoy it more, as will every othermember of the family. (Chapter 10 covers different locations likehillsides or heavily wooded areas.)
I Can See Clearly NowWhen you think about observing your garden, consider where you canfrequently see it—especially from inside the house. What room are youin the most? Can you see the garden from there? The reason is not onlyfor your pleasure but for protection. If it is close, you will see problems(like deer, wilting plants, a neighbor’s dog or cat) when they begin ratherthan hours later after all the damage is done.
Remember the Square Foot Garden way is to treat your plants just likeyou treat your children or grandchildren, and you know you would be
glancing out the window at them. I believe that every plant out there isconstantly seeking your attention by saying, “Look at me, look at my newblossom, look how big I’m getting.” Isn’t that just like children?
Placement of your Square Foot Garden opens up so many doors to theway you care for, enjoy, appreciate, and harvest it. Plus you’ll show it offmore often and get the whole family involved. It’s even possible to splitup your garden and place some of your boxes in different locations forperhaps a different visual effect or a different purpose.
HOW MUCH SUN WILL YOUR BOXES GET?The numbered boxes represent potential locations around a garden. As the sun rises in the east andsets in the west, the boxes are shaded to various degrees by the house and tree. So box 7 is in thesun all day, while box 2 is in shade for much of the day.
2 SUNLIGHTThe next thing to consider in selecting a location is sunlight. Growingplants need sunlight. How much they need depends on the type of plant.In general, large-flowering or fruiting plants need a lot—at least eight
hours a day. These types of plants are referred to as a “summer crop” or“warm-weather plants” and include most of the favorite things thatpeople grow, such as tomatoes, peppers, squash, beans, and sunflowers.
In determining the amount of sunlight an area receives, keep in mindthat it changes throughout the year with the seasons. In early spring andagain in late fall the sun is lower in the sky than in the summertime. Andof course, there are not as many hours of light in the day in the spring andfall as there are in the summer.
If You Only Have ShadeIf you have shady conditions and no other place to locate your garden,you can still have a thriving garden but you’ll have a limited selection ofcrops to grow. So, obviously, you’d stay away from the tomatoes,peppers, and squash and plant the root and leaf crops like radishes,spinach, and lettuce. Of course, there are many flowers and herbs thatlove shade, so check with your local nursery if you are in this situation.
Too Much SunSometimes you might have a location that gets full sun all day long, fromsunup to sundown. That would actually be too much for some of the coolweather and leafy crops, as well as many flowers. Of course, with a big,huge garden there’s not much you can do. But with a Square Foot Garden,it’s very easy to provide shade by building a simple support and coveringthe 4 × 4 box with some shade cloth. That’s all covered in Chapter 4.
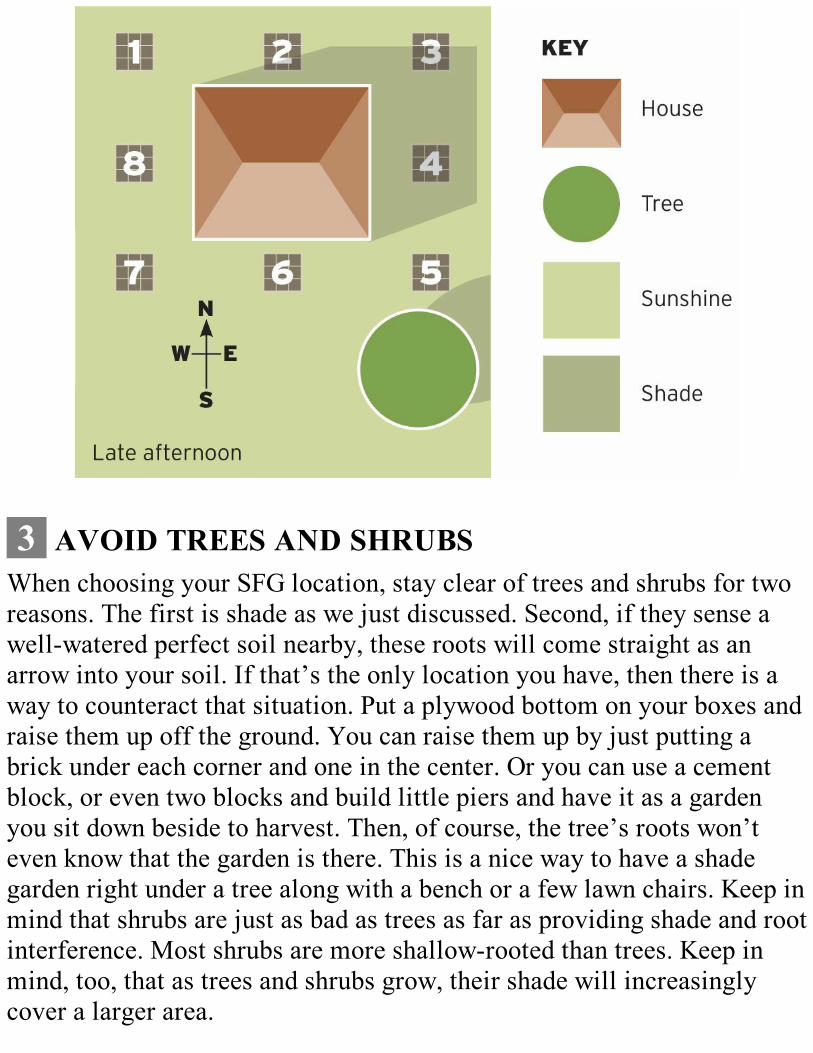
3 AVOID TREES AND SHRUBSWhen choosing your SFG location, stay clear of trees and shrubs for tworeasons. The first is shade as we just discussed. Second, if they sense awell-watered perfect soil nearby, these roots will come straight as anarrow into your soil. If that’s the only location you have, then there is away to counteract that situation. Put a plywood bottom on your boxes andraise them up off the ground. You can raise them up by just putting abrick under each corner and one in the center. Or you can use a cementblock, or even two blocks and build little piers and have it as a gardenyou sit down beside to harvest. Then, of course, the tree’s roots won’teven know that the garden is there. This is a nice way to have a shadegarden right under a tree along with a bench or a few lawn chairs. Keep inmind that shrubs are just as bad as trees as far as providing shade and rootinterference. Most shrubs are more shallow-rooted than trees. Keep inmind, too, that as trees and shrubs grow, their shade will increasinglycover a larger area.
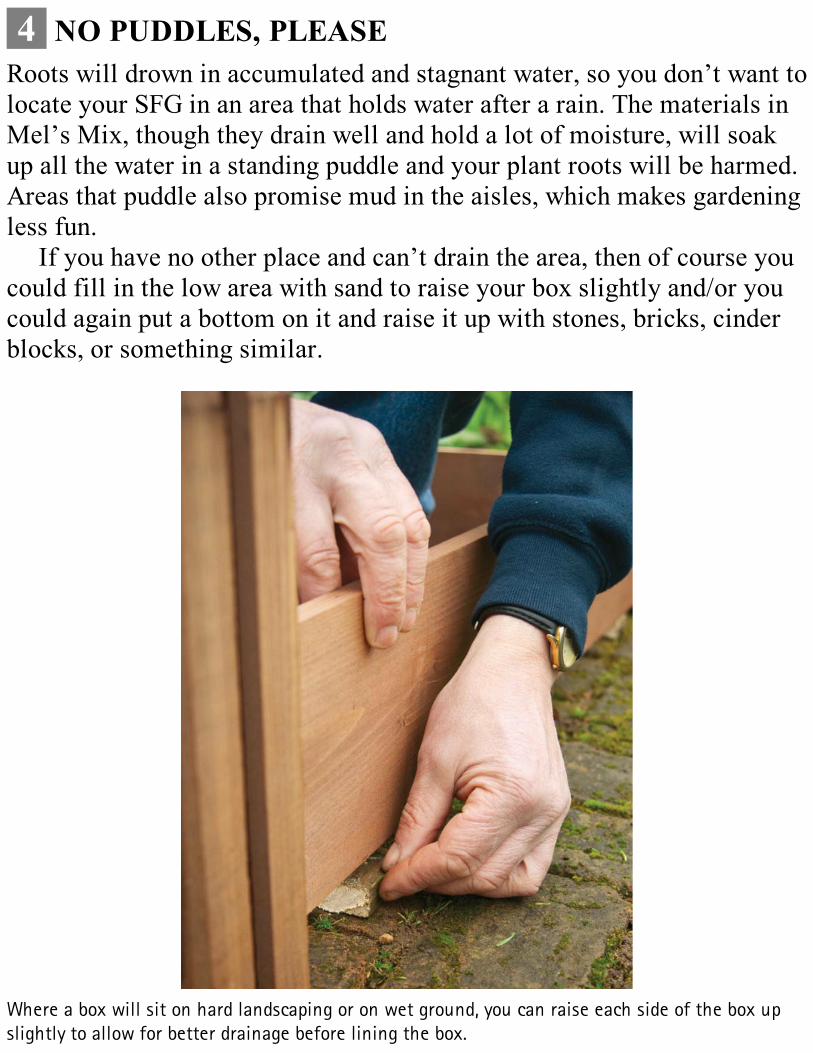
4 NO PUDDLES, PLEASERoots will drown in accumulated and stagnant water, so you don’t want tolocate your SFG in an area that holds water after a rain. The materials inMel’s Mix, though they drain well and hold a lot of moisture, will soakup all the water in a standing puddle and your plant roots will be harmed.Areas that puddle also promise mud in the aisles, which makes gardeningless fun.
If you have no other place and can’t drain the area, then of course youcould fill in the low area with sand to raise your box slightly and/or youcould again put a bottom on it and raise it up with stones, bricks, cinderblocks, or something similar.
Where a box will sit on hard landscaping or on wet ground, you can raise each side of the box upslightly to allow for better drainage before lining the box.
5 EXISTING SOIL—WHO CARES?When you’re choosing a location, it doesn’t really matter about thecondition of your existing soil. Many of the other gardening books tellyou how to go around the yard and dig test holes and see what kind of soilyou have. Or, how about all the unnecessary advice on how to take a soiltest and what the results mean? Forget about all that now. You don’t haveto know about it because we’re not going to use your existing soil. We’regoing to build bottomless boxes above the ground. You can even put yourboxes on the pavement or a patio and it won’t make any difference.
THE ENVELOPE, PLEASEThe best location is where you can see your garden more often from moredirections. Things like sunlight and avoiding trees and shrubs are merelyprecautions to help make your garden more successful. So walk aroundyour yard and think about the best place to locate and enjoy your garden.
DESIGNNow that you’ve determined how many boxes you’ll have and strolledaround your yard to find the best spot(s), it’s time to think about design.You can lay out your boxes so they turn corners, even intersect eachother, but keep in mind traffic and walking around. Don’t make dead endsor narrow places. Keep 3- or 4-foot aisles, and leave bigger areas forchairs, benches, and entranceways. Here is a fun idea: explain to theentire family the basic size and layout then let each member draw upideas and plans. Maybe everyone could have an area to design, build, andplant. Wouldn’t that be a great family project? Then, take a picture andsend it to me so we can share all kinds of designs with others.
Line Them UpYou can probably guess that, being a former army officer, I am going towant all the boxes lined up neatly and precisely, even perhaps having
them in a row (oh, what an unfortunate word)—excuse me—in a line. Imight want the entire area to be a square or at the very least a rectangle . .. but that’s just me. How about you—do you want a U-shape or an L-shape? Do whatever appeals to you.
Gardens Aren’t Just for Yards AnymoreHere’s another idea—no matter the season, you can build a SFG box witha plywood bottom and place it on your patio or picnic tabletop near yourback door. You may want to use smaller SFG boxes on the patio or decksuch as 2 × 2 or 2 × 4.
BE CREATIVEYou don’t have to be a landscape architect to measure and draw up whatyou imagine. The design is just as important as the size. You’re going tobe spending a lot of your time in your SFG—not working or weeding, butjust enjoying and relaxing. Be sure to make room for some chairs, abench, a water fountain, or a birdbath. One of the advantages of a SquareFoot Garden is that you have options in how you put it together so thatit’s perfect for you.

4
4Building Boxes and Structures
If you like to build things, you are going to love this chapter.A Square Foot Garden can be a lot like working with
Erector® sets, Lincoln Logs®, or Legos®. Since SFG growsso much in so little space and is made with readily available
materials, the basic box projects outlined in this chapterwon’t take all your time, space, or money.
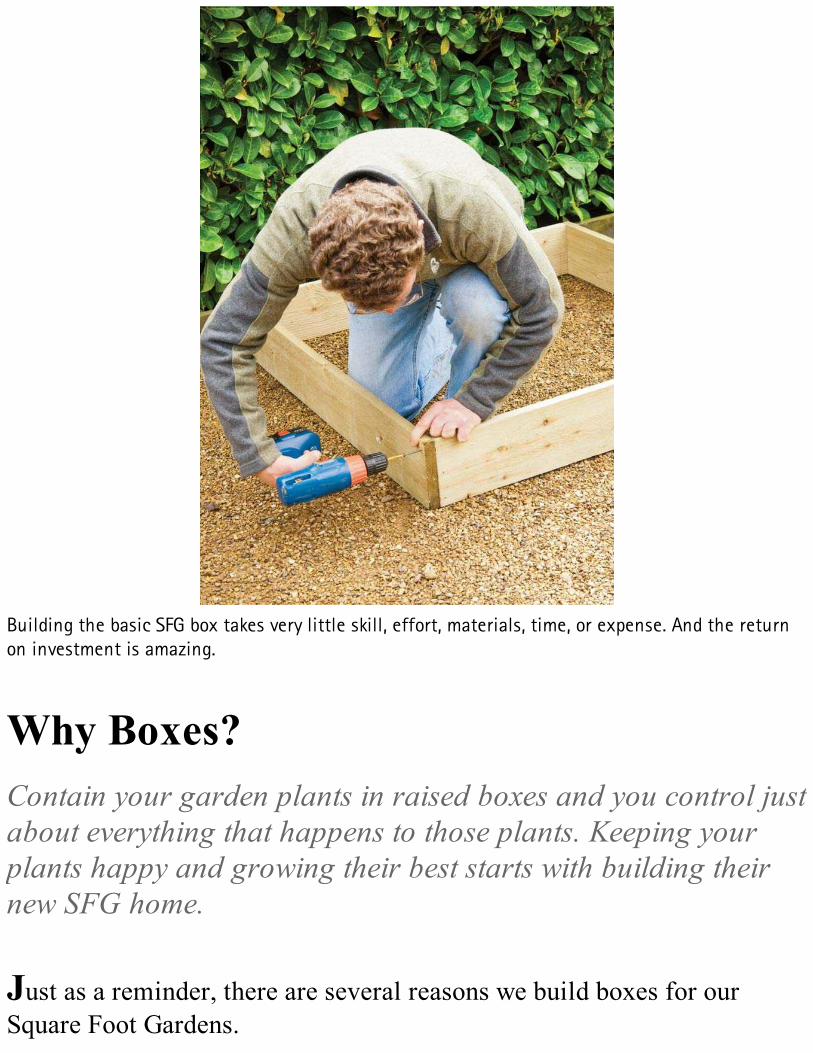
Building the basic SFG box takes very little skill, effort, materials, time, or expense. And the returnon investment is amazing.
Why Boxes?Contain your garden plants in raised boxes and you control justabout everything that happens to those plants. Keeping yourplants happy and growing their best starts with building theirnew SFG home.
Just as a reminder, there are several reasons we build boxes for ourSquare Foot Gardens.
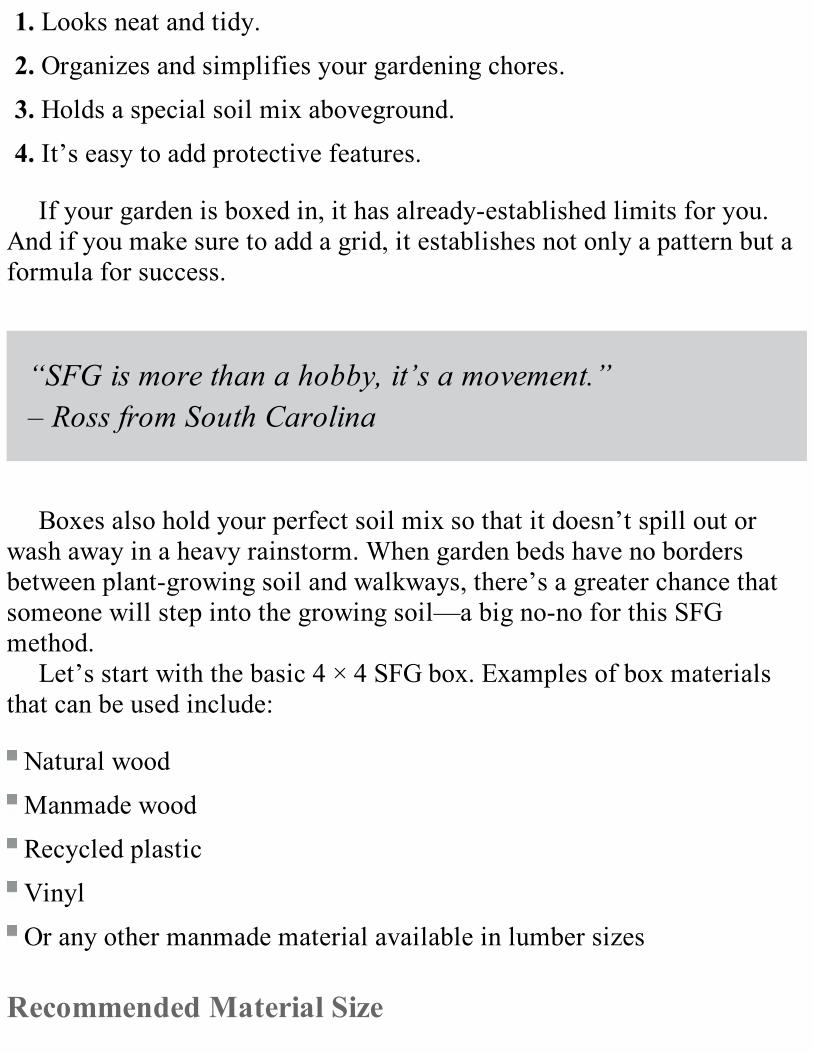
1. Looks neat and tidy.
2. Organizes and simplifies your gardening chores.
3. Holds a special soil mix aboveground.
4. It’s easy to add protective features.
If your garden is boxed in, it has already-established limits for you.And if you make sure to add a grid, it establishes not only a pattern but aformula for success.
“SFG is more than a hobby, it’s a movement.”– Ross from South Carolina
Boxes also hold your perfect soil mix so that it doesn’t spill out orwash away in a heavy rainstorm. When garden beds have no bordersbetween plant-growing soil and walkways, there’s a greater chance thatsomeone will step into the growing soil—a big no-no for this SFGmethod.
Let’s start with the basic 4 × 4 SFG box. Examples of box materialsthat can be used include:
Natural wood
Manmade wood
Recycled plastic
Vinyl
Or any other manmade material available in lumber sizes
Recommended Material Size
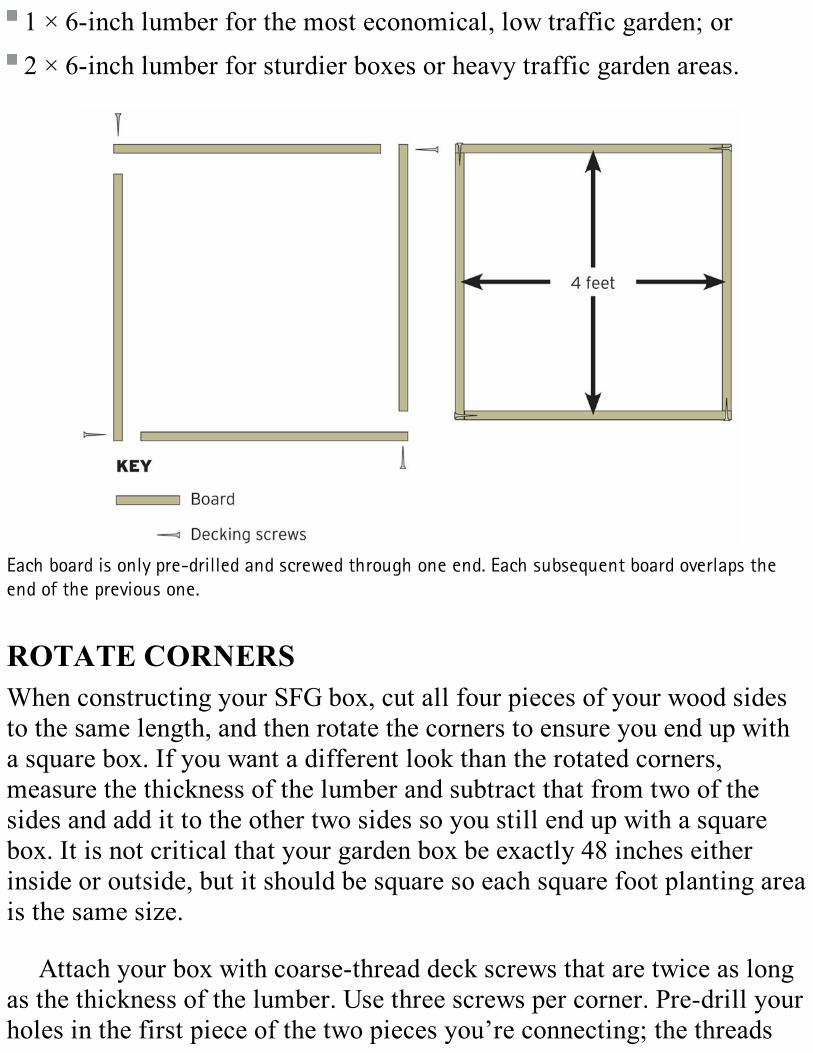
1 × 6-inch lumber for the most economical, low traffic garden; or
2 × 6-inch lumber for sturdier boxes or heavy traffic garden areas.
Each board is only pre-drilled and screwed through one end. Each subsequent board overlaps theend of the previous one.
ROTATE CORNERSWhen constructing your SFG box, cut all four pieces of your wood sidesto the same length, and then rotate the corners to ensure you end up witha square box. If you want a different look than the rotated corners,measure the thickness of the lumber and subtract that from two of thesides and add it to the other two sides so you still end up with a squarebox. It is not critical that your garden box be exactly 48 inches eitherinside or outside, but it should be square so each square foot planting areais the same size.
Attach your box with coarse-thread deck screws that are twice as longas the thickness of the lumber. Use three screws per corner. Pre-drill yourholes in the first piece of the two pieces you’re connecting; the threads
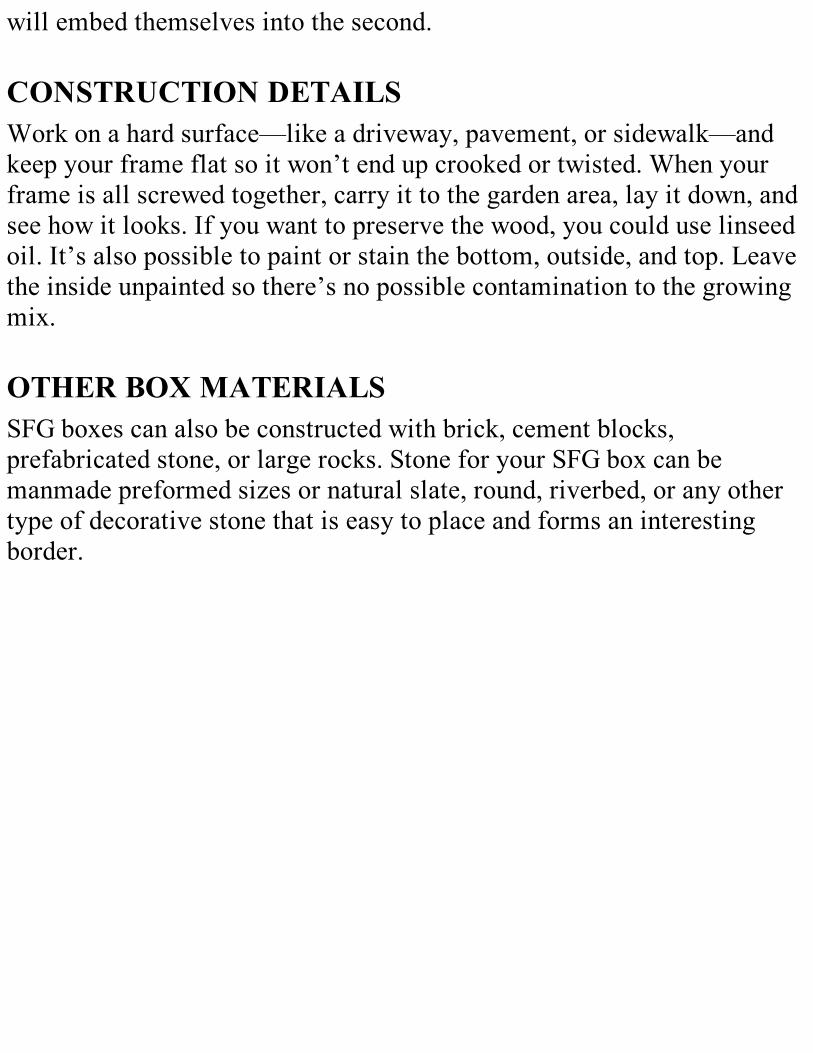
will embed themselves into the second.
CONSTRUCTION DETAILSWork on a hard surface—like a driveway, pavement, or sidewalk—andkeep your frame flat so it won’t end up crooked or twisted. When yourframe is all screwed together, carry it to the garden area, lay it down, andsee how it looks. If you want to preserve the wood, you could use linseedoil. It’s also possible to paint or stain the bottom, outside, and top. Leavethe inside unpainted so there’s no possible contamination to the growingmix.
OTHER BOX MATERIALSSFG boxes can also be constructed with brick, cement blocks,prefabricated stone, or large rocks. Stone for your SFG box can bemanmade preformed sizes or natural slate, round, riverbed, or any othertype of decorative stone that is easy to place and forms an interestingborder.

PENNY PINCHER
My idea of the best kind of wood is free wood. Go to any constructionsite, tell the foreman you are building a Square Foot Garden, and ask ifthey have any scrap lumber. Chances are they will be throwing out justwhat you need. They may even cut it for you if you ask nicely. Thenyour box is free.
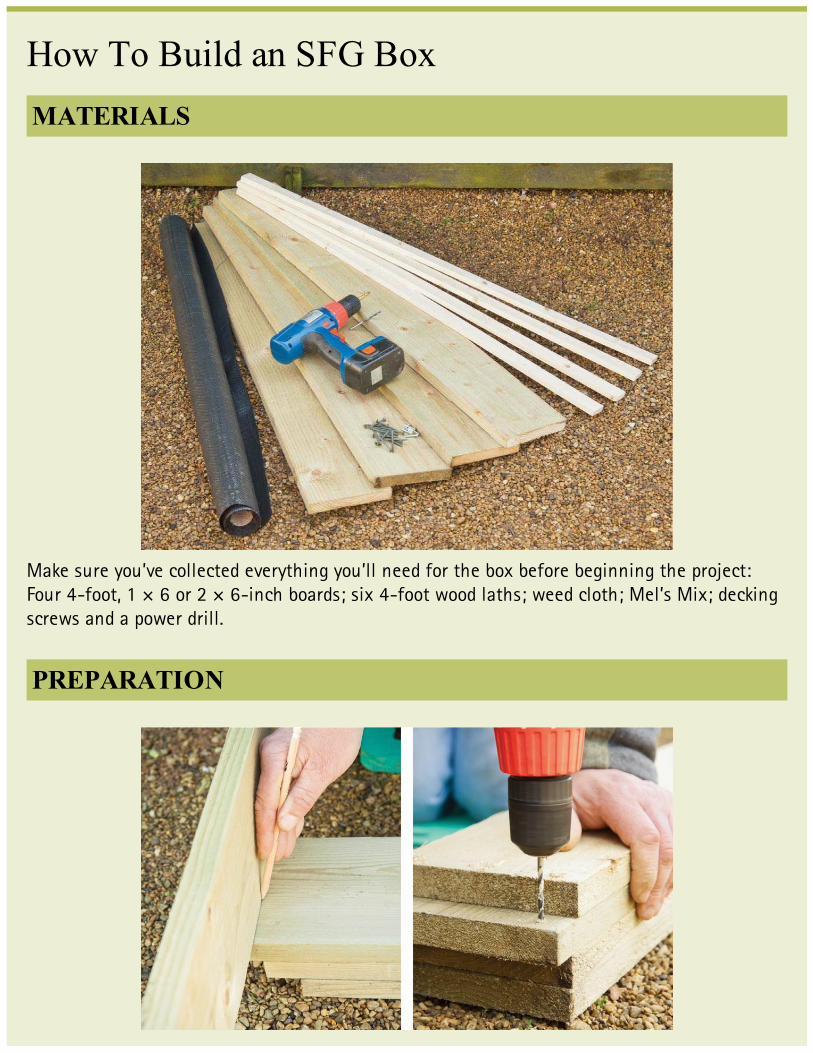
How To Build an SFG BoxMATERIALS
Make sure you’ve collected everything you’ll need for the box before beginning the project:Four 4-foot, 1 × 6 or 2 × 6-inch boards; six 4-foot wood laths; weed cloth; Mel’s Mix; deckingscrews and a power drill.
PREPARATION

Stack the four boards for the box sides in the stepped design shown at left; drill 3 holes in oneend of each board, by sliding each board back as you’re finished drilling the holes.
ASSEMBLY & FILLING
Screw three large, coarse-thread deck screws through the pre-drilled holes, overlapping boardends until you have a complete frame.
Move the frame to its final location, remove grass and weeds, and cut weed cloth to theoutside dimensions of the frame.
Add Mel’s Mix until it covers the bottom and then water. (Do this three times until your box isfull.) Then, add the grid and plant!
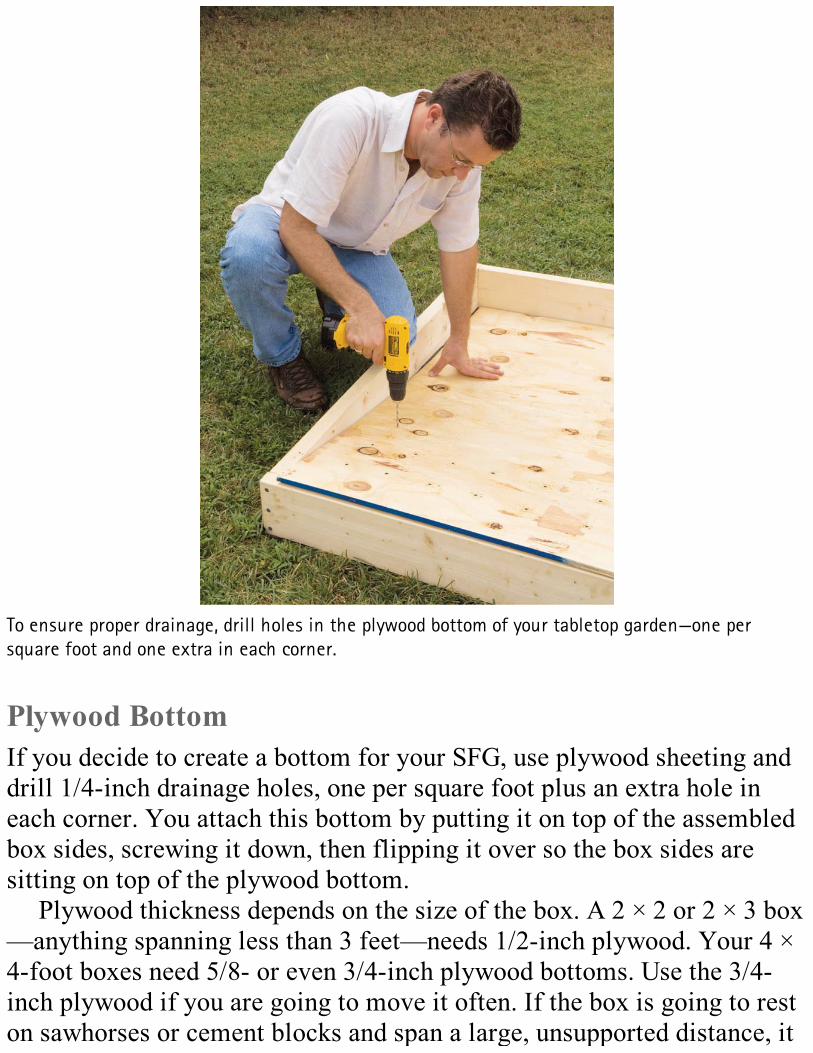
To ensure proper drainage, drill holes in the plywood bottom of your tabletop garden—one persquare foot and one extra in each corner.
Plywood BottomIf you decide to create a bottom for your SFG, use plywood sheeting anddrill 1/4-inch drainage holes, one per square foot plus an extra hole ineach corner. You attach this bottom by putting it on top of the assembledbox sides, screwing it down, then flipping it over so the box sides aresitting on top of the plywood bottom.
Plywood thickness depends on the size of the box. A 2 × 2 or 2 × 3 box—anything spanning less than 3 feet—needs 1/2-inch plywood. Your 4 ×4-foot boxes need 5/8- or even 3/4-inch plywood bottoms. Use the 3/4-inch plywood if you are going to move it often. If the box is going to reston sawhorses or cement blocks and span a large, unsupported distance, it
requires thicker plywood. I use regular plywood although some like tospend extra for the longer lasting, but much more expensive, marine orwaterproof plywood.
SPECIAL STRUCTURESFor out-of-season gardening, you can create spring, summer, fall, and/orwinter boxes. These are just 4 × 4 foot standard garden boxes or smaller 2× 4 size that can be modified for special uses; we’ll explain that inChapter 9. Depending on the time of year, boxes can be equipped withdouble decks, extensions, covers, or special modifications to allow alonger growing season. Usually these modifications are weather-relateditems like covers to shade tender seedlings in the summer or a frostprotector either in spring or fall. You will determine the bestmodifications, depending on your particular weather and environmentalconditions.
RAILING BOXESIf you have flat railings, it is very easy to set a box right on top of it. Forstability, it should be bolted to the wood railing. If you can’t bolt yourboxes down and you’re higher than the first floor, I would place the boxeson the floor. Consider the strength and size of your railing and thesurrounding environment, and make sure your railing boxes aren’t toobig.
Railing boxes make a decorative and excellent garden, particularly ifyou add trailing types of plants that add some color and character. Thereare various holders sold at home improvement stores that snap onto yourrailings to accommodate standard-sized boxes. Hang the box over theoutside edge, and it won’t take up any of your valuable deck space, and,should it drip when you’re watering, the water will bypass the deckbelow. However, if your box is on the inside of the railing, it would bemuch safer.

PYRAMID BOXESBe creative and make your SFG uniquely yours. Why not get fancy andstack one on top of another to create pyramids? Why would you do that?Because they’re spectacular, and they will be the highlight and focalpoint of your entire garden. Construction is very simple with just a fewbraces for stability.
Step Up, Young LadyThe next fancy garden layout would be to make a standard 4-foot wide byany length box but every 2 or 4 feet step up by one level. There are manyarrangements you could design, and they would be limited only by yourimagination. Build them the same way as the corner pyramid with aninside brace for every 4-foot section.
Make Boxes Extra DeepMaking boxes that are extra deep mean they are extra dramatic. I knowI’ve told you that 6 inches of Mel’s Mix is enough for all plants, but yourgarden becomes more dramatic when the container is extra tall. If youdecide to build your box taller, just use 8-, 10-, or 12-inch lumber insteadof the normal 6 inches. The only drawback is cost. But no matter—you’re
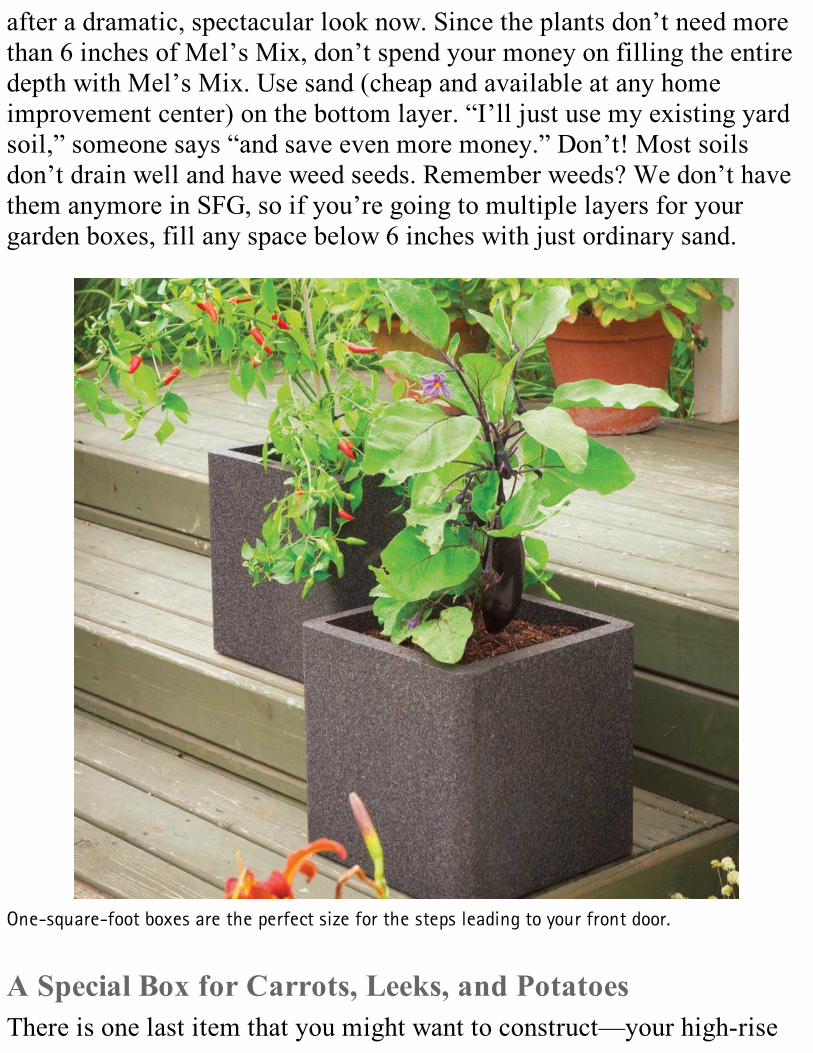
after a dramatic, spectacular look now. Since the plants don’t need morethan 6 inches of Mel’s Mix, don’t spend your money on filling the entiredepth with Mel’s Mix. Use sand (cheap and available at any homeimprovement center) on the bottom layer. “I’ll just use my existing yardsoil,” someone says “and save even more money.” Don’t! Most soilsdon’t drain well and have weed seeds. Remember weeds? We don’t havethem anymore in SFG, so if you’re going to multiple layers for yourgarden boxes, fill any space below 6 inches with just ordinary sand.
One-square-foot boxes are the perfect size for the steps leading to your front door.
A Special Box for Carrots, Leeks, and PotatoesThere is one last item that you might want to construct—your high-rise
boxes for carrots, leeks, and potatoes. These root crops need deep soil soinstead of digging down as in most gardening methods, we take the easyway and build up. Build a 1 × 1-foot box either 6, 9, or 12 inches tall outof plywood or any thin type of lumber. See Chapter 6 for details onplanting and growing.
GRIDS AND MATERIALSGrids are a must. Every box should have its own permanent andprominent grid. I’m so adamant about having a grid on every box I tellpeople that if your SFG doesn’t have a grid, it is not a Square FootGarden. But with a grid, it’s an attractive, unusual, and unique garden. Ittells the story of SFG in one glance. In addition it has many unseenbenefits, so stick with me on this one and build a grid for all of yourboxes.
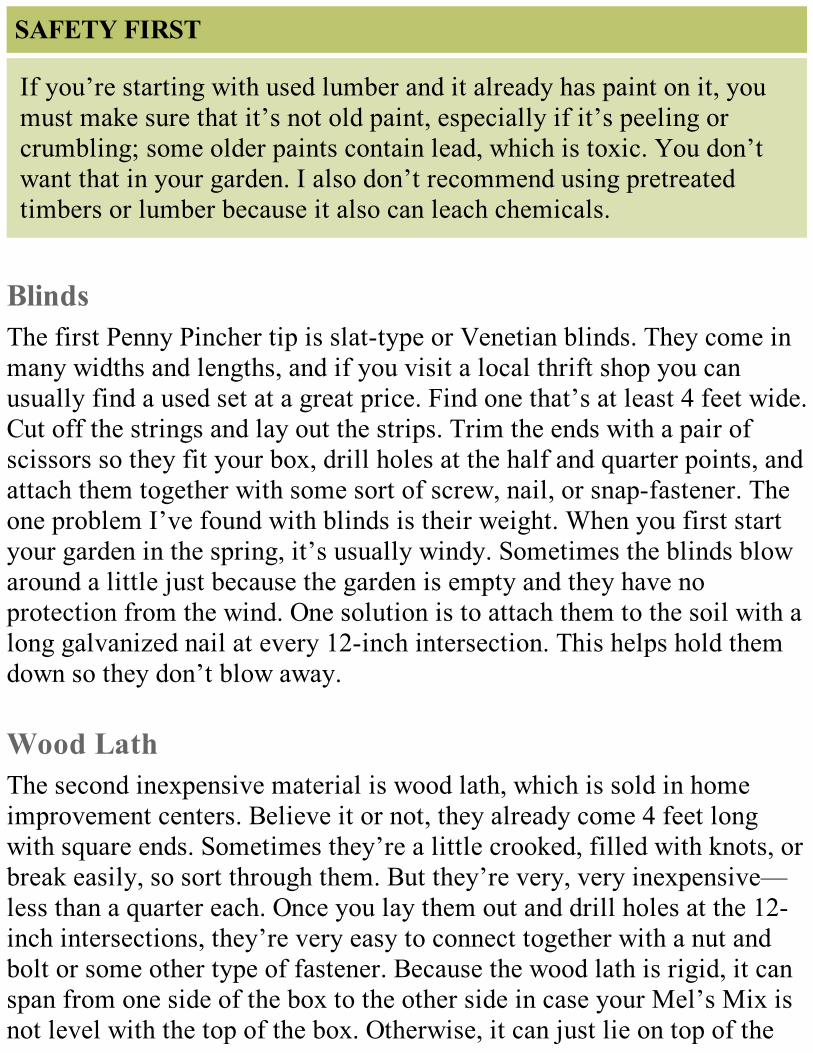
SAFETY FIRST
If you’re starting with used lumber and it already has paint on it, youmust make sure that it’s not old paint, especially if it’s peeling orcrumbling; some older paints contain lead, which is toxic. You don’twant that in your garden. I also don’t recommend using pretreatedtimbers or lumber because it also can leach chemicals.
BlindsThe first Penny Pincher tip is slat-type or Venetian blinds. They come inmany widths and lengths, and if you visit a local thrift shop you canusually find a used set at a great price. Find one that’s at least 4 feet wide.Cut off the strings and lay out the strips. Trim the ends with a pair ofscissors so they fit your box, drill holes at the half and quarter points, andattach them together with some sort of screw, nail, or snap-fastener. Theone problem I’ve found with blinds is their weight. When you first startyour garden in the spring, it’s usually windy. Sometimes the blinds blowaround a little just because the garden is empty and they have noprotection from the wind. One solution is to attach them to the soil with along galvanized nail at every 12-inch intersection. This helps hold themdown so they don’t blow away.
Wood LathThe second inexpensive material is wood lath, which is sold in homeimprovement centers. Believe it or not, they already come 4 feet longwith square ends. Sometimes they’re a little crooked, filled with knots, orbreak easily, so sort through them. But they’re very, very inexpensive—less than a quarter each. Once you lay them out and drill holes at the 12-inch intersections, they’re very easy to connect together with a nut andbolt or some other type of fastener. Because the wood lath is rigid, it canspan from one side of the box to the other side in case your Mel’s Mix isnot level with the top of the box. Otherwise, it can just lie on top of the

soil. If your grid spans across the box sides, keep the grid from movingabout by drilling a hole in the ends of the two center slats and screwingthem to your wooden box. Some people like to take the wood lath grid upfor the winter so it doesn’t get wet and rot as easily. Unscrew the fourscrews, fold the grid, and hang it on the garage wall. Put the screws in aplastic bag and hang it up with the grid to keep the screws safe and dryover the winter.
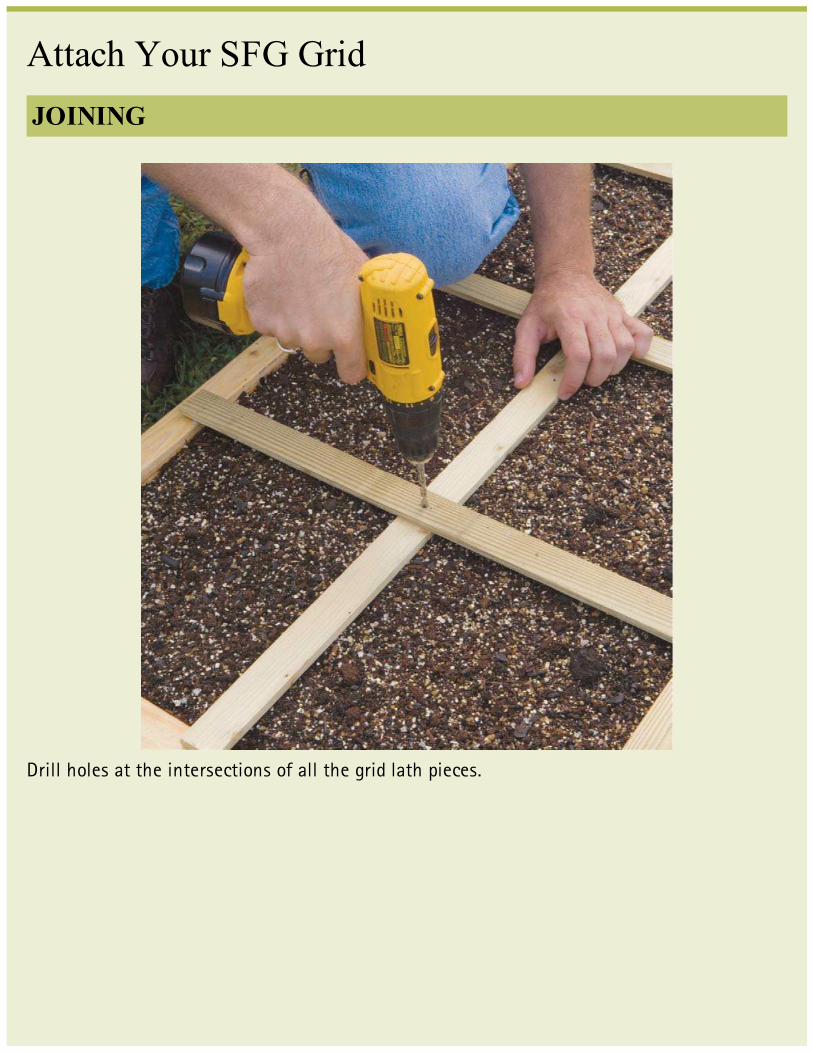
Attach Your SFG GridJOINING
Drill holes at the intersections of all the grid lath pieces.
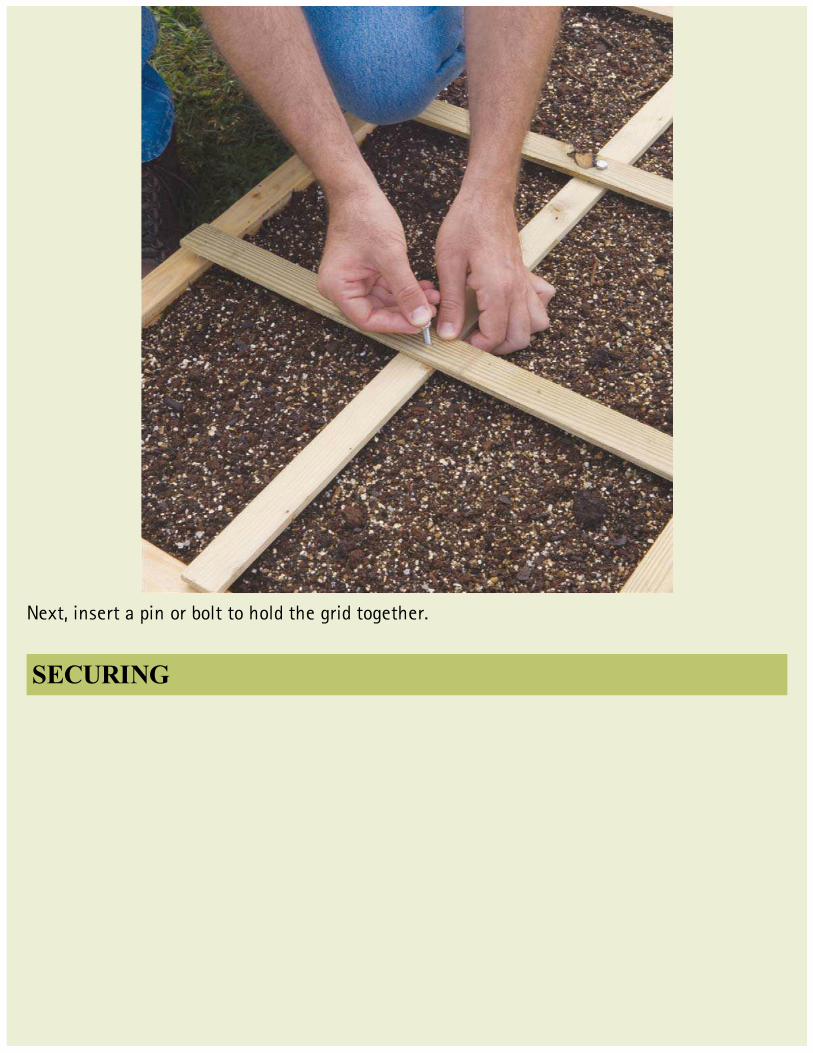
Next, insert a pin or bolt to hold the grid together.
SECURING
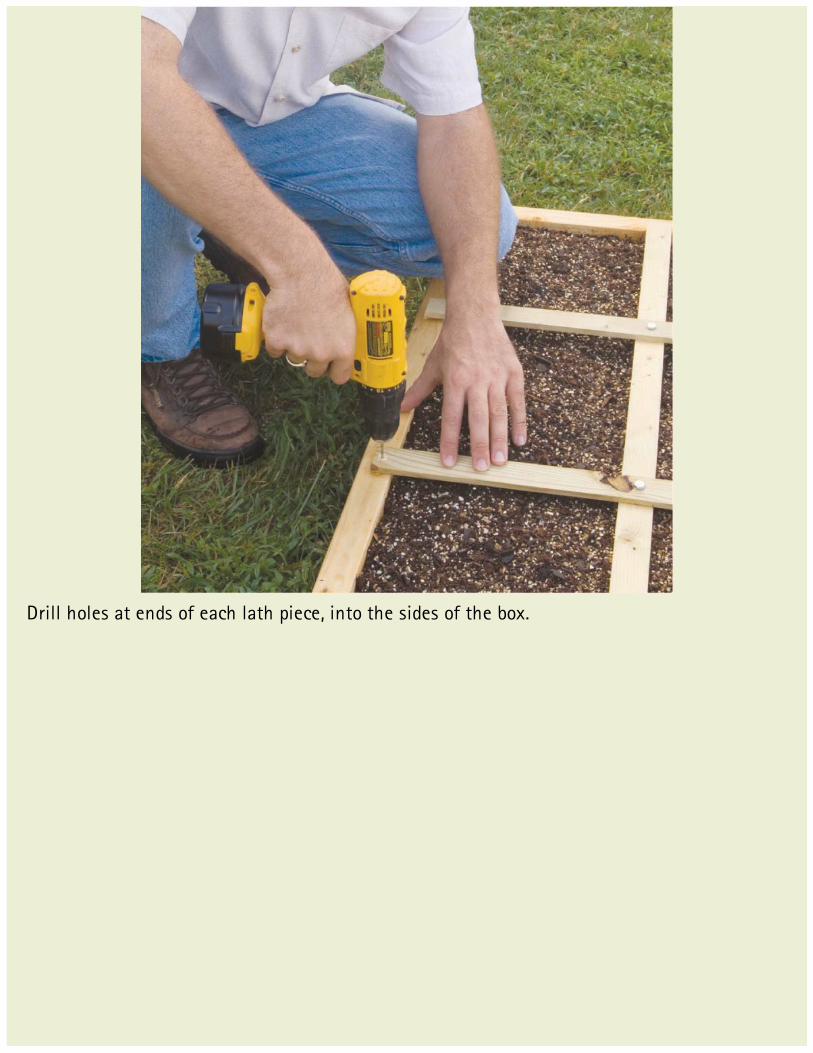
Drill holes at ends of each lath piece, into the sides of the box.
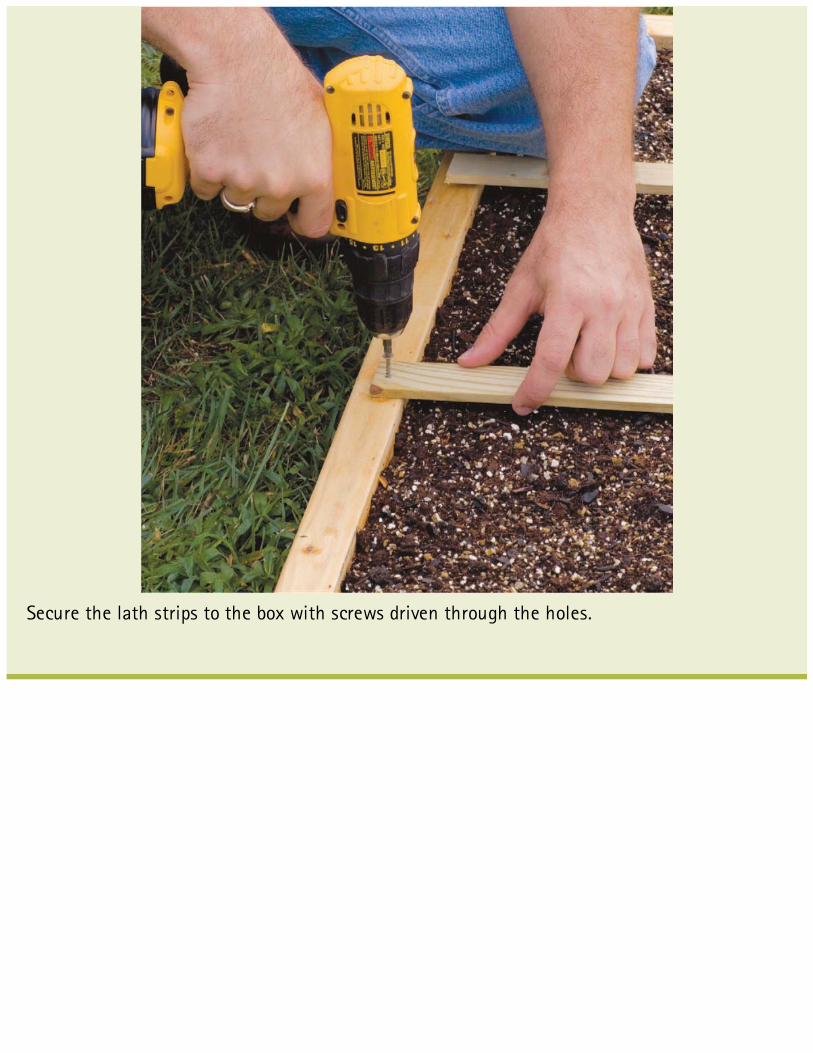
Secure the lath strips to the box with screws driven through the holes.
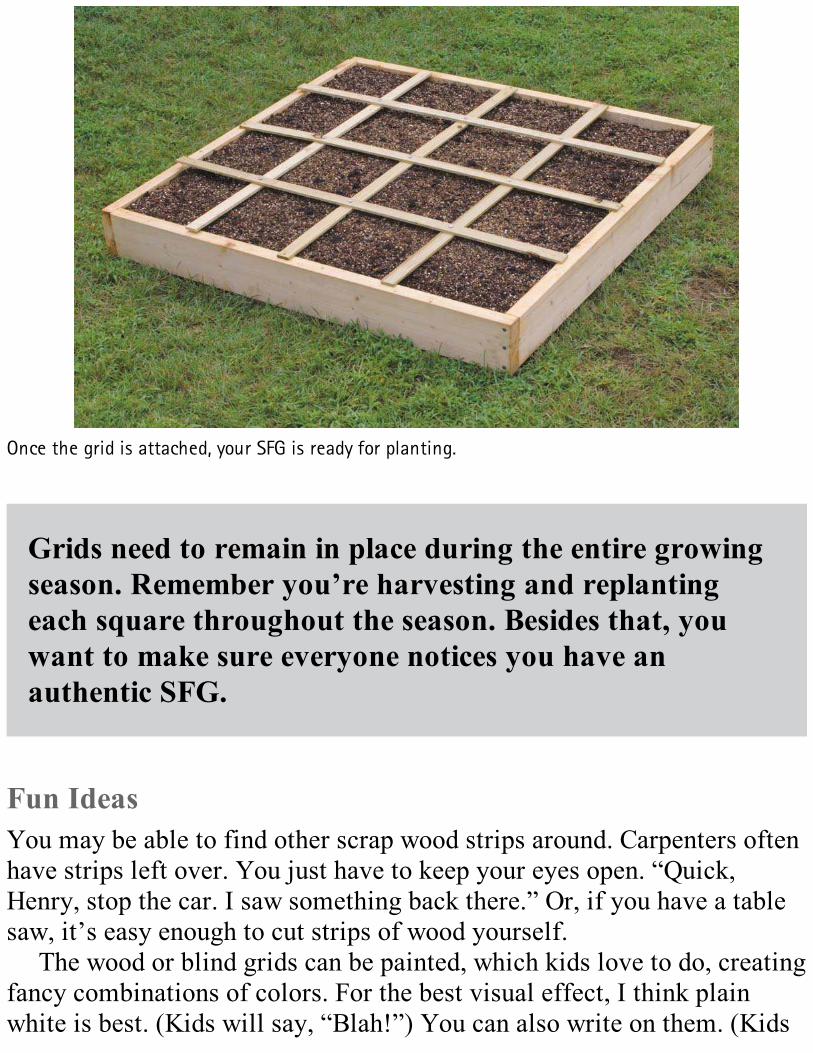
Once the grid is attached, your SFG is ready for planting.
Grids need to remain in place during the entire growingseason. Remember you’re harvesting and replantingeach square throughout the season. Besides that, youwant to make sure everyone notices you have anauthentic SFG.
Fun IdeasYou may be able to find other scrap wood strips around. Carpenters oftenhave strips left over. You just have to keep your eyes open. “Quick,Henry, stop the car. I saw something back there.” Or, if you have a tablesaw, it’s easy enough to cut strips of wood yourself.
The wood or blind grids can be painted, which kids love to do, creatingfancy combinations of colors. For the best visual effect, I think plainwhite is best. (Kids will say, “Blah!”) You can also write on them. (Kids
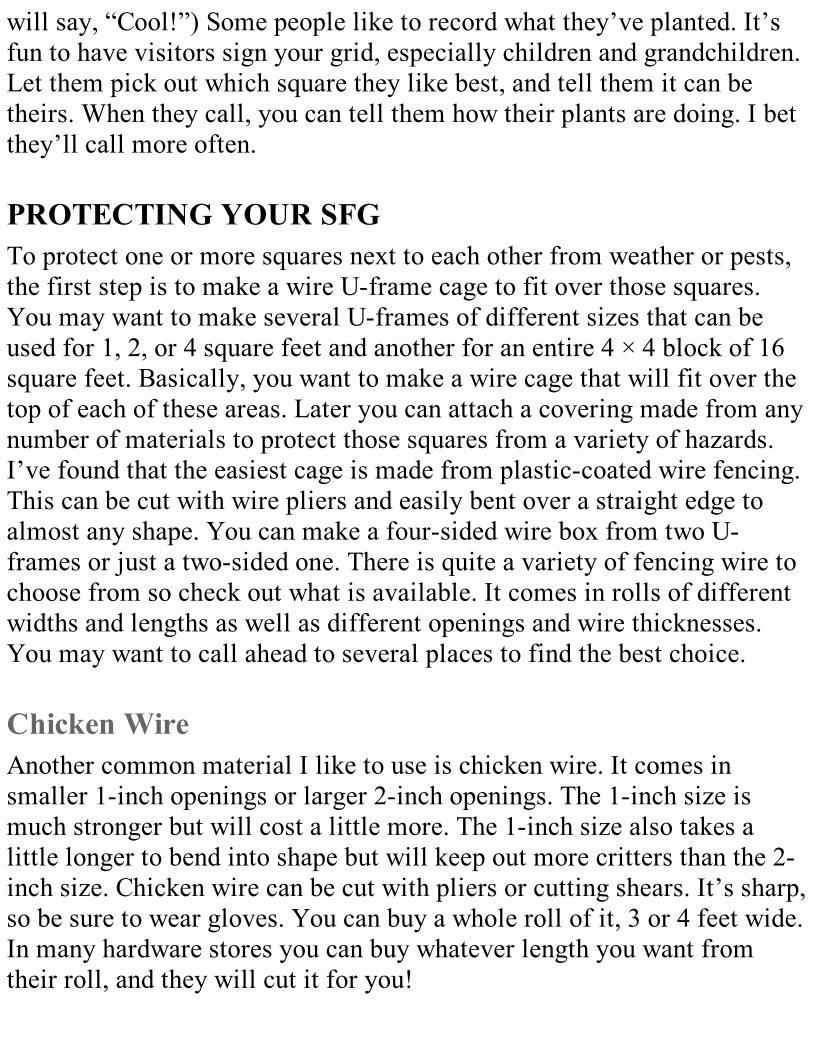
will say, “Cool!”) Some people like to record what they’ve planted. It’sfun to have visitors sign your grid, especially children and grandchildren.Let them pick out which square they like best, and tell them it can betheirs. When they call, you can tell them how their plants are doing. I betthey’ll call more often.
PROTECTING YOUR SFGTo protect one or more squares next to each other from weather or pests,the first step is to make a wire U-frame cage to fit over those squares.You may want to make several U-frames of different sizes that can beused for 1, 2, or 4 square feet and another for an entire 4 × 4 block of 16square feet. Basically, you want to make a wire cage that will fit over thetop of each of these areas. Later you can attach a covering made from anynumber of materials to protect those squares from a variety of hazards.I’ve found that the easiest cage is made from plastic-coated wire fencing.This can be cut with wire pliers and easily bent over a straight edge toalmost any shape. You can make a four-sided wire box from two U-frames or just a two-sided one. There is quite a variety of fencing wire tochoose from so check out what is available. It comes in rolls of differentwidths and lengths as well as different openings and wire thicknesses.You may want to call ahead to several places to find the best choice.
Chicken WireAnother common material I like to use is chicken wire. It comes insmaller 1-inch openings or larger 2-inch openings. The 1-inch size ismuch stronger but will cost a little more. The 1-inch size also takes alittle longer to bend into shape but will keep out more critters than the 2-inch size. Chicken wire can be cut with pliers or cutting shears. It’s sharp,so be sure to wear gloves. You can buy a whole roll of it, 3 or 4 feet wide.In many hardware stores you can buy whatever length you want fromtheir roll, and they will cut it for you!
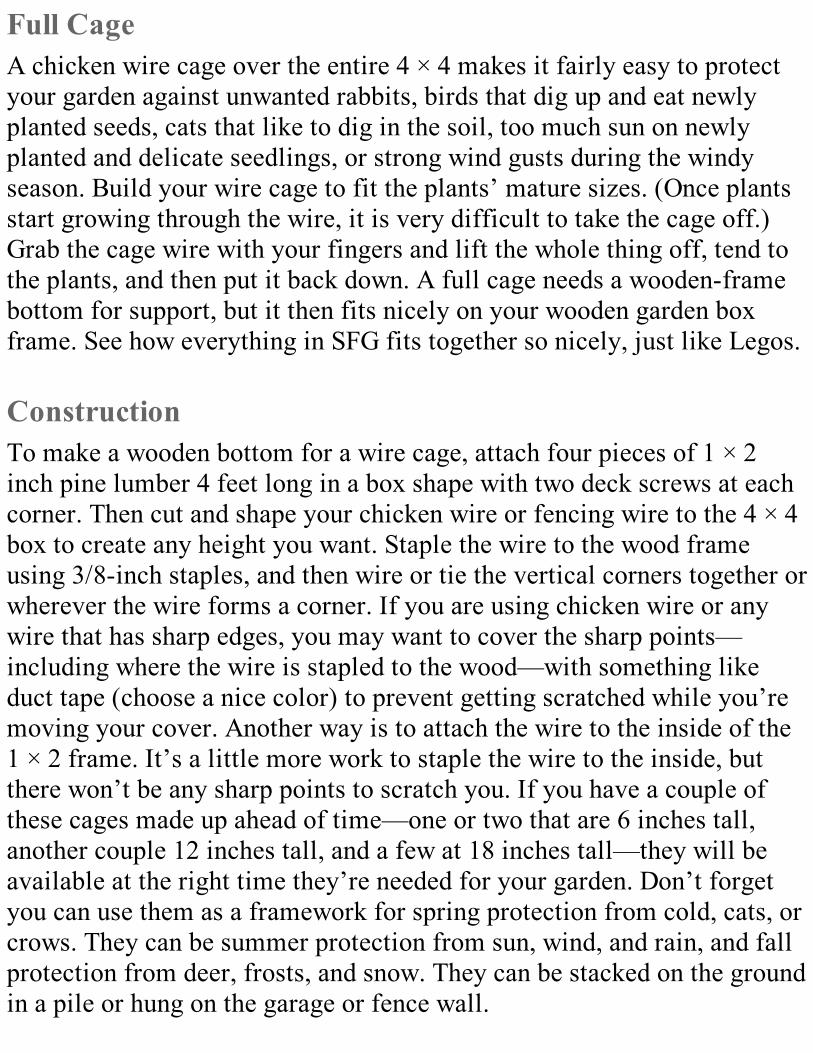
Full CageA chicken wire cage over the entire 4 × 4 makes it fairly easy to protectyour garden against unwanted rabbits, birds that dig up and eat newlyplanted seeds, cats that like to dig in the soil, too much sun on newlyplanted and delicate seedlings, or strong wind gusts during the windyseason. Build your wire cage to fit the plants’ mature sizes. (Once plantsstart growing through the wire, it is very difficult to take the cage off.)Grab the cage wire with your fingers and lift the whole thing off, tend tothe plants, and then put it back down. A full cage needs a wooden-framebottom for support, but it then fits nicely on your wooden garden boxframe. See how everything in SFG fits together so nicely, just like Legos.
ConstructionTo make a wooden bottom for a wire cage, attach four pieces of 1 × 2inch pine lumber 4 feet long in a box shape with two deck screws at eachcorner. Then cut and shape your chicken wire or fencing wire to the 4 × 4box to create any height you want. Staple the wire to the wood frameusing 3/8-inch staples, and then wire or tie the vertical corners together orwherever the wire forms a corner. If you are using chicken wire or anywire that has sharp edges, you may want to cover the sharp points—including where the wire is stapled to the wood—with something likeduct tape (choose a nice color) to prevent getting scratched while you’removing your cover. Another way is to attach the wire to the inside of the1 × 2 frame. It’s a little more work to staple the wire to the inside, butthere won’t be any sharp points to scratch you. If you have a couple ofthese cages made up ahead of time—one or two that are 6 inches tall,another couple 12 inches tall, and a few at 18 inches tall—they will beavailable at the right time they’re needed for your garden. Don’t forgetyou can use them as a framework for spring protection from cold, cats, orcrows. They can be summer protection from sun, wind, and rain, and fallprotection from deer, frosts, and snow. They can be stacked on the groundin a pile or hung on the garage or fence wall.

“Square Foot Gardening is great for the family. Eachperson has his or her own plot.”– Gary from Michigan
COVERSMaterials used for covering the wire cages can be anything from clearplastic to protect plants from wind or cold weather and snow, sleet, orrain—to some sort of cloth like cheesecloth or floating cover to protectplants from insects getting in to lay their eggs.
ClothespinsA cover can be easily held in place with clothespins. The cover can beopen on some sides to allow air to circulate or it can be completelyenclosed. One consideration, of course, is whether too much heat willbuild up inside the cage, and that depends on the season and the amountof sunlight your garden receives in your area. When there is too muchsunlight for newly planted transplants, just put a shade cloth over the topof your cage. If you have several newly planted squares among otherwell-established plant squares, you can attach shade patches over justthose plants that need a little shade.
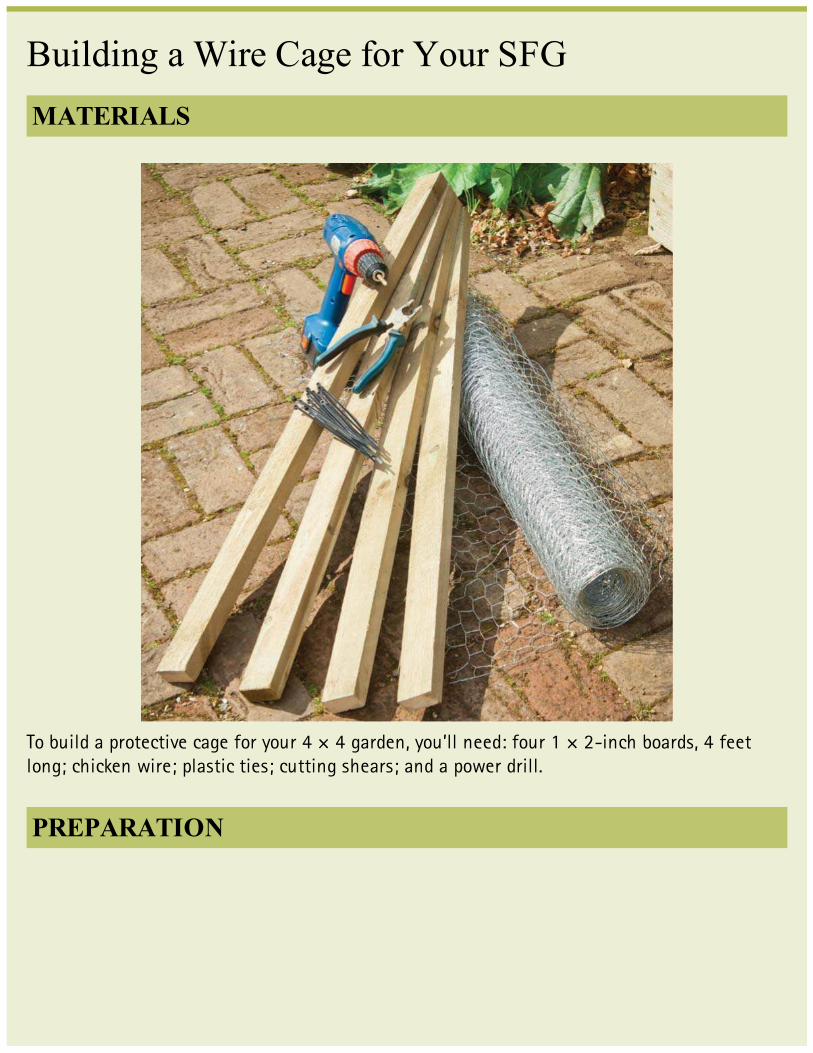
Building a Wire Cage for Your SFGMATERIALS
To build a protective cage for your 4 × 4 garden, you’ll need: four 1 × 2-inch boards, 4 feetlong; chicken wire; plastic ties; cutting shears; and a power drill.
PREPARATION
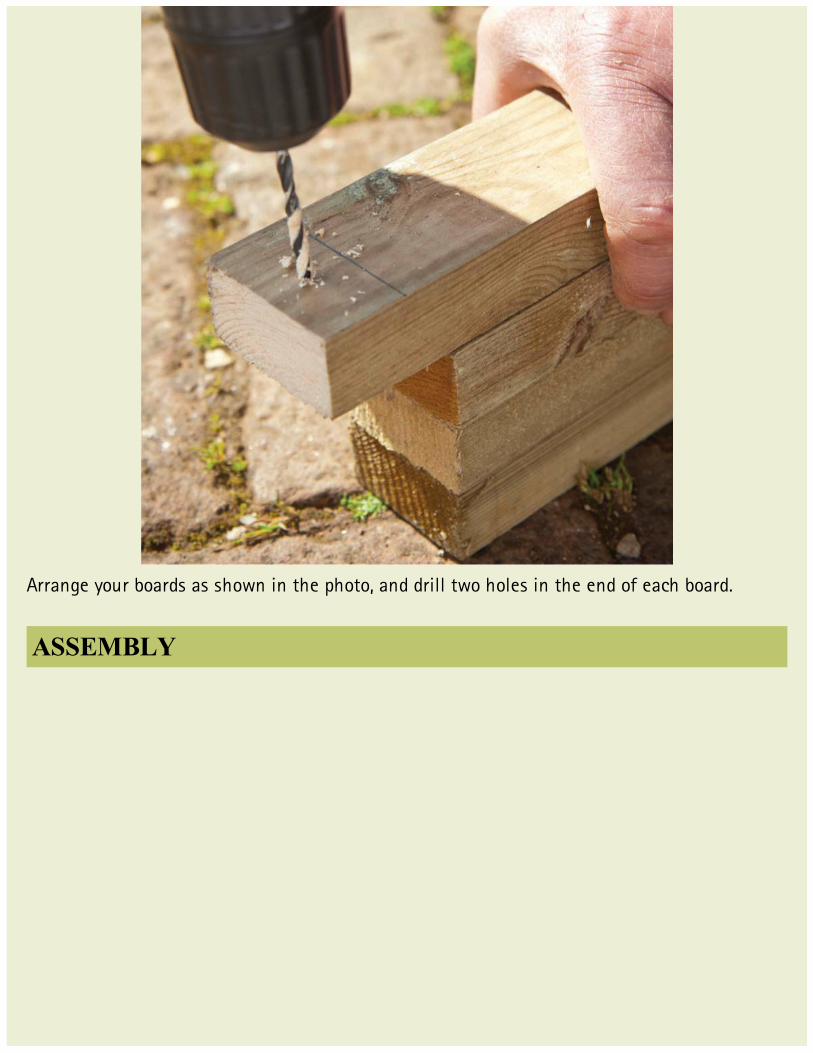
Arrange your boards as shown in the photo, and drill two holes in the end of each board.
ASSEMBLY
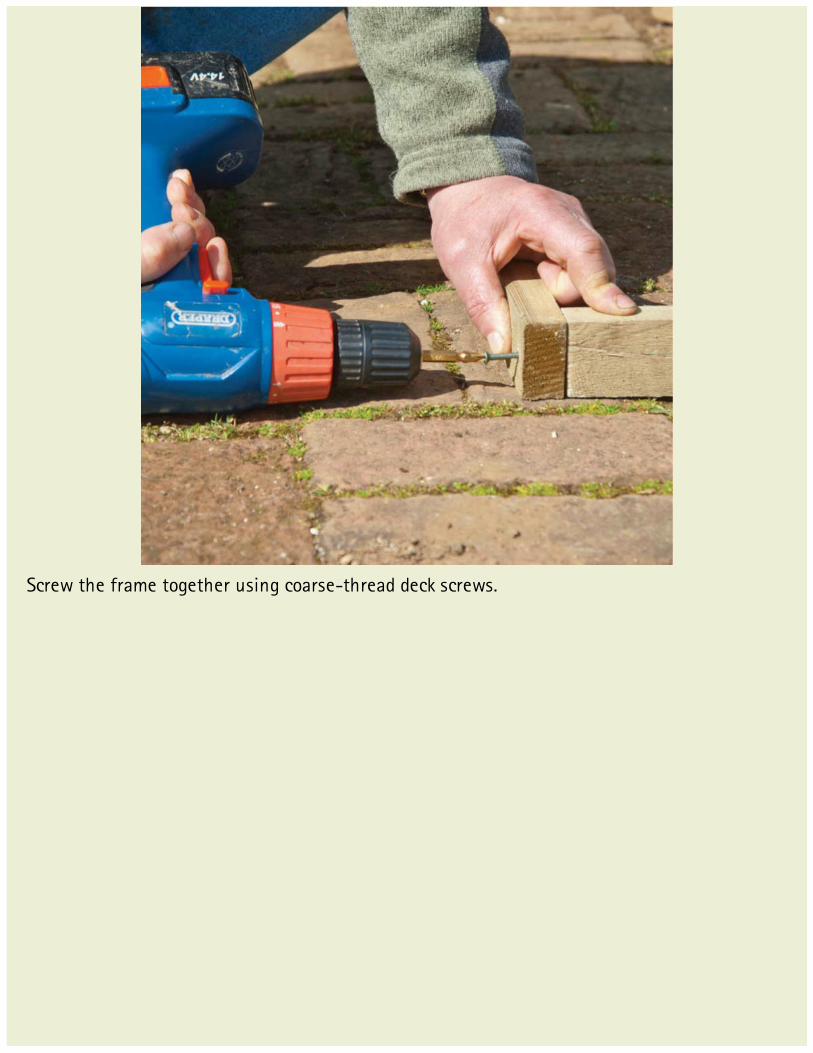
Screw the frame together using coarse-thread deck screws.

Roll out the chicken wire and cut to length, for sides high enough to cover your mature plants.
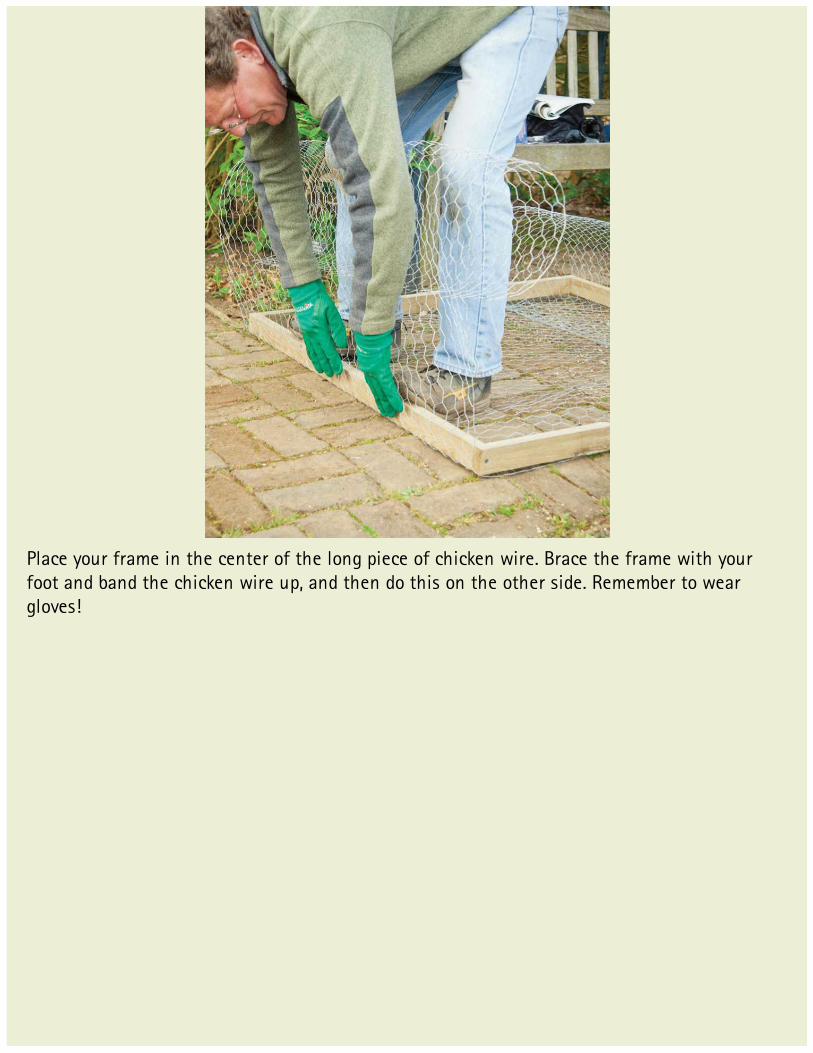
Place your frame in the center of the long piece of chicken wire. Brace the frame with yourfoot and band the chicken wire up, and then do this on the other side. Remember to weargloves!
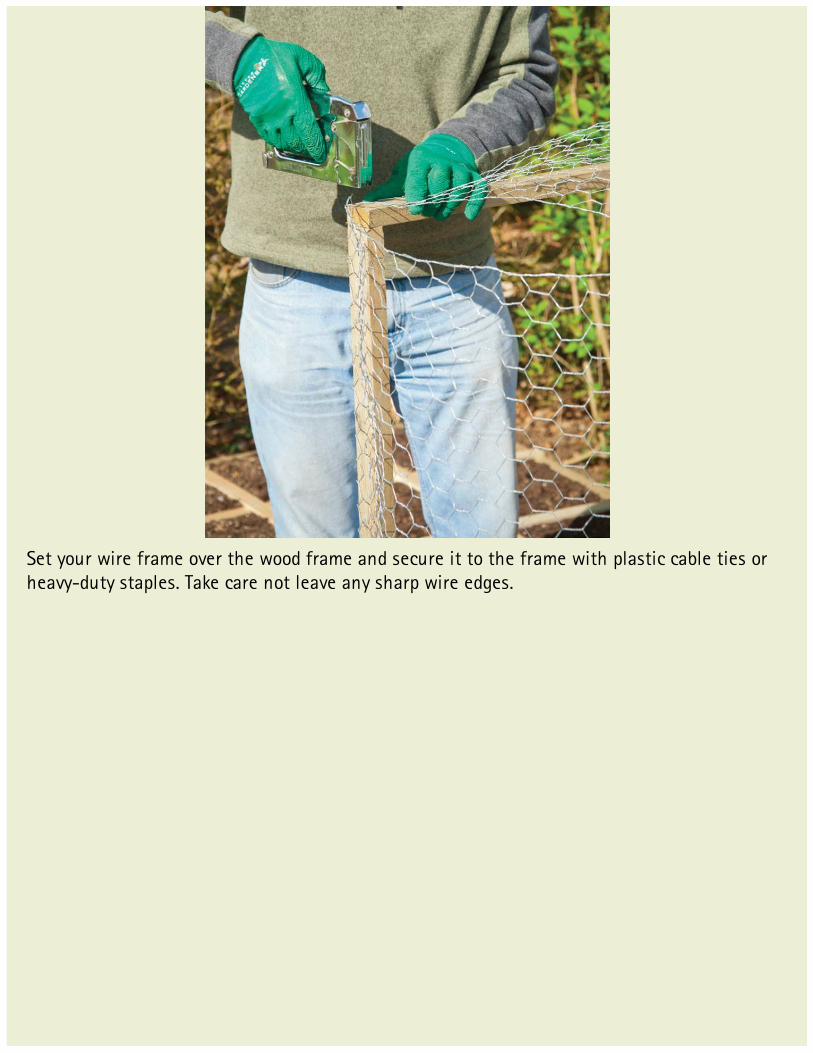
Set your wire frame over the wood frame and secure it to the frame with plastic cable ties orheavy-duty staples. Take care not leave any sharp wire edges.
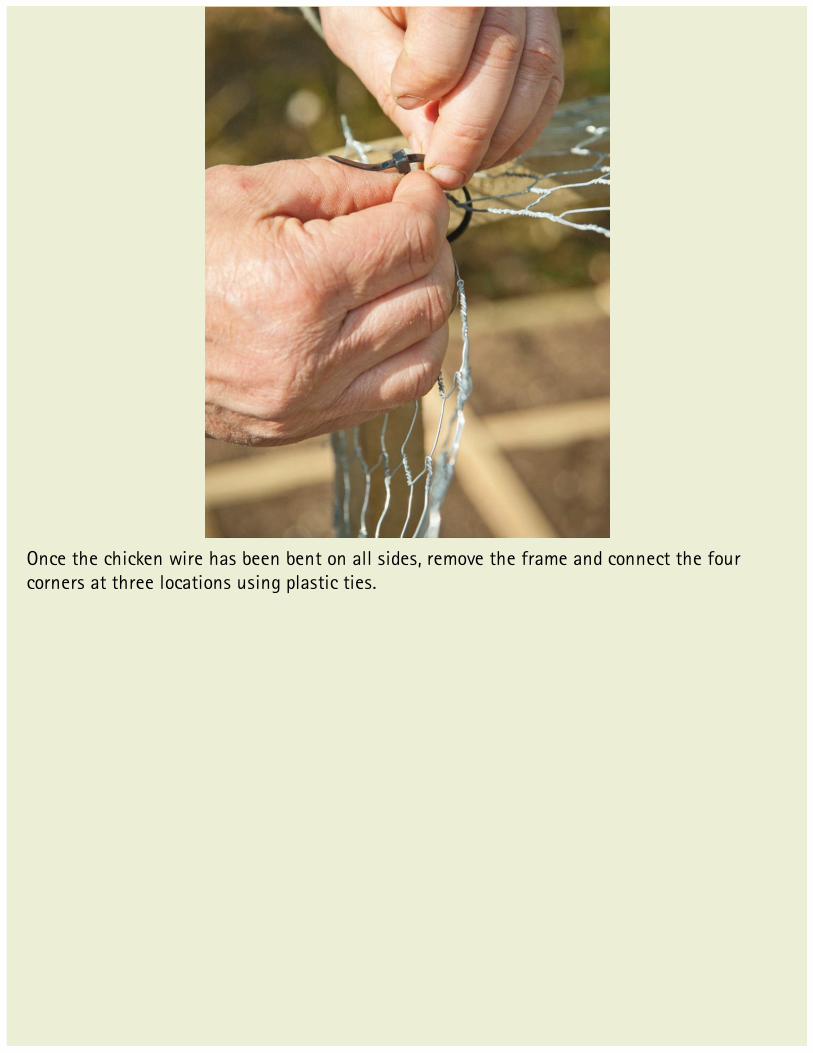
Once the chicken wire has been bent on all sides, remove the frame and connect the fourcorners at three locations using plastic ties.
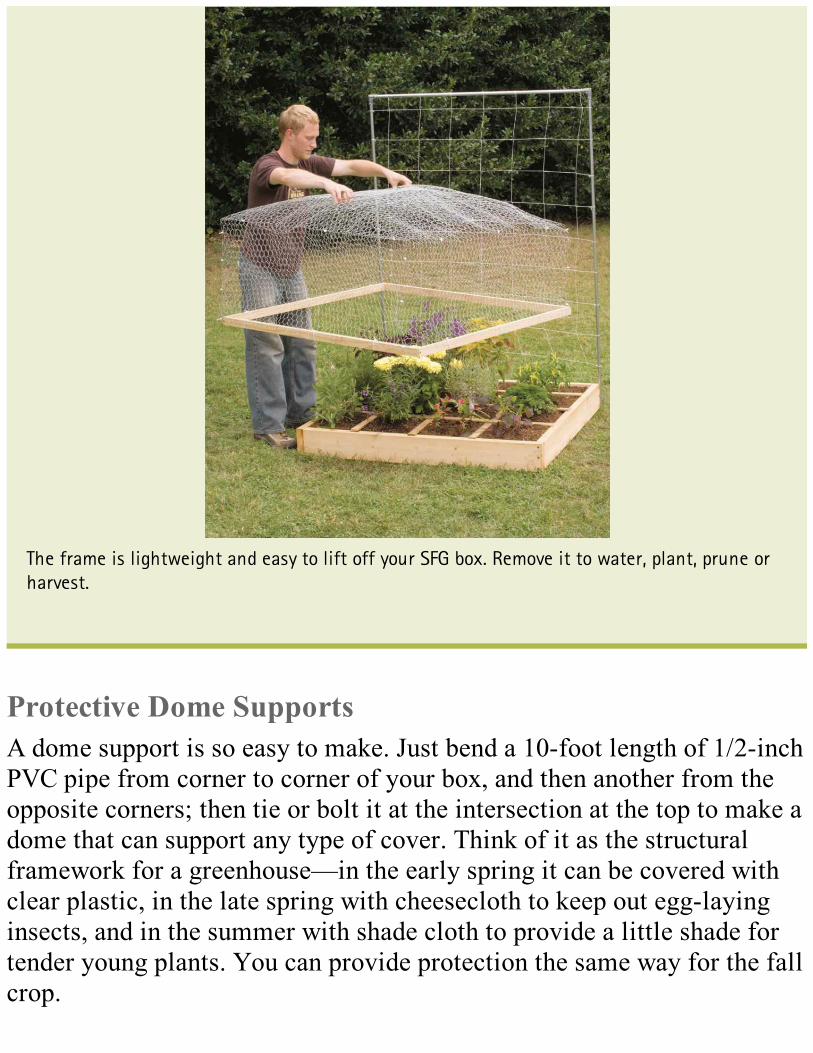
The frame is lightweight and easy to lift off your SFG box. Remove it to water, plant, prune orharvest.
Protective Dome SupportsA dome support is so easy to make. Just bend a 10-foot length of 1/2-inchPVC pipe from corner to corner of your box, and then another from theopposite corners; then tie or bolt it at the intersection at the top to make adome that can support any type of cover. Think of it as the structuralframework for a greenhouse—in the early spring it can be covered withclear plastic, in the late spring with cheesecloth to keep out egg-layinginsects, and in the summer with shade cloth to provide a little shade fortender young plants. You can provide protection the same way for the fallcrop.
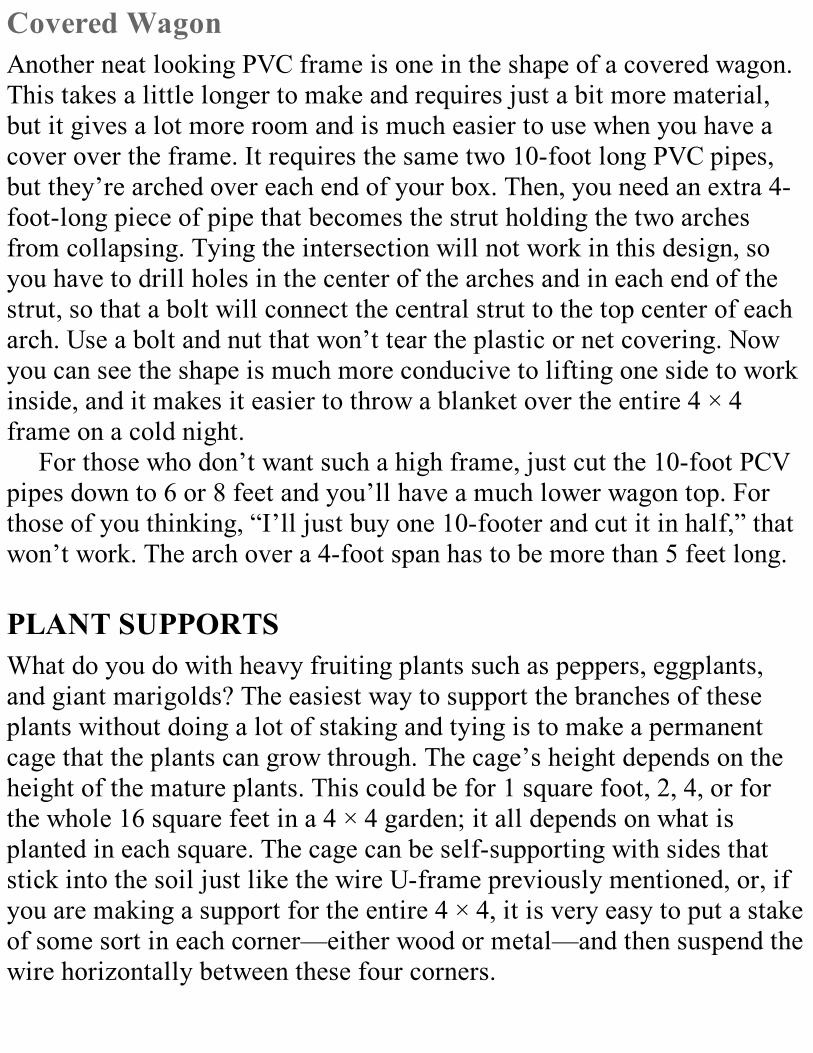
Covered WagonAnother neat looking PVC frame is one in the shape of a covered wagon.This takes a little longer to make and requires just a bit more material,but it gives a lot more room and is much easier to use when you have acover over the frame. It requires the same two 10-foot long PVC pipes,but they’re arched over each end of your box. Then, you need an extra 4-foot-long piece of pipe that becomes the strut holding the two archesfrom collapsing. Tying the intersection will not work in this design, soyou have to drill holes in the center of the arches and in each end of thestrut, so that a bolt will connect the central strut to the top center of eacharch. Use a bolt and nut that won’t tear the plastic or net covering. Nowyou can see the shape is much more conducive to lifting one side to workinside, and it makes it easier to throw a blanket over the entire 4 × 4frame on a cold night.
For those who don’t want such a high frame, just cut the 10-foot PCVpipes down to 6 or 8 feet and you’ll have a much lower wagon top. Forthose of you thinking, “I’ll just buy one 10-footer and cut it in half,” thatwon’t work. The arch over a 4-foot span has to be more than 5 feet long.
PLANT SUPPORTSWhat do you do with heavy fruiting plants such as peppers, eggplants,and giant marigolds? The easiest way to support the branches of theseplants without doing a lot of staking and tying is to make a permanentcage that the plants can grow through. The cage’s height depends on theheight of the mature plants. This could be for 1 square foot, 2, 4, or forthe whole 16 square feet in a 4 × 4 garden; it all depends on what isplanted in each square. The cage can be self-supporting with sides thatstick into the soil just like the wire U-frame previously mentioned, or, ifyou are making a support for the entire 4 × 4, it is very easy to put a stakeof some sort in each corner—either wood or metal—and then suspend thewire horizontally between these four corners.

Building a Dome Support
Bend two 10-foot, 1/2-inch diameter PVC pipes from corner to corner.
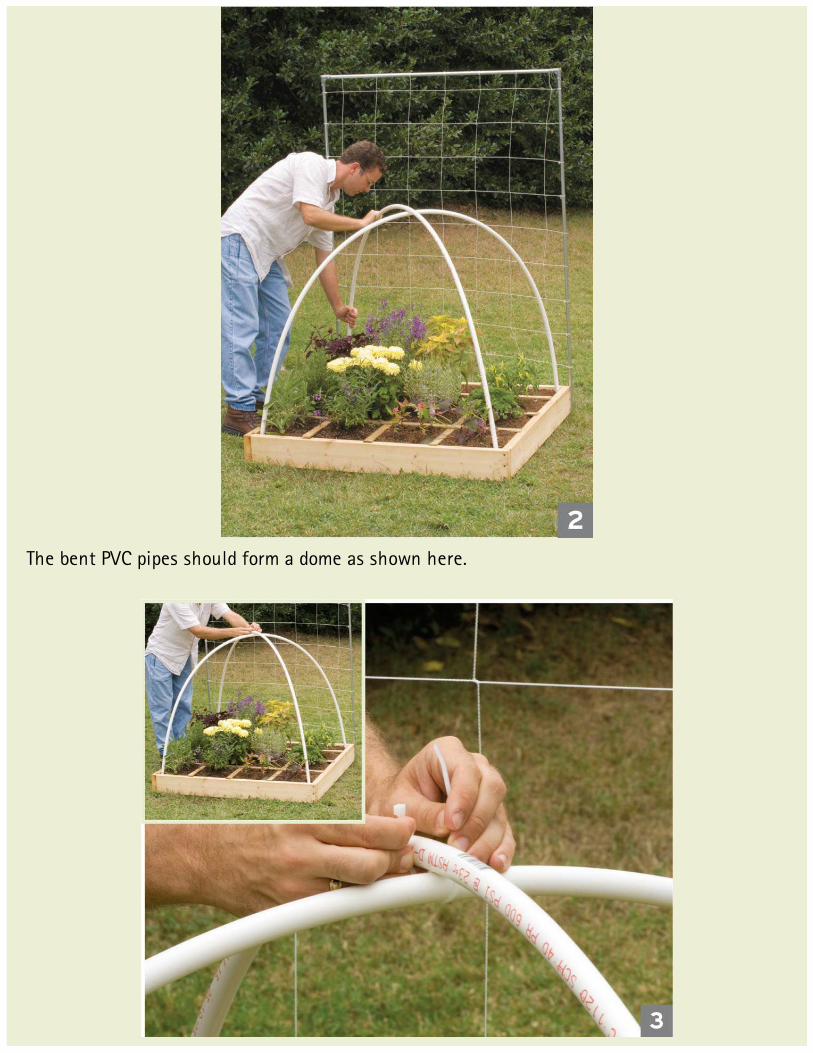
The bent PVC pipes should form a dome as shown here.
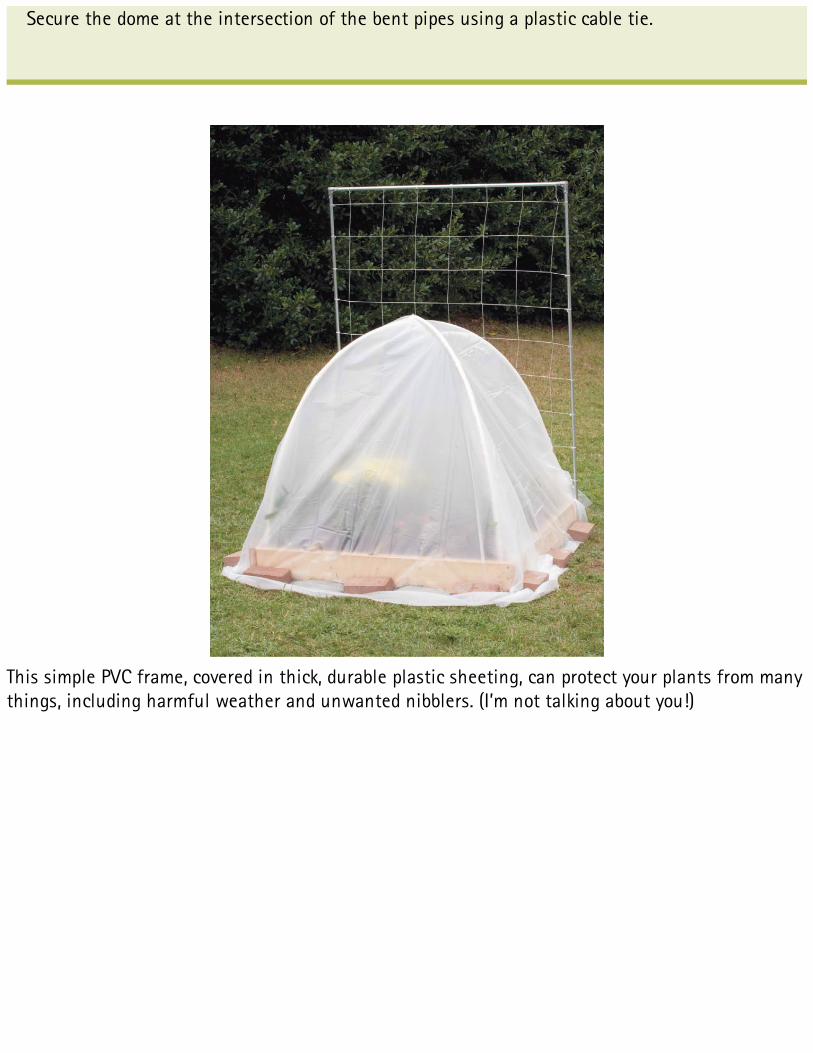
Secure the dome at the intersection of the bent pipes using a plastic cable tie.
This simple PVC frame, covered in thick, durable plastic sheeting, can protect your plants from manythings, including harmful weather and unwanted nibblers. (I’m not talking about you!)

Building a Covered Wagon SupportPREPARATION
Locate the centers of your two PVC pipes, and mark those points.
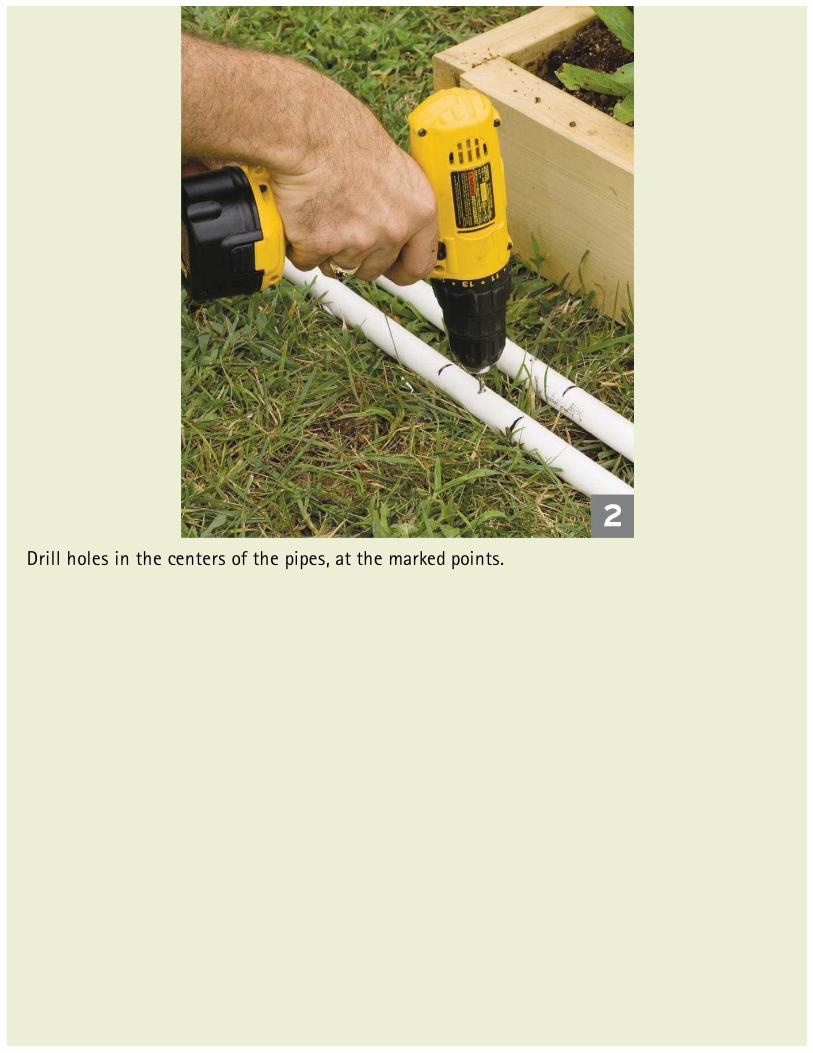
Drill holes in the centers of the pipes, at the marked points.
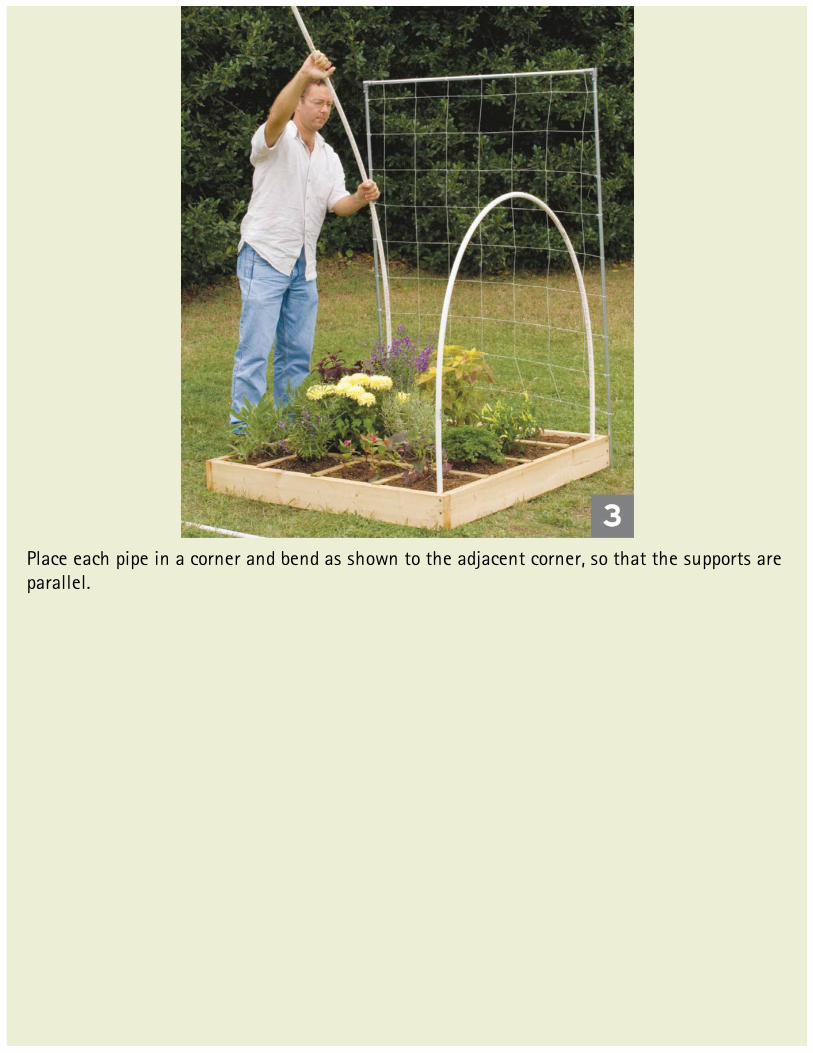
Place each pipe in a corner and bend as shown to the adjacent corner, so that the supports areparallel.
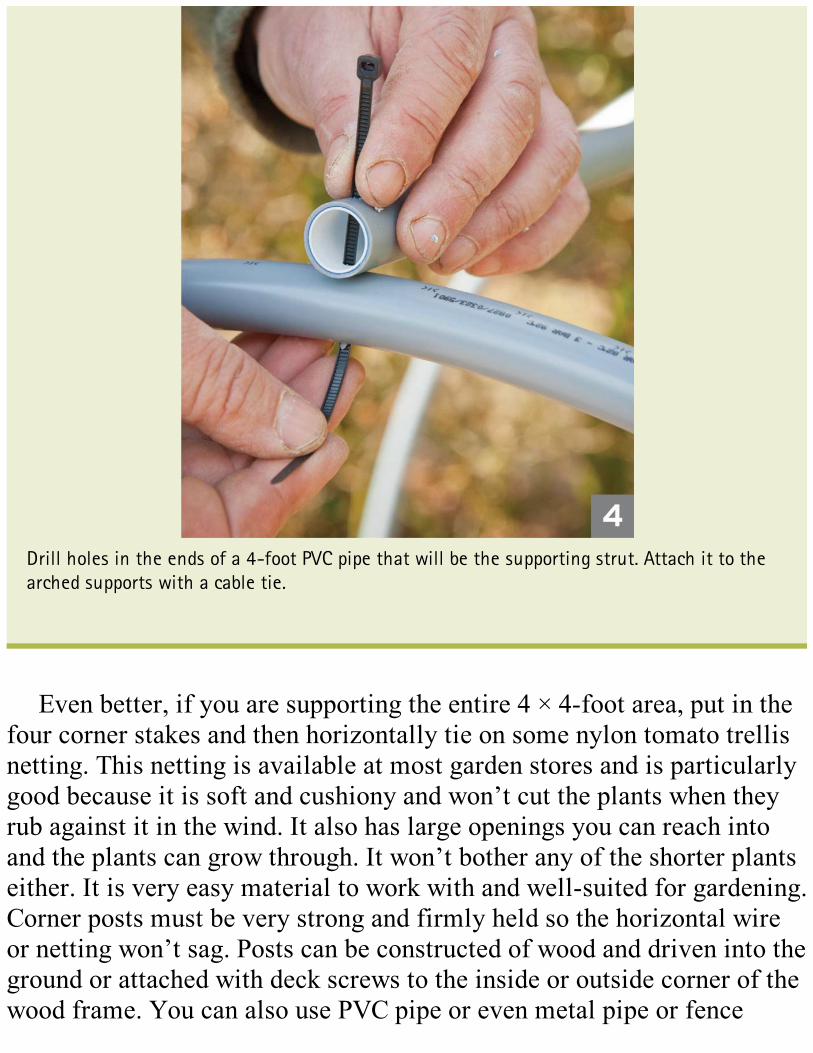
Drill holes in the ends of a 4-foot PVC pipe that will be the supporting strut. Attach it to thearched supports with a cable tie.
Even better, if you are supporting the entire 4 × 4-foot area, put in thefour corner stakes and then horizontally tie on some nylon tomato trellisnetting. This netting is available at most garden stores and is particularlygood because it is soft and cushiony and won’t cut the plants when theyrub against it in the wind. It also has large openings you can reach intoand the plants can grow through. It won’t bother any of the shorter plantseither. It is very easy material to work with and well-suited for gardening.Corner posts must be very strong and firmly held so the horizontal wireor netting won’t sag. Posts can be constructed of wood and driven into theground or attached with deck screws to the inside or outside corner of thewood frame. You can also use PVC pipe or even metal pipe or fence

posts. The many options available show how flexible Square FootGardening can be.
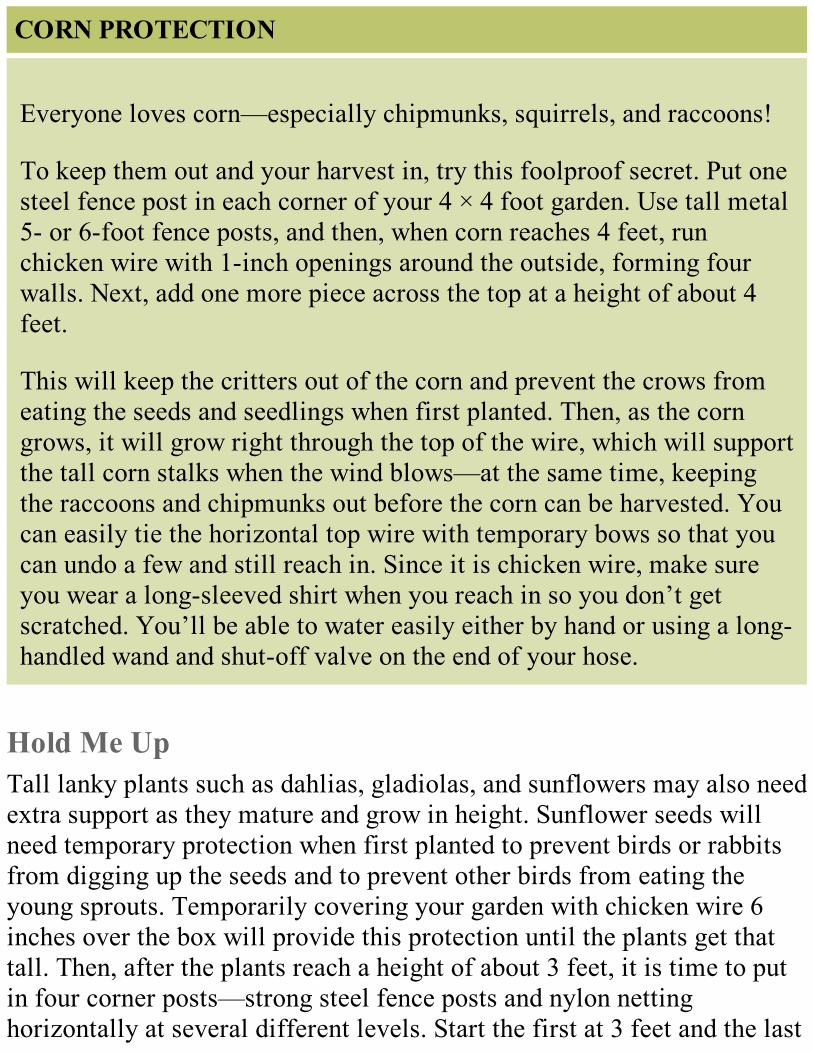
CORN PROTECTION
Everyone loves corn—especially chipmunks, squirrels, and raccoons!
To keep them out and your harvest in, try this foolproof secret. Put onesteel fence post in each corner of your 4 × 4 foot garden. Use tall metal5- or 6-foot fence posts, and then, when corn reaches 4 feet, runchicken wire with 1-inch openings around the outside, forming fourwalls. Next, add one more piece across the top at a height of about 4feet.
This will keep the critters out of the corn and prevent the crows fromeating the seeds and seedlings when first planted. Then, as the corngrows, it will grow right through the top of the wire, which will supportthe tall corn stalks when the wind blows—at the same time, keepingthe raccoons and chipmunks out before the corn can be harvested. Youcan easily tie the horizontal top wire with temporary bows so that youcan undo a few and still reach in. Since it is chicken wire, make sureyou wear a long-sleeved shirt when you reach in so you don’t getscratched. You’ll be able to water easily either by hand or using a long-handled wand and shut-off valve on the end of your hose.
Hold Me UpTall lanky plants such as dahlias, gladiolas, and sunflowers may also needextra support as they mature and grow in height. Sunflower seeds willneed temporary protection when first planted to prevent birds or rabbitsfrom digging up the seeds and to prevent other birds from eating theyoung sprouts. Temporarily covering your garden with chicken wire 6inches over the box will provide this protection until the plants get thattall. Then, after the plants reach a height of about 3 feet, it is time to putin four corner posts—strong steel fence posts and nylon nettinghorizontally at several different levels. Start the first at 3 feet and the last
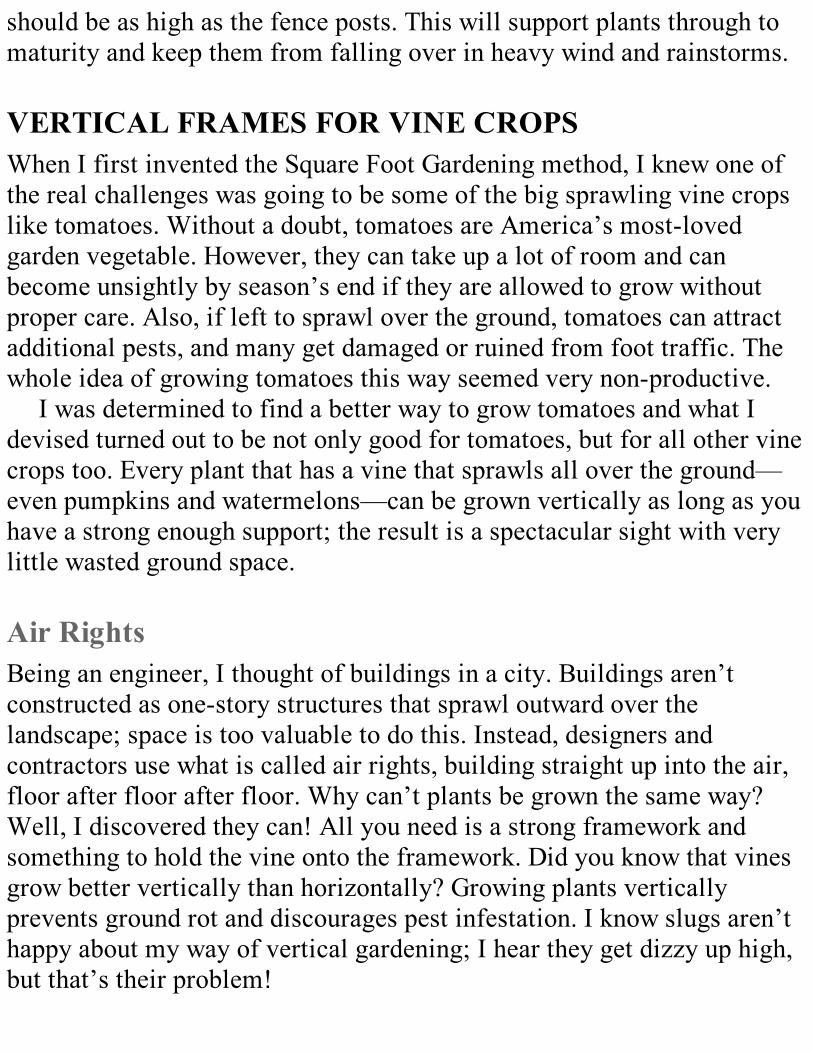
should be as high as the fence posts. This will support plants through tomaturity and keep them from falling over in heavy wind and rainstorms.
VERTICAL FRAMES FOR VINE CROPSWhen I first invented the Square Foot Gardening method, I knew one ofthe real challenges was going to be some of the big sprawling vine cropslike tomatoes. Without a doubt, tomatoes are America’s most-lovedgarden vegetable. However, they can take up a lot of room and canbecome unsightly by season’s end if they are allowed to grow withoutproper care. Also, if left to sprawl over the ground, tomatoes can attractadditional pests, and many get damaged or ruined from foot traffic. Thewhole idea of growing tomatoes this way seemed very non-productive.
I was determined to find a better way to grow tomatoes and what Idevised turned out to be not only good for tomatoes, but for all other vinecrops too. Every plant that has a vine that sprawls all over the ground—even pumpkins and watermelons—can be grown vertically as long as youhave a strong enough support; the result is a spectacular sight with verylittle wasted ground space.
Air RightsBeing an engineer, I thought of buildings in a city. Buildings aren’tconstructed as one-story structures that sprawl outward over thelandscape; space is too valuable to do this. Instead, designers andcontractors use what is called air rights, building straight up into the air,floor after floor after floor. Why can’t plants be grown the same way?Well, I discovered they can! All you need is a strong framework andsomething to hold the vine onto the framework. Did you know that vinesgrow better vertically than horizontally? Growing plants verticallyprevents ground rot and discourages pest infestation. I know slugs aren’thappy about my way of vertical gardening; I hear they get dizzy up high,but that’s their problem!
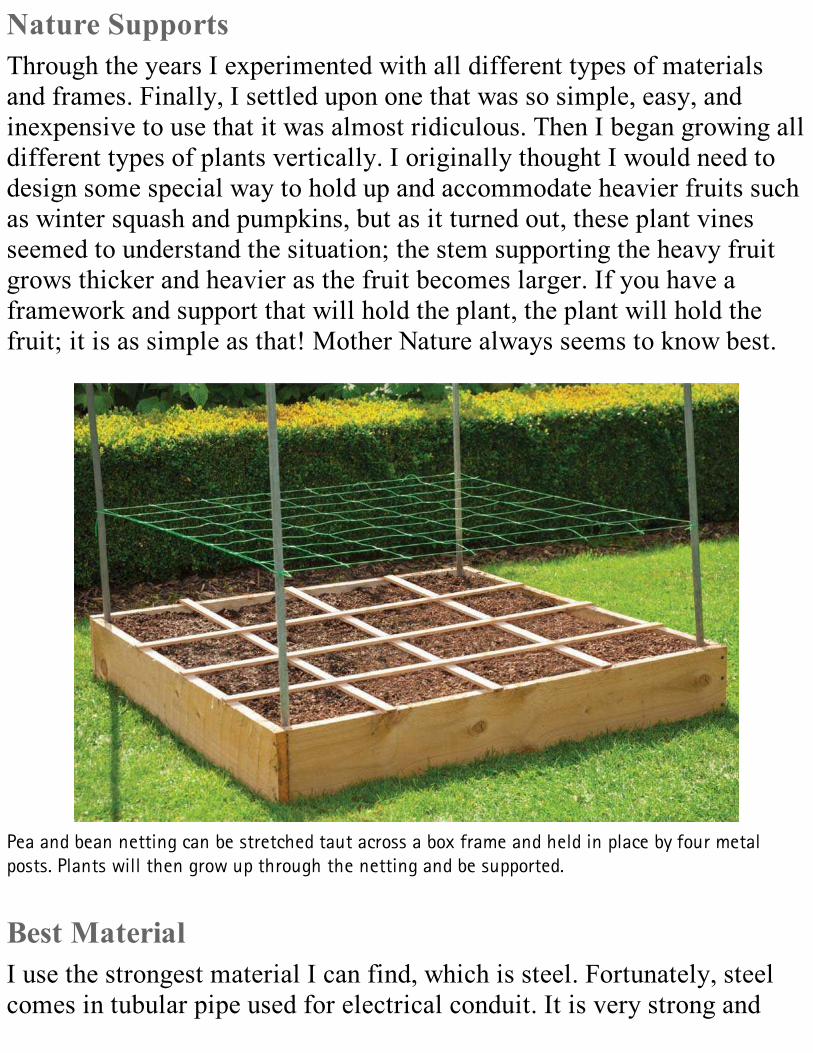
Nature SupportsThrough the years I experimented with all different types of materialsand frames. Finally, I settled upon one that was so simple, easy, andinexpensive to use that it was almost ridiculous. Then I began growing alldifferent types of plants vertically. I originally thought I would need todesign some special way to hold up and accommodate heavier fruits suchas winter squash and pumpkins, but as it turned out, these plant vinesseemed to understand the situation; the stem supporting the heavy fruitgrows thicker and heavier as the fruit becomes larger. If you have aframework and support that will hold the plant, the plant will hold thefruit; it is as simple as that! Mother Nature always seems to know best.
Pea and bean netting can be stretched taut across a box frame and held in place by four metalposts. Plants will then grow up through the netting and be supported.
Best MaterialI use the strongest material I can find, which is steel. Fortunately, steelcomes in tubular pipe used for electrical conduit. It is very strong and
turns out to be very inexpensive. Couplings are also available so you canconnect two pieces together. I designed an attractive frame that fits rightonto the 4 × 4 box, and it can be attached to the wooden box with clampsthat can be bought at any store. Or, steel reinforcing rods driven into theexisting ground outside your box provide a very steady and strong base;then the electrical conduit slips snugly over the bars. It’s very simple andinexpensive to assemble. Anyone can do it—even you! To preventvertically grown plants from shading other parts of the garden, Irecommend that tall, vertical frames be constructed on the north side ofthe garden. To fit it into a 4 × 4 box, I designed a frame that measured 4feet wide and almost 6 feet tall.
Tie It TightVertically growing plants need to be tied to their supports. Nylon nettingwon’t rot in the sun and weather, and I use it exclusively now for bothvertical frames and horizontal plant supports. It is very strong—almostunbreakable—and guaranteed for twenty years. It is a wonderful materialavailable at garden stores and in catalogs. The nylon netting is alsodurable enough to grow the heavier vine crops on vertical frames,including watermelons, pumpkins, cantaloupes, winter and summersquashes, and tomatoes. You will see in Chapter 8 how easy it is to trainplants to grow vertically. To hold the plants to the frame, I have foundthat nylon netting with 7-inch square openings made especially fortomato growing works well because you can reach your hand through.Make sure it is this type so it won’t cut the stem of the plant when itblows against it in the wind. This comes in 4-foot widths and can easilybe tied to the metal frame. It’s sometimes hard to find, so call around.
Winter StorageBecause the netting is loose, it can flop around unless you tie it verytightly to the frame; this is the first step. At the end of the season theframes can be left up or they can be slipped off the steel rebar and hung

on a garage wall. Although the conduit is galvanized and endures manyyears of service, it eventually will rust—especially at the bottom where itcomes in contact with the ground. If you do hang up your metal frames inthe winter, for safety reasons make sure you cover or clearly mark thesteel rebar that is left sticking out of the ground. You can flag it withbrightly covered tape, paint it, or find caps that can be screwed on toprevent someone from tripping.
PENNY PINCHER
Here’s a no-cost easy way to make your composter out of wood.Women tell me they love this because it requires no tools, wire cutting,equipment, or familiarity with construction. Find four wood pallets ofsimilar size and appearance. The place to find them is behind the storesand shops where the dumpsters are. Ask first, just to make sure theyare being thrown out. If you can find four of about the same size andlook, your finished composter will look like it’s custom made just foryou. A brick or stone under each corner helps keep the wood off theground to keep it from rotting; corners are tied with rope, cord, orchain. It doesn’t have to be nailed or screwed together, and it doesn’thave to be real tight. You may want to have the pallet boards faceoutside to look nice, and you can make them all run either horizontallyor vertically—whatever looks best.
COMPOSTERSA composting operation can be as simple as a pile of leaves, weeds, andkitchen scraps. Mother Nature does it all the time. Go to any forest orfield and you’ll see she gets the job done without any structures. Butpeople are different. We like to conserve space, keep things in theirplace; and we usually want to build a container or enclosure for ourcompost materials, which speeds up the operation by creating bulk, whichthen allows the pile to heat up and decompose faster.
What can we buy or build? There are many compost containers on themarket mostly made from plastic. All work well, are attractive, andreasonably priced. There are composters that tumble or turn, speeding upthe process, but they cost more and worst of all—you still have to turnthem. It’s fun at first but it gets old very fast.
Make Your OwnWe need a structure that will hold a pile of material in either a round or
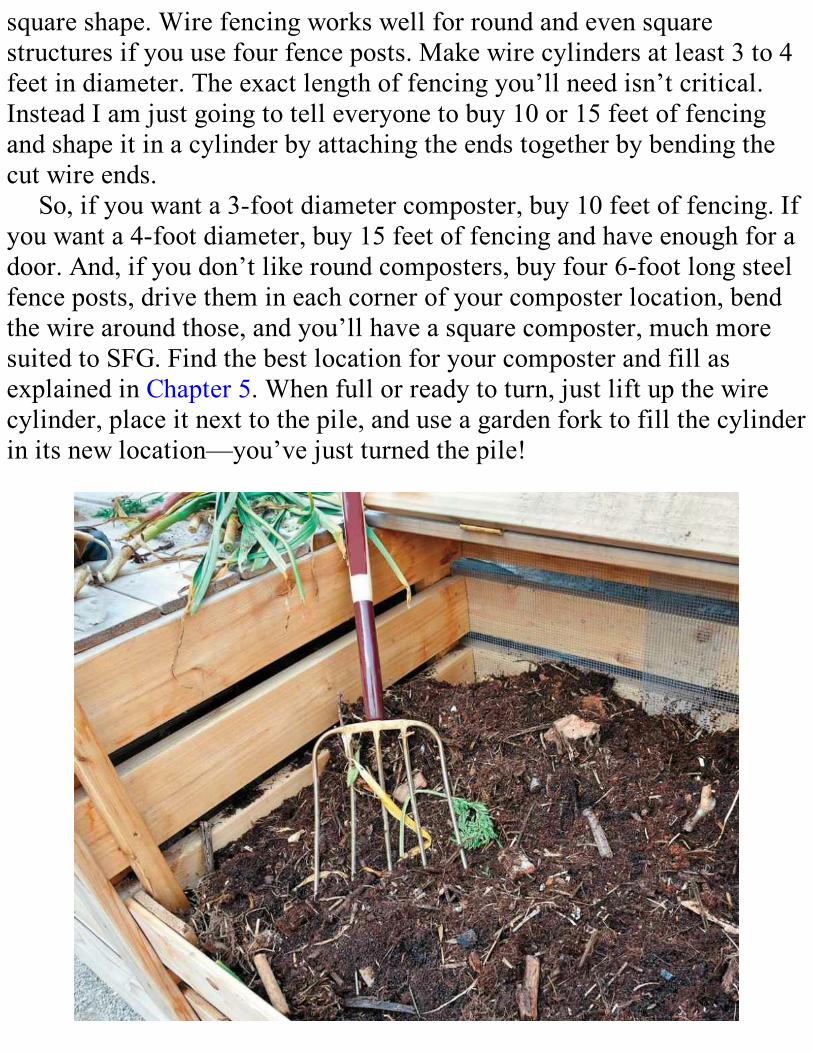
square shape. Wire fencing works well for round and even squarestructures if you use four fence posts. Make wire cylinders at least 3 to 4feet in diameter. The exact length of fencing you’ll need isn’t critical.Instead I am just going to tell everyone to buy 10 or 15 feet of fencingand shape it in a cylinder by attaching the ends together by bending thecut wire ends.
So, if you want a 3-foot diameter composter, buy 10 feet of fencing. Ifyou want a 4-foot diameter, buy 15 feet of fencing and have enough for adoor. And, if you don’t like round composters, buy four 6-foot long steelfence posts, drive them in each corner of your composter location, bendthe wire around those, and you’ll have a square composter, much moresuited to SFG. Find the best location for your composter and fill asexplained in Chapter 5. When full or ready to turn, just lift up the wirecylinder, place it next to the pile, and use a garden fork to fill the cylinderin its new location—you’ve just turned the pile!
If you don’t have a compost pile yet, start one now. It’s essential to the Square Foot Gardeningmethod.
With a GateAnother idea is to have an enclosure that’s easier to get into to mix andwater or even turn. Make an entrance opening with or without a gate.Start by driving two steel fence posts in the ground at your selectedlocation; make them about 3 or 4 feet apart. Then attach your wirefencing to these posts. Two options are available for you—with andwithout a gate. If you want a gate it will cost you an extra 3 or 4 feet offencing. No big deal, and it will look nicer and be neater when theenclosure starts filling up. You still tie or wire the fencing to both fenceposts; one becomes the hinge, the other the door latch.
Make the latch S-hook from wire, or you can buy this type of hook atthe store. You can have one compost bin or two together or even threedepending on how large your operation is.
Weekly BinsJust like the wire enclosures, you can have one, two, or up to six bins alltogether for Monday through Saturday. (Don’t forget we rest on Sunday!)When and why would you need more than one? When you get seriousabout composting, you may be able to get enough material to fill up oneevery week. Then, for mixing (as explained in Chapter 5), you just movematerial from a full bin into an empty one right next to it. The nice thingabout a series is you only need three pallets for each additional bin.
I could include directions for other materials to use like bricks orcement blocks, landscape timbers, or logs, but no one is going to build acomposter out of those materials. They would be too expensive andinefficient. They may look good in books but not in our system becausethey are just not practical.
Of course, no one says you have to have an enclosure, but if you’re aSquare Foot Gardener and you have nice square boxes for all of yourgarden, why would you want just a pile for your composter?
AISLES“Put your best foot forward” is the saying, but what are you going to putit on? Grass, brick, boards, gravel, or just plain dirt? Most people puttheir Square Foot boxes in their yard and leave the grass for their aisles.This helps keep a natural look. And don’t worry, the grass won’t get a lotof hard use because there’s not that much to do in an SFG. If you want toleave natural soil in your aisles use an action hoe once a week to rid youraisle of pesky weeds.
If you don’t want grass in your aisles, lay down a mulch. Here again,you want to first dig out any weeds or grass; then to prevent weeds fromgrowing back without using chemicals, you can put down a landscapefabric or weed cloth. There are many on the market today. They come in3- or 4-foot wide rolls and do quite a good job. (Don’t use regular blackplastic—it won’t drain and it’s slippery.) Then just cover the cloth with atleast 1 or 2 inches of mulch.
You can also use gravel, which comes in all different kinds and sizes,colors and shapes, or you can use other types of ground cover like groundup bark or pine needles; I’ve even seen people use straw, hay, salt hay, oreven leaves collected and saved from last fall. As you walk, thesematerials break up and gradually decompose, creating something you canadd later to your compost pile.
You can also build walkways out of brick, wood planks, or pavingstones. Again, take out any weeds and put down a weed cloth first. Youcan create some very interesting patterns with bricks and paving blocks.Keep the joints fairly tight so the surface doesn’t shift.
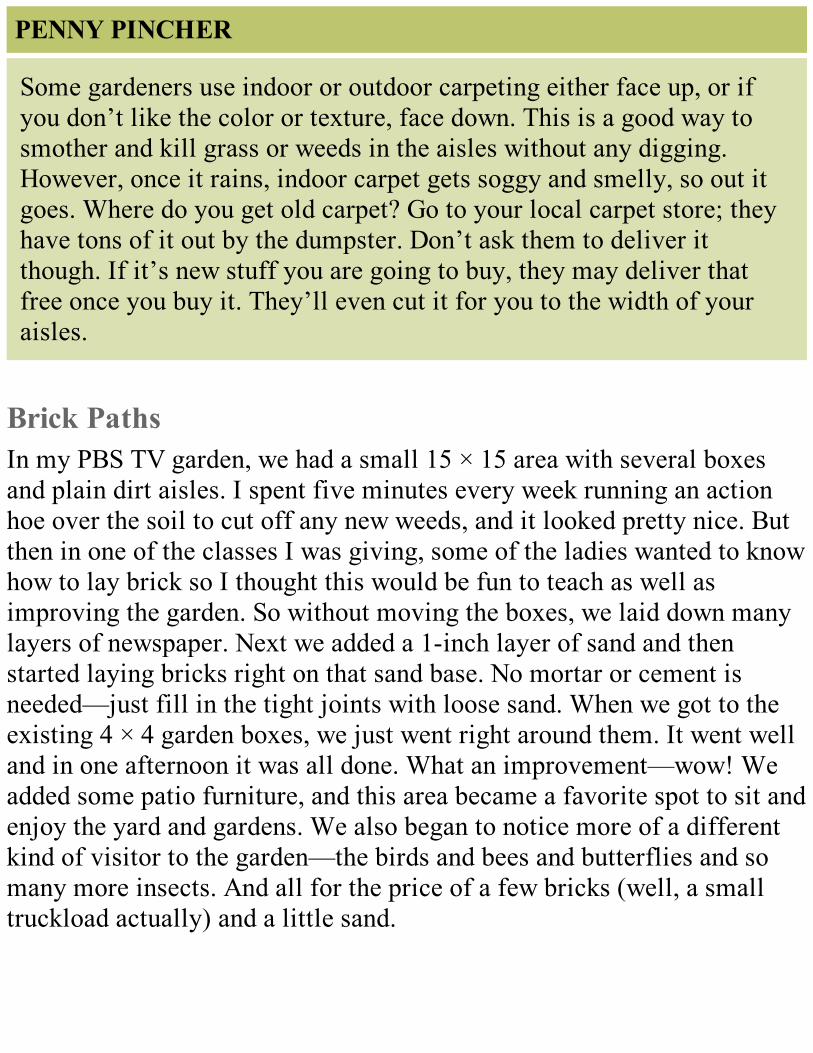
PENNY PINCHER
Some gardeners use indoor or outdoor carpeting either face up, or ifyou don’t like the color or texture, face down. This is a good way tosmother and kill grass or weeds in the aisles without any digging.However, once it rains, indoor carpet gets soggy and smelly, so out itgoes. Where do you get old carpet? Go to your local carpet store; theyhave tons of it out by the dumpster. Don’t ask them to deliver itthough. If it’s new stuff you are going to buy, they may deliver thatfree once you buy it. They’ll even cut it for you to the width of youraisles.
Brick PathsIn my PBS TV garden, we had a small 15 × 15 area with several boxesand plain dirt aisles. I spent five minutes every week running an actionhoe over the soil to cut off any new weeds, and it looked pretty nice. Butthen in one of the classes I was giving, some of the ladies wanted to knowhow to lay brick so I thought this would be fun to teach as well asimproving the garden. So without moving the boxes, we laid down manylayers of newspaper. Next we added a 1-inch layer of sand and thenstarted laying bricks right on that sand base. No mortar or cement isneeded—just fill in the tight joints with loose sand. When we got to theexisting 4 × 4 garden boxes, we just went right around them. It went welland in one afternoon it was all done. What an improvement—wow! Weadded some patio furniture, and this area became a favorite spot to sit andenjoy the yard and gardens. We also began to notice more of a differentkind of visitor to the garden—the birds and bees and butterflies and somany more insects. And all for the price of a few bricks (well, a smalltruckload actually) and a little sand.
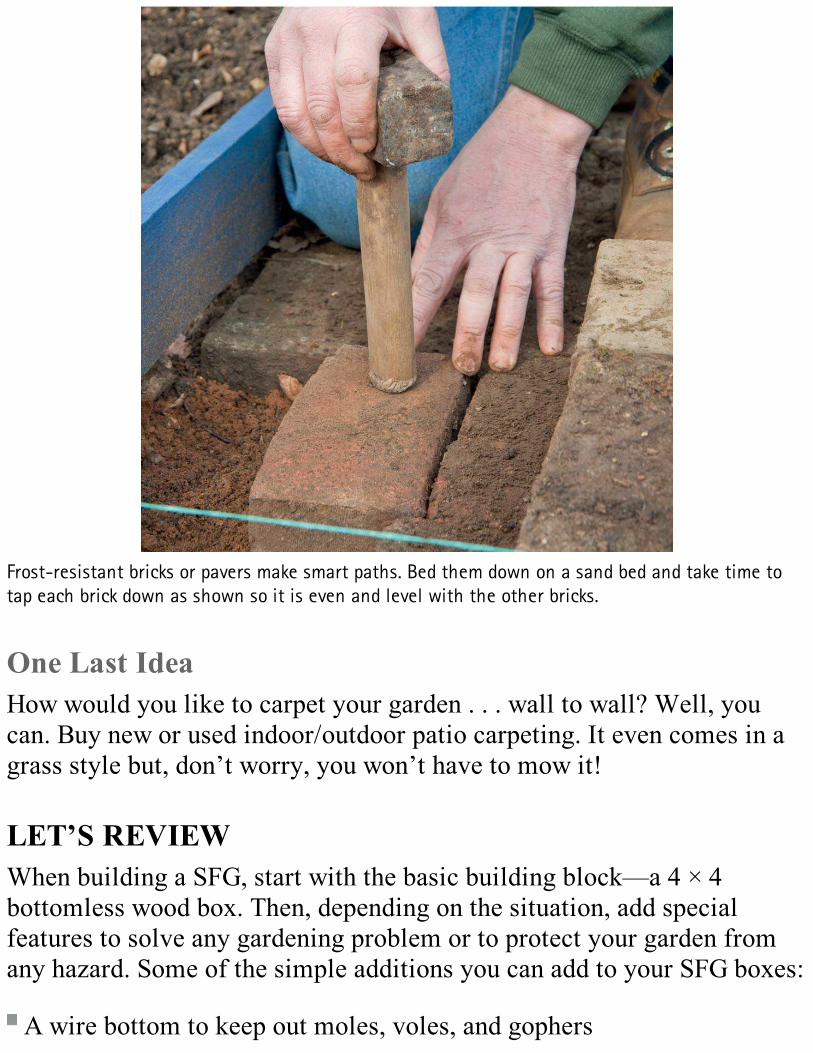
Frost-resistant bricks or pavers make smart paths. Bed them down on a sand bed and take time totap each brick down as shown so it is even and level with the other bricks.
One Last IdeaHow would you like to carpet your garden . . . wall to wall? Well, youcan. Buy new or used indoor/outdoor patio carpeting. It even comes in agrass style but, don’t worry, you won’t have to mow it!
LET’S REVIEWWhen building a SFG, start with the basic building block—a 4 × 4bottomless wood box. Then, depending on the situation, add specialfeatures to solve any gardening problem or to protect your garden fromany hazard. Some of the simple additions you can add to your SFG boxes:
A wire bottom to keep out moles, voles, and gophers
A weed cloth bottom to keep out weeds or grass
A chicken wire top to keep out cats, dogs, and rabbits
A PVC top frame then:
Clear plastic to create a miniature greenhouse
Bird or deer netting
A blanket to protect plants from frosts
Floating covers to protect from insects
The possibilities are endless for everyone, from apartment dwellers tothe elderly, and even people with special needs.
After all this talk about building all these different things forprotecting your garden, I don’t want you to become worried, thinking thatyou have to spend a lot of time creating complex structures for your SFG.It’s not so! We’ve just learned how easy it is to adjust a SFG to improveits flexibility and to accommodate unique gardening situations. This isreadily done since a SFG is so small and manageable. For the most part,your plants will just sit there quietly growing, looking better and betterevery day. So relax and enjoy!
FamilyBut remember, protecting your garden is a lot like protecting yourchildren—if it’s cold, add a blanket (a sweater); if sleet and hail arepredicted, add clear plastic (a raincoat); and if it’s windy, add an extrashield against the wind (a windbreaker). Since you wouldn’t let your kidsplay out in the cold winter without a snowsuit for protection, do the samefor your plants. Keeping this in mind, you’ll be able to come up with easyand practical solutions for protecting your garden from the worst ofconditions. That makes it very rewarding because then you can enjoyyour garden much longer every year.

5

5Mel’s Mix, Essential for Square
Foot Gardening SuccessMel’s Mix is the most important, productive, essential,
necessary, critical, major subject and is the backbone of theentire book and the Square Foot Gardening method!
Mix up a batch of Mel’s Mix once and you’re done with the soil for your SFG!
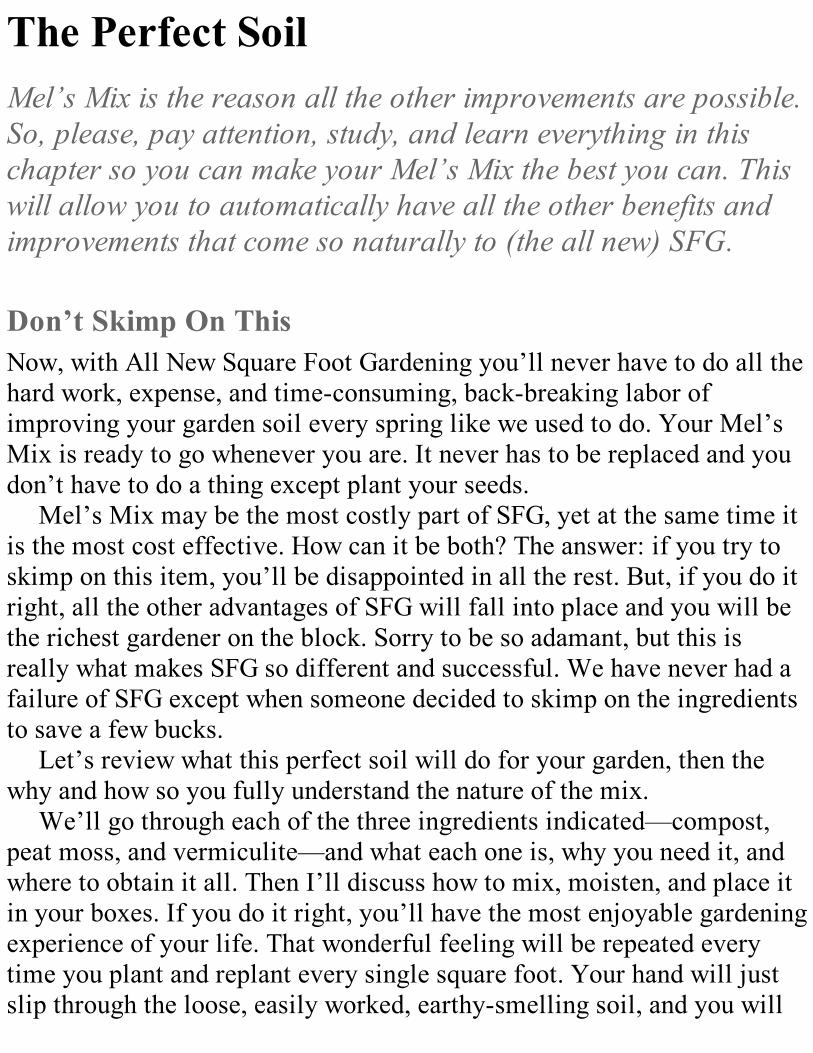
The Perfect SoilMel’s Mix is the reason all the other improvements are possible.So, please, pay attention, study, and learn everything in thischapter so you can make your Mel’s Mix the best you can. Thiswill allow you to automatically have all the other benefits andimprovements that come so naturally to (the all new) SFG.
Don’t Skimp On ThisNow, with All New Square Foot Gardening you’ll never have to do all thehard work, expense, and time-consuming, back-breaking labor ofimproving your garden soil every spring like we used to do. Your Mel’sMix is ready to go whenever you are. It never has to be replaced and youdon’t have to do a thing except plant your seeds.
Mel’s Mix may be the most costly part of SFG, yet at the same time itis the most cost effective. How can it be both? The answer: if you try toskimp on this item, you’ll be disappointed in all the rest. But, if you do itright, all the other advantages of SFG will fall into place and you will bethe richest gardener on the block. Sorry to be so adamant, but this isreally what makes SFG so different and successful. We have never had afailure of SFG except when someone decided to skimp on the ingredientsto save a few bucks.
Let’s review what this perfect soil will do for your garden, then thewhy and how so you fully understand the nature of the mix.
We’ll go through each of the three ingredients indicated—compost,peat moss, and vermiculite—and what each one is, why you need it, andwhere to obtain it all. Then I’ll discuss how to mix, moisten, and place itin your boxes. If you do it right, you’ll have the most enjoyable gardeningexperience of your life. That wonderful feeling will be repeated everytime you plant and replant every single square foot. Your hand will justslip through the loose, easily worked, earthy-smelling soil, and you will
sigh with happiness and smile every time. It is truly an emotionalexperience that very few gardeners have ever encountered. But enoughtalk and teasing—let’s get started!
No MoreThe list at right is just some of the knowledge you had to learn aboutbackyard soils in the past. But not now! Forget about every one of them.Why? Because Square Foot Gardening is now so simple you don’t have tolearn all the intricate details of soil structure, texture, and drainage. Youdon’t even have to know what pH means, how to pronounce it, or whichletter is a capital and which is lower case (or why people are alwaysgetting that mixed up). Why, you may ask? Because I’ve designed ourperfect soil mix with the correct pH level (acid or alkaline) for just aboutall plants.
For those of you who crave more information, a good, blended,balanced compost—one of the ingredients in Mel’s Mix and what youwill add to your boxes after each harvest—made from at least fivedifferent ingredients will not only have a pH close to neutral, but it alsobalances the acidity in peat moss. In addition, since we don’t use yourexisting soil (remember we only need 6 inches of pure Mel’s Mix), youwon’t be concerned with what type of soil it is or what the pH is. Youwon’t have to buy a pH soil test kit or take samples to your countyextension agent. You won’t have to learn that eastern U.S. soils areslightly acidic while western soils are more alkaline, and you won’t haveto learn what to add, how much, and when. You won’t have to buy aspreader or any of that stuff.
No Fertilizer, No MessMel’s Mix has all the nutrients, minerals, and trace elements that plantsneed. So forget all about fertilizer. Isn’t that amazing? Not only do younot have to buy it, you don’t even have to learn about it. SFG is an all-organic, all-natural method.

Come spring you’ll find there is no work to do; there is no going to thestore, reading labels, lugging big bags or bales of soil additives home, nospreading them out, working in lime, getting a rototiller running andworking—then trying to turn over that wet, mucky soil, getting it all overyour shoes and tools—oh, what a mess that was. But that is all a thing ofthe past. Why, you don’t even have to do the soilball test in the palm ofyour hand only to find out you have to wait another week because yoursoil is too wet or still frozen. (What’s the soilball test, you ask? I’m notgoing to tell you because you don’t need to know it any longer.)
THINGS YOU HAVE TO KNOW TO ACHIEVE . . .
. . . Backyard Soil for Single Row Gardening Structure Drainage Texture Organic content pH Fertilizer Blending
. . . Mel’s Mix for SFG The Formula
Your Mel’s Mix is always ready to plant no matter what the weather.It’s always loose, friable (which the experts define as that which is easilyworked—good and crumbly), and ready for the right time of year to plant.It drains and becomes unfrozen so much quicker than regular garden soil.
WHERE HAVE YOU BEEN?Planting a garden will no longer depend on when the soil is ready butonly on the right date to plant seeds and transplants. This is just one moresimplification of gardening the Square Foot way. How does that allsound? Simple and easy—no work, no muss, no fuss. I have had peopleask me, “Why weren’t you born one hundred years ago so I could havestarted with Square Foot Gardening instead of having to do all the workof single-row gardening all my life?” Good question!
MY SIMPLE FORMULA
1/3 Garden Compost

1/3 Peat Moss1/3 Vermiculite
Mix equal parts of each, measured by volume not byweight.
NO DIGGINGUsing Mel’s Mix completely eliminates all the hard work of digging andmoving existing soil. A 4 × 4 × 12-inch-deep area contains 16 cubic feetof soil that weighs well over 400 pounds. That’s a lot of soil to dig up andmove around. All gardening in the past has been based upon improvingyour existing soil. Don’t even be concerned about it. You don’t have toknow anything about soils. Just start with a perfect growing soil—Mel’sMix of one-third compost, one-third peat moss, and one-third vermiculitemeasured by volume.
LIKE A SPONGEThrough many experiments, I came up with the very best ingredients forthat perfect growing soil. Of course, I made sure they were allinexpensive, readily available, and able to hold just the right amount ofmoisture for plants while not becoming too soggy for roots, which mightdrown your plants. I created a formula that holds moisture yet drainswell.
At first this seemed like an impossible task, but then I thought aboutsponges. When you take a dry sponge and slowly add water to it, it justkeeps soaking up water until it’s finally saturated. At that point, any extrawater just drains out the bottom. Well, it turns out that two of ouringredients—peat moss and vermiculite—do exactly that same thing. Ittakes a while to wet them and keep them moist so you have to keepadding water, but finally, when they become saturated, any excess waterjust drains right out the bottom. Peat moss and vermiculite are sold at
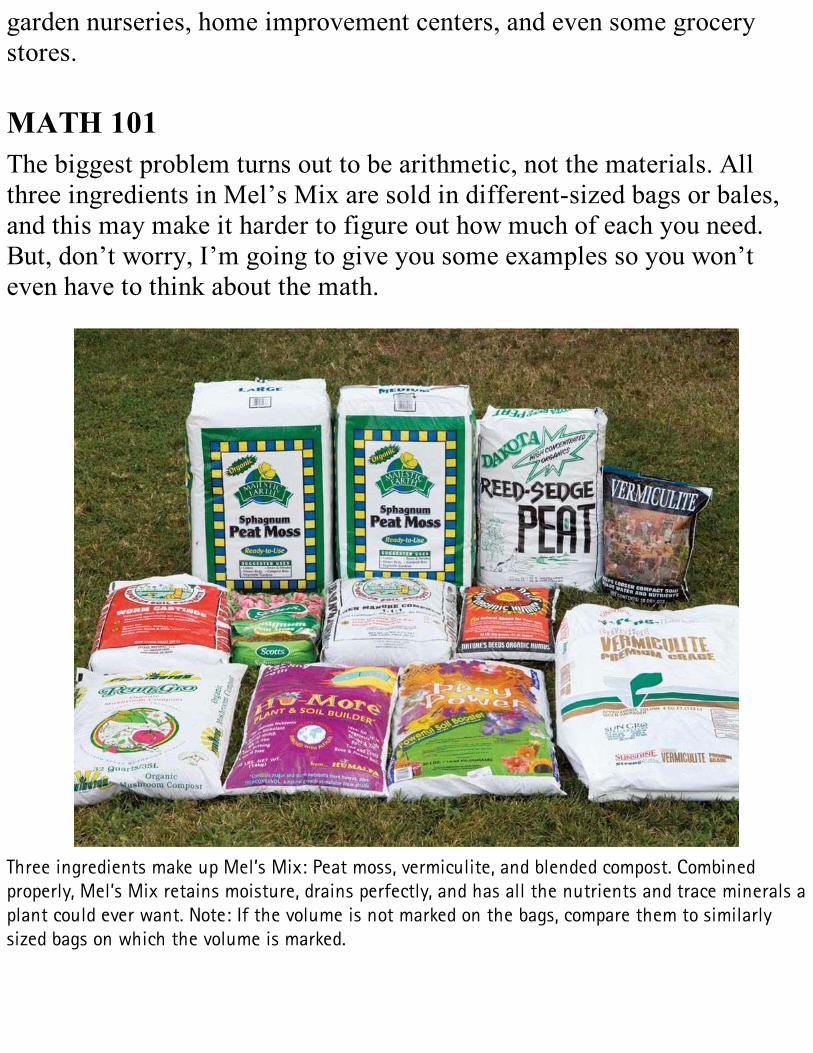
garden nurseries, home improvement centers, and even some grocerystores.
MATH 101The biggest problem turns out to be arithmetic, not the materials. Allthree ingredients in Mel’s Mix are sold in different-sized bags or bales,and this may make it harder to figure out how much of each you need.But, don’t worry, I’m going to give you some examples so you won’teven have to think about the math.
Three ingredients make up Mel’s Mix: Peat moss, vermiculite, and blended compost. Combinedproperly, Mel’s Mix retains moisture, drains perfectly, and has all the nutrients and trace minerals aplant could ever want. Note: If the volume is not marked on the bags, compare them to similarlysized bags on which the volume is marked.
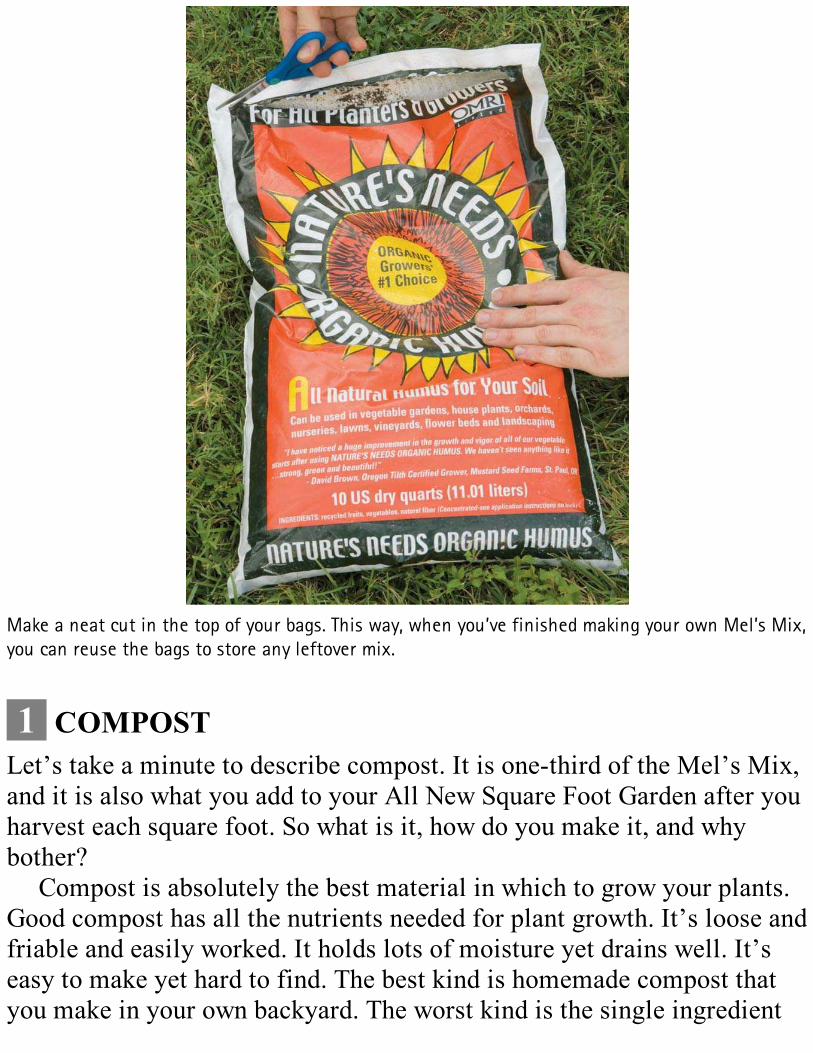
Make a neat cut in the top of your bags. This way, when you’ve finished making your own Mel’s Mix,you can reuse the bags to store any leftover mix.
1 COMPOSTLet’s take a minute to describe compost. It is one-third of the Mel’s Mix,and it is also what you add to your All New Square Foot Garden after youharvest each square foot. So what is it, how do you make it, and whybother?
Compost is absolutely the best material in which to grow your plants.Good compost has all the nutrients needed for plant growth. It’s loose andfriable and easily worked. It holds lots of moisture yet drains well. It’seasy to make yet hard to find. The best kind is homemade compost thatyou make in your own backyard. The worst kind is the single ingredient

byproduct some company has produced and bagged.
Good and BadSo, let’s simplify garden composting and garden compost. First off, it’s avery confusing subject because the word “compost” is both a noun and averb. As a noun, compost is described as a rich, crumbly, soil-likematerial used in gardening. As a verb, it is the process of breaking downplant material that is no longer growing through a decomposition process.
MEL’S MIX IS MADE FROM . . .
One-third by volume garden compost
On-third by volume peat moss
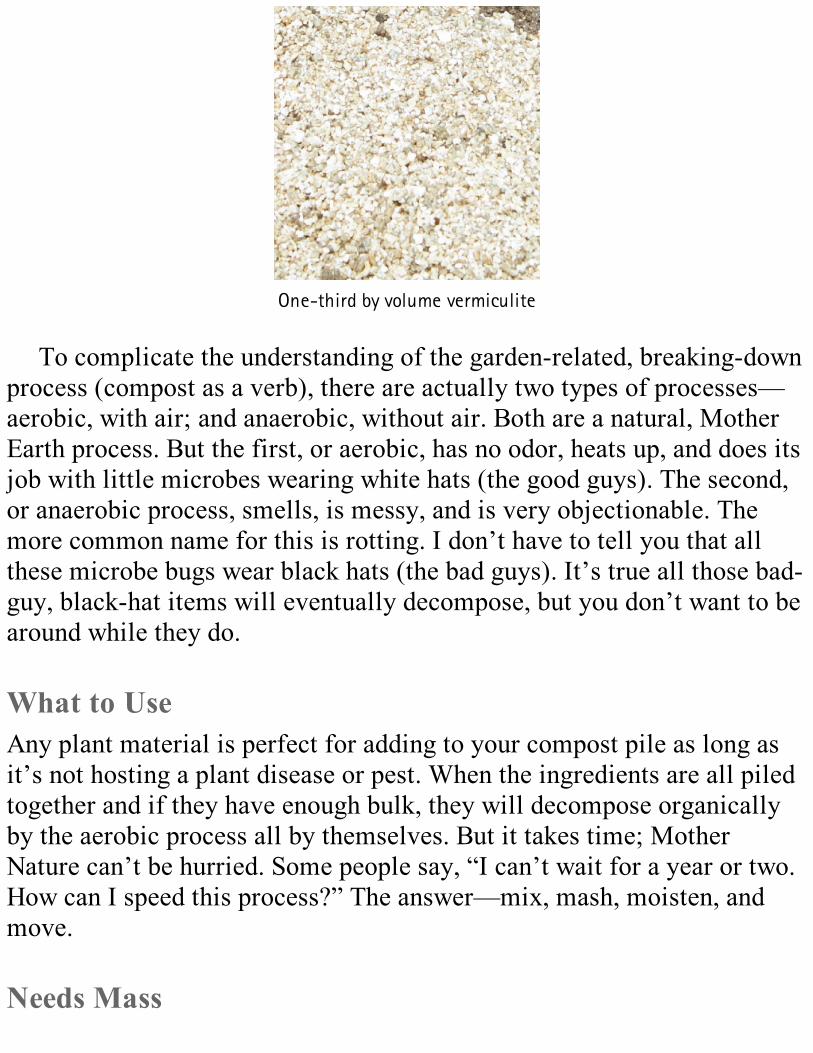
One-third by volume vermiculite
To complicate the understanding of the garden-related, breaking-downprocess (compost as a verb), there are actually two types of processes—aerobic, with air; and anaerobic, without air. Both are a natural, MotherEarth process. But the first, or aerobic, has no odor, heats up, and does itsjob with little microbes wearing white hats (the good guys). The second,or anaerobic process, smells, is messy, and is very objectionable. Themore common name for this is rotting. I don’t have to tell you that allthese microbe bugs wear black hats (the bad guys). It’s true all those bad-guy, black-hat items will eventually decompose, but you don’t want to bearound while they do.
What to UseAny plant material is perfect for adding to your compost pile as long asit’s not hosting a plant disease or pest. When the ingredients are all piledtogether and if they have enough bulk, they will decompose organicallyby the aerobic process all by themselves. But it takes time; MotherNature can’t be hurried. Some people say, “I can’t wait for a year or two.How can I speed this process?” The answer—mix, mash, moisten, andmove.
Needs Mass

Using the right ingredients and mixing, mashing, moistening, and movingthem will help speed the composting. But there is one more idealcondition, and that is mass. The more bulk you have in your pile (up to acertain point), the faster it will compost or decompose. If your pile istaller than 4 feet, you’ll have a hard time adding new ingredients. If thearea is larger than 4 × 4, the air will have trouble getting into the centerwhere all the action is and the white-hat, good-guy microbes will turninto the black-hat, bad-guy microbes and the pile will start to decomposeanaerobically (without air) and start to smell. If you don’t have enoughbulk—smaller than 3 × 3, your pile will just sit there and do nothingexcept cry out, “I’m going to wait for Mother Nature.”
We keep calling it a pile, and you may wonder if it will be ugly andmessy. But the pile can be contained very nicely with a homemade orstore-bought container called a composter. (Oh no! Another name!) Sonow, I’m going to be composting my compost in my composter. You’vegot it! See, that wasn’t so bad.
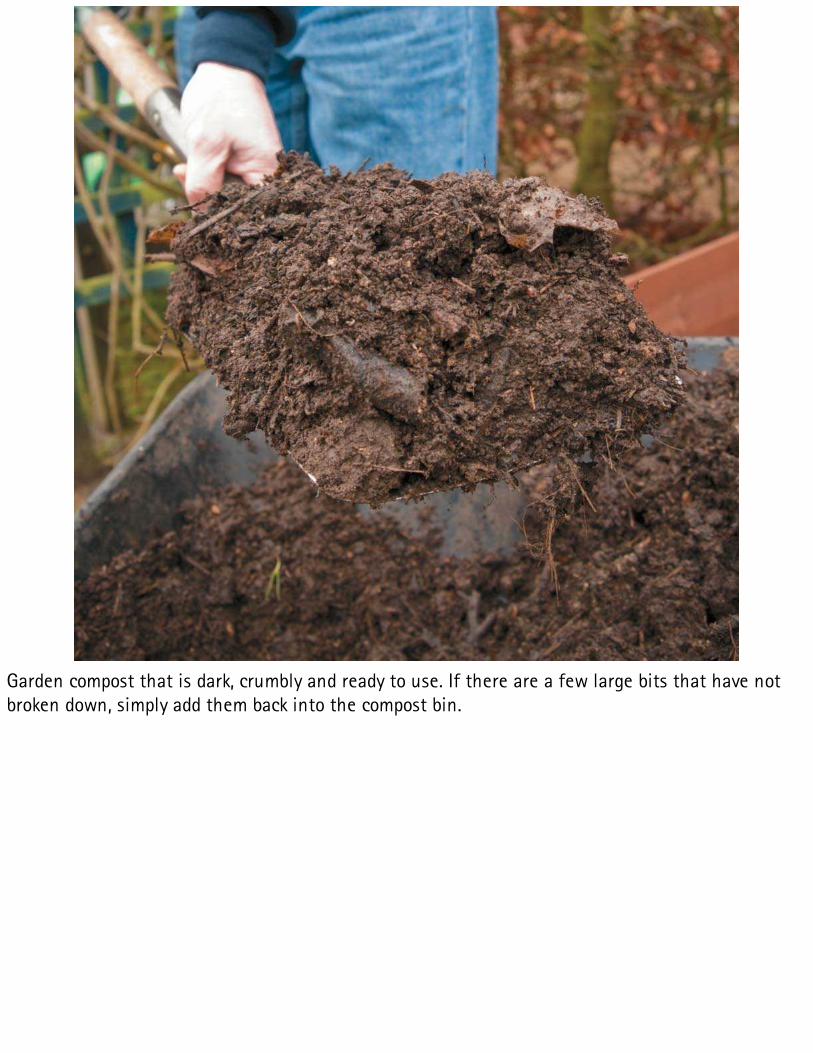
Garden compost that is dark, crumbly and ready to use. If there are a few large bits that have notbroken down, simply add them back into the compost bin.
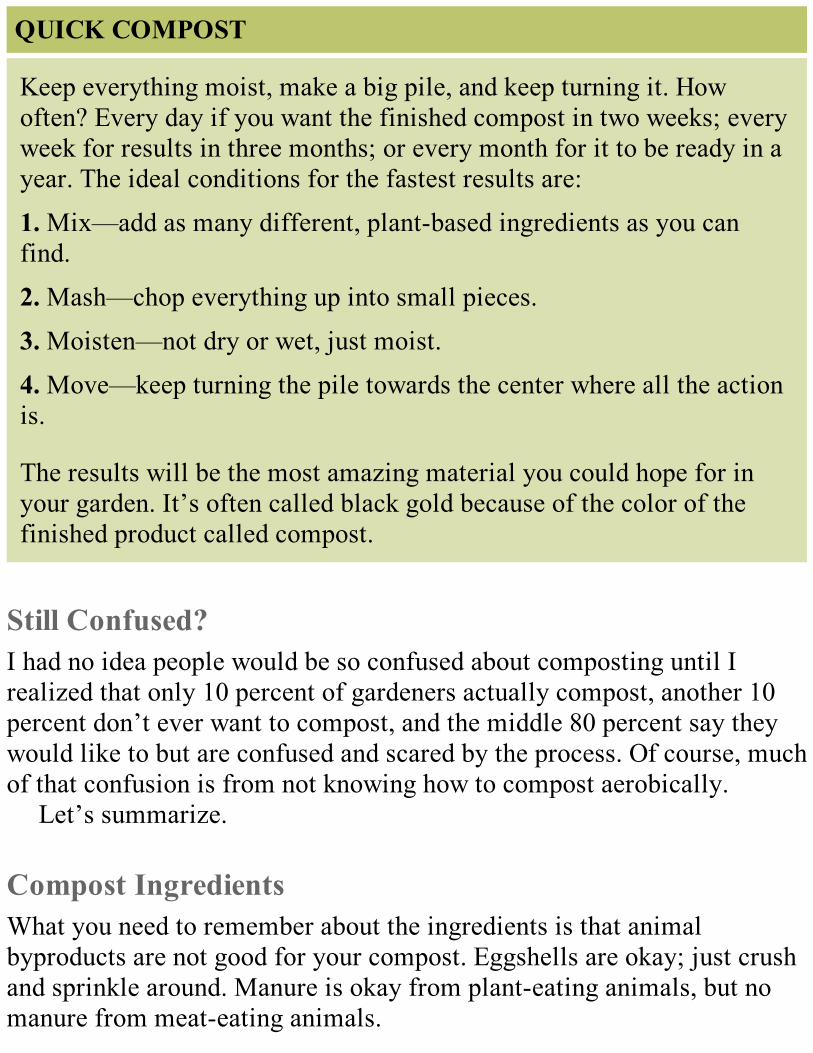
QUICK COMPOST
Keep everything moist, make a big pile, and keep turning it. Howoften? Every day if you want the finished compost in two weeks; everyweek for results in three months; or every month for it to be ready in ayear. The ideal conditions for the fastest results are:
1. Mix—add as many different, plant-based ingredients as you canfind.
2. Mash—chop everything up into small pieces.
3. Moisten—not dry or wet, just moist.
4. Move—keep turning the pile towards the center where all the actionis.
The results will be the most amazing material you could hope for inyour garden. It’s often called black gold because of the color of thefinished product called compost.
Still Confused?I had no idea people would be so confused about composting until Irealized that only 10 percent of gardeners actually compost, another 10percent don’t ever want to compost, and the middle 80 percent say theywould like to but are confused and scared by the process. Of course, muchof that confusion is from not knowing how to compost aerobically.
Let’s summarize.
Compost IngredientsWhat you need to remember about the ingredients is that animalbyproducts are not good for your compost. Eggshells are okay; just crushand sprinkle around. Manure is okay from plant-eating animals, but nomanure from meat-eating animals.

TURN THE HANDLES OR CHOP, CHOP, CHOPIf you are in a real hurry, there are expensive, but effective, rotating drumcomposters you can buy. You just turn a handle, flip a container, or pusha barrel around, and the contents are mixed and moved. Great idea, andthey work if you do it regularly.
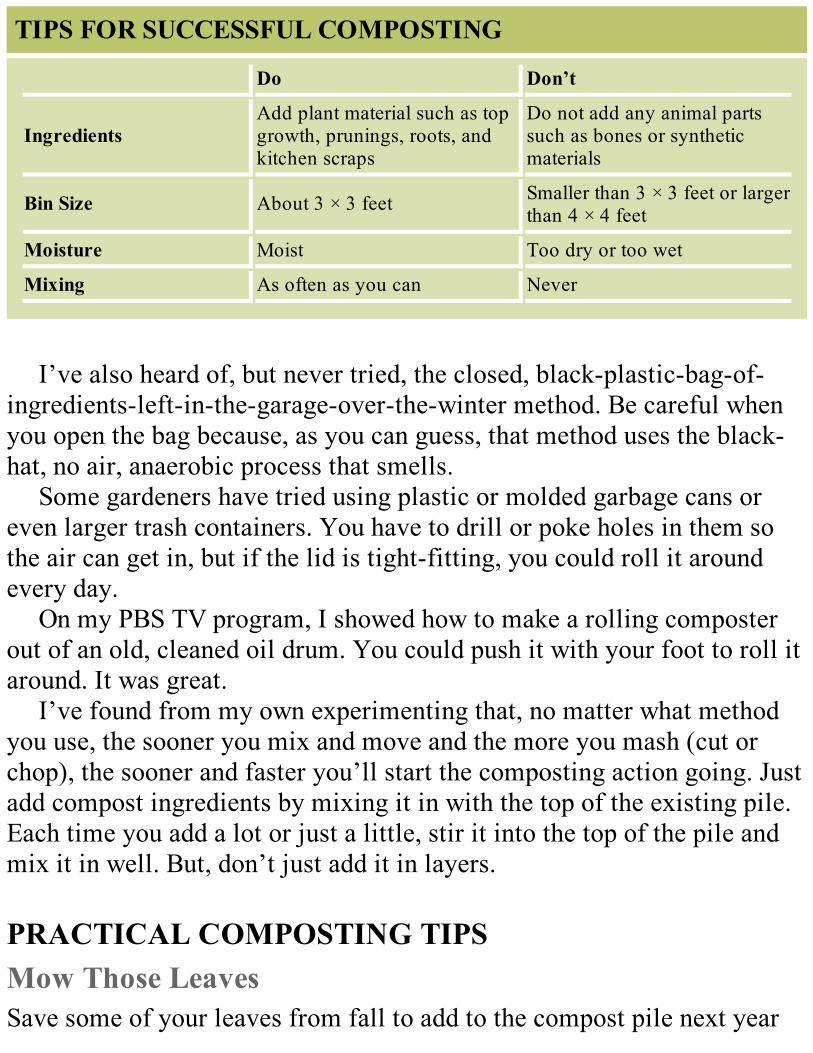
TIPS FOR SUCCESSFUL COMPOSTING
Do Don’t
IngredientsAdd plant material such as topgrowth, prunings, roots, andkitchen scraps
Do not add any animal partssuch as bones or syntheticmaterials
Bin Size About 3 × 3 feet Smaller than 3 × 3 feet or largerthan 4 × 4 feet
Moisture Moist Too dry or too wet
Mixing As often as you can Never
I’ve also heard of, but never tried, the closed, black-plastic-bag-of-ingredients-left-in-the-garage-over-the-winter method. Be careful whenyou open the bag because, as you can guess, that method uses the black-hat, no air, anaerobic process that smells.
Some gardeners have tried using plastic or molded garbage cans oreven larger trash containers. You have to drill or poke holes in them sothe air can get in, but if the lid is tight-fitting, you could roll it aroundevery day.
On my PBS TV program, I showed how to make a rolling composterout of an old, cleaned oil drum. You could push it with your foot to roll itaround. It was great.
I’ve found from my own experimenting that, no matter what methodyou use, the sooner you mix and move and the more you mash (cut orchop), the sooner and faster you’ll start the composting action going. Justadd compost ingredients by mixing it in with the top of the existing pile.Each time you add a lot or just a little, stir it into the top of the pile andmix it in well. But, don’t just add it in layers.
PRACTICAL COMPOSTING TIPSMow Those LeavesSave some of your leaves from fall to add to the compost pile next year
rather than all at once. After you rake them up, run the lawnmower overthem to chop them up and then stuff into plastic bags (make sure they aredry) or, if you are a “neatnik,” store them in gray garbage bins storedalong the wall of your compost operation.
Dry That GrassOthers like to save their grass clippings the same way, but you have to bevery careful. If piled up, fresh green grass will quickly turn into a black-hat, anaerobic operation that’s a stinking, slimy, gooey mess. Grassclippings have to be dried before adding them to the pile or stored forlater addition. It does seem like an oxymoron to dry the grass clippingsonly to moisten them in the compost pile, but now I’m sure you can seewhy we do it that way.
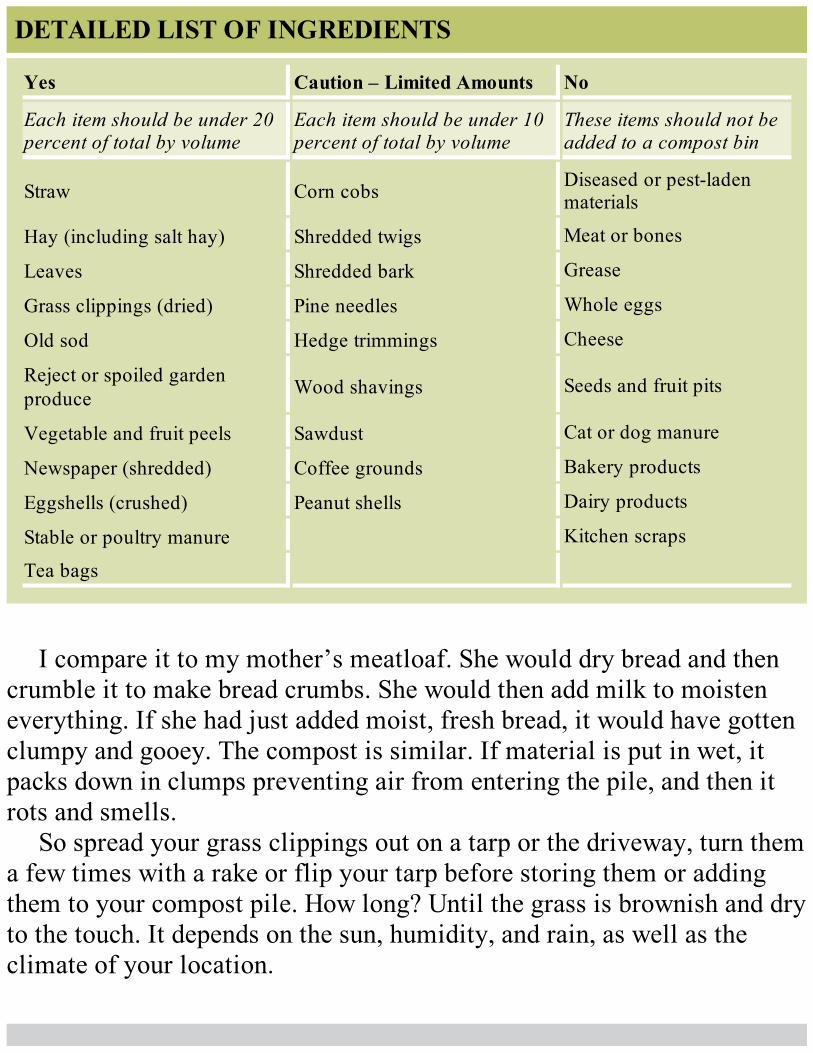
DETAILED LIST OF INGREDIENTS
Yes Caution – Limited Amounts No
Each item should be under 20percent of total by volume
Each item should be under 10percent of total by volume
These items should not beadded to a compost bin
Straw Corn cobs Diseased or pest-ladenmaterials
Hay (including salt hay) Shredded twigs Meat or bones
Leaves Shredded bark Grease
Grass clippings (dried) Pine needles Whole eggs
Old sod Hedge trimmings Cheese
Reject or spoiled gardenproduce Wood shavings Seeds and fruit pits
Vegetable and fruit peels Sawdust Cat or dog manure
Newspaper (shredded) Coffee grounds Bakery products
Eggshells (crushed) Peanut shells Dairy products
Stable or poultry manure Kitchen scraps
Tea bags
I compare it to my mother’s meatloaf. She would dry bread and thencrumble it to make bread crumbs. She would then add milk to moisteneverything. If she had just added moist, fresh bread, it would have gottenclumpy and gooey. The compost is similar. If material is put in wet, itpacks down in clumps preventing air from entering the pile, and then itrots and smells.
So spread your grass clippings out on a tarp or the driveway, turn thema few times with a rake or flip your tarp before storing them or addingthem to your compost pile. How long? Until the grass is brownish and dryto the touch. It depends on the sun, humidity, and rain, as well as theclimate of your location.
“My square foot garden has been the most productive,lowest maintenance garden I’ve ever had.”– Pat from Utah
Mix and TurnThis is a good time to remind you that the center of the pile is where mostof the action is. It will be the hottest (up to 150°F or 65°C), the moistest,and with the most white-hats running around decomposing theingredients. Knowing all that when you turn the contents of one compostbin into another, you will be putting the top of A into the bottom of B—assuming you have two bins or piles side-by-side—then you make sureyou put the outside material of A into the inside of B. Get it? It’s just likethe theory that opposites attract. Mix in (at the same time) oppositecolors, wetness, size—everything opposite for the fastest operation. Inother words, brown with green, wet with dry, coarse with fine. That’s alleasy to remember—just think of opposites attracting and you’ll have agreat operation.
IF YOU DECIDE TO BUY COMPOSTDon’t buy all of one kind of compost if you decide to not make ityourself. Don’t let the clerk sell you the “best and most popular,”especially if it’s loose and not bagged. Here’s why. All commercialcompost is a byproduct from one industry. It might be the wood, cattle,mushroom, cannery, cotton, or soybean industry that has a waste productand they have to get rid of it. They said, “What if we take our wasteproduct (sawdust, manure, vines, pulp, or husks) and compost it, peoplewill pay us and take it away.” Everyone laughed but, by golly, ithappened just that way. Now every industry with a waste product isfinding ways to get rid of it at a profit all the while protecting theenvironment. What a good deal. The only setback for gardeners is most

bags of compost come from a single product and have only oneingredient.
What’s the solution? Buy a variety of composts and mix themtogether. Now, you are more likely to get a better mixture.
GO BIG TIMEIf you are really into this, you can brainstorm to think of places thatthrow out organic or plant material. Like a bird shop and all those birddroppings that go on the bottom of the cage. And, how about the annualfire department community breakfast—fresh fruit, banana and orangepeels maybe, but also how about eggshells? Just ask ahead—take boxesor bags and ask them to separate the trash. Or, how about the annual 4thof July watermelon picnic in town? There are all kinds of places whereyou can collect ingredients for your compost pile. And, you know, thenice thing is that you’ll find the same situation the world over.
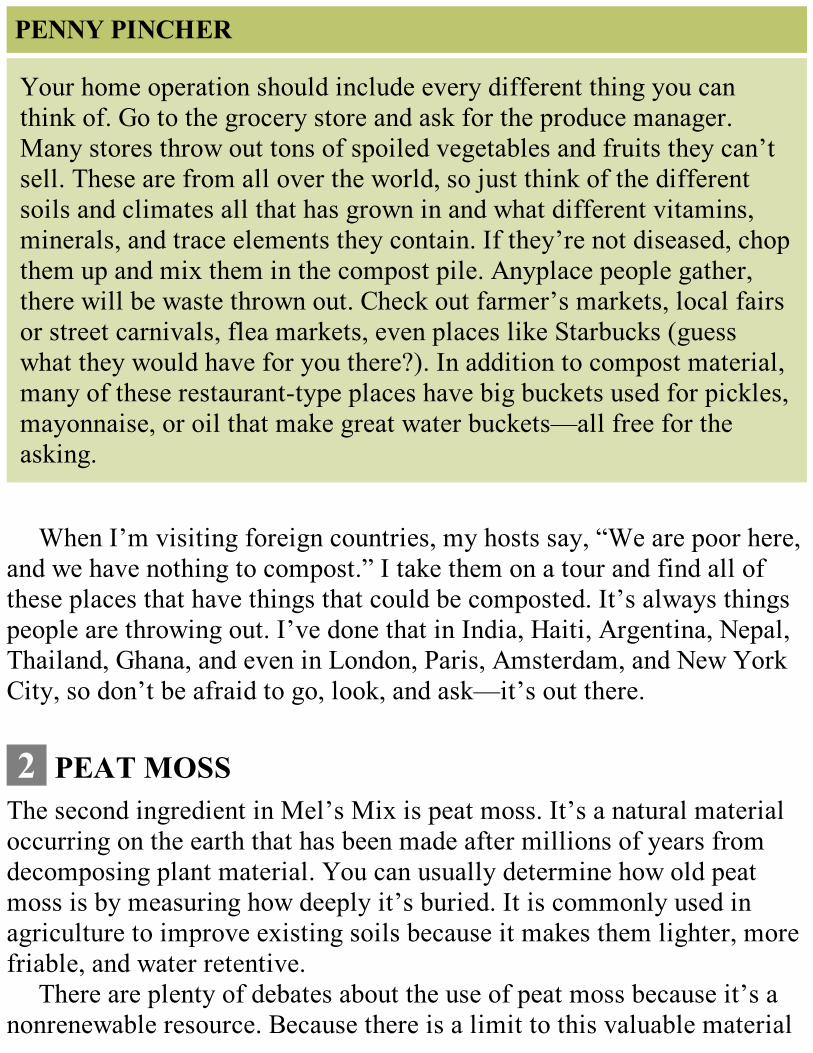
PENNY PINCHER
Your home operation should include every different thing you canthink of. Go to the grocery store and ask for the produce manager.Many stores throw out tons of spoiled vegetables and fruits they can’tsell. These are from all over the world, so just think of the differentsoils and climates all that has grown in and what different vitamins,minerals, and trace elements they contain. If they’re not diseased, chopthem up and mix them in the compost pile. Anyplace people gather,there will be waste thrown out. Check out farmer’s markets, local fairsor street carnivals, flea markets, even places like Starbucks (guesswhat they would have for you there?). In addition to compost material,many of these restaurant-type places have big buckets used for pickles,mayonnaise, or oil that make great water buckets—all free for theasking.
When I’m visiting foreign countries, my hosts say, “We are poor here,and we have nothing to compost.” I take them on a tour and find all ofthese places that have things that could be composted. It’s always thingspeople are throwing out. I’ve done that in India, Haiti, Argentina, Nepal,Thailand, Ghana, and even in London, Paris, Amsterdam, and New YorkCity, so don’t be afraid to go, look, and ask—it’s out there.
2 PEAT MOSSThe second ingredient in Mel’s Mix is peat moss. It’s a natural materialoccurring on the earth that has been made after millions of years fromdecomposing plant material. You can usually determine how old peatmoss is by measuring how deeply it’s buried. It is commonly used inagriculture to improve existing soils because it makes them lighter, morefriable, and water retentive.
There are plenty of debates about the use of peat moss because it’s anonrenewable resource. Because there is a limit to this valuable material
I’d like to guide you in using it responsibly while maximizing itsbenefits.
Only a LittleThe SFG method uses only 20 percent of the space of traditional single-row gardens. Therefore, you automatically use only 20 percent—one-fifth—as much peat moss, an 80 percent reduction. In addition, with SquareFoot Gardening, you add peat moss once and only once when you firstcreate your Mel’s Mix. Thereafter, you’ll never need to add peat moss tothe garden. (What you will add is compost, which is renewable.)
In the United States, most peat moss comes from the northern statesand Canada where it is still readily available. Because it’s such a valuableresource, SFG says let’s not waste it. Instead let’s get rid of all single-row gardens that require five times as much nonrenewable materials toimprove the soil year after year. Let’s be conservative and sensible anduse what we have, a beneficial, natural material, but make it longerlasting.
3 VERMICULITEVermiculite, the third and final ingredient in Mel’s Mix, is also a naturalmaterial and is obtainable all over the world. It’s mica rock mined out ofthe ground. Once the rock is collected, it is then ground up into smallparticles and heated until it explodes just like popcorn, forming smallpieces from as large as the tip of your little finger down to almost apowder. However, this material is filled with nooks and crannies, just likean English muffin. These nooks and crannies hold a tremendous amountof water and yet can breathe, making the soil extremely friable and loose.The moisture is always there for the roots to absorb. Remember that rootsdon’t grow through soil; they grow around soil particles. That’s whyplants do better in a loose, friable soil because the roots have an easytime growing.

CertifiedVermiculite is graded into several sizes—fine, medium, and coarse—andis also tested and qualified for different types of uses. The coarseagricultural grade holds the most moisture while at the same time givingthe most friability to the soil mix. You may find that some stores do notcarry vermiculite. If you ask them why, you might hear a story thatstarted many years ago when one mine in Montana was shut downbecause part of the mine was found to contain asbestos. Now, shuttingdown a mine because it contains asbestos makes sense.
However, some newspaper stories associated the problem with all ofthe products coming from the mine. Although the mine was shut downand the industry has produced a great deal of evidence that thecontamination was not in the vermiculite, the story surfaces every fewyears as if it was new, thereby getting everyone upset all over again. Itwas a serious situation, but as a result, the good news is that all thevermiculite mines around the world and products sold are nowmeticulously inspected by everyone; the bags we buy now even comewith a “Certified Asbestos Free” sticker.
Locating it can be difficult. Let your fingers do the walking and callaround. Call all the major nurseries, garden supply centers, and majorhome improvement stores and try to get the garden manager on the phoneand ask them if they carry the large 4-cubic-foot bags of coarsevermiculite because you’re building a Square Foot Garden. If that fails,look under “greenhouse supplies or suppliers” in the yellow pages forwholesale distributors. Some people have found it at farm feed stores oreven on the Internet.
There is one caution when you mix it, and it is the same caution withpeat moss. Both materials are dusty when dry right out of the bag so weargloves and a painting mask. Mix only outdoors on a calm day.
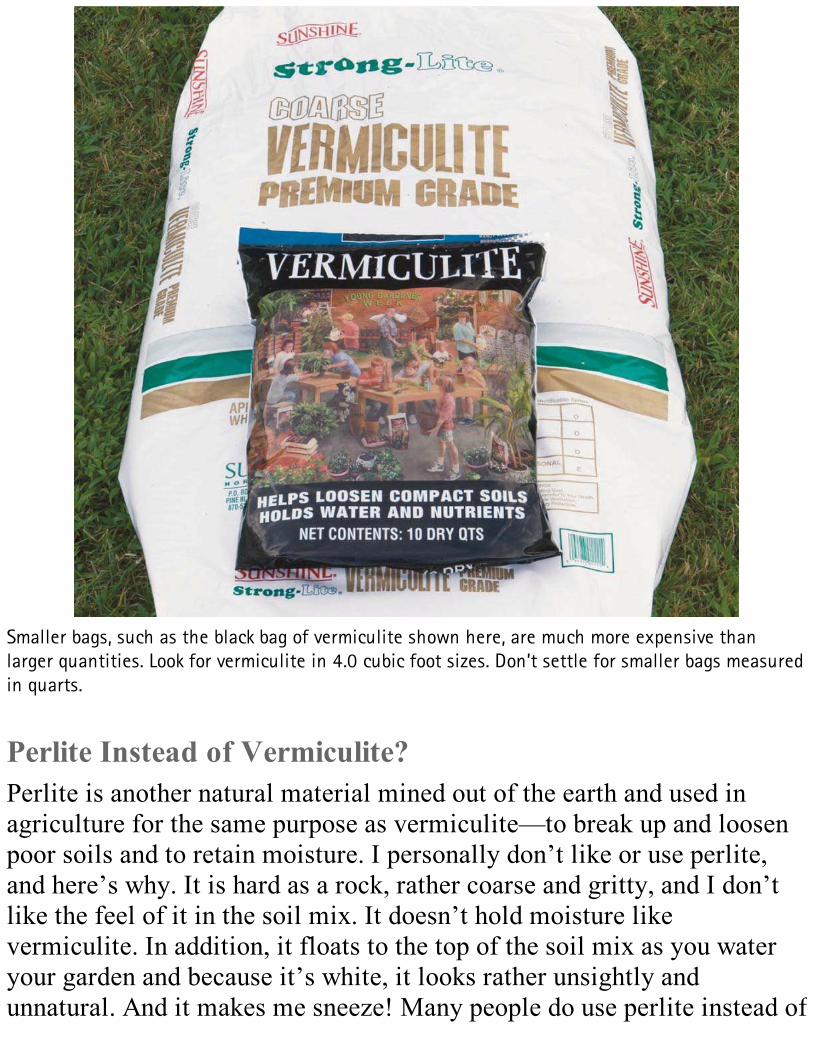
Smaller bags, such as the black bag of vermiculite shown here, are much more expensive thanlarger quantities. Look for vermiculite in 4.0 cubic foot sizes. Don’t settle for smaller bags measuredin quarts.
Perlite Instead of Vermiculite?Perlite is another natural material mined out of the earth and used inagriculture for the same purpose as vermiculite—to break up and loosenpoor soils and to retain moisture. I personally don’t like or use perlite,and here’s why. It is hard as a rock, rather coarse and gritty, and I don’tlike the feel of it in the soil mix. It doesn’t hold moisture likevermiculite. In addition, it floats to the top of the soil mix as you wateryour garden and because it’s white, it looks rather unsightly andunnatural. And it makes me sneeze! Many people do use perlite instead of
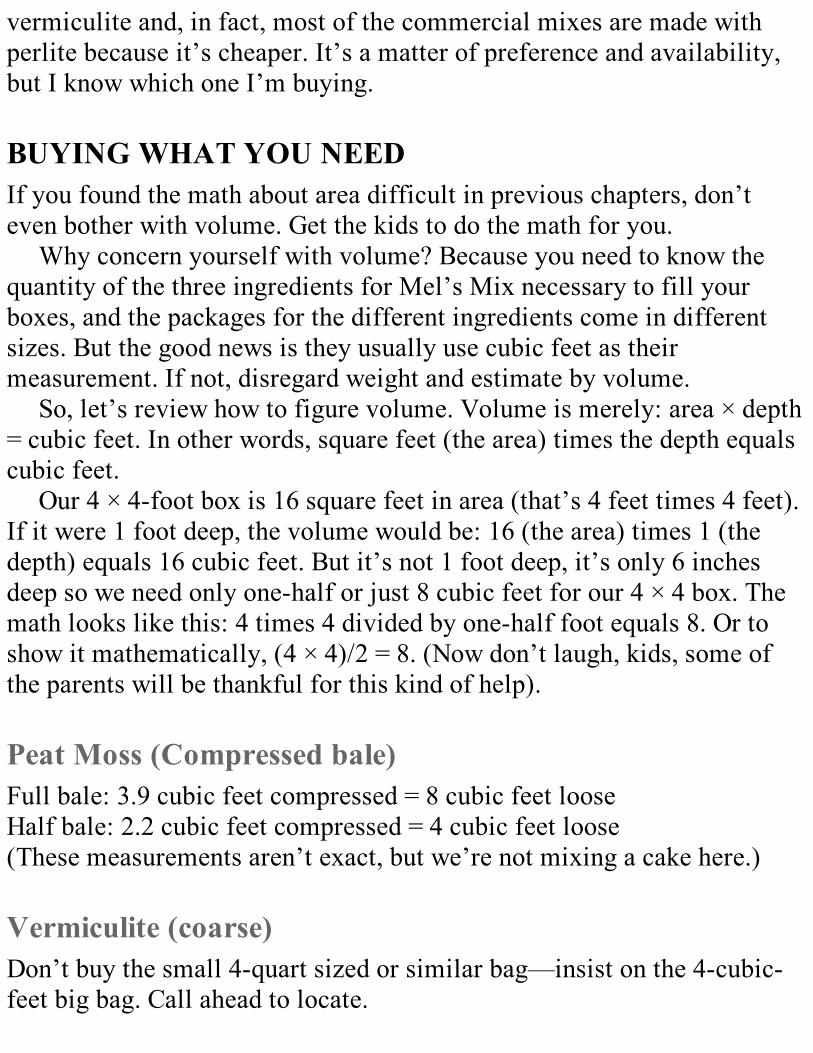
vermiculite and, in fact, most of the commercial mixes are made withperlite because it’s cheaper. It’s a matter of preference and availability,but I know which one I’m buying.
BUYING WHAT YOU NEEDIf you found the math about area difficult in previous chapters, don’teven bother with volume. Get the kids to do the math for you.
Why concern yourself with volume? Because you need to know thequantity of the three ingredients for Mel’s Mix necessary to fill yourboxes, and the packages for the different ingredients come in differentsizes. But the good news is they usually use cubic feet as theirmeasurement. If not, disregard weight and estimate by volume.
So, let’s review how to figure volume. Volume is merely: area × depth= cubic feet. In other words, square feet (the area) times the depth equalscubic feet.
Our 4 × 4-foot box is 16 square feet in area (that’s 4 feet times 4 feet).If it were 1 foot deep, the volume would be: 16 (the area) times 1 (thedepth) equals 16 cubic feet. But it’s not 1 foot deep, it’s only 6 inchesdeep so we need only one-half or just 8 cubic feet for our 4 × 4 box. Themath looks like this: 4 times 4 divided by one-half foot equals 8. Or toshow it mathematically, (4 × 4)/2 = 8. (Now don’t laugh, kids, some ofthe parents will be thankful for this kind of help).
Peat Moss (Compressed bale)Full bale: 3.9 cubic feet compressed = 8 cubic feet looseHalf bale: 2.2 cubic feet compressed = 4 cubic feet loose(These measurements aren’t exact, but we’re not mixing a cake here.)
Vermiculite (coarse)Don’t buy the small 4-quart sized or similar bag—insist on the 4-cubic-feet big bag. Call ahead to locate.

MEL’S MIX VOLUMENow here’s the tricky part. Since all the products for Mel’s Mix come indifferent volumes, you’ll have to purchase them already knowing howmuch you’ll need to mix correctly and fill your boxes completely. Let’suse a hypothetical example. If we had 4 × 4 boxes, they would each havea volume of 8 cubic feet, as we determined already. So, if we had sixboxes to fill, we would need 6 × 8 = 48 cubic feet of mix. (Six boxestimes 8 cubic feet for each box equals 48 cubic feet of mix.) One-third ofthe total for each ingredient = 48/3 = 16 cubic feet of each. (A total of 48cubic feet divided by three different ingredients equals 16 cubic feet ofeach ingredient.)
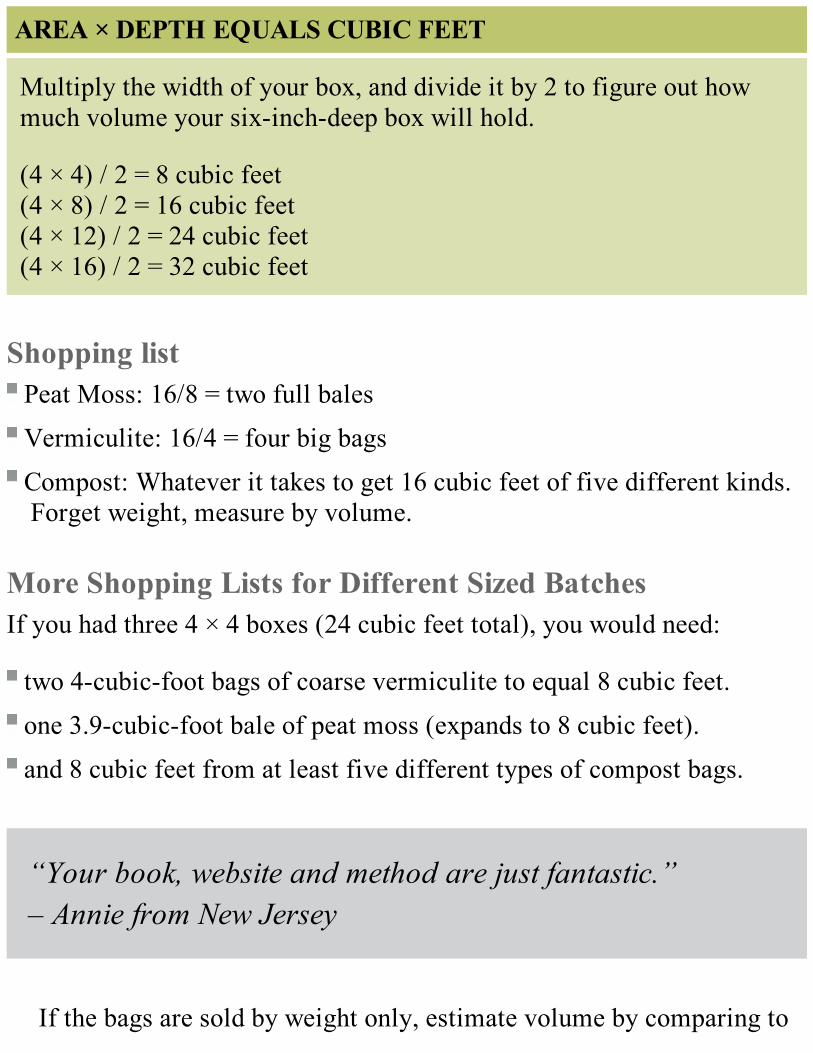
AREA × DEPTH EQUALS CUBIC FEET
Multiply the width of your box, and divide it by 2 to figure out howmuch volume your six-inch-deep box will hold.
(4 × 4) / 2 = 8 cubic feet(4 × 8) / 2 = 16 cubic feet(4 × 12) / 2 = 24 cubic feet(4 × 16) / 2 = 32 cubic feet
Shopping list Peat Moss: 16/8 = two full bales
Vermiculite: 16/4 = four big bags
Compost: Whatever it takes to get 16 cubic feet of five different kinds.Forget weight, measure by volume.
More Shopping Lists for Different Sized BatchesIf you had three 4 × 4 boxes (24 cubic feet total), you would need:
two 4-cubic-foot bags of coarse vermiculite to equal 8 cubic feet.
one 3.9-cubic-foot bale of peat moss (expands to 8 cubic feet).
and 8 cubic feet from at least five different types of compost bags.
“Your book, website and method are just fantastic.”– Annie from New Jersey
If the bags are sold by weight only, estimate volume by comparing to
similar sized bags that note volume.If you had one 4 × 4 box and one 2 × 4 or one 3 × 3 box (12 cubic feet),
and you wanted to mix up half of a batch to start with, you would addtogether just one 4-cubic-foot bag of vermiculite, half of a 3.9-cubic-footbale of peat moss (or if you can find the 2.2-cubic-foot bales that expandto equal about 4 cubic feet loose), and two of the 2-cubic-foot bags ofcompost. If the compost comes in other sized bags, you may have to do alittle arithmetic. That’s enough Mel’s Mix to fill one 4 × 4 box that needs8 cubic feet plus one 2 × 4 box that needs four cubic feet, or one 3 × 3 boxthat needs 41/2 cubic feet.
HOW TO MIXThis is where making your Mel’s Mix and filling your boxes starts to getfun. Mix it all at once if possible (storing any excess in recycled bags).But if it’s too big a batch to handle, split it into smaller batches.
Here’s a suggestion: Use a pair of scissors to cut open your bagscarefully along the top so you can reuse them. At the same time explainto the kids the environmental three R’s—reduce, reuse, and recycle. OurSquare Foot Gardening system is a great example of:
1. reduce, by 80 percent,
2. reuse, save the bags, and
3. recycle plants in your compost.
Get a large tarp, at least 16 × 16-feet, and open it near your gardenwhere you have all your boxes built and located. Make sure you havethem in their final resting place—check with the boss one more time andask, “Are you sure this is where you want all the boxes, dear?”
All of the three ingredients are dusty when dry, so do this when thereis no wind. Don’t do it in the garage, or you’ll get dust all over your nicenew car or workshop. Wear a painter’s mask and have a hose ready with avery fine spray. Don’t forget to have a few mixing tools ready like a snow
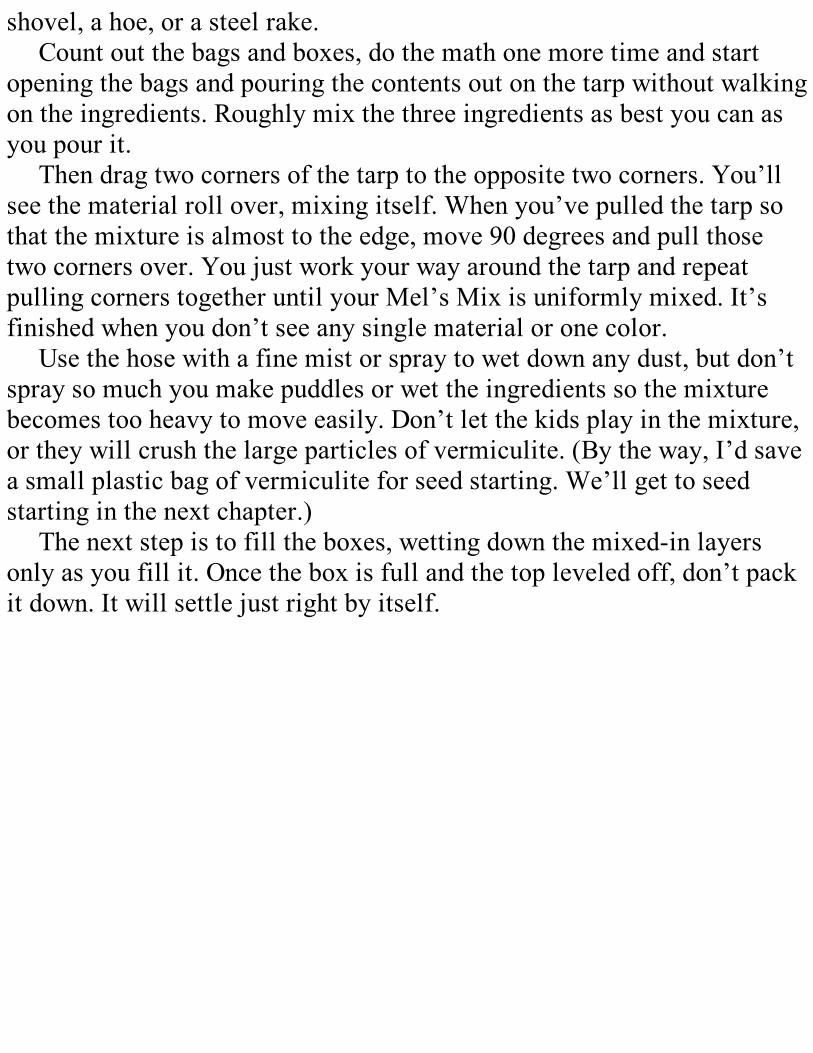
shovel, a hoe, or a steel rake.Count out the bags and boxes, do the math one more time and start
opening the bags and pouring the contents out on the tarp without walkingon the ingredients. Roughly mix the three ingredients as best you can asyou pour it.
Then drag two corners of the tarp to the opposite two corners. You’llsee the material roll over, mixing itself. When you’ve pulled the tarp sothat the mixture is almost to the edge, move 90 degrees and pull thosetwo corners over. You just work your way around the tarp and repeatpulling corners together until your Mel’s Mix is uniformly mixed. It’sfinished when you don’t see any single material or one color.
Use the hose with a fine mist or spray to wet down any dust, but don’tspray so much you make puddles or wet the ingredients so the mixturebecomes too heavy to move easily. Don’t let the kids play in the mixture,or they will crush the large particles of vermiculite. (By the way, I’d savea small plastic bag of vermiculite for seed starting. We’ll get to seedstarting in the next chapter.)
The next step is to fill the boxes, wetting down the mixed-in layersonly as you fill it. Once the box is full and the top leveled off, don’t packit down. It will settle just right by itself.
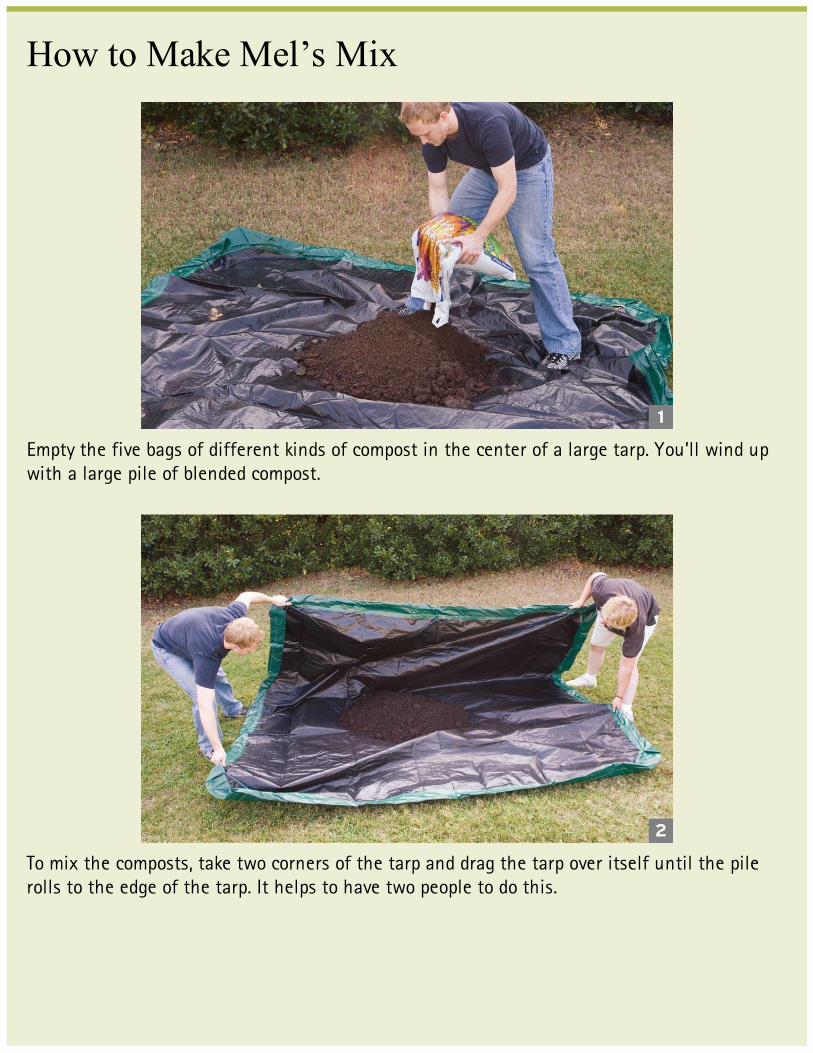
How to Make Mel’s Mix
Empty the five bags of different kinds of compost in the center of a large tarp. You’ll wind upwith a large pile of blended compost.
To mix the composts, take two corners of the tarp and drag the tarp over itself until the pilerolls to the edge of the tarp. It helps to have two people to do this.
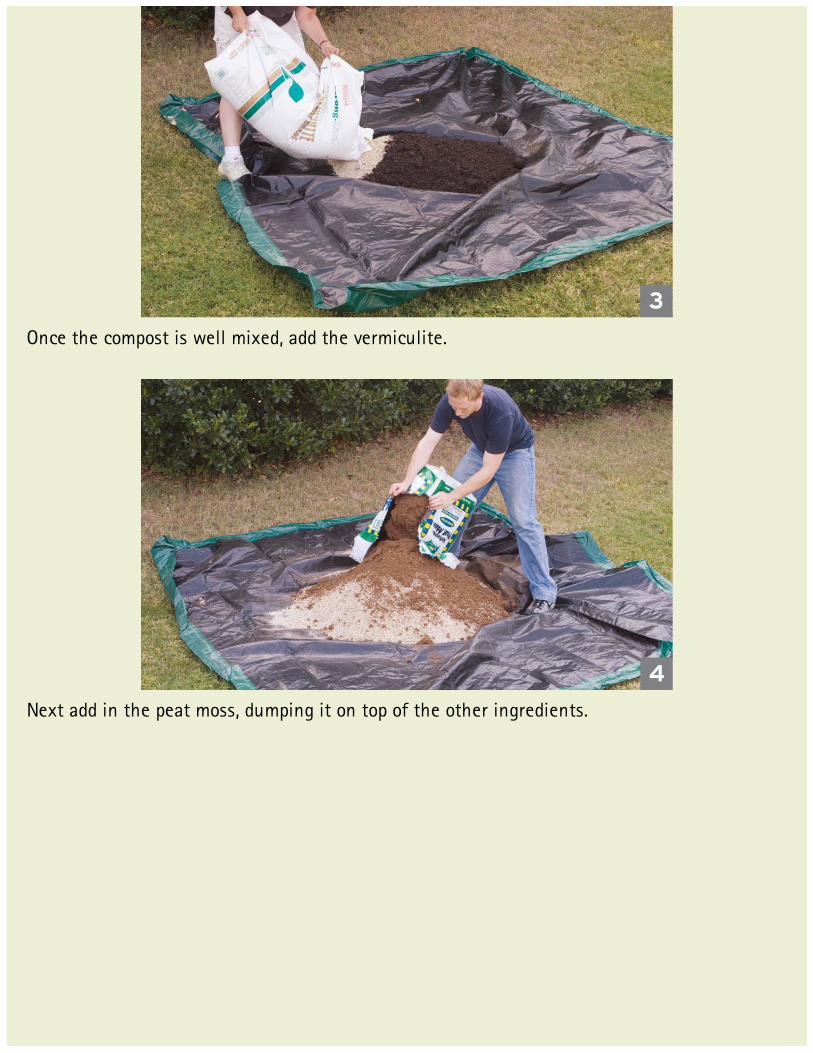
Once the compost is well mixed, add the vermiculite.
Next add in the peat moss, dumping it on top of the other ingredients.
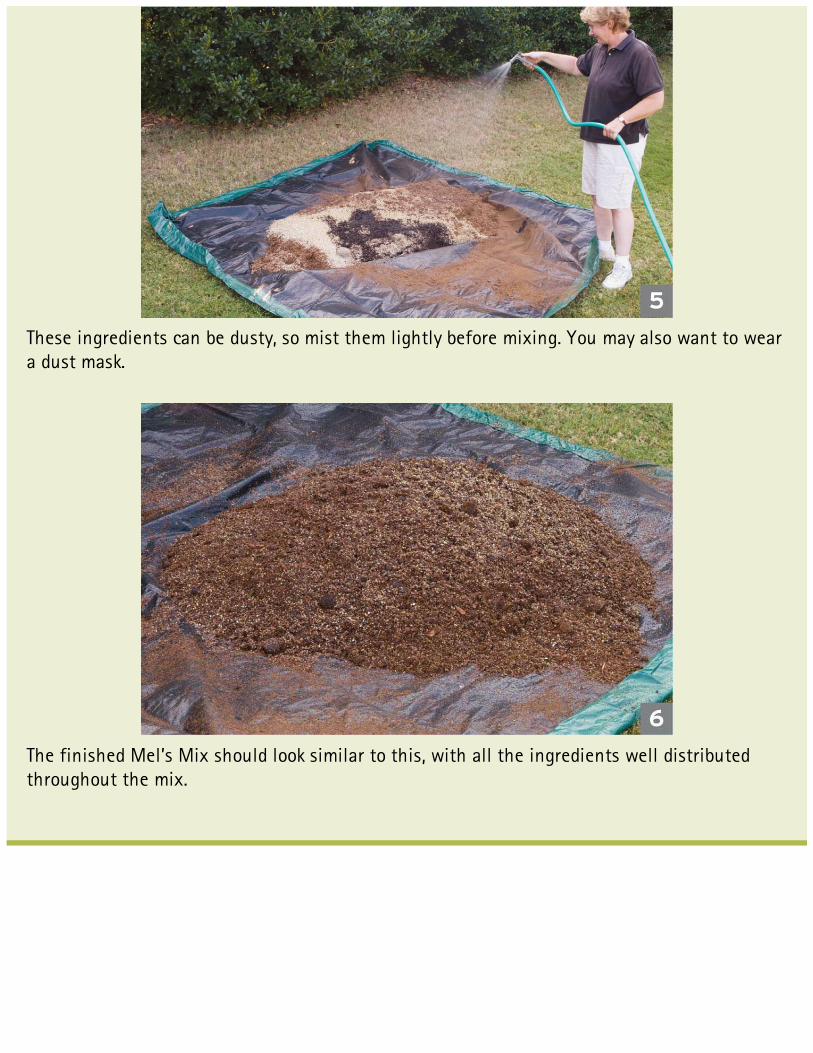
These ingredients can be dusty, so mist them lightly before mixing. You may also want to weara dust mask.
The finished Mel’s Mix should look similar to this, with all the ingredients well distributedthroughout the mix.
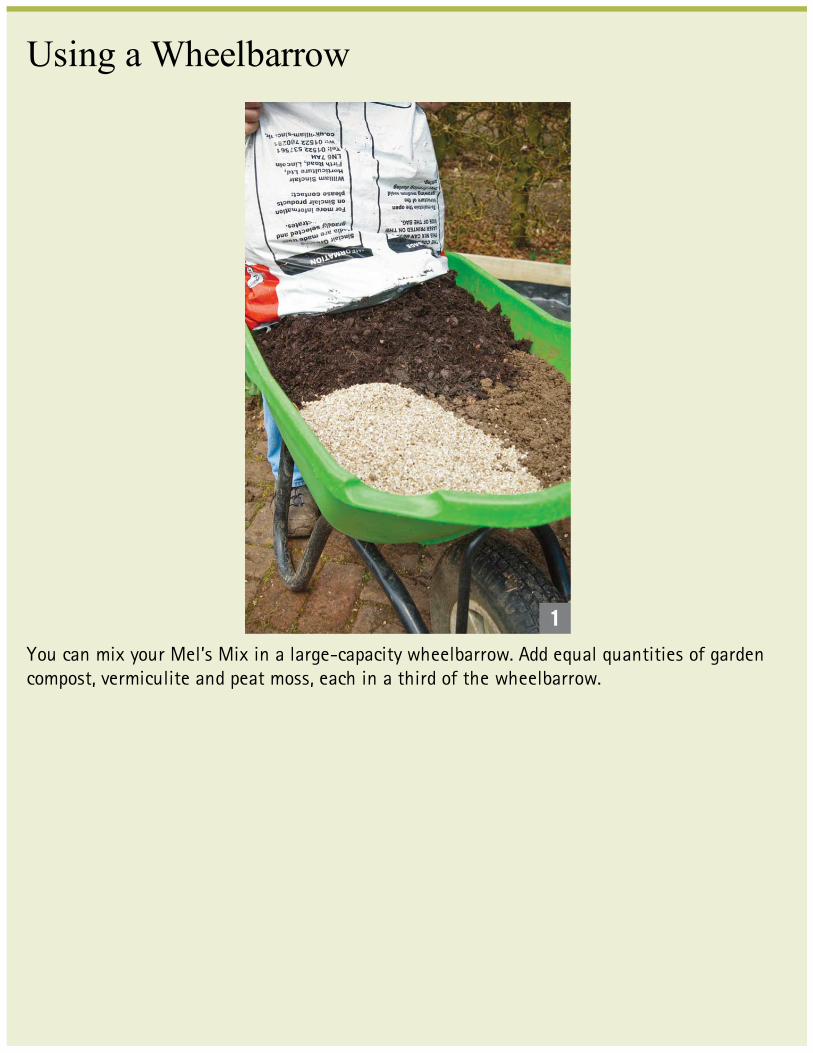
Using a Wheelbarrow
You can mix your Mel’s Mix in a large-capacity wheelbarrow. Add equal quantities of gardencompost, vermiculite and peat moss, each in a third of the wheelbarrow.
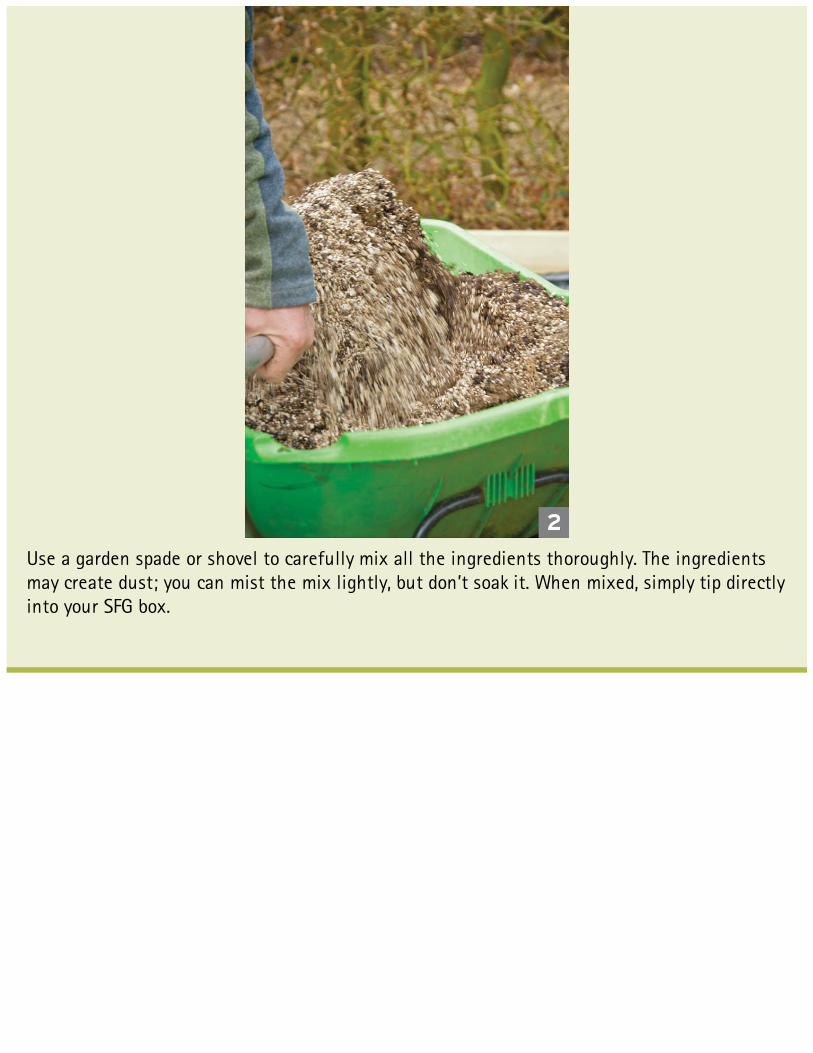
Use a garden spade or shovel to carefully mix all the ingredients thoroughly. The ingredientsmay create dust; you can mist the mix lightly, but don’t soak it. When mixed, simply tip directlyinto your SFG box.
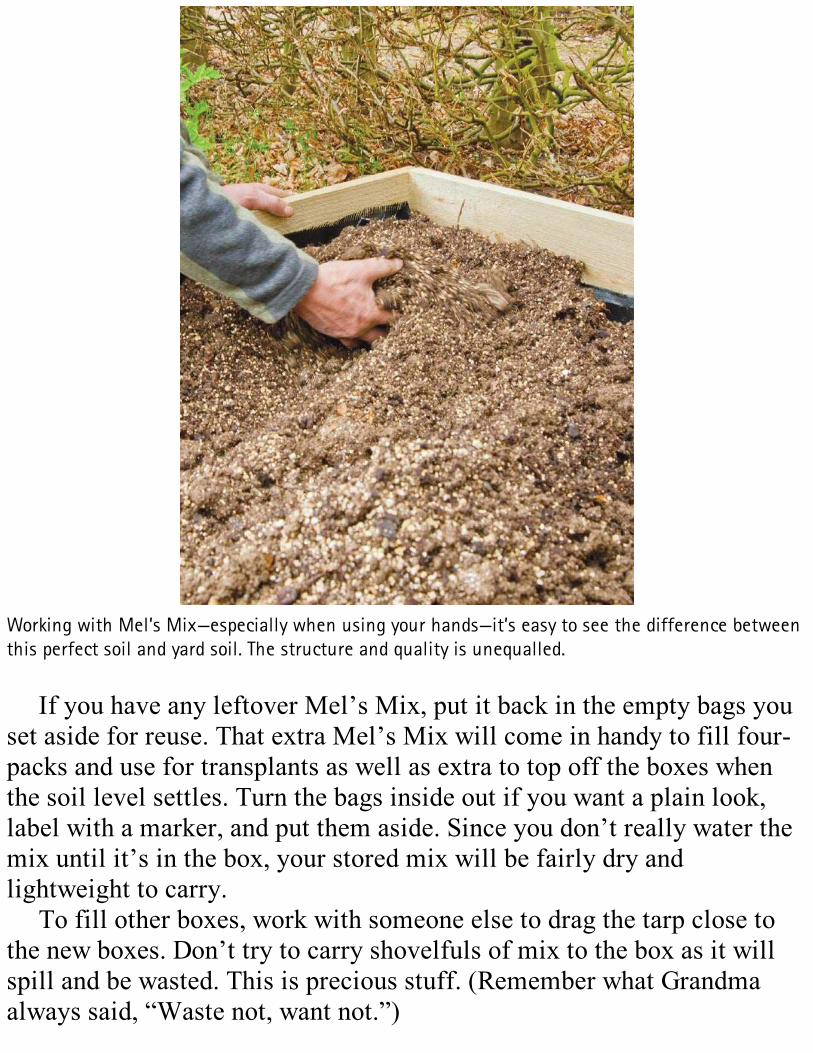
Working with Mel’s Mix—especially when using your hands—it’s easy to see the difference betweenthis perfect soil and yard soil. The structure and quality is unequalled.
If you have any leftover Mel’s Mix, put it back in the empty bags youset aside for reuse. That extra Mel’s Mix will come in handy to fill four-packs and use for transplants as well as extra to top off the boxes whenthe soil level settles. Turn the bags inside out if you want a plain look,label with a marker, and put them aside. Since you don’t really water themix until it’s in the box, your stored mix will be fairly dry andlightweight to carry.
To fill other boxes, work with someone else to drag the tarp close tothe new boxes. Don’t try to carry shovelfuls of mix to the box as it willspill and be wasted. This is precious stuff. (Remember what Grandmaalways said, “Waste not, want not.”)
That’s also why we don’t water the Mel’s Mix in the tarp, but as youare adding it to the box—that way the remaining material in the tarpdoesn’t get so heavy that it is hard to drag. As soon as you add your gridto each box, you are ready to plant.
Don’t wet the soil any more than is absolutely necessary;use a fine spray to reduce any dust. Soil becomes veryheavy when wet, and it would be difficult to drag thetarp around your yard.
You have now completed the most important and rewarding step inSFG. If you followed the formula correctly, and didn’t add any of yourexisting soil, it will stay loose and friable as long as you live and you willbe so excited and happy. You may have to keep one square just for show;visitors to your garden will watch as you say, “Just look at this soil as yourun your hands through it.” Many of you will then add, “Here, you try it.Just feel this soil.” (But don’t become a pest.)
AN AFTERTHOUGHTI want to make doubly sure you got the message of this chapter, so I’dlike to summarize the critical facts about compost. You need blendedcompost made from at least five different ingredients. Mix severaldifferent types of compost together if you buy your compost. Mostcommercial composts have only one or two ingredients because they aremerely leftover waste materials or byproducts from an industrial orcommercial operation. By themselves, they do not make a goodingredient in Mel’s Mix.
However, the good news is, if you can find at least five of theseindividual composted materials you can mix them together to make awell-rounded blended compost ingredient for your Mel’s Mix.

And if you did your job and got a blended compost made from at leastfive major ingredients, you will be blessed with the most wonderfulgarden you could ever imagine. And no more work ever.

6

6How to Plant Your All New Square
Foot GardenNow we’re getting to the interesting and fun part of SquareFoot Gardening. You’ve learned all of the basics. You’ve
picked the size, shape, and location of your garden. You’vebuilt the frames, put in the Mel’s Mix, and added the grids.
Now it’s time to plant.
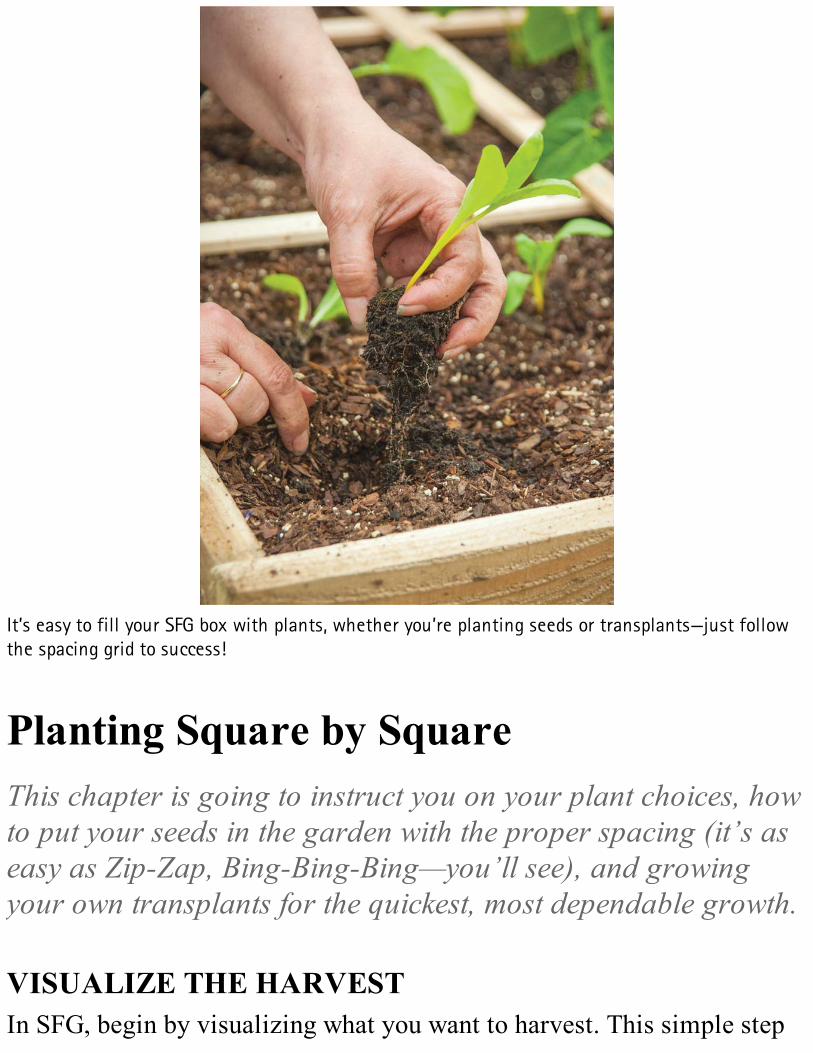
It’s easy to fill your SFG box with plants, whether you’re planting seeds or transplants—just followthe spacing grid to success!
Planting Square by SquareThis chapter is going to instruct you on your plant choices, howto put your seeds in the garden with the proper spacing (it’s aseasy as Zip-Zap, Bing-Bing-Bing—you’ll see), and growingyour own transplants for the quickest, most dependable growth.
VISUALIZE THE HARVESTIn SFG, begin by visualizing what you want to harvest. This simple step
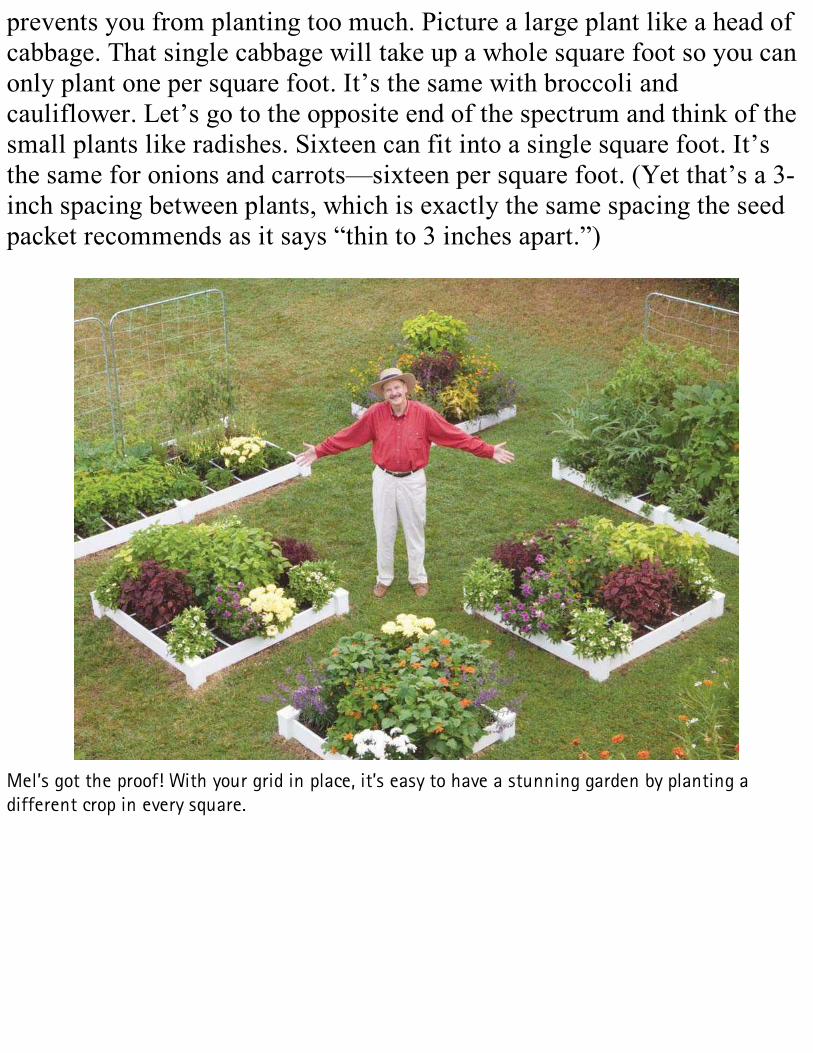
prevents you from planting too much. Picture a large plant like a head ofcabbage. That single cabbage will take up a whole square foot so you canonly plant one per square foot. It’s the same with broccoli andcauliflower. Let’s go to the opposite end of the spectrum and think of thesmall plants like radishes. Sixteen can fit into a single square foot. It’sthe same for onions and carrots—sixteen per square foot. (Yet that’s a 3-inch spacing between plants, which is exactly the same spacing the seedpacket recommends as it says “thin to 3 inches apart.”)
Mel’s got the proof! With your grid in place, it’s easy to have a stunning garden by planting adifferent crop in every square.
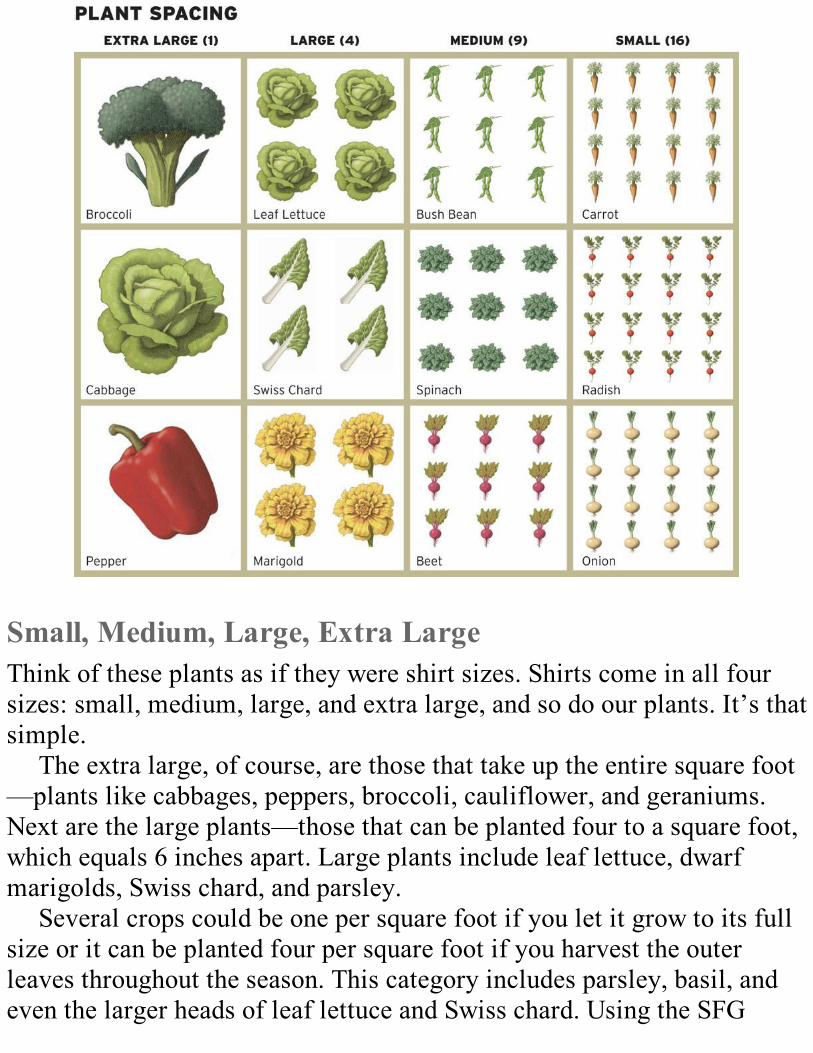
Small, Medium, Large, Extra LargeThink of these plants as if they were shirt sizes. Shirts come in all foursizes: small, medium, large, and extra large, and so do our plants. It’s thatsimple.
The extra large, of course, are those that take up the entire square foot—plants like cabbages, peppers, broccoli, cauliflower, and geraniums.Next are the large plants—those that can be planted four to a square foot,which equals 6 inches apart. Large plants include leaf lettuce, dwarfmarigolds, Swiss chard, and parsley.
Several crops could be one per square foot if you let it grow to its fullsize or it can be planted four per square foot if you harvest the outerleaves throughout the season. This category includes parsley, basil, andeven the larger heads of leaf lettuce and Swiss chard. Using the SFG
method, you snip and constantly harvest the outer leaves of edible greens,so they don’t take up as much space as in a conventional garden.
Medium plants come next. They fit nine to every square foot, whichequals 4 inches apart. Medium plants include bush beans, beets, and largeturnips.
Another way to get the proper spacing and number per square foot is tobe a little more scientific and do a little arithmetic as shown below.
You can see that one, four, nine, or sixteen plants should be spaced anequivalent number of inches apart. This is the same distance the seedpacket will say “thin to.” Of course we don’t have to “thin to” because wedon’t plant a whole packet of seeds anymore. So if you’re planting seeds,or even putting in transplants that you purchased or grew from seed, justfind the seed packet or planting directions to see what the distance is forthinning. This distance then determines whether you’re going to plantone, four, nine, or sixteen plants.
Just because we’re talking about measuring in inches doesn’t meanyou have to get out your ruler or yardstick, and you don’t have to do anycomplicated measuring or figuring either. This is when the grid becomeshandy. When your square foot is bordered by a grid, it’s much easier tothink one, four, nine, or sixteen plants in each square foot.
All you do is draw lines in the soil with your fingers! For one plant persquare foot just poke a hole in the middle of the square with your finger.For four per square foot, draw a vertical and horizontal line dividing thesquare in half each way. The plants go right in the center of these foursmaller squares.
HOW MUCH TO PLANTI recommend, especially at the beginning, that you plant only what youwant to eat. Occasionally try something new, of course, but especially atfirst only grow those vegetables and herbs that you normally eat.
Remember, plant each adjoining square foot with a different crop.Why? Here are several reasons:

1. It prevents you from overplanting any one particular item.
2. It allows you to stagger your harvest by planting one square foot thisweek and another of the same crop in two weeks or so.
3. It promotes conservation, companion planting, crop rotation, andallows better plant hygiene and reduced pest problems.
4. It automatically helps to improve your growing soil three times a yearin very easy, small steps. Remember the saying, “Square by square,you’ll soon be there.”
5. Besides all of the above, it looks pretty.
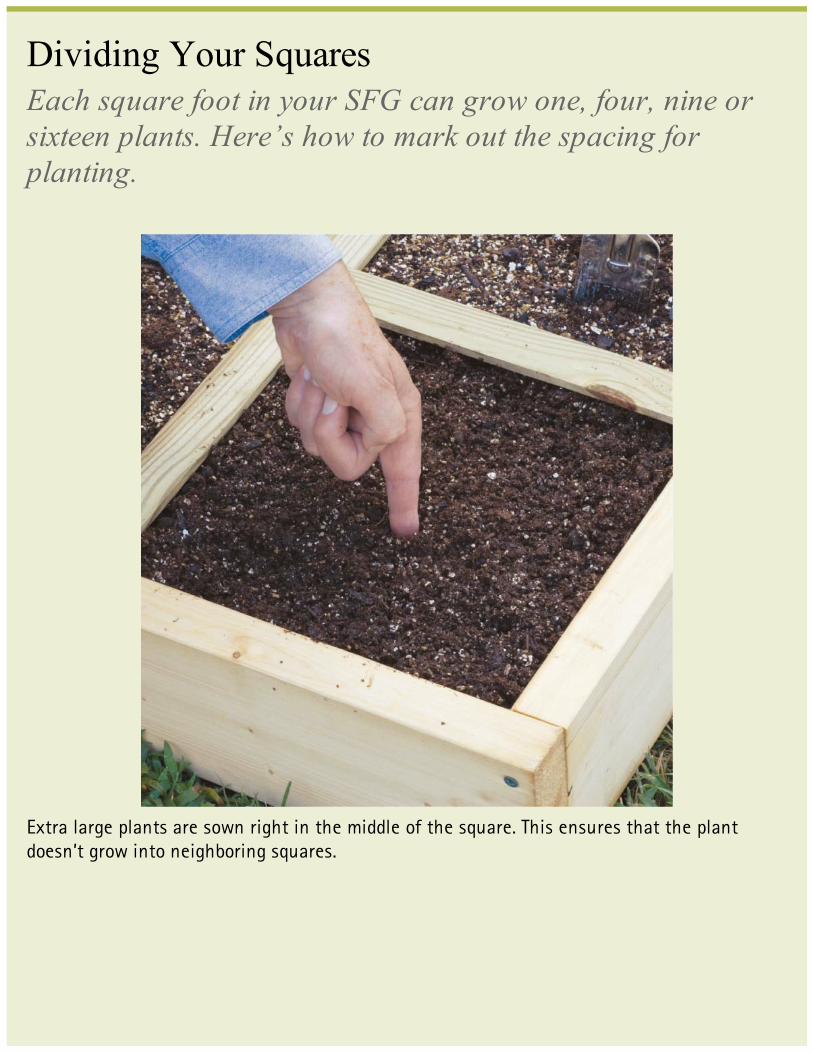
Dividing Your SquaresEach square foot in your SFG can grow one, four, nine orsixteen plants. Here’s how to mark out the spacing forplanting.
Extra large plants are sown right in the middle of the square. This ensures that the plantdoesn’t grow into neighboring squares.
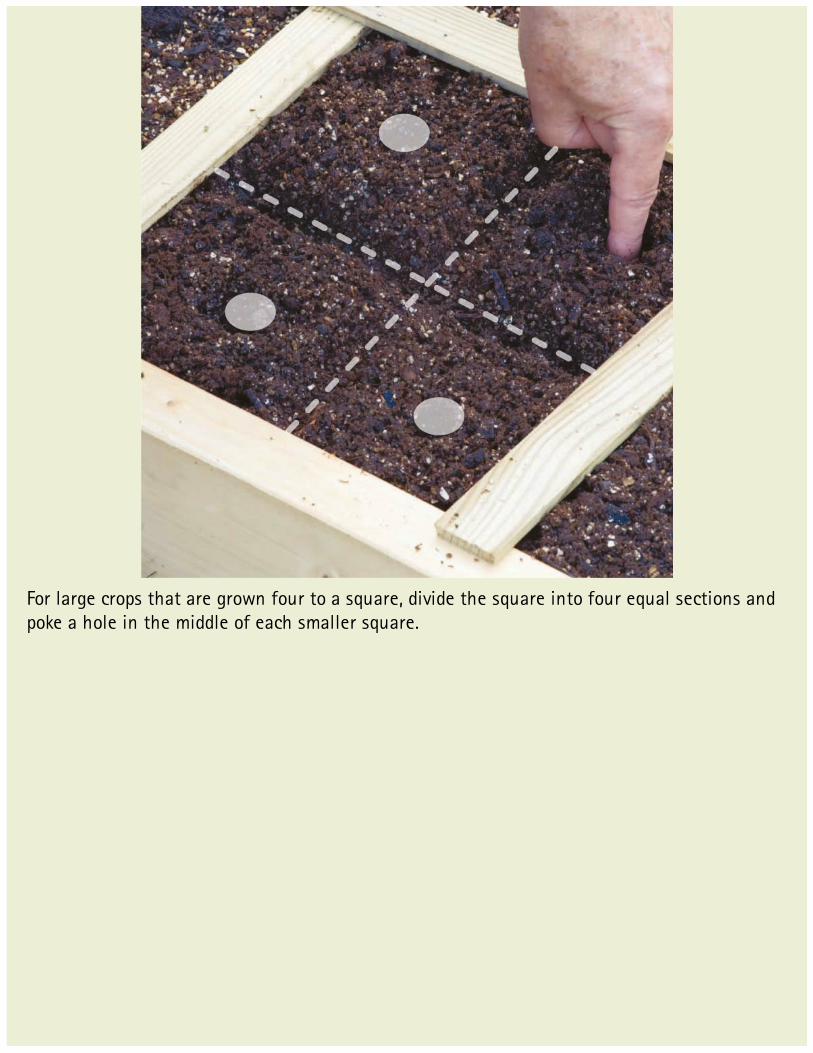
For large crops that are grown four to a square, divide the square into four equal sections andpoke a hole in the middle of each smaller square.
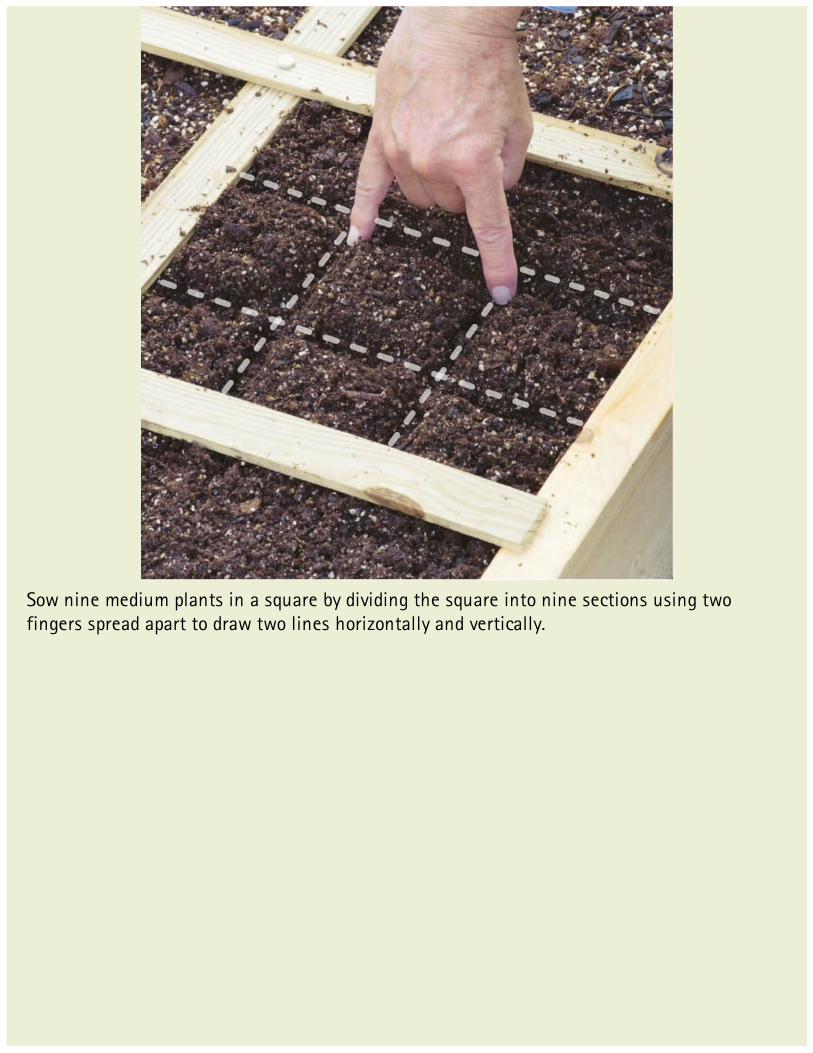
Sow nine medium plants in a square by dividing the square into nine sections using twofingers spread apart to draw two lines horizontally and vertically.
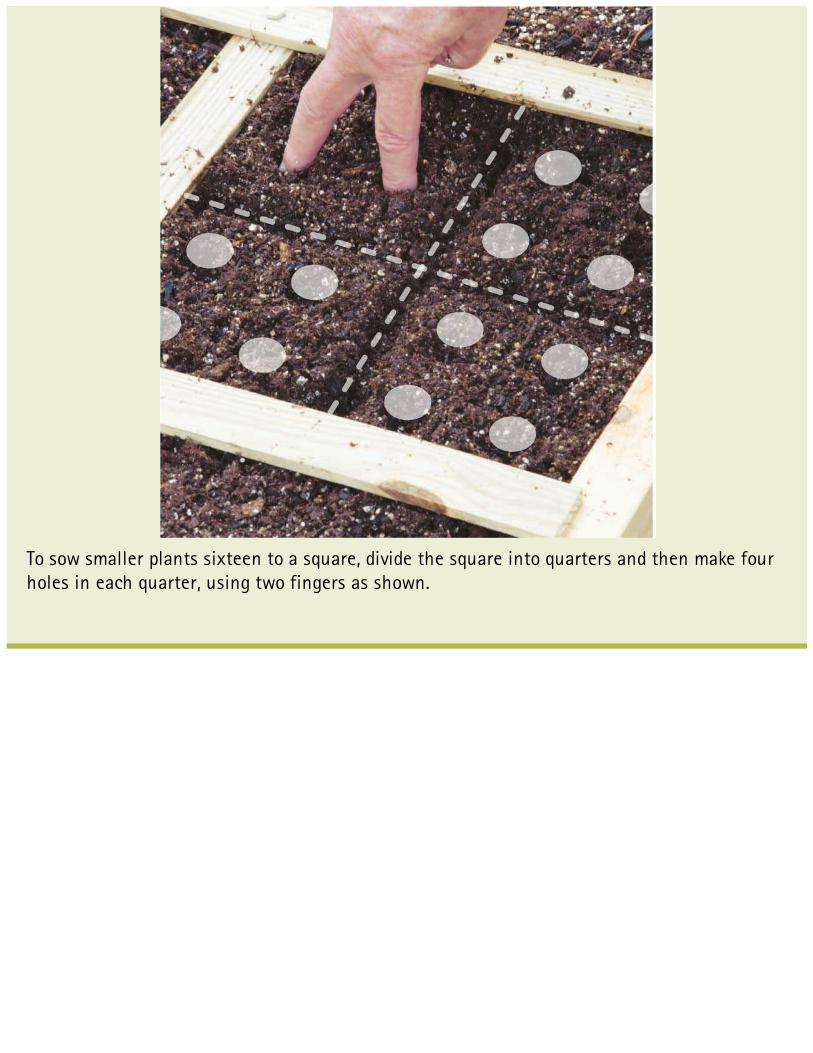
To sow smaller plants sixteen to a square, divide the square into quarters and then make fourholes in each quarter, using two fingers as shown.
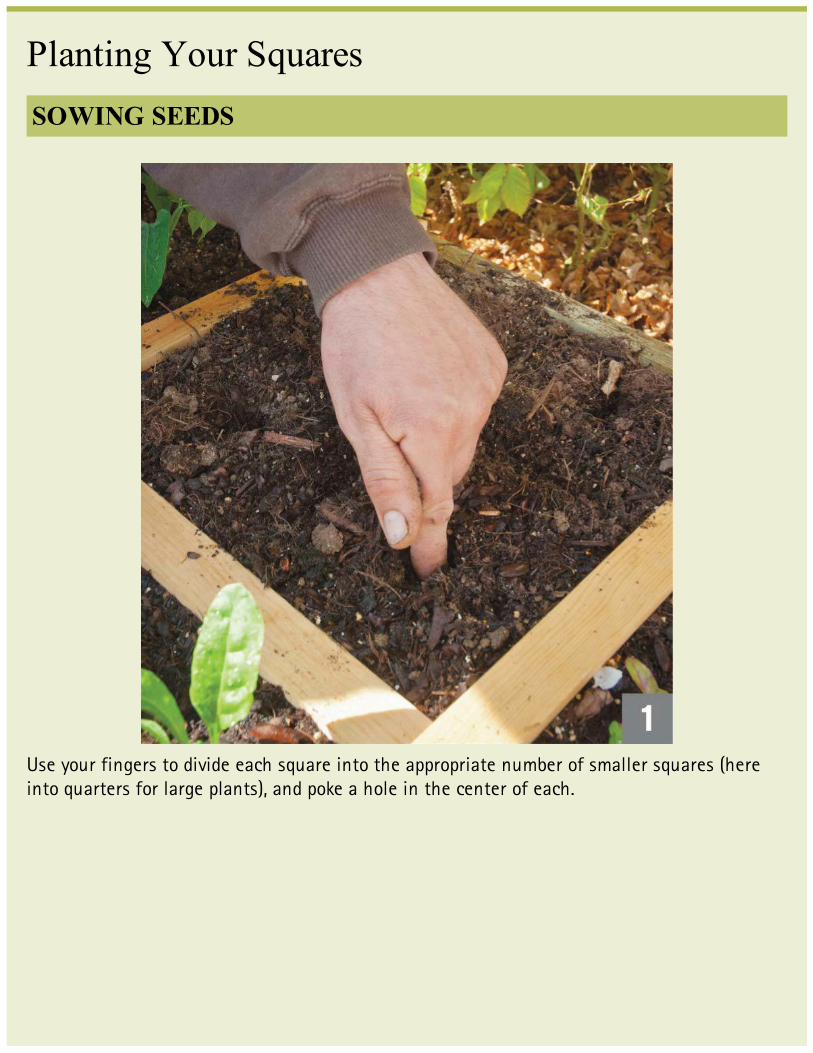
Planting Your SquaresSOWING SEEDS
Use your fingers to divide each square into the appropriate number of smaller squares (hereinto quarters for large plants), and poke a hole in the center of each.
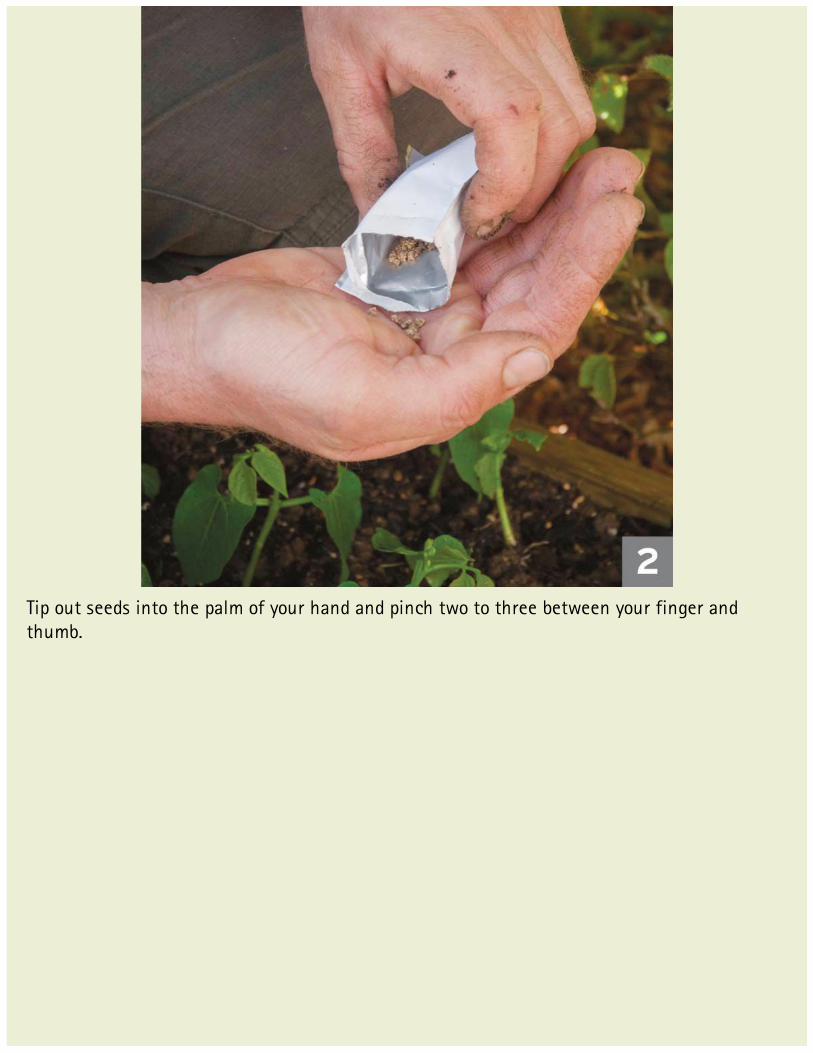
Tip out seeds into the palm of your hand and pinch two to three between your finger andthumb.
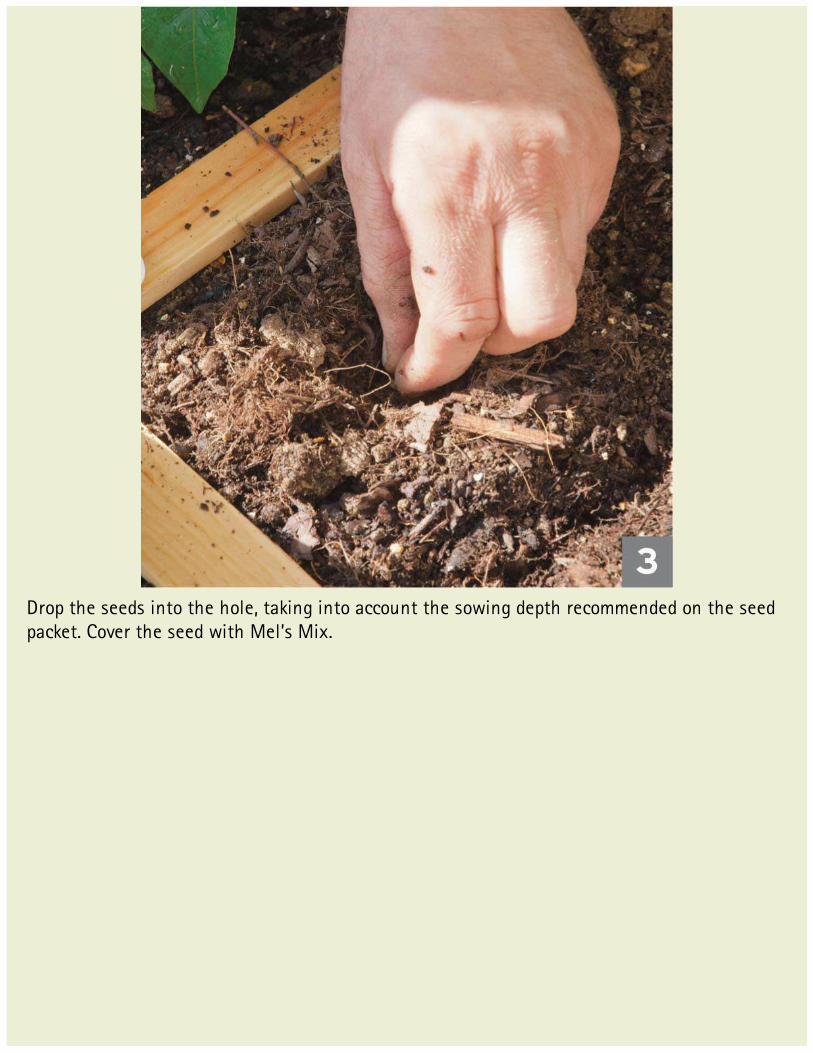
Drop the seeds into the hole, taking into account the sowing depth recommended on the seedpacket. Cover the seed with Mel’s Mix.
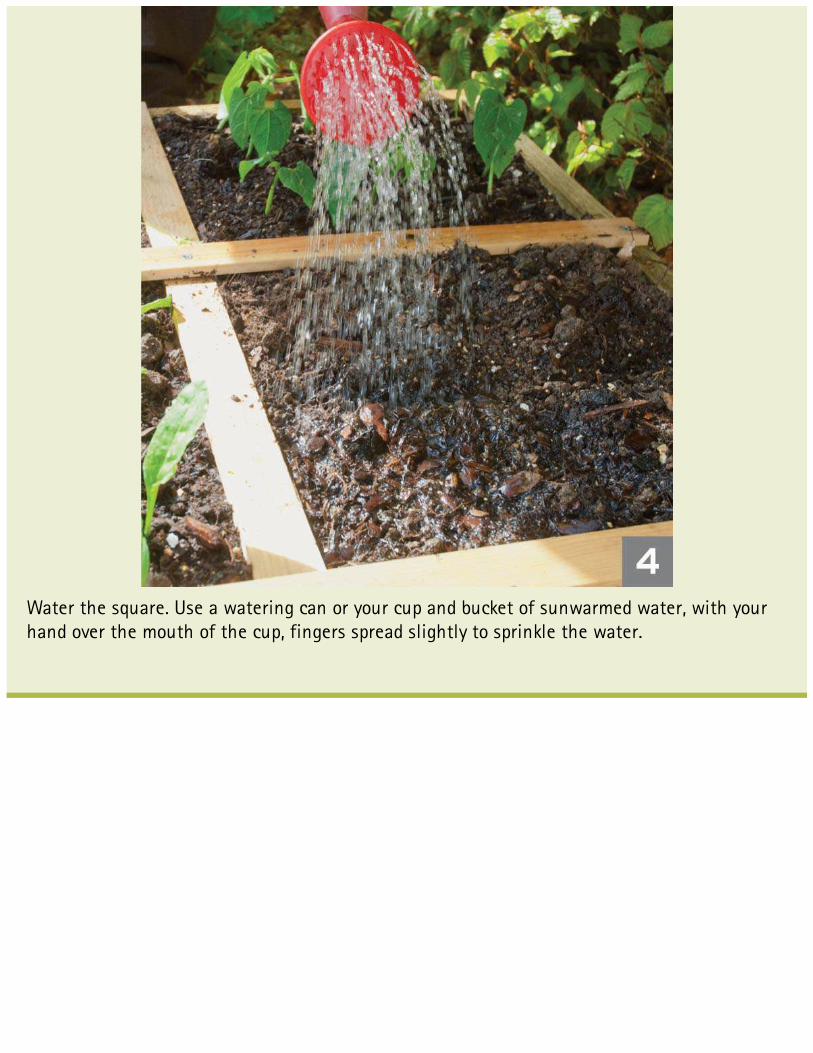
Water the square. Use a watering can or your cup and bucket of sunwarmed water, with yourhand over the mouth of the cup, fingers spread slightly to sprinkle the water.
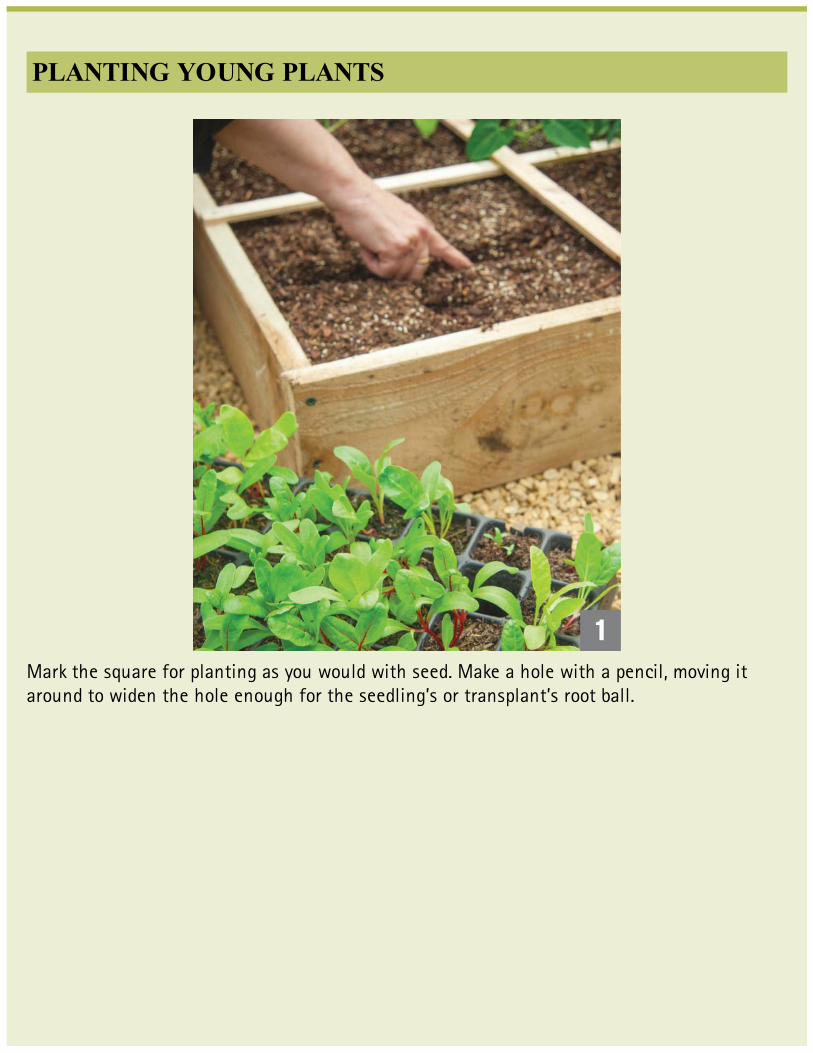
PLANTING YOUNG PLANTS
Mark the square for planting as you would with seed. Make a hole with a pencil, moving itaround to widen the hole enough for the seedling’s or transplant’s root ball.

Remove the seedling or transplant from its container, being careful not to damage the youngplant. Make sure the root ball is slightly loose.
Settle the transplant or seedling into the hole. Gently firm the soil around the base of theplants, creating a depression around the base to hold water.

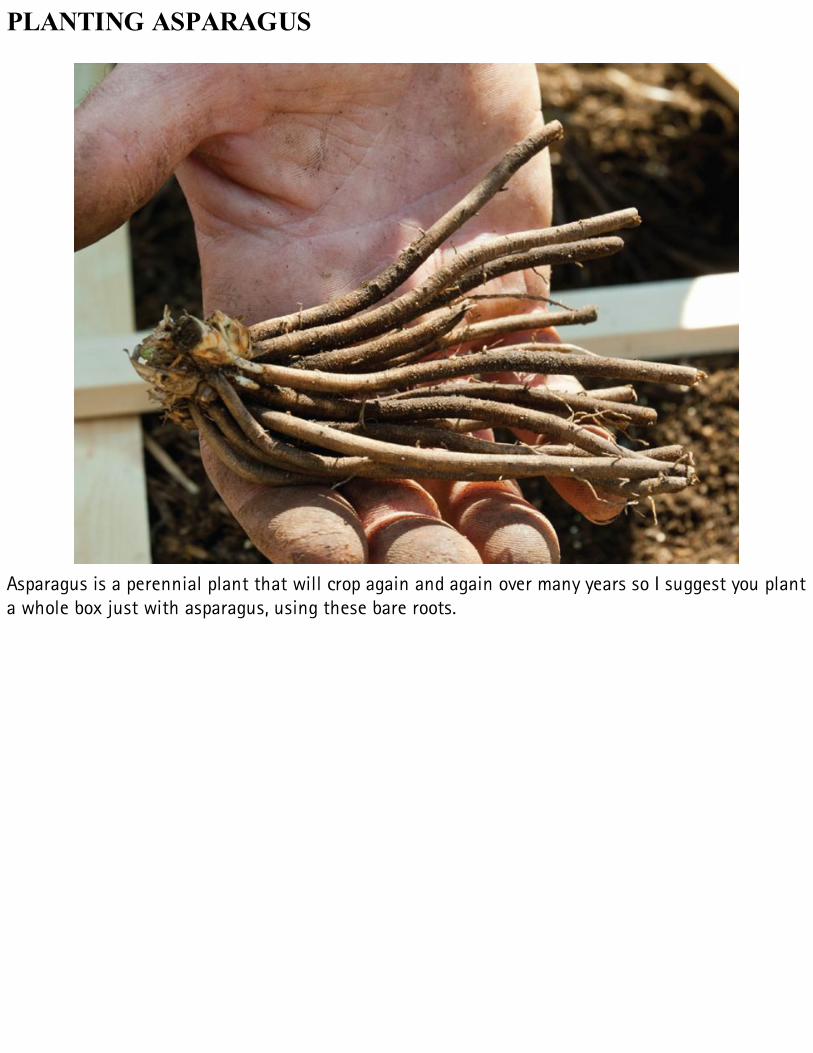
PLANTING ASPARAGUS
Asparagus is a perennial plant that will crop again and again over many years so I suggest you planta whole box just with asparagus, using these bare roots.
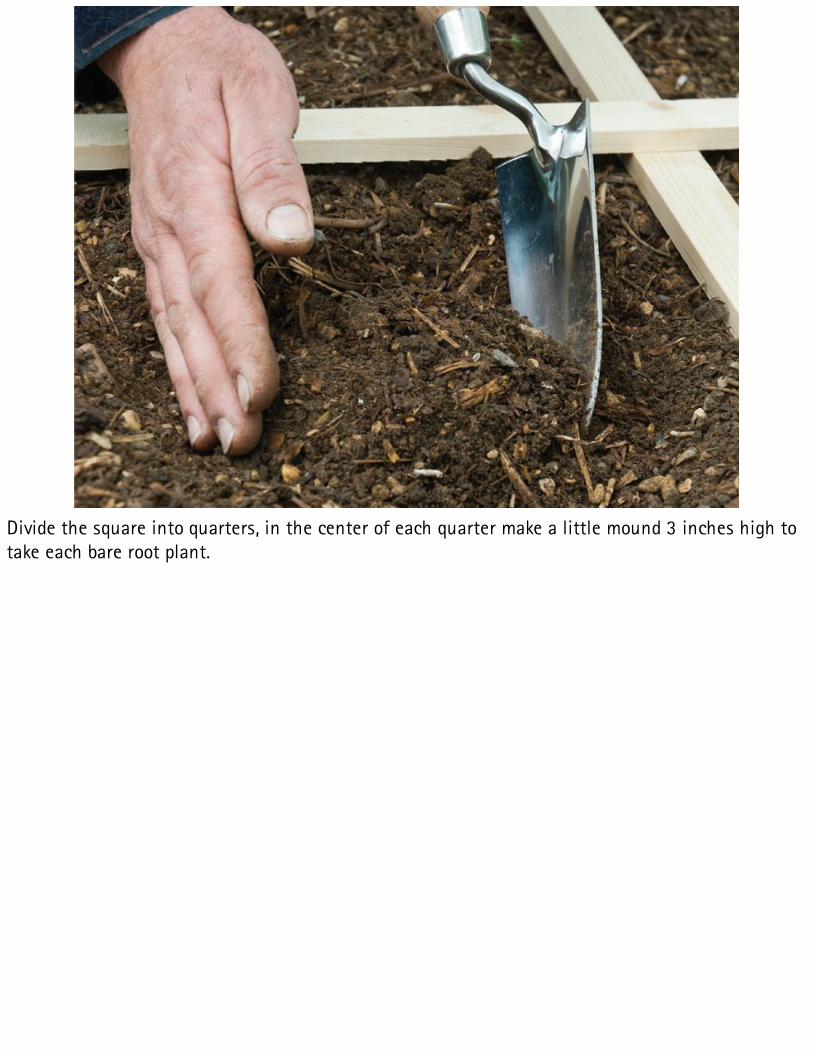
Divide the square into quarters, in the center of each quarter make a little mound 3 inches high totake each bare root plant.
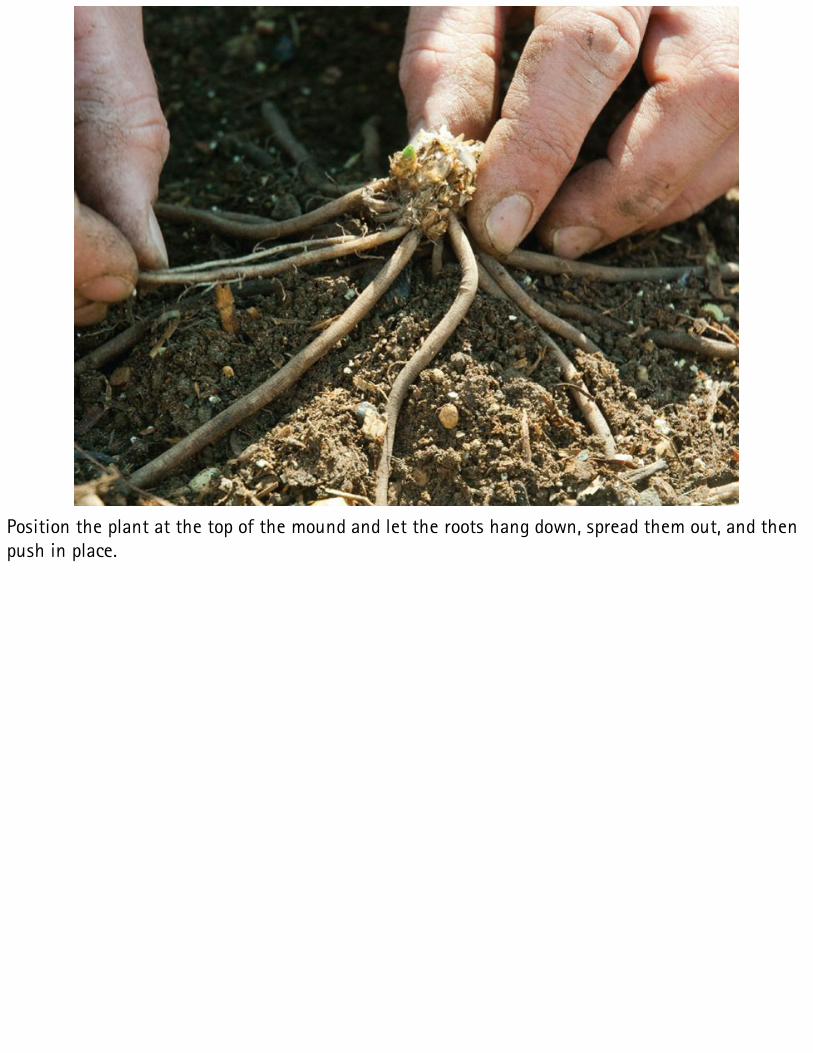
Position the plant at the top of the mound and let the roots hang down, spread them out, and thenpush in place.
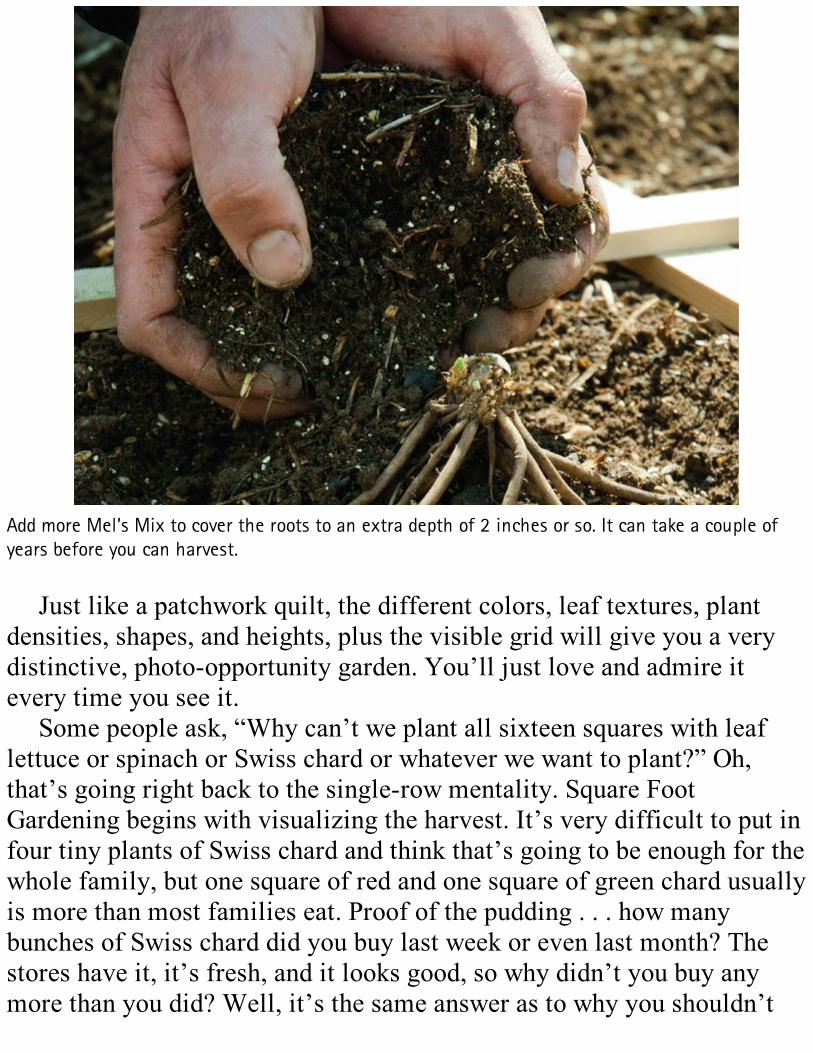
Add more Mel’s Mix to cover the roots to an extra depth of 2 inches or so. It can take a couple ofyears before you can harvest.
Just like a patchwork quilt, the different colors, leaf textures, plantdensities, shapes, and heights, plus the visible grid will give you a verydistinctive, photo-opportunity garden. You’ll just love and admire itevery time you see it.
Some people ask, “Why can’t we plant all sixteen squares with leaflettuce or spinach or Swiss chard or whatever we want to plant?” Oh,that’s going right back to the single-row mentality. Square FootGardening begins with visualizing the harvest. It’s very difficult to put infour tiny plants of Swiss chard and think that’s going to be enough for thewhole family, but one square of red and one square of green chard usuallyis more than most families eat. Proof of the pudding . . . how manybunches of Swiss chard did you buy last week or even last month? Thestores have it, it’s fresh, and it looks good, so why didn’t you buy anymore than you did? Well, it’s the same answer as to why you shouldn’t
plant too much of one thing.It’s worth repeating here that the biggest problem for single-row
gardeners has always been “I planted too much. I can’t take care of it. It’stoo much work and I’m sorry now.” All that has changed with SFG andyou now have boundaries (the grid) and the opportunity to ask yourself,“For every single square foot I plant, is that enough? Do I really wantmore? Would it be better to plant another square foot of the same thing ina week or two or three?”
TIME OF YEARKeep in mind that you can build a Square Foot Garden anytime of theyear—spring, summer, fall, and even winter. For most of the country, youcould start planting in any season other than winter. What time of theyear is it right now for you and where are you in the sequence of a yearlygardening cycle? Think of it like the movie theater before the mainfeature. You’re all settled in with your popcorn, ready to devote your fullattention to the movie. In the gardening year, this is usually theequivalent of springtime. What if you came in the middle of the picture?For gardening that would be summertime. You can still plant a warm-weather crop even if you missed the spring crop. If it’s now fall, you canstill start your SFG with a great cool-weather crop and get some valuableexperience before next spring. Start whenever you get the urge to plant.
For convenience, we’ll start with the beginning of the garden year formost of the country, springtime. (Some parts of the country, like Texasand Florida, can grow all year long. You lucky people.)
Seasonal PlantsYou can get at least three crops a year in every square foot of your SFG.Every choice is going to be fun, exciting, and tasty. Of course, yourselection depends on the time of year, and what you and your family needand want. There are two types of crops when you consider weather. Thefirst are called cool-weather crops that do best in the spring and fall, but

won’t survive in the hot summer. The second group is the warm- or hot-weather crops that, you guessed it, don’t do well in the cool weather ofspring and fall, but thrive in the hot weather of summer.
HARDINESS AND PROTECTION WITH SFGSFG’s size makes it very easy to protect your new plantings from an extraearly or late frost. There’s a lot more information about frosts and freezesin Chapter 9, especially if you are interested in extending the season, aswell as ways to protect your plants so you can get more from your garden.
Plants aren’t all the same, of course. They are just like people. Somecan stand the heat, cold, or humidity better than others. We classify theseas hardy, and those that can’t handle it as non-hardy. Each of the fourseasons has three time periods—the early season, midseason, and lateseason. If you’re thinking about a spring crop, for example, there may besome vegetables that can only grow in the mid-part of the spring whileothers can tolerate a little more cold in the beginning of the season, butcan’t stand any heat at all near the late part of the season. It takes a littlewhile to get used to which is which, and how best they fit in with yourplanting schedule.
Though the weather is never exactly the same every year, it helps toknow a plant’s hardiness. Don’t worry—you’ll learn it in time. This is notan exact science so relax if you’re a beginner and just enjoy the ride.Don’t expect to find a perfect list because how well plants thrive differsin different parts of the country and of course, different years, sometimesfor no explainable reason. If you lose a few squares of something oneyear it’s no big deal. It doesn’t mean you’re not going to be a greatgardener.
HOW NOT TO SELECT PLANTS
Looking through a seed catalog is not the best way to decide what togrow. They make it all look so good and sound so exciting that you caneasily get carried away. I recommend you review your shopping listfrom last week and last month. That eliminates the “Oh, I’d like togrow that!” or “Wouldn’t it be fun to grow peanuts?” Start simple andeasy with the foods you already eat regularly. Expand and experimentlater on.
So often I hear “But I’m so anxious to start my SFG. I’ve alwayswanted a garden. I want to grow everything.” Well, if you’ve beenwishing and wanting to grow for twenty years, spending the first yeargetting experience and confidence with the SFG method won’t makeany difference. Then spend the next forty years enjoying your garden.Don’t ruin a lifetime hobby by starting off too big.
Frost DatesAlthough people like to celebrate the first day of spring (March 20th)according to the calendar, plants don’t give a hoot about our calendar—they respond to weather. In the spring we need to know the date of thelast frost in our area. That will help us determine when to plant. Eachdifferent crop—whether cool-season or warm-season—will need to beplanted so many weeks before or after that last day of frost.
For plants, the fall growing season begins not with the first calendarday of fall (September 23rd), but with the first frost and continues untilthe first freeze of the fall. The average dates of your first and last frostdepend on where you live in the country and the regional and localvariations of weather. All we can do is go by the past and hope it will besimilar this year. To help, the government collects dates for your area andcalculates the average date from the past one hundred years. Of course,the average is only a guide.

“You have got me so excited about gardening again; I loveteaching SFG. It is so much more successful than othermethods. I don’t know why all gardeners and farmers aren’tusing it.”– Mike from Utah
How do you find your local frost dates? The Internet is the bestresource for detailed information. You can also call your local countyextension agent or most area nurseries. To find your local extensionagent, look in the government blue pages for your county in yourtelephone book, then look for the heading “Extension of [your state]University.”
Frost Date WebsitesYou can access your frost dates on any number of websites, by entering“frost dates” in the search engine. The best one I’ve found iswww.victoryseeds.com/frost. This Internet site has the frost dates andhardiness zone maps for the entire United States as well as Canada, andlinks for hardiness zones for Australia, Europe, the Ukraine (in English),and China (also in English). The hardiness zone map for the United Statesis interactive, you just point to where you live and click, and you get theinformation. This site also links to your local university extensionservice. Let the experts advise you on the varieties that will do best inyour local area.
SEQUENCE OF GROWTHDid you know that plants grow and bloom everywhere in the samesequence? In other words, throughout the country, daffodils bloom in thespringtime, then a little later tulips bloom, then it’s time for the lilacs to
bloom. (Did I leave out dandelions?) Start noticing the sequence in yourlocation. It would include trees, shrubs, flowers, even weeds.
I read a book once about following spring north. It’s theoreticallypossible that if you drive fast enough (and eat and sleep quickly), youcould see nothing but tulips in bloom all the way from Georgia to Maine.
If you know what kinds of plants are summer crops (the most popularand well-known vegetables), it’s easy to remember that everything else isa spring or fall crop. Summer crops include beans, peppers, eggplants,tomatoes, and squash. If you plant these when it’s too early or cool,they’ll either die or their growth will most likely be stunted for that year.
CHARTSI’ve designed charts for All New Square Foot Gardening so you’ll knowwhen to plant and in what order. These charts will guide you along,providing seed-to-sprouting times at certain soil temperatures. I’ve alsoincluded calendar charts that show, based upon area frost dates (assumingyou have a frost), how soon before or after a frost you can plant a givencrop. You’ll find that some plants are very frost-hardy and can be plantedmuch earlier than those that are just on the borderline. Turn to page 262to 269 to see the charts.
PLAN ON A FALL CROPAs soon as the summer crop is finished, you’re ready to plant cool-weather crops for the upcoming fall. These crops are frost-hardy,meaning that both young and mature plants withstand frost. The seedsyou plant at the end of summer will sprout quickly since the soil iswarmer. Transplants can begin outdoors and grow much faster than thesame thing planted in the spring. Look at the charts; compare sproutingtimes for the same seeds in both spring and summer temperatures.
The fall crop gains an extra advantage from late summer weather. Theproblem with cool-weather plants in the spring is not cool weather butwarm weather at harvest time. A plant’s purpose in life is to reproduce

seed, and the rising temperatures of an approaching summer make thishappen sooner. As it does so, the plant’s whole character changes. Manypeople don’t realize that plants like lettuce put up a flower stalk, whichthen goes to seed. If you wait too long to harvest lettuce, the stalk willshoot up, and the same thing happens to other crops like cabbage. Thehead splits open, a stalk shoots up, develops flowers, and then turns toseed. It’s nature’s way of allowing the plant to reproduce, but the plantchanges taste when this happens. All the energy goes toward the seed andthe plant itself, as far as taste is concerned, becomes rather tough, coarse,and bitter.
In cooler weather, this process is delayed. The plant feels no urgencyto complete the growing cycle. So in the fall, the plant slows itsmaturation process, allowing it to maintain flavor for a longer length oftime as temperatures continue to grow cooler and cooler. If it’s frost-hardy, it doesn’t matter if it is the middle of fall and you start gettingfrost. Some plants can endure some freezing and still provide a crop forharvesting. Fall is a great time to plant if you put in the right crops.
SOIL TEMPERATURESoil temperatures vastly influence sprouting times. For example, if youplant carrot seeds in the summertime when the temperature of the soil isbetween 60° and 80°F, the seeds will sprout in less than a week. But ifyou plant the same seeds in early spring when the ground temperature isperhaps 40 degrees, they will take a month and a half to sprout. Justanother 10 degrees warmer and they will sprout in a little over two weeks.The chart shows that when the soil is cold and freezing, no seeds willsprout. When it warms up to 40 only half of them will sprout; but as soonas it gets to 50 degrees, suddenly almost all of them will sprout and willcontinue right through the warmer temperatures of summer and fall.
What happens to seeds when they don’t sprout because the ground iscold? They could rot, or fungus could attack them. They could break theirdormancy and then go dry. They could be attacked by insects, or dug upby animals or birds. So, the quicker you can get them to sprout the better
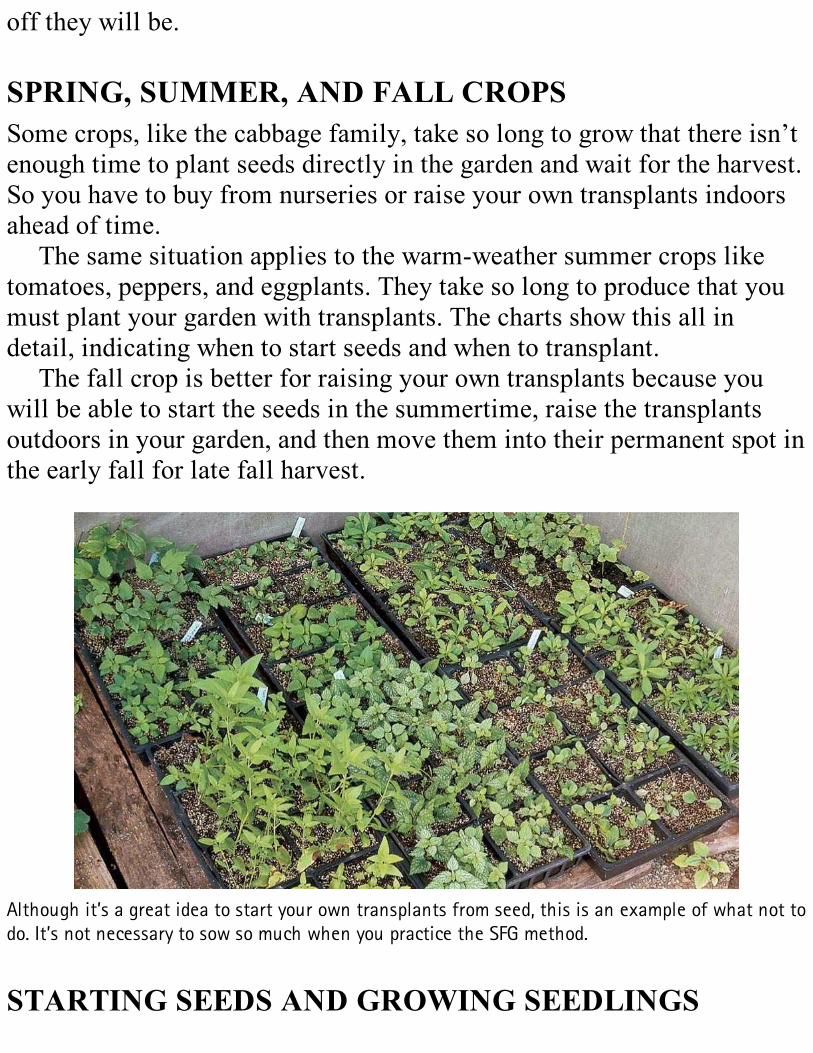
off they will be.
SPRING, SUMMER, AND FALL CROPSSome crops, like the cabbage family, take so long to grow that there isn’tenough time to plant seeds directly in the garden and wait for the harvest.So you have to buy from nurseries or raise your own transplants indoorsahead of time.
The same situation applies to the warm-weather summer crops liketomatoes, peppers, and eggplants. They take so long to produce that youmust plant your garden with transplants. The charts show this all indetail, indicating when to start seeds and when to transplant.
The fall crop is better for raising your own transplants because youwill be able to start the seeds in the summertime, raise the transplantsoutdoors in your garden, and then move them into their permanent spot inthe early fall for late fall harvest.
Although it’s a great idea to start your own transplants from seed, this is an example of what not todo. It’s not necessary to sow so much when you practice the SFG method.
STARTING SEEDS AND GROWING SEEDLINGS

There are plenty of advantages to growing your own transplants andstoring the remaining seeds in their packet until next year. First, seedscost pennies, while transplants cost dollars. There are many morevarieties offered in seed catalogs than as transplants at the nurseries. Theonly setback is time because growing your own transplants depends onthe time and work you can spare. If you’re a brand new gardener,however, you may want to wait until next year to start your owntransplants. Like everything else in life, we tend to go overboard and dotoo much and then it becomes a chore. Don’t let it happen to you!
GERMINATION RATE
What happens to seeds that are in storage? As they grow older, theirgermination rate (the percentage that sprouts under ideal conditions)gradually diminishes. But the solution is very simple. Plant a pinch ofseeds—just two to three—instead of only one to ensure that at leastone will sprout. If your seeds are many years old, test the germinationrate yourself or just plant three or five or however many seedsdepending on how well they sprouted the year before. If you markedthe sprouting rate on the packet, you can reasonably estimate howmany to plant the next year.
Storage of SeedsIf your seeds are stored properly, they will last for many years. Contraryto what the gardening industry would like you to believe, it is notnecessary to buy fresh seeds every year or to pour out that whole packetof seeds all at once. SFG teaches you to plant just a pinch of seeds. Thenstore the rest. By planting just a pinch of seeds instead of a whole packet,you can save a lot of money by saving the excess seeds for next year’scrop, and the next year’s, and so on. Some seeds will last up to five years.Seed companies guarantee that a certain percentage will sprout; thisnumber is always very high, usually up into the nineties. Of course theseed industry wants you to buy a fresh packet of seeds every year so theycan stay in business. There’s nothing wrong with that! But there’s alsonothing wrong with saving money with a more efficient system.
How to Store SeedsWhat is the ideal storage condition for seeds? It is just the opposite of themoisture and warmth that make them sprout. You’ll want to store them ina cool, dry place—the driest, coldest place in your home. Some peoplefreeze their seeds. But I find they get moisture even if they are in a zip-lock bag because it never seems to be totally airtight. I prefer

refrigerating them in a wide-mouth jar with a screw lid. Label yourcontainers and store them in the refrigerator on a back shelf. In each jarplace a desiccant packet from a medicine vial, or add a little powderedmilk wrapped in a tissue to soak up any excess moisture in the jar.
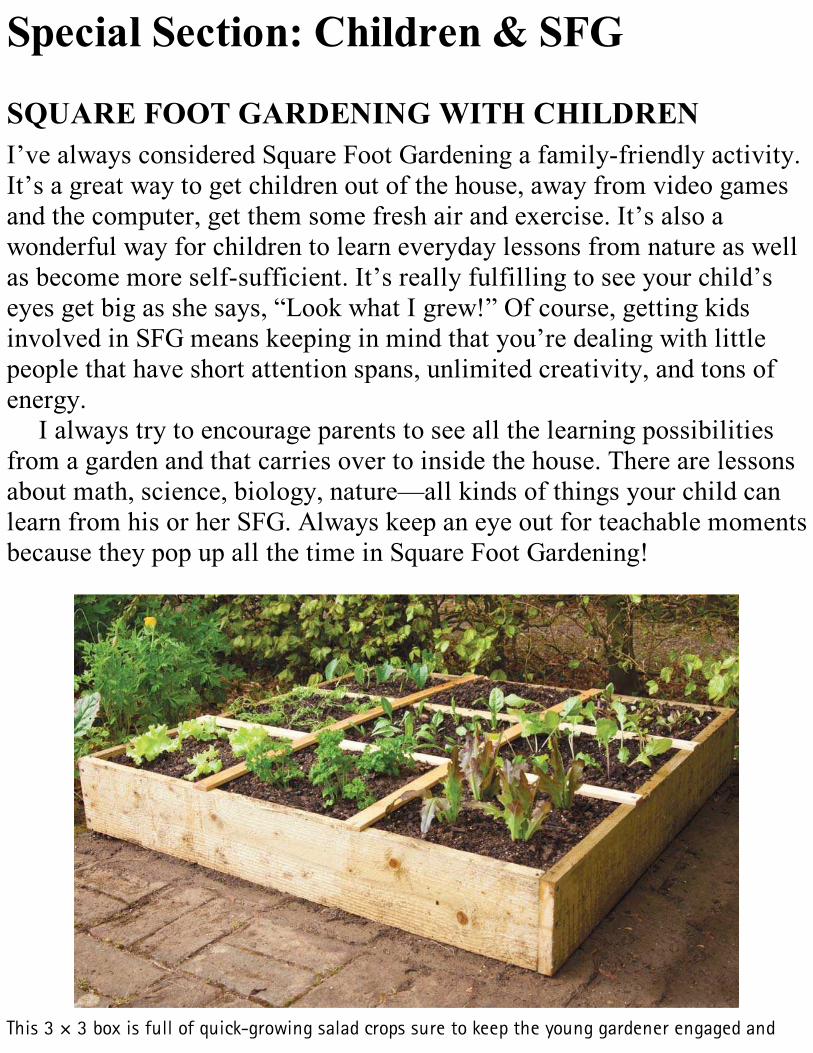
Special Section: Children & SFG
SQUARE FOOT GARDENING WITH CHILDRENI’ve always considered Square Foot Gardening a family-friendly activity.It’s a great way to get children out of the house, away from video gamesand the computer, get them some fresh air and exercise. It’s also awonderful way for children to learn everyday lessons from nature as wellas become more self-sufficient. It’s really fulfilling to see your child’seyes get big as she says, “Look what I grew!” Of course, getting kidsinvolved in SFG means keeping in mind that you’re dealing with littlepeople that have short attention spans, unlimited creativity, and tons ofenergy.
I always try to encourage parents to see all the learning possibilitiesfrom a garden and that carries over to inside the house. There are lessonsabout math, science, biology, nature—all kinds of things your child canlearn from his or her SFG. Always keep an eye out for teachable momentsbecause they pop up all the time in Square Foot Gardening!
This 3 × 3 box is full of quick-growing salad crops sure to keep the young gardener engaged and

excited with the harvest.
Off to a Good StartStart as you would any SFG, with the location. Let your child pick alocation but guide them toward one that gets all the sun the plants willneed and is as close to a door that your son or daughter regularly uses aspossible. (Don’t forget, it can be the front door as well as the back!) Youwant your child to pass it often and be able to see it out of the house—that way they are more likely to interact with their SFG. I think it wouldbe great if you could position their box so that your child can see it fromher room. Wouldn’t that be wonderful—she looks out her window andsees it every day. That would work especially well for a child’s bedroomon the second floor. It’s just a real treat if you can send your child out topick strawberries for her cereal in the morning. That’s a special way forkids to learn the value of a garden.
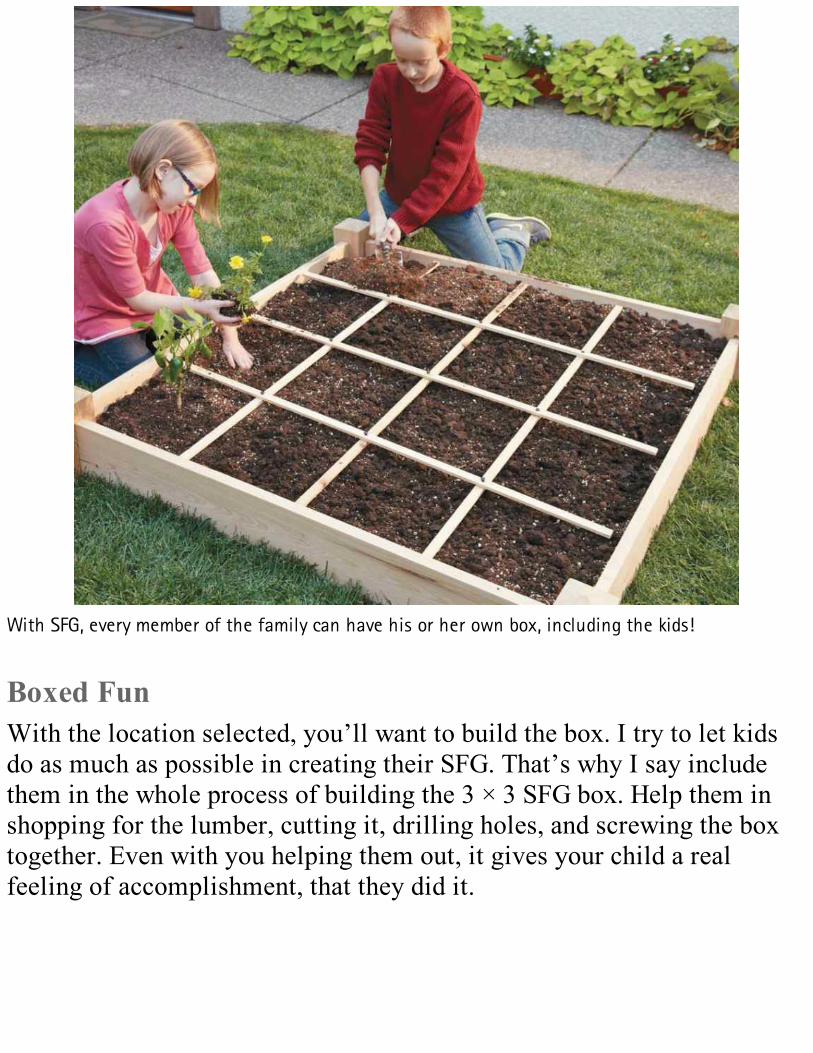
With SFG, every member of the family can have his or her own box, including the kids!
Boxed FunWith the location selected, you’ll want to build the box. I try to let kidsdo as much as possible in creating their SFG. That’s why I say includethem in the whole process of building the 3 × 3 SFG box. Help them inshopping for the lumber, cutting it, drilling holes, and screwing the boxtogether. Even with you helping them out, it gives your child a realfeeling of accomplishment, that they did it.
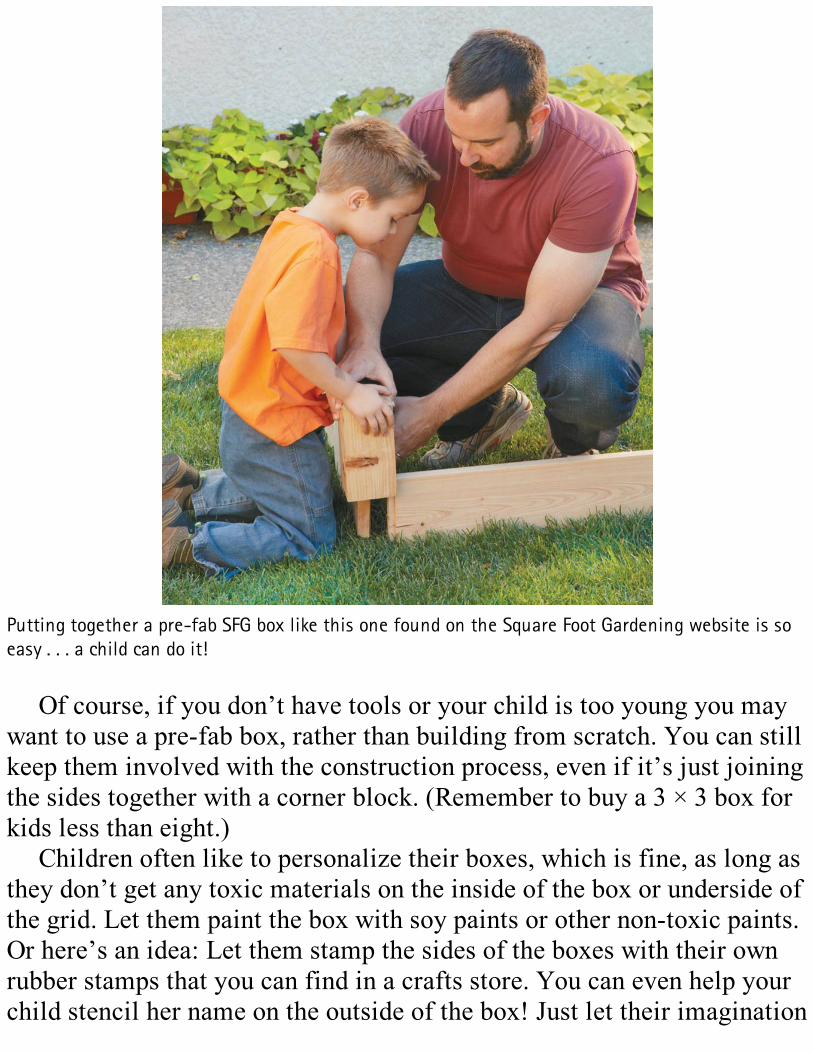
Putting together a pre-fab SFG box like this one found on the Square Foot Gardening website is soeasy . . . a child can do it!
Of course, if you don’t have tools or your child is too young you maywant to use a pre-fab box, rather than building from scratch. You can stillkeep them involved with the construction process, even if it’s just joiningthe sides together with a corner block. (Remember to buy a 3 × 3 box forkids less than eight.)
Children often like to personalize their boxes, which is fine, as long asthey don’t get any toxic materials on the inside of the box or underside ofthe grid. Let them paint the box with soy paints or other non-toxic paints.Or here’s an idea: Let them stamp the sides of the boxes with their ownrubber stamps that you can find in a crafts store. You can even help yourchild stencil her name on the outside of the box! Just let their imagination
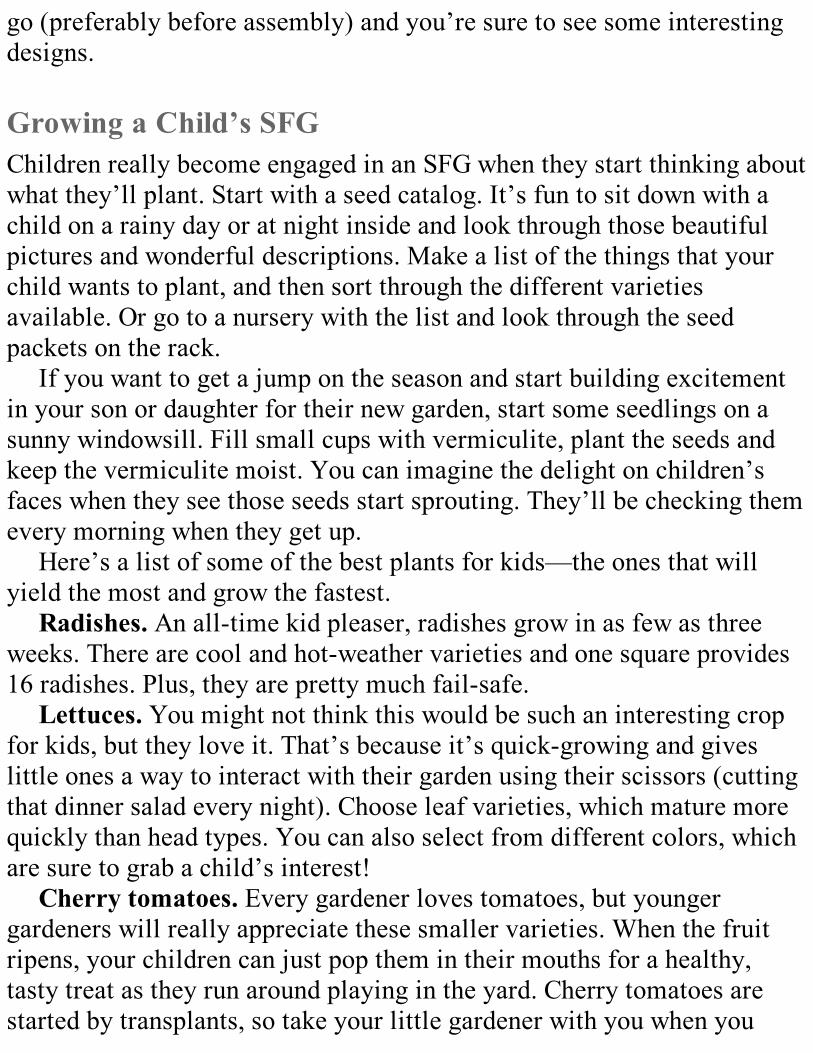
go (preferably before assembly) and you’re sure to see some interestingdesigns.
Growing a Child’s SFGChildren really become engaged in an SFG when they start thinking aboutwhat they’ll plant. Start with a seed catalog. It’s fun to sit down with achild on a rainy day or at night inside and look through those beautifulpictures and wonderful descriptions. Make a list of the things that yourchild wants to plant, and then sort through the different varietiesavailable. Or go to a nursery with the list and look through the seedpackets on the rack.
If you want to get a jump on the season and start building excitementin your son or daughter for their new garden, start some seedlings on asunny windowsill. Fill small cups with vermiculite, plant the seeds andkeep the vermiculite moist. You can imagine the delight on children’sfaces when they see those seeds start sprouting. They’ll be checking themevery morning when they get up.
Here’s a list of some of the best plants for kids—the ones that willyield the most and grow the fastest.
Radishes. An all-time kid pleaser, radishes grow in as few as threeweeks. There are cool and hot-weather varieties and one square provides16 radishes. Plus, they are pretty much fail-safe.
Lettuces. You might not think this would be such an interesting cropfor kids, but they love it. That’s because it’s quick-growing and giveslittle ones a way to interact with their garden using their scissors (cuttingthat dinner salad every night). Choose leaf varieties, which mature morequickly than head types. You can also select from different colors, whichare sure to grab a child’s interest!
Cherry tomatoes. Every gardener loves tomatoes, but youngergardeners will really appreciate these smaller varieties. When the fruitripens, your children can just pop them in their mouths for a healthy,tasty treat as they run around playing in the yard. Cherry tomatoes arestarted by transplants, so take your little gardener with you when you
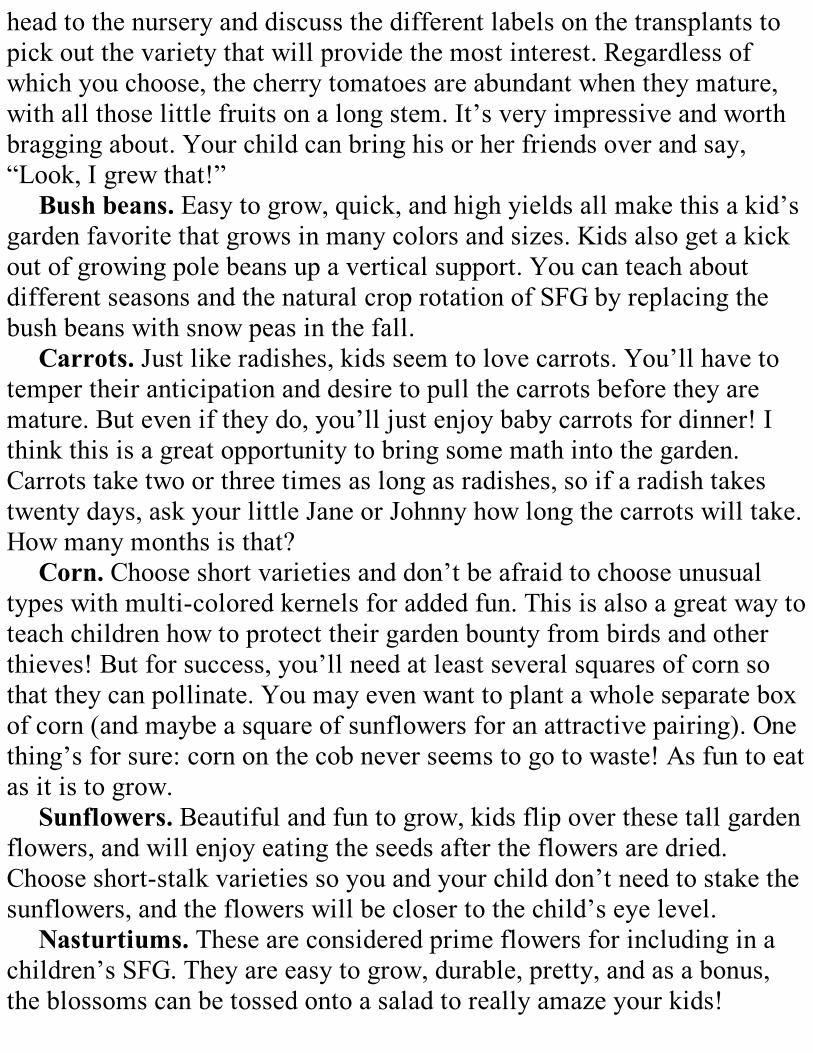
head to the nursery and discuss the different labels on the transplants topick out the variety that will provide the most interest. Regardless ofwhich you choose, the cherry tomatoes are abundant when they mature,with all those little fruits on a long stem. It’s very impressive and worthbragging about. Your child can bring his or her friends over and say,“Look, I grew that!”
Bush beans. Easy to grow, quick, and high yields all make this a kid’sgarden favorite that grows in many colors and sizes. Kids also get a kickout of growing pole beans up a vertical support. You can teach aboutdifferent seasons and the natural crop rotation of SFG by replacing thebush beans with snow peas in the fall.
Carrots. Just like radishes, kids seem to love carrots. You’ll have totemper their anticipation and desire to pull the carrots before they aremature. But even if they do, you’ll just enjoy baby carrots for dinner! Ithink this is a great opportunity to bring some math into the garden.Carrots take two or three times as long as radishes, so if a radish takestwenty days, ask your little Jane or Johnny how long the carrots will take.How many months is that?
Corn. Choose short varieties and don’t be afraid to choose unusualtypes with multi-colored kernels for added fun. This is also a great way toteach children how to protect their garden bounty from birds and otherthieves! But for success, you’ll need at least several squares of corn sothat they can pollinate. You may even want to plant a whole separate boxof corn (and maybe a square of sunflowers for an attractive pairing). Onething’s for sure: corn on the cob never seems to go to waste! As fun to eatas it is to grow.
Sunflowers. Beautiful and fun to grow, kids flip over these tall gardenflowers, and will enjoy eating the seeds after the flowers are dried.Choose short-stalk varieties so you and your child don’t need to stake thesunflowers, and the flowers will be closer to the child’s eye level.
Nasturtiums. These are considered prime flowers for including in achildren’s SFG. They are easy to grow, durable, pretty, and as a bonus,the blossoms can be tossed onto a salad to really amaze your kids!
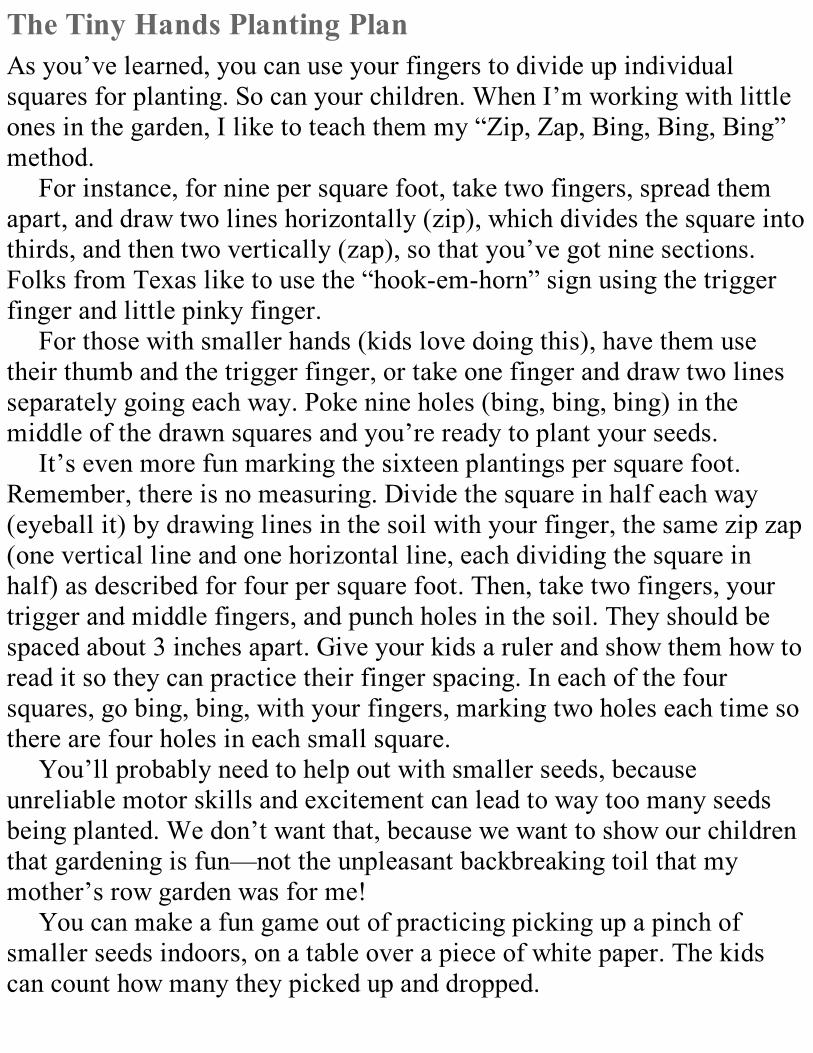
The Tiny Hands Planting PlanAs you’ve learned, you can use your fingers to divide up individualsquares for planting. So can your children. When I’m working with littleones in the garden, I like to teach them my “Zip, Zap, Bing, Bing, Bing”method.
For instance, for nine per square foot, take two fingers, spread themapart, and draw two lines horizontally (zip), which divides the square intothirds, and then two vertically (zap), so that you’ve got nine sections.Folks from Texas like to use the “hook-em-horn” sign using the triggerfinger and little pinky finger.
For those with smaller hands (kids love doing this), have them usetheir thumb and the trigger finger, or take one finger and draw two linesseparately going each way. Poke nine holes (bing, bing, bing) in themiddle of the drawn squares and you’re ready to plant your seeds.
It’s even more fun marking the sixteen plantings per square foot.Remember, there is no measuring. Divide the square in half each way(eyeball it) by drawing lines in the soil with your finger, the same zip zap(one vertical line and one horizontal line, each dividing the square inhalf) as described for four per square foot. Then, take two fingers, yourtrigger and middle fingers, and punch holes in the soil. They should bespaced about 3 inches apart. Give your kids a ruler and show them how toread it so they can practice their finger spacing. In each of the foursquares, go bing, bing, with your fingers, marking two holes each time sothere are four holes in each small square.
You’ll probably need to help out with smaller seeds, becauseunreliable motor skills and excitement can lead to way too many seedsbeing planted. We don’t want that, because we want to show our childrenthat gardening is fun—not the unpleasant backbreaking toil that mymother’s row garden was for me!
You can make a fun game out of practicing picking up a pinch ofsmaller seeds indoors, on a table over a piece of white paper. The kidscan count how many they picked up and dropped.
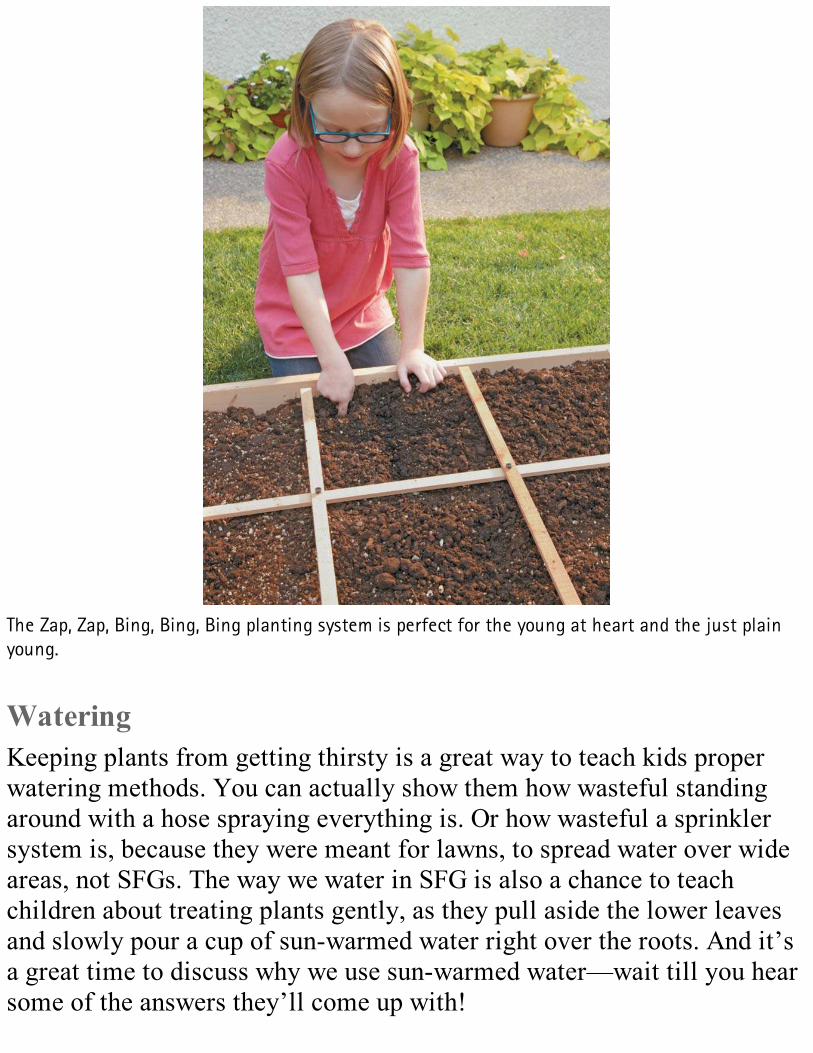
The Zap, Zap, Bing, Bing, Bing planting system is perfect for the young at heart and the just plainyoung.
WateringKeeping plants from getting thirsty is a great way to teach kids properwatering methods. You can actually show them how wasteful standingaround with a hose spraying everything is. Or how wasteful a sprinklersystem is, because they were meant for lawns, to spread water over wideareas, not SFGs. The way we water in SFG is also a chance to teachchildren about treating plants gently, as they pull aside the lower leavesand slowly pour a cup of sun-warmed water right over the roots. And it’sa great time to discuss why we use sun-warmed water—wait till you hearsome of the answers they’ll come up with!
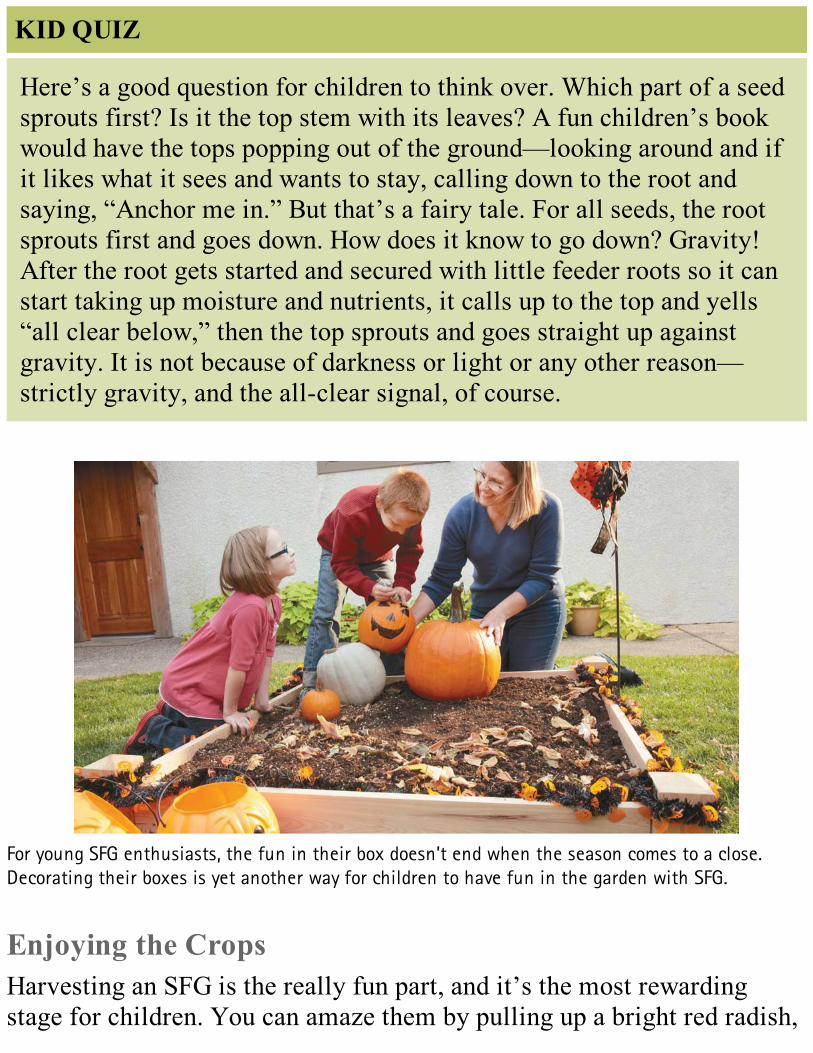
KID QUIZ
Here’s a good question for children to think over. Which part of a seedsprouts first? Is it the top stem with its leaves? A fun children’s bookwould have the tops popping out of the ground—looking around and ifit likes what it sees and wants to stay, calling down to the root andsaying, “Anchor me in.” But that’s a fairy tale. For all seeds, the rootsprouts first and goes down. How does it know to go down? Gravity!After the root gets started and secured with little feeder roots so it canstart taking up moisture and nutrients, it calls up to the top and yells“all clear below,” then the top sprouts and goes straight up againstgravity. It is not because of darkness or light or any other reason—strictly gravity, and the all-clear signal, of course.
For young SFG enthusiasts, the fun in their box doesn’t end when the season comes to a close.Decorating their boxes is yet another way for children to have fun in the garden with SFG.
Enjoying the CropsHarvesting an SFG is the really fun part, and it’s the most rewardingstage for children. You can amaze them by pulling up a bright red radish,
swishing it around in the sun-warmed water bucket, and popping it intoyour mouth. Just imagine the look of delight on their faces when theylearn that everything in the garden is ready to eat . . . right now. You’llhave to show them how to determine if a fruit or vegetable is mature(without dampening their enthusiasm), but after that, they’ll get in thefun habit of harvesting salad makings every night.
They’ll be able to say with pride, “I grew that!”
WHAT DID I DO WRONG?Knowing that roots sprout first will help your seeds successfully grow.Here’s why. Traditionally, gardeners hoed open a long row, planted awhole packet of seeds, covered, watered, and then walked away fromtheir garden hoping for the best. If nothing grew, they thought the worst:“Maybe they were bad seeds. Or, maybe I’m a terrible gardener!” Whatthese gardeners did not realize was that the seed might have alreadysprouted, perhaps after a week or two, and the root was heading downbefore the top could come up and break the surface. If the gardener gaveup and quit watering, it is possible that their seed did die. Why? Becauseif the soil dries below the seed—in the root zone only 1 or 2 inches belowthe surface—the root will wither and die from lack of moisture. But if thegardener had kept the soil moist, then the seeds would have had a goodchance to put the root down to support the plant and its new shoot.
KEEPING RECORDSMany gardeners keep planting data—when, what, and where they plant,how long it takes to sprout, and how well their plants grow. It may soundlike a lot of bookkeeping, yet some people enjoy recording their gardendata and even set up computerized spreadsheets to make computationsfrom this information. I don’t bother to keep all these details myself, butif you enjoy it, this may help you learn faster and measure the progressmore effectively.
MOVING PLANTSA SFG garden is small, and I’ve been able to change things around oncethey were all planted. It doesn’t take much to move and replantsomething from one square to another if you think it would look bettersomewhere else. It’s kind of like arranging a room of furniture andpictures on a wall. You can make all kinds of layouts and drawings evento scale, but I guarantee you once everything is in place, you’ll changeyour mind.
DROP A PINCHWe have learned about seed size and shape and storage and sproutingconditions. The next thing is to practice planting. You can do this indoorsin the winter before you start your garden. Take different kinds of seedsfrom the tiniest to the largest and practice picking up and dropping apinch of seeds onto a piece of white paper to count your results. This isreally a lot of fun, almost a family game.
There is a very practical reason for doing this. When I tell people tojust plant a pinch of seeds—two or three—I think I have given them allthe instructions they need. But I always find so much variation in howmany seeds they end up planting. It’s in your finger dexterity, and youmay need a little practice. If you are having trouble, you may even wantto use a spoon for picking up that pinch of seeds. A white plastic spoonusually works great, especially if you’re using darker colored seeds. Ifyou scoop up too many, you can just shake a few back into the palm ofyour hand.
Some seeds require special preparation or plantingmethods. These seeds are so few, though, that it’s notworth going into detail. It’s not something you have toremember or study because the seed companies, bless
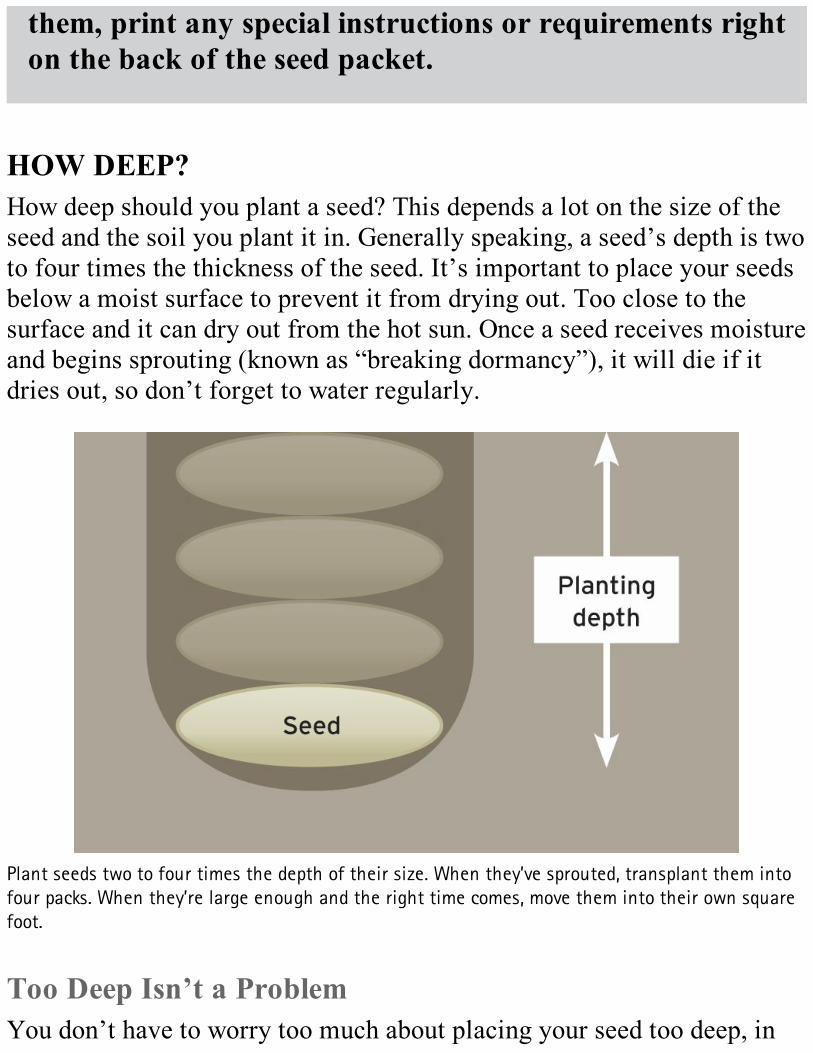
them, print any special instructions or requirements righton the back of the seed packet.
HOW DEEP?How deep should you plant a seed? This depends a lot on the size of theseed and the soil you plant it in. Generally speaking, a seed’s depth is twoto four times the thickness of the seed. It’s important to place your seedsbelow a moist surface to prevent it from drying out. Too close to thesurface and it can dry out from the hot sun. Once a seed receives moistureand begins sprouting (known as “breaking dormancy”), it will die if itdries out, so don’t forget to water regularly.
Plant seeds two to four times the depth of their size. When they’ve sprouted, transplant them intofour packs. When they’re large enough and the right time comes, move them into their own squarefoot.
Too Deep Isn’t a ProblemYou don’t have to worry too much about placing your seed too deep, in
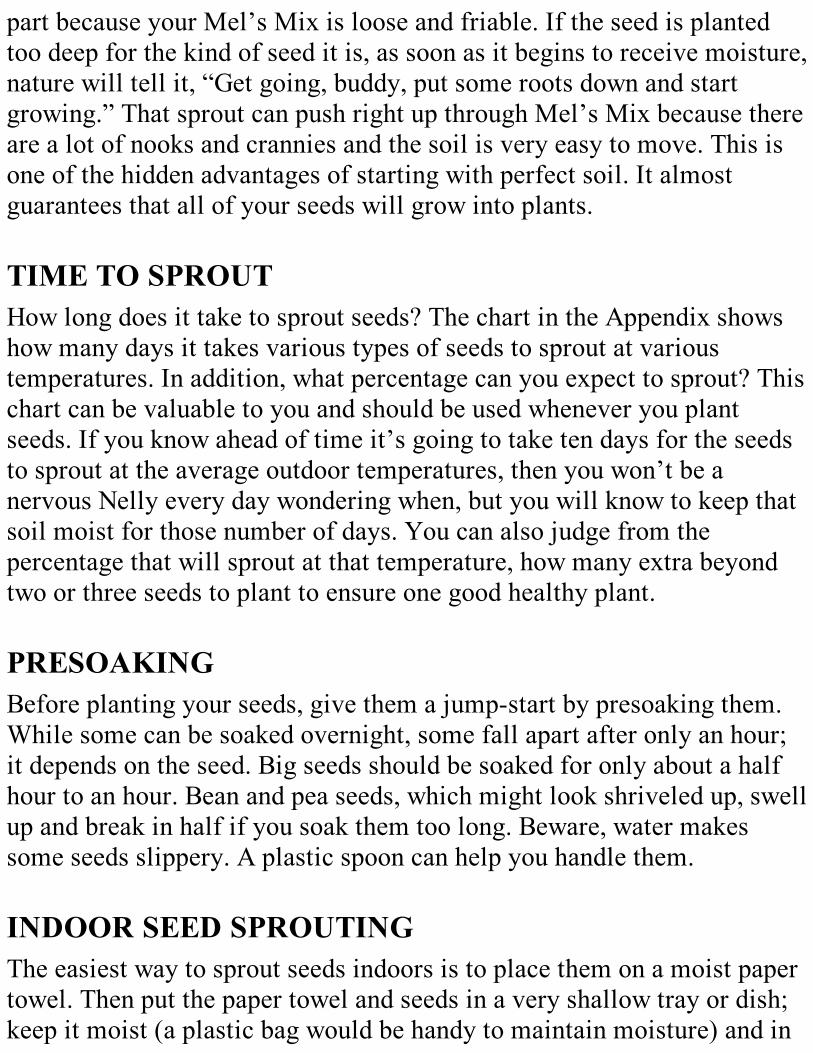
part because your Mel’s Mix is loose and friable. If the seed is plantedtoo deep for the kind of seed it is, as soon as it begins to receive moisture,nature will tell it, “Get going, buddy, put some roots down and startgrowing.” That sprout can push right up through Mel’s Mix because thereare a lot of nooks and crannies and the soil is very easy to move. This isone of the hidden advantages of starting with perfect soil. It almostguarantees that all of your seeds will grow into plants.
TIME TO SPROUTHow long does it take to sprout seeds? The chart in the Appendix showshow many days it takes various types of seeds to sprout at varioustemperatures. In addition, what percentage can you expect to sprout? Thischart can be valuable to you and should be used whenever you plantseeds. If you know ahead of time it’s going to take ten days for the seedsto sprout at the average outdoor temperatures, then you won’t be anervous Nelly every day wondering when, but you will know to keep thatsoil moist for those number of days. You can also judge from thepercentage that will sprout at that temperature, how many extra beyondtwo or three seeds to plant to ensure one good healthy plant.
PRESOAKINGBefore planting your seeds, give them a jump-start by presoaking them.While some can be soaked overnight, some fall apart after only an hour;it depends on the seed. Big seeds should be soaked for only about a halfhour to an hour. Bean and pea seeds, which might look shriveled up, swellup and break in half if you soak them too long. Beware, water makessome seeds slippery. A plastic spoon can help you handle them.
INDOOR SEED SPROUTINGThe easiest way to sprout seeds indoors is to place them on a moist papertowel. Then put the paper towel and seeds in a very shallow tray or dish;keep it moist (a plastic bag would be handy to maintain moisture) and in

a warm place in the house. Check daily; when you see roots, it’s time toplant. Rather than handling the seed at this point, carefully cut the papertowel into little squares, and lift each one out with a knife. Now you’reready to take it outside, plant it in your SFG filled with Mel’s Mix, coverit, and give it a drink of water. You’ve just given your plant a head start—in about half the time. Instead of fourteen days, you may see a sproutcoming up in just six.
Modular trays allow roots to develop in their own cell of growing medium, this means they don’t gettangled up with neighbouring roots and so transplanting young plants is easier and there is less ofa check to growth.
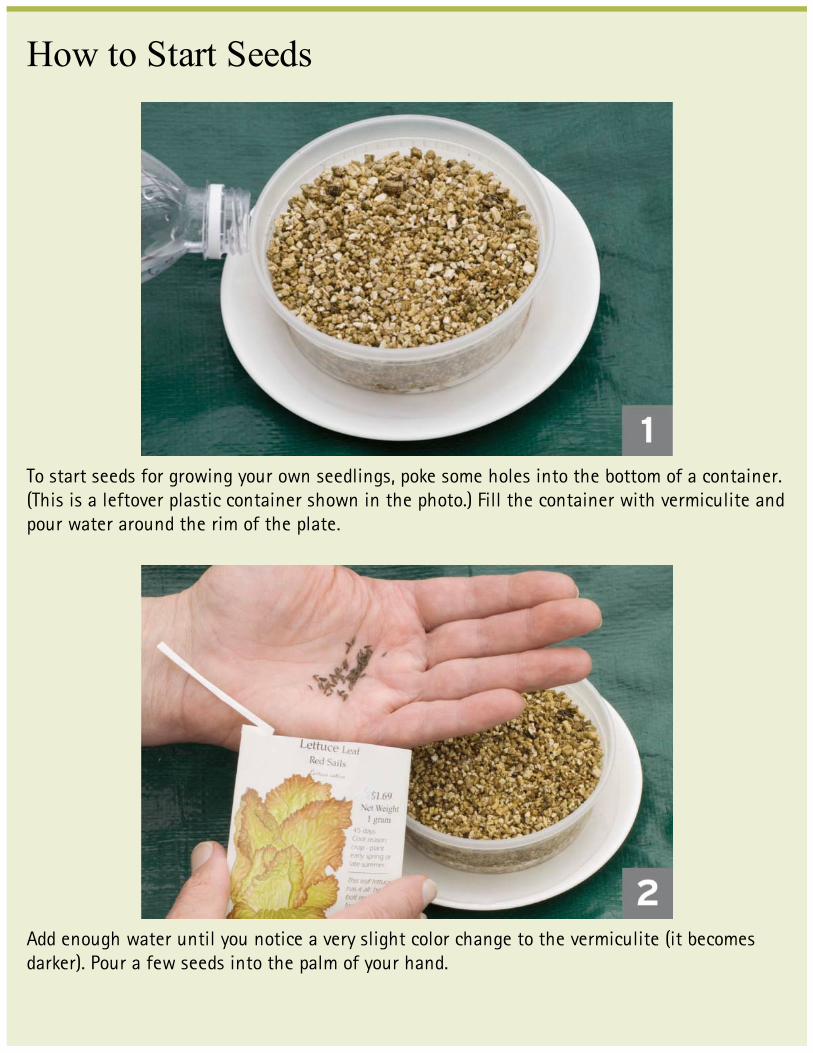
How to Start Seeds
To start seeds for growing your own seedlings, poke some holes into the bottom of a container.(This is a leftover plastic container shown in the photo.) Fill the container with vermiculite andpour water around the rim of the plate.
Add enough water until you notice a very slight color change to the vermiculite (it becomesdarker). Pour a few seeds into the palm of your hand.
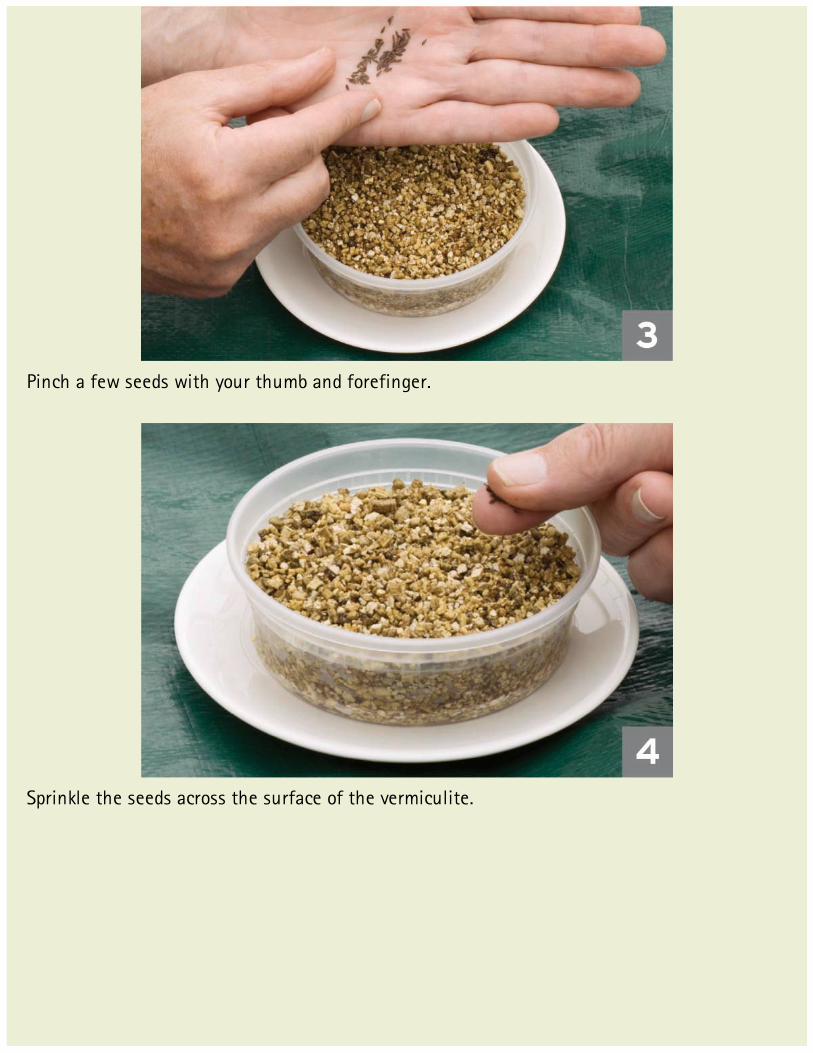
Pinch a few seeds with your thumb and forefinger.
Sprinkle the seeds across the surface of the vermiculite.
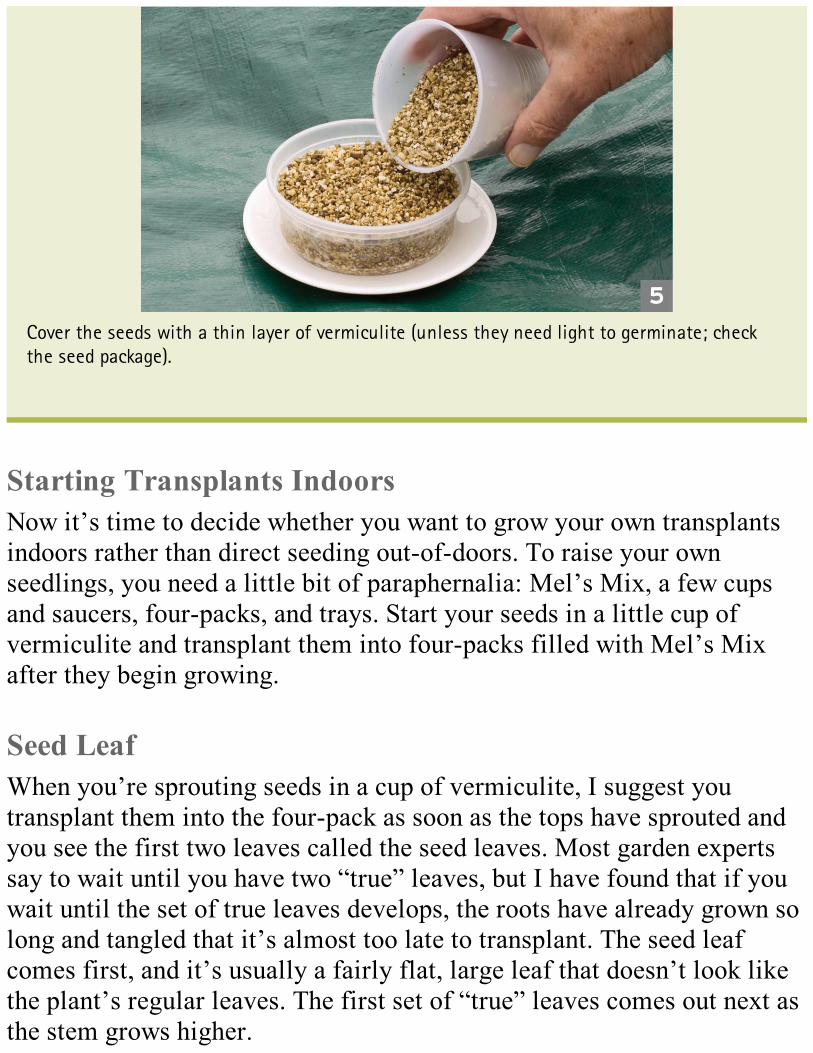
Cover the seeds with a thin layer of vermiculite (unless they need light to germinate; checkthe seed package).
Starting Transplants IndoorsNow it’s time to decide whether you want to grow your own transplantsindoors rather than direct seeding out-of-doors. To raise your ownseedlings, you need a little bit of paraphernalia: Mel’s Mix, a few cupsand saucers, four-packs, and trays. Start your seeds in a little cup ofvermiculite and transplant them into four-packs filled with Mel’s Mixafter they begin growing.
Seed LeafWhen you’re sprouting seeds in a cup of vermiculite, I suggest youtransplant them into the four-pack as soon as the tops have sprouted andyou see the first two leaves called the seed leaves. Most garden expertssay to wait until you have two “true” leaves, but I have found that if youwait until the set of true leaves develops, the roots have already grown solong and tangled that it’s almost too late to transplant. The seed leafcomes first, and it’s usually a fairly flat, large leaf that doesn’t look likethe plant’s regular leaves. The first set of “true” leaves comes out next asthe stem grows higher.
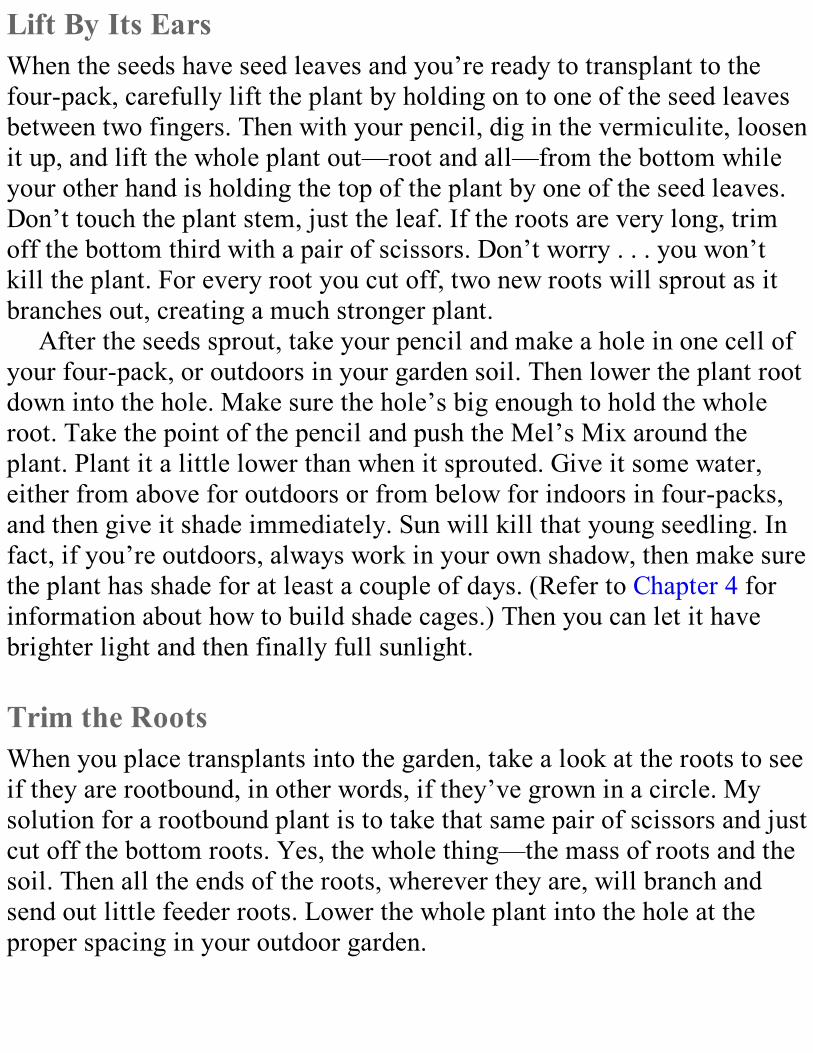
Lift By Its EarsWhen the seeds have seed leaves and you’re ready to transplant to thefour-pack, carefully lift the plant by holding on to one of the seed leavesbetween two fingers. Then with your pencil, dig in the vermiculite, loosenit up, and lift the whole plant out—root and all—from the bottom whileyour other hand is holding the top of the plant by one of the seed leaves.Don’t touch the plant stem, just the leaf. If the roots are very long, trimoff the bottom third with a pair of scissors. Don’t worry . . . you won’tkill the plant. For every root you cut off, two new roots will sprout as itbranches out, creating a much stronger plant.
After the seeds sprout, take your pencil and make a hole in one cell ofyour four-pack, or outdoors in your garden soil. Then lower the plant rootdown into the hole. Make sure the hole’s big enough to hold the wholeroot. Take the point of the pencil and push the Mel’s Mix around theplant. Plant it a little lower than when it sprouted. Give it some water,either from above for outdoors or from below for indoors in four-packs,and then give it shade immediately. Sun will kill that young seedling. Infact, if you’re outdoors, always work in your own shadow, then make surethe plant has shade for at least a couple of days. (Refer to Chapter 4 forinformation about how to build shade cages.) Then you can let it havebrighter light and then finally full sunlight.
Trim the RootsWhen you place transplants into the garden, take a look at the roots to seeif they are rootbound, in other words, if they’ve grown in a circle. Mysolution for a rootbound plant is to take that same pair of scissors and justcut off the bottom roots. Yes, the whole thing—the mass of roots and thesoil. Then all the ends of the roots, wherever they are, will branch andsend out little feeder roots. Lower the whole plant into the hole at theproper spacing in your outdoor garden.
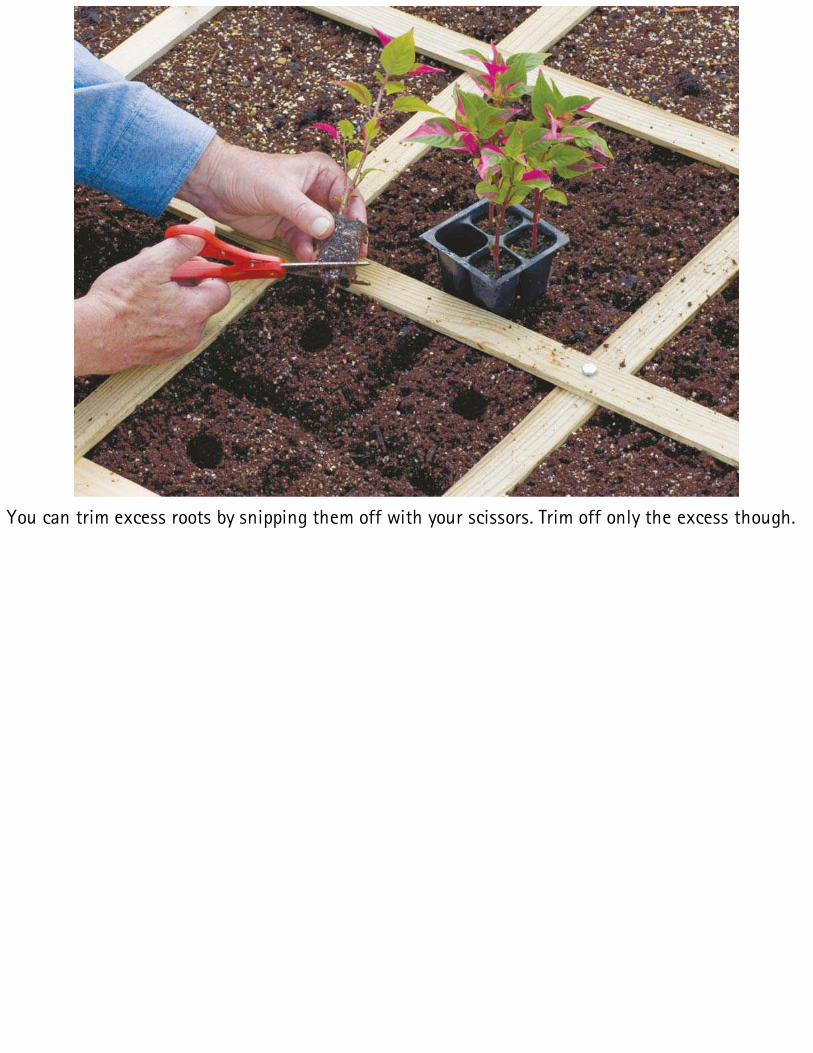
You can trim excess roots by snipping them off with your scissors. Trim off only the excess though.
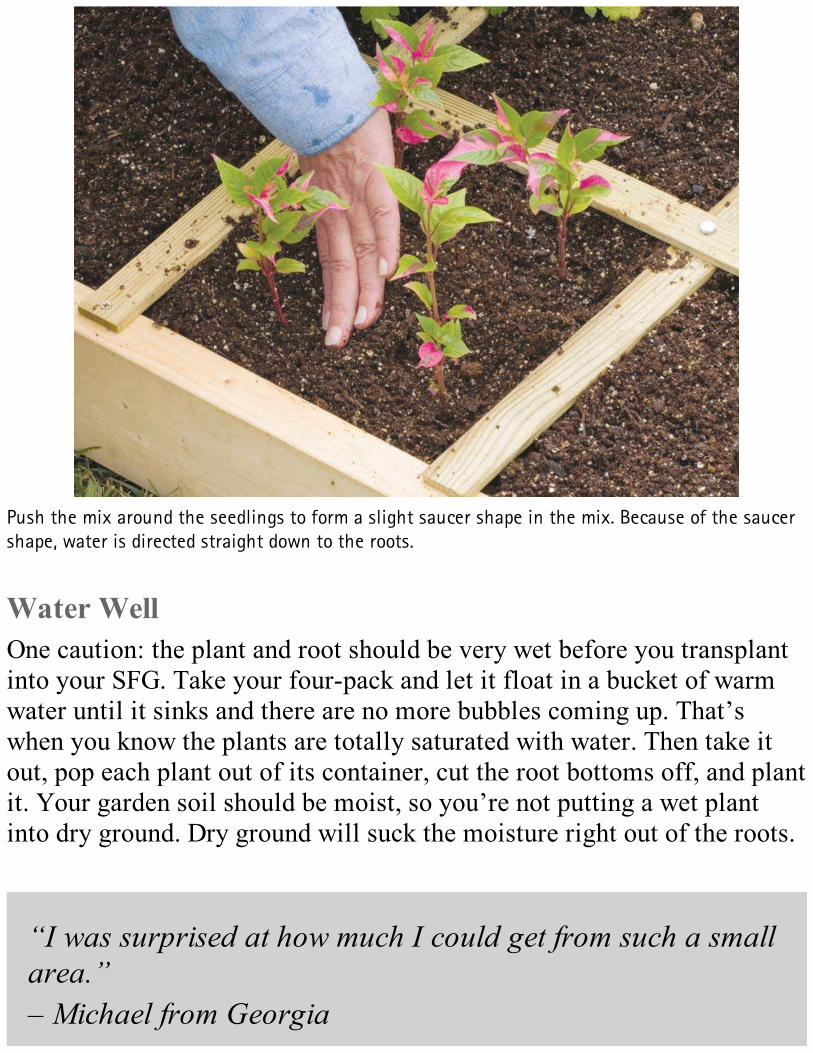
Push the mix around the seedlings to form a slight saucer shape in the mix. Because of the saucershape, water is directed straight down to the roots.
Water WellOne caution: the plant and root should be very wet before you transplantinto your SFG. Take your four-pack and let it float in a bucket of warmwater until it sinks and there are no more bubbles coming up. That’swhen you know the plants are totally saturated with water. Then take itout, pop each plant out of its container, cut the root bottoms off, and plantit. Your garden soil should be moist, so you’re not putting a wet plantinto dry ground. Dry ground will suck the moisture right out of the roots.
“I was surprised at how much I could get from such a smallarea.”– Michael from Georgia
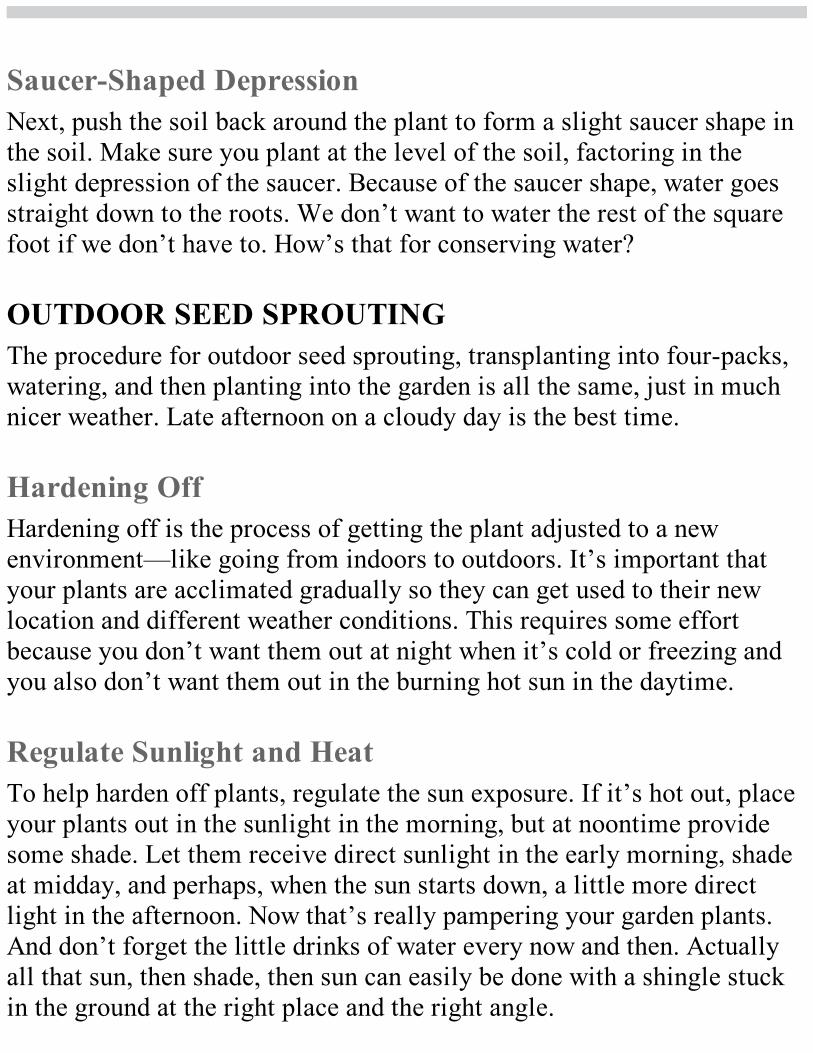
Saucer-Shaped DepressionNext, push the soil back around the plant to form a slight saucer shape inthe soil. Make sure you plant at the level of the soil, factoring in theslight depression of the saucer. Because of the saucer shape, water goesstraight down to the roots. We don’t want to water the rest of the squarefoot if we don’t have to. How’s that for conserving water?
OUTDOOR SEED SPROUTINGThe procedure for outdoor seed sprouting, transplanting into four-packs,watering, and then planting into the garden is all the same, just in muchnicer weather. Late afternoon on a cloudy day is the best time.
Hardening OffHardening off is the process of getting the plant adjusted to a newenvironment—like going from indoors to outdoors. It’s important thatyour plants are acclimated gradually so they can get used to their newlocation and different weather conditions. This requires some effortbecause you don’t want them out at night when it’s cold or freezing andyou also don’t want them out in the burning hot sun in the daytime.
Regulate Sunlight and HeatTo help harden off plants, regulate the sun exposure. If it’s hot out, placeyour plants out in the sunlight in the morning, but at noontime providesome shade. Let them receive direct sunlight in the early morning, shadeat midday, and perhaps, when the sun starts down, a little more directlight in the afternoon. Now that’s really pampering your garden plants.And don’t forget the little drinks of water every now and then. Actuallyall that sun, then shade, then sun can easily be done with a shingle stuckin the ground at the right place and the right angle.
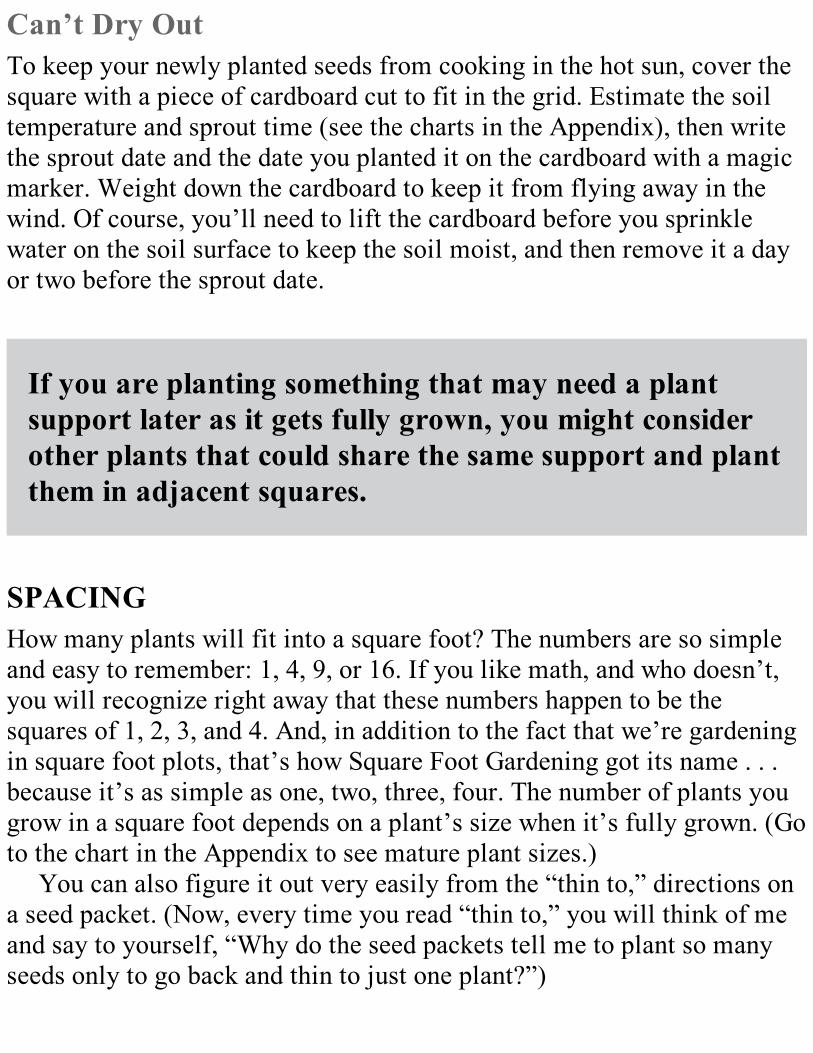
Can’t Dry OutTo keep your newly planted seeds from cooking in the hot sun, cover thesquare with a piece of cardboard cut to fit in the grid. Estimate the soiltemperature and sprout time (see the charts in the Appendix), then writethe sprout date and the date you planted it on the cardboard with a magicmarker. Weight down the cardboard to keep it from flying away in thewind. Of course, you’ll need to lift the cardboard before you sprinklewater on the soil surface to keep the soil moist, and then remove it a dayor two before the sprout date.
If you are planting something that may need a plantsupport later as it gets fully grown, you might considerother plants that could share the same support and plantthem in adjacent squares.
SPACINGHow many plants will fit into a square foot? The numbers are so simpleand easy to remember: 1, 4, 9, or 16. If you like math, and who doesn’t,you will recognize right away that these numbers happen to be thesquares of 1, 2, 3, and 4. And, in addition to the fact that we’re gardeningin square foot plots, that’s how Square Foot Gardening got its name . . .because it’s as simple as one, two, three, four. The number of plants yougrow in a square foot depends on a plant’s size when it’s fully grown. (Goto the chart in the Appendix to see mature plant sizes.)
You can also figure it out very easily from the “thin to,” directions ona seed packet. (Now, every time you read “thin to,” you will think of meand say to yourself, “Why do the seed packets tell me to plant so manyseeds only to go back and thin to just one plant?”)
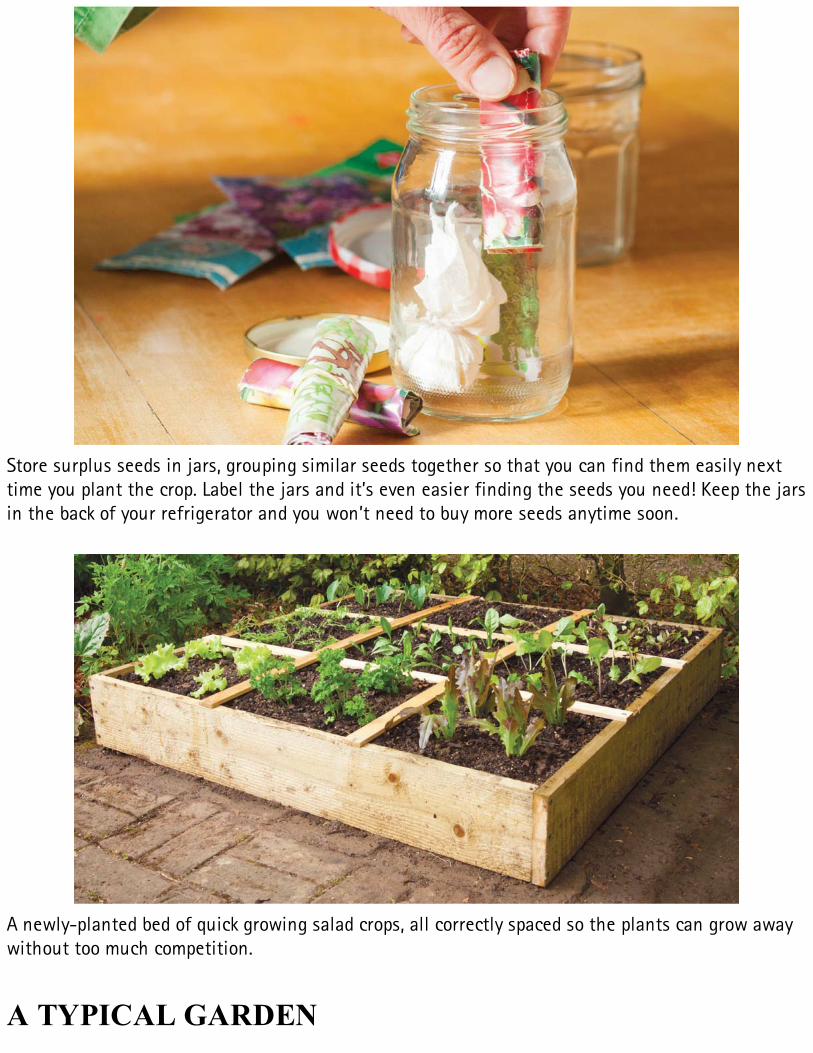
Store surplus seeds in jars, grouping similar seeds together so that you can find them easily nexttime you plant the crop. Label the jars and it’s even easier finding the seeds you need! Keep the jarsin the back of your refrigerator and you won’t need to buy more seeds anytime soon.
A newly-planted bed of quick growing salad crops, all correctly spaced so the plants can grow awaywithout too much competition.
A TYPICAL GARDEN

Let’s plant one 4 × 4 and see how much we will grow in those 16 squarefeet. We’ll start with tall plants on the north side of the box so they don’tshade shorter plants. Then put some colorful flowers in each corner. Let’sassume it is still springtime, but that we’re past the last frost, so we couldput four pansies in each corner using our favorite colors.
Carrots require little care until they’re harvested. So let’s plant twosquares of different carrots in the center squares, one square of sixteenonions and a low-maintenance square of sixteen radishes in the center.Then we’ll put one square of nine beets in an outside square becausewe’ll harvest their leaves during the season and then finally pull the beetbottoms later. We can plant two or three varieties of leaf lettuce on theoutside, depending on your tastes. In another square we could put sixteenchives, and four parsley plants in another, which would provide us acontinual harvest. For more color we might want to put a square of redsalvia along the back. And perhaps in one corner some dwarf dahlias, oneper square foot. Or perhaps some nasturtiums spaced at one per squarefoot. One of the first things we would have planted in the spring is one ortwo squares of spinach, nine per square foot. Then depending on yourfamily’s taste we could have one or more squares from the cabbagefamily. That could be red or green cabbage, broccoli, or cauliflower.Keep in mind this is not the only 4 × 4 in the whole garden. So we don’thave to put all the cabbage into one SFG. It’s better to space them outthroughout the garden—makes it harder for the cabbage moth to findthem all.
PLANS AND DRAWINGSRemember I mentioned that some people feel a desire to think ahead anddraw up a list of everything to be planted in their garden. Then there areeven some people who want to assign those plants to spaces ahead oftime. So it means drawing a chart, more or less to scale, of your gardenand assigning those particular crops to each square foot. Despite being anengineer who loves charts and diagrams, I don’t usually do that. I justlike to plant as I see fit. It’s very easy to stand in the garden and as the
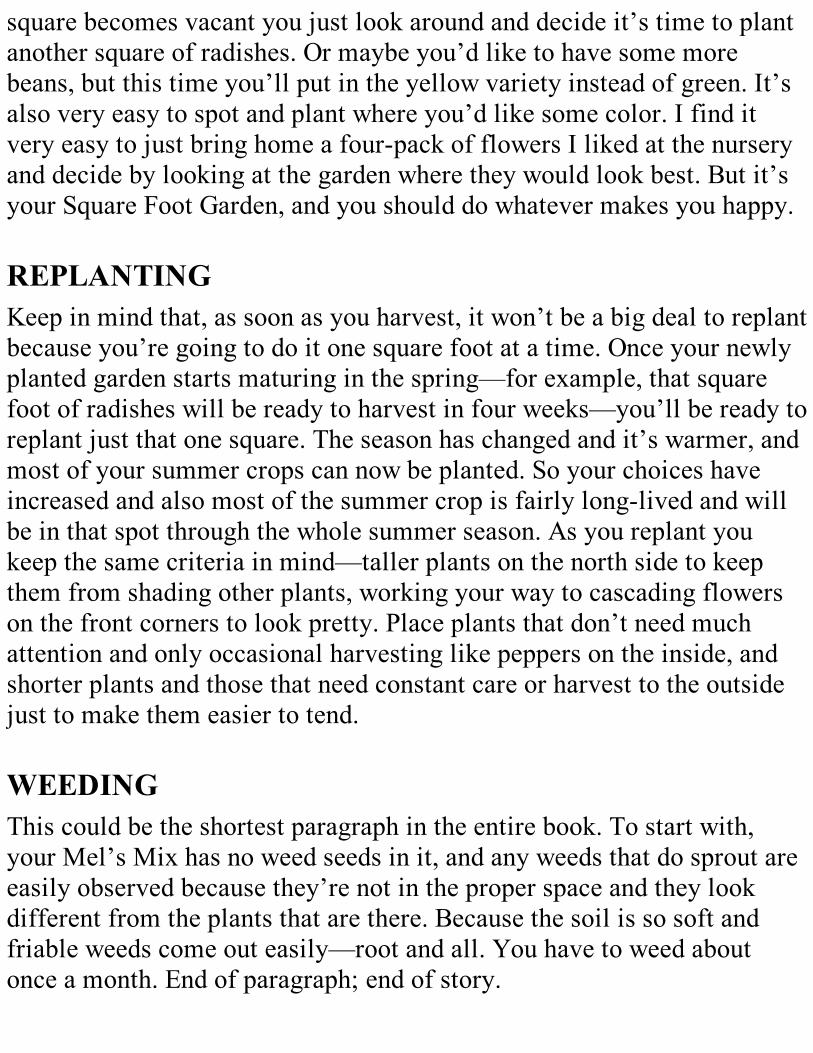
square becomes vacant you just look around and decide it’s time to plantanother square of radishes. Or maybe you’d like to have some morebeans, but this time you’ll put in the yellow variety instead of green. It’salso very easy to spot and plant where you’d like some color. I find itvery easy to just bring home a four-pack of flowers I liked at the nurseryand decide by looking at the garden where they would look best. But it’syour Square Foot Garden, and you should do whatever makes you happy.
REPLANTINGKeep in mind that, as soon as you harvest, it won’t be a big deal to replantbecause you’re going to do it one square foot at a time. Once your newlyplanted garden starts maturing in the spring—for example, that squarefoot of radishes will be ready to harvest in four weeks—you’ll be ready toreplant just that one square. The season has changed and it’s warmer, andmost of your summer crops can now be planted. So your choices haveincreased and also most of the summer crop is fairly long-lived and willbe in that spot through the whole summer season. As you replant youkeep the same criteria in mind—taller plants on the north side to keepthem from shading other plants, working your way to cascading flowerson the front corners to look pretty. Place plants that don’t need muchattention and only occasional harvesting like peppers on the inside, andshorter plants and those that need constant care or harvest to the outsidejust to make them easier to tend.
WEEDINGThis could be the shortest paragraph in the entire book. To start with,your Mel’s Mix has no weed seeds in it, and any weeds that do sprout areeasily observed because they’re not in the proper space and they lookdifferent from the plants that are there. Because the soil is so soft andfriable weeds come out easily—root and all. You have to weed aboutonce a month. End of paragraph; end of story.
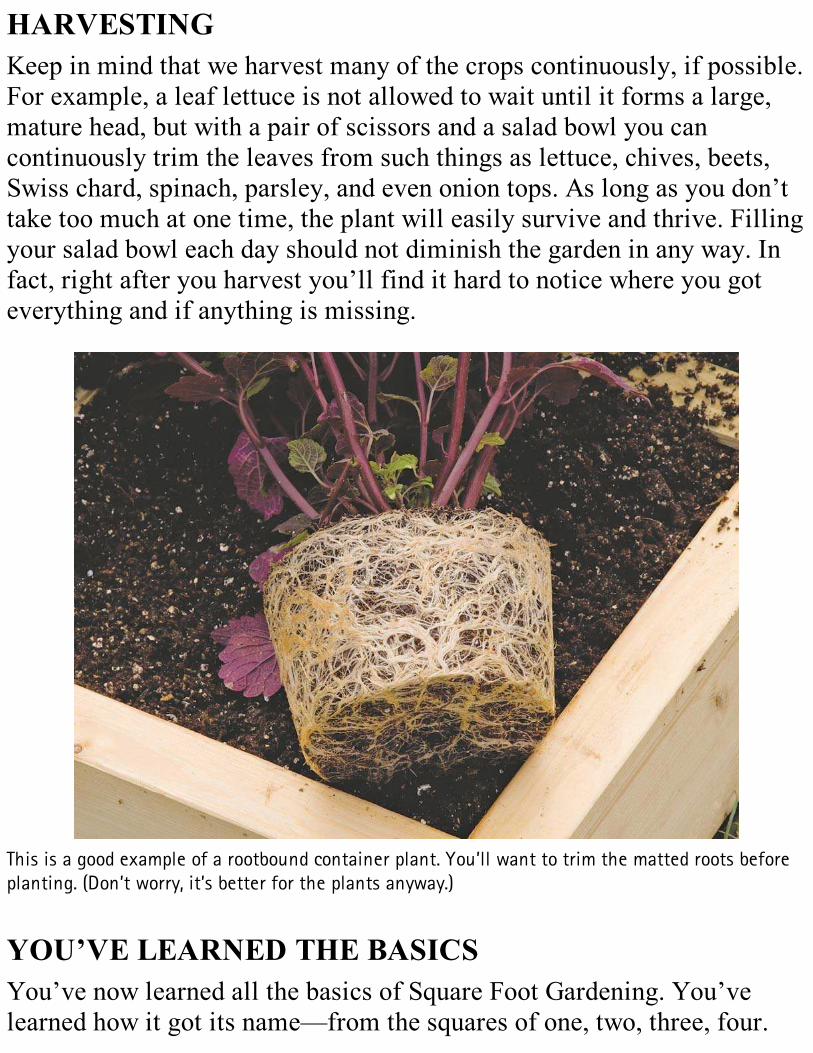
HARVESTINGKeep in mind that we harvest many of the crops continuously, if possible.For example, a leaf lettuce is not allowed to wait until it forms a large,mature head, but with a pair of scissors and a salad bowl you cancontinuously trim the leaves from such things as lettuce, chives, beets,Swiss chard, spinach, parsley, and even onion tops. As long as you don’ttake too much at one time, the plant will easily survive and thrive. Fillingyour salad bowl each day should not diminish the garden in any way. Infact, right after you harvest you’ll find it hard to notice where you goteverything and if anything is missing.
This is a good example of a rootbound container plant. You’ll want to trim the matted roots beforeplanting. (Don’t worry, it’s better for the plants anyway.)
YOU’VE LEARNED THE BASICSYou’ve now learned all the basics of Square Foot Gardening. You’velearned how it got its name—from the squares of one, two, three, four.

You have also learned how many and what kind of plants fit into a squarefoot by memorizing, calculating, or by looking it up on the chart. You’velearned how to zip zap in the soil to get the proper and exact spacing thenstart planting your seeds and transplants. Are we having any fun yet?Next chapter we’re going to discuss how to maintain and harvest yourSFG.
Okay, now it’s time to go out to your garden and do somethingoutrageous that will amaze or dumbfound any neighbor who might bewatching you. Do you know how to do a rain dance?

7

7Growing and Harvesting
This is going to be a fairly short chapter because SFGrequires so little maintenance once your garden is prepared
and planted. You’ll experience a continuous cycle ofnurturing, harvesting, and replanting each year with no soilpreparation and no weeding to do ever again. How does that
sound?
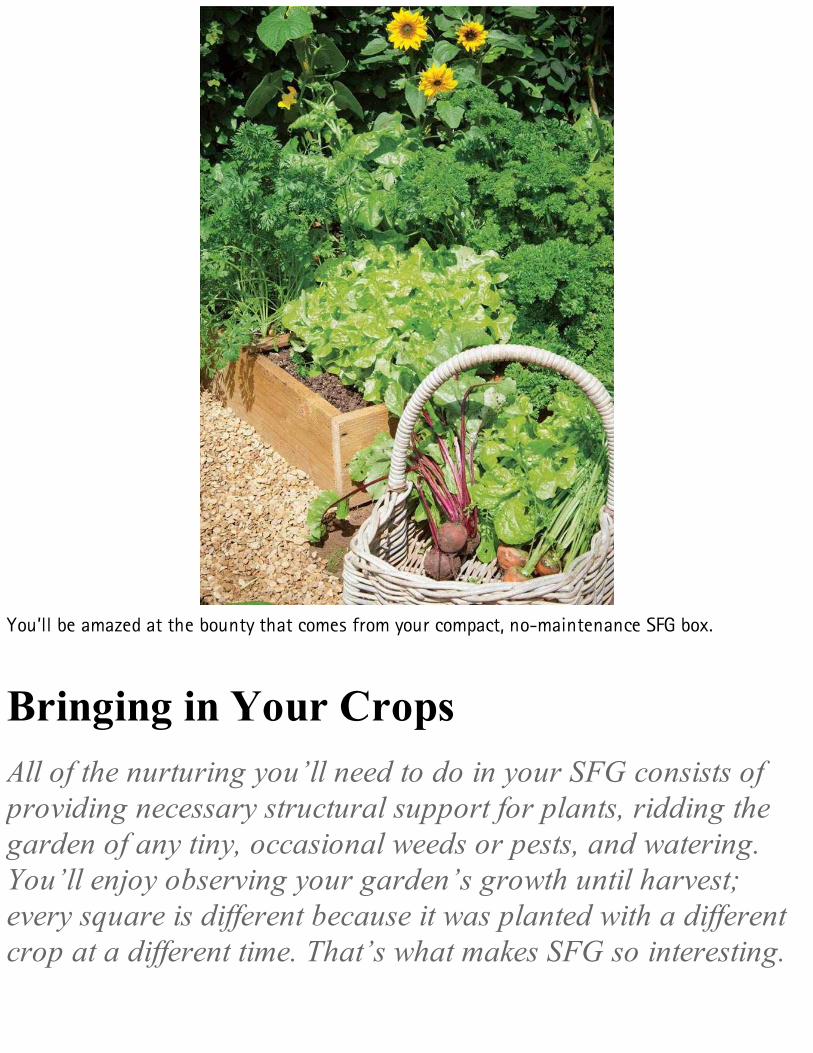
You’ll be amazed at the bounty that comes from your compact, no-maintenance SFG box.
Bringing in Your CropsAll of the nurturing you’ll need to do in your SFG consists ofproviding necessary structural support for plants, ridding thegarden of any tiny, occasional weeds or pests, and watering.You’ll enjoy observing your garden’s growth until harvest;every square is different because it was planted with a differentcrop at a different time. That’s what makes SFG so interesting.
CAREWhen asked to name the greatest advantage of the All New Square FootGardening, most say it’s tending their garden from aisles and neverstepping on their soil. Like many others, I always wondered why we weretaught to loosen soil with rototillers, shovels, forks, and hoes, only towalk all over it again packing it down.
So why are the experts still teaching us to do this? I say, just stopwalking on your growing soil—it’s that simple.
KEEP IT LOOSELet’s think of some of the advantages of not packing your soil down. Theplant roots need air and moisture, just like people. If you pack the soildown, it becomes more and more compressed (called compaction) and itbecomes harder and harder for air to circulate through the soil making itmore difficult for roots to grow. They may not die, but they certainlywon’t grow well. So why not provide them with nice, loose, friable soillike Mel’s Mix? This way, water can percolate down and air cancirculate.
THREE TOOLSAnother big advantage of SFG is that the number and cost of tools isreduced to almost nothing—you will only need three tools. Just think,you no longer need a rototiller! Eliminate that cost and you now have anextra thousand dollars in your pocket. And you don’t have to hiresomeone at fifty dollars every year to plow for you. You don’t even needa shovel or rake or any of those special digging tools that have beeninvented to dig up the tough soil. Gardening “experts” will tell you to goout and buy the best tools you can find because they will last longer, butthey also cost more. With SFG, you no longer need any of those big,expensive, heavy-duty tools that take so much energy to maneuver—they’re suddenly obsolete.
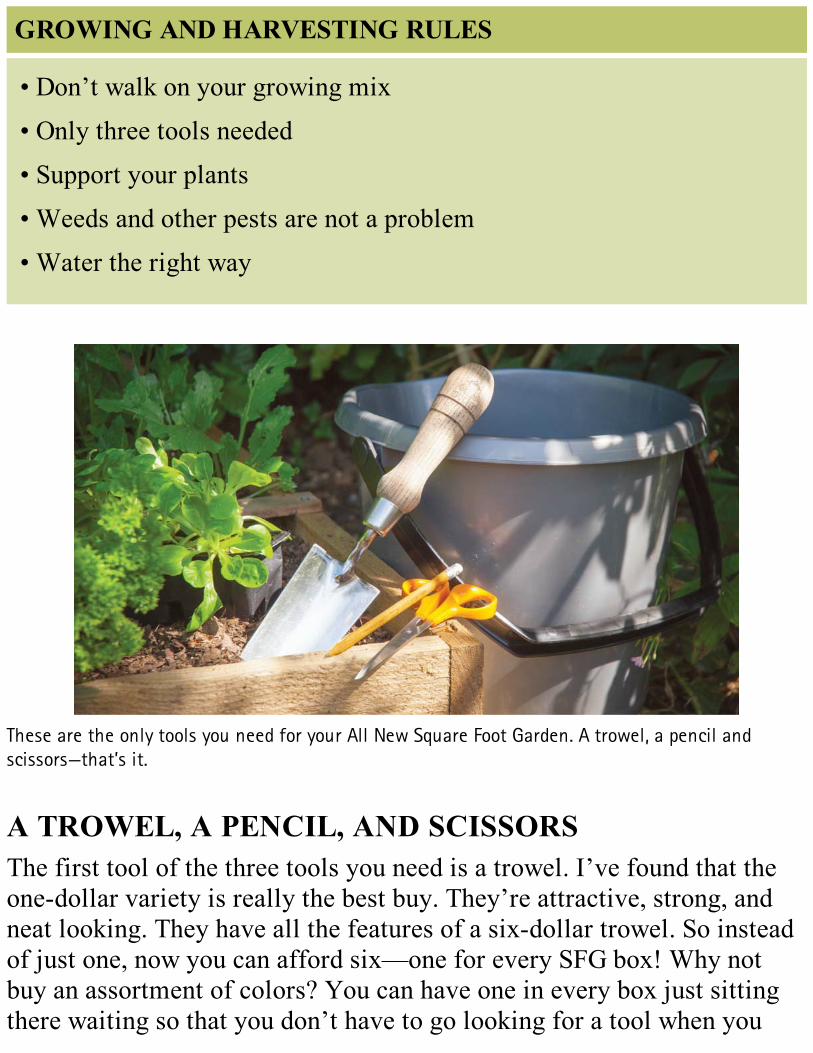
GROWING AND HARVESTING RULES
• Don’t walk on your growing mix
• Only three tools needed
• Support your plants
• Weeds and other pests are not a problem
• Water the right way
These are the only tools you need for your All New Square Foot Garden. A trowel, a pencil andscissors—that’s it.
A TROWEL, A PENCIL, AND SCISSORSThe first tool of the three tools you need is a trowel. I’ve found that theone-dollar variety is really the best buy. They’re attractive, strong, andneat looking. They have all the features of a six-dollar trowel. So insteadof just one, now you can afford six—one for every SFG box! Why notbuy an assortment of colors? You can have one in every box just sittingthere waiting so that you don’t have to go looking for a tool when you

walk by and see a square that is ready for replanting. Of course, if you seean occasional weed, your big, strong weeding tools are your own thumband forefinger!
The trowel is for transplanting, for mixing in an added trowel full ofcompost when you replant each square foot, and for loosening up andturning over the Mel’s Mix in an individual square foot or even an entire4 × 4. In the spring you won’t believe how perfect the soil will be if youfollow the Mel’s Mix formula and start with a perfect soil.
PENNY PINCHER
I like to buy children’s pointed scissors in August when you can findback-to-school sales. Usually I can purchase them for about fifty cents—an affordable price that allows for several pairs around the garden.
The other two tools you’ll need are a pencil (yes, that’s a tool) forpoking holes and lifting out young seedlings for transplanting, and a pairof scissors for harvesting beet, lettuce, or Swiss chard leaves for supper,cutting off dead blossoms, and snipping off extra seedlings if more thanone seed sprouts in a hole. Because SFG tools are so simple andinexpensive, I love to splurge and keep one of each at every 4 × 4. Thatway, I never have to look for a tool.
It would be fun to list all the tools that you no longer need if you havea SFG. In fact, you could probably just go into your garage or toolshedand see them all right there—poor, lonely tools. Maybe you have someold-fashioned single-row friends who just can’t give up all that hard workand could use some extra heavy-duty tools. You could rent them out andmaybe make a few bucks.
PENNY PINCHER
You can even make your own kneeling pad out of scarp carpeting. Ifyou have some leftover indoor/outdoor carpeting, it won’t matter if itgets wet; it dries quickly and folds up nicely to make a great kneelingpad. It wouldn’t hurt to have a few of these pads scattered throughoutyour SFG. They are available as scrap or samples at any placecarpeting is sold.
OPTIONAL ACCESSORYAlthough you only need three tools, you might want to invest in akneeling pad. Unless your boxes are placed on tabletops, your mostfrequent position while gardening will be kneeling. For less than fourdollars, you can buy a kneeling pad that is comfortable and durable.There’s no need to buy the fancy ones that strap to your knees. They’reterribly uncomfortable and will end up hanging in your tool shed alongwith the other lonely tools.
WEEDSSFG has few or no weeds. But how? Weeds plague every garden, right?First, there are no weed seeds in peat moss or vermiculite. Next, anyseeds that were in the ingredients you added to the compost pile will getcooked and killed in that 150°F temperature as the pile heats up. If youprepare the bed properly and line the bottom of the box with landscapefabric, no weeds will sprout from the bottom. Since we are not using ourground soil, which is filled with weeds, the only possible weed seeds inour SFG might have blown in, and as soon as they sprout, you will seethem because they are out of place. Your two fingers will do the rest,pulling out the weed, roots and all. Compare that to what you’veexperienced with your existing soil. Anytime the existing soil anywherein the country is left alone, it sprouts weeds. Which system would youlike to have in your backyard?
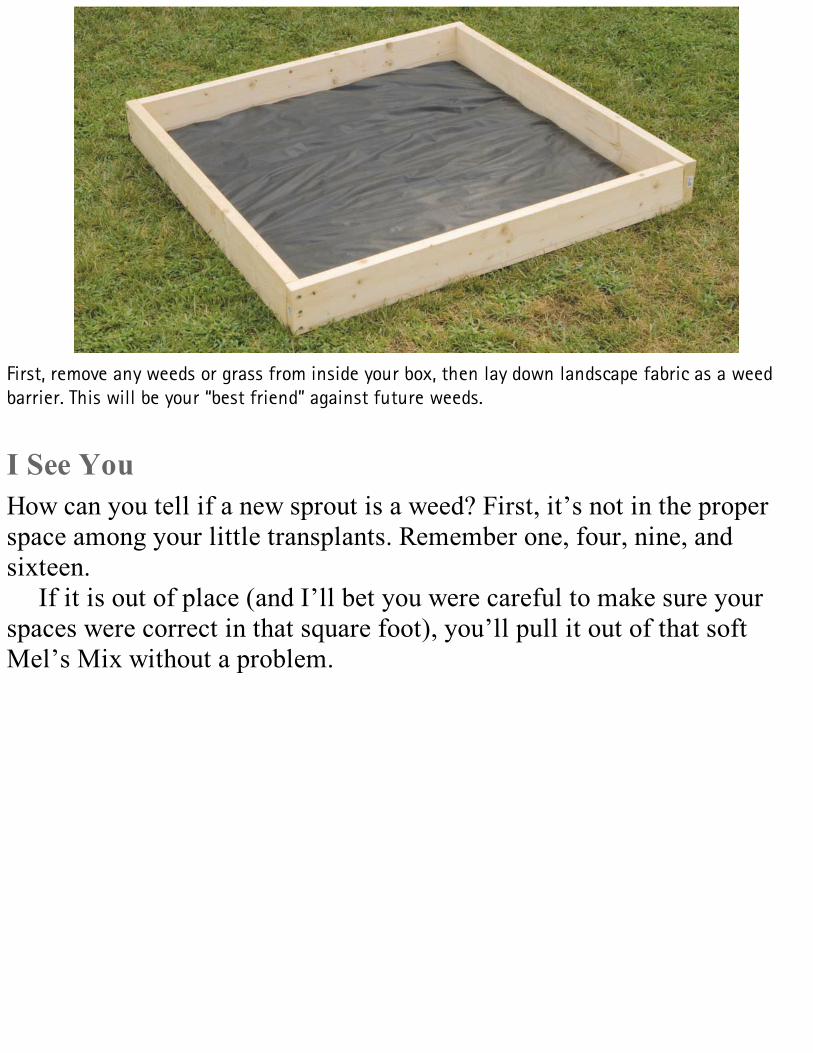
First, remove any weeds or grass from inside your box, then lay down landscape fabric as a weedbarrier. This will be your “best friend” against future weeds.
I See YouHow can you tell if a new sprout is a weed? First, it’s not in the properspace among your little transplants. Remember one, four, nine, andsixteen.
If it is out of place (and I’ll bet you were careful to make sure yourspaces were correct in that square foot), you’ll pull it out of that softMel’s Mix without a problem.

Weeds are a rare occurrence in an SFG, but if you do find one it will stand out because it won’t bein proper plant spacing. Any weed will be easy to pluck out because of the nature of Mel’s Mix.
PESTS AND PLANT PROBLEMSThe only way to intelligently answer the questions we get about pests andplant problems requires knowing the weather, growing conditions,history, and present gardening condition in an area. If the question camefrom my county, I’d give a great answer. But when it comes from acrossthe country or anywhere in the world, it’s difficult to give an accurateanswer.
County Extension AgentsThere is a good solution. Some of our tax dollars go to train and maintaina staff of horticultural experts in every county in the country—the countyextension service agents. In addition, the county extension agents trainanother group of neighborhood volunteers called “Master Gardeners,”who then go out in the community helping others by answering theirquestions. It is a great service, and we often refer questions to the agentsand their staff. If your question is about pests or problems or even thebest varieties to grow in your area, you couldn’t find a more informative

source. To find your local extension agent, look in your phone book in theGovernment blue pages, find your county, and then look for the heading“Extension of (your state) University;” don’t look under “Agriculture.”
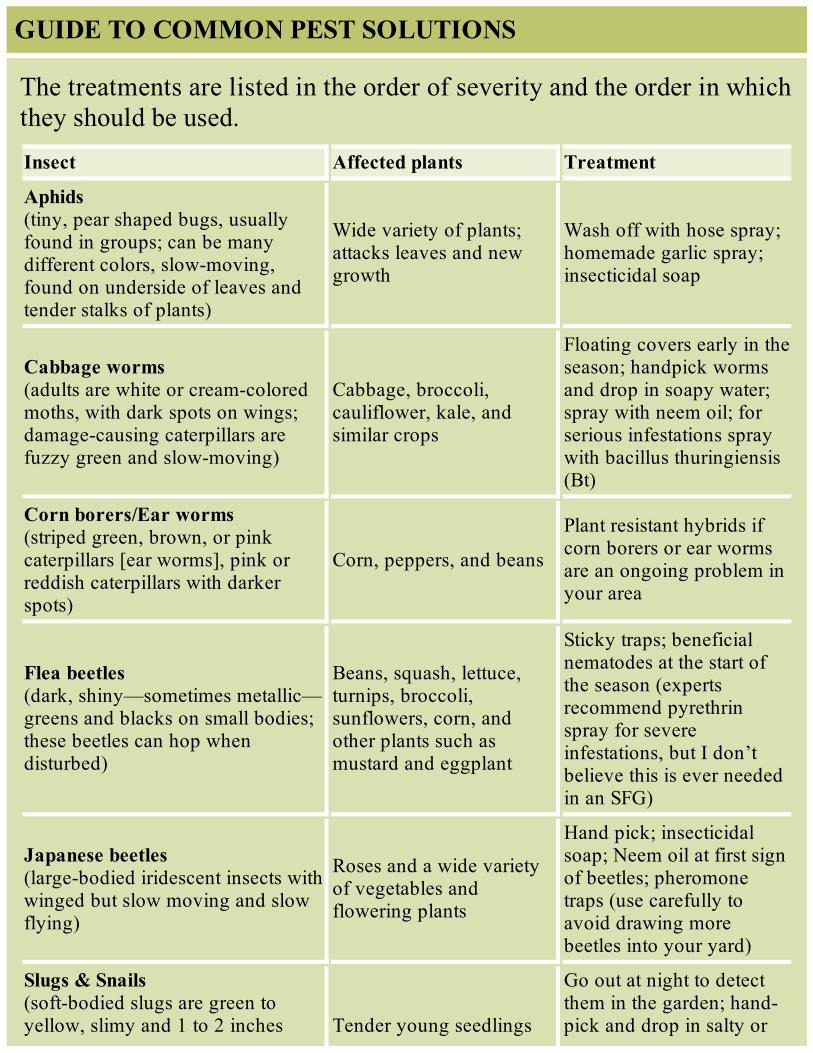
GUIDE TO COMMON PEST SOLUTIONS
The treatments are listed in the order of severity and the order in whichthey should be used.Insect Affected plants Treatment
Aphids(tiny, pear shaped bugs, usuallyfound in groups; can be manydifferent colors, slow-moving,found on underside of leaves andtender stalks of plants)
Wide variety of plants;attacks leaves and newgrowth
Wash off with hose spray;homemade garlic spray;insecticidal soap
Cabbage worms(adults are white or cream-coloredmoths, with dark spots on wings;damage-causing caterpillars arefuzzy green and slow-moving)
Cabbage, broccoli,cauliflower, kale, andsimilar crops
Floating covers early in theseason; handpick wormsand drop in soapy water;spray with neem oil; forserious infestations spraywith bacillus thuringiensis(Bt)
Corn borers/Ear worms(striped green, brown, or pinkcaterpillars [ear worms], pink orreddish caterpillars with darkerspots)
Corn, peppers, and beans
Plant resistant hybrids ifcorn borers or ear wormsare an ongoing problem inyour area
Flea beetles(dark, shiny—sometimes metallic—greens and blacks on small bodies;these beetles can hop whendisturbed)
Beans, squash, lettuce,turnips, broccoli,sunflowers, corn, andother plants such asmustard and eggplant
Sticky traps; beneficialnematodes at the start ofthe season (expertsrecommend pyrethrinspray for severeinfestations, but I don’tbelieve this is ever neededin an SFG)
Japanese beetles(large-bodied iridescent insects withwinged but slow moving and slowflying)
Roses and a wide varietyof vegetables andflowering plants
Hand pick; insecticidalsoap; Neem oil at first signof beetles; pheromonetraps (use carefully toavoid drawing morebeetles into your yard)
Slugs & Snails(soft-bodied slugs are green toyellow, slimy and 1 to 2 inches Tender young seedlings
Go out at night to detectthem in the garden; hand-pick and drop in salty or
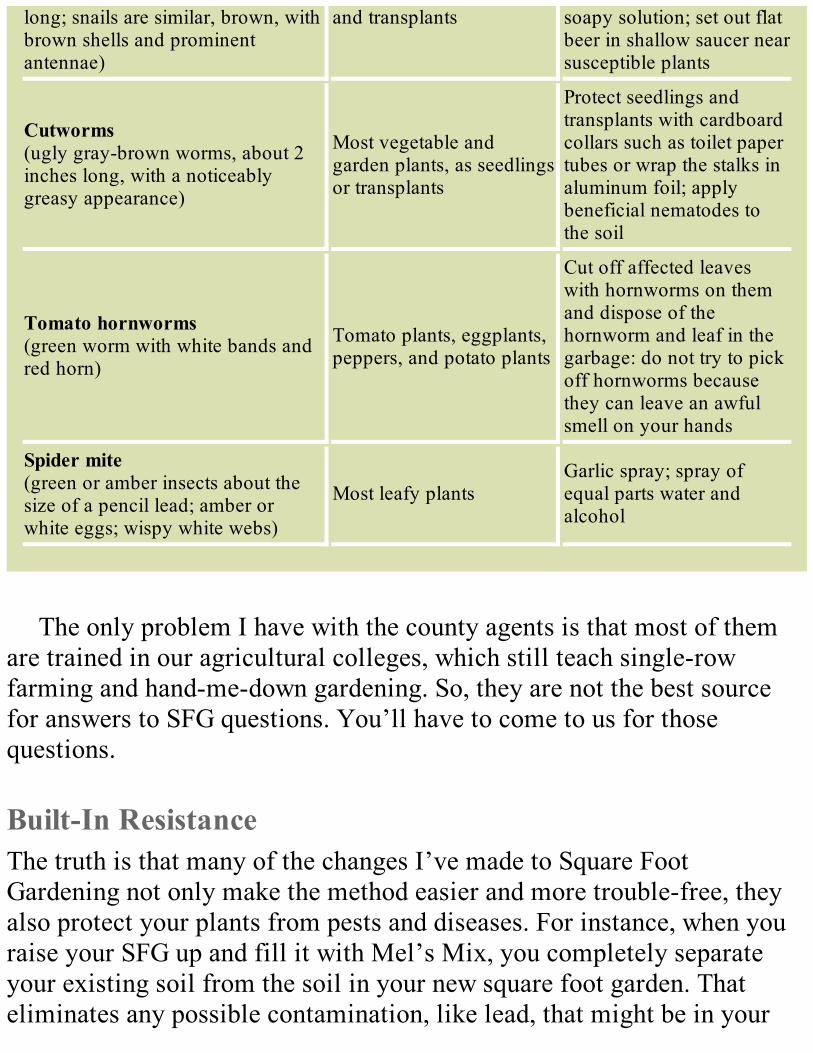
long; snails are similar, brown, withbrown shells and prominentantennae)
and transplants soapy solution; set out flatbeer in shallow saucer nearsusceptible plants
Cutworms(ugly gray-brown worms, about 2inches long, with a noticeablygreasy appearance)
Most vegetable andgarden plants, as seedlingsor transplants
Protect seedlings andtransplants with cardboardcollars such as toilet papertubes or wrap the stalks inaluminum foil; applybeneficial nematodes tothe soil
Tomato hornworms(green worm with white bands andred horn)
Tomato plants, eggplants,peppers, and potato plants
Cut off affected leaveswith hornworms on themand dispose of thehornworm and leaf in thegarbage: do not try to pickoff hornworms becausethey can leave an awfulsmell on your hands
Spider mite(green or amber insects about thesize of a pencil lead; amber orwhite eggs; wispy white webs)
Most leafy plantsGarlic spray; spray ofequal parts water andalcohol
The only problem I have with the county agents is that most of themare trained in our agricultural colleges, which still teach single-rowfarming and hand-me-down gardening. So, they are not the best sourcefor answers to SFG questions. You’ll have to come to us for thosequestions.
Built-In ResistanceThe truth is that many of the changes I’ve made to Square FootGardening not only make the method easier and more trouble-free, theyalso protect your plants from pests and diseases. For instance, when youraise your SFG up and fill it with Mel’s Mix, you completely separateyour existing soil from the soil in your new square foot garden. Thateliminates any possible contamination, like lead, that might be in your
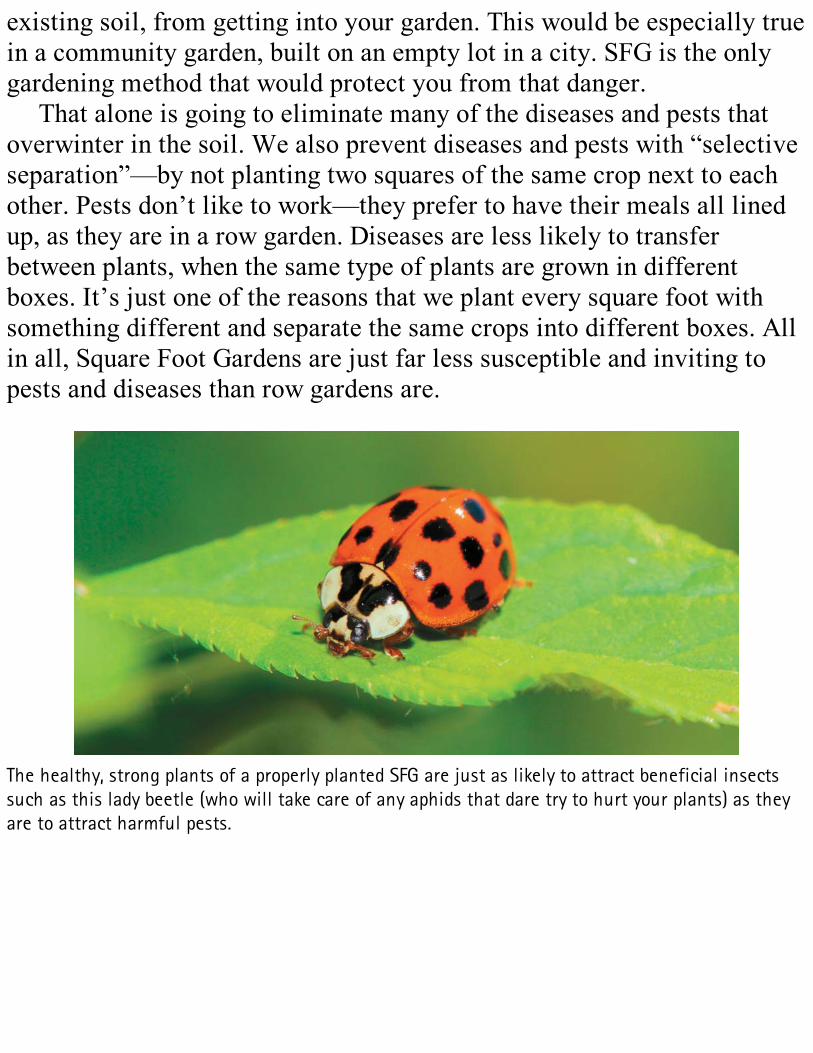
existing soil, from getting into your garden. This would be especially truein a community garden, built on an empty lot in a city. SFG is the onlygardening method that would protect you from that danger.
That alone is going to eliminate many of the diseases and pests thatoverwinter in the soil. We also prevent diseases and pests with “selectiveseparation”—by not planting two squares of the same crop next to eachother. Pests don’t like to work—they prefer to have their meals all linedup, as they are in a row garden. Diseases are less likely to transferbetween plants, when the same type of plants are grown in differentboxes. It’s just one of the reasons that we plant every square foot withsomething different and separate the same crops into different boxes. Allin all, Square Foot Gardens are just far less susceptible and inviting topests and diseases than row gardens are.
The healthy, strong plants of a properly planted SFG are just as likely to attract beneficial insectssuch as this lady beetle (who will take care of any aphids that dare try to hurt your plants) as theyare to attract harmful pests.
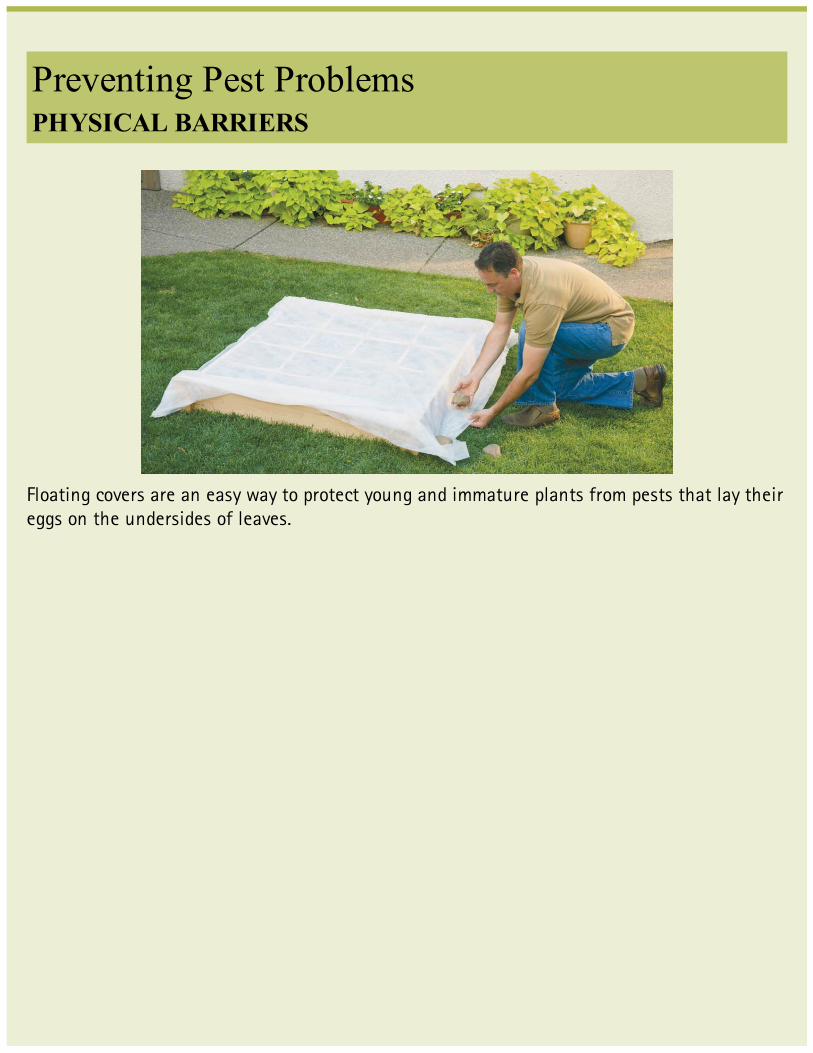
Preventing Pest ProblemsPHYSICAL BARRIERS
Floating covers are an easy way to protect young and immature plants from pests that lay theireggs on the undersides of leaves.
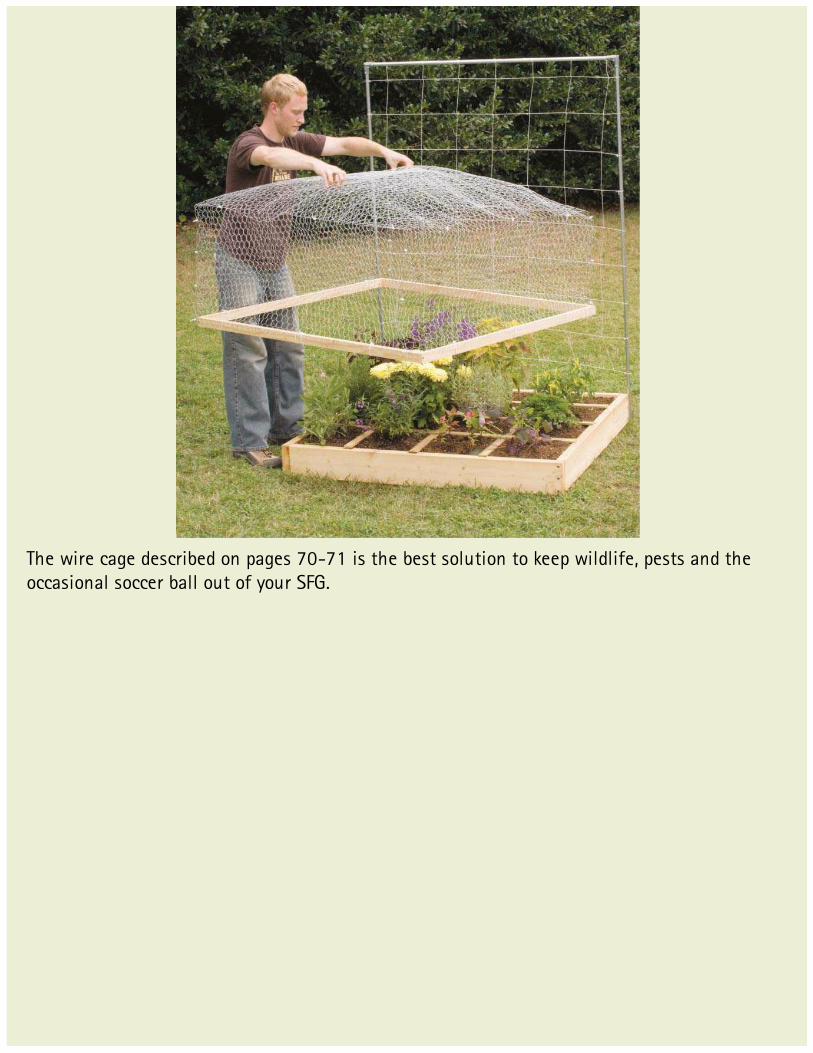
The wire cage described on pages 70-71 is the best solution to keep wildlife, pests and theoccasional soccer ball out of your SFG.
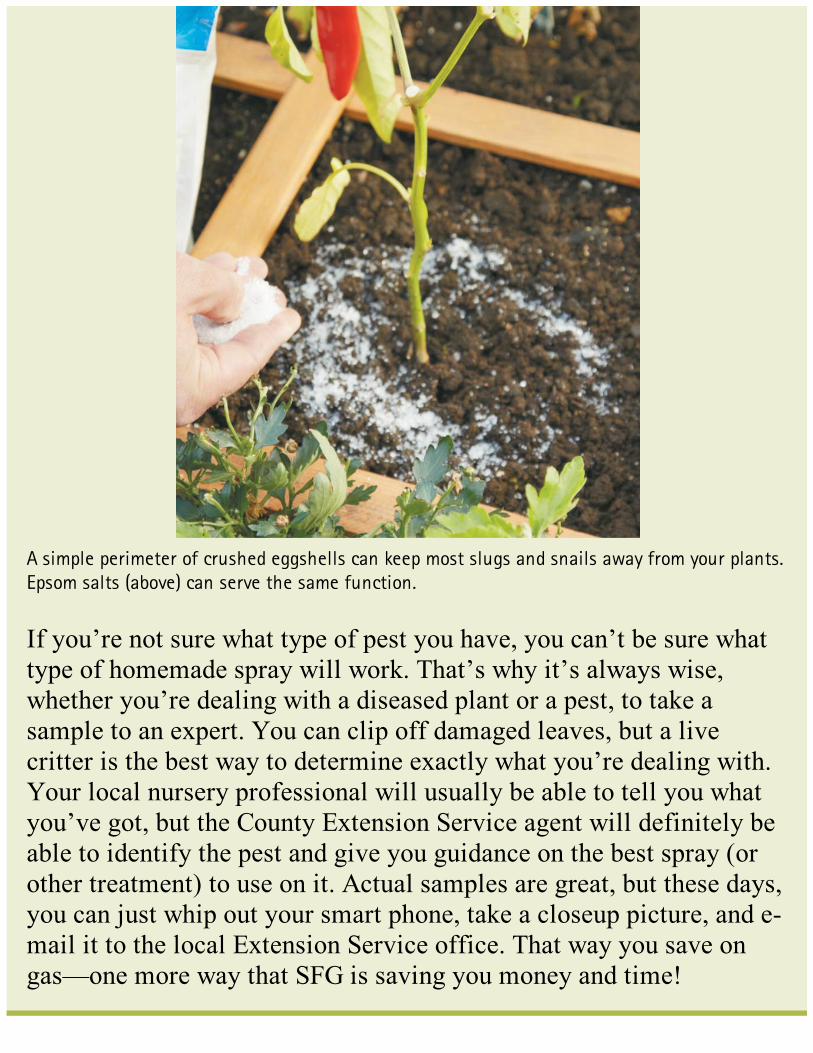
A simple perimeter of crushed eggshells can keep most slugs and snails away from your plants.Epsom salts (above) can serve the same function.
If you’re not sure what type of pest you have, you can’t be sure whattype of homemade spray will work. That’s why it’s always wise,whether you’re dealing with a diseased plant or a pest, to take asample to an expert. You can clip off damaged leaves, but a livecritter is the best way to determine exactly what you’re dealing with.Your local nursery professional will usually be able to tell you whatyou’ve got, but the County Extension Service agent will definitely beable to identify the pest and give you guidance on the best spray (orother treatment) to use on it. Actual samples are great, but these days,you can just whip out your smart phone, take a closeup picture, and e-mail it to the local Extension Service office. That way you save ongas—one more way that SFG is saving you money and time!

PREVENTATIVE SPRAYS
Make a pest spray by boiling ingredients for several minutes—in this case garlic and cayennepepper (one of the most effective sprays). Allow the liquid to cool to room temperature, thenstrain it into a spray bottle, using a strainer or cheesecloth over a funnel.
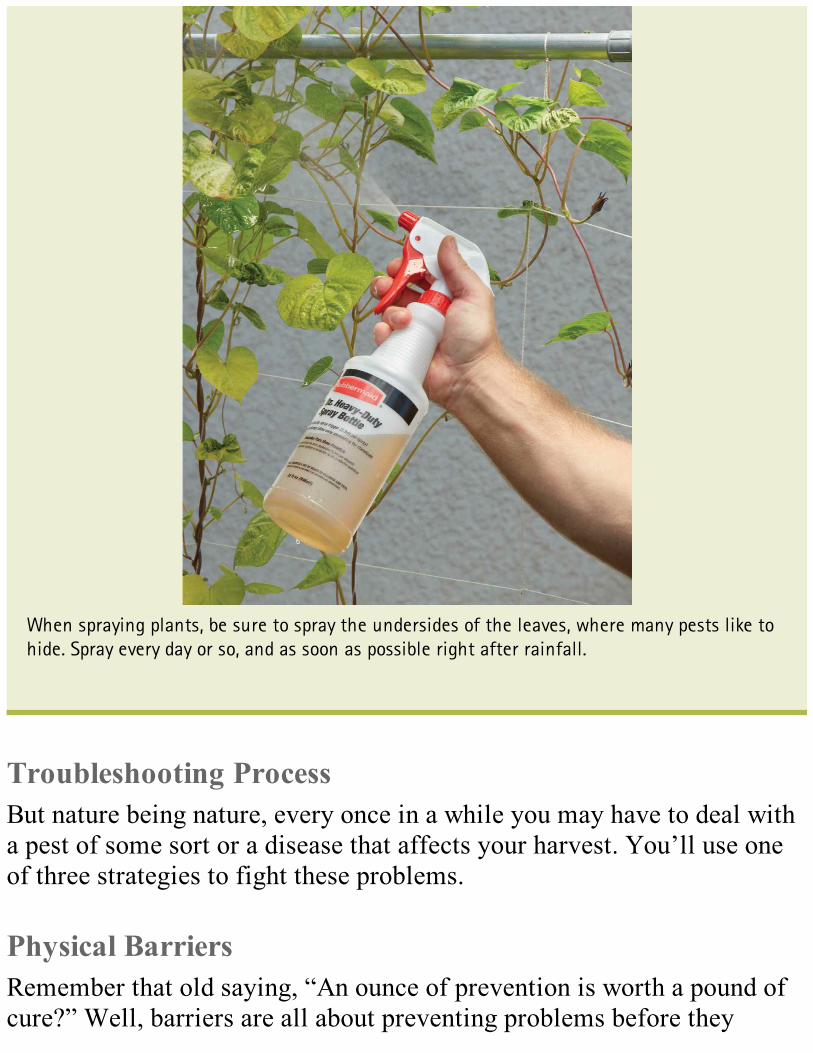
When spraying plants, be sure to spray the undersides of the leaves, where many pests like tohide. Spray every day or so, and as soon as possible right after rainfall.
Troubleshooting ProcessBut nature being nature, every once in a while you may have to deal witha pest of some sort or a disease that affects your harvest. You’ll use oneof three strategies to fight these problems.
Physical BarriersRemember that old saying, “An ounce of prevention is worth a pound ofcure?” Well, barriers are all about preventing problems before they
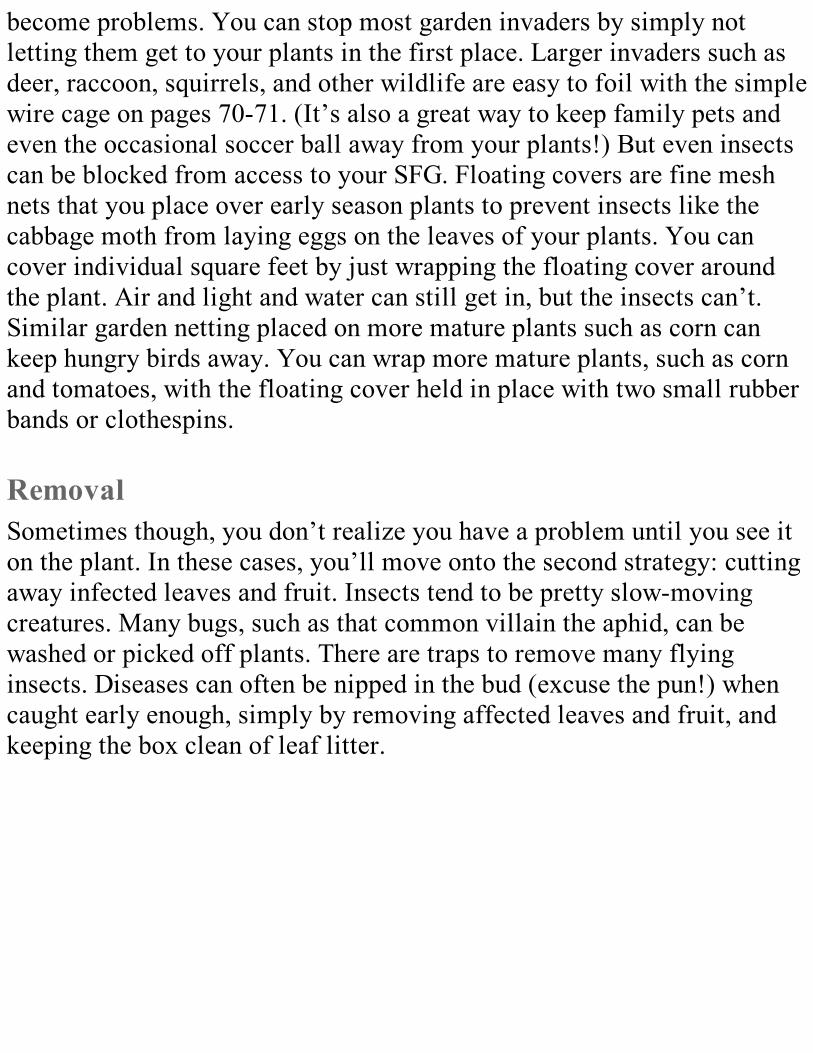
become problems. You can stop most garden invaders by simply notletting them get to your plants in the first place. Larger invaders such asdeer, raccoon, squirrels, and other wildlife are easy to foil with the simplewire cage on pages 70-71. (It’s also a great way to keep family pets andeven the occasional soccer ball away from your plants!) But even insectscan be blocked from access to your SFG. Floating covers are fine meshnets that you place over early season plants to prevent insects like thecabbage moth from laying eggs on the leaves of your plants. You cancover individual square feet by just wrapping the floating cover aroundthe plant. Air and light and water can still get in, but the insects can’t.Similar garden netting placed on more mature plants such as corn cankeep hungry birds away. You can wrap more mature plants, such as cornand tomatoes, with the floating cover held in place with two small rubberbands or clothespins.
RemovalSometimes though, you don’t realize you have a problem until you see iton the plant. In these cases, you’ll move onto the second strategy: cuttingaway infected leaves and fruit. Insects tend to be pretty slow-movingcreatures. Many bugs, such as that common villain the aphid, can bewashed or picked off plants. There are traps to remove many flyinginsects. Diseases can often be nipped in the bud (excuse the pun!) whencaught early enough, simply by removing affected leaves and fruit, andkeeping the box clean of leaf litter.
Physical removal is one of the most effective and easiest ways to head off problems at the firstsight of trouble. This strategy works for many insects as well as diseases.
TreatmentsSometimes though, a problem is a little more advanced. Where simpleremoval doesn’t take care of things, you’ll need to use the third strategy:active treatments. These include both homemade formulas, such as theever-useful garlic spray (insects of all kinds just hate it) and over-the-counter solutions.
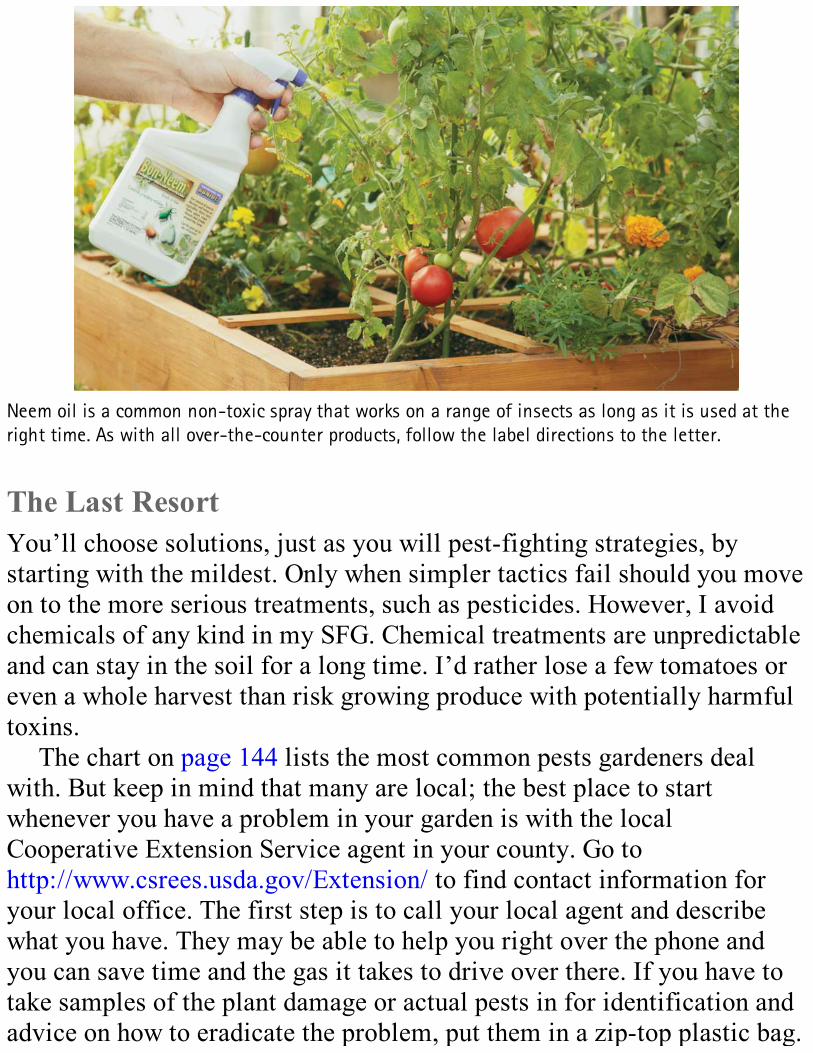
Neem oil is a common non-toxic spray that works on a range of insects as long as it is used at theright time. As with all over-the-counter products, follow the label directions to the letter.
The Last ResortYou’ll choose solutions, just as you will pest-fighting strategies, bystarting with the mildest. Only when simpler tactics fail should you moveon to the more serious treatments, such as pesticides. However, I avoidchemicals of any kind in my SFG. Chemical treatments are unpredictableand can stay in the soil for a long time. I’d rather lose a few tomatoes oreven a whole harvest than risk growing produce with potentially harmfultoxins.
The chart on page 144 lists the most common pests gardeners dealwith. But keep in mind that many are local; the best place to startwhenever you have a problem in your garden is with the localCooperative Extension Service agent in your county. Go tohttp://www.csrees.usda.gov/Extension/ to find contact information foryour local office. The first step is to call your local agent and describewhat you have. They may be able to help you right over the phone andyou can save time and the gas it takes to drive over there. If you have totake samples of the plant damage or actual pests in for identification andadvice on how to eradicate the problem, put them in a zip-top plastic bag.

To summarize pest problems, try not to worry about them. Enjoy yourgarden. If one square gets devastated, pull it up and replant it withsomething else. If you didn’t use the protective structures of Chapter 4,try them out next season to help eliminate your problems.
WHICH PLANT VARIETIES?Quite often people will ask questions like, “Which are the best varietiesof potatoes or carrots to grow in my corner of the state?” These questionscan only be answered by your local expert—the county extension agent.They are always up-to-date on all the new varieties and what grows bestin their area. Keep in mind if you have a question about any of the vinecrops, you will want to train them up a trellis, while most single-rowgardens allow them to sprawl.
SUPPORT YOUR LOCAL PLANTSSome plants, such as root crops and low-growing salad crops, need nosupport, so there is nothing to do for them. The taller crops might need alittle help, however, depending on whether they are a leaf or head croplike Swiss chard or cabbage. If a heavy wind and rain or hailstorm knocksthem over, simply straighten them up and push a little extra soil aroundthe stem.
Too Top HeavyThe plants that usually need a little support are the summer crops likepeppers, okra, eggplant, corn, and bush tomatoes. Those can easily besupported by installing nylon netting so it is suspended across the entire 4× 4 garden, held tight by four corner posts. (See Chapter 4 forconstruction details.) The same support technique will also work for tallflowers like gladiolus, giant marigolds, and tall dahlias. One of thereasons we provide plant support is the soil mix is so loose and friablethat the tall plants need a little help.

WATERINGPlants need water just like people do. Everyone asks, “How do you waterand how much?” My ideal way to water is ladling out a cup of sun-warmed water from a bucket that can be left in the sun next to yourgarden. Gently lift the bottom leaves of the plant and, with your otherhand, ladle a cup of that water into the depression around the plant. Witha saucer-shaped depression in the soil, the water will soak right down tothe roots instead of rolling away from the plant into other parts of thegarden.
We do get a few people who say, “Oh that would take too long.” Butthey’ve failed to think about the fact that, first, their garden is only afraction of the size that it used to be. That means 80 percent of thewatering you used to do is no longer needed and was actually wasted.Next, you’re not watering the tops of the plants or the leaves, so you’renot promoting fungal diseases and other problems. You’re keeping thewater where it will do the most good—around the base of the plant whereit can travel down to the root system.
The soil consistency of your Mel’s Mix is already 100 percent ofmaterials that hold moisture. When you water, it goes right into the soilaround the root system and stays there. The root system is going to beable to drink up the water in the amount and time needed. Is this a majoradvance in water conservation or what? Hello, conservationist, are youlistening?
And why sun-warmed water? One answer is that it’s for the samereason people don’t like to take a cold shower. The more scientific reasonis plants can absorb nutrients in the soil much faster and grow better ifthe soil and water temperature are warmer. In spring and late fall, sun-warmed water helps warm the soil. Remember the chart in the Appendixshowing sprouting times in various temperatures. The warmer theweather, the faster they’ll grow and the quicker you’ll harvest. That’swhy people have greenhouses. If you build a structure to form a miniaturegreenhouse around your SFG, the radiant heat from the sun will warm thesoil from the surface down. But simply pouring warm (not hot) water into

the soil means the warmth tends to go a little deeper—and even quicker—than the sun baking the surface of the soil.
A bucket of sun-warmed water is the ideal source of water for your SFG. Keep it near the box andfull, and you’ll be able to water any time you notice your Mel’s Mix is drying out.
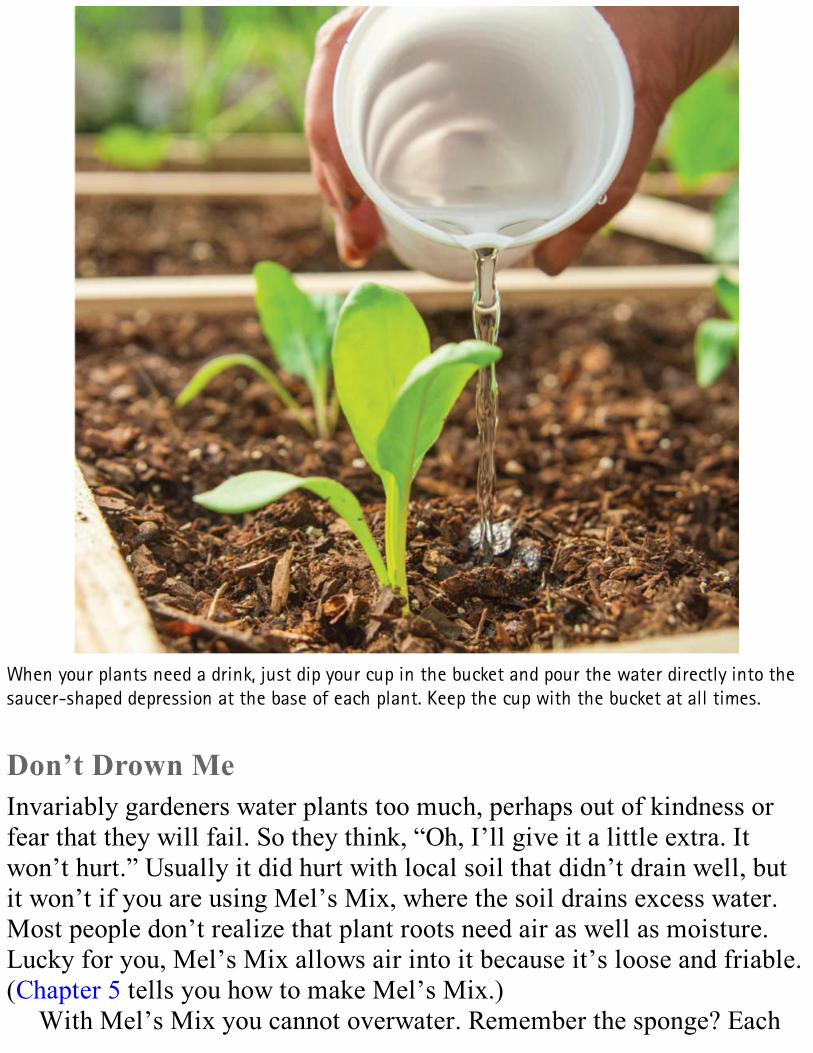
When your plants need a drink, just dip your cup in the bucket and pour the water directly into thesaucer-shaped depression at the base of each plant. Keep the cup with the bucket at all times.
Don’t Drown MeInvariably gardeners water plants too much, perhaps out of kindness orfear that they will fail. So they think, “Oh, I’ll give it a little extra. Itwon’t hurt.” Usually it did hurt with local soil that didn’t drain well, butit won’t if you are using Mel’s Mix, where the soil drains excess water.Most people don’t realize that plant roots need air as well as moisture.Lucky for you, Mel’s Mix allows air into it because it’s loose and friable.(Chapter 5 tells you how to make Mel’s Mix.)
With Mel’s Mix you cannot overwater. Remember the sponge? Each
little piece can hold moisture so a plant root can grow around that pieceand take out the moisture when needed. When that little sponge getssaturated, the rest of the water drains right out through the bottom. That’show Mel’s Mix works, and that’s why you never have to worry aboutgiving your plants too much water.
With Mel’s Mix you cannot overwater. I repeat: youcannot overwater.
But because your soil mix drains readily when saturated, it also has atendency to dry out more quickly than most garden soils. Regular soilsstay saturated, so single-row gardeners may be used to turning on thesprinkler or flooding the garden twice a week and that’s it. Your All NewSquare Foot Garden is different. You have to water a little more often andpay more attention to watering.
The secret, of course, is looking at the plants. After a while you’ll beable to walk past your 4 × 4 garden box and immediately spot any squarefoot that needs water. Perhaps the plants will be slightly wilted. Maybethey’ll be just a little droopy or their color will be a little off. You merelywater those square feet right then and there because your bucket of warmwater is always right next to your garden. And because you’re dipping acup in the bucket you’re not going to get yourself all wet and dirty.
Think of your plants in your garden the same as you do your children.If they’ve been out in the hot sun and playing hard and one of them looksa little droopy and wilted, you know right away to inspect that child alittle closer to make sure he or she is properly hydrated.
Too MuchExisting watering systems give all different types and sizes of plants thesame amount of water at the same time. This is not only very impersonal;
it’s also very inefficient. If our farmers did that we’d have watershortages all around the country. Hey, wait a minute, we do have watershortages all around the country!
“I’ve lived my life doing the backbreaking work of singlerow gardening—this is so much better!”– Gina from Kentucky
How MuchIn conclusion, only water as much as each plant needs. And the best wayto tell is from experience—the same way you know your child needs adrink. Yes, it does take a little bit of experience to raise a family, butgaining this experience brings a lot of pleasure.
ALTERNATE WATERING METHODSA HoseFor those who want to use a more traditional method, there is always thehose. Yes, it’s a nuisance to get out or put away, and in row gardening italways seemed to be knocking plants down as it has to be dragged aroundthe garden. Another advantage to SFG boxes is the hose won’t do thatanymore as the box corners keep the hose from crushing the plants.
If you do use a hose, make sure you have one of those shut-off valvesright at the end of the hose so you have complete control of the force andamount of the water. There are many short and long extension handwands that come with a spray nozzle. This also allows you to waterdirectly under your plants, and the nozzle on the end of the wand can bepoked down and worked around the lower leaves of the plant so that mostof the plant remains dry.
Leave an extra length of hose coiled in the sun to help warm the water

up a little, maybe just to take the chill off tap water, but you have to becareful at the start if it’s hot out and a hose full of water has been layingin the sun for some time. You don’t want the water to be too hot. Do whatyou do when giving the baby a bottle—test the water on your wrist.
NURTURE YOUR PLANTS
I suggest watering by hand because it allows you the time to nurtureyour plants. You’re able to stop and notice how your plants aregrowing. You can appreciate their beauty and color, notice theirblossoms and fruit. It tells you when the plant is going to be ready forharvest. It’s a satisfying feeling to work in your garden with each plant.You’re not standing off in the distance with a hose, which is veryimpersonal. You’re not opening a big valve and letting the sprinklersystem take over or the irrigation water come in. (And guess what?Irrigation water is filled with weed seeds. Have you folks who live instates that irrigate ever wondered why you have to weed your single-row garden so often?) Even a drip irrigation system is impersonal—though, I must admit, efficient.
Drip, Drip, DripA very efficient way to water your SFG is with a drip irrigation system. Iknow it was designed for row gardeners, but it can be adapted for SFGjust as easily. The only problem I have is it sort of takes away thenurturing and close attention paid to your plants. If you just turn a valveor worse yet, a mechanical timer turns the water on and off, you never getclose to your plants and they will miss you. But I must admit the wateringgets done very efficiently and effectively. Try running small soaker tubesspaced every 6 inches the length of your box for complete coverage ofevery square foot.
Lawn Sprinkler SystemsSome people tell me they have located their SFG on the lawn, and theyhave an underground sprinkler system that goes on and off automatically.What should they do, they ask? What can you do—rip up the lawn or turnoff the system? No, you just live with it. I tell them to make do with whatthey have and just keep a bucket or two around for special plants as
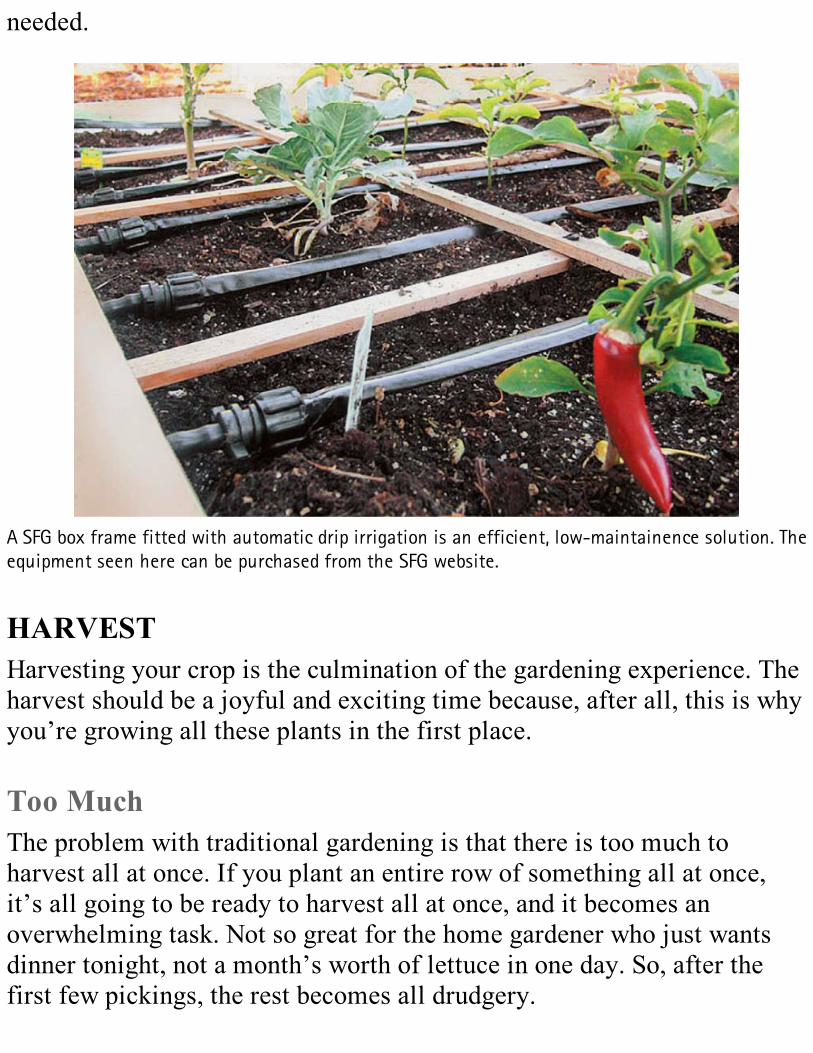
needed.
A SFG box frame fitted with automatic drip irrigation is an efficient, low-maintainence solution. Theequipment seen here can be purchased from the SFG website.
HARVESTHarvesting your crop is the culmination of the gardening experience. Theharvest should be a joyful and exciting time because, after all, this is whyyou’re growing all these plants in the first place.
Too MuchThe problem with traditional gardening is that there is too much toharvest all at once. If you plant an entire row of something all at once,it’s all going to be ready to harvest all at once, and it becomes anoverwhelming task. Not so great for the home gardener who just wantsdinner tonight, not a month’s worth of lettuce in one day. So, after thefirst few pickings, the rest becomes all drudgery.
Control That PlantingEverything is different with a SFG. Now, every time you begin to plantsomething in your SFG, look the item up in your SFG book to find howmany to plant per square foot. Prepare the soil, smooth it out, do the zip,zap, bing, bing, bing, bing to mark the spacing. Now, select the varietiesyou want from your seeds, pour some into the palm of one hand, andplant a pinch in each hole. As you smooth the soil over the seeds, waterwith a fine spray. Then ask yourself, “Do I want any more than sixteenradishes all at once? They’ll be ready in four weeks and they’ll all cometo harvest within one week.” Usually the answer is “No. I really don’twant any more than this. I’ll wait a week or two to plant another squarefoot of radishes somewhere else.” Right then and there you can see one ofthe huge advantages of your grid establishing boundaries and SFG givingyou automatic control—simple and easy.
Remember that the SFG theory is to visualize the harvest. Askyourself, “How much do I need for one or two weeks?” Then only plantthat much. It takes about a minute.
A Little of This, A Little of ThatYou don’t have to wait for the plant to mature to its maximum size. Goout at harvest time (which might be a half an hour before lunch or dinner)with your pair of scissors and a small basket or salad bowl, and cut off afew outer leaves, perhaps one from each plant. To harvest a varied salad,just take four lettuce leaves, parsley leaves from another, and perhapsbeet greens from another. Each square may contain a different variety andcolor of lettuce. You might pull one radish and one carrot, even thoughthey’ve only grown to half size, wash them off in your bucket of sun-warmed water, put the tops in the compost bin, and then continue aroundyour Square Foot Garden taking just a little bit here and a little bit thereof this and that. Soon your harvest basket is full and you look at yourgarden and cannot even see that anything is missing.
Snip, SnipContinually harvest any type of leafy vegetable—like leaf lettuce orSwiss chard—by snipping a little here and a little there throughout theseason. This can’t go on forever because the plant, especially coolweather plants, will eventually go to seed. When it sends up a seed stalk,the plant has completed its growing season and its use for harvesting.Take one last harvest, remove what’s left over, and prepare that squarefoot for replanting—unless you want the kids to see how a lettuce orradish plant produces seed.
“I had always been a little afraid of composting, but Melmakes everything so logical and easy to understand.”– Karen from Utah
HARVEST AND REPLANTWith Square Foot Gardening, you’re only dealing with 1 square foot at atime. To paraphrase the words of Dr. Robert Schuller, “Inch by inch,anything’s a cinch.” With SFG, our saying is going to be “square bysquare, you’ll soon be there.” As soon as you finish harvesting 1 squarefoot, it’s time to prepare the soil and plant a new crop. Just take out anydebris like dead leaves, stems, or roots—you can place these in yourcompost bin—then add a trowel full of compost (hopefully it’shomemade) to the square, turn the soil over with the trowel, smooth itover, and you’re ready to replant. You can do all of that in 60 seconds!
ReplantingNow it’s getting more interesting and fun because you will be able tochoose what you want to replant in every single square foot all throughthe garden season. Remember, you can get at least three crops a year in
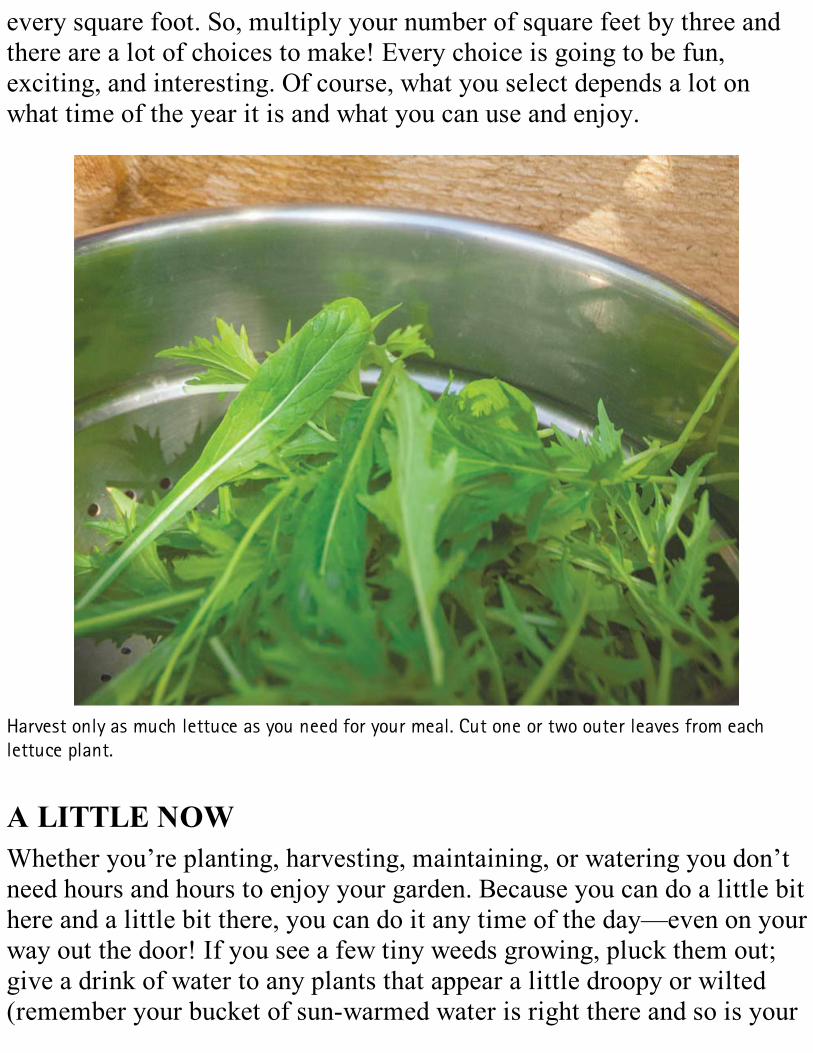
every square foot. So, multiply your number of square feet by three andthere are a lot of choices to make! Every choice is going to be fun,exciting, and interesting. Of course, what you select depends a lot onwhat time of the year it is and what you can use and enjoy.
Harvest only as much lettuce as you need for your meal. Cut one or two outer leaves from eachlettuce plant.
A LITTLE NOWWhether you’re planting, harvesting, maintaining, or watering you don’tneed hours and hours to enjoy your garden. Because you can do a little bithere and a little bit there, you can do it any time of the day—even on yourway out the door! If you see a few tiny weeds growing, pluck them out;give a drink of water to any plants that appear a little droopy or wilted(remember your bucket of sun-warmed water is right there and so is your
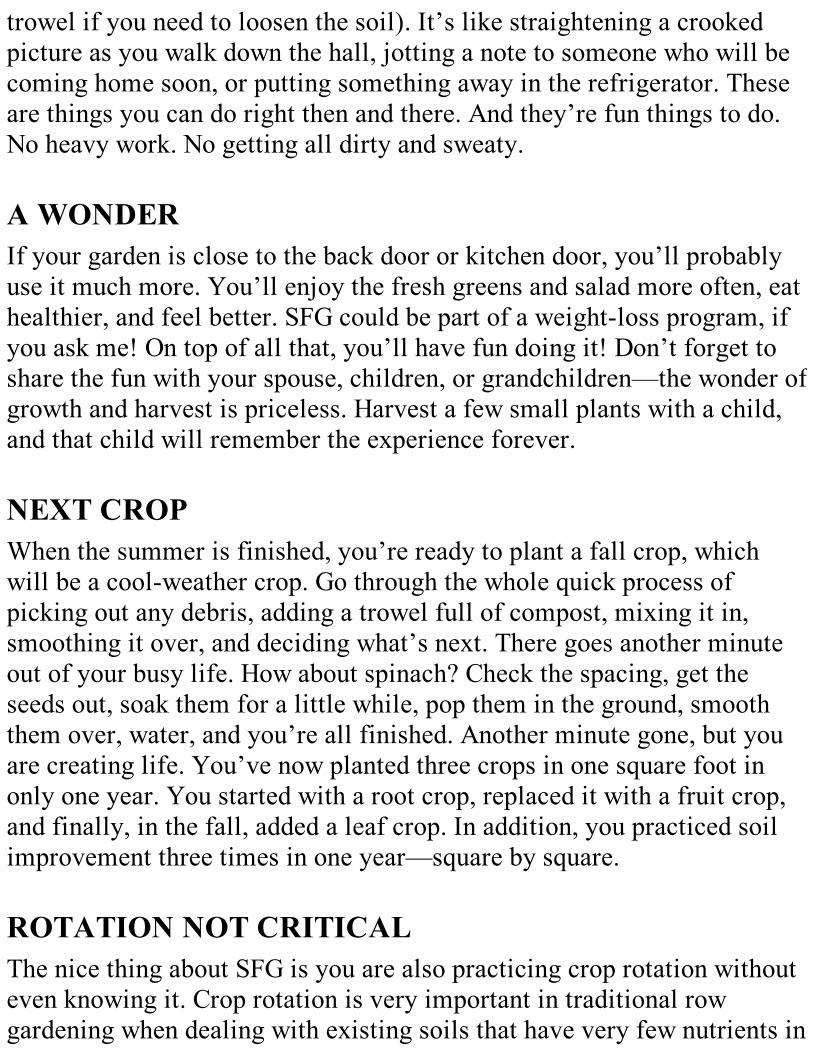
trowel if you need to loosen the soil). It’s like straightening a crookedpicture as you walk down the hall, jotting a note to someone who will becoming home soon, or putting something away in the refrigerator. Theseare things you can do right then and there. And they’re fun things to do.No heavy work. No getting all dirty and sweaty.
A WONDERIf your garden is close to the back door or kitchen door, you’ll probablyuse it much more. You’ll enjoy the fresh greens and salad more often, eathealthier, and feel better. SFG could be part of a weight-loss program, ifyou ask me! On top of all that, you’ll have fun doing it! Don’t forget toshare the fun with your spouse, children, or grandchildren—the wonder ofgrowth and harvest is priceless. Harvest a few small plants with a child,and that child will remember the experience forever.
NEXT CROPWhen the summer is finished, you’re ready to plant a fall crop, whichwill be a cool-weather crop. Go through the whole quick process ofpicking out any debris, adding a trowel full of compost, mixing it in,smoothing it over, and deciding what’s next. There goes another minuteout of your busy life. How about spinach? Check the spacing, get theseeds out, soak them for a little while, pop them in the ground, smooththem over, water, and you’re all finished. Another minute gone, but youare creating life. You’ve now planted three crops in one square foot inonly one year. You started with a root crop, replaced it with a fruit crop,and finally, in the fall, added a leaf crop. In addition, you practiced soilimprovement three times in one year—square by square.
ROTATION NOT CRITICALThe nice thing about SFG is you are also practicing crop rotation withouteven knowing it. Crop rotation is very important in traditional rowgardening when dealing with existing soils that have very few nutrients in
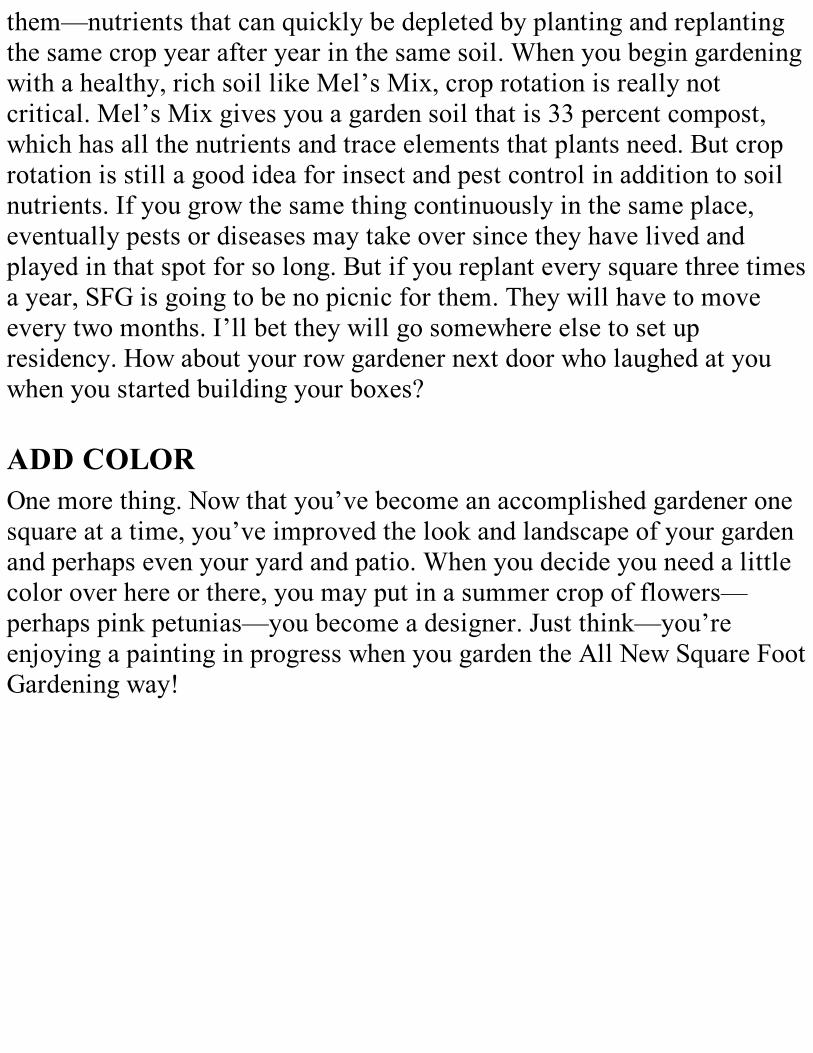
them—nutrients that can quickly be depleted by planting and replantingthe same crop year after year in the same soil. When you begin gardeningwith a healthy, rich soil like Mel’s Mix, crop rotation is really notcritical. Mel’s Mix gives you a garden soil that is 33 percent compost,which has all the nutrients and trace elements that plants need. But croprotation is still a good idea for insect and pest control in addition to soilnutrients. If you grow the same thing continuously in the same place,eventually pests or diseases may take over since they have lived andplayed in that spot for so long. But if you replant every square three timesa year, SFG is going to be no picnic for them. They will have to moveevery two months. I’ll bet they will go somewhere else to set upresidency. How about your row gardener next door who laughed at youwhen you started building your boxes?
ADD COLOROne more thing. Now that you’ve become an accomplished gardener onesquare at a time, you’ve improved the look and landscape of your gardenand perhaps even your yard and patio. When you decide you need a littlecolor over here or there, you may put in a summer crop of flowers—perhaps pink petunias—you become a designer. Just think—you’reenjoying a painting in progress when you garden the All New Square FootGardening way!
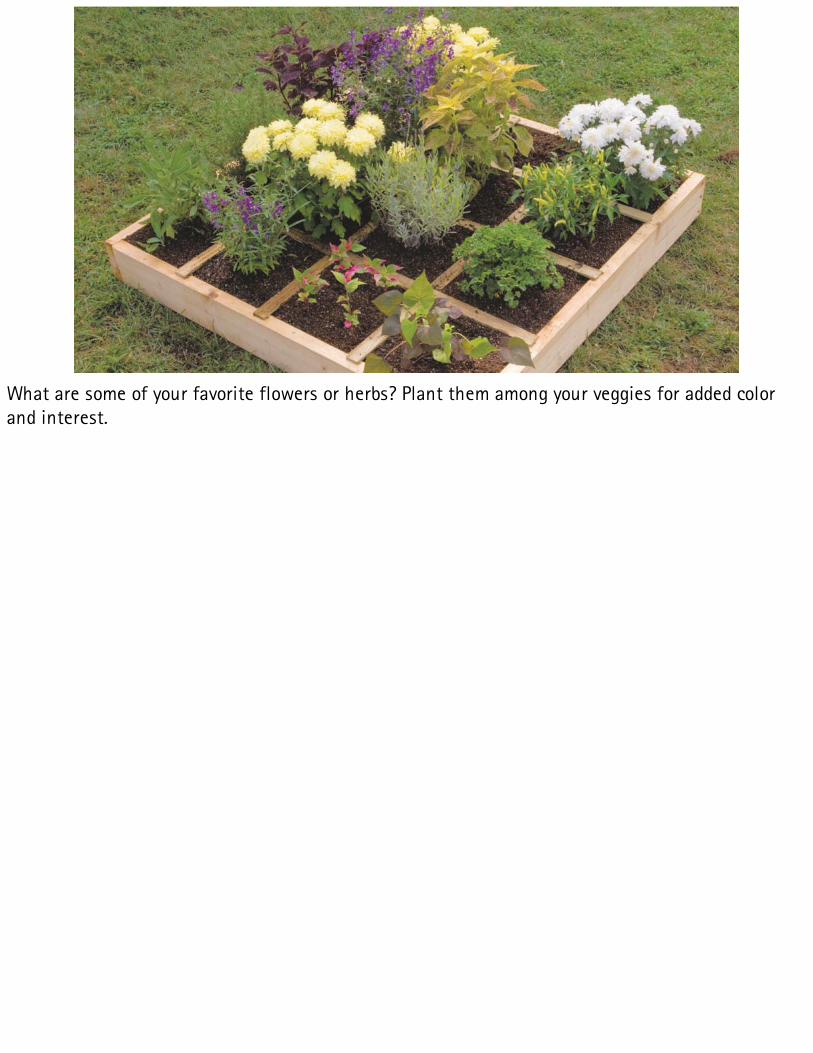
What are some of your favorite flowers or herbs? Plant them among your veggies for added colorand interest.

8
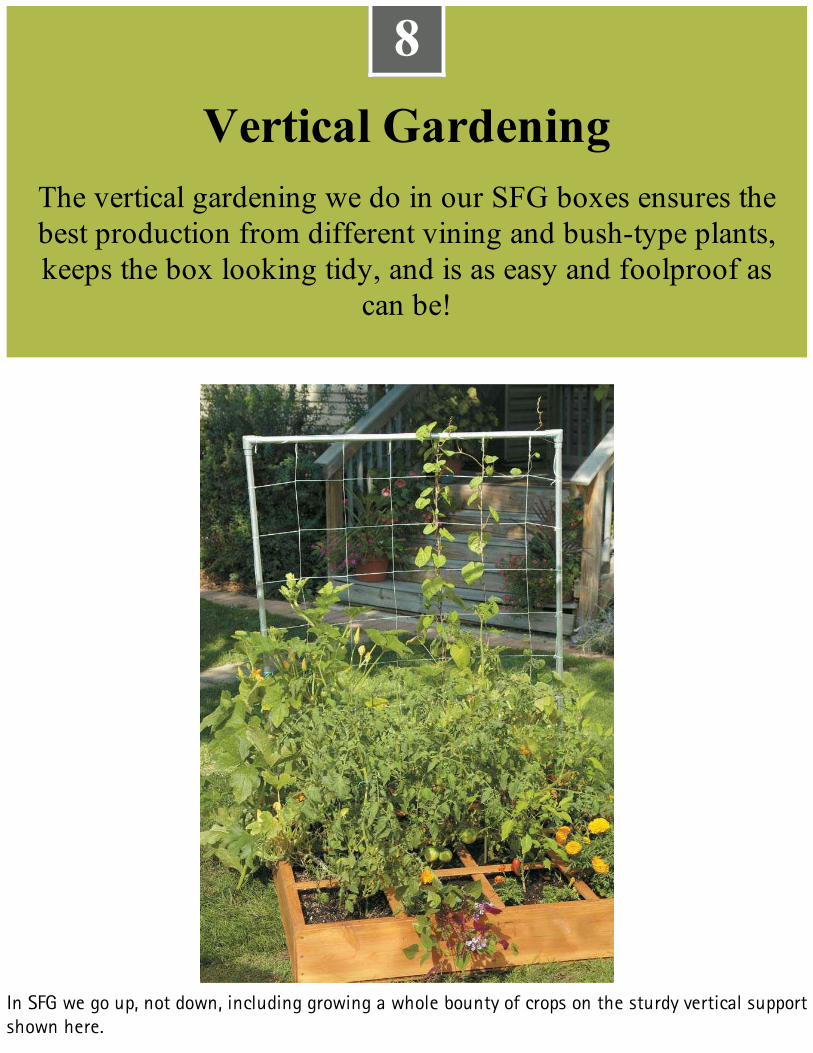
8Vertical Gardening
The vertical gardening we do in our SFG boxes ensures thebest production from different vining and bush-type plants,keeps the box looking tidy, and is as easy and foolproof as
can be!
In SFG we go up, not down, including growing a whole bounty of crops on the sturdy vertical supportshown here.
Gardening with SupportBy now, you might feel that the 80 percent reduction in size, theno fertilizer needed, the growing in only 6 inches of Mel’s Mix,or even the no digging of your existing soil ever again are allthat you could ask from your All New Square Foot Garden.
In addition, you might say that most people would think that all of theabove is amazing and earth-shattering (well, okay, how about justimpressive), but this topic, “Vertical Gardening,” is downrightspectacular.
HOW IT HAPPENEDHere’s a quick flashback to 1976 when this retired engineer took upgardening. I developed SFG but as I looked at tomato plants growing inpots on decks and in single-row gardens, I knew my work wasn’tcomplete. Tomatoes are not only America’s favorite vegetable to grow,but they also take up the most room and cause quite an unsightly mess bythe end of the season if they are allowed to sprawl all over the ground.There are also the complaints of slugs getting in and ruining all of thetomatoes as well as gardeners stepping all over the vines and crushingthem when trying to harvest the fruit. The whole idea of growingtomatoes this way seems very non-productive. At the time, the only cagesavailable were too short and too weak to solve the problem.
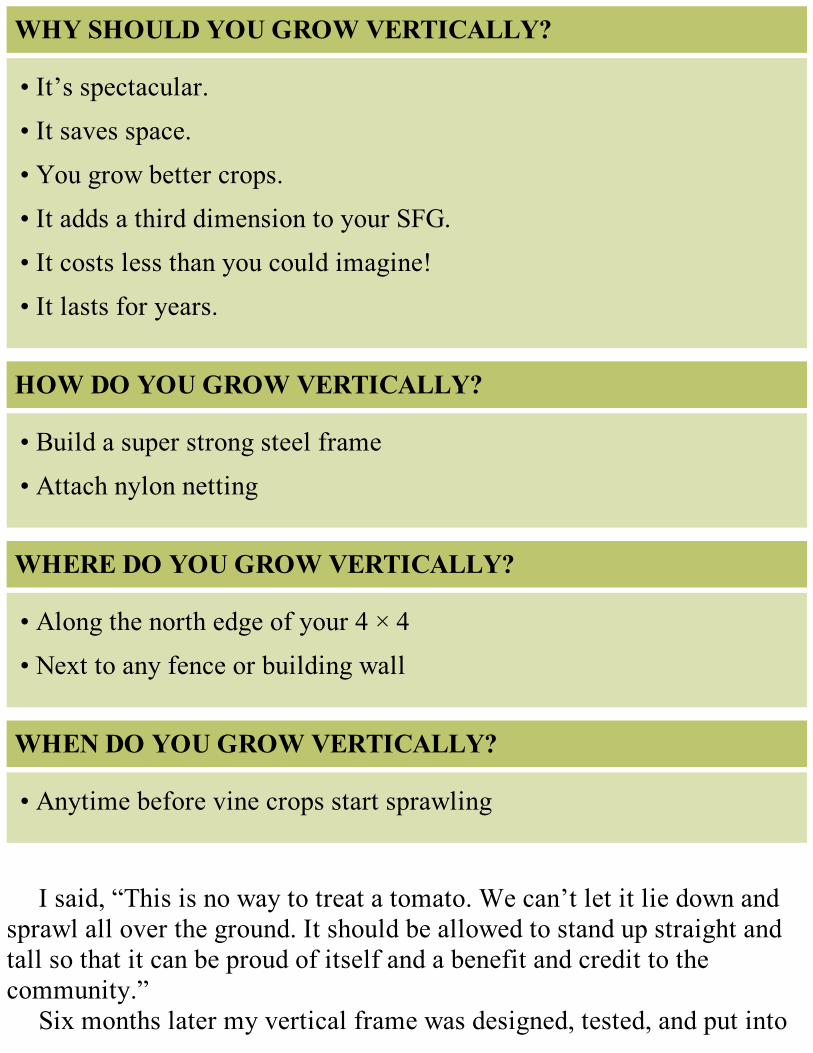
WHY SHOULD YOU GROW VERTICALLY?
• It’s spectacular.
• It saves space.
• You grow better crops.
• It adds a third dimension to your SFG.
• It costs less than you could imagine!
• It lasts for years.
HOW DO YOU GROW VERTICALLY?
• Build a super strong steel frame
• Attach nylon netting
WHERE DO YOU GROW VERTICALLY?
• Along the north edge of your 4 × 4
• Next to any fence or building wall
WHEN DO YOU GROW VERTICALLY?
• Anytime before vine crops start sprawling
I said, “This is no way to treat a tomato. We can’t let it lie down andsprawl all over the ground. It should be allowed to stand up straight andtall so that it can be proud of itself and a benefit and credit to thecommunity.”
Six months later my vertical frame was designed, tested, and put into
operation. It was an All-American model made from rigid German steelconduit and Japanese twine. It was so strong that it held up through rain,sleet, snow, and heavy September storms when the tomato plant filled theentire frame and was loaded with red, ripe tomatoes.
“I couldn’t believe the amount of vegetables it raised.”– Dan from Texas
After growing tomatoes this unique and attractive way for severalyears, I began thinking about the other vine crops that spread all over thegarden. Could they be grown the same way? First I tried pole beans (a no-brainer), then cucumbers and peas. Then even winter and summer squash.They all worked and grew well, and they looked just great growing on avertical frame. And I was so pleased with the results of growing vinecrops this new way that I said, “This is a good thing,” and included themethod in my first book on SFG.
But since then—Wow! You should see the vertical gardens now. Thepumpkins, all kinds of melons (including the new smaller watermelons),and all of the really big squashes grow 7 feet in the air.
VERTICAL GARDENINGA few years ago at our display gardens in Utah, we were growing 35-pound pumpkins 7 feet in the air. We made the vertical frames 8 feetabove the ground for no other reason than we wanted to show off anddemonstrate how tall they can be! Now this was a spectacular sight, andmany people have wanted to know how they could accomplish this samefeat in their own backyard.
We usually refer to vertical gardening as “Advanced SFG.” But, really,as soon as you master the basics of Square Foot Gardening, you can enjoygrowing crops vertically. And you will be the envy of the neighborhood
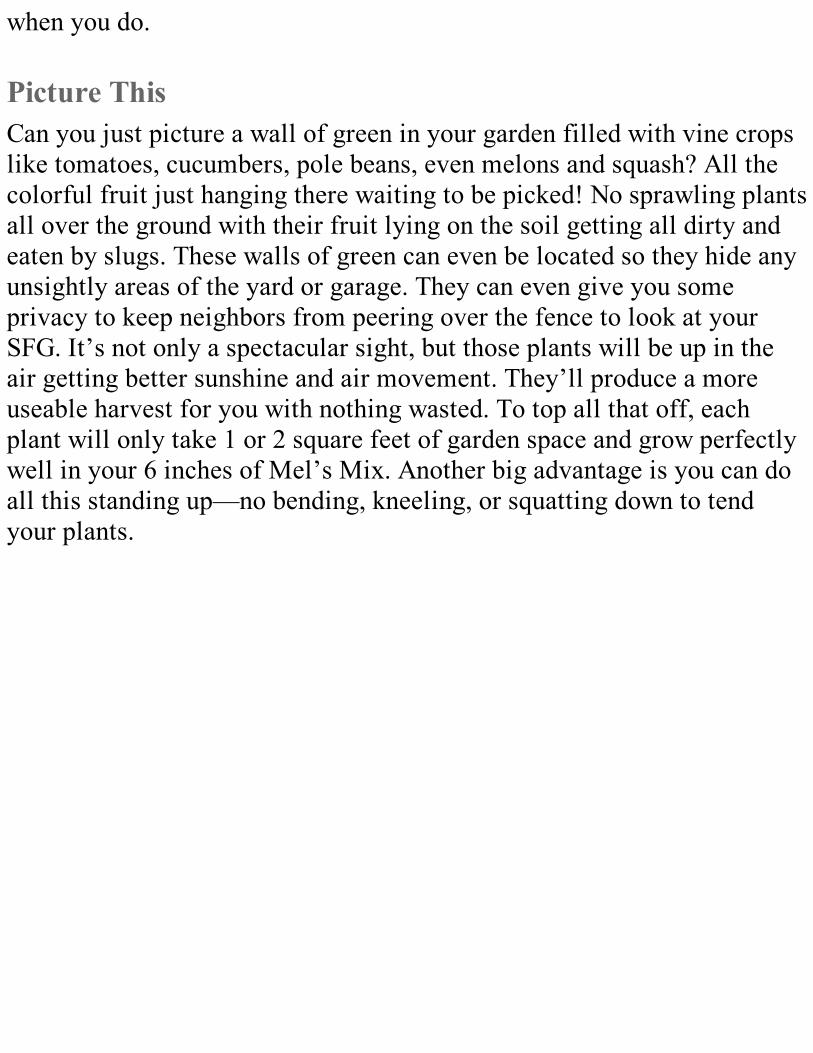
when you do.
Picture ThisCan you just picture a wall of green in your garden filled with vine cropslike tomatoes, cucumbers, pole beans, even melons and squash? All thecolorful fruit just hanging there waiting to be picked! No sprawling plantsall over the ground with their fruit lying on the soil getting all dirty andeaten by slugs. These walls of green can even be located so they hide anyunsightly areas of the yard or garage. They can even give you someprivacy to keep neighbors from peering over the fence to look at yourSFG. It’s not only a spectacular sight, but those plants will be up in theair getting better sunshine and air movement. They’ll produce a moreuseable harvest for you with nothing wasted. To top all that off, eachplant will only take 1 or 2 square feet of garden space and grow perfectlywell in your 6 inches of Mel’s Mix. Another big advantage is you can doall this standing up—no bending, kneeling, or squatting down to tendyour plants.
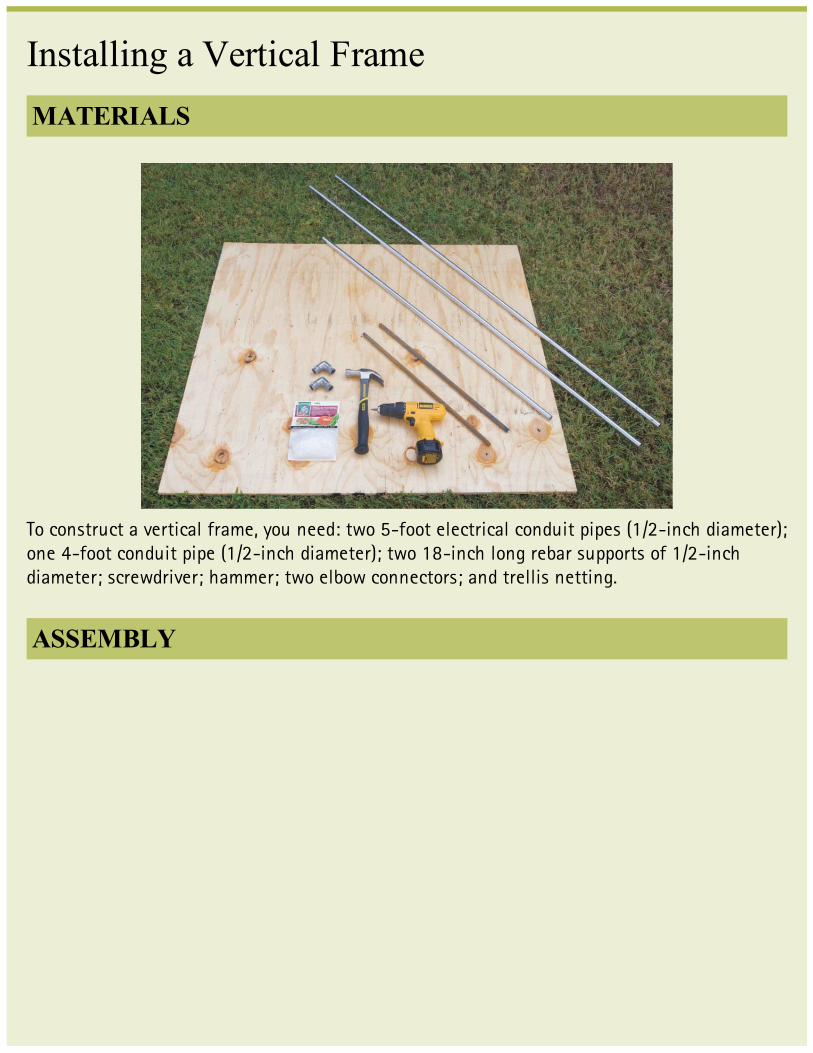
Installing a Vertical FrameMATERIALS
To construct a vertical frame, you need: two 5-foot electrical conduit pipes (1/2-inch diameter);one 4-foot conduit pipe (1/2-inch diameter); two 18-inch long rebar supports of 1/2-inchdiameter; screwdriver; hammer; two elbow connectors; and trellis netting.
ASSEMBLY

Once you’ve attached the elbow connectors to your 4-foot conduit pipe, lay it against thenorth-facing board of your SFG. Next, hammer the rebar where the elbows are located. You’llwant to drive the rebar in about half its height.
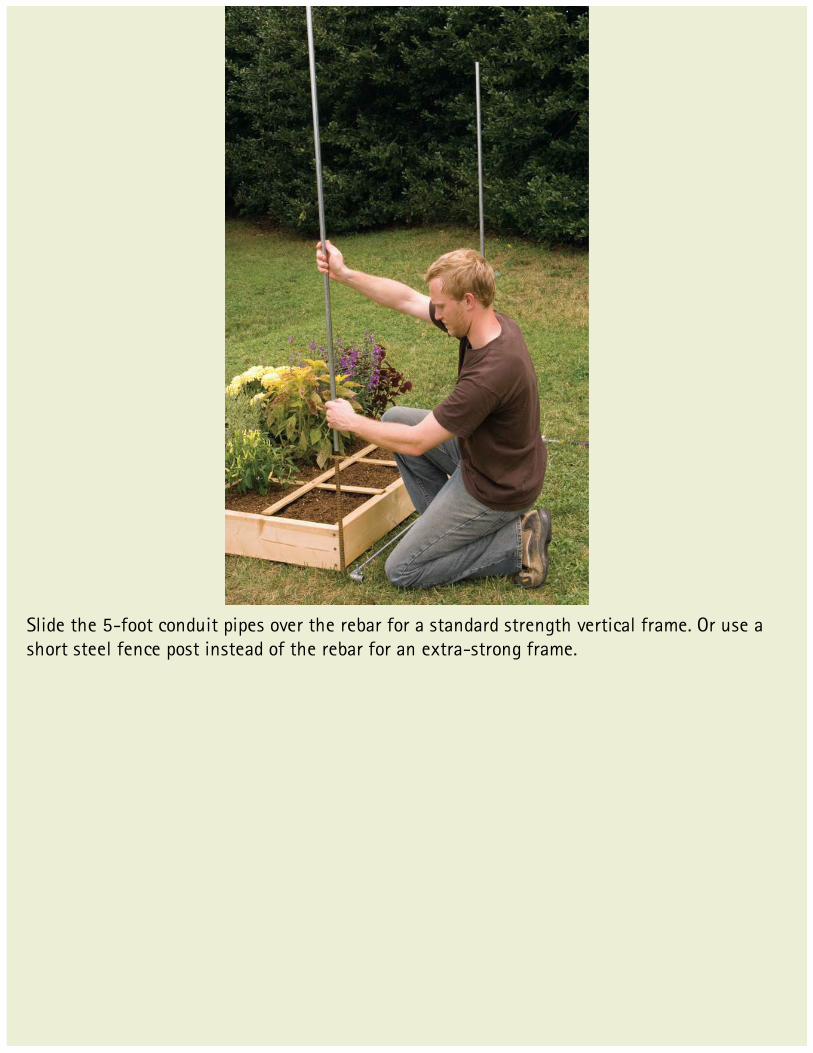
Slide the 5-foot conduit pipes over the rebar for a standard strength vertical frame. Or use ashort steel fence post instead of the rebar for an extra-strong frame.

Attach the top conduit to the legs and tighten the screws in the elbows.
CONSTRUCTING SUPPORTSI experimented through the years with all different types of materials andframes, and I finally settled upon one that was so simple, easy, andinexpensive to use that it was almost ridiculous.
I found that electrical conduit is the cheapest, strongest, and bestmaterial to use for the vertical supports. I do not like PVC pipe or woodbecause it eventually will bend and break and destroy your whole verticalgarden. When you first build and plant a vertical frame out of just aboutanything, it looks sturdy and strong. But, near the end of the growing

season, when your plants have grown to the top and filled up all the openspaces, that frame acts like a sail on a boat. Just when your tomatoes aregetting ripe and ready to pick, along comes a late summer storm with lotsof wind and rain, and the next thing you know the whole thing is flat onthe ground.
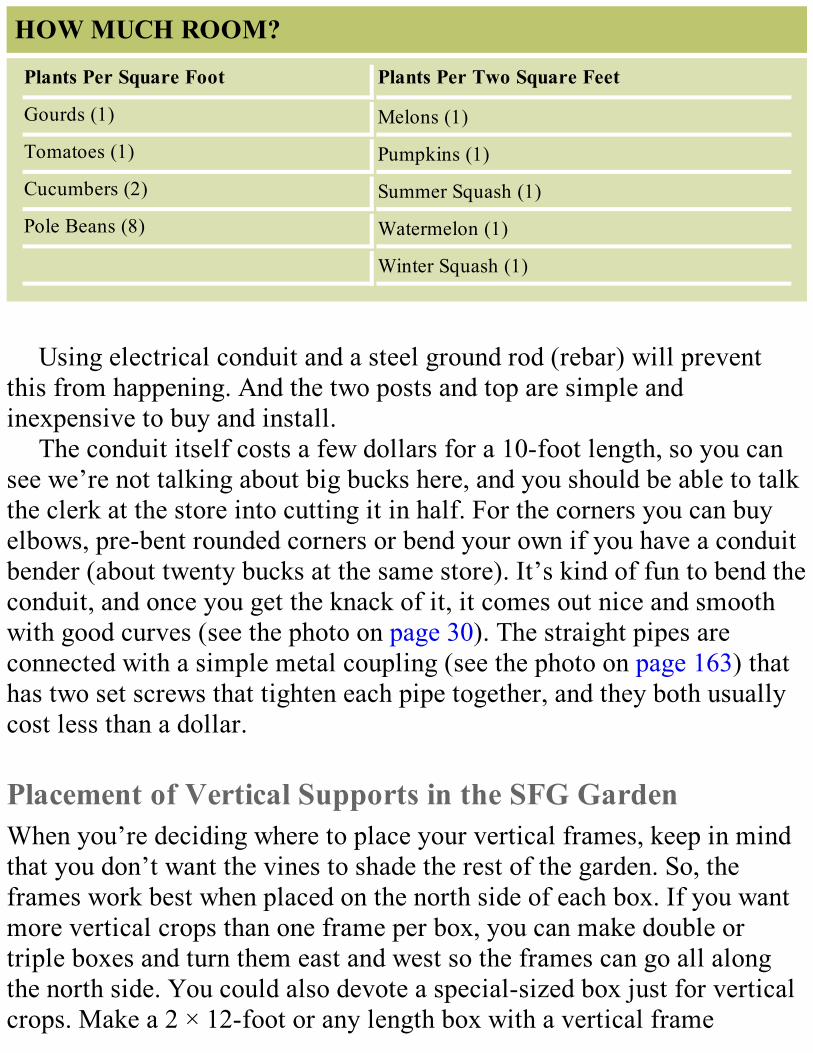
HOW MUCH ROOM?
Plants Per Square Foot Plants Per Two Square Feet
Gourds (1) Melons (1)
Tomatoes (1) Pumpkins (1)
Cucumbers (2) Summer Squash (1)
Pole Beans (8) Watermelon (1)
Winter Squash (1)
Using electrical conduit and a steel ground rod (rebar) will preventthis from happening. And the two posts and top are simple andinexpensive to buy and install.
The conduit itself costs a few dollars for a 10-foot length, so you cansee we’re not talking about big bucks here, and you should be able to talkthe clerk at the store into cutting it in half. For the corners you can buyelbows, pre-bent rounded corners or bend your own if you have a conduitbender (about twenty bucks at the same store). It’s kind of fun to bend theconduit, and once you get the knack of it, it comes out nice and smoothwith good curves (see the photo on page 30). The straight pipes areconnected with a simple metal coupling (see the photo on page 163) thathas two set screws that tighten each pipe together, and they both usuallycost less than a dollar.
Placement of Vertical Supports in the SFG GardenWhen you’re deciding where to place your vertical frames, keep in mindthat you don’t want the vines to shade the rest of the garden. So, theframes work best when placed on the north side of each box. If you wantmore vertical crops than one frame per box, you can make double ortriple boxes and turn them east and west so the frames can go all alongthe north side. You could also devote a special-sized box just for verticalcrops. Make a 2 × 12-foot or any length box with a vertical frame
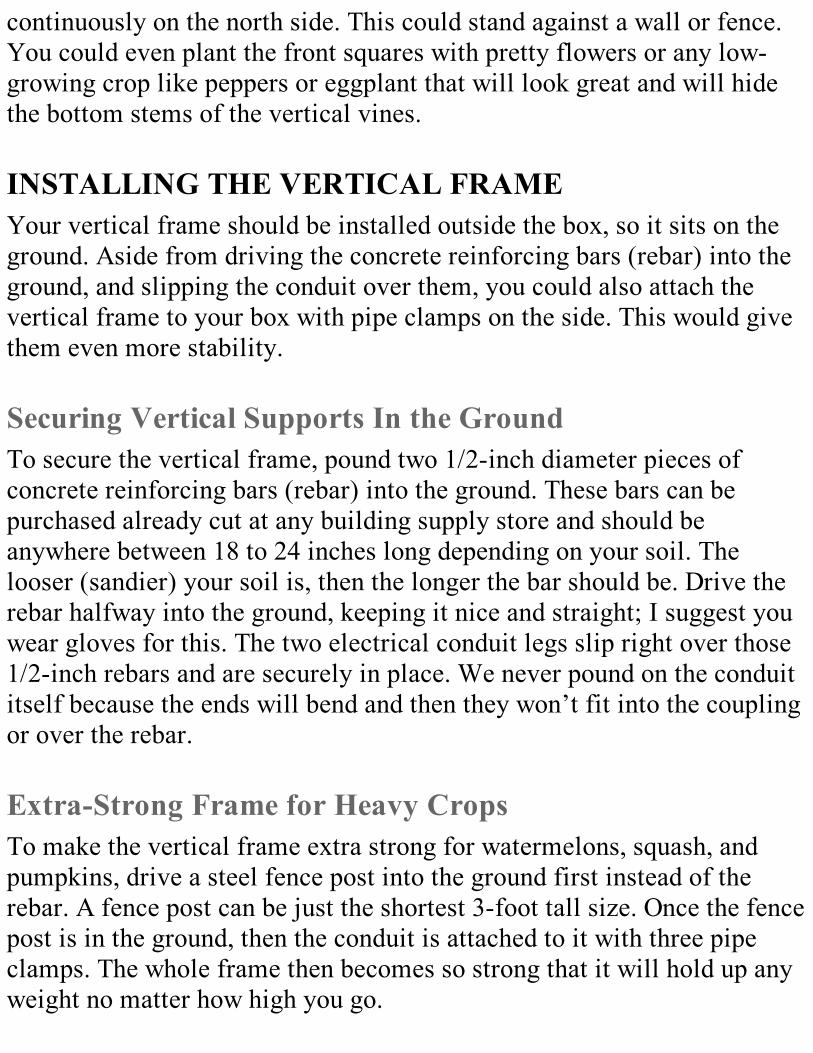
continuously on the north side. This could stand against a wall or fence.You could even plant the front squares with pretty flowers or any low-growing crop like peppers or eggplant that will look great and will hidethe bottom stems of the vertical vines.
INSTALLING THE VERTICAL FRAMEYour vertical frame should be installed outside the box, so it sits on theground. Aside from driving the concrete reinforcing bars (rebar) into theground, and slipping the conduit over them, you could also attach thevertical frame to your box with pipe clamps on the side. This would givethem even more stability.
Securing Vertical Supports In the GroundTo secure the vertical frame, pound two 1/2-inch diameter pieces ofconcrete reinforcing bars (rebar) into the ground. These bars can bepurchased already cut at any building supply store and should beanywhere between 18 to 24 inches long depending on your soil. Thelooser (sandier) your soil is, then the longer the bar should be. Drive therebar halfway into the ground, keeping it nice and straight; I suggest youwear gloves for this. The two electrical conduit legs slip right over those1/2-inch rebars and are securely in place. We never pound on the conduititself because the ends will bend and then they won’t fit into the couplingor over the rebar.
Extra-Strong Frame for Heavy CropsTo make the vertical frame extra strong for watermelons, squash, andpumpkins, drive a steel fence post into the ground first instead of therebar. A fence post can be just the shortest 3-foot tall size. Once the fencepost is in the ground, then the conduit is attached to it with three pipeclamps. The whole frame then becomes so strong that it will hold up anyweight no matter how high you go.
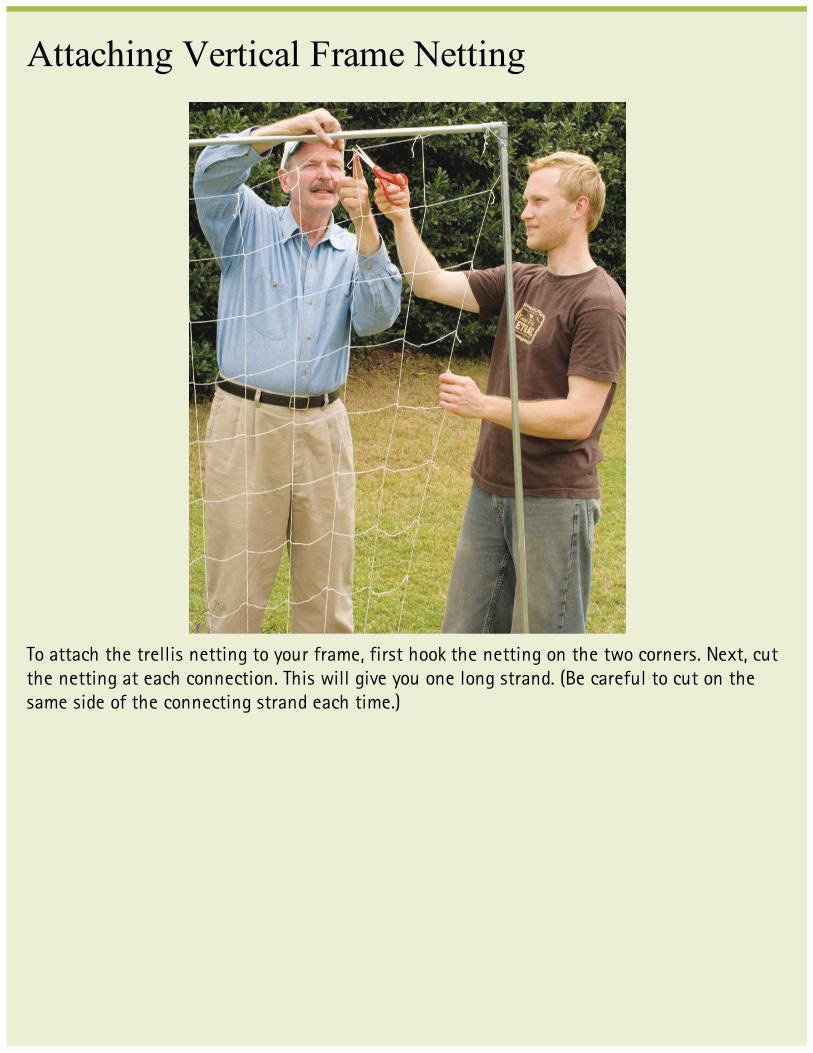
Attaching Vertical Frame Netting
To attach the trellis netting to your frame, first hook the netting on the two corners. Next, cutthe netting at each connection. This will give you one long strand. (Be careful to cut on thesame side of the connecting strand each time.)
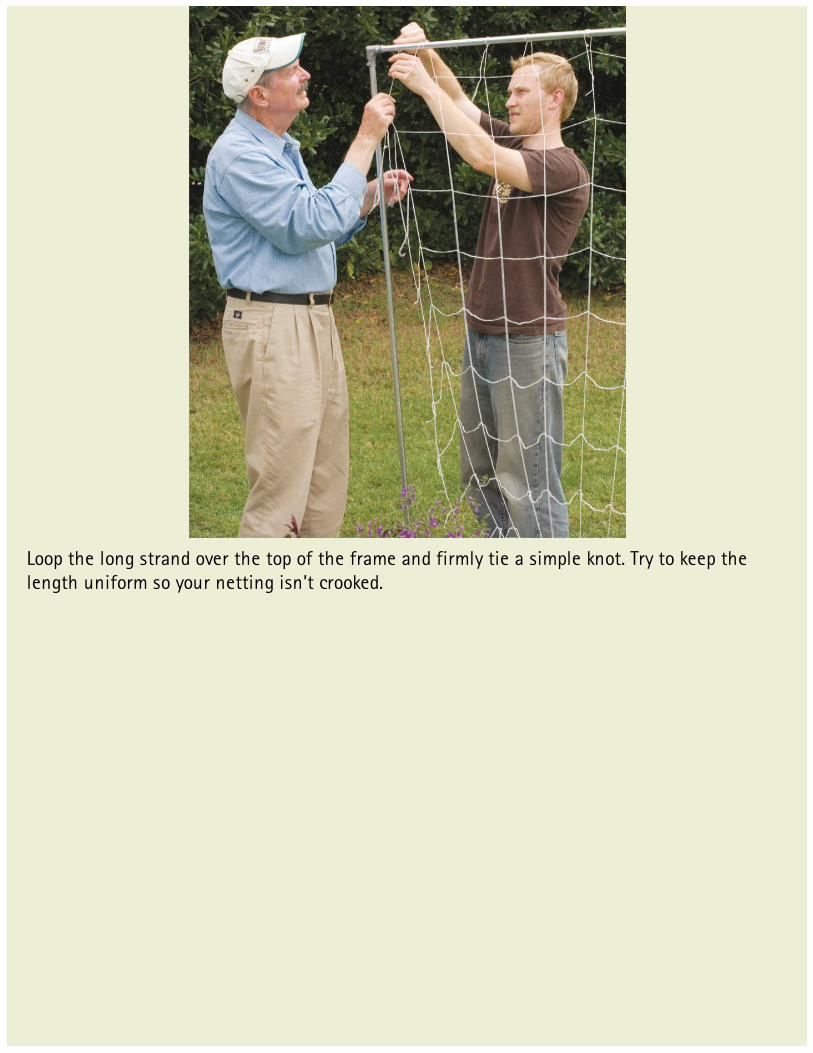
Loop the long strand over the top of the frame and firmly tie a simple knot. Try to keep thelength uniform so your netting isn’t crooked.
Make the same cuts down the sides of the frame and firmly tie knots around the supportingpipes.
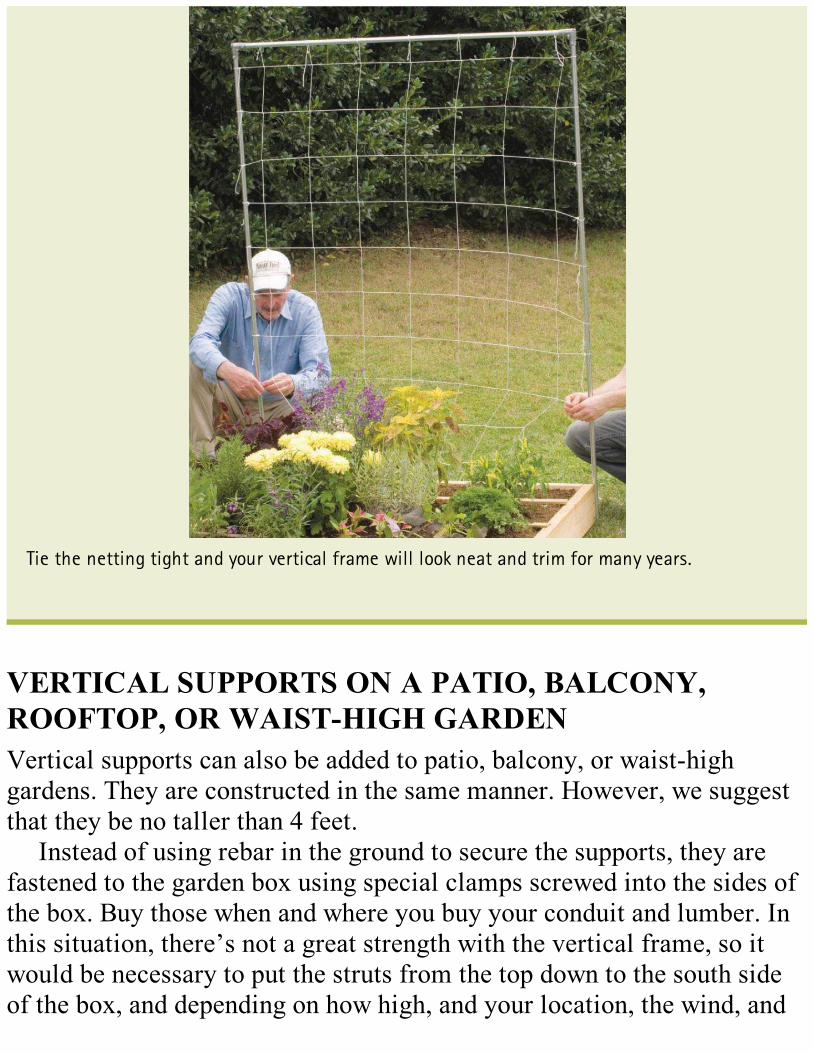
Tie the netting tight and your vertical frame will look neat and trim for many years.
VERTICAL SUPPORTS ON A PATIO, BALCONY,ROOFTOP, OR WAIST-HIGH GARDENVertical supports can also be added to patio, balcony, or waist-highgardens. They are constructed in the same manner. However, we suggestthat they be no taller than 4 feet.
Instead of using rebar in the ground to secure the supports, they arefastened to the garden box using special clamps screwed into the sides ofthe box. Buy those when and where you buy your conduit and lumber. Inthis situation, there’s not a great strength with the vertical frame, so itwould be necessary to put the struts from the top down to the south sideof the box, and depending on how high, and your location, the wind, and
the plant growth, you might have to provide additional support, such asguy wires.
NYLON NETTING ON THE SUPPORTSNow that the vertical frame has been constructed, it is time to addsomething for the plants to grow on. I used to use either special wide-opening fencing or good strong synthetic twine or cord, but then alongcame this beautiful, soft, indestructible nylon netting with large openingsyou can reach through. This nylon garden netting is now the only materialI use for vertical gardening. It’s white, keeps its color, can’t be broken,will last forever, and is easy to work with. The netting is tied tightly andsecurely to the top and sides of the vertical frame, and the plants can thenbe gently woven in and out of the netting as they grow. The netting comesin 4- and 5-foot widths and various lengths and is available at mostgarden centers and catalogs. When we teach our classes, it is always funto ask two of the strongest men to come up front and try to break thenetting; they just can’t do it!
At least once a week, gently take the new growth on yourvertical crops, and carefully weave it in and out of thenetting. The wide squares in the netting make it easy toreach through and guide your plants without breakingthem.
ARBORS AND WALKWAYSIf an upside-down, U-shaped metal vertical frame works so well for onebox, just think of all the various shapes, sizes, and arrangements you canmake with more vertical frames.
You can put two together in a straight line, turn a corner, or even
zigzag. You can put four together to form an arbor. You can put nettingon two sides so it’s a walk-through, on three sides so it’s a sitting area, oron four sides with one little opening for the kids to play in. That would bea secret place, and you could put netting across the top or run two sets ofvertical frames down a pathway, creating a wall. You could even create awhole maze with dead ends, turns, and twists. All of the types of plantsthat would grow on it produce huge leaves, and make a very interestingvisual pattern for your yard.
And don’t forget vining flowers. If you want something that bloomsevery year with little care required, instead of an annual vine, you mightwant to plant something more permanent like a perennial flower such asclematis, honeysuckle, climbing roses, trumpet vine, or thumbelina.Another good summer vining crop is New Zealand spinach. If you hadlong walkways with the vertical frames down each side, you could build2-foot-by-any-length boxes and have them on the outside giving youplenty of walking room. You could also put them so that 1 foot is insidethe path, and 1 foot is outside. I would plant the vine crops on the outsideso they would climb up the netting, and plant flowers along the insidethat will do well in the eventual shade of the pathway—perhapssomething like impatiens or coleus.
PLANTS THAT GROW VERTICALLYSeed packets and catalogs often do not indicate whether a variety is avining or bush type. The seed companies are constantly changing andadding new varieties, and in order to find out the best ones that vine, Iwould suggest that you call (if they have a toll-free number) or e-mail thevarious seed companies to find out. Tell them you are doing Square FootGardening and want to grow crops vertically and that you want to knowwhich of their varieties are vines which need trellising and support.
Planting Seeds or TransplantsRemember, tomatoes are the only vine crop you cannot start as a seed
directly in the garden. They take so long to grow into a sizeable plant thatin most cases we have to grow or buy transplants to put into the garden assoon as the last frost of spring is over. The rest of the vine crops can bestarted from seed directly in the garden. The seed planting chart in theAppendix shows when to plant them at the best time, and Chapter 9shows you how to start the season earlier or extend it later.
EASY CLIMBOne of the particularly desirable points of vertical gardening is thatthere’s very little maintenance to do for the plants. Aside from watering,it’s a matter of once a week tucking the tops of the plant in through anopening in the netting, and back through another one, so they keepclimbing up the netting. Some of the vertical crops, like pole beans andcucumbers, will do all the climbing themselves, but tomatoes have to behelped through the openings and pointed to the top. The netting is sostrong that it will easily hold up the plant and, in fact, after furtherstudies I found out the netting will also hold up all the fruit, includingsmall watermelons and pumpkins. Some of the winter squashes got soheavy I was afraid late summer storms would blow over the wholecontraption. It depends on how strong the ground rods are and how toughthe soil is. But if your frame is located outside the box and the ground rodis pounded into your existing soil, it would require bending the rebar, orthe electrical conduit, before the frame would come down.
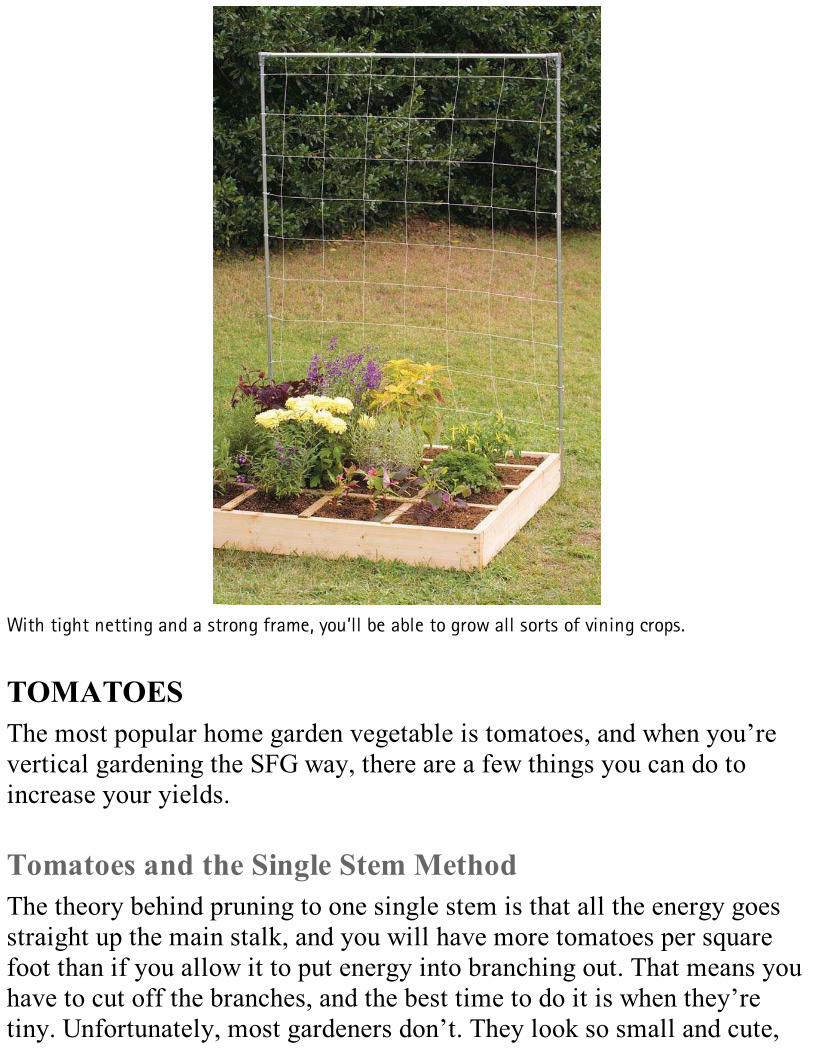
With tight netting and a strong frame, you’ll be able to grow all sorts of vining crops.
TOMATOESThe most popular home garden vegetable is tomatoes, and when you’revertical gardening the SFG way, there are a few things you can do toincrease your yields.
Tomatoes and the Single Stem MethodThe theory behind pruning to one single stem is that all the energy goesstraight up the main stalk, and you will have more tomatoes per squarefoot than if you allow it to put energy into branching out. That means youhave to cut off the branches, and the best time to do it is when they’retiny. Unfortunately, most gardeners don’t. They look so small and cute,
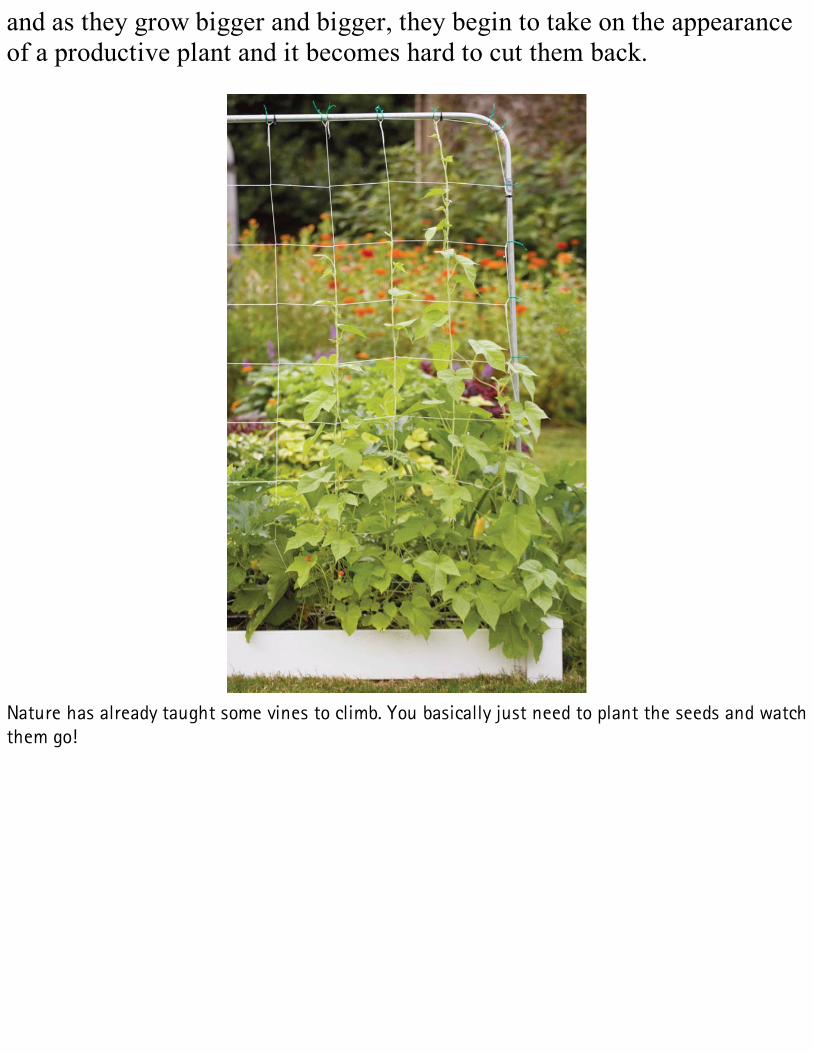
and as they grow bigger and bigger, they begin to take on the appearanceof a productive plant and it becomes hard to cut them back.
Nature has already taught some vines to climb. You basically just need to plant the seeds and watchthem go!
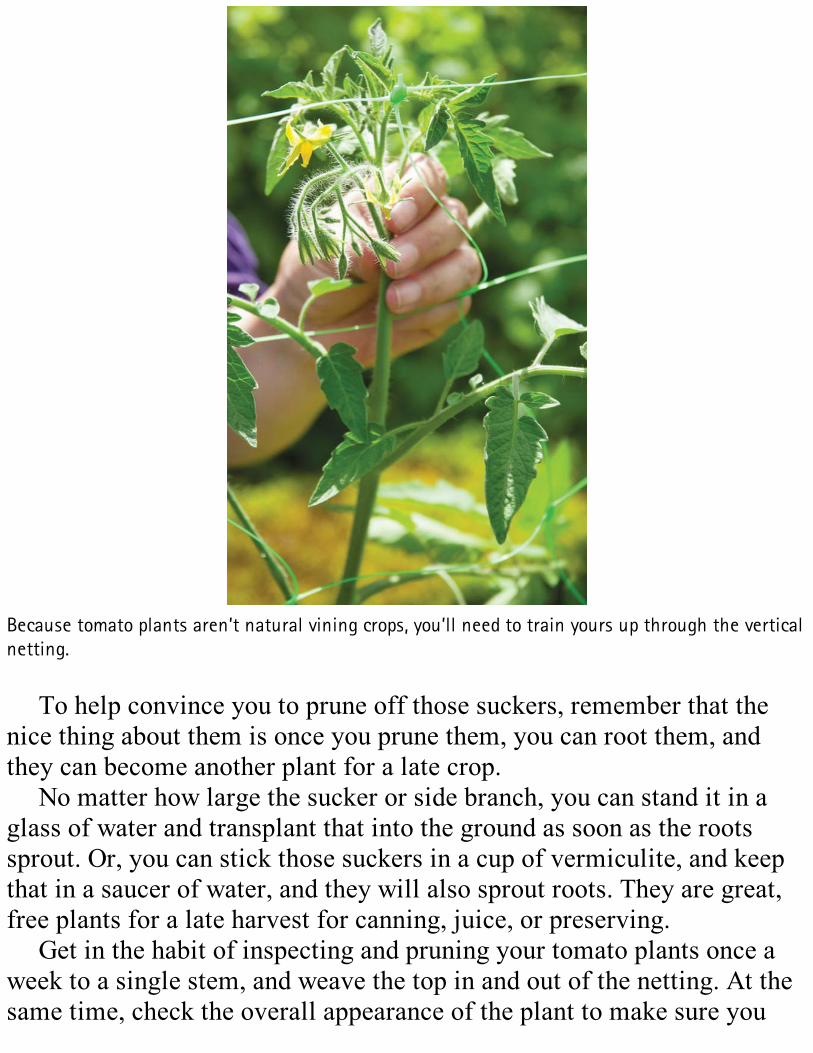
Because tomato plants aren’t natural vining crops, you’ll need to train yours up through the verticalnetting.
To help convince you to prune off those suckers, remember that thenice thing about them is once you prune them, you can root them, andthey can become another plant for a late crop.
No matter how large the sucker or side branch, you can stand it in aglass of water and transplant that into the ground as soon as the rootssprout. Or, you can stick those suckers in a cup of vermiculite, and keepthat in a saucer of water, and they will also sprout roots. They are great,free plants for a late harvest for canning, juice, or preserving.
Get in the habit of inspecting and pruning your tomato plants once aweek to a single stem, and weave the top in and out of the netting. At thesame time, check the overall appearance of the plant to make sure you
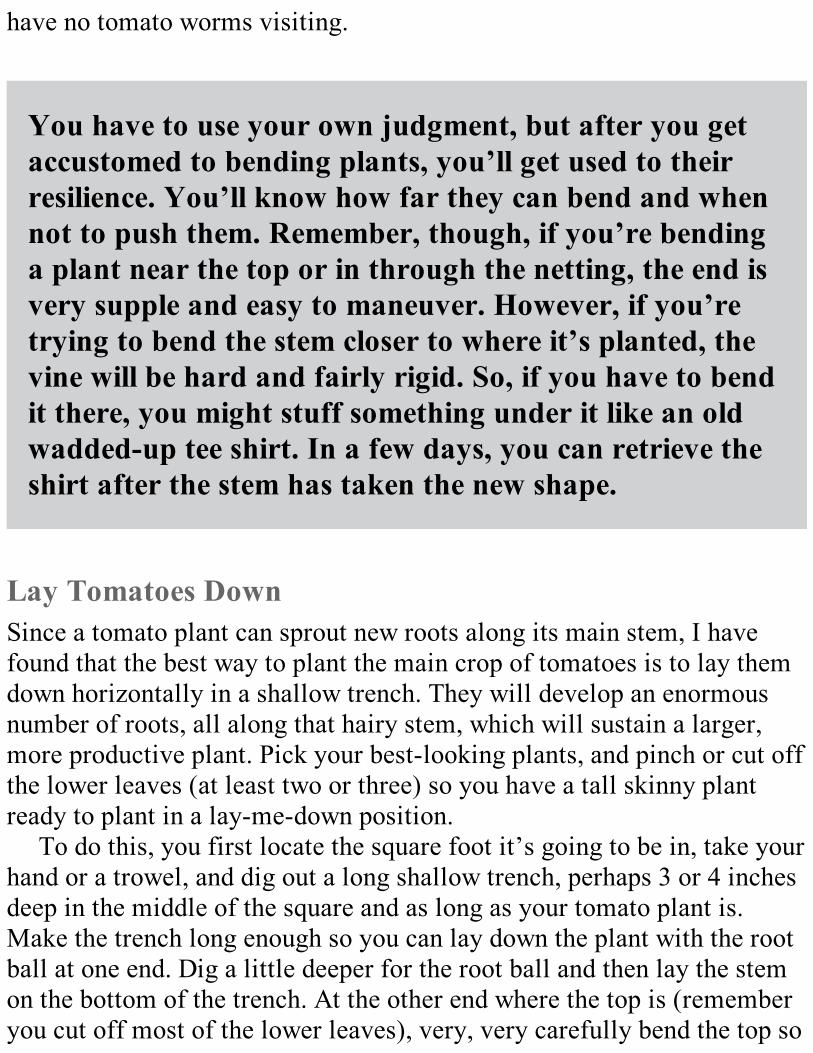
have no tomato worms visiting.
You have to use your own judgment, but after you getaccustomed to bending plants, you’ll get used to theirresilience. You’ll know how far they can bend and whennot to push them. Remember, though, if you’re bendinga plant near the top or in through the netting, the end isvery supple and easy to maneuver. However, if you’retrying to bend the stem closer to where it’s planted, thevine will be hard and fairly rigid. So, if you have to bendit there, you might stuff something under it like an oldwadded-up tee shirt. In a few days, you can retrieve theshirt after the stem has taken the new shape.
Lay Tomatoes DownSince a tomato plant can sprout new roots along its main stem, I havefound that the best way to plant the main crop of tomatoes is to lay themdown horizontally in a shallow trench. They will develop an enormousnumber of roots, all along that hairy stem, which will sustain a larger,more productive plant. Pick your best-looking plants, and pinch or cut offthe lower leaves (at least two or three) so you have a tall skinny plantready to plant in a lay-me-down position.
To do this, you first locate the square foot it’s going to be in, take yourhand or a trowel, and dig out a long shallow trench, perhaps 3 or 4 inchesdeep in the middle of the square and as long as your tomato plant is.Make the trench long enough so you can lay down the plant with the rootball at one end. Dig a little deeper for the root ball and then lay the stemon the bottom of the trench. At the other end where the top is (rememberyou cut off most of the lower leaves), very, very carefully bend the top so
it starts pointing up. You can take the Mel’s Mix, and push it underneaththat bent top to act as a pillow (see, this is really a bed), and if you’revery gentle, you’ll end up with the top sticking out of the soil at a slightangle. It does not have to point straight up; it just has to be aboveground.Fill in the rest of the trench and water well.
In just a few days that top will straighten itself up, and at the sametime all the new roots will start sprouting out from the main stem. If younoticed the root system when you put the plant in the ground, dependingon what size pot it was growing in, it probably had a very small rootball,perhaps only 1 or 2 inches wide, and 1 or 2 inches long. But now for theaverage transplant you’re going to develop a 6- to 8-inch rootball alongthe entire length. This procedure will not take any strength from theplant, and it will not delay any of the first tomatoes you’re going toharvest from that plant. In fact, because of its extra root strength and size,it will be a more vigorous grower than before.
Some books may advise you to dig a deep hole, and plant the tomatostraight down deep so just the top leaves show, thus burying the entirestem with the idea that the roots will still sprout along the stem. This isokay, but that puts the plant quite deep in the ground and usually it’s stillspringtime and the ground is still fairly cool. So I’ve found the lay-me-down method will make the plant grow much faster, because the soil atthat level is warmer, by perhaps as much as 10 degrees. After the plant isheading skyward, you treat it the exact same way as any other tomatotransplant. This method of lay-me-down planting also will give you morefruit because the first fruiting branch to form along the main stem will becloser to the ground, allowing you more distance to the top of yourvertical frame to have fruit.
“More manageable, enjoyable, and bountiful than I’d everimagined.”– Manja from Oregon
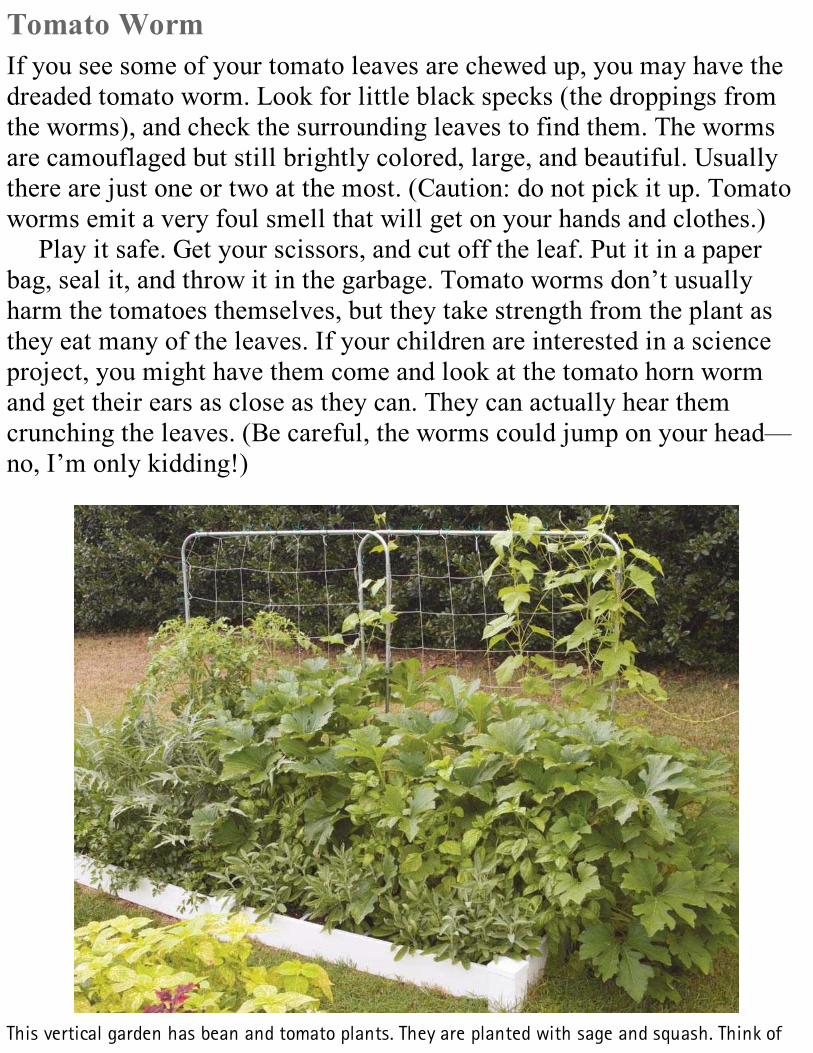
Tomato WormIf you see some of your tomato leaves are chewed up, you may have thedreaded tomato worm. Look for little black specks (the droppings fromthe worms), and check the surrounding leaves to find them. The wormsare camouflaged but still brightly colored, large, and beautiful. Usuallythere are just one or two at the most. (Caution: do not pick it up. Tomatoworms emit a very foul smell that will get on your hands and clothes.)
Play it safe. Get your scissors, and cut off the leaf. Put it in a paperbag, seal it, and throw it in the garbage. Tomato worms don’t usuallyharm the tomatoes themselves, but they take strength from the plant asthey eat many of the leaves. If your children are interested in a scienceproject, you might have them come and look at the tomato horn wormand get their ears as close as they can. They can actually hear themcrunching the leaves. (Be careful, the worms could jump on your head—no, I’m only kidding!)
This vertical garden has bean and tomato plants. They are planted with sage and squash. Think of
the harvest!
Over the TopWhat do you do when the tomato plant gets to the top of your tower, andthere is still a lot of growing season left? You have two choices,depending on how many tomatoes you’ve picked so far and how manygreen ones are coming. You can either cut the top right off, stop itsgrowth, and allow a good part of the energy to go into the existingtomatoes. Or, you can let the top continue to grow, and let it hang overthe side. It will keep growing until the end of the season, which for atomato plant is the first frost. If you want to protect this plant from thefirst frost (and everyone does), the vertical frame is designed so all youhave to do is gently lay a tarp or blanket over it. Next morning take it off,fold it up, and you’re ready until the next threat of frost. This way youcan keep your tomato plants growing and producing for several moreweeks.
PRUNING CUCUMBERS, MELONS, AND MOREThe other vine crops can have their side branches continue to grow untilthe whole plant takes up too much space. In general you want the plant tospread out to be approximately 1 to 2 feet wide on the vertical framenetting. If you plant one plant per square foot, it can fill that 12-inch widesquare, going right up the netting. If the spacing for that particularvegetable (for example, cucumbers that are spaced 2 per square foot), youwould trim the side branches back so that each one is from 6 to 9 incheswide outside of its space. Squash is a little different because the leavesare so large that it’s hard to judge where the stem is and how much roomthe entire plant is taking. That’s why we give squash a lot more room (2square feet per plant) in the vertical garden. Although most squash plantswill grow on one central stalk, some do branch. Those with branches takelonger to have fruit, so if you cut them off all the energy will go to themain branch and the flowers and fruit on that main branch. When it grows
to the top, let it hang down until it gets near the bottom, put it through thenetting, turn it up, and start all over again.
All the vining plants are very vigorous, energetic, and sturdy, sothere’s not much you can do to deter their growth. But whenever you’rebending a stem to poke it through the netting or over the top, hold it withtwo hands and be careful so it doesn’t break.
SAFETY PRECAUTIONSIf your crops are growing thickly and have covered the 4-foot-wideframes, you might want to play it safe and put guy wires on the verticalframe when you get near the end of the season. This requires tyingsomething like fishing line or strong cord from the top bar down to thesouth side of the box. For the north side, you could always prop the top upwith a 12-foot board cut out with a notch to fit into the top bar. Thatwould hold the frame up from both directions.
COLD-SEASON HANDLING OF A VERTICAL FRAMEAfter the growing season is over, the frame can be removed intact andhung out of the way in the garage to wait for the next growing season.Some people leave their vertical frame up all winter, and during theholiday season, weave brightly colored ribbon or even lights in and out ofthe netting to decorate for the holidays!
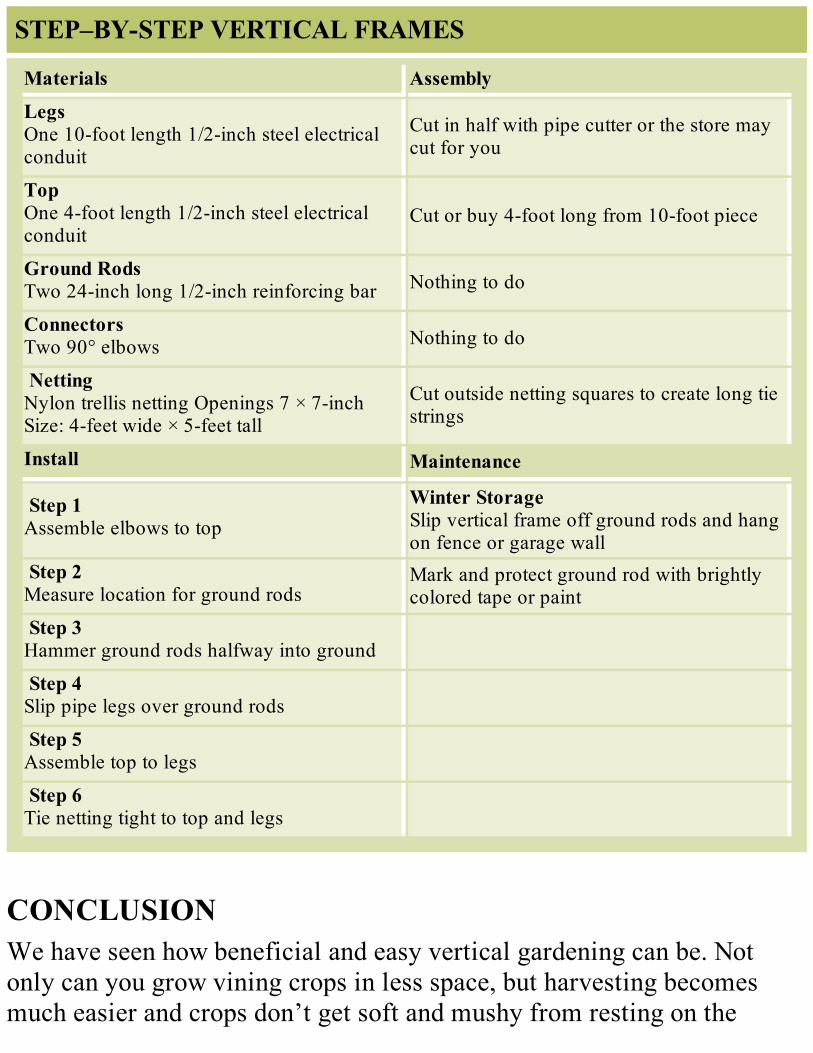
STEP–BY-STEP VERTICAL FRAMES
Materials Assembly
LegsOne 10-foot length 1/2-inch steel electricalconduit
Cut in half with pipe cutter or the store maycut for you
TopOne 4-foot length 1/2-inch steel electricalconduit
Cut or buy 4-foot long from 10-foot piece
Ground RodsTwo 24-inch long 1/2-inch reinforcing bar Nothing to do
ConnectorsTwo 90° elbows Nothing to do
NettingNylon trellis netting Openings 7 × 7-inchSize: 4-feet wide × 5-feet tall
Cut outside netting squares to create long tiestrings
Install Maintenance
Step 1Assemble elbows to top
Winter StorageSlip vertical frame off ground rods and hangon fence or garage wall
Step 2Measure location for ground rods
Mark and protect ground rod with brightlycolored tape or paint
Step 3Hammer ground rods halfway into ground
Step 4Slip pipe legs over ground rods
Step 5Assemble top to legs
Step 6Tie netting tight to top and legs
CONCLUSIONWe have seen how beneficial and easy vertical gardening can be. Notonly can you grow vining crops in less space, but harvesting becomesmuch easier and crops don’t get soft and mushy from resting on the

ground. Vertical frames add beauty to a garden as well as that unique,upward dimension.
So, we encourage you to add this innovative feature of Square FootGardening to your own garden. You will be so glad you did!

9
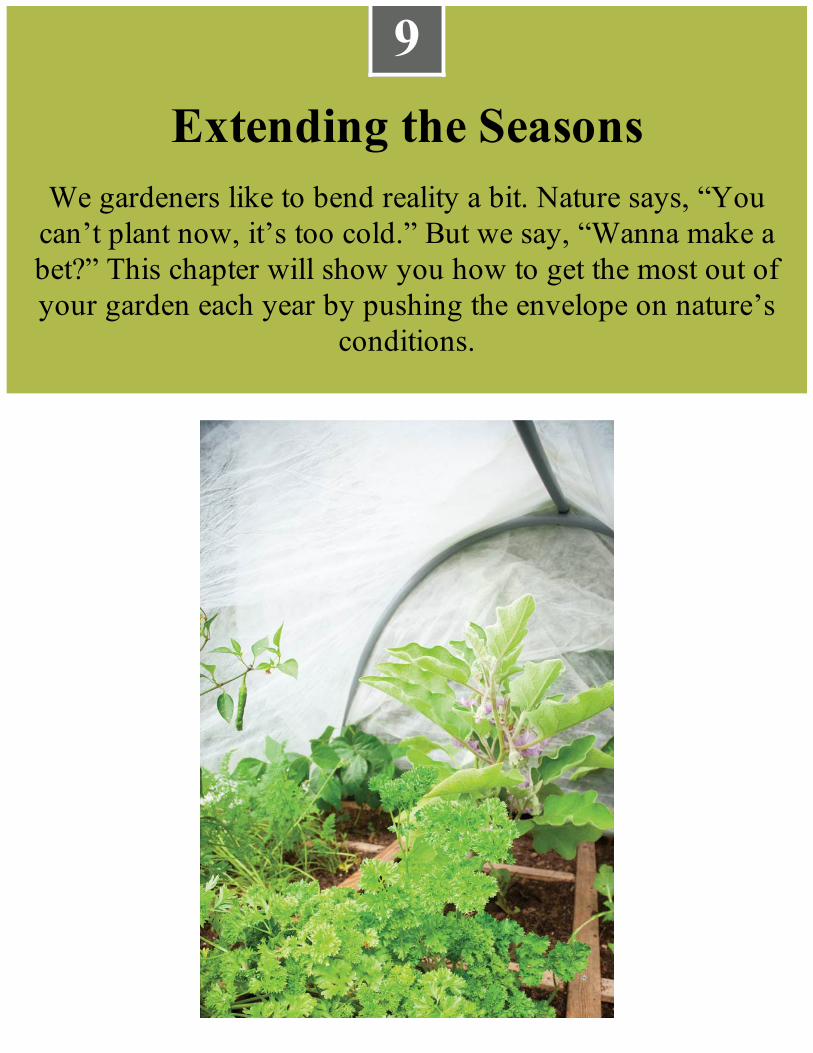
9Extending the Seasons
We gardeners like to bend reality a bit. Nature says, “Youcan’t plant now, it’s too cold.” But we say, “Wanna make abet?” This chapter will show you how to get the most out ofyour garden each year by pushing the envelope on nature’s
conditions.
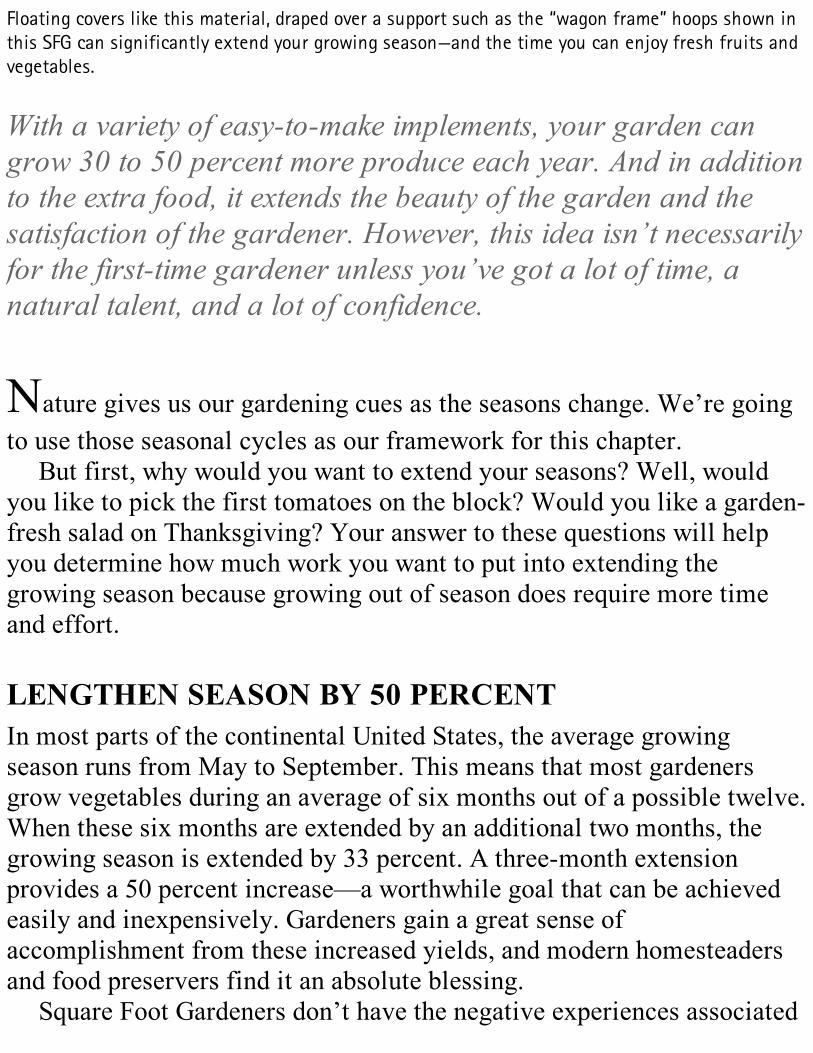
Floating covers like this material, draped over a support such as the “wagon frame” hoops shown inthis SFG can significantly extend your growing season—and the time you can enjoy fresh fruits andvegetables.
With a variety of easy-to-make implements, your garden cangrow 30 to 50 percent more produce each year. And in additionto the extra food, it extends the beauty of the garden and thesatisfaction of the gardener. However, this idea isn’t necessarilyfor the first-time gardener unless you’ve got a lot of time, anatural talent, and a lot of confidence.
Nature gives us our gardening cues as the seasons change. We’re goingto use those seasonal cycles as our framework for this chapter.
But first, why would you want to extend your seasons? Well, wouldyou like to pick the first tomatoes on the block? Would you like a garden-fresh salad on Thanksgiving? Your answer to these questions will helpyou determine how much work you want to put into extending thegrowing season because growing out of season does require more timeand effort.
LENGTHEN SEASON BY 50 PERCENTIn most parts of the continental United States, the average growingseason runs from May to September. This means that most gardenersgrow vegetables during an average of six months out of a possible twelve.When these six months are extended by an additional two months, thegrowing season is extended by 33 percent. A three-month extensionprovides a 50 percent increase—a worthwhile goal that can be achievedeasily and inexpensively. Gardeners gain a great sense ofaccomplishment from these increased yields, and modern homesteadersand food preservers find it an absolute blessing.
Square Foot Gardeners don’t have the negative experiences associated

with doing all that hard work when they garden, so they look forward tomore gardening and want to lengthen the growing season. For them,gardening isn’t a test of endurance. It’s a pleasant experience. They don’twant to know how soon they can quit, but how long they can continueexperiencing the joy of gardening!
Don’t think you must extend the season to be an accomplishedgardener. Sometimes it’s just as good to sit back, relax, and just “godormant” for a while. Instead of gardening you could be satisfied andsave time and work.
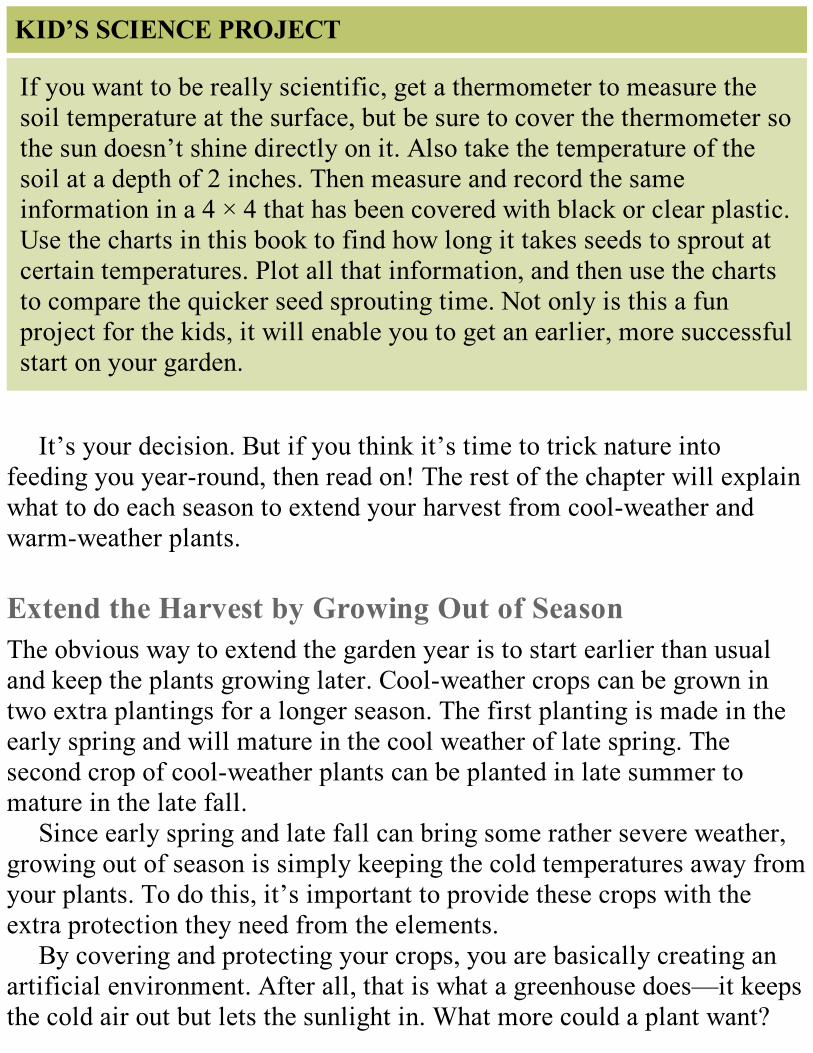
KID’S SCIENCE PROJECT
If you want to be really scientific, get a thermometer to measure thesoil temperature at the surface, but be sure to cover the thermometer sothe sun doesn’t shine directly on it. Also take the temperature of thesoil at a depth of 2 inches. Then measure and record the sameinformation in a 4 × 4 that has been covered with black or clear plastic.Use the charts in this book to find how long it takes seeds to sprout atcertain temperatures. Plot all that information, and then use the chartsto compare the quicker seed sprouting time. Not only is this a funproject for the kids, it will enable you to get an earlier, more successfulstart on your garden.
It’s your decision. But if you think it’s time to trick nature intofeeding you year-round, then read on! The rest of the chapter will explainwhat to do each season to extend your harvest from cool-weather andwarm-weather plants.
Extend the Harvest by Growing Out of SeasonThe obvious way to extend the garden year is to start earlier than usualand keep the plants growing later. Cool-weather crops can be grown intwo extra plantings for a longer season. The first planting is made in theearly spring and will mature in the cool weather of late spring. Thesecond crop of cool-weather plants can be planted in late summer tomature in the late fall.
Since early spring and late fall can bring some rather severe weather,growing out of season is simply keeping the cold temperatures away fromyour plants. To do this, it’s important to provide these crops with theextra protection they need from the elements.
By covering and protecting your crops, you are basically creating anartificial environment. After all, that is what a greenhouse does—it keepsthe cold air out but lets the sunlight in. What more could a plant want?
In addition, all of the summer or hot-weather crops can be started twoto three weeks earlier than normal and they, too, can be extended up to amonth beyond their normal season in the fall. Then, an extra planting oflettuce, spinach, and radishes can be grown during the hot summermonths that are normally considered out of season for these two crops.Sound like a lot of work? With Square Foot Gardening, it’s easier thanyou think. It all depends on you providing protection from the sudden andharsh temperatures and weather.
Box with CageSince a Square Foot Garden takes up so little space, it is relatively easy toprotect your crops.
While special techniques that provide extra protection may vary withthe season and the variety of vegetable, they are quickly learned andeasily practiced. Chapter 4 explains how to build a special box and thevarious kinds of protective cages. These structures make it possible tomoderate the climate in that box so you can stretch your growing seasonat both ends.
EARLY SPRINGA great time to extend the growing season is early spring before anyoneelse is out gardening. Begin by warming up the soil in your SFG boxes.Spread clear or black plastic over the top of the soil, and weigh it downwith a brick in each corner. After a couple of sunny days, take the coveroff, lift the grid out, and mix up the soil with a trowel so the warmersurface soil is moved down below and the colder, deeper soils are raisedto the top. Then replace the plastic covers. This is no big deal since yourMel’s Mix is loose and friable at all times of the year. Besides, the soil isonly 6 inches deep. How much work could that be?

It’s okay to start seeds inside to get a jump on the season, but you still have to practice good SFGmethods. This gardener planted too many seeds—remember, a pinch is two to three seeds, not ten.
JUMP START YOUR SEEDSIf you want to get a quicker start and earlier growth, try sprouting yourseeds indoors, and then transplanting them into individual containers
when they are very young. Before the plants get too large, harden themoff before planting them outdoors in your spring box.
SPRINGFor your first spring planting, set up a spring box with a storm windowcover or the PVC type structure over any garden square where you’ll beplanting an early crop so the sun will start warming the soil. Do thisabout four weeks before it’s time to plant your seeds. For a double-quicksoil warm-up, cover the soil with clear or black plastic, and then removeit before planting. Or you can use plastic covered cages over individualsquares around the garden instead of the entire 4 × 4-foot area. When theweather is warm enough, transplant the plants you’ve grown into the opengarden squares. They can also be left to grow where they were planted byremoving the protective cage from the squares.
Climate ControlWhen you’re using a spring box on your early crops, remember that freshair has to get in and you have to vent out the hot air that builds up onsunny days even in cold or freezing weather.
Heat builds up quickly in the boxes on sunny days. As the weatherwarms up, slide or lift the cover open a little farther each week until youcan remove it entirely. (Don’t try to prop up a glass storm window withsticks; believe me, the wind will blow it down whenever you’re notaround.) A light frost won’t hurt most cool-weather crops, but too muchheat will cook them. It takes a little experience to learn how to control theheat and moisture inside your frame. Keep in mind these precautionswhen trying to grow out of season.
You must check your spring plant boxes every day insunny weather. If your plants begin to wilt or if the soil
dries to a depth of 1 inch, it’s time to water. Water witha cup of sun-warmed water.
Extending Cool-Weather Crops into SummerIn addition to lettuce and radishes, you might also try growing spinach oreven cabbage out of season into the early summer. Spring crops can begrown from seeds or from transplants started indoors a few weeks aheadof time. When choosing varieties of cool-weather crops to grow intosummer, look for words like “long standing,” “slow to bolt,” and “heatresistant” in the seed catalogs or packet descriptions.
SUMMERAs the spring season progresses, it’s time to give some summervegetables—such as beans, squash, and cucumbers—a head start. Forearlier harvests, try starting the seeds for these warm-weather crops rightin their permanent location under a protective cage two weeks before theusual planting time. They will be much hardier and stronger thanseedlings grown on the windowsill. When all danger of frost is past,remove the covers.
There is an entire industry with all kinds of protective devices andproducts to help the gardener be successful in early gardening. They varyfrom water-filled walls around the plant to special ground coversdesigned to heat up the soil quicker. Try some of these products and seewhat happens. I always like to place an unprotected plant right next to theprotected one for comparison.
Shade and WaterIf you’re the type of person who doesn’t like hot, sticky weather, and youliterally wilt in the sun, then the obvious solution is to move into theshade with a large pitcher of your favorite cold drink. Well, lettuce and

radishes are no different. If you can provide shade for these spring crops(especially during the noon sun), along with some extra water, you willbe able to harvest throughout most of the summer. Look for special hot-weather varieties of your favorite plants in your seed catalog.
Cover the square with a shade cage, and give the plants plenty of water—as a general rule, water twice as often as you usually would.Remember, one of the best aids for growing a good crop is Mel’s Mix—our soil mix that combines equal parts peat moss, coarse vermiculite, andblended compost. It holds lots of moisture so the plant roots can take upall that’s needed, yet drains well so the roots can’t become waterlogged.
Shade ScreensThe shade cage will admit enough light for proper growth while keepingthe temperature down considerably. A layer of thick mulch will also helpmoderate soil temperatures. You can also make use of natural shade orsun screens by locating a planting of spring crops behind (to the north of)your vertical growing frames.
Keep in mind that you’re growing out of season, which means it is notthe plant’s natural inclination to grow then. You are urging these plantson, so be generous with your help and attention and don’t expect toomuch. Just enjoy the challenge and experience!
Summer Plants into FallGardeners sometimes wonder whether the extra effort involved inprotecting summer crops from the first fall frost is worth the effort.
SUMMER LETTUCE
Did you ever notice that just when all of the good summer saladvegetables are ready—like tomatoes, cucumbers, and peppers—thelettuce and radishes are all gone? In the hot, long days of summer,these spring crops bolt and set seed, becoming bitter and unappetizing.However, there is a way to get around this and still “have your saladand eat it, too!”
1. Cover lettuce with a shade cage (see Chapter 4 for instructions).
2. Give it twice as much as water as you normally would.
3. Cover the ground surrounding the lettuce with a thick layer ofmulch.
I think it certainly is, if you want an extra two or three weeks worth ofharvest from all those warm-weather crops. Quite often the first frost isfollowed by a long period of clear, warm weather before the next frost. Ifyou can protect your garden from that first frost, you can enjoy greenplants and fresh vegetables during one of the most pleasant periods of theyear—mid-autumn. Since most of these crops have a six to eight weekharvest season, the extra two to three weeks gained amount to quite a bit—more than a 25 percent extension of the season.
All Together NowTo protect your crops from frost, you can start with a PVC arch orcovered wagon frame, and then cover it with a large sheet of plastic,floating cover, or light blanket. Fasten down the corners so it won’t blowoff during the night. Or, the low-growing crops can be readily protectedwith a loose covering of hay that is easily removed the next morning.
To protect vine crops from frost, just throw a blanket or tarp over thevertical frame so it’s hanging down on all sides. This is one of the prime
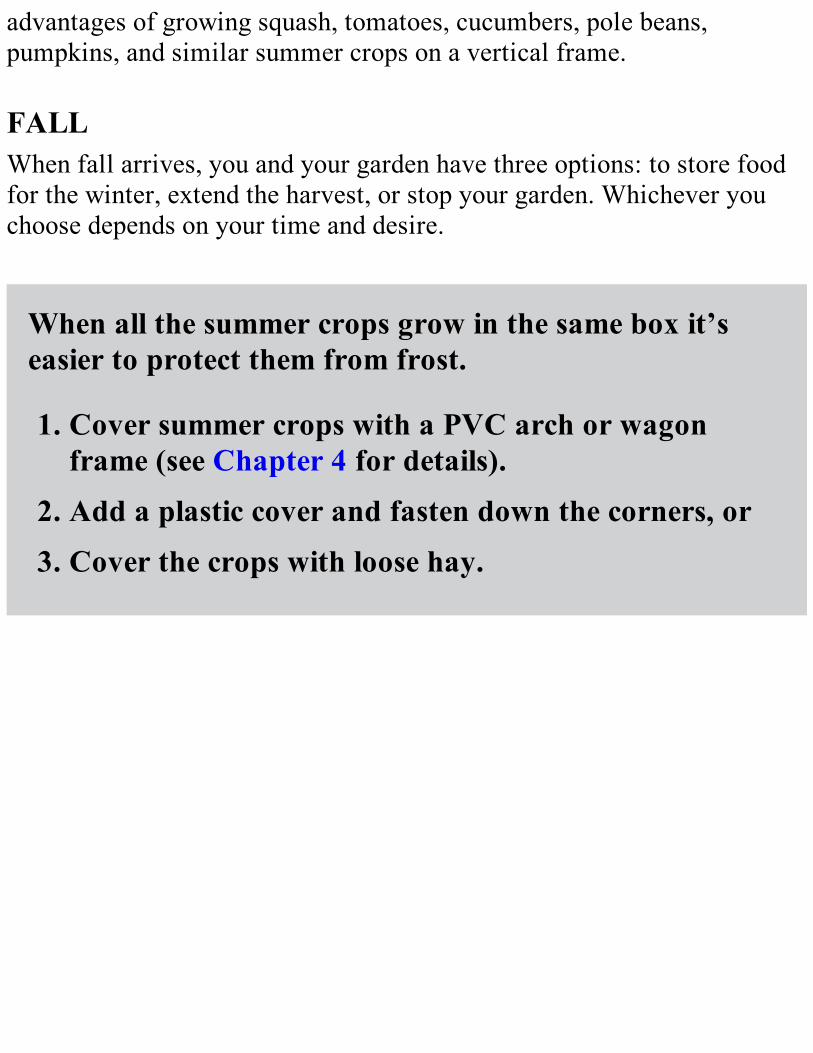
advantages of growing squash, tomatoes, cucumbers, pole beans,pumpkins, and similar summer crops on a vertical frame.
FALLWhen fall arrives, you and your garden have three options: to store foodfor the winter, extend the harvest, or stop your garden. Whichever youchoose depends on your time and desire.
When all the summer crops grow in the same box it’seasier to protect them from frost.
1. Cover summer crops with a PVC arch or wagonframe (see Chapter 4 for details).
2. Add a plastic cover and fasten down the corners, or3. Cover the crops with loose hay.
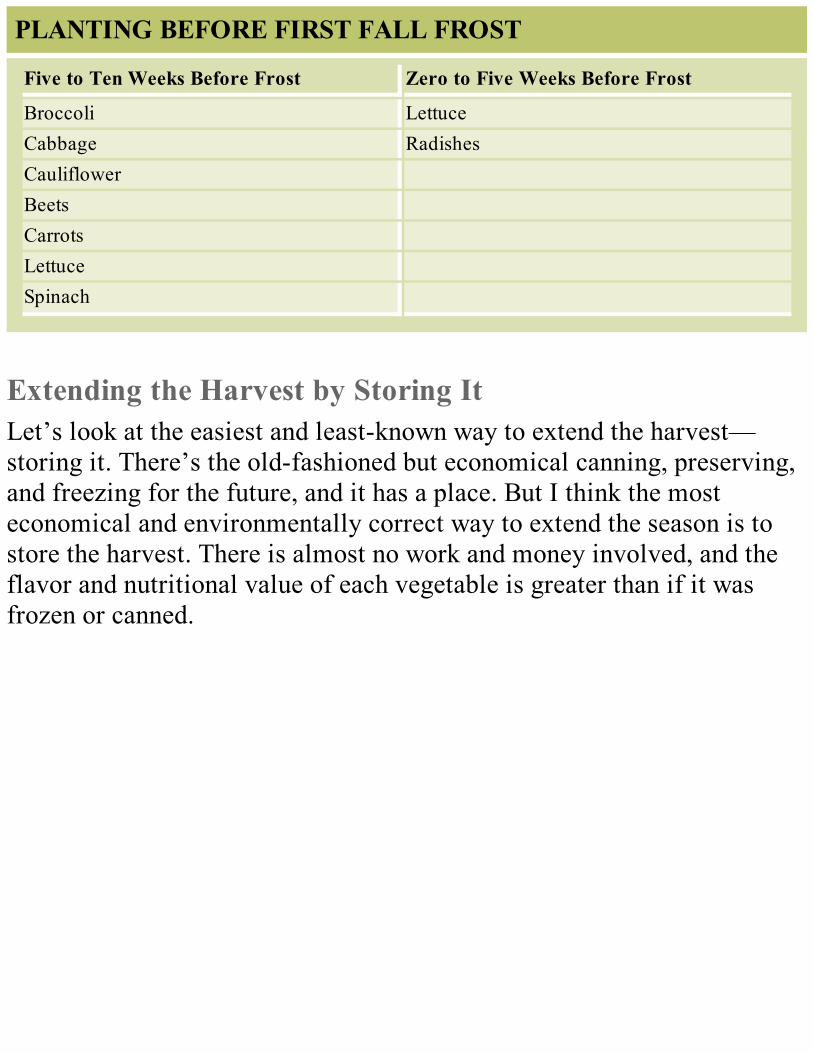
PLANTING BEFORE FIRST FALL FROST
Five to Ten Weeks Before Frost Zero to Five Weeks Before Frost
Broccoli LettuceCabbage RadishesCauliflower Beets Carrots Lettuce Spinach
Extending the Harvest by Storing ItLet’s look at the easiest and least-known way to extend the harvest—storing it. There’s the old-fashioned but economical canning, preserving,and freezing for the future, and it has a place. But I think the mosteconomical and environmentally correct way to extend the season is tostore the harvest. There is almost no work and money involved, and theflavor and nutritional value of each vegetable is greater than if it wasfrozen or canned.
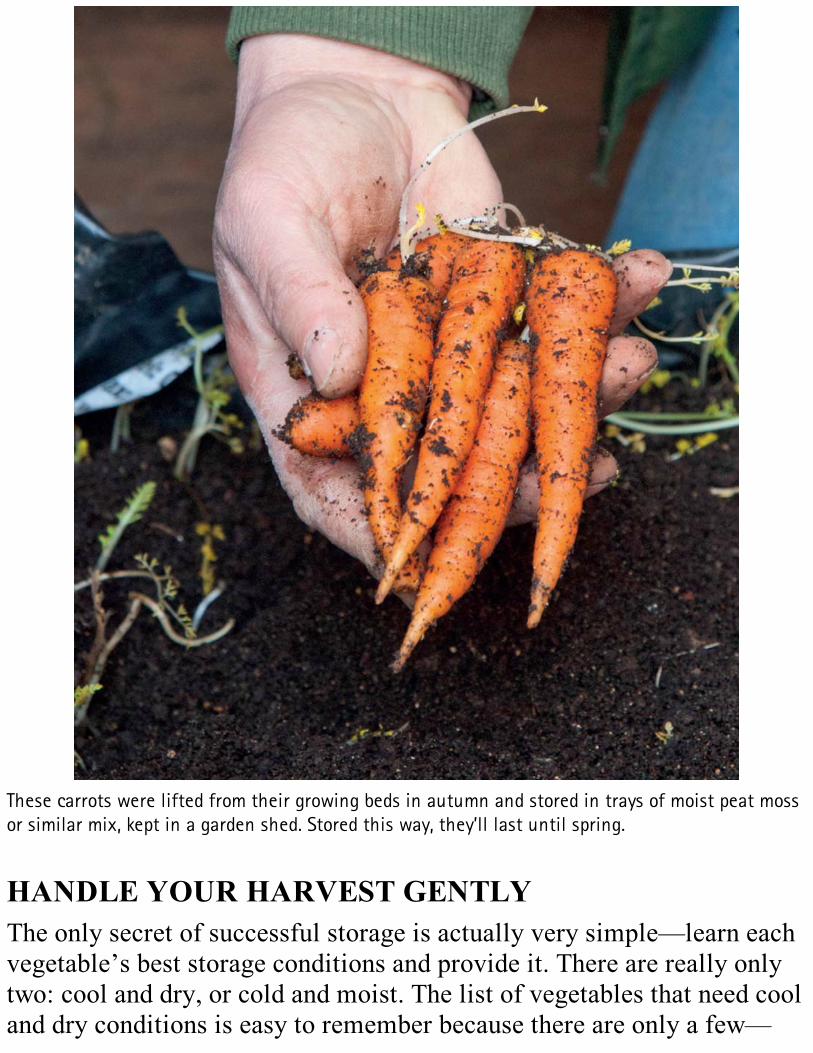
These carrots were lifted from their growing beds in autumn and stored in trays of moist peat mossor similar mix, kept in a garden shed. Stored this way, they’ll last until spring.
HANDLE YOUR HARVEST GENTLYThe only secret of successful storage is actually very simple—learn eachvegetable’s best storage conditions and provide it. There are really onlytwo: cool and dry, or cold and moist. The list of vegetables that need cooland dry conditions is easy to remember because there are only a few—

pumpkins, winter squash, and onions. The temperature should be around50° to 60°F, and the humidity needs to be fairly low—at about 50 percent.
Try to find a cool corner of your garage or basement where thetemperature stays above 35 but below 60°F. If you think your storage areamight freeze or get too warm at times, you can build two walls to enclosea corner to provide an even-temperature fruit closet. Add someinsulation, and remember to allow plenty of air circulation. Don’t stackproduce up in a big pile, but spread your vegetables out evenly on a shelf(not on the floor).
Handle produce as gently and infrequently as possible. When you’reout harvesting, treat each vegetable as if it were an egg. Any bruise or cutwill be the first spot to spoil. Lay each harvested vegetable separately in abox of sawdust or crumpled newspaper; don’t pile them all together. Donot wash or scrub the produce. Leave the bottom of the root on root crops,and at least an inch of the top growth. For crops such as vine crops, leaveas much of the stem on as possible. Only store produce that is in reallygood condition.
Vegetables in the group that need cold and moist conditions are allroot crops—beets, carrots, turnips, white potatoes, and winter radishesplus all of the cabbage family. This group also includes fruit—especiallyapples. The ideal storage temperature for them is as cold as you can getwithout actually freezing—35° to 45°F.
Actually, the simplest way to store root crops is not to dig them up atall. Roll a bale of hay over the planted area; this will break their tops andstop the plant’s growing cycle while keeping the ground from freezing.When you’re ready to harvest, simply roll the bale over, dig up a fewvegetables, and then replace the bale. Regular radishes won’t hold up toolong in freezing weather while the winter radish will last almostindefinitely. Carrots and leeks also do quite well through the entirewinter. If you’re feeling adventurous, you can experiment with leavingdifferent root crops in the ground to see which last through the fall andwinter so you’ll know what to expect the following year.
Cozy CoverCabbage and other leaf and head crops can also be stored in the garden,but they won’t do well under a solid bale of hay. Instead, it is better touse a loose, fluffy covering of straw or leaves. To keep the wind fromblowing this loose covering around, try placing a 2-foot-high fence ofchicken wire around your garden areas and anchoring the wiring at eachcorner with stakes.
DIG IT INAnother storage method for root crops is to bury a container in the groundand pack your vegetables in layers of moist sawdust, peat moss, or sand.You can sink a plastic or metal garbage can straight into the ground whilekeeping the top a few inches above the surface so no water gets in. Makesure the cover fits tightly; then pile at least 12 inches of hay or leavesover the top. Keep everything dry by covering it with a weighted-downplastic sheet or tarp. Watch out for leaks in the container that can allowgroundwater to seep in. If you can, select an area on high ground to locatethe storage container. The ground will not freeze under or around thiscontainer, and your vegetables will be maintained in a very even andmoist condition.
DON’T FEED THE ANIMALS
There is one problem with using hay bales as winter mulch—they canprovide a cozy nest for ground mice and voles that love to eat crunchyroot crops. So keep an eye out for these pests and any damage they maybe doing. If they do infest your winter storage plot, it’s best to harvesteverything and store your produce in a different place.
TEMPERATURE DIFFERENCESOn a cold night you can walk around your property and actually feel thedifferences in temperature. The cold air virtually rolls down the slope andsettles in low-lying areas; in fact, this is called cold air drainage.Surprisingly, this will happen even where there is not a great differencein elevation. Once you get the knack of watching out for frost andcovering your plants when it threatens, you will see the advantages oflocating a garden on the top or south side of a slope rather than at thebottom of a low area. You will also see the advantage of grouping yourcrops according to their weather requirements. This makes it easier toprotect them from either frost or freezing in both the spring and fall. Oneof the greatest advantages of SFG is how easy it is to protect your gardensince it is condensed into small, uniform areas.
It’s much simpler and more cost effective to grow cool-weather cropsfor an extended season using a sun-heated box that protects plants fromjust the severe weather fluctuations.

WRITE IT DOWN
Don’t forget to draw a diagram of what’s left in the garden and whereso you won’t be frantically digging around on a cold winter afternoonlooking for the carrots but finding only radishes. The entire gardenlooks the same once the snow covers everything.
FrostFrost forms when the outdoor temperature drops below the freezing point,resulting in the deposit of ice crystals. Plant material will freeze whenthere is an accumulation of cold air, 32°F or below, at ground level. Frostcan, and does, occur in low areas while the hills and slopes right next tothem might be frost-free. This is because hot air rises and cold air sinks.If a body of water is nearby, it can greatly reduce the occurrence of frostas water holds heat very well.
In general, frost usually occurs in the very early morning hours,particularly after a still, calm night when the weather is dry. The chancesof frost are also increased following the passage of a cold front, indicatedby an intermittent and changing weather pattern of broken clouds andoccasional precipitation; this is in contrast to the steady or continuousrain and the heavy, low-hanging clouds that accompany a warm front.
When frost is predicted, be ready. Your best bet is to catch the eveningweather forecast, particularly the local one. Another (perhaps better)source is the Internet. One of the best websites is www.weather.com.Click on “Lifestyle,” then “Home and Garden,” then “Lawn and Garden”and enter your zip code. You’ll get all the information you need to beready for that first frost.
Light Versus Hard FrostA light frost blackens the outer leaves of most summer flowers andvegetables. It is indicated by a white covering on the lawn in very earlymorning. Summer vegetables can still be harvested if eaten right away.

A hard frost will blacken and kill all summer flowers and vegetables.Plants that were bushy and colorful the day before are now just droopyskeletons with blackened leaves hanging like rags from the stems. Thiscan be very disheartening for gardeners who come out in the morning tofind that the garden has been devastated. A hard frost is indicated by acrunchy feel to the ground and a thin film of ice on the birdbath. This isthe time when most gardeners declare an end to the season. But if youhave planted some colorful fall-blooming plants (mums, asters, and somehardy daisies) along with the fall vegetables, and you clean up the gardenright away, your garden will still look attractive and inviting after a hardfrost. Your spirits will be lifted and you can go on to enjoy an autumngarden.
GROWING WINTER VEGGIES
1. Select fast-growing varieties with superior cold resistance.
2. Select the sunniest sheltered spot in your yard (it can be temporary).
3. Plant in a sheltered box.
WINTERGardeners who are particularly ambitious and want to continue growingsomething all winter will need additional tools for providing specialprotection to a very select variety of plants. If you can keep the groundfrom freezing solid and provide sunlight in just a small area, in manyparts of the country you can continue growing special varieties of lettuceand spinach, hardy leaf crops such as kale, and a number of orientalvegetables all winter long. It’s also possible to plant some members ofthe onion family in the fall in order to get a larger or early crop nextspring and summer. Call your county extension service for local adviceand conditions.
As you continue gardening, you’ll learn which vegetables are hardierin your particular area. Wind and rain have a lot to do with plant survivaland how much protection you need to provide.
Special Cold VarietiesSalad from your garden during the coldest months of winter? You bet. Afall box (that’s just a SFG box that’s used during the fall) can providefresh salad each week during the winter without a greenhouse. Here’show: select fast-growing vegetables for your winter garden. Try any ofthe hardy salad greens and root crops, but look for special cold-tolerantvarieties. Every seed company offers different varieties so look throughcatalogs and select those that are recommended for cold and wintergrowing. Look for names that have words in them like “Arctic,” “Frost
King,” or “Snow Man” (I just made that last one up).
PICK A SPOTNow, pick the sunniest, most sheltered spot you can find for your wintergarden. It doesn’t have to be in the main garden; next to the house orgarage is better, especially if you have white painted brick or stuccowalls, since they will reflect quite a bit of heat into your miniaturegarden. Remember that the sun is very low in the sky during the winter,and the place that may have been in full sun during the summer couldnow very well be a very shady place in the winter. Don’t place the boxunder the roof or gutter line, or you’ll risk the chance that rain, sleet, orsnow will fall on it. You’ll be in good shape if the area is sheltered fromstrong winter winds and if it gets a maximum amount of winter sunlight.It doesn’t have to be a permanent spot either. First, lay down a sheet ofplastic or sturdy weed cloth and in the spring you can pick everything upand return the area back to its former use.
“Fantastic! It very much appeals to my innate sense oforganization and efficiency.”– Jeff from North Carolina
Snuggle UpInstall your winter box, fill it with Mel’s Mix, and start your planting.Since the plants will grow very slowly compared to spring and summerand since you’ll be harvesting every leaf almost as it is ready, you canplant your produce closer than the usual spacing, even as close as one-half the recommended distance.
Insulate
Provide some insulation around the winter box, by banking the outsidewith soil or placing bales of hay all around. Provide a tight-fitting coveror make a double-layer cover with plastic to keep the soil and air fromlosing heat at night. Throw a blanket or tarp on the box for those extracold nights.
“Best book on gardening I’ve ever read, wish I’d found ityears ago.”– Mindy from New Jersey
PUTTING YOUR GARDEN TO BEDWhen it is time to put the SFG to bed, we do this the same way we putour children to bed. You wouldn’t think of sending them to their roomand paying no attention to them would you? Instead, we encourage themto prepare for bedtime—to brush their teeth, get one last drink, fix thebed just the way they want it, and then spend some time reading abedtime story. Then it’s finally lights out.
Well, treat your garden the same way. Don’t leave it a mess with deadplants and debris lying about. Tidy it up and make it look good. Now is anexcellent time to mix a little extra compost in each box and smooth andlevel it out so it will be all ready for the spring planting. That’s neverhappened before with single-row gardening. Now it’s not only possible,but also very practical.
The little extra work you do in the fall will keep your garden attractiveand neat-looking all winter and make your springtime garden easier tobegin. You’ll simply go out, rake off the mulch cover (remember yourrototilling neighbor?), and start planting either at the regular time orearly.
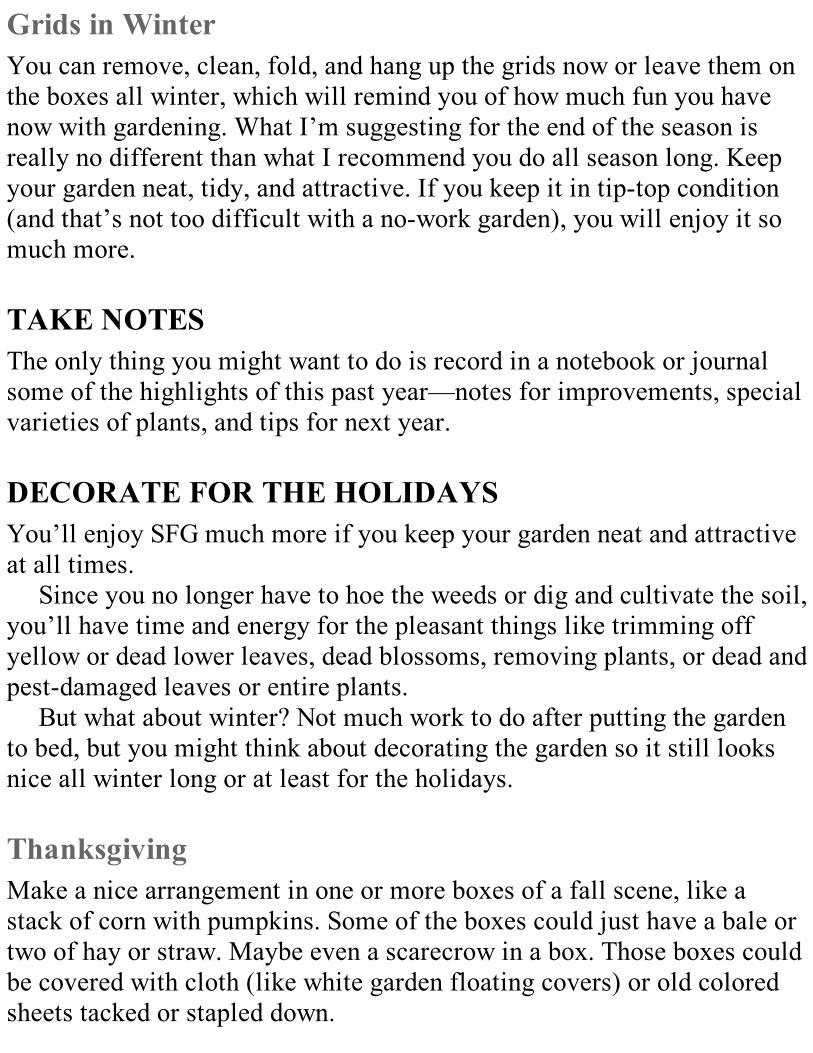
Grids in WinterYou can remove, clean, fold, and hang up the grids now or leave them onthe boxes all winter, which will remind you of how much fun you havenow with gardening. What I’m suggesting for the end of the season isreally no different than what I recommend you do all season long. Keepyour garden neat, tidy, and attractive. If you keep it in tip-top condition(and that’s not too difficult with a no-work garden), you will enjoy it somuch more.
TAKE NOTESThe only thing you might want to do is record in a notebook or journalsome of the highlights of this past year—notes for improvements, specialvarieties of plants, and tips for next year.
DECORATE FOR THE HOLIDAYSYou’ll enjoy SFG much more if you keep your garden neat and attractiveat all times.
Since you no longer have to hoe the weeds or dig and cultivate the soil,you’ll have time and energy for the pleasant things like trimming offyellow or dead lower leaves, dead blossoms, removing plants, or dead andpest-damaged leaves or entire plants.
But what about winter? Not much work to do after putting the gardento bed, but you might think about decorating the garden so it still looksnice all winter long or at least for the holidays.
ThanksgivingMake a nice arrangement in one or more boxes of a fall scene, like astack of corn with pumpkins. Some of the boxes could just have a bale ortwo of hay or straw. Maybe even a scarecrow in a box. Those boxes couldbe covered with cloth (like white garden floating covers) or old coloredsheets tacked or stapled down.
Christmas or WinterHere are some ideas that will make your SFG festive during the bleakwinter months.
1. Make Christmas boxes out of your garden boxes by using old coloredor striped sheets, a tarp or table cloth, or floating garden covers.
2. Think ahead when you go to yard sales or the thrift shop. Many coverscould serve double duty as frost covers in the fall, then decorativecovers in the winter.
3. Use wide, colorful ribbon, rope, or contrasting colored strips of sheetsto tie bows on the boxes. Tuck in greens and pine cones, even lights ifyou can get an extension cord to the garden. (Remember now, yourgarden no longer needs to be way out back; it can be right near yourback door where you’ll see it more often.)
4. Decorate your vertical frames with decorative lights, pine branches,pine cones, and bird feeders.
After Christmas, stick a discarded Christmas tree in the center of eachbox, and make them into bird feeders, with or without lights. Tie a stringfrom each box corner to the treetop for support.
START SMALLThis chapter has taught us how to extend all the seasons and how doingthat can give us an extra 50 percent of gardening time. How exciting! Ifyou read through all this and felt a little discouraged or glazed-over,don’t worry. If you have never grown out-of-season, add just a fewfeatures here and there as you gain more confidence. It can be a really funchallenge to any gardener—regardless of experience. As with all newgardening projects, my recommendation is to start small in order to gainexperience, confidence, and pleasure—then expand. And just in case youneed more convincing, remember that All New Square Foot Gardening

eliminates so many gardening tasks that you have the time and energy toextend the seasons.

OUT WITH THE OLD
Old Way New Way
1. Clean off summer residue Do this daily and it won’t accumulate2. Turn over the soil No longer necessary3. Perform a pH test No longer necessary4. Add all the humus you can get No longer necessary5. Add peat moss if no humus No longer necessary6. Add new 3 to 6 inch layer No longer necessary7. Dig in manure or leaf mold No longer necessary8. Add some fertilizer No longer necessary9. Use a fork, shovel, spade No longer necessary—use trowel
10. Dig as deep as you can No longer necessary11. Deeper is better No longer necessary12. Break up clods, remove stones No longer necessary

10
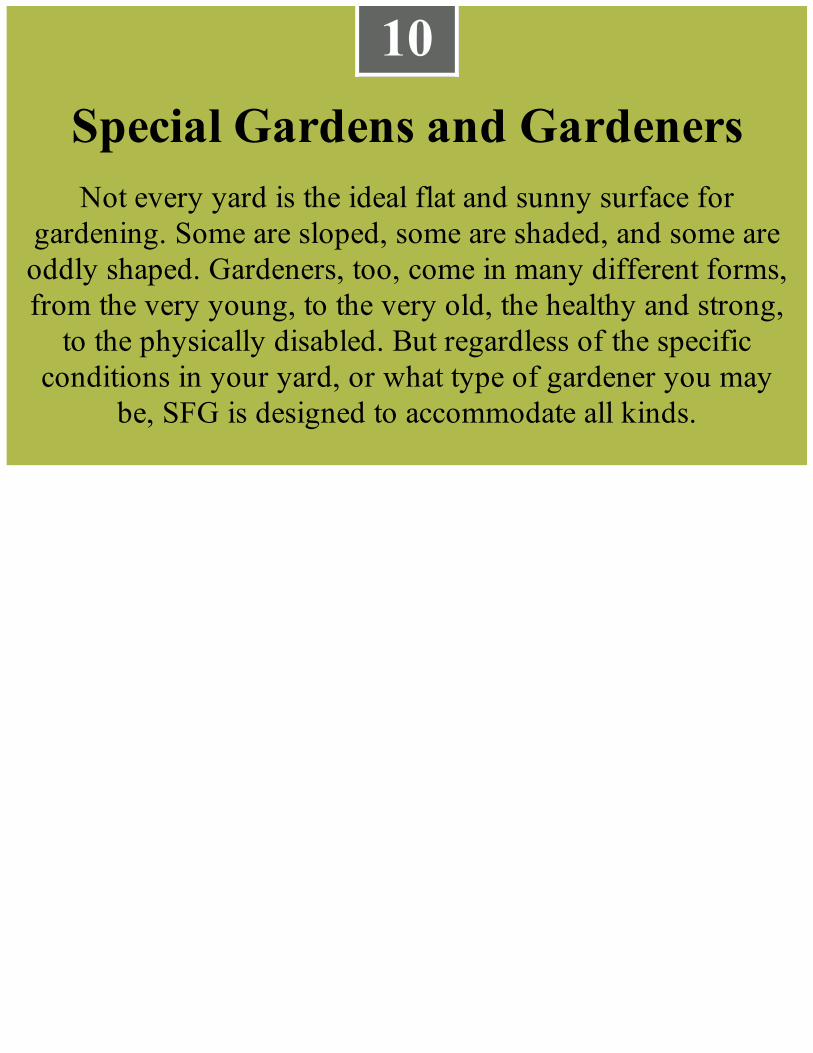
10Special Gardens and GardenersNot every yard is the ideal flat and sunny surface for
gardening. Some are sloped, some are shaded, and some areoddly shaped. Gardeners, too, come in many different forms,from the very young, to the very old, the healthy and strong,
to the physically disabled. But regardless of the specificconditions in your yard, or what type of gardener you may
be, SFG is designed to accommodate all kinds.
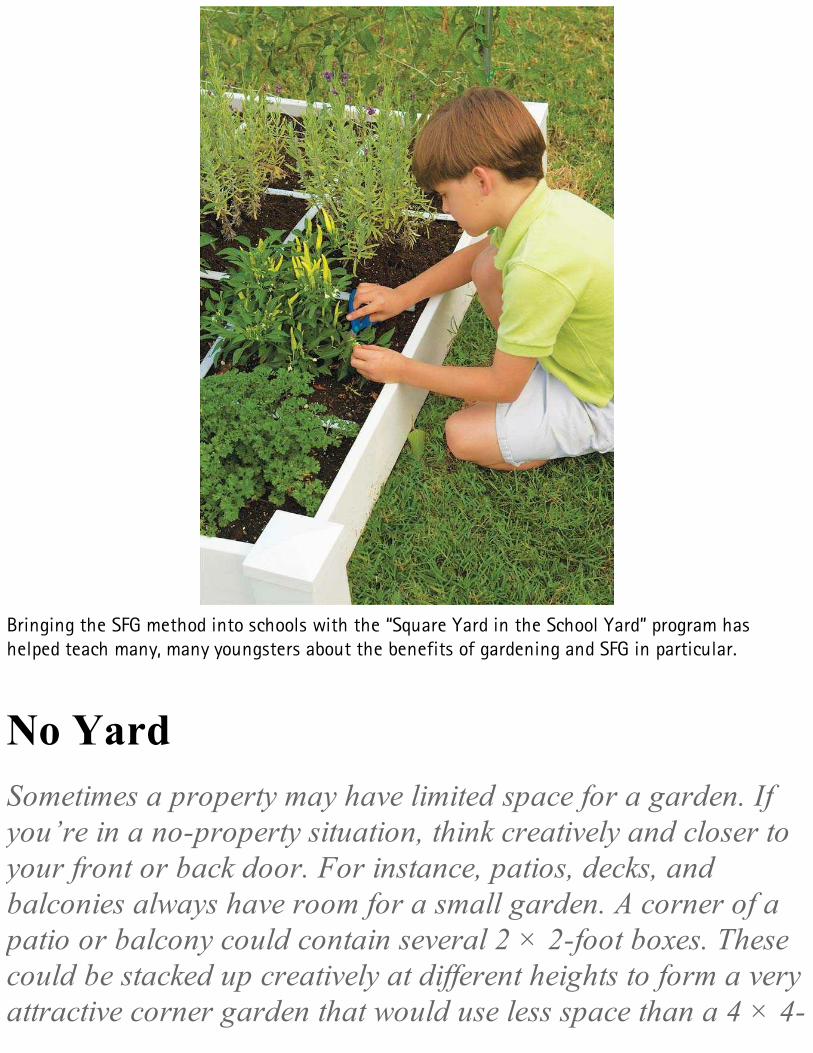
Bringing the SFG method into schools with the “Square Yard in the School Yard” program hashelped teach many, many youngsters about the benefits of gardening and SFG in particular.
No YardSometimes a property may have limited space for a garden. Ifyou’re in a no-property situation, think creatively and closer toyour front or back door. For instance, patios, decks, andbalconies always have room for a small garden. A corner of apatio or balcony could contain several 2 × 2-foot boxes. Thesecould be stacked up creatively at different heights to form a veryattractive corner garden that would use less space than a 4 × 4-
foot area. The boxes could be placed on low tables of differentheights or on something like milk crates or cinder blocks inorder to give each one a different height. If you install a verticalframe with netting along both walls or just tack the netting tothe walls, it could fan out so it gets larger as it gets higher toexpand the garden area even larger. Another option, of course,is at the base of and even on top of a balcony or deck railing.You could install 6- to 12-inch wide boxes on the floor or boltedto the top of or hanging from the railing on both sides. Thiswould create almost a wall of gardens ending up in quite a fewavailable square feet.
WOODED YARDIf you have a heavily wooded yard, then you don’t have too manychoices. One solution is to locate several boxes around the housewherever they might receive enough sunlight. Your boxes could be on theground or even on legs next to the house. If you had a southern exposurewith enough sunlight, you could put a double-decker long box against thehouse. Other than that, the only choice would be to make a clearing in thewoods, but that would have to be a fairly substantial area to get your SFGboxes out of the shade. If these suggestions don’t work—it’s shadegardening for you.
HILLSIDESWhat if the only space you have for a garden is on a hillside or fairlysteep slope?
If it’s facing south, it may be worthwhile to develop it for your AllNew Square Foot Garden. The limiting factors are how steep the slope isand how big your garden is going to be. You’re in luck with a SFGbecause you can build boxes that will fit into the lay of the land.
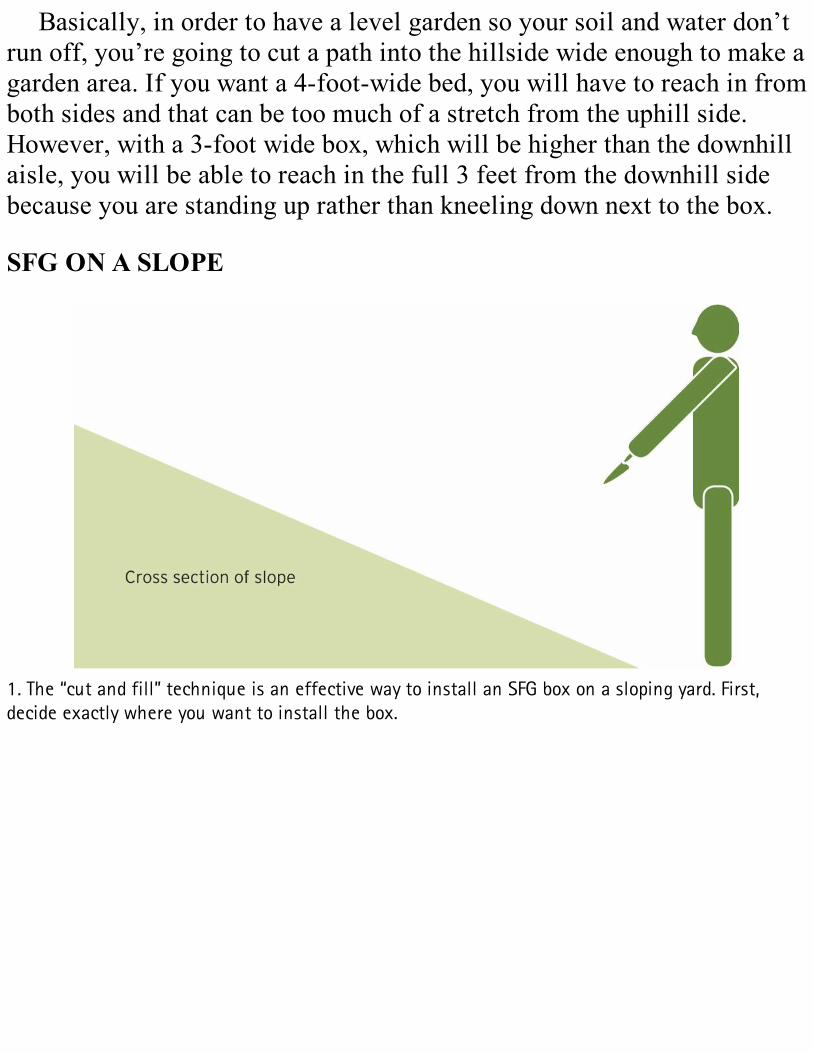
Basically, in order to have a level garden so your soil and water don’trun off, you’re going to cut a path into the hillside wide enough to make agarden area. If you want a 4-foot-wide bed, you will have to reach in fromboth sides and that can be too much of a stretch from the uphill side.However, with a 3-foot wide box, which will be higher than the downhillaisle, you will be able to reach in the full 3 feet from the downhill sidebecause you are standing up rather than kneeling down next to the box.
SFG ON A SLOPE
1. The “cut and fill” technique is an effective way to install an SFG box on a sloping yard. First,decide exactly where you want to install the box.
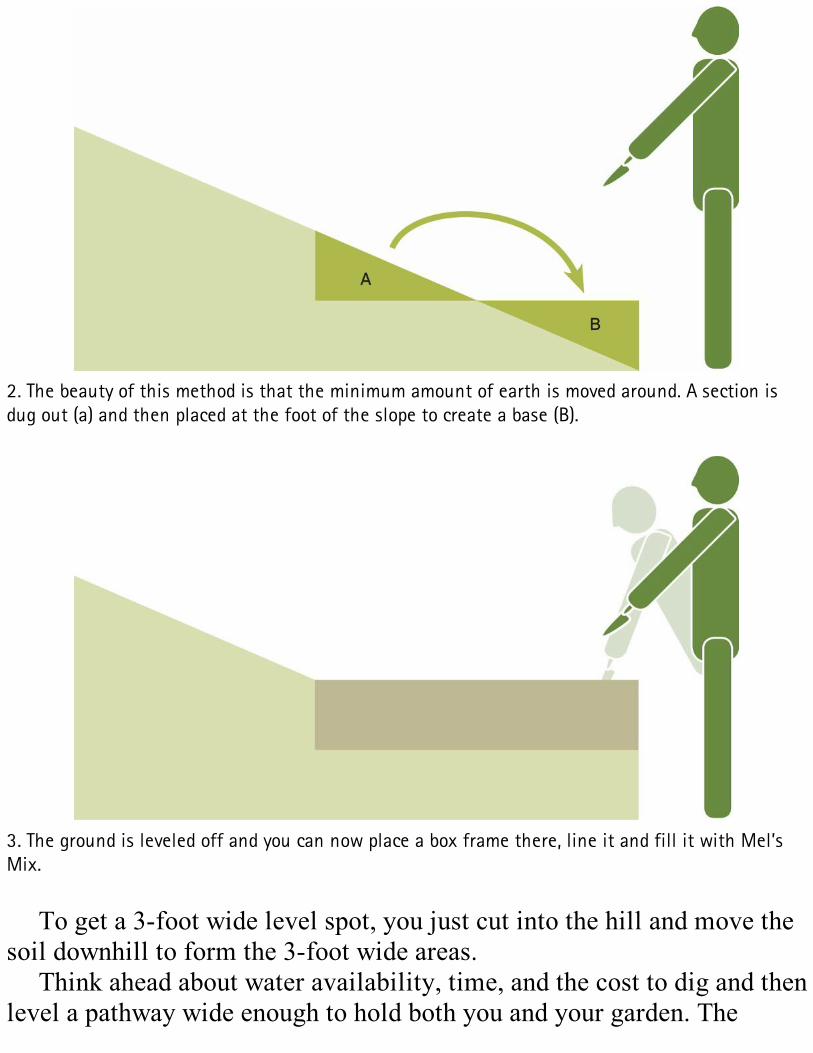
2. The beauty of this method is that the minimum amount of earth is moved around. A section isdug out (a) and then placed at the foot of the slope to create a base (B).
3. The ground is leveled off and you can now place a box frame there, line it and fill it with Mel’sMix.
To get a 3-foot wide level spot, you just cut into the hill and move thesoil downhill to form the 3-foot wide areas.
Think ahead about water availability, time, and the cost to dig and thenlevel a pathway wide enough to hold both you and your garden. The
steeper the slope, the harder it becomes.
DECKSWhen creating deck gardens in an apartment or condominium, be sure toconsider the people below you and how you’re going to water. Yourgarden may not be a problem when it rains, but when it is sunny andbright and your garden water drips down on the neighbors while they areat their barbeque below, they may not look favorably upon you or yourgarden.
There are several things you can do about this situation. First of all,since Mel’s Mix holds water so well, it’s highly unlikely you willoverwater, which will prevent a lot of dripping or excess water leakage.Just in case, though, you can always choose not to drill drain holes atconsistent intervals over the entire bottom of your SFG, but only a couplein one corner. Then, slightly slope the box towards this one corner andput a decorative vase or other container underneath to catch any drips thatmay leak out.
RAILINGSAnother popular location for a garden is on a railing—particularly on awooden railing. Railing boxes make a very decorative and excellentgarden, particularly if you include trailing plants that add some color andcharacter. If you have railings that are flat, it is very easy to set a boxright on top of it. For stability, it should be bolted down. If you can’t boltyour boxes to the railing and you’re higher than the first floor, I wouldplace the boxes on the floor. Consider the strength and size of yourrailing and the surrounding environment to make sure your railing boxesaren’t too big. There are various holders sold at home improvementstores that snap onto your railings and can accommodate standard-sizedboxes. These boxes can hang over the outside or inside of your railing,depending on your preference. One advantage of having the box hangover the outside edge is the box won’t take up any of your valuable deck
space. In addition, should it drip when you’re watering, the water willbypass the deck below. There is one safety concern and that is anythingfalling. If your box is on the inside of the railing, it doesn’t have far tofall and won’t hurt anyone.
GRANDPARENTSOne of the greatest bonds that I have found between grandparents andgrandchildren is formed during a gardening project, even if the visit isshort. Give your grandchild a garden or just a square, let him write hisname on the grid, encourage her to plant her garden, and you may findyour grandchildren will keep in touch more often just to find out how thegarden is growing. This, of course, can work just the opposite way whenthe grandparent visits the child’s home and they plant a garden there.And, of course, there will be great anticipation for the next visit and whathas happened in the garden. Selecting plants for children is quite simple;plants should be easy to grow, fast growing for quick results, andsomething that will produce an exciting result.
GARDENING FOR SENIORSSome people find it difficult to do hard, manual labor like digging up theexisting soil, as well as getting down on the ground and then getting backup again. With SFG, the simple answer is to just raise the garden up tothe gardener’s height. It can be a sit-down garden, which is particularlyadaptable for a person in a wheelchair or someone that wants to sit andgarden. A little higher would be a stand-up garden if that makes it easierto tend; since there is very little maintenance—just nurturing—you arenot standing for long periods of time. And the gardens, once they have aplywood bottom installed, can be moved to any location for theconvenience and pleasure of the gardener.
You can now put various sizes of boxes on patios, near the pool, theback door, or any pleasant area around the house that is easy for a seniorto attend to their garden. Of course, there is no longer the need to walk

way out back carrying a bunch of heavy-duty tools. Now, it is just amatter of going to your garden and tending it with the minimal amount ofeffort, work, and tools. There is no weeding, and because we are startingwith a perfect soil mix, there is never any heavy digging. There is no needto even have shovels or forks or any large tools, just one trowel.
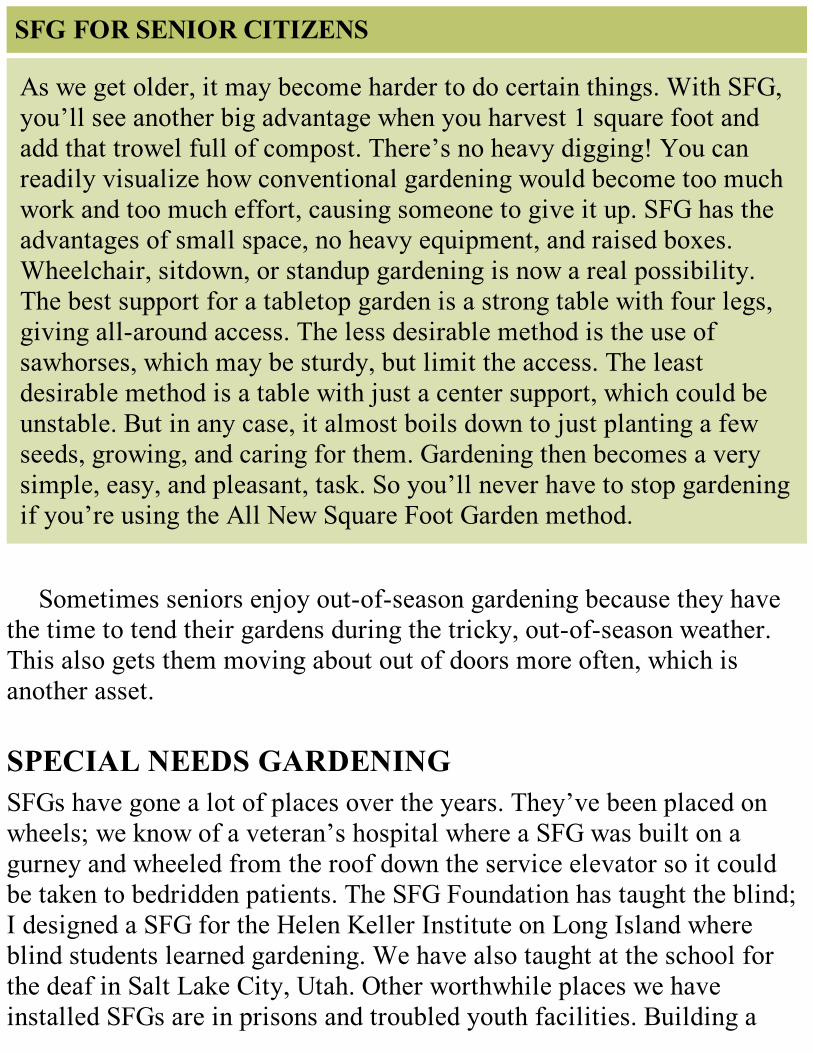
SFG FOR SENIOR CITIZENS
As we get older, it may become harder to do certain things. With SFG,you’ll see another big advantage when you harvest 1 square foot andadd that trowel full of compost. There’s no heavy digging! You canreadily visualize how conventional gardening would become too muchwork and too much effort, causing someone to give it up. SFG has theadvantages of small space, no heavy equipment, and raised boxes.Wheelchair, sitdown, or standup gardening is now a real possibility.The best support for a tabletop garden is a strong table with four legs,giving all-around access. The less desirable method is the use ofsawhorses, which may be sturdy, but limit the access. The leastdesirable method is a table with just a center support, which could beunstable. But in any case, it almost boils down to just planting a fewseeds, growing, and caring for them. Gardening then becomes a verysimple, easy, and pleasant, task. So you’ll never have to stop gardeningif you’re using the All New Square Foot Garden method.
Sometimes seniors enjoy out-of-season gardening because they havethe time to tend their gardens during the tricky, out-of-season weather.This also gets them moving about out of doors more often, which isanother asset.
SPECIAL NEEDS GARDENINGSFGs have gone a lot of places over the years. They’ve been placed onwheels; we know of a veteran’s hospital where a SFG was built on agurney and wheeled from the roof down the service elevator so it couldbe taken to bedridden patients. The SFG Foundation has taught the blind;I designed a SFG for the Helen Keller Institute on Long Island whereblind students learned gardening. We have also taught at the school forthe deaf in Salt Lake City, Utah. Other worthwhile places we haveinstalled SFGs are in prisons and troubled youth facilities. Building a
small portable garden (in sizes from 2 × 2 up to 4 × 4 with a plywoodbottom added) allows people to participate who otherwise might not havebeen able to garden.
GARDENING IN SCHOOLSOne thing I’ve learned from teaching SFG over the last thirty years is thatkids love to garden. They are so excited about growing plants. From thebeginning, it was obvious that SFG is perfect for teaching arithmetic andall kinds of math and, that in fact, anything in the scientific field is easilytaught using gardening as the vehicle. But then I began to see that ateacher could readily relate all subjects to gardening.
One of the best examples of this is a teacher in California namedSandy. She teaches every subject in the classroom through the class’sSquare Foot Gardens. One year, the final project was to have each studentwrite me a letter telling me about their garden. They each described whatthey liked best and then drew a picture illustrating it. They were learningpenmanship, spelling, pronunciation, letter writing, and the ability todescribe observations and feelings. During the year, Sandy covered manyaspects of science and art, as well as economics, history, language,communication, and the environmental issues. The class produced a playand video about SFG and invited parents and the rest of the school tocome learn with them. This, of course, gave Sandy the opportunity toteach play writing, acting, stage presence, costume design and making,advertising, publicity, promotion, and so much more. A side benefit isthat, in addition to school subjects, the children learned the importantvalues of sharing, nurturing, and responsibility.
We have worked with all age groups from preschool through highschool using gardening as a teaching tool. Suddenly learning begins tohave some type of meaning in their lives, and they can begin to see thevalue of the subjects they have been learning in the past.
A Square Yard in the School Yard
The only change in SFG for children is that we make the box a littlesmaller because they can’t reach in as far. Instead they garden in a 3 × 3-foot box, which equals a square yard. As I mentioned before, this is howwe got the name for our school program, “A Square Yard in the SchoolYard.” We have the description and photos of many school programs onour website on the School Gardening page.
A plan needs to be made on what to do with the gardens during thesummer vacation period. There are lots of solutions—all you need to dois brainstorm with the students, and the brainstorming itself becomesanother learning experience!
COMMUNITY GARDENSWith SFG, it is possible to have pocket gardens anywhere in thecommunity, even right in a city. It doesn’t take an entire empty lot now,and it doesn’t have to be a huge project to convert space into acommunity garden. It is now possible to take just a corner of that lot orany other small space—perhaps even in an existing city park—and have avery small community Square Foot Garden. Each person can have fromone 4 × 4-foot box up to an area of perhaps 12 × 12, which would enablethem to have four or more boxes. One of the best things about using SFGin a community garden is that since there are no weeds, the gardendoesn’t become an overrun eyesore by the middle of the summer. Thismeans it is much easier to operate and get public and official approval. Ifyou want to start a community garden, I would emphasize the need againto start small, gain experience, become successful, and then expandduring the second season or year.
Community gardens do require a set of guidelines for whatparticipants can and cannot grow so they don’t interfere with theirneighbor’s garden; the guidelines should also cover the hours ofoperation, use of water, and maintenance of the gardens so they look neatand attractive. The use of pesticides and fertilizer was always a bigconcern with community gardens, but that issue can be totally eliminatedwith SFG.

In the layout of the garden, it would be nice to have several tableswhere people in wheelchairs could wheel right up to their assigned gardenplot. Also, several benches and some shade are always a good feature.
GROUP PROJECTSA SFG could be a demonstration project for many different groups,including children’s gardens, scouts, 4-H’ers, Master Gardeners,botanical gardens, and garden clubs. A group could create a salad gardenwith all the fixings—lettuce, tomatoes, root crops, and edible flowers.Each square would have a nice sign stating what is there and how it isused in a salad. Another idea would be an herb display with signs and aninvitation to touch the plants.
The nice part about the idea of using a SFG is it requires so littlemaintenance yet produces such a spectacular showcase. It is an easy wayof attracting new members or of putting on a demonstration at a function.Another nice thing about it is, at the end of a fair or show, four people canpick up the garden, put it into a van, and take it home. In that situation,you can even include a shortened vertical frame so that it would still fit inthe vehicle and yet would add a third dimension to your display.
“Your method is awesome. My 3-year-old and I have a blastwith two 4 × 6 boxes.”– Rich from North Carolina
HUMANITARIAN PROJECTSFor some, gardening is an enjoyable hobby, but for many it can mean thedifference between life and death. One step up from starving—the worstcondition in the world—is poverty and continual hunger—and that’swhere SFG comes in. We can help solve the hunger situation. We have a

billion people who need help, and the solution is to teach them how tohelp themselves. They need to be shown how and then helped to start justone Square Meter Garden of their own; the rest will follow. We teachthem to use straight compost in their gardens because of the lack of peatmoss and vermiculite in many of these areas of the world; they can createcompost for free, while improving their environment. We believe that,instead of our governments and humanitarian organizations sending food,they should start educational programs that teach people how to compostand how to create a SFG garden. It would cost less, produce more, allowpeople to become self-sufficient, take very little effort, and yet deliverworthwhile results.
That is why the SFG Foundation is so intent on taking Square FootGardening worldwide with its international counterpart Square MeterGardening. We feel it can truly make a difference in the every-day livesof so many millions of people.
On My SoapboxWell, here I am, on my soapbox trying to solve worldwide problemswhen you just want to learn how to have a better garden in your yard. Butwhat this book is all about is how SFG can reach and help so many morepeople.
That’s the significant and imperative message I want to bring to theworld. Will you help me? You can—by encouraging others to start a SFG.Get involved in your community or stretch your involvement to the entireworld. Anyone, anywhere in the world can now have a small square metergarden right at their back door. The nutritional value of the children’sdiet will improve dramatically and step-by-step, and as they expand theirgarden, that family will be closer to self-sufficiency and independencefrom government and private aid programs. You know the saying, “Givea man a fish and you feed him for a day. Teach a man to fish and you feedhim for a lifetime.” The world hunger problem can never be solved untilwe help people help themselves, step-by-step, square-by-square. Then,maybe the saying will be, “Show a family how to Square Meter Garden,

and they will feed themselves forever.”

11

11Appendix
At A Glance VegetablesAt A Glance Herbs & FlowersBasil and BeyondPlant ProfilesPlanting ChartsIndexMeet Mel Bartholomew
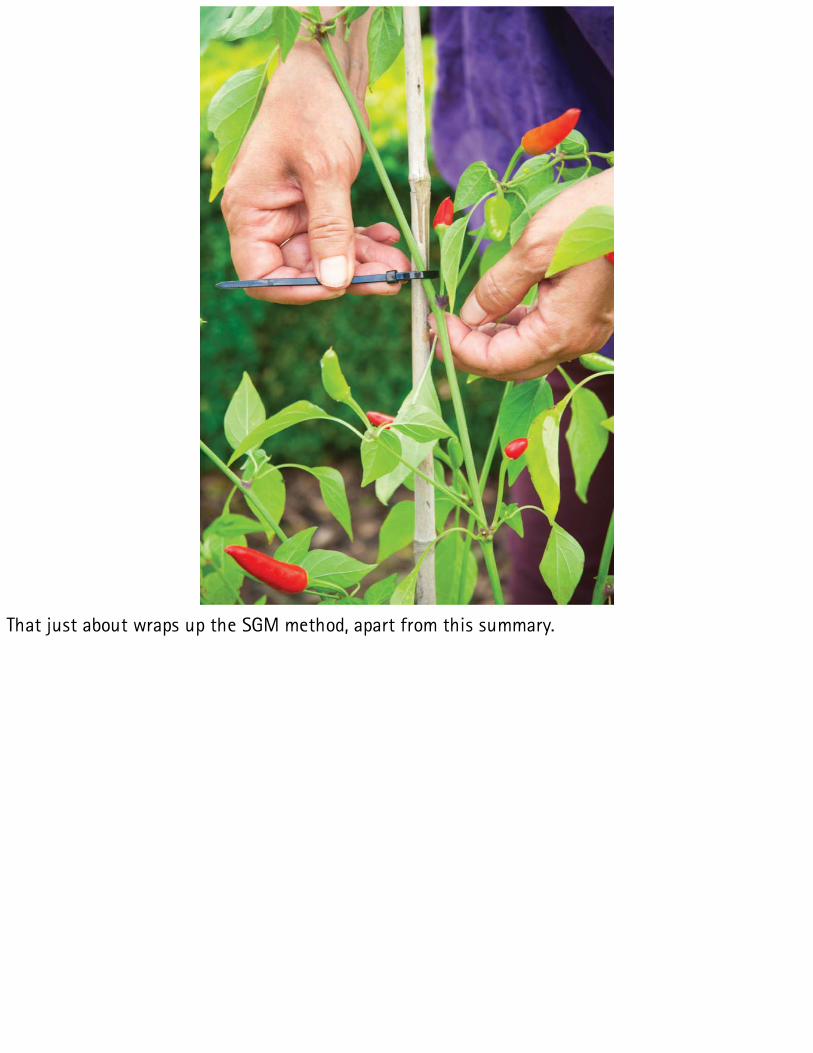
That just about wraps up the SGM method, apart from this summary.
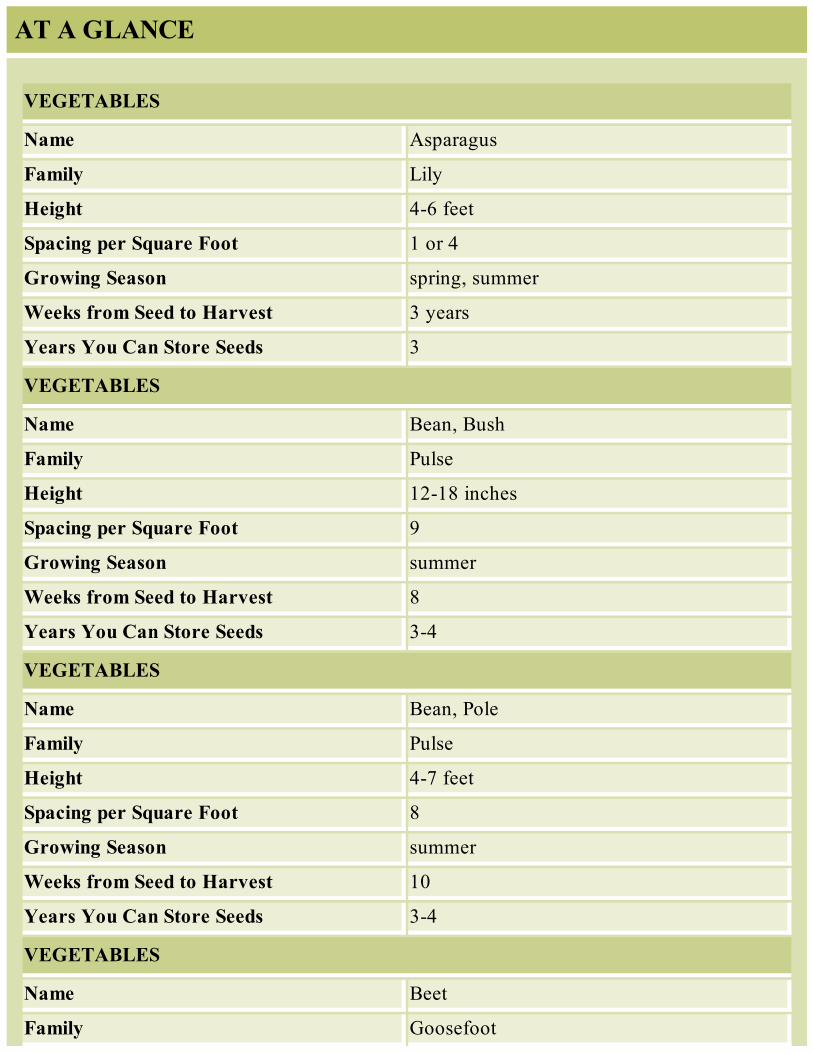
AT A GLANCE
VEGETABLES
Name Asparagus
Family Lily
Height 4-6 feet
Spacing per Square Foot 1 or 4
Growing Season spring, summer
Weeks from Seed to Harvest 3 years
Years You Can Store Seeds 3
VEGETABLES
Name Bean, Bush
Family Pulse
Height 12-18 inches
Spacing per Square Foot 9
Growing Season summer
Weeks from Seed to Harvest 8
Years You Can Store Seeds 3-4
VEGETABLES
Name Bean, Pole
Family Pulse
Height 4-7 feet
Spacing per Square Foot 8
Growing Season summer
Weeks from Seed to Harvest 10
Years You Can Store Seeds 3-4
VEGETABLES
Name Beet
Family Goosefoot
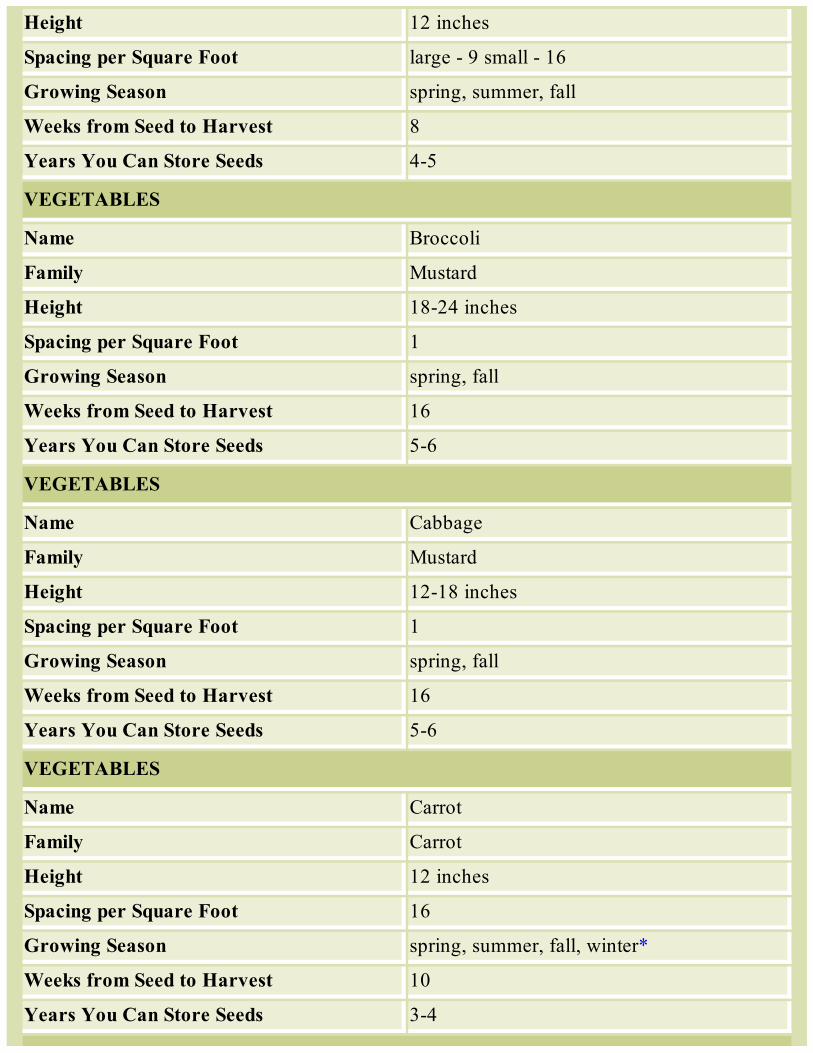
Height 12 inches
Spacing per Square Foot large - 9 small - 16
Growing Season spring, summer, fall
Weeks from Seed to Harvest 8
Years You Can Store Seeds 4-5
VEGETABLES
Name Broccoli
Family Mustard
Height 18-24 inches
Spacing per Square Foot 1
Growing Season spring, fall
Weeks from Seed to Harvest 16
Years You Can Store Seeds 5-6
VEGETABLES
Name Cabbage
Family Mustard
Height 12-18 inches
Spacing per Square Foot 1
Growing Season spring, fall
Weeks from Seed to Harvest 16
Years You Can Store Seeds 5-6
VEGETABLES
Name Carrot
Family Carrot
Height 12 inches
Spacing per Square Foot 16
Growing Season spring, summer, fall, winter*
Weeks from Seed to Harvest 10
Years You Can Store Seeds 3-4
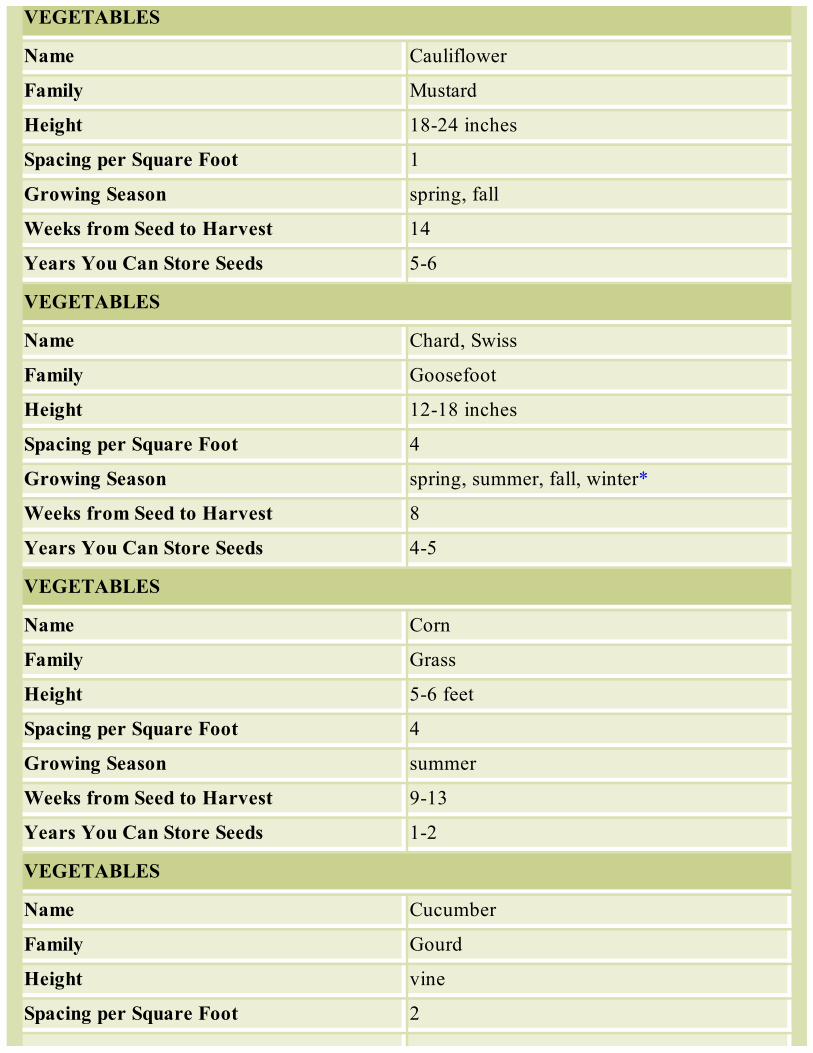
VEGETABLES
Name Cauliflower
Family Mustard
Height 18-24 inches
Spacing per Square Foot 1
Growing Season spring, fall
Weeks from Seed to Harvest 14
Years You Can Store Seeds 5-6
VEGETABLES
Name Chard, Swiss
Family Goosefoot
Height 12-18 inches
Spacing per Square Foot 4
Growing Season spring, summer, fall, winter*
Weeks from Seed to Harvest 8
Years You Can Store Seeds 4-5
VEGETABLES
Name Corn
Family Grass
Height 5-6 feet
Spacing per Square Foot 4
Growing Season summer
Weeks from Seed to Harvest 9-13
Years You Can Store Seeds 1-2
VEGETABLES
Name Cucumber
Family Gourd
Height vine
Spacing per Square Foot 2
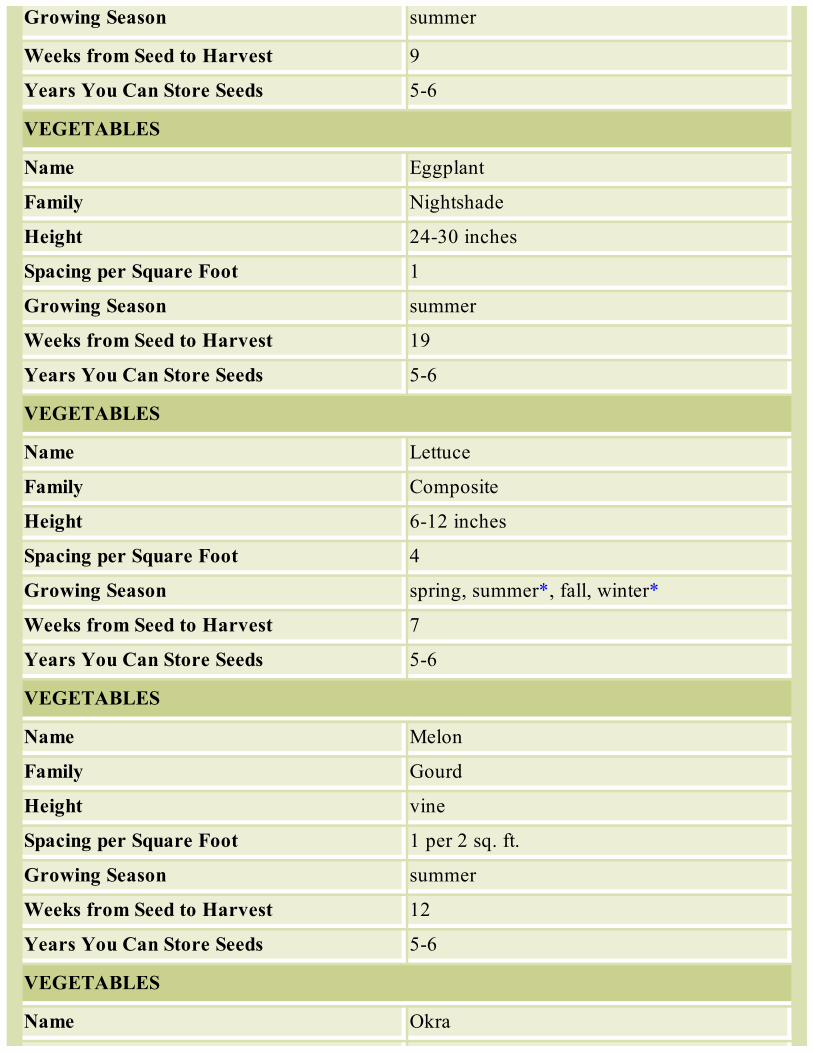
Growing Season summer
Weeks from Seed to Harvest 9
Years You Can Store Seeds 5-6
VEGETABLES
Name Eggplant
Family Nightshade
Height 24-30 inches
Spacing per Square Foot 1
Growing Season summer
Weeks from Seed to Harvest 19
Years You Can Store Seeds 5-6
VEGETABLES
Name Lettuce
Family Composite
Height 6-12 inches
Spacing per Square Foot 4
Growing Season spring, summer*, fall, winter*
Weeks from Seed to Harvest 7
Years You Can Store Seeds 5-6
VEGETABLES
Name Melon
Family Gourd
Height vine
Spacing per Square Foot 1 per 2 sq. ft.
Growing Season summer
Weeks from Seed to Harvest 12
Years You Can Store Seeds 5-6
VEGETABLES
Name Okra
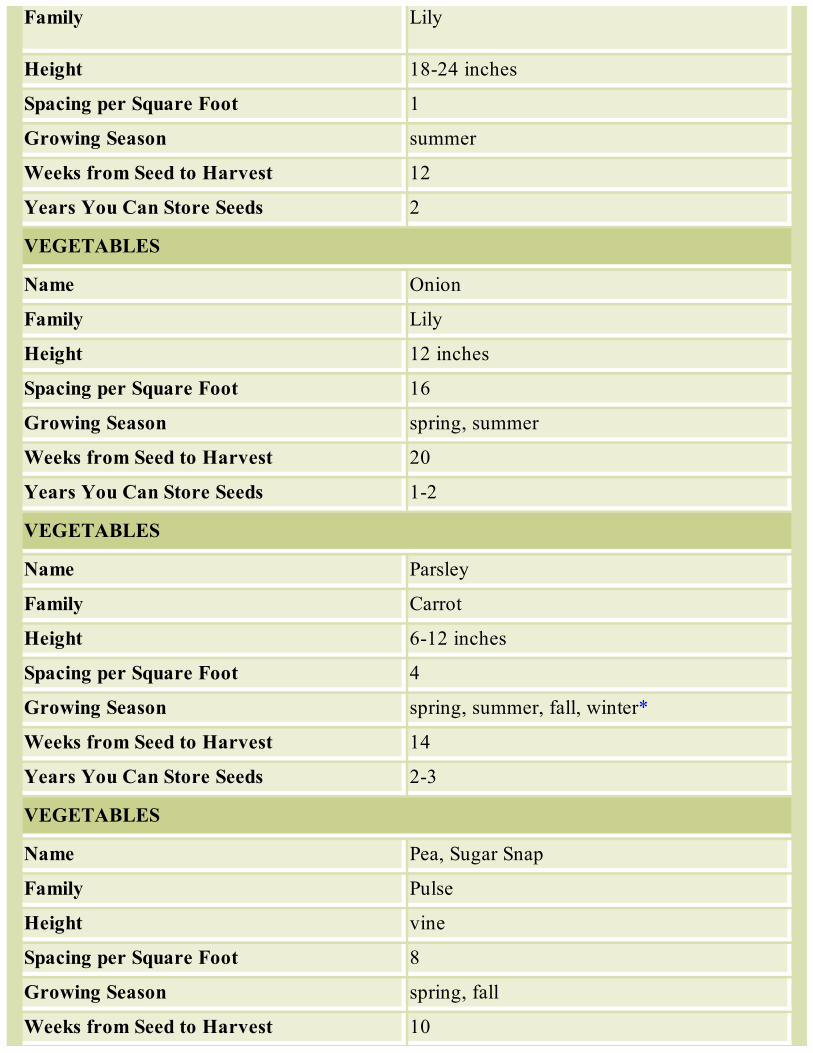
Family Lily
Height 18-24 inches
Spacing per Square Foot 1
Growing Season summer
Weeks from Seed to Harvest 12
Years You Can Store Seeds 2
VEGETABLES
Name Onion
Family Lily
Height 12 inches
Spacing per Square Foot 16
Growing Season spring, summer
Weeks from Seed to Harvest 20
Years You Can Store Seeds 1-2
VEGETABLES
Name Parsley
Family Carrot
Height 6-12 inches
Spacing per Square Foot 4
Growing Season spring, summer, fall, winter*
Weeks from Seed to Harvest 14
Years You Can Store Seeds 2-3
VEGETABLES
Name Pea, Sugar Snap
Family Pulse
Height vine
Spacing per Square Foot 8
Growing Season spring, fall
Weeks from Seed to Harvest 10
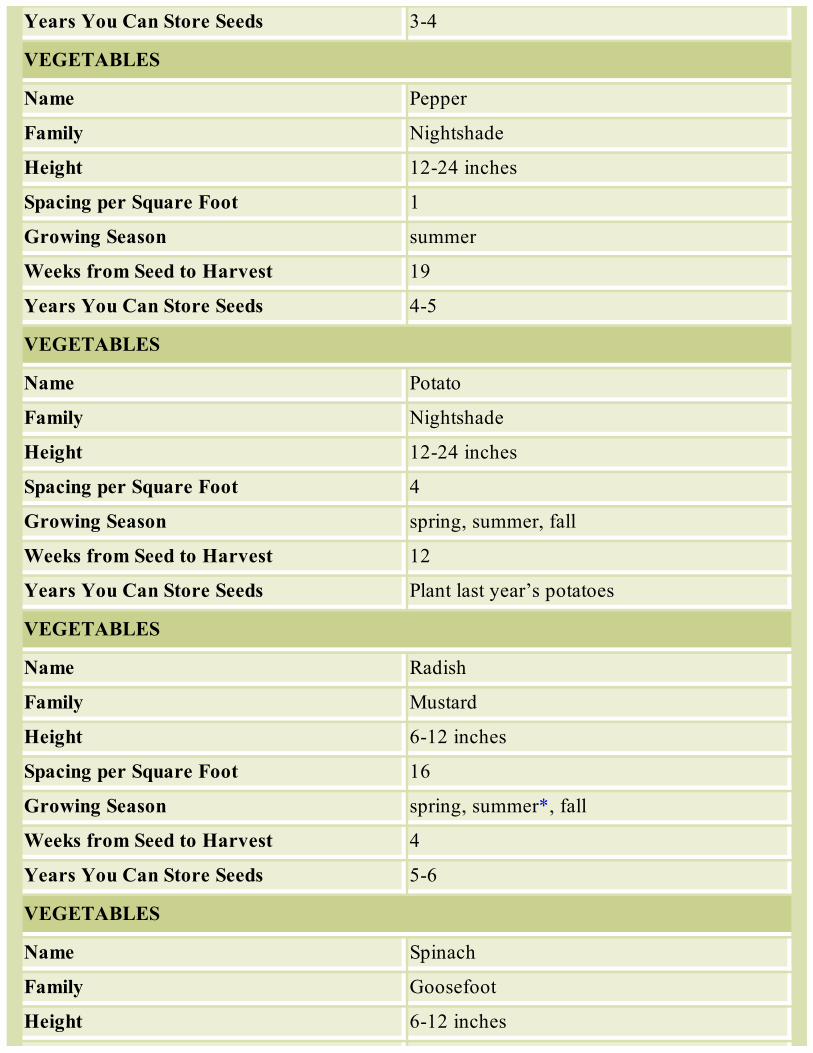
Years You Can Store Seeds 3-4
VEGETABLES
Name Pepper
Family Nightshade
Height 12-24 inches
Spacing per Square Foot 1
Growing Season summer
Weeks from Seed to Harvest 19
Years You Can Store Seeds 4-5
VEGETABLES
Name Potato
Family Nightshade
Height 12-24 inches
Spacing per Square Foot 4
Growing Season spring, summer, fall
Weeks from Seed to Harvest 12
Years You Can Store Seeds Plant last year’s potatoes
VEGETABLES
Name Radish
Family Mustard
Height 6-12 inches
Spacing per Square Foot 16
Growing Season spring, summer*, fall
Weeks from Seed to Harvest 4
Years You Can Store Seeds 5-6
VEGETABLES
Name Spinach
Family Goosefoot
Height 6-12 inches
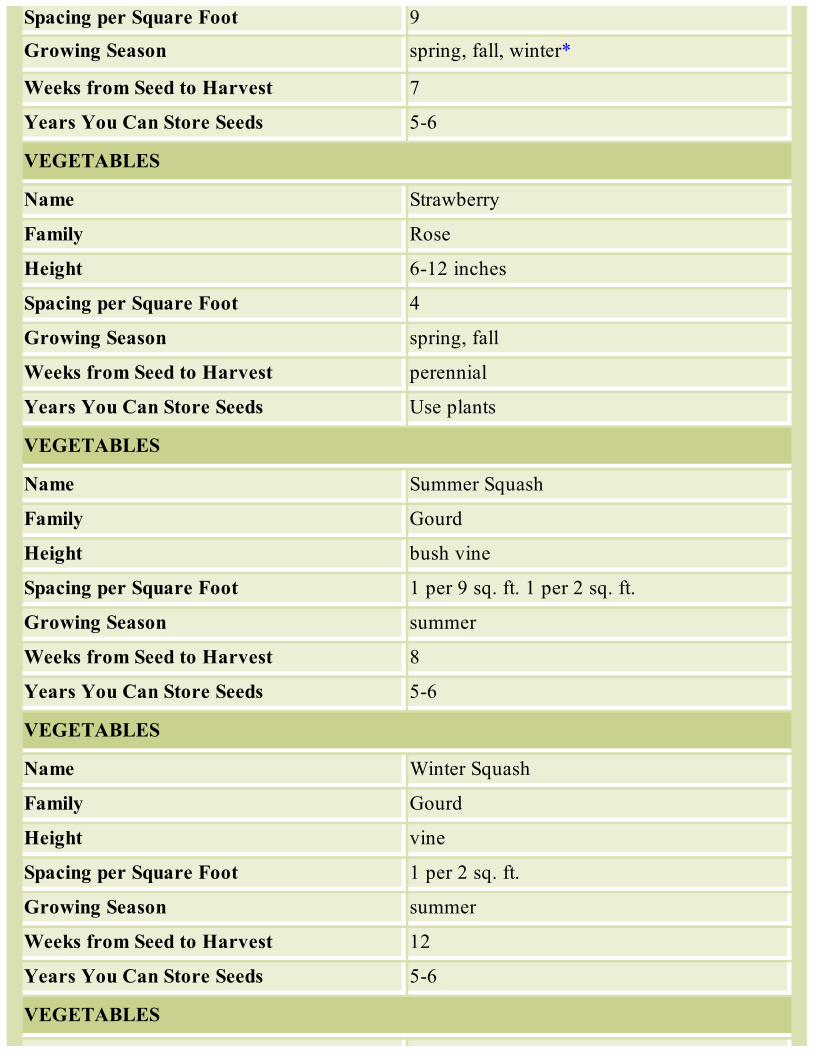
Spacing per Square Foot 9
Growing Season spring, fall, winter*
Weeks from Seed to Harvest 7
Years You Can Store Seeds 5-6
VEGETABLES
Name Strawberry
Family Rose
Height 6-12 inches
Spacing per Square Foot 4
Growing Season spring, fall
Weeks from Seed to Harvest perennial
Years You Can Store Seeds Use plants
VEGETABLES
Name Summer Squash
Family Gourd
Height bush vine
Spacing per Square Foot 1 per 9 sq. ft. 1 per 2 sq. ft.
Growing Season summer
Weeks from Seed to Harvest 8
Years You Can Store Seeds 5-6
VEGETABLES
Name Winter Squash
Family Gourd
Height vine
Spacing per Square Foot 1 per 2 sq. ft.
Growing Season summer
Weeks from Seed to Harvest 12
Years You Can Store Seeds 5-6
VEGETABLES
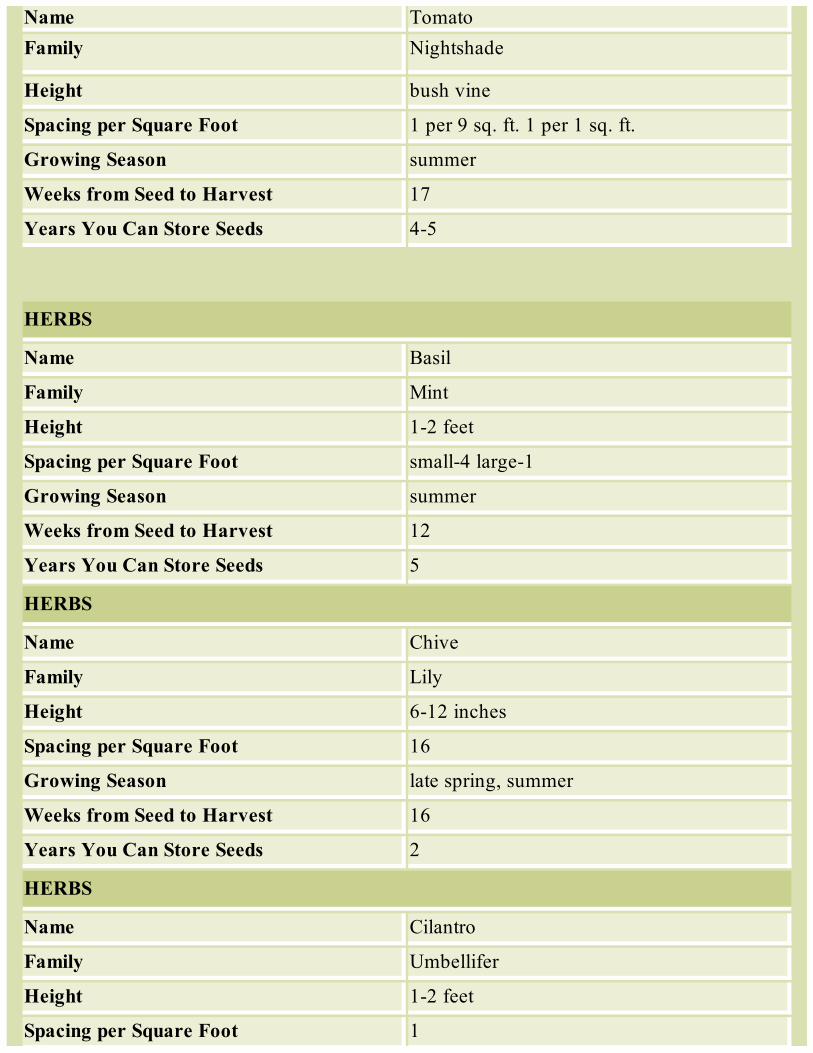
Name TomatoFamily Nightshade
Height bush vine
Spacing per Square Foot 1 per 9 sq. ft. 1 per 1 sq. ft.
Growing Season summer
Weeks from Seed to Harvest 17
Years You Can Store Seeds 4-5
HERBS
Name Basil
Family Mint
Height 1-2 feet
Spacing per Square Foot small-4 large-1
Growing Season summer
Weeks from Seed to Harvest 12
Years You Can Store Seeds 5
HERBS
Name Chive
Family Lily
Height 6-12 inches
Spacing per Square Foot 16
Growing Season late spring, summer
Weeks from Seed to Harvest 16
Years You Can Store Seeds 2
HERBS
Name Cilantro
Family Umbellifer
Height 1-2 feet
Spacing per Square Foot 1
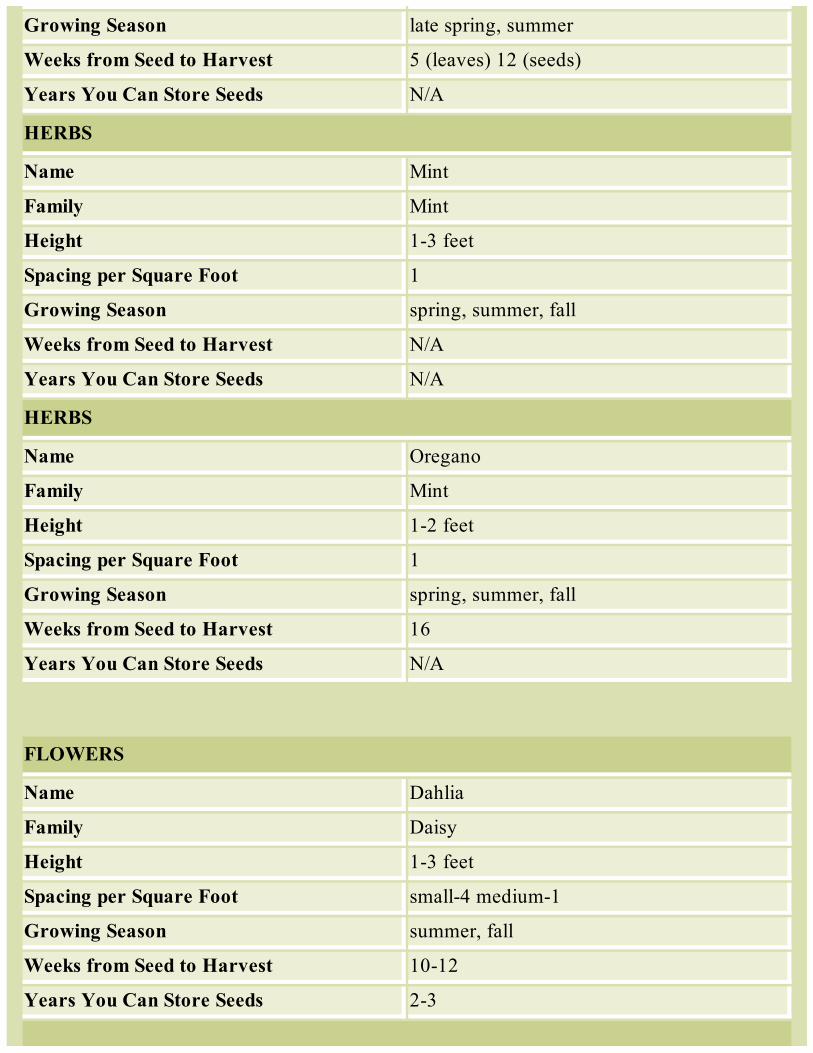
Growing Season late spring, summer
Weeks from Seed to Harvest 5 (leaves) 12 (seeds)
Years You Can Store Seeds N/A
HERBS
Name Mint
Family Mint
Height 1-3 feet
Spacing per Square Foot 1
Growing Season spring, summer, fall
Weeks from Seed to Harvest N/A
Years You Can Store Seeds N/A
HERBS
Name Oregano
Family Mint
Height 1-2 feet
Spacing per Square Foot 1
Growing Season spring, summer, fall
Weeks from Seed to Harvest 16
Years You Can Store Seeds N/A
FLOWERS
Name Dahlia
Family Daisy
Height 1-3 feet
Spacing per Square Foot small-4 medium-1
Growing Season summer, fall
Weeks from Seed to Harvest 10-12
Years You Can Store Seeds 2-3
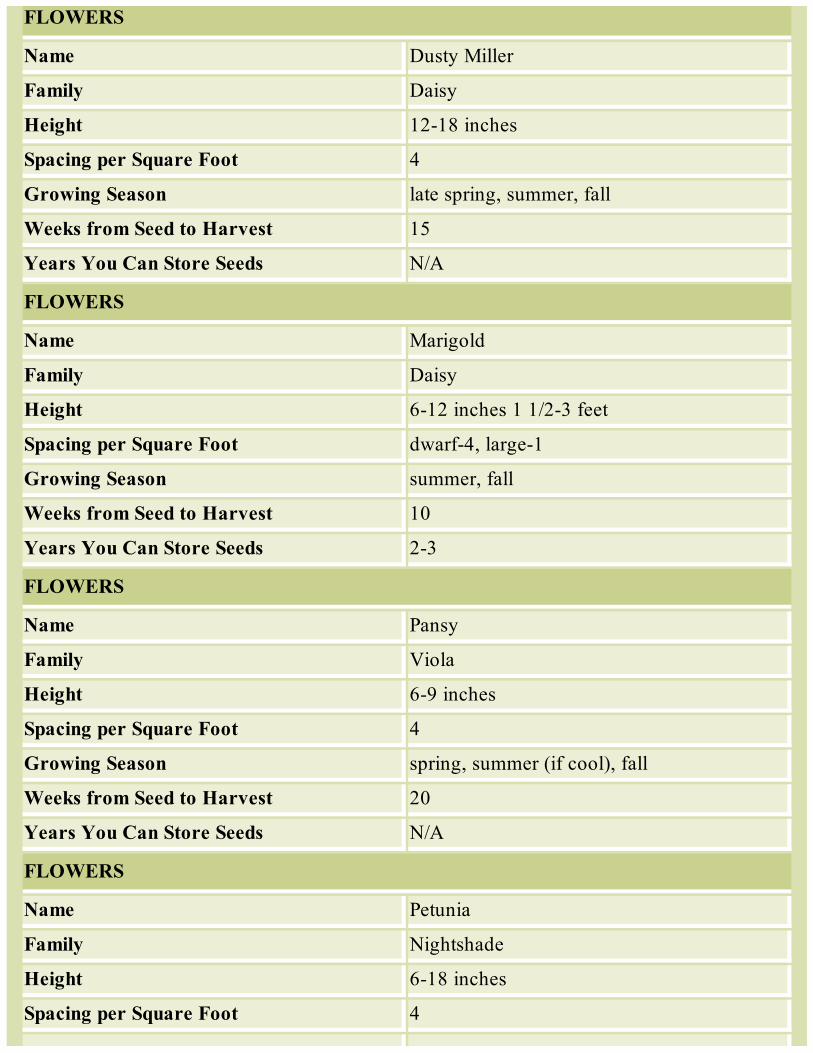
FLOWERS
Name Dusty Miller
Family Daisy
Height 12-18 inches
Spacing per Square Foot 4
Growing Season late spring, summer, fall
Weeks from Seed to Harvest 15
Years You Can Store Seeds N/A
FLOWERS
Name Marigold
Family Daisy
Height 6-12 inches 1 1/2-3 feet
Spacing per Square Foot dwarf-4, large-1
Growing Season summer, fall
Weeks from Seed to Harvest 10
Years You Can Store Seeds 2-3
FLOWERS
Name Pansy
Family Viola
Height 6-9 inches
Spacing per Square Foot 4
Growing Season spring, summer (if cool), fall
Weeks from Seed to Harvest 20
Years You Can Store Seeds N/A
FLOWERS
Name Petunia
Family Nightshade
Height 6-18 inches
Spacing per Square Foot 4
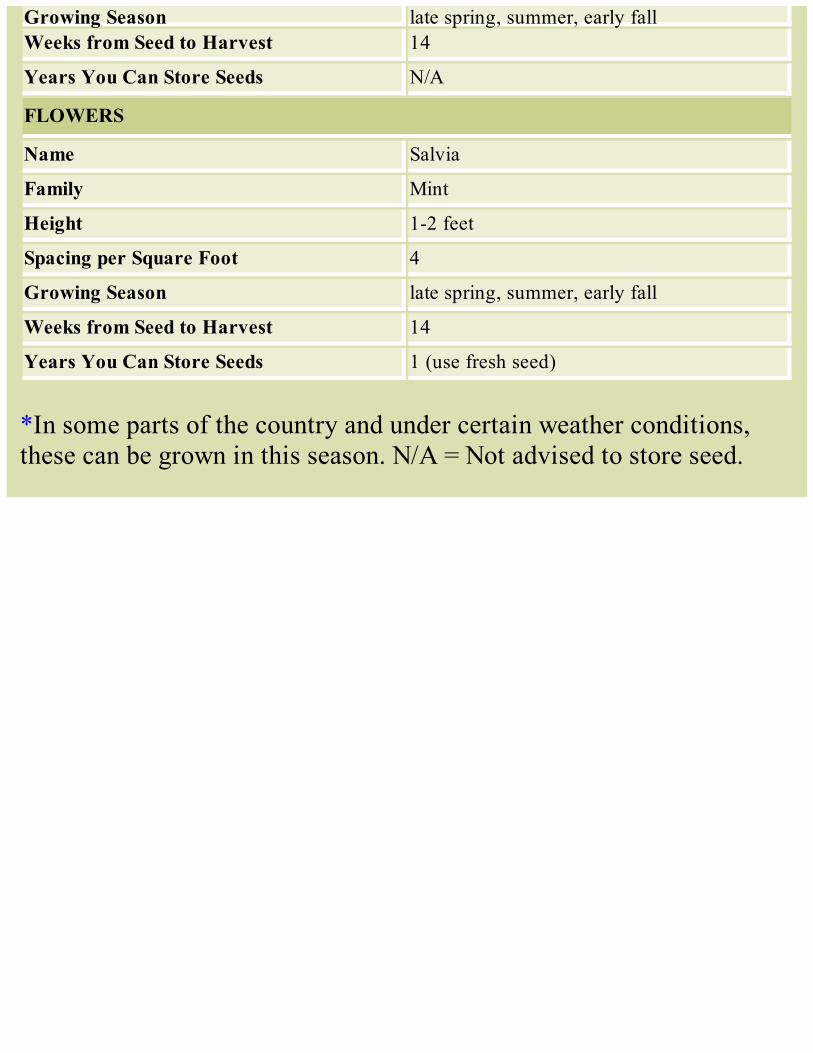
Growing Season late spring, summer, early fallWeeks from Seed to Harvest 14
Years You Can Store Seeds N/A
FLOWERS
Name Salvia
Family Mint
Height 1-2 feet
Spacing per Square Foot 4
Growing Season late spring, summer, early fall
Weeks from Seed to Harvest 14
Years You Can Store Seeds 1 (use fresh seed)
*In some parts of the country and under certain weather conditions,these can be grown in this season. N/A = Not advised to store seed.

Basil and BeyondAlthough we associate basil with Italian cooking, it is animportant ingredient in Asian cuisine too. ‘Siam Queen’ is aspicy Thai basil with an intense flavor and fragrance. ‘HolyBasil’ is a sacred herb in India where it is used in religiousceremonies and planted around Hindu temples. Introducedto Europe in the sixteenth century as a culinary andmedicinal herb, it made its way to England and America inthe mid-seventeenth century.
Basil is used as the perfect complement to summer tomatoes. For asummertime treat, combine tomatoes, basil, garlic, olive oil, andbalsamic vinegar in a food processor, spread on crusty bread, andsprinkle with Parmesan cheese.
Six plants of ‘Sweet Genovese’ will yield enough leaves to makepesto all year without overdosing on it. A mixture of basil, garlic,Parmesan cheese, and olive oil, pesto is a treat with a distinctiveItalian flavor. Try making pesto bread instead of garlic bread, or usepesto as an imaginative sandwich spread.
2 cups basil leaves 2 cloves garlic 1/2 cup grated Parmesan cheese 2 tbsp. Romano cheese 1/4 cup pine nuts or walnuts dash of salt 1/2 cup olive oil water
Combine basil, garlic, cheeses, nuts, and salt in a food processor or
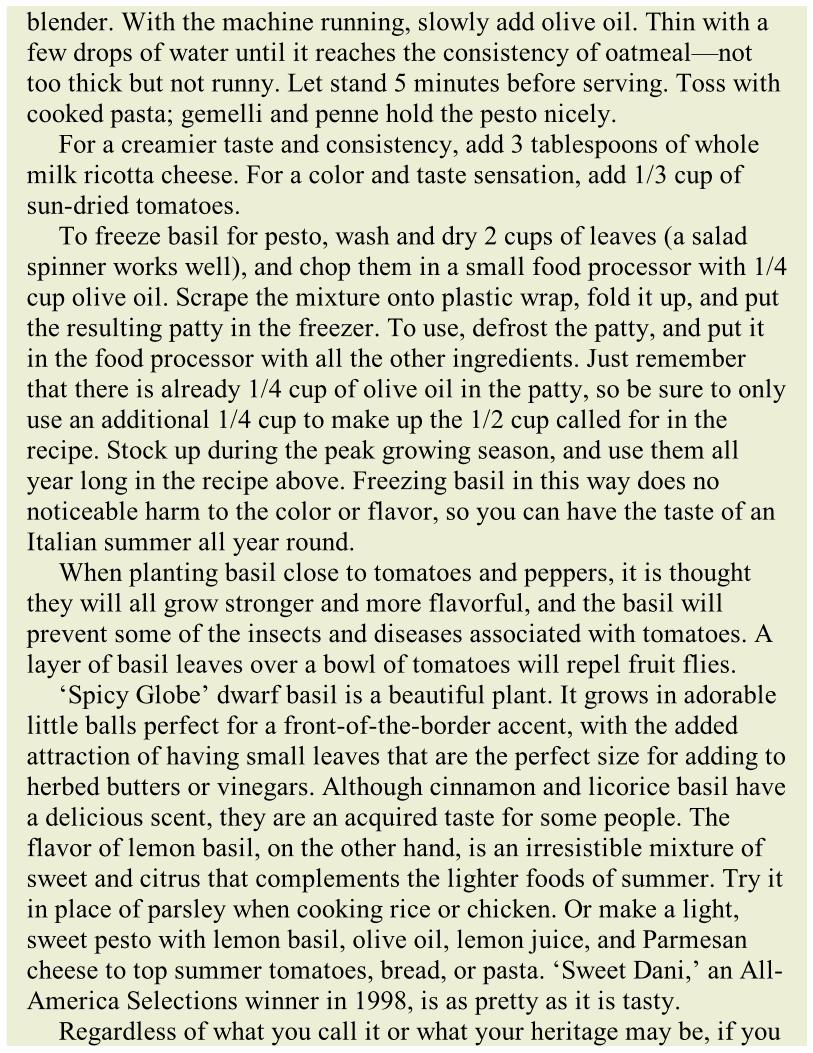
blender. With the machine running, slowly add olive oil. Thin with afew drops of water until it reaches the consistency of oatmeal—nottoo thick but not runny. Let stand 5 minutes before serving. Toss withcooked pasta; gemelli and penne hold the pesto nicely.
For a creamier taste and consistency, add 3 tablespoons of wholemilk ricotta cheese. For a color and taste sensation, add 1/3 cup ofsun-dried tomatoes.
To freeze basil for pesto, wash and dry 2 cups of leaves (a saladspinner works well), and chop them in a small food processor with 1/4cup olive oil. Scrape the mixture onto plastic wrap, fold it up, and putthe resulting patty in the freezer. To use, defrost the patty, and put itin the food processor with all the other ingredients. Just rememberthat there is already 1/4 cup of olive oil in the patty, so be sure to onlyuse an additional 1/4 cup to make up the 1/2 cup called for in therecipe. Stock up during the peak growing season, and use them allyear long in the recipe above. Freezing basil in this way does nonoticeable harm to the color or flavor, so you can have the taste of anItalian summer all year round.
When planting basil close to tomatoes and peppers, it is thoughtthey will all grow stronger and more flavorful, and the basil willprevent some of the insects and diseases associated with tomatoes. Alayer of basil leaves over a bowl of tomatoes will repel fruit flies.
‘Spicy Globe’ dwarf basil is a beautiful plant. It grows in adorablelittle balls perfect for a front-of-the-border accent, with the addedattraction of having small leaves that are the perfect size for adding toherbed butters or vinegars. Although cinnamon and licorice basil havea delicious scent, they are an acquired taste for some people. Theflavor of lemon basil, on the other hand, is an irresistible mixture ofsweet and citrus that complements the lighter foods of summer. Try itin place of parsley when cooking rice or chicken. Or make a light,sweet pesto with lemon basil, olive oil, lemon juice, and Parmesancheese to top summer tomatoes, bread, or pasta. ‘Sweet Dani,’ an All-America Selections winner in 1998, is as pretty as it is tasty.
Regardless of what you call it or what your heritage may be, if you
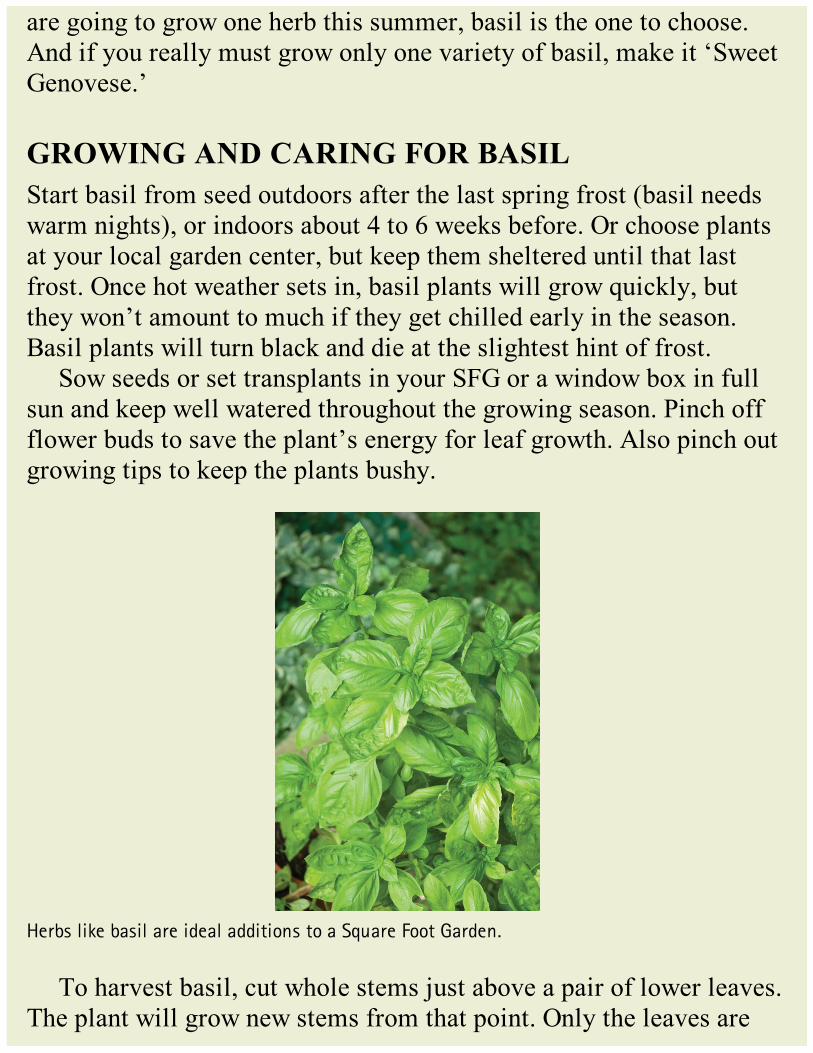
are going to grow one herb this summer, basil is the one to choose.And if you really must grow only one variety of basil, make it ‘SweetGenovese.’
GROWING AND CARING FOR BASILStart basil from seed outdoors after the last spring frost (basil needswarm nights), or indoors about 4 to 6 weeks before. Or choose plantsat your local garden center, but keep them sheltered until that lastfrost. Once hot weather sets in, basil plants will grow quickly, butthey won’t amount to much if they get chilled early in the season.Basil plants will turn black and die at the slightest hint of frost.
Sow seeds or set transplants in your SFG or a window box in fullsun and keep well watered throughout the growing season. Pinch offflower buds to save the plant’s energy for leaf growth. Also pinch outgrowing tips to keep the plants bushy.
Herbs like basil are ideal additions to a Square Foot Garden.
To harvest basil, cut whole stems just above a pair of lower leaves.The plant will grow new stems from that point. Only the leaves are

used in fresh or frozen recipes; the stems go to the mulch pile.To dry basil, hang entire stems upside down out of direct sunlight.
Remove the dried leaves from the stems and store in an airtightcontainer. Crush dried leaves into your favorite sauces for a subtlebasil flavor.
Now let’s talk about some other plants.
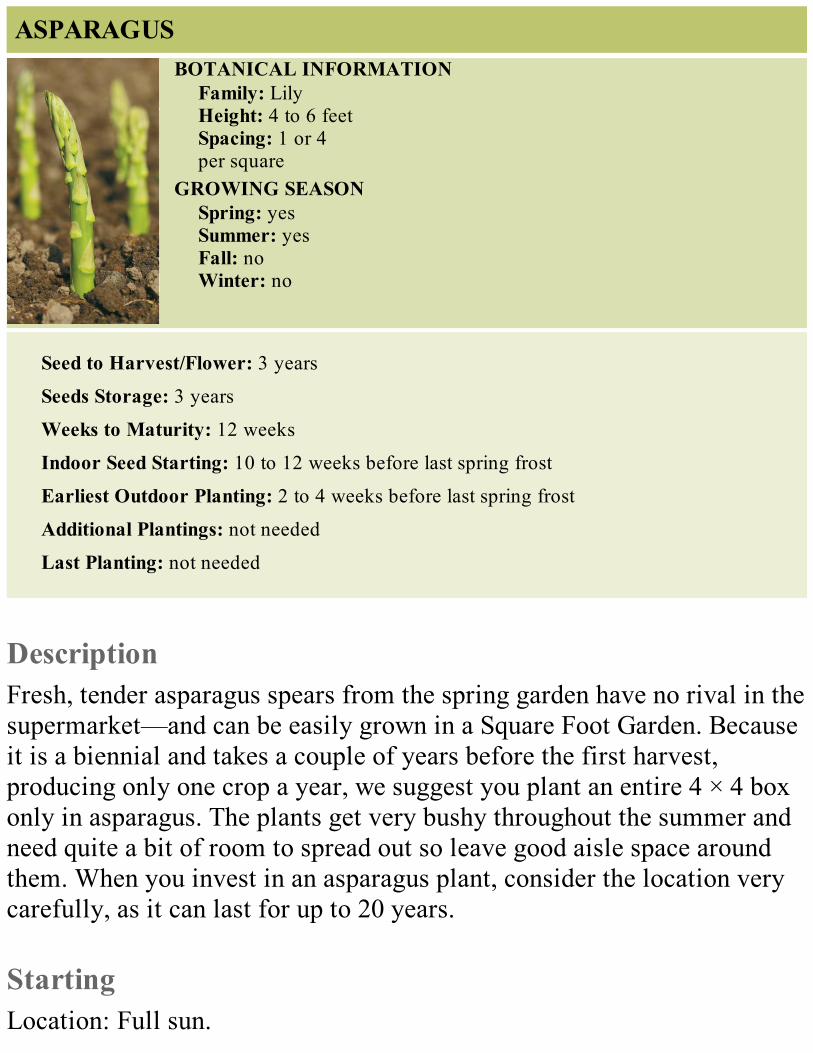
ASPARAGUSBOTANICAL INFORMATION
Family: LilyHeight: 4 to 6 feetSpacing: 1 or 4per square
GROWING SEASONSpring: yesSummer: yesFall: noWinter: no
Seed to Harvest/Flower: 3 years
Seeds Storage: 3 years
Weeks to Maturity: 12 weeks
Indoor Seed Starting: 10 to 12 weeks before last spring frost
Earliest Outdoor Planting: 2 to 4 weeks before last spring frost
Additional Plantings: not needed
Last Planting: not needed
DescriptionFresh, tender asparagus spears from the spring garden have no rival in thesupermarket—and can be easily grown in a Square Foot Garden. Becauseit is a biennial and takes a couple of years before the first harvest,producing only one crop a year, we suggest you plant an entire 4 × 4 boxonly in asparagus. The plants get very bushy throughout the summer andneed quite a bit of room to spread out so leave good aisle space aroundthem. When you invest in an asparagus plant, consider the location verycarefully, as it can last for up to 20 years.
StartingLocation: Full sun.
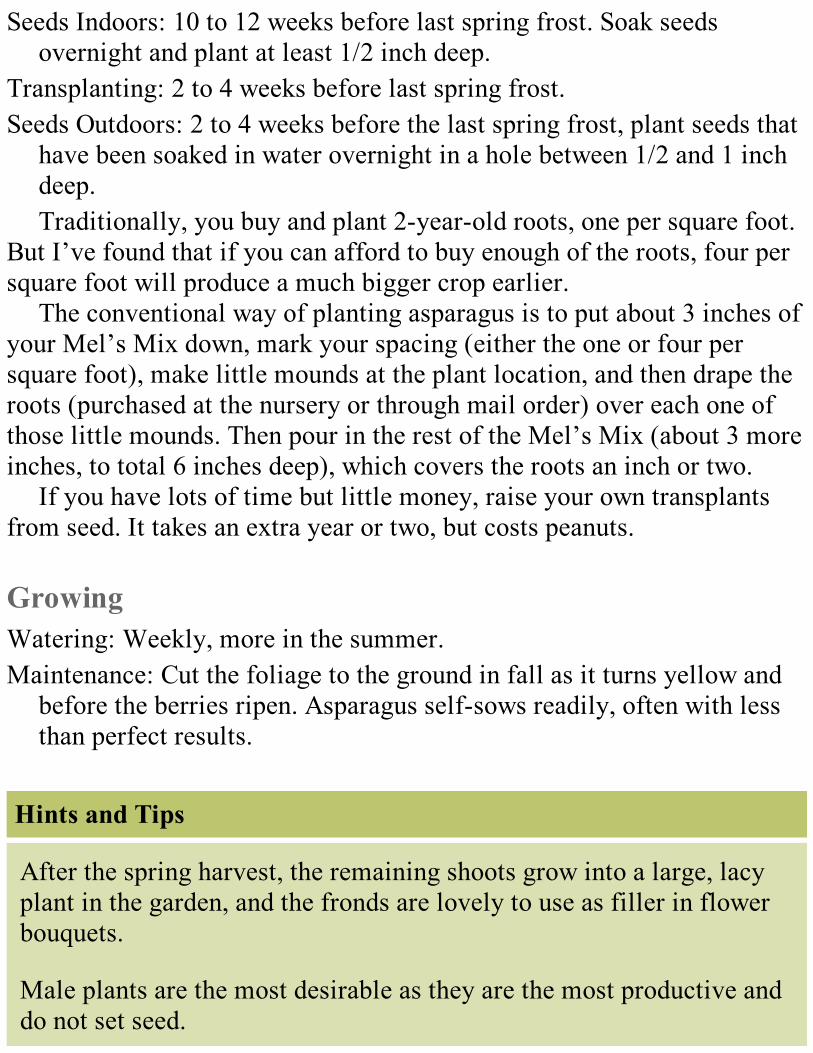
Seeds Indoors: 10 to 12 weeks before last spring frost. Soak seedsovernight and plant at least 1/2 inch deep.
Transplanting: 2 to 4 weeks before last spring frost.Seeds Outdoors: 2 to 4 weeks before the last spring frost, plant seeds that
have been soaked in water overnight in a hole between 1/2 and 1 inchdeep.Traditionally, you buy and plant 2-year-old roots, one per square foot.
But I’ve found that if you can afford to buy enough of the roots, four persquare foot will produce a much bigger crop earlier.
The conventional way of planting asparagus is to put about 3 inches ofyour Mel’s Mix down, mark your spacing (either the one or four persquare foot), make little mounds at the plant location, and then drape theroots (purchased at the nursery or through mail order) over each one ofthose little mounds. Then pour in the rest of the Mel’s Mix (about 3 moreinches, to total 6 inches deep), which covers the roots an inch or two.
If you have lots of time but little money, raise your own transplantsfrom seed. It takes an extra year or two, but costs peanuts.
GrowingWatering: Weekly, more in the summer.Maintenance: Cut the foliage to the ground in fall as it turns yellow and
before the berries ripen. Asparagus self-sows readily, often with lessthan perfect results.
Hints and Tips
After the spring harvest, the remaining shoots grow into a large, lacyplant in the garden, and the fronds are lovely to use as filler in flowerbouquets.
Male plants are the most desirable as they are the most productive anddo not set seed.
HarvestingHow: Cut the largest asparagus shoots at the surface of the soil with a
sharp serrated knife, making a slanting cut.When: Harvest asparagus in late spring, when the shoots are 4 to 6 inches
tall, for about 6 weeks. Spears taller than 6 inches can be tough.Harvest from mature plants only: don’t harvest from first-year plants,and only sparingly, say one or two shoots per plant, the second year.Three-year-old plants are considered mature.
Preparing and UsingAsparagus is best used as fresh as possible, but it can be stored for acouple of days in the refrigerator, standing on end on a wet pad or in a jarof cold water. Asparagus can be eaten raw, steamed, boiled, grilled,roasted, or cooked in casseroles and salads. Tall narrow asparagus kettlesare designed to cook the spears upright, immersing the stems while thetender heads steam. Cook asparagus briefly as it can become mushy ifovercooked.
ProblemsSlugs, asparagus beetle, rust, Fusarium root rot.
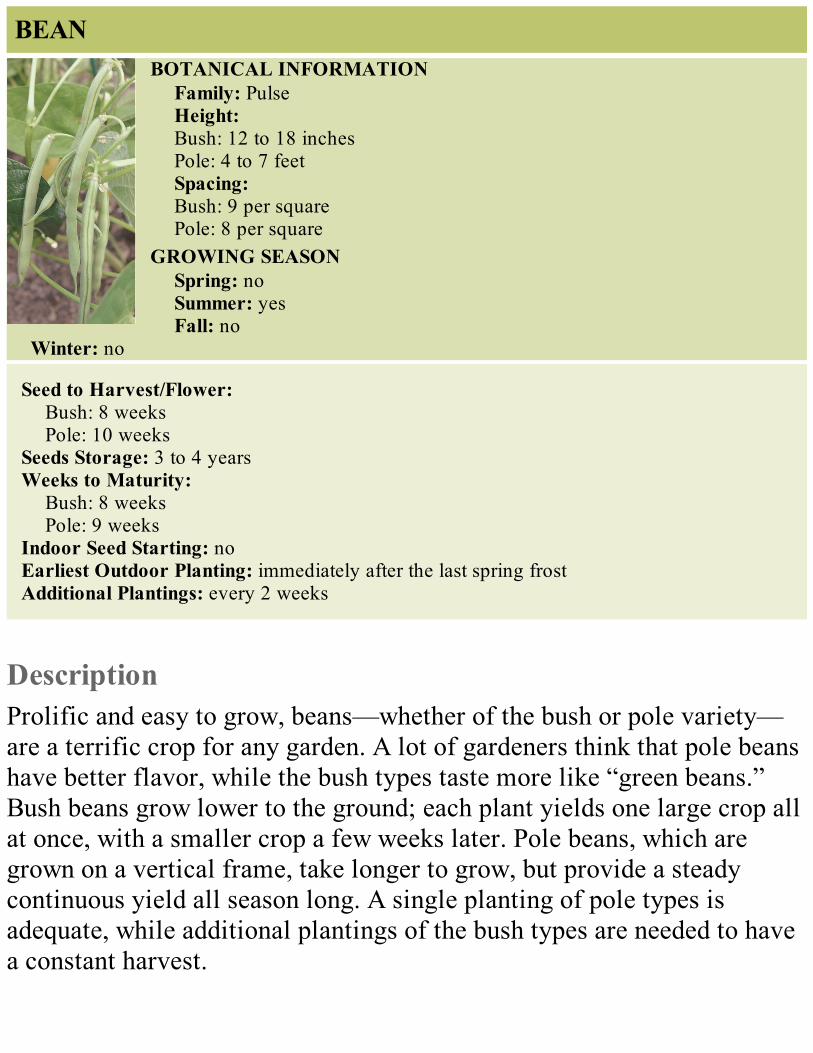
BEANBOTANICAL INFORMATION
Family: PulseHeight:Bush: 12 to 18 inchesPole: 4 to 7 feetSpacing:Bush: 9 per squarePole: 8 per square
GROWING SEASONSpring: noSummer: yesFall: no
Winter: no
Seed to Harvest/Flower:Bush: 8 weeksPole: 10 weeks
Seeds Storage: 3 to 4 yearsWeeks to Maturity:
Bush: 8 weeksPole: 9 weeks
Indoor Seed Starting: noEarliest Outdoor Planting: immediately after the last spring frostAdditional Plantings: every 2 weeks
DescriptionProlific and easy to grow, beans—whether of the bush or pole variety—are a terrific crop for any garden. A lot of gardeners think that pole beanshave better flavor, while the bush types taste more like “green beans.”Bush beans grow lower to the ground; each plant yields one large crop allat once, with a smaller crop a few weeks later. Pole beans, which aregrown on a vertical frame, take longer to grow, but provide a steadycontinuous yield all season long. A single planting of pole types isadequate, while additional plantings of the bush types are needed to havea constant harvest.

StartingLocation: Full sun.Seeds Indoors: No.Transplanting: Does not transplant well.Seeds Outdoors: Presoak seeds thirty minutes for faster sprouting. Water
soil and cover square with a chicken-wire cage to keep out birds. Seedssprout in 5 to 10 days; remove cage after two weeks. For a continuousharvest of bush beans, plant a new square of a different color orvariety every 2 weeks all summer long.
GrowingWatering: Beans must have regular waterings. Do not allow the soil to
dry out, but keep the leaves dry.Maintenance: Weed weekly if you see any weeds sprouting.
HarvestingHow: Break or cut each stem holding the bean pod (there’s no harm done
if the bean breaks and part of the pod stays on the vine). Do not pull onthe plant when harvesting.
When: Pick beans when they are still small and tender. Do not allow themto get so large that pods bulge with seeds; the plant will stopproducing and the best flavor is past.
Preparing and UsingWash and refrigerate if not using immediately. Beans do not store well,so try to use them the same day they are picked. In the old days, beanswere called string beans and the string had to be pulled off beforecooking. Newer varieties—called snap beans—only form strings if youlet them get too tough and large. Beans contain lots of vitamins A, B, andC, as well as calcium and iron.
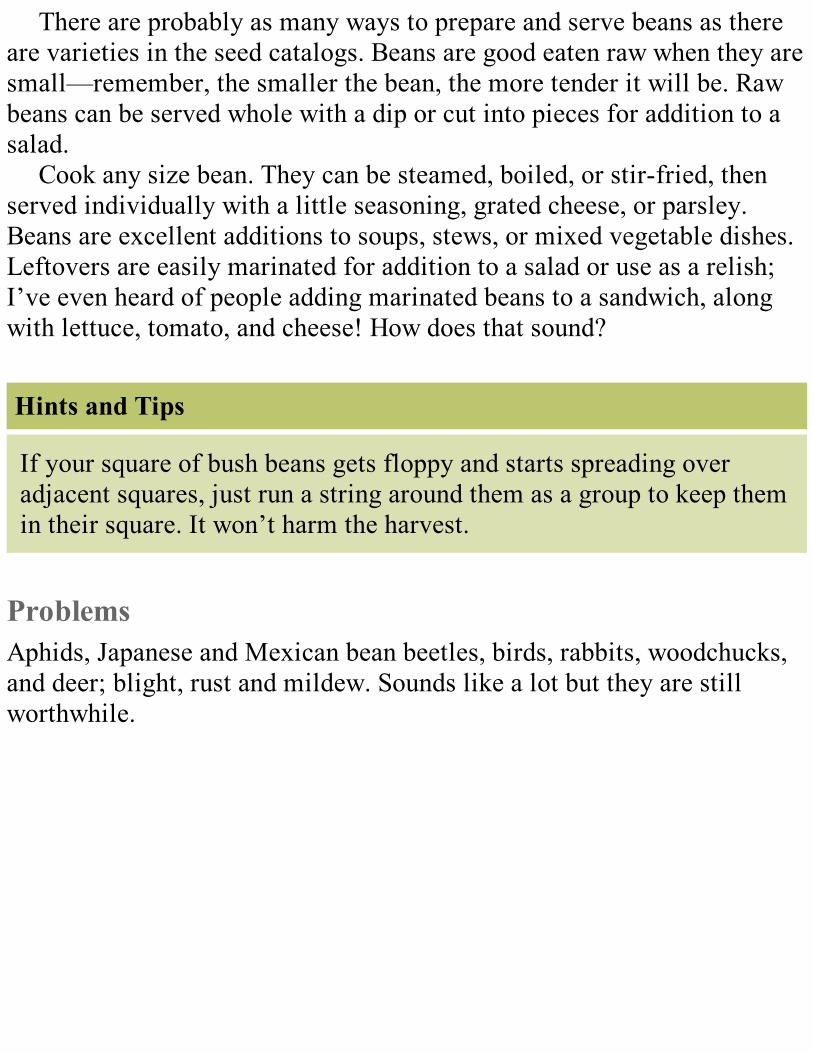
There are probably as many ways to prepare and serve beans as thereare varieties in the seed catalogs. Beans are good eaten raw when they aresmall—remember, the smaller the bean, the more tender it will be. Rawbeans can be served whole with a dip or cut into pieces for addition to asalad.
Cook any size bean. They can be steamed, boiled, or stir-fried, thenserved individually with a little seasoning, grated cheese, or parsley.Beans are excellent additions to soups, stews, or mixed vegetable dishes.Leftovers are easily marinated for addition to a salad or use as a relish;I’ve even heard of people adding marinated beans to a sandwich, alongwith lettuce, tomato, and cheese! How does that sound?
Hints and Tips
If your square of bush beans gets floppy and starts spreading overadjacent squares, just run a string around them as a group to keep themin their square. It won’t harm the harvest.
ProblemsAphids, Japanese and Mexican bean beetles, birds, rabbits, woodchucks,and deer; blight, rust and mildew. Sounds like a lot but they are stillworthwhile.
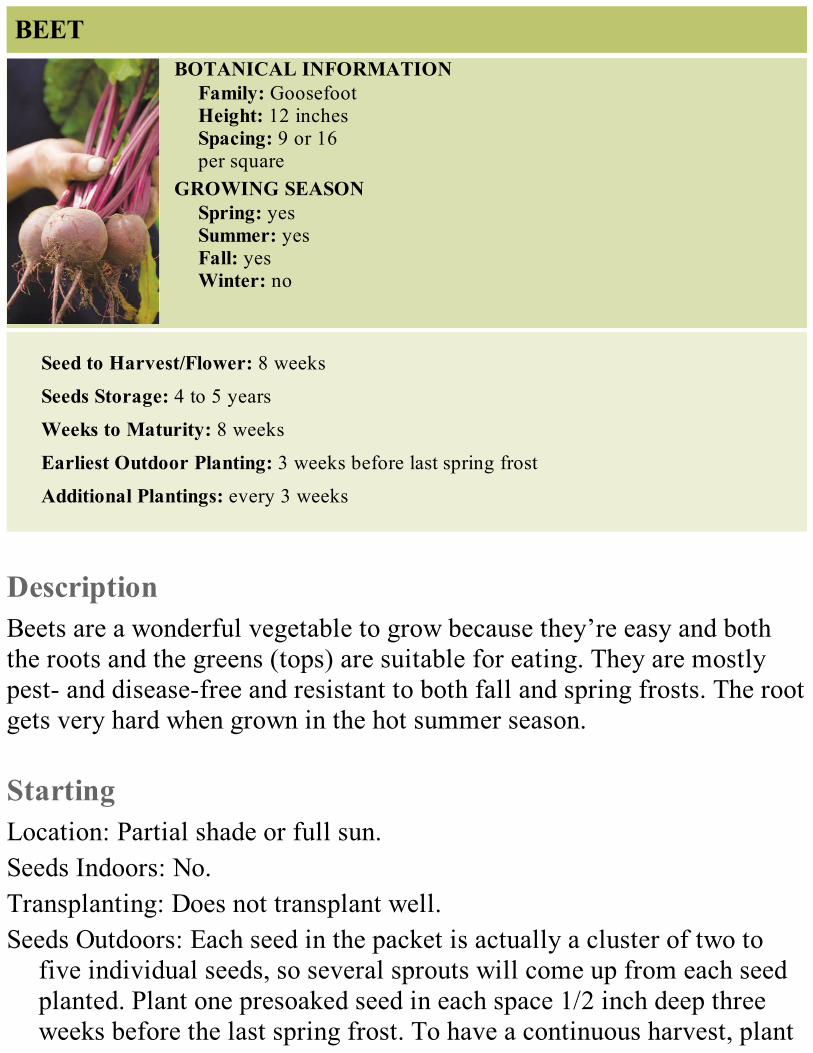
BEETBOTANICAL INFORMATION
Family: GoosefootHeight: 12 inchesSpacing: 9 or 16per square
GROWING SEASONSpring: yesSummer: yesFall: yesWinter: no
Seed to Harvest/Flower: 8 weeks
Seeds Storage: 4 to 5 years
Weeks to Maturity: 8 weeks
Earliest Outdoor Planting: 3 weeks before last spring frost
Additional Plantings: every 3 weeks
DescriptionBeets are a wonderful vegetable to grow because they’re easy and boththe roots and the greens (tops) are suitable for eating. They are mostlypest- and disease-free and resistant to both fall and spring frosts. The rootgets very hard when grown in the hot summer season.
StartingLocation: Partial shade or full sun.Seeds Indoors: No.Transplanting: Does not transplant well.Seeds Outdoors: Each seed in the packet is actually a cluster of two to
five individual seeds, so several sprouts will come up from each seedplanted. Plant one presoaked seed in each space 1/2 inch deep threeweeks before the last spring frost. To have a continuous harvest, plant
a new square every three weeks except in the hottest part of thesummer. After the sprouts are about 1 inch tall, cut off all except thestrongest plant from each seed cluster.
GrowingWatering: Plants need constant and even moisture.Maintenance: Keep damaged leaves picked off, mulch in hot weather, and
weed weekly.
HarvestingHow: Pull up the entire plant with the largest top. If you’re not sure of
bulb size, dig around the root with your fingers to uncover the top tocheck the size. To harvest greens, individual leaves can be cut at anytime, but don’t take more than one or two from each plant.
When: Roots are the most tender when half size, so start pulling when theroots are approximately the size of a Ping-Pong ball and continue untilthey are full size. Leaves are usable at any size.
Preparing and UsingUse greens whole or chopped in fresh salads, or cook them like spinach.Roots are rich in iron and vitamin B. Serve hot—boiled or steamed.Marinate leftovers for a salad or relish. Try sautéing shredded raw beetsquickly and serve hot, or try them cooked and chilled (shredded, sliced,or diced) in salads or mixed with cottage cheese. Small whole beets canalso be cooked and served with an orange sauce, salad dressing, or aspoonful of sour cream.
Hints and Tips
Try a square each of several varieties for different tastes, texture, andcolors.

ProblemsCutworms, slugs and snails, leaf miners, rabbits, woodchucks, and deer.Relatively disease-free.
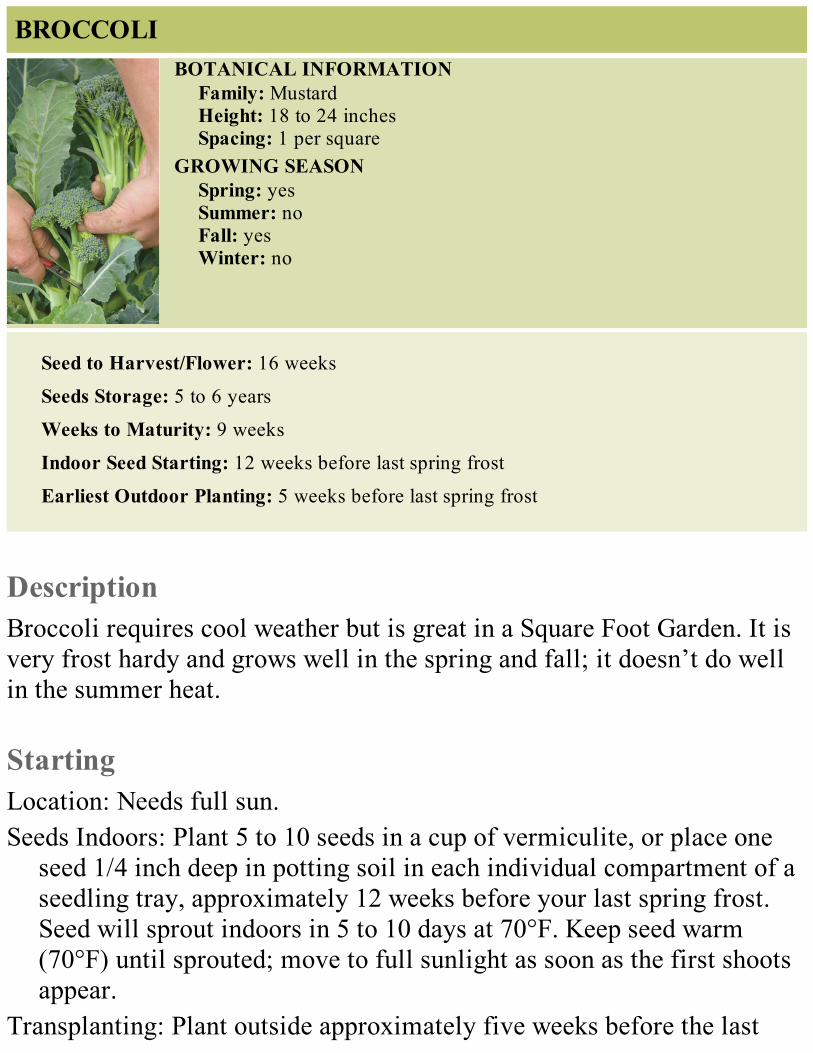
BROCCOLIBOTANICAL INFORMATION
Family: MustardHeight: 18 to 24 inchesSpacing: 1 per square
GROWING SEASONSpring: yesSummer: noFall: yesWinter: no
Seed to Harvest/Flower: 16 weeks
Seeds Storage: 5 to 6 years
Weeks to Maturity: 9 weeks
Indoor Seed Starting: 12 weeks before last spring frost
Earliest Outdoor Planting: 5 weeks before last spring frost
DescriptionBroccoli requires cool weather but is great in a Square Foot Garden. It isvery frost hardy and grows well in the spring and fall; it doesn’t do wellin the summer heat.
StartingLocation: Needs full sun.Seeds Indoors: Plant 5 to 10 seeds in a cup of vermiculite, or place one
seed 1/4 inch deep in potting soil in each individual compartment of aseedling tray, approximately 12 weeks before your last spring frost.Seed will sprout indoors in 5 to 10 days at 70°F. Keep seed warm(70°F) until sprouted; move to full sunlight as soon as the first shootsappear.
Transplanting: Plant outside approximately five weeks before the last
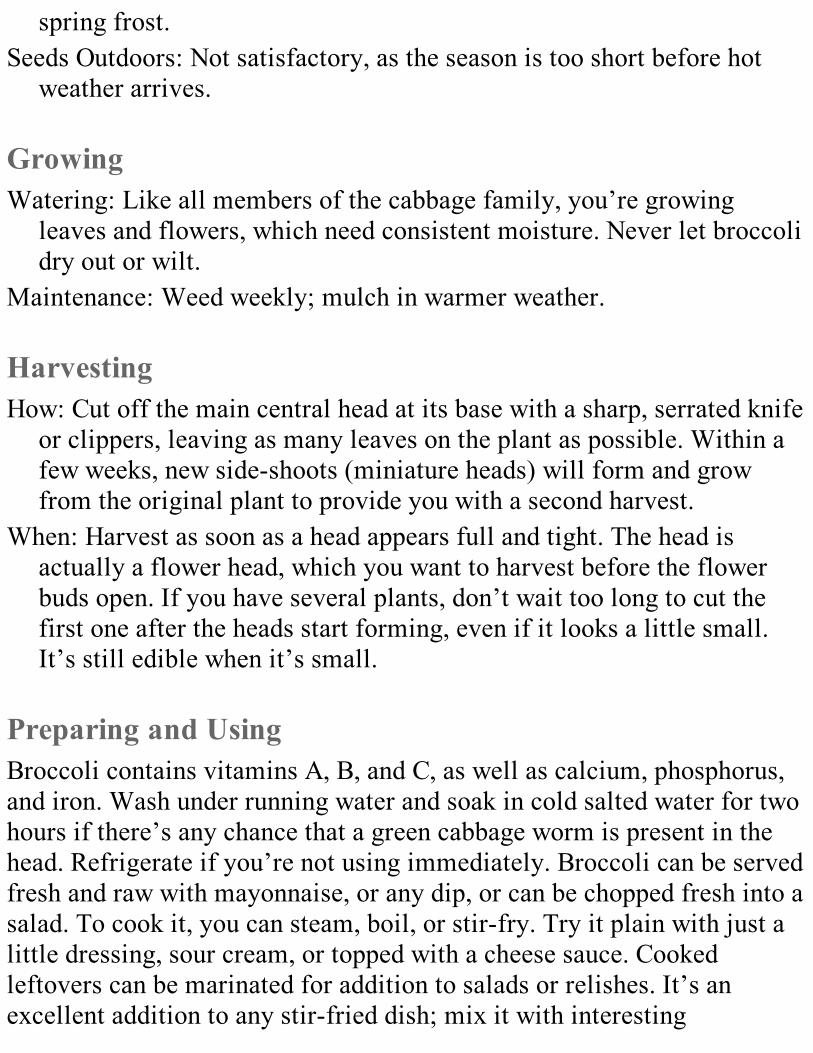
spring frost.Seeds Outdoors: Not satisfactory, as the season is too short before hot
weather arrives.
GrowingWatering: Like all members of the cabbage family, you’re growing
leaves and flowers, which need consistent moisture. Never let broccolidry out or wilt.
Maintenance: Weed weekly; mulch in warmer weather.
HarvestingHow: Cut off the main central head at its base with a sharp, serrated knife
or clippers, leaving as many leaves on the plant as possible. Within afew weeks, new side-shoots (miniature heads) will form and growfrom the original plant to provide you with a second harvest.
When: Harvest as soon as a head appears full and tight. The head isactually a flower head, which you want to harvest before the flowerbuds open. If you have several plants, don’t wait too long to cut thefirst one after the heads start forming, even if it looks a little small.It’s still edible when it’s small.
Preparing and UsingBroccoli contains vitamins A, B, and C, as well as calcium, phosphorus,and iron. Wash under running water and soak in cold salted water for twohours if there’s any chance that a green cabbage worm is present in thehead. Refrigerate if you’re not using immediately. Broccoli can be servedfresh and raw with mayonnaise, or any dip, or can be chopped fresh into asalad. To cook it, you can steam, boil, or stir-fry. Try it plain with just alittle dressing, sour cream, or topped with a cheese sauce. Cookedleftovers can be marinated for addition to salads or relishes. It’s anexcellent addition to any stir-fried dish; mix it with interesting

combinations of meats and vegetables.
Hints and Tips
After you cut the main stalk, don’t remove the plant, as new smallerheads will form for a second harvest. Some claim the smaller side-shoots are even more flavorful than the central head.
ProblemsCutworms, root maggots, green worms, and cabbage worms; club root.
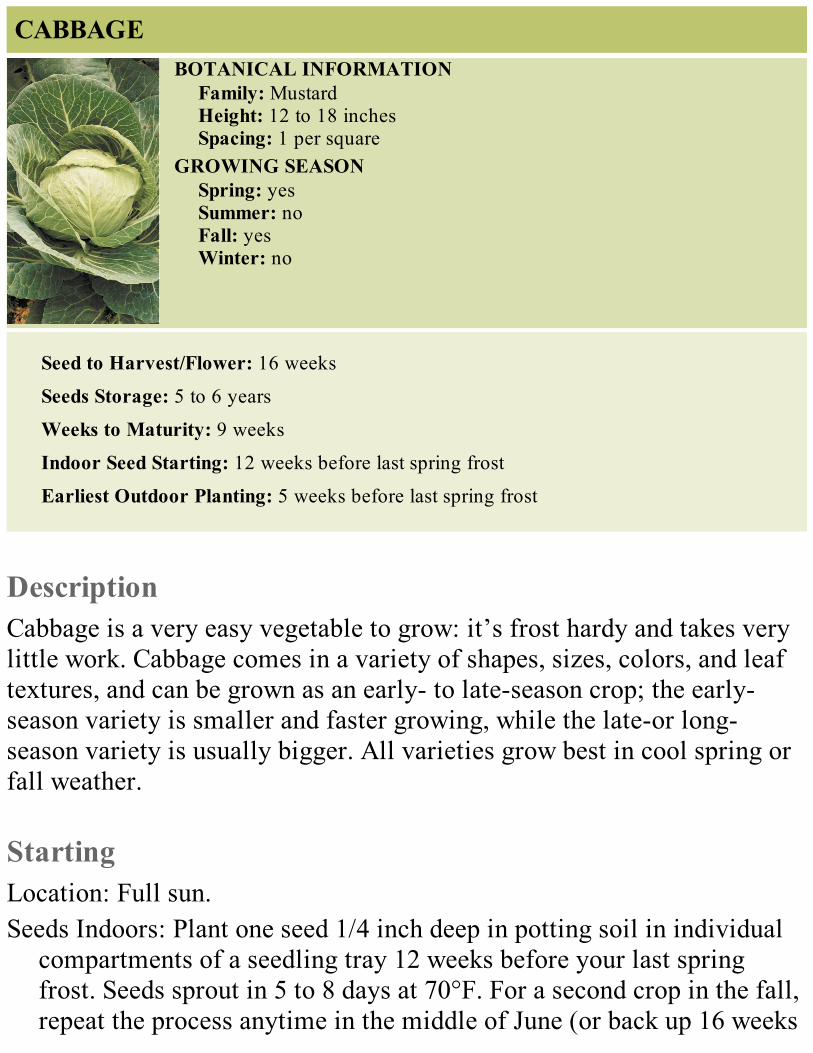
CABBAGEBOTANICAL INFORMATION
Family: MustardHeight: 12 to 18 inchesSpacing: 1 per square
GROWING SEASONSpring: yesSummer: noFall: yesWinter: no
Seed to Harvest/Flower: 16 weeks
Seeds Storage: 5 to 6 years
Weeks to Maturity: 9 weeks
Indoor Seed Starting: 12 weeks before last spring frost
Earliest Outdoor Planting: 5 weeks before last spring frost
DescriptionCabbage is a very easy vegetable to grow: it’s frost hardy and takes verylittle work. Cabbage comes in a variety of shapes, sizes, colors, and leaftextures, and can be grown as an early- to late-season crop; the early-season variety is smaller and faster growing, while the late-or long-season variety is usually bigger. All varieties grow best in cool spring orfall weather.
StartingLocation: Full sun.Seeds Indoors: Plant one seed 1/4 inch deep in potting soil in individual
compartments of a seedling tray 12 weeks before your last springfrost. Seeds sprout in 5 to 8 days at 70°F. For a second crop in the fall,repeat the process anytime in the middle of June (or back up 16 weeks
from your first fall frost date). In most places you can usually startseeds of a new crop as soon as you’ve harvested your spring crop.Keep warm (70°F) until sprouted; move to full sunlight as soon as firstshoots appear.
Transplanting: Don’t let transplants get too large before planting themoutside. Late transplants do not form good heads, and sometimesflower the first year if allowed to get too large.
Seeds Outdoors: The season is too short to plant seeds directly in thegarden for the spring crop, and starting the fall crop from seedoutdoors would tie up too much valuable garden space that could beused more productively. Start all seeds in individual containers fortransplanting into the garden.
GrowingWatering: Cabbage needs lots of water to head up properly, but after the
head is formed and while it is growing to full size, cut back onwatering or the head will grow too fast and split.
Maintenance: Weed weekly; cut away any extra-large bottom leaves ifthey are yellow. If large lower leaves are spreading to other squares,cut away any portions that are “over the line.” This will not hurt theplant.
HarvestingHow: Cut off the entire head with a sharp, serrated knife or clippers.When: Anytime the head starts to develop and feels firm. If you have
several plants, don’t wait until all the heads are large. They may splitin hot weather and go to seed, and you’ll be left with nothing.
Preparing and UsingCabbage is delicious cooked or raw and contains a lot of vitamin C.

ProblemsSlugs and snails, aphids, and cabbage worms (their worst enemy).
Hints and Tips
Cover cabbages with a bonnet of insect netting or floating cover tokeep out the cabbage moth. Otherwise, watch for eaten leaves and thenpick the green cabbage worms off by hand.
CARROTBOTANICAL INFORMATION
Family: CarrotHeight: 12 inchesSpacing: 16 per square
GROWING SEASONSpring: yesSummer: yesFall: yesWinter: yes
Seed to Harvest/Flower: 10 weeks
Seeds Storage: 3 to 4 years
Weeks to Maturity: 10 weeks
Indoor Seed Starting: no
Earliest Outdoor Planting: 3 weeks before last spring frost
DescriptionCarrots are related to the wildflower Queen Anne’s lace. The seeds are sosmall that planting them can be very tedious; practice dropping a pinch (2or 3 seeds) on some white paper until you get the hang of it. Carrots canbe either long and thin or short and stubby; pick the shape and size thatbest suits your garden. There is nothing more exciting for kids (includingkids my age) than pulling up a carrot they planted months ago! It’s sort oflike fishing—you don’t know how big it is until you see it, but you hopeit’s a whopper.
StartingLocation: Full sun, but can stand partial shade.Seeds Indoors: No.Transplanting: Does not transplant well.

Seeds Outdoors: Sprouts in two to three weeks outdoors. Seeds are verysmall; try pelleted seeds if necessary. Plant two or three seeds in eachof the 16 spaces in a square. Water soil and cover the square with aplastic-covered cage. Keep the ground moist at all times, even if itmeans daily spraying in sunny weather.
GrowingWatering: Carrots must have constant moisture until they’re almost
mature to grow quickly and continuously. Then reduce watering so thecarrots don’t crack from overly rapid growth.
Maintenance: Weed weekly; otherwise carrots are relatively work-free.
HarvestingHow: Pull up those with the largest tops. If you’re not sure which are
biggest, dig around the plant with your fingers to test the size.When: Pick them early, when they’re only half size and at their sweetest
and most tender.
Preparing and UsingScrub with a vegetable brush, but don’t peel them. Most of the vitaminsare in the skin or close to the surface. Rich in vitamin A and thiamine(vitamin B1), carrots also contain calcium. Carrots are delicious freshand raw—shredded, sliced thinly, or cut into sticks for snacking. Theycan be cooked by steaming or boiling. They can be served in a variety ofdishes, or added to soups and stews, but seem best when served with adressing, a dab of sour cream, or sprinkled with parsley and gratedcheese. Carrots are so versatile you can even make a wonderfully moistcake with them.
Hints and Tips

The long and thin ones can be grown in your SFG with the addition of ahigh-rise box (see Chapter 4). For a late winter harvest, mulch heavilyto keep the ground from freezing to protect your fall-planted carrots.
ProblemsCarrot rust fly, rabbits, woodchucks, deer, and voles. Virtually disease-free.

CAULIFLOWERBOTANICAL INFORMATION
Family: MustardHeight: 18 to 24 inchesSpacing: 1 per square
GROWING SEASONSpring: yesSummer: noFall: yesWinter: no
Seed to Harvest/Flower: 14 weeks
Seeds Storage: 5 to 6 years
Weeks to Maturity: 8 weeks
Indoor Seed Starting: 10 weeks before last spring frost
Earliest Outdoor Planting: 4 weeks before last spring frost
DescriptionEven though cauliflower is a member of the cabbage family, it is not ascold hardy and is more susceptible to the heat. Fall is the best season forplanting because the plant will mature in the cool weather. Whitecauliflower is the most popular variety but the purple one is considered tobe more flavorful and does better in the heat. The white variety needs 14to 15 weeks to mature while the purple variety can take up to 19 weeks.
StartingLocation: Full sun, but will tolerate partial shade.Seeds Indoors: Will sprout in 5 to 10 days at 70°F. Plant 5 to 10 seeds in
a cup of vermiculite, or plant one seed 1/4 inch deep in potting soil inindividual compartments of a seedling flat ten weeks before the lastspring frost. For a second crop in the fall, repeat the process anytime
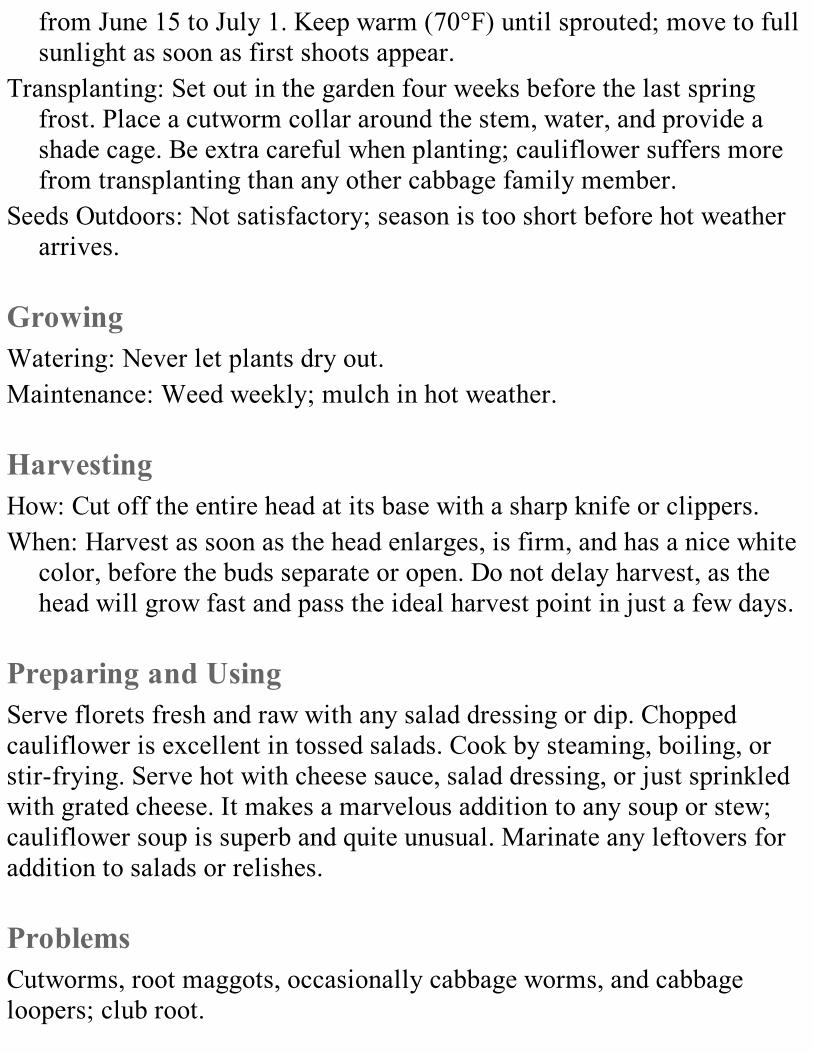
from June 15 to July 1. Keep warm (70°F) until sprouted; move to fullsunlight as soon as first shoots appear.
Transplanting: Set out in the garden four weeks before the last springfrost. Place a cutworm collar around the stem, water, and provide ashade cage. Be extra careful when planting; cauliflower suffers morefrom transplanting than any other cabbage family member.
Seeds Outdoors: Not satisfactory; season is too short before hot weatherarrives.
GrowingWatering: Never let plants dry out.Maintenance: Weed weekly; mulch in hot weather.
HarvestingHow: Cut off the entire head at its base with a sharp knife or clippers.When: Harvest as soon as the head enlarges, is firm, and has a nice white
color, before the buds separate or open. Do not delay harvest, as thehead will grow fast and pass the ideal harvest point in just a few days.
Preparing and UsingServe florets fresh and raw with any salad dressing or dip. Choppedcauliflower is excellent in tossed salads. Cook by steaming, boiling, orstir-frying. Serve hot with cheese sauce, salad dressing, or just sprinkledwith grated cheese. It makes a marvelous addition to any soup or stew;cauliflower soup is superb and quite unusual. Marinate any leftovers foraddition to salads or relishes.
ProblemsCutworms, root maggots, occasionally cabbage worms, and cabbageloopers; club root.

Hints and Tips
For white varieties that are not self-blanching, bend or break largeleaves over the top when heads start to form. Then tie or hold with arubber band to cover and protect the head from exposure to the sun,which can turn the head yellow.
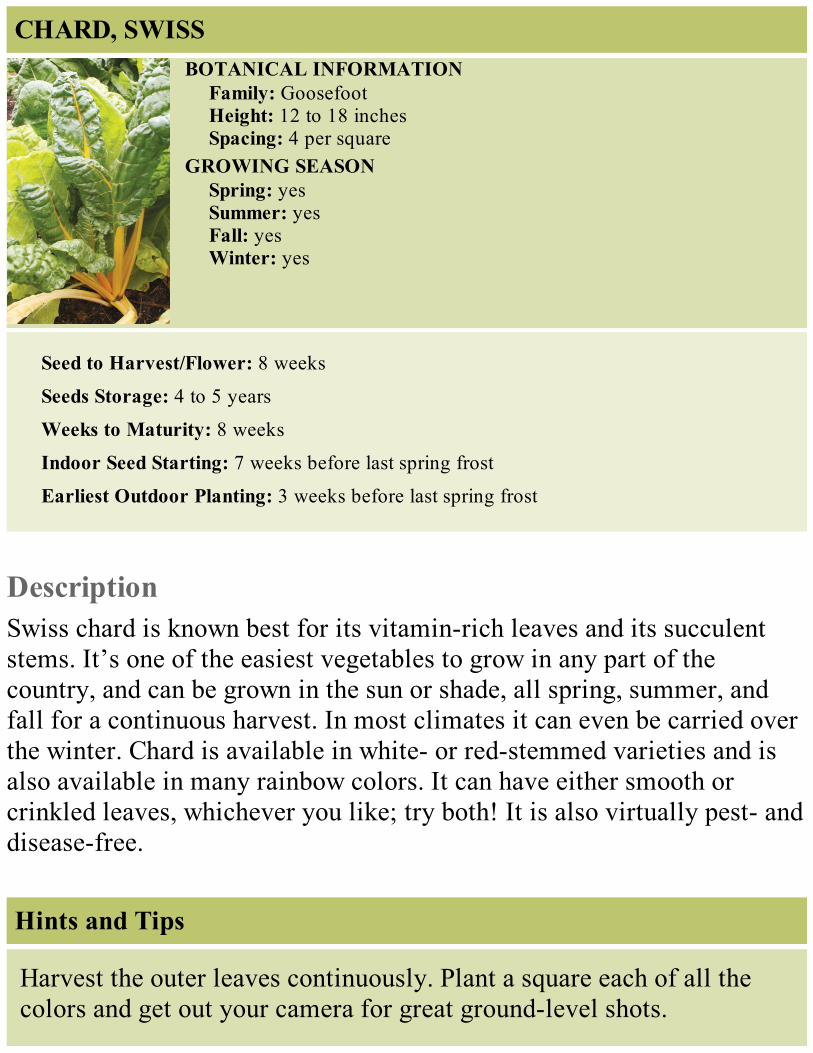
CHARD, SWISSBOTANICAL INFORMATION
Family: GoosefootHeight: 12 to 18 inchesSpacing: 4 per square
GROWING SEASONSpring: yesSummer: yesFall: yesWinter: yes
Seed to Harvest/Flower: 8 weeks
Seeds Storage: 4 to 5 years
Weeks to Maturity: 8 weeks
Indoor Seed Starting: 7 weeks before last spring frost
Earliest Outdoor Planting: 3 weeks before last spring frost
DescriptionSwiss chard is known best for its vitamin-rich leaves and its succulentstems. It’s one of the easiest vegetables to grow in any part of thecountry, and can be grown in the sun or shade, all spring, summer, andfall for a continuous harvest. In most climates it can even be carried overthe winter. Chard is available in white- or red-stemmed varieties and isalso available in many rainbow colors. It can have either smooth orcrinkled leaves, whichever you like; try both! It is also virtually pest- anddisease-free.
Hints and Tips
Harvest the outer leaves continuously. Plant a square each of all thecolors and get out your camera for great ground-level shots.
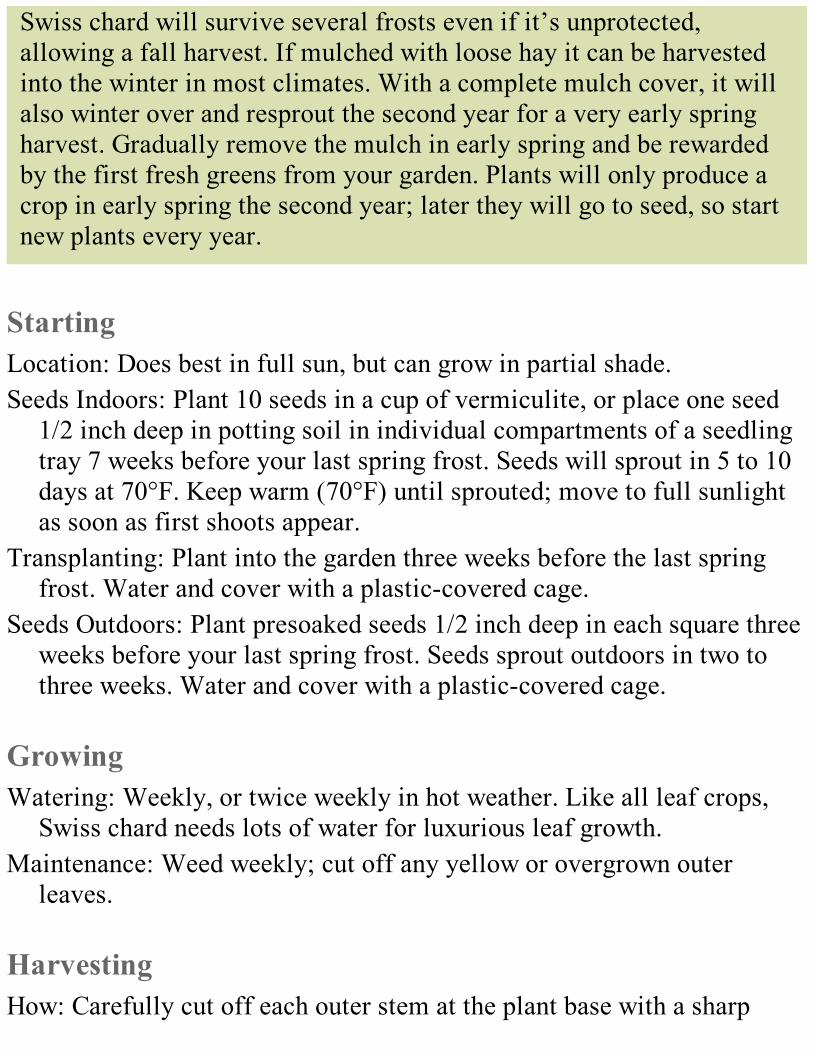
Swiss chard will survive several frosts even if it’s unprotected,allowing a fall harvest. If mulched with loose hay it can be harvestedinto the winter in most climates. With a complete mulch cover, it willalso winter over and resprout the second year for a very early springharvest. Gradually remove the mulch in early spring and be rewardedby the first fresh greens from your garden. Plants will only produce acrop in early spring the second year; later they will go to seed, so startnew plants every year.
StartingLocation: Does best in full sun, but can grow in partial shade.Seeds Indoors: Plant 10 seeds in a cup of vermiculite, or place one seed
1/2 inch deep in potting soil in individual compartments of a seedlingtray 7 weeks before your last spring frost. Seeds will sprout in 5 to 10days at 70°F. Keep warm (70°F) until sprouted; move to full sunlightas soon as first shoots appear.
Transplanting: Plant into the garden three weeks before the last springfrost. Water and cover with a plastic-covered cage.
Seeds Outdoors: Plant presoaked seeds 1/2 inch deep in each square threeweeks before your last spring frost. Seeds sprout outdoors in two tothree weeks. Water and cover with a plastic-covered cage.
GrowingWatering: Weekly, or twice weekly in hot weather. Like all leaf crops,
Swiss chard needs lots of water for luxurious leaf growth.Maintenance: Weed weekly; cut off any yellow or overgrown outer
leaves.
HarvestingHow: Carefully cut off each outer stem at the plant base with a sharp

knife when the leaves are 6 to 9 inches tall. The smaller inner leaveswill continue to grow.
When: Start harvesting when the outer leaves are about 6 to 9 inches tall(approximately eight weeks after planting seeds), and continueharvesting outer leaves (stalk and all) every week or so. Don’t let outerleaves get too large before harvesting.
Preparing and UsingBoth leaves and stems are edible; leaves are very rich in vitamins A andC, calcium, and iron. The stalks can be cooked and served like asparagus;the leaves are used fresh or cooked, and are similar to, but milder in tastethan, spinach.
After harvest, rinse and pat dry like lettuce or spinach; refrigerate ifnot using immediately. Cut out the central stalk and use the leaves asfresh greens for salads, or boil or steam as you would spinach. Addfreshly chopped greens to any appropriate soup for a garden-fresh taste.Chop the central stem or stalk into convenient-size pieces and boil orsteam like asparagus or celery. Serve with your favorite salad dressing,covered with bread crumbs, or grated cheese. Marinate leftover stalksovernight for a salad or appetizers.
ProblemsSlugs and snails, cutworms, and leaf miners; occasionally rabbits,woodchucks, and deer. Free of most diseases.
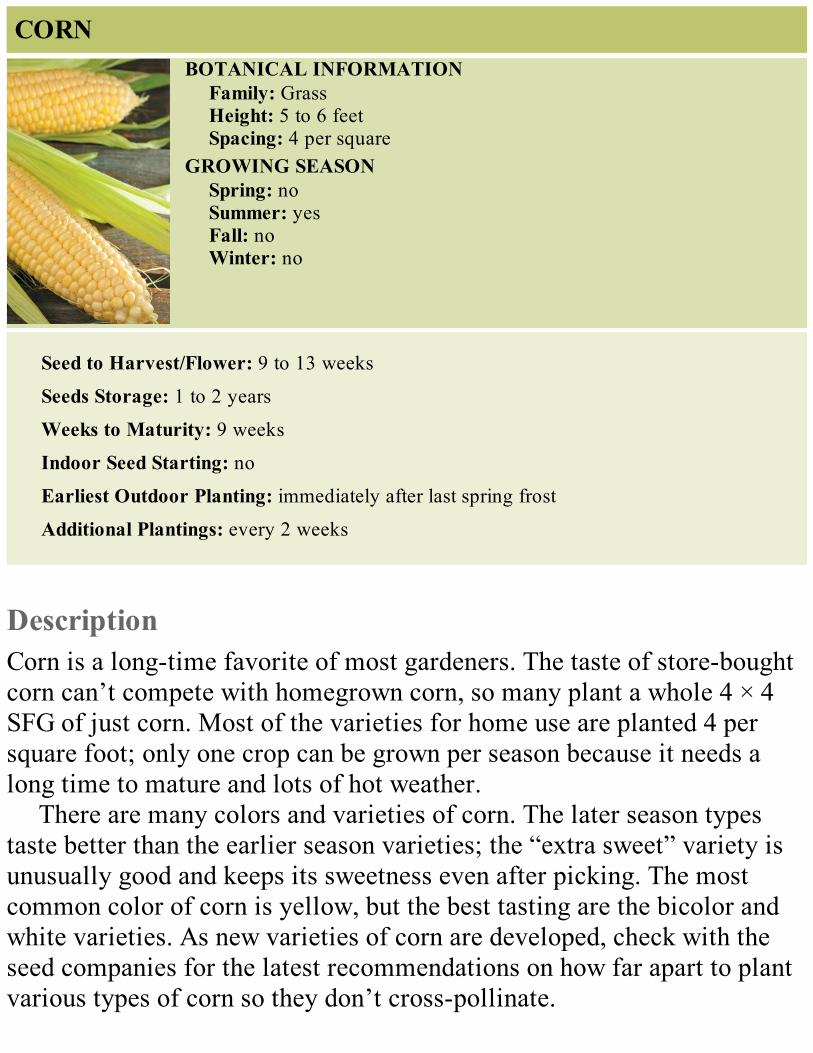
CORNBOTANICAL INFORMATION
Family: GrassHeight: 5 to 6 feetSpacing: 4 per square
GROWING SEASONSpring: noSummer: yesFall: noWinter: no
Seed to Harvest/Flower: 9 to 13 weeks
Seeds Storage: 1 to 2 years
Weeks to Maturity: 9 weeks
Indoor Seed Starting: no
Earliest Outdoor Planting: immediately after last spring frost
Additional Plantings: every 2 weeks
DescriptionCorn is a long-time favorite of most gardeners. The taste of store-boughtcorn can’t compete with homegrown corn, so many plant a whole 4 × 4SFG of just corn. Most of the varieties for home use are planted 4 persquare foot; only one crop can be grown per season because it needs along time to mature and lots of hot weather.
There are many colors and varieties of corn. The later season typestaste better than the earlier season varieties; the “extra sweet” variety isunusually good and keeps its sweetness even after picking. The mostcommon color of corn is yellow, but the best tasting are the bicolor andwhite varieties. As new varieties of corn are developed, check with theseed companies for the latest recommendations on how far apart to plantvarious types of corn so they don’t cross-pollinate.
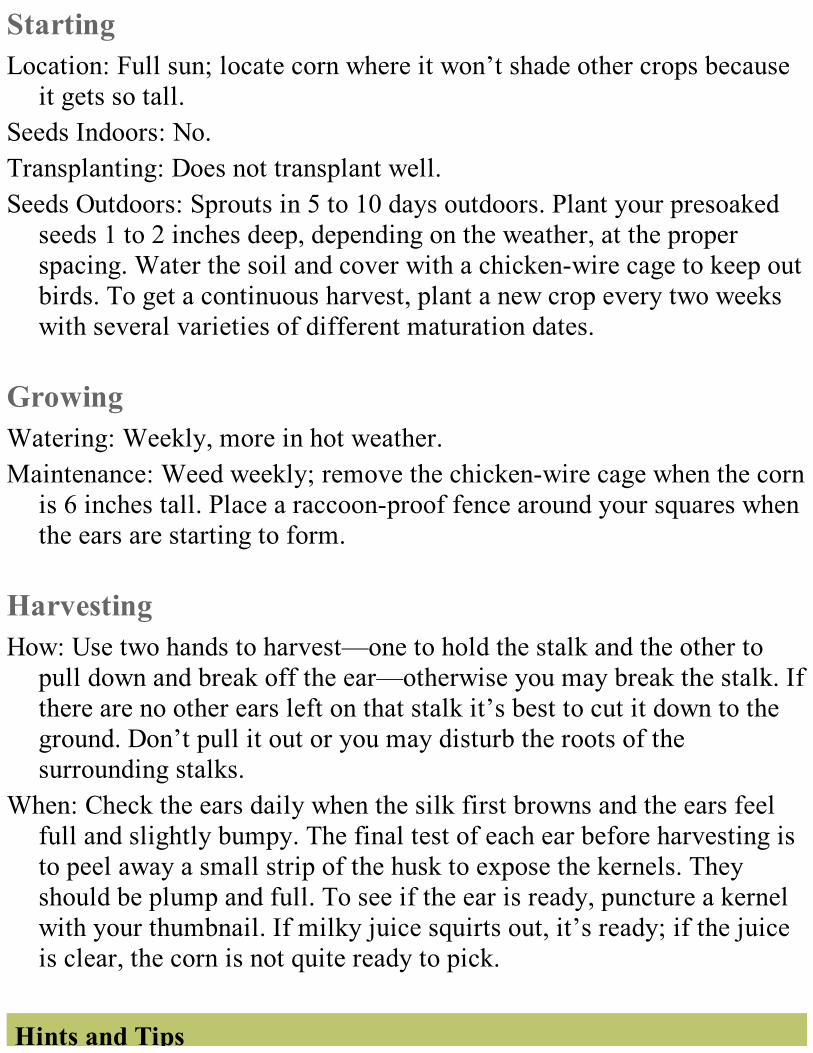
StartingLocation: Full sun; locate corn where it won’t shade other crops because
it gets so tall.Seeds Indoors: No.Transplanting: Does not transplant well.Seeds Outdoors: Sprouts in 5 to 10 days outdoors. Plant your presoaked
seeds 1 to 2 inches deep, depending on the weather, at the properspacing. Water the soil and cover with a chicken-wire cage to keep outbirds. To get a continuous harvest, plant a new crop every two weekswith several varieties of different maturation dates.
GrowingWatering: Weekly, more in hot weather.Maintenance: Weed weekly; remove the chicken-wire cage when the corn
is 6 inches tall. Place a raccoon-proof fence around your squares whenthe ears are starting to form.
HarvestingHow: Use two hands to harvest—one to hold the stalk and the other to
pull down and break off the ear—otherwise you may break the stalk. Ifthere are no other ears left on that stalk it’s best to cut it down to theground. Don’t pull it out or you may disturb the roots of thesurrounding stalks.
When: Check the ears daily when the silk first browns and the ears feelfull and slightly bumpy. The final test of each ear before harvesting isto peel away a small strip of the husk to expose the kernels. Theyshould be plump and full. To see if the ear is ready, puncture a kernelwith your thumbnail. If milky juice squirts out, it’s ready; if the juiceis clear, the corn is not quite ready to pick.
Hints and Tips
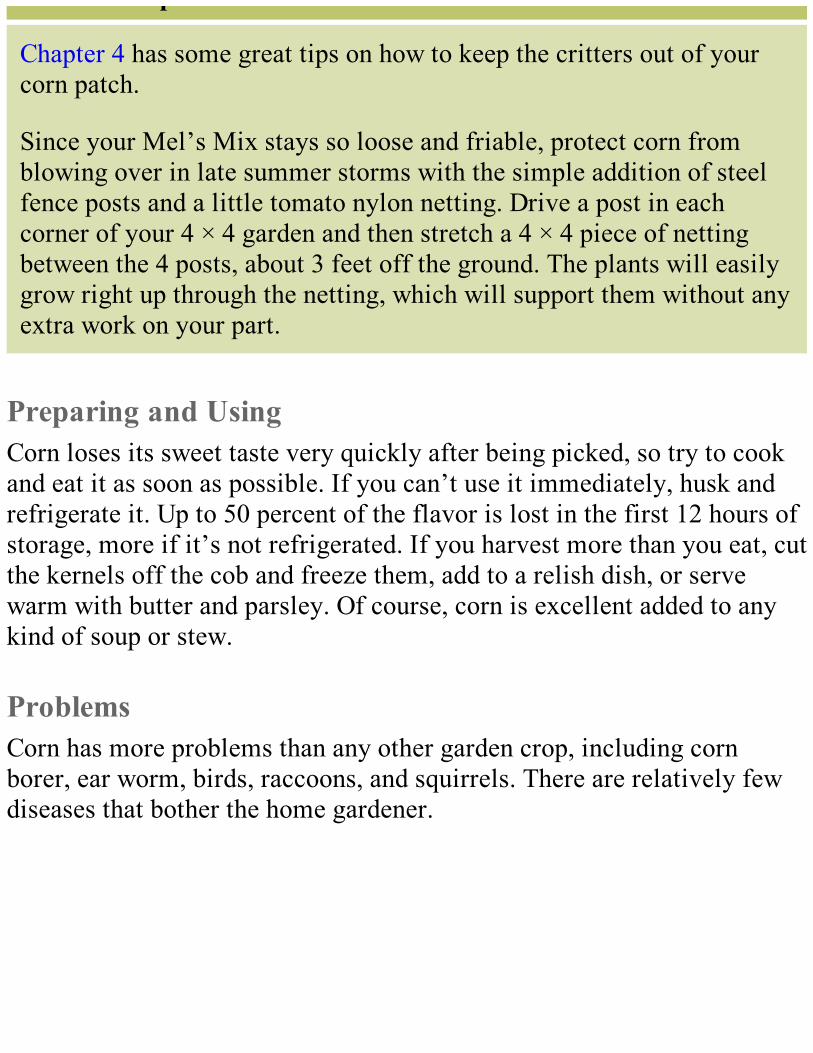
Hints and Tips
Chapter 4 has some great tips on how to keep the critters out of yourcorn patch.
Since your Mel’s Mix stays so loose and friable, protect corn fromblowing over in late summer storms with the simple addition of steelfence posts and a little tomato nylon netting. Drive a post in eachcorner of your 4 × 4 garden and then stretch a 4 × 4 piece of nettingbetween the 4 posts, about 3 feet off the ground. The plants will easilygrow right up through the netting, which will support them without anyextra work on your part.
Preparing and UsingCorn loses its sweet taste very quickly after being picked, so try to cookand eat it as soon as possible. If you can’t use it immediately, husk andrefrigerate it. Up to 50 percent of the flavor is lost in the first 12 hours ofstorage, more if it’s not refrigerated. If you harvest more than you eat, cutthe kernels off the cob and freeze them, add to a relish dish, or servewarm with butter and parsley. Of course, corn is excellent added to anykind of soup or stew.
ProblemsCorn has more problems than any other garden crop, including cornborer, ear worm, birds, raccoons, and squirrels. There are relatively fewdiseases that bother the home gardener.
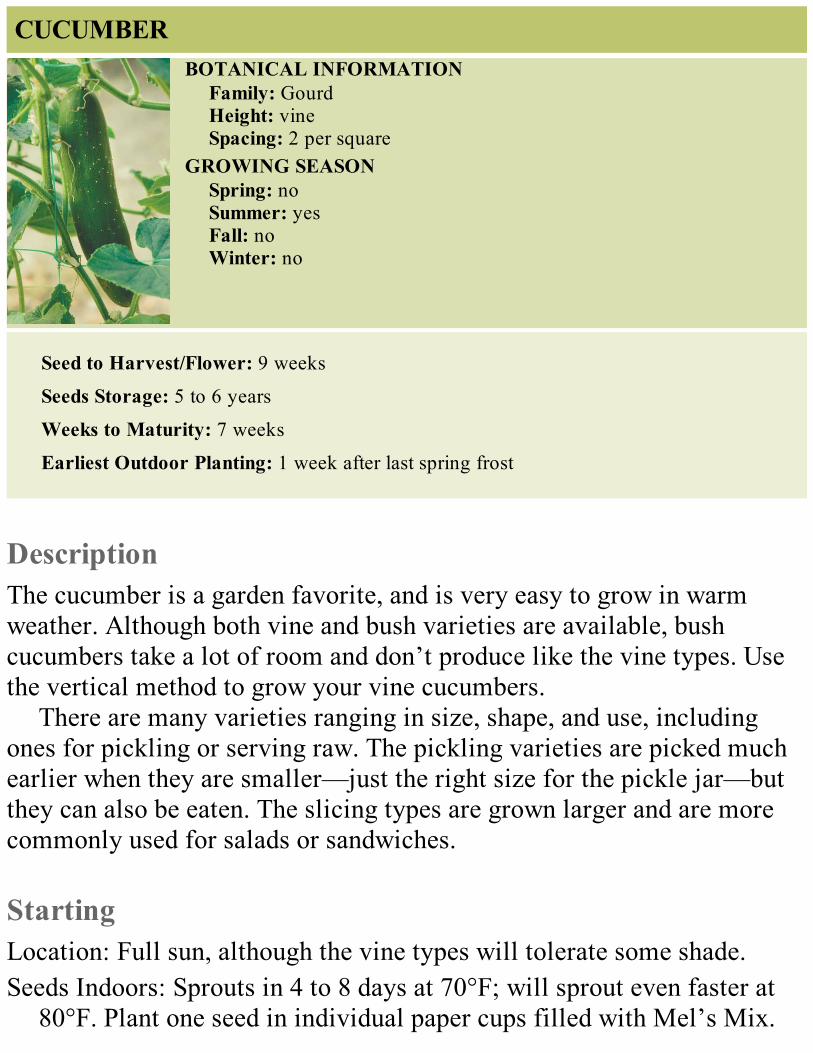
CUCUMBERBOTANICAL INFORMATION
Family: GourdHeight: vineSpacing: 2 per square
GROWING SEASONSpring: noSummer: yesFall: noWinter: no
Seed to Harvest/Flower: 9 weeks
Seeds Storage: 5 to 6 years
Weeks to Maturity: 7 weeks
Earliest Outdoor Planting: 1 week after last spring frost
DescriptionThe cucumber is a garden favorite, and is very easy to grow in warmweather. Although both vine and bush varieties are available, bushcucumbers take a lot of room and don’t produce like the vine types. Usethe vertical method to grow your vine cucumbers.
There are many varieties ranging in size, shape, and use, includingones for pickling or serving raw. The pickling varieties are picked muchearlier when they are smaller—just the right size for the pickle jar—butthey can also be eaten. The slicing types are grown larger and are morecommonly used for salads or sandwiches.
StartingLocation: Full sun, although the vine types will tolerate some shade.Seeds Indoors: Sprouts in 4 to 8 days at 70°F; will sprout even faster at
80°F. Plant one seed in individual paper cups filled with Mel’s Mix.
Punch holes in the bottom for drainage. Keep warm (at least 70°F)until sprouted; move to full sunlight as soon as the first shoots appear.
Transplanting: Plant the cup and all in the ground at the proper plantspacing. If the cup is waxed cardboard or a heavy paper, tear away thebottom carefully; avoid disturbing the roots. Water and cover with ashade cage.
Seeds Outdoors: Sprouts in five to ten days; place presoaked seeds atproper spacing, water, and keep soil moist until seeds sprout.
GrowingWatering: Weekly; twice weekly in hot weather. Never let the soil dry
out. Avoid wetting the leaves, as this spreads any fungus disease thatmay be present. Cucumbers have the highest water content of anyvegetable, so plenty of moisture is required for proper growth.
Maintenance: Weed weekly; keep vines on the trellis; watch out forbeetles; mulch in hot weather.
HarvestingHow: Cut (don’t pull) the stem connecting the fruit to the vine.When: Harvest continually! Never allow any cucumbers to become
yellow or overly large, or the plant will stop producing. Keep pickingeven if you have to toss some on the compost pile because you can’tuse them. Don’t try the old practice of eating the large cukes andleaving the smaller ones on the vine, because in only one or two daysthe little ones will be big. Instead, compost the very large cucumbersand eat the smaller ones.
Preparing and UsingWash and scrub with a vegetable brush. Serve long, slender burplessvarieties with the skins left on. Peel the fatter varieties before slicing,cubing, or cutting into long sticks. Serve fresh, sliced on sandwiches with
onions and mayonnaise, or marinate for relish. Many gardeners likecucumbers simply soaked in vinegar overnight and served with lots ofpepper. They also go well in any salad or arranged around a spoonful ofcottage cheese.
Hints and Tips
Don’t let the fruit get too large; pick early and often. Try some of thelong, thin varieties for a fun crop.
ProblemsCucumber beetles; mildew, wilt, and mosaic.
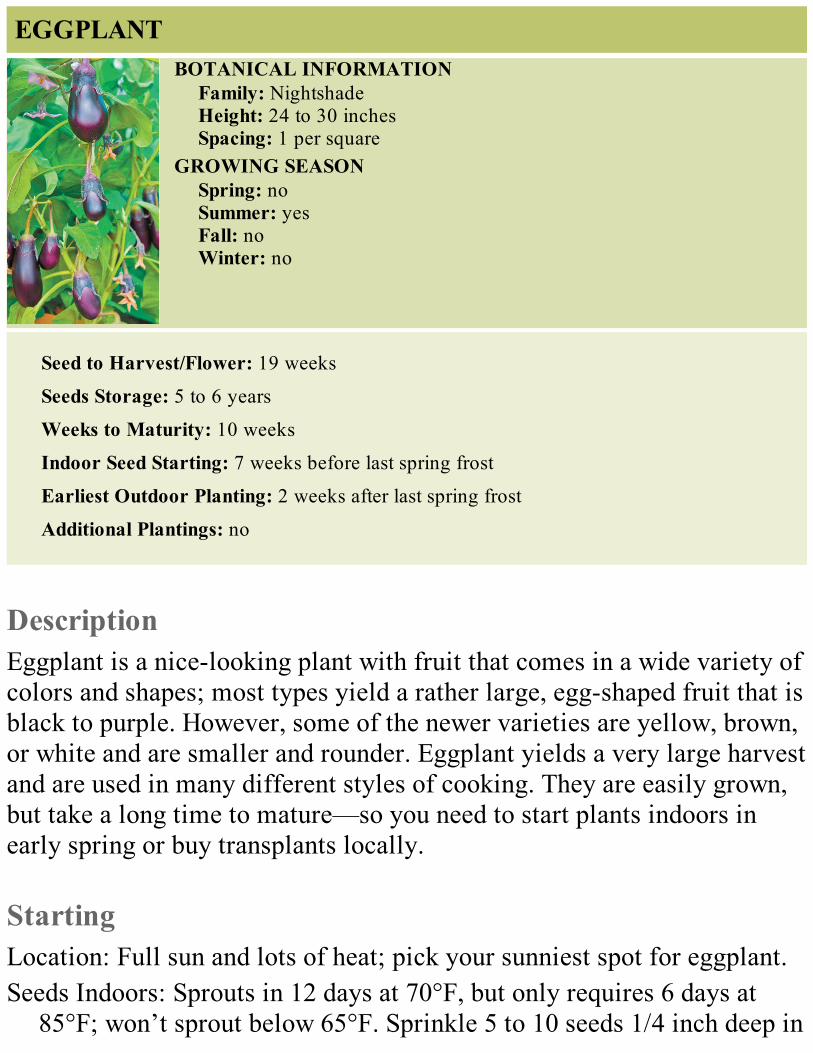
EGGPLANTBOTANICAL INFORMATION
Family: NightshadeHeight: 24 to 30 inchesSpacing: 1 per square
GROWING SEASONSpring: noSummer: yesFall: noWinter: no
Seed to Harvest/Flower: 19 weeks
Seeds Storage: 5 to 6 years
Weeks to Maturity: 10 weeks
Indoor Seed Starting: 7 weeks before last spring frost
Earliest Outdoor Planting: 2 weeks after last spring frost
Additional Plantings: no
DescriptionEggplant is a nice-looking plant with fruit that comes in a wide variety ofcolors and shapes; most types yield a rather large, egg-shaped fruit that isblack to purple. However, some of the newer varieties are yellow, brown,or white and are smaller and rounder. Eggplant yields a very large harvestand are used in many different styles of cooking. They are easily grown,but take a long time to mature—so you need to start plants indoors inearly spring or buy transplants locally.
StartingLocation: Full sun and lots of heat; pick your sunniest spot for eggplant.Seeds Indoors: Sprouts in 12 days at 70°F, but only requires 6 days at
85°F; won’t sprout below 65°F. Sprinkle 5 to 10 seeds 1/4 inch deep in
a cup filled with vermiculite 7 weeks before your last spring frost.Keep warm (at least 70°F) until sprouted; move to full sunlight assoon as first shoots appear; then pot up in seedling trays as soon asplants are large enough (usually one to three weeks). Keep a carefulwatch over the plants, especially after transplanting them into seedlingtrays, because any pause or stoppage of the growth will affect theultimate bearing capacity of the plant.
Transplanting: Plant into the garden two weeks after the last spring frost;disturb the roots as little as possible. Water and cover with a shadecage. Since eggplant is so vulnerable to cold weather, cover the wirecage with a clear plastic cover as well as a sun shade to provide agreenhouse atmosphere if it is at all chilly. In a few days the sun shadecan be removed.
Seeds Outdoors: Not satisfactory, as the season is too short before hotweather arrives.
GrowingWatering: Eggplant needs constant moisture, especially when fruits are
forming and enlarging.Maintenance: Weed weekly; add a thick mulch when hot weather sets in.
Provide a wide mesh, open-wire cage support when the eggplant is halfgrown; the plants will grow right through it, and will be supportedwithout staking.
HarvestingHow: Always cut the fruit from the bush with clippers; watch out for
sharp spines on the stems and fruits.When: Edible almost anytime after the fruit turns dark and glossy (when
it’s about 6 inches), don’t let them get too large. If they turn a dullcolor they are overripe and the seeds will be large and hard.
Hints and Tips
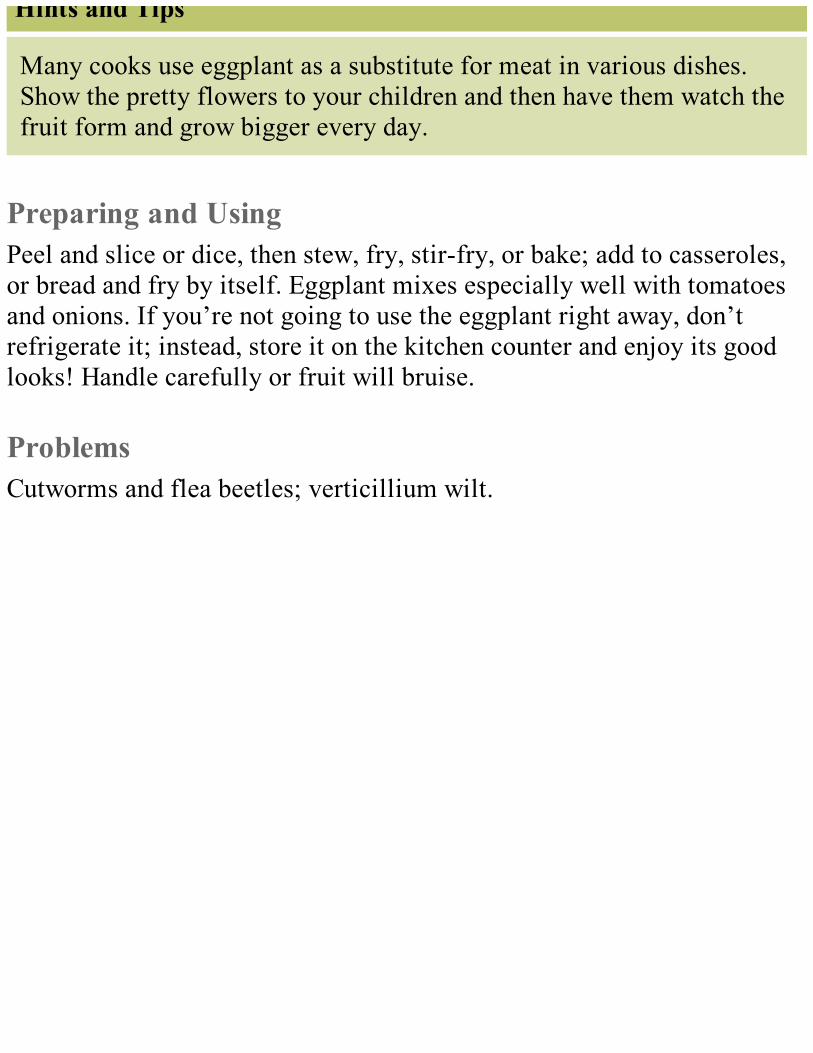
Hints and Tips
Many cooks use eggplant as a substitute for meat in various dishes.Show the pretty flowers to your children and then have them watch thefruit form and grow bigger every day.
Preparing and UsingPeel and slice or dice, then stew, fry, stir-fry, or bake; add to casseroles,or bread and fry by itself. Eggplant mixes especially well with tomatoesand onions. If you’re not going to use the eggplant right away, don’trefrigerate it; instead, store it on the kitchen counter and enjoy its goodlooks! Handle carefully or fruit will bruise.
ProblemsCutworms and flea beetles; verticillium wilt.
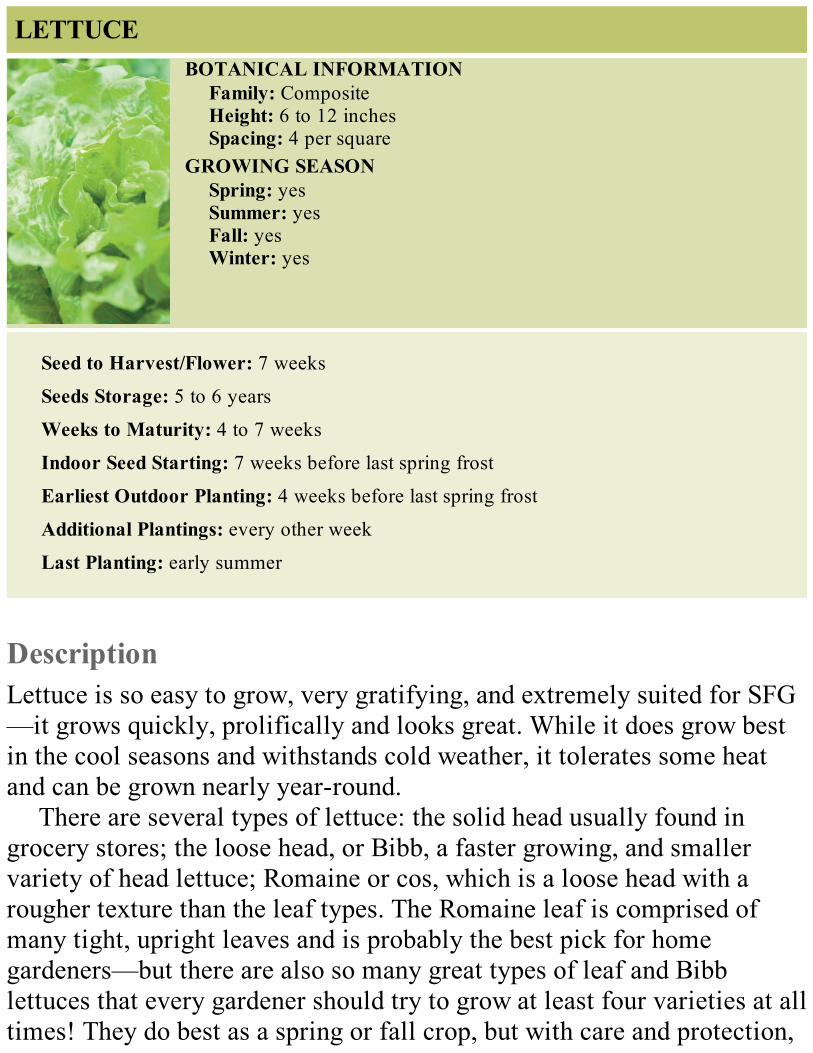
LETTUCEBOTANICAL INFORMATION
Family: CompositeHeight: 6 to 12 inchesSpacing: 4 per square
GROWING SEASONSpring: yesSummer: yesFall: yesWinter: yes
Seed to Harvest/Flower: 7 weeks
Seeds Storage: 5 to 6 years
Weeks to Maturity: 4 to 7 weeks
Indoor Seed Starting: 7 weeks before last spring frost
Earliest Outdoor Planting: 4 weeks before last spring frost
Additional Plantings: every other week
Last Planting: early summer
DescriptionLettuce is so easy to grow, very gratifying, and extremely suited for SFG—it grows quickly, prolifically and looks great. While it does grow bestin the cool seasons and withstands cold weather, it tolerates some heatand can be grown nearly year-round.
There are several types of lettuce: the solid head usually found ingrocery stores; the loose head, or Bibb, a faster growing, and smallervariety of head lettuce; Romaine or cos, which is a loose head with arougher texture than the leaf types. The Romaine leaf is comprised ofmany tight, upright leaves and is probably the best pick for homegardeners—but there are also so many great types of leaf and Bibblettuces that every gardener should try to grow at least four varieties at alltimes! They do best as a spring or fall crop, but with care and protection,
they can be grown in summer and even in winter in many parts of thecountry. Look for the types that are suitable for summer or winterseasons.
StartingLocation: Full sun to partial shade; shade is welcomed in the hot summer.
As with all leafy vegetables, the stronger the light, the higher thevitamin C content will be.
Seeds Indoors: Sprouts in 2 to 3 days at 70°F. Start 5 to 10 seeds ofseveral different varieties in cups filled with vermiculite 7 weeksbefore your last spring frost date. Keep warm (70°F) until sprouted;move to full sunlight as soon as first shoots appear; then pot up inseedling trays as soon as plants are large enough (usually one to threeweeks).
Transplanting: Move plants into the garden anytime until they are halfgrown. Plant a new square or two of lettuce every other week untilearly summer. The hot weather, long days, warm nights, and dry soilof summer cause lettuce to bolt to seed. Plant special varieties sold asheat- or bolt-resistant. After summer is over you can start planting thesame varieties you did in the spring.
Seeds Outdoors: Sprouts in 5 to 10 days. Seeds sprout quickly outdoorsand grow fairly rapidly; however, this method is time-saving butspace-consuming. If space is your concern, start all seeds indoors oroff to the side of the garden and move plants into the garden whenthey’re half grown. Transplants seem to bolt to seed more easily thandirect-seeded plants, so plant the summer crop directly in the garden.Plant one or two seeds in each hole; water daily until they sprout.
GrowingWatering: Try not to wet the leaves; you may spread fungal diseases.
Don’t water at night; morning is the best followed by noon or lateafternoon.
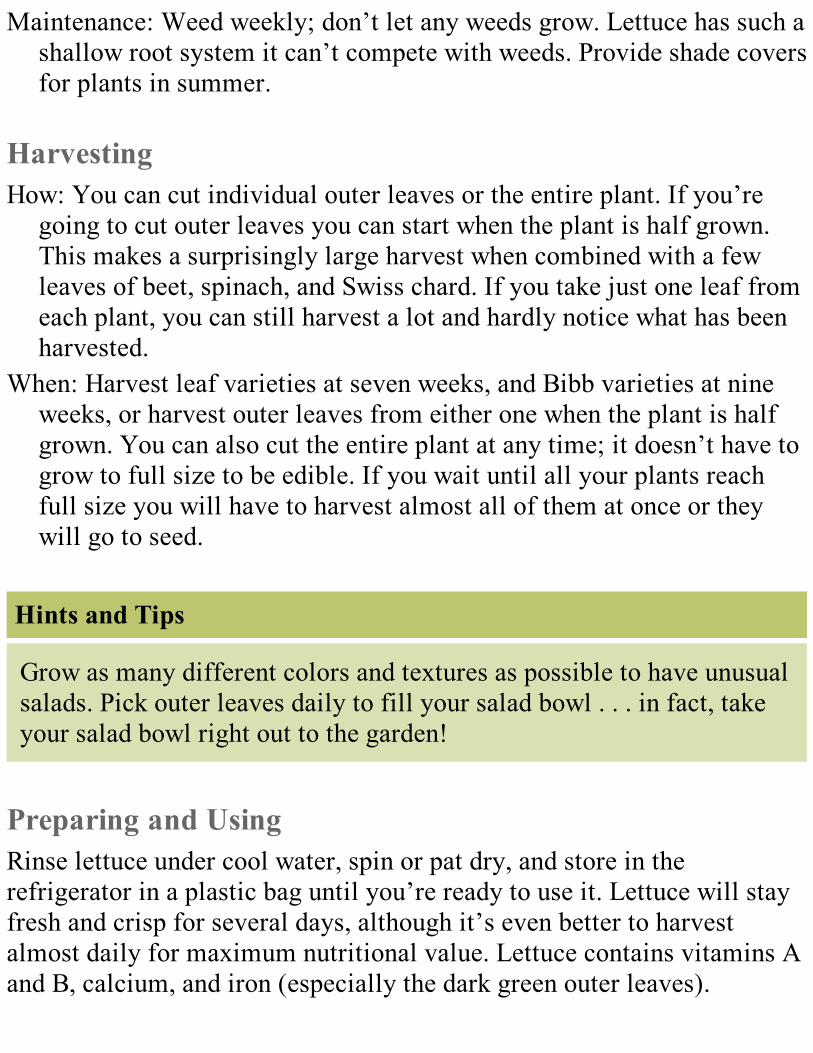
Maintenance: Weed weekly; don’t let any weeds grow. Lettuce has such ashallow root system it can’t compete with weeds. Provide shade coversfor plants in summer.
HarvestingHow: You can cut individual outer leaves or the entire plant. If you’re
going to cut outer leaves you can start when the plant is half grown.This makes a surprisingly large harvest when combined with a fewleaves of beet, spinach, and Swiss chard. If you take just one leaf fromeach plant, you can still harvest a lot and hardly notice what has beenharvested.
When: Harvest leaf varieties at seven weeks, and Bibb varieties at nineweeks, or harvest outer leaves from either one when the plant is halfgrown. You can also cut the entire plant at any time; it doesn’t have togrow to full size to be edible. If you wait until all your plants reachfull size you will have to harvest almost all of them at once or theywill go to seed.
Hints and Tips
Grow as many different colors and textures as possible to have unusualsalads. Pick outer leaves daily to fill your salad bowl . . . in fact, takeyour salad bowl right out to the garden!
Preparing and UsingRinse lettuce under cool water, spin or pat dry, and store in therefrigerator in a plastic bag until you’re ready to use it. Lettuce will stayfresh and crisp for several days, although it’s even better to harvestalmost daily for maximum nutritional value. Lettuce contains vitamins Aand B, calcium, and iron (especially the dark green outer leaves).

ProblemsRabbits, deer, woodchucks, slugs, cutworms, sow bugs, and wire worms.There are not many diseases to be concerned about unless the lettuce isquite wet at ground level.
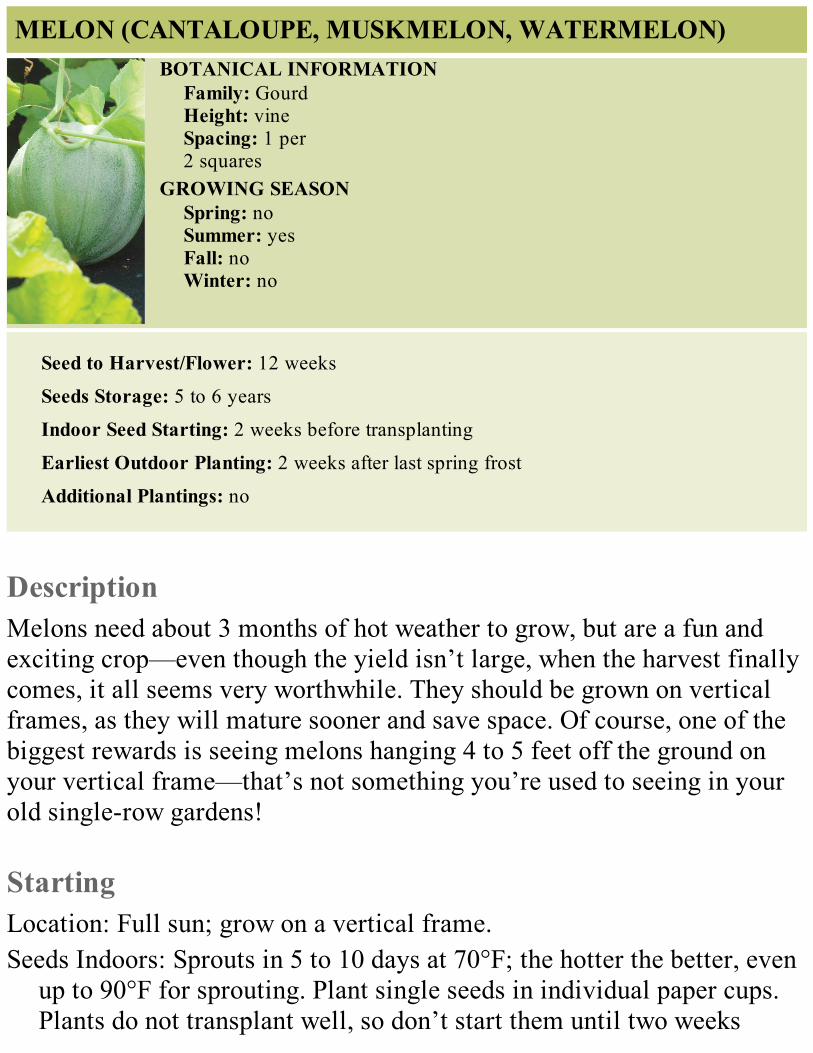
MELON (CANTALOUPE, MUSKMELON, WATERMELON)BOTANICAL INFORMATION
Family: GourdHeight: vineSpacing: 1 per2 squares
GROWING SEASONSpring: noSummer: yesFall: noWinter: no
Seed to Harvest/Flower: 12 weeks
Seeds Storage: 5 to 6 years
Indoor Seed Starting: 2 weeks before transplanting
Earliest Outdoor Planting: 2 weeks after last spring frost
Additional Plantings: no
DescriptionMelons need about 3 months of hot weather to grow, but are a fun andexciting crop—even though the yield isn’t large, when the harvest finallycomes, it all seems very worthwhile. They should be grown on verticalframes, as they will mature sooner and save space. Of course, one of thebiggest rewards is seeing melons hanging 4 to 5 feet off the ground onyour vertical frame—that’s not something you’re used to seeing in yourold single-row gardens!
StartingLocation: Full sun; grow on a vertical frame.Seeds Indoors: Sprouts in 5 to 10 days at 70°F; the hotter the better, even
up to 90°F for sprouting. Plant single seeds in individual paper cups.Plants do not transplant well, so don’t start them until two weeks
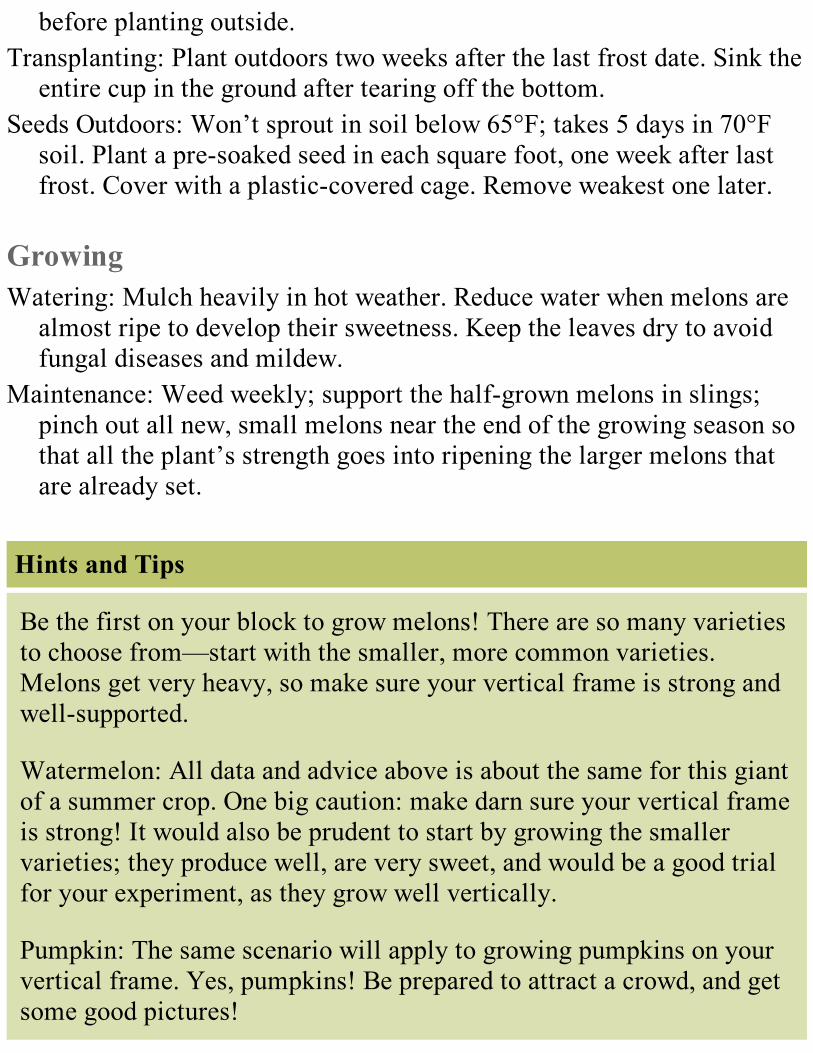
before planting outside.Transplanting: Plant outdoors two weeks after the last frost date. Sink the
entire cup in the ground after tearing off the bottom.Seeds Outdoors: Won’t sprout in soil below 65°F; takes 5 days in 70°F
soil. Plant a pre-soaked seed in each square foot, one week after lastfrost. Cover with a plastic-covered cage. Remove weakest one later.
GrowingWatering: Mulch heavily in hot weather. Reduce water when melons are
almost ripe to develop their sweetness. Keep the leaves dry to avoidfungal diseases and mildew.
Maintenance: Weed weekly; support the half-grown melons in slings;pinch out all new, small melons near the end of the growing season sothat all the plant’s strength goes into ripening the larger melons thatare already set.
Hints and Tips
Be the first on your block to grow melons! There are so many varietiesto choose from—start with the smaller, more common varieties.Melons get very heavy, so make sure your vertical frame is strong andwell-supported.
Watermelon: All data and advice above is about the same for this giantof a summer crop. One big caution: make darn sure your vertical frameis strong! It would also be prudent to start by growing the smallervarieties; they produce well, are very sweet, and would be a good trialfor your experiment, as they grow well vertically.
Pumpkin: The same scenario will apply to growing pumpkins on yourvertical frame. Yes, pumpkins! Be prepared to attract a crowd, and getsome good pictures!

HarvestingHow: Twist the melon with one hand while holding the stem with the
other. If it resists parting, the melon is not ripe.When: Harvest whenever it has a strong melon scent, and the netting
pattern on the rind (if it’s a cantaloupe) becomes very prominent. Thestem will slip off easily when the melon is rotated. If each melon isheld in a sling it won’t roll around and accidentally twist itself offwhen it’s ripe.
Preparing and UsingSome people like melons warm, some, chilled. Cut muskmelons orcantaloupes in half, scoop out the seeds, and cut into wedges, or serve anentire half filled with ice cream, blueberries, or custard. The flesh of allmelons can also be scooped out using a melon-baller or cut into cubesand mixed with or added to a fresh fruit salad. They’re excellent forbreakfast or served as a dinner dessert.
ProblemsCutworms; mildew and wilt disease.
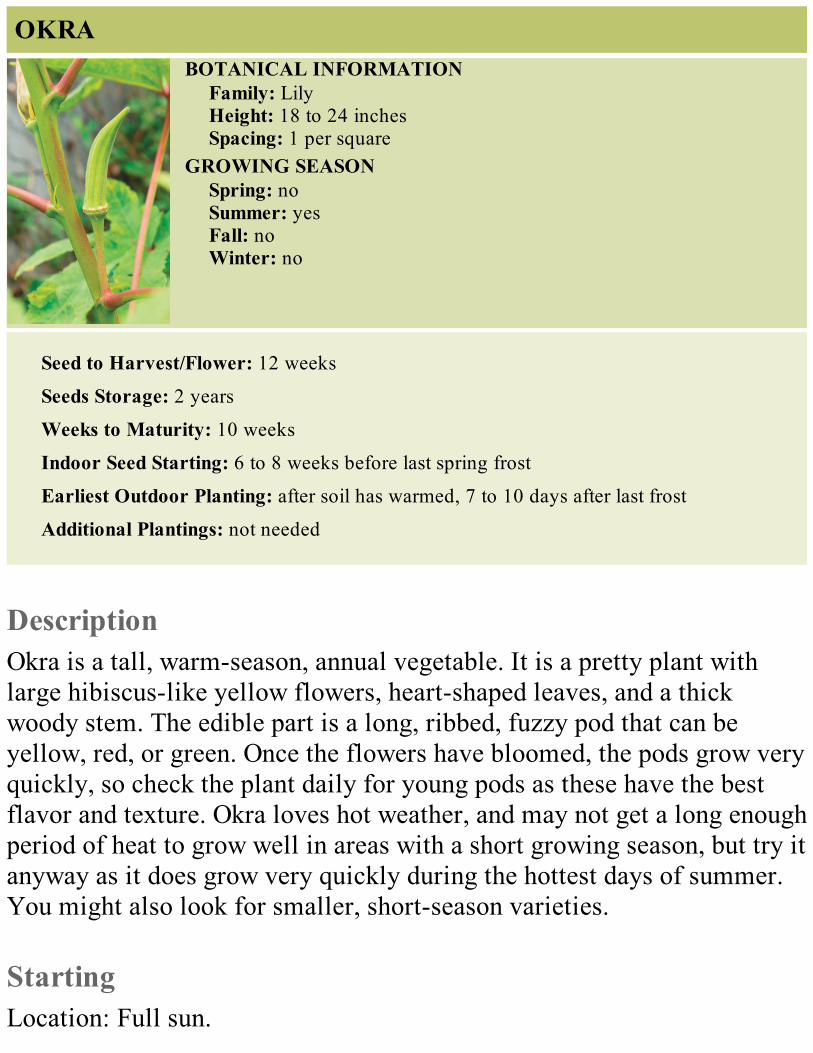
OKRABOTANICAL INFORMATION
Family: LilyHeight: 18 to 24 inchesSpacing: 1 per square
GROWING SEASONSpring: noSummer: yesFall: noWinter: no
Seed to Harvest/Flower: 12 weeks
Seeds Storage: 2 years
Weeks to Maturity: 10 weeks
Indoor Seed Starting: 6 to 8 weeks before last spring frost
Earliest Outdoor Planting: after soil has warmed, 7 to 10 days after last frost
Additional Plantings: not needed
DescriptionOkra is a tall, warm-season, annual vegetable. It is a pretty plant withlarge hibiscus-like yellow flowers, heart-shaped leaves, and a thickwoody stem. The edible part is a long, ribbed, fuzzy pod that can beyellow, red, or green. Once the flowers have bloomed, the pods grow veryquickly, so check the plant daily for young pods as these have the bestflavor and texture. Okra loves hot weather, and may not get a long enoughperiod of heat to grow well in areas with a short growing season, but try itanyway as it does grow very quickly during the hottest days of summer.You might also look for smaller, short-season varieties.
StartingLocation: Full sun.
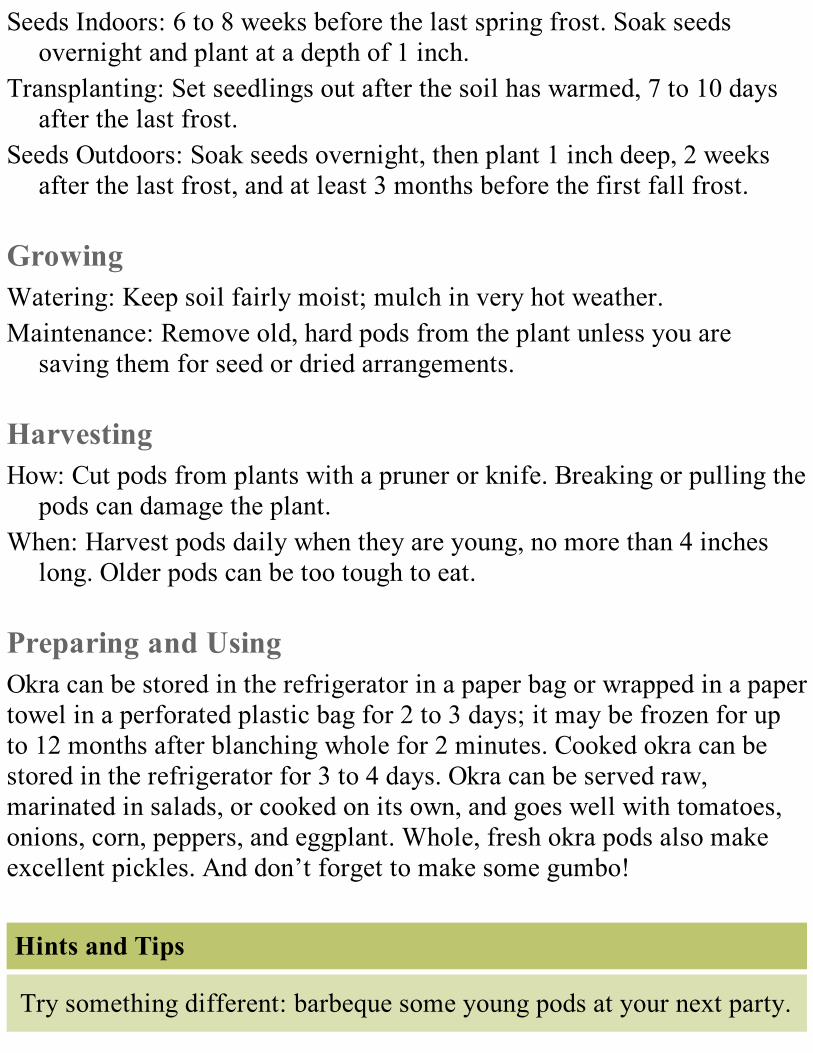
Seeds Indoors: 6 to 8 weeks before the last spring frost. Soak seedsovernight and plant at a depth of 1 inch.
Transplanting: Set seedlings out after the soil has warmed, 7 to 10 daysafter the last frost.
Seeds Outdoors: Soak seeds overnight, then plant 1 inch deep, 2 weeksafter the last frost, and at least 3 months before the first fall frost.
GrowingWatering: Keep soil fairly moist; mulch in very hot weather.Maintenance: Remove old, hard pods from the plant unless you are
saving them for seed or dried arrangements.
HarvestingHow: Cut pods from plants with a pruner or knife. Breaking or pulling the
pods can damage the plant.When: Harvest pods daily when they are young, no more than 4 inches
long. Older pods can be too tough to eat.
Preparing and UsingOkra can be stored in the refrigerator in a paper bag or wrapped in a papertowel in a perforated plastic bag for 2 to 3 days; it may be frozen for upto 12 months after blanching whole for 2 minutes. Cooked okra can bestored in the refrigerator for 3 to 4 days. Okra can be served raw,marinated in salads, or cooked on its own, and goes well with tomatoes,onions, corn, peppers, and eggplant. Whole, fresh okra pods also makeexcellent pickles. And don’t forget to make some gumbo!
Hints and Tips
Try something different: barbeque some young pods at your next party.

ProblemsAphids and cabbage worms, verticillium or fusarium wilt.
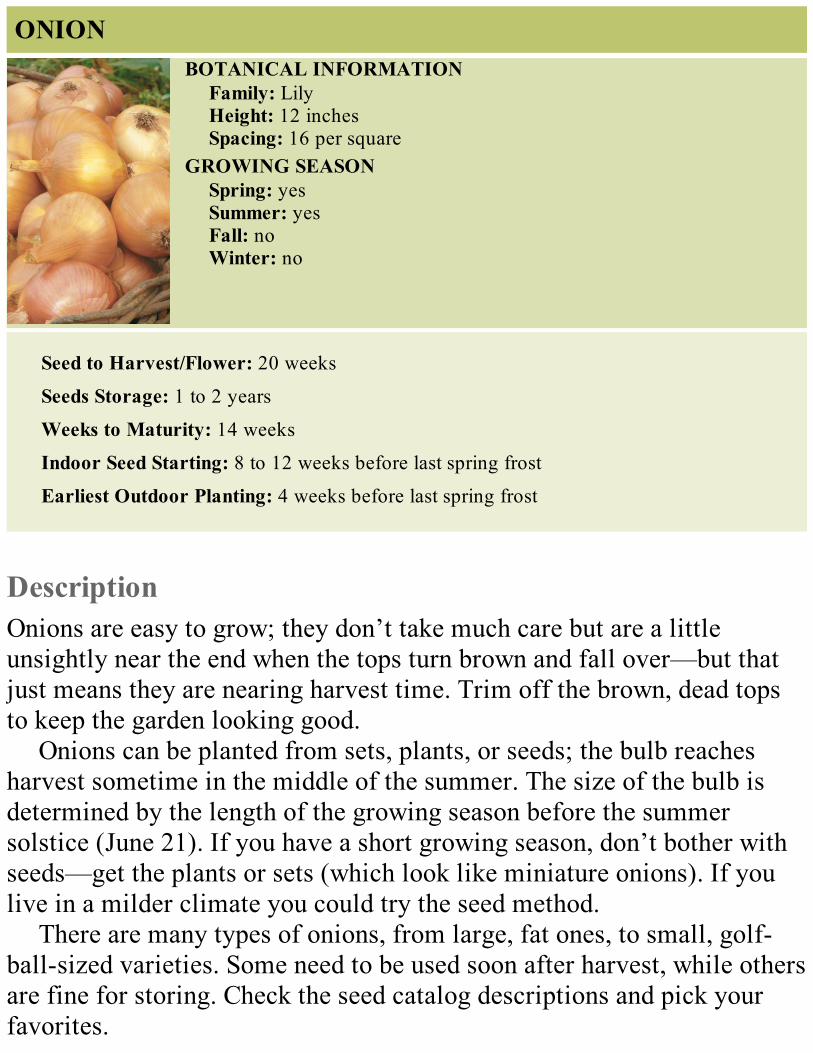
ONIONBOTANICAL INFORMATION
Family: LilyHeight: 12 inchesSpacing: 16 per square
GROWING SEASONSpring: yesSummer: yesFall: noWinter: no
Seed to Harvest/Flower: 20 weeks
Seeds Storage: 1 to 2 years
Weeks to Maturity: 14 weeks
Indoor Seed Starting: 8 to 12 weeks before last spring frost
Earliest Outdoor Planting: 4 weeks before last spring frost
DescriptionOnions are easy to grow; they don’t take much care but are a littleunsightly near the end when the tops turn brown and fall over—but thatjust means they are nearing harvest time. Trim off the brown, dead topsto keep the garden looking good.
Onions can be planted from sets, plants, or seeds; the bulb reachesharvest sometime in the middle of the summer. The size of the bulb isdetermined by the length of the growing season before the summersolstice (June 21). If you have a short growing season, don’t bother withseeds—get the plants or sets (which look like miniature onions). If youlive in a milder climate you could try the seed method.
There are many types of onions, from large, fat ones, to small, golf-ball-sized varieties. Some need to be used soon after harvest, while othersare fine for storing. Check the seed catalog descriptions and pick yourfavorites.
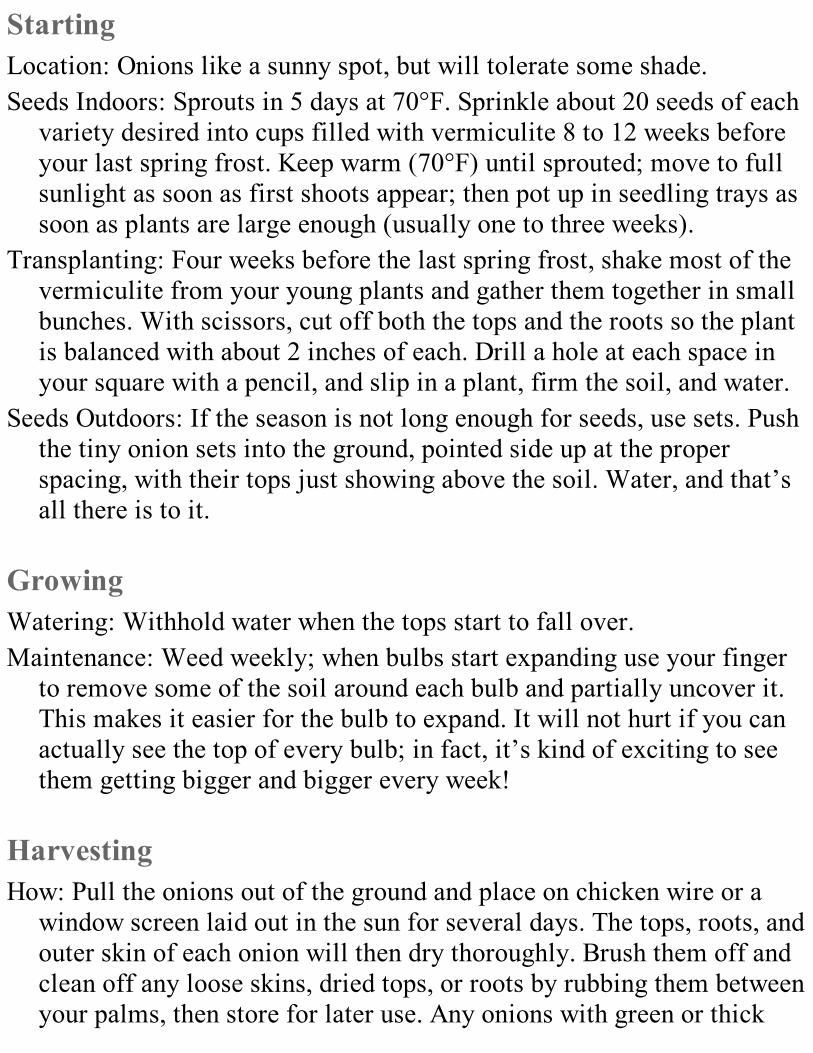
StartingLocation: Onions like a sunny spot, but will tolerate some shade.Seeds Indoors: Sprouts in 5 days at 70°F. Sprinkle about 20 seeds of each
variety desired into cups filled with vermiculite 8 to 12 weeks beforeyour last spring frost. Keep warm (70°F) until sprouted; move to fullsunlight as soon as first shoots appear; then pot up in seedling trays assoon as plants are large enough (usually one to three weeks).
Transplanting: Four weeks before the last spring frost, shake most of thevermiculite from your young plants and gather them together in smallbunches. With scissors, cut off both the tops and the roots so the plantis balanced with about 2 inches of each. Drill a hole at each space inyour square with a pencil, and slip in a plant, firm the soil, and water.
Seeds Outdoors: If the season is not long enough for seeds, use sets. Pushthe tiny onion sets into the ground, pointed side up at the properspacing, with their tops just showing above the soil. Water, and that’sall there is to it.
GrowingWatering: Withhold water when the tops start to fall over.Maintenance: Weed weekly; when bulbs start expanding use your finger
to remove some of the soil around each bulb and partially uncover it.This makes it easier for the bulb to expand. It will not hurt if you canactually see the top of every bulb; in fact, it’s kind of exciting to seethem getting bigger and bigger every week!
HarvestingHow: Pull the onions out of the ground and place on chicken wire or a
window screen laid out in the sun for several days. The tops, roots, andouter skin of each onion will then dry thoroughly. Brush them off andclean off any loose skins, dried tops, or roots by rubbing them betweenyour palms, then store for later use. Any onions with green or thick
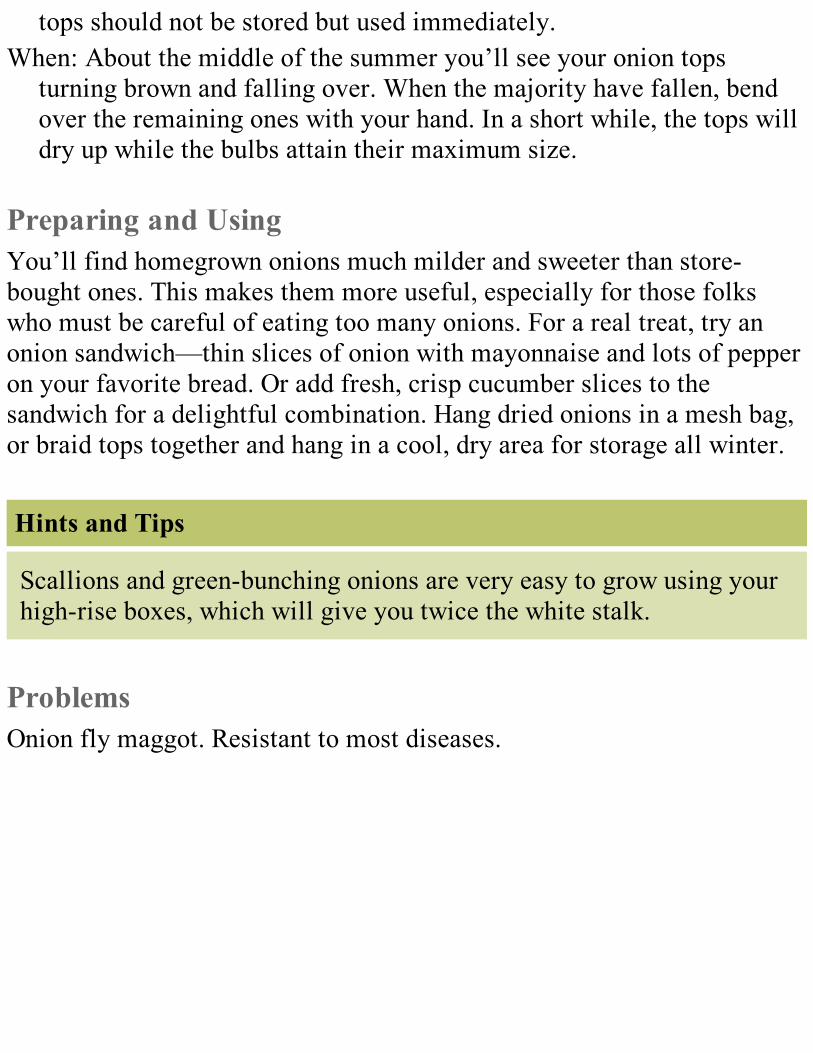
tops should not be stored but used immediately.When: About the middle of the summer you’ll see your onion tops
turning brown and falling over. When the majority have fallen, bendover the remaining ones with your hand. In a short while, the tops willdry up while the bulbs attain their maximum size.
Preparing and UsingYou’ll find homegrown onions much milder and sweeter than store-bought ones. This makes them more useful, especially for those folkswho must be careful of eating too many onions. For a real treat, try anonion sandwich—thin slices of onion with mayonnaise and lots of pepperon your favorite bread. Or add fresh, crisp cucumber slices to thesandwich for a delightful combination. Hang dried onions in a mesh bag,or braid tops together and hang in a cool, dry area for storage all winter.
Hints and Tips
Scallions and green-bunching onions are very easy to grow using yourhigh-rise boxes, which will give you twice the white stalk.
ProblemsOnion fly maggot. Resistant to most diseases.
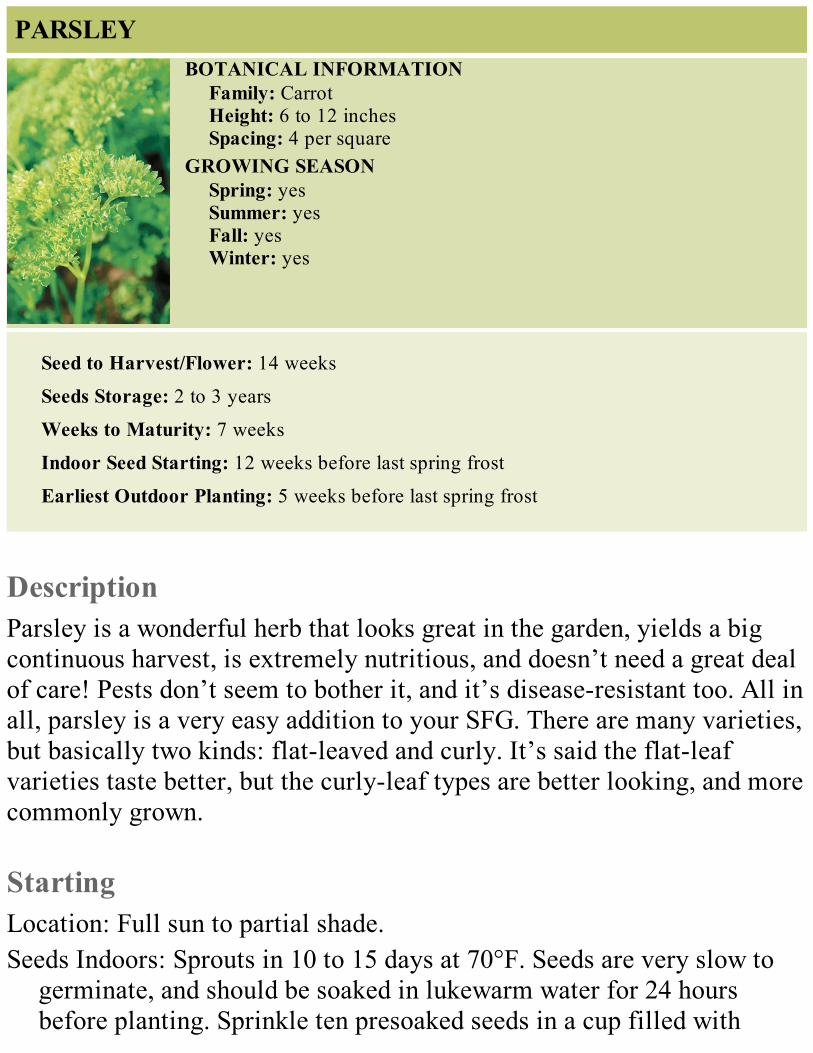
PARSLEYBOTANICAL INFORMATION
Family: CarrotHeight: 6 to 12 inchesSpacing: 4 per square
GROWING SEASONSpring: yesSummer: yesFall: yesWinter: yes
Seed to Harvest/Flower: 14 weeks
Seeds Storage: 2 to 3 years
Weeks to Maturity: 7 weeks
Indoor Seed Starting: 12 weeks before last spring frost
Earliest Outdoor Planting: 5 weeks before last spring frost
DescriptionParsley is a wonderful herb that looks great in the garden, yields a bigcontinuous harvest, is extremely nutritious, and doesn’t need a great dealof care! Pests don’t seem to bother it, and it’s disease-resistant too. All inall, parsley is a very easy addition to your SFG. There are many varieties,but basically two kinds: flat-leaved and curly. It’s said the flat-leafvarieties taste better, but the curly-leaf types are better looking, and morecommonly grown.
StartingLocation: Full sun to partial shade.Seeds Indoors: Sprouts in 10 to 15 days at 70°F. Seeds are very slow to
germinate, and should be soaked in lukewarm water for 24 hoursbefore planting. Sprinkle ten presoaked seeds in a cup filled with
vermiculite 12 weeks before last spring frost. Keep warm (70°F) untilsprouted; move to full sunlight as soon as first shoots appear; then potup in seedling trays as soon as plants are large enough (usually one tothree weeks).
Transplanting: Move outdoors five weeks before the last spring frost oranytime plants are large enough; plant them at the same depth theygrew in the pot.
Seeds Outdoors: Better to start indoors because seeds are slow anddifficult to germinate.
GrowingWatering: Never let parsley dry out completely because it becomes tough
and bitter and may bolt to seed in the first year.Maintenance: Weed weekly. Mulch heavily for continual harvest in
winter, and for early-spring growing the following year.
HarvestingHow: Cut outer leaves as needed; for a large harvest, cut off the entire
plant slightly above tiny middle shoots. Either way, the plant willcontinue to grow with no harm.
When: Harvest as soon as the plant gets 3 to 4 inches tall and anytimethereafter.
Preparing and UsingParsley is good in soups, casseroles, stews, and with fish or any kind ofmeat; it’s excellent over boiled vegetables, particularly potatoes. Parsleyis loaded with vitamins A and C. Cut up leaves with scissors and sprinkleon food for that decorative gourmet chef look!
Hints and Tips

Pot up a plant or two in the fall for a kitchen windowsill garden, oreven plan ahead and pot up several for holiday, birthday, or Christmasgifts.
ProblemsRelatively free from pests and diseases.
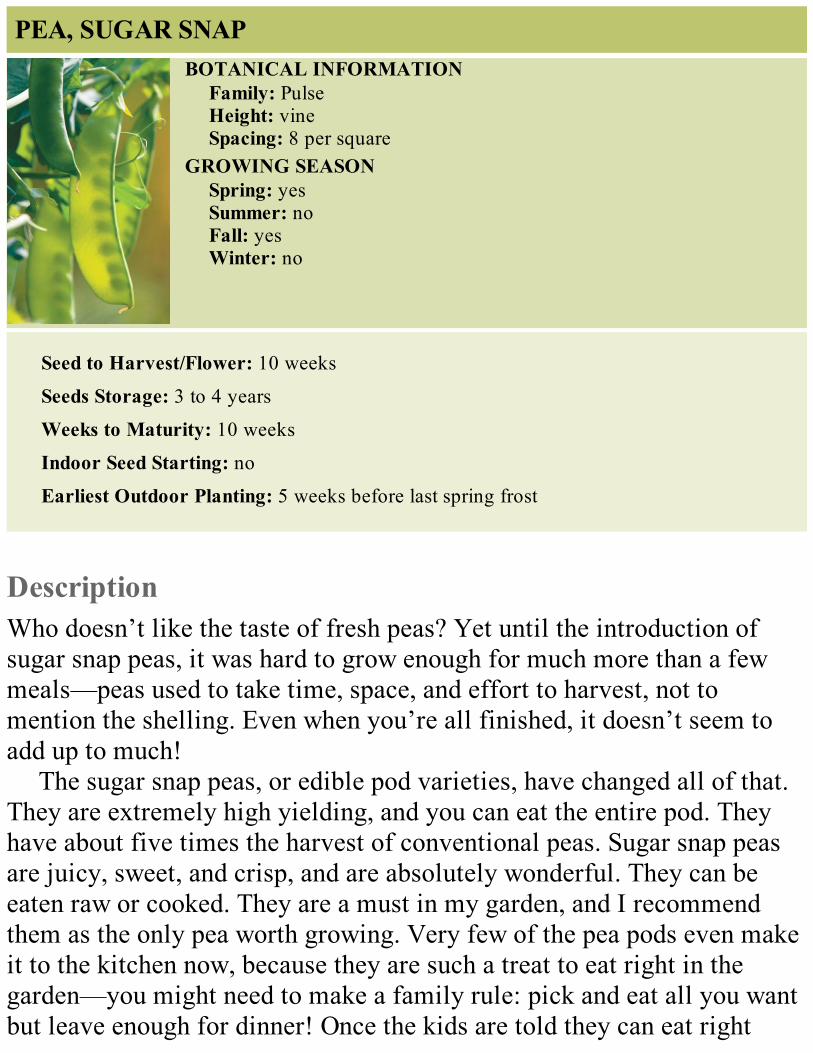
PEA, SUGAR SNAPBOTANICAL INFORMATION
Family: PulseHeight: vineSpacing: 8 per square
GROWING SEASONSpring: yesSummer: noFall: yesWinter: no
Seed to Harvest/Flower: 10 weeks
Seeds Storage: 3 to 4 years
Weeks to Maturity: 10 weeks
Indoor Seed Starting: no
Earliest Outdoor Planting: 5 weeks before last spring frost
DescriptionWho doesn’t like the taste of fresh peas? Yet until the introduction ofsugar snap peas, it was hard to grow enough for much more than a fewmeals—peas used to take time, space, and effort to harvest, not tomention the shelling. Even when you’re all finished, it doesn’t seem toadd up to much!
The sugar snap peas, or edible pod varieties, have changed all of that.They are extremely high yielding, and you can eat the entire pod. Theyhave about five times the harvest of conventional peas. Sugar snap peasare juicy, sweet, and crisp, and are absolutely wonderful. They can beeaten raw or cooked. They are a must in my garden, and I recommendthem as the only pea worth growing. Very few of the pea pods even makeit to the kitchen now, because they are such a treat to eat right in thegarden—you might need to make a family rule: pick and eat all you wantbut leave enough for dinner! Once the kids are told they can eat right
from the garden, they’ll become much more interested in eatingvegetables!
StartingLocation: Full sun in spring; shaded toward summer if possible.Seeds Indoors: No.Transplanting: Does not transplant well.Seeds Outdoors: Sprouts in 10 to 15 days outdoors. Mix presoaked seeds
with legume inoculant powder for an added boost, then plant 1 inchdeep about 5 weeks before the last spring frost. Water and cover with aplastic-covered tunnel.
GrowingWatering: Never let the peas dry out.
Maintenance: Weed weekly; keep water off the vines. Keep the vinestrained up the vertical frame; mulch as weather gets warm.
HarvestingHow: Carefully (with two hands) pick or cut pods off their stems.When: The beauty of these peas is that you can eat them at any stage of
growth. They’re just as tasty (raw or cooked) whether their pods arefully mature and bulging with peas, or still thin and barely starting toshow the peas inside. Munch on a few every time you’re in the garden—what a treat!
Preparing and UsingJust wash and they are ready to eat or cook. Try to use them as fresh aspossible; store what you can’t use right away in refrigerator. Sugar snapsare rich in vitamins A, B1, and C, and contain phosphorus and iron. Asthe pods get nearly full size, some develop a string along each edge, but

it’s easy to remove: just snap off the stem end and pull down, and bothstrings will easily peel off. The pod is still very crisp and tasty even whenfull size.
If the pods start to lose their nice pea-green color and turn brown onthe vine, they are overripe. Pick them immediately and add them to thecompost pile, because if you don’t harvest them they will cause the vineto stop producing new peas.
The versatility of these tasty peas stretches the imagination. Try themraw in salads, with a dip, plain, or mixed with other fresh vegetables invinegar or sour cream dressing . . . or cook them by boiling, steaming, orstir-frying.
Hints and Tips
Let the kids grow them and you’ll have a vegetarian in the making.
ProblemsNo pests to speak of (except those people in the family that eat toomany), but sometimes prone to powdery mildew, especially during warmweather when the leaves get wet.
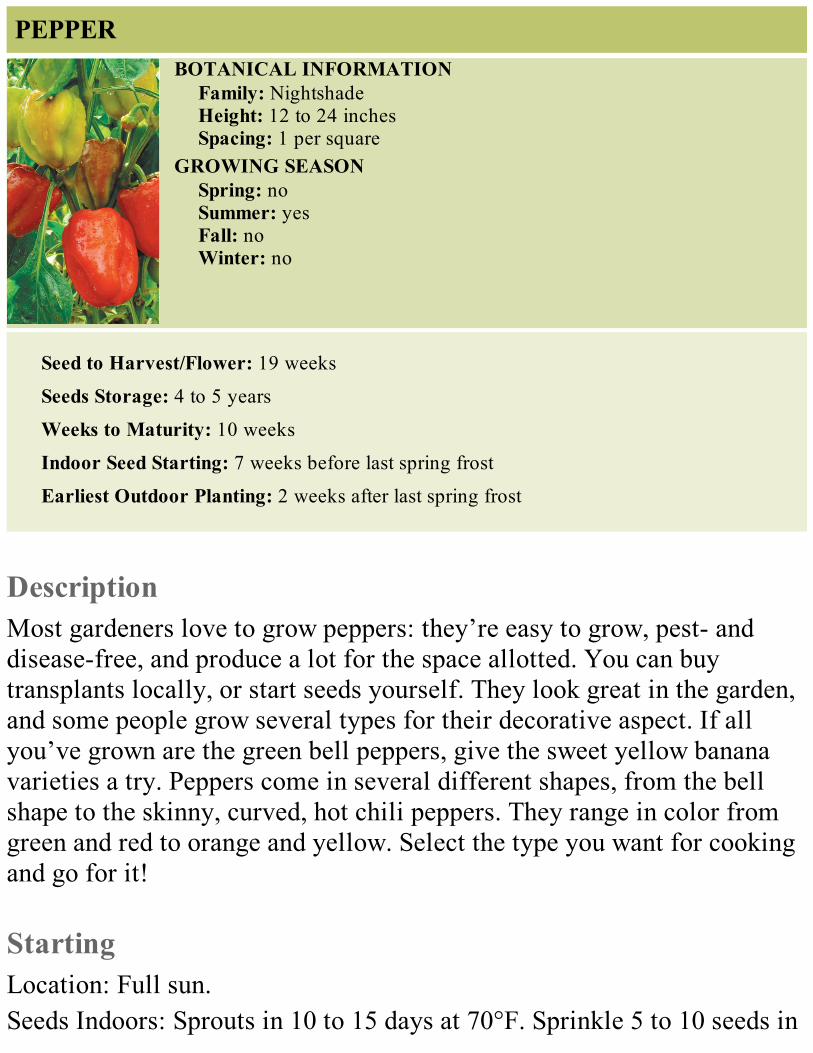
PEPPERBOTANICAL INFORMATION
Family: NightshadeHeight: 12 to 24 inchesSpacing: 1 per square
GROWING SEASONSpring: noSummer: yesFall: noWinter: no
Seed to Harvest/Flower: 19 weeks
Seeds Storage: 4 to 5 years
Weeks to Maturity: 10 weeks
Indoor Seed Starting: 7 weeks before last spring frost
Earliest Outdoor Planting: 2 weeks after last spring frost
DescriptionMost gardeners love to grow peppers: they’re easy to grow, pest- anddisease-free, and produce a lot for the space allotted. You can buytransplants locally, or start seeds yourself. They look great in the garden,and some people grow several types for their decorative aspect. If allyou’ve grown are the green bell peppers, give the sweet yellow bananavarieties a try. Peppers come in several different shapes, from the bellshape to the skinny, curved, hot chili peppers. They range in color fromgreen and red to orange and yellow. Select the type you want for cookingand go for it!
StartingLocation: Full sun.Seeds Indoors: Sprouts in 10 to 15 days at 70°F. Sprinkle 5 to 10 seeds in
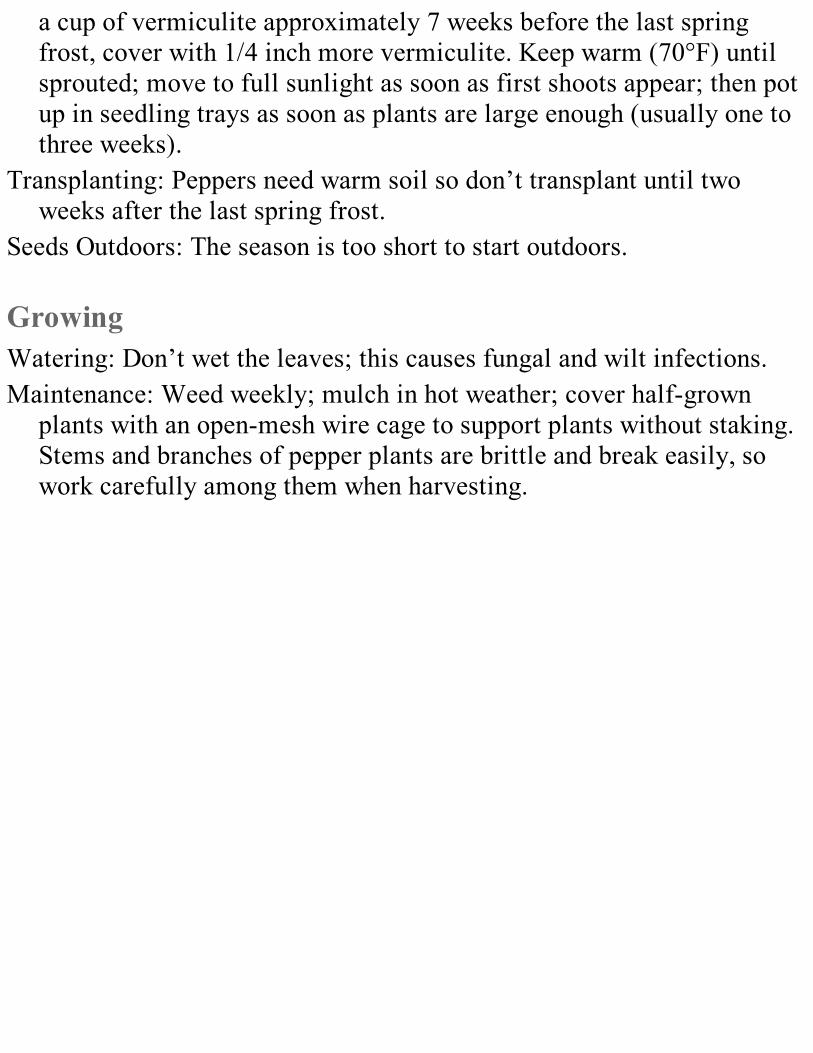
a cup of vermiculite approximately 7 weeks before the last springfrost, cover with 1/4 inch more vermiculite. Keep warm (70°F) untilsprouted; move to full sunlight as soon as first shoots appear; then potup in seedling trays as soon as plants are large enough (usually one tothree weeks).
Transplanting: Peppers need warm soil so don’t transplant until twoweeks after the last spring frost.
Seeds Outdoors: The season is too short to start outdoors.
GrowingWatering: Don’t wet the leaves; this causes fungal and wilt infections.Maintenance: Weed weekly; mulch in hot weather; cover half-grown
plants with an open-mesh wire cage to support plants without staking.Stems and branches of pepper plants are brittle and break easily, sowork carefully among them when harvesting.
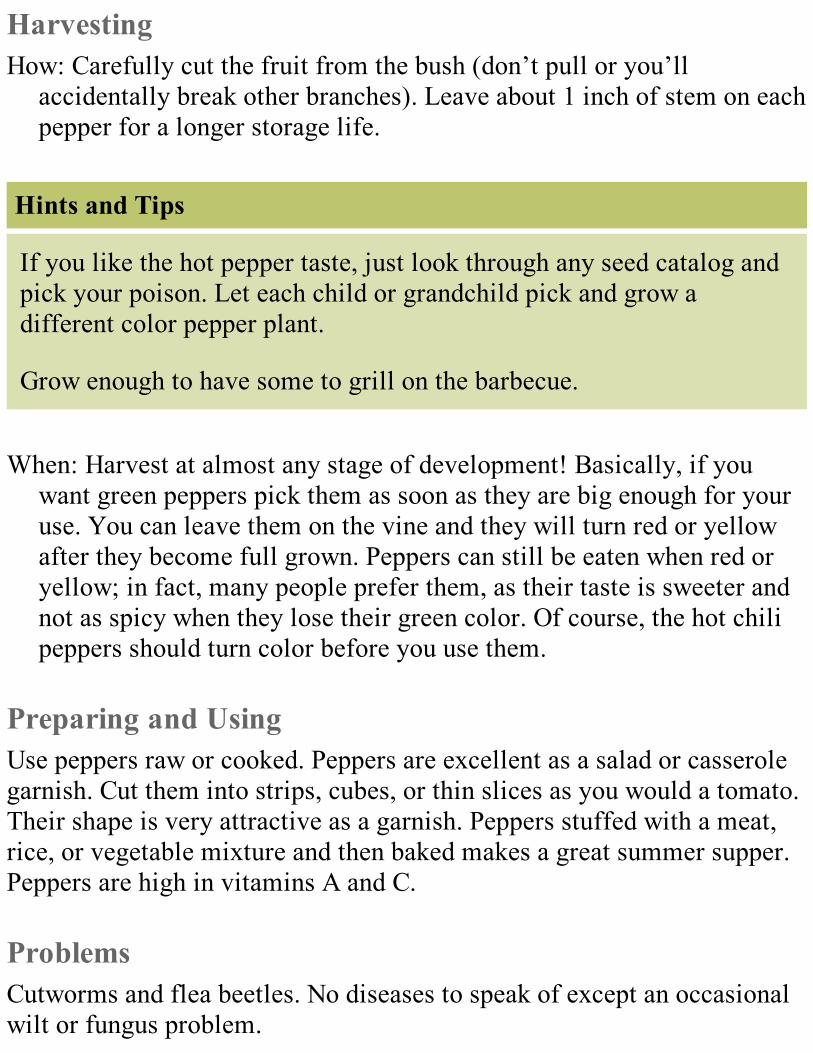
HarvestingHow: Carefully cut the fruit from the bush (don’t pull or you’ll
accidentally break other branches). Leave about 1 inch of stem on eachpepper for a longer storage life.
Hints and Tips
If you like the hot pepper taste, just look through any seed catalog andpick your poison. Let each child or grandchild pick and grow adifferent color pepper plant.
Grow enough to have some to grill on the barbecue.
When: Harvest at almost any stage of development! Basically, if youwant green peppers pick them as soon as they are big enough for youruse. You can leave them on the vine and they will turn red or yellowafter they become full grown. Peppers can still be eaten when red oryellow; in fact, many people prefer them, as their taste is sweeter andnot as spicy when they lose their green color. Of course, the hot chilipeppers should turn color before you use them.
Preparing and UsingUse peppers raw or cooked. Peppers are excellent as a salad or casserolegarnish. Cut them into strips, cubes, or thin slices as you would a tomato.Their shape is very attractive as a garnish. Peppers stuffed with a meat,rice, or vegetable mixture and then baked makes a great summer supper.Peppers are high in vitamins A and C.
ProblemsCutworms and flea beetles. No diseases to speak of except an occasionalwilt or fungus problem.
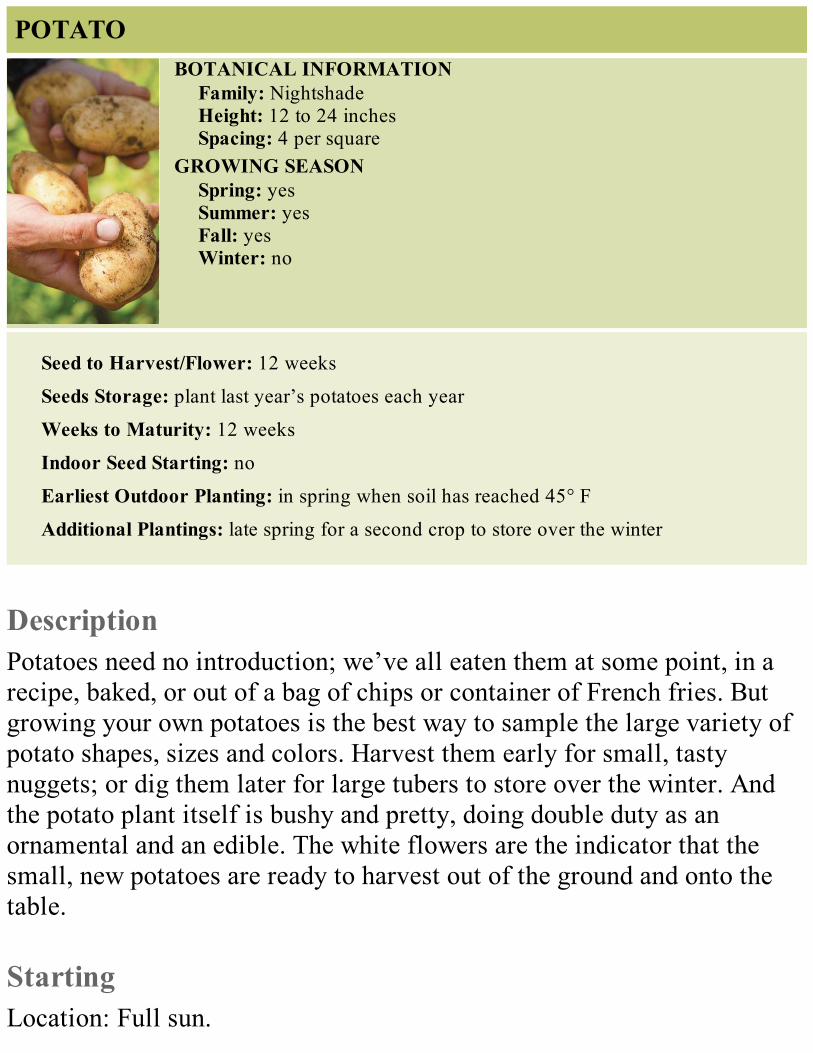
POTATOBOTANICAL INFORMATION
Family: NightshadeHeight: 12 to 24 inchesSpacing: 4 per square
GROWING SEASONSpring: yesSummer: yesFall: yesWinter: no
Seed to Harvest/Flower: 12 weeks
Seeds Storage: plant last year’s potatoes each year
Weeks to Maturity: 12 weeks
Indoor Seed Starting: no
Earliest Outdoor Planting: in spring when soil has reached 45° F
Additional Plantings: late spring for a second crop to store over the winter
DescriptionPotatoes need no introduction; we’ve all eaten them at some point, in arecipe, baked, or out of a bag of chips or container of French fries. Butgrowing your own potatoes is the best way to sample the large variety ofpotato shapes, sizes and colors. Harvest them early for small, tastynuggets; or dig them later for large tubers to store over the winter. Andthe potato plant itself is bushy and pretty, doing double duty as anornamental and an edible. The white flowers are the indicator that thesmall, new potatoes are ready to harvest out of the ground and onto thetable.
StartingLocation: Full sun.
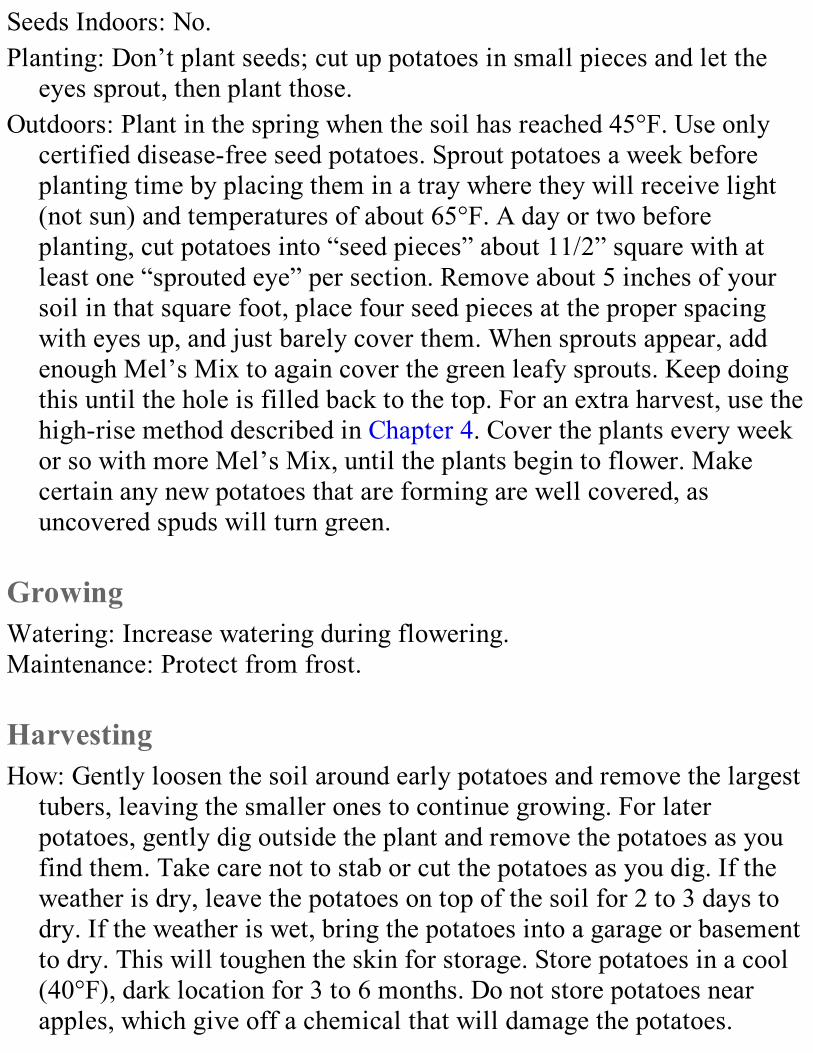
Seeds Indoors: No.Planting: Don’t plant seeds; cut up potatoes in small pieces and let the
eyes sprout, then plant those.Outdoors: Plant in the spring when the soil has reached 45°F. Use only
certified disease-free seed potatoes. Sprout potatoes a week beforeplanting time by placing them in a tray where they will receive light(not sun) and temperatures of about 65°F. A day or two beforeplanting, cut potatoes into “seed pieces” about 11/2” square with atleast one “sprouted eye” per section. Remove about 5 inches of yoursoil in that square foot, place four seed pieces at the proper spacingwith eyes up, and just barely cover them. When sprouts appear, addenough Mel’s Mix to again cover the green leafy sprouts. Keep doingthis until the hole is filled back to the top. For an extra harvest, use thehigh-rise method described in Chapter 4. Cover the plants every weekor so with more Mel’s Mix, until the plants begin to flower. Makecertain any new potatoes that are forming are well covered, asuncovered spuds will turn green.
GrowingWatering: Increase watering during flowering.Maintenance: Protect from frost.
HarvestingHow: Gently loosen the soil around early potatoes and remove the largest
tubers, leaving the smaller ones to continue growing. For laterpotatoes, gently dig outside the plant and remove the potatoes as youfind them. Take care not to stab or cut the potatoes as you dig. If theweather is dry, leave the potatoes on top of the soil for 2 to 3 days todry. If the weather is wet, bring the potatoes into a garage or basementto dry. This will toughen the skin for storage. Store potatoes in a cool(40°F), dark location for 3 to 6 months. Do not store potatoes nearapples, which give off a chemical that will damage the potatoes.
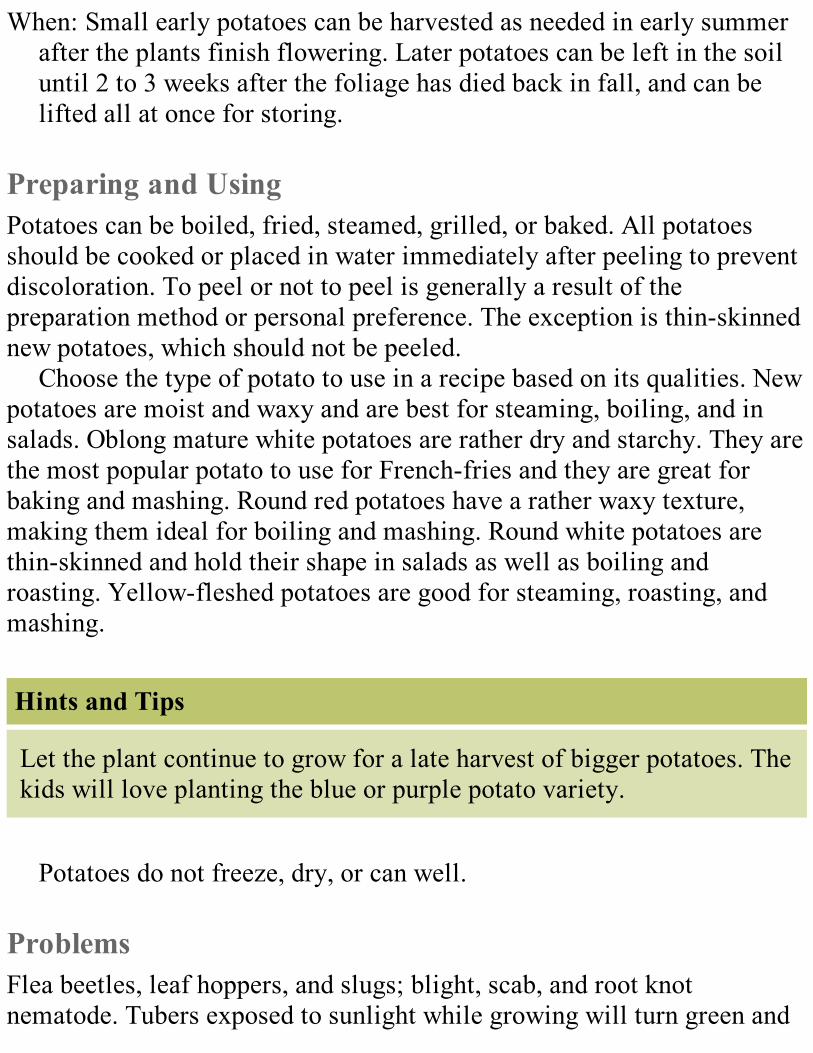
When: Small early potatoes can be harvested as needed in early summerafter the plants finish flowering. Later potatoes can be left in the soiluntil 2 to 3 weeks after the foliage has died back in fall, and can belifted all at once for storing.
Preparing and UsingPotatoes can be boiled, fried, steamed, grilled, or baked. All potatoesshould be cooked or placed in water immediately after peeling to preventdiscoloration. To peel or not to peel is generally a result of thepreparation method or personal preference. The exception is thin-skinnednew potatoes, which should not be peeled.
Choose the type of potato to use in a recipe based on its qualities. Newpotatoes are moist and waxy and are best for steaming, boiling, and insalads. Oblong mature white potatoes are rather dry and starchy. They arethe most popular potato to use for French-fries and they are great forbaking and mashing. Round red potatoes have a rather waxy texture,making them ideal for boiling and mashing. Round white potatoes arethin-skinned and hold their shape in salads as well as boiling androasting. Yellow-fleshed potatoes are good for steaming, roasting, andmashing.
Hints and Tips
Let the plant continue to grow for a late harvest of bigger potatoes. Thekids will love planting the blue or purple potato variety.
Potatoes do not freeze, dry, or can well.
ProblemsFlea beetles, leaf hoppers, and slugs; blight, scab, and root knotnematode. Tubers exposed to sunlight while growing will turn green and

are mildly toxic.
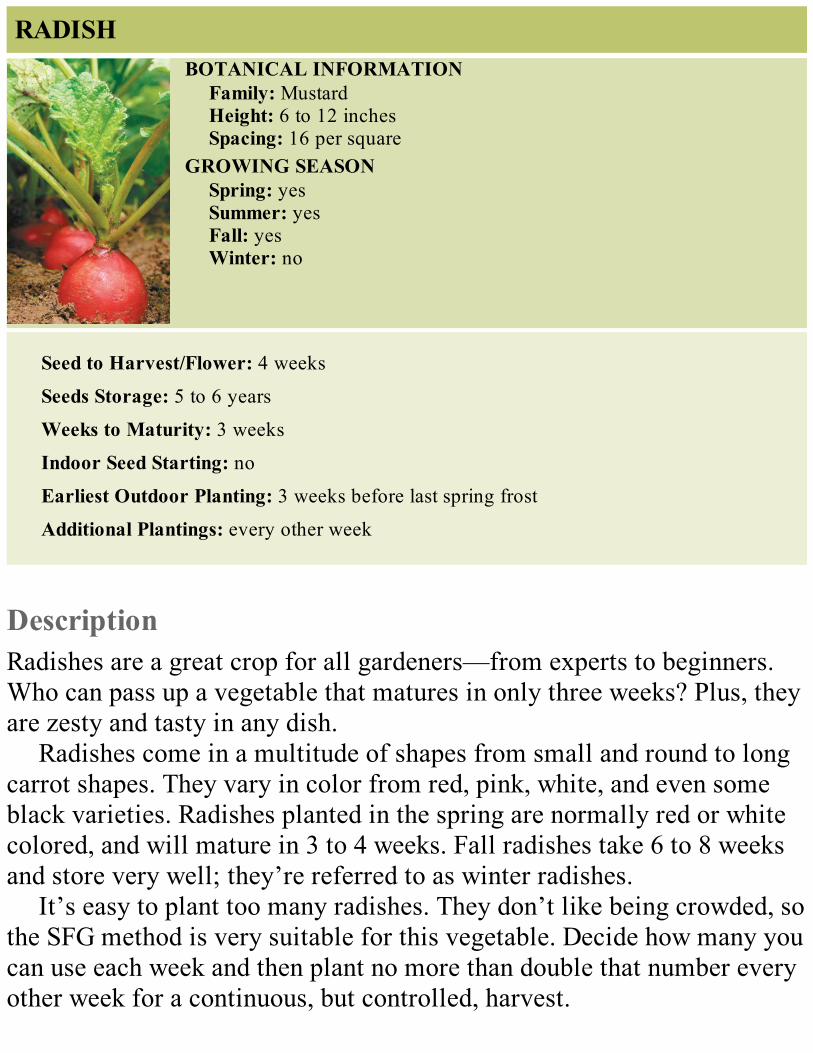
RADISHBOTANICAL INFORMATION
Family: MustardHeight: 6 to 12 inchesSpacing: 16 per square
GROWING SEASONSpring: yesSummer: yesFall: yesWinter: no
Seed to Harvest/Flower: 4 weeks
Seeds Storage: 5 to 6 years
Weeks to Maturity: 3 weeks
Indoor Seed Starting: no
Earliest Outdoor Planting: 3 weeks before last spring frost
Additional Plantings: every other week
DescriptionRadishes are a great crop for all gardeners—from experts to beginners.Who can pass up a vegetable that matures in only three weeks? Plus, theyare zesty and tasty in any dish.
Radishes come in a multitude of shapes from small and round to longcarrot shapes. They vary in color from red, pink, white, and even someblack varieties. Radishes planted in the spring are normally red or whitecolored, and will mature in 3 to 4 weeks. Fall radishes take 6 to 8 weeksand store very well; they’re referred to as winter radishes.
It’s easy to plant too many radishes. They don’t like being crowded, sothe SFG method is very suitable for this vegetable. Decide how many youcan use each week and then plant no more than double that number everyother week for a continuous, but controlled, harvest.
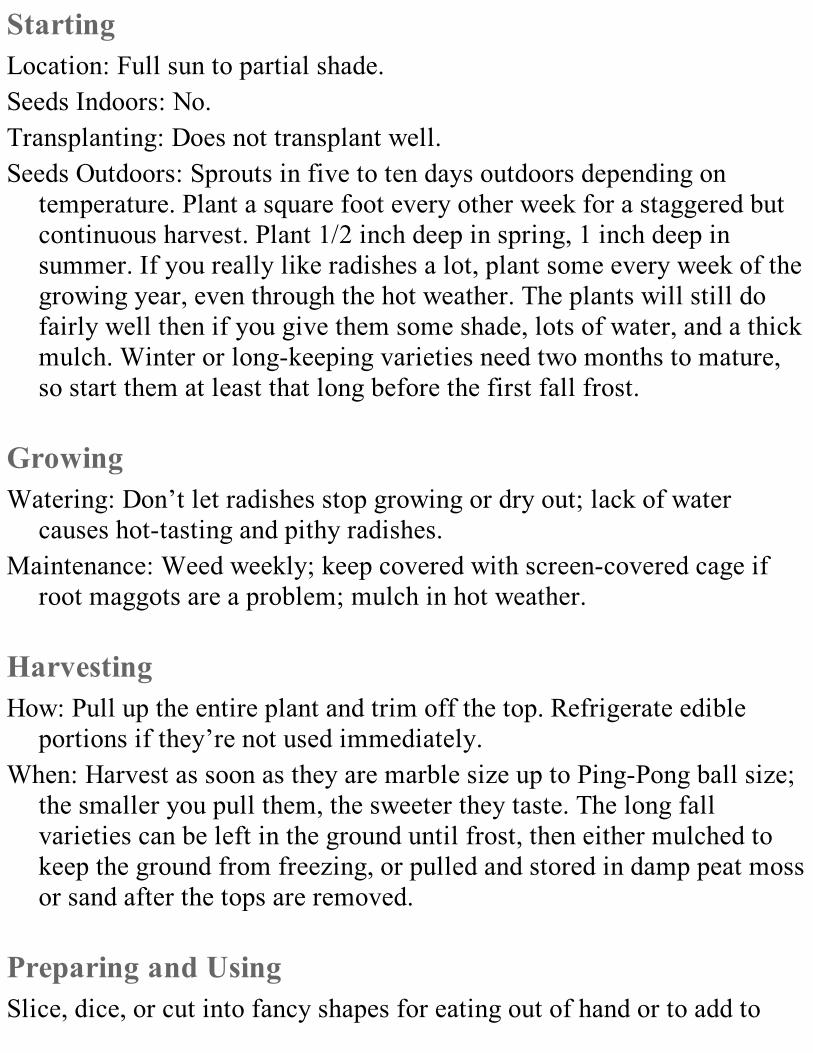
StartingLocation: Full sun to partial shade.Seeds Indoors: No.Transplanting: Does not transplant well.Seeds Outdoors: Sprouts in five to ten days outdoors depending on
temperature. Plant a square foot every other week for a staggered butcontinuous harvest. Plant 1/2 inch deep in spring, 1 inch deep insummer. If you really like radishes a lot, plant some every week of thegrowing year, even through the hot weather. The plants will still dofairly well then if you give them some shade, lots of water, and a thickmulch. Winter or long-keeping varieties need two months to mature,so start them at least that long before the first fall frost.
GrowingWatering: Don’t let radishes stop growing or dry out; lack of water
causes hot-tasting and pithy radishes.Maintenance: Weed weekly; keep covered with screen-covered cage if
root maggots are a problem; mulch in hot weather.
HarvestingHow: Pull up the entire plant and trim off the top. Refrigerate edible
portions if they’re not used immediately.When: Harvest as soon as they are marble size up to Ping-Pong ball size;
the smaller you pull them, the sweeter they taste. The long fallvarieties can be left in the ground until frost, then either mulched tokeep the ground from freezing, or pulled and stored in damp peat mossor sand after the tops are removed.
Preparing and UsingSlice, dice, or cut into fancy shapes for eating out of hand or to add to
salads, and for garnishes. If you have too many all at once, twist or cutoff the tops and store in a plastic bag in the refrigerator. Radishes willkeep for up to a week before getting soft.
Hints and Tips
Teaching a child to garden? This is the perfect first crop; let each childpick a color, and take it from there.
ProblemsNone to speak of, except possibly root maggots.
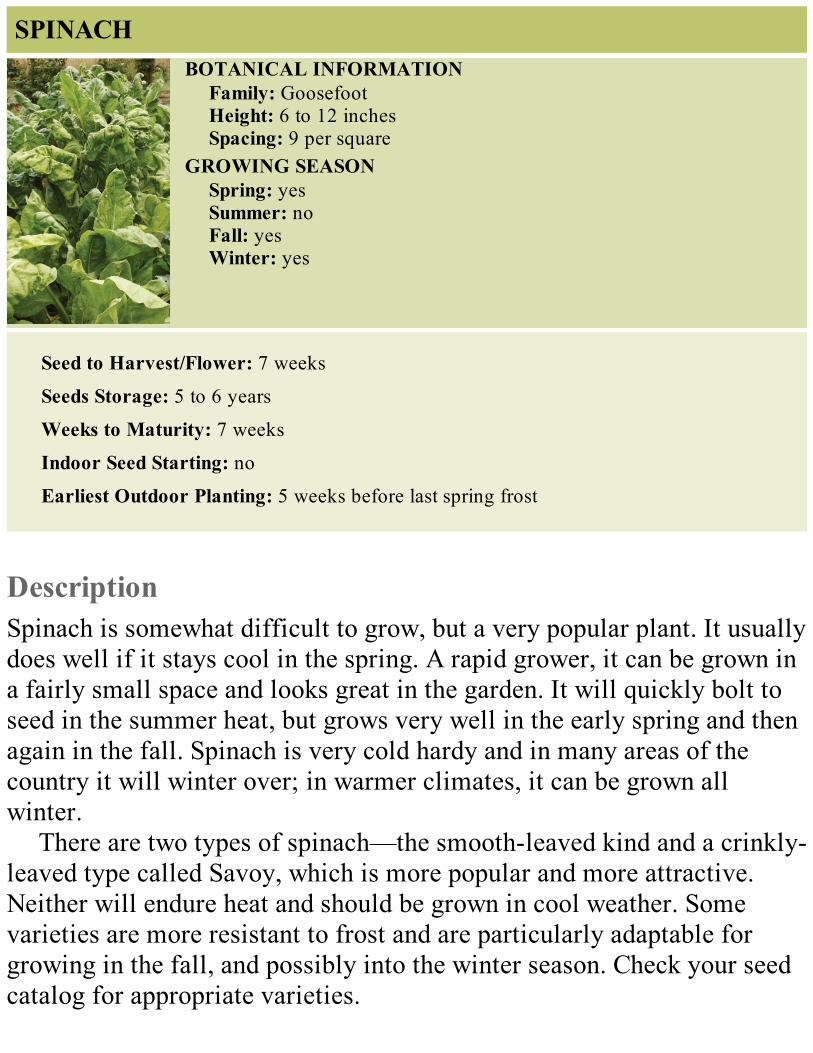
SPINACHBOTANICAL INFORMATION
Family: GoosefootHeight: 6 to 12 inchesSpacing: 9 per square
GROWING SEASONSpring: yesSummer: noFall: yesWinter: yes
Seed to Harvest/Flower: 7 weeks
Seeds Storage: 5 to 6 years
Weeks to Maturity: 7 weeks
Indoor Seed Starting: no
Earliest Outdoor Planting: 5 weeks before last spring frost
DescriptionSpinach is somewhat difficult to grow, but a very popular plant. It usuallydoes well if it stays cool in the spring. A rapid grower, it can be grown ina fairly small space and looks great in the garden. It will quickly bolt toseed in the summer heat, but grows very well in the early spring and thenagain in the fall. Spinach is very cold hardy and in many areas of thecountry it will winter over; in warmer climates, it can be grown allwinter.
There are two types of spinach—the smooth-leaved kind and a crinkly-leaved type called Savoy, which is more popular and more attractive.Neither will endure heat and should be grown in cool weather. Somevarieties are more resistant to frost and are particularly adaptable forgrowing in the fall, and possibly into the winter season. Check your seedcatalog for appropriate varieties.
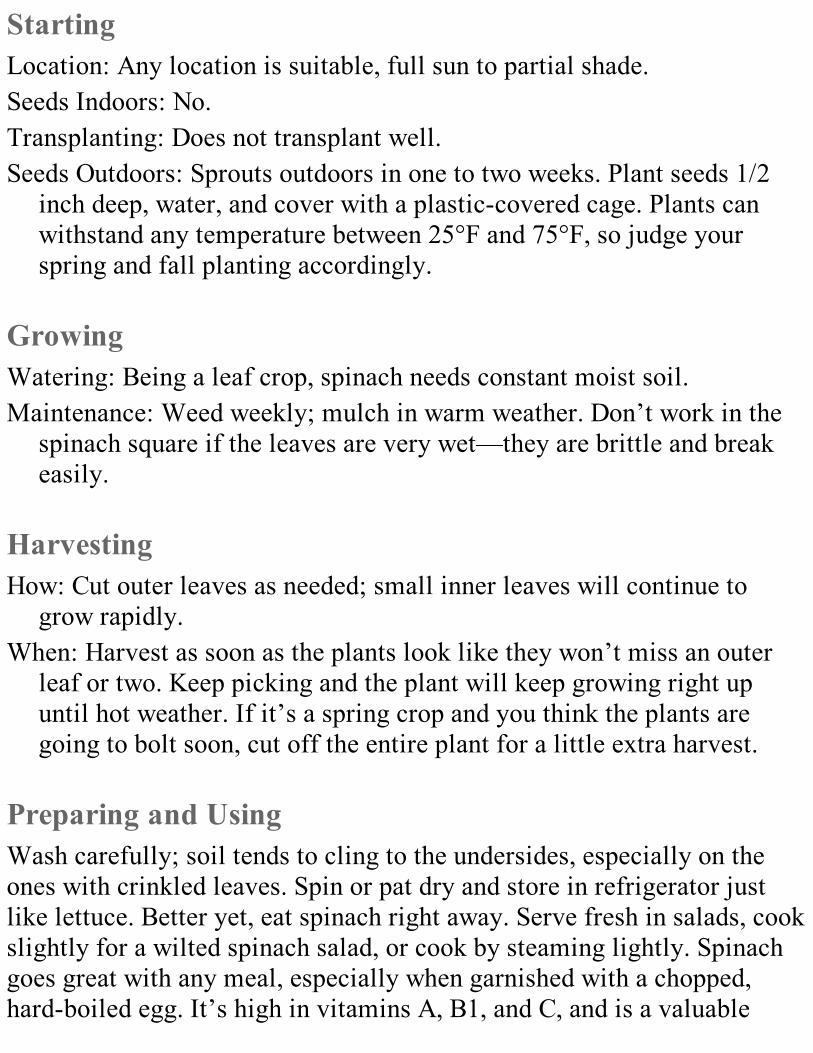
StartingLocation: Any location is suitable, full sun to partial shade.Seeds Indoors: No.Transplanting: Does not transplant well.Seeds Outdoors: Sprouts outdoors in one to two weeks. Plant seeds 1/2
inch deep, water, and cover with a plastic-covered cage. Plants canwithstand any temperature between 25°F and 75°F, so judge yourspring and fall planting accordingly.
GrowingWatering: Being a leaf crop, spinach needs constant moist soil.Maintenance: Weed weekly; mulch in warm weather. Don’t work in the
spinach square if the leaves are very wet—they are brittle and breakeasily.
HarvestingHow: Cut outer leaves as needed; small inner leaves will continue to
grow rapidly.When: Harvest as soon as the plants look like they won’t miss an outer
leaf or two. Keep picking and the plant will keep growing right upuntil hot weather. If it’s a spring crop and you think the plants aregoing to bolt soon, cut off the entire plant for a little extra harvest.
Preparing and UsingWash carefully; soil tends to cling to the undersides, especially on theones with crinkled leaves. Spin or pat dry and store in refrigerator justlike lettuce. Better yet, eat spinach right away. Serve fresh in salads, cookslightly for a wilted spinach salad, or cook by steaming lightly. Spinachgoes great with any meal, especially when garnished with a chopped,hard-boiled egg. It’s high in vitamins A, B1, and C, and is a valuable

source of iron.
Hints and Tips
If you want to grow spinach in the warmer weather, search the seedcatalogs for bolt-resistant varieties and provide shade, a heavy mulch,and lots of water in the warmer weather.
ProblemsLeaf miners and aphids. No diseases to speak of.
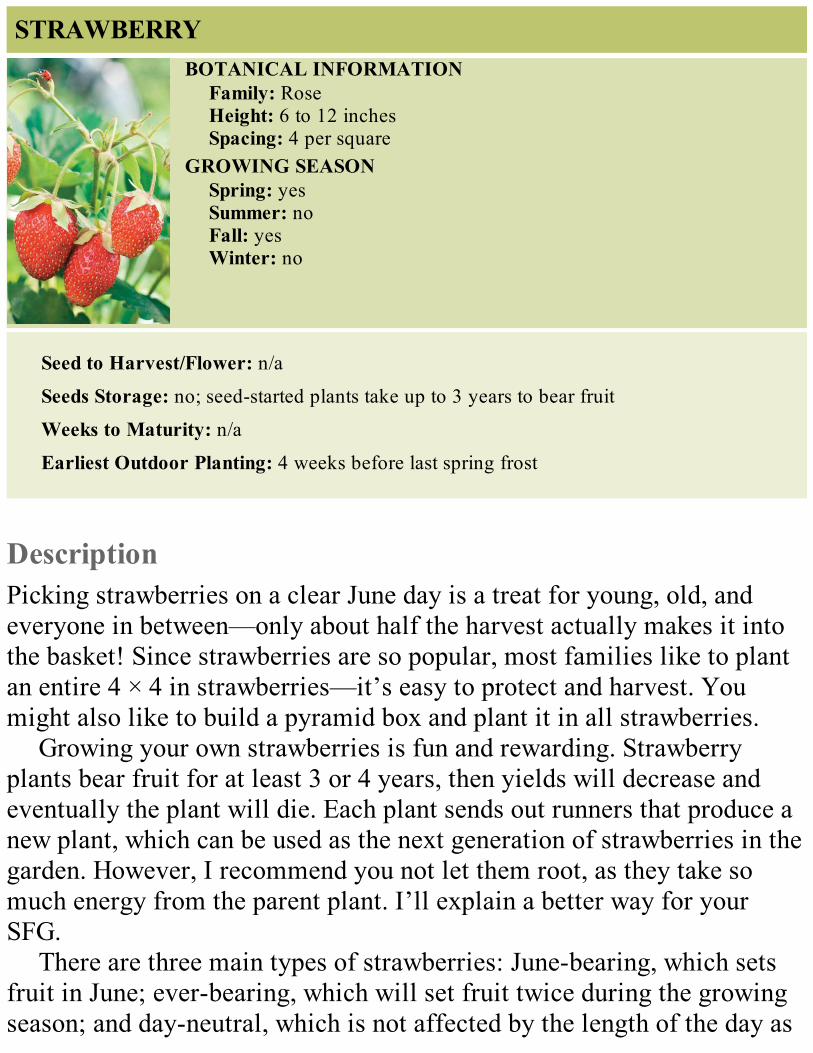
STRAWBERRYBOTANICAL INFORMATION
Family: RoseHeight: 6 to 12 inchesSpacing: 4 per square
GROWING SEASONSpring: yesSummer: noFall: yesWinter: no
Seed to Harvest/Flower: n/a
Seeds Storage: no; seed-started plants take up to 3 years to bear fruit
Weeks to Maturity: n/a
Earliest Outdoor Planting: 4 weeks before last spring frost
DescriptionPicking strawberries on a clear June day is a treat for young, old, andeveryone in between—only about half the harvest actually makes it intothe basket! Since strawberries are so popular, most families like to plantan entire 4 × 4 in strawberries—it’s easy to protect and harvest. Youmight also like to build a pyramid box and plant it in all strawberries.
Growing your own strawberries is fun and rewarding. Strawberryplants bear fruit for at least 3 or 4 years, then yields will decrease andeventually the plant will die. Each plant sends out runners that produce anew plant, which can be used as the next generation of strawberries in thegarden. However, I recommend you not let them root, as they take somuch energy from the parent plant. I’ll explain a better way for yourSFG.
There are three main types of strawberries: June-bearing, which setsfruit in June; ever-bearing, which will set fruit twice during the growingseason; and day-neutral, which is not affected by the length of the day as
the others are. And don’t overlook the Alpine strawberry, which willreward you with tiny but incredibly tasty fruit over a long period!
StartingLocation: Full sun.Seeds Indoors: No.Transplanting: Early spring, as soon as the soil is not frozen. Be sure soil
is not wet.Outdoors: Most gardeners buy strawberry plants in packets of a dozen or
so. Soak first, then trim off the roots slightly, and plant 4 per squarefoot. Leave a saucer-shaped depression around each plant for effectivewatering. Keep the soil moist; increase water when strawberries arefruiting.
GrowingWatering: Weekly; more during dry periods.Maintenance: Cut off all the runners as soon as you see them each week;
that way all the energy will stay in the parent plant for an increasedharvest each year. After 3 or 4 years when the harvest starts todiminish, it is best to pull out those plants and replant, perhaps in adifferent square with brand-new certified disease-free plants from thenursery. It’s true that those runners will produce baby plants and itseems a waste not to use them; some people like to let them grow.However, the problem comes from too many runners producing toomany baby plants (because the gardener forgets to cut them off); theytake all the energy from the parent, reducing the harvest.
HarvestingHow: Pick the fruit leaving a short piece of stem attached; use scissors
for a clean cut.When: Harvest as fruit ripens, for 2 to 3 weeks.
Preparing and UsingUse strawberries as soon as possible after picking; pop a few right in yourmouth. They can be used in fruit salads, on cakes, and in pies. Freezewhole strawberries for use in smoothies—they will be soft when theydefrost, but still flavorful.
ProblemsBirds and slugs; verticillium wilt. People who put too many in theirmouth and too few in the basket.
Hints and Tips
Cover plants with bird netting to preserve harvest.
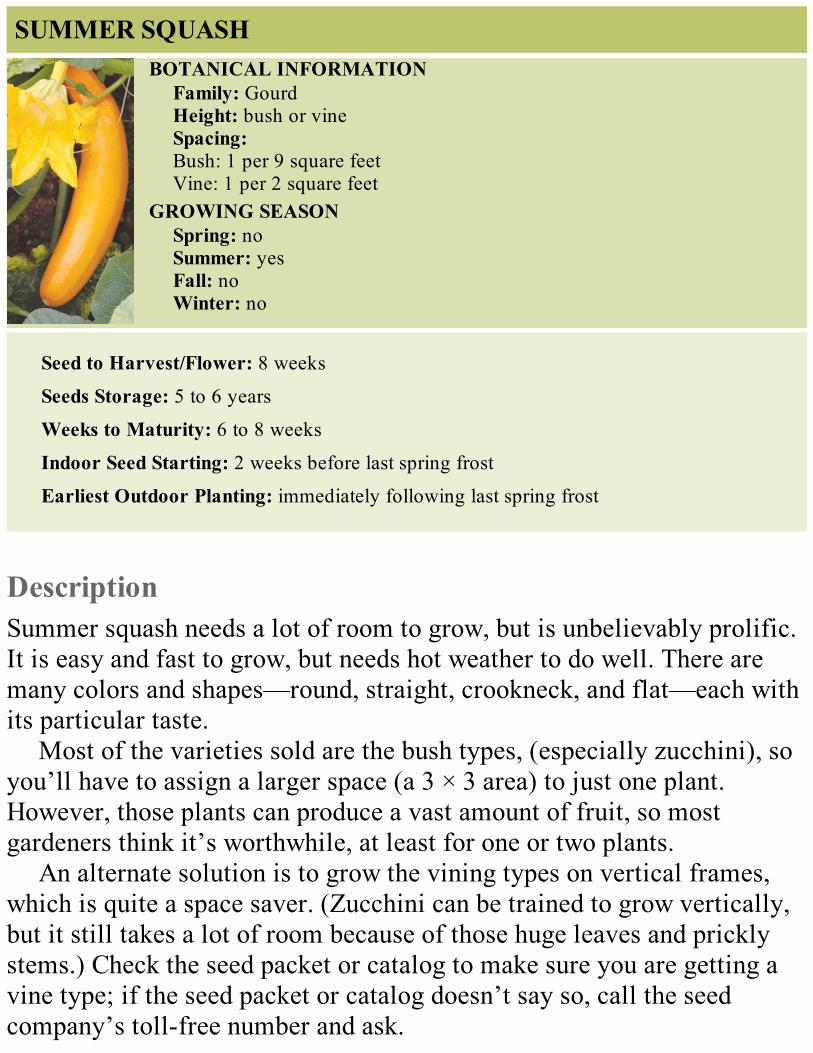
SUMMER SQUASHBOTANICAL INFORMATION
Family: GourdHeight: bush or vineSpacing:Bush: 1 per 9 square feetVine: 1 per 2 square feet
GROWING SEASONSpring: noSummer: yesFall: noWinter: no
Seed to Harvest/Flower: 8 weeks
Seeds Storage: 5 to 6 years
Weeks to Maturity: 6 to 8 weeks
Indoor Seed Starting: 2 weeks before last spring frost
Earliest Outdoor Planting: immediately following last spring frost
DescriptionSummer squash needs a lot of room to grow, but is unbelievably prolific.It is easy and fast to grow, but needs hot weather to do well. There aremany colors and shapes—round, straight, crookneck, and flat—each withits particular taste.
Most of the varieties sold are the bush types, (especially zucchini), soyou’ll have to assign a larger space (a 3 × 3 area) to just one plant.However, those plants can produce a vast amount of fruit, so mostgardeners think it’s worthwhile, at least for one or two plants.
An alternate solution is to grow the vining types on vertical frames,which is quite a space saver. (Zucchini can be trained to grow vertically,but it still takes a lot of room because of those huge leaves and pricklystems.) Check the seed packet or catalog to make sure you are getting avine type; if the seed packet or catalog doesn’t say so, call the seedcompany’s toll-free number and ask.
StartingLocation: Full sun.Seeds Indoors: Doesn’t transplant well because of the long taproot. It’s
best to start seeds outdoors.If you do want to start indoors, plant one seed in a paper cup of Mel’s
Mix 1 inch deep. Plant 2 weeks before your last frost date.Transplanting: Plant outdoors on your last spring frost date.Seeds Outdoors: Sprouts in 5 to 10 days outdoors. For bush types, plant 2
presoaked seeds in the center of a nine-square space. For vine types,also plant 2 presoaked seeds in the middle of a 2-square-foot spaceunder your vertical frame. Make sure you hollow out a dish shapearound the planted seeds to hold plenty of water. Place a plastic-covered cage over the seeds to warm the soil. After sprouting, cut offthe weakest plant if both seeds sprout.
Hints and Tips
If you need or want to tell the kids about the birds and bees, the gardenis the right place to do it—and summer squash is the right plant for youto use. Point out to any eager faces the difference between the male andfemale flower. The female already has a miniature fruit right beforethe blossom. The male blossom, which contains the pollen—oh, youknow the rest of the story. Didn’t your mother or father talk to you inthe garden?
GrowingWatering: Keep the leaves dry to prevent powdery mildew.Maintenance: Weed weekly; keep vines trained up vertical frames or
within bounds of the square.
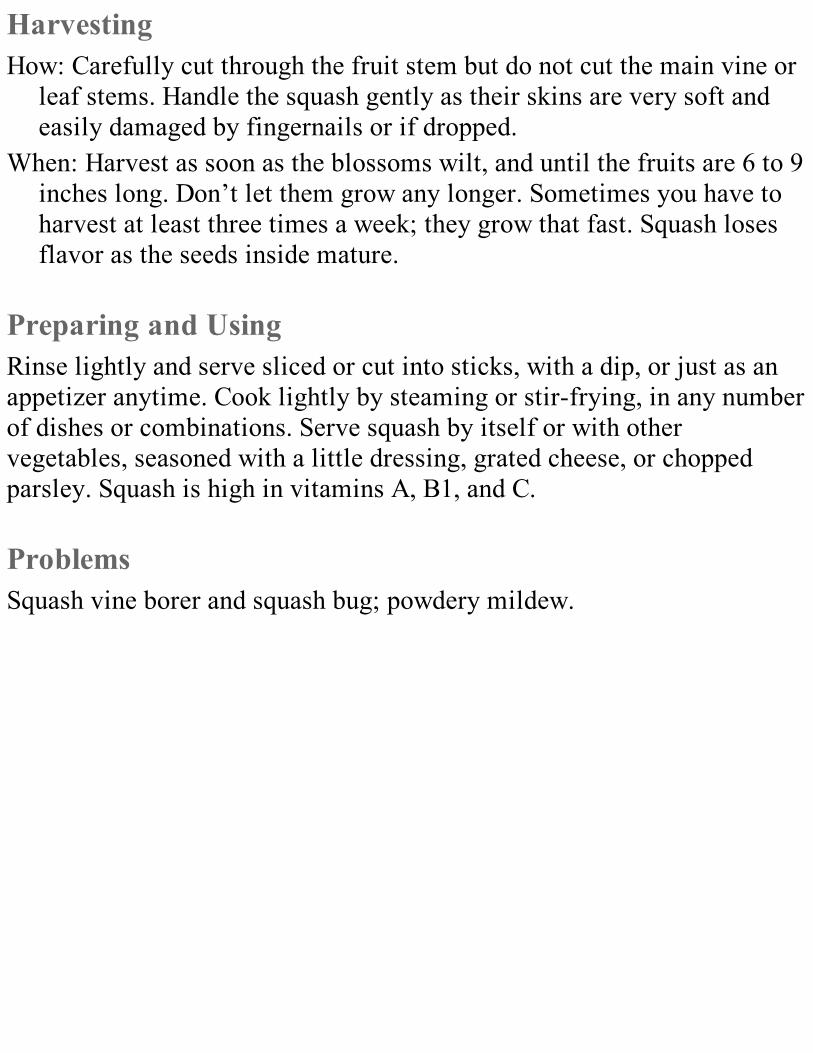
HarvestingHow: Carefully cut through the fruit stem but do not cut the main vine or
leaf stems. Handle the squash gently as their skins are very soft andeasily damaged by fingernails or if dropped.
When: Harvest as soon as the blossoms wilt, and until the fruits are 6 to 9inches long. Don’t let them grow any longer. Sometimes you have toharvest at least three times a week; they grow that fast. Squash losesflavor as the seeds inside mature.
Preparing and UsingRinse lightly and serve sliced or cut into sticks, with a dip, or just as anappetizer anytime. Cook lightly by steaming or stir-frying, in any numberof dishes or combinations. Serve squash by itself or with othervegetables, seasoned with a little dressing, grated cheese, or choppedparsley. Squash is high in vitamins A, B1, and C.
ProblemsSquash vine borer and squash bug; powdery mildew.
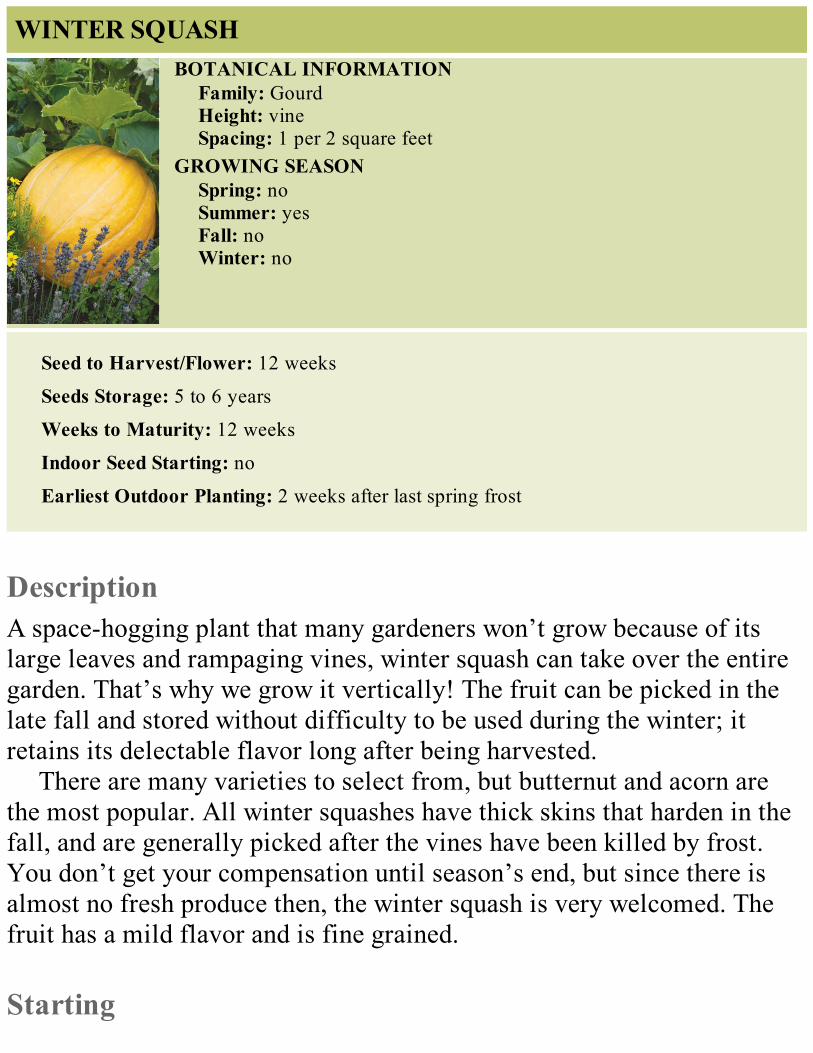
WINTER SQUASHBOTANICAL INFORMATION
Family: GourdHeight: vineSpacing: 1 per 2 square feet
GROWING SEASONSpring: noSummer: yesFall: noWinter: no
Seed to Harvest/Flower: 12 weeks
Seeds Storage: 5 to 6 years
Weeks to Maturity: 12 weeks
Indoor Seed Starting: no
Earliest Outdoor Planting: 2 weeks after last spring frost
DescriptionA space-hogging plant that many gardeners won’t grow because of itslarge leaves and rampaging vines, winter squash can take over the entiregarden. That’s why we grow it vertically! The fruit can be picked in thelate fall and stored without difficulty to be used during the winter; itretains its delectable flavor long after being harvested.
There are many varieties to select from, but butternut and acorn arethe most popular. All winter squashes have thick skins that harden in thefall, and are generally picked after the vines have been killed by frost.You don’t get your compensation until season’s end, but since there isalmost no fresh produce then, the winter squash is very welcomed. Thefruit has a mild flavor and is fine grained.
Starting
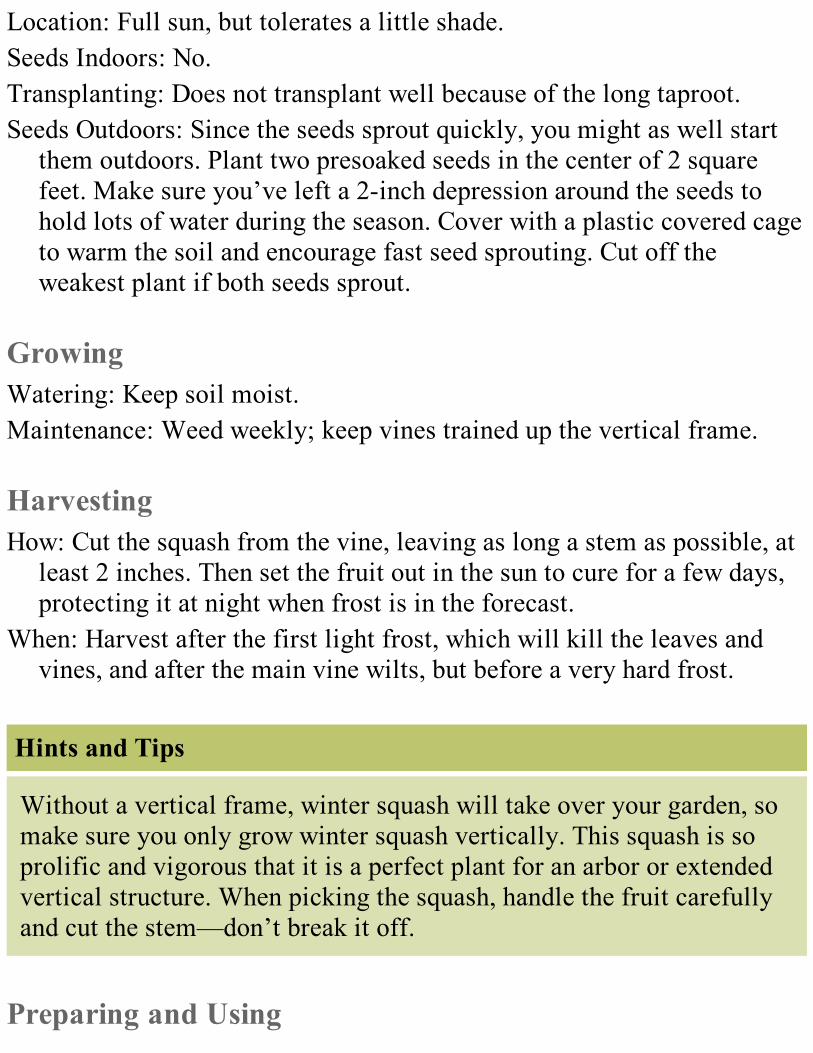
Location: Full sun, but tolerates a little shade.Seeds Indoors: No.Transplanting: Does not transplant well because of the long taproot.Seeds Outdoors: Since the seeds sprout quickly, you might as well start
them outdoors. Plant two presoaked seeds in the center of 2 squarefeet. Make sure you’ve left a 2-inch depression around the seeds tohold lots of water during the season. Cover with a plastic covered cageto warm the soil and encourage fast seed sprouting. Cut off theweakest plant if both seeds sprout.
GrowingWatering: Keep soil moist.Maintenance: Weed weekly; keep vines trained up the vertical frame.
HarvestingHow: Cut the squash from the vine, leaving as long a stem as possible, at
least 2 inches. Then set the fruit out in the sun to cure for a few days,protecting it at night when frost is in the forecast.
When: Harvest after the first light frost, which will kill the leaves andvines, and after the main vine wilts, but before a very hard frost.
Hints and Tips
Without a vertical frame, winter squash will take over your garden, somake sure you only grow winter squash vertically. This squash is soprolific and vigorous that it is a perfect plant for an arbor or extendedvertical structure. When picking the squash, handle the fruit carefullyand cut the stem—don’t break it off.
Preparing and Using

Peel, cut in half, scoop out seeds, and prepare for boiling or baking.Excellent served mashed or in chunks with butter and parsley. Wintersquash can even be added to some soups and stews. Butternut can be usedin pumpkin pie recipes (many cooks say it’s better tasting than pumpkinitself). Store winter squash in a cool, dry place at 40° to 50°F; check oftenand use if you see any bruised or rotten spots.
ProblemsA few beetles; powdery mildew; and vines too rambunctious to control.
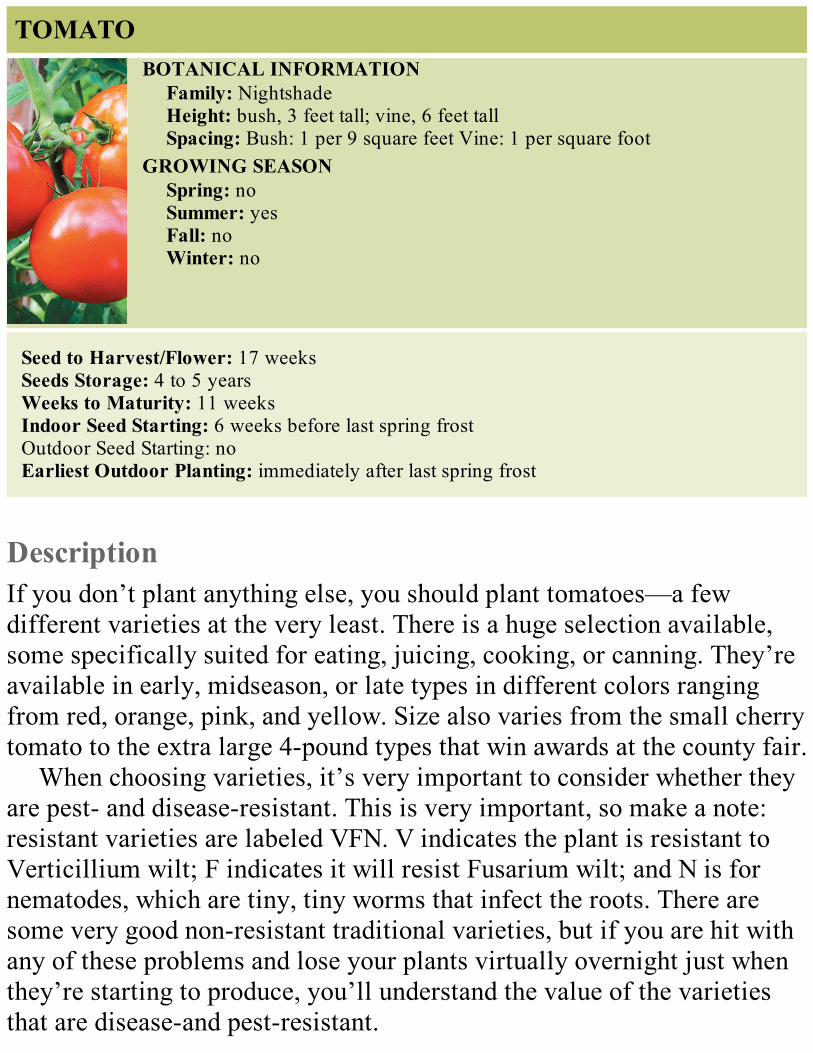
TOMATOBOTANICAL INFORMATION
Family: NightshadeHeight: bush, 3 feet tall; vine, 6 feet tallSpacing: Bush: 1 per 9 square feet Vine: 1 per square foot
GROWING SEASONSpring: noSummer: yesFall: noWinter: no
Seed to Harvest/Flower: 17 weeksSeeds Storage: 4 to 5 yearsWeeks to Maturity: 11 weeksIndoor Seed Starting: 6 weeks before last spring frostOutdoor Seed Starting: noEarliest Outdoor Planting: immediately after last spring frost
DescriptionIf you don’t plant anything else, you should plant tomatoes—a fewdifferent varieties at the very least. There is a huge selection available,some specifically suited for eating, juicing, cooking, or canning. They’reavailable in early, midseason, or late types in different colors rangingfrom red, orange, pink, and yellow. Size also varies from the small cherrytomato to the extra large 4-pound types that win awards at the county fair.
When choosing varieties, it’s very important to consider whether theyare pest- and disease-resistant. This is very important, so make a note:resistant varieties are labeled VFN. V indicates the plant is resistant toVerticillium wilt; F indicates it will resist Fusarium wilt; and N is fornematodes, which are tiny, tiny worms that infect the roots. There aresome very good non-resistant traditional varieties, but if you are hit withany of these problems and lose your plants virtually overnight just whenthey’re starting to produce, you’ll understand the value of the varietiesthat are disease-and pest-resistant.
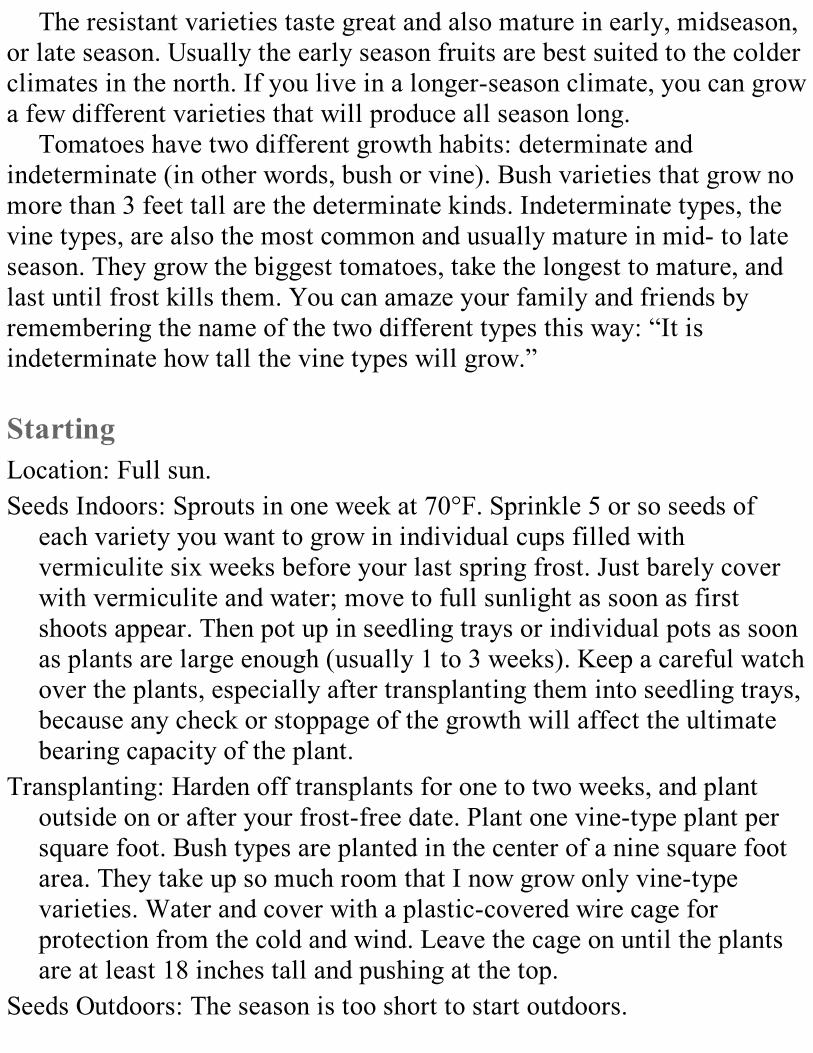
The resistant varieties taste great and also mature in early, midseason,or late season. Usually the early season fruits are best suited to the colderclimates in the north. If you live in a longer-season climate, you can growa few different varieties that will produce all season long.
Tomatoes have two different growth habits: determinate andindeterminate (in other words, bush or vine). Bush varieties that grow nomore than 3 feet tall are the determinate kinds. Indeterminate types, thevine types, are also the most common and usually mature in mid- to lateseason. They grow the biggest tomatoes, take the longest to mature, andlast until frost kills them. You can amaze your family and friends byremembering the name of the two different types this way: “It isindeterminate how tall the vine types will grow.”
StartingLocation: Full sun.Seeds Indoors: Sprouts in one week at 70°F. Sprinkle 5 or so seeds of
each variety you want to grow in individual cups filled withvermiculite six weeks before your last spring frost. Just barely coverwith vermiculite and water; move to full sunlight as soon as firstshoots appear. Then pot up in seedling trays or individual pots as soonas plants are large enough (usually 1 to 3 weeks). Keep a careful watchover the plants, especially after transplanting them into seedling trays,because any check or stoppage of the growth will affect the ultimatebearing capacity of the plant.
Transplanting: Harden off transplants for one to two weeks, and plantoutside on or after your frost-free date. Plant one vine-type plant persquare foot. Bush types are planted in the center of a nine square footarea. They take up so much room that I now grow only vine-typevarieties. Water and cover with a plastic-covered wire cage forprotection from the cold and wind. Leave the cage on until the plantsare at least 18 inches tall and pushing at the top.
Seeds Outdoors: The season is too short to start outdoors.
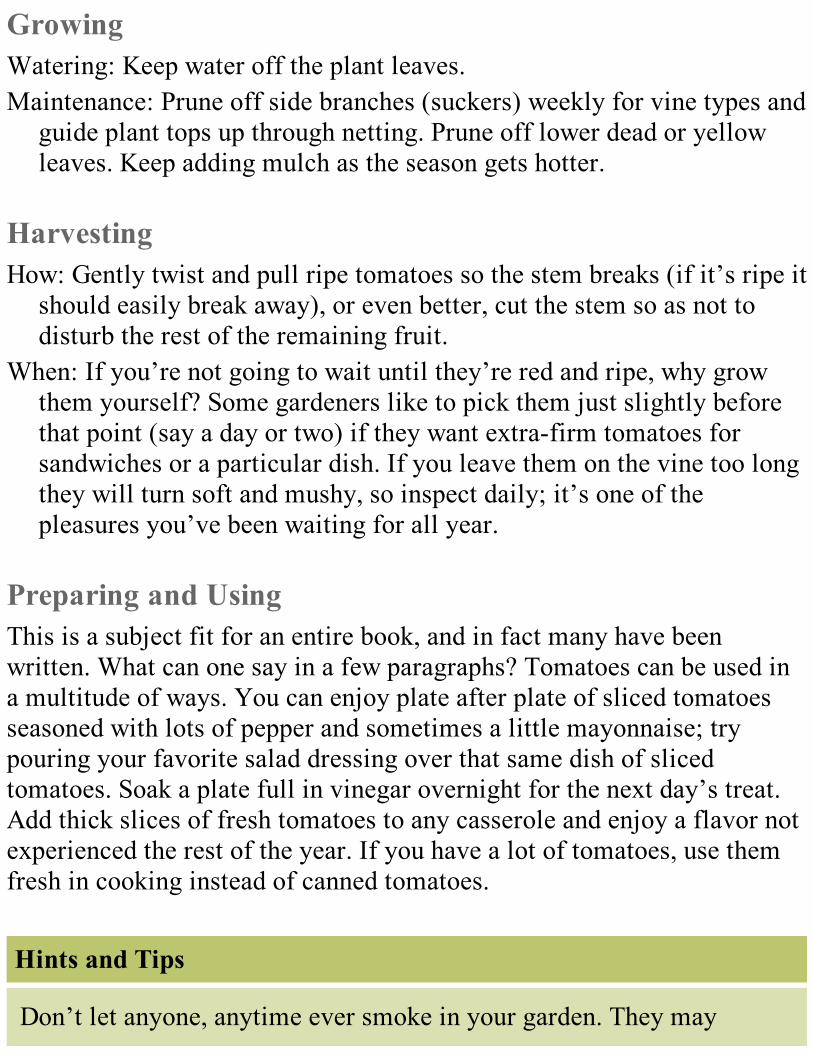
GrowingWatering: Keep water off the plant leaves.Maintenance: Prune off side branches (suckers) weekly for vine types and
guide plant tops up through netting. Prune off lower dead or yellowleaves. Keep adding mulch as the season gets hotter.
HarvestingHow: Gently twist and pull ripe tomatoes so the stem breaks (if it’s ripe it
should easily break away), or even better, cut the stem so as not todisturb the rest of the remaining fruit.
When: If you’re not going to wait until they’re red and ripe, why growthem yourself? Some gardeners like to pick them just slightly beforethat point (say a day or two) if they want extra-firm tomatoes forsandwiches or a particular dish. If you leave them on the vine too longthey will turn soft and mushy, so inspect daily; it’s one of thepleasures you’ve been waiting for all year.
Preparing and UsingThis is a subject fit for an entire book, and in fact many have beenwritten. What can one say in a few paragraphs? Tomatoes can be used ina multitude of ways. You can enjoy plate after plate of sliced tomatoesseasoned with lots of pepper and sometimes a little mayonnaise; trypouring your favorite salad dressing over that same dish of slicedtomatoes. Soak a plate full in vinegar overnight for the next day’s treat.Add thick slices of fresh tomatoes to any casserole and enjoy a flavor notexperienced the rest of the year. If you have a lot of tomatoes, use themfresh in cooking instead of canned tomatoes.
Hints and Tips
Don’t let anyone, anytime ever smoke in your garden. They may

contaminate your plants with a tobacco disease. In fact, they shouldeven wash their hands before entering the garden if they are going tohandle any of the plants. (Oh, well, there goes all your smokingfriends.)
ProblemsCutworm, whitefly, and the big, bad, but beautiful tomato horn worm;various wilt diseases.

HERBS
BASILBOTANICAL INFORMATION
Family: MintHeight: 1 to 2 feetSpacing: small, 4 per square foot large, 1 per square foot
GROWING SEASONSpring: noSummer: yesFall: noWinter: no
Seed to Harvest/Flower: 12 weeksSeeds Storage: 5 yearsWeeks to Maturity: 4 to 6 weeksIndoor Seed Starting: 4 to 6 weeks before last frostEarliest Outdoor Planting: after soil has warmedAdditional Plantings: 3 weeks and 6 weeksLast Planting: not needed
DescriptionBasil is a non-invasive member of the mint family. ‘Sweet Genovese’ isthe pesto basil. Basil is used not only in Italian cooking, but in manyAsian cuisines. In India, it is planted around the temples and is a part ofmany religious ceremonies. Basil also comes in flavors such ascinnamon, licorice, and lemon. Go ahead and splurge—grow a fewdifferent kinds and discover the wonders of this beautiful and deliciousherb.
StartingLocation: Full sun.Seeds Indoors: Start seeds indoors 4 to 6 weeks before the last frost.
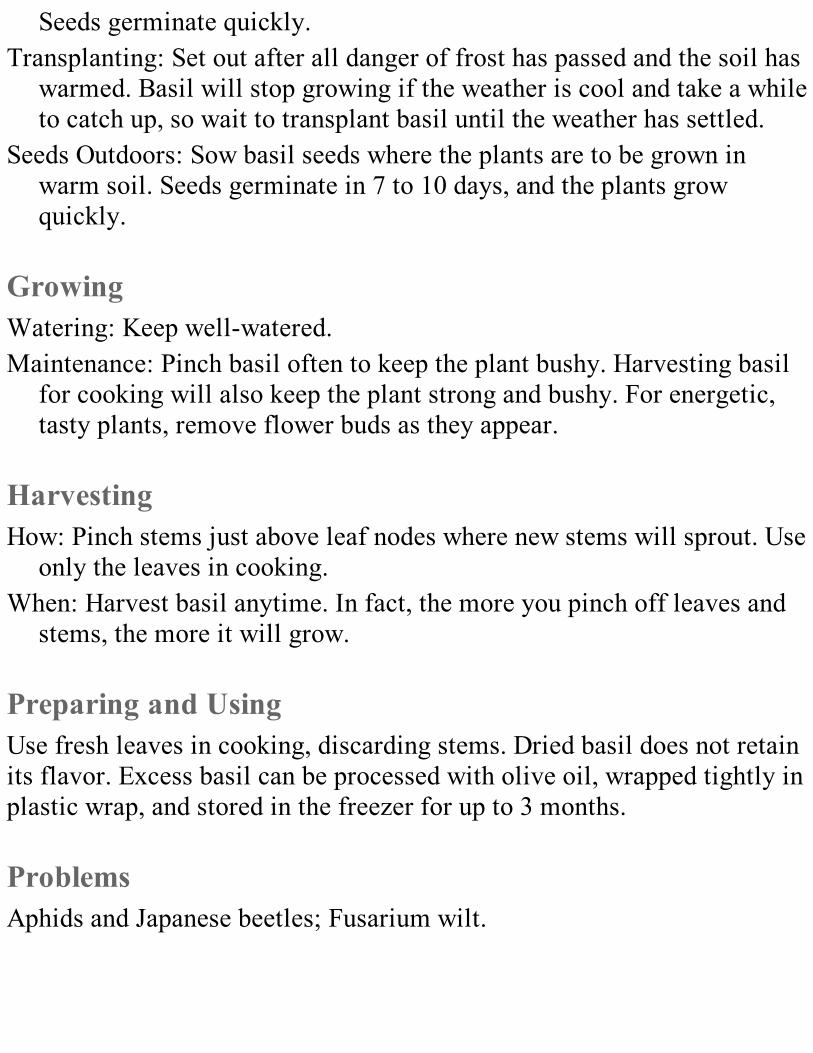
Seeds germinate quickly.Transplanting: Set out after all danger of frost has passed and the soil has
warmed. Basil will stop growing if the weather is cool and take a whileto catch up, so wait to transplant basil until the weather has settled.
Seeds Outdoors: Sow basil seeds where the plants are to be grown inwarm soil. Seeds germinate in 7 to 10 days, and the plants growquickly.
GrowingWatering: Keep well-watered.Maintenance: Pinch basil often to keep the plant bushy. Harvesting basil
for cooking will also keep the plant strong and bushy. For energetic,tasty plants, remove flower buds as they appear.
HarvestingHow: Pinch stems just above leaf nodes where new stems will sprout. Use
only the leaves in cooking.When: Harvest basil anytime. In fact, the more you pinch off leaves and
stems, the more it will grow.
Preparing and UsingUse fresh leaves in cooking, discarding stems. Dried basil does not retainits flavor. Excess basil can be processed with olive oil, wrapped tightly inplastic wrap, and stored in the freezer for up to 3 months.
ProblemsAphids and Japanese beetles; Fusarium wilt.
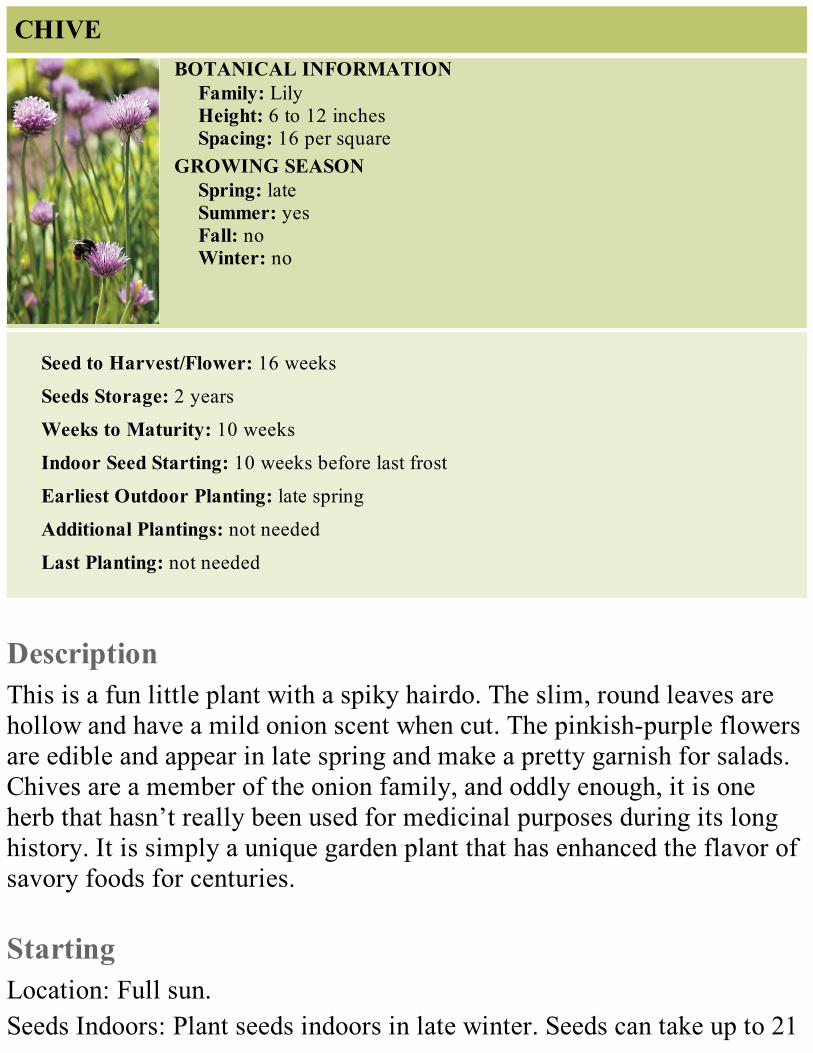
CHIVEBOTANICAL INFORMATION
Family: LilyHeight: 6 to 12 inchesSpacing: 16 per square
GROWING SEASONSpring: lateSummer: yesFall: noWinter: no
Seed to Harvest/Flower: 16 weeks
Seeds Storage: 2 years
Weeks to Maturity: 10 weeks
Indoor Seed Starting: 10 weeks before last frost
Earliest Outdoor Planting: late spring
Additional Plantings: not needed
Last Planting: not needed
DescriptionThis is a fun little plant with a spiky hairdo. The slim, round leaves arehollow and have a mild onion scent when cut. The pinkish-purple flowersare edible and appear in late spring and make a pretty garnish for salads.Chives are a member of the onion family, and oddly enough, it is oneherb that hasn’t really been used for medicinal purposes during its longhistory. It is simply a unique garden plant that has enhanced the flavor ofsavory foods for centuries.
StartingLocation: Full sun.Seeds Indoors: Plant seeds indoors in late winter. Seeds can take up to 21
days to germinate.Transplanting: Set plants out in spring. Although chives are cold-hardy, it
is best to set new plants out after all danger of frost has passed.Seeds Outdoors: Sprouts in late spring to early summer.
GrowingWatering: Keep soil moist.Maintenance: Plants will spread, so divide clumps every few years to
rejuvenate the plants.
HarvestingHow: Snip the tips of the leaves as needed to garnish baked potatoes and
creamed soups. Don’t cut off more than 1/3 of the plant at any onetime.
When: Chives can be harvested anytime after the new leaves havereached 6 to 8 inches. To enjoy the tasty pink flowers, don’t harvestthe plant until you can see the flower buds, then clip around them orwait until they bloom. The flowers make a lovely garnish.
Preparing and UsingCut 1/3 of the tops off all leaves if you like the flat-top look, or cut a fewleaves down to 1/3 of each leaf. Snip the fresh hollow leaves into salads,sauces, soups, or dips.
ProblemsInsufficient water can cause leaf tips to turn brown.
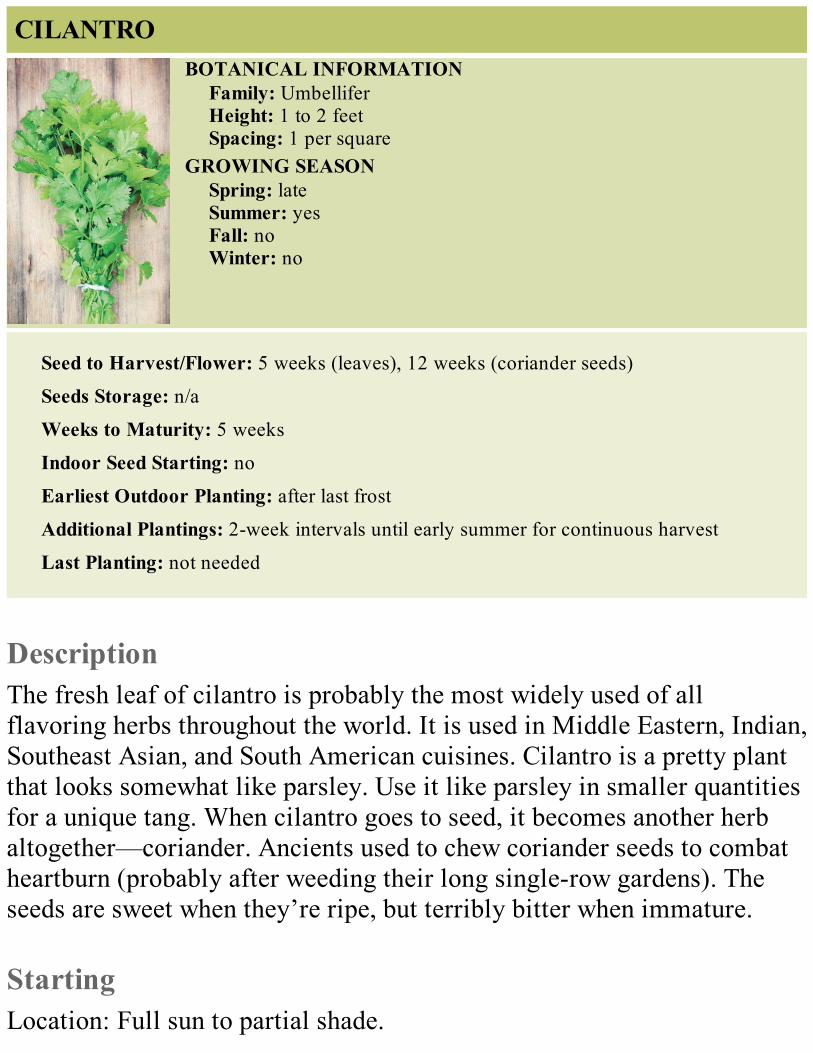
CILANTROBOTANICAL INFORMATION
Family: UmbelliferHeight: 1 to 2 feetSpacing: 1 per square
GROWING SEASONSpring: lateSummer: yesFall: noWinter: no
Seed to Harvest/Flower: 5 weeks (leaves), 12 weeks (coriander seeds)
Seeds Storage: n/a
Weeks to Maturity: 5 weeks
Indoor Seed Starting: no
Earliest Outdoor Planting: after last frost
Additional Plantings: 2-week intervals until early summer for continuous harvest
Last Planting: not needed
DescriptionThe fresh leaf of cilantro is probably the most widely used of allflavoring herbs throughout the world. It is used in Middle Eastern, Indian,Southeast Asian, and South American cuisines. Cilantro is a pretty plantthat looks somewhat like parsley. Use it like parsley in smaller quantitiesfor a unique tang. When cilantro goes to seed, it becomes another herbaltogether—coriander. Ancients used to chew coriander seeds to combatheartburn (probably after weeding their long single-row gardens). Theseeds are sweet when they’re ripe, but terribly bitter when immature.
StartingLocation: Full sun to partial shade.
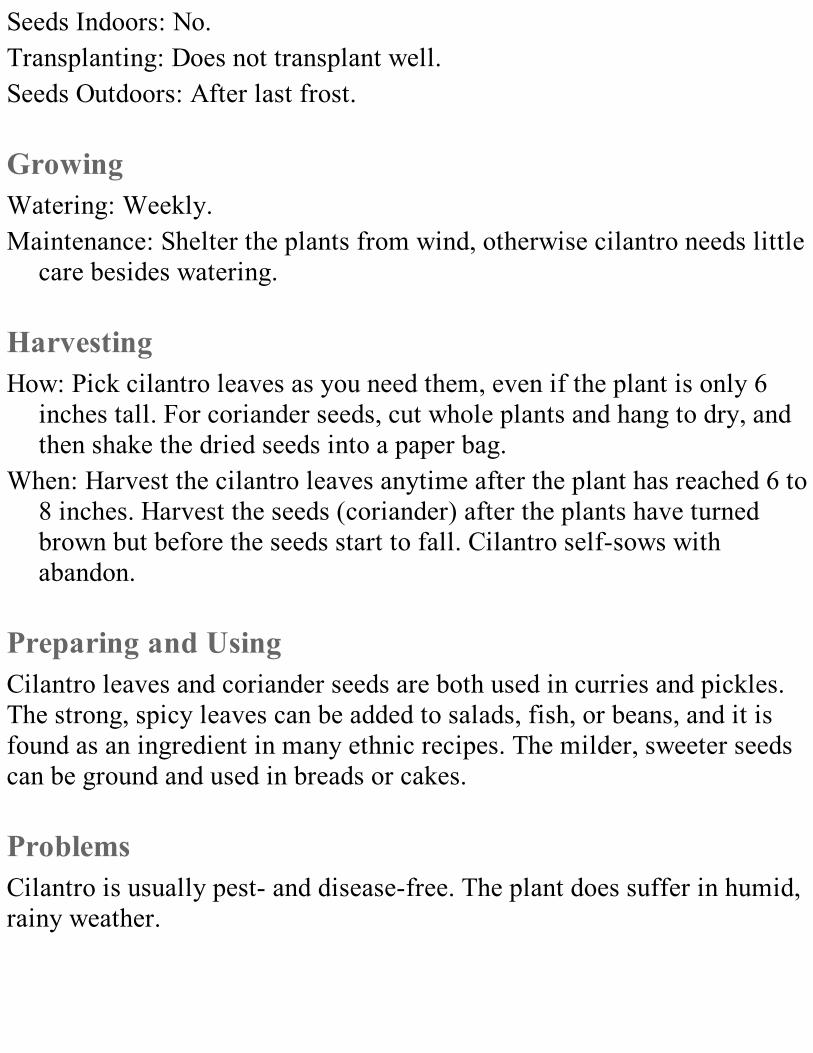
Seeds Indoors: No.Transplanting: Does not transplant well.Seeds Outdoors: After last frost.
GrowingWatering: Weekly.Maintenance: Shelter the plants from wind, otherwise cilantro needs little
care besides watering.
HarvestingHow: Pick cilantro leaves as you need them, even if the plant is only 6
inches tall. For coriander seeds, cut whole plants and hang to dry, andthen shake the dried seeds into a paper bag.
When: Harvest the cilantro leaves anytime after the plant has reached 6 to8 inches. Harvest the seeds (coriander) after the plants have turnedbrown but before the seeds start to fall. Cilantro self-sows withabandon.
Preparing and UsingCilantro leaves and coriander seeds are both used in curries and pickles.The strong, spicy leaves can be added to salads, fish, or beans, and it isfound as an ingredient in many ethnic recipes. The milder, sweeter seedscan be ground and used in breads or cakes.
ProblemsCilantro is usually pest- and disease-free. The plant does suffer in humid,rainy weather.
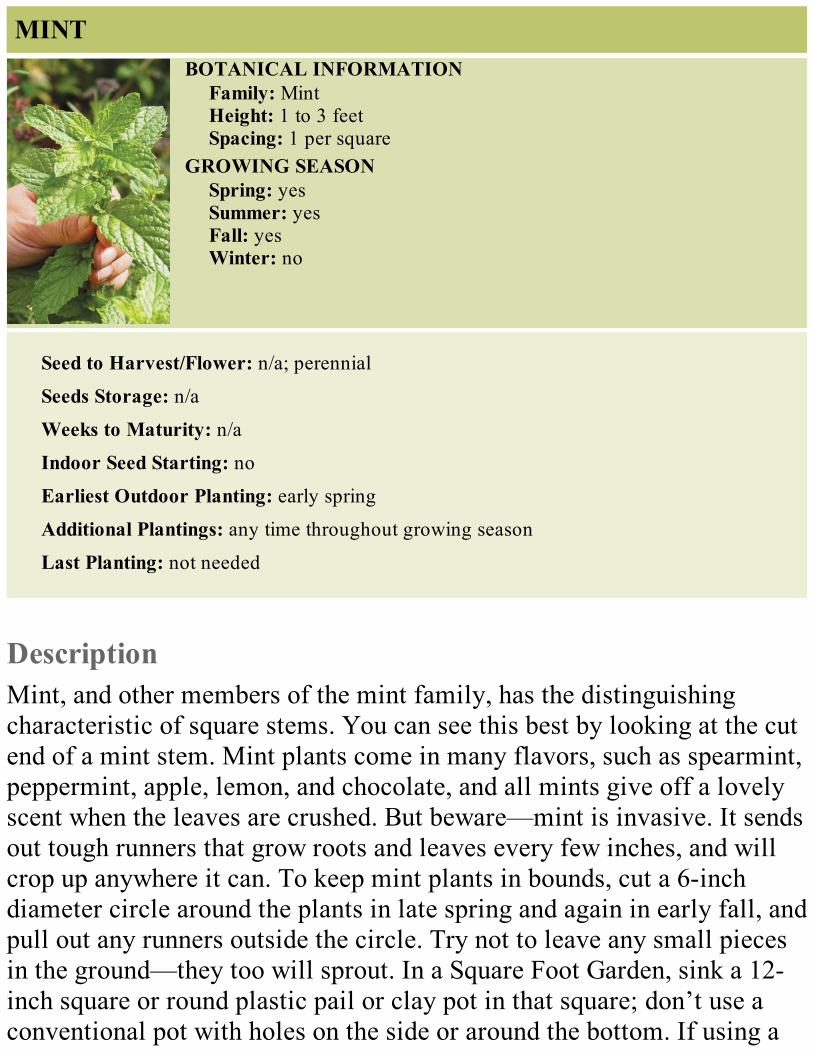
MINTBOTANICAL INFORMATION
Family: MintHeight: 1 to 3 feetSpacing: 1 per square
GROWING SEASONSpring: yesSummer: yesFall: yesWinter: no
Seed to Harvest/Flower: n/a; perennial
Seeds Storage: n/a
Weeks to Maturity: n/a
Indoor Seed Starting: no
Earliest Outdoor Planting: early spring
Additional Plantings: any time throughout growing season
Last Planting: not needed
DescriptionMint, and other members of the mint family, has the distinguishingcharacteristic of square stems. You can see this best by looking at the cutend of a mint stem. Mint plants come in many flavors, such as spearmint,peppermint, apple, lemon, and chocolate, and all mints give off a lovelyscent when the leaves are crushed. But beware—mint is invasive. It sendsout tough runners that grow roots and leaves every few inches, and willcrop up anywhere it can. To keep mint plants in bounds, cut a 6-inchdiameter circle around the plants in late spring and again in early fall, andpull out any runners outside the circle. Try not to leave any small piecesin the ground—they too will sprout. In a Square Foot Garden, sink a 12-inch square or round plastic pail or clay pot in that square; don’t use aconventional pot with holes on the side or around the bottom. If using a
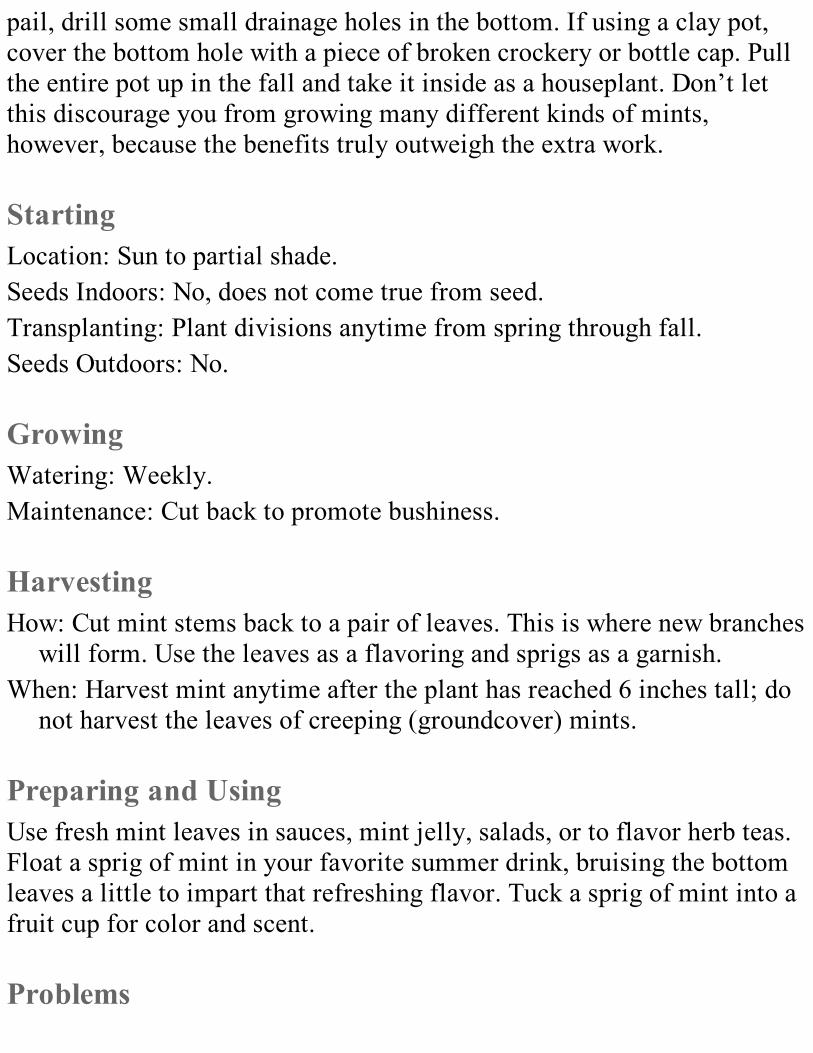
pail, drill some small drainage holes in the bottom. If using a clay pot,cover the bottom hole with a piece of broken crockery or bottle cap. Pullthe entire pot up in the fall and take it inside as a houseplant. Don’t letthis discourage you from growing many different kinds of mints,however, because the benefits truly outweigh the extra work.
StartingLocation: Sun to partial shade.Seeds Indoors: No, does not come true from seed.Transplanting: Plant divisions anytime from spring through fall.Seeds Outdoors: No.
GrowingWatering: Weekly.Maintenance: Cut back to promote bushiness.
HarvestingHow: Cut mint stems back to a pair of leaves. This is where new branches
will form. Use the leaves as a flavoring and sprigs as a garnish.When: Harvest mint anytime after the plant has reached 6 inches tall; do
not harvest the leaves of creeping (groundcover) mints.
Preparing and UsingUse fresh mint leaves in sauces, mint jelly, salads, or to flavor herb teas.Float a sprig of mint in your favorite summer drink, bruising the bottomleaves a little to impart that refreshing flavor. Tuck a sprig of mint into afruit cup for color and scent.
Problems

Mint is basically disease- and pest-free. Plants may wilt and turn brownwithout sufficient water, but should spring right back after a goodsoaking.
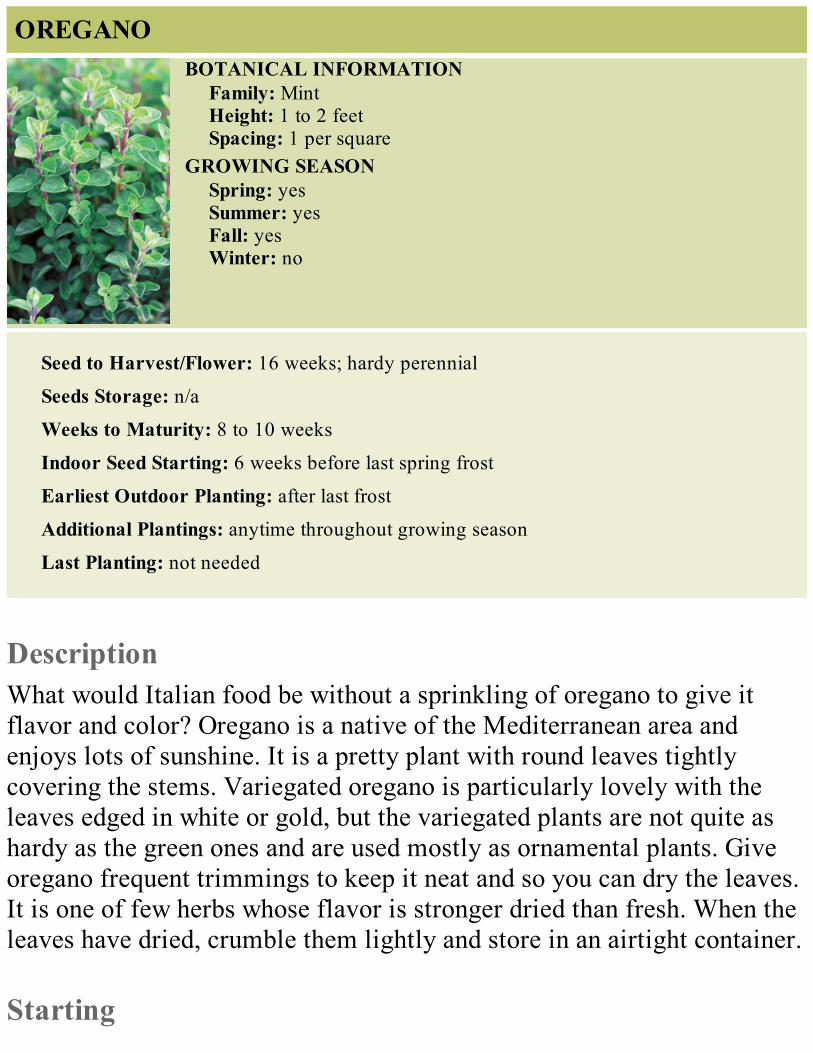
OREGANOBOTANICAL INFORMATION
Family: MintHeight: 1 to 2 feetSpacing: 1 per square
GROWING SEASONSpring: yesSummer: yesFall: yesWinter: no
Seed to Harvest/Flower: 16 weeks; hardy perennial
Seeds Storage: n/a
Weeks to Maturity: 8 to 10 weeks
Indoor Seed Starting: 6 weeks before last spring frost
Earliest Outdoor Planting: after last frost
Additional Plantings: anytime throughout growing season
Last Planting: not needed
DescriptionWhat would Italian food be without a sprinkling of oregano to give itflavor and color? Oregano is a native of the Mediterranean area andenjoys lots of sunshine. It is a pretty plant with round leaves tightlycovering the stems. Variegated oregano is particularly lovely with theleaves edged in white or gold, but the variegated plants are not quite ashardy as the green ones and are used mostly as ornamental plants. Giveoregano frequent trimmings to keep it neat and so you can dry the leaves.It is one of few herbs whose flavor is stronger dried than fresh. When theleaves have dried, crumble them lightly and store in an airtight container.
Starting
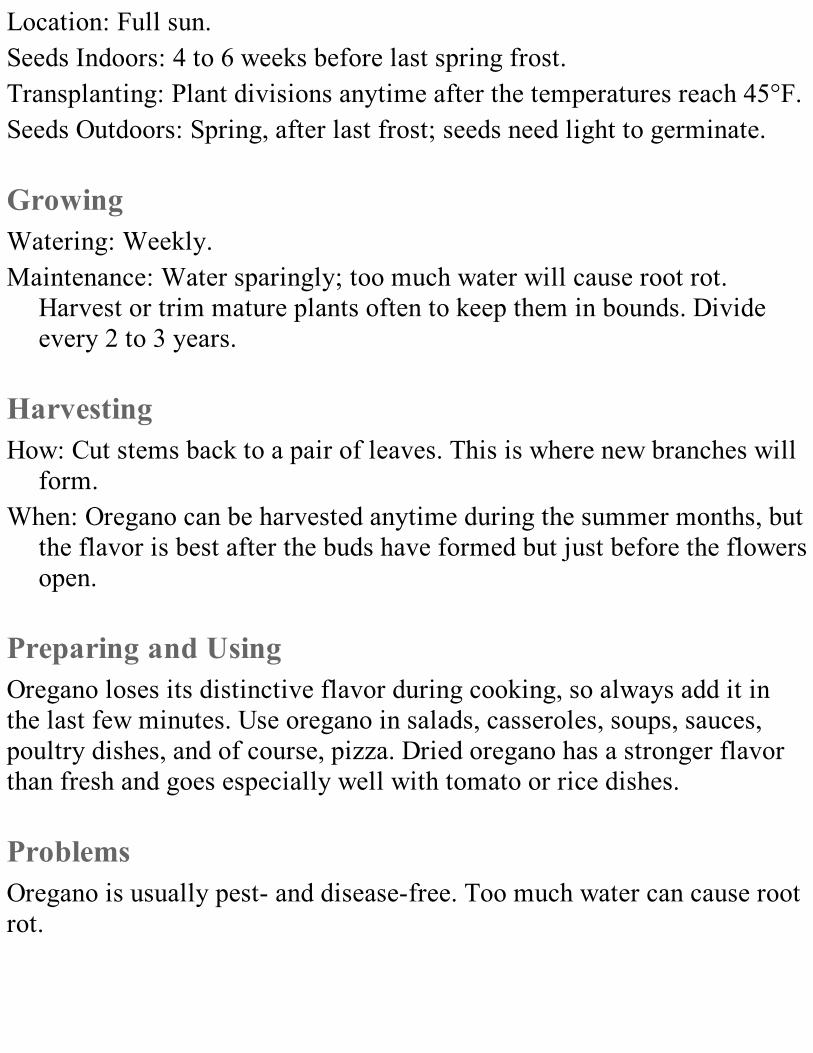
Location: Full sun.Seeds Indoors: 4 to 6 weeks before last spring frost.Transplanting: Plant divisions anytime after the temperatures reach 45°F.Seeds Outdoors: Spring, after last frost; seeds need light to germinate.
GrowingWatering: Weekly.Maintenance: Water sparingly; too much water will cause root rot.
Harvest or trim mature plants often to keep them in bounds. Divideevery 2 to 3 years.
HarvestingHow: Cut stems back to a pair of leaves. This is where new branches will
form.When: Oregano can be harvested anytime during the summer months, but
the flavor is best after the buds have formed but just before the flowersopen.
Preparing and UsingOregano loses its distinctive flavor during cooking, so always add it inthe last few minutes. Use oregano in salads, casseroles, soups, sauces,poultry dishes, and of course, pizza. Dried oregano has a stronger flavorthan fresh and goes especially well with tomato or rice dishes.
ProblemsOregano is usually pest- and disease-free. Too much water can cause rootrot.
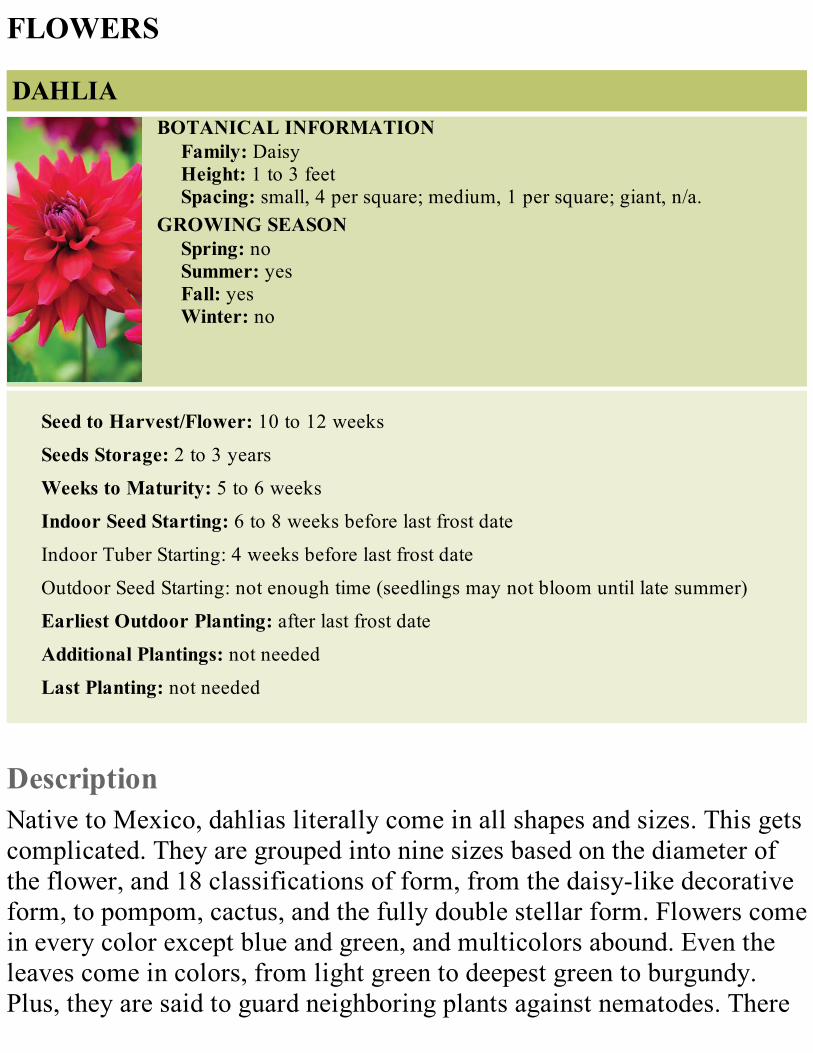
FLOWERS
DAHLIABOTANICAL INFORMATION
Family: DaisyHeight: 1 to 3 feetSpacing: small, 4 per square; medium, 1 per square; giant, n/a.
GROWING SEASONSpring: noSummer: yesFall: yesWinter: no
Seed to Harvest/Flower: 10 to 12 weeks
Seeds Storage: 2 to 3 years
Weeks to Maturity: 5 to 6 weeks
Indoor Seed Starting: 6 to 8 weeks before last frost date
Indoor Tuber Starting: 4 weeks before last frost date
Outdoor Seed Starting: not enough time (seedlings may not bloom until late summer)
Earliest Outdoor Planting: after last frost date
Additional Plantings: not needed
Last Planting: not needed
DescriptionNative to Mexico, dahlias literally come in all shapes and sizes. This getscomplicated. They are grouped into nine sizes based on the diameter ofthe flower, and 18 classifications of form, from the daisy-like decorativeform, to pompom, cactus, and the fully double stellar form. Flowers comein every color except blue and green, and multicolors abound. Even theleaves come in colors, from light green to deepest green to burgundy.Plus, they are said to guard neighboring plants against nematodes. There
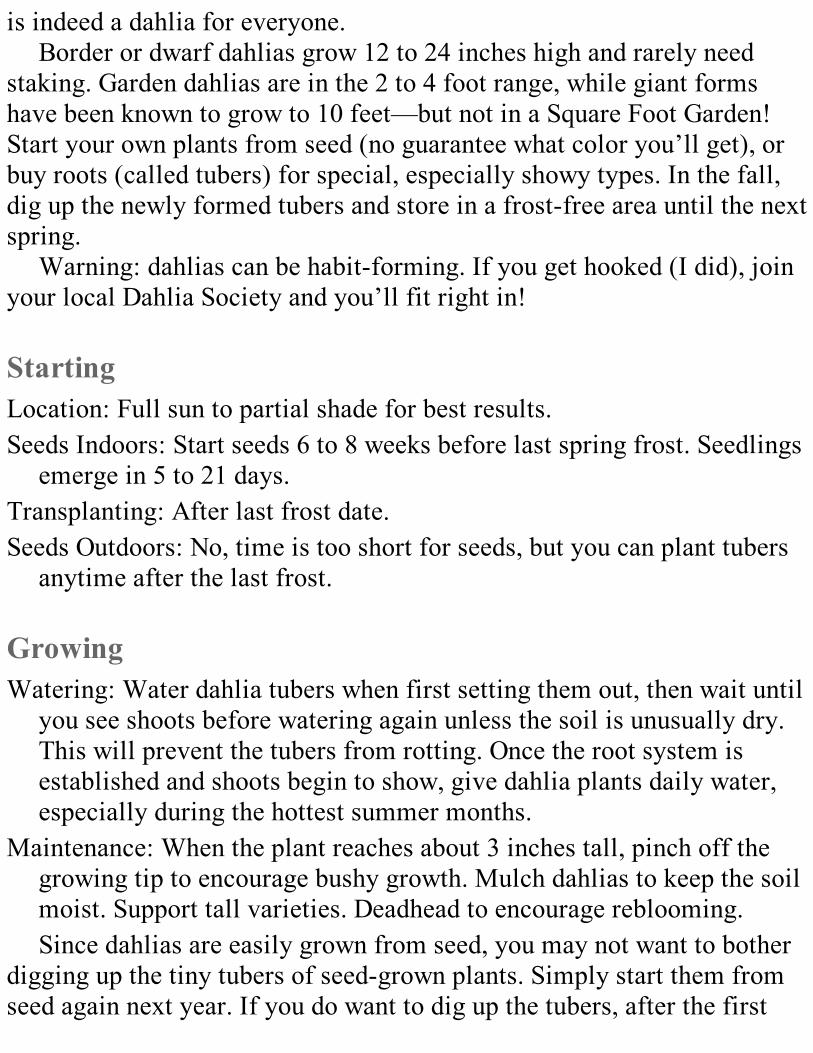
is indeed a dahlia for everyone.Border or dwarf dahlias grow 12 to 24 inches high and rarely need
staking. Garden dahlias are in the 2 to 4 foot range, while giant formshave been known to grow to 10 feet—but not in a Square Foot Garden!Start your own plants from seed (no guarantee what color you’ll get), orbuy roots (called tubers) for special, especially showy types. In the fall,dig up the newly formed tubers and store in a frost-free area until the nextspring.
Warning: dahlias can be habit-forming. If you get hooked (I did), joinyour local Dahlia Society and you’ll fit right in!
StartingLocation: Full sun to partial shade for best results.Seeds Indoors: Start seeds 6 to 8 weeks before last spring frost. Seedlings
emerge in 5 to 21 days.Transplanting: After last frost date.Seeds Outdoors: No, time is too short for seeds, but you can plant tubers
anytime after the last frost.
GrowingWatering: Water dahlia tubers when first setting them out, then wait until
you see shoots before watering again unless the soil is unusually dry.This will prevent the tubers from rotting. Once the root system isestablished and shoots begin to show, give dahlia plants daily water,especially during the hottest summer months.
Maintenance: When the plant reaches about 3 inches tall, pinch off thegrowing tip to encourage bushy growth. Mulch dahlias to keep the soilmoist. Support tall varieties. Deadhead to encourage reblooming.Since dahlias are easily grown from seed, you may not want to bother
digging up the tiny tubers of seed-grown plants. Simply start them fromseed again next year. If you do want to dig up the tubers, after the first
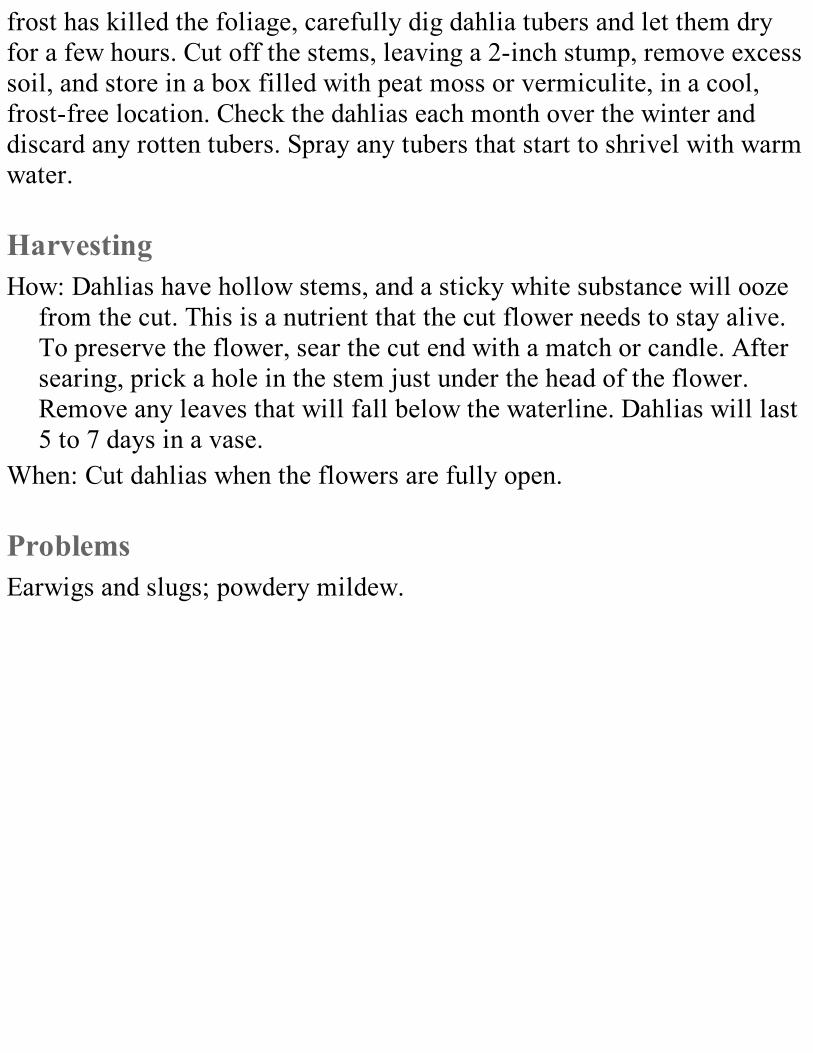
frost has killed the foliage, carefully dig dahlia tubers and let them dryfor a few hours. Cut off the stems, leaving a 2-inch stump, remove excesssoil, and store in a box filled with peat moss or vermiculite, in a cool,frost-free location. Check the dahlias each month over the winter anddiscard any rotten tubers. Spray any tubers that start to shrivel with warmwater.
HarvestingHow: Dahlias have hollow stems, and a sticky white substance will ooze
from the cut. This is a nutrient that the cut flower needs to stay alive.To preserve the flower, sear the cut end with a match or candle. Aftersearing, prick a hole in the stem just under the head of the flower.Remove any leaves that will fall below the waterline. Dahlias will last5 to 7 days in a vase.
When: Cut dahlias when the flowers are fully open.
ProblemsEarwigs and slugs; powdery mildew.
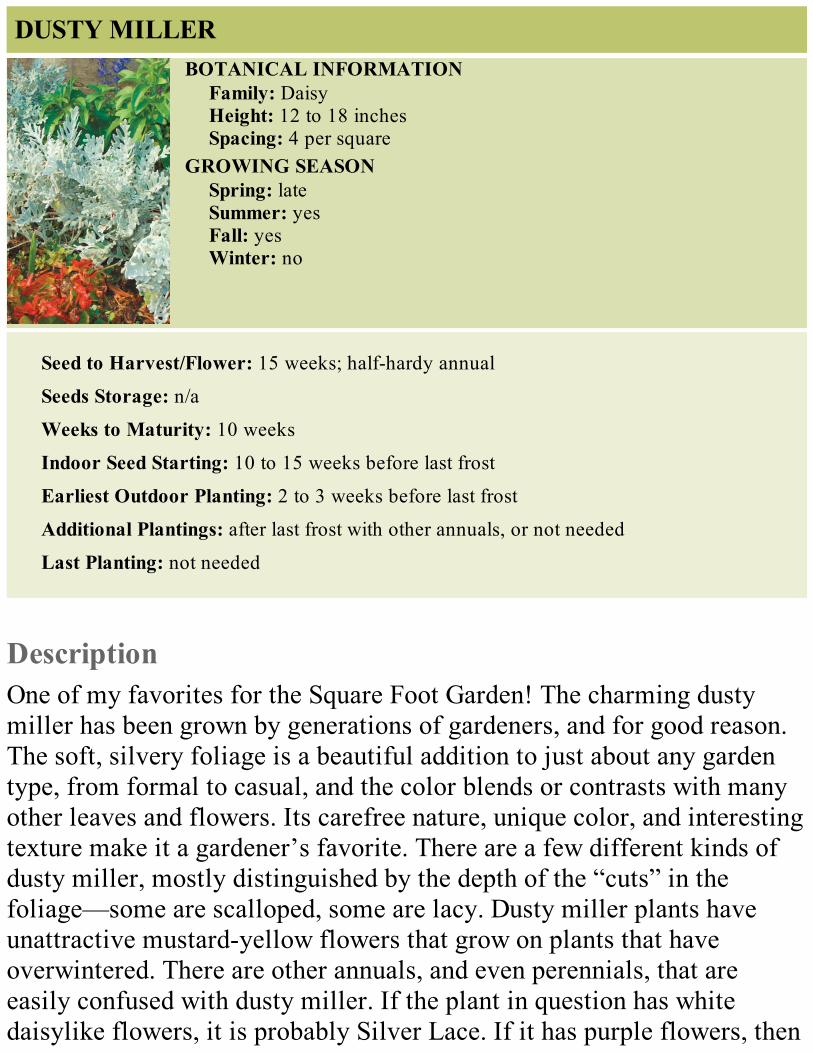
DUSTY MILLERBOTANICAL INFORMATION
Family: DaisyHeight: 12 to 18 inchesSpacing: 4 per square
GROWING SEASONSpring: lateSummer: yesFall: yesWinter: no
Seed to Harvest/Flower: 15 weeks; half-hardy annual
Seeds Storage: n/a
Weeks to Maturity: 10 weeks
Indoor Seed Starting: 10 to 15 weeks before last frost
Earliest Outdoor Planting: 2 to 3 weeks before last frost
Additional Plantings: after last frost with other annuals, or not needed
Last Planting: not needed
DescriptionOne of my favorites for the Square Foot Garden! The charming dustymiller has been grown by generations of gardeners, and for good reason.The soft, silvery foliage is a beautiful addition to just about any gardentype, from formal to casual, and the color blends or contrasts with manyother leaves and flowers. Its carefree nature, unique color, and interestingtexture make it a gardener’s favorite. There are a few different kinds ofdusty miller, mostly distinguished by the depth of the “cuts” in thefoliage—some are scalloped, some are lacy. Dusty miller plants haveunattractive mustard-yellow flowers that grow on plants that haveoverwintered. There are other annuals, and even perennials, that areeasily confused with dusty miller. If the plant in question has whitedaisylike flowers, it is probably Silver Lace. If it has purple flowers, then
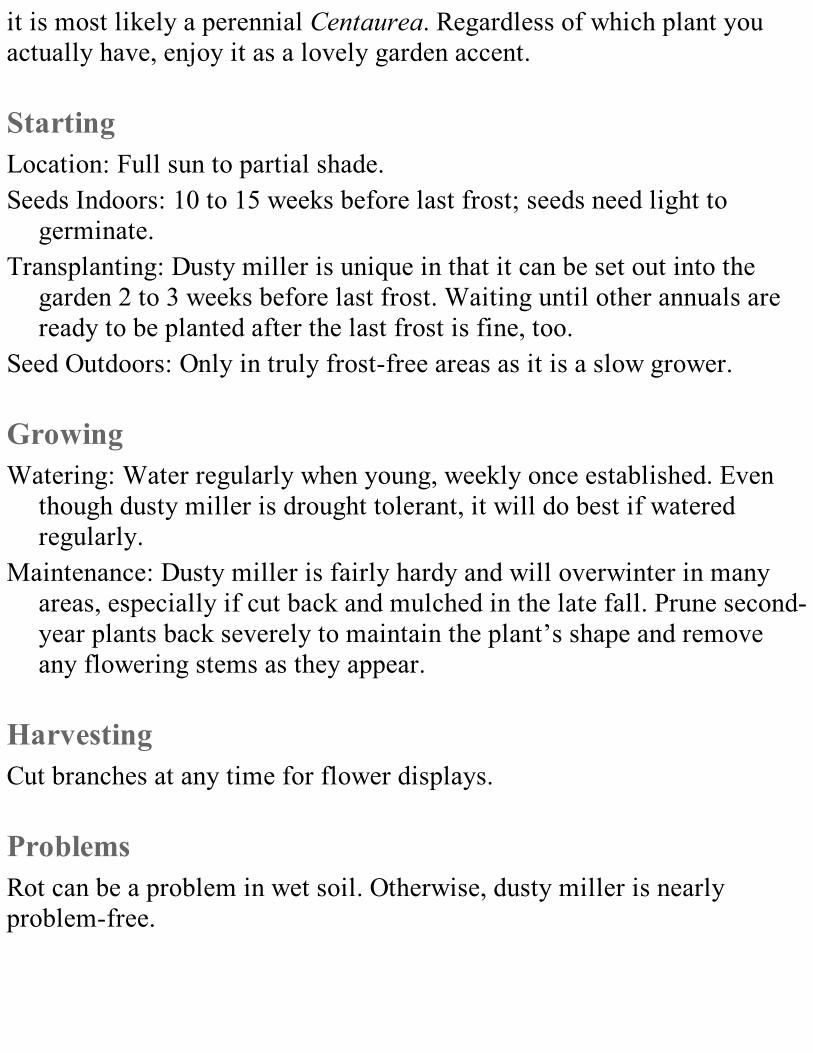
it is most likely a perennial Centaurea. Regardless of which plant youactually have, enjoy it as a lovely garden accent.
StartingLocation: Full sun to partial shade.Seeds Indoors: 10 to 15 weeks before last frost; seeds need light to
germinate.Transplanting: Dusty miller is unique in that it can be set out into the
garden 2 to 3 weeks before last frost. Waiting until other annuals areready to be planted after the last frost is fine, too.
Seed Outdoors: Only in truly frost-free areas as it is a slow grower.
GrowingWatering: Water regularly when young, weekly once established. Even
though dusty miller is drought tolerant, it will do best if wateredregularly.
Maintenance: Dusty miller is fairly hardy and will overwinter in manyareas, especially if cut back and mulched in the late fall. Prune second-year plants back severely to maintain the plant’s shape and removeany flowering stems as they appear.
HarvestingCut branches at any time for flower displays.
ProblemsRot can be a problem in wet soil. Otherwise, dusty miller is nearlyproblem-free.
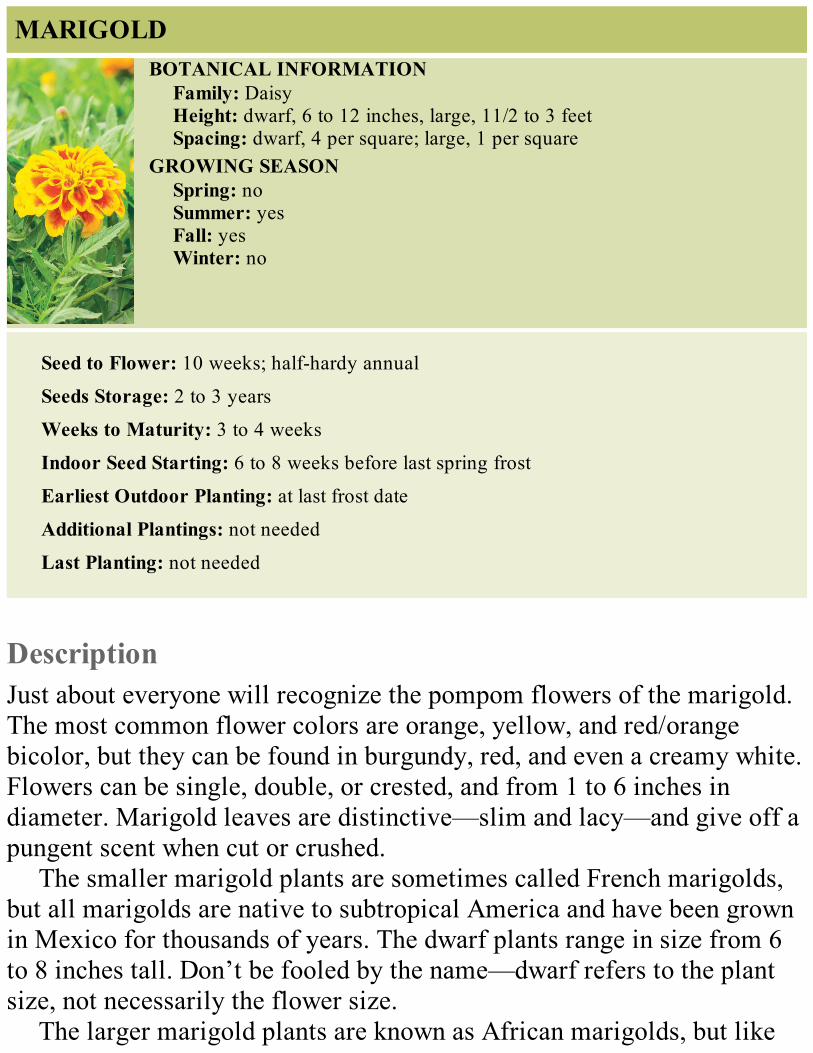
MARIGOLDBOTANICAL INFORMATION
Family: DaisyHeight: dwarf, 6 to 12 inches, large, 11/2 to 3 feetSpacing: dwarf, 4 per square; large, 1 per square
GROWING SEASONSpring: noSummer: yesFall: yesWinter: no
Seed to Flower: 10 weeks; half-hardy annual
Seeds Storage: 2 to 3 years
Weeks to Maturity: 3 to 4 weeks
Indoor Seed Starting: 6 to 8 weeks before last spring frost
Earliest Outdoor Planting: at last frost date
Additional Plantings: not needed
Last Planting: not needed
DescriptionJust about everyone will recognize the pompom flowers of the marigold.The most common flower colors are orange, yellow, and red/orangebicolor, but they can be found in burgundy, red, and even a creamy white.Flowers can be single, double, or crested, and from 1 to 6 inches indiameter. Marigold leaves are distinctive—slim and lacy—and give off apungent scent when cut or crushed.
The smaller marigold plants are sometimes called French marigolds,but all marigolds are native to subtropical America and have been grownin Mexico for thousands of years. The dwarf plants range in size from 6to 8 inches tall. Don’t be fooled by the name—dwarf refers to the plantsize, not necessarily the flower size.
The larger marigold plants are known as African marigolds, but like

their smaller cousins, they are also indigenous to the Americas. Giantmarigolds can grow to over 3 feet tall and are a little too big for a SquareFoot Garden.
Marigolds are said to discourage nematodes when planted neartomatoes, potatoes, asparagus, strawberries, or roses, especially if theyare grown for several seasons in ground where nematodes are suspected.Marigolds also repel the Mexican bean beetle when planted around beanplants. Japanese beetles are attracted to the odorless varieties ofmarigolds, where they can be trapped and drowned in soapy water placednear the marigolds.
I want to tell you a little story about what is grown around the globe.Whenever we do a humanitarian project overseas, people ask me, “Howdo you know what crops they can grow in that country?” I answer, “Wespecifically tell the people we do not try to compete with the farmer ortry to grow the basic things they normally eat as part of their SquareMeter Garden.” We tell them, “We are going to grow new things so yourchildren can have more nutrients and better health than they now have.”And still we are asked, “But, how do you know those things will growthere?”
The answer was illustrated when I went to India to attend the grandopening ceremonies of Father Abraham’s new Square Foot GardenTraining Center. They gave us garlands of their locally grown specialflower—and guess what it was? Marigolds! Even more astounding,broccoli turned out to be their most popular and bestselling vegetable.That made me realize that everything we grow in our USA Square FootGardens can usually be grown just about anywhere in the world.
StartingLocation: Grow in a sunny location.Seeds Indoors: Marigold seeds will germinate in about 7 to 14 days, ideal
for a child’s first foray into the wonders of growing plants from seeds.Transplanting: After last frost date.
Seeds Outdoors: Okay, but usually not practical as the season is too short.
GrowingWatering: Weekly when young, twice weekly when larger. Don’t let
marigolds dry out—the plants will wilt and die quickly, and the stresswill attract insects and diseases.
Maintenance: Pinch the growing tips back when the plant reaches about 3inches tall to encourage bushiness. Pinch or cut off spent blooms toprolong flowering.
HarvestingHow: When thinking of flowers to cut for the vase, marigolds don’t
immediately spring to mind. However, they make a cute bouquet thatcan last for 7 to 14 days, as long as the stems are not bent. Marigoldstems are short, so try to cut where the flower stem meets a main stem.Remove the leaves that will be under water. To reduce the aroma, adda spoonful of sugar to the water.
When: Cut marigolds when the flowers are one-half to three-quartersopen. Fully open marigolds will die quickly in the vase.
ProblemsSlugs and mites; Botrytis blight and wilt.
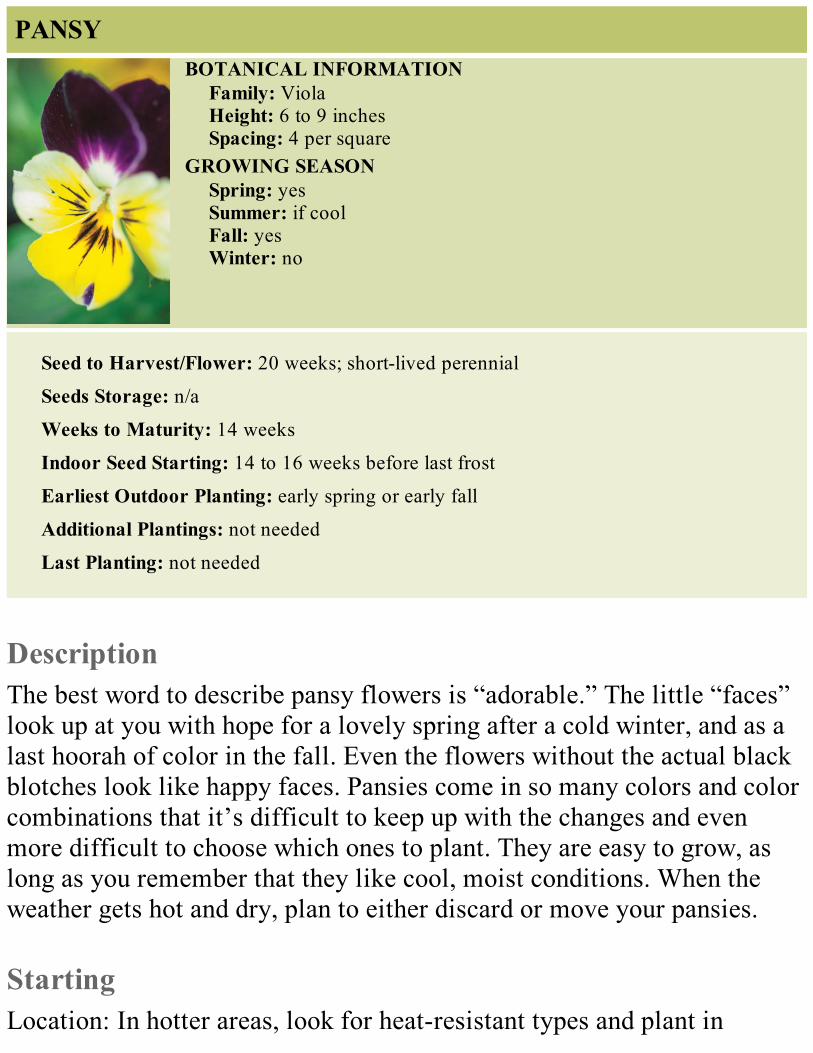
PANSYBOTANICAL INFORMATION
Family: ViolaHeight: 6 to 9 inchesSpacing: 4 per square
GROWING SEASONSpring: yesSummer: if coolFall: yesWinter: no
Seed to Harvest/Flower: 20 weeks; short-lived perennial
Seeds Storage: n/a
Weeks to Maturity: 14 weeks
Indoor Seed Starting: 14 to 16 weeks before last frost
Earliest Outdoor Planting: early spring or early fall
Additional Plantings: not needed
Last Planting: not needed
DescriptionThe best word to describe pansy flowers is “adorable.” The little “faces”look up at you with hope for a lovely spring after a cold winter, and as alast hoorah of color in the fall. Even the flowers without the actual blackblotches look like happy faces. Pansies come in so many colors and colorcombinations that it’s difficult to keep up with the changes and evenmore difficult to choose which ones to plant. They are easy to grow, aslong as you remember that they like cool, moist conditions. When theweather gets hot and dry, plan to either discard or move your pansies.
StartingLocation: In hotter areas, look for heat-resistant types and plant in
moderate shade. Pansies can be planted in full sun where summers arecool.
Seeds Indoors: Growing pansies from seed indoors can be a challenge.Sow indoors 14 to 16 weeks before the last frost date. Barely cover theseed, then refrigerate for 2 weeks. Once exposed to roomtemperatures, seeds should sprout in 10 days.
Transplanting: Set pansies out in early spring as soon as the ground canbe worked, and again in early fall to bring the gardening season to acolorful close. In warmer climates, set them out in fall for early springbloom.
Seeds Outdoors: Not practical.
GrowingWatering: Weekly; water more often if the plants wilt and in the heat of
the summer.Maintenance: Keep pansies cool and moist. Deadhead pansies for
continuous bloom, and cut back leggy plants to stimulate new growth.
HarvestingHow: Pansies make a cute cut flower; keep in mind that the stems are
quite short.When: Cut pansy flowers just after they unfurl.
ProblemsSlugs and snails; insufficient moisture.
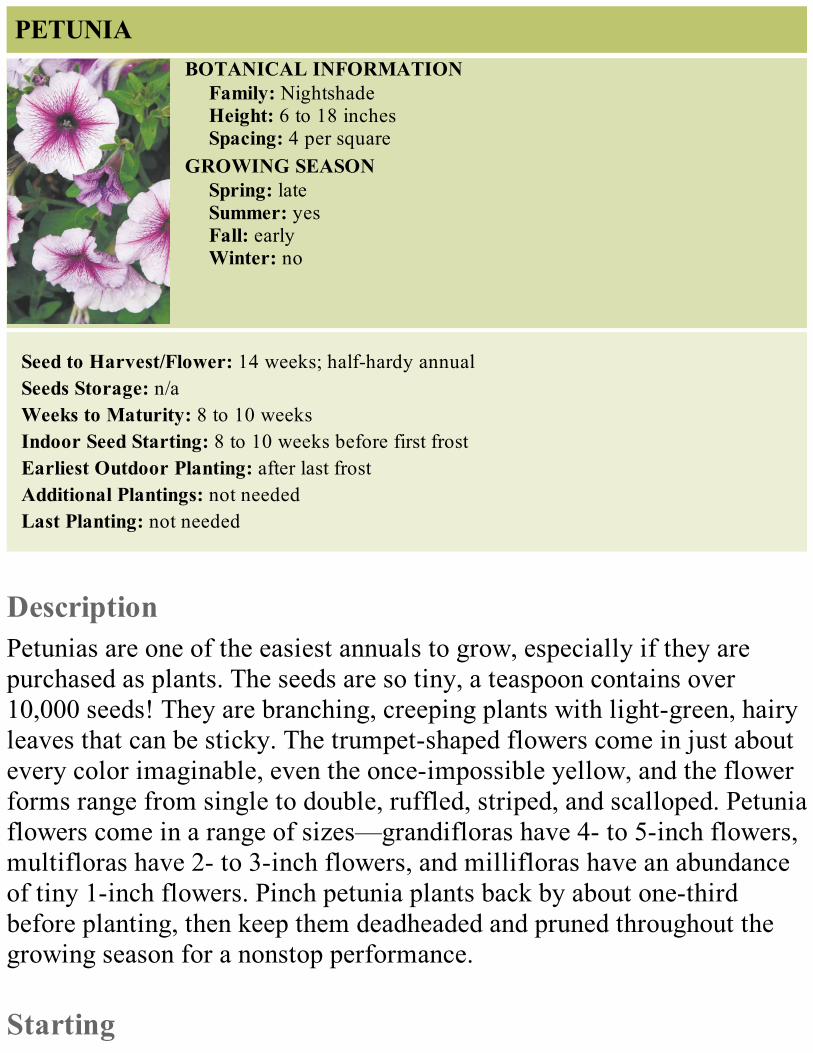
PETUNIABOTANICAL INFORMATION
Family: NightshadeHeight: 6 to 18 inchesSpacing: 4 per square
GROWING SEASONSpring: lateSummer: yesFall: earlyWinter: no
Seed to Harvest/Flower: 14 weeks; half-hardy annualSeeds Storage: n/aWeeks to Maturity: 8 to 10 weeksIndoor Seed Starting: 8 to 10 weeks before first frostEarliest Outdoor Planting: after last frostAdditional Plantings: not neededLast Planting: not needed
DescriptionPetunias are one of the easiest annuals to grow, especially if they arepurchased as plants. The seeds are so tiny, a teaspoon contains over10,000 seeds! They are branching, creeping plants with light-green, hairyleaves that can be sticky. The trumpet-shaped flowers come in just aboutevery color imaginable, even the once-impossible yellow, and the flowerforms range from single to double, ruffled, striped, and scalloped. Petuniaflowers come in a range of sizes—grandifloras have 4- to 5-inch flowers,multifloras have 2- to 3-inch flowers, and millifloras have an abundanceof tiny 1-inch flowers. Pinch petunia plants back by about one-thirdbefore planting, then keep them deadheaded and pruned throughout thegrowing season for a nonstop performance.
Starting
Location: Full sun to partial shade.Seeds Indoors: Start seeds indoors 8 to 10 weeks before last frost, 12 to
14 weeks for slower growing varieties. Don’t cover the seeds. Petuniascan germinate slowly, from 7 to 21 days.
Transplanting: Set petunias out when all danger of frost has passed. Pinchat transplanting for better branching.
Seeds Outdoors: No. Growth from seed takes too long to be practical.
GrowingWatering: Weekly.Maintenance: Deadhead to encourage bloom, and prune back by half if
the plant gets scraggly.
HarvestingHow: Petunia flowers make an excellent cut flower for very small
containers. Try a tiny vase on the kitchen table or sink area with justone stem in water.
When: Just as the bud is opening.
ProblemsAphids; gray mold and soft rot can occur in humid areas.
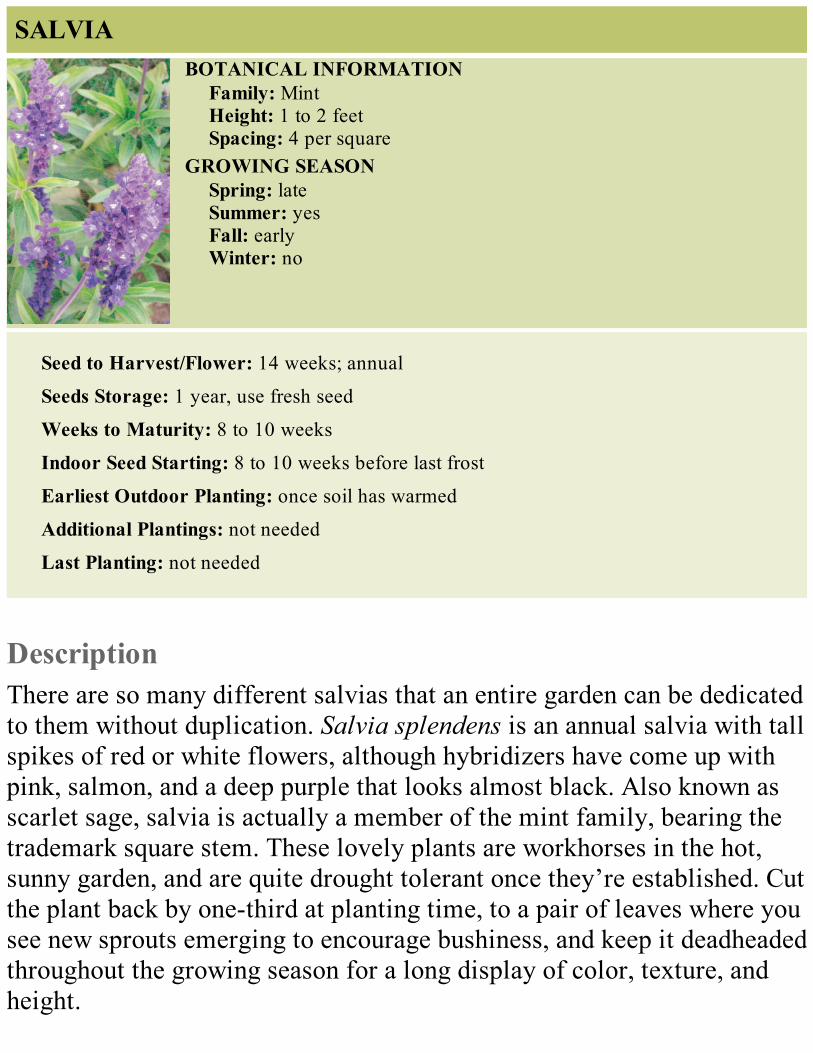
SALVIABOTANICAL INFORMATION
Family: MintHeight: 1 to 2 feetSpacing: 4 per square
GROWING SEASONSpring: lateSummer: yesFall: earlyWinter: no
Seed to Harvest/Flower: 14 weeks; annual
Seeds Storage: 1 year, use fresh seed
Weeks to Maturity: 8 to 10 weeks
Indoor Seed Starting: 8 to 10 weeks before last frost
Earliest Outdoor Planting: once soil has warmed
Additional Plantings: not needed
Last Planting: not needed
DescriptionThere are so many different salvias that an entire garden can be dedicatedto them without duplication. Salvia splendens is an annual salvia with tallspikes of red or white flowers, although hybridizers have come up withpink, salmon, and a deep purple that looks almost black. Also known asscarlet sage, salvia is actually a member of the mint family, bearing thetrademark square stem. These lovely plants are workhorses in the hot,sunny garden, and are quite drought tolerant once they’re established. Cutthe plant back by one-third at planting time, to a pair of leaves where yousee new sprouts emerging to encourage bushiness, and keep it deadheadedthroughout the growing season for a long display of color, texture, andheight.
StartingLocation: Full sun to partial shade.Seeds Indoors: Sow seed indoors 6 to 8 weeks before the last frost. Don’t
cover the tiny seeds, they need light to germinate. Keep the mix justslightly moist to avoid damping-off.
Transplanting: Set salvia out after the soil has warmed as they can bevery frost sensitive.
Seeds Outdoors: No, not enough time.
GrowingWatering: Weekly.Maintenance: Deadhead often to promote branching and uninterrupted
flowering.
HarvestingHow: To encourage a fall crop of blooms, cut all the main stems back to a
pair of leaves again in late summer and you’ll have a late seasonshowcase of color.
When: As soon as half the buds have opened on the flower stalk.
ProblemsSlugs, aphids and whitefly; mildew.
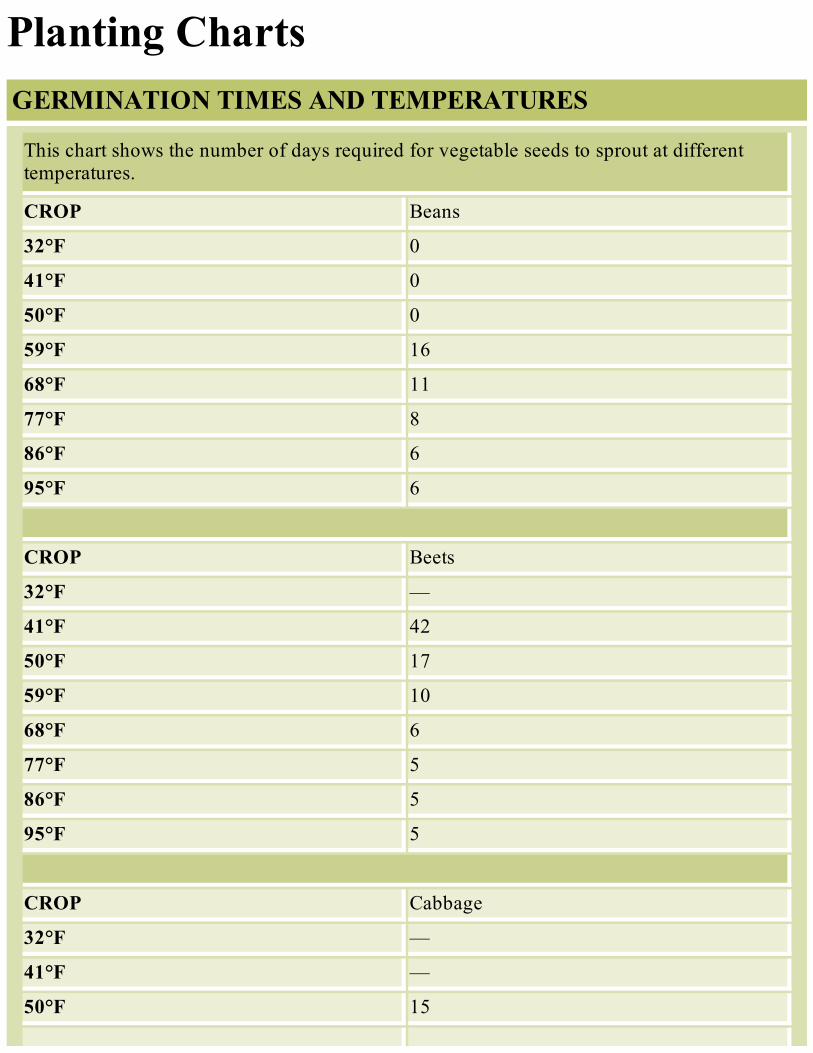
Planting ChartsGERMINATION TIMES AND TEMPERATURES
This chart shows the number of days required for vegetable seeds to sprout at differenttemperatures.
CROP Beans
32°F 0
41°F 0
50°F 0
59°F 16
68°F 11
77°F 8
86°F 6
95°F 6
CROP Beets
32°F —
41°F 42
50°F 17
59°F 10
68°F 6
77°F 5
86°F 5
95°F 5
CROP Cabbage
32°F —
41°F —
50°F 15

59°F 968°F 6
77°F 5
86°F 4
95°F —
CROP Carrots
32°F 0
41°F 51
50°F 17
59°F 10
68°F 7
77°F 6
86°F 6
95°F 9
CROP Cauliflower
32°F —
41°F —
50°F 20
59°F 10
68°F 6
77°F 5
86°F 5
95°F —
CROP Corn
32°F 0
41°F 0
50°F 22
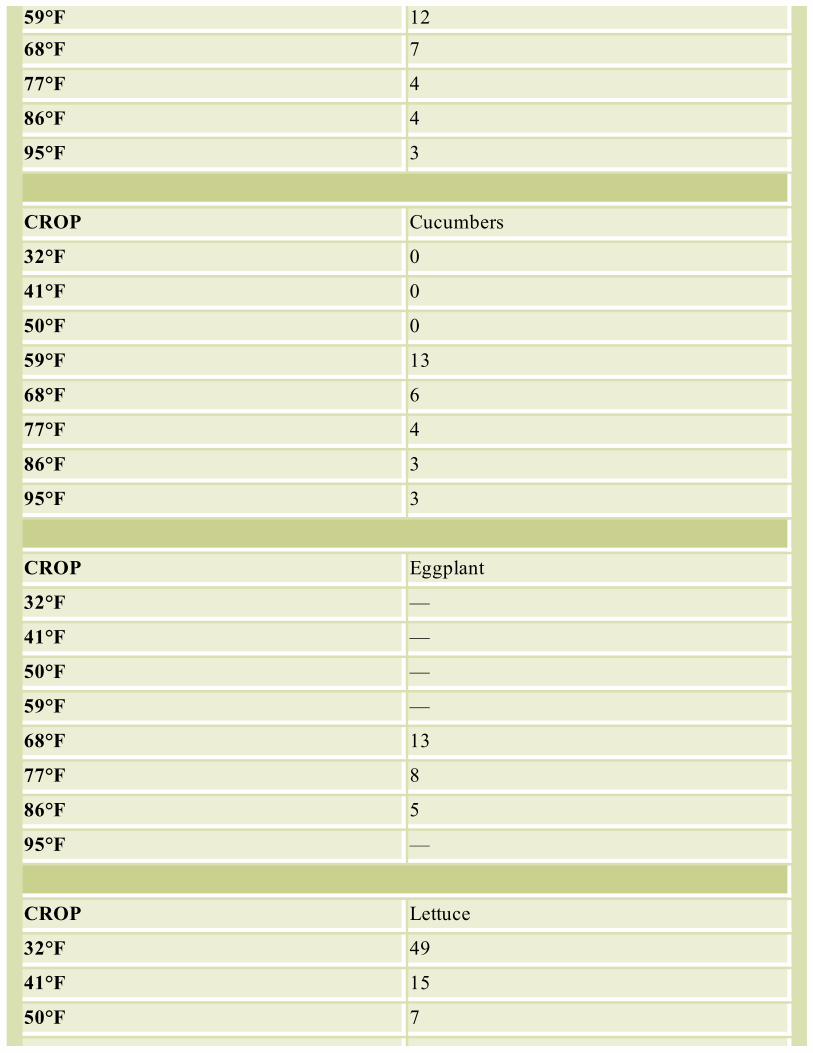
59°F 1268°F 7
77°F 4
86°F 4
95°F 3
CROP Cucumbers
32°F 0
41°F 0
50°F 0
59°F 13
68°F 6
77°F 4
86°F 3
95°F 3
CROP Eggplant
32°F —
41°F —
50°F —
59°F —
68°F 13
77°F 8
86°F 5
95°F —
CROP Lettuce
32°F 49
41°F 15
50°F 7

59°F 4
68°F 3
77°F 2
86°F 3
95°F 0
CROP Muskmelons
32°F —
41°F —
50°F —
59°F —
68°F 8
77°F 4
86°F 3
95°F —
CROP Onions
32°F 136
41°F 31
50°F 13
59°F 7
68°F 5
77°F 4
86°F 4
95°F 13
CROP Parsley
32°F —
41°F —
50°F 29

59°F 17
68°F 14
77°F 13
86°F 12
95°F —
CROP Peas
32°F —
41°F 36
50°F 14
59°F 9
68°F 8
77°F 6
86°F 6
95°F —
CROP Peppers
32°F 0
41°F 0
50°F 0
59°F 25
68°F 13
77°F 8
86°F 6
95°F 9
CROP Radishes
32°F 0
41°F 29
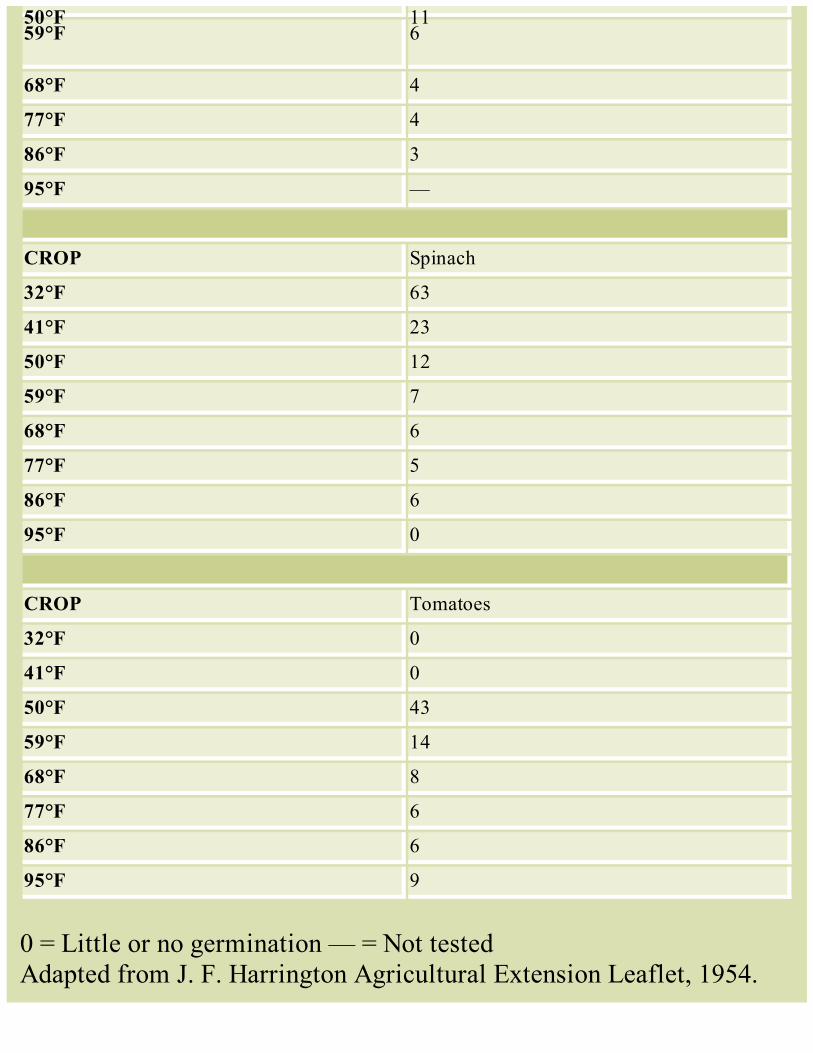
50°F 1159°F 6
68°F 4
77°F 4
86°F 3
95°F —
CROP Spinach
32°F 63
41°F 23
50°F 12
59°F 7
68°F 6
77°F 5
86°F 6
95°F 0
CROP Tomatoes
32°F 0
41°F 0
50°F 43
59°F 14
68°F 8
77°F 6
86°F 6
95°F 9
0 = Little or no germination — = Not testedAdapted from J. F. Harrington Agricultural Extension Leaflet, 1954.

PERCENTAGE OF GERMINATION
This chart indicates the percentage of normal vegetable seedlings produced at differenttemperatures.
CROP Beans
32°F 0
41°F 0
50°F 1
59°F 97
68°F 90
77°F 97
86°F 47
95°F 39
CROP Cabbage
32°F 0
41°F 27
50°F 78
59°F 93
68°F —
77°F 99
86°F —
95°F —
CROP Carrots
32°F 0
41°F 48
50°F 93
59°F 95
68°F 96

77°F 9686°F 95
95°F 74
CROP Corn
32°F 0
41°F 0
50°F 47
59°F 97
68°F 97
77°F 98
86°F 91
95°F 88
CROP Cucumbers
32°F 0
41°F 0
50°F 0
59°F 95
68°F 99
77°F 99
86°F 99
95°F 99
CROP Eggplant
32°F —
41°F —
50°F —
59°F —
68°F 21

77°F 5386°F 60
95°F —
CROP Lettuce
32°F 98
41°F 98
50°F 98
59°F 99
68°F 99
77°F 99
86°F 12
95°F 0
CROP Muskmelons
32°F —
41°F —
50°F —
59°F —
68°F 38
77°F 94
86°F 90
95°F —
CROP Onions
32°F 90
41°F 98
50°F 98
59°F 98
68°F 99

77°F 97
86°F 91
95°F 73
CROP Parsley
32°F —
41°F —
50°F 63
59°F —
68°F 69
77°F 64
86°F 50
95°F —
CROP Peas
32°F —
41°F 89
50°F 94
59°F 93
68°F 93
77°F 94
86°F 86
95°F 0
CROP Peppers
32°F 0
41°F 0
50°F 1
59°F 70
68°F 96
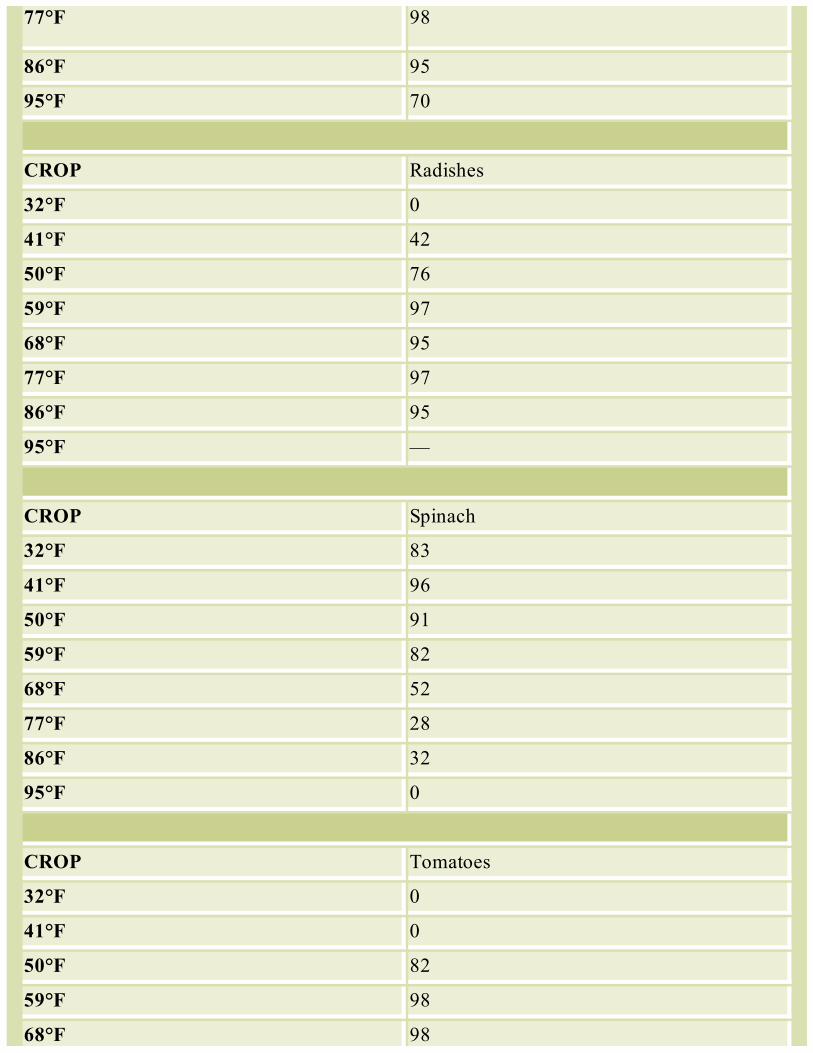
77°F 98
86°F 95
95°F 70
CROP Radishes
32°F 0
41°F 42
50°F 76
59°F 97
68°F 95
77°F 97
86°F 95
95°F —
CROP Spinach
32°F 83
41°F 96
50°F 91
59°F 82
68°F 52
77°F 28
86°F 32
95°F 0
CROP Tomatoes
32°F 0
41°F 0
50°F 82
59°F 98
68°F 98
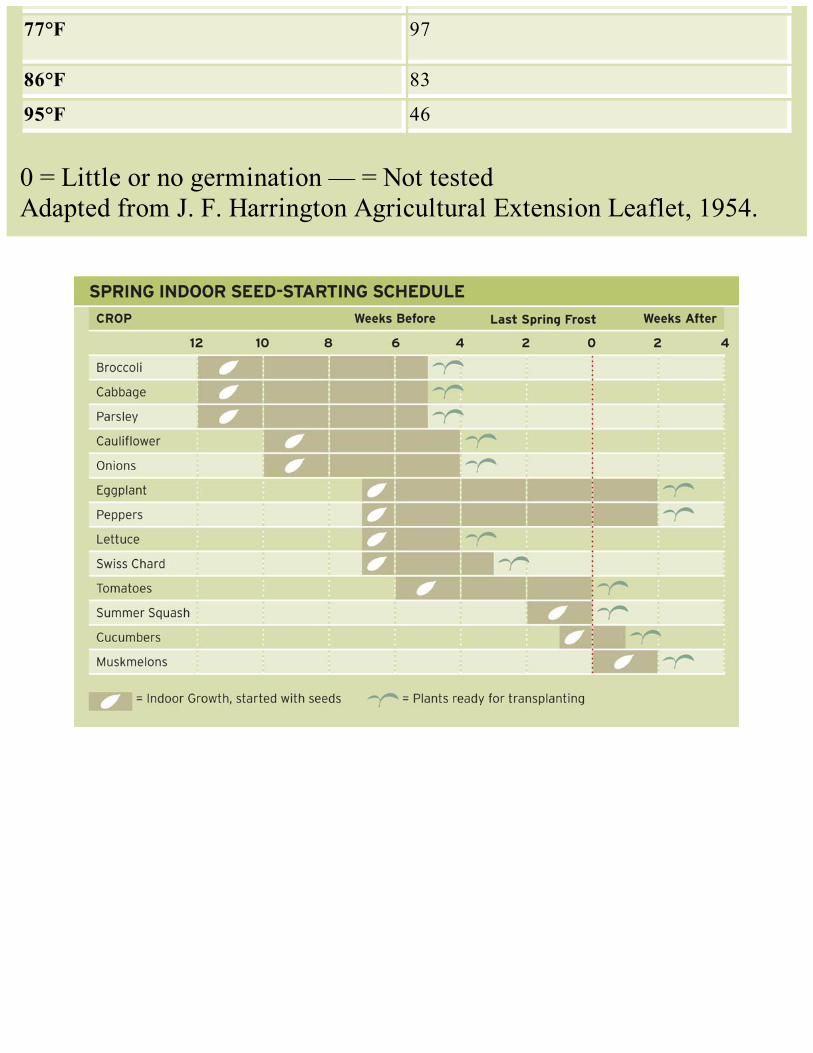
77°F 97
86°F 83
95°F 46
0 = Little or no germination — = Not testedAdapted from J. F. Harrington Agricultural Extension Leaflet, 1954.

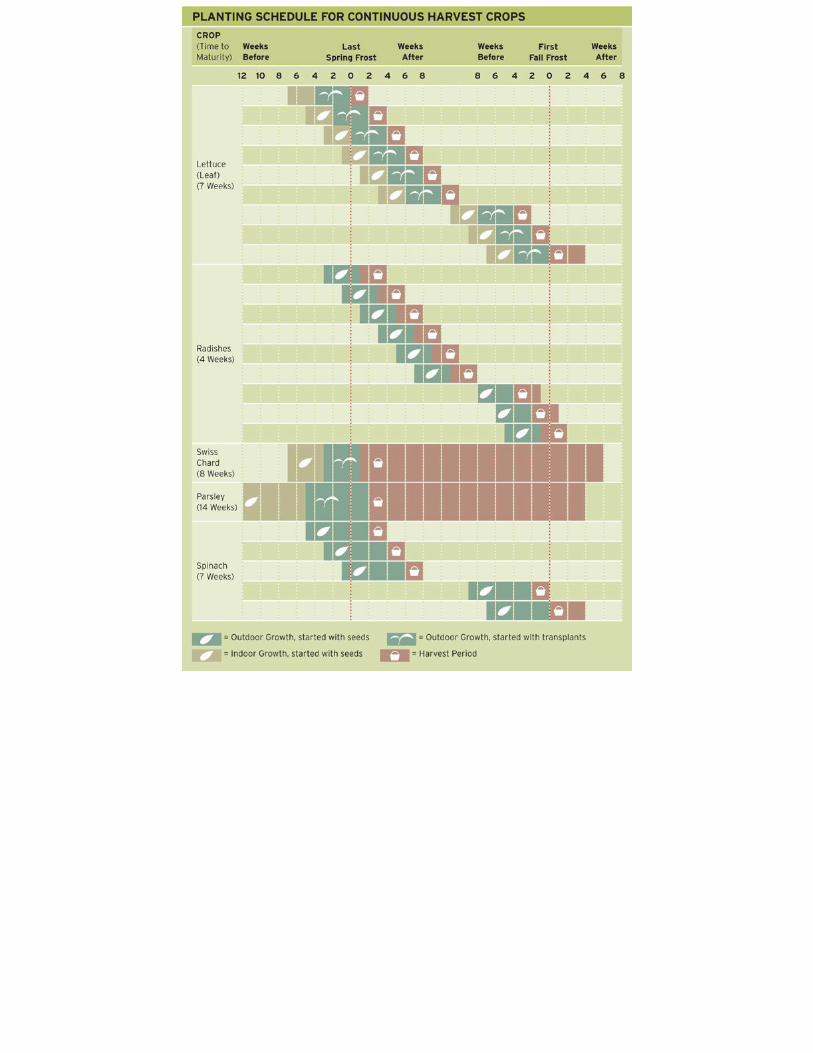
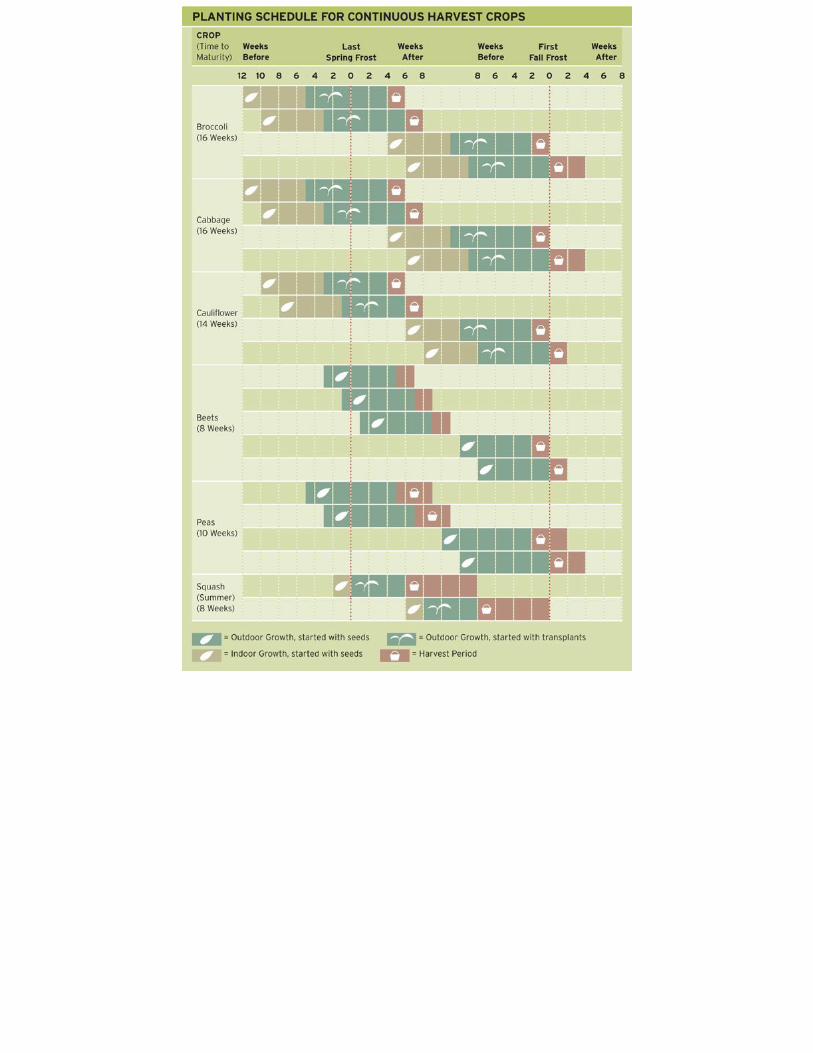
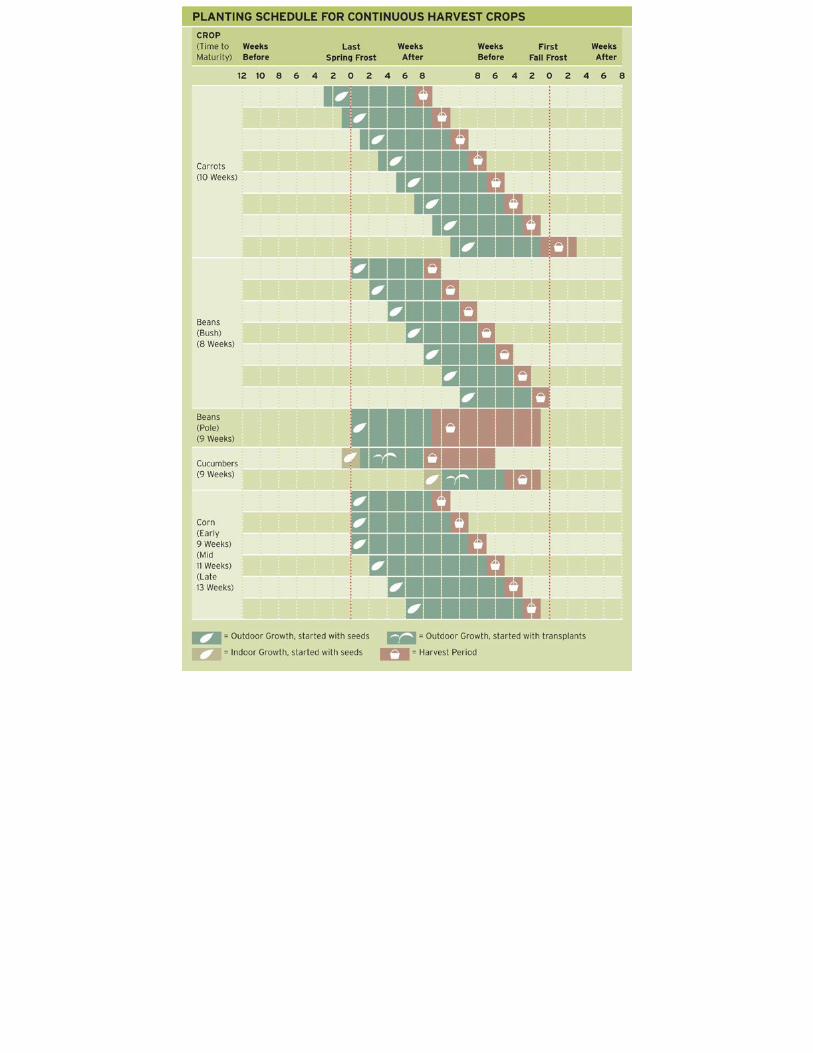
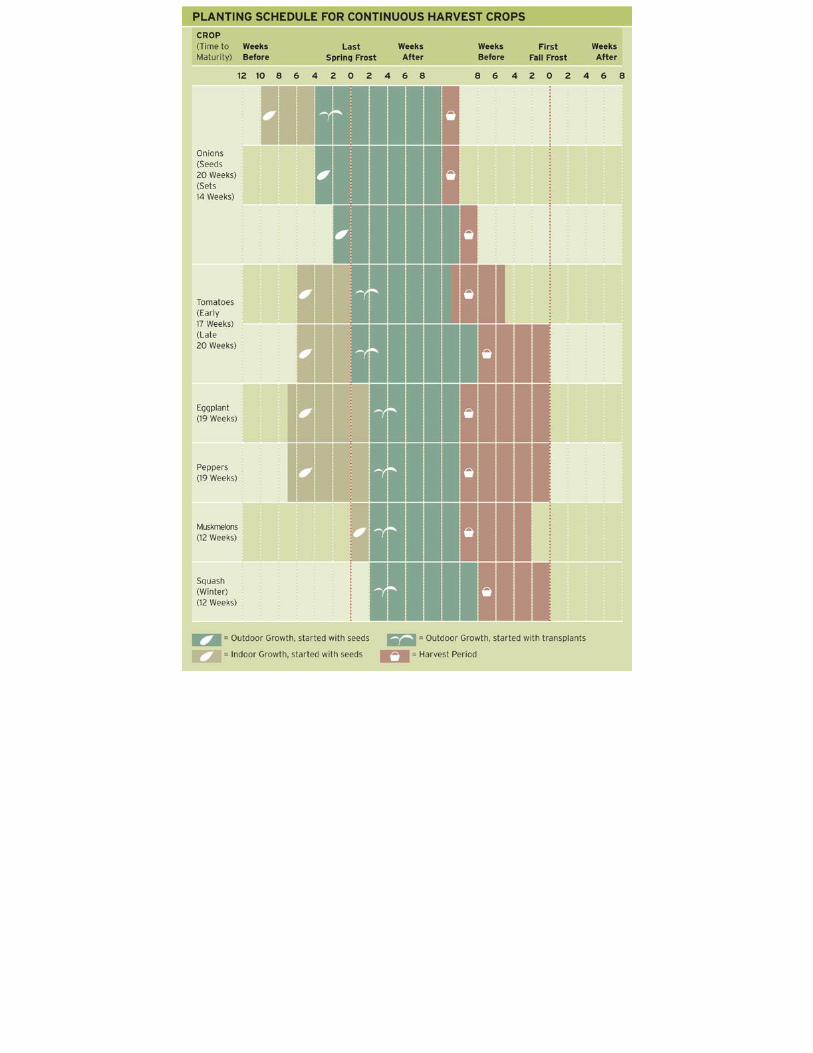
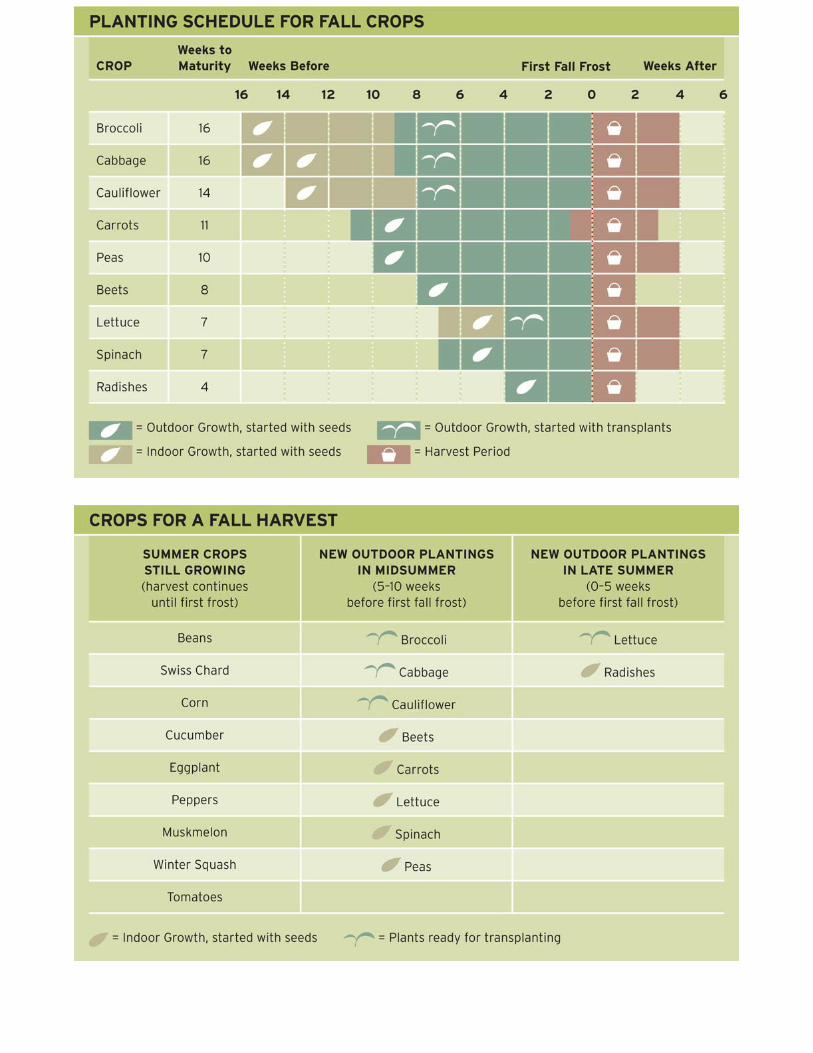

IndexAisles
materials for, 39–40, 81–83planning, 51width of, 13, 39
See also WalkwaysApples, 185Arbors, 167–168Asparagus, 114, 208–209
Basil, 206–207, 247–248Beans, 123, 209–211Beets, 185, 211–212Boxes
benefits of, 37, 58bottoms for, 62–63building, 58–59, 60–62for children’s gardens, 121–123, 199depth of, 36, 64–65drainage and, 62materials for, 38, 46, 58, 59, 62–63modifications to, 63, 83painting, 38, 59patio, 42portability of, 42–43pyramid, 63for railings, 63for root vegetables, 65size of, 50stepping up, 64
Broccoli, 212–213
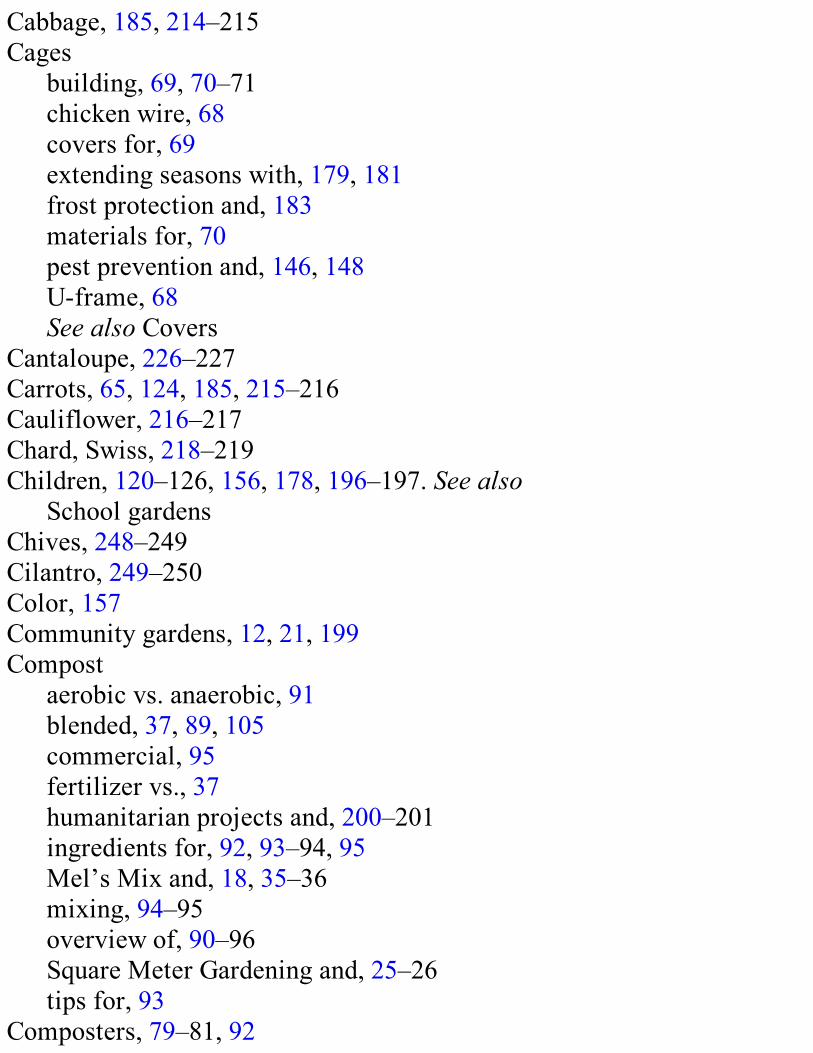
Cabbage, 185, 214–215Cages
building, 69, 70–71chicken wire, 68covers for, 69extending seasons with, 179, 181frost protection and, 183materials for, 70pest prevention and, 146, 148U-frame, 68See also Covers
Cantaloupe, 226–227Carrots, 65, 124, 185, 215–216Cauliflower, 216–217Chard, Swiss, 218–219Children, 120–126, 156, 178, 196–197. See also
School gardensChives, 248–249Cilantro, 249–250Color, 157Community gardens, 12, 21, 199Compost
aerobic vs. anaerobic, 91blended, 37, 89, 105commercial, 95fertilizer vs., 37humanitarian projects and, 200–201ingredients for, 92, 93–94, 95Mel’s Mix and, 18, 35–36mixing, 94–95overview of, 90–96Square Meter Gardening and, 25–26tips for, 93
Composters, 79–81, 92
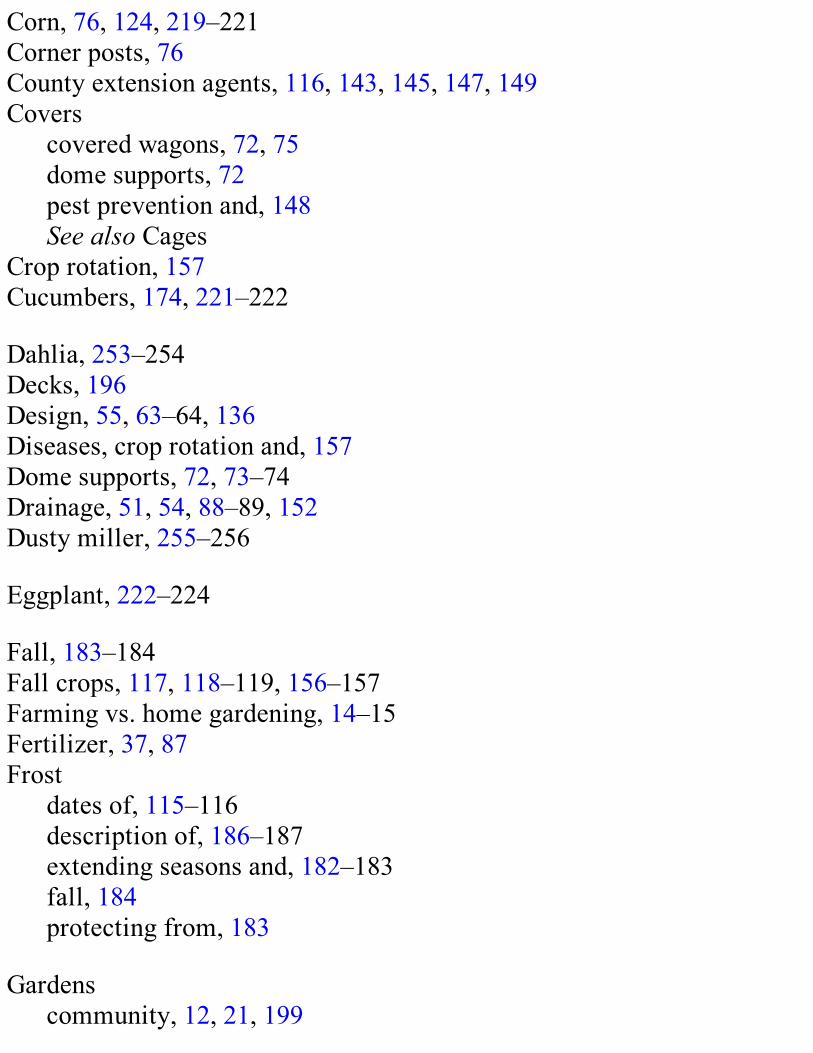
Corn, 76, 124, 219–221Corner posts, 76County extension agents, 116, 143, 145, 147, 149Covers
covered wagons, 72, 75dome supports, 72pest prevention and, 148See also Cages
Crop rotation, 157Cucumbers, 174, 221–222
Dahlia, 253–254Decks, 196Design, 55, 63–64, 136Diseases, crop rotation and, 157Dome supports, 72, 73–74Drainage, 51, 54, 88–89, 152Dusty miller, 255–256
Eggplant, 222–224
Fall, 183–184Fall crops, 117, 118–119, 156–157Farming vs. home gardening, 14–15Fertilizer, 37, 87Frost
dates of, 115–116description of, 186–187extending seasons and, 182–183fall, 184protecting from, 183
Gardenscommunity, 12, 21, 199

decorating, 190–191example of, 135location for, 19–20, 32–33, 51–55, 120–121number of, 46–47school, 23–24, 28, 198–199size of, 46–51
Germination rate, 119, 263Grids
attaching, 66decorating, 67–68dividing, 110, 111materials for, 40, 65necessity of, 40–41storage of, 67, 189
Group projects, 200Growing, rules for, 140Growth, sequence of, 116–117
Hardening off, 133Hardiness, 115Harvest
children and, 156from children’s gardens, 126continuous, 136–137, 155fall, 269rules for, 140staggering, 13, 19storing, 184–186visualizing, 108, 114, 154
Hillside gardening, 194–196Holiday decorating, 190–191Horizontal planting, 171–172Humanitarian projects, 200–201

Irrigation, drip, 153–154
Kneeling pad, 142
Landscape fabric (weed cloth), 61, 81, 142Leeks, 65Lettuce, 123, 182, 183, 224–226Location
for children’s gardens, 120–121considerations for, 51–55proximity and, 19–20, 32–33
Manure, 17Marigold, 256–258Master Gardeners, 143, 145Melons, 226–227Mel’s Mix
formula for, 35–36, 88mixing, 100–105overview of, 86–87volume, determining, 99
Mint, 250–252Mulch, 81Muskmelon, 226–227
Nasturtiums, 124Neem oil, 149Netting, 78, 166, 167, 168–170Number of gardens, 46–47
Okra, 227–228Onions, 184, 229–230Oregano, 252–253
Pansy, 258–259Parsley, 230–231Patio boxes, 167Peas, sugar snap, 232–233Peat moss, 18, 35–36, 37, 89, 96, 98Pencil, 141Penny Pincher tips, 59, 65, 79, 82, 95, 141, 142Peppers, 233–235Perlite, 98Pesto, 206–207Pests
county extension agents and, 143crop rotation and, 157guide to common, 144harvest storage and, 185preventing, 146–148resistance to, 145treating, 148–150
Petunia, 259–260Planning, 46–48, 50–51, 136Plant supports, 72, 76, 150Planting
charts for, 117, 262in children’s gardens, 124–125depth for, 127–128outdoor schedule, 264–269quantity and, 110seedlings, 113from seeds, 112spacing and, 134varieties of, 150
Plantsfor children’s gardens, 123–124moving, 127
seasonal, 114–115spacing of, 15–17, 109–110, 111, 134training, 168–169
Potatoes, 65, 185, 235–237Proximity to house, 51–52Pruning, 174Pumpkins, 184Pyramid boxes, 63
Radishes, 123, 182, 185, 237–238Railing boxes, 63, 196Raised gardens, 197–198Record keeping, 127, 189Replanting, 136Roots, trimming, 131, 132, 137Row covers, 146Rows, 15–16
Salvia, 260–261Sand, 64Saucer-shaped depression, 133, 150School gardens, 23–24, 28, 198–199. See also ChildrenScissors, 141Seasons, extending
cool-weather crops and, 181during fall, 183–184overview of, 178–179soil temperature and, 179–180during spring, 179–181starting indoors, 181during summer, 182–183during winter, 187–189
Seasons, getting started and, 114Seed leaves, 131
Seedlings, starting indoors, 131–133Seeds
depth for, 127–128germination rates for, 119, 263planting, 41–42, 127presoaking, 128–129schedule for starting, 263sprouting time, 128starting indoors, 129–131, 181starting outdoors, 133–134, 168storage of, 119, 134transplants vs., 119
Selective separation, 145Seniors, 197–198Shade, 53Shade cloth, 53, 69, 182Size of gardens, 46–51Slopes, 194–196Soil
depth of, 36existing, 51, 54improvement, 17–18not packed down, 140root depth and, 18–19starting with mix, 33–34temperature of, 118, 151–152, 178, 179–180See also Mel’s Mix
Spacing, 15–17, 109–110, 111, 134Special needs gardening, 198Spinach, 238–239Spring, extending season during, 179–181Spring crops, 118–119Sprinkler systems, 154Square Foot Gardening
Foundation, 27, 28–29history of, 11, 21–27improvements to, 26–27, 32instructors, 26, 29
Square Meter Gardening, 25, 29Squash, 174, 184, 241–244Strawberries, 240–241Summer, extending season during, 182–183Summer crops, 118–119Sunflowers, 124Sunlight, 51, 52–53, 133, 188Supports
dome, 72, 73–74plant, 72, 76See also Vertical frames
Tabletop gardens, 42–43Thinning, 42Tomatoes
cherry, 123frost and, 173horizontal planting, 171–172profile for, 244–246single-stem method, 170–171tomato horn worm and, 172–173vertical frames for, 76–77
Tools, 140–142Transplants
seeds vs., 119starting indoors, 131
Trees and shrubs, 51, 54Trowel, 141Turnips, 185
Vermiculite, 18, 35–36, 37, 89, 96–98, 99Vertical frames
construction of, 162–163, 164–165guy wires for, 174installing, 162–163, 165materials for, 78, 162, 164netting for, 78, 166on patios, 167step-by-step guide for, 175storage of, 78–79, 174–175
Vertical gardening, 76–79, 160–161, 168–170. See also Vertical framesVine crops, 76–79Volume, calculating, 98–99
Walkways, 167–168. See also AislesWatering
children’s gardens and, 125extending season and, 182overview of, 150–154seeds and, 126transplants and, 133
Watermelon, 226–227Weed cloth (landscape fabric), 61, 81, 142Weeds/weeding, 136, 142–143Winter, 187–189Wood lath, 65–66Wooded yards, 194
Yield, 47, 48–49
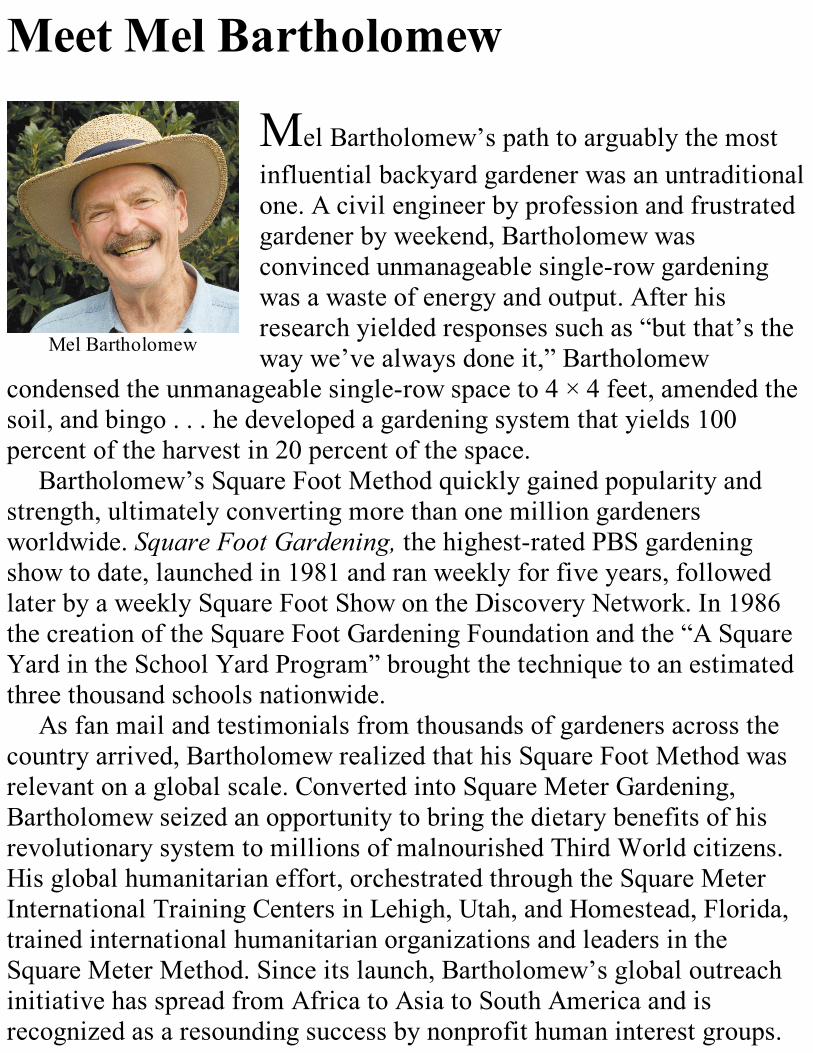
Mel Bartholomew
Meet Mel Bartholomew
Mel Bartholomew’s path to arguably the mostinfluential backyard gardener was an untraditionalone. A civil engineer by profession and frustratedgardener by weekend, Bartholomew wasconvinced unmanageable single-row gardeningwas a waste of energy and output. After hisresearch yielded responses such as “but that’s theway we’ve always done it,” Bartholomew
condensed the unmanageable single-row space to 4 × 4 feet, amended thesoil, and bingo . . . he developed a gardening system that yields 100percent of the harvest in 20 percent of the space.
Bartholomew’s Square Foot Method quickly gained popularity andstrength, ultimately converting more than one million gardenersworldwide. Square Foot Gardening, the highest-rated PBS gardeningshow to date, launched in 1981 and ran weekly for five years, followedlater by a weekly Square Foot Show on the Discovery Network. In 1986the creation of the Square Foot Gardening Foundation and the “A SquareYard in the School Yard Program” brought the technique to an estimatedthree thousand schools nationwide.
As fan mail and testimonials from thousands of gardeners across thecountry arrived, Bartholomew realized that his Square Foot Method wasrelevant on a global scale. Converted into Square Meter Gardening,Bartholomew seized an opportunity to bring the dietary benefits of hisrevolutionary system to millions of malnourished Third World citizens.His global humanitarian effort, orchestrated through the Square MeterInternational Training Centers in Lehigh, Utah, and Homestead, Florida,trained international humanitarian organizations and leaders in theSquare Meter Method. Since its launch, Bartholomew’s global outreachinitiative has spread from Africa to Asia to South America and isrecognized as a resounding success by nonprofit human interest groups.

And there are no signs of slowing down. Bartholomew’s globaloutreach continues throughout the world while closer to home, attentionhas shifted to increasing the Square Foot presence in the Californiaschool system. Bartholomew is determined to continue and strengthen thewell established Square Foot programs and institutions across the nationand the globe.
Bartholomew operates his nonprofit Square Foot GardeningFoundation in Eden, Utah.

ACKNOWLEDGMENTSI am most fortunate to be surrounded by a dedicated staff who not only
worked many late nights getting this book ready, but who truly believe inand are dedicated to the principles of Square Foot Gardening. ChrisPeterson Editorial and Victoria Boudman My most able and devoted
assistant
Chris PetersonEditorial
and Victoria BoudmanMy most able and devoted assistant

DEDICATIONThis book is dedicated to the loving memory of my daughter, Gail
Bartholomew (1954–2000). Gail was my biggest supporter and was oneof the original members of the Board of Directors for the Square Foot
Gardening Foundation. She was most enthusiastic about our schoolgardening program.

First published in 2013 by Cool Springs Press, an imprint of the QuaysidePublishing Group, 400 First Avenue North, Suite 300, Minneapolis, MN55401
© 2013 Cool Springs Press
Text © 2013 Square Foot Gardening Foundation
All rights reserved. With the exception of quoting brief passages for thepurposes of review, no part of this publication may be reproduced withoutprior written permission from the Publisher.
The information in this book is true and complete to the best of ourknowledge. All recommendations are made without any guarantee on thepart of the author or Publisher, who also disclaims any liability incurredin connection with the use of this data or specific details.
Cool Springs Press titles are also available at discounts in bulk quantityfor industrial or sales-promotional use. For details write to Special SalesManager at Cool Springs Press, 400 North First Avenue, Suite 300,Minneapolis, MN 55401 USA.
To find out more about our books, visit us online atwww.coolspringspress.com.
Digital Edition: 978-1-61058-733-4Hardcover Edition: 978-1-59186-548-3
Library of Congress Cataloging-in-Publication Data
Bartholomew, Mel. All new square foot gardening : the revolutionary way to grow more inless space / Mel Bartholomew.-- 2nd ed. p. cm.

Includes index. ISBN 978-1-59186-548-3 (softcover) 1. Vegetable gardening. 2. Square foot gardening. 3. Vertical gardening.4. Gardening for children. I. Title.
SB321.B275 2013 635--dc23
2012042837
10 9 8 7 6 5 4 3 2
Layout: Danielle Smith
Cover photography: Paul Markert
Photo Credits:
Istock: 209
LDI: pages 13, 44, 54, 82, 92, 129, 180, 184, 211, 212, 215, 216, 218, 226,235, 238, 241, 243, 250
Paul Markert: 84, 121, 122, 125, 126, 146 (top and lower right), 147(both) 148, 149, 158
J. Paul More: pages 10, 20, 24, 30, 34, 38, 41, 61 (lower four), 62, 66(all), 67, 71 (lower right), 73 (all), 74, 75 (top two and lower left), 89, 90,97, 101 (both), 102 all, 103 (top), 108, 111 (all), 130 (all), 132 (both),137, 142, 146 (lower left), 157, 162 (both), 163 (both), 166 (all), 169, 170(left), 173, 192. 272
Shutterstock: pages 80, 145, 207, 208, 214, 219, 221, 222, 224, 227, 229,230, 232, 233, 237, 240, 244, 247, 248, 249, 252, 255, 256, 259, 260

Neil Soderstrom: 118
Square Foot Gardening Foundation: page 154
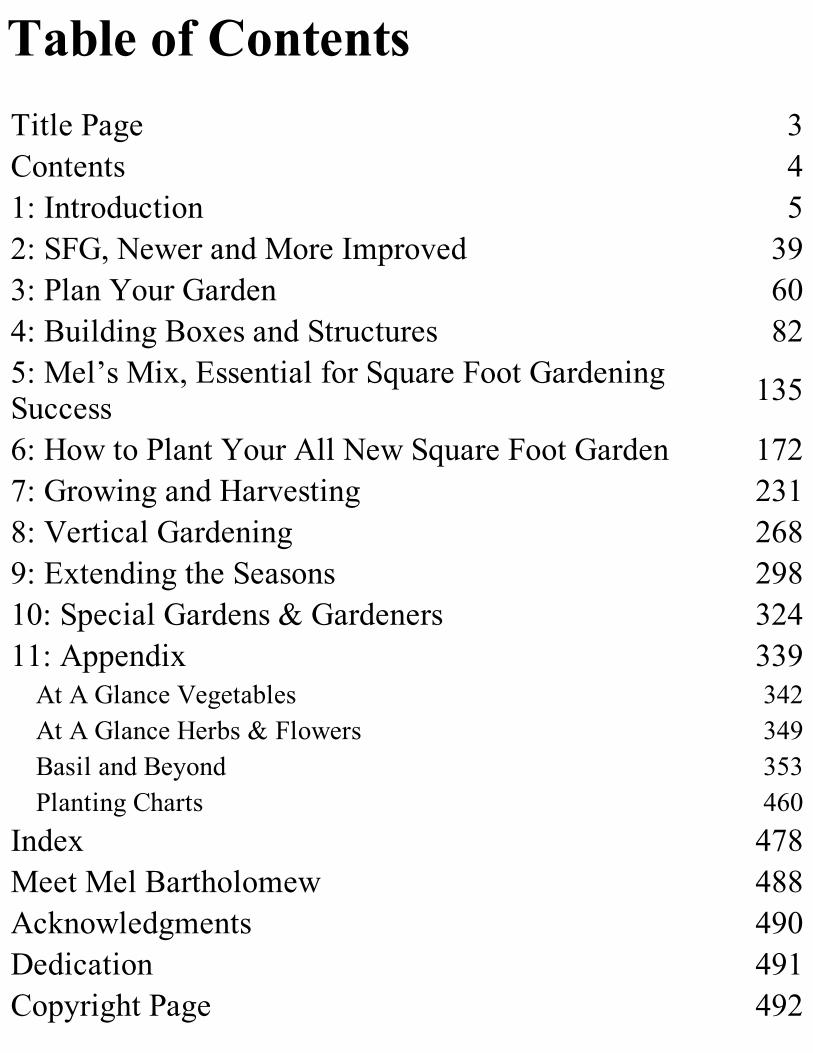
Table of ContentsTitle Page 3Contents 41: Introduction 52: SFG, Newer and More Improved 393: Plan Your Garden 604: Building Boxes and Structures 825: Mel’s Mix, Essential for Square Foot GardeningSuccess 135
6: How to Plant Your All New Square Foot Garden 1727: Growing and Harvesting 2318: Vertical Gardening 2689: Extending the Seasons 29810: Special Gardens & Gardeners 32411: Appendix 339
At A Glance Vegetables 342At A Glance Herbs & Flowers 349Basil and Beyond 353Planting Charts 460
Index 478Meet Mel Bartholomew 488Acknowledgments 490Dedication 491Copyright Page 492