Cooking - Petaluma Adobe
27
07-22-06 Cooking The cooks were responsible for providing the meals at the Adobe. Each student is to assist in the preparation of a typical Mexican Rancho meal and to assemble the proper equipment needed. The Supervisors will build and maintain a fire in the stove (and oven). Some great resources for period cooking tools, bowls, mugs, and utensils are: Jas. Townsend and Son, Inc catalog 1-800-338-1665 www.jastown.com Smoke and Fire Co catalog 1-800-766-5334 www.smoke-fire.com BACKGROUND To make this work the parents and teachers both have to want to make the ELP authentic and a real teaching experience. In the Mission days, meals were simple but nourishing. A typical breakfast was “atole” rather like our oatmeal. Lunch was more atole with bits of meat and vegetables. Dinner was perhaps a hearty stew or roasted meat or fowl. Sweet desserts were uncommon. Breads or tortillas were common. During the Rancho period, the trade ships were bringing in more items like coffee, teas, and chocolate. But, these items were still scarce and expensive. Not all ranchos had livestock that provided milk and there wasn’t refrigeration. Therefore, milk and cheese were not common. The dairy products (milk, cheese, and eggs) often caused problems for the digestive tracts of the Native Americans. However, it was mainly the upper classes that consumed these “delights” and had access to them. During the time of the 1840’s, at the Adobe you would NOT find, candy (Snickers, M&M’s etc.) cookies, (Oreo’s, Fig Newtons, etc) juice drinks in boxes, gum, ground beef, whole milk, cheese, sour cream, breakfast rolls from Safeway. Such dishes as the breakfast burritos, refritos, corn bread with cheese, enchiladas and tacos are American food brought later, well after the 1840’s. Flour tortillas weren’t predominately used in California until about the mid-1860’s when white flour was more available. Flour was hard to keep fresh for any length of time due to bugs. However, corn could be dried on the cob and kept for longer periods of time without rotting or bug problems. The cattle here were raised primarily for their hides and secondly for their meat. They were not dairy cattle. There were not any goats at Rancho de Petaluma, therefore without goats and milking cattle there were not any dairy products. Chickens were more often used for their meat than their eggs. The Chicken eggs were not usually available to the workers but the upper classes would use them for meals and in desserts.
Transcript of Cooking - Petaluma Adobe
07-22-06
Cooking The cooks were responsible for providing the meals at the Adobe. Each student
is to assist in the preparation of a typical Mexican Rancho meal and to assemble the proper equipment needed.
The Supervisors will build and maintain a fire in the stove (and oven).
Some great resources for period cooking tools, bowls, mugs, and utensils are: Jas. Townsend and Son, Inc catalog 1-800-338-1665 www.jastown.com
Smoke and Fire Co catalog 1-800-766-5334 www.smoke-fire.com BACKGROUND
To make this work the parents and teachers both have to want to make the ELP authentic and a real teaching experience.
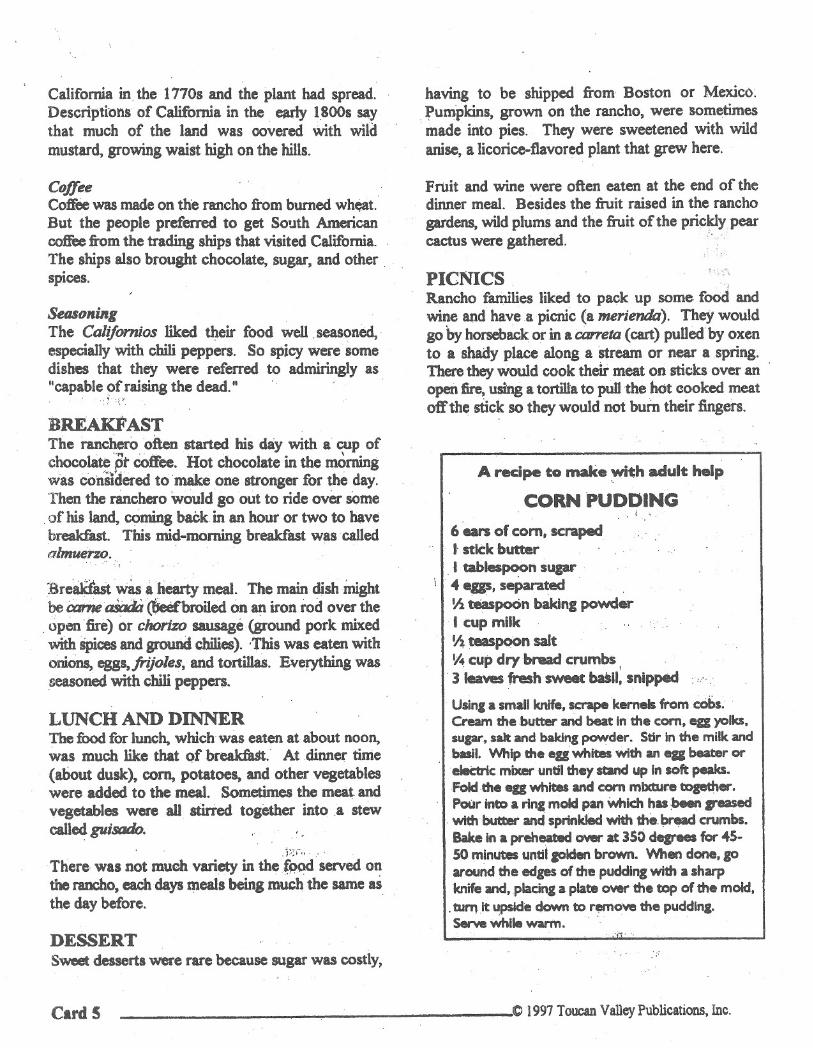
In the Mission days, meals were simple but nourishing. A typical breakfast was “atole” rather like our oatmeal. Lunch was more atole with bits of meat and vegetables. Dinner was perhaps a hearty stew or roasted meat or fowl. Sweet desserts were uncommon. Breads or tortillas were common.
During the Rancho period, the trade ships were bringing in more items like coffee, teas, and chocolate. But, these items were still scarce and expensive. Not all ranchos had livestock that provided milk and there wasn’t refrigeration. Therefore, milk and cheese were not common. The dairy products (milk, cheese, and eggs) often caused problems for the digestive tracts of the Native Americans. However, it was mainly the upper classes that consumed these “delights” and had access to them.
During the time of the 1840’s, at the Adobe you would NOT find, candy (Snickers, M&M’s etc.) cookies, (Oreo’s, Fig Newtons, etc) juice drinks in boxes, gum, ground beef, whole milk, cheese, sour cream, breakfast rolls from Safeway. Such dishes as the breakfast burritos, refritos, corn bread with cheese, enchiladas and tacos are American food brought later, well after the 1840’s. Flour tortillas weren’t predominately used in California until about the mid-1860’s when white flour was more available. Flour was hard to keep fresh for any length of time due to bugs. However, corn could be dried on the cob and kept for longer periods of time without rotting or bug problems. The cattle here were raised primarily for their hides and secondly for their meat. They were not dairy cattle. There were not any goats at Rancho de Petaluma, therefore without goats and milking cattle there were not any dairy products. Chickens were more often used for their meat than their eggs. The Chicken eggs were not usually available to the workers but the upper classes would use them for meals and in desserts.

07-22-06
The point is to have the school’s that do this program be as close to authentic as possible, so what we’ve done is found some history on the era and old Mexican recipes and Mission recipes. Also a fact that people may not know, but the Indian people had corn before the European’s came to this land. The Indians in the southern part of the state traded for corn from the people of Arizona, New Mexico, and Texas.
A good book is, California Rancho Cooking, written by Jacqueline Higuera McMahan. However, she has “restored the rancho recipes for today’s kitchen.” Which means you’ll have to do research to validate the authenticity of using some of the those recipes and ingredients at a rancho in Petaluma in the 1830-40’s.
HISTORY
Starting with the Corn, a sacred plant to the Mexican people and their religion (as far back as the 1500’s and the Spanish conquest of the Aztec’s). Corn supplied starch, the main source in the people’s diet, as well as protein with little fat. Sometimes eaten green off the cob, raw boiled or roasted. Immature kernels were cut or scraped off and made into cakes or added to other dishes. But the Mexican people usually let the corn ripen and then stored the ears in ventilated corncribs.
Stone mortars and pestles were used to grind the kernels into a meal and atole
was made (corn gruel). A better way of heating the kernels was to place them in a lime solution until the skins came off. Skinless kernels were called nixtamal; an Aztec word still used today. The nixtamal could be dried and stored, boiled fresh in water. When boiled the kernels swelled up and became soft, (today called Hominy-yellow or white). The nixtamal was then used to make pozole, one of their basic dishes. Also the making of tortillas was made from nixtamal, by mashing them into a masa (a dough).
Known as the “bread of Mexico” the Mexican people used their tortillas as plates,
forks and spoons. They would dip their tortillas into stews, tear off pieces to scoop up sauces, the tortilla could be eaten with almost any kind of food that didn’t have a lot of liquid.

07-22-06
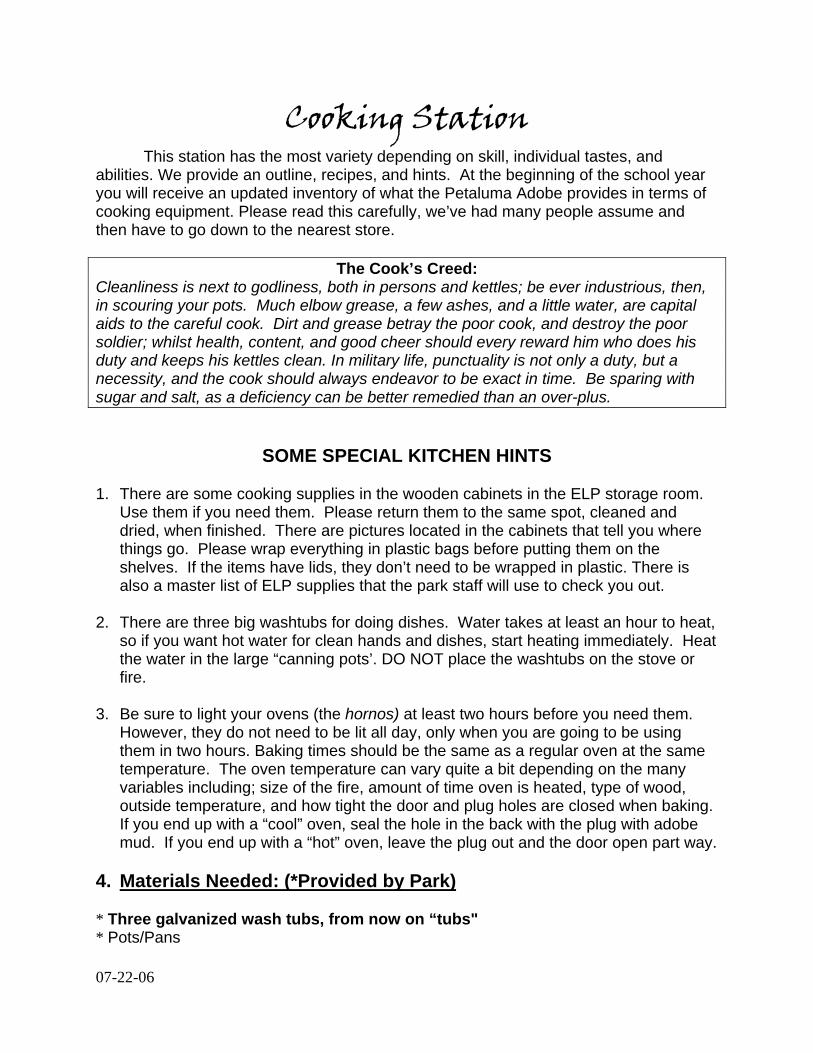
Cooking Station This station has the most variety depending on skill, individual tastes, and
abilities. We provide an outline, recipes, and hints. At the beginning of the school year you will receive an updated inventory of what the Petaluma Adobe provides in terms of cooking equipment. Please read this carefully, we’ve had many people assume and then have to go down to the nearest store.
The Cook’s Creed: Cleanliness is next to godliness, both in persons and kettles; be ever industrious, then, in scouring your pots. Much elbow grease, a few ashes, and a little water, are capital aids to the careful cook. Dirt and grease betray the poor cook, and destroy the poor soldier; whilst health, content, and good cheer should every reward him who does his duty and keeps his kettles clean. In military life, punctuality is not only a duty, but a necessity, and the cook should always endeavor to be exact in time. Be sparing with sugar and salt, as a deficiency can be better remedied than an over-plus.
SOME SPECIAL KITCHEN HINTS
1. There are some cooking supplies in the wooden cabinets in the ELP storage room.
Use them if you need them. Please return them to the same spot, cleaned and dried, when finished. There are pictures located in the cabinets that tell you where things go. Please wrap everything in plastic bags before putting them on the shelves. If the items have lids, they don’t need to be wrapped in plastic. There is also a master list of ELP supplies that the park staff will use to check you out.
2. There are three big washtubs for doing dishes. Water takes at least an hour to heat,
so if you want hot water for clean hands and dishes, start heating immediately. Heat the water in the large “canning pots’. DO NOT place the washtubs on the stove or fire.
3. Be sure to light your ovens (the hornos) at least two hours before you need them.
However, they do not need to be lit all day, only when you are going to be using them in two hours. Baking times should be the same as a regular oven at the same temperature. The oven temperature can vary quite a bit depending on the many variables including; size of the fire, amount of time oven is heated, type of wood, outside temperature, and how tight the door and plug holes are closed when baking. If you end up with a “cool” oven, seal the hole in the back with the plug with adobe mud. If you end up with a “hot” oven, leave the plug out and the door open part way.
4. Materials Needed: (*Provided by Park) * Three galvanized wash tubs, from now on “tubs" * Pots/Pans

07-22-06
* Fire wood * Garbage bags and cans * Matches * Recipes Non-Chlorine Bleach and biodegradable dish soap Utensils, including hot pads Dish towels and soap Food 5. Some common forgotten items include (but are not limited to!):
Dish towels Dish Soap (biodegradable only) Bleach (non chlorine) Scrubbing pads, brushes, etc. Small, sharp knives Butter, oil, salt, pepper Large spoons, spatulas Graters Can openers Pot holders
Station Set-up:
THINK SAFETY AT ALL TIMES
Hornos (Beehive Ovens) Note: Do not leave the door or plug in place while a fire is in the oven.
1. If the hornos are being used, a fire needs to be burning inside of them for two hours before you need to use them.
2. Unplug the back plug of the horno and remove the door. If there are any bricks inside the horno they need to be removed. You can place them on the triangular ledge next to the horno door.
3. Build a reasonable sized fire inside of the horno. 4. Once you have decided the horno is ready to bake in, removed the large logs. Then
you have two options. 1-if you are using the dutch ovens with feet, you can leave the ashes inside. 2-if you are using pans or dishes you will need to use a shovel to remove the ashes. Then place the bricks inside. The pans can then go on top of the bricks. After you have put the food in, put the door and plug back in to the horno..
5. The horno temperature can vary quite a bit depending on many variables, including; size of fire, amount of time the horno is heated, outside temperature, type of wood, and how tight the door and plug holes are closed when trying to bake. If the horno is too cool-use adobe mud to seal holes around plug in the back. If the horno is too hot-crack the door a bit and leave the plug out.

07-22-06
Garbage Cans and Bags 1. It is the responsibility of everyone to maintain the garbage cans. There is a garbage
can next to the cooking tables, one next to the office, and another next to the grill/adobe cook stove.
2. The bags will be placed outside of the office by park staff. 3. Please make sure that the bags have not slipped down in to the cans. When this
happens we must pull the cans out and clean them. It is not easy to get the cans out of the barrels.
4. Please keep an eye on the garbage cans. When one is full, the bag needs to be removed and tied. There is a wheelbarrow available for the STUDENTS to use to haul the trash to the Dumpster. (It is their job!) Ask the park staff for the location of the dumpster.
5. PLEASE DO NOT decide to pile all the bags in one location and haul them all at the same time. The sheep find these bags easily and tear holes in the plastic or endanger themselves.
6. Once the full bag has been removed, replace a new one in the can.
Recycling At the current time, the Petaluma Adobe does not have a recycling program. We encourage you to collect your own recycables and send them home with someone who can take care of it.
Wash Tubs
1. The three tubs are located in the ELP Supply Room. Please do not use the tubs marked “Baskets Only.”
2. All three tubs are to be taken out of the ELP Supply Room and placed on the ledge adjacent to the grills next to the hornos.
3. The three tubs are for a wash station. One for soapy water, one for a sterilizing rinse, and one for clear rinse water.
4. The first tub should contain hot water and biodegradable dish soap. 5. The second tub should contain warm water with 1 tablespoon of non-chlorine bleach
to each 2 gallons of water. 6. The third tub should be filled with hot, clear water for a rinse. 7. The water takes at least an hour to heat, so if you want hot water right away for
clean hands and dishes, start heating it immediately. 8. Heat the water in the “spaghetti/canning” pots. Ideally, water should be heating on
the grill next to the wash tubs all day to use for dish water. DO NOT place the tubs on the stove or grill, the bottom seam will fail.
9. Ideally, the first group to be at the cooking station should fill up the tubs with water. The “spaghetti/canning” pots can be filled with water and then lifted back to the tubs by two students.
10. The water in the wash tubs will need to be emptied and refilled often. The water from the wash tubs is to be dumped down the courtyard drain. First, remove all chunks of food from the water. The wash tubs can then be carried to the courtyard drain that is the farthest away from the cooking area, it is right next to the small courtyard pot. Please do not dump down the other two drains, they clog up easily.

07-22-06
Fires (under the grills in the adobe cook stove)
1. The fires under the grills should be built in a regular “campfire” type fashion. 2. DO NOT use dangerous liquids to start your fires. Use dry kindling that has been
chopped small enough. 3. The outdoor adobe cook stove can be quite dangerous, especially to those that are
wearing loose clothing such as skirts or rebozos. 4. It is better to stand to one side of the fire opening and not directly in front of the fire
when cooking. 5. Please do not remove ashes build-up from the stove area, make the fire on top of
the ashes. This uses less wood and the ashes provide a natural riser.
Pots/Pans 1. There are a wide variety of pots and pans available in the ELP Supply Room. 2. The pots/pans are stored in the two large wooden cabinets. There is a layout posted
on the inside of each showing where the pots and pans are located. You should find every one that is on a shelf, stored in a plastic bag.
3. Please make sure to read “Caring for Cast Iron” below Caring for Cast Iron There are many cast iron pots available in the ELP cupboards for the group to use. They are wonderful to cook with and are authentic. After cooking in one of the pots, it should be wiped clean with a paper towel and then rinsed in hot water. Do not scour; scouring will remove the natural seasoning of the pot and cause rust and possibility a metallic taste. Do not use detergent or harsh cleaning products. If it has food caked on it, try putting hot water in it and simmering it on a stove for a while. Then wipe it with a paper towel and rinse it in hot water. Dry it thoroughly. Another way to clean it is to

07-22-06
scrub t with coarse salt and a soft sponge. The salt absorbs oil and lifts away bits of food while preserving the pan’s seasoning. Rinse away the salt and wipe dry. Wipe a little oil around the inside of the pot and lid to re-season. Dutch Oven Cooking Dutch ovens were very important to the cooks. Past ELP cooks have used our ovens to make breads and desserts. There are many resources available that can give more direction on how to use them. (Please see either the “Bibliography” or “References for Research” sections at the end of the manual.) These resources state that charcoal briquets should be used above and below the oven. However, here you will be using coals from the fires. It will take a little time to get used to how much heat is needed. Remember, this is opposite of a convection oven: the heat goes where you put it. Coals on the top will brown the top, coals on the bottom will cook the bottom. You will want balanced heat, start slowly and check often. The following is a list of items that may help: 1. make sure that the oven is cleaned and seasoned (See “Caring for Cast Iron”) 2. Pre-heat the oven so that most of the cooking comes from residue heat. 3. Make sure plenty of coals are available in the fire. 4. If the oven is placed near the main fire, you will have uneven heat. 5. Leave an air space between the oven and the bed of coals so the baked good will
not burn on the bottom as easily. 6. If baking in a pan, raise the pan above the bottom of the oven on a rack or with a few
rocks. 7. When checking the cooking progress, make sure to remove the coals from the lid
and to sweep ashes away. Do not lay the lid down on something that is dirty. 8. If baking a sticky dessert, you might want to line the oven with tin foil before adding
dough. (Not historical, but definitely more convenient) 9. After using the oven, season the cast iron by washing in hot water (no soap), drying
over the fire, and then coating the inside with a thin film of cooking oil. Make sure that it is ready for the next group.
Station: 1. Through out the day: the fires need to be maintained, the rinse water needs to be
free of debris, and the garbage cans have to be emptied. 2. When it is time to use the horno; the fire needs to be removed. This must be done by
an ADULT. The fire can be transferred to the grill/adobe cook stove area. 3. Once the fire is removed, the bricks can be placed into the oven. (The pans usually
rest on the bricks to decrease the chance of burning the bottom.) Station Clean-up: 1. The garbage cans need to be emptied and new bags need to be put in them. 2. All garbage needs to be hauled to the Dumpster. 3. The cooking tables need to be cleaned off and wiped down. 4. The fires can be left to burn out on their own.

07-22-06
5. The wash tubs need to be CLEANED AND WASHED OUT. Once this is done, they also need to be DRIED. Then, they can be returned to the ELP Supply Room.
6. (Please see “Caring for Cast Iron” above) The pots and pans need to be washed, scrubbed, and dried. DO NOT SEND WET POTS BACK TO THE ELP CLOSET! They can then be put on the higher ledge of the adobe cook stove. This is where they will remain until park staff is able to check them. Once the park staff clears them, they need to be wrapped in plastic bags and returned to their appropriate location within the wooden cabinets. (Please follow the layout provided inside each of the cabinets.)
7. The cooking area needs to be swept and raked of any debris. 8. The refrigerator needs to be emptied of any leftover food and drinks. 9. The woodpile needs to be refilled properly. This means two rows of wood, filled to
the top, facing the same direction. 10. All leftover items: food, utensils, etc.,that were brought by the class need to be
packed up to return to the parking lot. 11. PLEASE DO NOT LEAVE ANY EXTRA SUPPLIES BEHIND. We appreciate the
kindness, but the mice often find the supplies before we do. 12. The staff person on Wednesday will check to make sure that all items are properly
returned to their place.

07-22-06
07-22-06
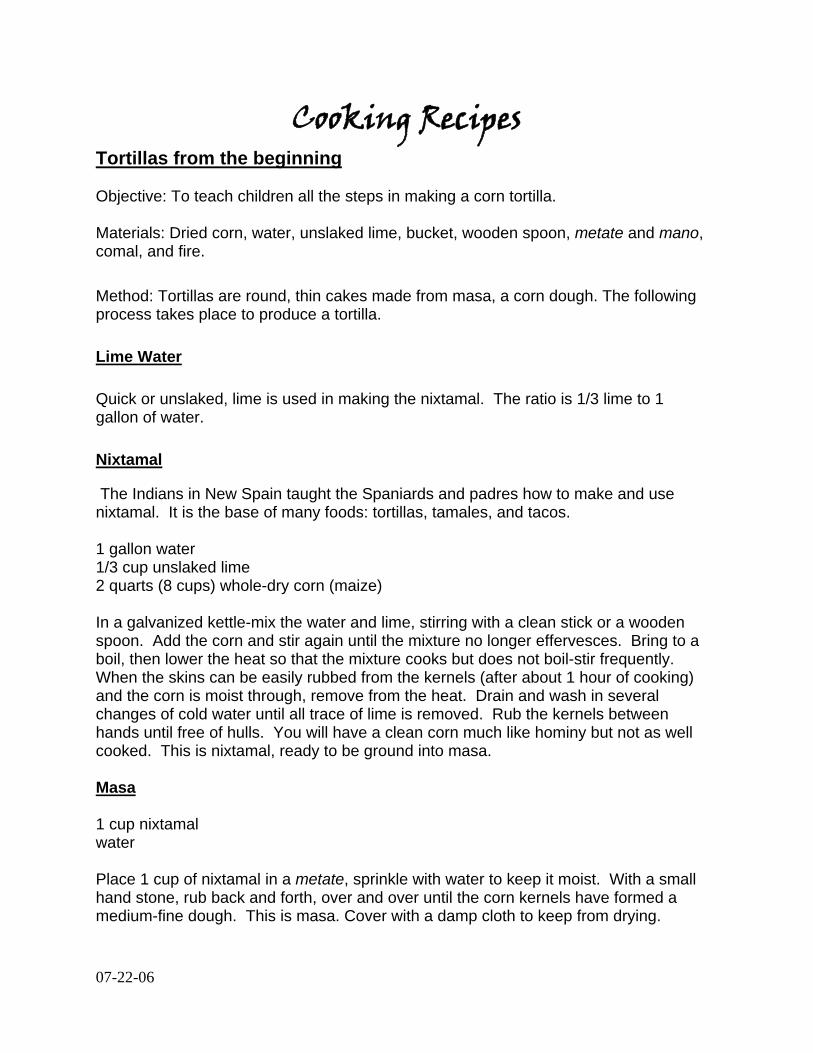
Cooking Recipes Tortillas from the beginning Objective: To teach children all the steps in making a corn tortilla. Materials: Dried corn, water, unslaked lime, bucket, wooden spoon, metate and mano, comal, and fire. Method: Tortillas are round, thin cakes made from masa, a corn dough. The following process takes place to produce a tortilla.
Lime Water
Quick or unslaked, lime is used in making the nixtamal. The ratio is 1/3 lime to 1 gallon of water.
Nixtamal
The Indians in New Spain taught the Spaniards and padres how to make and use nixtamal. It is the base of many foods: tortillas, tamales, and tacos. 1 gallon water 1/3 cup unslaked lime 2 quarts (8 cups) whole-dry corn (maize) In a galvanized kettle-mix the water and lime, stirring with a clean stick or a wooden spoon. Add the corn and stir again until the mixture no longer effervesces. Bring to a boil, then lower the heat so that the mixture cooks but does not boil-stir frequently. When the skins can be easily rubbed from the kernels (after about 1 hour of cooking) and the corn is moist through, remove from the heat. Drain and wash in several changes of cold water until all trace of lime is removed. Rub the kernels between hands until free of hulls. You will have a clean corn much like hominy but not as well cooked. This is nixtamal, ready to be ground into masa. Masa 1 cup nixtamal water Place 1 cup of nixtamal in a metate, sprinkle with water to keep it moist. With a small hand stone, rub back and forth, over and over until the corn kernels have formed a medium-fine dough. This is masa. Cover with a damp cloth to keep from drying.

07-22-06
Cooking: Form the masa into 2-inch balls, press and pat with the hand into 6 inch round cakes. Bake on hot, ungreased griddle until slightly brown and blistered on both sides.
Corn Tortillas
4 cups of masa (Masa Harina – corn flour can be purchased in most supermarkets. If you have a Mexican market nearby you can purchase masa dough freshly made) ½ teaspoon salt and 2 1/2 cups hot water, not boiling. Put masa and salt in large bowl, add water and mix with your hands until dough comes together in softball. Keep kneading the dough until it holds together without cracking about 3 minutes. Using right away, divide dough into 18 equal portions cover with a damp towel or wrap. Making for later, wrap the whole ball in wrap and refrigerate for up to 1 day. Make tortillas place a portion of dough between two pieces of wax paper, press with a tortilla press or roll out with a rolling pin into a circle 6-7 inches in diameter use fingers to smooth any ragged edges. Cook tortillas, first heat up a heavy skillet, griddle or comal over high heat, until it starts to smoke. Take tortilla out of paper and place in the pan. Cook 30 seconds, heat should be medium-high. Turn and cook on the other side for 1 minute, turn again. Sometimes the tortilla puffs a bit but is still pliable not crisp, about 30 seconds then remove. Flour Tortillas 3 cups unbleached all-purpose flour 1 teaspoon salt 1/3 cup vegetable oil or shortening (traditionally made with lard but for health reasons, vegetables oils are now used.) 1 cup warm water but not boiling Combine the flour, salt, and oil in large bowl and mix together until crumbly, like for pie dough. Add water and mix until you can gather the dough into a ball. Now place dough on a lightly floured surface and knead until smooth and elastic, about 5 minutes. Cover with a towel and set aside for at least 30 minutes or up to 2 hrs. Make tortillas; divide the dough into 12 equal portions. Roll each portion between the palms of your hands to make a ball. On a lightly floured surface roll out each ball into an 8-inch circle, place each tortilla between wax paper as you go. Cook tortillas, heat a heavy skillet, griddle or comal over high heat till they start smoking. Place tortilla in pan and cook for 30 seconds, turn over cook until slightly puffed and speckled brown on the underside but soft enough to fold about 30 seconds, remove.

07-22-06
Borracho Beans 1 16oz jar of Salsa (Safeway Select Salsa/Southwest, mild, has all the ingredients that were used in cooking) 1 16oz jar of water 4-- 15.5 oz cans of pinto beans – flavored with bacon 1 small red onion, chopped 1 small bundle of cilantro chopped-remove half of the stems 1 tablespoon of chili powder – for taste, this is optional 1 teaspoon of garlic powder or 2 gloves chopped Place everything in a pot except cilantro and bring to a boil approx. 15 minutes. Add cilantro last. For refried beans: Drain leftover beans in bowl, retaining 1 cup of juice. Mash beans in bowl and re-cook beans in a fry pan. Add bean soup back to the beans to make them wet but not soupy. You might want to add some more salt and pepper
Simple Mexican Rice
2 Cups of Wild Rice. You can substitute with white long grain rice ½ Cup melted lard. But for health reasons now, use olive oil. 3 Cloves of garlic mashed with ½ teaspoon salt-optional 2 Medium onions, minced 6 Teaspoons of ground chile powder 4 Cups of water. In a large pot, put the olive oil when hot put in the rice, cook on medium heat and until it’s golden in color and has the light smell of popcorn. Now add the onions, garlic, salt and cook a little bit more till onions are slightly soft. Remove any excess oil. Add chile powder and water. Let the rice cook on medium heat for 10 minutes uncovered, or until you can see holes forming in the center of the rice, rice has absorbed most of the water. Cover and steam for 5 to 10 minutes, remove from heat and let stand for about 20 minutes. This rice can be made ahead of time for other dishes or soups.
Caldo De Pollo (Chicken Soup) and Caldo De Res (Beef Soup)
These recipes are the same except for the meat. These recipes can also be fixed in a crock-pot ahead of time.
Ingredients: 2 packages of Taco Mix fix as directed on package. 2 cups of wild rice (can use long grain white rice) For beef soup use 6-8 potatoes instead of rice.

07-22-06
2-16 oz jars of salsa and 2 jars of water. Beef soup uses 1 jar salsa and 1 large can of whole tomatoes, but use the same amount of water. 2 lbs. Chicken parts (boneless and skinless, optional) 4 to 6 stalks of celery, sliced ½ cup onion – 3 cloves of garlic (optional for extra taste) 1 bag of frozen mixed vegetables (corn, peas, green beans, carrots or 1 can of each and 6 carrots sliced) Put all ingredients except vegetables into a large pot or in a crock-pot on low and cook overnight. In large pot cooks covered and on medium low until chicken is tender and rice is soft, about 1 to 2 hours. Beef may have to cook an extra hour. Any fat on the meat do not trim. Add vegetables to crock pot 45 minutes before serving or if using large pot add vegetables 30 minutes before serving.
Simple Tamales 5 lbs. of beef or pork, cooked and shredded 6 to 7 lbs. Fresh masa 1 ½ lbs. Lard (check masa package, some you just add water others you can use oil) 1 tablespoon salt or salt substitute 1 ½ pints of red chili sauce 1 bundle of oujas (corn shucks). Cook meat by boiling in a large pot with just enough water to cover completely. Add salt to taste and cook till tender. Cool meat, save broth. Shred cool meat and add chili sauce. Clean oujas in warm water, mix masa. Mix the masa with enough broth also to make a smooth paste. Beat till a small amount of the masa (1-teaspoon) will float in a cup of cool water. Spread masa on the ouja about 1/8 to ¼ thick, now add a small amount of meat and roll up. Fold up ends and place on the fold side down on a rack in a pan deep enough to steam. Add 1 to 2 ½ inches of water, cover tightly with lid (a cloth can be used under lid to make it fit tighter) for about 1 ½ hours. Makes 4 to 5 dozen tamales. Variations: Add taco mix to your meat. Add fresh vegetables and rice. Chicken with refried beans. Raisins in the center add a different taste. Picadillo This dish is served on rice or eaten with a tortilla. Add fresh vegetables for a complete meal

07-22-06
1 lb. shredded beef 2 large potatoes, peeled and diced into small cubes ½ cup yellow onion, diced ½ cup bell pepper, diced 1 tablespoon fresh garlic, minced 1 tablespoon oil (can use olive oil) 1 teaspoon salt 1 teaspoon coarse black pepper 1 teaspoon ground cumin (comion) 2 large tomatoes, cored peeled and cut up Heat a large skillet and add oil, add beef, separate it as you put it in skillet. Add onions, bell pepper, garlic and spices. Cook for about 10 minutes stirring often now add potatoes. Cover and on medium low cook for about 45 minutes or until potatoes are tender. Add tomatoes, cover and cook 5 more minutes. Remove from heat and serve over rice.
Authentic Mission Recipes The padres brought with them a number of Spanish and Mexican recipes. The dishes were mostly formed around grain and cornmeal, chilies, and sweetened with sugar and chocolate. Relleno de Frijoles (bean filling) 1 cup cook frijoles ½ teaspoon salt 1 tablespoon fat or shortening 3 tablespoons sugar Dash of cinnamon or nutmeg Mash frijoles and sauté lightly in fat. Add the sugar, salt, and spice and cook over medium heat until the mixture is thick and separates from the pan. Cool. Fill the tortillas. Jiricalla (custard) This is the nearest to ice cream that the Californians had. 6 eggs ¾ cup sugar ½ cup water 1 quart milk dash of nutmeg

07-22-06
½ cup masa or 2 tablespoons of cornstarch Separate the eggs and beat the yolks lightly. Scald the milk and add sugar and nutmeg; then add slowly to the beaten egg yolks. Dilute the masa with water, blending well. Add the milk and egg mixture and cook over medium heat, stirring all the while, until it thickens. Beat the egg whites until light and fluffy, put on top of the jiricalla, sprinkle sparingly with sugar, place in oven-just long enough to set the meringue. Cool. Champurrado (a thick chocolate) 6 teaspoons grated chocolate (or cocoa) 6 teaspoons sugar 1 cup hot water 2 eggs well beaten 2 teaspoons vanilla 5 cups milk, scalded dash of cinnamon/nutmeg ½ cup masa (or 2 tablespoons cornstarch) In a double boiler, combine chocolate and sugar; add the hot water slowly, stirring until mixture forms a smooth paste. Add milk, a little at a time, then the masa, which has been thinned with a small amount of hot liquid (or the cornstarch, which has been blended with some hot liquid). Just before serving, fold in eggs, vanilla, and cinnamon or nutmeg. Pueblo Bread 2 packages of dry yeast 2 teaspoons salt ½ cup warm water 4 tablespoons oil 3 eggs 2 cups water 10 cups flour (4 whole wheat and 6 white) Dissolve yeast in warm water. Add eggs, oil, and salt. Alternately, add flour and water. Batter will be stiff and should be kneaded. Allow to rise until doubled. Punch down and knead for 10 minutes. Form into 6-8 loaves and cover with a moist cloth. Allow to rise in a warm spot for 11/2-2 hours. Bake at 375 degrees for 45 minutes or until golden brown. Tortas de Nopalitos From Lydia E. Pedrin, Old Town San Diego State Historic Park, Casa de Machado y Stewart Salsa:
07-22-06
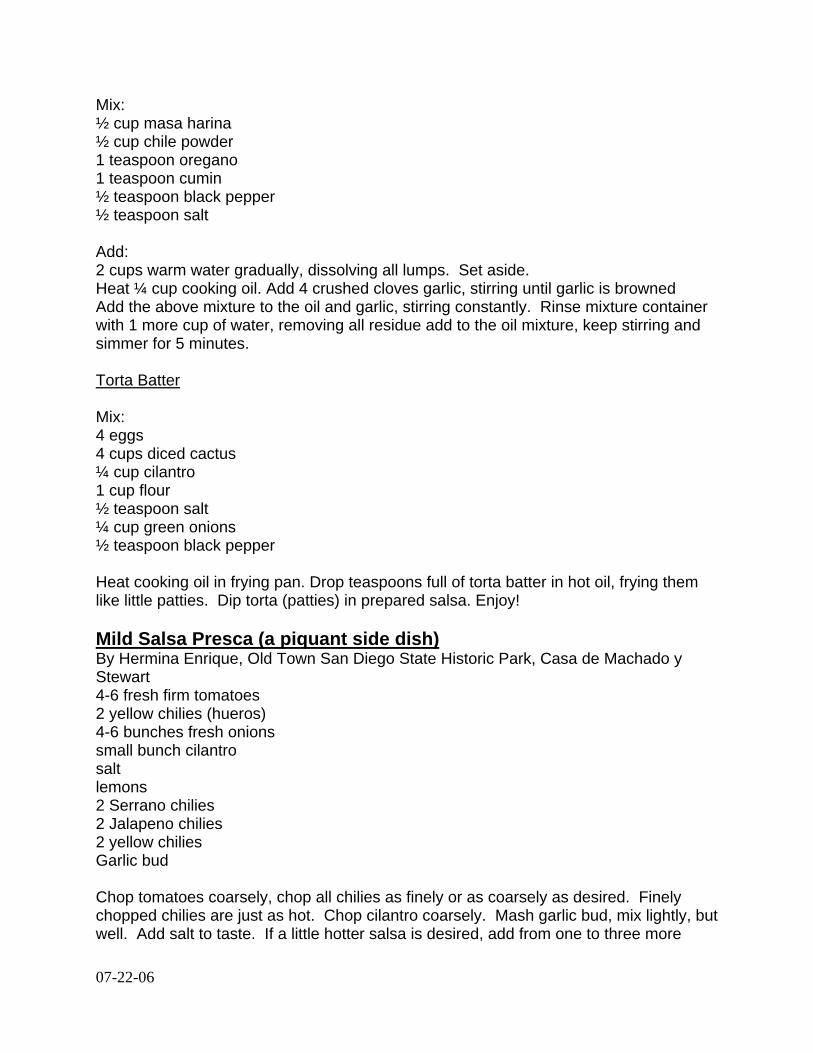
Mix: ½ cup masa harina ½ cup chile powder 1 teaspoon oregano 1 teaspoon cumin ½ teaspoon black pepper ½ teaspoon salt Add: 2 cups warm water gradually, dissolving all lumps. Set aside. Heat ¼ cup cooking oil. Add 4 crushed cloves garlic, stirring until garlic is browned Add the above mixture to the oil and garlic, stirring constantly. Rinse mixture container with 1 more cup of water, removing all residue add to the oil mixture, keep stirring and simmer for 5 minutes. Torta Batter Mix: 4 eggs 4 cups diced cactus ¼ cup cilantro 1 cup flour ½ teaspoon salt ¼ cup green onions ½ teaspoon black pepper Heat cooking oil in frying pan. Drop teaspoons full of torta batter in hot oil, frying them like little patties. Dip torta (patties) in prepared salsa. Enjoy! Mild Salsa Presca (a piquant side dish) By Hermina Enrique, Old Town San Diego State Historic Park, Casa de Machado y Stewart 4-6 fresh firm tomatoes 2 yellow chilies (hueros) 4-6 bunches fresh onions small bunch cilantro salt lemons 2 Serrano chilies 2 Jalapeno chilies 2 yellow chilies Garlic bud Chop tomatoes coarsely, chop all chilies as finely or as coarsely as desired. Finely chopped chilies are just as hot. Chop cilantro coarsely. Mash garlic bud, mix lightly, but well. Add salt to taste. If a little hotter salsa is desired, add from one to three more

07-22-06
chilies of each kind. If salsa is too hot, use a few drops of lemon juice squeezed over your serving. Sopaipillas (from Sunset Magazine- www.sunset.com) One of the Southwest’s great treat, sopaipillas are light, airy pillows of fried dough, which are traditionally drizzled with honey or sprinkled with powdered sugar. They’re rewarding to make, because the results are so magical. You roll the yeast dough thin cut it into pieces, the fry them in hot oil. As you push them into the oil, they puff into pillows that are hollow inside. 1 package active dry yeast ¼ cup warm water (about 110°) 1 ½ cups milk 3 tablespoons lard or vegetable shortening 2 tablespoons sugar 1 teaspoon salt 3 ½ to 4 cups all-purpose flour 1 cup whole-wheat flour vegetable oil powdered sugar honey In a large bowl, dissolve the yeast in warm water. In a 1 ½ to 2-quart pan, combine milk, lard (shortening), sugar, and salt; heat to 110° and add to dissolved yeast. With a spoon, stir in 3 cups all-purpose flour and all the whole-wheat flour; beat until dough is stretchy. Stir in ½ cup more all-purpose flour to form a stiff dough. Scrape dough onto a floured board and knead, adding as little all-purpose flour as possible to prevent sticking, until dough is smooth. Place hand-mixed dough in an oiled bow and turn over to coat top. Cover dough with plastic wrap and let stand at room temperature until doubled, about 1 hour. Punch dough down. If you’re not ready to cut and fry dough now, cover and chill up to 1 day. Knead dough on a lightly floured board to expel air. Cut into four equal portions. Roll each portion into a round about 1/8 inch thick. With a floured knife, cut each round into six equal wedges. Lay wedges in a single layer on floured baking sheets; cover with plastic wrap and refrigerate. Repeat until all dough is cut. Pour 1 ½ to 2 inches of oil into a 5 to 6-quart pan. Heat to about 350°, then adjust heat to maintain this temperature. Drop one or two pieces of dough into oil. With a slotted spoon, push them down into oil until they begin to puff. Fry until pale gold on both sides turning over as needed to brown evenly, 2 to 3 minutes total. Drain in paper towel-lined pans. Repeat to fry remaining sopaipillas.

07-22-06
Serve immediately or keep first ones warm in a 200° oven until all are fried. Serve plain or dusted with powdered sugar; offer honey to drizzle over sopaipillas. At this time we do not have the example cooking station schedule and shopping list organized into individual recipes. We will work on that for an upcoming manual.

07-22-06
Cooking Station Example Rotation Schedule
Shopping List for: Frijoles de la Olla (beans), Pollo (chicken), Limonada (lemonade), Salsa, Arroz Blanco (white rice), Egg Bread, and breakfast eggs and potatoes as
demonstrated in the following cooking station break down.
The following is an example of what Nancy Stevens uses when she comes to the Adobe. The times and names of the groups can be adjusted to fit the needs of your scheduling and class. This is the schedule that we base our Teachers Workshop on. The following amounts and recipes are based on a group of 40. You may have to adjust amounts and times to pertain to your group.
SHOPPING LIST FOR PETALUMA ADOBE OVERNIGHT FOR 40 PEOPLE:
Bulk: 10 lbs. sugar (get extra for coffee drinkers) 10 lbs. flour 2 lbs. butter coffee 6 rolls of paper towels vegetable oil 4 yeast cakes 5 dozen eggs baking powder salt 20 potatoes 1 pkg. of chorizo sausage (this is spicy, if you choose to, you can use turkey sausage or a variation, or leave out) 40 oz. Pinto beans 80 tortillas ready made 8 onions 20 chicken breasts 22 cups of chicken or vegetable broth 50 cloves of garlic aluminum foil 4 lbs. rice 2 large salad dressings 2 large bags of tortilla chips
Mexican Mercado: 1 pkg. masa harina to make 40 tortillas (optional) 16 serrano peppers 1 bunch cilantro Last Minute: 4 heads lettuce (or bagged lettuce) 40 large tomatoes 2 cucumbers green onions 1 quart half and half (for coffee) 10 Jicama 100-120 lemons 100-120 oranges Hot Chocolate: Prepackaged hot chocolate mix for 40 Or if making traditional Mexican Hot Chocolate: enough powdered or fresh milk to make the quantity desired. Follow the directions on the package. We usually use Abuela’s (yellow carton).

07-22-06
Cooking Station Example Rotation Schedule
COOKING STATION
The fires should be going and maintained through out the day and fetch fresh water as needed. After the safety talk by park staff, the Chief cook should put a large kettle of water on to boil and put the frijoles on to soak. EACH GROUP: Read what you are going to be doing and then get the appropriate food and cooking utensils (pots, etc.) out of the ELP Supply Room. Group 1 12:30-1:30 p.m. Get out all the needed pots/pans for your station. Also, get out the three wash tubs. Two people can help by filling the canning pots with water and carrying them over to the wash tubs. Dump the water into the wash tubs. Also, set 1-2 canning pots filled with water on the grill closest to the wash tubs. Build and start your fires in this grill space and the middle one. WASH YOUR HANDS! Frijoles de la olla (beans from the pot) 1. Put 10 cups of pinto beans in a large pot 2. Cover completely with water 3. Cover and let it soak Pollo preparation 1. Put all of the chicken in a large kettle and cover with water 2. Chop 1 onion and add it to the chicken pot 3. Peel 8 cloves of garlic, then add to the chicken 4. Add 2 teaspoons of salt 5. Put on the fire Begin limonada preparation 1. Cut lemons in half 2. Squeeze 1 cup lemon juice into separate container and set aside 3. Four cups cold water into large server 4. Add 2/3 cup sugar and stir 5. Add the lemon juice and stir again Group 2 1:30-2:25 p.m. WASH YOUR HANDS! Prepare the salsa for the chicken tacos 1. Chop 40 tomatoes 2. Chop 7 onions

07-22-06
3. Squeeze or chop 17 cloves of garlic 4. Chop 16 green serrano peppers 5. Chop cilantro 6. Add a little bit of lemon juice 7. Divide in ½ and serve ½ with chips as a snack 8. Cover and set aside the other ½ to be cooked later ALSO 9. Stir the frijoles 10. Stir the chicken Group 3 2:25-3:20 p.m. WASH YOUR HANDS Frijoles de la olla 1. Water should be poured off by the chief cook 2. Add 40 cups of HOT water to the beans (or 10 quarts or 5 half gallons or 2 ½
gallons!) 3. Squeeze or chop 20 cloves of garlic and add to the pot 4. Add 5 teaspoons of salt 5. Stir over the fire Other tasks as needed 6. Cut and squeeze more lemons 7. Fetch fresh water 8. Stir the chicken Group 4 3:20-4:15 p.m. WASH YOUR HANDS Limonada preparation 1. Cut lemons in half 2. Squeeze 2 cups of lemon juice into separate container and set aside 3. 8 cups of cold water 4. Add 2/3 cup sugar and stir 5. Add the lemon juice and stir again! 6. Repeat the above directions as necessary for the desired quantity of juice. Prepare fruit for dessert 1. Peel 10 medium jicamas and cut into half circle slices 2. Cut 10 oranges into thin slices, then half circles, then peel 3. Cut 5 cucumbers into ½ cm. slices and then cut into half circles 4. Store in separate containers and put in the refrigerator 5. If you are having a salad, this would be a good time to chop up lettuce. 6. Prepare fire in 3rd grill

07-22-06
Group 5 4:15-5:10 p.m. WASH YOUR HANDS Arroz Blanco 1. Remove chicken pot from fire and set aside to cool 2. Put in 10 cups of rice 3. Sauté in 1/3 cup of oil until the rice changes color 4. Add 5 cloves chopped garlic 5. Add 1 onion finely chopped 6. Pour in 20 cups of chicken or vegetable broth (add water if needed) 7. Add 10 teaspoon salt 8. Stir then cover until liquid has evaporated Group 6 5:10-6:00 p.m. WASH YOUR HANDS 1. Wrap tortillas in aluminum foil and set at the side of the fire to warm 2. Stir the frijoles 3. Debone the chicken and cut into bite-sized pieces 4. Heat 4 Tablespoons oil in frying pan, add the chicken and sauté until brown. Add
Red Salsa, stir and cover. 5. Check the rice and stir as needed 6. Pico de Gallo: artistically arrange the fruit dessert in a large wooden bowl and a
platter: jicama, oranges, cucumbers on a platter and sprinkle lightly with salt, drizzle with lemon juice, and lightly sprinkle chili over all.
SERVE DINNER!
NIGHT WATCH DUTIES!
Make sure fire is burning First Watch 10-11:35 p.m. Fill wash tubs with water and make sure there are two pots of water heating on the stove next to the wash tubs. Get the butter out first thing and put it on the table so that it can soften for the next group. Egg Bread Part 1: 1. In a small bowl, dissolve 4 yeast cakes (or packets) in 1 ½ cups warm water 95-105
degrees 2. Add 1 ½ cups flour 3. Mix and let stand, covered in a warm place 4. Brand your candleholders. THE BRAND NEEDS 20 MINUTES (OR SO) TO HEAT,
THE BRAND IS LOCATED TO THE RIGHT OF THE RACK WITH SHOVELS, RAKES, AND BROOMS IN THE ELP SUPPLY ROOM.
5. DO NOT LEAVE THE BRAND IN THE FIRE ONCE DONE.
07-22-06
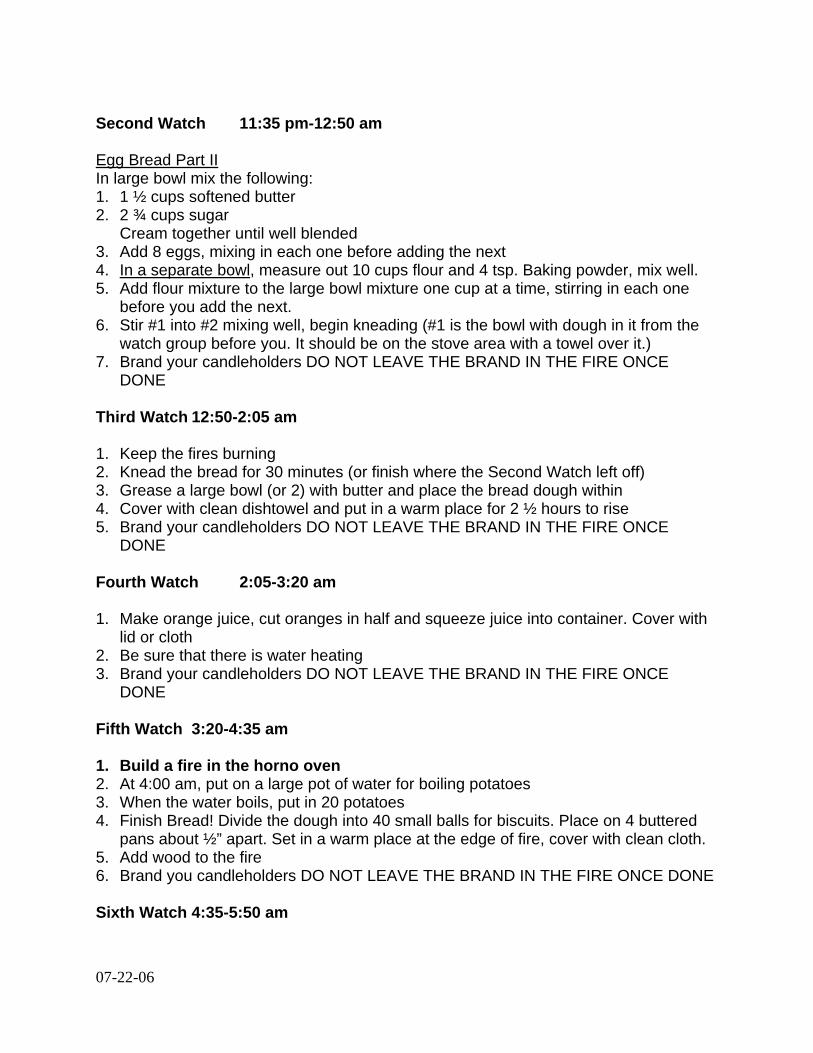
Second Watch 11:35 pm-12:50 am Egg Bread Part II In large bowl mix the following: 1. 1 ½ cups softened butter 2. 2 ¾ cups sugar
Cream together until well blended 3. Add 8 eggs, mixing in each one before adding the next 4. In a separate bowl, measure out 10 cups flour and 4 tsp. Baking powder, mix well. 5. Add flour mixture to the large bowl mixture one cup at a time, stirring in each one
before you add the next. 6. Stir #1 into #2 mixing well, begin kneading (#1 is the bowl with dough in it from the
watch group before you. It should be on the stove area with a towel over it.) 7. Brand your candleholders DO NOT LEAVE THE BRAND IN THE FIRE ONCE
DONE Third Watch 12:50-2:05 am 1. Keep the fires burning 2. Knead the bread for 30 minutes (or finish where the Second Watch left off) 3. Grease a large bowl (or 2) with butter and place the bread dough within 4. Cover with clean dishtowel and put in a warm place for 2 ½ hours to rise 5. Brand your candleholders DO NOT LEAVE THE BRAND IN THE FIRE ONCE
DONE Fourth Watch 2:05-3:20 am 1. Make orange juice, cut oranges in half and squeeze juice into container. Cover with
lid or cloth 2. Be sure that there is water heating 3. Brand your candleholders DO NOT LEAVE THE BRAND IN THE FIRE ONCE
DONE Fifth Watch 3:20-4:35 am 1. Build a fire in the horno oven 2. At 4:00 am, put on a large pot of water for boiling potatoes 3. When the water boils, put in 20 potatoes 4. Finish Bread! Divide the dough into 40 small balls for biscuits. Place on 4 buttered
pans about ½” apart. Set in a warm place at the edge of fire, cover with clean cloth. 5. Add wood to the fire 6. Brand you candleholders DO NOT LEAVE THE BRAND IN THE FIRE ONCE DONE Sixth Watch 4:35-5:50 am
07-22-06
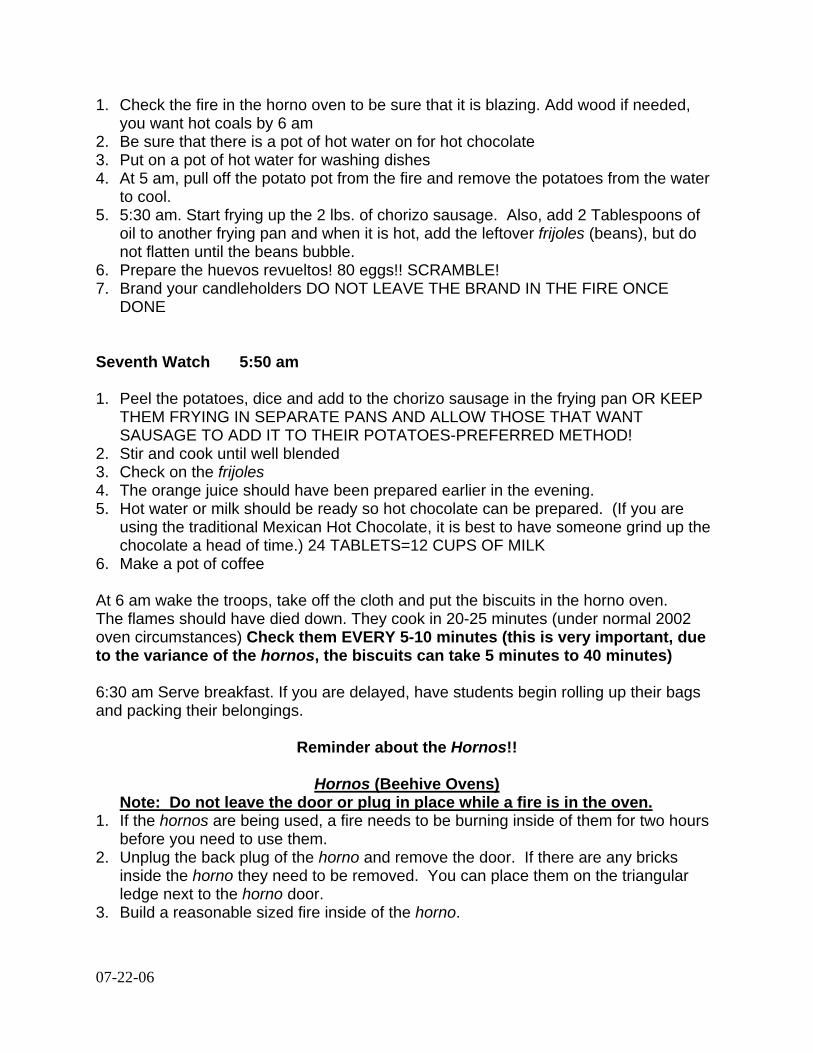
1. Check the fire in the horno oven to be sure that it is blazing. Add wood if needed, you want hot coals by 6 am
2. Be sure that there is a pot of hot water on for hot chocolate 3. Put on a pot of hot water for washing dishes 4. At 5 am, pull off the potato pot from the fire and remove the potatoes from the water
to cool. 5. 5:30 am. Start frying up the 2 lbs. of chorizo sausage. Also, add 2 Tablespoons of
oil to another frying pan and when it is hot, add the leftover frijoles (beans), but do not flatten until the beans bubble.
6. Prepare the huevos revueltos! 80 eggs!! SCRAMBLE! 7. Brand your candleholders DO NOT LEAVE THE BRAND IN THE FIRE ONCE
DONE Seventh Watch 5:50 am 1. Peel the potatoes, dice and add to the chorizo sausage in the frying pan OR KEEP
THEM FRYING IN SEPARATE PANS AND ALLOW THOSE THAT WANT SAUSAGE TO ADD IT TO THEIR POTATOES-PREFERRED METHOD!
2. Stir and cook until well blended 3. Check on the frijoles 4. The orange juice should have been prepared earlier in the evening. 5. Hot water or milk should be ready so hot chocolate can be prepared. (If you are
using the traditional Mexican Hot Chocolate, it is best to have someone grind up the chocolate a head of time.) 24 TABLETS=12 CUPS OF MILK
6. Make a pot of coffee At 6 am wake the troops, take off the cloth and put the biscuits in the horno oven. The flames should have died down. They cook in 20-25 minutes (under normal 2002 oven circumstances) Check them EVERY 5-10 minutes (this is very important, due to the variance of the hornos, the biscuits can take 5 minutes to 40 minutes) 6:30 am Serve breakfast. If you are delayed, have students begin rolling up their bags and packing their belongings.
Reminder about the Hornos!!
Hornos (Beehive Ovens) Note: Do not leave the door or plug in place while a fire is in the oven.
1. If the hornos are being used, a fire needs to be burning inside of them for two hours before you need to use them.
2. Unplug the back plug of the horno and remove the door. If there are any bricks inside the horno they need to be removed. You can place them on the triangular ledge next to the horno door.
3. Build a reasonable sized fire inside of the horno.

07-22-06
4. Once you have decided the horno is ready to bake in, removed the large logs. Then you have two options. 1-if you are using the dutch ovens with feet; you can leave the ashes inside. 2-if you are using pans or dishes you will need to use a shovel to remove the ashes. Then place the bricks inside. The pans can then go on top of the bricks. After you have put the food in, put the door and plug back in to the horno.
5. The horno temperature can vary quite a bit depending on many variables, including; size of fire, amount of time the horno is heated, outside temperature, type of wood, and how tight the door and plug holes are closed when trying to bake. If the horno is too cool-use adobe mud to seal holes around plug in the back. If the horno is too hot-crack the door a bit and leave the plug out use mud to seal holes around plug in the back. If the horno is too hot-crack the door a bit and leave the plug out.