Computer Science Concepts in Scratch · Scratch 2 implements some extensions to the Scratch...
32
Computer Science Concepts in Scratch (Supplement for Scratch 2.0) Version 1.0 Michal Armoni and Moti Ben-Ari
Transcript of Computer Science Concepts in Scratch · Scratch 2 implements some extensions to the Scratch...
Computer Science Concepts in Scratch
(Supplement for Scratch 2.0)
Version 1.0
Michal Armoni and Moti Ben-Ari
c© 2013 by Michal Armoni, Moti Ben-Ari, Weizmann Institute of Science.
This work is licensed under the Creative Commons Attribution-NonCommercial-NoDerivs3.0 Unported License. To view a copy of this license, visit http://creativecommons.org/licenses/by-nc-nd/3.0/ or send a letter to Creative Commons, 444 Castro Street,Suite 900, Mountain View, California, 94041, USA.
Chapter 1
Introduction
This document is a supplement to Computer Science Concepts in Scratch. It explains themodifications to Scratch 2 relative to Scratch 1.4. Chapter 1 presents the principles thatguided the development of the new version and an overview of the major changes.Chapter 2 explains how to work with the new user interface. The final three chaptersdiscuss new instructions added to Scratch: Chapter 3 on abstraction and defining newblocks, Chapter 4 on cloning sprites and Chapter 5 on integrating images from a videocamera into Scratch projects.
The need for a new version arose from a major shift in computing that has occurredin the past few years. Until recently, all personal computers were desktop comput-ers permanently installed at school or home, or laptop computers that were still quiteheavy and usually remained on a desk. Software was distributed on disks and in-stalled on the computer; alternatively, a software package could be downloaded froma website, although it still had to be installed.
Now, the range of computing devices includes smartphones, tablets, netbooks and ul-trabooks that are much more portable and lack removable disks. Furthermore, wire-less communication with the internet through WIFI is available almost everywhere.Files are stored in the cloud, that is, on servers of companies like DROPBOX. Softwareitself need not be installed on your computer. The term software as a service is used forsoftware like GOOGLE DRIVE that are accessed through your web browser. Finally, weno longer exchange files like pictures and music on disks; instead, social networks likeFACEBOOK are used.
Scratch 2 is based on this new computing environment:
Run in a browser There is no need to install Scratch. Just point your browser toscratch.mit.edu and you can immediately start to develop projects.
1
2 Chapter 1
Store in the cloud All your projects are stored on the Scratch server. You can startworking on a project at school and then continue working at home. Projects arestored automatically so no effort is required to back them up or copy them tomedia like disks.
Sharing components of projects Since all data is stored in the cloud, it is easy to shareindividual costumes, sounds, scripts and sprites between projects.
Social network In Scratch 2 it is easier to share a project, as well as to comment on it,indicate that you love it, or remix it.
Scratch 2 implements some extensions to the Scratch programming language:
Abstraction by defining new blocks In Scratch 2 you can define a new instructionthat is composed of a sequence of existing instructions. Defining new instruc-tions is a significant addition to Scratch because it enables us to implement acentral concept in computer science called abstraction: defining a computationthat can be used without knowing the details of its implementation.
Cloning sprites Many projects such as games and simulations need multiple copiesof a single sprite: flocks of birds, batteries of rockets to attack an alien, playerson a soccer team, etc. In Scratch 2 you can construct a single sprite and thengenerate clones of the sprite. A clone appears as a separate image on the stagebut all clones of a sprite share the same scripts.
Integrating video Most computing devices include a built-in camera that you can usefor creating video clips or for engaging in video chats using services such asSKYPE. In Scratch 2 you can project the output of the camera onto the stage.Sprites on the stage can sense and measure movement in the video image. Thisfeatures can be used to interact with sprites without using the mouse or key-board.
Chapter 2
The Scratch 2 User Interface
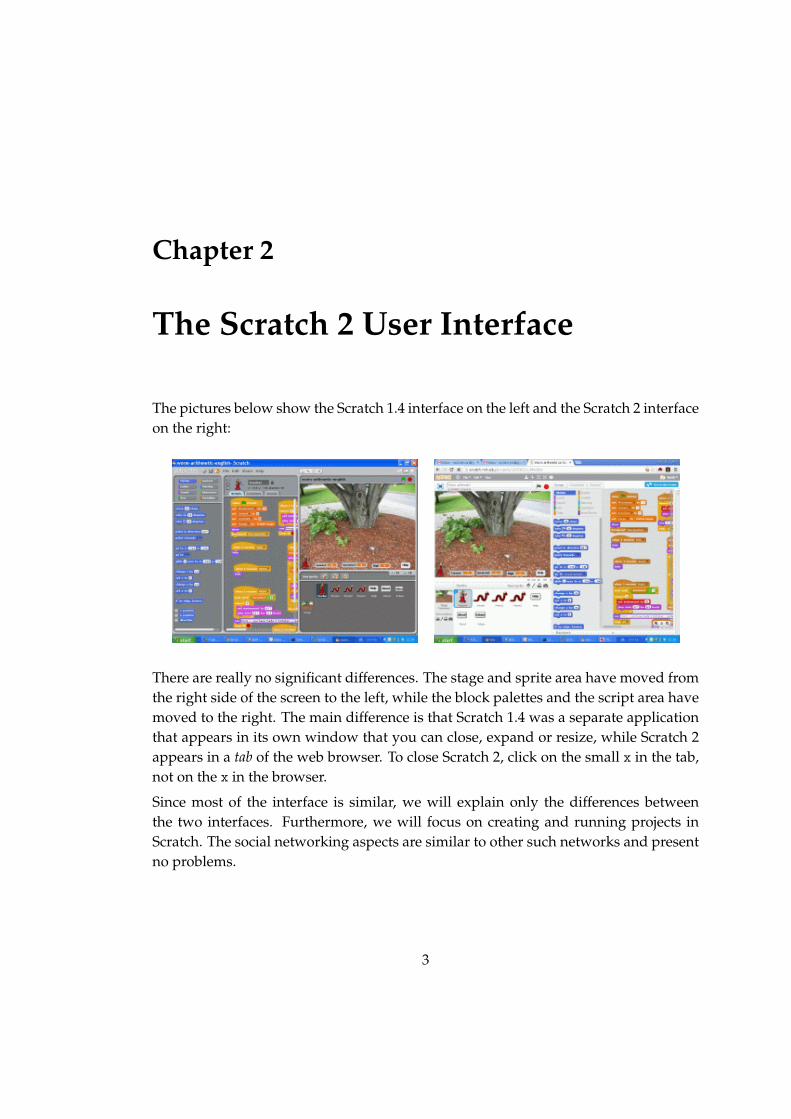
The pictures below show the Scratch 1.4 interface on the left and the Scratch 2 interfaceon the right:
There are really no significant differences. The stage and sprite area have moved fromthe right side of the screen to the left, while the block palettes and the script area havemoved to the right. The main difference is that Scratch 1.4 was a separate applicationthat appears in its own window that you can close, expand or resize, while Scratch 2appears in a tab of the web browser. To close Scratch 2, click on the small x in the tab,not on the x in the browser.
Since most of the interface is similar, we will explain only the differences betweenthe two interfaces. Furthermore, we will focus on creating and running projects inScratch. The social networking aspects are similar to other such networks and presentno problems.
3
4 Chapter 2
Opening an account
Since Scratch 2 runs in a web server, you have to open a Scratch account if you don’talready have one. You will need to choose a user name and a password that mustbe entered each time that you connect to Scratch. (The browser will suggest that itremember your user name and password and you will have to decide if you want itdo so!) Once you log in successfully, you will see the Scratch home page.
The Scratch website
The Scratch website remains at scratch.mit.edu but the design of the home pagehas been significantly changed. Much of the page is devoted to highlighting new andinteresting projects and you are invited to explore them.
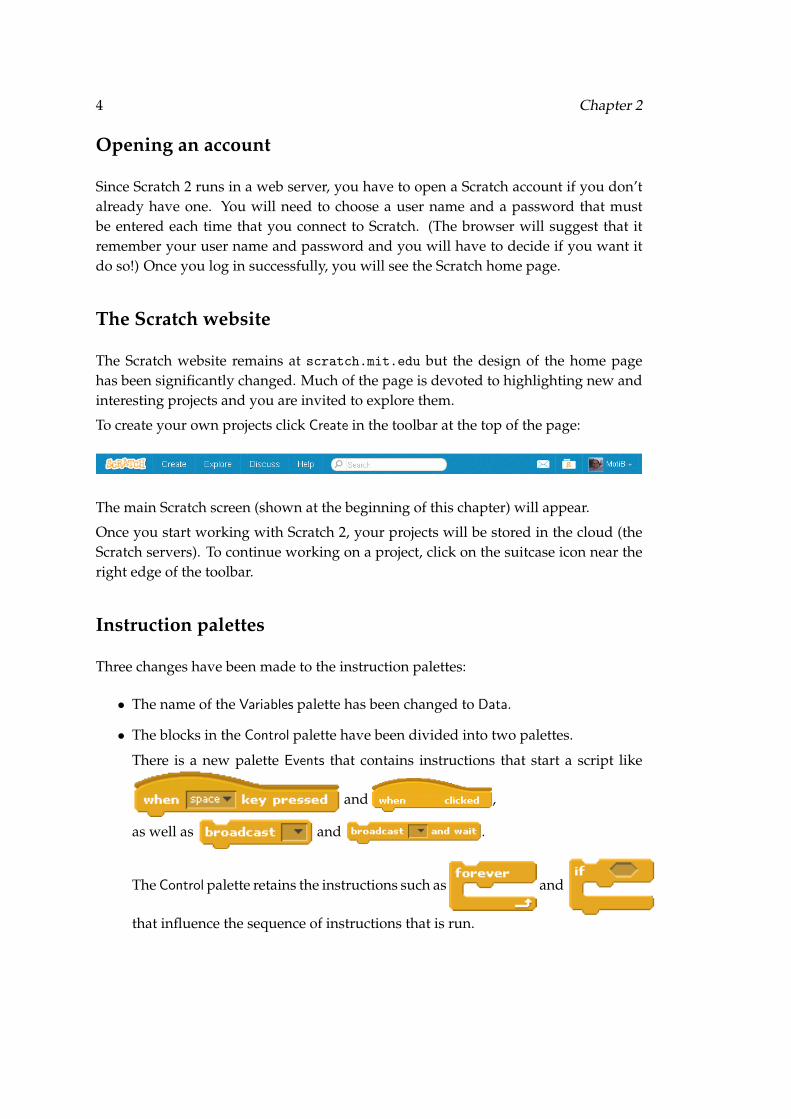
To create your own projects click Create in the toolbar at the top of the page:
The main Scratch screen (shown at the beginning of this chapter) will appear.
Once you start working with Scratch 2, your projects will be stored in the cloud (theScratch servers). To continue working on a project, click on the suitcase icon near theright edge of the toolbar.
Instruction palettes
Three changes have been made to the instruction palettes:
• The name of the Variables palette has been changed to Data.
• The blocks in the Control palette have been divided into two palettes.
There is a new palette Events that contains instructions that start a script like
and ,
as well as and .
The Control palette retains the instructions such as and
that influence the sequence of instructions that is run.
The Scratch 2 User Interface 5
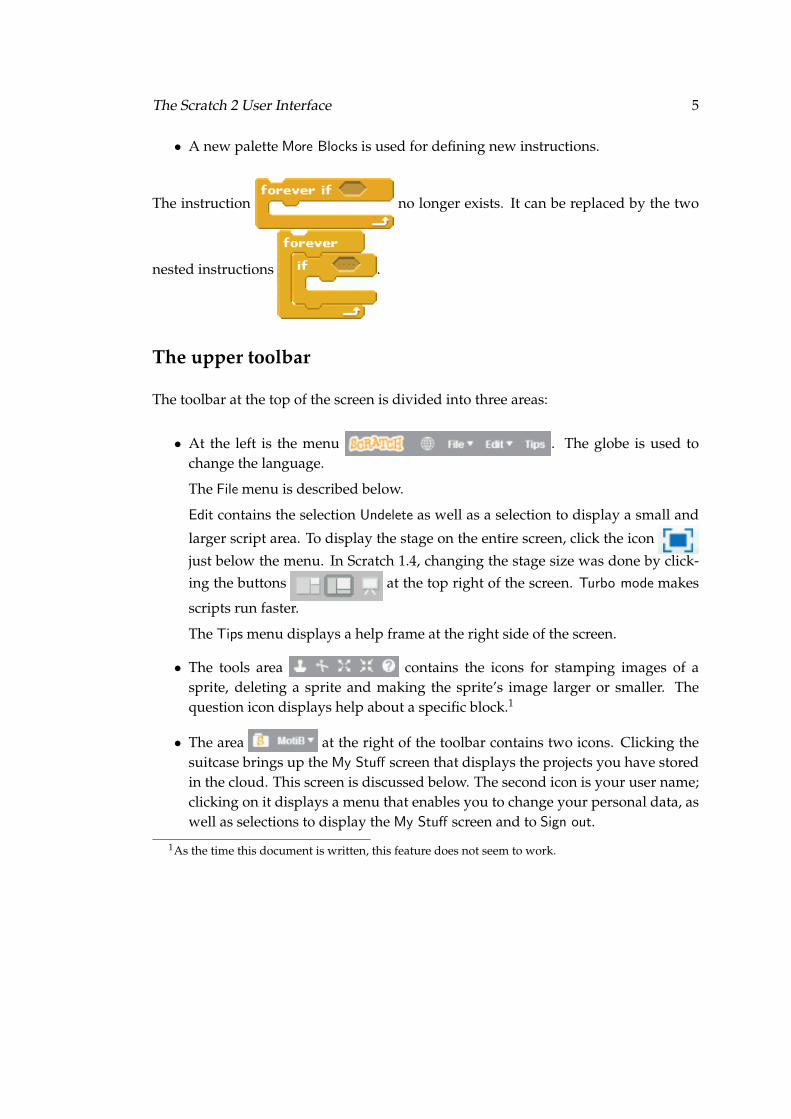
• A new palette More Blocks is used for defining new instructions.
The instruction no longer exists. It can be replaced by the two
nested instructions .
The upper toolbar
The toolbar at the top of the screen is divided into three areas:
• At the left is the menu . The globe is used tochange the language.
The File menu is described below.
Edit contains the selection Undelete as well as a selection to display a small and
larger script area. To display the stage on the entire screen, click the icon
just below the menu. In Scratch 1.4, changing the stage size was done by click-ing the buttons at the top right of the screen. Turbo mode makes
scripts run faster.
The Tips menu displays a help frame at the right side of the screen.
• The tools area contains the icons for stamping images of asprite, deleting a sprite and making the sprite’s image larger or smaller. Thequestion icon displays help about a specific block.1
• The area at the right of the toolbar contains two icons. Clicking thesuitcase brings up the My Stuff screen that displays the projects you have storedin the cloud. This screen is discussed below. The second icon is your user name;clicking on it displays a menu that enables you to change your personal data, aswell as selections to display the My Stuff screen and to Sign out.
1As the time this document is written, this feature does not seem to work.
6 Chapter 2
Toolbars for sprites and backdrops
The toolbar above the sprite area in the lower left
of the screen replaces the toolbar . From left to right theicons are: choose a sprite from the library, paint a sprite, choose a sprite from a file,import a a sprite from a camera. It is no longer possible to choose a random sprite.
The same icons for the backdrop appear to the left of the sprite area: .
Note: The terminology has changed: backgrounds are now called backdrops.
Editing pictures and sounds
The Paint Editor of Scratch 2 is similar to that of Scratch 1.4 although the placement ofthe icons and buttons has changed. You shouldn’t have any difficulty working withthe new interface. As mentioned in the introduction, images are now stored as vectorgraphics, but this is transparent to the user.
Scratch 2 introduces Sound Editor that enables you to cut and paste sections of a soundtrack and to apply effects to the sound. You should be able to master the editor byexperimenting with it.
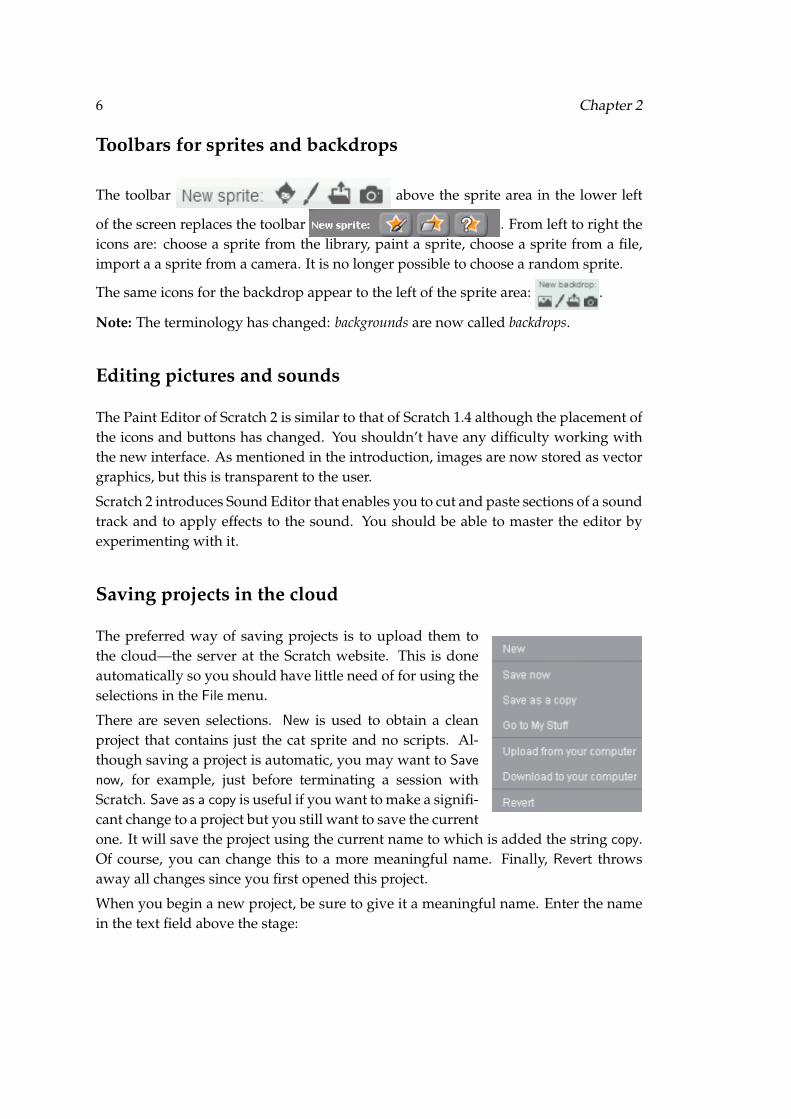
Saving projects in the cloud
The preferred way of saving projects is to upload them tothe cloud—the server at the Scratch website. This is doneautomatically so you should have little need of for using theselections in the File menu.
There are seven selections. New is used to obtain a cleanproject that contains just the cat sprite and no scripts. Al-though saving a project is automatic, you may want to Save
now, for example, just before terminating a session withScratch. Save as a copy is useful if you want to make a signifi-cant change to a project but you still want to save the currentone. It will save the project using the current name to which is added the string copy.Of course, you can change this to a more meaningful name. Finally, Revert throwsaway all changes since you first opened this project.
When you begin a new project, be sure to give it a meaningful name. Enter the namein the text field above the stage:
The Scratch 2 User Interface 7
Sharing projects and opening an existing project
Your projects are stored in the cloud. To open one, choose the selection Go to My Stuff
in the File menu, or simply click on the suitcase in the upper right corner of the screen.The My Stuff screen will be displayed; it contains an entry for each project:
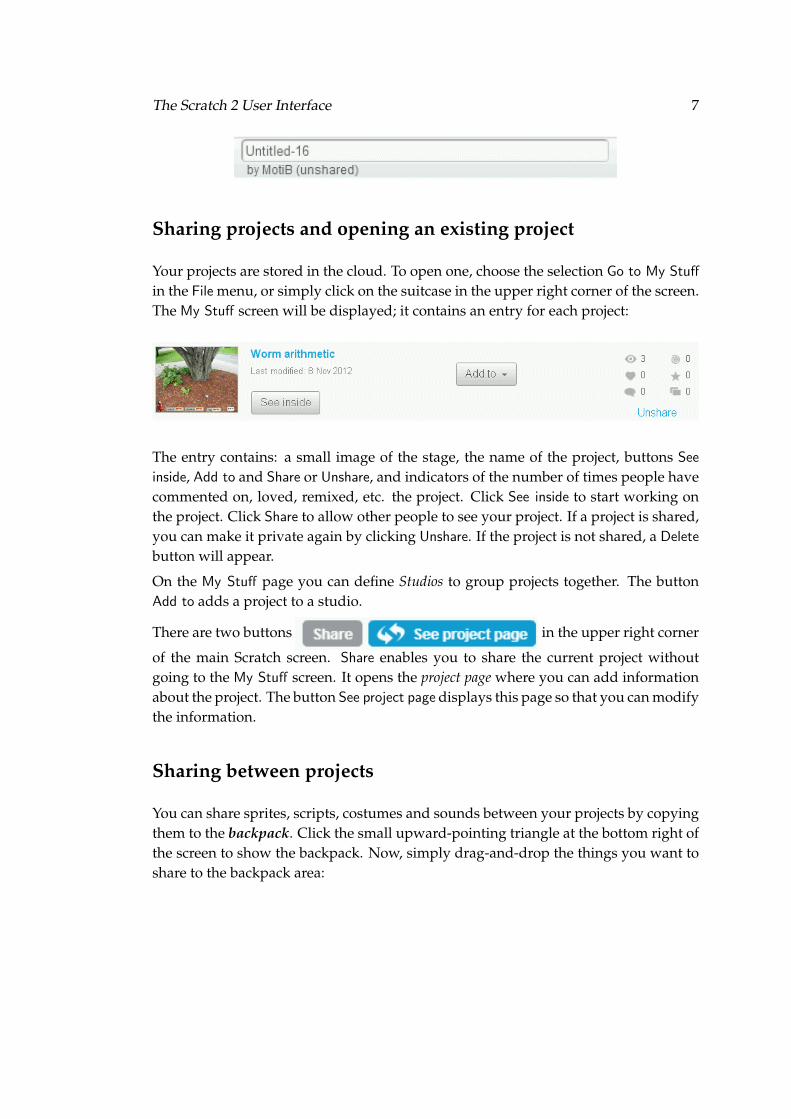
The entry contains: a small image of the stage, the name of the project, buttons See
inside, Add to and Share or Unshare, and indicators of the number of times people havecommented on, loved, remixed, etc. the project. Click See inside to start working onthe project. Click Share to allow other people to see your project. If a project is shared,you can make it private again by clicking Unshare. If the project is not shared, a Delete
button will appear.
On the My Stuff page you can define Studios to group projects together. The buttonAdd to adds a project to a studio.
There are two buttons in the upper right corner
of the main Scratch screen. Share enables you to share the current project withoutgoing to the My Stuff screen. It opens the project page where you can add informationabout the project. The button See project page displays this page so that you can modifythe information.
Sharing between projects
You can share sprites, scripts, costumes and sounds between your projects by copyingthem to the backpack. Click the small upward-pointing triangle at the bottom right ofthe screen to show the backpack. Now, simply drag-and-drop the things you want toshare to the backpack area:

8 Chapter 2
They will be stored in the cloud and you can access them from any project by draggingand dropping from the backpack to the appropriate area: a sprite to the sprite area,a costume to the costume area, and so on. If you need to delete something from thebackpack, right-click on it and select Delete.
If you insist on files . . .
Saving projects in the cloud is very convenient but there are reasons why you mightwant to save project in a file on your computer; for example, you have a project thatyou developed in Scratch 1.4 and you want to continue to work on it in Scratch 2, oryou need to submit a project to your teacher without sharing it with everyone in theScratch world.
There are selections in the File menu for uploading a projectfrom a file on your computer to the cloud and for download-ing a project to a file. Scratch 2 projects use the file extensionsb2, but you can also upload files with extension sb that were created by Scratch 1.4.
Warning: When you open files, for example in a word processor, the fileyou were working on is closed and the new file is opened. However, whenyou upload a file in Scratch 2, it overwrites the project that is open. Whenthe project is saved (automatically) you will loose whatever was in thatproject. Therefore, before you upload a project, select New from the File
menu so that the uploaded project will overwrite a new empty project.Then you can give it a meaningful name and select Save now.
Chapter 3
Abstraction and New Blocks
Abstraction
How does the computer run an instruction like ? The size of the
stage is 480 units in the x-direction and 240 units in the y-direction. Suppose that theScratch cat is placed at position (100, 100) pointing in direction 0 (to the right). To runthe instruction move 10 steps , the computer must: (a) erase the current image of thecat sprite on the stage, (b) calculate the new position of the sprite as (110, 100) (adding10 to the x-position 100), (c) draw the image of the cat centered at the new position(110, 100).
If the cat is pointing in direction 90 (up), the computer must perform the same opera-tions except that the new position is now (100, 110). If the cat is pointing in direction45 (northeast), the computation of the new position is more difficult: the new positionof the cat is (107, 107).
Aren’t we lucky that the Scratch environment lets us use a single simple instruction
and performs all the complicated calculations itself?! The Scratch
environment hides the calculations needed to run the instruction and all we had to dowas to supply one piece of information, the number of steps that the cat move move.This is an example of abstraction: we see a simple description of what a computationdoes, but the details of how the computation is done are hidden from us. Abstractionis the core concept of computer science because computers and their programs areextremely complex and we would not be able to work with them if we had to beaware of all the details all the time.
In fact, abstraction is central to scientific and engineering activity. Most people drivecars but know very little about what happens when they start the car and drive. It isquite simple to drive a car: you only have to master using the steering wheel, the gas
9

10 Chapter 3
and brake pedals, and the gear lever. The complex mechanical details of the engine(the cylinders and pistons), the transmission (gears and clutch), the brakes (disks andshoes) are all hidden from the driver (at least until the car needs to be serviced at agarage!).
Scratch 2 enables us to create new abstractions by defining new instructions that arecomposed from sequences of instructions (both those supplied by Scratch and thosewe define ourselves). You can consider a new instruction simply as a shorthand fora sequence of instructions, but you will obtain the greatest benefit from this feature ifyou can express a new instruction as an abstraction of a computation.
Definition and interface
Every abstraction has two parts: a definition and an interface. The definition is thehidden part. Continuing our example from the beginning of the chapter, the definitionof instruction move 10 steps consists of the three steps needed to erase the image ofthe sprite, calculate its new position and draw the image. The interface is the partof the abstraction that lets us use this computation. The word interface itself can beconsidered at something that enables two “faces”—the computation and the user ofthe computation—to interact.
New instructions for implementing abstractions
Let us now demonstrate these concepts by defining an abstraction.
In project meet-forever in Chapter 3, the two sprites run the following pair of instruc-tions indefinitely:
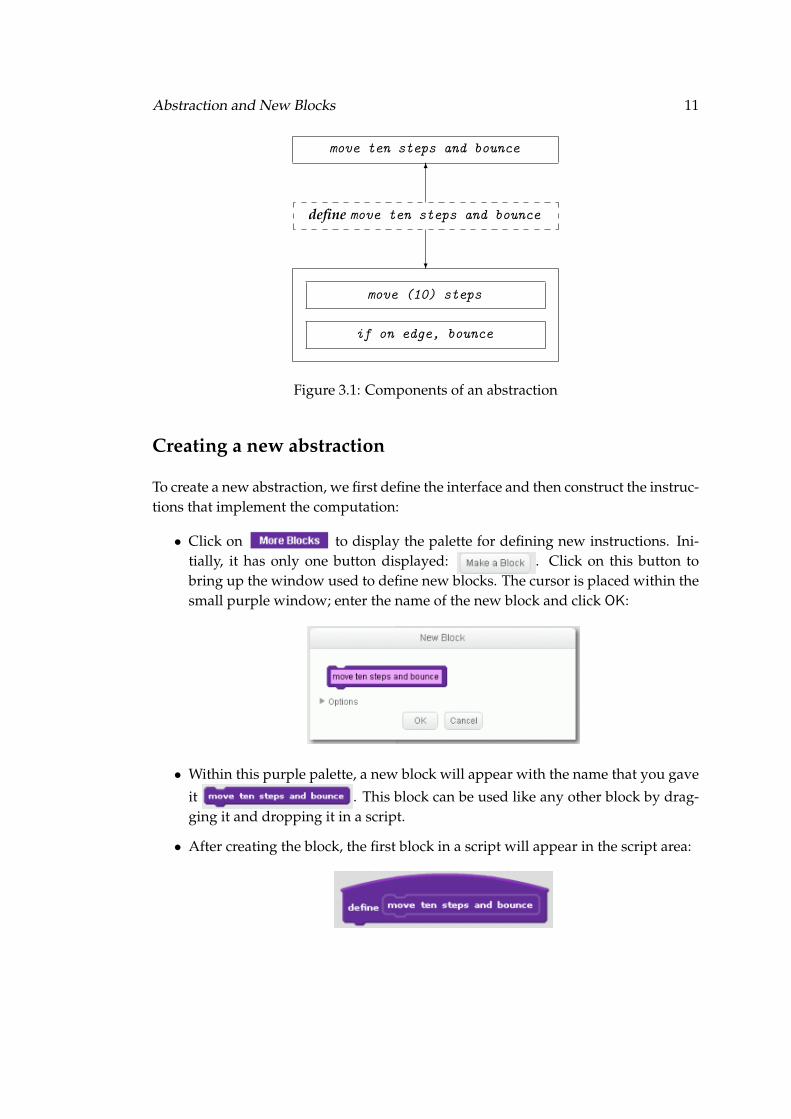
Since we use this sequence of two instructions frequently, let us create an abstractionthat hides the details of the computation and an interface that lets us use the compu-tation (Figure 3.1).
At the top of the diagram is the new instruction represented by a new block calledmove ten steps and bounce . At the bottom of the diagram is the hidden implemen-tation of the instruction consisting of two existing instructions. The dashed box is theinterface that connects the two.
Abstraction and New Blocks 11
if on edge, bounce
move (10) steps
define move ten steps and bounce
move ten steps and bounce
?
6
Figure 3.1: Components of an abstraction
Creating a new abstraction
To create a new abstraction, we first define the interface and then construct the instruc-tions that implement the computation:
• Click on to display the palette for defining new instructions. Ini-tially, it has only one button displayed: . Click on this button tobring up the window used to define new blocks. The cursor is placed within thesmall purple window; enter the name of the new block and click OK:
• Within this purple palette, a new block will appear with the name that you gave
it . This block can be used like any other block by drag-ging it and dropping it in a script.
• After creating the block, the first block in a script will appear in the script area:
12 Chapter 3
This is the interface block, which contains the name of the new instruction thatwe are about to define. The interface serves two purposes: it gives the namethat will be used by other scripts and it indicates the beginning of the sequenceof instructions that implement the new instruction. The curved top of the blockmeans, as usual, that it has to be the first block in a script.
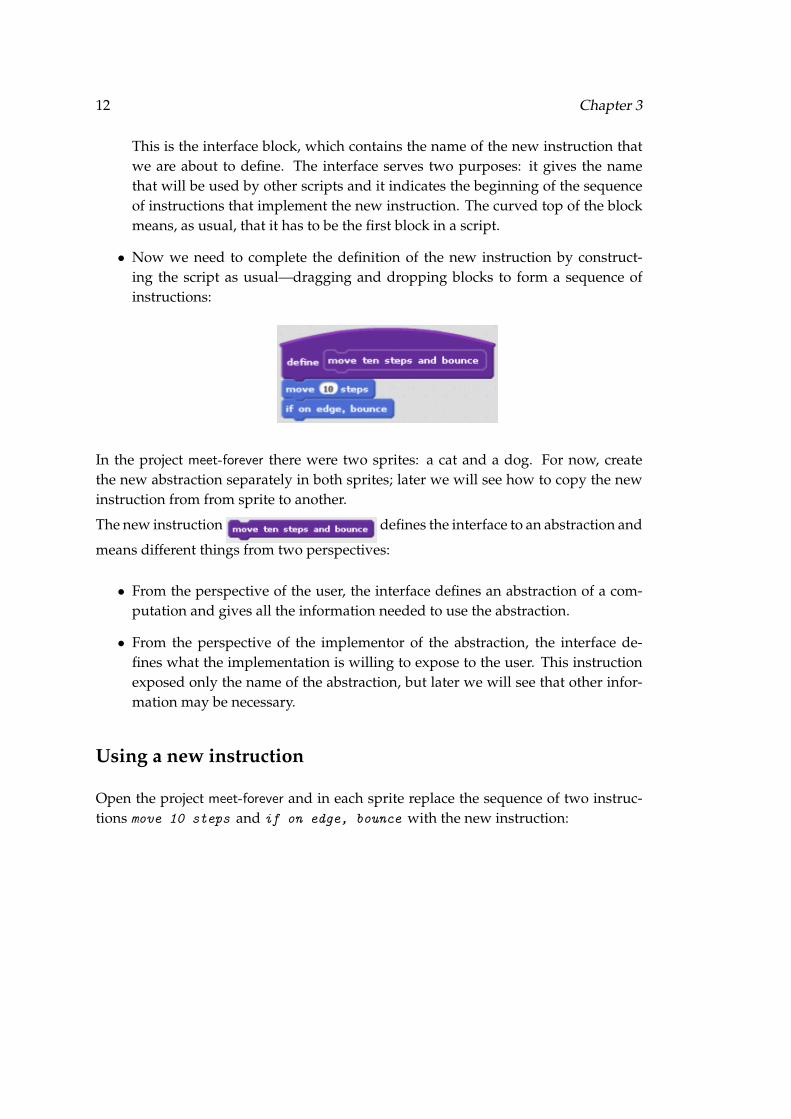
• Now we need to complete the definition of the new instruction by construct-ing the script as usual—dragging and dropping blocks to form a sequence ofinstructions:
In the project meet-forever there were two sprites: a cat and a dog. For now, createthe new abstraction separately in both sprites; later we will see how to copy the newinstruction from from sprite to another.
The new instruction defines the interface to an abstraction and
means different things from two perspectives:
• From the perspective of the user, the interface defines an abstraction of a com-putation and gives all the information needed to use the abstraction.
• From the perspective of the implementor of the abstraction, the interface de-fines what the implementation is willing to expose to the user. This instructionexposed only the name of the abstraction, but later we will see that other infor-mation may be necessary.
Using a new instruction
Open the project meet-forever and in each sprite replace the sequence of two instruc-tions move 10 steps and if on edge, bounce with the new instruction:

Abstraction and New Blocks 13
Run the project and check that the behavior of the sprites has not changed.
Exercise 1
Create abstractions the following actions, use them in projects and checkthat their behaviors are correct:
(a) move 10 steps and turn right
(b) move 10 steps backwards and turn around
(c) if you touch the dog, say ‘‘Help’’ for two seconds
General and specific instructions: Parameters
Most Scratch instructions are not as simple as . Many instruc-
tions are general instructions like that have to be changed into
specific instructions like by including values in the instruction. We
will now see how to create new general instructions.
An abstraction can contain one or more parameters. A parameter is a way of commu-nicating between the user of an abstraction and the implementation of the abstraction.It functions somewhat like a mail box. The user of the abstraction places a value in theparameter and this value is picked up and used in the implementation. In terms ofthe instruction, a parameter is then used to change a general instruction into a specificinstruction.
Parameters are essential to creating useful abstractions because they enable one ab-straction to be used in many contexts. Consider, for example, an abstraction for draw-ing a square. If we had to create an separate abstraction for many different sizes ofsquares, we would have to work too hard, because the instructions for drawing asquare depend very simply on the length of the side of the square. Here is a descrip-tion of an appropriate abstraction:
14 Chapter 3
define draw a square whose side is N centimetersdraw a horizontal line of N centimetersat one end of the horizontal line
draw an upwards vertical line of N centimetersat the other end of the horizontal line
draw an upwards vertical line of N centimetersjoin the tops of the two vertical lines with a horizontal line
From this example we see that defining an abstraction with parameters involves:
• Giving a name to the parameter in the interface of the abstraction.
• Using the parameter in the instructions that implement the abstraction.
The users of the abstraction still need to know very little: the name of the abstractionand the meaning of its parameter. The details of the implementation remain hidden.There are many other ways of implementing the abstraction, some of them probablybetter. (For example, draw a square as one continuous line: right, up, left, down.) Wecan change the implementation without telling the users of the abstraction about thechange; they only need to know what the abstraction does, its name and the meaningsof its parameters.
New instructions with parameters: the interface
We will change the simple instruction into a general instruc-
tion that can be made into a specific instruction by
giving a value for the parameter. Note the structure of the instruction: it consists of theword move followed by a small window for the value followed by the words steps
and bounce . To construct this instruction, first click Make a Block and perform thefollowing steps:
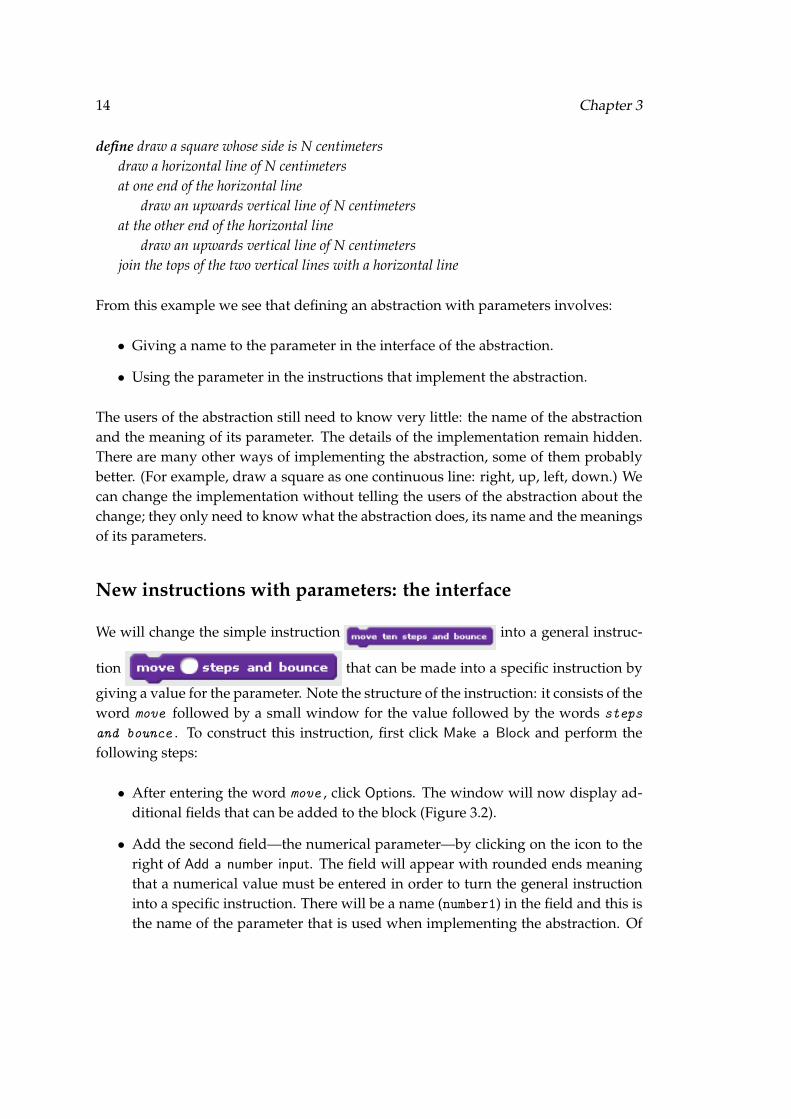
• After entering the word move , click Options. The window will now display ad-ditional fields that can be added to the block (Figure 3.2).
• Add the second field—the numerical parameter—by clicking on the icon to theright of Add a number input. The field will appear with rounded ends meaningthat a numerical value must be entered in order to turn the general instructioninto a specific instruction. There will be a name (number1) in the field and this isthe name of the parameter that is used when implementing the abstraction. Of
Abstraction and New Blocks 15
Figure 3.2: Defining a parameter
course you should change the name to a more meaningful one than number1; wehave entered num-steps as the name of the parameter.
• The third field is a text field. Click the icon to the right of Add label text and enterthe text steps and bounce .
• Click OK to save. The new block will appear
in the palette.
New instructions with parameters: the implementation
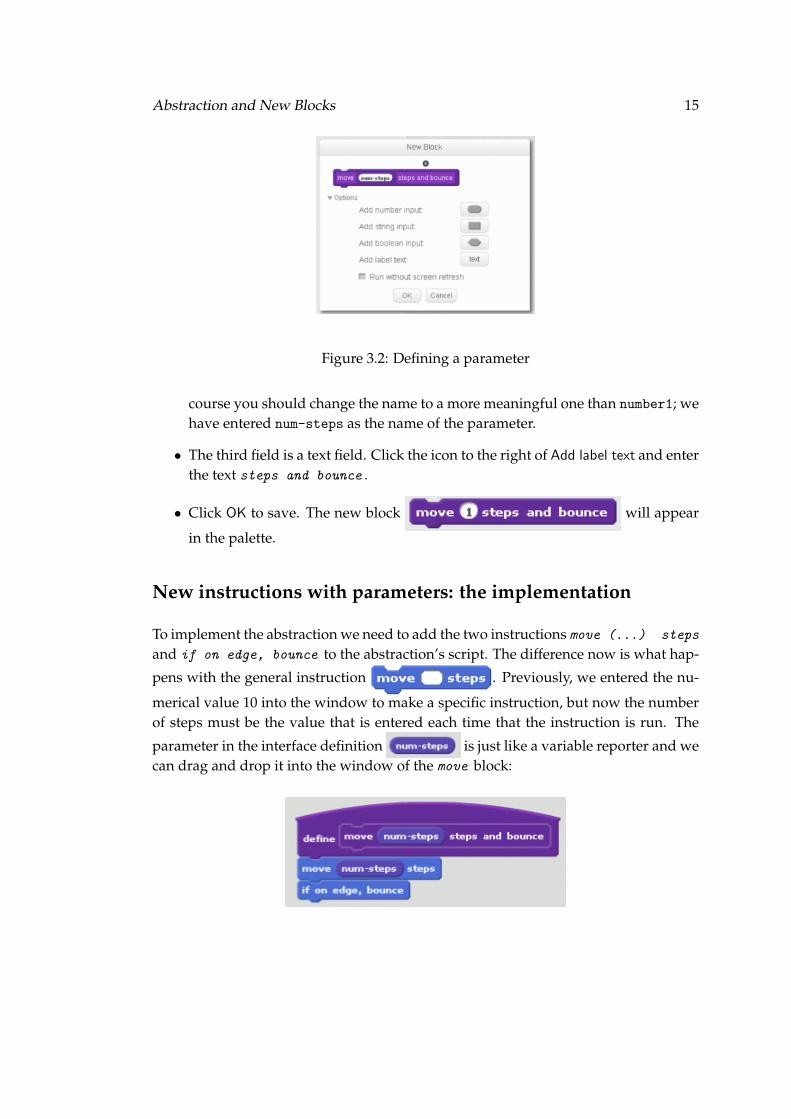
To implement the abstraction we need to add the two instructions move (...) steps
and if on edge, bounce to the abstraction’s script. The difference now is what hap-
pens with the general instruction . Previously, we entered the nu-
merical value 10 into the window to make a specific instruction, but now the numberof steps must be the value that is entered each time that the instruction is run. The
parameter in the interface definition is just like a variable reporter and wecan drag and drop it into the window of the move block:

16 Chapter 3
The parameter functions as a mail box: whatever value was placed there by the scriptrunning the instruction is transfered to the script defining the instruction. Of course,what the script does with the value is hidden from the script that uses the instruction.
New instructions with parameters: using the instruction
Using the instruction with a parameter is no different than using any similar generalinstruction. Drag it to a script and enter a numerical value (a number or a variable oran expression) in the small window:
Saving abstractions for reuse
The abstractions we created were for a specific sprite and the new instructions appearin the palette of that sprite only, but abstractions are usually useful in a different con-text than the one where it was created. To save a new instruction, drag and drop itsscript into the backpack area at the bottom right of the screen:
You may have to click the small triangle in order to see the backpack area.
To use an instruction that has been saved, simply drag its script from the backpackinto the script area of another sprite. When you click on the button More Blocks thenew instruction will appear in its palette.
Exercise 2
Create abstractions the following actions, use them in projects and checkthat their behaviors are correct:
Abstraction and New Blocks 17
(a) move (a number of) steps and turn right
(b) move (a number of) steps and turn (a number of degrees)
(c) turn right and glide to x: (x-position), y: (y-position)
(d) turn (a number of) degrees and
glide to x: (x-position), y: (y-position)
(e) glide around a square whose size is (length)
New concept: abstractionAn abstraction is a way to construct a computation that can be usedeven though its implementation is hidden.An abstraction is composed of a definition and an interface. The def-inition is the implementation of the abstraction, while the interfacetells how to use the abstraction.Parameters in the interface are used to pass information from theuser of the abstraction to the implementation.
New construct in Scratch: new instructions
New instructions are created by clicking on in thepalette. The new-block window appears and is used
to define the interface of the instruction (its name and the names andtypes of its parameters). When this block is used, values for the pa-rameters must be supplied to turn the general instruction into a spe-cific instruction.
The definition of the new instruction is given in a script that startswith the define-block; for example:
Parameters that appear in this block can be used in the script to readthe values entered when the block is used.

18 Chapter 3
Chapter 4
Clones
Sprites and clones
One of the limitations of Sprite 1.4 is that you need to create a separate sprite for eachentity. For example, if you are creating a game with ten cars you need ten sprites. InScratch 2, you can create clones of single sprite.
Example 1Launching multiple rockets(Based upon Exercise 12(d) in Chapter 10.)
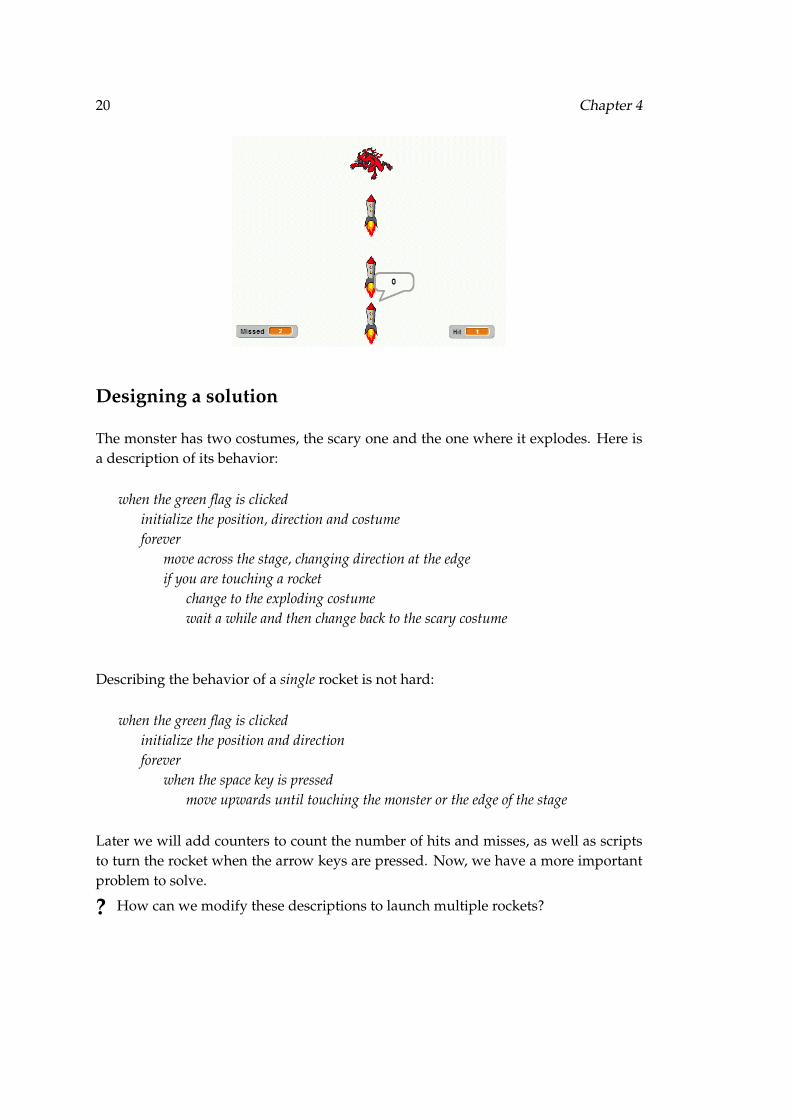
A monster moves from left to right and back at the top of the stage. At the bottomof the stage is a launch pad from which rockets are launched when the space key ispressed. The direction of the rocket can be controlled by pressing the left and rightarrow keys, but only until the rocket is launched. After the rocket is launched itsdirection cannot be changed. If a rocket hits the monster, the monster explodes butimmediately returns to life and continues to move. Count the number of times thatrockets hit the monster and the number of times that they miss.
Program file name: rocket-clone1
19
20 Chapter 4
Designing a solution
The monster has two costumes, the scary one and the one where it explodes. Here isa description of its behavior:
when the green flag is clickedinitialize the position, direction and costumeforever
move across the stage, changing direction at the edgeif you are touching a rocket
change to the exploding costumewait a while and then change back to the scary costume
Describing the behavior of a single rocket is not hard:
when the green flag is clickedinitialize the position and directionforever
when the space key is pressedmove upwards until touching the monster or the edge of the stage
Later we will add counters to count the number of hits and misses, as well as scriptsto turn the rocket when the arrow keys are pressed. Now, we have a more importantproblem to solve.
? How can we modify these descriptions to launch multiple rockets?
Clones 21
One solution is to create multiple sprites, one for each rocket. Aside from the extrawork needed to copy the sprites, this solution has the limitation that we need to knowin advance the maximum number of rockets. Instead, we will use clones.
New concept: clonesA clone is a copy of a sprite. (It is not a sprite itself.) Each cloneappears as a separate image on the stage, but all clones run the samescripts that were defined for the sprite.
With the concept of clones, we add the following behavior to the rocket sprite:
when this clone is createdforever
if I am touching the edge of the stageadd one to Hitserase me
else if I am touching the monsteradd one to Misseserase me
otherwisemove upwards
? How are clones created?
This will be done when the space key is pressed:
when the space key is pressedcreate a clone of the rocket sprite
For technical reasons to be explained later, this script will belong to the stage and notto the rocket sprite.
Let us now implement these behaviors in Scratch.
22 Chapter 4
Implementing the project with clones
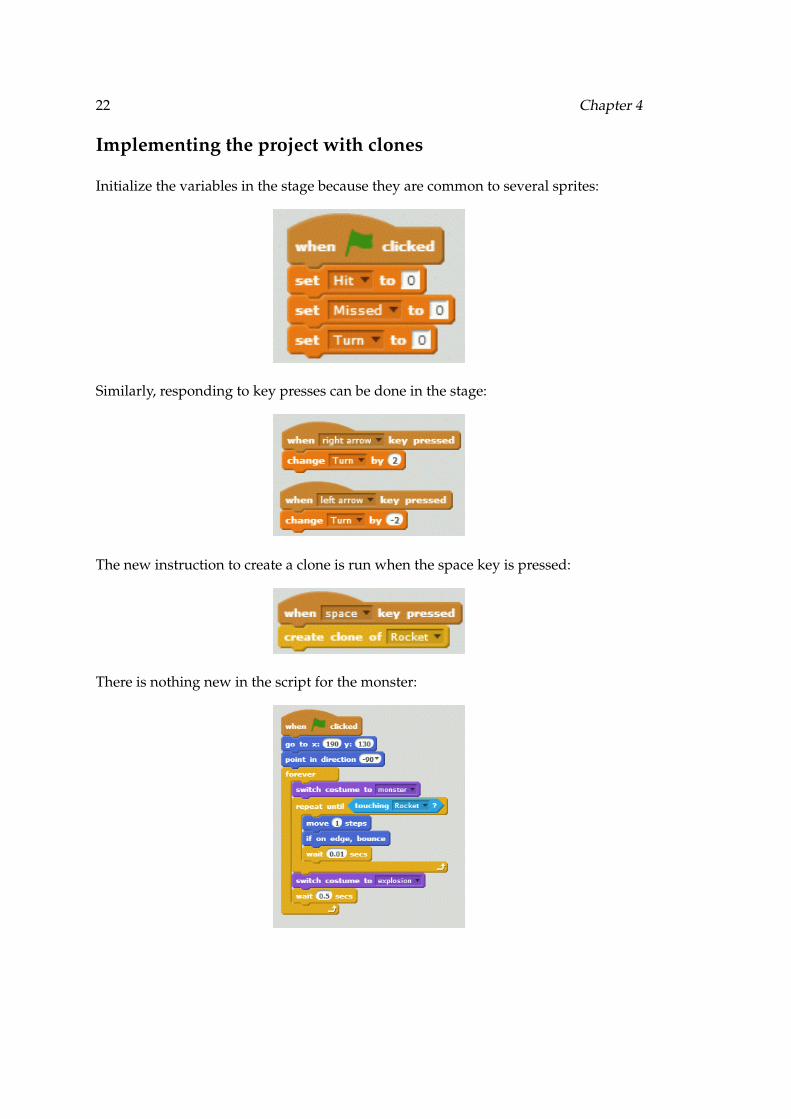
Initialize the variables in the stage because they are common to several sprites:
Similarly, responding to key presses can be done in the stage:
The new instruction to create a clone is run when the space key is pressed:
There is nothing new in the script for the monster:
Clones 23
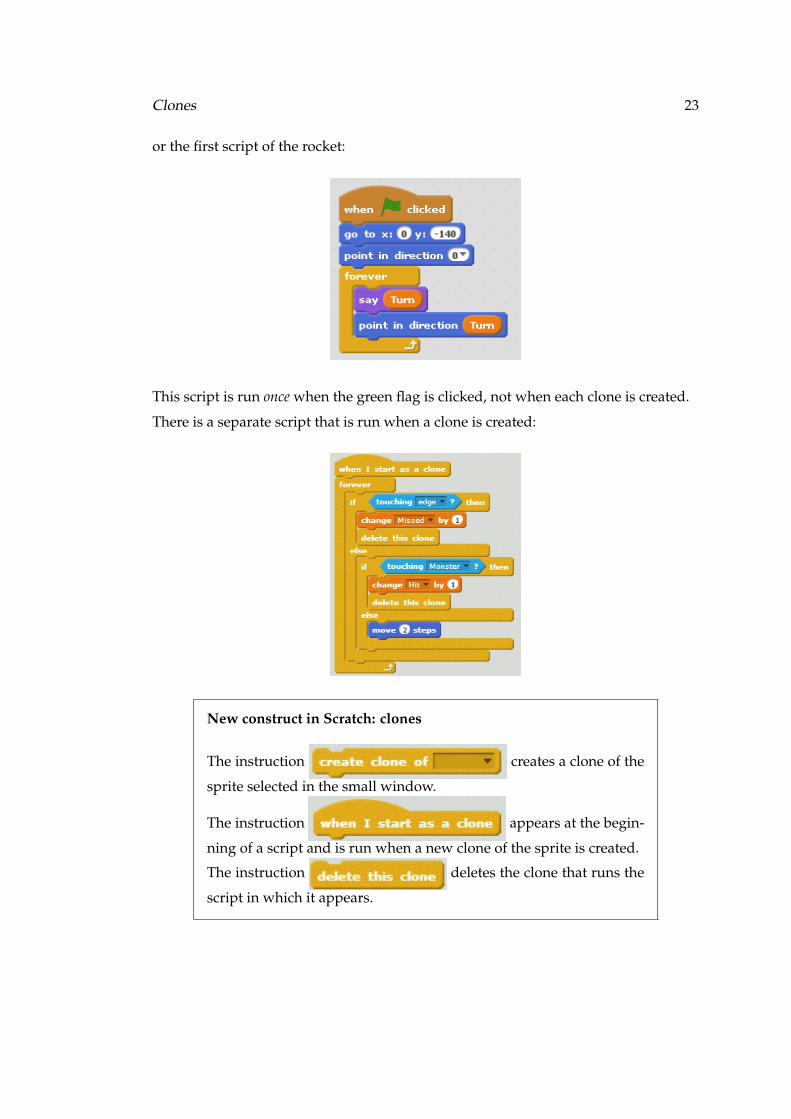
or the first script of the rocket:
This script is run once when the green flag is clicked, not when each clone is created.
There is a separate script that is run when a clone is created:
New construct in Scratch: clones
The instruction creates a clone of the
sprite selected in the small window.
The instruction appears at the begin-
ning of a script and is run when a new clone of the sprite is created.
The instruction deletes the clone that runs the
script in which it appears.
24 Chapter 4
Note that the instruction has a flat bottom so it must be the last
instruction in a script. Since the instruction is run by the clone, this makes sense becausethe clone no longer exists after running the instructions. However, the sprite fromwhich it was cloned continues to exist and to run its scripts.
Guidelines for programming with clones
• When a clone is created its image appears on the stage exactly at the same posi-tion as its sprite. Therefore, you won’t be able to see it unless you move the clone.
The first instructions after should be movement
instructions so that the clone will appear.
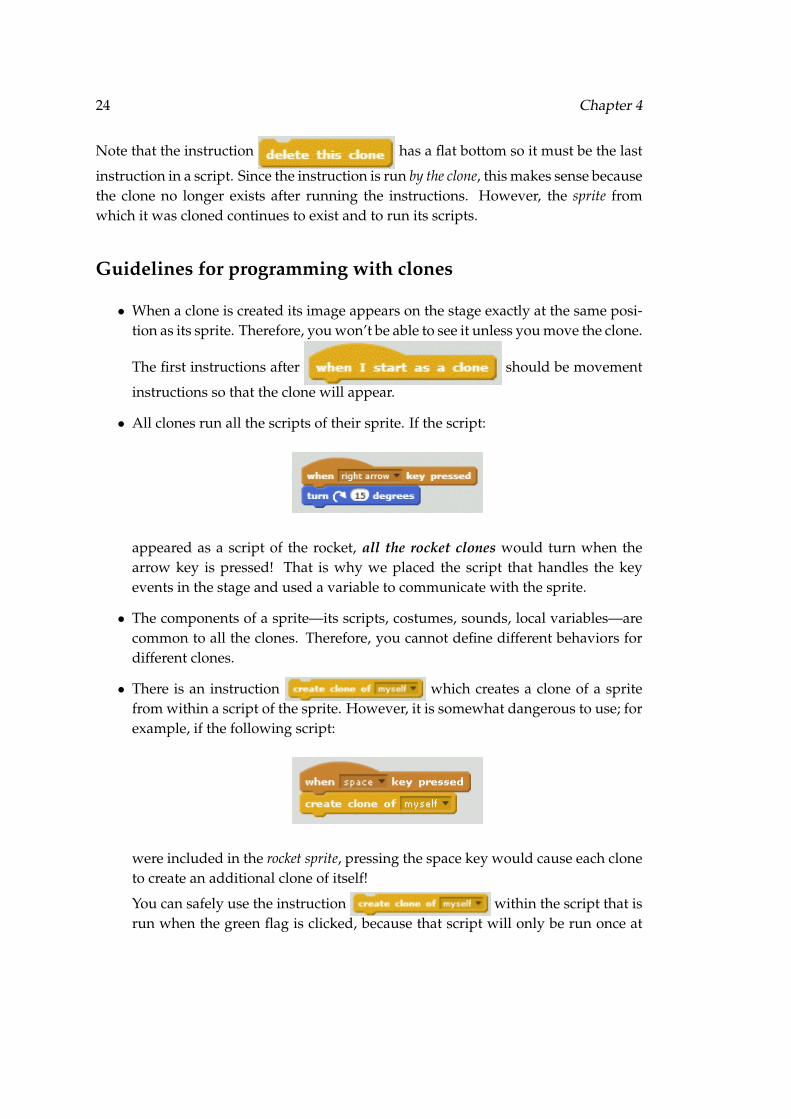
• All clones run all the scripts of their sprite. If the script:
appeared as a script of the rocket, all the rocket clones would turn when thearrow key is pressed! That is why we placed the script that handles the keyevents in the stage and used a variable to communicate with the sprite.
• The components of a sprite—its scripts, costumes, sounds, local variables—arecommon to all the clones. Therefore, you cannot define different behaviors fordifferent clones.
• There is an instruction which creates a clone of a spritefrom within a script of the sprite. However, it is somewhat dangerous to use; forexample, if the following script:
were included in the rocket sprite, pressing the space key would cause each cloneto create an additional clone of itself!
You can safely use the instruction within the script that isrun when the green flag is clicked, because that script will only be run once at
Clones 25
the beginning of the program. Here is another version of the project that usesthis instruction:
Program file name: rocket-clone2
Exercise 1
(Challenging!) Explain what happens if the instruction wait (1) secs isleft out of the script.
Exercise 2
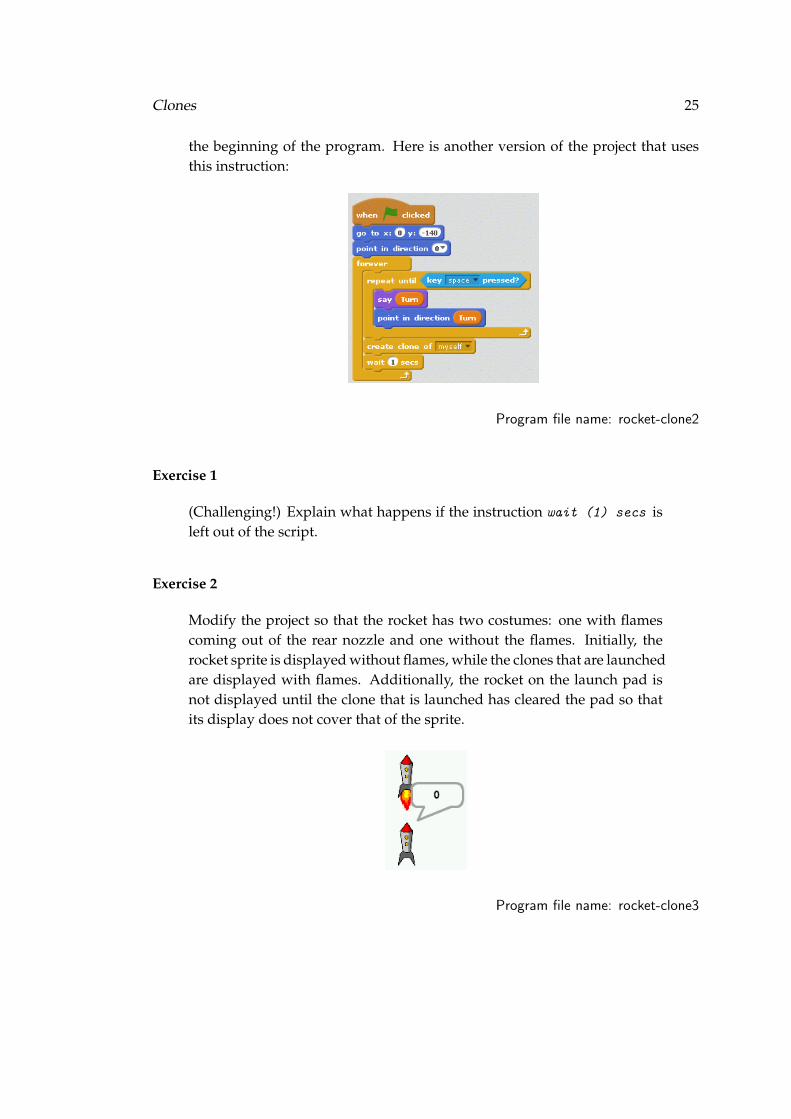
Modify the project so that the rocket has two costumes: one with flamescoming out of the rear nozzle and one without the flames. Initially, therocket sprite is displayed without flames, while the clones that are launchedare displayed with flames. Additionally, the rocket on the launch pad isnot displayed until the clone that is launched has cleared the pad so thatits display does not cover that of the sprite.
Program file name: rocket-clone3

26 Chapter 4
Chapter 5
Integrating Video into Projects
Digital devices such as smartphones use touch screens and motion sensors. Scratch 2can detect motion on the computer’s camera and use it to control an animation. Thesupport is rather basic: the video image is displayed on the backdrop and a sprite cansense if motion exists in the image and the direction of the motion.
You must experiment with the commands because every camera will re-turn different values for the motion sensor. The values may also dependon the lighting in the room and even on the clothes you are wearing.
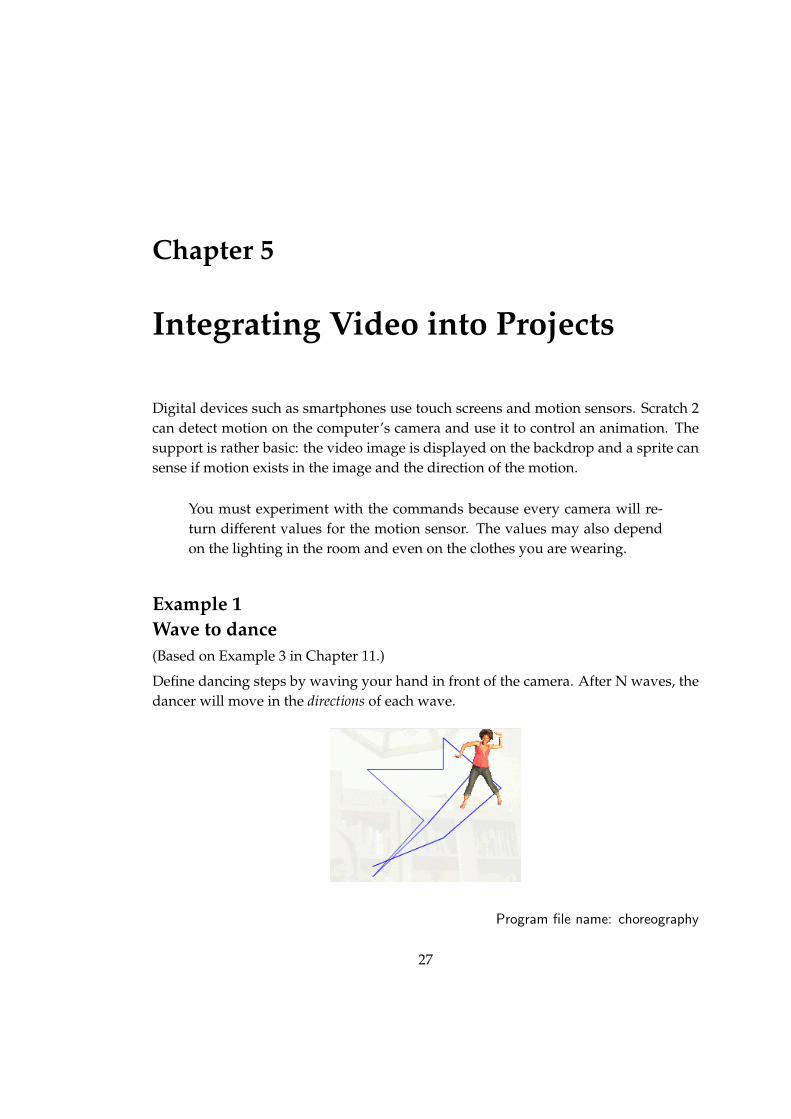
Example 1Wave to dance(Based on Example 3 in Chapter 11.)
Define dancing steps by waving your hand in front of the camera. After N waves, thedancer will move in the directions of each wave.
Program file name: choreography
27
28 Chapter 5
Designing a solution
In the solution of Example 3 in Chapter 11 we used two lists for each dancer, onefor the x-positions and one for the y-positions. Here we only need one list for thedancer’s directions. In that example, data was stored in the lists in response to theevent of clicking a mouse button; here, the event will be sensing motion.
when motion in front of the camera is sensedadd the direction of the motion to the listif the number of directions saved is N
notify the sprite to start dancing
when notified to start dancingfor each number I from 1 to N
turn to the I’th direction in the listmove forward
Implementing the solution in Scratch 2
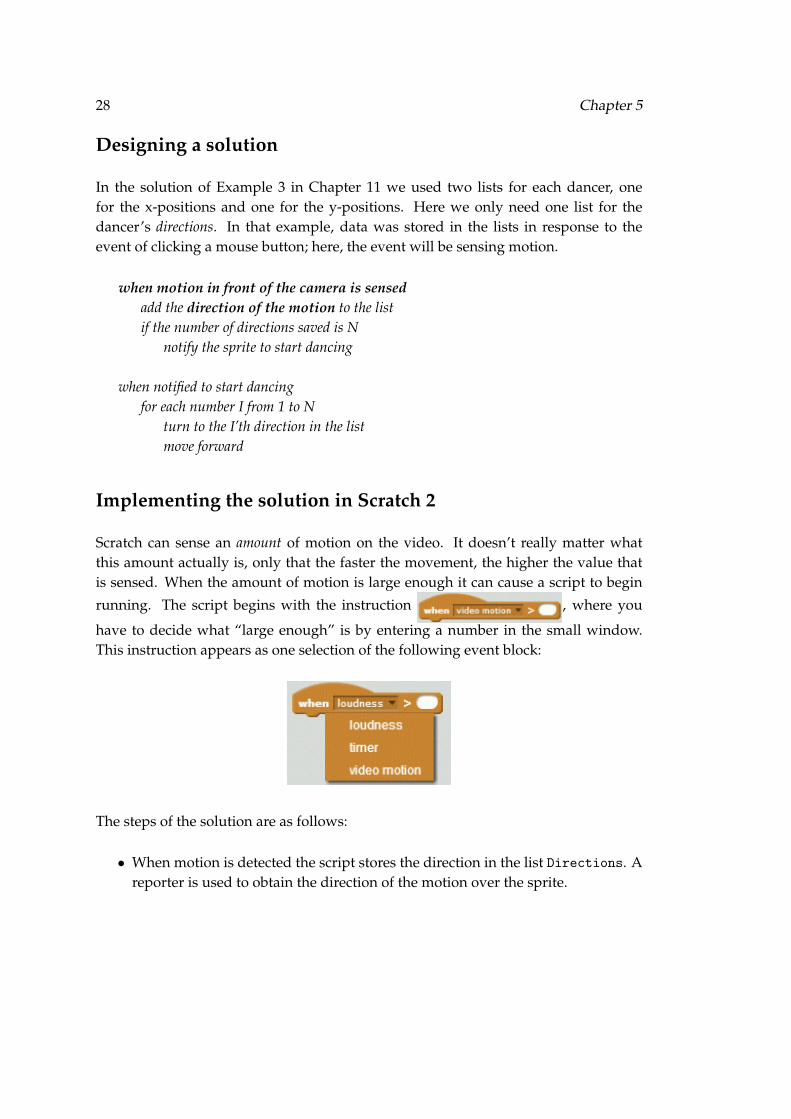
Scratch can sense an amount of motion on the video. It doesn’t really matter whatthis amount actually is, only that the faster the movement, the higher the value thatis sensed. When the amount of motion is large enough it can cause a script to begin
running. The script begins with the instruction , where you
have to decide what “large enough” is by entering a number in the small window.This instruction appears as one selection of the following event block:
The steps of the solution are as follows:
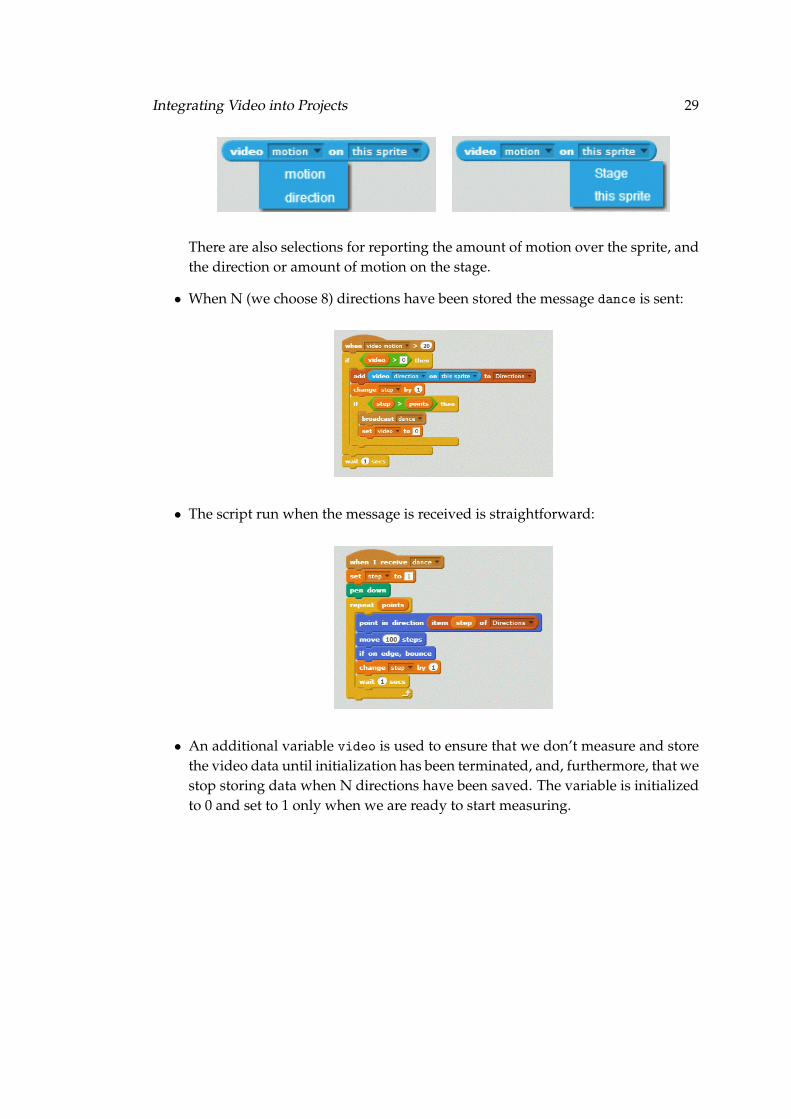
• When motion is detected the script stores the direction in the list Directions. Areporter is used to obtain the direction of the motion over the sprite.
Integrating Video into Projects 29
There are also selections for reporting the amount of motion over the sprite, andthe direction or amount of motion on the stage.
• When N (we choose 8) directions have been stored the message dance is sent:
• The script run when the message is received is straightforward:
• An additional variable video is used to ensure that we don’t measure and storethe video data until initialization has been terminated, and, furthermore, that westop storing data when N directions have been saved. The variable is initializedto 0 and set to 1 only when we are ready to start measuring.
30 Chapter 5
Controlling the video camera
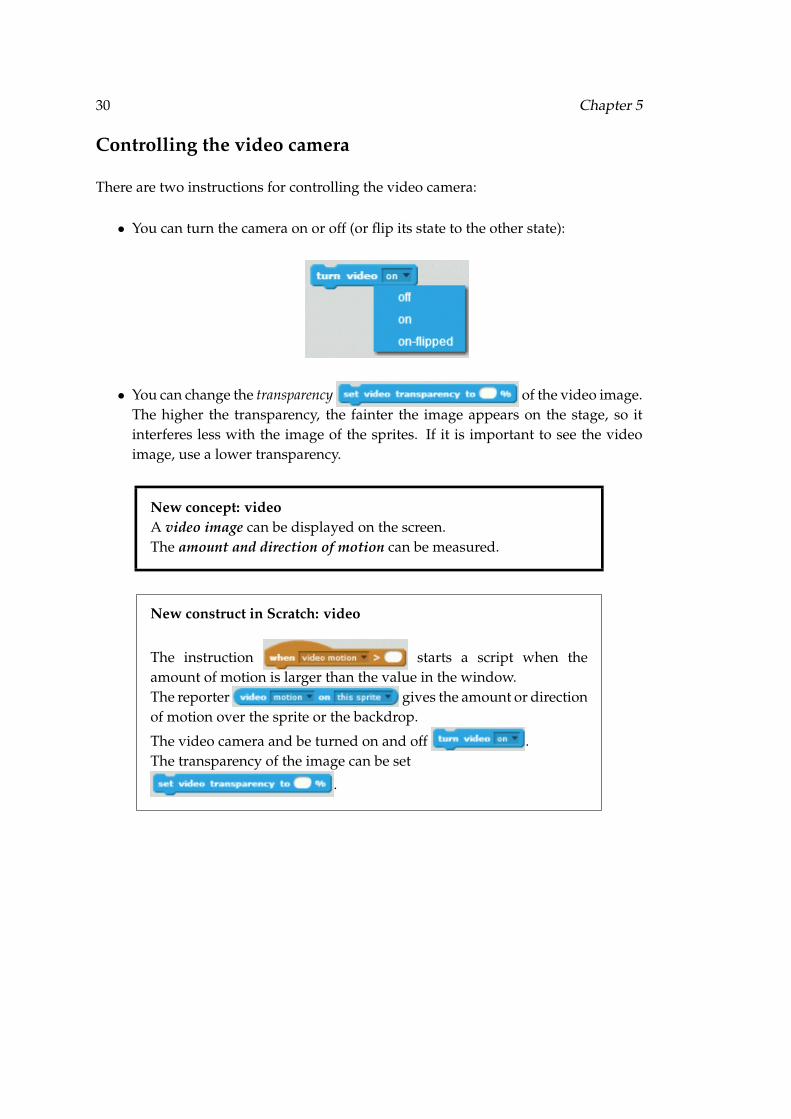
There are two instructions for controlling the video camera:
• You can turn the camera on or off (or flip its state to the other state):
• You can change the transparency of the video image.The higher the transparency, the fainter the image appears on the stage, so itinterferes less with the image of the sprites. If it is important to see the videoimage, use a lower transparency.
New concept: videoA video image can be displayed on the screen.The amount and direction of motion can be measured.
New construct in Scratch: video
The instruction starts a script when theamount of motion is larger than the value in the window.The reporter gives the amount or directionof motion over the sprite or the backdrop.
The video camera and be turned on and off .The transparency of the image can be set
.