Communications Toolkit - Written Communications•Marian Reiter, Graphic Artist, 4-H Youth...
179
Transcript of Communications Toolkit - Written Communications•Marian Reiter, Graphic Artist, 4-H Youth...
Communications ToolkitFun Skill-Building Activities
to Do With Kids
A 4-H Youth Development BookChildren, Youth & Family ProgramsMichigan State University ExtensionEast Lansing, Michigan, USA
Special thanks to the Michigan 4-H Youth Development staff
members, volunteers, teens and other young
people who helped guide the development
of this resource.
A 4-H Youth Development Book
The name “4-H” and the emblem consisting of a four-leaf clover with stem and the letter “H” on each leafl et are protected under Title 18 U.S.C. 707.
COMMUNICATIONS TOOLKIT: FUN SKILL-BUILDING ACTIVITIES TO DO WITH KIDS. Copyright © 2000 by the Michi-gan State University Board of Trustees. These materials may be copied for purposes of 4-H programs and other nonprofi t educational groups. The skill sheets, activities and handouts in this publication are designed to be photocopied for nonprofi t educational purposes only. 4-H Youth Development grants permission to 4-H programs and other nonprofi t educational groups to reproduce these masters. Printed in the United States of America on recycled paper. For information address 4-H Youth Development, Michigan State University Extension, 160 Agriculture Hall, East Lansing, Michigan, 48824-1039.
ISBN 1-56525-013-3
MSU is an affi rmative-action, equal-opportunity employer. Michigan State University Extension programs and materials are open to all without regard to race, color, national origin, gender, gender identify, religion, age, height, weight, disability, political beliefs, sexual orientation, marital status, family status or veteran status. Issued in furtherance of MSU Extension work, acts of May 8 and June 30, 1914, in cooperation with the U.S. Department of Agriculture. Thomas G. Coon, Director, MSU Extension, East Lansing, MI 48824. This information is for educational purposes only. Reference to commercial products or trade names does not imply endorsement by MSU Extension or bias against those not mentioned. 1P–2M–11:99–LP–RM

COMMUNICATIONS TOOLKIT • About This Toolkit: Introduction & General Information – 1©2000 Michigan State University Board of Trustees.
AcknowledgmentsThe Communications Toolkit: FunSkill-Building Activities to Do WithKids was developed by MichiganState University Extension’s 4-HYouth Development. Publication ofthis curriculum was made possibleby a grant from Pharmacia & UpjohnAnimal Health of Kalamazoo, Michigan,to the Michigan 4-H Foundation ofEast Lansing, Michigan.
Project Coordinated by:Karen Pace, Associate ProgramLeader, 4-H Youth Development,Michigan State University Extension
Writers:• Cheryl Howell, 4-H Information
Officer, ANR Communications,Michigan State University
• Mary Kronenberg, Former 4-HYouth Agent, WashtenawCounty, Michigan State Univer-sity Extension
• Karen Pace, Associate ProgramLeader, 4-H Youth Develop-ment, Michigan State Univer-sity Extension
• Marian Reiter, Graphic Artist,4-H Youth Development,Michigan State UniversityExtension
Edited by:• Rebecca McKee, Editor, 4-H
Youth Development, MichiganState University Extension
• Mindy Popa Scherr, FreelanceEditor
Graphic design by:• Marian Reiter, Graphic Artist,
4-H Youth Development,Michigan State UniversityExtension
ContentsAbout This Toolkit: Introduction & General Information ..... 2
Written Communications .................................................... 9What Leaders Need to Know................................................... 9Skill Sheets ......................................................................... 17Activities ............................................................................ 23
Vocal Expression & Public Speaking ................................... 29What Leaders Need to Know................................................. 29Skill Sheets ......................................................................... 31Icebreakers ......................................................................... 38Activities ............................................................................ 42
Visual Communication & Graphic Design ........................... 55What Leaders Need to Know................................................. 55Skill Sheets ......................................................................... 59Design Warm-Up Activities ................................................... 73Activities & Projects ............................................................. 91
Video, Media & Technology ...............................................131What Leaders Need to Know................................................131Skill Sheets ........................................................................139Icebreakers ........................................................................152Activities & Projects ...........................................................155
2 – COMMUNICATIONS TOOLKIT • About This Toolkit: Introduction & General Information©2000 Michigan State University Board of Trustees.
About This ToolkitIntroduction & General Information
Welcome to theCommunicationsToolkit: Fun Skill-Building Activities toDo With Kids! Thisresource was developedfor people who workwith young people aged12 and up, althoughmany of the activitiescan be adapted easilyfor use with youngerchildren. In the toolkityou’ll find information,activities and resourcesthat will help kids buildon their skills in vocalexpression and publicspeaking, video, mediarelations, graphic designand writing.
WhyCommunications?Helping kids build communicationskills is often mentioned as one ofthe most important areas of youthdevelopment. The ways we commu-nicate – as young people and asadults – cut across all that we do inlife. Our interpersonal skills and howwe express ourselves in written andspoken form have significant effectson our professional and personalendeavors throughout our lives. Aswe enter the 21st century, the needis greater than ever for young peopleto sharpen their skills in reading,writing, speaking and presentinginformation.
What’s in ThisToolkit & HowYou Can Use ItThe Communications Toolkit is de-signed to be flexible and easy touse. It has five sections:
1. About This Toolkit
2. Written Communications
3. Vocal Expression and PublicSpeaking
4. Visual Communication andGraphic Design
5. Video, Media and Technology
Within each communication areayou will find subsections:
• What Leaders Need to Know–Including an introduction, life skillsthat can be learned, a glossary ofterms and other general information.
• Skill Sheets – Information onimportant skills that are neededfor that communication area. Skillsheets are for you, the facilitator,and may be copied for youngpeople, when appropriate.
• Icebreakers, Activities andProjects – Purposeful activities thathelp kids work in teams or on theirown to build communication skills.Each activity lists information aboutthe focus, purpose, materials, time,setting, procedure and tips for “talk-ing it over” with participants.
• Beyond the Toolkit: More Ideasand Resources – Project ideas,books, resources and ideas on howto use the community as a classroom.
Most of the materials in thistoolkit are written for you, theadult or teen facilitator who isworking with kids aged 12 to 19.Some sections include copy-readyhandouts for participants.
What LeadersNeed to KnowSelf-Assessment &EvaluationMany of the activities in the Com-munications Toolkit provide youngpeople the opportunity for self-expression and creativity, which,for some kids, can be a bit scary.Consequently, the philosophy ofthis resource book is one of positivelearning and growth. Your goalshould be to create a safe, caring,positive learning environment inwhich young people can build ontheir communication skills.

COMMUNICATIONS TOOLKIT • About This Toolkit: Introduction & General Information – 3©2000 Michigan State University Board of Trustees.
Experienced communicators knowthat the best way to improve one’sskills is through lots of practice. Thebest thing you can do as a leader isto provide varied opportunities foryoung people to practice and reflecton their skills in writing, speaking,graphics and video. The worst thingyou can do is to allow negative, un-helpful criticism by other youngpeople or adults, which can squelchinterest in learning more about atopic. The experiences in this toolkitemphasize self-reflection and discus-sion to help young people thinkabout how they feel about their ownlearning process and the areas theywould like to learn more about.Some sections include informationfor you to use or adapt that can helpyou and others provide positive,helpful, constructive feedback for theyoung people with whom you work.
Later in this “About the Toolkit”section, you’ll find a worksheetcalled “What I Learned.” This formis for you to copy and distribute tothe young people involved in activi-ties or projects found in thistoolkit. The self-assessment toolgives kids the chance to thinkabout:
• What they’ve learned.
• How they feel about themselvesrelated to the skill they’velearned.
• Communication areas they’dlike to learn more about.
Let kids reflect to themselves as theywrite their answers on this sheet,which is “for their eyes only.” Afterthey’ve filled it out, you can en-courage small group discussionabout what they learned or let thosewho are comfortable doing so sharetheir responses with the wholegroup.
Communication ProjectEvaluation GuideIf you’re working with young peoplein situations where you want to pro-vide evaluative feedback on theircommunication projects, please con-sider using the following kinds ofquestions. For each of the questions,remember to provide the youngpeople with information about whatworks well and constructive feedbackabout what they may want to trydifferently next time.
• Does it appear that the projectis well thought-out?
• Is the purpose of the messageclear and understandable?
• Does the message appeal tothe intended audience?
• Does the method and formatwork with the message andintended audience?
Make the ToolkitWork for You!Communications skill developmentcan be woven into just about every-thing we do with young people.
Explore what your group is inter-ested in and choose activities fromthe appropriate sections of thistoolkit. Some people may choose toblend communications into whatthey’re already doing with kids –using a variety of activities from thetoolkit to meet their needs. Othersmay want to make communicationsmore of a focus and use activities andother items from several sections ofthe toolkit over a period of time.Don’t feel that you need to read allthat’s here or do everything providedin the order in which it appears inthe toolkit. Pull what you needwhen you need it, and adapt it to fityour group.
Think about combining activitiesfrom all the sections to create a
larger project. Your group may wantto create a local media campaign, forexample, that helps people under-stand what it’s like to be a teen,think about youth violence preven-tion, or discover the benefits of 4-Hor another youth group.
The contents of this toolkit will helpyour group understand the impor-tance of planning and working to-gether as a team as they write newsarticles, create posters and producetelevision spots. Be creative! Explorethe toolkit and create a plan forusing what’s here in ways that meetyour needs and those of the youngpeople with whom you work.
Using theCommunicationsToolkit to Meet YourNeedsWhen you’re deciding how to usethe Communications Toolkit withyour group, first think about:
• What do you or other leadersneed to know to help youngpeople learn about communi-cations?
• What do youth participantswant and need to know aboutcommunications?
• What time and resources areavailable?
• What’s the end goal – whatwould you like your communi-cation training to accomplish?
Then pick and combine the materi-als that best meet your group’s needs.
You can tailor the information andactivities provided in the Communi-cation Toolkit in many ways. For ex-ample, if you want to:
•Jumpstart your own understand-ing of the different areas of com-munications and learn ways tointroduce young people to the

4 – COMMUNICATIONS TOOLKIT • About This Toolkit: Introduction & General Information©2000 Michigan State University Board of Trustees.
Communications Toolkit activities– Review the “skill sheets” in eacharea, which provide basic subjectmatter information. Reading the“About This Toolkit” section as wellas the “What Leaders Need to Know”introductory sections to each com-munication area will give you back-ground for working with youngpeople.
•Get your youth group’s feet wetand expand their “comfort zones”in the different areas of commu-nications – Set up a fun, fast-pacedand interactive communications“skill-a-thon” (a room set up withseveral learning stations that par-ticipants can rotate through) usingshort activities from different sec-tions of the Communications Toolkit.You can structure the skill-a-thonso that participants rotate to a newactivity after a set period of time.Look for icebreakers or activities thatcan be done in 30 minutes or less orthat could be modified to fit ashorter format.
•Use the Communications Toolkit“a la carte,” on an “as needed”basis – Use the activities or skillsheets when the need arises. For in-stance, if your group needs to writefor a newsletter or put togetherawards documentation, check the“Written Communications” section;prepare for public speaking at anupcoming event, check the “Vocal Ex-pression and Public Speaking” sec-
tion; videotape a group performanceor activity, check the “Video, Mediaand Technology” section; designgraphics for a poster or display,check the “Visual Communicationsand Graphic Design” section.
•Take your group on an in-depthexploration of a communicationsarea they’re interested in – Pickone of the communications areasand go through all of the activities.Investigate the “Try This, Too” ideasthat accompany many activities.Consider the resource materialslisted in the “Beyond the Toolkit:More Ideas and Resources” sectionfor that particular communicationarea.
•Start with a project idea andexplore the communication areasneeded to carry out the project –Develop a communications cam-paign around a community servicetopic or a public awareness message.Use relevant activities from the Com-munications Toolkit, applying theprojects to fit the theme you havein mind.
The CommunicationProcessWhether you’re developing a speech,writing a news article, creating aposter or producing a videotape, it’simportant to understand the basiccommunication process. Communi-cation can be defined as “a processby which information is exchangedbetween individuals through a com-mon system of symbols, signs orinformation.” You can apply thisdefinition to the development oforal, written, graphic and videopresentations.
“A process by which information isexchanged between individuals...”This phrase emphasizes that youmust have a message or somethingto share (information) for commu-
nication to take place. This is alsocalled a goal or “objective.” For ex-ample, an objective for a speech couldbe to help young people learn thehealth risks of smoking cigarettes.
The definition also emphasizes thatcommunication is a process betweenindividuals or groups. This is calledyour “audience” – the types ofpeople who will see or hear your mes-sage. In the example above, the au-dience for the antismoking messageis young people. It’s very importantto know as much as possible aboutyour audience. You must narrow inon who they are, what their beliefsand attitudes are, what they may andmay not know about your topic, andmore.
For example, you could specificallytarget kids aged 11 and 12 who at-tend your local middle school.Knowing your audience usuallyrequires some detective work. Thiscould include research such as askingquestions of people in your targetaudience and of others who areexperts on that particular groupbut who may not be members of thegroup themselves.
“…through a common system ofsymbols, signs or information.”This part of the definition of com-munication stresses the importanceof the method, or format, youchoose to share your message. Keepin mind that communication is atwo-way process between peopleand groups.
When you carefully consider theaudience you’re trying to reach, youcan craft your message in a way thatwill be meaningful to that group.Would a flier or a video work best?Can you reach your group by mak-ing a powerful speech at a schoolassembly or service club meeting?
Keeping your intended audience inmind, you must carefully consider

COMMUNICATIONS TOOLKIT • About This Toolkit: Introduction & General Information – 5©2000 Michigan State University Board of Trustees.
and choose the following elementswhen crafting your message:
• Language and words (style,slang, educational level)
• Type and number of graphicsymbols
• Style
• Rhythm of your message
For example, if you want to reachpreteens with an anti-smoking mes-sage, a short presentation by a peerabout how “uncool” it is to stinklike stale smoke and how smokingslows you down on the basketballcourt may make sense. Perhaps a rapsong with this message would cap-ture the attention of your 11- and12-year-olds. Would a rap work bestas a live performance or as a video?Could you do both? If you’re prepar-ing an antismoking message foradults, would a rap song – whetherperformed live or on video – work?Probably not.
With any communication project,it’s important to:
1. Clearly define your message. (Tryto keep it to one key idea.)
2. Carefully identify your targetaudience. (Be very specific.)
3. Select the methods, approachesand formats that will work best forthat group. (What mix of oral, writ-ten, video, graphic, computer orother methods will best reach youraudience?)
4. Find out how you did. (Askmembers of your target audience,through interviews or surveys,whether they think your communi-cation efforts worked!)
How to BrainstormMany activities in the Communica-tions Toolkit recommend that youhelp kids brainstorm ideas before
they begin an activity or project.Brainstorming encourages everyonein a group to share ideas and exploreas many approaches to a problem orproject as possible. It’s kind of a cre-ative thinking free-for-all!
Many ideas that seem impractical atfirst may evolve into very useful andwonderful solutions. Businesspeople, scientists, educators andothers in the work world use brain-storming all the time to create inno-vative, problem-solving approaches.
Here’s a quick lesson on how tobrainstorm.
1. Have large sheets of paper (suchas newsprint) and markers availableto write down everyone’s ideas.
2. Explain to the young people thateveryone’s thoughts and ideas arevalid (even if they sound far-fetchedor seem a little weird.) Brainstorm-ing is not a time for evaluating orjudging ideas. The goal is to get lotsof ideas on the table. Put-downs arenot acceptable.
3. Give everyone who wants toshare the opportunity to do so.Don’t let one or two kids dominatethe group.
4. After the group members haveshared all the ideas they can thinkof, begin a fair and democratic pro-cess of discussing which idea (orcombination of ideas) the groupthinks will work best for the par-ticular situation.
Encourage the kids to follow theserules while brainstorming:
Rule 1: Do not judge ideas!
Rule 2: It’s okay to be far-out.
Rule 3: Think of as many ideas asyou can.
Rule 4: Piggyback on someoneelse’s ideas.
You may want to write these rules on asheet of newsprint and display thesheet where all the kids can see it.
Help Kids “LearnBy Doing”:The ExperientialLearning ModelDecades of research have providedevidence that the experientiallearning model is a very effectivemethod for helping children learn.And it’s really not complicated atall! The experiential learning modelis based on the work of John Deweyand emphasizes the importance ofbuilding in opportunities for kidsto Do – Reflect – Apply.
•“Do” refers to hands-on learning,including activities and projects thatget young people actively involvedwith the subject matter. In thistoolkit you will find activities thatactively engage teens in the processof learning and skill-buildingthrough creating posters, speeches,videos and other projects.
•“Reflect” refers to taking timeafter the activity or project is com-pleted to think about and sharewhat happened, the importance ofwhat was learned, and the feelingsyoung people have about whatthey learned. Each activity in thistoolkit includes a “Talking It Over”section that helps the leader guidethis thinking and sharing process.

6 – COMMUNICATIONS TOOLKIT • About This Toolkit: Introduction & General Information©2000 Michigan State University Board of Trustees.
• “Apply” refers to taking the ac-tivity to another level by thinkingand talking about how the informa-tion learned through the activity canbe applied to “real life” situationsand other learning opportunities.Throughout this toolkit you will findreferences to real career opportuni-ties in the area of communications.The “Beyond the Toolkit” sectionswill help you guide young people inapplying what they’ve learned tonew and future learning opportuni-ties. Activities also include sectionscalled “Try This, Too” and “Whereto Go From Here” to guide you inhelping kids apply what they’relearning to new situations.
The Importance ofBias-FreeCommunicationAs you help young people developor strengthen their communicationskills, one very important area toconsider is the use of language andimages. Words and pictures havepower – more power than we mayrealize. They can include or exclude,
stereotype or provide accurate infor-mation about people. Words and im-ages can encourage or discourage,diminish and degrade. When mes-sages around us every day in books,radio, television or newspapers con-tain information that reflects sex-ism, racism, adultism and other bi-ases, the impact on readers, viewersand learners is profound. There arecritically important connections be-tween our thoughts, words and ac-tions, and the language we use re-flects and helps shape society. Hereare a few things to consider abouthelping young people develop bias-free communication habits:
•Biased words and phrases makeunfair assumptions about somegroups, label people in ways thatthey do not choose for themselves,use maleness as the norm, and treatfemaleness as the exception. An ex-ample of the latter is the use of “he,him, mankind” and other so-calleduniversal terms that are clearlygender-biased. Another example isthe use of suffixes such as -ess, -etteand trix in words like “poetess,”which means a female poet, while
the word “poet” means a person whowrites poetry. “Poet” is consideredthe norm, and “poetess” a deviantfrom the norm. See the problem? Apoet is defined as “one who writespoetry” while a poetess is definedas “a female poet.” Such wording im-plies that men are “the real thing”and women are “not quite the realthing.” Some other phrases, such as“man and wife,” imply inequities. Inthis phrase, women are referred tounfairly because the woman is iden-tified only in terms of her relation-ship to the man. The fair and appro-priate phrase to use is either “hus-band and wife” or “man and woman.”
•Remember that when referring toa person who has a physical differ-ence or health challenge, always“put the person first.” For example,don’t label someone “handicapped”or “disabled,” refer to him or heras “a person with a disability” or“a person who is physically chal-lenged.” A person is not an “AIDSvictim” but rather “a person whohas AIDS.”
•Keep in mind that the only thingconstant about language is that itis constantly changing. Just whenyou thought you knew the preferredway to refer to a particular group ofpeople, for example, more optionsemerge that some would prefer. It’simportant to monitor the changesand nuances of words and languagein order to be as respectful as pos-sible. When you’re confused abouthow to refer to someone, the bestapproach is to ask the person (forexample, “Do you prefer Ms. or Mrs.?”or “Do you prefer Black or AfricanAmerican?”).
•Just as thoughtful writers givecareful attention to spelling, gram-mar and sentence structure, so mustwe give careful consideration andeffort to searching for unbiasedwords. This applies to choosingwords for oral communication as
Help Kids “Learn By Doing”: The Experiential Learning Model
1Experience
the activity;“Do it”
○
○
○
○
○
○
○
○
○
○
○
○
○
○
○
○○
○
○
○
○
○
○
○
○
○
○
○
○
○
○
○
○
○
○
○
○
○
○
○
○
○
○
○
○
○
○
○
DO
APPLYREFLECT
2Sharewhat
happened
3Processwhat’s
important
4Generalize – the “so
what”
5Apply – the“now what”
COMMUNICATIONS TOOLKIT • About This Toolkit: Introduction & General Information – 7©2000 Michigan State University Board of Trustees.
well. A book called The Bias-FreeWord Finder: A Dictionary of Nondis-criminatory Language, by RosalieMaggio (Boston, Massachusetts: Bea-con Press Books, 1991), is an excel-lent resource for understanding thereasons why creating bias-free com-munication is so important. It alsoprovides an extensive dictionary ofnondiscriminatory language.
•When creating or choosing imagesand pictures, be careful to be inclu-sive. Images that are inclusive con-vey the message that “all are wel-come here” and this information isopen and available to all. For example,if teens are developing a videotapethat documents “life in our com-munity,” the people videotapedought to reflect different kinds ofpeople who do, in fact, live in thecommunity. Think about includinga variety of people who reflect di-versity of ages, race and ethnicity,gender, socio-economic class, dis-ability and so on. And be carefulnot to stereotype people. Don’tportray certain groups in waysthat tend to be inaccurate stereo-types and over-generalizations ofthat group.
About Kids in This AgeRangeThe Communications Toolkit will helpyou create learning opportunities foryoung people 12 and up. (Some ac-tivities may be adapted for youngerchildren.) When working with teens,it’s important to keep in mind thestage of development they are in.Here are some important factors toconsider:
Younger Teens (Aged 12 to 15)
•Young people in this age range aremoving from concrete thinking to-
ward the ability to think abstractly.They enjoy playing with ideas, andyou can provide opportunities forthem to explore new areas of inter-est. Issues of values, justice andequality may become very importantto them. Caring adults can providepositive opportunities for discussion,self-reflection and growth.
•Social acceptance and peer groupsbecome increasingly important tokids this age. Clubs, classrooms andyouth groups should be supportive,caring environments in whichyoung people feel connected andaccepted by adults and peers.Adults can set the tone for a groupby expecting respectful behaviorand modeling it themselves in theirinteractions with young peopleand other adults. Young peoplethis age can and should be activelyinvolved in selecting the directionof their learning activities. Adultsshow respectful behavior towardteens when they ask for and valuetheir ideas and opinions.
•The early teen years can be anemotional roller coaster for manyyoung people. Fast-changing bodiesand hormones can cause moodswings and behaviors that lookadult-like one minute and child-likethe next. For some teens, this canbe a time of challenge to their self-concept. You can help teens throughthis potential time of turmoil bybeing accepting and caring. Helpyounger teens reflect on whatthey’re good at and identify theirpersonal strengths.
Older Teens (Aged 16 to 18)
•Teens in this age range are begin-ning to master abstract thinking andare likely to be focused on and con-cerned about their futures. Career
exploration and preparation becomeincreasingly important. Adults canhelp teens “try on” different skillsand careers, and the CommunicationsToolkit provides many activities andproject ideas to get them started.
•Older teens often have an intenseneed to “belong” to groups outsidethe family. They see themselves asquite capable of choosing their ownactivities and projects and much pre-fer to do so. The role of an adultshifts away from “leader/teacher” to“advisor/confidant.” Adults can“open the door” to new experiencesand explorations that older teenscrave.
•Older teens have the capacity tounderstand the needs and feelingsof others even though they may notconsistently portray this empathy.Opportunities for community ser-vice give them the chance to deepentheir understanding and strengthentheir relationships to others in thecommunity. One way to explore com-munity service is to have older teenshelp teach middle school-agedyoung people communication skillsusing the activities in the Commu-nications Toolkit.

8 – COMMUNICATIONS TOOLKIT • About This Toolkit: Introduction & General Information©2000 Michigan State University Board of Trustees.
SELF-EVALUATION FORM:
What I Learned
Skill Area:Please list the communicationskill areas you covered (for ex-ample, video, media and tech-nology; visual communicationsand graphic design; vocal ex-pression and public speaking;or written communication).
• I found I was good at:
• I found these things hard to do and want to work on them:
• I would do these things differently if I did this activity or projectagain:
• I’d like to learn more about the following things in this skill area:
What I Learned About Me• Before we got started with this activity or project I felt:
• During this activity or project I felt:
• After the activity or project I felt:

ContentsWhat Leaders Need to KnowIntroduction ......................................................................... 9Definition of Writing & the Writing Process .............................. 9Helping Kids Become More Comfortable Writers......................... 9Life Skills ............................................................................10Self-Assessment & Evaluation ................................................ 10Glossary............................................................................... 11Careers ................................................................................ 12Notable Writers .................................................................... 12Ways to Involve Parents in the Writing Process & Practice .........12Using Written Communication in Your Youth Group .................. 13Beyond the Toolkit: More Ideas & Resources ............................ 14
Skill SheetsThe Writing Process .............................................................. 17Creative Writing ................................................................... 19News Writing ........................................................................ 20Steps to Creating a Newsletter ............................................... 22
Group Story Writing .............................................................. 23The ABC’s of Me .................................................................... 24Who’s in the News? ............................................................... 25Find Those W’s & That H! .......................................................26

COMMUNICATIONS TOOLKIT • Written Communications –9©2000 Michigan State University Board of Trustees.
What LeadersNeed to KnowIntroductionWhether your group writes songlyrics, “how-to” instructions, termpapers or newsletter articles, theability to write allows them to en-tertain, teach, inform or enlightenothers.
Writing is a nearly universal way ofcommunicating feelings, knowledge,ideas and intuition across genera-tions and even across cultures.
This section of the CommunicationsToolkit is designed to help youngpeople practice writing in manyways. Through the resources in thissection, you can:
• Explore ways to help kids becomemore comfortable with written com-munications.
• Use written communications skillsheets to find out how to use writ-ten communication in your youthgroup.
• Explore creative and practical usesof written communications.
• Explore careers that require writ-ten communication.
• Discover activities that help kidsexplore the writing process.
• Find out ways to learn more.
Definition ofWriting & theWriting ProcessIn this section of the Communica-tions Toolkit, we have defined “writ-ing” as “using language to compose
a set of ideas or concepts for pur-poses of communication.” Lan-guage, in this instance, can bewords, musical notes or any under-standable and appropriate charac-ter used to communicate a concept.
Although “The Writing Process” skillsheet on page 17 has numbered steps,writing as a process doesn’t alwaysflow into any particular pattern orline. Each step can lead to any otherstep that’s part of the process. Forinstance, once you draft your work,you may discover that a different for-mat would work better, or that youneed more information. Although allthe steps are integral to the process,each writer is responsible for decid-ing the order in which he or she willuse the steps to create a written work.
Again, whether it’s a poem, a song, aterm paper, a news story, a short storyor even directions for completing atask, writers must incorporate eachof these steps to effectively expressthemselves in writing.
Helping KidsBecome MoreComfortableWritersReading to WriteHow do you motivate kids to com-fortably take pen in hand? One easyway is to encourage them to read –or to read to them – written works ofall sorts. These could include comicbooks, short stories, newspapers, nov-els, magazines, CD liner notes, poetryand sheet music. When kids can ap-preciate the sound, the motion, the
rhythm of words that are spoken, itgives them an excellent idea of whattheir own written words can do foran audience. Consider these ideas forhelping kids learn to appreciate goodwriting:
• Read out loud to the group froma variety of works. For instance,read a short story out loud and havethe members critique it for interest,entertainment value and writingstyle. Ask them whether the infor-mation would have worked betterin a different format. Were therepassages that were boring or hardto understand? Ask them to improvethe text, change the ending or re-format the information into a betterpresentation.
• Have the kids turn a front-pagenewspaper article into a two-minutetelevision news story or a news-paper display ad into a 30-secondradio spot.
• Ask the young people to put thewords of a poem to music. Read thepoem out loud, then have the kidsadapt the words to familiar musicaltunes. Tell them it’s okay to changethe words to fit the music better.
• Ask for a volunteer to read a shortstory out loud to the group. Thenhave the volunteer read it again,changing the story’s ending. (Short,fictional stories that can be read in15 minutes or less work best. Yourlocal librarian can help you iden-tify books that would work well.)
• As kids show an interest in dif-ferent forms of writing, encouragethem to learn more about that formby reading other people’s work.
10 – COMMUNICATIONS TOOLKIT • Written Communications©2000 Michigan State University Board of Trustees.
Have them study how a piece is or-ganized, how long it is (andwhether that length was appropri-ate) and what the author empha-sized in it. Have the group experi-ment with writing the piece fromtheir own point of view or experi-ences. If the piece is about a sub-ject they know something about,ask them if the piece contained newor unfamiliar words. If there were,have the kids think of simpler oreasier ways to express the samethought or information.
• Have your group members expandon the typical book report by read-ing a newspaper story, a writtenpiece on a subject they’re interestedin, a poem, short story, novel orchildren’s book. Then have themwrite the answers to several ques-tions about what they read:- How did the story make you
feel?- What did the story explain or
talk about?- Was the work a fair treatment
of the subject matter?- What information was impor-
tant for you to know that wasleft out of the story?
Understanding theMeaning of WordsWhen kids look at words as funpuzzles to explore and solve, insteadof as stumbling blocks to under-standing, their comfort with read-ing and writing increases.
Strategies for increasing kids’ com-fort with words include:
• Have kids read a newspaper, shortstory, speech or any written com-munication. Ask them to jot downwords that are new to them, thatthey don’t understand or that theylike and would like to learn moreabout. Then have the kids look upthe words in a dictionary to discovertheir meaning or in a thesaurus to
discover a simpler word the authorcould have used to increase thereader’s understanding.
• Have the group work together tochoose a word of the month. Writethe word on a sheet of newsprintand post it somewhere in yourmeeting room that is visible to ev-eryone. Challenge kids to use theword as often and as creatively asthey possibly can in their writtenwork for the group that month.Make a chart to track the members’use of the word. Place a star by eachperson’s name each time he or shesuccessfully uses the word. At theend of the month, reward the per-son who was able to incorporate the“word of the month” into the mostwriting exercises or group writingexperiences.
• Develop a list of words that maybe unfamiliar to the group. Askthem to guess the complicatedwords’ definitions by breaking themapart. For example, by breaking“malodorous” into its smaller rootwords, (“mal” or “bad” and “odor-ous” or “having an odor”) they canlearn that the word means bad odoror bad smelling. This exercise canhelp kids learn not to be intimi-dated by large words.
Life SkillsThe ability to write well is itself animportant and marketable life skill.The writing activities and skillsheets in this section will help de-velop young people’s ability to:
• Communicate and express them-selves effectively.
• Judge the value of informationfor a given purpose (for example,evaluating information for newswriting).
• Ask questions to gain moreinformation.
• Organize and plan for a finalproduct.
• Work as a team member (for ex-ample, creating a newsletter withothers).
• Build personal awareness and self-esteem by understanding their abili-ties and having an opportunity toexperience success.
• Manage feelings (for example,using writing as an expression offeelings).
So, you may be asking, how do youget kids to write? Well, there’s onlyone way – encourage them to write,write and write some more! The bestway to develop writing skills is justto do it. Use any and all opportuni-ties to encourage kids to practicewriting.
Also, allow kids to write simply toexpress themselves. Kids (and adults)can be intimidated and avoid writingaltogether if they’re afraid it won’tbe “perfect.” Tell kids to forget aboutspelling and grammatical details atfirst. Those things can certainly beaddressed some other time if thework is intended for publication.
This section of the CommunicationsToolkit offers a variety of activitiesand suggestions to help you helpkids write! It also offers resourcesto help you and your kids betterunderstand the concepts and toolsof written expression and commu-nication. Included are definitionsof different forms of written expres-sion, a list of writing resources andways to extend learning experiences“beyond the toolkit.”
Self-Assessment& EvaluationAfter each activity or project youlead with young people, please helpthem think about what theylearned. Make copies of the “What
COMMUNICATIONS TOOLKIT • Written Communications –11©2000 Michigan State University Board of Trustees.
I Learned” self-evaluation form onpage 8 and distribute them to yourgroup. Ask them to think quietlyabout the questions and make notesabout what they learned, how they
GlossaryPersonal ExpressionBook – A set of written, printedor blank sheets bound togetherinto a volume
Creative writing – Stories, po-ems, songs, plays or lyrics (seethe “Creative Writing” skill sheeton pg. 19)
Journal – A record of experi-ences, ideas or reflections keptregularly for private use
Mission statement – A state-ment that defines or outlines acalling, vocation or specific taskwith which a person or group ischarged
Public InformationFact sheet – A printed sheet thatpresents information that is trueor has objective reality
News release – A compilation ofmaterial that is newsworthy andappropriate for distribution in anewspaper, news periodical ornewscast
Newsletter – A printed sheet,pamphlet or small newspapercontaining news or informationof interest chiefly to a specialgroup
Public service announcement –A promotional message broadcastin the public interest on televi-sion and radio stations at no costto the provider
Speech – Communication or ex-pression of thoughts in spokenwords; a public discourse or address
Video scripts – Written text usedin production or performance of avideotape
PromotionAdvertisement (Ad) – An act orprocess (that is, broadcast) or no-tice used to make somethingknown, announce publicly or callpublic attention to
Brochure – A pamphlet or bookletcontaining descriptive or advertis-ing material
Flier – A form of advertisementdistributed by hand to, or pickedup by, a particular audience
Jingle – A short verse or songmarked by catchy repetition
Poster – A bill or placard for post-ing in a public place
OtherCase statement – A written state-ment describing a situation requir-ing action; usually used for cam-paigns to raise financial or emo-tional support for a project
Communication outline – A planor preliminary account of how youplan to communicate; can helpwriters organize their thoughts towrite for any media
feel about their skills in that areaand what they’d like to learn moreabout. Then lead a discussion withthe whole group and ask if anyonewants to share what they came up
Copy – Manuscript or textmaterial
Essay – An analytic or interpre-tative literary composition usu-ally dealing with a subject froma limited or personal point ofview
Grant proposal – A written re-quest for financial support thatoutlines an action plan, budget,and rationale and support forwhy the money is needed
Project proposals – A writtensynopsis of a proposed activitythat includes goals, intendedoutcomes and a plan of action
School reports – Written reportsdesigned to explain, educateabout or describe a subject ortopic, usually for academic creditor a grade
with. Young people may want tokeep their “What I Learned” self-evaluation forms to refer to laterand as a way to document theirlearning process.

12 – COMMUNICATIONS TOOLKIT • Written Communications©2000 Michigan State University Board of Trustees.
CareersMost jobs require some writingskills, but a few jobs require (or al-low, depending on your point ofview) higher-level, full-time writingskills. As the group considers thefollowing list of career options, askthe participants what form ofwritten communication a person ineach field would use. (You can usethe glossary on pg. 11 as a resource.)• Advertising, marketing or
public relations professional• Author• Clergy member• Curriculum developer or
specialist• Editor• Fund-raiser• Journalist• Label/packaging writer• Legislative aide• Novelist• Playwright• Poet• Professor• Script writer for film,
television, radio• Songwriter• Speech writer• Technical writer
Notable WritersHaving excellent writing skills hasenabled many historical and notablepersonalities to make importantcontributions to our lives and tosociety.
Louisa May Alcott – Her classicworks have become standard class-room literature for many young stu-dents. In 1994, her most famouswork, Little Women, again was madeinto a major motion picture, a mere126 years after the book was firstpublished!
Maya Angelou – The actress, poetand novelist earned national atten-tion in 1993 when she read herpoem, “The Pulse of the Morning,”at President Clinton’s inauguration.
Judy Blume – Adolescents aroundthe world have enjoyed and learnedfrom the entertaining books aboutgrowing up written by this author.
Hillary Rodham Clinton – The FirstLady of the Clinton Administration,who is also a lawyer, has writtenlandmark briefs during her legalcareer. And her book, It Takes a Vil-lage to Raise a Child, written dur-ing her husband’s first term in theWhite House, has been a rallyingcry for people working on behalf ofchildren, youth and families.
Charles Dickens – The words of thisclassical writer have made him im-mortal.
Martin Luther King Jr. – Dr. Kingwas a wonderful writer who usedlanguage to create memorable andhistory-making speeches. His wordshelped convince people of the mer-its of racial equality and worldpeace.
Charles Schultz – The creator ofthe Peanuts comic strip happens tobe an excellent illustrator, too! He’sa great example of a writer who usesanother medium to communicatehis ideas.
Dr. Seuss – This genius of rhymeand imagination taught kids andadults alike how much fun wordsand writing can be!
Will Smith – “The Fresh Prince” isexpert at using verse to communicatecontemporary ideas in a languageand style that kids can understand.
Ways to InvolveParents in theWriting Process& PracticeThe very best way for young peopleto become better writers is for themto write as often as they can. En-list the help of parents in your ef-forts to encourage writing in the fol-lowing ways:
• Encourage parents to write let-ters to their kids and have the kidswrite them back. If parents haveelectronic mail (email) addresses,have them share the address withtheir kids and encourage them toexchange messages or short letters.Even without email, parents can usea similar technique by stamping andaddressing 12 envelopes to theirwork addresses. Once a month, par-ents can encourage their childrento send a letter that captures theirthoughts and what’s going on thatmonth. Parents can write backthrough the mail.
• Poll parents to see if there arewriters in the group. If there are,invite them to be a part of a ses-sion that focuses on the kind ofwriting they do professionally orpersonally.
• Ask parents to encourage journalwriting at home. Have them helptheir kids keep holiday or vacationjournals.
• Plan a parent’s night where kidscan formally present and showcasetheir written works for their parents.
• Have parents become partnerswith their children in creating sto-ries about the family history.
COMMUNICATIONS TOOLKIT • Written Communications –13©2000 Michigan State University Board of Trustees.
Other ideas for parent involvementmight become apparent in the pro-cess of helping kids develop theirwriting skills. You also could ask thekids to talk about ways they wouldlike to work with their parents ontheir writing skills and help encour-age that involvement in your inter-actions with parents.
Using WrittenCommunication inYour Youth GroupCreative Writing as aGroup ProjectOne great way for young people toexplore creative writing is to do sowith friends or other young peoplewho share the same interests. Kidscan learn about themselves andeach other through the opportuni-ties for personal expression thatcreative writing provides. Activitiesinclude writing poetry, short sto-ries and novels, songs and plays.
Consider having your creative writ-ing group try one or more of theactivity ideas that follow.
Explore writing forms – Eachmonth choose a form of creativewriting your group would like toexplore. Spend the first part of yourtime together reading or reviewingan acknowledged quality work inthat form. For example, for a closelook at poetry, the group could readworks by one of our nation’s poetlaureates such as Robert Frost orMaya Angelou. To study song lyr-ics, check out works by artists onthe top ten lists published by out-lets such as Billboard magazine.(Song lyrics are often printed onalbum jackets or CD liner notes.)Your local library or bookstore canhelp you find examples of popularkids books or books that kids havebeen assigned to read in school.
Then offer kids a way to expressthemselves and their thoughts orideas through that same medium.Some forms (books) may take longerto explore than just one meeting.By the end of the project year (orby county fair time), they couldhave several works completed forexhibit or recognition.
Publish a creative writing news-letter or magazine – Have eachmember submit at least one piecefor each issue to share with othergroup members, parents, all county4-H families or whatever audienceyour group has identified. If theychoose to do a magazine, they couldhelp pay for it by seeking localsponsorship from a publishing com-pany or printer, or by selling ads.
Organize peer review sessions –Encourage the members to practicesome form of creative writing be-tween meetings. Require each writerto bring at least one completedwork or work-in-progress to eachmeeting for review. Establish guide-lines to ensure that criticism is pro-ductive and valuable to the writer,so that his or her creative energyisn’t crushed. As the peer reviewersread or listen to a work, have themthink about and be ready to answerthe following questions:
• What did the work make you thinkabout while you read or listened toit?
• How did it make you feel? Didyou feel anything after listening toor reading the work?
• What did you learn that you didn’tknow before, either about the writeror the subject?
• What did you want to know thatthe writer failed to share or illumi-nate in the writing?
• What would have made the workmore powerful for you?
Have each writer go through the samereview process. Think about sharingsome of your own writing, too. Askthe group to discuss the responses.This activity should be set up and runas a safe environment, one that nur-tures the creative growth of thewriter. Writers should be willing tolisten to and learn from the peer re-viewers, and to understand how theirwriting affects others.
Using a GroupNewsletter toExplore Writing SkillsNewsletters are designed to deliverspecific information to an identi-fied audience on a regular basis.Youth groups could use newslettersto communicate important informa-tion to their members, recognizethe activities or accomplishmentsof their members and showcase theirmembers’ knowledge or skills (suchas in creative writing).
How can your group decide whetherthey need to produce a newsletter?A newsletter can be a good com-munication tool when the informa-tion you want to communicate is:
• Intended for people with an ob-vious common interest.
• Confined to limited interests ordeals with one subject matter (suchas the operations of the local 4-Hclub or group).
• Relevant and useful to the readers.
• Reliable, accurate and consideredtrustworthy by the audience.
• Familiar and personal. That is, thepublishers are people the readersknow and can contact easily.
• Short and to the point. The infor-mation can be read quickly.
• Timely, referring to the recentpast, present or near future.
14 – COMMUNICATIONS TOOLKIT • Written Communications©2000 Michigan State University Board of Trustees.
See the “Steps to Creating a News-letter” on pg. 22 for more informa-tion.
Writing as aClub ProjectIf you have a group of kids whoseprimary interest is in writing andcommunications, consider startinga writing club. Your group couldserve as a resource to other clubsor groups in your community thatare interested in making writing apart of their program.
Your group could be responsible for:
• The county 4-H newsletter.Group members could be responsiblefor gathering news from through-out the county, writing stories, ed-iting submissions, and producingand distributing the newsletter. Thiscould be a year-long responsibilityor a one-time issue to note a majorevent or occasion.
• Writing and illustrating greet-ing cards that are unique to yourgroup or program.
• All promotion and publicity ac-tivities for a county 4-H programor youth organization. The groupcould serve as the program’s publicrelations firm. They could work withthe local staff to prepare and dis-tribute news releases, brochures,advertisements, public service an-nouncements, special histories orwritten pieces for special events.These writing, production and me-
dia relations opportunities can givekids portfolio pieces that couldstrengthen later college or jobapplications.
• Creating county 4-H programexhibits or ads for your organi-zation. If your group members areinterested in strengthening theirwritten and visual communicationsskills, this could be an excellentproject that benefits the countyprogram and provides a wealth ofpractical experience.
Writing to Strengthen4-H Project Knowledge4-H offers kids many opportunitiesto practice their writing skills. Mak-ing writing an integral part of the4-H project can ensure that youngpeople:
• Develop a broad knowledge oftheir project area.
• Become confident of their skill ina project through their ability towrite about it.
• Are able to communicate withothers about the skills and talentsthey have learned in a project area.
You can help your kids use writingto strengthen their project knowl-edge or knowledge on any subjectby encouraging them to write:
• Instructions on how to perform aproject task.
• Descriptions of pieces they havecreated, whether those pieces arephotographs, works of art, piecesof clothing or new or easier meth-ods for doing a project.
• Journals in which they regularlyrecord progress on their project orwork they are doing as part of thegroup.
• Promotional pieces (news releases,public service announcements, ads,fliers, brochures) about fund-
raisers, about their group to recruitvolunteers or members, or about anupcoming special event.
• Histories of the project or theirclub in their county.
• Speeches to deliver during a meet-ing about the project.
• Résumés featuring project orgroup experiences that can trans-late into employment options.
• Project manuals for younger kidsinterested in taking up a project.
Any of these activities can becomea part of any project work in which4-H’ers or other young people en-gage. And it gives them what theyneed to become good writers – prac-tice, practice and more practice.
Beyond theToolkit:More Ideas &ResourcesThe Communityas a ResourceLibrariesWhat better place to explore allkinds of writing – from journals,periodicals and legal writings tonovels and nonfiction literature –than your local library?
On a visit to a local library you canhave group members check outbooks, then read and write reviewsof them.
Libraries are excellent places forwriters to research possible topics,or to learn about other writers andpeople whose success or fame isbased on their use of the writtenword. Libraries are also good sourcesof information on how other peoplefeel about an author’s work.
COMMUNICATIONS TOOLKIT • Written Communications –15©2000 Michigan State University Board of Trustees.
Newspapers
Your local newspaper can be a placefor your group to see professionalreporters and writers in action orfor you to find writers to speak toyour group. It can also be a placefor your members to test their writ-ing skills through letters to theeditor, opinion columns, or place-ment of news releases or other work.
Many newspapers solicit work byoutside writers in an effort to in-clude a variety of viewpoints andopinions on events and issues thataffect their coverage areas. Somenewspapers even dedicate a page orsection each week to teen issues,featuring articles submitted byyoung adult writers. Look on theeditorial page for guidelines on sub-mitting letters to the editor andother types of articles, or call thenewspaper’s editorial offices.
Broadcast Media Outlets
Writing for radio and television dif-fers from writing for a print me-dium. Air time is – literally – money,and the writing reflects that. Newsand opinion pieces are generallyshorter and written with more ofan ear for how they sound thansimilar pieces intended for print.Arrange a tour of a radio or televi-sion station and a talk by a staffwriter to help your group learnabout the unique skills requiredwhen writing for broadcast. Audio-or videotape a radio or televisionnews broadcast and play the tapeat a later meeting. Have the grouptime the stories and listen for dif-ferences in the writing style fornews stories, advertising copy andpublic service announcements.
Bookstores
Schedule a group visit to a book-store. While you’re there, survey thebestseller lists to take a “snapshot”
of what the public wants to read.Ask the manager to talk to yourgroup about what people come tothe store to buy, what themes ortitles are popular in literature to-day and what kind of how-to infor-mation is selling well in the store.Visiting a bookstore can be espe-cially informative for someone con-sidering becoming a professionalwriter.
City Magazines
Many major cities have magazinesthat focus primarily on local sto-ries. If your city has a dedicatedmagazine, arrange for your groupto interview the editors and find outwhat kinds of stories they’re lookingfor. Do they accept creative worksfrom freelance authors or writers?Do they accept contributions fromyoung people? Do they hire paid orvolunteer interns or correspondentsto cover issues that affect youngpeople in the community?
Books & ElectronicResourcesBooks on Developing LanguageArts Skills
• A dictionary and a thesaurus. Allwriters need these reference toolsto help them improve their writingskills
• Language Arts Activities for Chil-dren (3rd edition), by Donna E.Norton and Saundra Norton. CollegeStation, Texas: Texas A&M Univer-sity, Merrill Press, 1994.
• Picture This: Teaching ReadingThrough Visualization, by LauraRose. Tucson, Arizona: Zephyr Press,1989.
• Spuntz I: Language Arts Activitiesfor Self-Awareness, by MerrillHarmin, Ph.D. Tucson, Arizona:Zephyr Press, 1992.
• Whole Language in Action! Teach-ing With Children’s Literature, by
Nancy Polette. O’Fallen, Missouri:Book Lures Inc., 1990.
Books on Developing WritingSkills• The Associated Press Stylebook andLibel Manual, edited by NormGoldstein. New York: The AssociatedPress. 1996. The most widely usedand taught reference book for news-style writing; useful for newsletterdevelopment, news releases andbroadcast writing. It is updatedperiodically.
• Plan It: Your Personal Guide toMaking a Plan and Carrying It Out(4-H 1501), Michigan 4-H YouthPrograms, 1991. This worksheethelps kids construct plans by an-ticipating their needs and obstacles,with the ultimate goal of sharingwhat they learn. (Available from theMichigan State University BulletinOffice, 10B Agriculture Hall, EastLansing, MI 48824-1039.)
• Recipes for Writing: Motivation,Skills and Activities, by Murray Suidand Wanda Lincoln. Addison-WesleyPublishing Company Inc., 1989. Acomprehensive resource for explor-ing the writing process and a vari-ety of writing forms. The book in-cludes copy-ready forms and activi-ties for helping young people write.“Recipes for Writing” can serve as agreat companion to this toolkit.
• So You’ve Been Elected Reporter ofYour Club (4-H 1472), Michigan 4-HYouth Programs (reprinted withpermission from the Iowa StateUniversity and Illinois State Univer-sity Cooperative Extension Ser-vices), 1989. This bulletin offersguidelines for promotional and newswriting, with an example of a newsstory’s development and tips forwriting effective news articles. Italso includes a practice worksheet.(Available from the Michigan StateUniversity Bulletin Office, 10B Ag-riculture Hall, East Lansing, MI48824-1039.)
16 – COMMUNICATIONS TOOLKIT • Written Communications©2000 Michigan State University Board of Trustees.
• Ways to Learn More Packet (4–H1499), Michigan 4-H Youth Programs,1991. Expanding kids’ knowledge isthe goal of this folder! Kids are giveninformation on writing in 18 areas –from business letters to pen pals, fieldjournals to questionnaires and sur-veys, résumés to telephone resources– in a fun and exciting way. (Avail-able from the Michigan State Univer-sity Bulletin Office, 10B AgricultureHall, East Lansing, MI 48824-1039.)
• Writing: How and Why, by MatthewLipman with Ann M. Sharp. UpperMontclair, New Jersey: Institute forthe Advancement of Philosophy forChildren, 1980.
Electronic Resources
The following Internet or World WideWeb (WWW) resources feature oppor-tunities for language arts and writ-ing skill development. Keep in mindthat Internet and WWW addressestend to change fairly often. Use thegeneral categories listed here assearch terms with any of the Internetsearch engines: “writing,” “creativewriting,” “news writing,” “poetry,”“literature,” “children’s literature,”“authors,” “novelists” or “publishers.”You could also have the participantscome up with their own set of searchterms. (See pg. 134 for informationon Internet safety.)
The Big Busy House (http://www.h a r p e r c h i l d re ns . c om/index.htm) – This commercial site,a section of the HarperCollins Pub-
lishers site, offers information onchildren’s literature and activitiesthat encourage reading and lan-guage arts skill development.
The Children’s Literature WebGuide (http://www.ucalgary.ca/~dkbrown/) – Provides a compre-hensive listing of children’s litera-ture and access to sites where kidscan publish their works online.
Cyberkids (http://www. cyberkids.com) and Cyberteens (http://www.cyberteens.com) – Two onlinecommercial magazines that publishoriginal electronic stories and artcreated by kids and teens.
Elements of Style (http://www.bartleby.com/141/index.html)– Columbia University offers anonline version of this invaluablewriter’s tool that is also publishedby MacMillan Publishing CompanyInc., New York.
Kids Web (http://www.kidsvista.com) – A digital library of WorldWide Web resources appropriate forkids. Each subject section, includ-ing literature, music and drama,contains a list of links to informa-tion that is understandable and in-teresting to school kids. It also fea-tures links to more advanced mate-rial on each subject.
MidLink Magazine (http://longwood.cs.ucf.edu~MidLink/) –An electronic magazine for kids inthe middle grades (generally aged10 to 15) that provides an interac-tive space to enjoy art and writing.
It links middle school students allover the world.
• Schoolhouse Rock (http://genxtv l and . s imp lene t . com/SchoolHouseRock/index-lo.shtml) –An online compilation of the edu-cational series that airs on the ABCtelevision network between Saturdaymorning cartoons. The site providesa great way to help kids explore howwords and music can be combinedto teach complicated concepts.
• Word Play (http://www.wolinskyweb.com/word.htm) – Aguide to sites that feature fun withwords. The listing is an extensive,reviewed list of Web sites that ex-plore words in their many forms.Also features word games that youcan adapt and use with your groupto get them feeling more comfort-able with words. As with all Websites, an adult should review thesuggested sites for age and contentappropriateness before sharing withkids.
COMMUNICATIONS TOOLKIT • Written Communications –17©2000 Michigan State University Board of Trustees.
SKILL SHEET:
The Writing Process
There are seven basicsteps to writing. Usethis skill sheet to helpyou through the steps.And remember, writingas a process doesn’t flowinto any particularpattern or line. Itdoesn’t matter so muchhow you incorporate thesteps, but that yourwriting should includesome attention to eachof the steps.
Step 1: Find IdeasAsk yourself what and who arepeople talking about? What’s beenon your mind a lot lately? Whatwould you like to do somethingabout? What do you find most in-teresting? These are the start ofideas you can write about. Nowwrite them down and save them.When you’re ready to begin yourwriting project, pull them out andpick out the idea that most appealsto you.
Step 2: PlanOnce you’ve picked out the idea thatmost appeals to you, decide whomost needs to read or hear youridea. Who is your audience? Whatis the goal of your work? Do youwant to entertain, inform or teachyour audience? Do you want to ex-press your opinion or describe youridea? Or do you want to changepeople’s minds or the way they act?In planning you should:
• Define your audience.
• Decide on the purpose of yourwriting.
• Decide if you will give anoverview or discuss a smallpart of your idea.
• Write your title.
• Decide on your format – will itbe a song, a poem, an essay, anews article, a feature story, aposter, a videotape, a bumpersticker?
• Decide the length of yourpiece.
• Decide whose point of view youwill write from – yours (firstperson – I), your audience(second person – you) or someother person’s (third person –he, she or they).
• Determine your tone. Will yourwritings show strength, humor,fear, celebration? Will you bequiet, easy, restful or loud,boisterous, wacky? Decidingthis point will help you choosethe words you need to makeyour point.
Step 3: ResearchThere are many places you can goand methods you can use to re-search a story. First determine whatyou most need to know about yourstory idea. Then decide how you willfind out what you need to know.Will you go to the library or surfthe Internet? Will you interviewpeople? Will you watch, look andlisten? Once you determine whatyou need to know and how you canget the information, go to thesource and record what’s necessaryto help you write your piece. Be sureto check your sources to ensure thatthe information is up-to-date andaccurate. This might require check-ing more than one source for all theinformation you need to gather.
Step 4: OrganizeDecide how you’ll approach the in-formation. You can present infor-mation in chronological order (mea-sured by time), spatial order (fromtop to bottom, from end to begin-ning, from left to right or viceversa), rank order (best to worst,
18 – COMMUNICATIONS TOOLKIT • Written Communications©2000 Michigan State University Board of Trustees.
most important to least important,first to last, biggest to smallest) oreven emotional order (from happyto sad, from anger to resolution,from uninformed to informed).
Step 5: DraftTake your idea, and your plan forthe best way to approach that idea,and all of the information you’vegathered in your research aboutthat idea and your outline for or-ganizing your idea – and write!Develop a practice version of thepiece you want to create.
Step 6: ReviseNow, take a break from the piece.Sometimes even a 30-minute breakhelps you see it much clearer, butthe best break would be betweengroup meetings, if you have thetime. When you pick up your workagain, read it first to decide if itmeets your goals. Does it entertain,inform, educate, encourage or ex-cite you? Is everything you need tobe there in your manuscript? Thebest way to determine this wouldbe to have a friend or partner readand react to your work. Have theperson tell you if there are parts heor she doesn’t understand or feelsyou left out. Ask the person to sharehow the piece made him or her feel.Did it achieve what you wanted toachieve with your audience? Alsohave the person point out any ob-
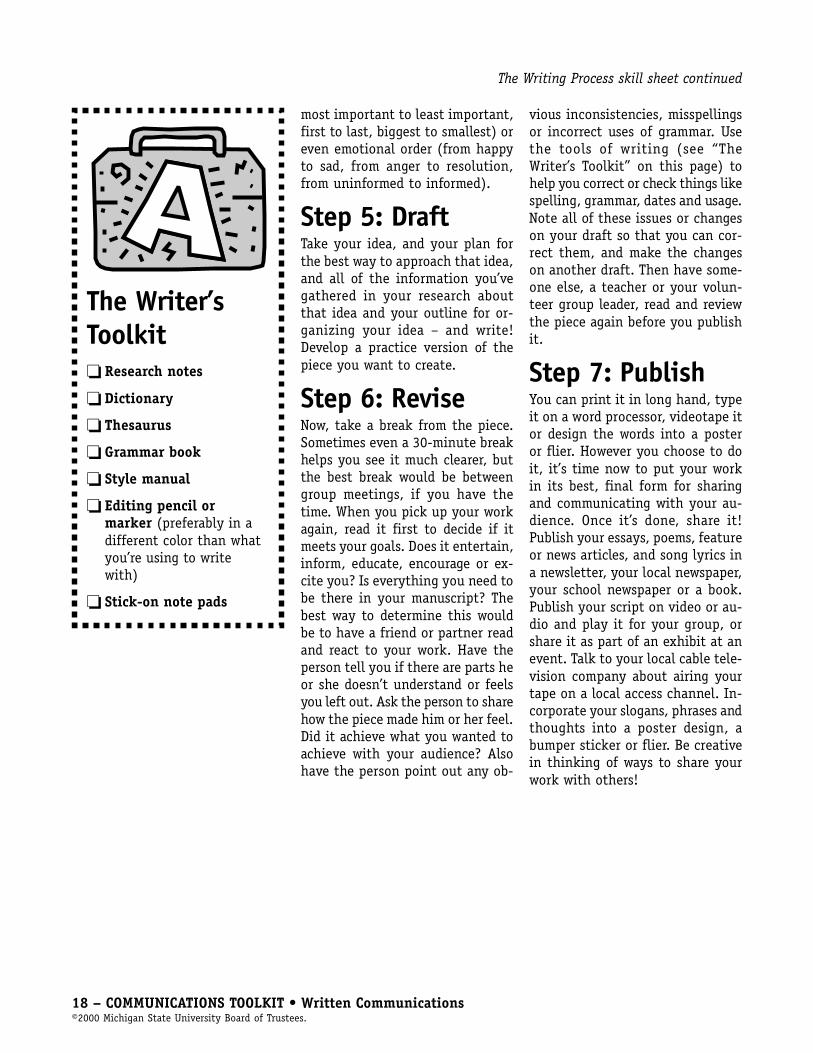
The Writer’sToolkit� Research notes
� Dictionary
� Thesaurus
� Grammar book
� Style manual
� Editing pencil ormarker (preferably in adifferent color than whatyou’re using to writewith)
� Stick-on note pads
The Writing Process skill sheet continued
vious inconsistencies, misspellingsor incorrect uses of grammar. Usethe tools of writing (see “TheWriter’s Toolkit” on this page) tohelp you correct or check things likespelling, grammar, dates and usage.Note all of these issues or changeson your draft so that you can cor-rect them, and make the changeson another draft. Then have some-one else, a teacher or your volun-teer group leader, read and reviewthe piece again before you publishit.
Step 7: PublishYou can print it in long hand, typeit on a word processor, videotape itor design the words into a posteror flier. However you choose to doit, it’s time now to put your workin its best, final form for sharingand communicating with your au-dience. Once it’s done, share it!Publish your essays, poems, featureor news articles, and song lyrics ina newsletter, your local newspaper,your school newspaper or a book.Publish your script on video or au-dio and play it for your group, orshare it as part of an exhibit at anevent. Talk to your local cable tele-vision company about airing yourtape on a local access channel. In-corporate your slogans, phrases andthoughts into a poster design, abumper sticker or flier. Be creativein thinking of ways to share yourwork with others!

COMMUNICATIONS TOOLKIT • Written Communications –19©2000 Michigan State University Board of Trustees.
SKILL SHEET:
Creative Writing
Use the Seven StepsWhether you decide to write a cartoon or comic strip,a play, a poem, a song or a story, it’s very importantthat you follow the seven steps of the writing process:
1. Finding ideas.
2. Planning how you will create the piece.
3. Gathering the information you need to completethe piece.
4. Outlining how you will present the information.
5. Creating a first draft.
6. Editing or revising that draft.
7. Publishing the work.
Use the “Writing Process” skill sheet (see pg. 17) as acompanion to this one when you begin creative writ-ing. The special features of some creative writing formscan help you work through the process of writing.
The Cartoon or Comic StripA cartoon or comic strip is a drawing or series of draw-ings designed to entertain or make a point. The wordsin cartoons or comic strips are there to:
• Provide the characters’ thoughts or dialogue(usually appear in balloons over the character’simage or at the bottom of the cartoon panel).
• Identify or label graphic images. This is particu-larly important when the drawing itself doesn’tclearly and completely convey the point thecartoonist is trying to make.
Cartoonists typically use very few words in this cre-ative format, so they must choose the words they usewith great care.
The PlayOne of the key elements that distinguishes plays ordramas is the importance of dialogue and physical ac-tion. Dialogue and action are used to illustrate or tellthe story to an audience. Plays or dramas usually in-clude all of the elements found in a written story, but
they have the added advantage of helping people hearand visualize the feelings, emotions and conflicts ofthe characters through live performance.
The PoemA poem is a work composed of lines of verse that mayor may not rhyme. Poems – whether they rhyme ornot – often have a rhythm to them, especially whenread aloud. Although rhyming lines of verse can beeasy, it is more important that the rhymes have mean-ing or make sense to the reader. The mix of verse shouldclearly lead to the reader understanding a message,idea or concept. In writing a poem, the writer alsomust decide where the lines will rhyme. Will everyother line rhyme or will the rhyme come at other times?What will be the rhythm or beat of your poem? Thisquestion is important whether your verse rhymes ornot. Short poems (one or two lines) can be used tocreate greeting cards. Unlike the freedom of poemsand other prose, greeting card poems are often guidedby the occasion the card is designed to recognize.
The SongA song is a work of words (the lyrics) and music (thetune). Songs are distinguished by the ability to flowwords and their meaning to a tune you’ve identified.Often songwriters adapt the music of nursery songs oradapt their verses to popular music. Works of poetryoften can be put to music to create songs. Make surethe mood of the music matches or complements themood and tone of your words.
The StoryA story is an account of events, incidents or situa-tions. The format for most stories includes an intro-duction of the key characters or locations, the devel-opment of some kind of conflict or problem one or allof the characters face, descriptions of all the interest-ing things readers need to know about the character(s)and the conflict, a dramatic resolution to the conflictor problem (the climax) and then a conclusion.

20 – COMMUNICATIONS TOOLKIT • Written Communications©2000 Michigan State University Board of Trustees.
SKILL SHEET:
News Writing
Whether you’re writingnews releases to send tothe media or writing astory for your group’snewsletter, followingthese news writing tipswill help you success-fully communicate whatpeople really need toknow.
What Is News?The best way to decide what is “news” in your community is to read,listen and watch. What are reporters writing about in your local newspa-per? What are broadcasters talking about on the local nightly newscast?What are people talking about in your community? In most cases, newsconsists of the events, people and ideas that are:
• Local – Happening in your community, to your community, withyour community.
• Timely – Happening now or near to now.
• New – Unique, different or never been done before.
• Important – Affects lots of people in your community.
• Progressive – Improves the way we live, learn and do things.
• In conflict – Involves tension or struggle.
• Of human interest – Makes people feel or react.
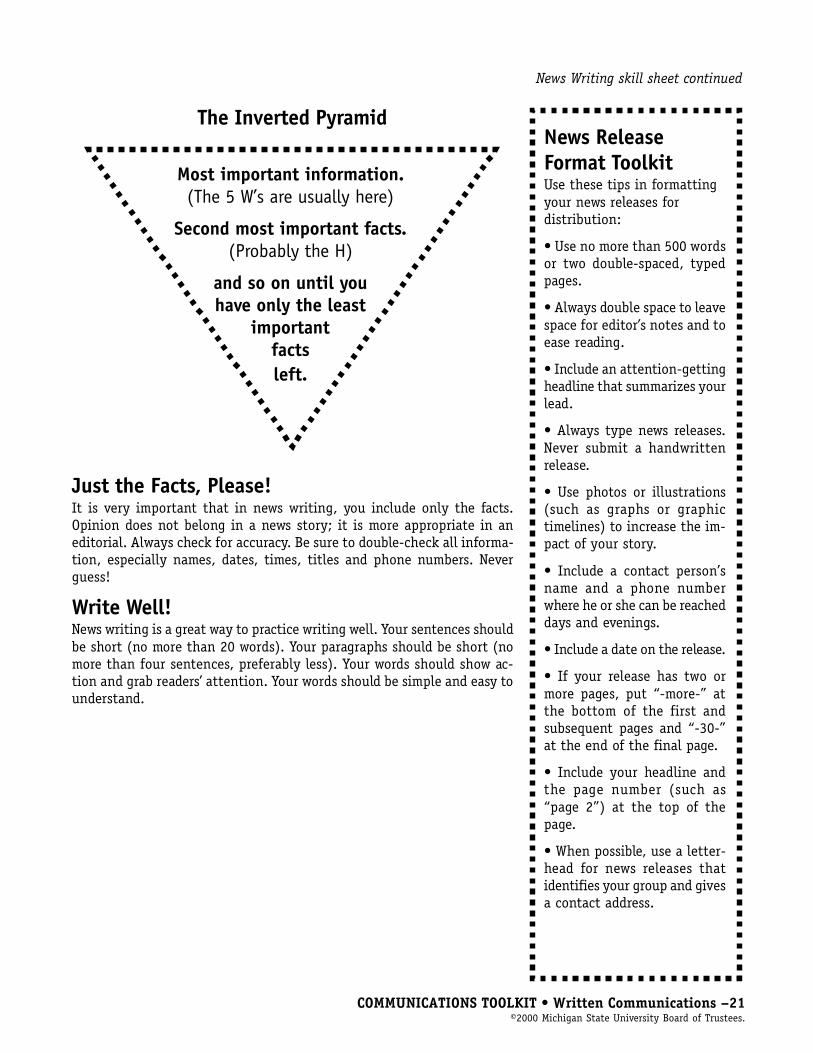
The Five W’s and the HThe very first thing a person should read in your story are the Five W’s,and maybe the H!
• Who is your story about?
• What is your story about?
• When did or will the story occur?
• Where did it or will it take place?
• Why did or will it take place?
• Why does or should anyone care?
• How did or will it happen?
By identifying the who, what, when, where, why and how of your storyidea, you help the media and your intended audience decide whether thestory is worth their time to read. The five W’s are typically the elementsthat make up the first sentence or paragraph of the story – the lead. TheH is more often found in the balance or the detail of the story, but it stillneeds to be one of the first things the reader gets from your story.
Inverted PyramidMake your point and make it fast (your five W’s and H lead) and thengive the facts and details from most important to least important as yourstory progresses. In news writing this is called the inverted pyramid.Your writing should allow an editor to cut from the bottom and not losethe essence of the story you’re trying to tell.
COMMUNICATIONS TOOLKIT • Written Communications –21©2000 Michigan State University Board of Trustees.
News Writing skill sheet continued
News ReleaseFormat ToolkitUse these tips in formattingyour news releases fordistribution:
• Use no more than 500 wordsor two double-spaced, typedpages.
• Always double space to leavespace for editor’s notes and toease reading.
• Include an attention-gettingheadline that summarizes yourlead.
• Always type news releases.Never submit a handwrittenrelease.
• Use photos or illustrations(such as graphs or graphictimelines) to increase the im-pact of your story.
• Include a contact person’sname and a phone numberwhere he or she can be reacheddays and evenings.
• Include a date on the release.
• If your release has two ormore pages, put “-more-” atthe bottom of the first andsubsequent pages and “-30-”at the end of the final page.
• Include your headline andthe page number (such as“page 2”) at the top of thepage.
• When possible, use a letter-head for news releases thatidentifies your group and givesa contact address.
Most important information.(The 5 W’s are usually here)
Second most important facts.(Probably the H)
and so on until youhave only the least
importantfactsleft.
The Inverted Pyramid
Just the Facts, Please!It is very important that in news writing, you include only the facts.Opinion does not belong in a news story; it is more appropriate in aneditorial. Always check for accuracy. Be sure to double-check all informa-tion, especially names, dates, times, titles and phone numbers. Neverguess!
Write Well!News writing is a great way to practice writing well. Your sentences shouldbe short (no more than 20 words). Your paragraphs should be short (nomore than four sentences, preferably less). Your words should show ac-tion and grab readers’ attention. Your words should be simple and easy tounderstand.

22 – COMMUNICATIONS TOOLKIT • Written Communications©2000 Michigan State University Board of Trustees.
SKILL SHEET:
Steps to Creating aNewsletterIf you decide anewsletter is a goodcommunication tool foryour group, the stepsand questions on thissheet will help you getstarted.
Step1:Establish goals and objectives forthe newsletter to guide the con-tent, design and budget.
Step 2:Identify the newsletter’s audi-ence. Who do you most need tocommunicate with to reach yourgoals for publishing? Do you have away to distribute the newsletter tothis audience? What informationand format will interest the audience?
Step 3:Decide on the newsletter’s for-mat. Will it be text only? Will itinclude photographs or artwork?What paper and ink colors will youuse? What size will each page be?How many pages will each issuehave?
Step 4:Decide how often you will pub-lish. Monthly? Quarterly?
Step 5:Decide on the quality level youwant and can afford for yournewsletter. Will the newsletter bephotocopied, offset printed or de-livered to your readers electroni-cally, via computers?
Step 6:Name your newsletter.
Step 7:Develop a production time line.Decide when you want the news-letter to reach your readers, andwork backwards from that date toset up the production schedule.
Decide on the deadlines for:
• Copy to be submitted.
• Editing and proofreading to becompleted.
• Pages to be designed and laidout (keylined).
• The date the pages will go tothe printer or photocopier (or,in the case of an electronicnewsletter, posted to themailing list or put up on theWorld Wide Web).
• The newsletter to be deliveredto readers.
Step 8:Assign production responsibili-ties to group members. Assign-ments could include reporters orwriters, editors (you may need sepa-rate editors for news, arts and fea-tures), graphic artists and design-ers, photographers and distributionpersonnel.
Step 9:Publish your newsletter. Startingup and publishing a newsletterhelps kids to learn to write concisely,meet deadlines and work as a team.This wonderful group project canincorporate a variety of skills groupmembers may have. See the “NewsWriting” skill sheet (on pg. 20) fortips on how to write the news storiesand other pieces your group mightdecide to include in the newsletter.
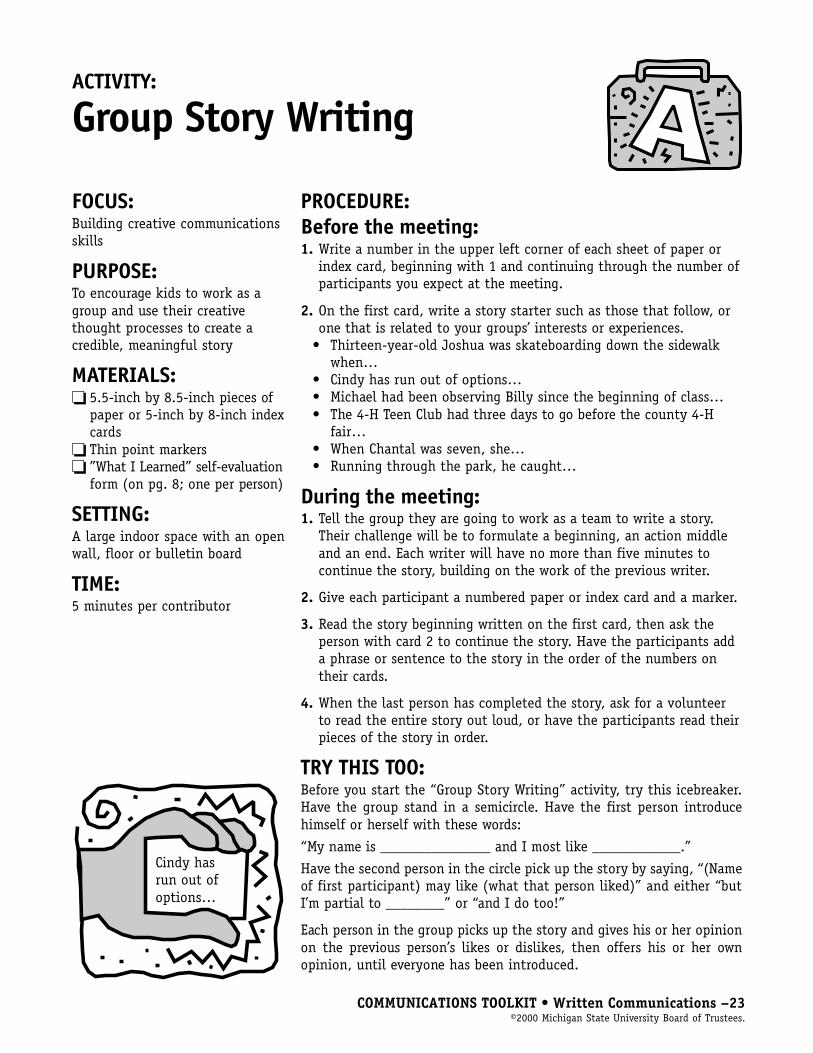
COMMUNICATIONS TOOLKIT • Written Communications –23©2000 Michigan State University Board of Trustees.
ACTIVITY:
Group Story Writing
FOCUS:Building creative communicationsskills
PURPOSE:To encourage kids to work as agroup and use their creativethought processes to create acredible, meaningful story
MATERIALS:� 5.5-inch by 8.5-inch pieces of
paper or 5-inch by 8-inch indexcards
� Thin point markers� ”What I Learned” self-evaluation
form (on pg. 8; one per person)
SETTING:A large indoor space with an openwall, floor or bulletin board
TIME:5 minutes per contributor
PROCEDURE:Before the meeting:1. Write a number in the upper left corner of each sheet of paper or
index card, beginning with 1 and continuing through the number ofparticipants you expect at the meeting.
2. On the first card, write a story starter such as those that follow, orone that is related to your groups’ interests or experiences.
• Thirteen-year-old Joshua was skateboarding down the sidewalkwhen…
• Cindy has run out of options…• Michael had been observing Billy since the beginning of class…• The 4-H Teen Club had three days to go before the county 4-H
fair…• When Chantal was seven, she…• Running through the park, he caught…
During the meeting:1. Tell the group they are going to work as a team to write a story.
Their challenge will be to formulate a beginning, an action middleand an end. Each writer will have no more than five minutes tocontinue the story, building on the work of the previous writer.
2. Give each participant a numbered paper or index card and a marker.
3. Read the story beginning written on the first card, then ask theperson with card 2 to continue the story. Have the participants adda phrase or sentence to the story in the order of the numbers ontheir cards.
4. When the last person has completed the story, ask for a volunteerto read the entire story out loud, or have the participants read theirpieces of the story in order.
TRY THIS TOO:Before you start the “Group Story Writing” activity, try this icebreaker.Have the group stand in a semicircle. Have the first person introducehimself or herself with these words:
“My name is _______________ and I most like ____________.”
Have the second person in the circle pick up the story by saying, “(Nameof first participant) may like (what that person liked)” and either “butI’m partial to ________” or “and I do too!”
Each person in the group picks up the story and gives his or her opinionon the previous person’s likes or dislikes, then offers his or her ownopinion, until everyone has been introduced.
Cindy hasrun out ofoptions…
24 – COMMUNICATIONS TOOLKIT • Written Communications©2000 Michigan State University Board of Trustees.
ACTIVITY:
The ABC’s of Me
FOCUS:Building creative communicationskills
PURPOSE:To have the participants create theirown alphabetical autobiographies
MATERIALS:� Newsprint� Marker� Masking tape� Paper� Pencils or pens� Dictionaries or thesauruses� ”What I Learned” self-evaluation
form (on pg. 8; one per person)
SETTING:A large space with writing surfaces
TIME:30–40 minutes
PROCEDURE:Before the meeting:Write a sample ABC autobiography on a sheet of newsprint and display itso that everyone can see it.
As my mother lay in labor at the hospital, she thought that she wouldsurely love an ice cream cone. Brother Bobby was wondering, he told meonce, whether he would finally get a male playmate or whether I wouldbe born a girl he would have to keep all his buddies away from. Cassie Iwas dubbed and protector he became…
During the meeting:1. Tell the group they’re going to write “The ABC’s of Me,” an autobiog-
raphy composed in 26 sentences. The first sentence starts with aword beginning with the letter “A,” the second sentence with aword beginning with the letter “B” and so on through the end ofthe alphabet. Read the sample ABC autobiography that you wroteon the newsprint to the group.
2. Tell the participants that proper names and titles are acceptable andthat they can use a dictionary or thesaurus if they are stuck.
3. Pass out paper and pens or pencils.
4. Give the group about 20 minutes to work on their autobiographies.When they’re done, have the participants take turns reading theirautobiographies to the group.
TRY THIS, TOO:Have the group write:• ABC stories about their project areas.• ABC biographies about a friend or family member.• ABC adaptations of published stories or fairy tales.• Autobiographies using the letters of their first name to start sen-
tences. For example:
JusticeJust a little bit into August, I was born.Under the astrological sign of Leo, that vivacious lion.Soon my parents named me “Justice,” because they saw great potentialfor me as a police officer or lawyer.Thus I spent my life developing the tools of peacekeeper and negotiator.In fact, as a youngster I often found amicable resolution to thesquabbles of my playmates.College helped me hone my choices, much to my parents dismay.Ever since I left the place, it’s a most artistic life I’ve led.
Adapted from Recipes for Writing:Motivation, Skills and Activities, byMurray Suid and Wanda Lincoln(Addison-Wesley Publishing Com-pany Inc., 1989)

COMMUNICATIONS TOOLKIT • Written Communications –25©2000 Michigan State University Board of Trustees.
ACTIVITY:
Who’s in the News?
FOCUS:To build news writing and analysisskills
PURPOSE:• To help participants understand
the purpose of news writing andhow the audience determinesthe style of the news article
• To help participants write aclear, informative and accuratenews story
MATERIALS:� Newsprint or chalkboard� Markers or chalk� Easel or masking tape� Local daily and weekly news-
papers� Pens or pencils� Equal numbers of name tags
that say “Reporter” and“Source”
� ”What I Learned” self-evaluationform (on pg. 8; one per person)
TIME:90 minutes or more (depending onsize of group)
SETTING:A room with desks or tables andchairs
PROCEDURE:Before the meeting:1. Collect several editions of local daily and weekly newspapers.
2. Prepare equal numbers of name tags that say “Source” and “Reporter.”
During the meeting:1. Tell the group they’ll have about 15 minutes to look through the
front (news), business, sports and feature sections of the newspa-pers. They should look for stories that feature the activities oractions of one person.
2. Take about 15 minutes and ask for volunteers to read aloud thearticles they selected. Tell the group to listen for the purpose of thearticle, the kind of information it included, and its intended audi-ence. Have a volunteer chart this information on the newsprint orchalkboard.
3. Have the group divide into pairs. Have each team pick up one“Source” and one “Reporter” name tag and decide who will playeach role.
4. Now tell the reporters they will have 15 minutes to interview thesources. The reporters should look for story angles (somethingnewsworthy, interesting, unique) that would appeal to the entiregroup. Encourage them to look for the kinds of angles they identi-fied in the newspaper articles.
5. After the 15-minute interviews are completed, give the reportersabout 20 minutes to “write up” their interview notes into articles.
6. If time allows, have the original “reporters” and “sources” traderoles and repeat the interview and article-writing process.
7. Ask for volunteers to read their articles to the group. Again havethe group listen for the purpose of the article, the kind of informa-tion it included, and its intended audience. Have a volunteer chartthe information on newsprint or the chalkboard.
TRY THIS TOO:Publish a group newsletter featuring the members’ articles. (See the “Stepsto Creating a Newsletter” skill sheet on pg. 22.)

26 – COMMUNICATIONS TOOLKIT • Written Communications©2000 Michigan State University Board of Trustees.
ACTIVITY:
Find Those W’s & That H!
FOCUS:To build news analysis and writingskills
PURPOSE:• To help participants under-
stand the elements of newswriting
• To help participants identifythe most important elementsof a news story
MATERIALS:� Daily and weekly newspapers� “Find Those W’s and That H”
handout (on pg. 28; two perparticipant)
� Pens or pencils� Newsprint or other large paper� Markers� ”What I Learned” self-evaluation
form (on pg. 8; one per person)
TIME:30 minutes or more, depending onsize of group
SETTING:Room that allows kids to work inpairs, either seated in chairs or onthe floor
PROCEDURE:Before the meeting:1. Collect several editions of local daily and weekly newspapers, or
copy several different front-page stories from different sections ofone newspaper to distribute to kids.
2. Make two copies for each participant of the “Find Those W’s andThat H” handout.
During the meeting:1. Group the kids into pairs to locate the “W’s” of the news stories
you’ve selected.
2. Explain the “5 W’s and the H” of news writing to the group – Who isthe story about? What is the story about? Where does the storytake place? When did the story take place? Why is the news impor-tant or why did the story take place? How did the story take place?Distribute a news story to each participant. Tell them they haveabout 5 minutes to locate all of the W’s and to note how far theyhad to look to get them all. They can use the “Find Those W’s andThat H” handout to note them all. (All five W’s and the H shouldshow up in the first two paragraphs of a news story. If they appearlower in the story, have the kids discuss and decide whether thestory is a news or feature story.)
3. After 5 minutes, have the kids switch news articles with theirpartners and repeat the process.
4. When they’re done, have each pair compare their sheets to see ifthey identified the same “5 W’s and the H.” Have the partners notethose stories where they had trouble finding all of the elements ordisagreed on which was the right W and H.
5. Now have the partners work together to decide what is the mostimportant of the elements they found in the story. Then have themwrite a new and different lead paragraph for the news story.
6. Bring the group back together and ask for volunteers to share theirwork. Have them read the first two paragraphs of their news storyand identify each of the “W’s and the H” of the story. If the part-ners disagreed on how they identified the elements of the story,have them share where they differed and why. (You also could justhave them read the story and see if the full group can identify thesame elements that they did.) After both partners have shared theirdiscoveries, have the team share their new lead paragraphs. Havethem share why they chose the elements they did to create the newlead.

COMMUNICATIONS TOOLKIT • Written Communications –27©2000 Michigan State University Board of Trustees.
7. If time permits, have the group do a creative critique comparing thenew lead to the original story lead.
TRY THIS TOO:As an icebreaker, have pairs find out the most important “W’s and H”about their partners and write lead paragraphs using that informationto introduce the partner.

28 – COMMUNICATIONS TOOLKIT • Written Communications©2000 Michigan State University Board of Trustees.
HANDOUT:
Find Those W’s & That H!
Look through a news article and see if you can locate the following elements:
Who:
What:
When:
Where:
Why:
How:
Which of the six was the most important or “newsy” of the elements? Why?
Write a new lead paragraph for the news story using the most important element you found in it.
TRY THIS TOO:Instead of using this handout with a news article, use it to find out about a friend or a person in your group.Write a lead paragraph to introduce the person to the rest of the group.

ContentsWhat Leaders Need to KnowWhy Learn About Vocal Expression? ........................................ 29A Comfortable Setting ........................................................... 29Life Skills ............................................................................29Self-Assessment & Evaluation ................................................ 29Public Speaking in Other Projects ........................................... 29You May Want to Know .......................................................... 30Who’s Talking Around Town? .................................................. 30Beyond the Toolkit: More Ideas & Resources ............................ 30
Skill SheetsDelivering a Vocal Presentation .............................................. 31Using Visual Aids .................................................................. 33Overcoming Stage Nerves .......................................................34Writing for Public Speaking ................................................... 35Tips for Effective Demonstrations ........................................... 36
IcebreakersSpeech Warm-Ups ................................................................. 38This Is My Friend .................................................................. 40Imagine It! ..........................................................................41
ActivitiesTell Me a Story (Illustrated Talks) ........................................... 42Show & Tell: A Demonstration Workshop .................................43Let’s Talk About Nerves ......................................................... 48What’s Wrong With This Picture? ............................................ 51
COMMUNICATIONS TOOLKIT • Vocal Expression & Public Speaking – 29©2000 Michigan State University Board of Trustees.
What LeadersNeed to KnowIf you asked kids to identify the as-signment they dread the most,chances are that most of themwould say “public speaking.” Speak-ing in front of their peers is prob-ably even more nerve-wracking tothem than speaking to a group oftotal strangers. Therefore, the goalof these public presentation materi-als is to help young people overcometheir fear of public speaking and in-crease their public speaking skills ina nonthreatening environment.
Why Learn AboutVocal Expression?Public speaking can seem daunting,but if a young person developsthese skills early on, the skills willbe an asset throughout his or herlife. People develop poise and self-confidence as they grow accustomedto standing before a crowd andsharing their thoughts and ideas.
As communication skills becomemore critical to the career world, sodoes the need for kids to learn theseskills. It’s also important for themto experience early success with ex-pressing themselves. This meansthat even though you may be afraidof public speaking because of badexperiences in the past or lack ofexperience, it’s time to put your fearsaside and really encourage yourmembers to stand up and speak up!Many kids don’t take the chance topractice public speaking because thepeople around them make it soundscarier than it is.
The activities in this section of theCommunications Toolkit should make
public speaking seem fun, not im-possible. This requires you to createan environment where all levels ofparticipation are applauded, regard-less of the speaker’s age or skill level.
A ComfortableSettingMany of the activities mention do-ing them “in a comfortable setting.”Creating a comfortable setting willtake some thought and planning.Keep in mind that young people, likeadults, have a variety of personalitytypes. That means that some kidswill naturally be more outgoing thanothers. Try not to push them toohard or too fast. Encourage them toshare ideas using a variety of meth-ods. As they become more comfort-able with sharing their ideas and withthe reactions their actions receive,they’ll be more adventurous in theprojects they undertake.
Life SkillsParticipating in the public speakingwarm-ups and activities in this sec-tion will help young people developtheir ability to:
• Organize their thoughts and ideas.
• Communicate information tosomeone else in a confident andconvincing manner.
• Problem-solve and be flexible (forexample, overcoming stage nerves oradapting information to differentaudiences and situations).
• Use resources wisely (specifically,to honor the time allotted for apresentation or speech)!
• Develop useful, marketable skills(for example, speech writing anddelivery techniques).
• Manage stress and feelings.
• Evaluate their work and set goalsfor improvement
Self-Assessment& EvaluationAfter each activity or project youlead with young people, please helpthem think about what they learned.Make copies of the “What I Learned”self-evaluation form on page 8 anddistribute them to your group. Askthem to think quietly about thequestions and make notes aboutwhat they learned, how they feelabout their skills in that area andwhat they’d like to learn more about.Then lead a discussion with thewhole group and ask if anyone wantsto share what they came up with.Young people may want to keeptheir “What I Learned” forms to re-fer to later and as a way to docu-ment their learning process.
Public Speakingin Other ProjectsThe skills young people learn whilepracticing public presentationstranslate well to other project areasand should be integrated intoproject activities whenever possible.Part of the experiential learningmodel is giving kids a chance toshare with others what they’velearned about a particular subject.By demonstrating a skill or illustrat-ing an idea before a group, kids are
30 – COMMUNICATIONS TOOLKIT • Vocal Expression & Public Speaking©2000 Michigan State University Board of Trustees.
practicing their public speakingskills and gaining confidence. Soonit will seem natural to them to ex-press their ideas without athought about how scary publicspeaking “should be.”
You May Want toKnowYou may want to know the follow-ing points before getting startedwith helping young people learnmore about public speaking.
1. The basic processes for writing anddelivering a speech or demonstration(see the “Writing for Public Speak-ing,” “Delivering a Vocal Presenta-tion” and “Overcoming StageNerves” skill sheets located on pp.35, 31 and 34, respectively).
2. How to help kids evaluate andfeel good about their experiencesin communication (see the “What ILearned” sheet on pg. 8).
3. Where to go for field trips, whereto find speakers to visit or how tofind out who’s talking around town.
4. The developmental needs of thekids in your group (see the Ages andStages of Child and Youth Develop-ment publication which is availablefrom Purdue University on the World
Wide Web at [http://www.agcom.purdue.edu/AgCom/Pubs/NCR/NCR-292.html]).
Who’s TalkingAround Town?To connect the idea of vocal expres-sion to careers and make publicspeaking come alive for your group,you may want to arrange a groupvisit with someone who uses publicspeaking as a major part of his orher job, such as:• Actors• Lawyers• Lobbyists• Managers• Ministers• Politicians• Presidents of professional
associations and civicorganizations
• Professional speakers• Radio broadcasters• Teachers• Telephone operators• Television personalities• Tour guides
Many organizations, such as Toast-masters and Optimists Clubs, focuson communication skills and maybe good sources of guest speakers.
Beyond theToolkit: MoreIdeas & ResourcesTo encourage your group to learnmore about public speaking and vo-cal expression, refer to the “Video,Media and Technology” and “VisualCommunication and Graphic Design”sections of the CommunicationsToolkit.
The World Wide Web and other sec-tions of the Internet offer informa-tion on developing vocal expressionskills. Use the general categorieslisted here as search terms with anyof the Internet search engines: “pub-lic speaking,” “vocal expression,”“speeches,” “speech writing,”“speakers.” You could also have theparticipants come up with their ownset of search terms. (See pg. 134 forinformation on Internet safety.)

COMMUNICATIONS TOOLKIT • Vocal Expression & Public Speaking – 31©2000 Michigan State University Board of Trustees.
SKILL SHEET:
Delivering a VocalPresentationIn any speech, demon-stration, play or choralreading you must beaware of how you’redelivering your messageas well as the content ofthe message. This skillsheet describes the basicsto remember for deliver-ing vocal presentations.For information onwriting a piece to bedelivered before anaudience, refer to the“Writing for PublicSpeaking” skill sheet onpage 35.
Delivering a SpeechVoiceAs many famous people have discovered, yourvoice can be a powerful tool. But like any toolyou must practice with it to use it well. Whengiving a speech, you want the entire audience tohear you. The following points may help:
• Project your voice and speak up. Voice projection is notshouting, and you can do it without straining. Speaking fromthe back of the throat makes your voice sound weak andtires it faster; use your diaphragm muscles to make yourvoice carry. The diaphragm muscles are between your chestand stomach. Using them will help you relax and make yourvoice sound stronger.
• Try to sound like yourself. Use a conversational tone withfamiliar words.
• Speak at a comfortable pace so everyone can hear and under-stand your entire speech.
• Enunciate (pronounce clearly) all vowels and consonants.
• Don’t slur your words – practice pronouncing the d’s, t’s anding’s on the end of words.
• When you’re rehearsing a speech, have someone stand near theback of the room to give you feedback on your projection anddelivery, as well as content.
Remember: A strong confident voice will make your message morebelievable.
Eye ContactEye contact, or lack of it, can make a difference inhow receptive the audience is to your message.These points may help:
• Maintain eye contact with your audience. Try to memorize youropening and closing statements so that you can maintain steadyeye contact when you need to hold the audience’s attention.
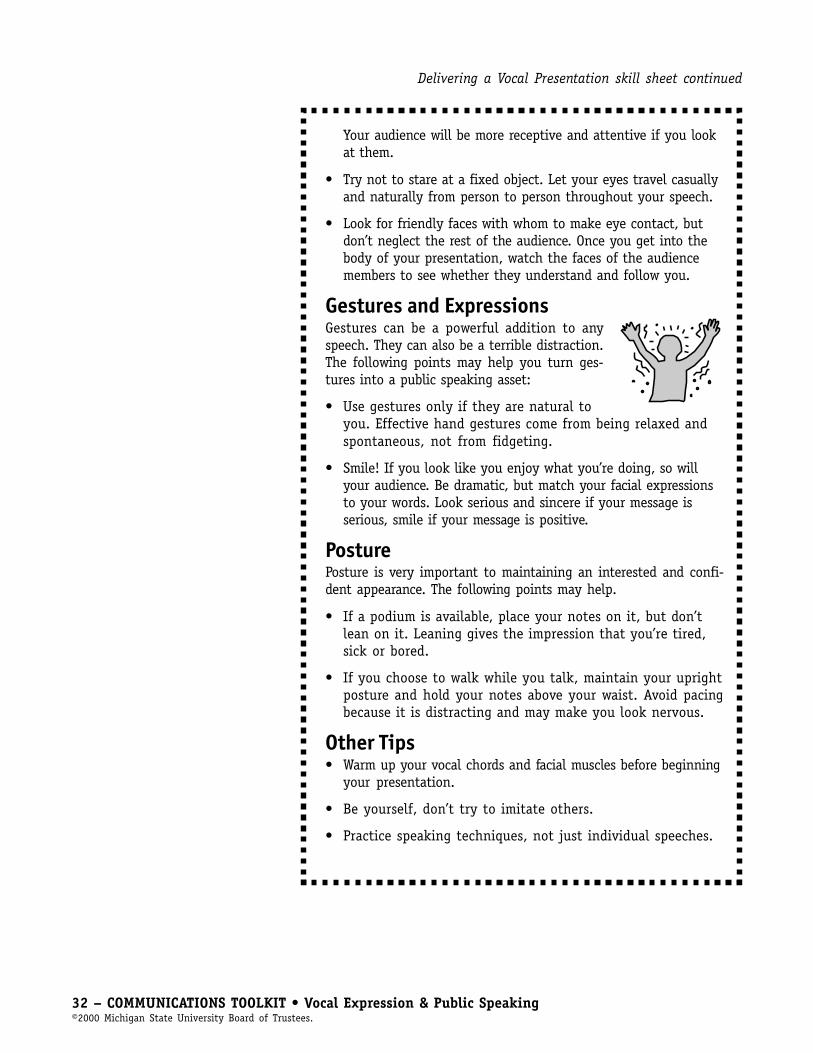
32 – COMMUNICATIONS TOOLKIT • Vocal Expression & Public Speaking©2000 Michigan State University Board of Trustees.
Your audience will be more receptive and attentive if you lookat them.
• Try not to stare at a fixed object. Let your eyes travel casuallyand naturally from person to person throughout your speech.
• Look for friendly faces with whom to make eye contact, butdon’t neglect the rest of the audience. Once you get into thebody of your presentation, watch the faces of the audiencemembers to see whether they understand and follow you.
Gestures and ExpressionsGestures can be a powerful addition to anyspeech. They can also be a terrible distraction.The following points may help you turn ges-tures into a public speaking asset:
• Use gestures only if they are natural toyou. Effective hand gestures come from being relaxed andspontaneous, not from fidgeting.
• Smile! If you look like you enjoy what you’re doing, so willyour audience. Be dramatic, but match your facial expressionsto your words. Look serious and sincere if your message isserious, smile if your message is positive.
PosturePosture is very important to maintaining an interested and confi-dent appearance. The following points may help.
• If a podium is available, place your notes on it, but don’tlean on it. Leaning gives the impression that you’re tired,sick or bored.
• If you choose to walk while you talk, maintain your uprightposture and hold your notes above your waist. Avoid pacingbecause it is distracting and may make you look nervous.
Other Tips• Warm up your vocal chords and facial muscles before beginning
your presentation.
• Be yourself, don’t try to imitate others.
• Practice speaking techniques, not just individual speeches.
Delivering a Vocal Presentation skill sheet continued

COMMUNICATIONS TOOLKIT • Vocal Expression & Public Speaking – 33©2000 Michigan State University Board of Trustees.
SKILL SHEET:
Using Visual Aids
Some speeches just stand alone.Abraham Lincoln’s “Gettysburg Ad-dress,” President John F. Kennedy’sinaugural speech and the Rev. Dr.Martin Luther King Jr.’s “I Have aDream” speech are examples of
memorable speeches given without the help of visualaids. However, audiences may need the help of visualsto fully comprehend some messages.
Visual aids come in many forms, such as slides, over-head transparencies, posters, flipcharts, videos, pup-pets or other actors, and objects.
For information on creating presentation graphics seethe “Designing Presentation Graphics That Work” skillsheet on page 67.
When To Use Visual AidsIn many situations, using a visual aid would enhanceyour presentation, such as:
• When you’re presenting complicated information.If the information you’re presenting is detailed and hasmany parts to it, you might want to use posters oroverheads to organize your thoughts. You can point toindividual items or place a check mark by items as youtalk to keep the audience moving with you.
• When pictures speak volumes. Some pictures reallydo speak a thousand words and can be very appealingto an audience. Showing slides, videos or posters maybe more effective than trying to describe a scene. Imag-ine how much more persuasive a photograph of a de-stroyed rain forest is than describing the way it looks.
• When your audience may fall asleep. In somespeeches it may be necessary to give many statistics orto talk about percentages. Overheads showing pie graphsor charts may break up the monotony of numbers. Bet-ter yet would be to show a short video clip illustratingthe content of your message between bouts of deliver-ing statistical data.
Audiovisual TipsA few tips to remember when using equipment topresent visual aids follow.
• Choose your audio and visual aids thoughtfully, keep-ing in mind the size and shape of your room, the ex-pected size of your audience and available equipment.For example: If you’re expecting an audience of 50 youwouldn’t want to show a video if you only have a singleor small monitor. The same is true for writing on a chalk-board or flip chart for a large room where your audiencemight be spread out over a distance.
• Practice with all equipment before you deliver yourspeech so you’re comfortable with how it works. Allowtime to make adjustments if necessary. You could prac-tice with the equipment at the same time you check themicrophone (if you’re using one).
• You may need to speak louder than you normally doin order to be heard over some equipment. Test thisbefore your presentation.
• Structure your presentation so that you aren’t con-stantly turning on and off the lights. Audience adjust-ment to light and dark may be slow, creating lag time inyour presentation.
• Rehearse your speech, including all of your visuals.You should be able to use them smoothly to enhanceyour presentation and not distract the audience fromyour primary message.
• Always have a backup plan in case you aren’t able touse your audio or visual aids (for whatever reason). Apresentation that relies completely on a video or slidesmay be a disaster if the equipment doesn’t work or isn’tavailable.
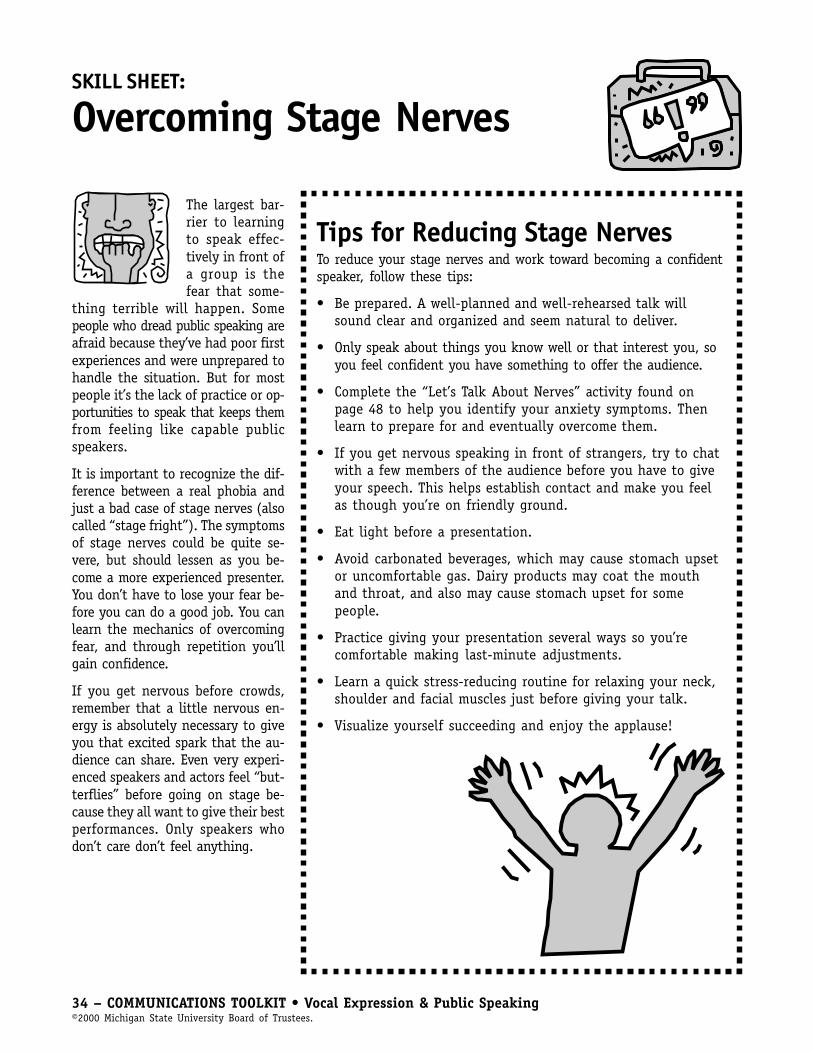
34 – COMMUNICATIONS TOOLKIT • Vocal Expression & Public Speaking©2000 Michigan State University Board of Trustees.
SKILL SHEET:
Overcoming Stage Nerves
The largest bar-rier to learningto speak effec-tively in front ofa group is thefear that some-
thing terrible will happen. Somepeople who dread public speaking areafraid because they’ve had poor firstexperiences and were unprepared tohandle the situation. But for mostpeople it’s the lack of practice or op-portunities to speak that keeps themfrom feeling like capable publicspeakers.
It is important to recognize the dif-ference between a real phobia andjust a bad case of stage nerves (alsocalled “stage fright”). The symptomsof stage nerves could be quite se-vere, but should lessen as you be-come a more experienced presenter.You don’t have to lose your fear be-fore you can do a good job. You canlearn the mechanics of overcomingfear, and through repetition you’llgain confidence.
If you get nervous before crowds,remember that a little nervous en-ergy is absolutely necessary to giveyou that excited spark that the au-dience can share. Even very experi-enced speakers and actors feel “but-terflies” before going on stage be-cause they all want to give their bestperformances. Only speakers whodon’t care don’t feel anything.
Tips for Reducing Stage NervesTo reduce your stage nerves and work toward becoming a confidentspeaker, follow these tips:
• Be prepared. A well-planned and well-rehearsed talk willsound clear and organized and seem natural to deliver.
• Only speak about things you know well or that interest you, soyou feel confident you have something to offer the audience.
• Complete the “Let’s Talk About Nerves” activity found onpage 48 to help you identify your anxiety symptoms. Thenlearn to prepare for and eventually overcome them.
• If you get nervous speaking in front of strangers, try to chatwith a few members of the audience before you have to giveyour speech. This helps establish contact and make you feelas though you’re on friendly ground.
• Eat light before a presentation.
• Avoid carbonated beverages, which may cause stomach upsetor uncomfortable gas. Dairy products may coat the mouthand throat, and also may cause stomach upset for somepeople.
• Practice giving your presentation several ways so you’recomfortable making last-minute adjustments.
• Learn a quick stress-reducing routine for relaxing your neck,shoulder and facial muscles just before giving your talk.
• Visualize yourself succeeding and enjoy the applause!
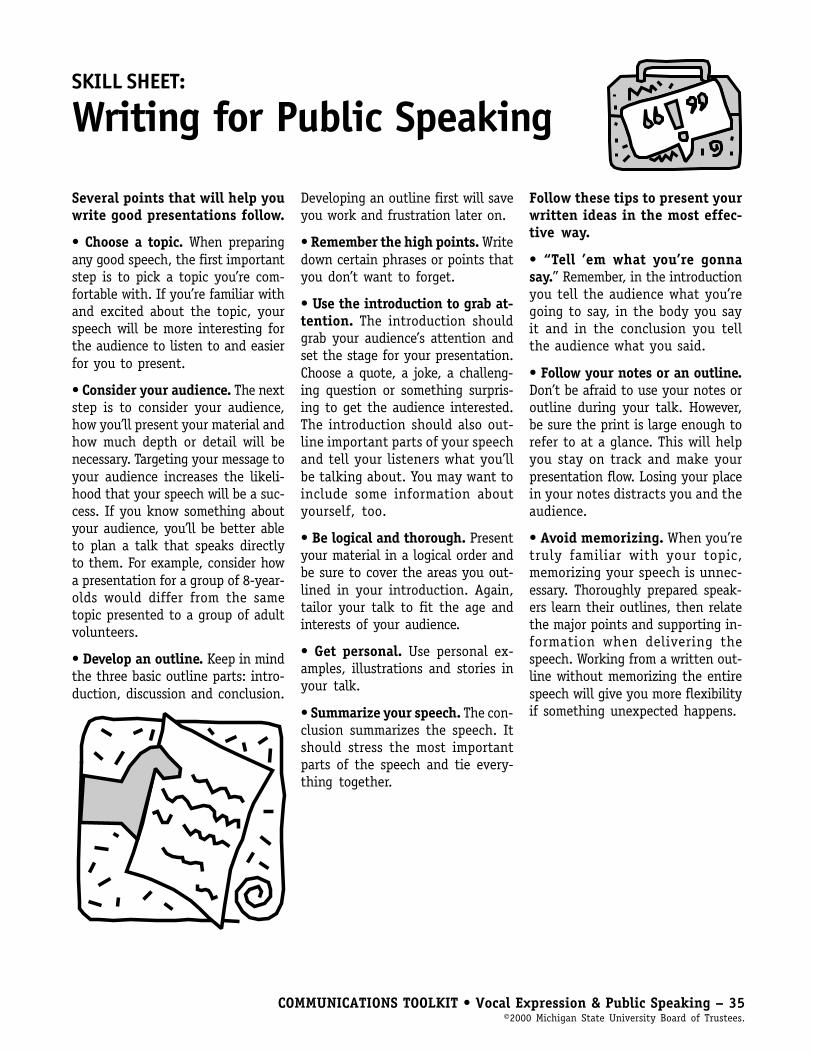
COMMUNICATIONS TOOLKIT • Vocal Expression & Public Speaking – 35©2000 Michigan State University Board of Trustees.
SKILL SHEET:
Writing for Public Speaking
Several points that will help youwrite good presentations follow.
• Choose a topic. When preparingany good speech, the first importantstep is to pick a topic you’re com-fortable with. If you’re familiar withand excited about the topic, yourspeech will be more interesting forthe audience to listen to and easierfor you to present.
• Consider your audience. The nextstep is to consider your audience,how you’ll present your material andhow much depth or detail will benecessary. Targeting your message toyour audience increases the likeli-hood that your speech will be a suc-cess. If you know something aboutyour audience, you’ll be better ableto plan a talk that speaks directlyto them. For example, consider howa presentation for a group of 8-year-olds would differ from the sametopic presented to a group of adultvolunteers.
• Develop an outline. Keep in mindthe three basic outline parts: intro-duction, discussion and conclusion.
Developing an outline first will saveyou work and frustration later on.
• Remember the high points. Writedown certain phrases or points thatyou don’t want to forget.
• Use the introduction to grab at-tention. The introduction shouldgrab your audience’s attention andset the stage for your presentation.Choose a quote, a joke, a challeng-ing question or something surpris-ing to get the audience interested.The introduction should also out-line important parts of your speechand tell your listeners what you’llbe talking about. You may want toinclude some information aboutyourself, too.
• Be logical and thorough. Presentyour material in a logical order andbe sure to cover the areas you out-lined in your introduction. Again,tailor your talk to fit the age andinterests of your audience.
• Get personal. Use personal ex-amples, illustrations and stories inyour talk.
• Summarize your speech. The con-clusion summarizes the speech. Itshould stress the most importantparts of the speech and tie every-thing together.
Follow these tips to present yourwritten ideas in the most effec-tive way.
• “Tell ’em what you’re gonnasay.” Remember, in the introductionyou tell the audience what you’regoing to say, in the body you sayit and in the conclusion you tellthe audience what you said.
• Follow your notes or an outline.Don’t be afraid to use your notes oroutline during your talk. However,be sure the print is large enough torefer to at a glance. This will helpyou stay on track and make yourpresentation flow. Losing your placein your notes distracts you and theaudience.
• Avoid memorizing. When you’retruly familiar with your topic,memorizing your speech is unnec-essary. Thoroughly prepared speak-ers learn their outlines, then relatethe major points and supporting in-formation when delivering thespeech. Working from a written out-line without memorizing the entirespeech will give you more flexibilityif something unexpected happens.
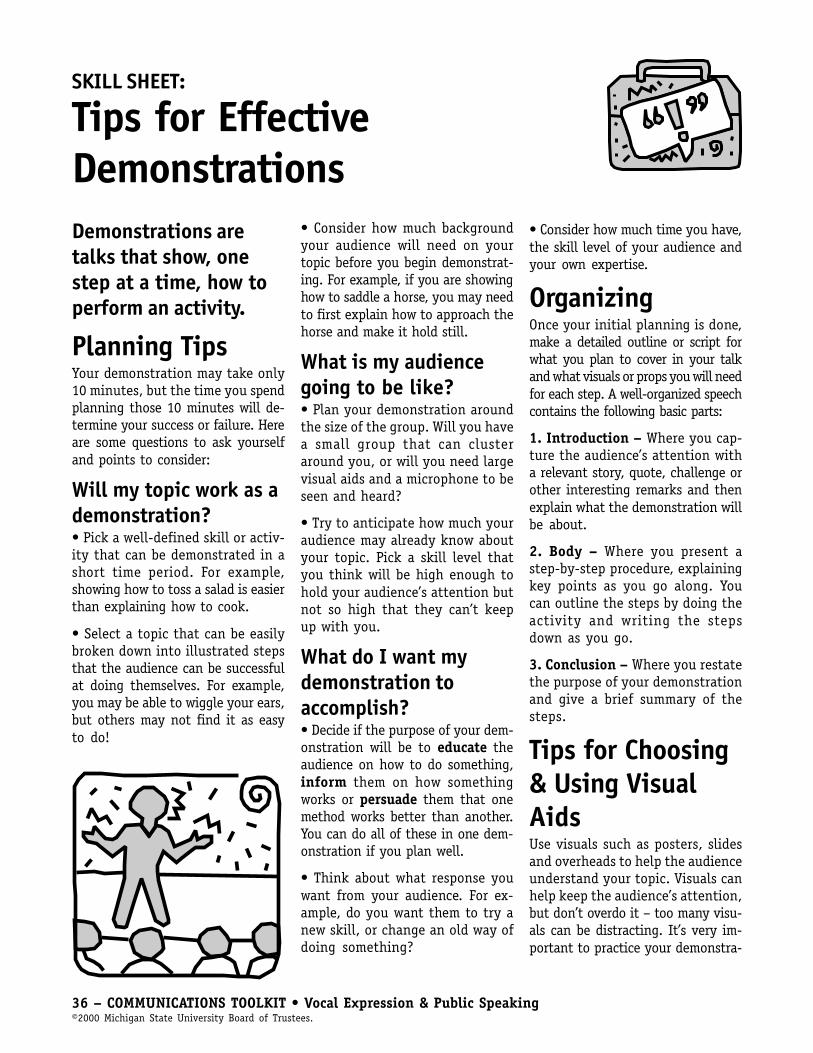
36 – COMMUNICATIONS TOOLKIT • Vocal Expression & Public Speaking©2000 Michigan State University Board of Trustees.
SKILL SHEET:
Tips for EffectiveDemonstrationsDemonstrations aretalks that show, onestep at a time, how toperform an activity.
Planning TipsYour demonstration may take only10 minutes, but the time you spendplanning those 10 minutes will de-termine your success or failure. Hereare some questions to ask yourselfand points to consider:
Will my topic work as ademonstration?• Pick a well-defined skill or activ-ity that can be demonstrated in ashort time period. For example,showing how to toss a salad is easierthan explaining how to cook.
• Select a topic that can be easilybroken down into illustrated stepsthat the audience can be successfulat doing themselves. For example,you may be able to wiggle your ears,but others may not find it as easyto do!
• Consider how much backgroundyour audience will need on yourtopic before you begin demonstrat-ing. For example, if you are showinghow to saddle a horse, you may needto first explain how to approach thehorse and make it hold still.
What is my audiencegoing to be like?• Plan your demonstration aroundthe size of the group. Will you havea small group that can clusteraround you, or will you need largevisual aids and a microphone to beseen and heard?
• Try to anticipate how much youraudience may already know aboutyour topic. Pick a skill level thatyou think will be high enough tohold your audience’s attention butnot so high that they can’t keepup with you.
What do I want mydemonstration toaccomplish?• Decide if the purpose of your dem-onstration will be to educate theaudience on how to do something,inform them on how somethingworks or persuade them that onemethod works better than another.You can do all of these in one dem-onstration if you plan well.
• Think about what response youwant from your audience. For ex-ample, do you want them to try anew skill, or change an old way ofdoing something?
• Consider how much time you have,the skill level of your audience andyour own expertise.
OrganizingOnce your initial planning is done,make a detailed outline or script forwhat you plan to cover in your talkand what visuals or props you will needfor each step. A well-organized speechcontains the following basic parts:
1. Introduction – Where you cap-ture the audience’s attention witha relevant story, quote, challenge orother interesting remarks and thenexplain what the demonstration willbe about.
2. Body – Where you present astep-by-step procedure, explainingkey points as you go along. Youcan outline the steps by doing theactivity and writing the stepsdown as you go.
3. Conclusion – Where you restatethe purpose of your demonstrationand give a brief summary of thesteps.
Tips for Choosing& Using VisualAidsUse visuals such as posters, slidesand overheads to help the audienceunderstand your topic. Visuals canhelp keep the audience’s attention,but don’t overdo it – too many visu-als can be distracting. It’s very im-portant to practice your demonstra-

COMMUNICATIONS TOOLKIT • Vocal Expression & Public Speaking – 37©2000 Michigan State University Board of Trustees.
tion using your visuals. Keep themwithin reach and in the order youwill present them. When you’re doneusing each one, set it aside so itdoesn’t distract from your nextpoint. Make sure your visuals:
• Are attractive.
• Are readable from the farthestdistance they will be viewed.
• Highlight important points.
• Are simple and neat.
• Are easy to use.
Props may be helpful when realismis needed. Make sure that your propsare practical for the setting you willbe in. For instance, including yourdog as part of a demonstration onpet grooming might make it morerealistic, but you’ll also need to thinkabout any problems that might arisefrom bringing an animal into a un-familiar situation.
If you’re planning to use electronicequipment, make sure you’ll haveoutlets available nearby and antici-pate any replacement bulbs or bat-teries you might need. Have a back-up plan in case your equipment fails.
Tips for GoodDelivery• Be enthusiastic!
• Dress for the part.
• Briefly introduce yourself, explain-ing your interest or special skills inyour topic.
• Start with your opening, thenget right into the action. Keepthings moving but don’t rush.
• Know your subject and explainwhat you’re doing as you do it.
• Practice in advance, but if some-thing doesn’t go the way youplanned it in the final demonstra-tion, explain briefly what happenedand continue.
• Be sure your audience can see whatyou’re doing at all times. Store itemsaway from the center of interestwhen you’re not using them.
• Speak clearly. If you must usenoisy equipment like a blender, ex-plain what you’re doing before andafter you use it. Don’t try to shoutover the noise.
• Stay within your allotted time.To show all the steps of a process,you may need to have materialsready to show in various stages(baking bread, for example).
• End your demonstration by show-ing the audience your finished prod-uct and letting them ask questions.If you don’t know an answer, sayso – don’t guess.
Practice MakesPerfectAssemble everything you need foryour presentation (and friendly vol-unteers to be your test audience) andpractice. Videotaping your practicedemonstration is another good wayto help you fine-tune it. Afterwardsask yourself (or your test audience):
• Are my actions in logical order?
• Did I explain what I was doingwhile I was doing it?
• Did I give complete information?
• Are my visual aids effective?
• Did I keep to my time limit?
• Do I know enough about my topicto answer questions from theaudience?
Tips for Effective Demonstrations skill sheet continued

38 – COMMUNICATIONS TOOLKIT • Vocal Expression & Public Speaking©2000 Michigan State University Board of Trustees.
ICEBREAKER:
Speech Warm-Ups
PURPOSE:• To help kids feel relaxed with
each other
• To help kids learn that it’sokay to make mistakes whenspeaking or reading aloud
MATERIALS:“Tongue Twisters” handout on pg.39; one per person)
SETTING:Comfortable room where kids canmeet in small groups
TIME:5–10 minutes
PROCEDURE:1. Divide the group into four- or five-person teams.
2. Have each person choose a tongue twister to work on. Give them aminute or two to practice saying their tongue twisters.
3. Have the participants take turns reading their tongue twistersaloud and teaching the tongue twisters to the rest of their smallgroup.
4. After they’ve “sampled” each tongue twister, tell the teams tochoose one tongue twister to read for the whole group.
Leader’s Note: If everyone picks one of the simpler tongue twisters (4,5 and 6) to work on the first time, repeat steps 1 through 4 and dropthose tongue twisters from the list. Work with the kids to help thempronounce the more difficult words clearly. Explain that this will helpthem learn to speak clearly.
Peter Piperpicked a peck ofpickled peppers

COMMUNICATIONS TOOLKIT • Vocal Expression & Public Speaking – 39©2000 Michigan State University Board of Trustees.
SPEECH WARM-UPS HANDOUT:
Tongue Twisters
Say these slowly at first; then say them as fast as you can without making any mistakes! If you makea mistake, start over, a little more slowly. Speak all final consonant sounds (such as t, d and p)distinctly. Also, take care to make the vowel sounds (a, e, i, o and u) distinctly.
1. Peter Piper picked a peck of pickledpeppers;A peck of pickled peppers Peter Piperpicked.If Peter Piper picked a peck of pickledpeppers,Where’s the peck of pickled peppers PeterPiper picked?
2. When a twister twisting would twist him atwist,For twisting a twist, three twists he wouldtwist.But if one of the twists untwists from thetwist,Then the twist, untwisting, untwists thetwists.
3. If Theofilus Thistle, the thistle-sifter, sifteda sieve of unsifted thistles,where is the sieve of unsifted thistles thatTheofilus Thistle the thistle sifter sifted?
4. Through thin cloths, the thief thrustthorns.
5. Cease sighing, since sighs seldom securesuccess.
6. Rubber baby buggy bumpers.
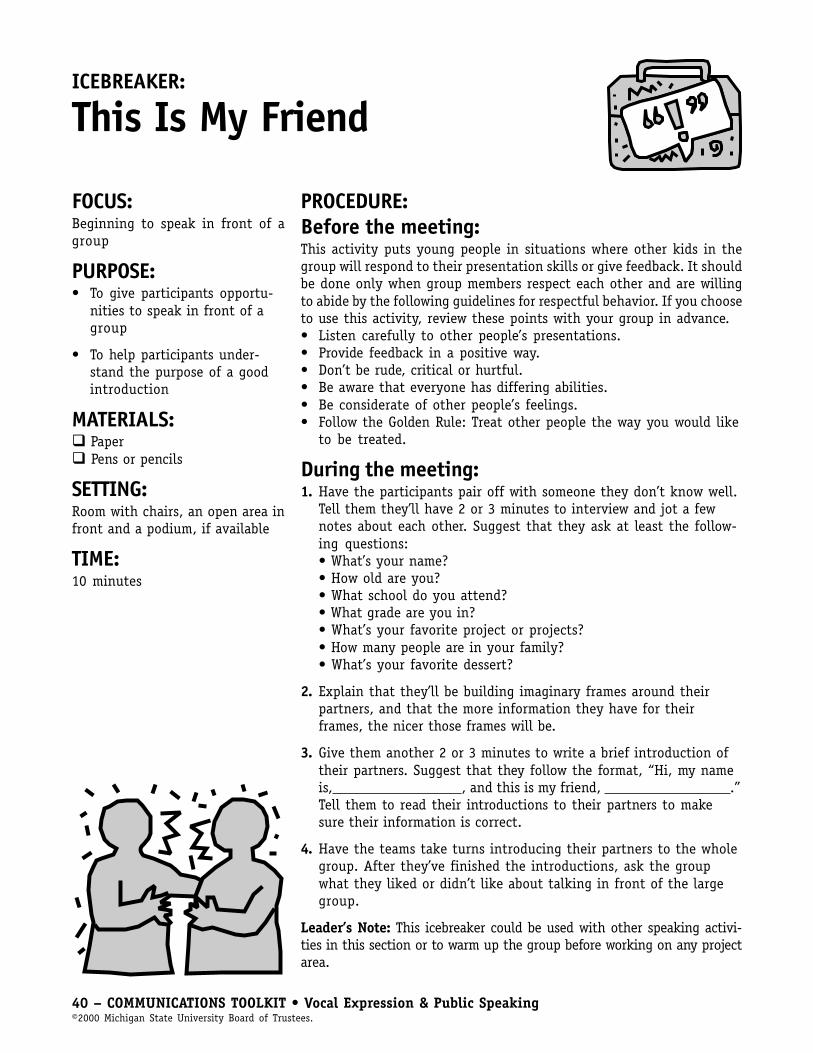
40 – COMMUNICATIONS TOOLKIT • Vocal Expression & Public Speaking©2000 Michigan State University Board of Trustees.
ICEBREAKER:
This Is My Friend
FOCUS:Beginning to speak in front of agroup
PURPOSE:• To give participants opportu-
nities to speak in front of agroup
• To help participants under-stand the purpose of a goodintroduction
MATERIALS: Paper Pens or pencils
SETTING:Room with chairs, an open area infront and a podium, if available
TIME:10 minutes
PROCEDURE:Before the meeting:This activity puts young people in situations where other kids in thegroup will respond to their presentation skills or give feedback. It shouldbe done only when group members respect each other and are willingto abide by the following guidelines for respectful behavior. If you chooseto use this activity, review these points with your group in advance.• Listen carefully to other people’s presentations.• Provide feedback in a positive way.• Don’t be rude, critical or hurtful.• Be aware that everyone has differing abilities.• Be considerate of other people’s feelings.• Follow the Golden Rule: Treat other people the way you would like
to be treated.
During the meeting:1. Have the participants pair off with someone they don’t know well.
Tell them they’ll have 2 or 3 minutes to interview and jot a fewnotes about each other. Suggest that they ask at least the follow-ing questions:• What’s your name?• How old are you?• What school do you attend?• What grade are you in?• What’s your favorite project or projects?• How many people are in your family?• What’s your favorite dessert?
2. Explain that they’ll be building imaginary frames around theirpartners, and that the more information they have for theirframes, the nicer those frames will be.
3. Give them another 2 or 3 minutes to write a brief introduction oftheir partners. Suggest that they follow the format, “Hi, my nameis, , and this is my friend, .”Tell them to read their introductions to their partners to makesure their information is correct.
4. Have the teams take turns introducing their partners to the wholegroup. After they’ve finished the introductions, ask the groupwhat they liked or didn’t like about talking in front of the largegroup.
Leader’s Note: This icebreaker could be used with other speaking activi-ties in this section or to warm up the group before working on any projectarea.
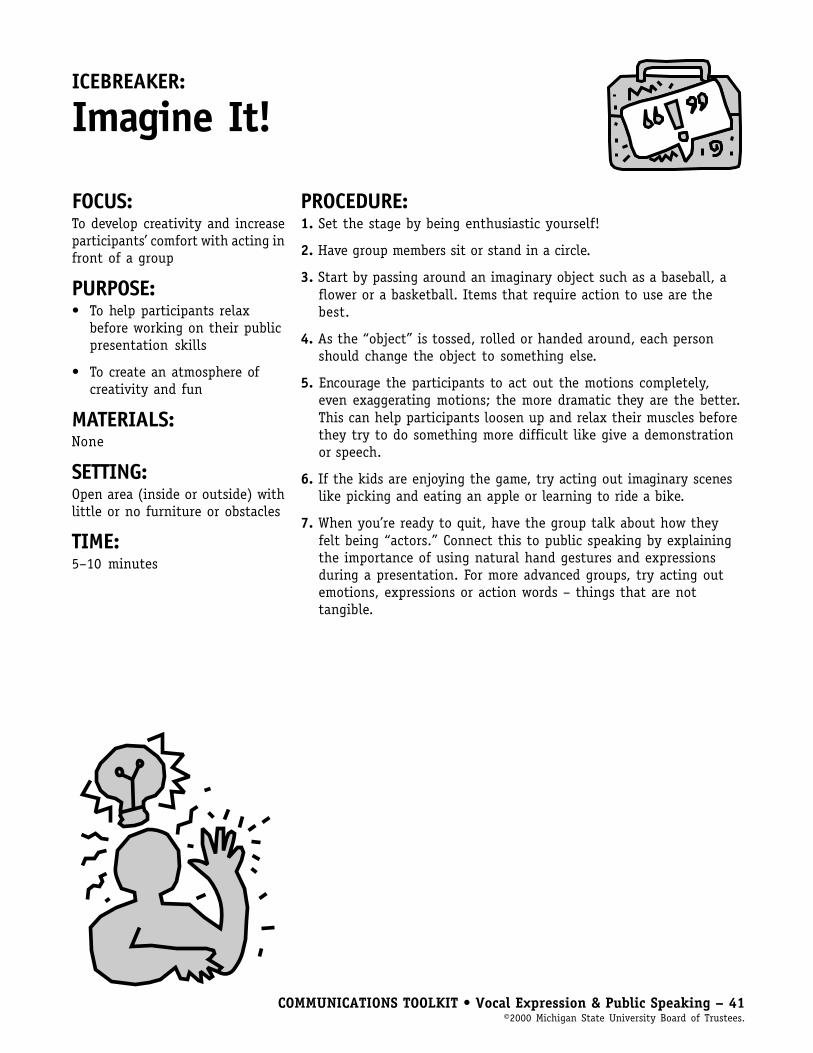
COMMUNICATIONS TOOLKIT • Vocal Expression & Public Speaking – 41©2000 Michigan State University Board of Trustees.
ICEBREAKER:
Imagine It!
FOCUS:To develop creativity and increaseparticipants’ comfort with acting infront of a group
PURPOSE:• To help participants relax
before working on their publicpresentation skills
• To create an atmosphere ofcreativity and fun
MATERIALS:None
SETTING:Open area (inside or outside) withlittle or no furniture or obstacles
TIME:5–10 minutes
PROCEDURE:1. Set the stage by being enthusiastic yourself!
2. Have group members sit or stand in a circle.
3. Start by passing around an imaginary object such as a baseball, aflower or a basketball. Items that require action to use are thebest.
4. As the “object” is tossed, rolled or handed around, each personshould change the object to something else.
5. Encourage the participants to act out the motions completely,even exaggerating motions; the more dramatic they are the better.This can help participants loosen up and relax their muscles beforethey try to do something more difficult like give a demonstrationor speech.
6. If the kids are enjoying the game, try acting out imaginary sceneslike picking and eating an apple or learning to ride a bike.
7. When you’re ready to quit, have the group talk about how theyfelt being “actors.” Connect this to public speaking by explainingthe importance of using natural hand gestures and expressionsduring a presentation. For more advanced groups, try acting outemotions, expressions or action words – things that are nottangible.

42 – COMMUNICATIONS TOOLKIT • Vocal Expression & Public Speaking©2000 Michigan State University Board of Trustees.
ACTIVITY:
Tell Me a Story(Illustrated Talks)FOCUS:Using a visual aid in a presentation
PURPOSE:• To encourage creativity
• To give participants a chanceto talk in front of a group
• To illustrate a connectionbetween speaking and usingvisual aids
MATERIALS: Scissors Magazines Poster board Glue sticks”What I Learned” self-evaluationform (on pg. 8; one per person)
SETTING:Room with space for the group tospread out
TIME:15–30 minutes
PROCEDURE:1. Give the group 5 to 8 minutes to select pictures from magazines.
Suggest that they pick pictures that interest them or that seem tofit together.
2. Have the kids glue their pictures to a poster board. Suggest thatthey arrange the pictures in the order of a story or just arrangethem so they look nice.
3. Depending on their ages or skill levels, you could have olderparticipants make up stories about their pictures and youngerones tell why they liked each picture they cut out. Participantscould use one of the story starters that follow (you may need tohelp younger participants decide on an opening).• I chose these pictures because…• This is a story about…• Once upon a time…
4. Have the group members tell their stories to the rest of the group.Encourage participants to point to the appropriate pictures ateach point in their stories. Remind them to re-establish good eyecontact with the audience after they have pointed out eachpicture.
COMMUNICATIONS TOOLKIT • Vocal Expression & Public Speaking – 43©2000 Michigan State University Board of Trustees.
ACTIVITY:
Show & Tell:A Demonstration WorkshopPURPOSE:To understand the basics of a dem-onstration and increase opportuni-ties for public speaking
MATERIALS:“Tips for Effective Demonstra-tions” skill sheet (on pg. 36;one per person – optional)“Delivering a Vocal Presenta-tion” skill sheet (on pg. 31;one per person – optional)“Practice Demonstrations”handout (on pg. 45; one perperson)Demonstration materialsPoster boardMarkers
“Tip Sheet for EvaluatingDemonstrations” handout (onpg. 46; one per person)”What I Learned” self-evaluationform (on pg. 8; one per person)
SETTING:Enough space for kids to break upinto small groups to work on theirdemonstrations; area should includea table for spreading out materialsduring demonstrations
TIME:30 minutes
PROCEDURE:Before the meeting:1. This activity puts young people in situations where other kids in
the group will respond to their presentation skills or give feed-back. It should be done only when group members respect eachother and are willing to abide by the following guidelines forrespectful behavior. If you choose to use this activity, review thesepoints with your group in advance.• Listen carefully to other people’s presentations.• Provide feedback in a positive way.• Don’t be rude, critical or hurtful.• Be aware that everyone has differing abilities.• Be considerate of other people’s feelings.• Follow the Golden Rule: Treat other people the way you would
like to be treated.
2. Read the “Tips for Effective Demonstrations” skill sheet so you candescribe the basic parts of a demonstration to the kids. You also maywant to copy the skill sheet for each person. See the “Delivering aVocal Presentation” skill sheet for more helpful hints.
3. If you have an older group member who has presented ademonstration before, ask him or her to prepare and give a shortdemonstration.
During the meeting:1. Have the older member give his or her demonstration.
2. Divide the group into teams or have the participants work alone,depending on their age and experience.
3. Hand each team a practice demonstration topic and the materialsnecessary for presenting that demonstration.
4. Give teams 5 to 8 minutes to create and practice their demonstra-tions. Encourage the teams to use posters to list ingredients ormaterials needed for their presentations.
5. After each team gives their demonstration, pass out the “Tip Sheetfor Evaluating Demonstrations” handout. Help the team membersidentify the points they did well at and the ones they need towork on. Keep in mind that this may be hard for some kids andthat just standing up in front of a group will be a challenge –always look for the positive first.
44 – COMMUNICATIONS TOOLKIT • Vocal Expression & Public Speaking©2000 Michigan State University Board of Trustees.
TALKING IT OVER:After all the teams have presented their demonstrations, encouragethe whole group to talk about their experiences. Ask the followingquestions.• How did it feel to be speaking in front of a group?• What did you find fun about doing demonstrations?• Was it as hard as you thought it would be?• When do you think you might do other demonstrations?
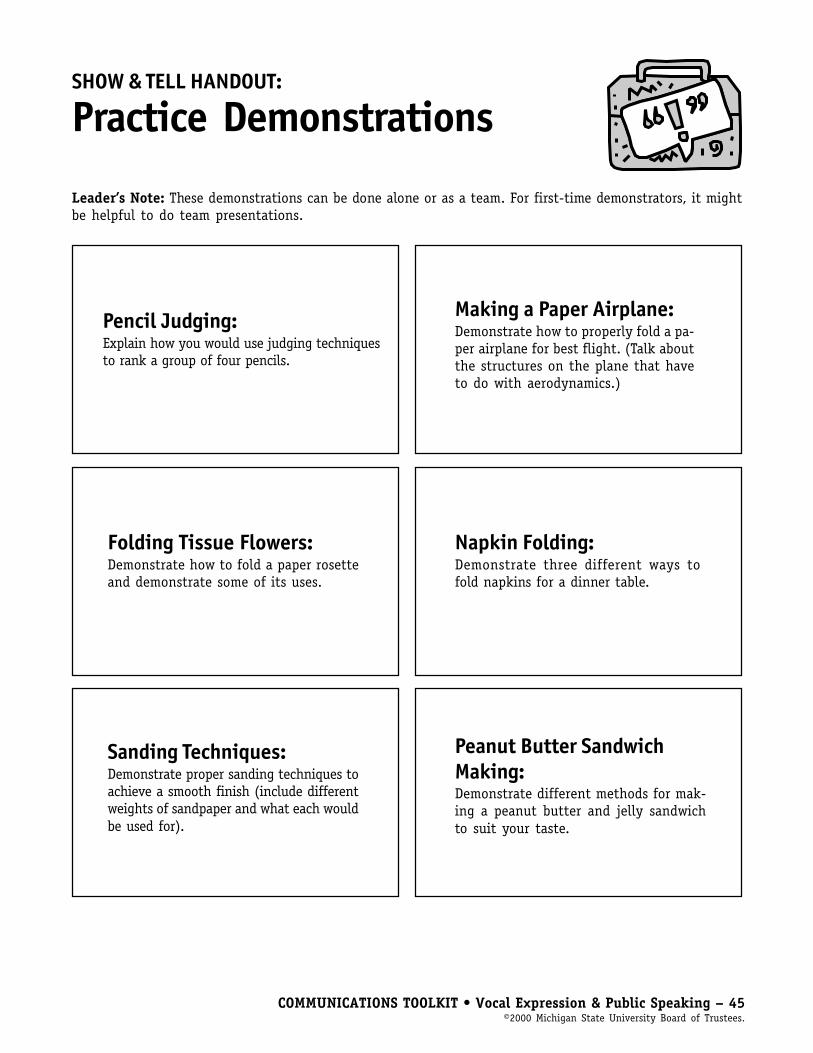
COMMUNICATIONS TOOLKIT • Vocal Expression & Public Speaking – 45©2000 Michigan State University Board of Trustees.
SHOW & TELL HANDOUT:
Practice Demonstrations
Leader’s Note: These demonstrations can be done alone or as a team. For first-time demonstrators, it mightbe helpful to do team presentations.
Pencil Judging:Explain how you would use judging techniquesto rank a group of four pencils.
Folding Tissue Flowers:Demonstrate how to fold a paper rosetteand demonstrate some of its uses.
Sanding Techniques:Demonstrate proper sanding techniques toachieve a smooth finish (include differentweights of sandpaper and what each wouldbe used for).
Making a Paper Airplane:Demonstrate how to properly fold a pa-per airplane for best flight. (Talk aboutthe structures on the plane that haveto do with aerodynamics.)
Napkin Folding:Demonstrate three different ways tofold napkins for a dinner table.
Peanut Butter SandwichMaking:Demonstrate different methods for mak-ing a peanut butter and jelly sandwichto suit your taste.

46 – COMMUNICATIONS TOOLKIT • Vocal Expression & Public Speaking©2000 Michigan State University Board of Trustees.
SHOW & TELL HANDOUT:
Tip Sheet for EvaluatingDemonstrations
The main purpose of any demonstration is to share information, ideas and skills with others. This could beaccomplished in many ways. The important thing is for you to have the chance to practice speaking skills.Don’t intimidate yourself by trying to achieve a certain set of standards. However, there are some basicareas in which you can evaluate your own progress and set goals for improvement. Think about andanswer the following questions.
TopicWas the topic appropriate for the audience age and interests? Why or why not?
ContentDid the demonstration give enough information to spark the audience’s interest? Why or why not?
Was the information presented in such a way that the audience could replicate the techniques or ideasdemonstrated?
PoiseDid you feel comfortable in front of the group? Why or why not?
Do you feel that you presented yourself well? Why or why not?

COMMUNICATIONS TOOLKIT • Vocal Expression & Public Speaking – 47©2000 Michigan State University Board of Trustees.
DeliveryWas your demonstration clear and organized?
Was the audience interested enough to ask for more information?
Did people respond as if they could hear everything?
Introduction and ConclusionDid you tell the audience what you were planning to say and then sum up what you said at the end?
OtherWhat else did you learn about giving speeches?
Tip Sheet for Evaluating Demonstrations handout continued
48 – COMMUNICATIONS TOOLKIT • Vocal Expression & Public Speaking©2000 Michigan State University Board of Trustees.
ACTIVITY:
Let’s Talk About Nerves
FOCUS:Increase public speaking skills
PURPOSE:• To help kids identify what
makes them scared of publicspeaking
• To help kids learn to plan forand around stage nerves
• To help kids feel less afraid ofthe nervous symptoms theyfeel
MATERIALS: “What Are You Afraid Of?”handout (on pg. 50; one perperson)
Pens or pencils”What I Learned” self-evaluationform (on pg. 8; one per person)
SETTING:Comfortable area where the groupcan sit in a circle
TIME:20–30 minutes
PROCEDURE:1. Introduce the topic by telling a personal story about a public
speaking experience. The story should contain something youlearned about yourself as a result.
2. Ask the kids if they also have some fear of speaking in front ofgroups. Explain that some fears and symptoms of nervousness willgo away with practice. However, they need to learn what theymight be afraid of and how they can work around it and still beable to share their ideas.
3. Hand out pencils or pens and the “What Are You Afraid Of?” hand-out to each person. Give them 5 to 7 minutes to write down someof the fears they may have and to check off some of the symptomsthis stress causes.
4. Bring the group back together to discuss their answers.
TALKING IT OVER:1. Allow at least 10 minutes for discussion, depending on the size of
the group. Share the following information with the group. (Fortips on reducing stage nerves or stage fright, refer to the “Over-coming Stage Nerves” skill sheet on page 34.)
Here are some fears that people have noted about public speaking:• Boring the audience to sleep• Burping uncontrollably• False teeth coming loose• Tripping on the way up to the stage
2. Ask the group the following questions:• What other fears can you think of? (Encourage the group to
brainstorm as many as they can.)• Are you surprised at all the things people fear about public
speaking? (Explain that when they can identify a fear veryspecifically they can work on overcoming it.)
• What might you do to prevent some of these fears from comingtrue? (For example, to help keep from boring an audience tosleep, you could read your speech to a friend to see how itsounds.)
3. Ask the group to come up with at least one solution or problem-solving technique for each fear they listed. Encourage them to becreative and not to worry about whether the solution will work forevery public speaking situation.
4. Ask for volunteers to talk about the nervous symptoms they’vehad before or while speaking in public. (You could open with

COMMUNICATIONS TOOLKIT • Vocal Expression & Public Speaking – 49©2000 Michigan State University Board of Trustees.
something like, “I always seem to get… sweaty hands… coldfeet… an upset stomach… when I know I have to get up and talkin front of others.) After they’ve compiled a list of symptoms,encourage them to come up with some ways they can reduce thesymptoms (for example, to remedy or minimize an upset stomach,eat only a light meal before speaking).
5. Give the group a final opportunity to talk about experiencesthey’ve had with speaking or reading aloud and how they felt.
6. Remind your group that being scared or nervous is not a goodreason to avoid public speaking. Being able to express their ideasand share information is very important. Even though publicspeaking may be hard now, the more they do it the easier it willbecome.
TRY THIS, TOO:Ask a local radio, television or sports celebrity to speak to your groupabout his or her experiences with performance nerves.
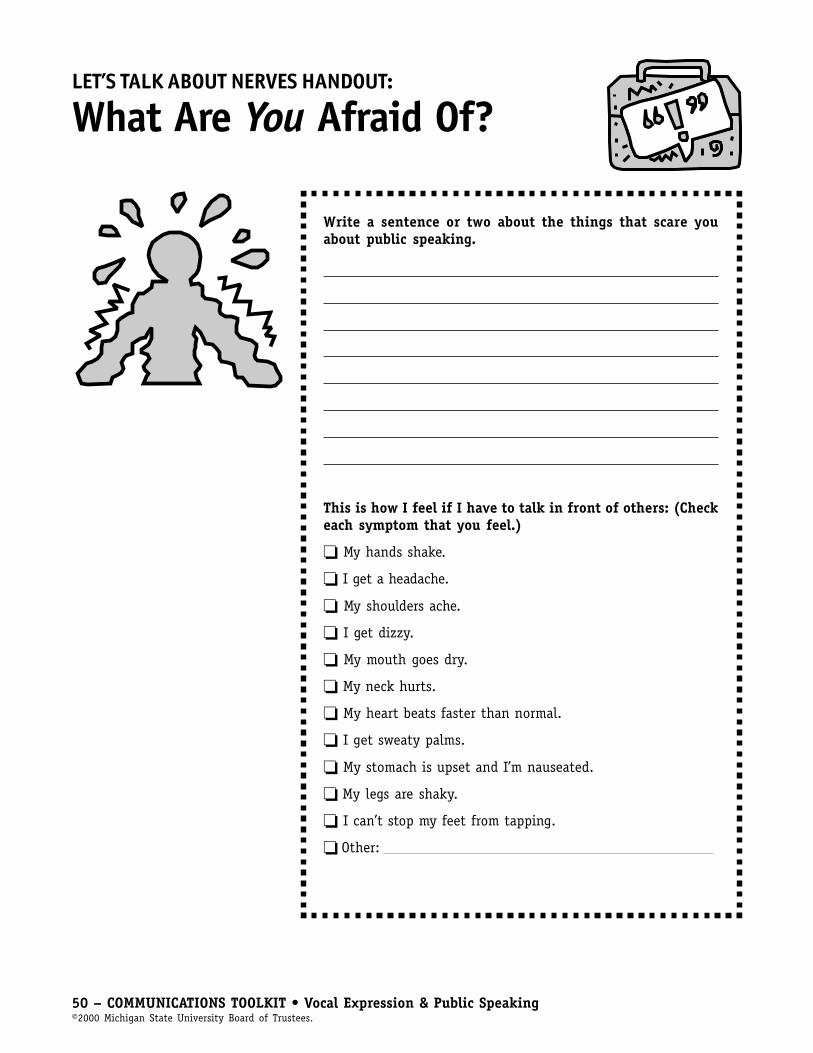
50 – COMMUNICATIONS TOOLKIT • Vocal Expression & Public Speaking©2000 Michigan State University Board of Trustees.
LET’S TALK ABOUT NERVES HANDOUT:
What Are You Afraid Of?
Write a sentence or two about the things that scare youabout public speaking.
This is how I feel if I have to talk in front of others: (Checkeach symptom that you feel.)
� My hands shake.
� I get a headache.
� My shoulders ache.
� I get dizzy.
� My mouth goes dry.
� My neck hurts.
� My heart beats faster than normal.
� I get sweaty palms.
� My stomach is upset and I’m nauseated.
� My legs are shaky.
� I can’t stop my feet from tapping.
� Other:
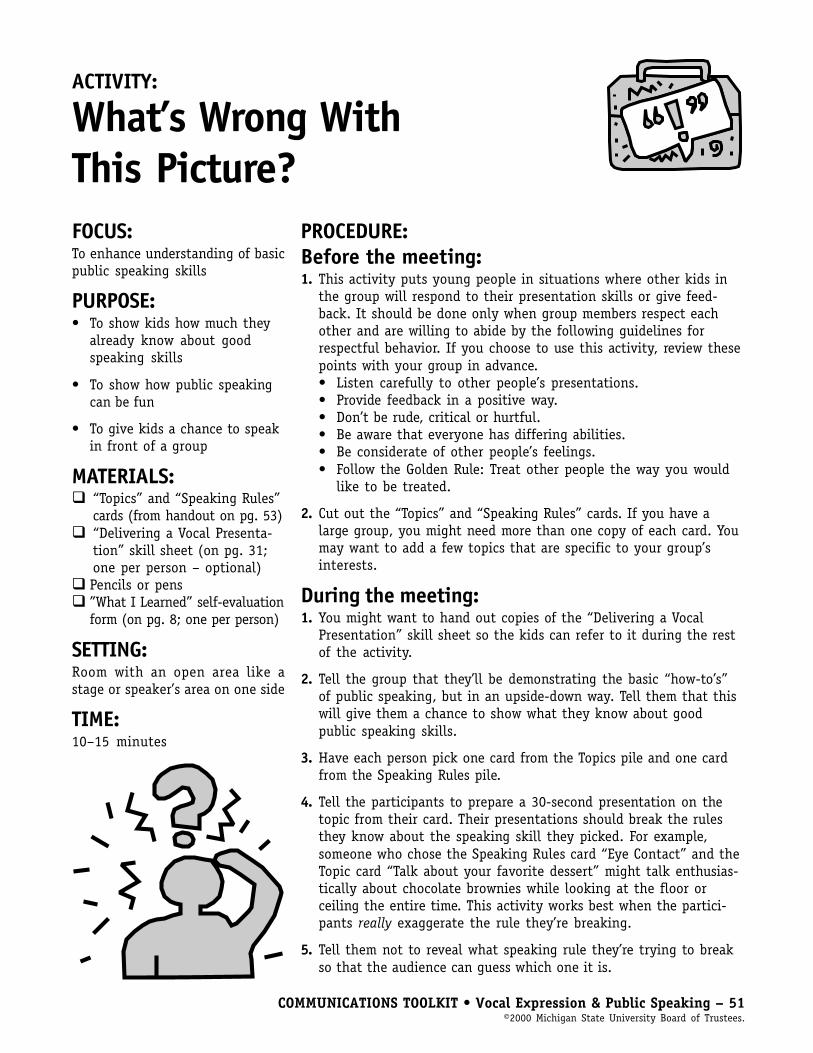
COMMUNICATIONS TOOLKIT • Vocal Expression & Public Speaking – 51©2000 Michigan State University Board of Trustees.
ACTIVITY:
What’s Wrong WithThis Picture?FOCUS:To enhance understanding of basicpublic speaking skills
PURPOSE:• To show kids how much they
already know about goodspeaking skills
• To show how public speakingcan be fun
• To give kids a chance to speakin front of a group
MATERIALS:“Topics” and “Speaking Rules”cards (from handout on pg. 53)“Delivering a Vocal Presenta-tion” skill sheet (on pg. 31;one per person – optional)Pencils or pens”What I Learned” self-evaluationform (on pg. 8; one per person)
SETTING:Room with an open area like astage or speaker’s area on one side
TIME:10–15 minutes
PROCEDURE:Before the meeting:1. This activity puts young people in situations where other kids in
the group will respond to their presentation skills or give feed-back. It should be done only when group members respect eachother and are willing to abide by the following guidelines forrespectful behavior. If you choose to use this activity, review thesepoints with your group in advance.• Listen carefully to other people’s presentations.• Provide feedback in a positive way.• Don’t be rude, critical or hurtful.• Be aware that everyone has differing abilities.• Be considerate of other people’s feelings.• Follow the Golden Rule: Treat other people the way you would
like to be treated.
2. Cut out the “Topics” and “Speaking Rules” cards. If you have alarge group, you might need more than one copy of each card. Youmay want to add a few topics that are specific to your group’sinterests.
During the meeting:1. You might want to hand out copies of the “Delivering a Vocal
Presentation” skill sheet so the kids can refer to it during the restof the activity.
2. Tell the group that they’ll be demonstrating the basic “how-to’s”of public speaking, but in an upside-down way. Tell them that thiswill give them a chance to show what they know about goodpublic speaking skills.
3. Have each person pick one card from the Topics pile and one cardfrom the Speaking Rules pile.
4. Tell the participants to prepare a 30-second presentation on thetopic from their card. Their presentations should break the rulesthey know about the speaking skill they picked. For example,someone who chose the Speaking Rules card “Eye Contact” and theTopic card “Talk about your favorite dessert” might talk enthusias-tically about chocolate brownies while looking at the floor orceiling the entire time. This activity works best when the partici-pants really exaggerate the rule they’re breaking.
5. Tell them not to reveal what speaking rule they’re trying to breakso that the audience can guess which one it is.
52 – COMMUNICATIONS TOOLKIT • Vocal Expression & Public Speaking©2000 Michigan State University Board of Trustees.
6. When the audience guesses what the speaker is trying to do, askthem to identify how good speakers would handle the speaking rule.
7. Continue in this manner until everyone has had a chance to talk.
TALKING IT OVER:Ask the group the following questions:• Did this activity help you learn anything new about public speaking
skills?• Have you tried or heard about other good tips for speaking to a
group?• Did this activity make it seem easier to try making a longer speech
in the future?• How could you share this information about public speaking with
other kids or adults?
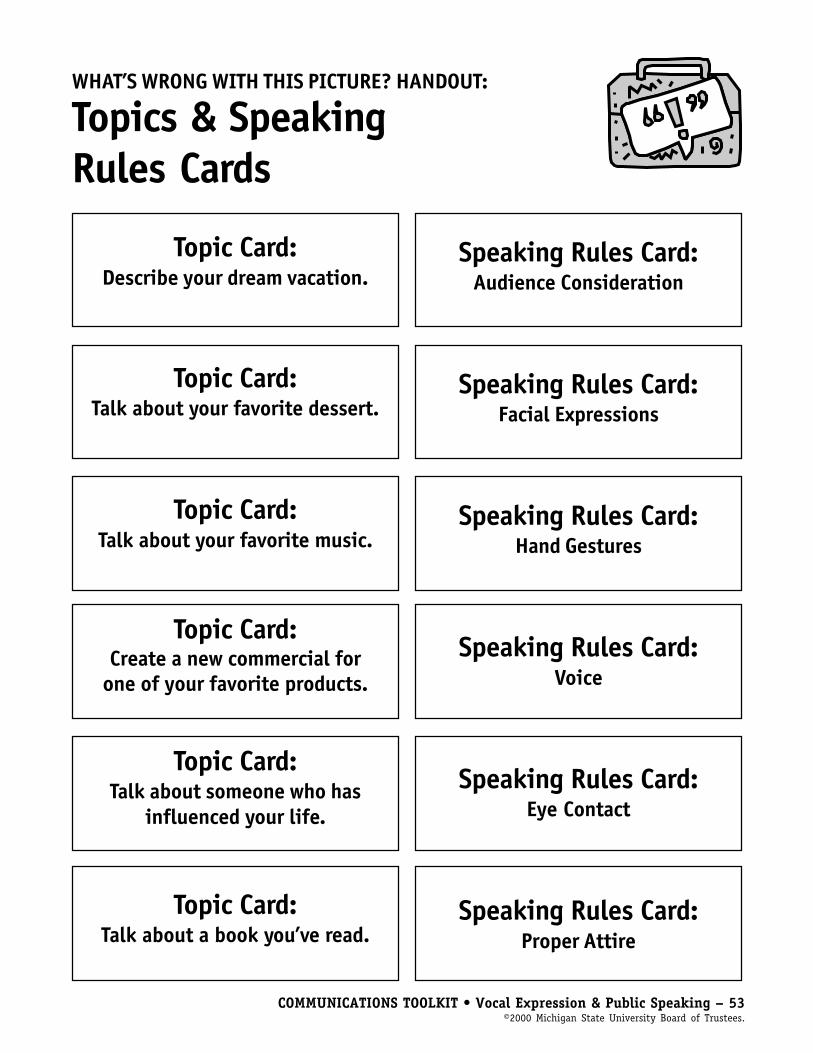
COMMUNICATIONS TOOLKIT • Vocal Expression & Public Speaking – 53©2000 Michigan State University Board of Trustees.
WHAT’S WRONG WITH THIS PICTURE? HANDOUT:
Topics & SpeakingRules Cards
Topic Card:Describe your dream vacation.
Topic Card:Talk about your favorite dessert.
Topic Card:Talk about your favorite music.
Topic Card:Create a new commercial for
one of your favorite products.
Topic Card:Talk about someone who has
influenced your life.
Speaking Rules Card:Audience Consideration
Topic Card:Talk about a book you’ve read.
Speaking Rules Card:Facial Expressions
Speaking Rules Card:Hand Gestures
Speaking Rules Card:Voice
Speaking Rules Card:Eye Contact
Speaking Rules Card:Proper Attire

54 – COMMUNICATIONS TOOLKIT • Vocal Expression & Public Speaking©2000 Michigan State University Board of Trustees.
ContentsWhat Leaders Need To KnowIntroduction ........................................................................55The Goal of Visual Communication Design ...............................55Kids & the Creative Process ....................................................55How to Use the Materials .......................................................56Life Skills ............................................................................56Self-Assessment & Evaluation ................................................ 56Beyond the Toolkit: More Ideas & Resources ............................57
Skill SheetsThe Creative Process ............................................................. 59Design Building Blocks – The Elements & Principles .................. 60Type Terms & Tips ................................................................. 62Color Terms & Tips ................................................................ 64Designing Symbols & Logos That Work .................................... 66Designing Presentation Graphics That Work .............................67Designing Layouts That Work .................................................68Designing Exhibits That Work ................................................ 70How Did I Do? A Self-Check for Evaluating Your Design Project ......72Design Warm-Up ActivitiesDesign Elements:• Line ................................................................................. 73• Shape ............................................................................... 74• Texture .............................................................................77• Space & Size ...................................................................... 78• Color ................................................................................ 80Design Principles:• Balance .............................................................................84• Rhythm ............................................................................87• Emphasis ..........................................................................88• Unity ................................................................................ 90
You’re My Type ..................................................................... 91Scanning the Visual Environment ........................................... 93Design a Logo ...................................................................... 94Design a Poster or Flier ......................................................... 96Design Presentation Graphics ............................................... 101
COMMUNICATIONS TOOLKIT • Visual Communication & Graphic Design – 55©2000 Michigan State University Board of Trustees.
What LeadersNeed to KnowIntroductionWhether you take a drive down awell-travelled highway, strollthrough a local shopping mall orsurf the Internet, you see and in-terpret many visual messages everyday. These messages may be informs such as logos, signs and post-ers, or television, computer andmagazine graphics.
You and your group may need todesign some visual messages of yourown. You might need a poster toadvertise a meeting, a brochure ornewsletter for your organization, ora logo for a club business. Computertechnology now gives more peopleaccess to many of the same or similardesign tools as those used by mediaprofessionals. To use these tools toeffectively communicate a message,however, requires more than justknowledge of the computer software.It requires an understanding of howto structure visual information usingthe elements and principles ofdesign. The area of design that dealswith structuring visual informationfor communicating messages is calledgraphic design.
Information is becoming more vi-sual in nature. (Consider CD-ROMmultimedia encyclopedias andgames, or the images availableacross the Internet – the electronic“information superhighway.”) As weexchange more information withpeople whose language and culturediffer from ours, visual communi-cation through well-designed sym-bols and images may help make ourmessages easier to understand.Today’s young people will face many
situations in the future – both onand off their jobs – in which theywill need to understand and usegood visual communication designskills to ensure that their messagesare seen and understood.
You can use the activities and in-formation in this section to help theyoung people you work with:
• Think about how and why visualmessages in our environment arecreated.
• Become familiar with the lan-guage of visual communications.
• Become comfortable with the cre-ative process as it applies to visualcommunication.
• Learn to use the basic elementsand principles of visual communi-cation design.
• Learn to evaluate visual communi-cation.
• Find additional visual communi-cation resources.
The Goal of VisualCommunicationDesignVisual communication is a specialblend of art and language used todeliver information to a particulargroup of people. If the informationis presented in a way that attractsthe intended audience and per-suades them to take action (suchas to come to a car wash or to re-cycle their trash), the designer hasdone his or her job well.
One way to state the goal of thevisual communication designer is:
To create visual formats for mes-sages, taking into consideration theintended audience by using mutu-ally understandable alphabets, sym-bols, colors, images and selectingappropriate media so the messagescan be received, understood and re-sponded to.
As you begin working with yourgroup on visual communication ac-tivities, ask the participants tothink about this. Have them putinto their own words what theythink the goal of a visual commu-nication designer might be.
Kids & theCreative ProcessCreative problem-solving and cre-ative presentation of visual infor-mation are essential elements of thedesign process. You can help stimu-late creative thinking by providingkids with:
• Opportunities, time and materi-als to explore.
• Encouragement to express theirown ideas.
• Acceptance and respect for theircreations.
Often it is difficult for kids (andadults!) to talk about their creativework in front of others for fear theywill be criticized. It’s helpful to askkids to talk about the process theywent through to create their work.Ask your group to identify and talkabout aspects of each others’ work
56 – COMMUNICATIONS TOOLKIT • Visual Communication & Graphic Design©2000 Michigan State University Board of Trustees.
they like. This gives kids a chanceto use their new design vocabularyto describe what they see.
Only when kids are comfortablewith this positive presentation andfeedback process should you beginto add questions like, “How couldone part of this project be improved,and why?” or “If you could do thisagain, what might you do differ-ently?” Allow one group member topresent a suggestion to the de-signer, then give the designer achance to agree or disagree with theobservation. The “How Did I Do? ASelf-Check for Evaluating Your De-sign Project” skill sheet found onpage 72 also can provide a way forindividuals to privately evaluatetheir own work.
How to Use theMaterialsIn addition to “What Leaders Needto Know,” the visual communicationsection includes:
• Skill Sheets – Single conceptsheets that provide basic informa-tion and tips. Specific sheets arereferred to in many of the activi-ties and may be copied and reviewedby leaders and members before be-ginning an activity. These sheetsalso can be used independent of theactivities for quick reference.
• Design Warm-Up Activities –Short activities that introduce spe-cific visual communication concepts.These can be used as warm-ups forprojects.
• Projects – Longer activities de-signed to take a group through thedesign process using a format suchas a poster or logo. Depending onthe needs of the group, each ofthese activities can be completedin a single meeting or expanded intomultiple meetings or workshops.
Before using the activities, thinkabout the suggested procedures andmaterials. Then adapt them to fitthe needs and resources of yourgroup.
The activities are designed so thatthey can be carried out with theleast amount of specialized tools,technical training on those tools,materials and room setup. If yourgroup has access to and familiaritywith computer page layout anddrawing software or other commu-nication technology, you can adaptthe activities to take advantage ofyour available resources.
The activities provide “generic”situations for participants to applytheir design skills to. However, youcan substitute a real situation suchas designing posters for an up-coming event. If your group is inter-ested in making communicationstheir project, you can use the ac-tivities as a jumping-off point forexploring the area of visual com-munication design.
Life SkillsUsing the visual communicationand graphic design activities in thissection can provide young peoplewith practice in valuable life skillssuch as:
• Planning and researching aproject, and then organizing theinformation.
• Making decisions and solvingproblems creatively.
• Using resources wisely.
• Working as a team member.
• Learning useful and marketabletechnical skills (the elements andprinciples of design, for example)and applying these skills to aproject.
• Developing record-keeping skills(for example, creating a graphicsportfolio).
• Communicating a concept or mes-sage to others through visualmeans.
• Strengthening self-esteem byunderstanding one’s abilities andhaving an opportunity to experiencesuccess.
• Evaluating a project and settinggoals for improvement.
Self-Assessment& EvaluationAfter each activity or project youlead with young people, please helpthem think about what theylearned. Make copies of the “WhatI Learned” self-evaluation form onpage 8 and distribute them to yourgroup. Ask them to think quietlyabout the questions and make notesabout what they learned, how theyfeel about their skills in that areaand what they’d like to learn moreabout. Then lead a discussion withthe whole group and ask if anyonewants to share what they came upwith. Young people may want tokeep their “What I Learned” self-evaluation forms to refer to laterand as a way to document theirlearning process.
COMMUNICATIONS TOOLKIT • Visual Communication & Graphic Design – 57©2000 Michigan State University Board of Trustees.
Beyond theToolkit:More Ideas &ResourcesCommunity as aResourceThere are probably individualsworking in the area of visual com-munication design in your commu-nity or neighboring areas. Their jobtitles are often “graphic designer”or “graphic artist.” Keep in mindthat the area of visual design isconstantly changing and so are thejob titles of designers! You may hearabout people who are working asmultimedia designers or desktoppublishers, or who have other titles.The designer’s job title often reflectsthe technology he or she is using.
You may find people with visualcommunication design skills work-ing in:
• Video or television studios design-ing word, symbol and data graph-ics, and studio sets.
• Advertising companies designingadvertisements for newspapers,magazines, billboards, catalogs andthe Internet.
• Book publishing art departmentsdesigning books, book catalogs andbook sales brochures.
• Sign painting and outdoor adver-tising companies designing signs,billboards and banners.
• Exhibit and display companiesdesigning exhibits and displays.
• In-house art departments for busi-nesses and government agenciesdesigning newsletters, reports, cata-logs, presentations and forms.
• Printing companies designing ma-terials to be offset or screen printed.
• Software companies designinggraphics for business, education orentertainment software.
• At home, “freelancing” illustra-tion, design, cartooning and morefor any of the groups mentionedabove.
• Internet service provider busi-nesses designing World Wide Webpages.
Your group may wish to invite localdesigners to talk about their workat one of your meetings or arrangeto visit a designer at his or herworkplace.
Additional ResourcesThe following materials will be use-ful for adults and older teens whowould like to learn more about vi-sual communications.
The World Wide Web is a growingsource of information on visualcommunication. Use the generalcategories listed here as searchterms with any of the Internetsearch engines (see pg. 134 for in-formation on Internet safety).
Business Practices & CopyrightInformation for GraphicDesigners
• Graphic Artists Guild Handbook ofPricing and Ethical Guidelines (9thEdition), edited by Rachel Burd.New York, New York: Graphic Art-ists Guild, 1997. This frequently
updated reference book provides in-formation for designers on pricinga variety of design work, writingcontracts and current copyrightlaws. World Wide Web address:(http://www.gag. org/)
Color
• Principles of Color Design, byWucius Wong. New York, New York:John Wiley & Sons, Inc., 1997. Thisbook provides an introduction to colorfor graphic designers and artists.
• Understanding Color: An Introduc-tion for Designers, by LindaHoltzschue. New York, New York:John Wiley & Sons, Inc., 1997. Thisbook provides basic color theoryinformation and exercises for art-ists and designers.
Creative Problem-Solving
• Design Yourself! by Kurt Hanks,Larry Belliston and Dave Edwards.Los Altos, California: Crisp Publica-tions, 1990. This book provides de-sign exercises, thought-provokingquotes and illustrations that willstimulate the creative planning andproblem-solving process.
Graphic Design & Layout
• The New Graphic Design School, byAlan Swann. New York, New York:John Wiley & Sons, Inc., 1997. Thisbook provides classroom or self-study exercises and projects in dif-ferent areas of graphic design. Itincludes exercises in using the ele-ments and principles of design aswell as the techniques necessary toput good design into practice.
• Making a Good Layout, by LoriSiebert and Lisa Ballard. Cincinnati,Ohio: North Light Books, 1992. Thisbook is an easy to use, step-by-stepguide to understanding the elementsand principles of layout design. Itprovides many design exercises andillustrations.

58 – COMMUNICATIONS TOOLKIT • Visual Communication & Graphic Design©2000 Michigan State University Board of Trustees.
• SchoolArts Magazine. Worcester,Massachusetts: Davis PublicationsInc. This magazine is written by andfor art teachers. The articles explainclassroom art activities that teach-ers have used successfully and of-ten focus on understanding designelements and principles. This maga-zine is also a good source for find-ing suppliers of art materials.
• Dynamic Graphics Magazine. Peo-ria, Illinois: Dynamic Graphics, Inc.This magazine shows the productionof graphic design projects witheasy-to-follow instructions.
Presentation Graphics
• Designer’s Guide to Creating Chartsand Diagrams, by Nigel Holmes. NewYork, New York: Watson-Guptill Pub-lications, 1991. This book providesexamples and exercises in how tomake data look visually exciting.
• The Presentation Design Book: Tips,Techniques & Advice for CreatingEffective, Attractive Slides, Overheads,Multimedia Presentations, ScreenShows, edited by Margaret Y. Rabb.Chapel Hill, North Carolina: VentanaPress, 1990. This book provides tips
and techniques for designing effec-tive presentation graphics.
Print Design and Production
• Pocket Pal: A Graphic Arts Produc-tion Handbook, by InternationalPaper Company. New York, NewYork: International Paper Company.This frequently updated referencebook has been providing basic in-formation on offset printing tech-nology and practices since 1934.
• How a Book Is Made, by AlikiBrandenberg. New York, New York:Harper Trophy, 1988. This children’sbook explains in easy-to-understandlanguage and illustrations the processof writing, editing, producing,printing and marketing a book.
Type
• Designing With Type: A BasicCourse in Typography, by JamesCraig. New York, New York: Watson-Guptill Publications, 1992. Thisbook provides basic information onunderstanding and using type.
• Upper & Lower Case (U&lc) maga-zine. New York, New York: Interna-tional Typeface Corporation. This
publication is targeted for graphicdesign students, teachers and pro-fessionals. The articles showcasehistorical and current typefaces andtype designers. Additional articlesare available on the World Wide Webat (http://www.uandlc. com).
Exhibit Ideas
• See the “Designing Exhibits ThatWork” skill sheet on page 70, whichis adapted from CommunicationsMade Easy: A 4-H Guide to Present-ing Information, published byMichigan 4-H Youth Programs, 1978(out of print).

COMMUNICATIONS TOOLKIT • Visual Communication & Graphic Design – 59©2000 Michigan State University Board of Trustees.
SKILL SHEET:
The Creative Process
The creative process is similar for allareas of communications — it usu-ally involves gathering information,brainstorming, planning, gettingfeedback, production and evaluation.Here are some things to consider ateach stage of your graphic designproject.
STAGE 1:
Gathering InformationBefore you start developing yourdesign, you’ll need to find out:• Who is the audience and what
do you want them to do?• What is the message?• What formats (such as adver-
tisements, fliers, brochures andpresentation graphics) areavailable and which format willbest suit your purpose?
• What setting will your designpiece be seen in? What will becompeting with it for attention?
• What production or reproduc-tion processes are available toyou and which one will bestsuit your purpose?
• What is the life span of yourdesign piece? Will it be readonce and recycled, or savedand used by more than oneperson?
• What is your timeline andbudget?
STAGE 2:
Brainstorming IdeasYour brain can work on a creativeproblem even when you’re not con-centrating on it! Be prepared –great creative insights can occur attimes when you’re doing somethingtotally unrelated to your project.
Brainstorming is a technique forgenerating lots of ideas in a shorttime (see “Brainstorming” on pg.5). Remember that all ideas aregood ideas at this stage!• Look in magazines, books or
other sources to see how otherssolved similar problems.
• Make lots of small, quick“thumbnail sketches” to tryout many visual ideas.
• Write lots of short, action-oriented headlines or slogans.
• Look for images (photographs,clip-art) that might go withyour message.
• Think about the feeling ormood you wish to convey, thenlook for type styles and colorsthat could help express it.
STAGE 3:
Fine-Tuning Ideas,Getting Feedback &Planning ProductionMake a more complete version ofyour best idea or ideas. This couldbe an actual size or scale model ofa drawing that looks as much aspossible like the final piece. You canuse it to:• Present to others for feedback.
• Serve as a “road map” forproducing your final artwork.
• Get cost and time estimates foroffset printing or other meth-ods of reproduction.
STAGE 4:
Producing theFinal PieceOnce your design is approved andyou’ve checked to make sure it willbe able to be produced within yourbudget, you can move on to pro-duction. Production methods will bedifferent depending on whetheryour final design will be:• Handmade.• Printed by a photocopier, offset
printing press or silkscreenprinter.
• Viewed on a television, videoor computer screen.
• Painted on a wall, signboard,vehicle or other object.
• Produced as a display orexhibit.
If your final product is going to behandled by others (such as aprinter) talk with the people whowill be working with your artwork.Be sure you know how they wouldlike it to be prepared. Include clear,written instructions and always givethem a phone number where theycan reach you with questions!
STAGE 5:
Evaluating ResultsDid your intended audience get yourmessage and respond the way youhoped they would? (See the “HowDid I Do?” skill sheet on pg. 72 forhelp in evaluating your work.)
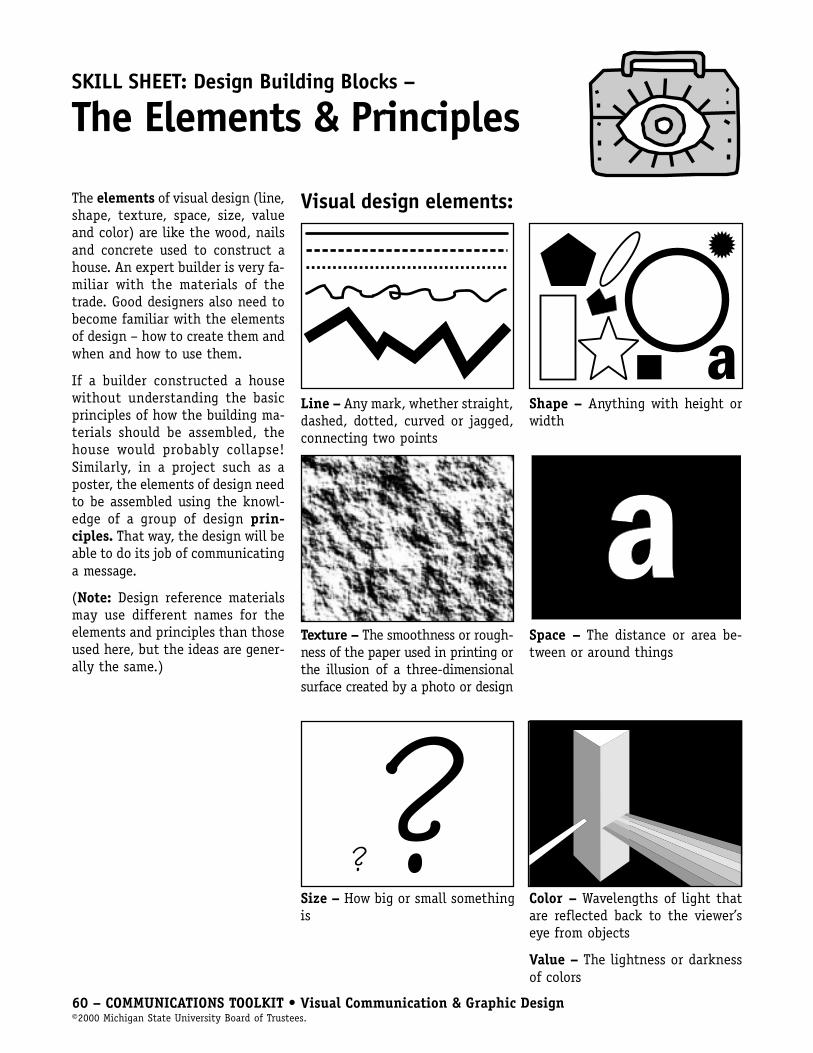
60 – COMMUNICATIONS TOOLKIT • Visual Communication & Graphic Design©2000 Michigan State University Board of Trustees.
SKILL SHEET: Design Building Blocks –
The Elements & Principles
The elements of visual design (line,shape, texture, space, size, valueand color) are like the wood, nailsand concrete used to construct ahouse. An expert builder is very fa-miliar with the materials of thetrade. Good designers also need tobecome familiar with the elementsof design – how to create them andwhen and how to use them.
If a builder constructed a housewithout understanding the basicprinciples of how the building ma-terials should be assembled, thehouse would probably collapse!Similarly, in a project such as aposter, the elements of design needto be assembled using the knowl-edge of a group of design prin-ciples. That way, the design will beable to do its job of communicatinga message.
(Note: Design reference materialsmay use different names for theelements and principles than thoseused here, but the ideas are gener-ally the same.)
Visual design elements:
Line – Any mark, whether straight,dashed, dotted, curved or jagged,connecting two points
Shape – Anything with height orwidth
Texture – The smoothness or rough-ness of the paper used in printing orthe illusion of a three-dimensionalsurface created by a photo or design
Space – The distance or area be-tween or around things
Size – How big or small somethingis
Color – Wavelengths of light thatare reflected back to the viewer’seye from objects
Value – The lightness or darknessof colors
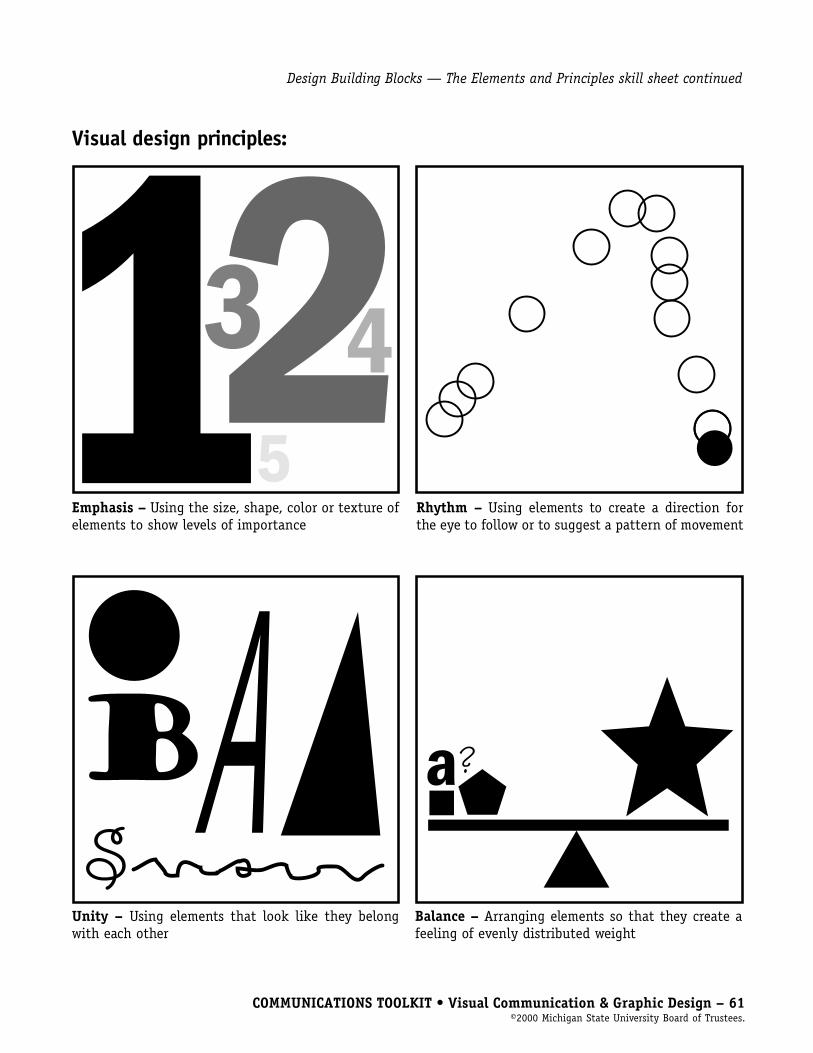
COMMUNICATIONS TOOLKIT • Visual Communication & Graphic Design – 61©2000 Michigan State University Board of Trustees.
Visual design principles:
Emphasis – Using the size, shape, color or texture ofelements to show levels of importance
Rhythm – Using elements to create a direction forthe eye to follow or to suggest a pattern of movement
Unity – Using elements that look like they belongwith each other
Balance – Arranging elements so that they create afeeling of evenly distributed weight
Design Building Blocks — The Elements and Principles skill sheet continued

62 – COMMUNICATIONS TOOLKIT • Visual Communication & Graphic Design©2000 Michigan State University Board of Trustees.
SKILL SHEET:
Type Terms & Tips
Type has a long and fascinating his-tory, going back probably to 1045 A.D.with the beginning of printing usingmovable type (one individual pieceof type for each character) in China.In 1440, the German printer JohannesGutenberg used movable type to printhis first edition of the Christian Bible.Since then, thousands of typefaceshave been designed and a great dealhas been written about how to workwith type.
There are people who have focusedtheir careers on designing typefacesfor the communications industry.These designers work to create type-faces that are easy to read and re-produce, have characters that haveunity (look like they belong to-gether) and express a particularmood or image.
Following are some definitions ofuseful type terms. Visual ex-amples of many of these termsare provided on page 63. Someof the words may seem peculiar– like “font” or “leading.” Keepin mind that many of these termsare carryovers from old printingtechnologies! For fun, you canresearch where they originated!
Baseline – The imaginary line onwhich all letters in a line of typestand
Boldface – A heavier version ofa regular typeface, usually usedfor emphasis
Bullet – Characters used to be-gin lines of type arranged in alist; each bullet indicates a newitem in the list
Flush left – Type that lines upvertically on the left
Flush right – Type that lines upvertically on the right
Font – A set of all of the lettersand punctuation marks within aparticular size and style of type
Italics – Letters that slant to theright
Justified – Lines of type thatalign vertically on both right andleft sides
Kerning – Adjusting the spacebetween letters
Leading – The space measuredfrom baseline to baseline in linesof type
Pica – A measurement of typelength and depth commonlyused by graphic designers andprinters; there are 6 picas in 1inch
Point – A measurement of typesize; there are 12 points in a picaand 72 points in 1 inch
Rule – Lines of various thick-nesses; the thickness of rules isusually measured in points andlength in picas or inches
Sans serif – Typefaces withoutserifs (short cross-strokes)
Serif – Short cross-strokes thatare used in some typefaces
Typeface – All letters of a par-ticular type style
Type style – Variations withina typeface such as italics or bold-face
Typography – The art and scienceof arranging type using the prin-ciples of visual design with cur-rent communications technology
Type Terms

COMMUNICATIONS TOOLKIT • Visual Communication & Graphic Design – 63©2000 Michigan State University Board of Trustees.
Type Tips
1. Serif typefaces – Times Roman,for example – are the most read-able for large areas of small type inprinted materials such as newslet-ters or books.
4. Use “white space” (areas of blankspace between letters, lines, wordsand paragraphs of type) to give thereader’s eye a chance to rest be-tween sections of information.
7. Using all capital letters or largeareas of bold, italics or underlinedtype reduces readability.
Serifserif
SansSerif
White space can be used to givethe reader’s eyes a rest.
White space can be used to givethe reader’s eyes a rest.
whitespace
This paragraph is aligned flush left. Itis easiest to read large areas of flushleft type.
This paragraph is aligned flush right.It is harder to read large areas offlush right type than type that is
aligned flush left.
This paragraph is centered.Use this alignment for specialemphasis or formal designs.
Use ALL CAPITAL LETTERS for em-phasis, not for large areas of text.
Use bold type for headlines or empha-sis, not for large areas of text.
Use italic type for emphasis, not for largeareas of text.
Use underline type for emphasis, not forlarge areas of text. (Use bold or italicbefore using underlining.)
This is 7-point type.
This is 9-point type.
This is 12-point type.
This is 16-point type.
This is 30-point type.
2. Sans serif typefaces – Helvetica,for example – are usually goodchoices for headlines or for videographics.
3. Using too many different type-faces and sizes in one design projectcan cause confusion and make thelayout look too cluttered for easyreading.
5. Large areas of flush right or cen-tered type are harder to read thanflush left. Use these alignments oc-casionally for special emphasis or,in the case of centered type, for aformal design. 8. Good type sizes for the main
reading areas of printed materialslike newsletters or books are 10-,11- or 12-point. Type sizes for pre-sentation graphics, posters and dis-plays should be larger. Make typesamples and see if you can readthem at the intended viewing dis-tance. Always consider the needs ofthe reader when picking a type size!
9. In general, smaller type worksbest in shorter line lengths andlarger type in longer line lengths.A “rule of thumb” to use for goodreadability is to keep the length oflines of type in columns between39 and 52 characters. (This will varydepending on the type size andface.)
Type Terms & Tips skill sheet continued
6. Match the headline typefaces youuse to your message. Type can beused to express many differentmoods – from formal and serious toplayful or comical. Remember thatreadability is the most importantthing. Avoid using stylized type-faces for your “body copy” or mainreading area.

64 – COMMUNICATIONS TOOLKIT • Visual Communication & Graphic Design©2000 Michigan State University Board of Trustees.
SKILL SHEET:
Color Terms & Tips
color names for products (such as“passion pink” lipstick, “Bavariantorte” paint and “almond” floor tile)that they hope will have emotionalappeal for consumers.
ArtisticArtists express themselves in theirwork using various colored media –papers, paints, pencils or computerdrawing and painting programs, forexample. Color wheels and color tri-angles are tools artists can use toaid in mixing pigments as well asto create harmonious combinationsof subtractive colors.
Graphic artists who create artworkto be reproduced by offset or silk-screen printing use ink color swatchbooks to help them specify precisecolors. Designers who use comput-ers can choose from several differ-ent color selection systems withintheir software. Which one theychoose depends on whether theirfinal product will be slides, laserprints, offset printing or computergraphics to be viewed only on amonitor.
Color TermsAdditive color – The colors of light(red, blue and green) that, when com-bined, create white; the colors seenon computer monitors are additive
Analogous colors – Colors that arenext to each other on the colorwheel
Chroma – The name of a color; syn-onym for hue or color
Complementary colors – Colorsdirectly opposite each other on thecolor wheel
Hue – The name of the color, suchas red, blue or yellow; synonym forchroma or color
Intensity – The strength of a coloror hue; also called saturation
Monochromatic – Containing onehue only
Pastel – A fashion industry termfor colors that have white mixedwith them
Primary colors – In subtractivecolor, the simplest colors of thecolor wheel that cannot be createdby any other colors in combination(red, blue and yellow); in additivecolor, the wavelengths of light nec-essary to create all colors (red, blueand green)
Process colors – Ink colors used inoffset printing to reproduce full-color images (cyan blue, magenta,yellow and black)
Saturation – The degree of colorpurity; fully saturated colors canonly contain two primary colors andnever black or white; also calledintensity
Secondary color – Colors made upof two primary colors; subtractivesecondaries are orange, green andviolet, additive secondaries arecyan, yellow and magenta
Shade – A pure color mixed withblack
Spectrum – All the visible hues orcolors
Subtractive color – The colors ofthings resulting from the absorptionof light; paint colors are subtractive
Color can be described in at leastthree different ways – scientifically,emotionally and artistically. As adesigner, you’ll find it useful to un-derstand the basics of each of theseviewpoints.
ScientificScientists describe color as wave-lengths of light (red is longest andviolet is shortest). White light ismade up of all the colors of the spec-trum. When light hits a surface,some wavelengths of light are ab-sorbed and some are reflected. Thereflected wavelengths are the col-ors we see. For example, green grassabsorbs all the light wavelengthsexcept green, which is reflectedback to our eyes.
EmotionalWe often use colors to symbolizeparticular emotions. These colorassociations can vary greatly fromone culture to another. For example,the color red in one culture mightsignify happiness, but in anotherculture, aggression or anger.
The fashion and interiordesign industries create
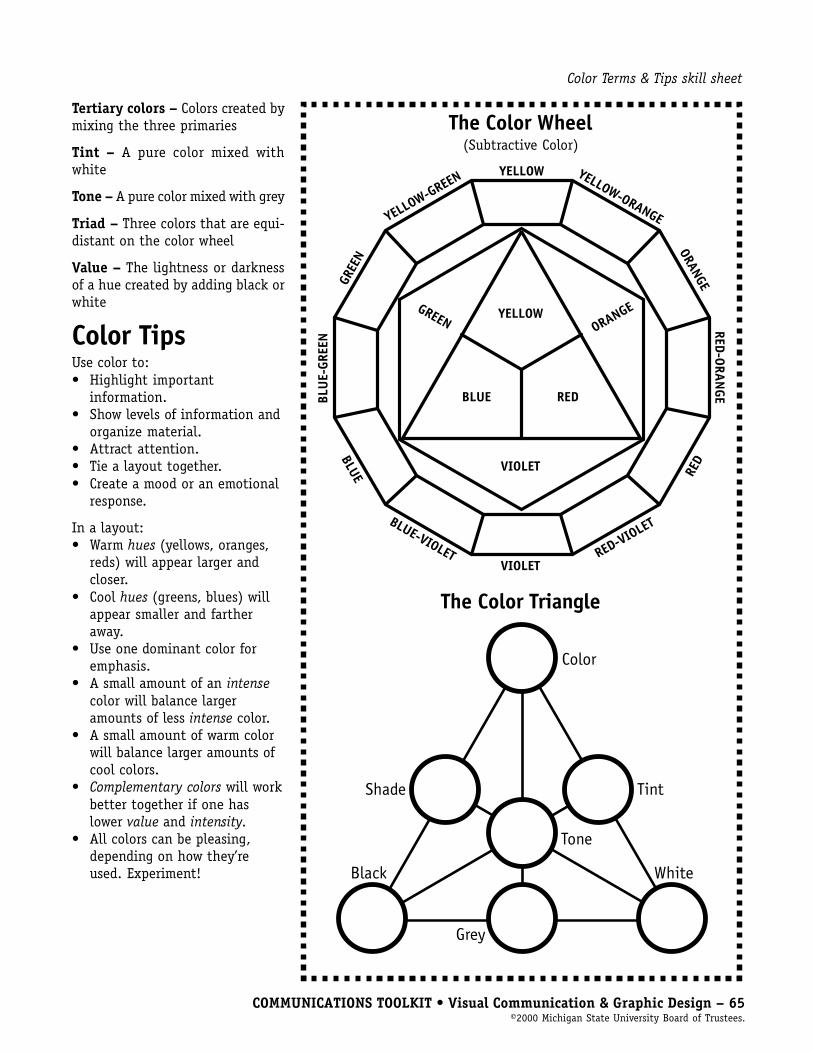
COMMUNICATIONS TOOLKIT • Visual Communication & Graphic Design – 65©2000 Michigan State University Board of Trustees.
Tertiary colors – Colors created bymixing the three primaries
Tint – A pure color mixed withwhite
Tone – A pure color mixed with grey
Triad – Three colors that are equi-distant on the color wheel
Value – The lightness or darknessof a hue created by adding black orwhite
Color TipsUse color to:• Highlight important
information.• Show levels of information and
organize material.• Attract attention.• Tie a layout together.• Create a mood or an emotional
response.
In a layout:• Warm hues (yellows, oranges,
reds) will appear larger andcloser.
• Cool hues (greens, blues) willappear smaller and fartheraway.
• Use one dominant color foremphasis.
• A small amount of an intensecolor will balance largeramounts of less intense color.
• A small amount of warm colorwill balance larger amounts ofcool colors.
• Complementary colors will workbetter together if one haslower value and intensity.
• All colors can be pleasing,depending on how they’reused. Experiment!
The Color Wheel(Subtractive Color)
The Color Triangle
Color Terms & Tips skill sheet
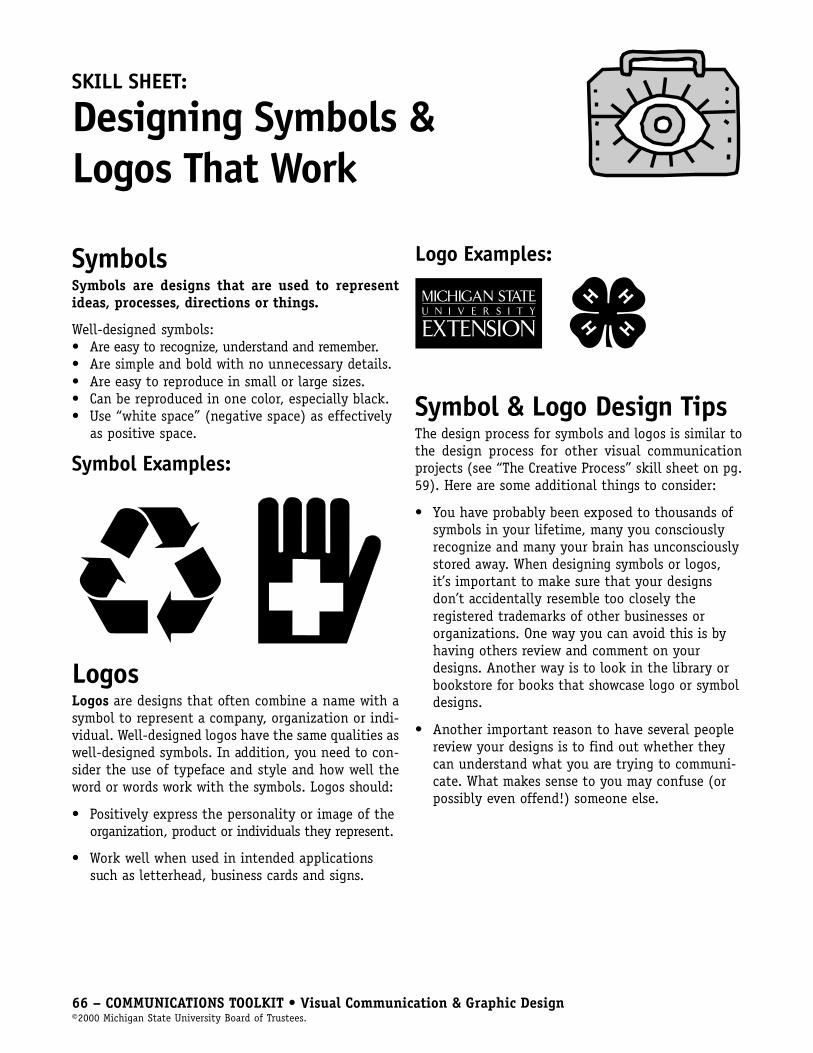
66 – COMMUNICATIONS TOOLKIT • Visual Communication & Graphic Design©2000 Michigan State University Board of Trustees.
SKILL SHEET:
Designing Symbols &Logos That Work
SymbolsSymbols are designs that are used to representideas, processes, directions or things.
Well-designed symbols:• Are easy to recognize, understand and remember.• Are simple and bold with no unnecessary details.• Are easy to reproduce in small or large sizes.• Can be reproduced in one color, especially black.• Use “white space” (negative space) as effectively
as positive space.
Symbol Examples:
LogosLogos are designs that often combine a name with asymbol to represent a company, organization or indi-vidual. Well-designed logos have the same qualities aswell-designed symbols. In addition, you need to con-sider the use of typeface and style and how well theword or words work with the symbols. Logos should:
• Positively express the personality or image of theorganization, product or individuals they represent.
• Work well when used in intended applicationssuch as letterhead, business cards and signs.
Logo Examples:
Symbol & Logo Design TipsThe design process for symbols and logos is similar tothe design process for other visual communicationprojects (see “The Creative Process” skill sheet on pg.59). Here are some additional things to consider:
• You have probably been exposed to thousands ofsymbols in your lifetime, many you consciouslyrecognize and many your brain has unconsciouslystored away. When designing symbols or logos,it’s important to make sure that your designsdon’t accidentally resemble too closely theregistered trademarks of other businesses ororganizations. One way you can avoid this is byhaving others review and comment on yourdesigns. Another way is to look in the library orbookstore for books that showcase logo or symboldesigns.
• Another important reason to have several peoplereview your designs is to find out whether theycan understand what you are trying to communi-cate. What makes sense to you may confuse (orpossibly even offend!) someone else.

COMMUNICATIONS TOOLKIT • Visual Communication & Graphic Design – 67©2000 Michigan State University Board of Trustees.
SKILL SHEET:
Designing PresentationGraphics That WorkPresentation graphics are visualaids used to clarify and highlightpublic speaking. Posters, chartsand overheads are some examples.
Consider YourAudience• Make type large enough for youraudience to read. Check out yourvisuals from the farthest distancethey will be viewed to see if theaudience can read them.
• Don’t stack type vertically or placeit at odd angles unless you reallyneed to for a special effect. Youraudience will get stiff necks tryingto read too much type that isn’thorizontal!
• Use points or areas of color to helplead the viewer’s eye through yourvisuals.
• Keep your visuals simple and theinformation on each one brief. Goeasy on the boxes, lines and otherpotential visual clutter. Break your
information up into several visualsand edit it so only the essential in-formation is shown.
• Don’t spend too much time on onevisual. You’ll lose the interest ofyour audience.
• Avoid using red and green togetherto compare data on charts andgraphs. It is difficult for people whoare color blind to see the difference.
Consider YourInformation• Take time to proofread and checkthe accuracy of your information.Never use visuals that you haven’tcarefully checked. (Failing to checkyour visuals ahead of time could beembarrassing to you and youraudience!)
• Vary the size, weight and color ofthe elements in your visuals whenyou need to emphasize something.
Too many elements used for empha-sis on one visual have the oppositeeffect – nothing will stand out!
Consider YourPresentationEnvironmentPlan time to check the availabilityof electrical plugs and extensioncords, curtains to darken windowsor the best arrangement of youraudiovisual equipment. If possible,double-check equipment beforeyour presentation to make sure itis working properly. Always have abackup plan just in case your equip-ment breaks down.
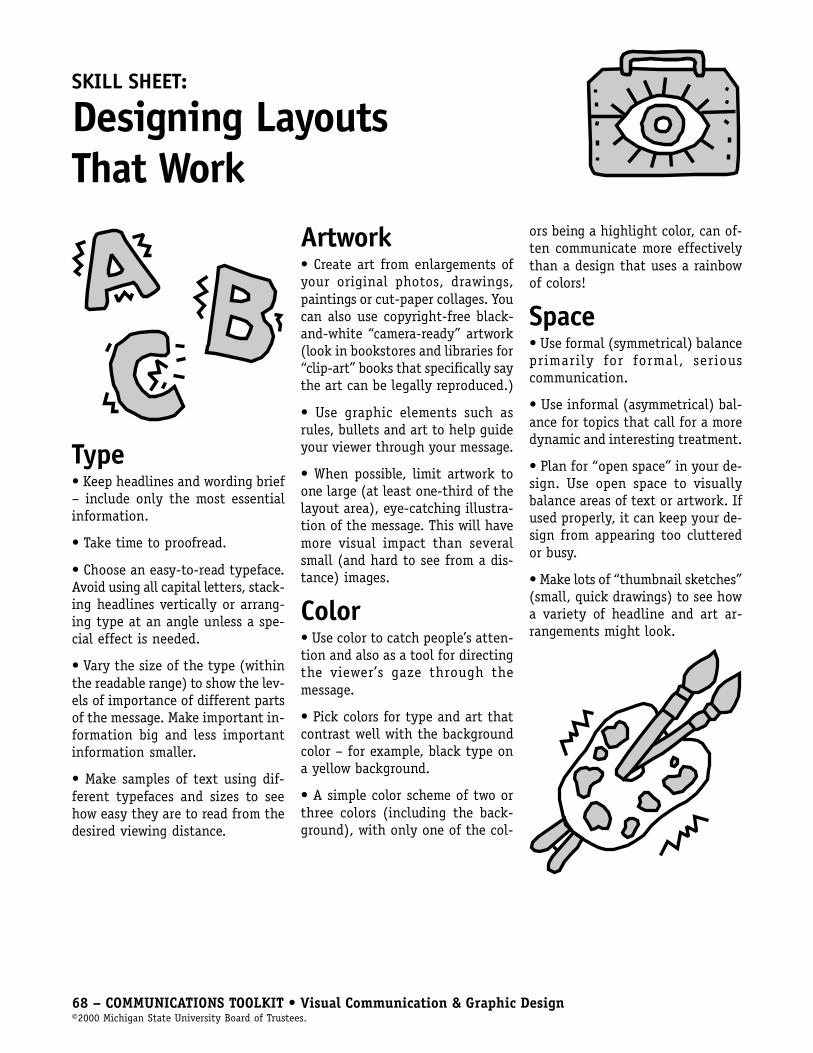
68 – COMMUNICATIONS TOOLKIT • Visual Communication & Graphic Design©2000 Michigan State University Board of Trustees.
SKILL SHEET:
Designing LayoutsThat Work
Type• Keep headlines and wording brief– include only the most essentialinformation.
• Take time to proofread.
• Choose an easy-to-read typeface.Avoid using all capital letters, stack-ing headlines vertically or arrang-ing type at an angle unless a spe-cial effect is needed.
• Vary the size of the type (withinthe readable range) to show the lev-els of importance of different partsof the message. Make important in-formation big and less importantinformation smaller.
• Make samples of text using dif-ferent typefaces and sizes to seehow easy they are to read from thedesired viewing distance.
Artwork• Create art from enlargements ofyour original photos, drawings,paintings or cut-paper collages. Youcan also use copyright-free black-and-white “camera-ready” artwork(look in bookstores and libraries for“clip-art” books that specifically saythe art can be legally reproduced.)
• Use graphic elements such asrules, bullets and art to help guideyour viewer through your message.
• When possible, limit artwork toone large (at least one-third of thelayout area), eye-catching illustra-tion of the message. This will havemore visual impact than severalsmall (and hard to see from a dis-tance) images.
Color• Use color to catch people’s atten-tion and also as a tool for directingthe viewer’s gaze through themessage.
• Pick colors for type and art thatcontrast well with the backgroundcolor – for example, black type ona yellow background.
• A simple color scheme of two orthree colors (including the back-ground), with only one of the col-
ors being a highlight color, can of-ten communicate more effectivelythan a design that uses a rainbowof colors!
Space• Use formal (symmetrical) balanceprimarily for formal, seriouscommunication.
• Use informal (asymmetrical) bal-ance for topics that call for a moredynamic and interesting treatment.
• Plan for “open space” in your de-sign. Use open space to visuallybalance areas of text or artwork. Ifused properly, it can keep your de-sign from appearing too clutteredor busy.
• Make lots of “thumbnail sketches”(small, quick drawings) to see howa variety of headline and art ar-rangements might look.
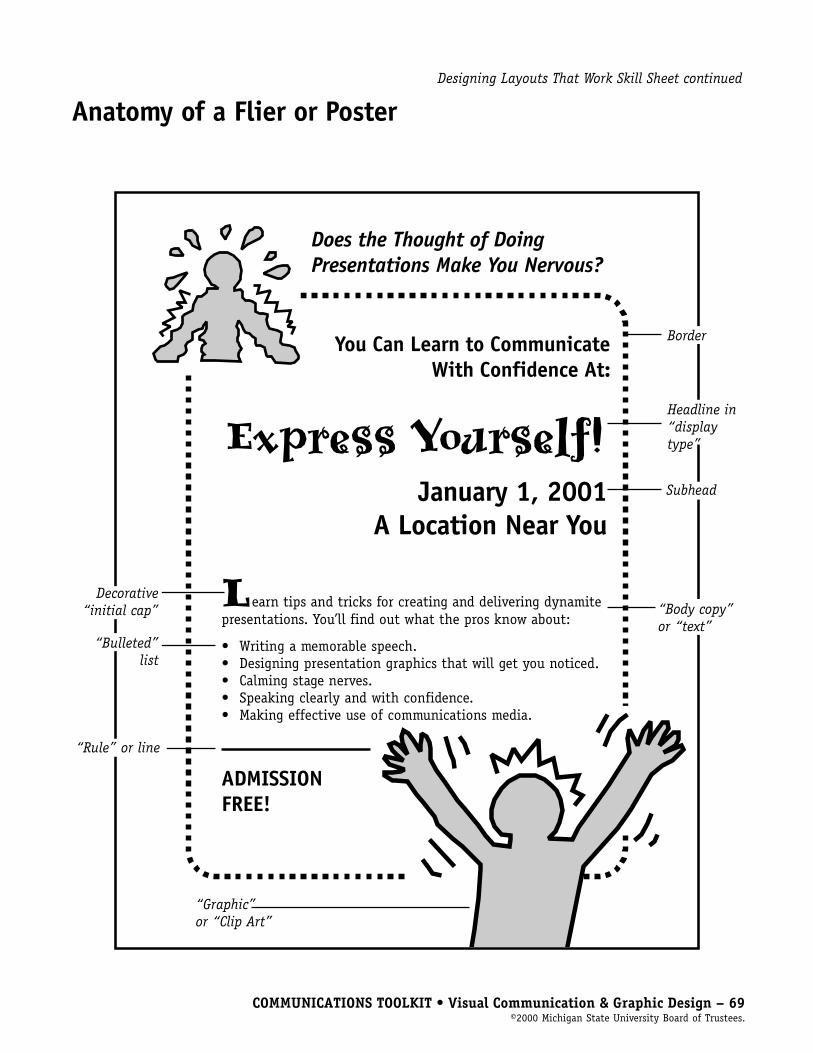
COMMUNICATIONS TOOLKIT • Visual Communication & Graphic Design – 69©2000 Michigan State University Board of Trustees.
Designing Layouts That Work Skill Sheet continued
Anatomy of a Flier or Poster
Express Yourself!January 1, 2001
A Location Near You
Does the Thought of DoingPresentations Make You Nervous?
You Can Learn to CommunicateWith Confidence At:
“Graphic”or “Clip Art”
Learn tips and tricks for creating and delivering dynamitepresentations. You’ll find out what the pros know about:
• Writing a memorable speech.• Designing presentation graphics that will get you noticed.• Calming stage nerves.• Speaking clearly and with confidence.• Making effective use of communications media.
ADMISSIONFREE!
“Rule” or line
“Bulleted”list
Decorative “initial cap” “Body copy”
or “text”
Border
Headline in“displaytype”
Subhead
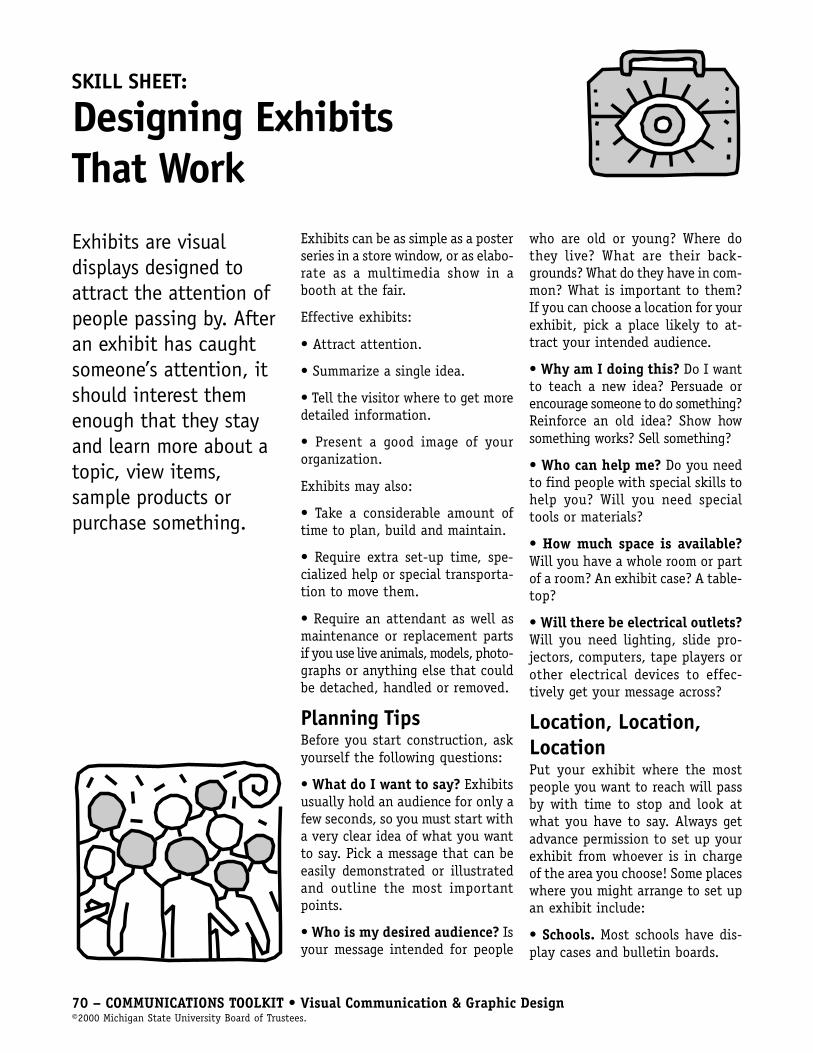
70 – COMMUNICATIONS TOOLKIT • Visual Communication & Graphic Design©2000 Michigan State University Board of Trustees.
SKILL SHEET:
Designing ExhibitsThat Work
Exhibits are visualdisplays designed toattract the attention ofpeople passing by. Afteran exhibit has caughtsomeone’s attention, itshould interest themenough that they stayand learn more about atopic, view items,sample products orpurchase something.
Exhibits can be as simple as a posterseries in a store window, or as elabo-rate as a multimedia show in abooth at the fair.
Effective exhibits:
• Attract attention.
• Summarize a single idea.
• Tell the visitor where to get moredetailed information.
• Present a good image of yourorganization.
Exhibits may also:
• Take a considerable amount oftime to plan, build and maintain.
• Require extra set-up time, spe-cialized help or special transporta-tion to move them.
• Require an attendant as well asmaintenance or replacement partsif you use live animals, models, photo-graphs or anything else that couldbe detached, handled or removed.
Planning TipsBefore you start construction, askyourself the following questions:
• What do I want to say? Exhibitsusually hold an audience for only afew seconds, so you must start witha very clear idea of what you wantto say. Pick a message that can beeasily demonstrated or illustratedand outline the most importantpoints.
• Who is my desired audience? Isyour message intended for people
who are old or young? Where dothey live? What are their back-grounds? What do they have in com-mon? What is important to them?If you can choose a location for yourexhibit, pick a place likely to at-tract your intended audience.
• Why am I doing this? Do I wantto teach a new idea? Persuade orencourage someone to do something?Reinforce an old idea? Show howsomething works? Sell something?
• Who can help me? Do you needto find people with special skills tohelp you? Will you need specialtools or materials?
• How much space is available?Will you have a whole room or partof a room? An exhibit case? A table-top?
• Will there be electrical outlets?Will you need lighting, slide pro-jectors, computers, tape players orother electrical devices to effec-tively get your message across?
Location, Location,LocationPut your exhibit where the mostpeople you want to reach will passby with time to stop and look atwhat you have to say. Always getadvance permission to set up yourexhibit from whoever is in chargeof the area you choose! Some placeswhere you might arrange to set upan exhibit include:
• Schools. Most schools have dis-play cases and bulletin boards.
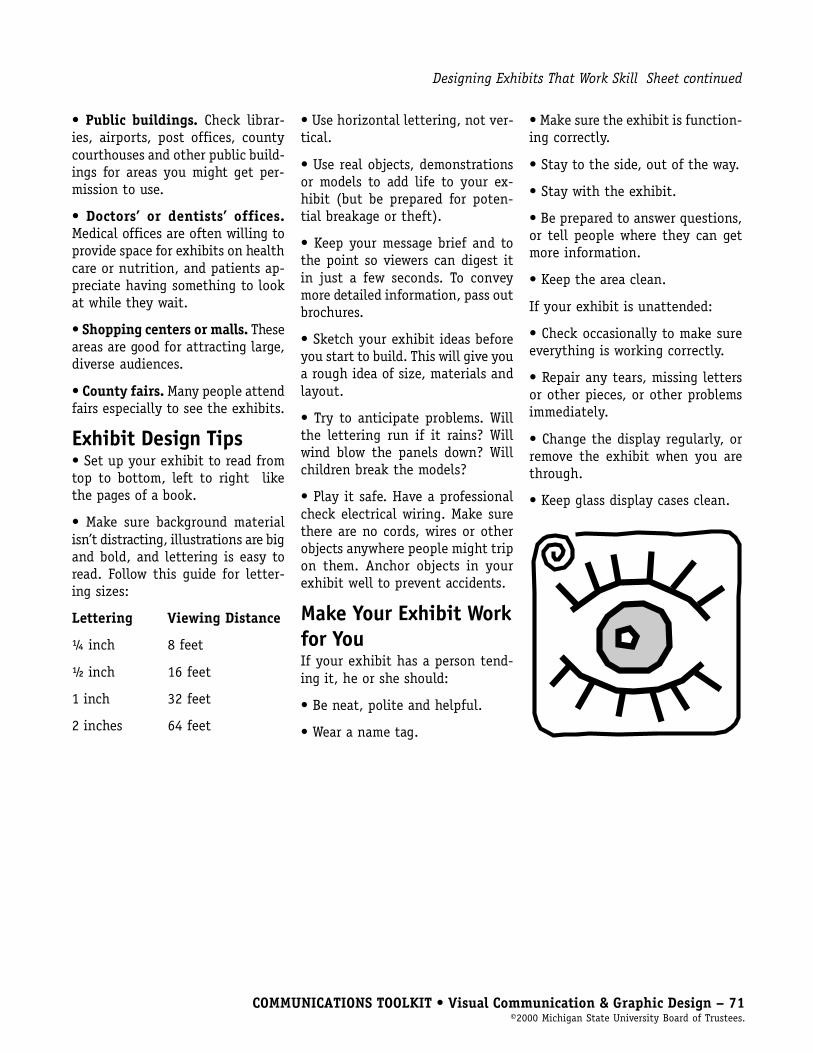
COMMUNICATIONS TOOLKIT • Visual Communication & Graphic Design – 71©2000 Michigan State University Board of Trustees.
• Public buildings. Check librar-ies, airports, post offices, countycourthouses and other public build-ings for areas you might get per-mission to use.
• Doctors’ or dentists’ offices.Medical offices are often willing toprovide space for exhibits on healthcare or nutrition, and patients ap-preciate having something to lookat while they wait.
• Shopping centers or malls. Theseareas are good for attracting large,diverse audiences.
• County fairs. Many people attendfairs especially to see the exhibits.
Exhibit Design Tips• Set up your exhibit to read fromtop to bottom, left to right likethe pages of a book.
• Make sure background materialisn’t distracting, illustrations are bigand bold, and lettering is easy toread. Follow this guide for letter-ing sizes:
Lettering Viewing Distance
¼ inch 8 feet
½ inch 16 feet
1 inch 32 feet
2 inches 64 feet
• Use horizontal lettering, not ver-tical.
• Use real objects, demonstrationsor models to add life to your ex-hibit (but be prepared for poten-tial breakage or theft).
• Keep your message brief and tothe point so viewers can digest itin just a few seconds. To conveymore detailed information, pass outbrochures.
• Sketch your exhibit ideas beforeyou start to build. This will give youa rough idea of size, materials andlayout.
• Try to anticipate problems. Willthe lettering run if it rains? Willwind blow the panels down? Willchildren break the models?
• Play it safe. Have a professionalcheck electrical wiring. Make surethere are no cords, wires or otherobjects anywhere people might tripon them. Anchor objects in yourexhibit well to prevent accidents.
Make Your Exhibit Workfor YouIf your exhibit has a person tend-ing it, he or she should:
• Be neat, polite and helpful.
• Wear a name tag.
Designing Exhibits That Work Skill Sheet continued
• Make sure the exhibit is function-ing correctly.
• Stay to the side, out of the way.
• Stay with the exhibit.
• Be prepared to answer questions,or tell people where they can getmore information.
• Keep the area clean.
If your exhibit is unattended:
• Check occasionally to make sureeverything is working correctly.
• Repair any tears, missing lettersor other pieces, or other problemsimmediately.
• Change the display regularly, orremove the exhibit when you arethrough.
• Keep glass display cases clean.

72 – COMMUNICATIONS TOOLKIT • Visual Communication & Graphic Design©2000 Michigan State University Board of Trustees.
SKILL SHEET:
How Did I Do?A Self-Check for Evaluating Your Design Project
Use this checklist to evaluate andfine-tune your design work. Keepnotes on what you think you didwell and on areas in which you’dlike to improve.
Audience� Does the design appeal to your intended audience? Is the type
legible? Are the graphics appropriate for the age level? Is the designbias-free? What works well and what might you do differently?
Message� Do all elements of your design communicate your message? Is it
clear what you want the viewer to know or do? What works well andwhat might you do differently?
Format� Are the format (such as brochure, flier, poster, ad, display, overhead
transparency) and layout appropriate for presenting the information?What works well and what might you do differently?
Environment� Does the design stand out in the environment in which it was
intended to be used? What works well and what might you dodifferently?
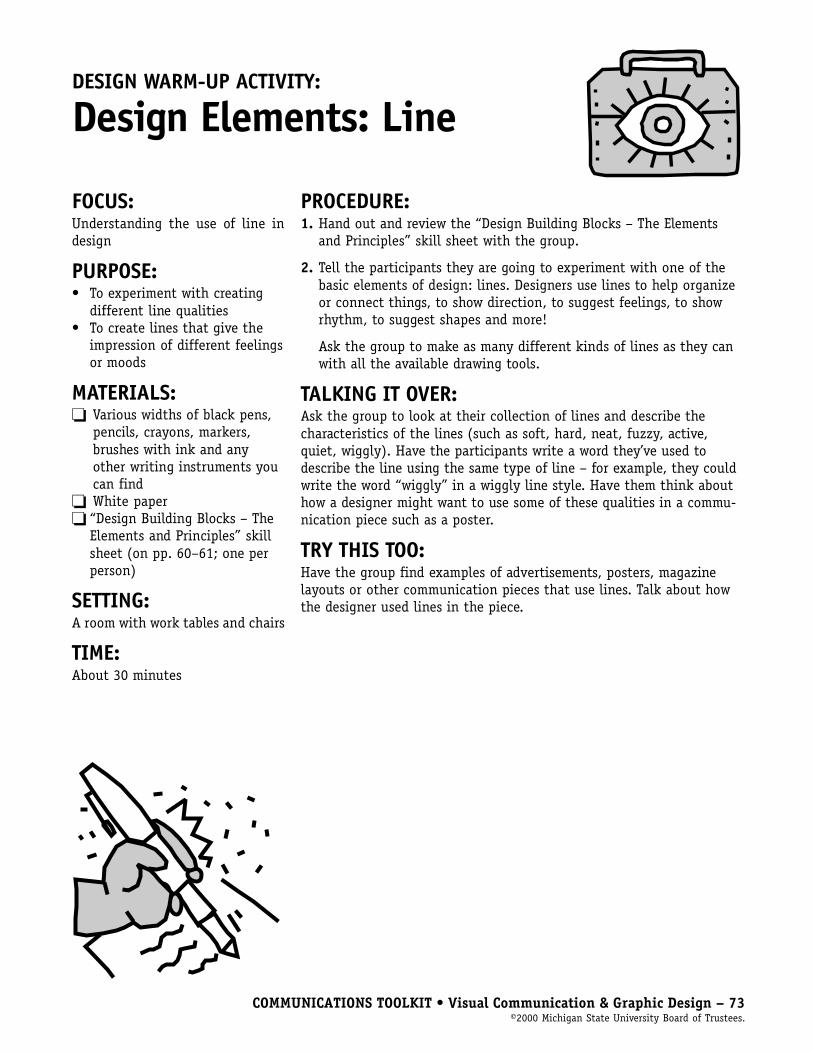
COMMUNICATIONS TOOLKIT • Visual Communication & Graphic Design – 73©2000 Michigan State University Board of Trustees.
DESIGN WARM-UP ACTIVITY:
Design Elements: Line
FOCUS:Understanding the use of line indesign
PURPOSE:• To experiment with creating
different line qualities• To create lines that give the
impression of different feelingsor moods
MATERIALS:� Various widths of black pens,
pencils, crayons, markers,brushes with ink and anyother writing instruments youcan find
� White paper� “Design Building Blocks – The
Elements and Principles” skillsheet (on pp. 60–61; one perperson)
SETTING:A room with work tables and chairs
TIME:About 30 minutes
PROCEDURE:1. Hand out and review the “Design Building Blocks – The Elements
and Principles” skill sheet with the group.
2. Tell the participants they are going to experiment with one of thebasic elements of design: lines. Designers use lines to help organizeor connect things, to show direction, to suggest feelings, to showrhythm, to suggest shapes and more!
Ask the group to make as many different kinds of lines as they canwith all the available drawing tools.
TALKING IT OVER:Ask the group to look at their collection of lines and describe thecharacteristics of the lines (such as soft, hard, neat, fuzzy, active,quiet, wiggly). Have the participants write a word they’ve used todescribe the line using the same type of line – for example, they couldwrite the word “wiggly” in a wiggly line style. Have them think abouthow a designer might want to use some of these qualities in a commu-nication piece such as a poster.
TRY THIS TOO:Have the group find examples of advertisements, posters, magazinelayouts or other communication pieces that use lines. Talk about howthe designer used lines in the piece.
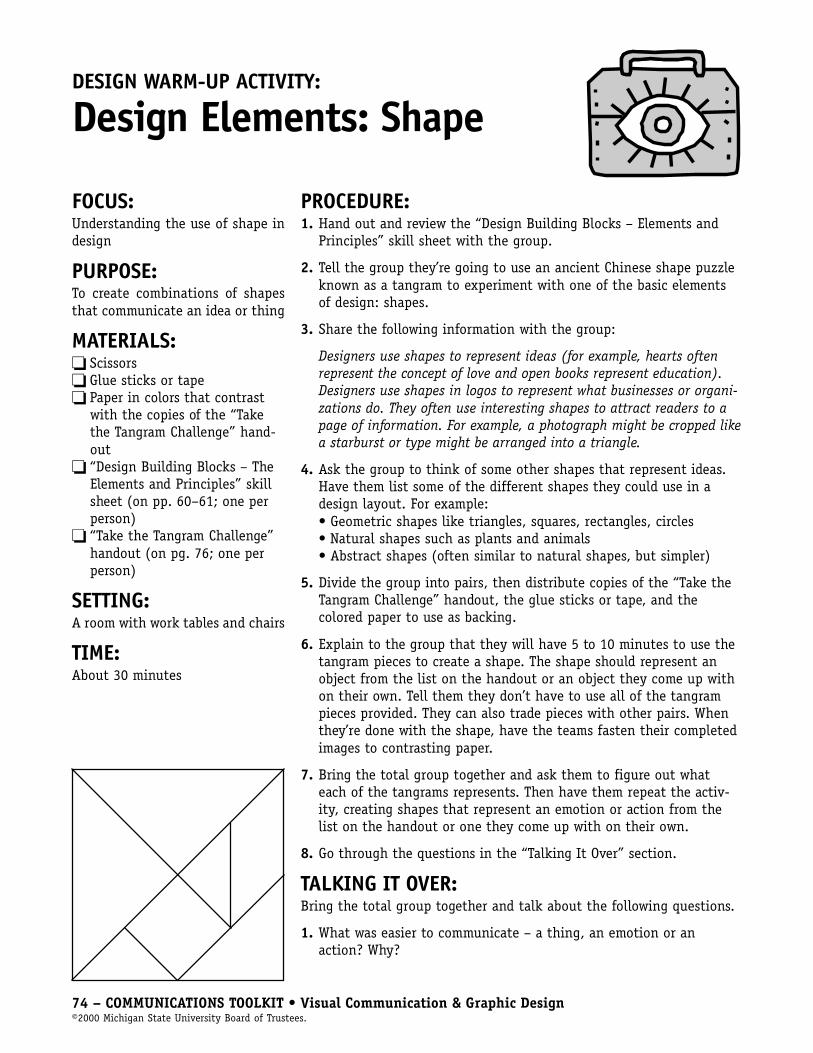
74 – COMMUNICATIONS TOOLKIT • Visual Communication & Graphic Design©2000 Michigan State University Board of Trustees.
DESIGN WARM-UP ACTIVITY:
Design Elements: Shape
FOCUS:Understanding the use of shape indesign
PURPOSE:To create combinations of shapesthat communicate an idea or thing
MATERIALS:� Scissors� Glue sticks or tape� Paper in colors that contrast
with the copies of the “Takethe Tangram Challenge” hand-out
� “Design Building Blocks – TheElements and Principles” skillsheet (on pp. 60–61; one perperson)
� “Take the Tangram Challenge”handout (on pg. 76; one perperson)
SETTING:A room with work tables and chairs
TIME:About 30 minutes
PROCEDURE:1. Hand out and review the “Design Building Blocks – Elements and
Principles” skill sheet with the group.
2. Tell the group they’re going to use an ancient Chinese shape puzzleknown as a tangram to experiment with one of the basic elementsof design: shapes.
3. Share the following information with the group:
Designers use shapes to represent ideas (for example, hearts oftenrepresent the concept of love and open books represent education).Designers use shapes in logos to represent what businesses or organi-zations do. They often use interesting shapes to attract readers to apage of information. For example, a photograph might be cropped likea starburst or type might be arranged into a triangle.
4. Ask the group to think of some other shapes that represent ideas.Have them list some of the different shapes they could use in adesign layout. For example:• Geometric shapes like triangles, squares, rectangles, circles• Natural shapes such as plants and animals• Abstract shapes (often similar to natural shapes, but simpler)
5. Divide the group into pairs, then distribute copies of the “Take theTangram Challenge” handout, the glue sticks or tape, and thecolored paper to use as backing.
6. Explain to the group that they will have 5 to 10 minutes to use thetangram pieces to create a shape. The shape should represent anobject from the list on the handout or an object they come up withon their own. Tell them they don’t have to use all of the tangrampieces provided. They can also trade pieces with other pairs. Whenthey’re done with the shape, have the teams fasten their completedimages to contrasting paper.
7. Bring the total group together and ask them to figure out whateach of the tangrams represents. Then have them repeat the activ-ity, creating shapes that represent an emotion or action from thelist on the handout or one they come up with on their own.
8. Go through the questions in the “Talking It Over” section.
TALKING IT OVER:Bring the total group together and talk about the following questions.
1. What was easier to communicate – a thing, an emotion or anaction? Why?

COMMUNICATIONS TOOLKIT • Visual Communication & Graphic Design – 75©2000 Michigan State University Board of Trustees.
2. How might that ease or difficulty in communication relate to theexperience of designing a logo or symbol? (Point out that in gen-eral, the more complex an idea is, the more abstract the symboldesigned to express it usually is. As a result, it may be more diffi-cult to communicate the same meaning to a variety of people.Corporate logos are good examples of this. If a company representsmany products and services, their logo is usually quite abstract.)
TRY THIS TOO:Have the group look through magazines and collect examples of symbolsand layouts that make creative use of shapes.

76 – COMMUNICATIONS TOOLKIT • Visual Communication & Graphic Design©2000 Michigan State University Board of Trustees.
DESIGN ELEMENTS: SHAPE HANDOUT
Take the Tangram Challenge
Tangrams are ancient Chinese puzzles in which players use seven pieces cut from a square to createdesigns and figures. The traditional game requires that all seven pieces be used in each design and thatno pieces overlap. For this activity, you may use as many of the pieces as you wish, but do not overlapthem.
CHALLENGE 1:Arrange the tangram pieces to make one of the ob-jects from the following list (or make up your own).
CHALLENGE 2:Use the tangram pieces to express one of the emo-tions or actions from the following list (or make upyour own).
• Airplane• Bird• Boat• Cat
• Flower• House• Mouse• Rabbit
• Snake• Tree
• Angry• Dancing• Happy
• Running• Sad• Sleeping
• Talking• Walking
Trace or copythe pattern andcut the piecesapart. You canglue the piecesto a piece ofpaper orcardboard of acontrastingcolor onceyou’ve createda design youlike.
COMMUNICATIONS TOOLKIT • Visual Communication & Graphic Design – 77©2000 Michigan State University Board of Trustees.
DESIGN WARM-UP ACTIVITY:
Design Elements: Texture
FOCUS:Understanding the use of texture indesign
PURPOSE:• To experiment with finding or
creating different visualtextures
• To try using texture to commu-nicate a feeling
MATERIALS:� A variety of objects with
different surface textures suchas window screen, lace, wood,feathers, leaves, grass
� Samples of printed materialsthat use different textures ofpaper
� Printed materials with visualtexture (patterns) such aswrapping paper, wallpaper,sections of photos cut frommagazines
� Sheets of colored paper with-out much texture
� Crayons� Scissors� Glue sticks� “Design Building Blocks – The
Elements and Principles” skillsheet (on pp. 60–61; one perperson)
SETTING:A room with work tables and chairs
TIME:About 30 minutes
PROCEDURE:1. Hand out and review the “Design Building Blocks – The Elements
and Principles” skill sheet with the group.
2. Tell the group they’re going to experiment with one of the basicelements of design – texture. Share the following information:
Texture actually can be felt (like the surface of linen finish paper orembossed lettering) or texture can be an illusion (like paper that isprinted to look like fabric or wood.) Printed patterns also can give theillusion of texture when used as a background or border.
3. Ask the group to list some moods or feelings they think could becommunicated through texture.
4. Divide the group into pairs. Tell them they’re going to create textureswatch sheets (similar to the swatch sheets interior designers use toshow clients different color and fabric selections.) Have the partici-pants create visual textures by placing textured objects underneathsheets of paper and rubbing the flat side of crayons over the paper.
5. Next have the teams clip examples of visual textures from photos inmagazines. Have the groups cut their texture swatches into similarshapes and sizes, then fasten the swatches that look as though theyhave a similar “feel” onto sheets of paper with descriptive titlessuch as “woodsy,” “rough,” “shiny” or “delicate.”
6. Have the teams take turns presenting their swatches and ideas tothe total group.
TALKING IT OVER:Bring the group together as a whole and talk about one or more of thefollowing questions.
1. How could you use texture in a design project?
2. Can you think of other ways to “capture” textures to use in design?(Tell them that designers often have access to collections of phototextures on CD-ROM disks that they can apply to shapes or letter-ing. Also, textures can be electronically scanned into computer filesor photocopied directly from objects. Point out that another impor-tant use for texture in design is in signage, where raised letteringand the use of the Braille alphabet are necessary.)
TRY THIS TOO:• Have the participants create a scrapbook of texture swatch pages.• Have the group research some of the computer design programs that
use fractal mathematics to create fascinating visual patterns.
78 – COMMUNICATIONS TOOLKIT • Visual Communication & Graphic Design©2000 Michigan State University Board of Trustees.
DESIGN WARM-UP ACTIVITY:
Design Elements:Space & SizeFOCUS:Understanding the use of space andsize in design
PURPOSE:To help participants become awareof the role of space and size in vi-sual communications
MATERIALS:� Solid color paper cut into
different sizes and shapes� Sheets of a contrasting solid
color paper� Scrap paper� Glue sticks, rubber cement or
clear tape� Pencils� “Design Building Blocks – The
Elements and Principles” skillsheet (on pp. 60–61; one perperson)
SETTING:A room with work tables and chairs
TIME:About 30 minutes
PROCEDURE:1. Hand out and review the “Design Building Blocks – The Elements
and Principles” skill sheet with the group.
2. Tell the participants they’re going to experiment with two of thebasic elements of design: space and size. Share the following infor-mation on space with the group:
In design, “space” is the area that type, shapes and lines occupy in acommunication piece. Space is also the areas surrounding what’s inprint (designers call this “open” or “white space”). The space be-tween objects, as well as the size of the space they take up in adesign, can give the impression of different relationships such as nearor far, crowded or lonely, important or not important. Space can beused to give the impression that a group of things belong together.Sometimes empty space is provided just to give the reader’s eye aplace to rest. Spacing between letters, words, lines and paragraphs isalso very important to the readability of type. The shape of the“white space” around objects can be used to communicate meaningas well.
3. Ask the group if they can think of any symbols or logos that makeuse of both positive and negative space. (The 4-H logo is oneexample – the H’s are negative spaces in the cloverleafs.)
4. Share the following information on size with the group:
Using different sizes of objects in a design can attract more attentionthan using objects that are all the same size. Making something thatis usually very small – such as an insect – very large in a design(maybe even so big that it is partially cut off the edge of the page) isunexpected and will make the viewer want to know more. The size oftype or symbols is critically important when a driver needs to read aroad sign from a distance in a moving car.
5. Ask the group to think of some other examples in which size mightbe critical.
6. Divide the group into pairs. Write the following ideas (or create yourown) on individual slips of scrap paper.• Lonely or outcast• Joyful• Leadership• Contrast unified or harmonious with divided or confused• Contrast tidy with messy• Contrast huge with tiny• Contrast wide with narrow
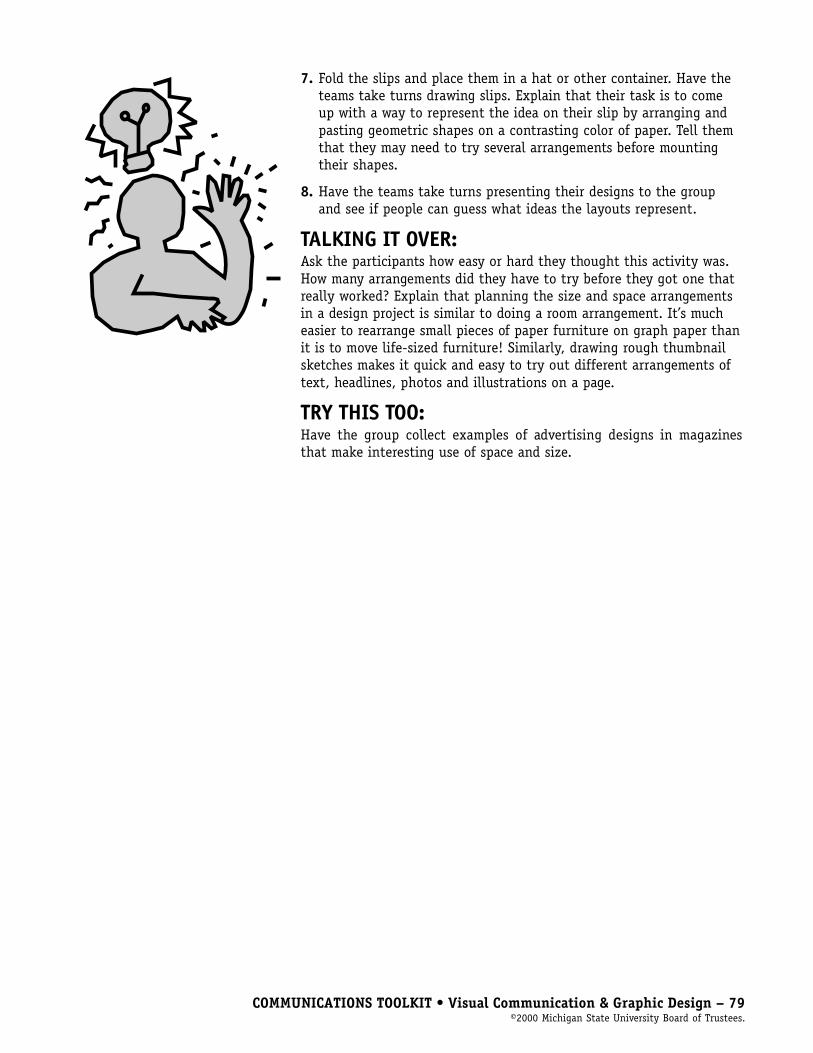
COMMUNICATIONS TOOLKIT • Visual Communication & Graphic Design – 79©2000 Michigan State University Board of Trustees.
7. Fold the slips and place them in a hat or other container. Have theteams take turns drawing slips. Explain that their task is to comeup with a way to represent the idea on their slip by arranging andpasting geometric shapes on a contrasting color of paper. Tell themthat they may need to try several arrangements before mountingtheir shapes.
8. Have the teams take turns presenting their designs to the groupand see if people can guess what ideas the layouts represent.
TALKING IT OVER:Ask the participants how easy or hard they thought this activity was.How many arrangements did they have to try before they got one thatreally worked? Explain that planning the size and space arrangementsin a design project is similar to doing a room arrangement. It’s mucheasier to rearrange small pieces of paper furniture on graph paper thanit is to move life-sized furniture! Similarly, drawing rough thumbnailsketches makes it quick and easy to try out different arrangements oftext, headlines, photos and illustrations on a page.
TRY THIS TOO:Have the group collect examples of advertising designs in magazinesthat make interesting use of space and size.

80 – COMMUNICATIONS TOOLKIT • Visual Communication & Graphic Design©2000 Michigan State University Board of Trustees.
DESIGN WARM-UP ACTIVITY:
Design Elements: Color
FOCUS:Understanding the use of color indesign
PURPOSE:To help participants become awareof the properties of color
MATERIALS:� Tempera or gouache paints
(yellow, blue, red, black andwhite)
� Paint brushes� Water containers� Newspapers� Color palettes or cups for
mixing colors� Pencils� White index paper� “Design Building Blocks – The
Elements and Principles” skillsheet (on pp. 60–61; one perperson)
� “Color Terms and Tips” skillsheet (on pp. 64–65; one perperson)
� “The Color Wheel and Triangle”handout (on pg. 82; one perperson, photocopied on card orindex stock)
� “Explore Color” handout (onpg. 83; six per person, photo-copied on card or index stock)
SETTING:A room with work tables, sink andchairs
TIME:1 to 2 hours
PROCEDURE:Before the meeting:1. Photocopy the handouts.
2. Cover tables with newspapers and set out painting supplies.
During the meeting:1. Hand out and review the “Design Building Blocks – The Elements
and Principles” skill sheet with the group.
2. Tell participants they are going to explore one of the basic elementsof design: color.
3. Give each participant a copy of the “Color Terms and Tips” and “TheColor Wheel and Triangle” handouts. Review the handouts with thegroup and explain that they are each going to create a tool thatthey can use when selecting colors for their design work.
4. Have them paint their color wheels, starting with the “subtractive”primary colors (yellow, red and blue), then mixing the secondary(the color in the middle between two primary colors). Finally, havethem paint the intermediary colors between the primary and sec-ondary colors.
5. When the color wheels are completed, ask participants to point outthe following:• Hue• Analogous colors• Complementary pairs of colors• Warm colors• Cool colors• Color triad
6. Tell the group to paint their color triangles by choosing one primaryor secondary color, then mixing it with white, grey and black.
7. When the color triangles are finished, ask participants to point outthe following:• Hue• Tint• Shade• Tone
8. Distribute six copies of the “Explore Color” handout to each partici-pant. Ask them to label the designs and color them using thefollowing color schemes:• Warm colors• Cool colors
COMMUNICATIONS TOOLKIT • Visual Communication & Graphic Design – 81©2000 Michigan State University Board of Trustees.
• Analogous colors• Monochromatic• Triad• Complementary
9. When the designs are dry, display them around the room, groupedby color scheme.
TALKING IT OVER:Bring the group together and ask the following questions about the emo-tional associations of color.
1. What feelings might the different color schemes represent? Why?
2. Does everyone associate the same colors with the same emotions?How might this information be used in visual communicationdesign?
3. What would you do differently if you were designing information foran audience from a different culture than your own?
TRY THIS TOO:A tremendous amount of information is available about color. Thegroup may be interested in exploring an area of color research such asfashion color. Color forecasting companies anticipate color trends forentire industries. Have your participants think about the range ofmanufactured products that might depend on color research. The groupcould have fun collecting and discussing the color names used forconsumer goods in stores and catalogs.

82 – COMMUNICATIONS TOOLKIT • Visual Communication & Graphic Design©2000 Michigan State University Board of Trustees.
DESIGN ELEMENTS: COLOR HANDOUT:
The Color Wheel & Triangle
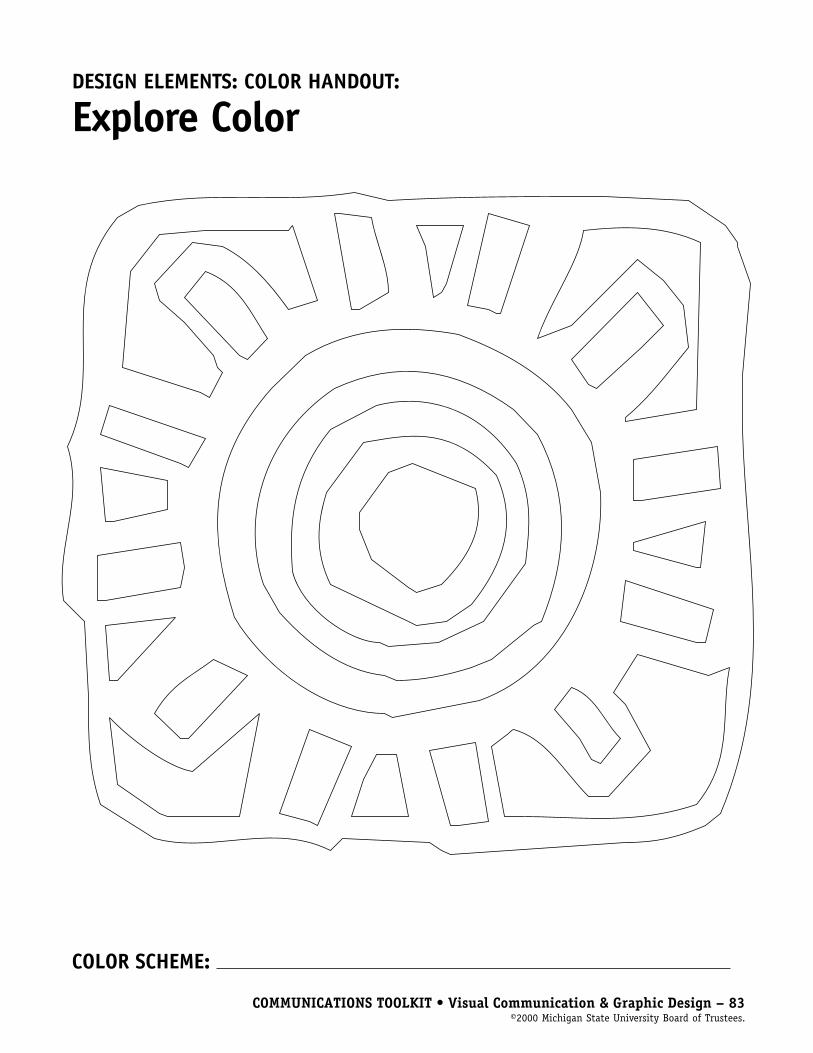
COMMUNICATIONS TOOLKIT • Visual Communication & Graphic Design – 83©2000 Michigan State University Board of Trustees.
DESIGN ELEMENTS: COLOR HANDOUT:
Explore Color
COLOR SCHEME:

84 – COMMUNICATIONS TOOLKIT • Visual Communication & Graphic Design©2000 Michigan State University Board of Trustees.
DESIGN WARM-UP ACTIVITY:
Design Principles: Balance
FOCUS:Understanding the use of balancein design
PURPOSE:To help the participants practiceapplying balance to a simple designproblem
MATERIALS:� Magazines� 8.5-inch by 11-inch white
paper� Glue sticks� Scissors� Bright red markers or crayons� “Design Building Blocks – The
Elements and Principles” skillsheet (on pp. 60–61; one perperson)
� “Balancing Shapes” handout(on pg. 86; two per group)
SETTING:A room with work tables and chairs
TIME:About 30 minutes
PROCEDURE:1. Hand out and review the “Design Building Blocks – The Elements
and Principles” skill sheet with the group.
2. Tell the participants they’re going to experiment with one of theprinciples of design: balance. Share the following information withthe group.
Unbalanced design may give the reader a feeling of uneasiness.Balanced design feels more secure and allows the viewer to concen-trate on the message you’re trying to communicate.
Two kinds of balance are generally used in design – symmetrical(formal) and asymmetrical (informal). Symmetrical balance is anarrangement of objects at equal distance to the left and right of thecenter of the overall design. Asymmetrical balance is an arrangementof objects with equal “visual weight” on either side of the design. Thedesign elements of color, size and shape all provide visual weight. Forexample, bright colors and large shapes would look “heavy” on theright side of an asymmetrical design and could be balanced by a largearea of white space on the left side.
3. Have the group look at advertisements in magazines and identifyexamples of both kinds of balance.
4. Divide the group into two-person teams. Tell them they’re going tocreate and compare designs with the two kinds of balance. Distrib-ute two sheets of 8.5-inch by 11-inch white paper and two copies ofthe “Balancing Shapes” handout, scissors, a bright red marker orcrayon and a glue stick to each team.
5. Tell the participants that to create a symmetrical design, theyshould cut out all the shapes on one of the “Balancing Shapes”handout. Then have them color the small white circle with the redmarker or crayon.
6. Next have them fold one sheet of white paper in half (in eitherdirection) and set the paper down so that the folded line is runningaway from them. Explain that this fold is the “line of symmetry.”Tell them to arrange the shapes they’ve cut on the white paper sothat the right side of the paper is a mirror image of the left side.
7. Now tell the group that to create an asymmetrical design, theyshould cut out all the shapes on the other “Balancing Shapes”handout. Then have them color the small white circle with the redmarker again.
COMMUNICATIONS TOOLKIT • Visual Communication & Graphic Design – 85©2000 Michigan State University Board of Trustees.
8. Have the participants look at the shapes and think about whichones have the most and the least “visual weight.” Tell them toarrange the shapes on the page so that the shapes look balancedbut are not symmetrically placed.
9. If you have enough time, have the groups create several symmetri-cal and asymmetrical designs to see how many different combina-tions they can come up with using the same shapes. Have the teamsdisplay their designs around the room.
TALKING IT OVER:Bring the whole group back together, and while they look at the designs,ask the following questions:
1. What kind of feeling do you get from the symmetrical designs? Inwhat kinds of design projects might you use this kind of balance?
2. What was easier to balance – the symmetrical or asymmetricaldesigns? (Point out that asymmetrical balance becomes easier withpractice.)
3. How did adding the colored circle affect the overall balance of thedesigns?
TRY THIS TOO:Have the group investigate how the principle of balance is used in adver-tising layout design. The participants could clip magazine ads, sort themby the type of balance used in the design and create a design referencenotebook.
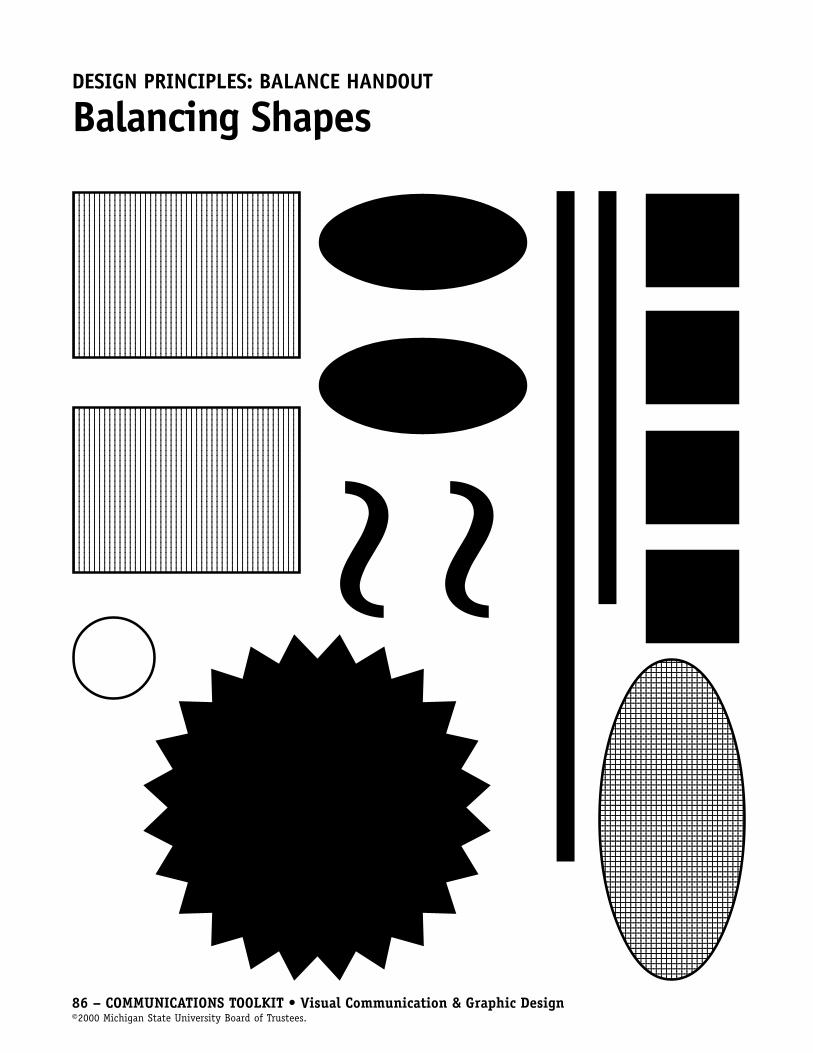
86 – COMMUNICATIONS TOOLKIT • Visual Communication & Graphic Design©2000 Michigan State University Board of Trustees.
DESIGN PRINCIPLES: BALANCE HANDOUT
Balancing Shapes123456789012345678901234567890121234567890123123456789012345678901234567890121234567890123123456789012345678901234567890121234567890123123456789012345678901234567890121234567890123123456789012345678901234567890121234567890123123456789012345678901234567890121234567890123123456789012345678901234567890121234567890123123456789012345678901234567890121234567890123123456789012345678901234567890121234567890123123456789012345678901234567890121234567890123123456789012345678901234567890121234567890123123456789012345678901234567890121234567890123123456789012345678901234567890121234567890123123456789012345678901234567890121234567890123123456789012345678901234567890121234567890123123456789012345678901234567890121234567890123123456789012345678901234567890121234567890123123456789012345678901234567890121234567890123123456789012345678901234567890121234567890123123456789012345678901234567890121234567890123123456789012345678901234567890121234567890123123456789012345678901234567890121234567890123123456789012345678901234567890121234567890123123456789012345678901234567890121234567890123123456789012345678901234567890121234567890123123456789012345678901234567890121234567890123123456789012345678901234567890121234567890123123456789012345678901234567890121234567890123123456789012345678901234567890121234567890123123456789012345678901234567890121234567890123123456789012345678901234567890121234567890123123456789012345678901234567890121234567890123123456789012345678901234567890121234567890123
123456789012345678901234567890121234567890123123456789012345678901234567890121234567890123123456789012345678901234567890121234567890123123456789012345678901234567890121234567890123123456789012345678901234567890121234567890123123456789012345678901234567890121234567890123123456789012345678901234567890121234567890123123456789012345678901234567890121234567890123123456789012345678901234567890121234567890123123456789012345678901234567890121234567890123123456789012345678901234567890121234567890123123456789012345678901234567890121234567890123123456789012345678901234567890121234567890123123456789012345678901234567890121234567890123123456789012345678901234567890121234567890123123456789012345678901234567890121234567890123123456789012345678901234567890121234567890123123456789012345678901234567890121234567890123123456789012345678901234567890121234567890123123456789012345678901234567890121234567890123123456789012345678901234567890121234567890123123456789012345678901234567890121234567890123123456789012345678901234567890121234567890123123456789012345678901234567890121234567890123123456789012345678901234567890121234567890123123456789012345678901234567890121234567890123123456789012345678901234567890121234567890123123456789012345678901234567890121234567890123123456789012345678901234567890121234567890123123456789012345678901234567890121234567890123123456789012345678901234567890121234567890123123456789012345678901234567890121234567890123123456789012345678901234567890121234567890123
12345678901234567890123456789123456789012345678901234567891234567890123456789012345678912345678901234567890123456789123456789012345678901234567891234567890123456789012345678912345678901234567890123456789123456789012345678901234567891234567890123456789012345678912345678901234567890123456789123456789012345678901234567891234567890123456789012345678912345678901234567890123456789123456789012345678901234567891234567890123456789012345678912345678901234567890123456789123456789012345678901234567891234567890123456789012345678912345678901234567890123456789123456789012345678901234567891234567890123456789012345678912345678901234567890123456789123456789012345678901234567891234567890123456789012345678912345678901234567890123456789123456789012345678901234567891234567890123456789012345678912345678901234567890123456789123456789012345678901234567891234567890123456789012345678912345678901234567890123456789123456789012345678901234567891234567890123456789012345678912345678901234567890123456789123456789012345678901234567891234567890123456789012345678912345678901234567890123456789123456789012345678901234567891234567890123456789012345678912345678901234567890123456789123456789012345678901234567891234567890123456789012345678912345678901234567890123456789123456789012345678901234567891234567890123456789012345678912345678901234567890123456789123456789012345678901234567891234567890123456789012345678912345678901234567890123456789123456789012345678901234567891234567890123456789012345678912345678901234567890123456789123456789012345678901234567891234567890123456789012345678912345678901234567890123456789123456789012345678901234567891234567890123456789012345678912345678901234567890123456789123456789012345678901234567891234567890123456789012345678912345678901234567890123456789123456789012345678901234567891234567890123456789012345678912345678901234567890123456789
~ ~
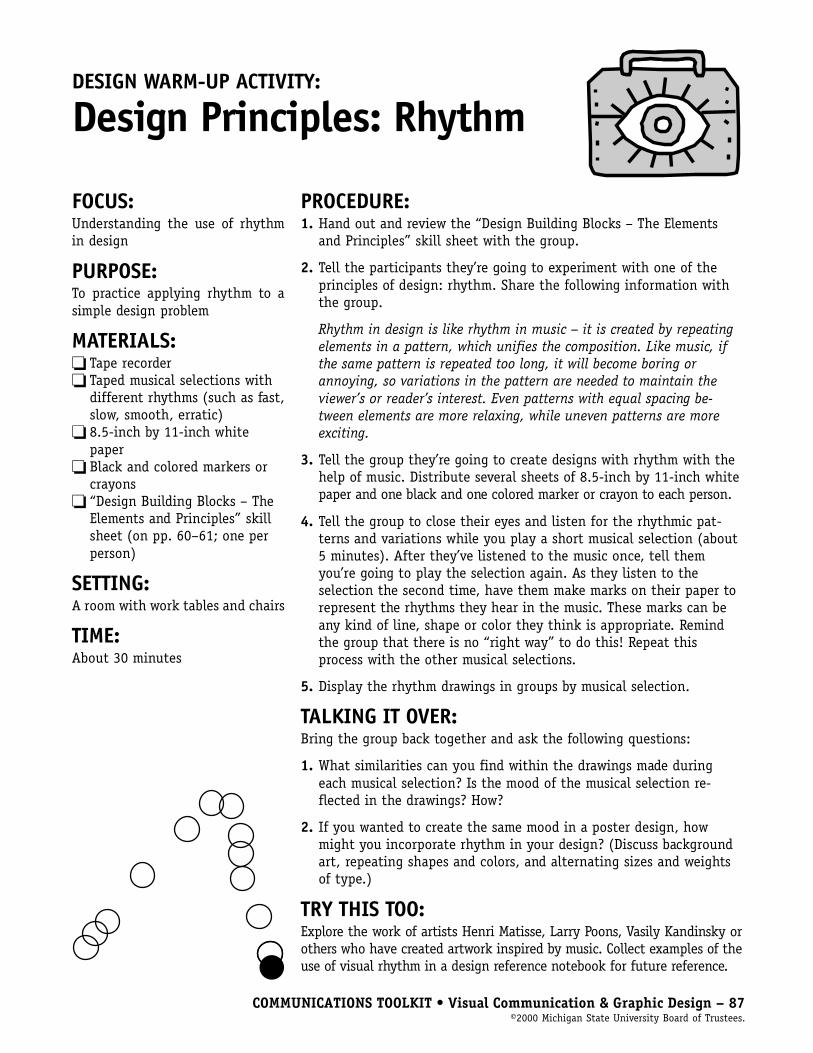
COMMUNICATIONS TOOLKIT • Visual Communication & Graphic Design – 87©2000 Michigan State University Board of Trustees.
DESIGN WARM-UP ACTIVITY:
Design Principles: Rhythm
FOCUS:Understanding the use of rhythmin design
PURPOSE:To practice applying rhythm to asimple design problem
MATERIALS:� Tape recorder� Taped musical selections with
different rhythms (such as fast,slow, smooth, erratic)
� 8.5-inch by 11-inch whitepaper
� Black and colored markers orcrayons
� “Design Building Blocks – TheElements and Principles” skillsheet (on pp. 60–61; one perperson)
SETTING:A room with work tables and chairs
TIME:About 30 minutes
PROCEDURE:1. Hand out and review the “Design Building Blocks – The Elements
and Principles” skill sheet with the group.
2. Tell the participants they’re going to experiment with one of theprinciples of design: rhythm. Share the following information withthe group.
Rhythm in design is like rhythm in music – it is created by repeatingelements in a pattern, which unifies the composition. Like music, ifthe same pattern is repeated too long, it will become boring orannoying, so variations in the pattern are needed to maintain theviewer’s or reader’s interest. Even patterns with equal spacing be-tween elements are more relaxing, while uneven patterns are moreexciting.
3. Tell the group they’re going to create designs with rhythm with thehelp of music. Distribute several sheets of 8.5-inch by 11-inch whitepaper and one black and one colored marker or crayon to each person.
4. Tell the group to close their eyes and listen for the rhythmic pat-terns and variations while you play a short musical selection (about5 minutes). After they’ve listened to the music once, tell themyou’re going to play the selection again. As they listen to theselection the second time, have them make marks on their paper torepresent the rhythms they hear in the music. These marks can beany kind of line, shape or color they think is appropriate. Remindthe group that there is no “right way” to do this! Repeat thisprocess with the other musical selections.
5. Display the rhythm drawings in groups by musical selection.
TALKING IT OVER:Bring the group back together and ask the following questions:
1. What similarities can you find within the drawings made duringeach musical selection? Is the mood of the musical selection re-flected in the drawings? How?
2. If you wanted to create the same mood in a poster design, howmight you incorporate rhythm in your design? (Discuss backgroundart, repeating shapes and colors, and alternating sizes and weightsof type.)
TRY THIS TOO:Explore the work of artists Henri Matisse, Larry Poons, Vasily Kandinsky orothers who have created artwork inspired by music. Collect examples of theuse of visual rhythm in a design reference notebook for future reference.

88 – COMMUNICATIONS TOOLKIT • Visual Communication & Graphic Design©2000 Michigan State University Board of Trustees.
DESIGN WARM-UP ACTIVITY:
Design Principles: Emphasis
FOCUS:Understanding the use of emphasisin design
PURPOSE:To practice applying emphasis to asimple design problem
MATERIALS:� 8.5-inch by 11-inch white
paper� 2-inch square cardboard
templates� Black and bright colored
construction paper� Scissors� Glue sticks� Pencils� Black markers or crayons� “Design Building Blocks – The
Elements and Principles” skillsheet (on pp. 60–61; one perperson)
SETTING:A room with work tables and chairs
TIME:About 30 minutes
PROCEDURE:1. Hand out and review the “Design Building Blocks – The Elements
and Principles” skill sheet with the group.
2. Decide whether you’re going to have the participants work individu-ally or in pairs. If they’ll be working in pairs, have them form two-person teams now.
3. Tell the participants they’re going to experiment with one of theprinciples of design: emphasis. Share the following information withthe group.
Emphasis is used in design to make important things get noticedfirst. You can vary the shape, color, angle, size, texture, value or linethickness of an object in a layout to give it emphasis. If a design hastoo many areas of emphasis, however, nothing will stand out and theviewer will become confused.
4. Distribute the 2-inch square cardboard templates, pencils, scissors,8.5-inch by 11-inch white paper and colored construction paper.
5. Explain that each person or group will create five designs that showdifferent ways to create emphasis. Tell them to start each design byusing the 2-inch cardboard template to trace and cut out nine 2-inch squares from black paper. Then arrange the squares in threerows of three with about ½-inch of white space between each row.
• Design 1 (Shape): Cut a 2-inch diameter shape that is not asquare out of black paper and replace one of the squares with thispiece. Paste all the pieces onto a white sheet.
• Design 2 (Color): Cut a 2-inch square out of red or another brightcolor of paper and replace one of the squares with this piece.Paste all the pieces onto a white sheet.
• Design 3 (Size): Cut a black square that is a little smaller orlarger than 2 inches and replace one of the squares with thispiece. Paste all the pieces onto a white sheet.
• Design 4 (Angle): Position one of the squares at a slightlydifferent angle than the others. Paste all the pieces onto a whitesheet.
• Design 5 (Texture and Value): Replace one of the squares with a2-inch black square with a different texture and value (lightness/darkness of black). Create the texture by either rubbing a blackcrayon on a piece of white paper placed over a textured object orby making an even pattern of lines over the paper. Paste all thepieces onto a white sheet.

COMMUNICATIONS TOOLKIT • Visual Communication & Graphic Design – 89©2000 Michigan State University Board of Trustees.
• Design 6 (Multicolor): Create a similar design with nine differentbright-colored 2-inch squares cut from construction paper andpasted onto a white sheet of paper with about ½-inch of whitespace between each square.
6. Tell the participants to view each of their designs by first closingtheir eyes, then opening them and seeing what part of the sheetcatches their attention first.
TALKING IT OVER:Have the participants get back into the larger group and ask the followingquestions:
1. Did some types of emphasis stand out more than others? Whichones?
2. What had emphasis in the multicolored design? Which is moreeffective for showing emphasis – the design with black and oneaccent color or the multicolor design?
TRY THIS TOO:• Have the group cut several ads from magazines and look at each one
to see where their eyes go first when they look at the ad. Discusswhy. See whether the group can find examples of ads with confusedemphasis.
• The group may wish to keep a notebook for their designs andobservations.
123456789012345123456789012345123456789012345123456789012345123456789012345123456789012345123456789012345123456789012345123456789012345123456789012345123456789012345123456789012345123456789012345123456789012345123456789012345
Design 1 (Shape) Example
Design 2 (Color) Example
Design 3 (Size) Example Design 4 (Angle) Example Design 5 (Texture and Value)Example
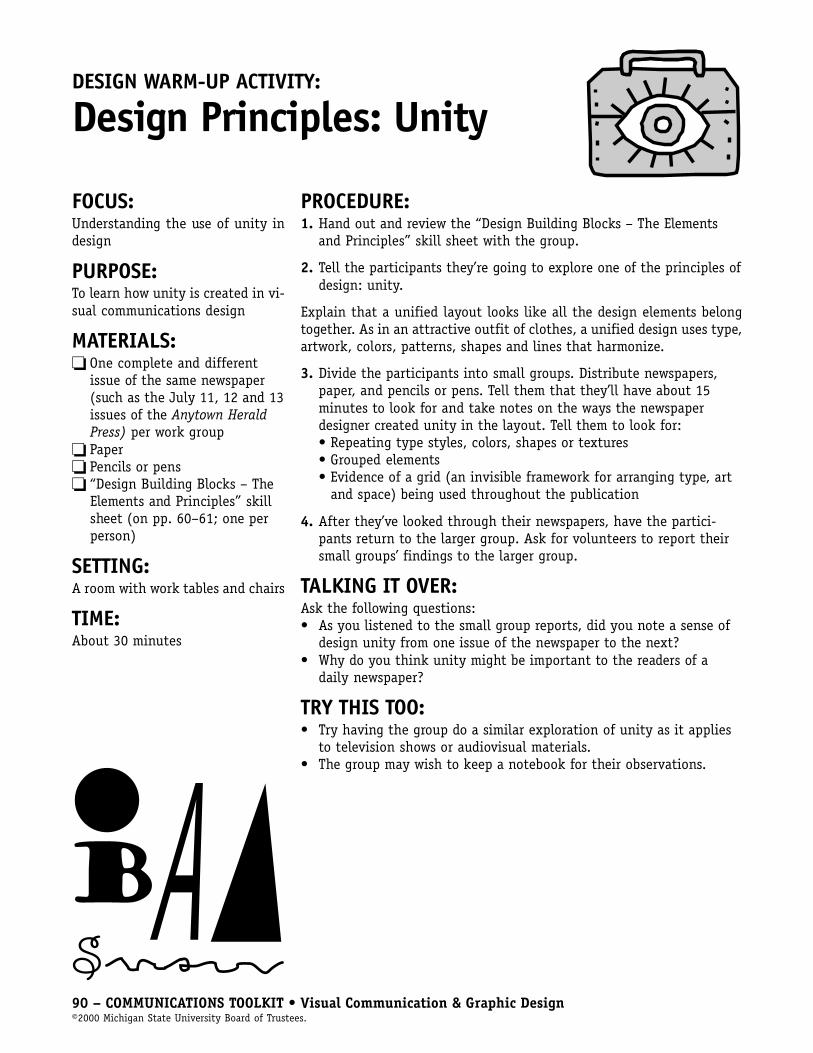
90 – COMMUNICATIONS TOOLKIT • Visual Communication & Graphic Design©2000 Michigan State University Board of Trustees.
DESIGN WARM-UP ACTIVITY:
Design Principles: Unity
FOCUS:Understanding the use of unity indesign
PURPOSE:To learn how unity is created in vi-sual communications design
MATERIALS:� One complete and different
issue of the same newspaper(such as the July 11, 12 and 13issues of the Anytown HeraldPress) per work group
� Paper� Pencils or pens� “Design Building Blocks – The
Elements and Principles” skillsheet (on pp. 60–61; one perperson)
SETTING:A room with work tables and chairs
TIME:About 30 minutes
PROCEDURE:1. Hand out and review the “Design Building Blocks – The Elements
and Principles” skill sheet with the group.
2. Tell the participants they’re going to explore one of the principles ofdesign: unity.
Explain that a unified layout looks like all the design elements belongtogether. As in an attractive outfit of clothes, a unified design uses type,artwork, colors, patterns, shapes and lines that harmonize.
3. Divide the participants into small groups. Distribute newspapers,paper, and pencils or pens. Tell them that they’ll have about 15minutes to look for and take notes on the ways the newspaperdesigner created unity in the layout. Tell them to look for:• Repeating type styles, colors, shapes or textures• Grouped elements• Evidence of a grid (an invisible framework for arranging type, art
and space) being used throughout the publication
4. After they’ve looked through their newspapers, have the partici-pants return to the larger group. Ask for volunteers to report theirsmall groups’ findings to the larger group.
TALKING IT OVER:Ask the following questions:• As you listened to the small group reports, did you note a sense of
design unity from one issue of the newspaper to the next?• Why do you think unity might be important to the readers of a
daily newspaper?
TRY THIS TOO:• Try having the group do a similar exploration of unity as it applies
to television shows or audiovisual materials.• The group may wish to keep a notebook for their observations.
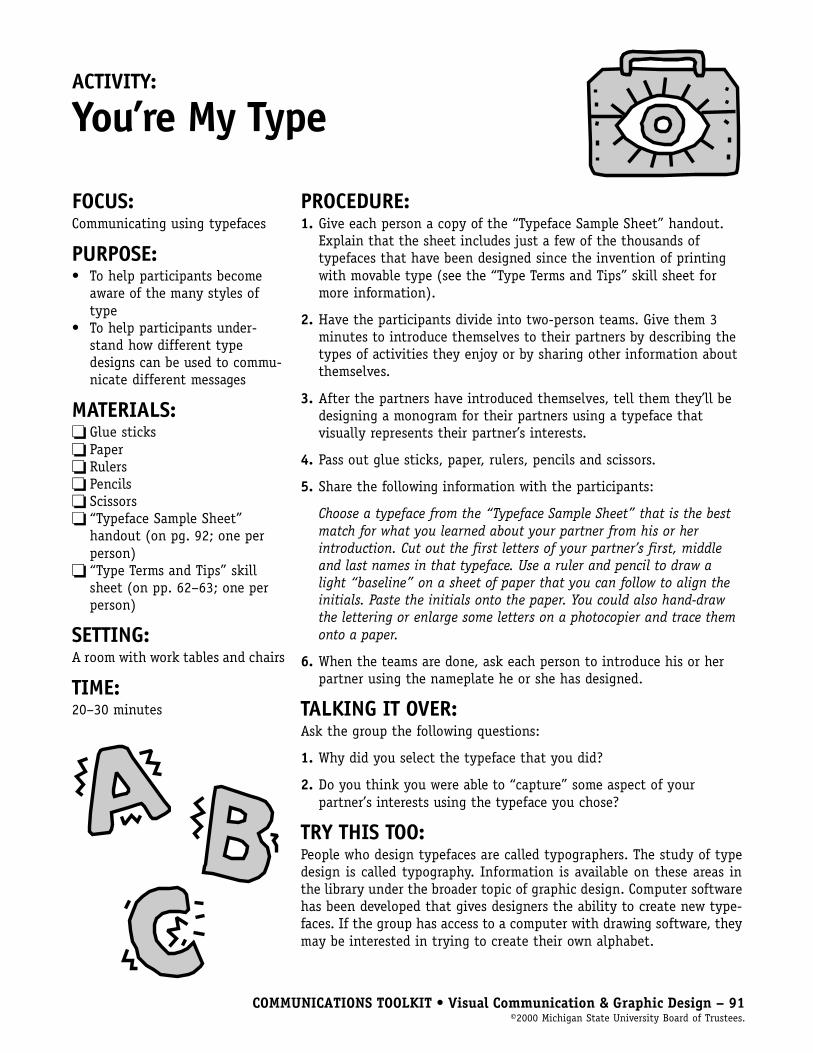
COMMUNICATIONS TOOLKIT • Visual Communication & Graphic Design – 91©2000 Michigan State University Board of Trustees.
ACTIVITY:
You’re My Type
FOCUS:Communicating using typefaces
PURPOSE:• To help participants become
aware of the many styles oftype
• To help participants under-stand how different typedesigns can be used to commu-nicate different messages
MATERIALS:� Glue sticks� Paper� Rulers� Pencils� Scissors� “Typeface Sample Sheet”
handout (on pg. 92; one perperson)
� “Type Terms and Tips” skillsheet (on pp. 62–63; one perperson)
SETTING:A room with work tables and chairs
TIME:20–30 minutes
PROCEDURE:1. Give each person a copy of the “Typeface Sample Sheet” handout.
Explain that the sheet includes just a few of the thousands oftypefaces that have been designed since the invention of printingwith movable type (see the “Type Terms and Tips” skill sheet formore information).
2. Have the participants divide into two-person teams. Give them 3minutes to introduce themselves to their partners by describing thetypes of activities they enjoy or by sharing other information aboutthemselves.
3. After the partners have introduced themselves, tell them they’ll bedesigning a monogram for their partners using a typeface thatvisually represents their partner’s interests.
4. Pass out glue sticks, paper, rulers, pencils and scissors.
5. Share the following information with the participants:
Choose a typeface from the “Typeface Sample Sheet” that is the bestmatch for what you learned about your partner from his or herintroduction. Cut out the first letters of your partner’s first, middleand last names in that typeface. Use a ruler and pencil to draw alight “baseline” on a sheet of paper that you can follow to align theinitials. Paste the initials onto the paper. You could also hand-drawthe lettering or enlarge some letters on a photocopier and trace themonto a paper.
6. When the teams are done, ask each person to introduce his or herpartner using the nameplate he or she has designed.
TALKING IT OVER:Ask the group the following questions:
1. Why did you select the typeface that you did?
2. Do you think you were able to “capture” some aspect of yourpartner’s interests using the typeface you chose?
TRY THIS TOO:People who design typefaces are called typographers. The study of typedesign is called typography. Information is available on these areas inthe library under the broader topic of graphic design. Computer softwarehas been developed that gives designers the ability to create new type-faces. If the group has access to a computer with drawing software, theymay be interested in trying to create their own alphabet.

92 – COMMUNICATIONS TOOLKIT • Visual Communication & Graphic Design©2000 Michigan State University Board of Trustees.
YOU’RE MY TYPE HANDOUT:
Typeface Sample SheetBeesknees ITC*
Bradley Hand ITC*
Cheltenham ITC Bold BT*
Eras Ultra ITC*
ITC Officina Sans Book*
Snap ITC*
Juice ITC*
Matisse ITC*
Tempus Sans ITC*
Viner Hand ITC*
* ©Copyright International Typeface Corporation

COMMUNICATIONS TOOLKIT • Visual Communication & Graphic Design – 93©2000 Michigan State University Board of Trustees.
ACTIVITY:
Scanning the VisualEnvironmentFOCUS:Thinking about visual communica-tions in our environment
PURPOSE:• To help participants become
aware of the variety of visualcommunications that surroundthem
• To help participants learn toidentify some different formsof visual communications
MATERIALS:� Pads of paper (one pad per
team)� Pens or pencils
SETTING:Public building or center such as aschool, community center, mall ordowntown area
TIME:30–45 minutes
PROCEDURE:1. Divide the group into two- or three-person teams. Give each team a
pad of paper and pen or pencil.
2. Tell the teams they’re going on a “visual treasure hunt.” Theyshould find and record as many examples of visual communicationas they can in 15 minutes (you can give them more time if youthink it’s necessary). Ask them to name some examples of the kindsof things they might look for (such as signs, logos, T-shirt messages,bumper stickers, billboards).
3. Ask each group to choose a person to record the group’s findings inwords or sketches.
Leader’s Note: Before your group disperses to gather examples of visualcommunication, review with them some appropriate safety rules. For ex-ample, staying together, staying alert to their surroundings and eventshappening around them, and meeting at the designated time at the des-ignated meeting place.
TALKING IT OVER:After the group has gotten back together, have each team present theirfindings. Have the group discuss the following questions:
1. How many messages were you able to find? Were you surprised at thenumber? Do you think there were even more that you didn’t notice?
2. Did some messages stand out more than others? Why? (Ask for adescription of color, type size, types of illustrations and otherdesign features.) Did some messages take longer to find? Why?
3. Do the visuals you found have different “jobs?” (Examples mightinclude directional signs, advertising, graffiti.) Did you see anymessages in Braille, raised lettering or other methods specificallydesigned for people with low vision or special needs?
4. How do you normally look at your visual environment – how muchdo you actually see? Discuss how people selectively view the visualenvironment depending on what they’re doing or thinking about atthe time.
TRY THIS TOO:Many of the visuals your participants found were created by graphic de-signers. Group members could look for more information in the libraryunder the topics of graphic design and advertising. People in the profes-sions of architecture, urban planning and industrial design are also in-volved in designing the visual environment of cities and towns.
94 – COMMUNICATIONS TOOLKIT • Visual Communication & Graphic Design©2000 Michigan State University Board of Trustees.
PROJECT:
Design a Logo
PURPOSE:To design a personal logo
MATERIALS:� Pencils� Graph paper� Ruler or straight edge� Tracing paper� Glue sticks� White paper� Black fine-tip and wide-tip
markers� Photocopier (optional)� “The Creative Process” skill
sheet (on pg. 59; one perperson)
� “Designing Symbols and LogosThat Work” skill sheet (on pg.66; one per person)
� “Typeface Sample Sheet”handout (on pg. 92; one perperson)
� “What I Learned” self-evaluationform (on pg. 8; one per person)
SETTING:A room with work tables and mov-able chairs
TIME:At least 60 minutes (more if youwish to have participants create amore polished product)
PROCEDURE:Before the meeting:It will be helpful if the group has experienced at least a couple of thedesign warm-up activities before doing this project. While all of theelements and principles are important to the design of logos, warm-upsthat focus on shape, space, rhythm or unity are good ones to start offwith. If you can do only two design warm-ups, choose one from thedesign elements and one from the design principles. The “You’re MyType” activity is also good to use before designing logos if the partici-pants are unfamiliar with typeface designs.
During the meeting:1. Tell the group that they’re going to design personal logos that will
contain a visual symbol and their initials. Pass out and brieflyreview “The Creative Process” and “Designing Symbols and LogosThat Work” skill sheets. It is helpful to view and discuss examples ofprofessionally designed logos from magazines and productpackaging.
2. Have the participants write some words to describe themselves andthink about a symbol (such as an animal or object) to representthemselves. Pass out copies of the “Typeface Sample Sheet” and askthe participants to look for a typeface that fits their personality.
3. Explain to the group that making thumbnail sketches is a great wayto brainstorm visual ideas. Using the information about themselvesthey’ve brainstormed, have them begin to explore some logo designsby drawing thumbnail sketches. Encourage them to fill several pageswith sketches and to not throw any away. Explain that sometimes asketch you initially don’t like may end up sparking another creativeidea that does work well.
4. Ask the participants to pick one of the thumbnails they like bestand draw it larger in pencil on a sheet of white paper. Have themrefine the design in pencil, then trace over and fill it in carefully inblack ink. This can be used as their “camera-ready art” to include inother identity products such as personal letterhead and callingcards.
5. If you have time, suggest that each person develop ideas for callingcard and letterhead layouts using their logo designs. These could bepresented as sketches or laid out using reduced photocopies of thelogos along with type from a typewriter or computer. To help withthis, you may want to provide examples of professional calling cardsand letterhead designs.
COMMUNICATIONS TOOLKIT • Visual Communication & Graphic Design – 95©2000 Michigan State University Board of Trustees.
TALKING IT OVER:Ask for volunteers to present their logos to the group and talk aboutthe evolution of their ideas from brainstorming to final design. Ask thegroup how they might go about creating a logo for a company orproduct they weren’t familiar with.
TRY THIS TOO:The group might be interested in creating a final product incorporatingtheir logos. If they want to have calling cards or letterhead offsetprinted, they could visit a commercial printing company and discusswith a printer how they would need to prepare their final art. Otheruses for their logo designs are to:• Have a rubber stamp made.• Embroider or appliqué the design into a sewing project.• Paint, silk-screen or stencil the design onto a personal item such as
a T-shirt.• Have small groups search for good logo examples in magazines and
tell the larger group why they think the designs are successful.
96 – COMMUNICATIONS TOOLKIT • Visual Communication & Graphic Design©2000 Michigan State University Board of Trustees.
PROJECT:
Design a Poster or Flier
PURPOSE:To use the design process and ele-ments and principles of design in aposter or flier format to communi-cate a message
MATERIALS:� Magazines, catalogs or photo-
copies of black-and-white clipart
� Scissors� Glue sticks, rubber cement or
clear tape� Colored pencils� Wide-tip and narrow-tip black
and colored markers� Rulers� Colored or white paper or
posterboard� Scrap paper� “The Creative Process” skill sheet
(on pg. 59; one per person)� “Design Building Blocks – The
Elements and Principles” skillsheet (on pp. 60–61; one perperson; optional)
� “Designing Layouts That Work”skill sheet (on pp. 68–69; oneper person)
� “Thumbnail Sketch Page” hand-out (on pg. 100; one per person)
� “How Did I Do? A Self-Checkfor Evaluating Your DesignProject” skill sheet (on pg. 72;one per person)
� “Sample Projects” handout (onpg. 99; one per person)
� “What I Learned” self-evaluationform (on pg. 8; one per person)
SETTING:Room with work tables and chairs
TIME:2 hours or more
PROCEDURE:Before the meeting:1. It will be helpful if the group has experienced at least a couple of
the design warm-up activities before doing this project. While all ofthe elements and principles are important to poster design, thewarm-ups that focus on space, size, color, type or balance are goodones to start with. If you can do only two design warm-ups, chooseone from the design elements and one from the design principles.
2. This activity puts young people in situations where other kids inthe group will respond to their presentation skills or give feedback.It should be done only when group members respect each other andare willing to abide by the following guidelines for respectfulbehavior. If you choose to use this activity, review these points withyour group in advance.• Listen carefully to other people’s presentations.• Provide feedback in a positive way.• Don’t be rude, critical or hurtful.• Be aware that everyone has differing abilities.• Be considerate of other people’s feelings.• Follow the Golden Rule: Treat other people the way you would like
to be treated.
3. You may wish to decorate the walls of the room with posters you’vecollected.
4. If you plan to have the teams’ posters or fliers reproduced by offsetor other printing processes, talk to a printer in advance to find outhow to best prepare the camera-ready art.
During the meeting:1. Tell the group they’re going to design either posters or fliers (fliers
are small posters that are usually 8.5 inches by 11 inches). Dividethe group into two- or three-person teams and have them work onreal publicity situations, situations they make up or one of theprojects from the “Sample Projects” handout. Point out that mostposters or fliers are viewed for only 8 to 10 seconds, so they’ll haveto make a strong impression fast!
2. Ask the teams what kinds of information they might need beforethey begin their design project. Pass out copies of “The CreativeProcess” skill sheet. Briefly review the design stages and then giveparticipants a chance to answer the questions in “Stage 1: GatheringInformation.”
3. Next, tell the group that it’s time to start brainstorming ideas andlayouts for their “design elements.” (You may wish to distribute and

COMMUNICATIONS TOOLKIT • Visual Communication & Graphic Design – 97©2000 Michigan State University Board of Trustees.
review the “Design Building Blocks – The Elements and Principles”skill sheet with the group.)
4. Distribute the “Designing Layouts That Work” skill sheet and goover it with the group. Emphasize that all ideas are good ideas atthe brainstorming stage! Then pass out the “Thumbnail SketchPage” and have the teams make several thumbnail sketches ofpotential layouts. If teams are having a hard time coming up withideas, suggest they look at magazine ads for sample layouts thatthey could adapt to their project.
5. After the teams have created a variety of thumbnail sketches, askeach team to choose the sketch they think has the most potentialfrom the ones they have drawn. Have them produce a more detailedlayout (graphic designers call detailed layouts “comprehensives” or“comps”) of that sketch, or if time is short, have them go directlyto laying out the final art on paper or posterboard. Team memberscan take responsibility for different elements of the design depend-ing on their comfort level with drawing and lettering.
6. Production: Discuss with the group how production techniques varydepending on the materials available and whether the final postersor fliers will be one-of-a-kind or reproduced by photocopying,silkscreening or offset printing. Tell them that no matter how theirposter or flier is to be reproduced, all art and lettering must beproduced in black and white. It must be neat, with any guidelineserased and all written material carefully proofread! If your grouphas access to computers with page layout software, they can pro-duce their projects electronically.
TALKING IT OVER:Have the teams present their final products to the group and explainthe design decisions they made. Ask the group to identify the strongpoints of each design. You can also have the participants use the “HowDid I Do? A Self-Check for Evaluating Your Design Project” skill sheetto reflect on their work.
TRY THIS TOO:• One “low-tech” (but still effective for beginners) way to do this
activity is to have the teams produce their posters or fliers withhand-drawn lettering and art using wide-tipped markers or to cutand paste colored paper or clip-art mounted on paper orposterboard. Lettering stencils may be helpful, too. Participants canmake guidelines with a ruler or T-square and pencil, then erase thelines when the poster is finished. They could also enlarge andmount computer-generated type or art on their posters and fliers.
• “Graphic design” is the profession of people who work with thedesign and production of “primarily” printed information. Peoplewho do graphic design work can often be found in advertisingagencies, on the staff of newspapers and magazines, or at printingbusinesses. The group may be interested in researching graphicdesign at the local library or arranging a visit with a local graphicdesigner.

98 – COMMUNICATIONS TOOLKIT • Visual Communication & Graphic Design©2000 Michigan State University Board of Trustees.
• The group might be interested in taking on the job of designingpublicity posters for a local group or event. Theme T-shirts areanother type of “wearable poster” design project the group mightenjoy trying.
• Have the participants look around, either in the building whereyou’re meeting or in the area, for examples of posters that catchtheir attention. If the group is meeting in a public building, havethe teams go outside and look for examples. (The activity called“Scanning the Visual Environment” on page 93 has suggestions forhow to do this.) Have the participants talk about why the layoutsare or are not effective.
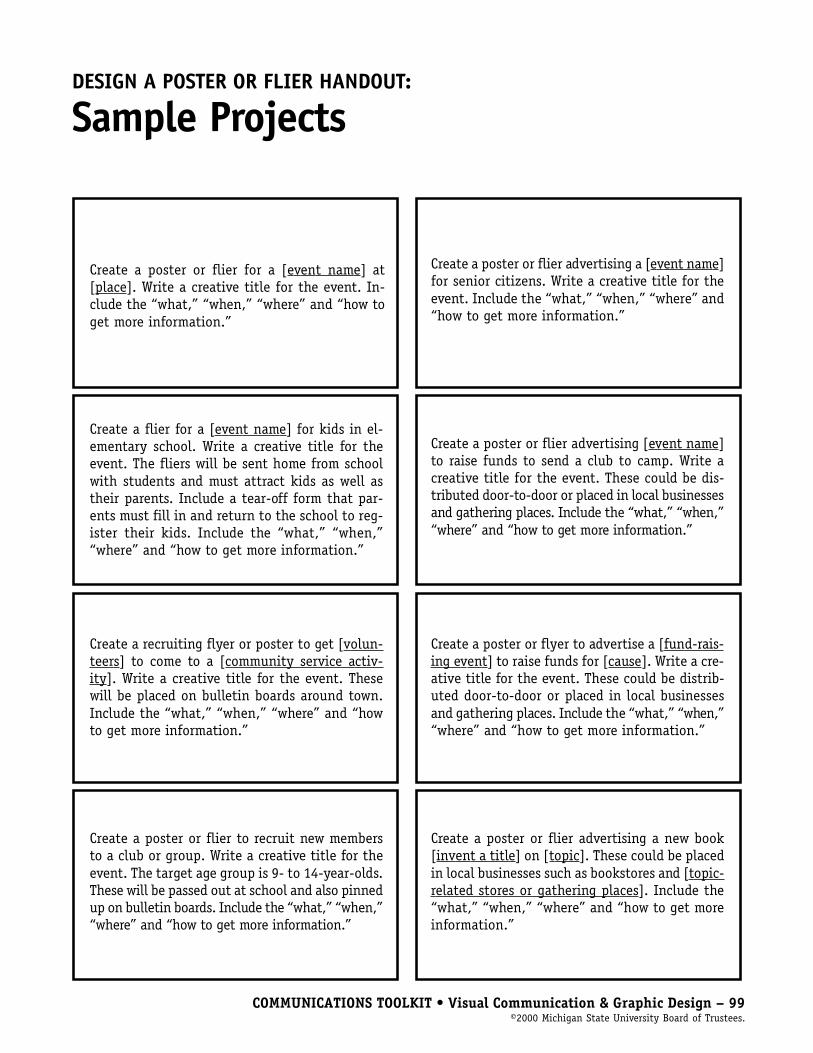
COMMUNICATIONS TOOLKIT • Visual Communication & Graphic Design – 99©2000 Michigan State University Board of Trustees.
DESIGN A POSTER OR FLIER HANDOUT:
Sample Projects
Create a poster or flier for a [event name] at[place]. Write a creative title for the event. In-clude the “what,” “when,” “where” and “how toget more information.”
Create a flier for a [event name] for kids in el-ementary school. Write a creative title for theevent. The fliers will be sent home from schoolwith students and must attract kids as well astheir parents. Include a tear-off form that par-ents must fill in and return to the school to reg-ister their kids. Include the “what,” “when,”“where” and “how to get more information.”
Create a recruiting flyer or poster to get [volun-teers] to come to a [community service activ-ity]. Write a creative title for the event. Thesewill be placed on bulletin boards around town.Include the “what,” “when,” “where” and “howto get more information.”
Create a poster or flier to recruit new membersto a club or group. Write a creative title for theevent. The target age group is 9- to 14-year-olds.These will be passed out at school and also pinnedup on bulletin boards. Include the “what,” “when,”“where” and “how to get more information.”
Create a poster or flier advertising a [event name]for senior citizens. Write a creative title for theevent. Include the “what,” “when,” “where” and“how to get more information.”
Create a poster or flier advertising [event name]to raise funds to send a club to camp. Write acreative title for the event. These could be dis-tributed door-to-door or placed in local businessesand gathering places. Include the “what,” “when,”“where” and “how to get more information.”
Create a poster or flyer to advertise a [fund-rais-ing event] to raise funds for [cause]. Write a cre-ative title for the event. These could be distrib-uted door-to-door or placed in local businessesand gathering places. Include the “what,” “when,”“where” and “how to get more information.”
Create a poster or flier advertising a new book[invent a title] on [topic]. These could be placedin local businesses such as bookstores and [topic-related stores or gathering places]. Include the“what,” “when,” “where” and “how to get moreinformation.”
100 – COMMUNICATIONS TOOLKIT • Visual Communication & Graphic Design©2000 Michigan State University Board of Trustees.
DESIGN A POSTER OR FLIER HANDOUT:
Thumbnail Sketch PageUse this page to draw quick, rough thumbnail sketches of your project ideas.
COMMUNICATIONS TOOLKIT • Visual Communication & Graphic Design – 101©2000 Michigan State University Board of Trustees.
PROJECT:
Design PresentationGraphics
Note: This project can be adapted for poster presentations by substitutingposter board for the overhead transparencies and projector.
PROCEDURE:Before the meeting:1. It will be helpful if the group has experienced at least a couple of
the design warm-up activities before doing this project. While all ofthe elements and principles are important to the design of presenta-tion graphics, warm-ups that focus on line, color, type, emphasis,balance or unity are good ones to start off with. If you can do onlytwo design warm-ups, choose one from the design elements and onefrom the design principles.
2. This activity puts young people in situations where other kids inthe group will respond to their presentation skills or give feedback.It should be done only when group members respect each other andare willing to abide by the following guidelines for respectfulbehavior. If you choose to use this activity, review these points withyour group in advance.• Listen carefully to other people’s presentations.• Provide feedback in a positive way.• Don’t be rude, critical or hurtful.• Be aware that everyone has differing abilities.• Be considerate of other people’s feelings.• Follow the Golden Rule: Treat other people the way you would like
to be treated.
3. Photocopy and cut apart the projects listed on the “Group ProjectSuggestions” handout or create your own and write them on slips ofscrap paper. Place the slips into a hat, box or other small container.
4. Photocopy the “Designing Presentations That Work” and “It’s a Dog’sLife” transparency presentation sets onto overhead transparency film.
During the meeting:1. Tell the group they’re going to design several overhead transparency-
type presentation graphics. Ask the participants why they thinkusing graphics during a presentation might be valuable. (Charts anddiagrams can help clarify spoken words, images help keep theaudience interested and help them remember important points,projected summaries of spoken points help people with low hearing,illustrations assist nonreaders.)
2. Point out the following advantages of overhead transparencies:• They are easy and inexpensive.• They are portable.• They don’t require a totally darkened room, so the audience can
see to take notes.
PURPOSE:To provide experience in designingand using presentation graphics
MATERIALS:� Overhead projector and screen� Overhead transparency film
(enough for presentation setsand projects)
� Overhead markers� “Designing Presentations That
Work” overhead transparencypresentation set (on pp. 110–121)
� “It’s a Dog’s Life” overheadtransparency presentation set(on pp. 122–130)
� Cellophane tape� Pencils� Rulers� Scissors� Hat, box, basket or similar
small container� “The Creative Process” skill
sheet (on pg. 59; one perperson)
� “Designing PresentationGraphics That Work” skill sheet(on pg. 67; one per person)
� “Planning Grid for OverheadTransparencies” handout (onpg. 103; one per person)
� “Font Sheet” handout (on pp.104–105; one per team)
� “Storyboard” handout (on pg.106; one per team)
� “Circle Sheet” handout (on pg.107; one per team)
� “Group Project Suggestions”handout (on pp. 108–109;enough copies for one activityper team)

102 – COMMUNICATIONS TOOLKIT • Visual Communication & Graphic Design©2000 Michigan State University Board of Trustees.
• You can face the audience while presenting.• They provide a friendly, hands-on way to present to small- to
medium-sized groups.
3. Review “The Creative Process” and the “Designing PresentationGraphics That Work” skill sheets with the group.
4. Present the overheads from the “Designing Presentations ThatWork” and the “It’s a Dog’s Life” overhead transparency presentationsets. (It’s more fun if you can get individuals from the group tovolunteer to present one or more of the overheads.)
5. Divide the group into pairs and have the teams take turns drawingan activity slip from the hat.
6. Explain that the teams will have about an hour to prepare andpractice using overhead transparencies to accompany a presentationon the topic they have drawn. Encourage all team members toparticipate in the final presentation.
7. Distribute the markers, overhead transparency film, and the “Plan-ning Grid for Overhead Transparencies,” “Font Sheet,” “Storyboard”and “Circle Sheet” handouts. Encourage them to use the:• “Planning Grid for Overhead Transparencies” to help them align
letters on the overhead transparency sheet.• “Font Sheet” to trace letters to help them keep the lettering size
in a readable range.• “Storyboard” sheets to make idea sketches or to write notes to use
during their presentations.• “Circle Sheet” to help them draw circles for pie charts.
8. When the teams have finished preparing and practicing their pre-sentations, you can ask for volunteers or have the teams drawnumbers from a hat to determine the order in which they willpresent their team’s final product to the group. Ask them to includea brief explanation of the subject matter. When each team finishesits presentation, ask the audience to point out the presentationtechniques they used and the things they did well.
TALKING IT OVER:Ask the group what they liked about the activity and about usingoverheads. Ask if anyone in the group has ever tried using presentationgraphics computer software. Point out that a number of computer soft-ware programs allow speakers to organize their presentations in advanceby entering their notes into outlines, then creating their graphics usingtemplates provided in the program.
You can also have the participants use the “How Did I Do? A Self-Checkfor Evaluating Your Design Project” skill sheet to reflect on their work.
TRY THIS TOO:The group might be interested in creating longer illustrated presenta-tions on topics they choose. They may also be interested in researchingcomputer presentation graphics and multimedia applications.
MATERIALS CONTINUED:� “How Did I Do? A Self-Check
for Evaluating Your DesignProject” skill sheet on pg. 72;one per person)
� “What I Learned” self-evaluationform (on pg. 8; one per person)
SETTING:Room with work tables and chairs,windows that can be darkened andelectrical outlets
TIME:2 hours
COMMUNICATIONS TOOLKIT • Visual Communication & Graphic Design – 103©2000 Michigan State University Board of Trustees.
DESIGN PRESENTATION GRAPHICS HANDOUT:Planning Grid for Overhead Transparencies

104 – COMMUNICATIONS TOOLKIT • Visual Communication & Graphic Design©2000 Michigan State University Board of Trustees.
DESIGN PRESENTATION GRAPHICS HANDOUT:
Font SheetFont – A set of all of the letters and punctuation marks within a particular size and style of type.
Franklin Gothic ITC Bold, 36 point*
* ©Copyright International Typeface Corporation
Franklin Gothic ITC Bold, 48 point*
COMMUNICATIONS TOOLKIT • Visual Communication & Graphic Design – 105©2000 Michigan State University Board of Trustees.
Franklin Gothic ITC Bold, 56 point*
Aa Bb Cc Dd Ee FfGg Hh Ii Jj Kk LlMm Nn Oo Pp QqRr Ss Tt Uu Vv WwXx Yy Zz 1 2 3 4 5 67 8 9 0 ` ~ ! @ # $ %^ & * ( ) _ - + = { } [ ] |\ : ; “ ‘ < , > . ? /
Font Sheet Handout continued
* ©Copyright International Typeface Corporation

106 – COMMUNICATIONS TOOLKIT • Visual Communication & Graphic Design©2000 Michigan State University Board of Trustees.
DESIGN PRESENTATION GRAPHICS HANDOUT:
Storyboard

COMMUNICATIONS TOOLKIT • Visual Communication & Graphic Design – 107©2000 Michigan State University Board of Trustees.
DESIGN PRESENTATION GRAPHICS HANDOUT:
Circle Sheet
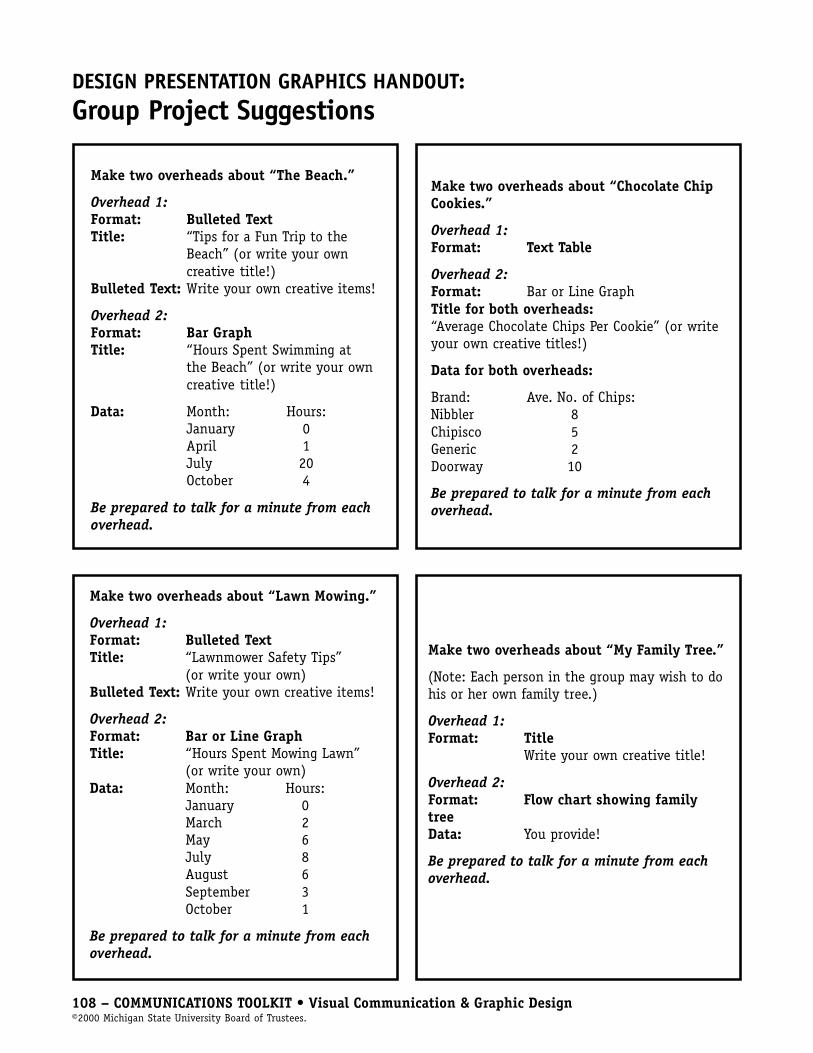
108 – COMMUNICATIONS TOOLKIT • Visual Communication & Graphic Design©2000 Michigan State University Board of Trustees.
DESIGN PRESENTATION GRAPHICS HANDOUT:Group Project Suggestions
Make two overheads about “The Beach.”
Overhead 1:Format: Bulleted TextTitle: “Tips for a Fun Trip to the
Beach” (or write your owncreative title!)
Bulleted Text: Write your own creative items!
Overhead 2:Format: Bar GraphTitle: “Hours Spent Swimming at
the Beach” (or write your owncreative title!)
Data: Month: Hours:January 0April 1July 20October 4
Be prepared to talk for a minute from eachoverhead.
Make two overheads about “Lawn Mowing.”
Overhead 1:Format: Bulleted TextTitle: “Lawnmower Safety Tips”
(or write your own)Bulleted Text: Write your own creative items!
Overhead 2:Format: Bar or Line GraphTitle: “Hours Spent Mowing Lawn”
(or write your own)Data: Month: Hours:
January 0March 2May 6July 8August 6September 3October 1
Be prepared to talk for a minute from eachoverhead.
Make two overheads about “Chocolate ChipCookies.”
Overhead 1:Format: Text Table
Overhead 2:Format: Bar or Line GraphTitle for both overheads:“Average Chocolate Chips Per Cookie” (or writeyour own creative titles!)
Data for both overheads:
Brand: Ave. No. of Chips:Nibbler 8Chipisco 5Generic 2Doorway 10
Be prepared to talk for a minute from eachoverhead.
Make two overheads about “My Family Tree.”
(Note: Each person in the group may wish to dohis or her own family tree.)
Overhead 1:Format: Title
Write your own creative title!
Overhead 2:Format: Flow chart showing familytreeData: You provide!
Be prepared to talk for a minute from eachoverhead.
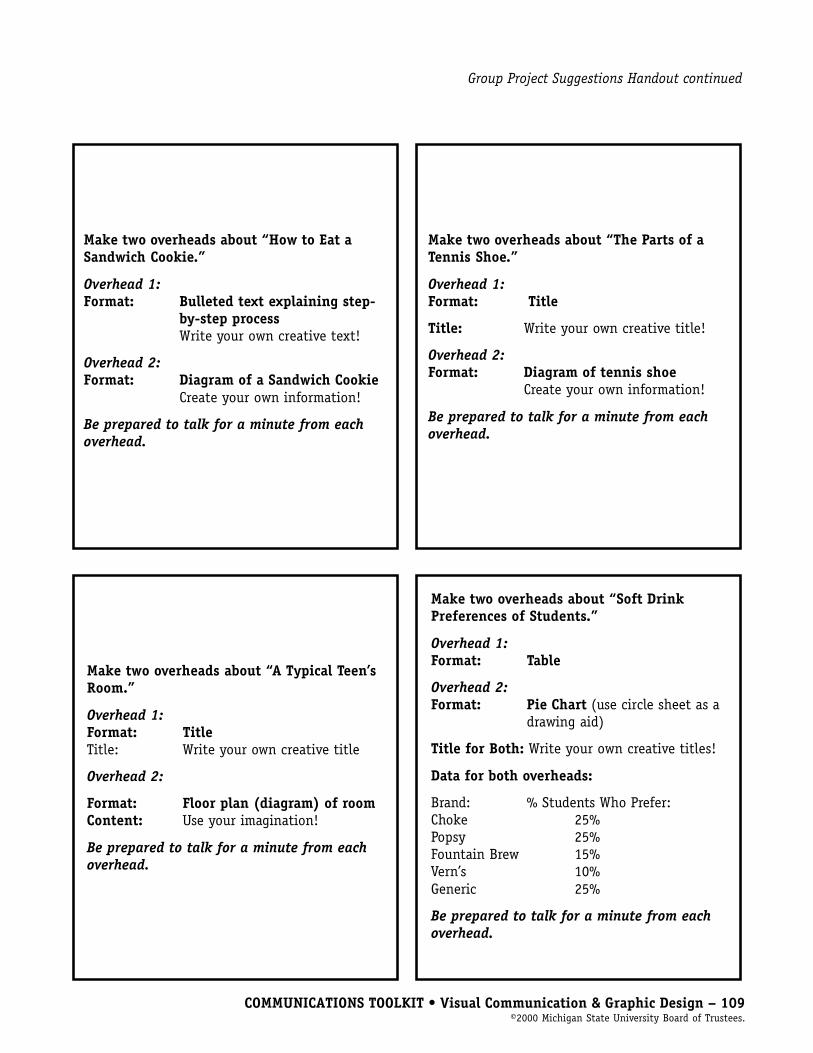
COMMUNICATIONS TOOLKIT • Visual Communication & Graphic Design – 109©2000 Michigan State University Board of Trustees.
Make two overheads about “How to Eat aSandwich Cookie.”
Overhead 1:Format: Bulleted text explaining step-
by-step processWrite your own creative text!
Overhead 2:Format: Diagram of a Sandwich Cookie
Create your own information!
Be prepared to talk for a minute from eachoverhead.
Make two overheads about “The Parts of aTennis Shoe.”
Overhead 1:Format: Title
Title: Write your own creative title!
Overhead 2:Format: Diagram of tennis shoe
Create your own information!
Be prepared to talk for a minute from eachoverhead.
Make two overheads about “A Typical Teen’sRoom.”
Overhead 1:Format: TitleTitle: Write your own creative title
Overhead 2:
Format: Floor plan (diagram) of roomContent: Use your imagination!
Be prepared to talk for a minute from eachoverhead.
Make two overheads about “Soft DrinkPreferences of Students.”
Overhead 1:Format: Table
Overhead 2:Format: Pie Chart (use circle sheet as a
drawing aid)
Title for Both: Write your own creative titles!
Data for both overheads:
Brand: % Students Who Prefer:Choke 25%Popsy 25%Fountain Brew 15%Vern’s 10%Generic 25%
Be prepared to talk for a minute from eachoverhead.
Group Project Suggestions Handout continued
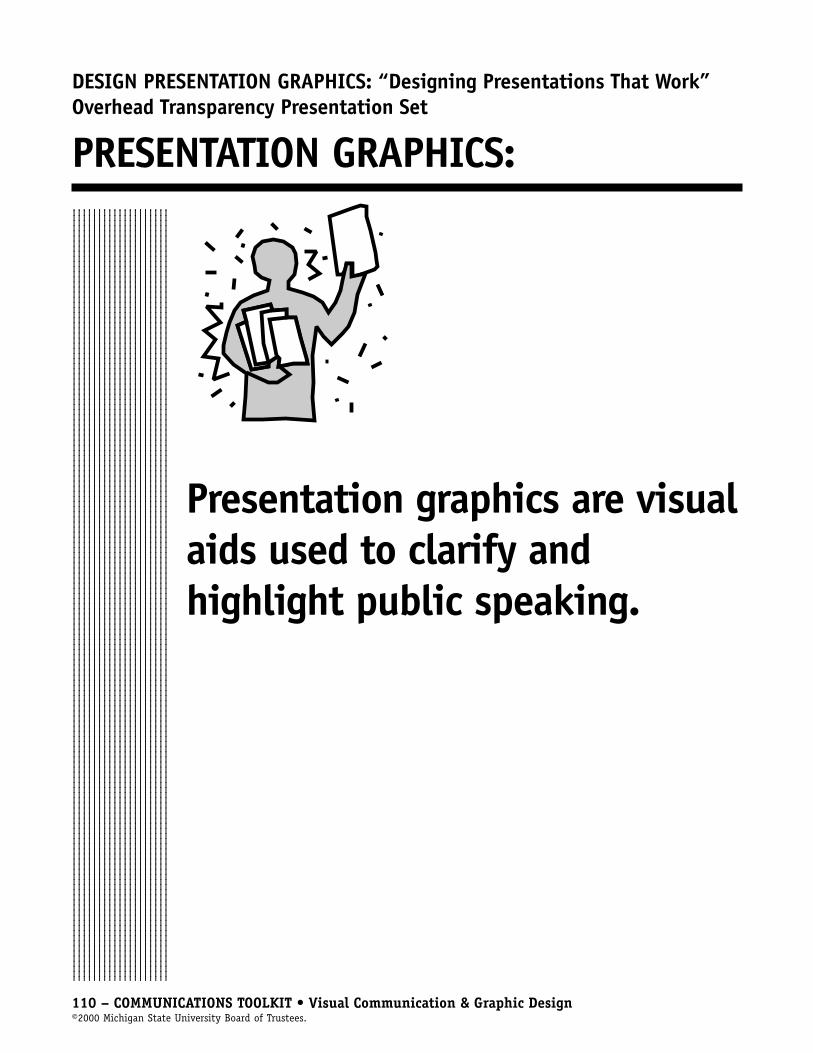
110 – COMMUNICATIONS TOOLKIT • Visual Communication & Graphic Design©2000 Michigan State University Board of Trustees.
DESIGN PRESENTATION GRAPHICS: “Designing Presentations That Work”Overhead Transparency Presentation Set
PRESENTATION GRAPHICS:1234567890123456789012345678901234567890123456789012345678901234567890123456789012345678901234567890123456789012345678901234567890123456789012345678901234567890123456789012345678901234567890123456789012345678901234567890123456789012345678901234567890123456789012345678901234567890123456789012345678901234567890123456789012345678901234567890123456789012345678901234567890123456789012345678901234567890123456789012345678901234567890123456789012345678901234567890123456789012345678901234567890123456789012345678901234567890123456789012345678901234567890123456789012345678901234567890123456789012345678901234567890123456789012345678901234567890123456789012345678901234567890123456789012345678901234567890123456789012345678901234567890123456789012345678901234567890123456789012345678901234567890123456789012345678901234567890123456789012345678901234567890123456789012345678901234567890123456789012345678901234567890123456789012345678901234567890123456789012345678901234567890123456789012345678901234567890123456789012345678901234567890123456789012345678901234567890123456789012345678901234567890123456789012345678901234567890123456789012345678901234567890123456789012345678901234567890123456789012345678901234567890123456789012345678901234567890123456789012345678901234567890123456789012345678901234567890123456789012345678901234567890123456789012345678901234567890123456789012345678901234567890123456789012345678901234567890123456789012345678901234567890123456789012345678901234567890123456789012345678901234567890123456789012345678901234567890123456789012345678901234567890123456789012345678901234567890123456789012345678901234567890123456789012345678901234567890123456789012345678901234567890123456789012345678901234567890123456789012345678901234567890123456789012345678901234567890123456789012345678901234567890123456789012345678901234567890123456789012345678901234567890123456789012345678901234567890123456789012345678901234567890123456789012345678901234567890123456789012345678901234567890123456789012345678901234567890123456789012345678901234567890123456789012345678901234567890123456789012345678901234567890123456789012345678901234567890123456789012345678901234567890123456789012345678901234567890123456789012345678901234567890123456789012345678901234567890123456789012345678901234567890123456789012345678901234567890123456789012345678901234567890123456789012345678901234567890123456789012345678901234567890123456789012345678901234567890123456789012345678901234567890123456789012345678901234567890123456789012345678901234567890123456789012345678901234567890123456789012345678901234567890123456789012345678901234567890123456789012345678901234567890123456789012345678901234567890123456789012345678901234567890123456789012345678901234567890123456789012345678901234567890123456789012345678901234567890123456789012345678901234567890123456789012345678901234567890123456789012345678901234567890123456789012345678901234567890123456789012345678901234567890123456789012345678901234567890123456789012345678901234567890123456789012345678901234567890
Presentation graphics are visualaids used to clarify andhighlight public speaking.

COMMUNICATIONS TOOLKIT • Visual Communication & Graphic Design – 111©2000 Michigan State University Board of Trustees.
DESIGN PRESENTATION GRAPHICS: “Designing Presentations That Work”Overhead Transparency Presentation Set
PRESENTATION GRAPHICS:1234567890123456789012345678901234567890123456789012345678901234567890123456789012345678901234567890123456789012345678901234567890123456789012345678901234567890123456789012345678901234567890123456789012345678901234567890123456789012345678901234567890123456789012345678901234567890123456789012345678901234567890123456789012345678901234567890123456789012345678901234567890123456789012345678901234567890123456789012345678901234567890123456789012345678901234567890123456789012345678901234567890123456789012345678901234567890123456789012345678901234567890123456789012345678901234567890123456789012345678901234567890123456789012345678901234567890123456789012345678901234567890123456789012345678901234567890123456789012345678901234567890123456789012345678901234567890123456789012345678901234567890123456789012345678901234567890123456789012345678901234567890123456789012345678901234567890123456789012345678901234567890123456789012345678901234567890123456789012345678901234567890123456789012345678901234567890123456789012345678901234567890123456789012345678901234567890123456789012345678901234567890123456789012345678901234567890123456789012345678901234567890123456789012345678901234567890123456789012345678901234567890123456789012345678901234567890123456789012345678901234567890123456789012345678901234567890123456789012345678901234567890123456789012345678901234567890123456789012345678901234567890123456789012345678901234567890123456789012345678901234567890123456789012345678901234567890123456789012345678901234567890123456789012345678901234567890123456789012345678901234567890123456789012345678901234567890123456789012345678901234567890123456789012345678901234567890123456789012345678901234567890123456789012345678901234567890123456789012345678901234567890123456789012345678901234567890123456789012345678901234567890123456789012345678901234567890123456789012345678901234567890123456789012345678901234567890123456789012345678901234567890123456789012345678901234567890123456789012345678901234567890123456789012345678901234567890123456789012345678901234567890123456789012345678901234567890123456789012345678901234567890123456789012345678901234567890123456789012345678901234567890123456789012345678901234567890123456789012345678901234567890123456789012345678901234567890123456789012345678901234567890123456789012345678901234567890123456789012345678901234567890123456789012345678901234567890123456789012345678901234567890123456789012345678901234567890123456789012345678901234567890123456789012345678901234567890123456789012345678901234567890123456789012345678901234567890123456789012345678901234567890123456789012345678901234567890123456789012345678901234567890123456789012345678901234567890123456789012345678901234567890123456789012345678901234567890123456789012345678901234567890123456789012345678901234567890123456789012345678901234567890123456789012345678901234567890123456789012345678901234567890123456789012345678901234567890123456789012345678901234567890123456789012345678901234567890123456789012345678901234567890123456789012345678901234567890
Consider the Audience:
�Use an easy-to-readtypeface and size.
�Keep text brief and use asimple layout.

112 – COMMUNICATIONS TOOLKIT • Visual Communication & Graphic Design©2000 Michigan State University Board of Trustees.
DESIGN PRESENTATION GRAPHICS: “Designing Presentations That Work”Overhead Transparency Presentation Set
Consider the Audience:
Don’t make typetoo small for youraudience to read.
(This is too small!)

COMMUNICATIONS TOOLKIT • Visual Communication & Graphic Design – 113©2000 Michigan State University Board of Trustees.
DESIGN PRESENTATION GRAPHICS: “Designing Presentations That Work”Overhead Transparency Presentation Set
Consider Your Audience:
D S TO T YN A P‘ C ET K !

114 – COMMUNICATIONS TOOLKIT • Visual Communication & Graphic Design©2000 Michigan State University Board of Trustees.
DESIGN PRESENTATION GRAPHICS: “Designing Presentations That Work”Overhead Transparency Presentation Set
Consider Your Audience:An
gled t
ype t
akes
more
effort
to re
ad!

COMMUNICATIONS TOOLKIT • Visual Communication & Graphic Design – 115©2000 Michigan State University Board of Trustees.
DESIGN PRESENTATION GRAPHICS: “Designing Presentations That Work”Overhead Transparency Presentation Set
Consider Your Audience:
Don’t
BOXES,LINES,
and other
VISUAL
ELEMENTS
Overdo

116 – COMMUNICATIONS TOOLKIT • Visual Communication & Graphic Design©2000 Michigan State University Board of Trustees.
DESIGN PRESENTATION GRAPHICS: “Designing Presentations That Work”Overhead Transparency Presentation Set
PRESENTATION GRAPHICS:1234567890123456789012345678901234567890123456789012345678901234567890123456789012345678901234567890123456789012345678901234567890123456789012345678901234567890123456789012345678901234567890123456789012345678901234567890123456789012345678901234567890123456789012345678901234567890123456789012345678901234567890123456789012345678901234567890123456789012345678901234567890123456789012345678901234567890123456789012345678901234567890123456789012345678901234567890123456789012345678901234567890123456789012345678901234567890123456789012345678901234567890123456789012345678901234567890123456789012345678901234567890123456789012345678901234567890123456789012345678901234567890123456789012345678901234567890123456789012345678901234567890123456789012345678901234567890123456789012345678901234567890123456789012345678901234567890123456789012345678901234567890123456789012345678901234567890123456789012345678901234567890123456789012345678901234567890123456789012345678901234567890123456789012345678901234567890123456789012345678901234567890123456789012345678901234567890123456789012345678901234567890123456789012345678901234567890123456789012345678901234567890123456789012345678901234567890123456789012345678901234567890123456789012345678901234567890123456789012345678901234567890123456789012345678901234567890123456789012345678901234567890123456789012345678901234567890123456789012345678901234567890123456789012345678901234567890123456789012345678901234567890123456789012345678901234567890123456789012345678901234567890123456789012345678901234567890123456789012345678901234567890123456789012345678901234567890123456789012345678901234567890123456789012345678901234567890123456789012345678901234567890123456789012345678901234567890123456789012345678901234567890123456789012345678901234567890123456789012345678901234567890123456789012345678901234567890123456789012345678901234567890123456789012345678901234567890123456789012345678901234567890123456789012345678901234567890123456789012345678901234567890123456789012345678901234567890123456789012345678901234567890123456789012345678901234567890123456789012345678901234567890123456789012345678901234567890123456789012345678901234567890123456789012345678901234567890123456789012345678901234567890123456789012345678901234567890123456789012345678901234567890123456789012345678901234567890123456789012345678901234567890123456789012345678901234567890123456789012345678901234567890123456789012345678901234567890123456789012345678901234567890123456789012345678901234567890123456789012345678901234567890123456789012345678901234567890123456789012345678901234567890123456789012345678901234567890123456789012345678901234567890123456789012345678901234567890123456789012345678901234567890123456789012345678901234567890123456789012345678901234567890123456789012345678901234567890123456789012345678901234567890123456789012345678901234567890123456789012345678901234567890123456789012345678901234567890123456789012345678901234567890123456789012345678901234567890123456789012345678901234567890123456789012345678901234567890
Consider the Information:
�Proofread and check foraccuracy.
�Use visual emphasis tohighlight important points.
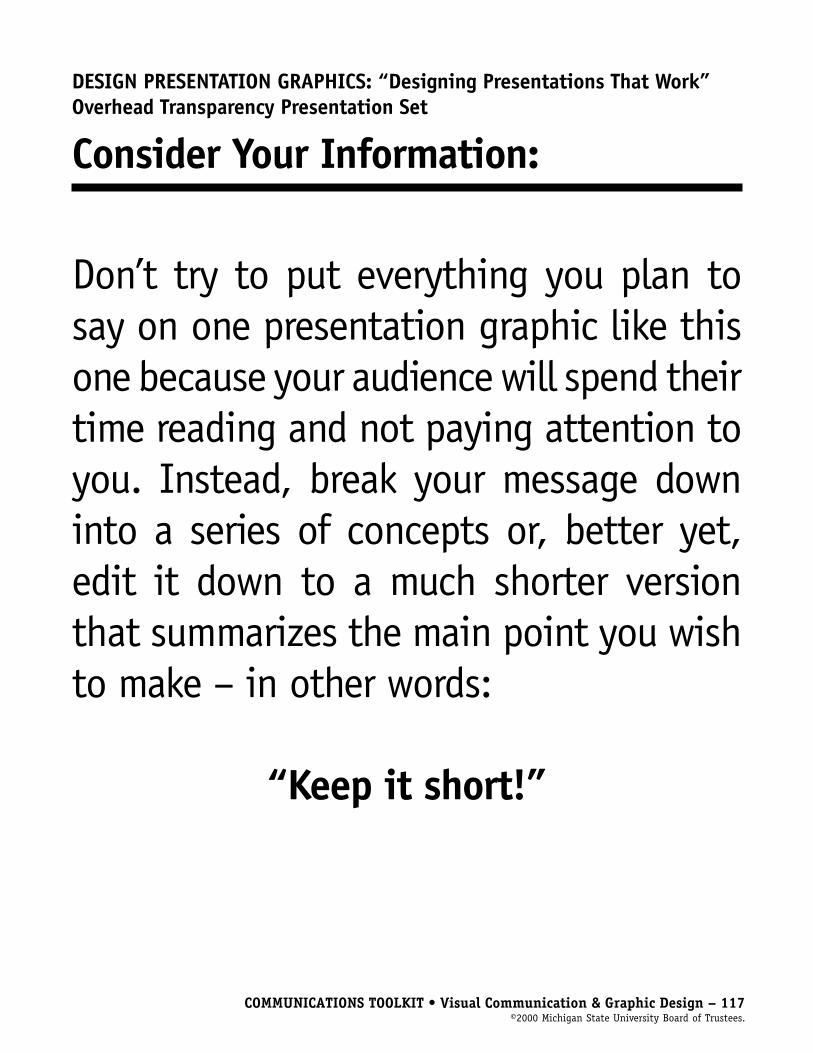
COMMUNICATIONS TOOLKIT • Visual Communication & Graphic Design – 117©2000 Michigan State University Board of Trustees.
DESIGN PRESENTATION GRAPHICS: “Designing Presentations That Work”Overhead Transparency Presentation Set
Consider Your Information:
Don’t try to put everything you plan tosay on one presentation graphic like thisone because your audience will spend theirtime reading and not paying attention toyou. Instead, break your message downinto a series of concepts or, better yet,edit it down to a much shorter versionthat summarizes the main point you wishto make – in other words:
“Keep it short!”

118 – COMMUNICATIONS TOOLKIT • Visual Communication & Graphic Design©2000 Michigan State University Board of Trustees.
DESIGN PRESENTATION GRAPHICS: “Designing Presentations That Work”Overhead Transparency Presentation Set
Consider Your Information:
IF ALL GRAPHIC ELEMENTS ARE THESAME SIZE, WEIGHT, STYLE AND COLOR,LIKE THIS, YOUR VISUALS WILL LACK
VISUAL EMPHASIS.
Use variations in
size,weight,
style& color
to create visual emphasis.

COMMUNICATIONS TOOLKIT • Visual Communication & Graphic Design – 119©2000 Michigan State University Board of Trustees.
DESIGN PRESENTATION GRAPHICS: “Designing Presentations That Work”Overhead Transparency Presentation Set
Consider Your Information:
Too much
can be overpowering.
EMPHASIS!

120 – COMMUNICATIONS TOOLKIT • Visual Communication & Graphic Design©2000 Michigan State University Board of Trustees.
DESIGN PRESENTATION GRAPHICS: “Designing Presentations That Work”Overhead Transparency Presentation Set
PRESENTATION GRAPHICS:1234567890123456789012345678901234567890123456789012345678901234567890123456789012345678901234567890123456789012345678901234567890123456789012345678901234567890123456789012345678901234567890123456789012345678901234567890123456789012345678901234567890123456789012345678901234567890123456789012345678901234567890123456789012345678901234567890123456789012345678901234567890123456789012345678901234567890123456789012345678901234567890123456789012345678901234567890123456789012345678901234567890123456789012345678901234567890123456789012345678901234567890123456789012345678901234567890123456789012345678901234567890123456789012345678901234567890123456789012345678901234567890123456789012345678901234567890123456789012345678901234567890123456789012345678901234567890123456789012345678901234567890123456789012345678901234567890123456789012345678901234567890123456789012345678901234567890123456789012345678901234567890123456789012345678901234567890123456789012345678901234567890123456789012345678901234567890123456789012345678901234567890123456789012345678901234567890123456789012345678901234567890123456789012345678901234567890123456789012345678901234567890123456789012345678901234567890123456789012345678901234567890123456789012345678901234567890123456789012345678901234567890123456789012345678901234567890123456789012345678901234567890123456789012345678901234567890123456789012345678901234567890123456789012345678901234567890123456789012345678901234567890123456789012345678901234567890123456789012345678901234567890123456789012345678901234567890123456789012345678901234567890123456789012345678901234567890123456789012345678901234567890123456789012345678901234567890123456789012345678901234567890123456789012345678901234567890123456789012345678901234567890123456789012345678901234567890123456789012345678901234567890123456789012345678901234567890123456789012345678901234567890123456789012345678901234567890123456789012345678901234567890123456789012345678901234567890123456789012345678901234567890123456789012345678901234567890123456789012345678901234567890123456789012345678901234567890123456789012345678901234567890123456789012345678901234567890123456789012345678901234567890123456789012345678901234567890123456789012345678901234567890123456789012345678901234567890123456789012345678901234567890123456789012345678901234567890123456789012345678901234567890123456789012345678901234567890123456789012345678901234567890123456789012345678901234567890123456789012345678901234567890123456789012345678901234567890123456789012345678901234567890123456789012345678901234567890123456789012345678901234567890123456789012345678901234567890123456789012345678901234567890123456789012345678901234567890123456789012345678901234567890123456789012345678901234567890123456789012345678901234567890123456789012345678901234567890123456789012345678901234567890123456789012345678901234567890123456789012345678901234567890123456789012345678901234567890123456789012345678901234567890123456789012345678901234567890123456789012345678901234567890123456789012345678901234567890
Consider the PresentationEnvironment:
�Plan time to double-checkroom set-up and equipment.
�Always have a backup plan!

COMMUNICATIONS TOOLKIT • Visual Communication & Graphic Design – 121©2000 Michigan State University Board of Trustees.
DESIGN PRESENTATION GRAPHICS: “Designing Presentations That Work”Overhead Transparency Presentation Set
Overhead Projection Techniques:1234567890123456789012345678901234567890123456789012345678901234567890123456789012345678901234567890123456789012345678901234567890123456789012345678901234567890123456789012345678901234567890123456789012345678901234567890123456789012345678901234567890123456789012345678901234567890123456789012345678901234567890123456789012345678901234567890123456789012345678901234567890123456789012345678901234567890123456789012345678901234567890123456789012345678901234567890123456789012345678901234567890123456789012345678901234567890123456789012345678901234567890123456789012345678901234567890123456789012345678901234567890123456789012345678901234567890123456789012345678901234567890123456789012345678901234567890123456789012345678901234567890123456789012345678901234567890123456789012345678901234567890123456789012345678901234567890123456789012345678901234567890123456789012345678901234567890123456789012345678901234567890123456789012345678901234567890123456789012345678901234567890123456789012345678901234567890123456789012345678901234567890123456789012345678901234567890123456789012345678901234567890123456789012345678901234567890123456789012345678901234567890123456789012345678901234567890123456789012345678901234567890123456789012345678901234567890123456789012345678901234567890123456789012345678901234567890123456789012345678901234567890123456789012345678901234567890123456789012345678901234567890123456789012345678901234567890123456789012345678901234567890123456789012345678901234567890123456789012345678901234567890123456789012345678901234567890123456789012345678901234567890123456789012345678901234567890123456789012345678901234567890123456789012345678901234567890123456789012345678901234567890123456789012345678901234567890123456789012345678901234567890123456789012345678901234567890123456789012345678901234567890123456789012345678901234567890123456789012345678901234567890123456789012345678901234567890123456789012345678901234567890123456789012345678901234567890123456789012345678901234567890123456789012345678901234567890123456789012345678901234567890123456789012345678901234567890123456789012345678901234567890123456789012345678901234567890123456789012345678901234567890123456789012345678901234567890123456789012345678901234567890123456789012345678901234567890123456789012345678901234567890123456789012345678901234567890123456789012345678901234567890123456789012345678901234567890123456789012345678901234567890123456789012345678901234567890123456789012345678901234567890123456789012345678901234567890123456789012345678901234567890123456789012345678901234567890123456789012345678901234567890123456789012345678901234567890123456789012345678901234567890123456789012345678901234567890123456789012345678901234567890123456789012345678901234567890123456789012345678901234567890123456789012345678901234567890123456789012345678901234567890123456789012345678901234567890123456789012345678901234567890123456789012345678901234567890123456789012345678901234567890123456789012345678901234567890123456789012345678901234567890123456789012345678901234567890
� “Reveal” text on bulletedlists, using a piece of paperor make a series of overheadsadding one step to each.
�Write information on theoverhead as you present.
�Highlight points with markeron the overhead as youpresent.
�Use overlays for presentingmultistep processes or ideas.
�Turn off the projector whenyou’re done making a point.
122 – COMMUNICATIONS TOOLKIT • Visual Communication & Graphic Design©2000 Michigan State University Board of Trustees.
DESIGN PRESENTATION GRAPHICS:“It’s a Dog’s Life” Overhead Transparency Presentation Set
It’s aDOG’SLife!
Format: Title
COMMUNICATIONS TOOLKIT • Visual Communication & Graphic Design – 123©2000 Michigan State University Board of Trustees.
DESIGN PRESENTATION GRAPHICS:“It’s a Dog’s Life” Overhead Transparency Presentation Set
BonesWaterTreesCatsLeashShoes
Format: Bulleted List
The Basics
124 – COMMUNICATIONS TOOLKIT • Visual Communication & Graphic Design©2000 Michigan State University Board of Trustees.
DESIGN PRESENTATION GRAPHICS:“It’s a Dog’s Life” Overhead Transparency Presentation Set
Daily Time Use
Format: Table
ACTIVITY HOURS/DAYSleeping 12.0Eating 4.8Chewing 3.6Barking 1.2Scratching 2.4TOTAL 24.0

COMMUNICATIONS TOOLKIT • Visual Communication & Graphic Design – 125©2000 Michigan State University Board of Trustees.
DESIGN PRESENTATION GRAPHICS:“It’s a Dog’s Life” Overhead Transparency Presentation Set
Format: Bar Graph
Sleeping
Eating
Chewing
Barking
Scratching
1 2 3 4 5 6 7 8 9 10 11 12
HOURS
Daily Time Use
126 – COMMUNICATIONS TOOLKIT • Visual Communication & Graphic Design©2000 Michigan State University Board of Trustees.
DESIGN PRESENTATION GRAPHICS:“It’s a Dog’s Life” Overhead Transparency Presentation Set
Format: Line Graph
Barking Hours
MON. TUES. WED. THURS. FRI. SAT. SUN.
DAYS
1
2
3
4

COMMUNICATIONS TOOLKIT • Visual Communication & Graphic Design – 127©2000 Michigan State University Board of Trustees.
DESIGN PRESENTATION GRAPHICS:“It’s a Dog’s Life” Overhead Transparency Presentation Set
Format: Pie Chart
Daily Time Use
Sleeping50%
Eating20%
Chewing15%
Scratching10%
Barking5%

128 – COMMUNICATIONS TOOLKIT • Visual Communication & Graphic Design©2000 Michigan State University Board of Trustees.
DESIGN PRESENTATION GRAPHICS:“It’s a Dog’s Life” Overhead Transparency Presentation Set
Format: Diagram
Lick Here
Jump Here
TreatsDispenser
CommandCenter
Can Opener
Watch Outfor These
Dog’s Best Friend
Wind LeashHere
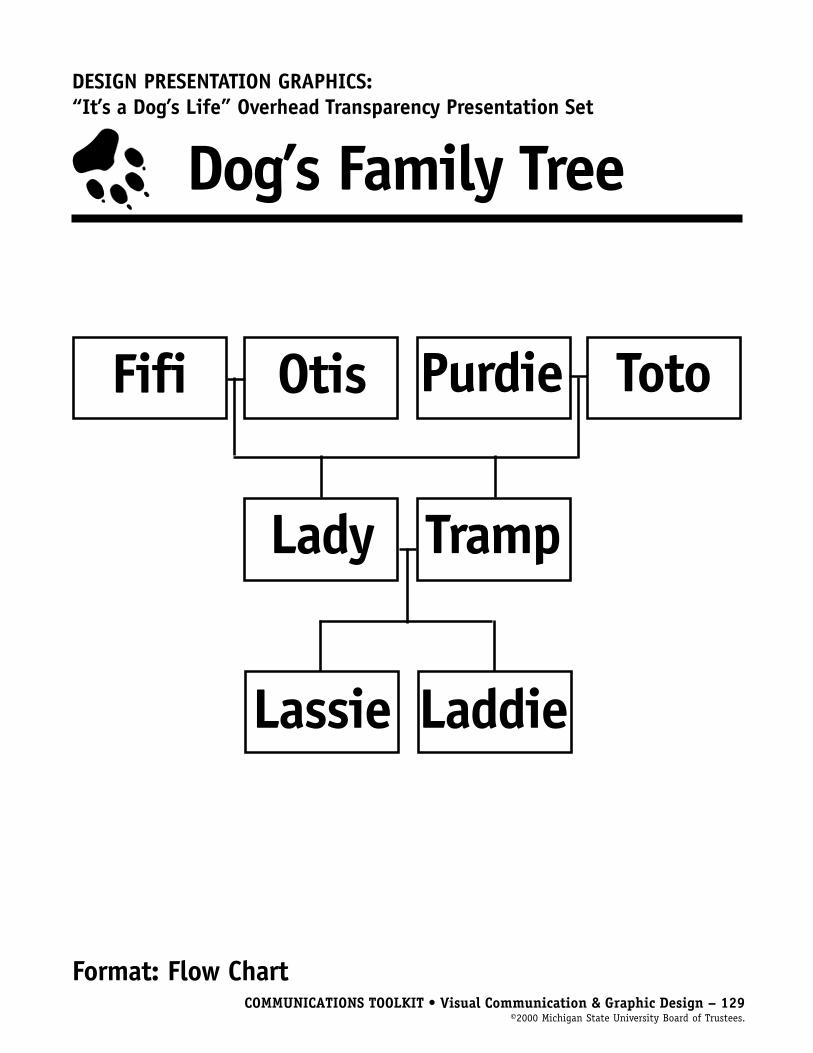
COMMUNICATIONS TOOLKIT • Visual Communication & Graphic Design – 129©2000 Michigan State University Board of Trustees.
DESIGN PRESENTATION GRAPHICS:“It’s a Dog’s Life” Overhead Transparency Presentation Set
Format: Flow Chart
Dog’s Family Tree
Fifi Otis TotoPurdie
TrampLady
Lassie Laddie
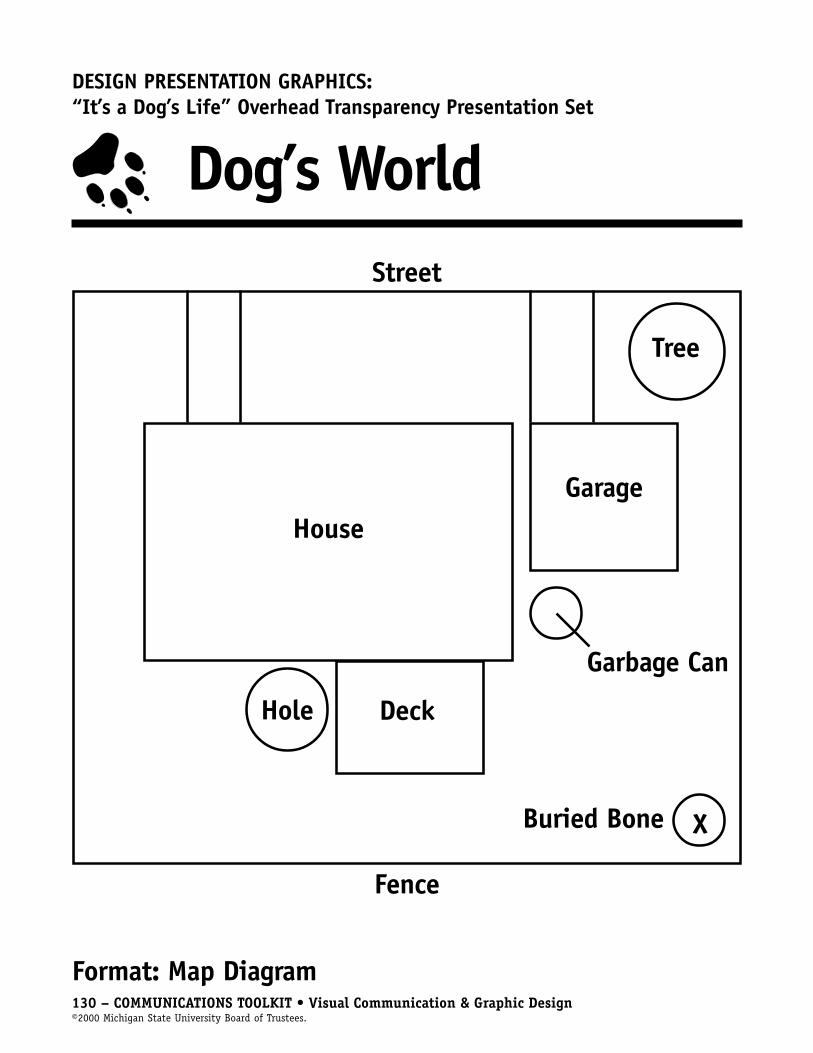
130 – COMMUNICATIONS TOOLKIT • Visual Communication & Graphic Design©2000 Michigan State University Board of Trustees.
Format: Map Diagram
DESIGN PRESENTATION GRAPHICS:“It’s a Dog’s Life” Overhead Transparency Presentation Set
Dog’s World
Garage
Fence
House
Hole
X
Tree
Deck
Street
Buried Bone
Garbage Can
ContentsWhat Leaders Need to KnowA Little History .................................................................. 131Why Learn About Video, Media & Technology? ....................... 131Where Do You Start? ........................................................... 131Video Production Glossary ................................................... 132Internet Glossary ................................................................ 133Basic Communication Processes Still Apply! .......................... 135Video, Media & Technology Planning Form............................. 136Life Skills .......................................................................... 137Self-Assessment & Evaluation .............................................. 137Beyond the Toolkit: More Ideas & Resources .......................... 137
Skill SheetsShooting Your Videos .......................................................... 139Video Editing ..................................................................... 140Writing Skills for Video ....................................................... 142Speaking Skills for Video ..................................................... 146Graphics for Video .............................................................. 147Interviewing Skills for Video ................................................ 148Make the Media Your Partner ............................................... 149Safety Rules for Online Time ................................................ 151
IcebreakersCommunication Treasure Hunt ............................................. 152Video Introductions ............................................................ 154
Activities & ProjectsCreate a Video Treatment..................................................... 155Create a Commercial ............................................................ 158Create a Talk Show.............................................................. 160Get Real! Produce a Documentary ......................................... 162Offline Chat About Online Time ............................................ 166Electronic Pen Pals .............................................................. 170

COMMUNICATIONS TOOLKIT • Video, Media & Technology – 131©2000 Michigan State University Board of Trustees.
What LeadersNeed to KnowA Little HistoryTechnology is a part of just about ev-ery home and office these days. Sincewe use high-tech equipment of somekind each day, most of us don’t realizethat these inventions have been aroundfor only a couple of hundred years orless. The kids in your group would prob-ably find it hard to imagine themselvesliving in the early 1800s. At that time,there was no way for people to trans-mit a message quickly over long dis-tances. Samuel F.B. Morse then inventedthe telegraph, a system of instant elec-tronic communication. That incredibleadvance in technology might seem al-most trivial to kids today when peoplecan easily communicate with people allover the world.
Since the 1800s, we’ve welcomed theinventions of the telephone, camera,phonograph, radio, motion pictures,television, videocassette recorders(VCRs) and compact discs (CDs). Be-sides the impact of these inventions,the television cable industry and sat-ellites have made the world a smallerplace. Cable and satellites provide pow-erful, collective media experiences forpeople across the country and aroundthe world. Computers are also an im-portant aid in communication. Peoplenow instantly “talk” to each otherthrough computer messages and elec-tronic mail (email). Computers make itpossible for us gather information andcommunicate with people anywhere
in the world without ever leavingour home, business or school com-puters! We’ve come a long way fromthe telegraph days to the laserdiscs, two-way interactive video,CD-ROM, hypermedia, desktopvideo conferencing (DVC) and digi-tal versatile disc (DVD) of the1980s, 1990s and beyond.
Why Learn AboutVideo, Media& Technology?Video, media and technology touchalmost everyone’s life in some waydaily. The equipment mentionedabove is commonplace in schools,homes and businesses. Kids need tounderstand these technologies sothat they are well prepared for theirfutures as workers and citizens in ahigh-tech world.
Where Do YouStart?Giving kids hands-on experienceusing video, media and technologyis the best way to build skills in theseareas. Think about the technologiesthat are available to you and theyoung people in your group.
Video & AudioProductionDo you have access to a camcorderfor video production? If you havecable television, then you probablyhave community access throughyour cable station. Find out whatthey provide in terms of equipmentand training in video production.
(Cable companies are required by lawto provide access to equipment andprogramming for people who live inthe communities they serve.) A glos-sary of video production terms isavailable on page 132 to help youbecome more familiar with some ofthe concepts that are unique to thisarea.
What about an audiotape recorder/player? Kids can create mock radiotalk shows, or practice being discjockeys by using simple householdtape recorders. They may also be ableto access a computer equipped withmicrophone, speakers and audioediting software in order to recordand edit their project digitally.
Computers& the InternetYour group can get access to com-puter programs and the Internetin many ways. Families of kids inyour group may have computers athome. Your local library may havecomputers and access to theInternet available for public use.What about businesses in yourcommunity? Ask about their inter-est in helping young people useand experience technologies in theworkplace. Do you or a member ofyour group know someone who isparticularly skilled in computerswho would be willing to share hisor her expertise? Don’t overlookyoung people! Kids tend to learnquickly and often are more com-puter literate than the adults in afamily! Ask high school or collegestudents to serve as computer re-source people to your youth group.

132 – COMMUNICATIONS TOOLKIT • Video, Media & Technology©2000 Michigan State University Board of Trustees.
Video Production Glossary“Action” – The director’s cue tobegin taping
Audience – Everyone who willview a particular videotape
Audio – The sound portion ofa videotape
Camcorder – A small one-piecevideo camera
Close-up (CU) – A camera shotin which a person or object isseen very close and fills theframe
Director – The person who givesleadership to the location videoshooting by giving directions andcalling out cues to on-cameratalent, camera operators, propspeople and others
Documentary – A type of filmor video that illustrates a realsituation or issue, or tells thestory of real people; a nonfictionstory that is shot with the realpeople involved in the situationor story, no actors are used
Edit – To select and electroni-cally assemble two or more au-dio and video segments
Edit in the camera – To createan illusion of an edited programby carefully planning an overalltape and then shooting the seg-ments in the order in which theyare to appear in the final program
Extreme close-up (ECU) – A veryclose shot of a portion of an objector person
Fade in or out – Audio: To gradu-ally increase or decrease the volumeof the sound; Video: To push a but-ton on the camera that makes thepicture slowly appear from black ordisappear to black
Focus – The sharpness and clarityof the picture
Monitor – A television set that cantransmit audio and video signalsfrom videotape
Pan – To move the camera from leftto right or from right to left whileshooting
Postproduction – The process ofediting, adding graphics, music andspecial effects to a tape after allthe footage has been shot
Pre-production – The planning stagesof video production; usually involvesidentifying the message and audience;outlining and script writing; research;scheduling; rehearsing; and budgetplanning
Producer – The person who givesoverall leadership to the productionof a tape, including message, audi-ence, content, scheduling, budgetand making sure deadlines are met
Special effects – Transitional effectssuch as fades, wipes, dissolves;
digital effects such as flips orflying video scenes
“Stand by” – The director’s cuethat everyone should ready them-selves to begin shooting video
Talent – The people whosevoices are heard or whose facesappear in front of the camera
Teamwork – In a video production,crew members working togethereffectively to complete a tape
Theme – The overall idea for aprogram
Tilt – To move the camera up anddown while shooting
Time cues “5, 4, 3, 2, 1” – Thedirector’s cues that the action andtaping will begin in five counts
Titles – Any graphic material orwords that are shown on camera
Two-shot – Framing two peopleor objects with the camera lens
Video – The picture portion ofthe videotape
Videotape – Magnetic tape thatcan record a television signal
Zoom in or out – The gradual get-ting closer or widening of the cam-era shot accomplished by usingthe camera’s toggle button tozoom in (get closer) or zoomout (get farther away)
Just What Is the Internet?
The Internet offers computer usersa way to communicate worldwide(for example, through email) andfind information on any topic, or-ganization, government or business(for example, through the WorldWide Web or WWW).
This worldwide network consists ofthousands of connected computernetworks using the same languageor “protocol” to communicate. (Seepage 133 for a glossary of Internetterms.) What sets the Internet apartfrom more traditional forms of pub-lishing is that it offers immediatetwo-way communication in a way
that print and broadcast media nevercould before. For example, theInternet allows you to watch a tele-vision show or read a newspaper andimmediately “visit” the related Website or Internet address and offerfeedback to the media outlet onwhat you have seen or read.

COMMUNICATIONS TOOLKIT • Video, Media & Technology – 133©2000 Michigan State University Board of Trustees.
Internet GlossaryAddress – The unique locationof an information site on theInternet, a specific file (for ex-ample, a Web page) or an emailuser
Bookmark – A saved link to a Website that has been added to a listof saved links so that you can sim-ply click on it rather than havingto retype the address when visit-ing the site again; also called“favorites”
Browser – A software programthat lets you find, see and hearmaterial on the World Wide Web,including text, graphics, soundand video; most online serviceshave their own browsers; alsocalled “Web browser”
Chat – The “live” exchange oftyped email messages betweentwo or more computer users, gen-erally using a protocol or set ofrules called “Internet Relay Chat”(IRC); despite the name, online“chatting” is generally done witha keyboard, rather than verbally
Domain name – An Internet ad-dress that usually contains someversion of the organization’s nameand an ending indicating the typeof organization such as .com (cor-porations or commercial entities),.edu (educational institutions),.org (nonprofit organizations),.mil (military organization), .net(network provider), and .gov(government institution)
Download – To copy a file fromone computer system to another;from the Internet user’s point ofview, to download a file is to re-quest it from another computer(or from a Web page on anothercomputer) and to receive it
Email (Electronic mail) – A way ofsending messages electronicallyfrom one computer to another, gen-erally through a modem and tele-phone line connected to a computer
Emoticon – Computer users’ attemptto convey emotion with a keyboard;tip your head to the left to read thesmiley :-) and wink ;-) and otheremoticons
FAQs (Frequently Asked Ques-tions) – A compilation of questions(and the answers to the questions)new participants in a newsgroup orvisitors to a Web site most frequentlyask; generally posted as time- andpatience-savers for veteran partici-pants and users, who often ask newusers (or “newbies”) to check the FAQbefore asking redundant questions
FTP (File Transfer Protocol) – Amethod for transferring files (forexample, computer games andother software programs) acrosscomputer networks
Home page – The main or first pageof a World Wide Web site that is thestarting point for a particular per-son, group or organization; oftenincludes an informal table of con-tents and links to other parts of theWeb site
HTML (Hypertext Markup Lan-guage) – The standard computer lan-guage used to create World Wide Web(hypertext) documents; HTML codeincludes a set of tags or labels thatindicate such things as whether apiece of text is a headline or part ofa bulleted list, the size of a graphicor the cells of a table, and the Webpage to which a link directs users
HTTP (HyperText Transfer Proto-col) – The standard method comput-
ers and networks use to transferinformation over the Internet
Hypertext link – An easymethod for retrieving informationby choosing highlighted words oricons on the screen; the link willtake you to related documents orsites
Internet – A worldwide collec-tion of computer networks thatallows people to find and use in-formation and communicate withothers
ISP (Internet Service Provider)– A generic term for any companythat can connect your computerdirectly to the Internet
EMOTICONSIcon What it Means:-) Smile
;-) Wink
:-( I’m sad
:-D Laughing
:’-O Crying
%( I’m Confused
:-o I’m Surprised
:-O I’m very surprised
ABBREVIATIONSBTW = By The Way
CUL8R = See You Later
IMO = In My Opinion
IMHO = In My HumbleOpinion
J/K = Just Kidding
LOL = Laughing Out Loud
ROFL = Rolling On theFloor Laughing
TTFN = Ta-Ta For Now
Continued on page 134

134 – COMMUNICATIONS TOOLKIT • Video, Media & Technology©2000 Michigan State University Board of Trustees.
Internet Glossary, continued
When you’re helping kids developcommunication skills, it’s importantto know that the Internet — espe-cially the World Wide Web — canprovide them with opportunities toapply all of the skills introduced inthis toolkit, including graphics,video, vocal and written. Youngpeople can write text, create agraphic identity to make that textcome alive, write a speech that ex-plains the information they havewritten, and produce a video to moreclearly illustrate their message. Thenthey can publish all of those pieceson a Web site and gain a worldwideaudience.
Millions of young people are onlinein America today, using theInternet at school, at their locallibraries, at home and as part ofafter-school activities. Youngpeople are using the Internet to:• Answer questions or do research.• Publish their own unique ideas
and creative works.• Communicate with their peers
by email.• Join groups or clubs that meet
online (“virtually”).• Shop.• Get directions and maps.• Play games.
The Internet is a valuable medium foryoung people to explore as part ofa communications project because:
• It’s a great research tool – Mostforms of the communication pro-cesses covered in the toolkit requirethe person creating a message toconduct at least some research. TheInternet offers easy access to:- Government documents with
information on demographics,statistics, history and a host ofother topics that young peoplemay need to know about.
- Universities and otherresearch organizations thatprovide information on justabout any subject your groupmay be interested in.
- Organizations whose ideas,products and networks mayhelp young people complete aproject, compare ideas andcommunicate with other peopleinterested in their topic.
- Newspapers, magazines,broadcast networks and othermedia outlets that provideindepth views of contemporaryissues, ideas and opportunities.
• It’s a good way to share yourmessage – The Internet can serve
as a communication or publishingmedium that allows:- Young people to have their
message widely seen or heardwith little or no duplicationexpense.
- Ideas and creative concepts tobe immediately updated ortested and can provide waysto get feedback from a varietyof audiences.
- Young people to use a widerange of communicationsmedia to express their ideas.
What Leaders Need to KnowAbout Internet Safety
When working with young people onthe Internet, keep in mind that –just like in the real world – thereare places that are appropriate to goand others that are inappropriate.Online interactions with strangerscan pose risks to children who aretrusting and curious. As youngpeople become more skilled at usingthe World Wide Web, email and otherforms of online communication,situations may arise that they willneed help clarifying and dealingwith. So, it’s extremely importantfor young people and the parentsand volunteers who work with themto be aware of some basic Internet
Netiquette – Rules or mannersfor interacting courteously withothers online
Newsgroups – Online discussiongroups categorized by specificsubjects (not necessarily news)that allow readers to send or“post” messages
Online service – A companythat provides its members accessto the Internet through its ownspecial user interface, as well asadditional services such as chat
rooms, children’s areas, travel plan-ning and financial management
Search engine – A program thatperforms keyword searches for infor-mation on the Internet
Spam – Unsolicited bulk email thatcan be sent to literally thousands ofpeople at the click of a mouse; be-cause it is often used to advertiseget-rich-quick schemes, porno-graphic Web sites and varioushoaxes, spam is one of the most de-spised forms of email on the Internet
URL (Uniform Resource Loca-tor) – The World Wide Web ad-dress of a site on the Internet;for example, the URL for theWhite House is http://www.whitehouse.gov
World Wide Web (Web or WWW)– A hypertext-based system thatallows you to browse through avariety of linked Internet re-sources organized by colorful,graphics-oriented home pages
COMMUNICATIONS TOOLKIT • Video, Media & Technology – 135©2000 Michigan State University Board of Trustees.
safety practices. You must also beable to respond to questions youngpeople may ask as situations arise.
Here are some ways you can ensurethe safety of the young people youwork with as they explore theInternet:
Review Internet safety guide-lines with kids before they getinvolved in online activities.Review the “Safety Rules for OnlineTime” skill sheet (on pg. 151) withkids before going online.
Following are the URLs (UniversalResource Locator or Internet address)of sites on the World Wide Web thatprovide safety rules and links toother Internet safety information:
• “Child Safety on the Informa-tion Highway,” National Center forMissing and Exploited Children.(http://www.missingkids.org/)An online brochure containing in-formation for parents on reducingonline risks to children as well asonline safety rules for families andchildren.
• “Staying Street Smart on theWeb,” Yahooligans, in cooperationwith The National Center for Missingand Exploited Children and Interac-tive Services Association. (http://www3.yahooligans.com/docs/safety/)Provides guidelines for young peopleand links to information parentsshould know about online safety.
• “Parents Guide to the Internet,”U.S. Department of Education, Wash-ington D.C. (http://www.ed.gov/p u b s / p a r e n t s / i n t e r n e t )A 16-page booklet (available inAdobe Acrobat format) that providesbasic information for parents onInternet use and tips for ensuringthat children have safe, productiveand enjoyable experiences on theInternet.
Involve parents from the start.Before going online with youngpeople, let parents or guardiansknow that their children will be usingthe Internet and that it will be asupervised educational experience.Think about providing a permissionslip for parents or guardians to signif you will be using an Internetbrowser without “parental controls.”Permissions slips are often requiredfor classroom Internet use in schools.This could also contain Internetsafety and behavior guidelines (suchas the “Safety Rules for Online Time”skill sheet on pg. 151) for the childto read, discuss with a parent andboth sign.
Use “parental controls” orInternet filtering software whenpossible. Many Internet service pro-viders allow subscribers to activate“parental controls” for their onlineaccounts. These controls offer arange of options such as closing offspecific chat areas and communica-tion features like “instant messages”or limiting access to the World WideWeb. Software is also available forpurchase and use with Internetbrowsers that will make sites con-taining objectionable words orphrases inaccessible. Keep in mindthat automated parental controlsand Internet filtering software arenot foolproof and should never takethe place of adult supervision. It isimportant that you stay involvedwith your group as they are onlineand talk with them about their ex-periences.
Use role-plays and guided discus-sion to help kids anticipate howto respond to Internet situationsthey may encounter. Even thoughyoung people may be familiar withgeneral guidelines for Internetsafety, it still may not be easy forthem to come up with appropriateresponses to some of the real-lifesituations they may encounteronline. The “Offline Chat AboutOnline Time” activity on page 166can help your group think through,discuss and make good decisionsabout situations that might come upwhile they are online.
BasicCommunicationProcesses StillApply!Whether you’re writing a speech forstudent council elections, creating avideotape for mass distribution ormaking a Web page to display on theWorld Wide Web, the basic principlesof communication apply. You musthave something to say! And youmust consider your audience verycarefully. Craft your message so thatit is directed to the specific group orkind of individuals you’re trying toreach. You can use the Video, Mediaand Technology Planning Form onpage 136 to help your group getstarted on a project they’ve identi-fied.
When beginning a video project, forexample, you must ask and answerthese basic questions:• What is our message? (for
example, “Don’t Drink andDrive”)
• Who is our audience? (forexample, young people aged16 to 21)
• How will we reach them? (forexample, produce a video foruse in high school classrooms)
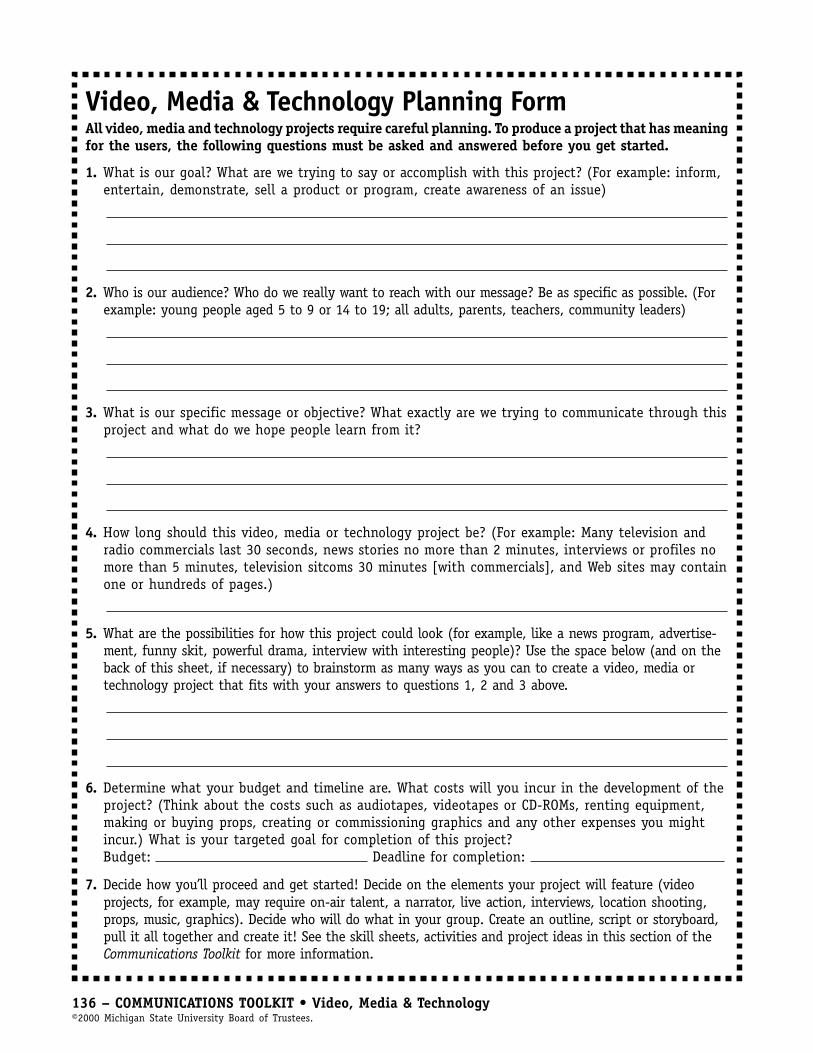
136 – COMMUNICATIONS TOOLKIT • Video, Media & Technology©2000 Michigan State University Board of Trustees.
Video, Media & Technology Planning FormAll video, media and technology projects require careful planning. To produce a project that has meaningfor the users, the following questions must be asked and answered before you get started.
1. What is our goal? What are we trying to say or accomplish with this project? (For example: inform,entertain, demonstrate, sell a product or program, create awareness of an issue)
2. Who is our audience? Who do we really want to reach with our message? Be as specific as possible. (Forexample: young people aged 5 to 9 or 14 to 19; all adults, parents, teachers, community leaders)
3. What is our specific message or objective? What exactly are we trying to communicate through thisproject and what do we hope people learn from it?
4. How long should this video, media or technology project be? (For example: Many television andradio commercials last 30 seconds, news stories no more than 2 minutes, interviews or profiles nomore than 5 minutes, television sitcoms 30 minutes [with commercials], and Web sites may containone or hundreds of pages.)
5. What are the possibilities for how this project could look (for example, like a news program, advertise-ment, funny skit, powerful drama, interview with interesting people)? Use the space below (and on theback of this sheet, if necessary) to brainstorm as many ways as you can to create a video, media ortechnology project that fits with your answers to questions 1, 2 and 3 above.
6. Determine what your budget and timeline are. What costs will you incur in the development of theproject? (Think about the costs such as audiotapes, videotapes or CD-ROMs, renting equipment,making or buying props, creating or commissioning graphics and any other expenses you mightincur.) What is your targeted goal for completion of this project?Budget: Deadline for completion:
7. Decide how you’ll proceed and get started! Decide on the elements your project will feature (videoprojects, for example, may require on-air talent, a narrator, live action, interviews, location shooting,props, music, graphics). Decide who will do what in your group. Create an outline, script or storyboard,pull it all together and create it! See the skill sheets, activities and project ideas in this section of theCommunications Toolkit for more information.
COMMUNICATIONS TOOLKIT • Video, Media & Technology – 137©2000 Michigan State University Board of Trustees.
• How can we structure themessage? (for example, producea documentary that includestestimonials by teens andparents who have lost friends orchildren to drunk driving)
Once you’ve answered these basicyet important questions, you canbegin the process of creating yourvideo project.
Life SkillsWhat life skills do kids and adultslearn by participating in video, mediaand technology projects?• Teamwork• Leadership (particularly
through the roles of producerand director)
• Time management and reliability• Decision-making and creative
problem-solving• The ability to plan and research
a project, and then organize theinformation
• The ability to use resourceswisely
• Resiliency (for example, whena shoot doesn’t go well thefirst time)
• Useful and marketable technicalskills
• Self-confidence and self-esteem(through understanding one’sabilities and having an opportu-nity to experience success)
• Evaluation skills and the abilityto set goals for improvement
• Career exploration skills andschool-to-work transitions
Self-Assessment &EvaluationAfter each activity or project youlead with young people, please helpthem think about what they learned.Make copies of the “What I Learned”self-evaluation form on page 8 anddistribute them to your group. Askthem to think quietly about the
questions and make notes aboutwhat they learned, how they feelabout their skills in that area andwhat they’d like to learn more about.Then lead a discussion with thewhole group and ask if anyone wantsto share what they came up with.Young people may want to keeptheir “What I Learned” forms to re-fer to later and as a way to docu-ment their learning process.
Beyond theToolkit: MoreIdeas & ResourcesThe activities in this section of theCommunications Toolkit are startingpoints for helping kids learn aboutcommunicating through video, me-dia and technology. Here are someideas for learning more and takingyour projects further.
Local Cable TelevisionCompaniesIf you have cable television in yourarea, then you have access to a com-munity resource that can help youwith your video projects. Cable com-panies provide training and equip-ment for shooting video “in thefield” (also called “on-location”) aswell as in-studio productions andediting. Call to find out what’s avail-able to you and your group. Cablecompanies are required by law toprovide access to their equipmentand facilities at no charge to peoplein their communities. Usually allthey require is that the video youproduce be aired on their localchannel – which is probably a plus!
BusinessesAsk for help from the video produc-tion facilities in your area. (Look inthe yellow pages of your phone di-rectory under “video production.”)Some companies will open their
doors to young people who want tolearn more about the business. Askyour local video rental store if theyhave cameras and other equipmentyour group can rent. Perhaps they’dlend equipment at no charge if theywere asked to support a creativeproject that involved kids in produc-ing something like a documentaryabout their community.
Many Internet Service Providers aroundthe U.S. offer free email or Web pagehosting as a way to promote their ad-vertisers. Some local companies mayalso offer free Web page hosting forpublic service organizations.
Colleges & UniversitiesFind out if any colleges or universi-ties in your area have film, video,multimedia or telecommunicationsdepartments. Students are excellentresource people, and working with ayouth group gives them a chance togain valuable hands-on experiencethemselves. Perhaps they could getcourse or independent study creditsif they help young people createvideos, Web pages or other mediaprojects for a semester. College stu-dents may also be interested in com-munity service and having meaning-ful volunteer experiences.
SchoolsDon’t overlook the local school’smedia department, computer labs orlibrary. They vary from area to area,but some school districts have cam-eras, editing equipment, multimediacomputer equipment, digital camerasor other communications technologyavailable for student use. Some evenhave television studios and two-wayvideo interactive classrooms. Dosome investigating, find out what’savailable and explore how yourgroup can learn from and use theresources in your community.
138 – COMMUNICATIONS TOOLKIT • Video, Media & Technology©2000 Michigan State University Board of Trustees.
More Ideas!The beauty of using video, mediaand technology to enhance commu-nication skills is that there is un-limited potential for creativity. Al-low the kids time to brainstorm asmany possibilities for activities andprojects as they can. Here are somesuggestions to get you started:
• Interview people on audio or videotape to allow them to share differ-ent points of view on a topic or togive testimonials. Try a talk showformat.
• Create a video or CD-ROM “familyphoto album.” Record interviewswith elderly family members thatdocument their life, history and fam-ily memories. Apply your productionskills to a family history project. (Besure to make an extra copy of sucha project as a safety precaution.)
• Create a Web site or CD-ROM withinformation about your family history.
• Create a video that resembles anews segment or program.
• Create videos that reflect impor-tant issues in the lives of children,youth and families in your commu-nity. Use the tapes in civic and othercommunity groups to focus people’sattention on issues of importance toyour group.
• Write and read a poem on camera.For more visual effect, have the readerstand near the camera microphonebut off-camera. Have others act outthe poem on camera, and shootgraphics or other props or visualsthat illustrate the words of thepoem. Music playing softly in thebackground may add to the dramaticeffect, too.
• Create a story or play and video-tape it in sequence to create a dra-matic production or role-play. (Seethe “Video Editing” skill sheet on
pg. 140 for information on how toedit in the camera.)
• Write and perform a song or rapand record it on audio or video tape.
• Create a video or multimedia year-book that features classmates inaction.
• Conceptualize, plan and storyboarda video even if you don’t have ac-cess to video equipment! The pro-cess itself is an excellent exercisein creative and critical thinking,problem-solving and teamwork.
Keep in mind that this project can bemore than just a learning opportunity.It can also be a way to get your mes-sage into the media. (See the “Makethe Media Your Partner” skill sheeton pg. 149 to learn more about howto work effectively with the media.Local radio and TV stations maywelcome the opportunity to airpublic service messages created byyoung people.
Explore Careers!Video and media–Many diverse ca-reer opportunities are available topeople interested in video and multi-media production. The “Video Pro-duction Roles” handout on page 165describes several key video-relatedjobs. Kids in your group could in-vestigate the types of career oppor-tunities that are available in indus-tries, companies and organizationssuch as:• Commercial television stations• Cable television stations• Public television stations• Video production companies• Business and corporate video
production departments• K–12 school media departments• College and university telecom-
munications departments• Satellite television and video-
conferencing organizations• CD-ROM and video laser disk
production companies
Internet–Businesses, educationalinstitutions and nonprofit organiza-tions use the World Wide Web todistribute information and conductbusiness. Web site designers workboth “in-house” within organiza-tions, or as independent contractorson projects. Many of the jobs thatare available in this growing com-munications area are posted eitheron the Web sites of the employersor on Internet “job boards” that pro-vide searchable “help wanted” listings.
Books• KIDVID: Fun-damentals of VideoInstruction, by Kaye Black. Tucson,Arizona: Zephyr Press, 1989.
• How to Make Your Own Video, byPerry Schwartz. Minneapolis, Minne-sota: First Avenue Editions, 1991.
• Lights, Camera, Action! A Guideto Video Instruction and Productionin the Classroom, by Bruce Limpus.Waco, Texas: Prufrock Press, 1994.
• Complete Communication Skills Ac-tivities Kit, by Leroy Hay, Ph.D., andRichard Zboray. West Nyack, NewYork: Center for Applied Research inEducation, 1992. This book containsa section on conceptualizing videosand activities that focus on listen-ing, speaking, writing, organizing in-formation, using and interpretingbody language and more.
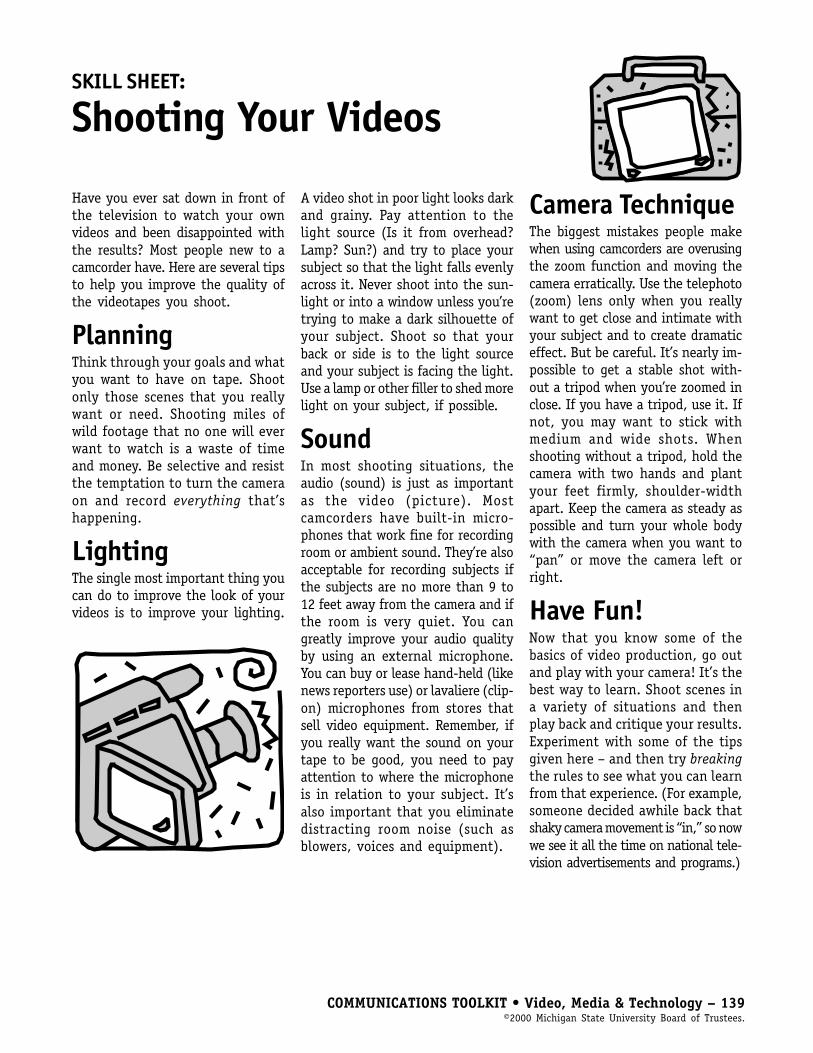
COMMUNICATIONS TOOLKIT • Video, Media & Technology – 139©2000 Michigan State University Board of Trustees.
SKILL SHEET:
Shooting Your Videos
Have you ever sat down in front ofthe television to watch your ownvideos and been disappointed withthe results? Most people new to acamcorder have. Here are several tipsto help you improve the quality ofthe videotapes you shoot.
PlanningThink through your goals and whatyou want to have on tape. Shootonly those scenes that you reallywant or need. Shooting miles ofwild footage that no one will everwant to watch is a waste of timeand money. Be selective and resistthe temptation to turn the cameraon and record everything that’shappening.
LightingThe single most important thing youcan do to improve the look of yourvideos is to improve your lighting.
A video shot in poor light looks darkand grainy. Pay attention to thelight source (Is it from overhead?Lamp? Sun?) and try to place yoursubject so that the light falls evenlyacross it. Never shoot into the sun-light or into a window unless you’retrying to make a dark silhouette ofyour subject. Shoot so that yourback or side is to the light sourceand your subject is facing the light.Use a lamp or other filler to shed morelight on your subject, if possible.
SoundIn most shooting situations, theaudio (sound) is just as importantas the video (picture). Mostcamcorders have built-in micro-phones that work fine for recordingroom or ambient sound. They’re alsoacceptable for recording subjects ifthe subjects are no more than 9 to12 feet away from the camera and ifthe room is very quiet. You cangreatly improve your audio qualityby using an external microphone.You can buy or lease hand-held (likenews reporters use) or lavaliere (clip-on) microphones from stores thatsell video equipment. Remember, ifyou really want the sound on yourtape to be good, you need to payattention to where the microphoneis in relation to your subject. It’salso important that you eliminatedistracting room noise (such asblowers, voices and equipment).
Camera TechniqueThe biggest mistakes people makewhen using camcorders are overusingthe zoom function and moving thecamera erratically. Use the telephoto(zoom) lens only when you reallywant to get close and intimate withyour subject and to create dramaticeffect. But be careful. It’s nearly im-possible to get a stable shot with-out a tripod when you’re zoomed inclose. If you have a tripod, use it. Ifnot, you may want to stick withmedium and wide shots. Whenshooting without a tripod, hold thecamera with two hands and plantyour feet firmly, shoulder-widthapart. Keep the camera as steady aspossible and turn your whole bodywith the camera when you want to“pan” or move the camera left orright.
Have Fun!Now that you know some of thebasics of video production, go outand play with your camera! It’s thebest way to learn. Shoot scenes ina variety of situations and thenplay back and critique your results.Experiment with some of the tipsgiven here – and then try breakingthe rules to see what you can learnfrom that experience. (For example,someone decided awhile back thatshaky camera movement is “in,” so nowwe see it all the time on national tele-vision advertisements and programs.)

140 – COMMUNICATIONS TOOLKIT • Video, Media & Technology©2000 Michigan State University Board of Trustees.
SKILL SHEET:
Video Editing
Editing is the art of assemblingscenes to create a meaningful storyor message on film or video. In the“real world” of video production,editing is a complex process withunlimited creative possibilities. Theprocess of video editing allows youto add elements like computergraphics and music.
When editing, you can arrange thescenes you’ve shot in any order youwant with creative transitions andspecial effects. You may be surprisedto learn that, unlike film editing,there is no splicing or touching thetape in video editing. The video ed-iting process is completely elec-tronic. It’s accomplished throughmultiple tape machines, computersand an operator or “editor” whopushes buttons.
Today, the world of video editingis being completely transformed bynew and changing technologies.“Nonlinear editing” has totally revo-lutionized the way people edit videoprojects. Nonlinear, computer-basedediting allows you to edit high-end,broadcast quality, sophisticatedvideo projects right out of a com-puter! Video production is an ex-tremely exciting and constantlychanging profession!
Getting Started:Editing in theCameraIf you are a beginner or don’t haveaccess to video editing equipment,you can shoot your program in a waythat makes it seem edited. This tech-nique is a little tricky because youcan’t change your mind once you’veshot a scene. Preproduction planningand rehearsing are very important.
Editing in the camera means that,after carefully planning your entirevideo program, you shoot each scenein the order you want it to appearon the finished tape. Every scene iscarefully set up so there is no extraor wild footage between shots.Here’s what you do:
1. Carefully plan your video and writea script or storyboard that describeseach scene, who will be featured,narration, props and other elements.
2. Before you start taping, have theon-air talent and videographer re-hearse each scene to make sure theyall know exactly what will happen inevery scene. You must begin tapingfrom the beginning of your scriptand then add each scene in the or-der that you want it to appear.
3. When you’re ready to “roll tape,”the director alerts everyone by call-ing out, “Quiet on the set!” Thevideographer then puts the camerain standby mode so he or she onlyhas to press the record/pause but-ton to begin recording. Then the di-rector says, “Stand by,” and countsdown slowly, “Five, four, three…“The director should NOT say “two
and one.” Instead, he or she shouldhold up those fingers to cue the tal-ent to begin. The camera operatorpushes the record button after thedirector says “three” and begins tap-ing. This ensures that you don’t hearthe director counting down on tape.It also ensures that you have the 2-second pause you need for the tapeto thread properly before the talentbegins to talk.
Be sure the camera operator and tal-ent know what the ending statementor action (called an “out-cue”) is forthe scene. The camera operatorpresses the pause button at thatpoint to stop taping and end thescene.
4. Now you’re ready to shoot thenext scene. Leave the camera offuntil everyone is in place and readyfor the next shot. (This works bestif it’s within just a few minutes sothat the camera stays in pausemode.) When you press the record/pause button again to start record-ing, the next scene will be added onto the last one seamlessly. (If youtake a lot of time between scenes,the camera will shut off. Then whenyou play back your tape, you maysee flashes or glitches betweenscenes.)
5. Don’t shoot anything you don’twant in the final program. Repeatthe process of rehearsing and roll-ing tape only when everyone is pre-pared and ready to do his or her part.If people make mistakes, try to keepgoing because you can’t go back andretape scenes when you’re editing inthe camera. Use your group’s mis-takes or “out-takes” as learning toolsso you can all do better next time!

COMMUNICATIONS TOOLKIT • Video, Media & Technology – 141©2000 Michigan State University Board of Trustees.
ShootingTechniques• Shoot only as much of each sceneas you really need to get yourpoint across – no more, no less.
• “Match action” between shots orscenes. This means that if you areshooting a wide shot of a scene andthen you shoot a close-up or me-dium shot of the same scene, thepositioning of people or props mustbe the same. For example, if you’reshooting a wide shot of a group ofpeople and then the next scene youwant to shoot is a close-up of onethose people, be sure that theperson’s body positioning is exactlythe same for the close-up as it wasin the wide shot. Have you ever no-ticed mismatched shots in televisionprograms or movies? Just for fun,watch carefully when viewing tele-vision programs to see if the direc-tor or “continuity” person made surethat the action from one scene tothe next is carefully matched. Forexample, you might see an actor’sarm on the table in one shot, thenin the next shot it’s in his or herlap. This looks quite humorous in
dialogue sequences where there areseveral cuts back and forth betweenangles.
• Cutaways are another option foradding visual appeal and interest toyour tape. A cutaway is a shot thatis very different than what was inthe previous scene. For example, inone scene the viewer sees a youngperson on-camera talking about hisor her pet. In the next scene, theviewer sees a close-up of the animaland hears the voice of the youngperson talking about the pet. (To ac-complish this, the young personwould need to stay off camera butvery close to the microphone.)
• Remember that the sound or back-ground noise will cut off every timeyou press the pause button on thecamera to end a scene. If you’re in anoisy environment for one sceneand then a quiet one for the next,your tape will sound abrupt at thosepoints. Also, if you have music inone scene and pause the camerawhile you move into another scene(with or without music), the soundwill be choppy and clipped. If youwant to have music playing in ascene, have someone slowly fade themusic out as part of the scene be-
fore you pause the camera to endthe scene. It will sound more naturaland appealing.
• You can create simple transitionsbetween scenes while editing inthe camera. For example, use thefade in and out function on yourcamera when you want a softer inor out point to a scene.
You can also use the manual focusknob to “rack focus” in or out of ascene. A rack focus is when thescene either goes from being clearand in-focus to being blurred, orfrom blurred to in-focus.
Another transition is a “swish pan.”This is a very quick side-to-sidemovement of the camera either awayfrom the on-camera action or fromthe pan to the on-camera action. Aslower pan from one person or ob-ject to the on-camera action alsoworks as a softer transition betweenscenes. All of these transition effectscan help create a sense of changeor of time passing.
(See the “Shooting Your Videos” skillsheet on pg. 139 for more informa-tion on lighting, camera movementand sound.)
Video Editing Skill Sheet continued
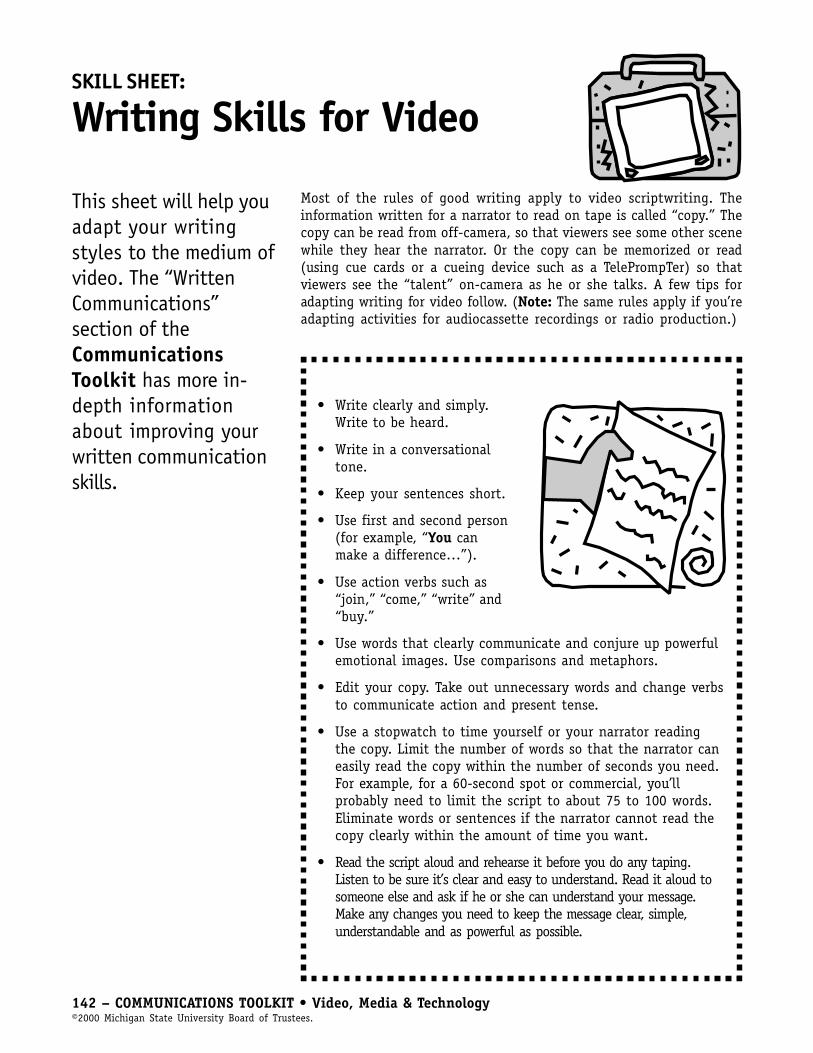
142 – COMMUNICATIONS TOOLKIT • Video, Media & Technology©2000 Michigan State University Board of Trustees.
SKILL SHEET:
Writing Skills for Video
Most of the rules of good writing apply to video scriptwriting. Theinformation written for a narrator to read on tape is called “copy.” Thecopy can be read from off-camera, so that viewers see some other scenewhile they hear the narrator. Or the copy can be memorized or read(using cue cards or a cueing device such as a TelePrompTer) so thatviewers see the “talent” on-camera as he or she talks. A few tips foradapting writing for video follow. (Note: The same rules apply if you’readapting activities for audiocassette recordings or radio production.)
• Write clearly and simply.Write to be heard.
• Write in a conversationaltone.
• Keep your sentences short.
• Use first and second person(for example, “You canmake a difference…”).
• Use action verbs such as“join,” “come,” “write” and“buy.”
• Use words that clearly communicate and conjure up powerfulemotional images. Use comparisons and metaphors.
• Edit your copy. Take out unnecessary words and change verbsto communicate action and present tense.
• Use a stopwatch to time yourself or your narrator readingthe copy. Limit the number of words so that the narrator caneasily read the copy within the number of seconds you need.For example, for a 60-second spot or commercial, you’llprobably need to limit the script to about 75 to 100 words.Eliminate words or sentences if the narrator cannot read thecopy clearly within the amount of time you want.
• Read the script aloud and rehearse it before you do any taping.Listen to be sure it’s clear and easy to understand. Read it aloud tosomeone else and ask if he or she can understand your message.Make any changes you need to keep the message clear, simple,understandable and as powerful as possible.
This sheet will help youadapt your writingstyles to the medium ofvideo. The “WrittenCommunications”section of theCommunicationsToolkit has more in-depth informationabout improving yourwritten communicationskills.

COMMUNICATIONS TOOLKIT • Video, Media & Technology – 143©2000 Michigan State University Board of Trustees.
Sample Video ScriptVideo scripts typically are sheets of paper divided down the middle. The left column is “Video” (what yousee) and the right column is “Audio” (what you hear).
Teens Tell AllVIDEO AUDIO
Fade in to medium shot of STEPHANIE ON-CAMERA:Stephanie in front of school Hello and welcome to our show, “Teens Tell All.” I’m Stephanie and
today I’ll be taking you on a video tour of Hazelton Middle School.That’s where I go, and I know a lot of kids who are anxious to tellyou what it’s like to go to school here. Well, it’s 7:55 on a coldNovember morning, and our first class starts in 5 minutes. We’dbetter get inside.
She walks out of shot toward frontdoor of school.
Shot in the hallway with lots of STEPHANIE VOICE-OVER: (MUST SPEAK LOUDLY DIRECTLY INTOkids milling around at lockers. MICROPHONE TO BE HEARD OVER BACKGROUND NOISE.)
This is the craziest part of middle school. We call it “lockermadness.” We have to get our books and things before every classand it seems like there’s never enough time.
Close-up of Mark, who’s beinginterviewed by Stephanie MARK:
(Mark explains in his own words his feelings about the little time hehas once he gets off the bus, gets in school and tries to get what heneeds from his locker in time to get to his first class on time. He willtry to make his answer about 30 seconds long.)
Stephanie on-camera outside STEPHANIE ON-CAMERA:her first class. You know, a lot of kids feel that way. Our days start off feeling kind
of crazy because we’re rushing and worried about being late forour first class. I wonder if they could start school even five minuteslater so we’d have time to slow down, say “hi” to our friends for aminute, and ease into our day...?
Bell rings and she turns and hurriedly walks into the classroom.
Writing Skills for Video Skill Sheet continued
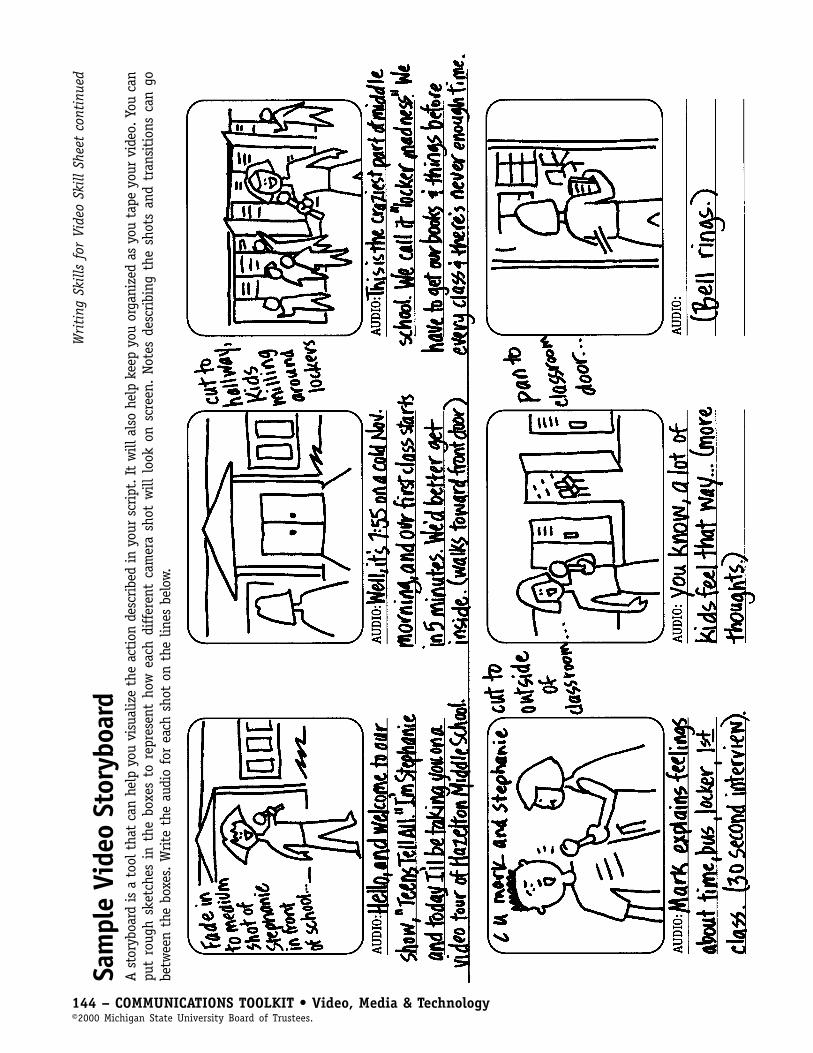
144 – COMMUNICATIONS TOOLKIT • Video, Media & Technology©2000 Michigan State University Board of Trustees.
Wri
ting
Ski
lls f
or V
ideo
Ski
ll Sh
eet
cont
inue
d
Sam
ple
Vide
o St
oryb
oard
A s
tory
boar
d is
a t
ool t
hat
can
help
you
vis
ualiz
e th
e ac
tion
des
crib
ed in
you
r sc
ript
. It
will
als
o he
lp k
eep
you
orga
nize
d as
you
tap
e yo
ur v
ideo
. You
can
put
roug
h sk
etch
es i
n th
e bo
xes
to r
epre
sent
how
eac
h di
ffer
ent
cam
era
shot
will
loo
k on
scr
een.
Not
es d
escr
ibin
g th
e sh
ots
and
tran
siti
ons
can
gobe
twee
n th
e bo
xes.
Write
the
aud
io f
or e
ach
shot
on
the
lines
bel
ow.
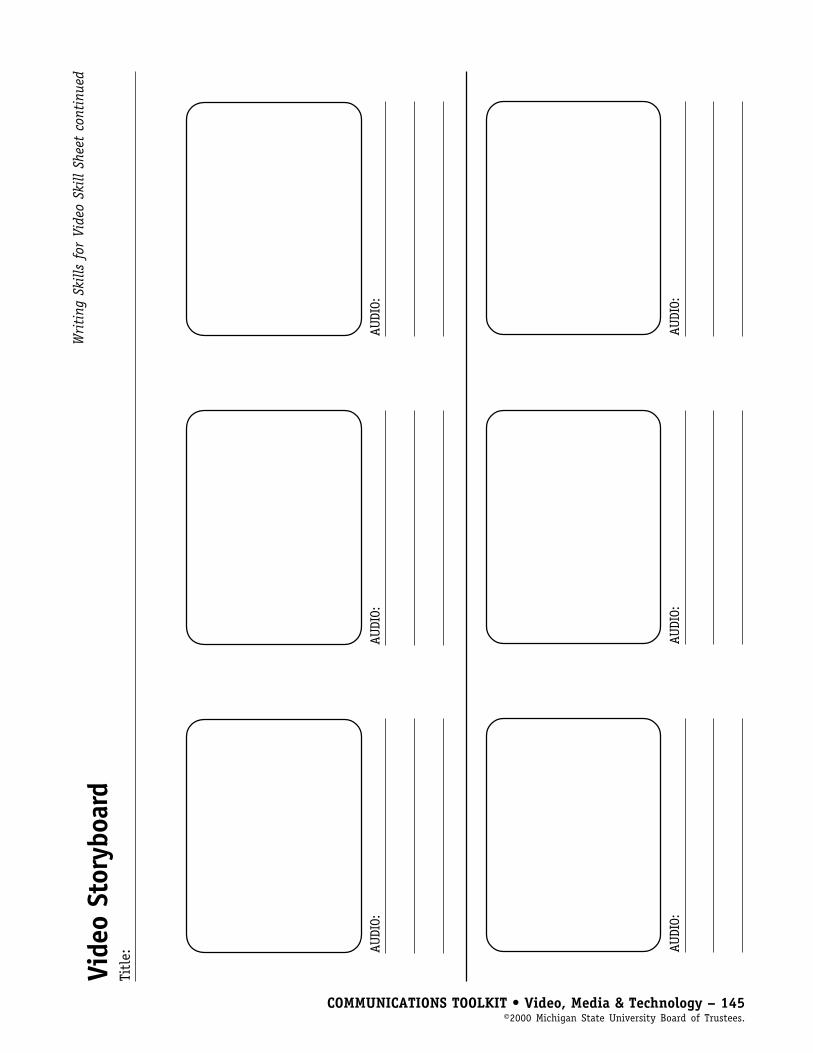
COMMUNICATIONS TOOLKIT • Video, Media & Technology – 145©2000 Michigan State University Board of Trustees.
Vide
o St
oryb
oard
Titl
e:
Wri
ting
Ski
lls f
or V
ideo
Ski
ll Sh
eet
cont
inue
d
AUDI
O:AU
DIO:
AUDI
O:
AUDI
O:AU
DIO:
AUDI
O:
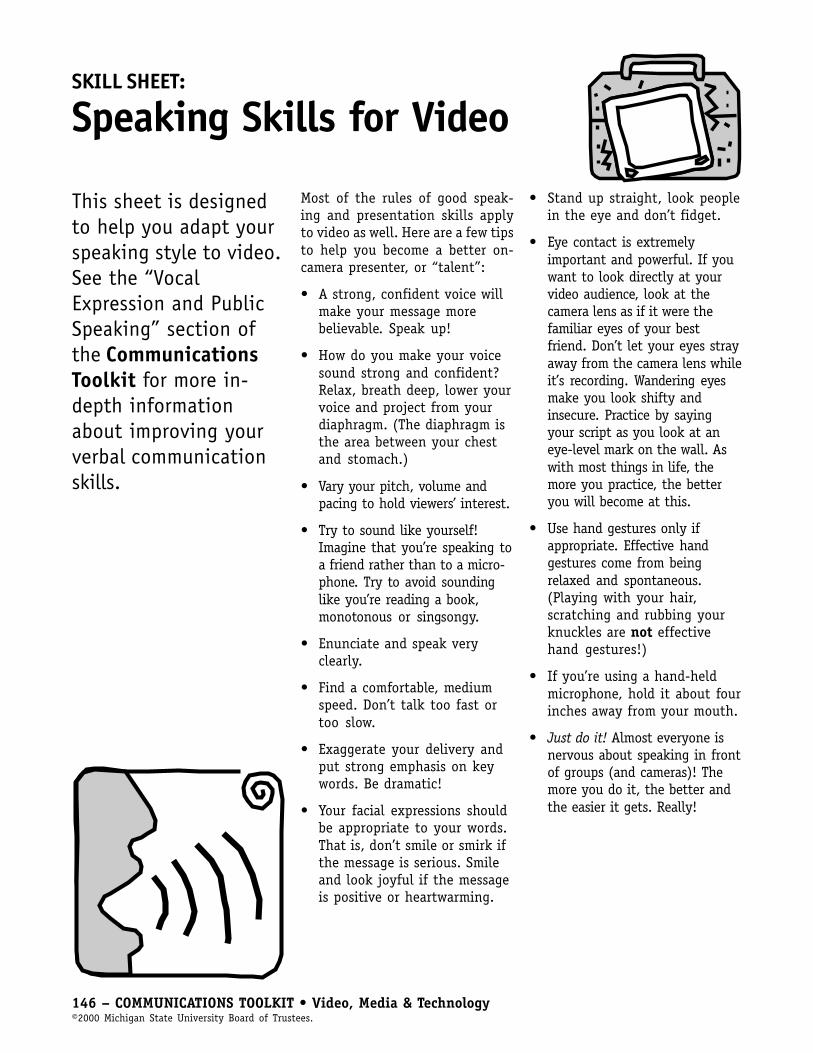
146 – COMMUNICATIONS TOOLKIT • Video, Media & Technology©2000 Michigan State University Board of Trustees.
SKILL SHEET:
Speaking Skills for Video
This sheet is designedto help you adapt yourspeaking style to video.See the “VocalExpression and PublicSpeaking” section ofthe CommunicationsToolkit for more in-depth informationabout improving yourverbal communicationskills.
Most of the rules of good speak-ing and presentation skills applyto video as well. Here are a few tipsto help you become a better on-camera presenter, or “talent”:
• A strong, confident voice willmake your message morebelievable. Speak up!
• How do you make your voicesound strong and confident?Relax, breath deep, lower yourvoice and project from yourdiaphragm. (The diaphragm isthe area between your chestand stomach.)
• Vary your pitch, volume andpacing to hold viewers’ interest.
• Try to sound like yourself!Imagine that you’re speaking toa friend rather than to a micro-phone. Try to avoid soundinglike you’re reading a book,monotonous or singsongy.
• Enunciate and speak veryclearly.
• Find a comfortable, mediumspeed. Don’t talk too fast ortoo slow.
• Exaggerate your delivery andput strong emphasis on keywords. Be dramatic!
• Your facial expressions shouldbe appropriate to your words.That is, don’t smile or smirk ifthe message is serious. Smileand look joyful if the messageis positive or heartwarming.
• Stand up straight, look peoplein the eye and don’t fidget.
• Eye contact is extremelyimportant and powerful. If youwant to look directly at yourvideo audience, look at thecamera lens as if it were thefamiliar eyes of your bestfriend. Don’t let your eyes strayaway from the camera lens whileit’s recording. Wandering eyesmake you look shifty andinsecure. Practice by sayingyour script as you look at aneye-level mark on the wall. Aswith most things in life, themore you practice, the betteryou will become at this.
• Use hand gestures only ifappropriate. Effective handgestures come from beingrelaxed and spontaneous.(Playing with your hair,scratching and rubbing yourknuckles are not effectivehand gestures!)
• If you’re using a hand-heldmicrophone, hold it about fourinches away from your mouth.
• Just do it! Almost everyone isnervous about speaking in frontof groups (and cameras)! Themore you do it, the better andthe easier it gets. Really!
COMMUNICATIONS TOOLKIT • Video, Media & Technology – 147©2000 Michigan State University Board of Trustees.
SKILL SHEET:
Graphics for Video
This sheet is designedto give you an idea ofhow video graphics canbe used to get amessage across andhow the design processworks. Read it withyour production team,then decide as a groupwho will be responsiblefor designing graphicsfor your video. See the“Visual Communicationand Graphic Design”section of theCommunicationsToolkit for more in-depth informationabout improving yourvisual communicationskills.
The “job” of avideo graphicVideo graphics can help reinforce:• The visual identity for a
product so it can be “pickedout of the crowd.”
• Where you need to go or callto find the product or service.
• An image for the product ormessage that is geared to atarget audience.
• Identification of the “talent” ifit is important to show names.
The DesignProcess1. Define the “design problem.”
Research and organize the keypoints you wish to communi-cate in the graphic.
2. Make “thumbnail” sketches or“roughs.”
3. Get group opinions.4. Produce final art. (Proofread
carefully!)5. Evaluate how well it worked.
Type Tips• Medium-weight, sans-serif and
thick serif typefaces read best.• Use small “chunks” of type at
a time – don’t overload thescreen with information.
• Use upper and lower case –not all upper case.
• Be sure type color and weightcontrasts well with the back-ground.
• Choose colors that reinforceyour message or product image.
• Use only one type “family” ifpossible.
• Avoid stacking type verticallyor diagonally if you wantmaximum readability.
Logos andSymbolsYou may wish to design a logo orsymbol to identify your product.A good logo or symbol:• Has positive associations.• Provides quick and easy
information.• Can be reduced without losing
effectiveness.• Works in one color.• Uses negative space well.• Has “heavy” weight for good
contrast with the backgroundand other design elements.
• Shows action or flow (upwardsand to the right is the mostpositive direction.)
And Finally…• Keep artwork proportional to
the video camera image area.• Be sure to leave enough of a
border around the artwork sothe paper edge doesn’t showin the shot.
148 – COMMUNICATIONS TOOLKIT • Video, Media & Technology©2000 Michigan State University Board of Trustees.
SKILL SHEET:
Interviewing Skillsfor VideoWhen you are beinginterviewed:• Prepare carefully. Anticipate and be prepared to
answer the questions you’ll probably be asked.
• Practice answering questions out loud before theinterview. This will help you make sure you likethe way your answers sound. Try to keep youranswers to 30 seconds or less.
• Speak at a pace that is neither too fast nor tooslow. Find a medium pace that sounds enthusiasticbut not hyper.
• Speak up, articulate each word and don’t mumble.
• Be brief, get to the point quickly and don’t ramble.
• Listen carefully to the interviewer’s questionsand reactions to your answers. Don’t fall intothe trap of thinking about what you’re going tosay next instead of listening.
• Maintain eye contact with your interviewer.“Speak” with your eyes and facial expressions.
• Appear confident and relaxed. The best way toaccomplish this is by being prepared and bypracticing.
When you’re theinterviewer:• Prepare carefully. Gather some background infor-
mation about the person you’re interviewing andprepare questions that help ensure you’ll getinteresting answers on tape.
• Establish a connection or rapport with theperson you’re interviewing. Work to gain hisor her trust and help him or her feel at ease.
• Start out with general questions and thenmove toward more specific, detailed questions.
• Ask open-ended questions that requirelonger answers. Avoid questions with “yes”or “no” answers.
• Whenever you’re confused about a responseto a question, don’t be afraid to ask forclarification. If you’re confused, chances areviewers will be confused, too.
• Listen carefully and maintain eye contact.Give the person enough time to answer yourquestions. Don’t jump in and try to answerquestions for the person you’re interviewing.Be quiet, nod your head and react with youreyes and facial expressions to what he or sheis saying. (Don’t let your voice “run over” theinterviewee’s voice.)
COMMUNICATIONS TOOLKIT • Video, Media & Technology – 149©2000 Michigan State University Board of Trustees.
SKILL SHEET:
Make the Media Your Partner
Young people who are interested in developing mediarelations skills have the potential to succeed at gettingmedia attention, because the fact that they are doingthe communicating is new and unique in itself. It’s im-portant, though, that young people have and use thebasic skills they need to be successful. By following theseguidelines, young people can increase the chances ofthe media becoming a partner in helping communicatethe messages kids need others to hear, read or see.
Determine Your Audience, ThenFind the Best Media Outlets toReach ThemOnce you know who you most need to communicatewith, identify the media outlets best suited to helpyou get your message to that audience. For example, ifkids are your primary audience, then you should have alist of all media outlets that cater to youth audiences.Some daily and weekly newspapers have special sec-tions for kids and young people; some broadcast out-lets have certain times of the day or special programswhen their broadcast offerings cater primarily to kids.Use the same process if your audience is parents, teach-ers, or other groups. For general news that affects thewider community, most media outlets will be yourtarget.
Identify the Outlet’s MostImportant Decision-MakerRemember, you’re looking for the person who eitherwrites about your area of interest or edits the sectionthat features your area of interest. Make a list of spe-cific contact people (editors and reporters) for each mediaoutlet that includes:• Contact person’s name• Accurate mailing address• Phone number• Email address• Title• Daily, hourly and weekly deadlines• Best times to reach or call the person
• The way the person prefers to receive informationfrom you
Much of this information can be gained from a phonecall or visit once you’ve identified a specific contact.
Determine the News Value of YourStoryBefore contacting media outlets or specific media con-tacts, make sure your story is news. Ask yourself whetherthe story is timely, local, important to the larger com-munity, will improve people’s lives, is unusual and rep-resents conflict. These are the things that determinewhat is and isn’t news. The most newsworthy story isthe one that meets at least one, and preferably more, ofthese criteria.
Just How Newsy Is It?• Your youth group had a meeting. No news
value if a routine meeting.
• Your youth group will have a meeting. Littleor no news value except to participants. Bestplaced in your group’s newsletter and maybein the community calendar, depending on thesize of your group.
• Your youth group is calling a meeting withcity council representatives to discuss theneed for a youth center. Significant newsvalue because of the importance of the topicand the fact that young people are callingthe meeting.
• Two members will represent your club at astate or national meeting. May be of inter-est to local media, but would be of moreinterest depending on purpose of conferenceor role of the two members at the conference.
(For more information on deciding news value, see the “NewsWriting” skill sheet on pg. 20.)

150 – COMMUNICATIONS TOOLKIT • Video, Media & Technology©2000 Michigan State University Board of Trustees.
Plan Your PitchBefore picking up the phone to make your media con-tact, you should:
• Write out your critical points – the 5 W’s and theH (who, what, when, where, why and how), andbe sure to localize the topic or issue.
• Identify others who can speak on the topic andbe interviewed, if needed.
• Anticipate the questions. Once you’ve answeredthe who, what, when, where, why and how, askyourself what other questions this informationmight generate and be prepared to answer them.For instance, you might be asked questions suchas, “Can you provide proof of your statements?”“Who else is affected by or agrees with yourstatements?” and “What, if any, time framesaffect your story?”
• Have materials available you can share immedi-ately if asked, such as a news release, fact sheetsand other background information.
• Practice your pitch to build your confidence inyour ability to get your key ideas acrossquickly.
Make the Pitch• Make sure you are respecting the media outlet’s
deadline times. It is best to call or phone afterdeadline or more than three hours before dead-line to be sure the reporter or editor has time tolisten to your pitch.
• Be brief! Try to craft your information deliveryto take no more than two minutes.
• Be accurate and factual. Never lie to the media. Ifyou make a mistake, be sure to follow up with thereporter or editor quickly to clarify your error. Butit’s best to be prepared to avoid mistakes.
Be AvailableProvide the media with the names and phone numbersof people who can talk to them about your story, dayor night. If there are specific times when a contact canbest be reached, indicate that information when com-municating with your media contacts. Once you’ve in-vited the media to be involved with your story, be sureyou or someone else can be available to help them getall the information they need.
Say Thank You!When you get great media coverage for your story, takethe time to thank the reporter and the editor for thevisibility they gave your issue or story. This simple cour-tesy will help strengthen your media relationships andmake you stand out. Surprisingly, reporters and editorsdon’t hear “thank you” enough when they write greatstories, so your courtesy would be memorable.
Make the Media Your Partner Skill Sheet continued
COMMUNICATIONS TOOLKIT • Video, Media & Technology – 151©2000 Michigan State University Board of Trustees.
Signature
Date
Parent/Guardian Signature
Date
SKILL SHEET:
Safety Rules for Online Time
� I will not send by email or chat,or post on a Web page, personalinformation such as my address,telephone number, parents’ orguardians’ work address ortelephone number, the name andlocation of my school or myphotograph without my parents’permission.
� I will tell my parents or othersupervising adult right away if Irun into any information thatmakes me feel uncomfortable.
� I will never agree to get togetherwith someone I “meet” onlinewithout first checking with myparents or guardians. If myparents agree to the meeting, I willbe sure that it is in a public placeand bring my mother, father orguardian along.
� I will not answer any messages thatare mean or in any way make mefeel uncomfortable. I will show themessage to my parents or othersupervising adult right away.
� I will talk with my parents orguardians about setting up rulesfor going online.
� I will never use bad language orsend mean messages online.
� I will never share my passwordwith anyone but my parents orguardians.
� I will not download or copy anyfiles, games or software to mycomputer without permissionfrom a supervising adult.

152 – COMMUNICATIONS TOOLKIT • Video, Media & Technology©2000 Michigan State University Board of Trustees.
ICEBREAKER:
CommunicationTreasure HuntFOCUS:Building friendships and groupcohesiveness
PURPOSE:• To get kids feeling comfort-
able with one another• To assess the group’s experi-
ences in various areas ofcommunication
• To explore communicationareas the group would like tolearn more about
MATERIALS:� “Find Someone Who…” handout
(on pg. 153; one per person)� Pencils (one per person)
SETTING:Any
TIME:10–15 minutes
PROCEDURE:Before the meeting:Review the “Find Someone Who…” handout and decide if you want tomake any additions to the handout to accommodate the size of yourgroup.
During the meeting:1. Tell the kids they’re going on a human “communication treasure
hunt.” Pass out pencils and the “Find Someone Who…” handoutand tell them they have about 10 minutes to find people in thegroup who fit the description listed. Tell them they can use eachperson only once. (Unless your group is very small.)
2. After about 10 minutes, stop the search and have the kids sit in acircle. Ask if anyone found people for all the descriptions. Askthem to share some of the special things they found out about thecommunication experiences of people in the group. (For example,ask whether anyone found a person who has sent an email mes-sage. If someone has, let that person talk about using email. Findout things like who they sent the message to, what system theyused, how hard it was.)
3. Point out that your group has lots of “resource people” who havehad a wide variety of experiences in the various communicationareas. (If very few young people have had experiences in the areaslisted, ask the group if they’re interested in learning more aboutsome of the areas.) Use this activity as a springboard into specificareas of communication that your group would like to explore.
(Adapted with permission from the “A Human Treasure Hunt” icebreaker in 4-H 1492, Inner Space: Interact-ing with Others, © 1991 Michigan State University.)

COMMUNICATIONS TOOLKIT • Video, Media & Technology – 153©2000 Michigan State University Board of Trustees.
COMMUNICATION TREASURE HUNT HANDOUT:
Find Someone Who…Find someone in your group who matches these descriptions. Fill in his or her name and the other informa-tion that’s requested. Remember, you can only use each person once.
Find someone who… Name:� Has made a speech in front of a group.
Group name:
� Has created a flier or poster.
Topic:
� Has written a newspaper article.
Headline:
� Has been on television.
Program name:
� Has helped friends resolve a conflict.
Outcome:
� Has been part of a discussion at a meeting.
Discussion topic:
� Has used a computer to draw a picture.
Picture subject:
� Has written a letter to the editor of a newspaper.
Letter topic:
� Has sent an email (electronic mail) message.
Message recipient:
� Has introduced a guest or speaker at a banquet or event.
Guest’s name:
� Has written a letter to someone famous.
Letter recipient:
� Has written a letter to a friend.
Letter recipient:
� Has been involved in making a video.
Video title or subject:
� Has used a computer to write a paper for school.
Paper topic:
154 – COMMUNICATIONS TOOLKIT • Video, Media & Technology©2000 Michigan State University Board of Trustees.
ICEBREAKER:
Video Introductions
FOCUS:• To help the group get to know
each other• To help the kids begin to feel
comfortable seeing or hearingthemselves on tape
PURPOSE:• To give kids the chance to
introduce themselves to thegroup
• To incorporate technologyinto the introduction process
• To give participants theopportunity to see or hearthemselves on tape
MATERIALS:� Camcorder and monitor or
audiotape recorder� Video or audiotape
SETTING:Any
TIME:10–15 minutes
PROCEDURE:Before the meeting:This activity puts young people in situations where other kids in thegroup will respond to their presentation skills or give feedback. It shouldbe done only when group members respect each other and are willingto abide by the following guidelines for respectful behavior. If you chooseto use this activity, review these points with your group in advance.• Listen carefully to other people’s presentations.• Provide feedback in a positive way.• Don’t be rude, critical or hurtful.• Be aware that everyone has differing abilities.• Be considerate of other people’s feelings.• Follow the Golden Rule: Treat other people the way you would like
to be treated.
During the meeting:Note to Leaders: This is written as a videotape activity. If you areusing an audiocassette recorder, the procedure is the same, except thatyou’ll be using different equipment.
1. Have the group sit in a circle. Explain briefly how to turn theequipment on and off and how to pause the tape. This will helpthe participants begin to feel comfortable handling the equipmentthemselves. Tell the group that everyone will have a chance totape and be taped.
2. Start the group off by asking the person next to you to videotapeyou. Talk directly to the camera and introduce yourself by saying afew things about your interests or hobbies. Then videotape theperson who videotaped you doing the same thing.
3. Continue passing the camera around the circle until everyone hashad the chance to tape and be taped.
4. When everyone is on tape, rewind the tape and play it backthrough the television or monitor. Encourage a quick round ofapplause after each person appears on camera to help the youngpeople feel good about what they did.
COMMUNICATIONS TOOLKIT • Video, Media & Technology – 155©2000 Michigan State University Board of Trustees.
ACTIVITY:
Create a Video Treatment
FOCUS:Building communication andconceptualizing skills
PURPOSE:• To help kids learn to work as a
team to create a video plan or“treatment.” (You don’t haveto actually create the videosunless your group wants to.Simply working on the plan-ning process is a good exercisefor the kids!)
• To give kids a chance topractice their writing skills
• To give kids a chance topractice their presentationskills
MATERIALS:Paper and pens or pencils (oneper person)“Create a Video Treatment”handout (on pg. 157; one perperson)”What I Learned” self-evaluationform (on pg. 8; one per per-son)
TIME:30–60 minutes (depending on thesize of your group)
SETTING:A comfortable room with space forthree- to five-person teams
PROCEDURE:Before the meeting:This activity puts young people in situations where other kids in thegroup will respond to their presentation skills or give feedback. It shouldbe done only when group members respect each other and are willingto abide by the following guidelines for respectful behavior. If you chooseto use this activity, review these points with your group in advance.• Listen carefully to other people’s presentations.• Provide feedback in a positive way.• Don’t be rude, critical or hurtful.• Be aware that everyone has differing abilities.• Be considerate of other people’s feelings.• Follow the Golden Rule: Treat other people the way you would like
to be treated.
During the meeting:1. Explain to the young people that most film and video programs begin
with a “treatment” (a plan or concept). Video treatments are usuallycreated by a team of people who share different perspectives on atopic. Review the “Video, Media and Technology Planning Form” (onpg. 136). Then share something like the following with the groupabout what video plans or treatments include:
Video treatments must specify the objective, or message you’retrying to convey to your audience. As you develop the treatment,you must work out the concept, or information on how you plan toapproach the video. This includes the kinds of images, interviews,spokespersons, story line, music, historic photos and more that youwill assemble to craft your message effectively. At this stage, youshould try to stay open to creative ideas. (If you’re working on amock or practice video treatment, the possibilities for what you canplan are virtually limitless!)
Ask yourself what the appropriate length is for your video to conveyyour message and meet the needs of your target audience. You alsomust envision the possible uses for your finished video. Think aboutwho will use it or see it. Will it air on television or be shown atschool, club or group meetings? Think about all the ways in whichthis video could be used.
2. Divide the group into three- to five-person teams. Pass out pencilsor pens and the “Create a Video Treatment” handout.
3. Tell the kids they will have 30 to 40 minutes to create a video treat-ment. You can either assign them all the same treatment to work on,such as “create a video that helps people get to know our school orclub,” or let each group decide what they want to do. (Allow extra

156 – COMMUNICATIONS TOOLKIT • Video, Media & Technology©2000 Michigan State University Board of Trustees.
time if they will choose their own topics.) Remind them that theymay need to brainstorm on a variety of topics to get started.
LEADERS’ HINT: Have the kids follow these rules as they do theirbrainstorming:Rule 1: Do not judge ideas!Rule 2: It’s okay to be far-out!Rule 3: Think of as many ideas as you can.Rule 4: Piggyback on someone else’s ideas.
You may want to write these rules on a sheet of newsprint anddisplay it where all the kids can see it.
4. Encourage the groups to work as teams and explain that they shouldtry to reach consensus (group agreement) on their decisions beforefilling in their forms. Tell them to write their ideas down carefully andcompletely so someone else reading their treatment would be able tounderstand it.
5. Explain that when time is up, each group will be asked to presenttheir video treatment to the whole group. Encourage each teammember to present a piece of the treatment plan. Explain thatthey shouldn’t simply read from their plan, but should embellishand give more detail than may be given in the written plan.
6. After the teams have finished their video treatments, call theteams together and ask each team to share their plans with thewhole group. After each team has presented their treatment, givethe other teams a chance to ask questions. Encourage positivefeedback and create a fun, nonthreatening environment.
TALKING IT OVER:After all the presentations have been completed, ask the kids the follow-ing questions:
1. What are the advantages of working as a team to create a videoplan or treatment?
2. What are some of the disadvantages?
3. What was it like trying to visualize what your video might looklike? Was it easy or hard to do? Why?
4. What did you find interesting about this activity?
5. What were some of the similarities and differences among thevideo treatments? (The answer to this question can be especiallyinteresting if all the groups worked on the same topic.)
6. If this was an imaginary project: Would your video treatment bedifferent if you were actually going to produce the video? If so,how?
7. If this was an imaginary project: Are you interested in using thesame process to begin planning a real video project? (If the answeris yes, set a date and get started!)

COMMUNICATIONS TOOLKIT • Video, Media & Technology – 157©2000 Michigan State University Board of Trustees.
VIDEO TREATMENT HANDOUT:
Create a Video Treatment
A treatment is the first step in planning a video project. Work with your group to think through andclarify the following points.
OBJECTIVE:(What’s your message?)
AUDIENCE:(Whom are you trying to reach?)
CONCEPT:(What approach will you take?)
LENGTH:(How long should the video be?)
USES:(How will this video be used?)

158 – COMMUNICATIONS TOOLKIT • Video, Media & Technology©2000 Michigan State University Board of Trustees.
ACTIVITY:
Create a Commercial
FOCUS:Building communication skills
PURPOSE:• To introduce kids to the art and
technology of video production• To give kids opportunities to
practice writing and speakingskills
• To give kids the opportunityto work in teams
• To give kids opportunities forcreative expression
MATERIALS:Video camera/camcorder (oneis enough but one per group isbest)Video cassette recorder (VCR)and monitorBlank videotapes“Writing Skills for Video” skillsheet (on pg. 142; one perteam)PaperPencilsNewsprint or other large paperAssortment of colored markersMasking tapePopcorn (optional)”What I Learned” self-evaluationform (on pg. 8; one per person)
TIME:90–120 minutes
SETTING:A room large enough for smallgroups to spread out, make noiseand work comfortably; break-outrooms or other areas for small groupswork best; an extra, quiet room ifyou have only one camcorder
PROCEDURE:Before the meeting:1. This activity puts young people in situations where other kids in
the group will respond to their presentation skills or give feed-back. It should be done only when group members respect eachother and are willing to abide by the following guidelines forrespectful behavior. If you choose to use this activity, review thesepoints with your group in advance.• Listen carefully to other people’s presentations.• Provide feedback in a positive way.• Don’t be rude, critical or hurtful.• Be aware that everyone has differing abilities.• Be considerate of other people’s feelings.• Follow the Golden Rule: Treat other people the way you would
like to be treated.
2. Read through the information related to video provided in “WhatLeaders Need to Know” and the skills sheets in this section tolearn more about video production terms; planning; shooting andediting techniques; and writing, speaking, graphics skills for video.A handout on video production roles is also available on page 165.
3. Decide whether you’ll have the group produce short commercialson serious issues they’re concerned about, or give them a looserrein to have fun and be wildly creative. (Both options work verywell. Consider letting the group decide which direction to pursue.)
4. Make enough copies for each team of the “Writing Skills for Video”skill sheet including the sample script and storyboard forms andextra blank storyboards, or provide blank paper for making scriptsand storyboards.
5. Be sure your video camera batteries are charged, that all equip-ment is in good working order and that you or someone else isvery comfortable using the equipment.
During the meeting:1. Explain to the kids that they will form production teams to create
television commercials. Explain that most commercials are 15, 30 or 60seconds long, and that they quickly, succinctly and creatively sell aproduct, service or idea. Briefly explain the principles of script writing,speaking and graphics for video. (See the skill sheets on pp. 142, 146and 147.)
2. Have the group divide into four- to six-person teams. Explain theteam approach to video production and that team members willhave to decide what specific responsibilities they want to accept.
COMMUNICATIONS TOOLKIT • Video, Media & Technology – 159©2000 Michigan State University Board of Trustees.
Tell them that some possibilities are to write the script, be thedirector or producer, or be part of the on-air talent.
3. If you’re going to let the teams decide the focus of their videos,tell them to decide as a team whether they want to create a publicservice announcement on a serious issue such as teen violence orpregnancy prevention, or come up with a commercial for a product.
4. Hand out blank paper for script writing, “Writing Skills for Video”skill sheets with storyboard forms, paper and pencils to each team.Tell the teams they’re working “on deadline”; they’ll have a setamount of time (45 or 60 minutes – your choice) to plan, write,rehearse and tape their videos.
5. If each team has a camera, send them off to quiet spots to planand produce their videos. If you only have one camera, set up thecamera in a “studio” (a quiet room) and have the teams take turnsgoing into the studio when they’re ready for taping.
6. After all the teams have taped their videos, have them gather inthe larger group. Have the teams take turns playing their videosfor the whole group. Ask a representative from each team tointroduce their tape and briefly explain what the issue or productis that they are “selling” in the commercial. Provide popcorn if youwant to create a fun “premiere” atmosphere. Encourage clappingand positive feedback after each commercial is shown.
TALKING IT OVER:After all the videos have been premiered, encourage the kids to sharehow they felt about the experience and what they learned from it. Askthe group the following questions:
1. What did you enjoy most about this experience?
2. What things were most challenging?
3. Did anything surprise you about what it’s like to work on a teamto create a videotape?
4. Would you do anything differently if you were to do it over again?
5. Are you interested in working on other video projects in thefuture? If so, what kinds of things would you like to do?
TRY THIS, TOO:Check out the “Combining and Synthesizing” activity in Outer Space:Discovering the Inventor in Me (4-H 1490), which is available for purchasefrom the Michigan State University Bulletin Office, 10B Agriculture Hall,East Lansing, MI 48824-1039. The activity has kids combine two unrelatedobjects, like a tennis ball and a shoe, to create a totally new and different“product.” After the teams have created their products, have them createcommercials to advertise them.
If your group is interested in creating a video project around a publicservice issue, contact your local television station and explore thepossibility of having them work with your group to get their videoproject aired. See the “Make the Media Your Partner” skill sheet on page149 to learn more about how to work effectively with the media.
No VideoEquipment?If you don’t have access to avideo camera (or just want tostart off with a simplified ac-tivity), use an audiocassetterecorder to do this activity.Talk about radio commercialsinstead of television. Explainto the kids that they will usetheir voices, sound effects,music, and more to create acommercial. No need to worryabout the visuals or pictureswith this version!
160 – COMMUNICATIONS TOOLKIT • Video, Media & Technology©2000 Michigan State University Board of Trustees.
ACTIVITY:
Create a Talk Show
FOCUS:Building communication skills
PURPOSE:• To give kids the opportunity
to create a mock televisiontalk show
• To help kids develop interview-ing skills
• To give kids the chance to beinterviewed on tape andcritique their own performances
MATERIALS:Video camera/camcorder (oneis enough but one per group isbest)Tripods (optional)Hand-held microphones(optional)Video cassette recorder (VCR)and monitorBlank videotapes (one perteam)PaperPencils (one per person)“Interviewing Skills for Video”skill sheet (on pg. 148; oneper person)“What I Learned” self-evaluationform (on pg. 8; one per person)
TIME:45 minutes (longer for large groups)
SETTING:A room large enough for groups tospread out and work comfortably,and a separate, quiet room forvideotaping
PROCEDURE:Before the meeting:1. This activity puts young people in situations where other kids in
the group will respond to their presentation skills or give feed-back. It should be done only when group members respect eachother and are willing to abide by the following guidelines forrespectful behavior. If you choose to use this activity, review thesepoints with your group in advance.• Listen carefully to other people’s presentations.• Provide feedback in a positive way.• Don’t be rude, critical or hurtful.• Be aware that everyone has differing abilities.• Be considerate of other people’s feelings.• Follow the Golden Rule: Treat other people the way you would
like to be treated.
2. Read through the activity and familiarize yourself with the “Inter-viewing Skills for Video” skill sheet. Make enough copies of it todistribute to your group. You may also wish to review the informationrelated to video provided in “What Leaders Need to Know” and theskills sheets in this section to learn more about video productionterms; planning; shooting and editing techniques; and writing,speaking, graphics skills for video. A handout on video productionroles is also available on page 165.
3. Be sure your video camera batteries are charged, that all equipment isin good working order and that you or someone else is very comfort-able using the equipment. Kids love using hand-held external micro-phones for interviews, so use them if you have them. You will need tohave one person per camera to serve as camera operator. Don’t forgetthat teen leaders make great videographers!
Leader’s Hint: This activity can be as simple or as complex as you and yourgroup want to make it. For example, the kids may want to create sets,costumes, masks and graphics, or use music to add fun and creativity tothe experience.
During the meeting:1. Explain to the group that they will each have the opportunity to
be the interviewer and the guest on a television talk show thatthey will create. Tell them that they will need to decide whetherthey will portray themselves, another person (such as a politician,sports figure or actor) or a completely fictional character. Askthem to think about what television talk shows typically look likeand to be creative as they plan and design theirs.

COMMUNICATIONS TOOLKIT • Video, Media & Technology – 161©2000 Michigan State University Board of Trustees.
2. Distribute the “Interviewing Skills for Video” skill sheet and brieflydiscuss the key points. Explain that their interviews will be donein a television talk show type setting. The interviews will help toestablish who the guest is and explore interesting things aboutthe guest. Each interview should be about 2 minutes long.
3. Ask the kids to choose a partner (preferably someone they don’tknow very well) and decide who will be the interviewer first. Givethem about 10 minutes of “think time” for the guests to decide ontheir characters and for the hosts to develop questions for the inter-view. Both people need to prepare to be the interviewer and the guestbecause they will switch roles.
4. Have the teams take turns videotaping their interviews in the “studio”(a quiet room) so the other teams can’t see or hear the taping sessions. Ifyou have several cameras, set up several taping areas to save time.Give both partners a chance to be the host (interviewer) and theguest. Remember to limit each interview to 2 minutes.
5. When all of the teams have been taped, call the whole group togetherand distribute the “What I Learned” self-evaluation forms. Tell thekids that when their segments are shown, they should watch them-selves and make a few quick notes on their handout. (Tell them thatthis self-evaluation is for their eyes only. It is just a way to help themfocus on and think about their own presentation and interviewingskills, and to identify possible areas of improvement.)
6. Play back the interviews one at a time. After each interview, haveone of the partners ask the whole group to first guess whether thecharacters are “fact or fiction” (real or made-up) and then to guesswho they are supposed to be. Encourage clapping and positivefeedback after each segment.
TALKING IT OVER:After all the interviews have been aired, ask the group the followingquestions:1. Did you enjoy the experience? Why or why not?2. Which did you enjoy best – being the interviewer or the guest?3. Did anything surprise you about how you looked and sounded on
tape?4. What kinds of real-life situations might you find yourself in where
you are either the interviewer or the one being interviewed?5. Did you learn anything new about being in these kinds of situations?
TRY THIS, TOO:Your group may be interested in exploring other video and television pos-sibilities. For example, many youth groups produce television talk showsthat air on local cable access stations. (Cable access stations are requiredby law to provide equipment, training, studios and air time to local groupsthat want their voices heard through television in the community.) Yourgroup may want to produce shows that explore issues that concern kidstheir age, promote community activities for kids, or do something you’venever thought of! See the “Make the Media Your Partner” skill sheet onpage 149 to learn more about how to work effectively with the media.
No VideoEquipment?If you don’t have access to avideo camera (or just want tostart off with a simplified ac-tivity), use an audiocassetterecorder to do this activity.Talk about using their voices,sound effects, music, andmore to give clues about whois being interviewed! No needto worry about the visuals orpictures with this version!
162 – COMMUNICATIONS TOOLKIT • Video, Media & Technology©2000 Michigan State University Board of Trustees.
PROJECT:
Get Real!Produce a DocumentaryFOCUS:Building communication skills
PURPOSE:• To increase kids’ knowledge
and experience in videoproduction
• To give kids experience produc-ing a documentary
• To help kids produce a video-tape that can be used as aproject
• To give kids the opportunityto express themselves increative ways
• To give kids the opportunityto work in teams to completea task
MATERIALS:Video camera/camcorderBlank videotapes“Video Editing” skill sheet (onpg. 140; one per person)“Writing Skills for Video” skillsheet (on pg. 142; one perperson)“Video Production Roles”handout (on pg. 165; one perperson)PaperNewsprint (large paper) andmarkersPens or pencils (one per person)Paper“What I Learned” self-evaluationform (on pg. 8; one per person)
PROCEDURE:Before the meeting:1. Read through the information related to video provided in the intro-
duction and skills sheets in this section to learn more about videoproduction terms; planning; shooting and editing techniques; andwriting, speaking and graphics skills for video. A handout on videoproduction roles is also available on page 165. The “Video Editing”skill sheet will help familiarize you with how to edit in your camera.
2. Read the “How to Brainstorm” information found on page 5 andfamiliarize yourself with the process.
3. Make enough copies for each team of the sample script andstoryboard forms and extra blank storyboards, or provide blankpaper for making scripts and storyboards.
4. Be sure your video camera batteries are charged and that allequipment is in good working order. You or someone else shouldbe very comfortable using the equipment.
During the meeting:BRAINSTORMING1. Explain to the group that they will be working together to produce a
documentary. A documentary presentation is a film or video thatshares information or tells a story of real people and situations. (Adocumentary typically uses no actors or rehearsed lines.) Ask thegroup to brainstorm as many ideas for their documentary as possible.If they need help getting their creative juices flowing, here are somepossibilities to help them get started:• Our Community: Is There Enough for Kids to Do?• Love/Hate: What Kids Think About School• How to Be a Better Parent: A Kid’s Perspective• How to Be a Better Teacher: Kids’ Advice for Teachers• Public Art in Our Community: Where Is It? What Does It Mean?• The History of Our Community• The Story of Our Town’s Oldest Citizen• The Power of Computers: How Are They Being Used in Our
Community?• A Day in the Life of a Dog• A Day in the Life of a Student at (Your) School• What Kids Can Learn Through 4-H• We’re Off to the Fair: The Experiences of (Any) Club

COMMUNICATIONS TOOLKIT • Video, Media & Technology – 163©2000 Michigan State University Board of Trustees.
• Are We Safe? The Real Story About Violence in Our Community• On the Job: A Look at (Any) Profession
After spending 15 to 30 minutes brainstorming and discussing ideas, helpthe group choose one topic that they’re all interested in working on. If thegroup cannot reach consensus, they may need to vote or pull a topic froma hat.
PLANNING2. Have the young people work together to plan their documentary.
They’ll need to talk about and decide on the following:
• What are the “big ideas” or questions they’d like to answer in theirvideo? (For example, if the subject is violence in the community,the areas that they might choose from are violence against kids,violence by kids, real and perceived threats, how violence isperpetuated, violence in the media or how kids and others can helpincrease the peace and stop the violence in their communities.)It’s best to focus on three or four main ideas rather than to tryto say everything there is to say about a topic.
• What kinds of people or perspectives should they include in thevideo to help share information and tell the story? (For example, ina video about violence, the young people could interview a localpolice officer or sheriff, crime victims, parents of crime victims,mall security guards, criminal justice people, prevention-focusedexperts who have ideas about stopping violence, and, of course,other young people.)
• Should the video include narration or a voice-over to help tellthe story? On- or off-camera narration can help bridge ideas andsettings. If there will be narration, who will write it and whowill say it? Will they say it on or off camera? Where within theoverall documentary will it be best to add narration?
PRODUCTION ROLES3. Distribute the “Video Production Roles” handout and review it
with the group. Have the group decide which jobs or roles eachperson will accept. If your group is small, each person may need totake on several roles.
SCRIPTING AND STORYBOARDING4. All film-making and video production requires careful planning.
Some producers create outlines. Others create scripts or story-boards. All of these are tools to help producers put ideas on paperand create a plan for getting the film or tape completed. Yourgroup can choose any of these options. Hand out blank paper forscript writing or outlines, the “Writing Skills for Video” skill sheetscontaining storyboard forms, and paper and pencils to your group.
Typically, in documentary production, a complete and detailedoutline is created and then all video interviews and scenes are shot.Afterwards, the writer or editor looks at everything on tape anddecides how the many pieces can be put together – along with narra-tion, music and graphics – to present the story effectively. If you
TIME:At least one or two planningmeetings and a day or two forshooting scenes; a follow-upmeeting is needed to view anddiscuss the final product andprocess
SETTING:The planning meeting can be inany quiet room large enough toaccommodate your group. Thevideo shoots will most likely takeplace out in the community,wherever the group decides willwork best for their production.
164 – COMMUNICATIONS TOOLKIT • Video, Media & Technology©2000 Michigan State University Board of Trustees.
have access to editing equipment (many local cable access companieswill provide people with free training and equipment), that’s how youcan proceed. For a more simplified project, “editing in the camera” isan option. (See the “Video Editing” skill sheet on pg. 140.) When thistechnique is used, the program is complete when you finish shootingthe last scene. (Consider using editing in the camera as an introduc-tory experience with documentary and other video production. If thistechnique piques your group’s interest, perhaps they can move intomore advanced projects that involve editing and post-productionwork. See “Beyond the Toolkit: More Ideas and Resources” on pg. 137for ideas on how to take your video projects further.)
SHOOTING THE VIDEO5. When the group has clearly defined what people, places and
narration (if any) will be in their tape and has created a script orstoryboard, then they are ready to begin scheduling one or moreshooting days. If your group is editing in the camera, they willneed to shoot the scenes, add narration, and tape all interviews inthe order in which they want those features to appear on the tape.The “Video Editing” skill sheet discusses how to shoot so that thetape has an edited “feel” to it even though it is not edited.
WHEN THE VIDEO IS DONE6. Creating a movie “premiere” atmosphere is always lots of fun.
Consider serving popcorn or other treats and celebrate the group’saccomplishment. See if the group is interested in sharing the tapewith parents, friends, teachers and others.
7. Have the kids fill out the “What I Learned” self-evaluation form onpage 8. Ask them to reflect privately on what they learned inproducing their documentary.
TALKING IT OVER:Ask for volunteers to share what they learned with others in the group.Ask the group the following questions:• What would you do differently if you were beginning again?• Would you like to “begin again” by planning to produce more
videos in the future?• How could this documentary be used as a communication or
teaching tool?• Would the topic of the documentary interest parent or teacher
groups?• Would you like to enter your documentary in the county fair or
other contest?
TRY THIS, TOO:• Contact a local television station or cable access station to see
whether they would be interested in airing the documentary. Seethe “Make the Media Your Partner” skill sheet on page 149 to learnmore about how to work effectively with the media.
• Contact your county Extension office to see if they would beinterested in incorporating the video into training for adults thathelps them better understand kids’ perspectives.
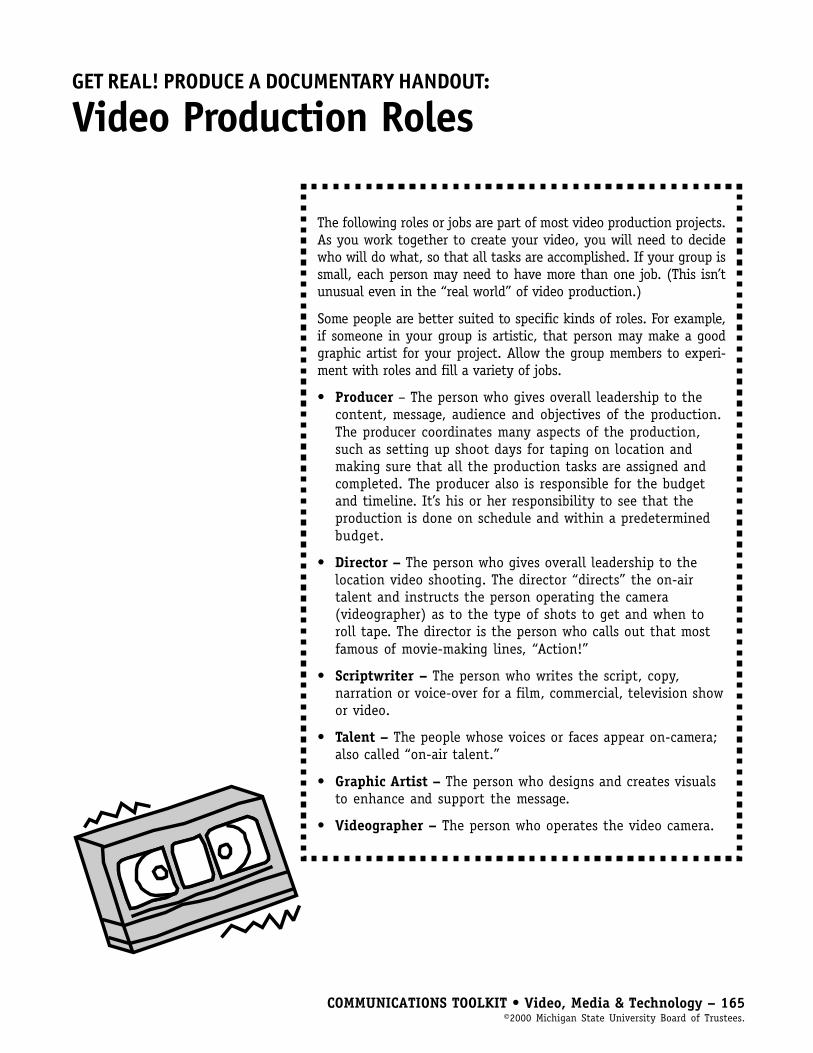
COMMUNICATIONS TOOLKIT • Video, Media & Technology – 165©2000 Michigan State University Board of Trustees.
GET REAL! PRODUCE A DOCUMENTARY HANDOUT:
Video Production Roles
The following roles or jobs are part of most video production projects.As you work together to create your video, you will need to decidewho will do what, so that all tasks are accomplished. If your group issmall, each person may need to have more than one job. (This isn’tunusual even in the “real world” of video production.)
Some people are better suited to specific kinds of roles. For example,if someone in your group is artistic, that person may make a goodgraphic artist for your project. Allow the group members to experi-ment with roles and fill a variety of jobs.
• Producer – The person who gives overall leadership to thecontent, message, audience and objectives of the production.The producer coordinates many aspects of the production,such as setting up shoot days for taping on location andmaking sure that all the production tasks are assigned andcompleted. The producer also is responsible for the budgetand timeline. It’s his or her responsibility to see that theproduction is done on schedule and within a predeterminedbudget.
• Director – The person who gives overall leadership to thelocation video shooting. The director “directs” the on-airtalent and instructs the person operating the camera(videographer) as to the type of shots to get and when toroll tape. The director is the person who calls out that mostfamous of movie-making lines, “Action!”
• Scriptwriter – The person who writes the script, copy,narration or voice-over for a film, commercial, television showor video.
• Talent – The people whose voices or faces appear on-camera;also called “on-air talent.”
• Graphic Artist – The person who designs and creates visualsto enhance and support the message.
• Videographer – The person who operates the video camera.
166 – COMMUNICATIONS TOOLKIT • Video, Media & Technology©2000 Michigan State University Board of Trustees.
ACTIVITY:
Offline Chat AboutOnline TimeFOCUS:Using the Internet safely andappropriately
PURPOSE:To help participants learn torespond appropriately to situationsthat might arise while using theInternet
MATERIALS: “Internet Statements” handout(on pg. 168) copied onto scrappaper or 3-inch by 5-inch indexcards
8½-inch by 11-inch “Agree”and “Disagree” signs (one ofeach per person; optional)
“Safety Rules for Online Time”skill sheet (on pg.151; one perperson)“What I Learned” self-evaluationform (on pg. 8; one per person)
SETTING:Room with movable chairs
TIME:15 to 20 minutes
PROCEDURE:Before the meeting:1. Read the “Computers and the Internet” information on pages 131 to
135 of this section.
2. Copy the Internet Statements handout and cut out each of thestatements or copy the statements onto 3-inch by 5-inch cards.Review the leader information for each statement.
3. Prepare “Agree” and “Disagree” signs (optional).
During the Meeting:1. Arrange the group in a circle. Go around the circle and ask partici-
pants to say whether they have used the Internet before and whatthey used it for. (If participants have never used the Internet, youcould ask if they know someone who has or if they have an ideawhat the Internet is and what they might use it for.)
2. Tell the group that they are going to get some statements about theInternet to read. Then they’ll say whether they agree or disagree withthe statements and why. Pass the statements around the group. Haveeach participant read and respond to a statement. Invite the rest ofthe group to respond to and discuss each statement after the indi-vidual presenting the statement has had a chance to do so.
TRY THIS, TOO:Pass out one “Agree” and “Disagree” sign to each person. After an indi-vidual reads and responds to a statement, have the other participantshold up the sign that matches their opinion of the statement.
TALKING IT OVER:Remind the group that the Internet it just like the “real world” – thereare places that are educational and fun for young people to visit andothers that are inappropriate. Just as they should be wary of strangersthey meet face-to-face, they should also be wary of people they meetonline. Ask them to brainstorm some rules they think families shouldhave for online use and why. Pass out copies of the “Safety Rules forOnline Time” skill sheet and read it together. Based on what theybrainstormed, ask if there are any rules they think should be added tothe list.
Remind the group that they also are responsible for their own behavioronline and that using bad language or saying mean things to othersonline is irresponsible. (And could cause their Internet privileges to becut off!) Ask them to brainstorm some situations where behavior onthe Internet could create bad feelings or be a problem.

COMMUNICATIONS TOOLKIT • Video, Media & Technology – 167©2000 Michigan State University Board of Trustees.
WHERE TO GO FROM HERE:Have your group look for and discuss current news stories on Internetsafety involving young people. Have your group investigate ways thatpeople who violate the safety of children on the Internet can be reported.The group could create a public service announcement, poster, flier, Webpage or other communications piece that informs kids about Internet safetyissues.
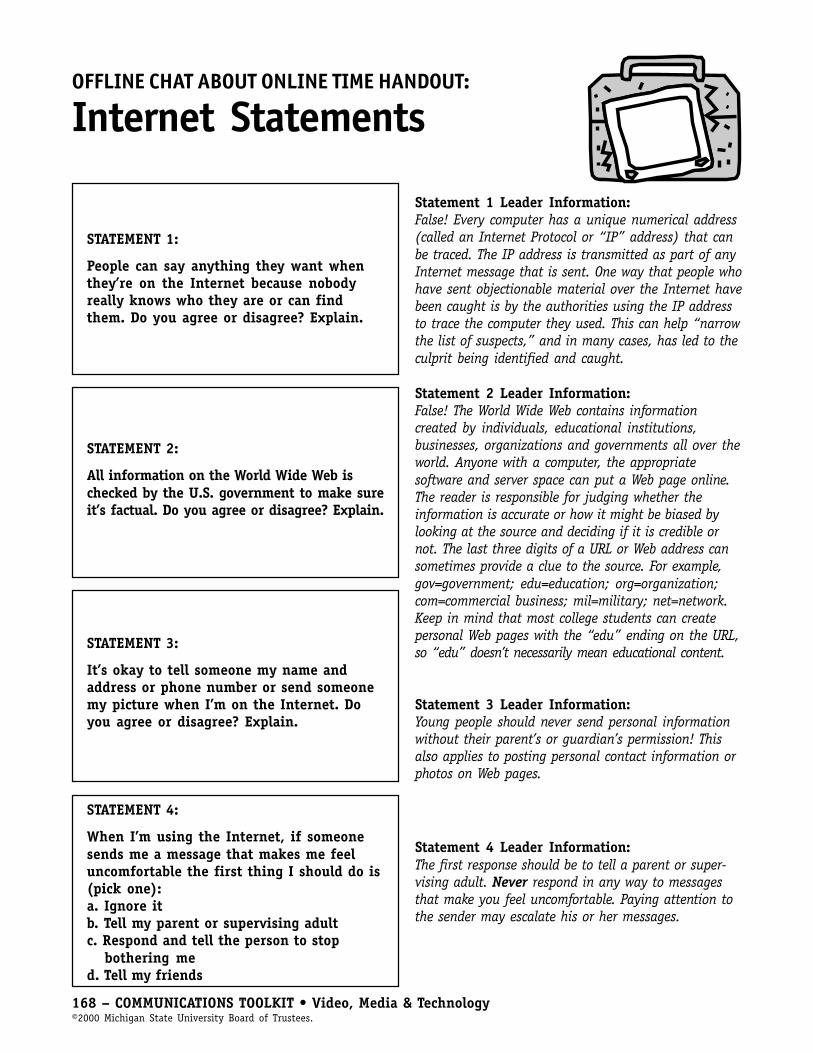
168 – COMMUNICATIONS TOOLKIT • Video, Media & Technology©2000 Michigan State University Board of Trustees.
OFFLINE CHAT ABOUT ONLINE TIME HANDOUT:
Internet Statements
STATEMENT 1:
People can say anything they want whenthey’re on the Internet because nobodyreally knows who they are or can findthem. Do you agree or disagree? Explain.
Statement 1 Leader Information:False! Every computer has a unique numerical address(called an Internet Protocol or “IP” address) that canbe traced. The IP address is transmitted as part of anyInternet message that is sent. One way that people whohave sent objectionable material over the Internet havebeen caught is by the authorities using the IP addressto trace the computer they used. This can help “narrowthe list of suspects,” and in many cases, has led to theculprit being identified and caught.
STATEMENT 2:
All information on the World Wide Web ischecked by the U.S. government to make sureit’s factual. Do you agree or disagree? Explain.
Statement 2 Leader Information:False! The World Wide Web contains informationcreated by individuals, educational institutions,businesses, organizations and governments all over theworld. Anyone with a computer, the appropriatesoftware and server space can put a Web page online.The reader is responsible for judging whether theinformation is accurate or how it might be biased bylooking at the source and deciding if it is credible ornot. The last three digits of a URL or Web address cansometimes provide a clue to the source. For example,gov=government; edu=education; org=organization;com=commercial business; mil=military; net=network.Keep in mind that most college students can createpersonal Web pages with the “edu” ending on the URL,so “edu” doesn’t necessarily mean educational content.
STATEMENT 3:
It’s okay to tell someone my name andaddress or phone number or send someonemy picture when I’m on the Internet. Doyou agree or disagree? Explain.
Statement 3 Leader Information:Young people should never send personal informationwithout their parent’s or guardian’s permission! Thisalso applies to posting personal contact information orphotos on Web pages.
STATEMENT 4:
When I’m using the Internet, if someonesends me a message that makes me feeluncomfortable the first thing I should do is(pick one):a. Ignore itb. Tell my parent or supervising adultc. Respond and tell the person to stop
bothering med. Tell my friends
Statement 4 Leader Information:The first response should be to tell a parent or super-vising adult. Never respond in any way to messagesthat make you feel uncomfortable. Paying attention tothe sender may escalate his or her messages.

COMMUNICATIONS TOOLKIT • Video, Media & Technology – 169©2000 Michigan State University Board of Trustees.
Internet Statements continued
STATEMENT 5:
It’s okay to let my best friends know mypassword. Do you agree or disagree? Explain.
Statement 5 Leader Information:False! Just as you would never share a credit cardnumber, never share your password. Having yourpassword will give another person access to youremail and Web privileges.
STATEMENT 6:
When I run into things on the Internet thatare offensive I should (pick one or more):a. Get out of the offensive areab. Tell my parent or other supervising adultc. Tell my friends
Statement 6 Leader Information:The best response is to immediately leave the offensivearea (don’t click on any links that would go further)and to tell a parent or supervising adult what happened.
STATEMENT 7:
I can copy anything (for example: text,graphics, games) I find on the Internetbecause it’s all free information.
Statement 7 Leader Information:False! Just because you can read it for free doesn’tmean that you have the legal right to copy or use it onyour personal Web page. Assume that everything on theInternet is copyrighted (that is, protected from copyingby United States and international law, even if itdoesn’t have a copyright notice). Unless the person ororganization posting it indicates you have permissionto copy, assume that you will need to ask for permission!
STATEMENT 8:
It’s okay to copy my friend’s email messageto me and send it to someone else.
Statement 8 Leader Information:This is a great way to get in trouble with your friends!Only copy someone’s personal correspondence to youand send it to someone else with permission from theoriginal sender.
STATEMENT 9:
Email is private and nobody can find outwhat I say in it except the person whoreceives it.
Statement 9 Leader Information:False! Don’t assume that all email is private. Forexample, your message can easily be forwarded toothers or printed and shared. The forward and replyfeatures in many email programs put an automaticcopy of the original message at the end of yourforward or reply unless you turn off that feature. Trynot to put anything in your email that you would beembarrassed to share with others!

170 – COMMUNICATIONS TOOLKIT • Video, Media & Technology©2000 Michigan State University Board of Trustees.
PROJECT:
Electronic Pen PalsFOCUS:Using technology to practicecommunications skills and buildfriendships
PURPOSE:• To get kids thinking about
communication technologiesavailable to them
• To give kids creative ways topractice writing and speakingskills
• To give kids opportunities tobuild new friendships with youngpeople living in other parts oftheir state, country or world
EQUIPMENT:The equipment you’ll need will de-pend on the technology you and thekids decide to use or what is avail-able to your group. Consider oneor more of the following:� Audiocassette recorder and
blank audiotapes� Camcorder, VCR/monitor and
blank videotapes� Computer with telephone
hookup or modem andInternet access with emailcommunications software
� Interactive video classroom(Many schools, communitycolleges and intermediate schooldistricts [ISDs] have access)
MATERIALS:Newsprint or other large paperMarkersPaperPencils“What Technology is Right forYour Project” leader back-ground (on pg. 171)“What I Learned” self-evaluationform (on pg. 8; one per person)
PROCEDURE:1. Several technologies are available to you for helping kids develop
“electronic pen pals.” Ask your group to brainstorm all the technolo-gies they can think of that enable people to communicate with oneanother (some examples include telephones, computers, fax machines,videos, audiotapes, videophones; refer to the “What Technology isRight for Your Project” leader background on page 171). List them onnewsprint or large paper.
2. Ask the kids the following questions:• What technologies would be most appropriate for building
long-distance friendships?• What methods would work best for this group? (Suggest that
they consider what equipment they have access to, the size ofgroup, the time commitment needed to use a given technology,and so on.)
• Does anyone in this group own or know someone who owns avideo or still camera, a tape recorder or a computer?
• Could the group borrow equipment from a friend or familymember, from a school, from the county Extension office orfrom a local business?
3. Once the group has chosen a communication method and acquiredthe equipment they will use, give them opportunities to “play”(carefully!) with the equipment to become familiar and comfortablewith using it.
4. Ask the young people from what area of the state, country orworld they would like to meet other kids. Brainstorm with the kidsways in which they could find other kids their age to get to knowelectronically. Here are some ideas:• Extension offices in each county of the country have lists of
4-H clubs. A county staff person may be able to suggest aninterested club. Extension has many international programs,and your county Extension staff may be able to help youconnect with a youth group in another country. If your groupsdon’t speak the same language, you’ll need to arrange interpreters.
• Contact the school district.• Contact other youth groups in your area, such as scouts, Boys
and Girls Clubs, the YMCA or YWCA.• Design a newspaper ad inviting other kids to be involved in
your electronic pen pal project. Ask the newspaper in thecommunity where you are recruiting pen pals to donate spacefor your ad. If the paper is unable to donate space, ask a localbusiness to sponsor your ad or conduct a fund-raiser to earnthe money you need to buy space.
• Network. Talk to relatives and other people you know in othercities for suggestions on links you could make with kids.
COMMUNICATIONS TOOLKIT • Video, Media & Technology – 171©2000 Michigan State University Board of Trustees.
ELECTRONIC PEN PALS LEADER BACKGROUND:
What Technology Is Right for Your Project?
AudiotapesAudiotapes are good tools for sharing among friendsbecause the technology is familiar to most people andreadily available. Your group could choose to intervieweach other on tape or simply share a minute or soabout themselves. Have your group try ending thetape with questions directed at the friends on thereceiving end. This will encourage a response and givethem something with which to get started. Encourageyour group to carefully think through how they wantto present themselves on tape – how they will startand end the tape, what questions they want to ask ofthe other kids and so on. Having a plan is veryimportant and will help ensure that they are pleasedwith their final tape. The cost of mailing an audiotapeis very reasonable so this technology is appealingfrom a budget standpoint as well! You may want tomake a copy of the tape before mailing it if you or thegroup wants to keep a record of your project.
VideotapesVideos are good tools for exploring friendships at adistance because you can see one another and eachothers’ surroundings. Video pen pals can be fromacross the world or across the county. Perhaps if yourgroup lives in the city you would like to get to knowand better understand kids who live on a farm or in arural area, or vice versa. Once you’ve located anothergroup that wants to build a friendship through video,write a list of questions that both groups can respondto on tape. Consider ending the tape with questionsabout things that the kids in your group want toknow about the other group of kids. This will helpencourage a return tape. When you get a tape fromthe other group, watch it with your group. Take timeto reflect on and talk about what was shared. Haveyour group think about the answers to the followingquestions:• What did you learn about the young people and
their lives?• How does this group seem similar to you?• How are they different?• What else would you like to know about them?
Video tours of homes, schools, communities (“a dayin the life…“ approach) might be a good way for
both groups to share. Perhaps the next step is anadult-supervised face-to-face meeting with yourgroup’s new friends!
Computer NetworksIf you or anyone in your group has access to theInternet or a commercial computer network, it’s easyto get to know people through a computer! Yourgroup can have real-time online “chats” with youngpeople across the country or across the world. Anadvantage of using computers for building electronicfriendships is that everyone is kind of “on equalground.” You can’t see or hear each other, so you canstart to get to know each other without preconceivednotions. You communicate using the computerkeyboard and type your questions and answers as yougo along. Commercial networks have “chat rooms” ordirectories that target kids. (Hint: This activity willwork best if the young people in the group have sometyping ability and good writing skills.)
SAFETY NOTE: Remember that kids should besupervised as they use computer networks, becausethey may be able to access information that’s notintended for young people. Read the “What LeadersNeed to Know About Internet Safety,” informationon page 134 and “Safety Rules for Online Time” skillsheet on page 151.
Have your group write a list of questions in advanceand encourage another group to “meet” online at aparticular date and time. (This meeting should beadult supervised.) Everyone in your group shouldhave the chance to type and respond to questions.
Keep in mind a whole new language of words andicons has emerged on the “ ’Net.” People tend tocommunicate in short abbreviated ways on networks.(See the Internet Glossary on pages 133 and 134.)Ask for clarification if you don’t understand aparticular message. You could type, for example,“I’m new at this! What does that mean?”

172 – COMMUNICATIONS TOOLKIT • Video, Media & Technology©2000 Michigan State University Board of Trustees.