CloudBacko Pro: Backup Office 365 Exchange Online Emails
62
CloudBacko Pro Office 365 Mailbox Backup to cloud / local destinations Last update: February 21, 2017 | Backup everything to cloud / local storage
-
Upload
adeline-wong -
Category
Software
-
view
65 -
download
0
Transcript of CloudBacko Pro: Backup Office 365 Exchange Online Emails

CloudBacko Pro Office 365 Mailbox Backup to cloud / local destinations
Last update: February 21, 2017
| Backup everything to cloud / local storage
| Backup everything to cloud / local storage
Step 1. Configure your Office 365 administrator settings
| Backup everything to cloud / local storage
Step 1: Configure your Office 365 administrator settings
• As an administrator of your company’s Office 365 account, you are able to view, select and backup all the Office 365 mailboxes under your company, including Resources Mailboxes, with CloudBacko Pro.
• For each mailbox you want to backup, you need to purchase a Office 365 Mailbox module.
• Before configuring Office 365 Mailbox backup set in your CloudBacko Pro software, you need to configure your Office 365 administrator account’s settings first.
| Backup everything to cloud / local storage
• Before the Office 365 account administrator or other account user can create any backup set, the administrator has to grant permission to the account(s) which are going to create backup set.
1.1. Granting permission to accounts for creating backup set
Step 1: Configure your Office 365 administrator settings

| Backup everything to cloud / local storage
• Open https://outlook.office365.com/ecp
• Login to the Exchange admin center as an account administrator.
Step 1: Configure your Office 365 administrator settings

| Backup everything to cloud / local storage
• Select the permissions menu on the left, then double click on Discovery Management on the right.
Step 1: Configure your Office 365 administrator settings

| Backup everything to cloud / local storage
• You can now add users to this group. Click the + icon under the Members section.
Step 1: Configure your Office 365 administrator settings

| Backup everything to cloud / local storage
• Look up the user name(s) you would like to add permission, then click add > OK to add the corresponding user(s).
• Click Save to confirm and exit the setting.
Step 1: Configure your Office 365 administrator settings

| Backup everything to cloud / local storage
• This permission allows users added under the Members section of the Discovery Management (refer to the previous section for setup) to back up and/or restore mailbox item(s) not only for their own account, but also the accounts of other users added under the same Members section. To grant permission for this feature, you have to add the Application Impersonation role by following the steps below.
1.2. Granting Permission for Application Impersonation
Step 1: Configure your Office 365 administrator settings
| Backup everything to cloud / local storage
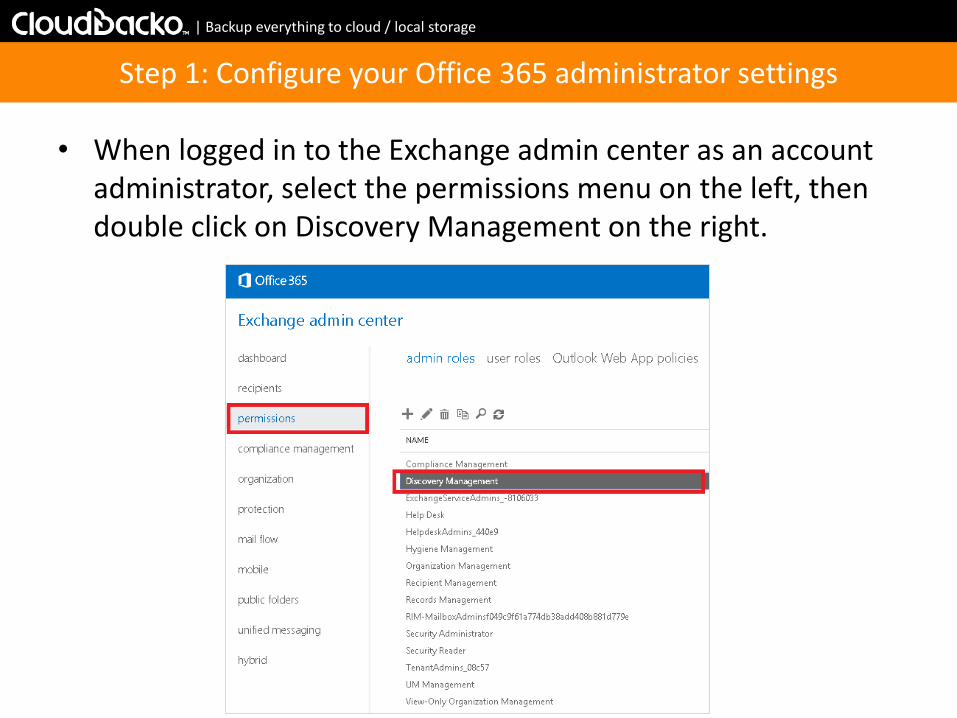
• When logged in to the Exchange admin center as an account administrator, select the permissions menu on the left, then double click on Discovery Management on the right.
Step 1: Configure your Office 365 administrator settings
| Backup everything to cloud / local storage
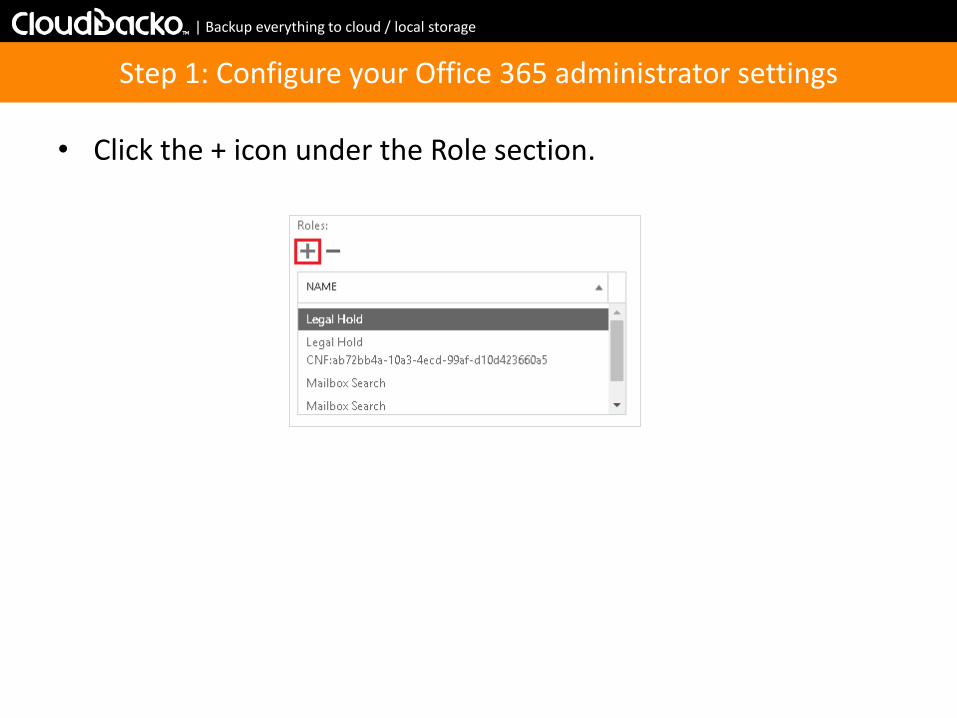
• Click the + icon under the Role section.
Step 1: Configure your Office 365 administrator settings
| Backup everything to cloud / local storage
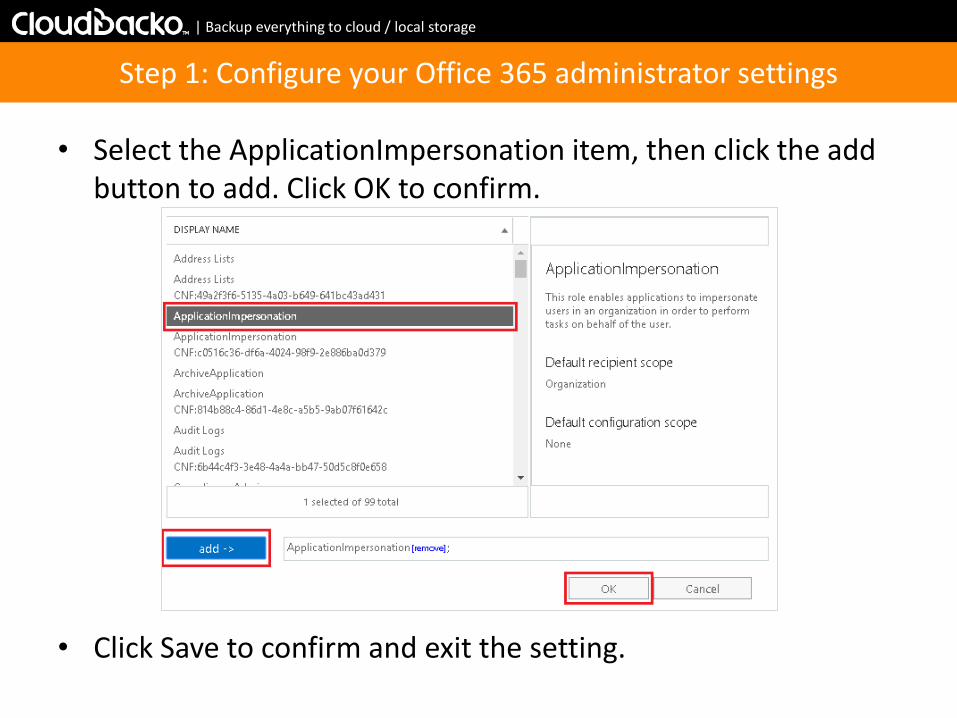
• Select the ApplicationImpersonation item, then click the add button to add. Click OK to confirm.
Step 1: Configure your Office 365 administrator settings
• Click Save to confirm and exit the setting.

| Backup everything to cloud / local storage
• Done! You have configured your Office 365 administrator settings successfully.
Step 1: Configure your Office 365 administrator settings
| Backup everything to cloud / local storage
Step 2. Configure your Office 365 Mailbox backup set
and fire a backup
| Backup everything to cloud / local storage
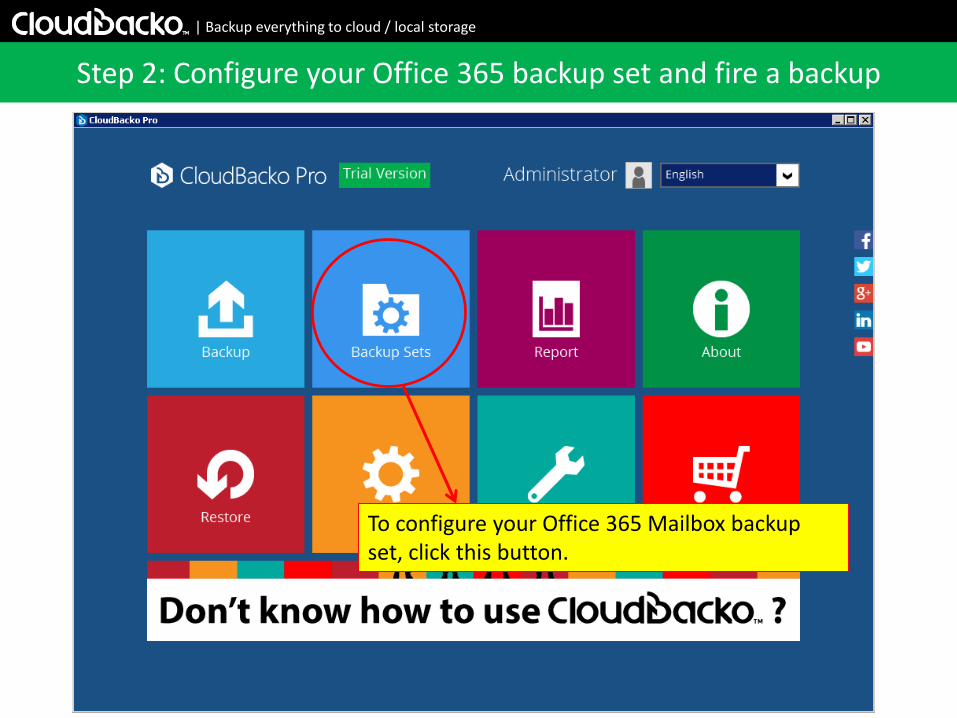
To configure your Office 365 Mailbox backup set, click this button.
Step 2: Configure your Office 365 backup set and fire a backup

| Backup everything to cloud / local storage
Click this “Add” button to open a backup set creation wizard, which will guide you through all the essential settings for creating a backup set.
Step 2: Configure your Office 365 backup set and fire a backup

| Backup everything to cloud / local storage
Select Office 365 Exchange Online Backup
Step 2: Configure your Office 365 backup set and fire a backup
| Backup everything to cloud / local storage
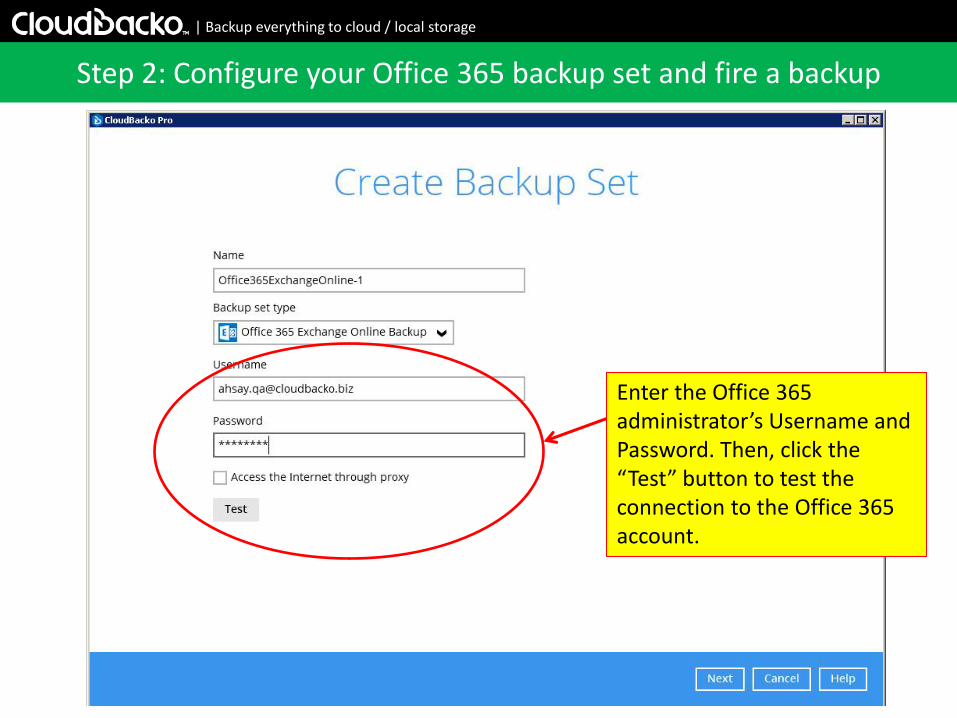
Enter the Office 365 administrator’s Username and Password. Then, click the “Test” button to test the connection to the Office 365 account.
Step 2: Configure your Office 365 backup set and fire a backup

| Backup everything to cloud / local storage
If successful, click “Next”.
Step 2: Configure your Office 365 backup set and fire a backup
| Backup everything to cloud / local storage
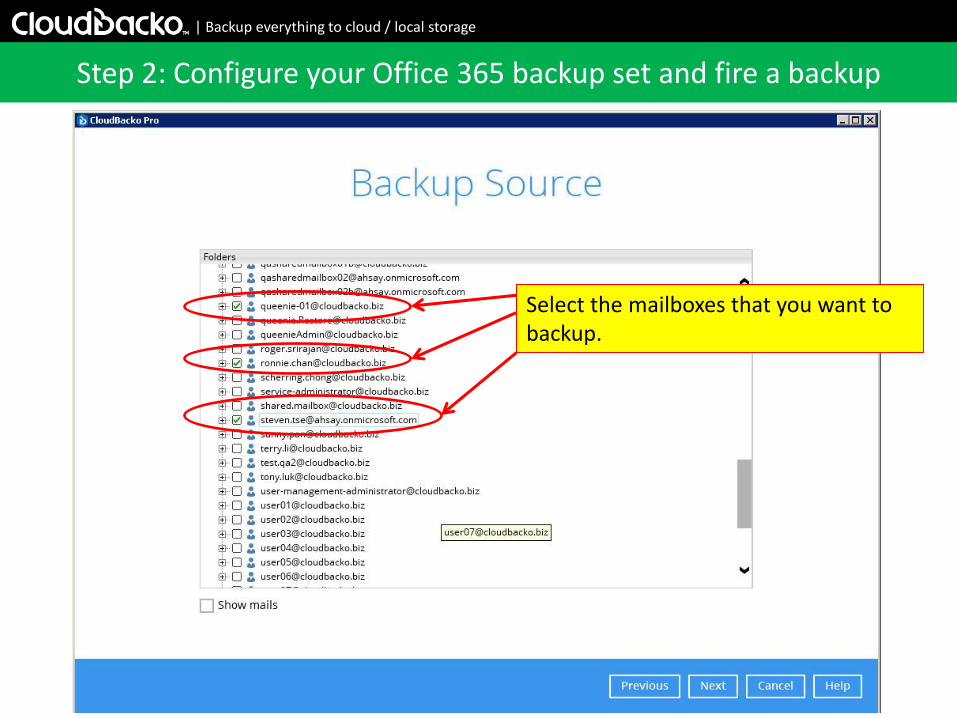
Select the mailboxes that you want to backup.
Step 2: Configure your Office 365 backup set and fire a backup

| Backup everything to cloud / local storage
You can also select individual mailbox items of a particular user to backup. Select “Show mails” if you want to select individual mails to backup.
Step 2: Configure your Office 365 backup set and fire a backup

| Backup everything to cloud / local storage
After selected the mailboxes / items to backup, you can setup the scheduled backup here. Turn “On” the scheduled backup feature if you want CloudBacko to backup the selected mailboxes / items automatically.
Step 2: Configure your Office 365 backup set and fire a backup

| Backup everything to cloud / local storage
Enable the scheduled backup feature, and then click “Add” button to create a schedule.
Step 2: Configure your Office 365 backup set and fire a backup

| Backup everything to cloud / local storage
For mission critical data, a daily backup is necessary. Simply define the starting time of this daily backup here. “Run Retention Policy after backup” is an option to clean up the backup data that are out of the retention period from the backup destination.
Step 2: Configure your Office 365 backup set and fire a backup

| Backup everything to cloud / local storage
Your first Daily schedule is created here. You can create another Weekly schedule by clicking the “Add” button.
Step 2: Configure your Office 365 backup set and fire a backup

| Backup everything to cloud / local storage
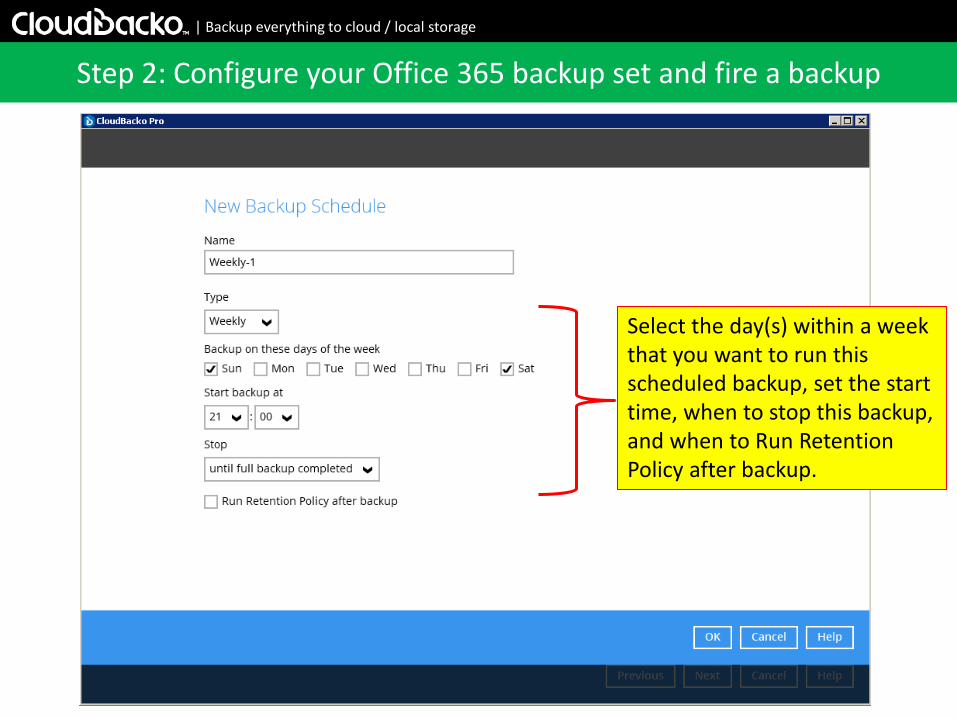
Choose the type of this schedule as Weekly.
Step 2: Configure your Office 365 backup set and fire a backup
| Backup everything to cloud / local storage
Select the day(s) within a week that you want to run this scheduled backup, set the start time, when to stop this backup, and when to Run Retention Policy after backup.
Step 2: Configure your Office 365 backup set and fire a backup
| Backup everything to cloud / local storage
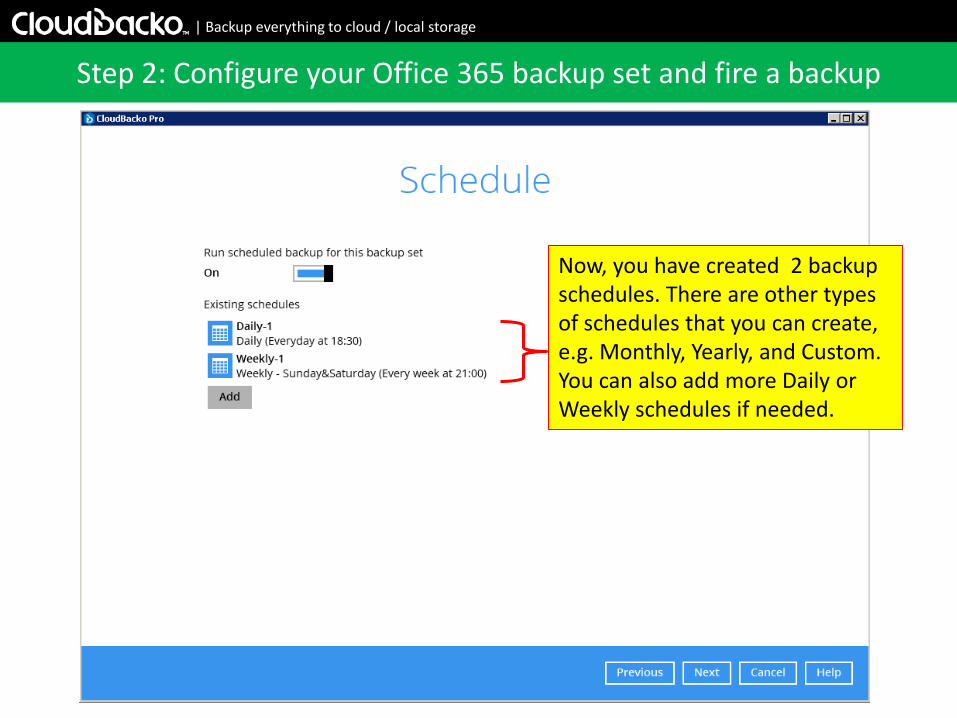
Now, you have created 2 backup schedules. There are other types of schedules that you can create, e.g. Monthly, Yearly, and Custom. You can also add more Daily or Weekly schedules if needed.
Step 2: Configure your Office 365 backup set and fire a backup

| Backup everything to cloud / local storage
Now, click the “Add” button to add a new storage destination or destination pool. Destination pool is mainly for pooling multiple free storage accounts (e.g. Google Drive, Microsoft OneDrive, Amazon Cloud Drive, etc.) as a one big free cloud storage for backing up data to cloud.
Step 2: Configure your Office 365 backup set and fire a backup

| Backup everything to cloud / local storage
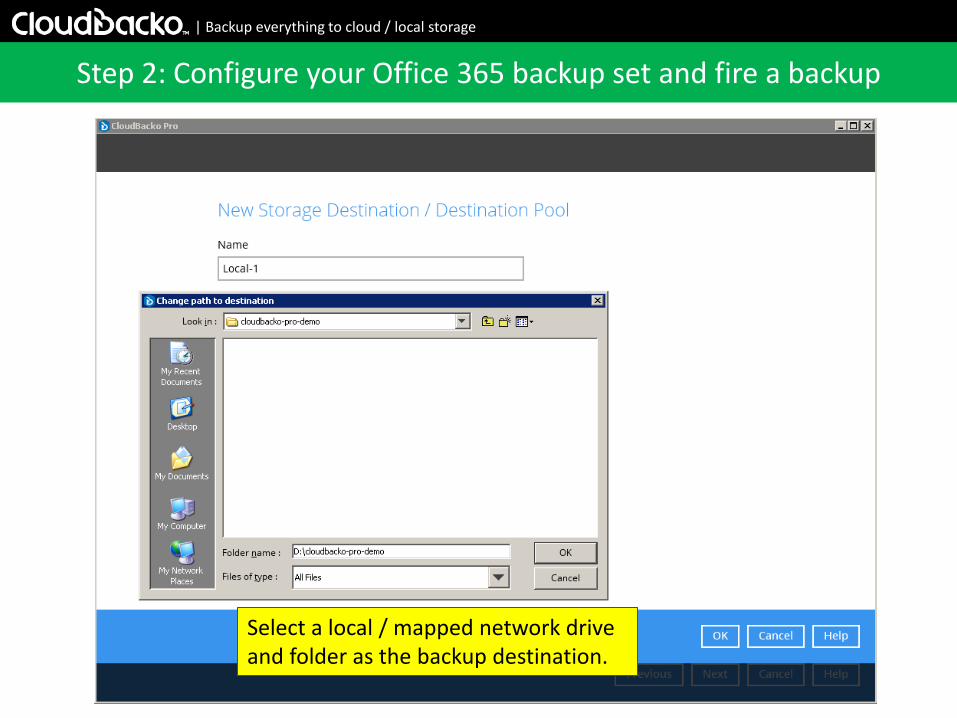
You can create a Local destination first.
Step 2: Configure your Office 365 backup set and fire a backup
| Backup everything to cloud / local storage
Select a local / mapped network drive and folder as the backup destination.
Step 2: Configure your Office 365 backup set and fire a backup
| Backup everything to cloud / local storage
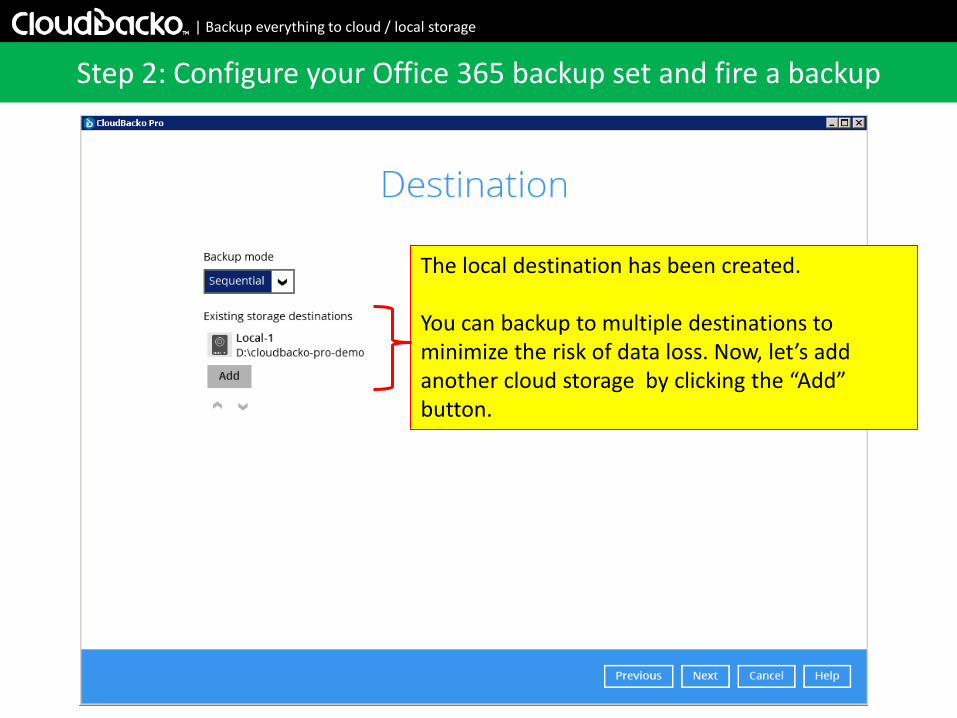
The local destination has been created. You can backup to multiple destinations to minimize the risk of data loss. Now, let’s add another cloud storage by clicking the “Add” button.
Step 2: Configure your Office 365 backup set and fire a backup
| Backup everything to cloud / local storage
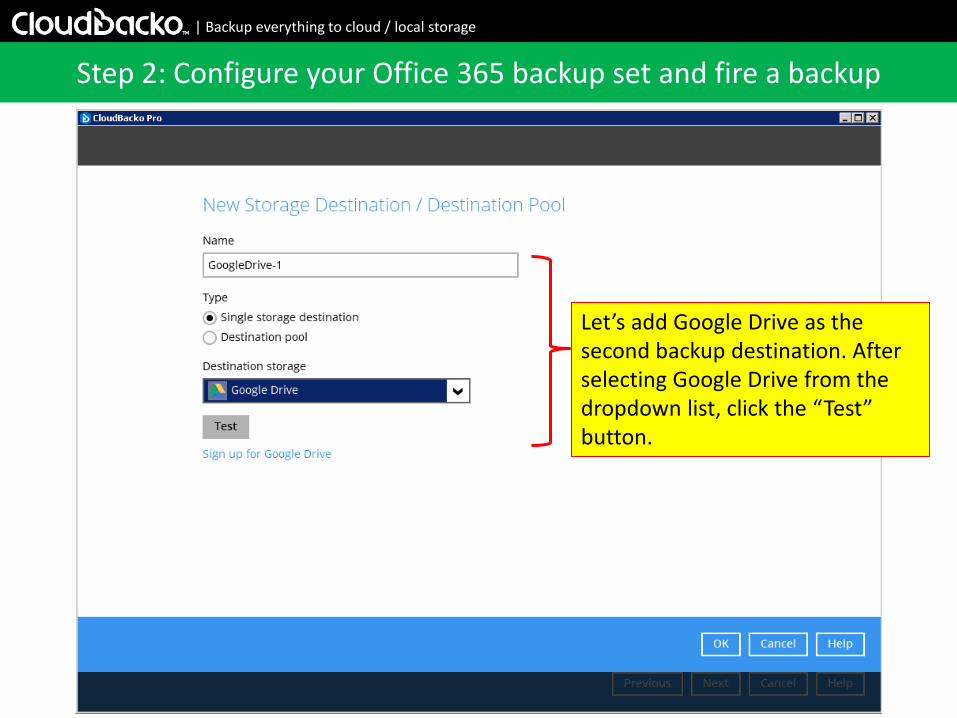
Let’s add Google Drive as the second backup destination. After selecting Google Drive from the dropdown list, click the “Test” button.
Step 2: Configure your Office 365 backup set and fire a backup
| Backup everything to cloud / local storage
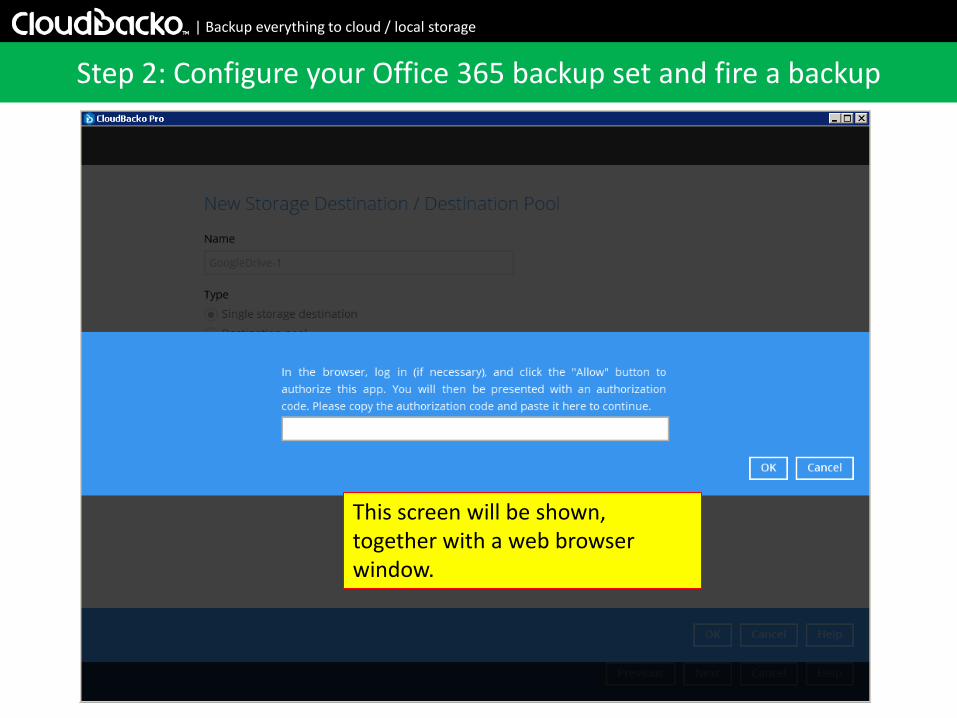
This screen will be shown, together with a web browser window.
Step 2: Configure your Office 365 backup set and fire a backup
| Backup everything to cloud / local storage
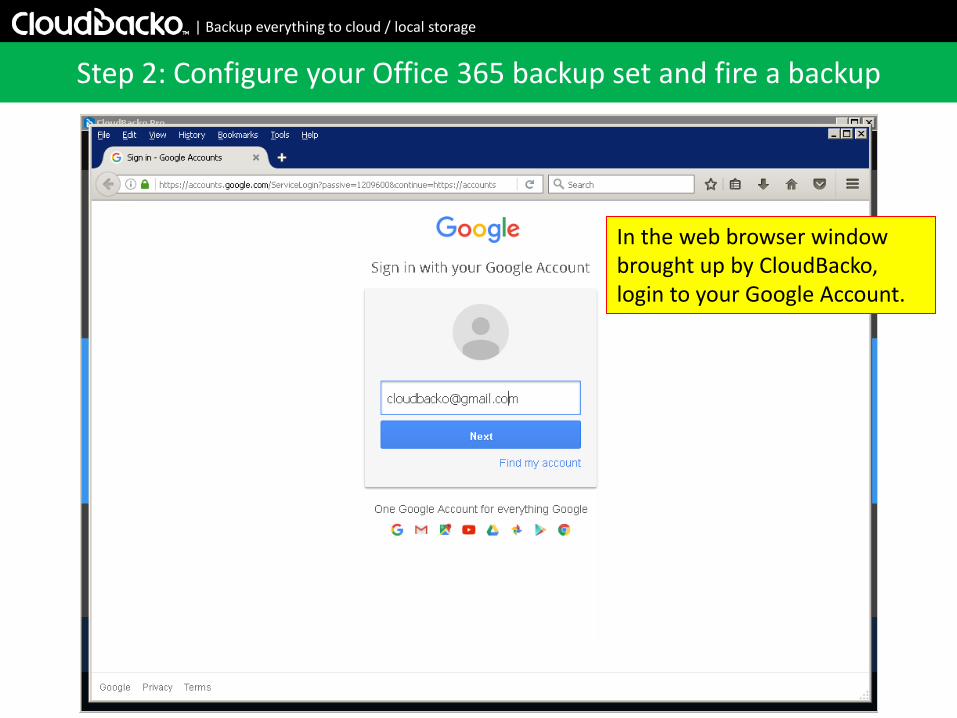
In the web browser window brought up by CloudBacko, login to your Google Account.
Step 2: Configure your Office 365 backup set and fire a backup

| Backup everything to cloud / local storage
Click the “Allow” button to allow CloudBacko software connect to your Google Account.
Step 2: Configure your Office 365 backup set and fire a backup
| Backup everything to cloud / local storage
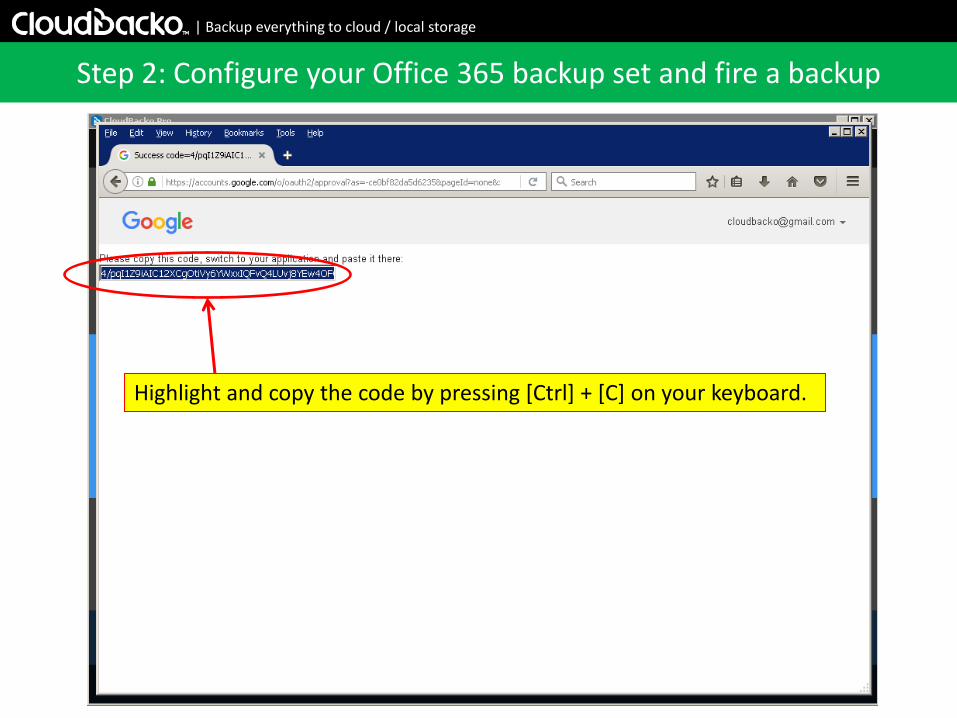
Highlight and copy the code by pressing [Ctrl] + [C] on your keyboard.
Step 2: Configure your Office 365 backup set and fire a backup
| Backup everything to cloud / local storage
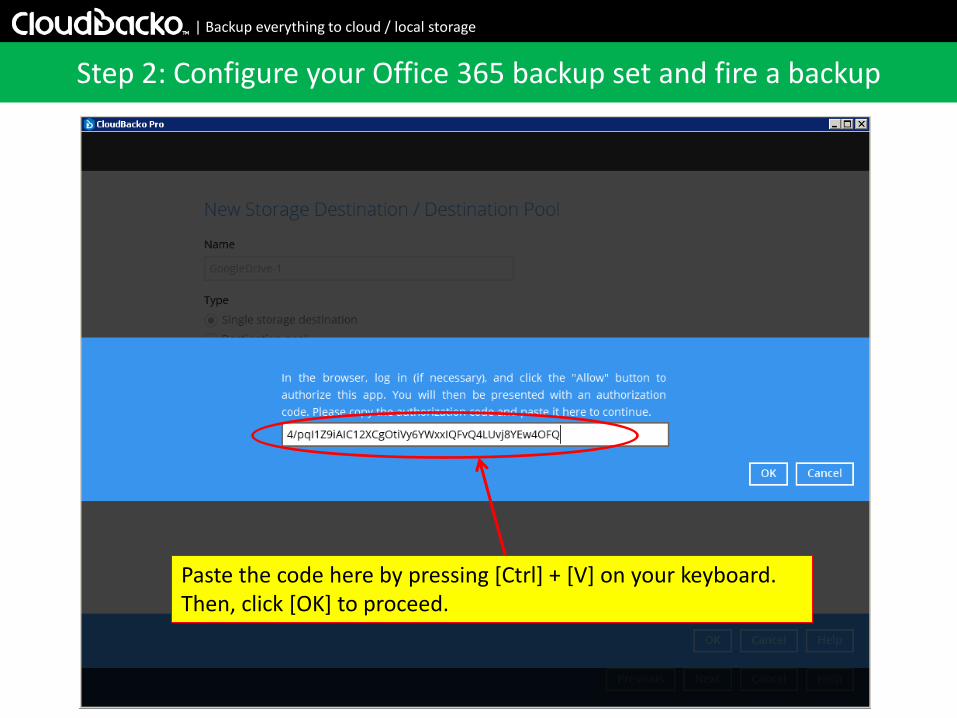
Paste the code here by pressing [Ctrl] + [V] on your keyboard. Then, click [OK] to proceed.
Step 2: Configure your Office 365 backup set and fire a backup
| Backup everything to cloud / local storage
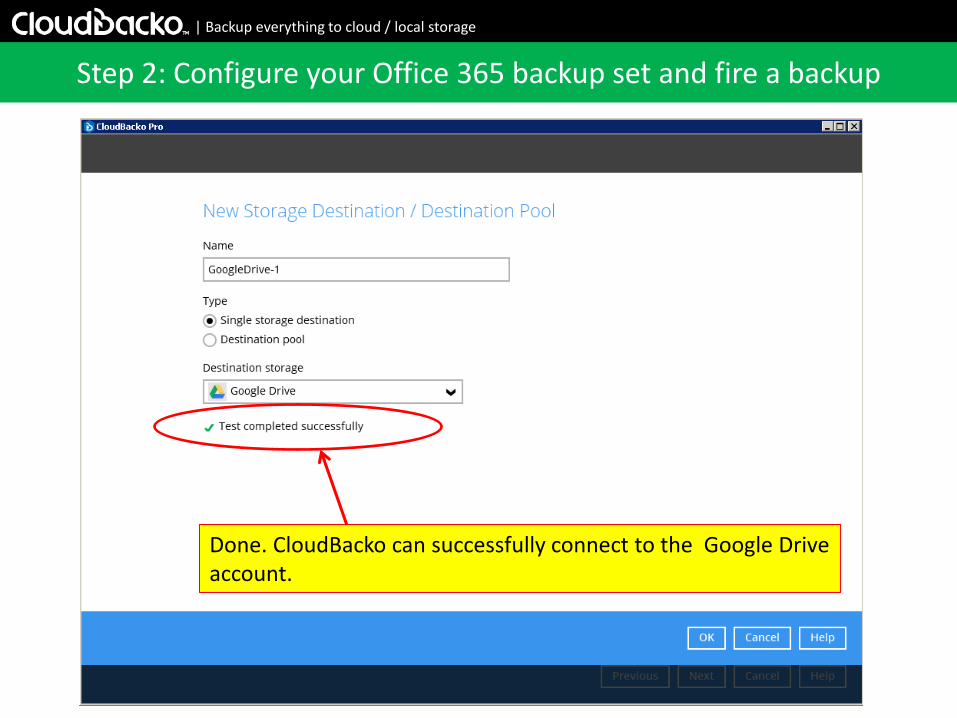
Done. CloudBacko can successfully connect to the Google Drive account.
Step 2: Configure your Office 365 backup set and fire a backup

| Backup everything to cloud / local storage
Now, we have 2 destinations, Local and Google Drive.
Step 2: Configure your Office 365 backup set and fire a backup

| Backup everything to cloud / local storage
You can select whether to trigger the scheduled backup to these 2 destinations “Sequentially” or “Concurrently”.
For Sequential backup mode, you can change the order of destinations by selecting a destination and then click these Up / Down buttons.
Step 2: Configure your Office 365 backup set and fire a backup
| Backup everything to cloud / local storage
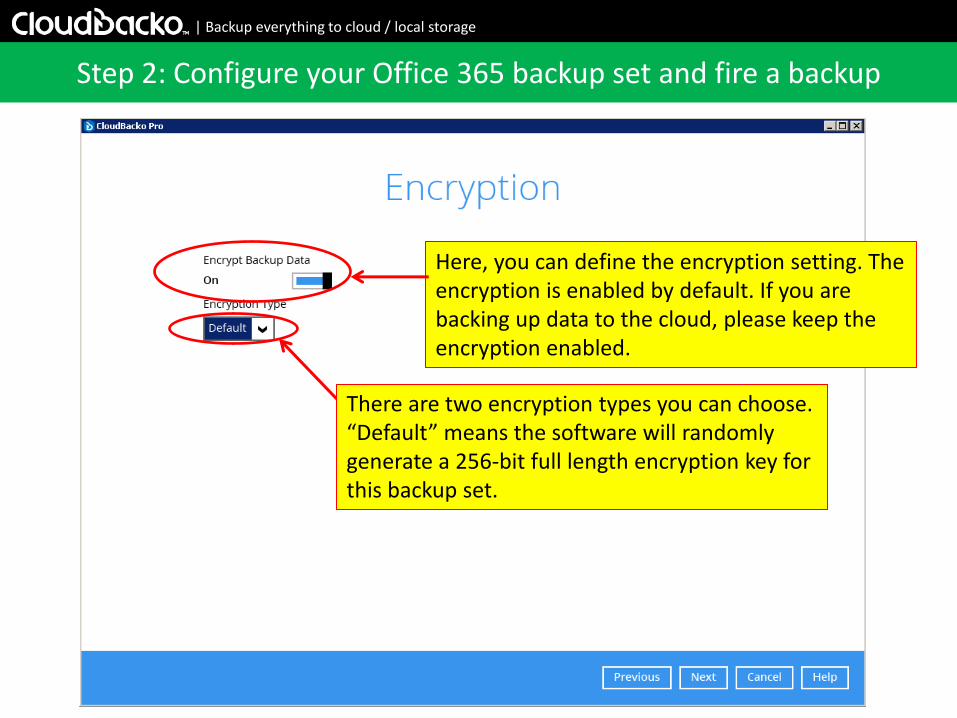
Here, you can define the encryption setting. The encryption is enabled by default. If you are backing up data to the cloud, please keep the encryption enabled.
There are two encryption types you can choose. “Default” means the software will randomly generate a 256-bit full length encryption key for this backup set.
Step 2: Configure your Office 365 backup set and fire a backup
| Backup everything to cloud / local storage
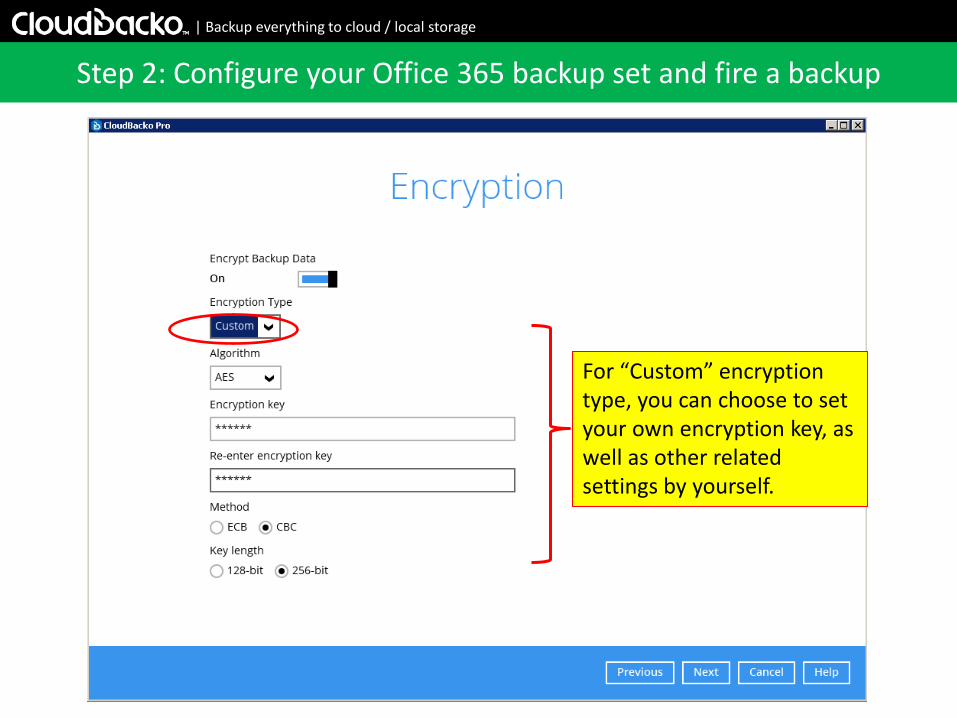
For “Custom” encryption type, you can choose to set your own encryption key, as well as other related settings by yourself.
Step 2: Configure your Office 365 backup set and fire a backup

| Backup everything to cloud / local storage
If you have chosen to use “Default” encryption type, CloudBacko will prompt you to save your encryption key generated by the software. To view the encryption key, click “Unmask encryption key”.
Step 2: Configure your Office 365 backup set and fire a backup

| Backup everything to cloud / local storage
The encryption key will be displayed to you. You can click “Copy to clipboard”.
Step 2: Configure your Office 365 backup set and fire a backup

| Backup everything to cloud / local storage
Paste your encryption key into a text editor and save it securely, and ideally outside your current computer. Then, click “Confirm” to proceed.
Step 2: Configure your Office 365 backup set and fire a backup

| Backup everything to cloud / local storage
Your Office 365 Mailbox backup set is created. You can immediately fire a backup now.
Step 2: Configure your Office 365 backup set and fire a backup

| Backup everything to cloud / local storage
After the backup to a destination has been completed, you can click this report icon to read the backup report.
Step 2: Configure your Office 365 backup set and fire a backup

| Backup everything to cloud / local storage
Step 3. Restore backed up emails to a user’s mailbox

| Backup everything to cloud / local storage
• In case one of your users accidentally deleted some mails from his/her Office 365 mailbox, as an administrator, you can help them restore the backed up emails back to his/her Office 365 mailbox.
Step 3: Restore backed up emails to a user’s mailbox

| Backup everything to cloud / local storage
Step 3: Restore backed up emails to a user’s mailbox
First of all, let’s login to a user’s Office 365 mailbox

| Backup everything to cloud / local storage
Step 3: Restore backed up emails to a user’s mailbox
Here are the mails in this user account

| Backup everything to cloud / local storage
Step 3: Restore backed up emails to a user’s mailbox
Let’s delete these 2 emails, assuming the user deleted them by mistake.

| Backup everything to cloud / local storage
Step 3: Restore backed up emails to a user’s mailbox
Those 2 emails are gone.
| Backup everything to cloud / local storage
Step 3: Restore backed up emails to a user’s mailbox
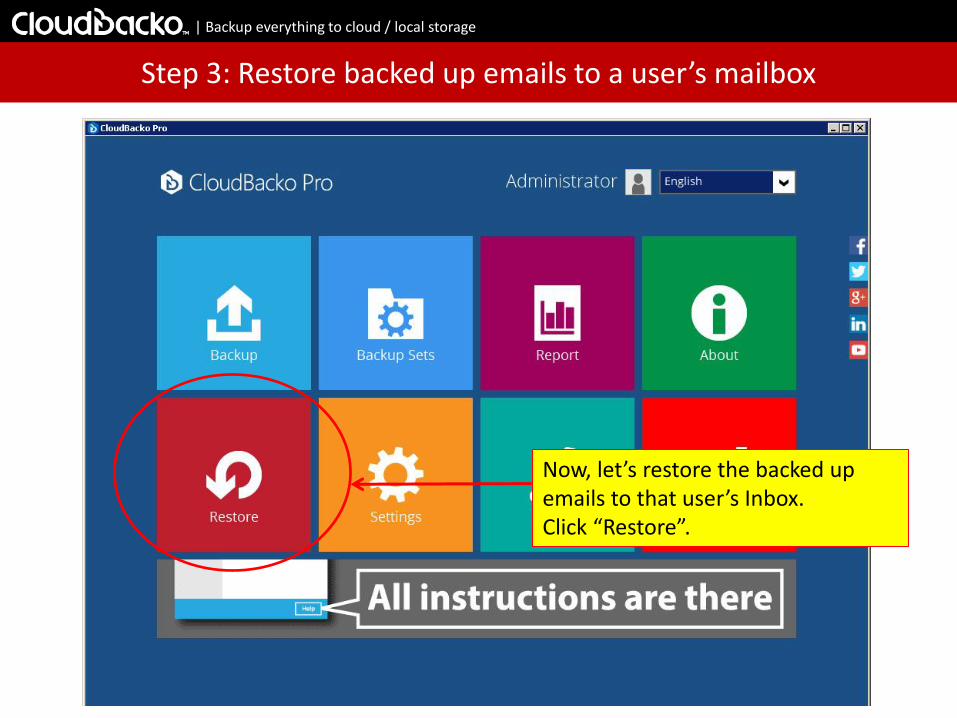
Now, let’s restore the backed up emails to that user’s Inbox. Click “Restore”.

| Backup everything to cloud / local storage
Step 3: Restore backed up emails to a user’s mailbox
Select your Office 365 Mailbox backup set.
| Backup everything to cloud / local storage
Step 3: Restore backed up emails to a user’s mailbox
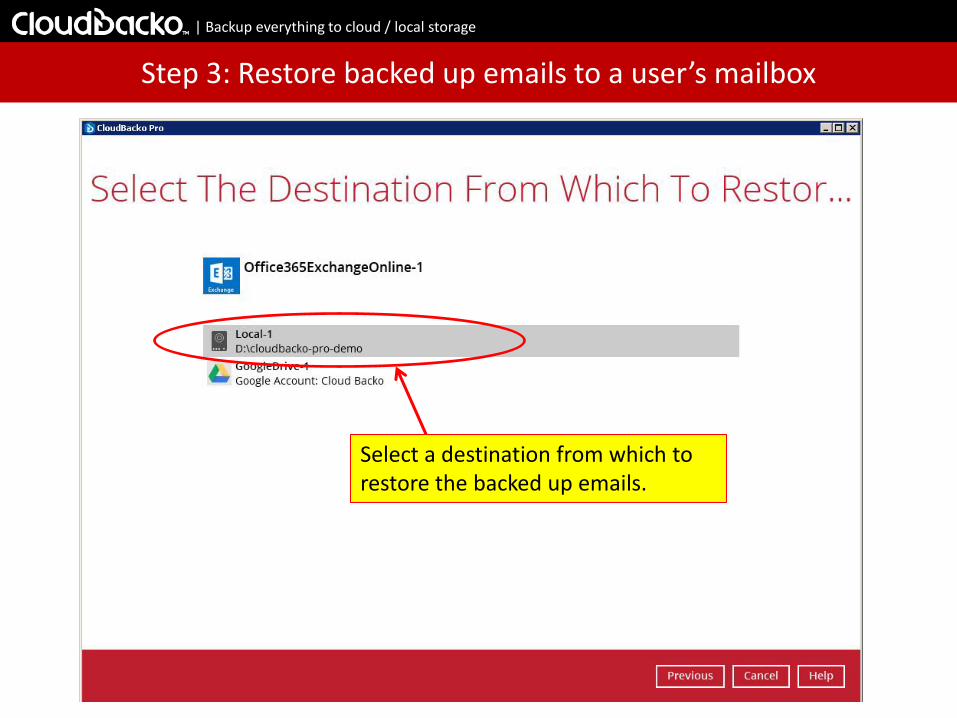
Select a destination from which to restore the backed up emails.
| Backup everything to cloud / local storage
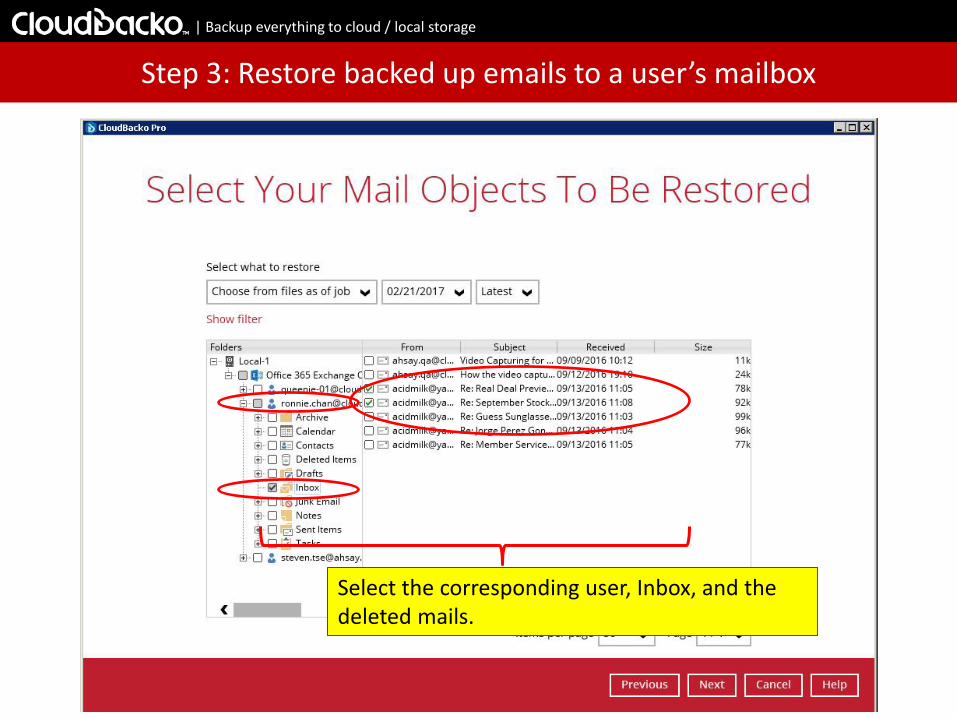
Step 3: Restore backed up emails to a user’s mailbox
Select the corresponding user, Inbox, and the deleted mails.

| Backup everything to cloud / local storage
Step 3: Restore backed up emails to a user’s mailbox
Set a temporary directory for the software to do some temporary works.
| Backup everything to cloud / local storage
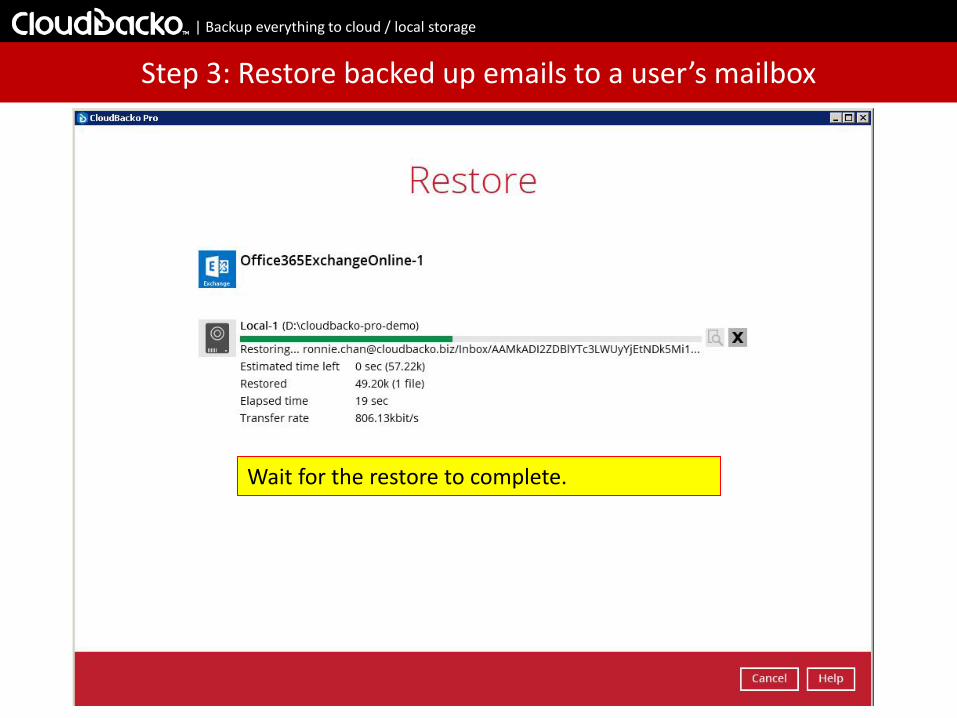
Step 3: Restore backed up emails to a user’s mailbox
Wait for the restore to complete.

| Backup everything to cloud / local storage
Step 3: Restore backed up emails to a user’s mailbox
After restore is completed, go back to check the user’s Office 365 inbox. The 2 deleted emails have been restored back to the inbox
| Backup everything to cloud / local storage
Thank you!