Altera DE2 Board and Quartus II Software ECE 3450 M. A. Jupina, VU, 2014.
μClinux on the Altera DE2David Lariviere and Stephen A. Edwards
Columbia University, 2008.
Abstract:
This technical report provides an introduction on how to compile and run uClinux and third-party programs to be run on a Nios II CPU core instantiated within the FPGA on the Altera DE2. It is based on experiences working with the OS and development board while teaching the Embedded Systems course during the springs of 2007 and 2008.

INTRODUCTION .......................................................................................................................................... 3
UCLINUX ........................................................................................................................................................ 3
BUILDROOT ..................................................................................................................................................... 3 UCLIBC ........................................................................................................................................................... 3
HARDWARE .................................................................................................................................................. 4
ALTERA DE2 .................................................................................................................................................. 4 FPGA ........................................................................................................................................................... 4 SOPC ............................................................................................................................................................ 4 NIOS II ........................................................................................................................................................... 4
DEVELOPMENT ENVIRONMENT ........................................................................................................... 4
QUARTUS II .................................................................................................................................................... 4 VMWARE ....................................................................................................................................................... 4
WALKTHROUGH ......................................................................................................................................... 6
BUILDING UCLINUX .......................................................................................................................................... 6 Running uClinux ..................................................................................................................................... 6 Directory Structure of uClinux-dist ........................................................................................................ 7
GETTING STARTED .................................................................................................................................... 7
CONFIGURING HARDWARE ................................................................................................................................. 7 Minimum Tools ....................................................................................................................................... 7
PROGRAMMING THE DE2 WITH UCLINUX ............................................................................................................. 8 Hello World ............................................................................................................................................ 8
DEMO APPLICATIONS ........................................................................................................................................ 8 LED ......................................................................................................................................................... 9 Audio ...................................................................................................................................................... 9 Frame Buffer ........................................................................................................................................... 9
CONFIGURING UCLINUX FOR FPGA HARDWARE ........................................................................... 9
CUSTOMIZING THE KERNEL ................................................................................................................ 10
PORTING SOFTWARE .............................................................................................................................. 11
CONFIGURING THE DEVELOPMENT ENVIRONMENT ................................................................. 11
Installing VMware Tools ...................................................................................................................... 11 INSTALL GCC CROSS-COMPILER ..................................................................................................................... 12
Extract Archive ..................................................................................................................................... 12 Add to Path ........................................................................................................................................... 12
INSTALL REQUIRED UTILITIES ........................................................................................................... 13
EXTRACTING UCLINUX DISTRIBUTION ........................................................................................... 14
EXTRACT GIT REPOSITORY ................................................................................................................................ 14 CONFIGURING UCLINUX-DIST FOR THE FIRST TIME: .............................................................................................. 14 CUSTOMIZING THE KERNEL: ............................................................................................................................. 17
Ethernet/Network Support .................................................................................................................... 17 USB Key (File system) Support ............................................................................................................ 17
CONFIGURING THE HARDWARE ........................................................................................................ 20
VGA AND PS2 KEYBOARD SUPPORT ............................................................................................................... 20
Introduction
uClinuxμClinux, pronounced “you-see-linux”, is a port of the Linux operating system targeting platforms that lack memory management units. uClinux was first written for the Motorola DragonBall processor, and has since been ported to a large number of embedded architectures: Altera Nios II, Xilinx Microblaze, ARM.
The lack of an MMU imposes additional requirements. The current Nios II set of patches do not provide support for shared libraries. Thus all libraries must be statically linked in to the final binary, making compiled binary size, especially for embedded systems, a critical concern. Several open source projects centered around uClinux exist, tailored to the specific requirements of embedded development.
uClinux was originally a set of patches to the existing Linux kernel. It has since been incorporated into the main Linux kernel.
BuildrootAs stated on the project’s website, Buildroot “is a set of Makefiles and patches that allow to easily generate both a cross-compilation toolchain and a root filesystem for your target.”1 In order to compile programs that can executed by the Nios II, the Buildroot is used to create a version of the GCC compiler and associated tools specifically for the Nios II and uClinux.
A preconfigured binary is hosted by Altera on their ftp site at ftp://ftp.altera.com/outgoing/nios2gcc-20080203.tar.bz2 .
uClibcuClibc is a ported implementation of the GNU C library, rewritten specifically to reduce compiled binary sizes.
The C standard library contains the implementation of the most common and required C functions (printf, fopen, rand, etc).
Note that while uClibc can be controlled via the standard uClinux-dist build configuration menus, with the current Nios Buildroot config, it is not. Rather, uClibc is preconfigured, compiled, and stored (located under /opt/nios2/nios2-linux-uclibc) along with the GCC crosscompiler tools for the Nios. Whenever the compiler is used to compile an application, it will automatically use uClibc.
What do we want here? Level of detail, if any, or skip entirely?Options:
• Description of FPGA in general.• Description of Nios processor.• Walkthrough of building minimal SOPC configuration to run uClinux on DE2?
Hardware
Altera DE2
FPGA
SOPC
Nios II
Development Environment
Quartus IIQuartus II is Altera’s IDE for developing and compiling the hardware configuration that the FPGA will be programmed with. Quartus II comes in two versions: Web Edition, offered free, and Subscription edition, which either requires purchasing an annual subscription, or requesting a donation from Altera (for academic institutions that qualify). The free Web Edition version, however, only exists on Windows.
For this technical report and included development environment, we assume that the user’s host machine has Quartus II pre-installed, and thus do not include a pre-installed version within the provided VM development environment.
VMwareThis technical report is accompanied with a preconfigured ready-to-go VMware virtual machine image containing a development environment. Included are all tools needed to compile both uClinux and third party applications to be run on the Altera DE2 FPGA, if configured with the appropriate hardware configuration.
Do we want to go into details of configuring/optimizing VMware. VMware player vs. server, how to setup a configuration to allow VMware server to host images that students can remotely connect into?
Configuring Network settings (bridged vs. NAT).
Optimization Settings

• Disable encryption of VM session (where communication between VMware server and a client (either on the local machine or remote) is not SSL encrypted.
• Disable paging (if VMware image stored on removal drive, such as iPod or USB drive).
• Ensure image is on drive configured for performance (instead of quick removal).
Also, transferring files between VMware environment and host machine? Could describe SAMBA/NFS for windows/Linux hosts resptively, but also need to try latest version of VMware Server released last week to see if file sharing from VMware tools works.
The accompanied VM-based development environment consists of a minimal CentOS 5.1 version of Linux, the Nios II-specific port of GCC, and the uClinux Buildroot. CentOS is a distribution of Linux that is binary compatible with Redhat Enterprise Edition, but is free.
The included development environment is configured as follows:• User Accounts (Description: login/password):
o Root user: root/fpgao Main user: fpga/fpga
• uClinux-dist (located in /home/fpga/uClinux-dist): containing all source code and Makefiles used to compile the Linux kernel, user mode programs, and generate the Linux image.
• GCC toolchain for the Nios II (located in /opt/nios2): contains the GCC crosschain and uClibc. Note that /opt/nios2/bin has already been added to the path.

WalkthroughThe following details the basic steps, using the provided VM environment, to compile uClinux and then upload it to the DE2.
Building uClinuxFirst launch the virtual machine in VMware by opening “uClinuxOnNios.vmx”. Once the virtual machine starts, it will boot CentOS up. When it has finished booting, the login prompt will be displayed. The login and password are both: fpga
Once logged in, you can immediately build uClinux. Simply type: make
Running make will invoke a series of build scripts that will:1. Prepare the build environment for the specific target architecture (Nios II) and
specific FPGA’s programmed hardware configuration (using a provided PTF file generated by SOPC Builder).
2. Compile uClinux3. Compile applications. 4. Generate a filesystem containing all apps and other miscellaneous files.5. Combine the Linux kernel and file system into a single bootable image (located in
~/uClinux-dist/images/zImage)
Running uClinuxWhen the entire build process is complete, ~/uClinux-dist/images/zImage is the file to be executed on the Nios II’s FPGA.
Configure the FPGAFirst transfer the file from the virtual machine to a host machine connected to the DE2.
First program the FPGA on the DE2 using the default compiled hardware SOF file:quartus_pgm –mode=jtag –o p;C:/path/default_de2.sof
Upload the uClinux ImageThen convert the zImage to the appropriate format and download it to the board:nios2-elf-objcopy C:/path/zImage –O srec zImage.srecnios2-gdb-server –g zImage.srec
The DE2’s FPGA is now programmed with the proper hardware configuration expected by uClinux, and the uClinux image containing both the kernel and filesystem have been downloaded to the board. All that is left is to connect to the Nios over the JTAG UART:
nios2-terminal
Directory Structure of uClinux-distWhen working with uClinux-dist to compile uClinux systems for the Nios II, the most relevant directories are:
• images: after compilation the final compressed “zImage” file is placed here. This is the file
• linux-2.6.x: contains the source code for the v2.6 of the Linux Kernel, used to run Linux on the Nios II.
• user: contains source code for all possible applications that can be included in the Linux system. Note that uClinux-dist contains applications that are ported only to specific architectures, excluding the Nios II, or to specific boards, excluding the DE2. It is therefore important to check the README and other documentation/source code of the application.
Getting Started
Configuring Hardware
Minimum Tools
Note that the most common method of downloading software to the board relies on a set of scripts (nios2-configure-sof and nios2-download) for both programming the FPGA and downloading the Linux image to memory. These programs require the installation of the full Nios SDK, which is more than a gigabyte in size.

If one only intends to use the provided virtual machine and uClinux, without the use of nios2-ide, it is possible to program and download the linux image to the DE2 without installing the Nios SDK.
Given a Quartus-compiled hardware design (DE2_NIOS_HOST_MOUSE_VGA.SOF) file and uClinux-generated image (zImage), it is possible to load uClinux on the board by:
quartus_pgm --mode=jtag –o p;DE2_NIOS_HOST_MOUSE_VGA.sofnios2-elf-objcopy zImage –O srec zImage.srecnios2-gdb-server -g zImage.srecnios2-terminal
Programming the DE2 with uClinuxProgramming applications to run on uClinux is little different from programming any other applications targeting a Unix or generic ANSI C environment. The only restrictions are:
• no usage of “fork()” system call (use vfork instead). • No shared libraries (all libraries must be statically linked in)• All binaries must be compiled with the “-elf2flt” command, in order to generate
binaries in the binary flat executable format, instead of the default ELF format. • If a stack size greater than 4 KB is needed, add “-sXXX” to the linking command
line, where XXX is the number of bytes to pre-allocate for the stack.
Hello World
For example, given the classic hello.c file (see below):
#include <stdio.h>void main() {
printf(“Hello World!\n”); }
One need only use:
nios2-linux-gcc hello.c –o hello –elf2flt
Demo ApplicationsSeveral demo applications were developed in order to demonstrate interacting with several of the hardware components on the DE2 board.
Note that all user-mode applications are located within /home/fpga/uClinux-dist/user.
The demo examples created for this report are included in /home/fpga/uClinux-dist/user/de2examples.
LED
Audio
Frame Buffer
Configuring uClinux for FPGA HardwareNote that the provided development VMware image comes with uClinux-dist pre-configured for the Altera Nios II, with default kernel and usermode configuration (as described in the appendix).
Note that in order for uClinux to run on the FPGA, the FPGA must contain a SOPC containing a Nios. Every SOPC is described by a PTF file.
It is possible to remotely Assuming that the DE2 System CD (version 1.4b) is mounted at /mnt/de2systemv14b, enter the following to configure uClinux-dist for the DE2_NET project:
make vendor_hwselect SYSPTF=/mnt/de2systemv14b/DE2_demonstrations/DE2_NET/system_0.ptf.
When prompted for:1. Please select which CPU you wish to build the kernel against: type “1”. (Note that
the system only has one Nios CPU). 2. Please select a device to upload the kernel to: type “1”. 3. Please select a device to execute kernel from: type “2”.
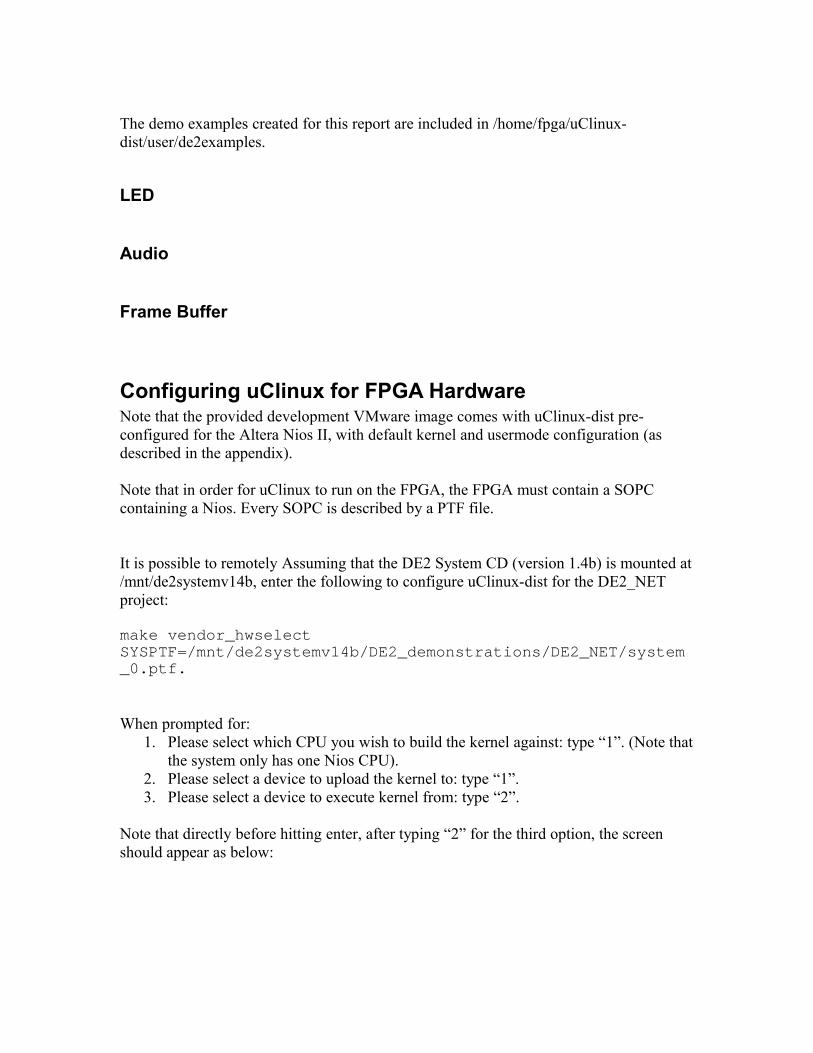
Note that directly before hitting enter, after typing “2” for the third option, the screen should appear as below:

Congratulations, uClinux is now configured to run on the DE2, when programmed with DE2_NET.
Lastly, to compile uClinux, simply type:
make
Customizing the KernelFrom within ~/uClinux-dist, run “make menuconfig”
Then choose “Kernel/Library/Defaults Selection”, and lastly check “Customize Kernel Settings”:
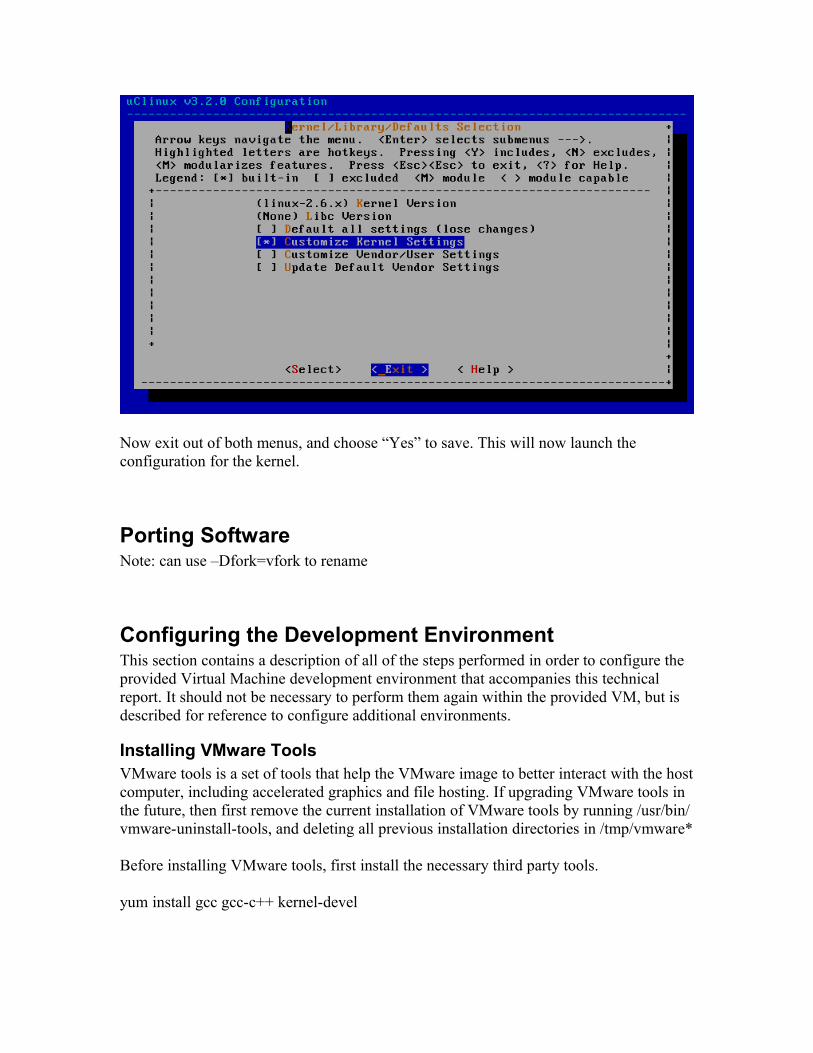
Now exit out of both menus, and choose “Yes” to save. This will now launch the configuration for the kernel.
Porting SoftwareNote: can use –Dfork=vfork to rename
Configuring the Development EnvironmentThis section contains a description of all of the steps performed in order to configure the provided Virtual Machine development environment that accompanies this technical report. It should not be necessary to perform them again within the provided VM, but is described for reference to configure additional environments.
Installing VMware ToolsVMware tools is a set of tools that help the VMware image to better interact with the host computer, including accelerated graphics and file hosting. If upgrading VMware tools in the future, then first remove the current installation of VMware tools by running /usr/bin/vmware-uninstall-tools, and deleting all previous installation directories in /tmp/vmware*
Before installing VMware tools, first install the necessary third party tools.
yum install gcc gcc-c++ kernel-devel

may need to run /usr/bin/vmware-config-tools.pl
commented out “if (not ($header_version_uts eq…”
Install GCC Cross-Compiler
Extract ArchiveProvided with the installation files for the technical report is a copy of the gcc cross compiler targeting the Nios II. It was installed from archive file nios2gcc-20080203.tar.bz2,
tar jxf nios2gcc-20080203.tar.bz2 -C /
This will extract the archive to /opt/nios2. /opt/nios2/bin contains all of the common gcc toolchain binaries.
Add to Path
Modify the file “~/.bash_profile”, changing the line
PATH=$PATH:$HOME/bin
to
PATH=$PATH:$HOME/bin:/opt/nios2/bin
This will add the installation directory of the nios II gcc cross compiler to the set of directories that the shell will automatically search executables for, so that one can run the tools without entering the complete installation path in addition to the binary name.
To verify everything is installed correctly, log out and then log back in, then type:
nios2-linux-gcc --version
which should then print out the following:

Install Required UtilitiesNote that the below is specific to CentOS (along with other Redhat compatible Linux distributions, including Fedora and RHEL).
As root, run:
yum install gcc make ncurses-devel bison flex gawk lynx
This will install all of the tools required for building uClinux.
Next, it is necessary to add an additional repository location (where the “yum” update program searches for possible installations), by entering (all on one line):
rpm –Uvh http://download.fedora.redhat.com/pub/epel/5/i386/epel-release-5-2.noarch.rpm
For a detailed explanation, see 2.
Then, install git:
yum install git-core
Extracting uClinux DistributionThe maintainers of the Nios II-specific codebase now use git, instead of SVN or CVS, to host the code base and updated patches. Git is a new file revision management system written by Linus Torvalds.
Extract git repositoryThe below commands assume that the user has mounted an external final system at /mnt/uclinuxdownloads that contains the file uClinux-dist-20080131.tar, hosted by Altera @ While in the home directory (“cd ~”), run the following:
tar xf /mnt/uclinuxdownloads/uClinux-dist-20080131.tar
This will extract the uClinux build root into ~/uClinux-dist. Assuming you are logged in using the default “fpga” user, it will be located in /home/fpga/uClinux-dist.
Extract Main Branch
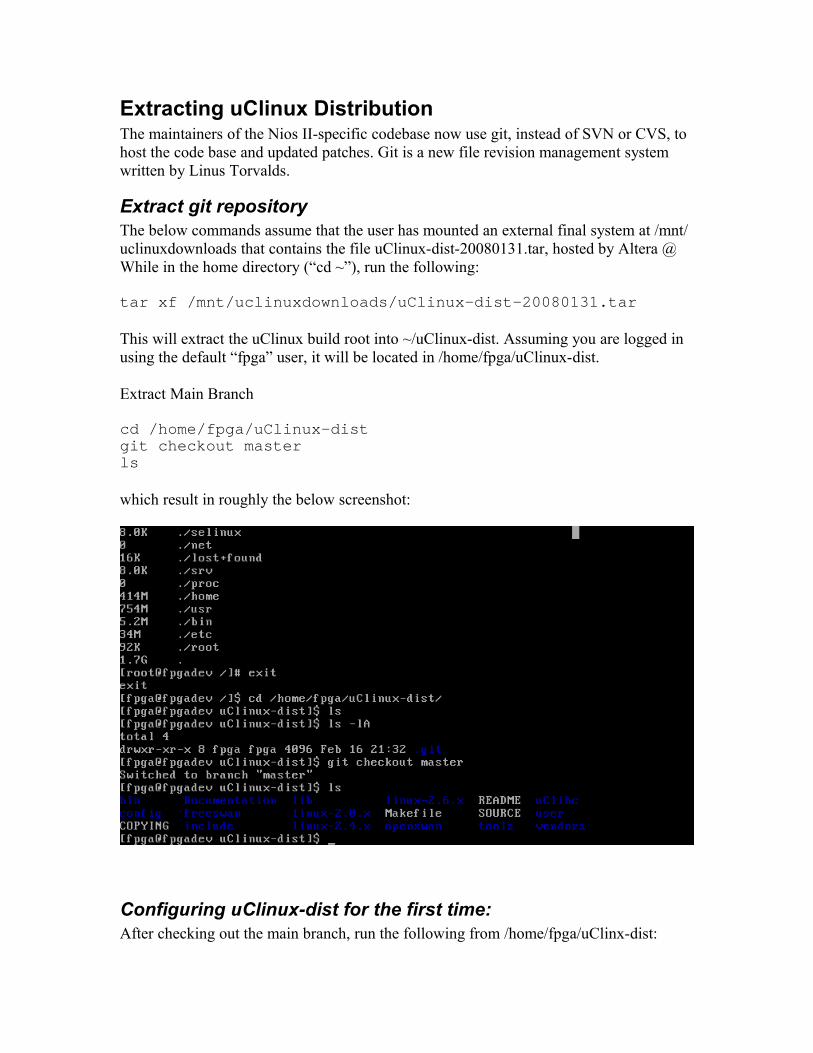
cd /home/fpga/uClinux-distgit checkout masterls
which result in roughly the below screenshot:
Configuring uClinux-dist for the first time:After checking out the main branch, run the following from /home/fpga/uClinx-dist:
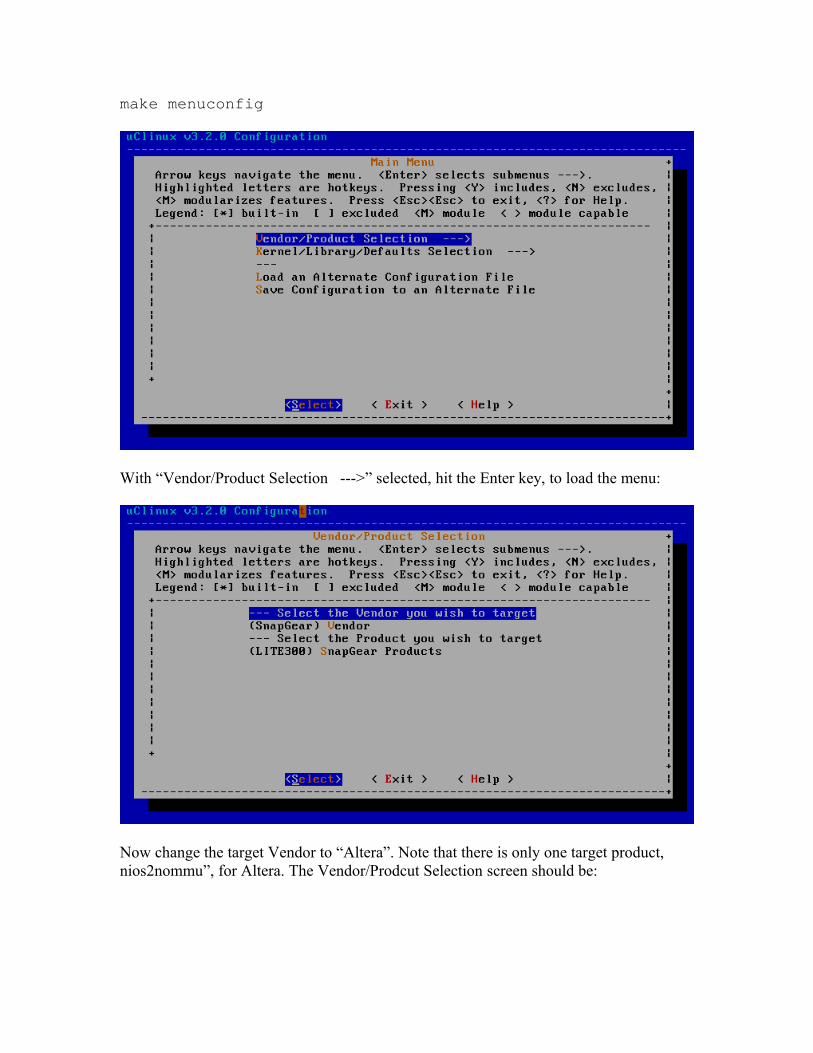
make menuconfig
With “Vendor/Product Selection --->” selected, hit the Enter key, to load the menu:
Now change the target Vendor to “Altera”. Note that there is only one target product, nios2nommu”, for Altera. The Vendor/Prodcut Selection screen should be:

After setting the vendor to Altera, select “Exit” and hit Enter to return to the Main Menu. Now from the main menu, enter the “Kernel/Library/Defaults Selection” menu, which initially is set to:
Change “Libc Version” to None, and select “Default all settings (lose changes).” The menu Kernel selection menu should now appear like:

Now Exit out of the Kernel Selection menu, and then exit out of the main Menu. When prompted “Do you wish to save your new kernel configuration?” choose “Yes.”
After “make menuconfig” exits, a set of scripts will automatically run configuring the build root. When it asks “debug (CONFIG_USER_DEBUG_DEBUG)” choose y (for yes).
Customizing the Kernel:
Ethernet/Network Support
Add Driver for DE2’s DM9000 NICDevice Drivers Network device support Ethernet (10 or 100Mbit) DM9000 support.
Modify startup bootscriptNote that at bootup the kernel will execute the file /to initialize, by editing ~/uClinux-dist/vendors/Altera/nios2nommu/rc
USB Key (File system) Support
SCSIDevice Drivers SCSI device support Select “SCSI device support” and “SCSI disk support”:
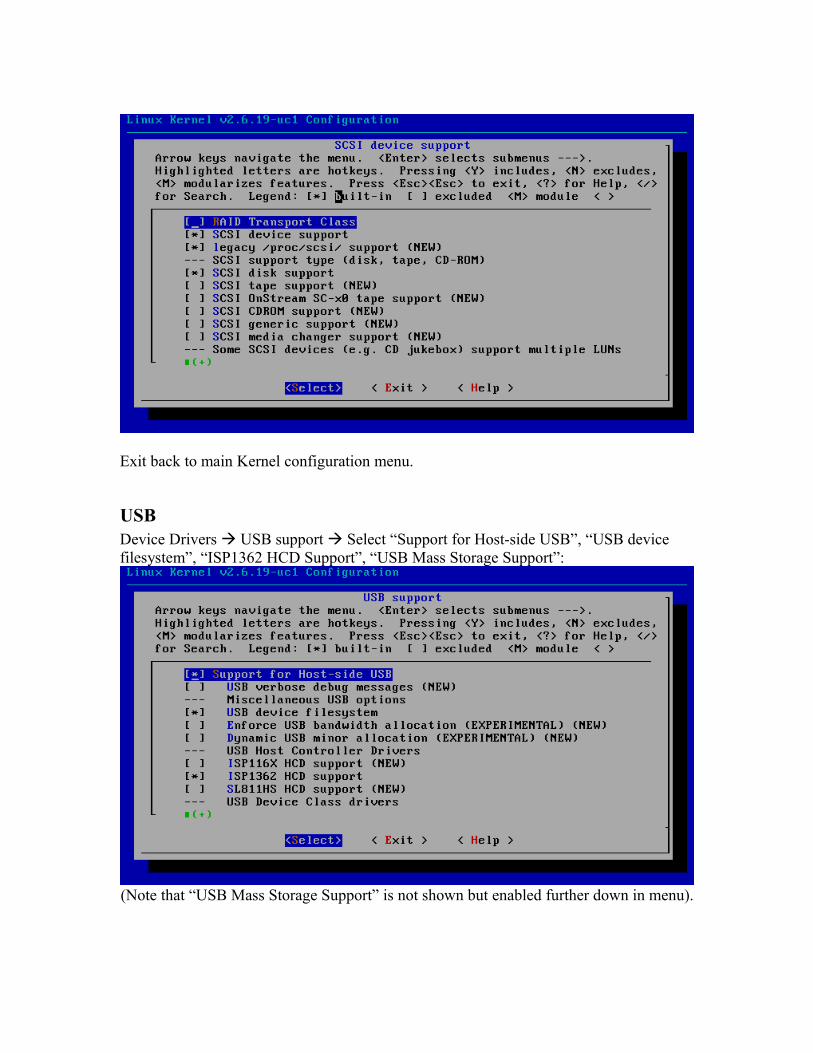
Exit back to main Kernel configuration menu.
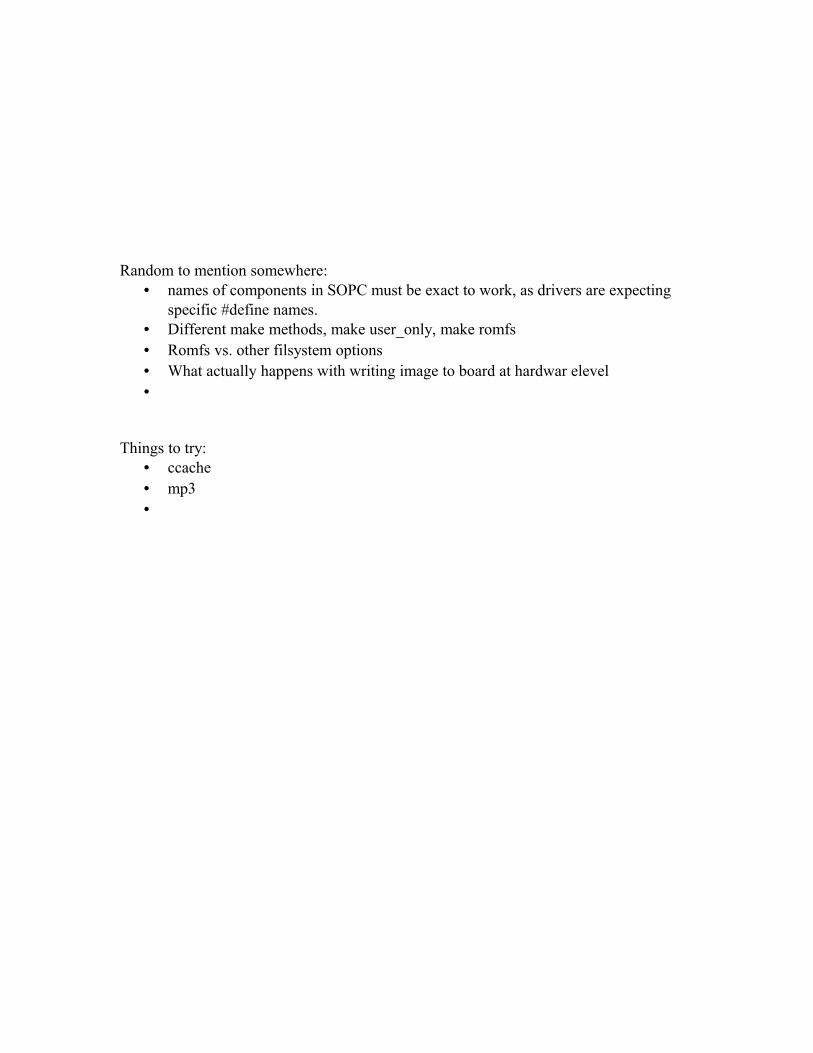
USBDevice Drivers USB support Select “Support for Host-side USB”, “USB device filesystem”, “ISP1362 HCD Support”, “USB Mass Storage Support”:
(Note that “USB Mass Storage Support” is not shown but enabled further down in menu).

File System (including FS language) SupportFile systems DOS/FAT/NT Filesystems Select “MSDOS fs support” and “VFAT (Windows-95) fs support):
Back out one level back to “File systems”, then Native Language Support Select “Codepage 437 (United States, Canada)” and “NLS ISO 8859-1 (Latin 1; Western European Languages)”.
VGA and Input (Keyboard, Mouse)Kernel Configuration:
• Processor type and featureso Platform drivers Options
Avalon VGA controller support PS2 controller
• Device Driverso Character Devices
Virtual Terminal Disable “Support for console on virtual terminal”
o Graphics Support Console display driver support
• Disable “VGA text console”• Disable “Framebuffer console support”
o Input Device Support Generic Input layer

Mouse interface Keyboard
• AT keyboardo USB Support
USB Human Interface Device (full HID) support HID input layer support
User Configuration:• Libz/libjpeg• Microwindows:
o Optimizeo Nanoxo NanXdemoo NanoWMo Have file io/jpego Frame Buffer Displayo Serial Mouseo Scan Keyboardo Nano-Xo NanoWMo NXclocko NXtermo NXView
Configuring the HardwareThe example project was based on DE2_NIOS_HOST_MOUSE_VGA, an example project included with the DE2 System CD, located under DE2_System_v1.4b\
VGA and PS2 Keyboard Support (TODO CITE), added following folders/files to main directory:
• Folders:o altera_up_avalon_ps2: folder containing PS2 componento VGA_Controller_component: folder containing VGA SOPC component
• Files:o DE2_NIOS_HOST_MOUSE_VGA.v: updated top level entityo SDRAM_PLL.v: updated PLL, changing SDRAM clock from 50MHz to
100MHz. o system_0.ptf: Updated SOPC description file, removing previous binary
VGA controller, and adding new VGA controller and PS2 component.
Random to mention somewhere:• names of components in SOPC must be exact to work, as drivers are expecting
specific #define names. • Different make methods, make user_only, make romfs• Romfs vs. other filsystem options• What actually happens with writing image to board at hardwar elevel•
Things to try:• ccache• mp3•

1 “About Buildroot.” Buildroot – Usage and documentation. http://buildroot.uclibc.org/buildroot.html 2 “Using EPEL: How can I install the packages from the EPEL software repository?” EPEL/FAQ – Fedora Project Wiki. http://fedoraproject.org/wiki/EPEL/FAQ#howtouse