Click “Start using Smore now” - lcps.org · 9. Now, the black bar at the top of your screen...
11
Smore Tutorial www.smore.com Madeline Davis, MSLIS 1. Type in your URL: www.smore.com 2. After the screen loads, select the “Sign up” link in the upper right corner. 3. Smore will create a pop up for you to sign in. 4. Fill out your Email Address, First name, Last name, and create a new email password for Smore. 5. Click “Start using Smore now” when finished.
Transcript of Click “Start using Smore now” - lcps.org · 9. Now, the black bar at the top of your screen...

Smore Tutorial
www.smore.com
Madeline Davis, MSLIS
1. Type in your URL: www.smore.com
2. After the screen loads, select the “Sign up” link in the upper right
corner.
3. Smore will create a pop up for you to sign in.
4. Fill out your Email Address, First name, Last name, and create a
new email password for Smore.
5. Click “Start using Smore now” when finished.

6. Smore will direct you to your home page where you will be able to
edit your profile, your flyers, and see how Smore works.
7. Select Designer Tour to learn about the features of Smore and how
Smore works.
8. Click along the tour and familiarize yourself with the features.

9. Now, the black bar at the top of your screen will list what you can
do with Smore: Upgrade, New Flyer, Your Flyers, Help and You
(your account).
10. Select “New Flyer.”
11. After clicking on “New Flyer,” Smore will pop up with a selection
page where you can choose from a variety formats: Event,
Business, For Sale, News Bulletin, Class, and Other.
12. Select “News Bulletin” for assignments describing a place or past
event.
13. Next, Smore will load your template for your flyer.
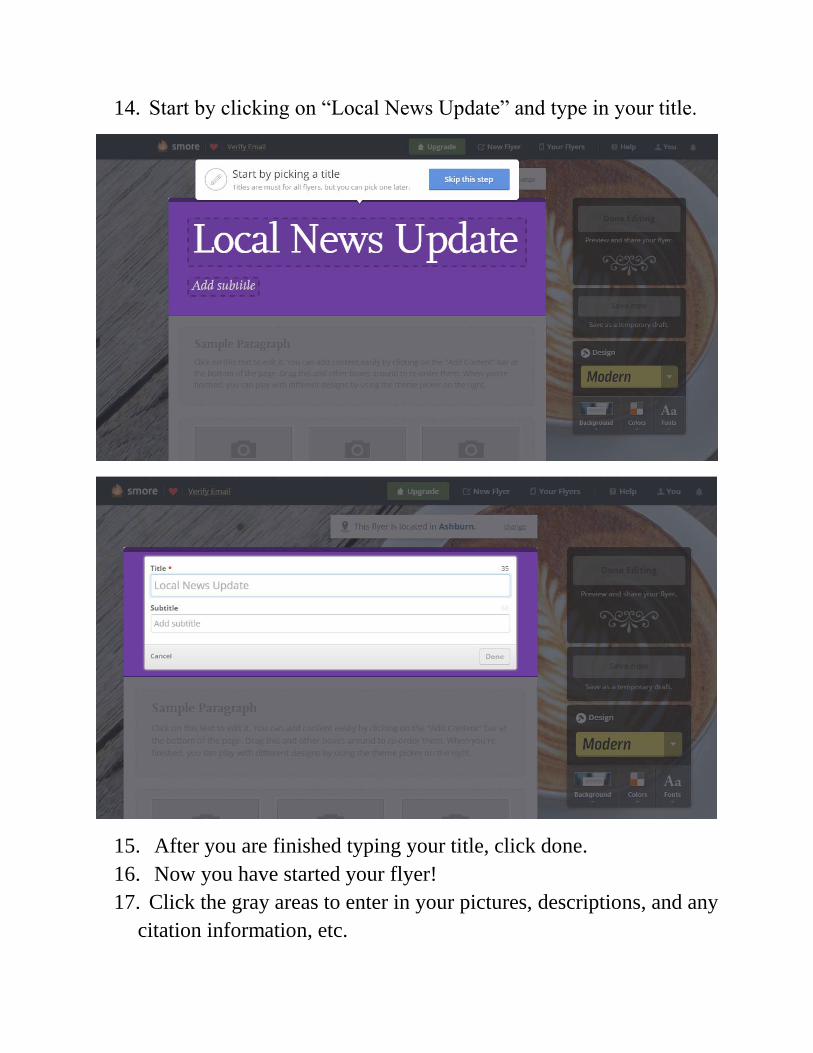
14. Start by clicking on “Local News Update” and type in your title.
15. After you are finished typing your title, click done.
16. Now you have started your flyer!
17. Click the gray areas to enter in your pictures, descriptions, and any
citation information, etc.
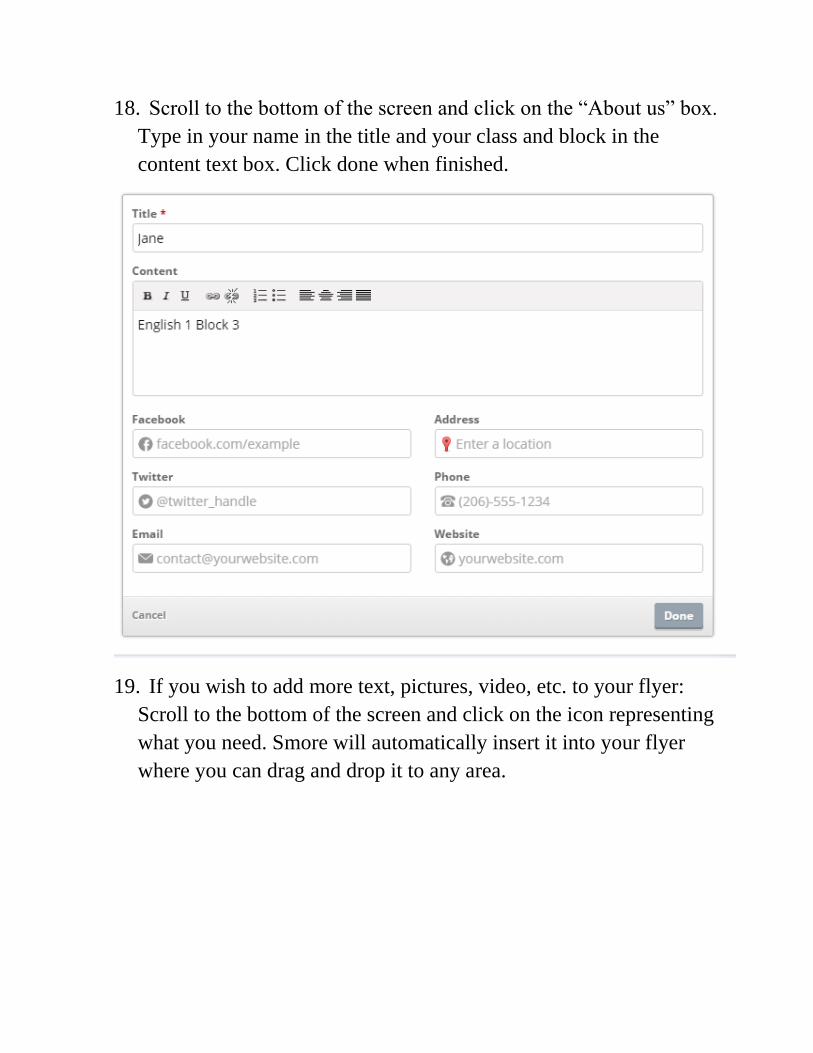
18. Scroll to the bottom of the screen and click on the “About us” box.
Type in your name in the title and your class and block in the
content text box. Click done when finished.
19. If you wish to add more text, pictures, video, etc. to your flyer:
Scroll to the bottom of the screen and click on the icon representing
what you need. Smore will automatically insert it into your flyer
where you can drag and drop it to any area.

20. Lastly, to design your flyer’s outlook, view the right side of the
screen. You can change the Background, Colors, Fonts and overall
Design of your flyer to fit your assignment.
21. Now, to publish your flyer:
a. Click “Save Now” and
b. “Done Editing.”

22. If you need to edit, you can always come back and select the box
“Edit your flyer” as well as preview it and print out a copy.
23. Also, you can share your flyer using Social Media and emailing it
by clicking on the Social Media icons at the top of the screen and
the “Send a newsletter” link in the Share with Email box.
24. To find the link to your flyer, examine the right hand side of the
screen under the number of visitors or views of your flyer.

25. Congratulations! You have completed your flyer!
26. If you need more help or information: select the “Help” icon at the
top of the screen in the black bar.
27. To view all of your flyers, select “Your Flyers” at the top of the
screen in the black bar. Smore will take you to your profile page and
list all the flyers you are working on and have created.
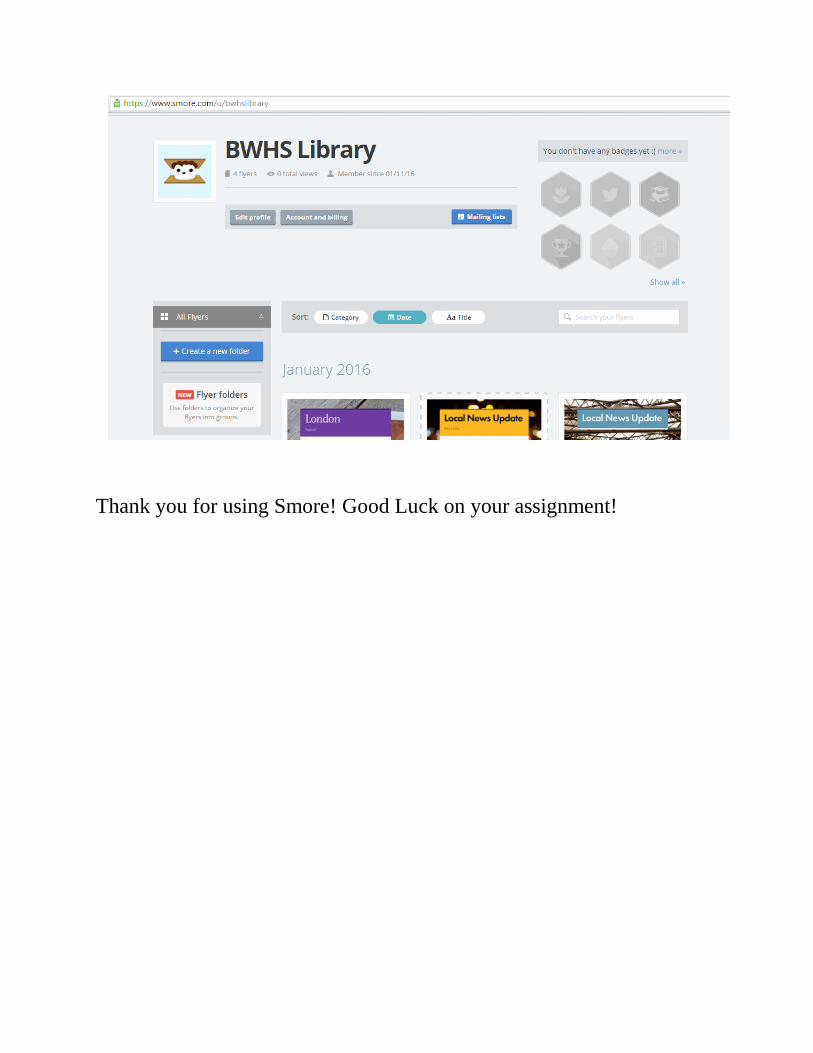
Thank you for using Smore! Good Luck on your assignment!
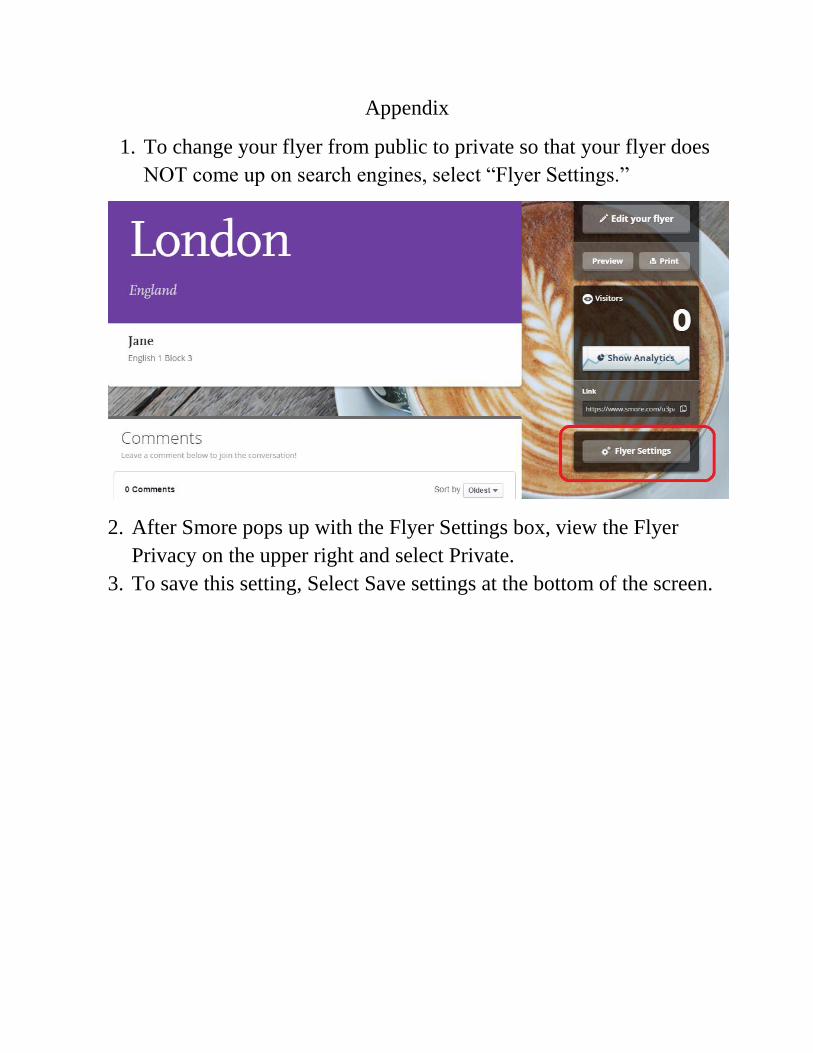
Appendix
1. To change your flyer from public to private so that your flyer does
NOT come up on search engines, select “Flyer Settings.”
2. After Smore pops up with the Flyer Settings box, view the Flyer
Privacy on the upper right and select Private.
3. To save this setting, Select Save settings at the bottom of the screen.