CLEEN portal Setting public access to portal documents.
15
CLEEN portal Setting public access to portal documents
-
Upload
hilary-clarke -
Category
Documents
-
view
225 -
download
2
Transcript of CLEEN portal Setting public access to portal documents.

CLEEN portal
Setting public access to portal documents

Step1: Actions on portal site
• Login to portal site• Open desired documents library• Create a view for the library• Save your work

Step1: Create a view on portal site
1
2
3
Note! The name of the library may vary in different program sites
4

Step1: Create a view on portal site (2)
You may choose whether to create a new view from the scratch or to take an existing one as a basis

Step1: Create a view on portal site (3)
The view name you specify here will be used later on in the web part configuration
Keep Modified and Modified By columns selected

Step1: Create a view on portal site (4)
Define your sorting and filtering criteria,Then press OK

Step1: Create a view on portal site (5)
In the resulting document view:1. Right-click the library name as shown above and choose “Copy shortcut” to copy the
library url. Then save it temporarily somewhere, e.g. in a Notepad2. Remember the view name you have specified and save it temporarily, e.g. in a
NotepadThe resulting strings may look like:https://portal.cleen.fi/sgem/CleendocsPublicDocumentsTestView

Step2: Actions on public site
• Login to public site• Open desired page in edit mode• Insert a documents view web part• Configure the web part• Save your work
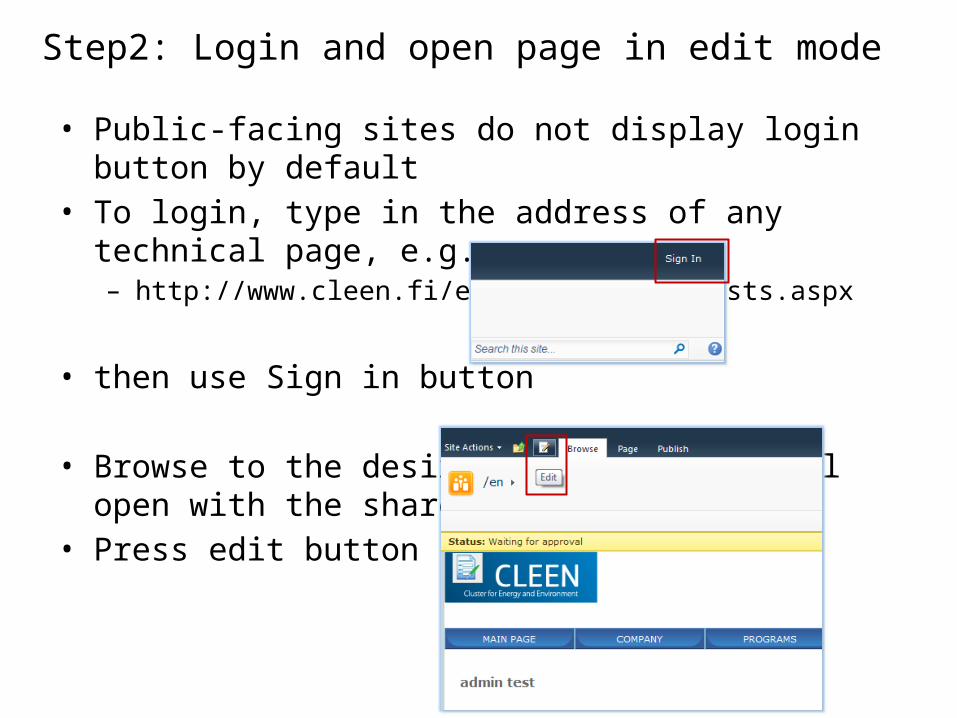
Step2: Login and open page in edit mode
• Public-facing sites do not display login button by default• To login, type in the address of any technical page, e.g.
– http://www.cleen.fi/en/_layouts/viewlsts.aspx
• then use Sign in button
• Browse to the desired page, and it will open with the sharepoint ribbon above:
• Press edit button

Step2: Insert a documents view web part
1
2
3
In the page edit mode:1. Select the row where you want your web part to appear and place your cursor there2. Go to “Editing Tools”->”Insert”->3. In the appearing ribbon select ”Web Part”

Step2: Insert a documents view web part(2)
1
2
3
In the web part selection dialog:1. Select Inno-W as a Category2. Select IWSharedItemsMenuWebPart3. Click Add

Step2: Insert a documents view web part(3)
1a
1b
Open web part editing dialog (two alternative ways):1. From drop-down menu2. From the ribbon
2b

Step2: Insert a documents view web part(4)
1
2
Type here the title
Type here the list url and the view name you have copied on the step 1
3Click apply and check if documents are displayed in the web part. Then click OK

Step2: Insert a documents view web part(5)
1
Click Save

Congratulations, here it is!