CDH4 Pseudo Installation - CentOS
52
Node Installat ion Manual venkat@cloudwick .com
description
CDH4 Pseudo Installation - CentOS
Transcript of CDH4 Pseudo Installation - CentOS

Steps for cloudera hadoop installation
on single node and multi node cluster.
Single-Node/Multi-Node Hadoop Cluster Setup
I. Operating System(O/S) Platform Selection And Installation.II. Designing The Cluster Network .
III. Change Your Hostname Without Rebooting In Linux.IV. Firewall Configuration
How Can You Disable Linux Firewall? Disabling Ip Tables. Disabling The Selinux.
V. Installation Of Java.VI. Cloudera Hadoop Installation.
VII. Hadoop Configuration.VIII. Adding The Dedicated Users To The Hadoop Group.
IX. Assigning Permission To Users.X. Formatting The Hdfs File System Via Name-Node.
XI. Starting Your Single-Node/Multi-Node Cluster.XII. Running A Map-Reduce Job On Single-Node/Multi-Node
Cluster .

Step1Operating System(o/s) platform selection and installation.
Why Linux?
Hadoop Supported Platforms
Hadoop native library is supported only on *nix platforms only. Unfortunately it is known not to work on Cygwin and Mac OS X and has mainly been used on the GNU/Linux platform.
It has been tested on the following GNU/Linux distributions:
RHEL4 /Fedora/SUSE Linux
Ubuntu
Gentoo
On all the above platforms a 32/64 bit Hadoop native library will work with a respective 32/64 bit jvm. Install any of the Linux flavor given below .

Step2:
Designing the cluster network.
Create two virtual machines - a Master and a slave using one of the Linux image. While creating the VM's, provide hadoop as user name. Once the VMs are ready, click on VM from file menu and choose settings. Select Network Adaptor and choose Bridged instead of NAT. Do this both on master and slave VMs.

Step3Change your Hostname without Rebooting in Linux
Make sure you are logged in as root and move to /etc/sysconfig and open the network file in vi.
[root@localhost /]# vi /etc/sysconfig/network
Look for the HOSTNAME line and replace it with the new hostname you want to use. Change the localhost.localdomain to the required hostname. Here I am going to change it as master.

When you are done, save your changes and exit vi.
Next edit the /etc/hosts file and set the new hostname.
[root@localhost /]# vi /etc/hosts
In hosts, edit the line that has the old hostname and replace it with your new one. if it is not there add the ip address and the new hostname by the end of the existing data.
Replace the localhost or whatever may be the hostname associated with the Host IP to the desired one as follows.

Save your changes and exit vi. The changes to /etc/hosts and /etc/sysconfig/network are necessary to make your changes persistent (in the event of an unscheduled reboot).
Now we use the hostname program to change the hostname that is currently set.
[root@localhost ~]# hostnamelocalhost.localdomain
[root@localhost ~]# hostname master[root@localhost ~]#
And run it again without any parameters to see if the hostname changed. [root@localhost ~]# hostnamemaster
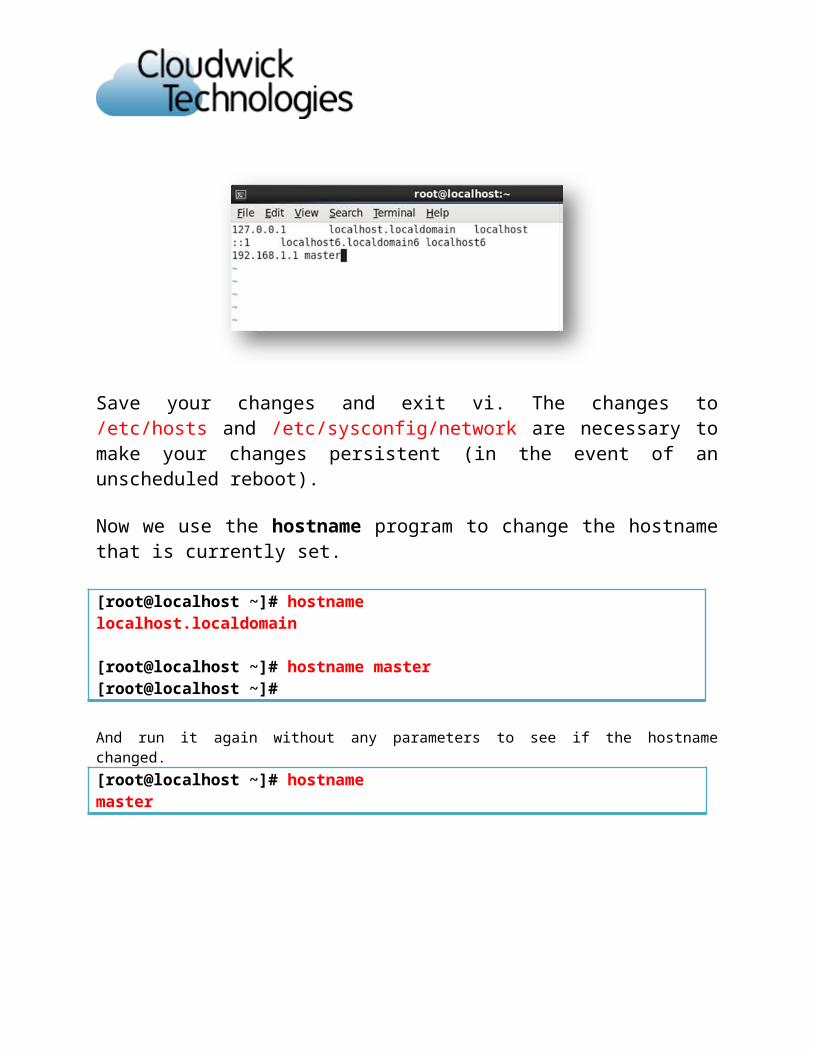
Finally we will restart the network to apply the changes we made to /etc/hosts and /etc/sysconfig/network.
[root@localhost /]# service network restart[root@localhost /]# chkconfig network on
To verify the hostname has been fully changed, exit from terminal and you should see your new hostname being used at the login prompt and after you've logged back in.
Do the same steps on slave machine as well.
If we are not updating the hosts file those systems will not communicate each other with the hostname. It will give some error like this.
Update the host file as follows.
Now let us try to ping to the slave
[root@master ~]# ping slavePING slave (192.168.208.216) 56(84) bytes of data.64 bytes from slave (192.168.208.216): icmp_seq=1 ttl=64 time=1.12 ms64 bytes from slave (192.168.208.216): icmp_seq=2 ttl=64 time=0.316 ms64 bytes from slave (192.168.208.216): icmp_seq=3 ttl=64 time=0.314 ms64 bytes from slave (192.168.208.216): icmp_seq=4 ttl=64 time=0.490 ms64 bytes from slave (192.168.208.216): icmp_seq=5 ttl=64 time=0.411 ms

Now try to ping from the slave to master
Follow the same steps in slave also.
[root@slave ~]# ping masterPING master (192.168.208.215) 56(84) bytes of data.64 bytes from master (192.168.208.215): icmp_seq=1 ttl=64 time=1.38 ms64 bytes from master (192.168.208.215): icmp_seq=2 ttl=64 time=0.424 ms64 bytes from master (192.168.208.215): icmp_seq=3 ttl=64 time=0.349 ms64 bytes from master (192.168.208.215): icmp_seq=4 ttl=64 time=0.329 ms64 bytes from master (192.168.208.215): icmp_seq=5 ttl=64 time=0.334 ms64 bytes from master (192.168.208.215): icmp_seq=6 ttl=64 time=0.331 ms

Step4
Firewall ConfigurationHadoop uses a lot of ports for its internal and external communications. We've just allowed all traffic between the servers in the cluster and clients. But if you don't want to do that you can also selectively open the required ports. By default in Linux the firewall are enabled such as
SELinux (Security-Enhanced Linux (SELinux) is a Linux feature that provides a mechanism for supporting access control security policies, including United States Department of Defense-style mandatory access controls, through the use of Linux Security Modules (LSM) in the Linux kernel. It is not a Linux distribution, but rather a set of Kernel modifications and user-space tools that can be added to various Linux distributions. Its architecture strives to separate enforcement of security decisions from the security policy itself and streamlines the volume of software charged with security policy enforcement. The key concepts underlying SELinux can be traced to several earlier projects by the United States National Security Agency.)
IPTables (iptables is a user space application program that allows a system administrator to configure the tables provided by the Linux kernel firewall (implemented as different Netfilter modules) and the chains and rules it stores. Different kernel modules and programs are currently used for different protocols; iptables applies to IPv4, ip6tables to IPv6, arptables to ARP, and ebtables to Ethernet frames.
iptables requires elevated privileges to operate and must be executed by user root, otherwise it fails to function. On most Linux systems, iptables is installed as /usr/sbin/iptables and documented in its man page,[2] which can be opened using man iptables when installed. It may also be found in /sbin/iptables, but since iptables is more like a service rather than an "essential binary", the preferred location remains /usr/sbin.)
TCP Wrapper(TCP Wrapper is a host-based networking ACL system, used to filter network access to Internet Protocol servers on (Unix-like) operating systems such as Linux or BSD. It allows host or subnetwork IP addresses, names and/or ident query replies, to be used as tokens on which to filter for access control purposes).
How Do I Disable Firewall?Disable the iptables (ipv4 and ipv6) and disable the selinux. As of now we are least bothered about TCP Wrappers.
a)Disabling IPtables(ipv4 and ip6)First login as the root user.Next enter the following three commands to disable firewall.# service iptables save

# service iptables stop# chkconfig iptables off
If you are using IPv6 firewall, enter:# service ip6tables save# service ip6tables stop# chkconfig ip6tables off
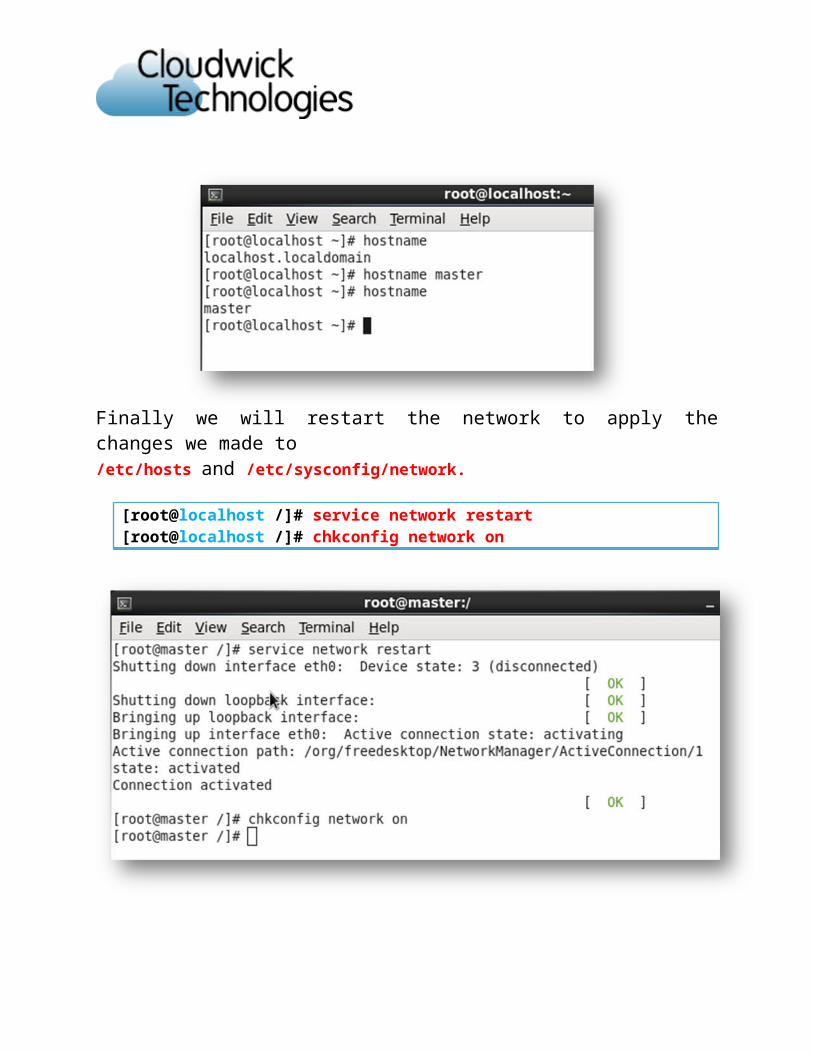
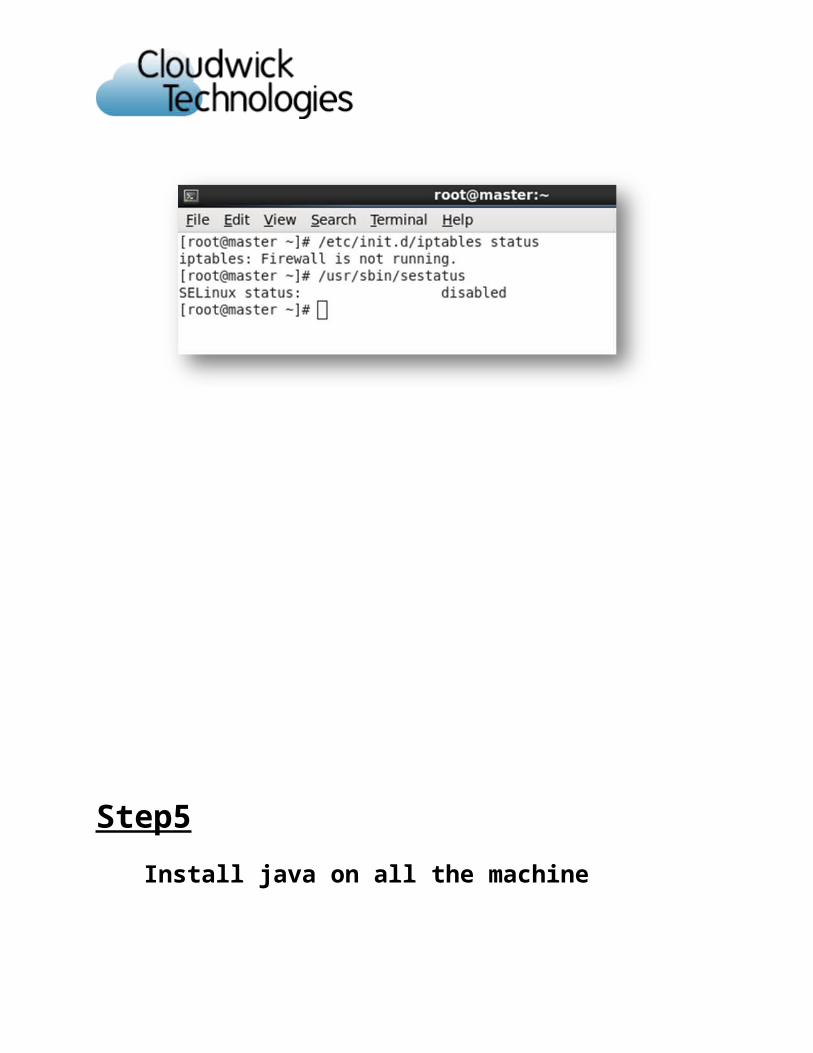
To check the firewall is running or not
[root@master /]# /etc/init.d/iptables status

b)Disabling the SELinuxDisable SELinux Temporarily
To disable SELinux temporarily you have to modify the /selinux/enforce file as shown below. Please note that this setting will be gone after the reboot of the system.
# cat /selinux/enforce1# echo 0 > /selinux/enforce# cat /selinux/enforce0
You can also use setenforce command as shown below to disable SELinux. Possible parameters to setenforce commands are: Enforcing , Permissive, 1 (enable) or 0 (disable).
# setenforce 0
Disable SELinux Permanently
To disable the SELinux permanently, modify the /etc/selinux/config and set the SELINUX=disabled as shown below. One you make any changes to the /etc/selinux/config, reboot the server for the changes to be considered.

# cat /etc/selinux/configSELINUX=disabledSELINUXTYPE=targeted
Following are the possible values for the SELINUX variable in the /etc/selinux/config file
• enforcing – The Security Policy is always Encoforced
• permissive - This just simulates the enforcing policy by only printing warning messages and not really enforcing the SELinux. This is good to first see how SELinux works and later figure out what policies should be enforced.
• disabled - Completely disable SELinux
Following are the possible values for SELINUXTYPE variable in the /etc/selinux/config file. This indicates the type of policies that can be used for the SELinux.
• targeted - This policy will protected only specific targeted network daemons.
• strict - This is for maximum SELinux protection.
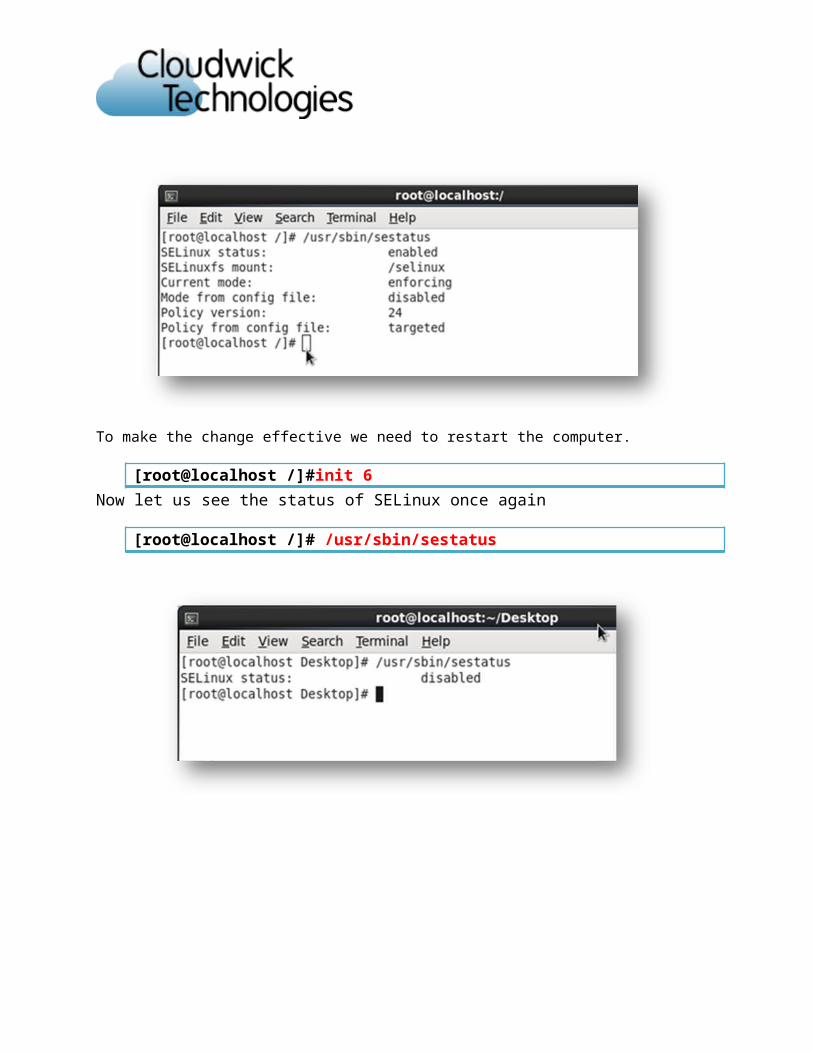
To see the status of SELinux
[root@localhost /]# /usr/sbin/sestatus
To make the change effective we need to restart the computer.
[root@localhost /]#init 6Now let us see the status of SELinux once again
[root@localhost /]# /usr/sbin/sestatus


Step5Install java on all the machine
Download and copy the java bin file in to the /usr/local directory
Requirements:
jdk1.6.0 x64(bin).or jre1.6.0 x64(bin).
Installation Instructions
This procedure installs the Java Development Kit (JDK) for 64-bit Linux, using a self-extracting binary file. The JDK download includes the Java SE Runtime Environment (JRE) – you do not have to download the JRE separately.
The name of the downloaded file has the following format:
jdk-6u<version>-linux-x64.bin
<version>jdk-6u18-linux-x64.bin
To install, download this file and use the following instructions.
1. Download and check the download file size.
You can download to any directory that you can write to.
This bundle can be installed by anyone (not only root users), in any location that the user can write to. However, only the root user can displace the system version of the Java platform supplied by Linux.
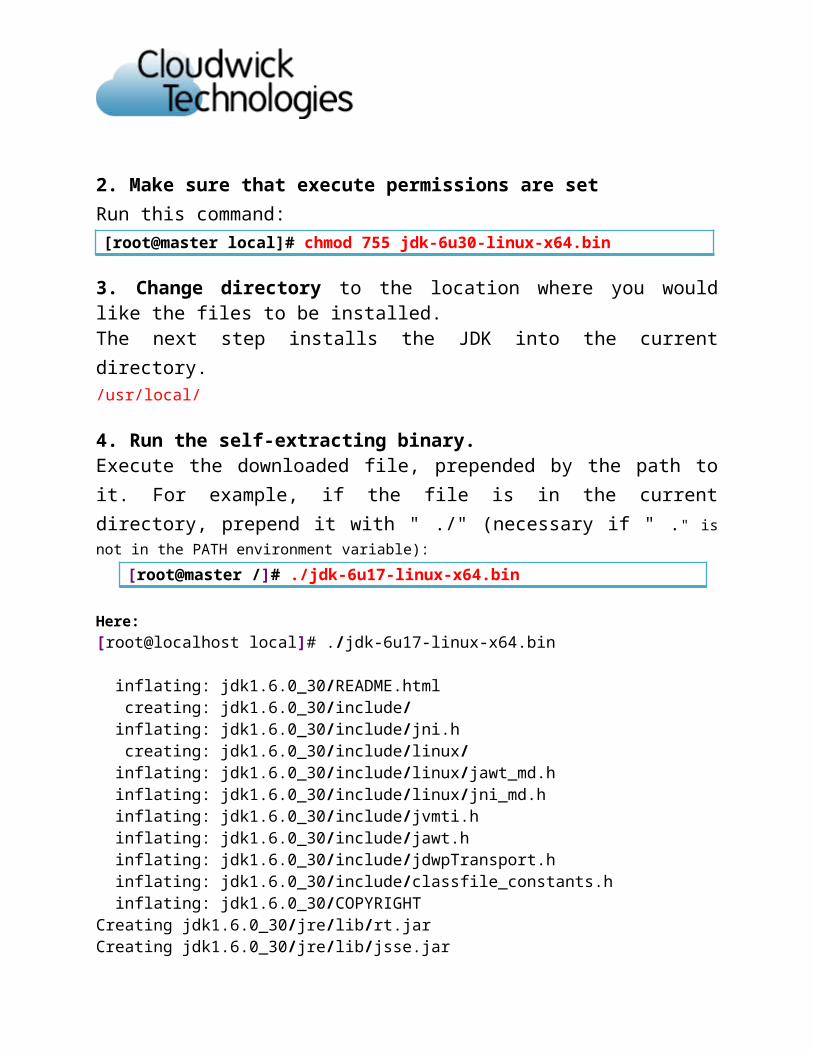
2. Make sure that execute permissions are setRun this command:[root@master local]# chmod 755 jdk-6u30-linux-x64.bin
3. Change directory to the location where you would like the files to be installed.The next step installs the JDK into the current directory./usr/local/
4. Run the self-extracting binary.Execute the downloaded file, prepended by the path to it. For example, if the file is in the current directory, prepend it with " ./" (necessary if " ." is not in the PATH environment variable):
[root@master /]# ./jdk-6u17-linux-x64.bin
Here:[root@localhost local]# ./jdk-6u17-linux-x64.bin
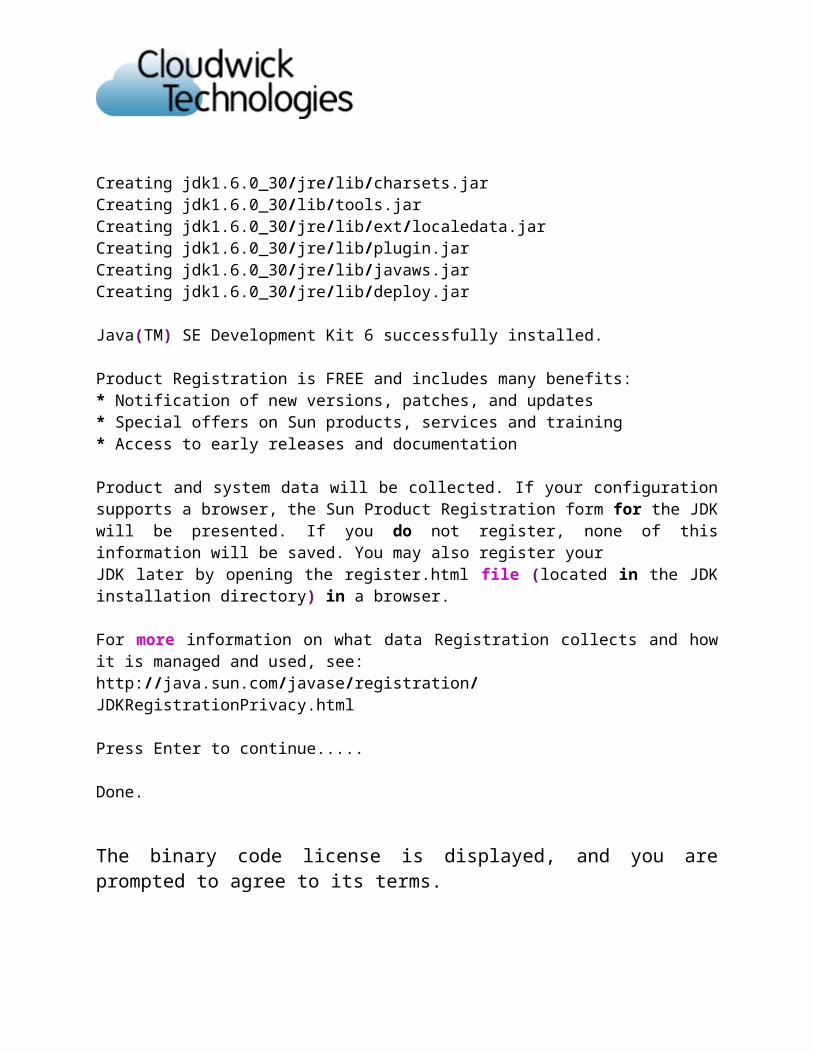
inflating: jdk1.6.0_30/README.html creating: jdk1.6.0_30/include/ inflating: jdk1.6.0_30/include/jni.h creating: jdk1.6.0_30/include/linux/ inflating: jdk1.6.0_30/include/linux/jawt_md.h inflating: jdk1.6.0_30/include/linux/jni_md.h inflating: jdk1.6.0_30/include/jvmti.h inflating: jdk1.6.0_30/include/jawt.h inflating: jdk1.6.0_30/include/jdwpTransport.h inflating: jdk1.6.0_30/include/classfile_constants.h inflating: jdk1.6.0_30/COPYRIGHTCreating jdk1.6.0_30/jre/lib/rt.jarCreating jdk1.6.0_30/jre/lib/jsse.jarCreating jdk1.6.0_30/jre/lib/charsets.jarCreating jdk1.6.0_30/lib/tools.jarCreating jdk1.6.0_30/jre/lib/ext/localedata.jarCreating jdk1.6.0_30/jre/lib/plugin.jarCreating jdk1.6.0_30/jre/lib/javaws.jarCreating jdk1.6.0_30/jre/lib/deploy.jar Java(TM) SE Development Kit 6 successfully installed. Product Registration is FREE and includes many benefits:* Notification of new versions, patches, and updates* Special offers on Sun products, services and training* Access to early releases and documentation
Product and system data will be collected. If your configuration supports a browser, the Sun Product Registration form for the JDK will be presented. If you do not register, none of this information will be saved. You may also register yourJDK later by opening the register.html file (located in the JDK installation directory) in a browser. For more information on what data Registration collects and how it is managed and used, see:http://java.sun.com/javase/registration/JDKRegistrationPrivacy.html Press Enter to continue..... Done.
The binary code license is displayed, and you are prompted to agree to its terms.
The Java Development Kit files are installed in a directory called jdk.6.0_<version> in the current directory. the directory stricture is as follows
Delete the bin file if you want to save disk space.
Note about Root Access: Installing the software automatically creates a directory called jre1.6.0_<version> . Note that if you choose to install the Java SE Runtime Environment into system-wide location such as /usr/local, you must first become root to gain the necessary permissions. If you do not have root access, simply install the Java SE Runtime Environment into your home directory, or a subdirectory that you have permission to write to.
Note about Overwriting Files: If you install the software in a directory that contains a subdirectory named jre1.6.0_ <version> , the new software overwrites files of the same name in that jre1.6.0_ <version> directory. Please be careful to rename the old directory if it contains files you would like to keep.

Note about System Preferences: By default, the installation script configures the system such that the backing store for system preferences is created inside the JDK's installation directory. If the JDK is installed on a network-mounted drive, it and the system preferences can be exported for sharing with Java runtime environments on other machines.
How to Set JAVA_HOME / PATH variables
We need to export the JAVA_HOME and the PATH to the environment variable. It is explained as follows.
A. ~/.bash_profile is a startup script which generally runs once. This particular file is used for commands which run when the normal user logs in. Common uses for .bash_profile are to set environment variables such as PATH, JAVA_HOME, to create aliases for shell commands, and to set the default permissions for newly created files.
Set JAVA_HOME & JAVA PATH
Open /etc/profile file$ vim /etc/profile
Set JAVA_HOME as follows using syntax export JAVA_HOME=<path-to-java>. If your path is set to /usr/local/jdk1.6.0_30/bin , set it as follows:
export JAVA_HOME=/usr/local/java
Set PATH as follows:export PATH=$PATH:/usr/local/java/bin
To check the installed java[root@localhost Desktop]# echo $JAVA_HOME/usr/local/java
[root@localhost Desktop]# echo $PATH/usr/local/sbin:/usr/sbin:/sbin:/usr/local/bin:/usr/bin:/bin:/root/bin:/usr/local/java/bin:/root/bin
[root@localhost Desktop]# which java/usr/local/java/bin/java[root@localhost Desktop]#
Step6Cloudera cdh3 installation(Hadoop Installation)Hadoop Distributed File System (HDFS)The Hadoop Distributed File System (HDFS) is a distributed file system designed to run on commodity hardware. It has many similarities with existing distributed file systems. however, the differences from other distributed file systems are significant. HDFS is highly fault-tolerant and is designed to be deployed on low- cost hardware. HDFS provides high throughput access to application data and is suitable for applications that have large data sets. HDFS relaxes a few POSIX requirements to enable streaming access to file system data. HDFS was originally built as infrastructure for the Apache Nutch web search engine project. HDFS is part of the Apache Hadoop project, which is part of the Apache Lucene project. The following picture gives an overview of the most important HDFS components.
Click the following link to go to the installation package. otherwise copy this link and open it in the browser.
https://ccp.cloudera.com/display/CDHDOC/CDH3+Installation
Go to the above website and follow the installation steps

Download and open the cdh3-repository-1.0.1-noarch.rpm using the package installer and install it.Follow the below steps to install the packages to install it.
click on Continue Anyway to initiate the installation of the package. Click on install to start the installation. Now it will Download and install the package
a)To add the CDH3 repository:Click the entry in the table shown in the website that matches your Red Hat or CentOS system, download the repo file, and save it in your /etc/yum.repos.d/ directory. the content looks like this.
[cloudera-cdh3]name=Cloudera's Distribution for Hadoop, Version 3mirrorlist=http://archive.cloudera.com/redhat/6/x86_64/cdh/3/mirrorsgpgkey = http://archive.cloudera.com/redhat/6/x86_64/cdh/RPM-GPG-KEY-cloudera gpgcheck = 1

(To install a different version of CDH on a Red Hat system, open the repo file (for example, cloudera-cdh3.repo, and change the 3 in the repo file to the version number you want. For example, change the 3 to 3u0 to install CDH3 Update 0.)
b)To install CDH3 on a Red Hat system:Before installing: (Optionally) add a repository key. Add the Cloudera Public GPG Key to your repository by executing one of the following commands:
# sudo rpm --import http://archive.cloudera.com/redhat/6/x86_64/cdh/RPM-GPG-KEY-cloudera
c)Find and install the Hadoop core package. For example:#yum search hadoop
#sudo yum install hadoop-0.20

Install each type of daemon package on the appropriate machine. For example, install the NameNode package on your Master machine:
#sudo yum install hadoop-0.20-<daemon type>
where <daemon type> is one of the following:namenode
DatanodeSecondarynamenode
Jobtracker
Tasktracker

After installation of the daemons check whether the daemons correctly installed or not. The installation directory is /etc/init.d.

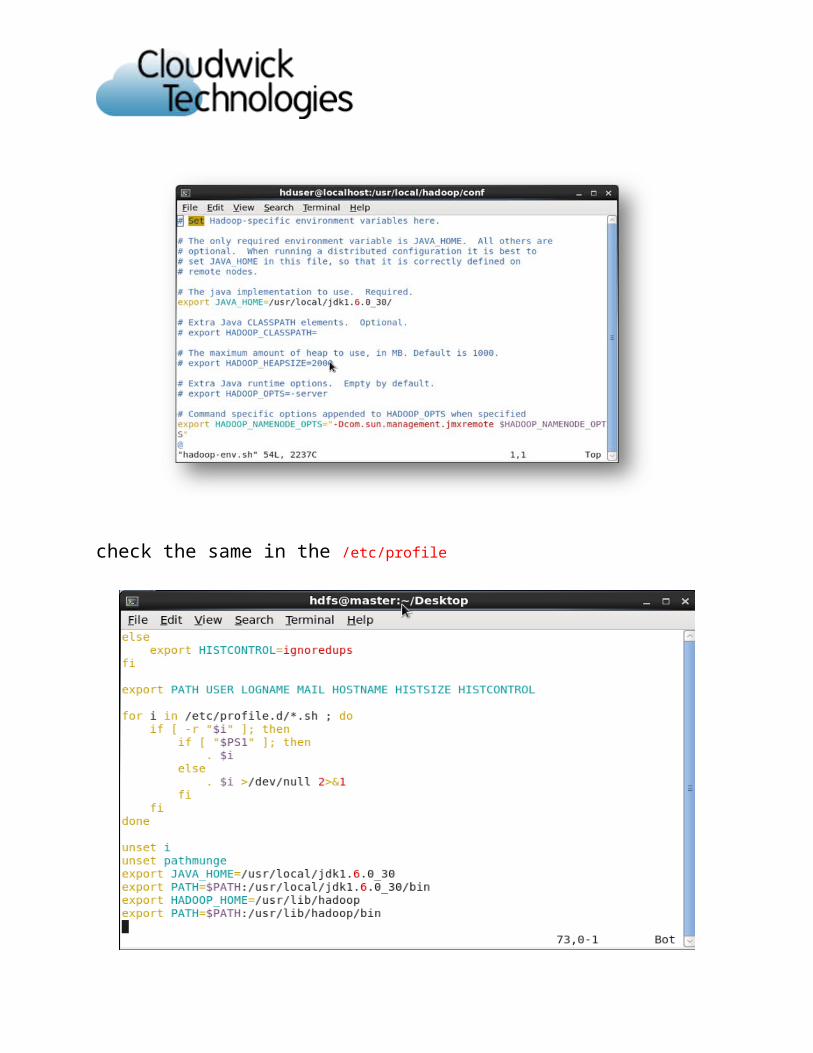
Step7ConfigurationUpdate hadoop-env.sh file in the hadoop folder The only required environment variable we have to configure for Hadoop in this tutorial is JAVA_HOME. Open /conf/hadoop-env.sh in the editor of your choice (if you used the installation path in this tutorial, the full path is /usr/local/hadoop/conf/hadoop-env.sh) and set the JAVA_HOME environment variable to the Sun JDK/JRE 6 directory.
Update the following lines to hadoop-env.sh file [root@Slave /]# cd /usr/lib/hadoop/conf/ [hduser@slave conf]$ vim hadoop-env.sh
Give the java home path in the hadoop-env.shexport JAVA_HOME=<path to java>jdk1.6.0_30/
Change # The java implementation to use. Required.# export JAVA_HOME=/usr/local/jdk1.6.0_30/
to# The java implementation to use. Required.export JAVA_HOME=/usr/local/jdk1.6.0_30/

check the same in the /etc/profile

Update the hadoop path in the /etc/profileNow logout from all the terminals and open the new terminal and check the hadoop versionas follows1)As a hadoop user
2)As a root user

Step8Adding the dedicated users to the hadoop group.
Now We will add the dedicated users(hdfs and mapred) to the hadoop group in master and the slave
In master
[root@master /]# sudo gpasswd -a hdfs hadoop [root@master /]# sudo gpasswd -a mapred hadoop
In slave [root@slave /]# sudo gpasswd -a hdfs hadoop [root@slave /]# sudo gpasswd -a mapred hadoop

conf/*-site.xmlNote: As of Hadoop 0.20.0, the configuration settings previously found in hadoop-site.xml were moved to core-site.xml (hadoop.tmp.dir, fs.default.name), mapred-site.xml (mapred.job.tracker) and hdfs-site.xml (dfs.replication).
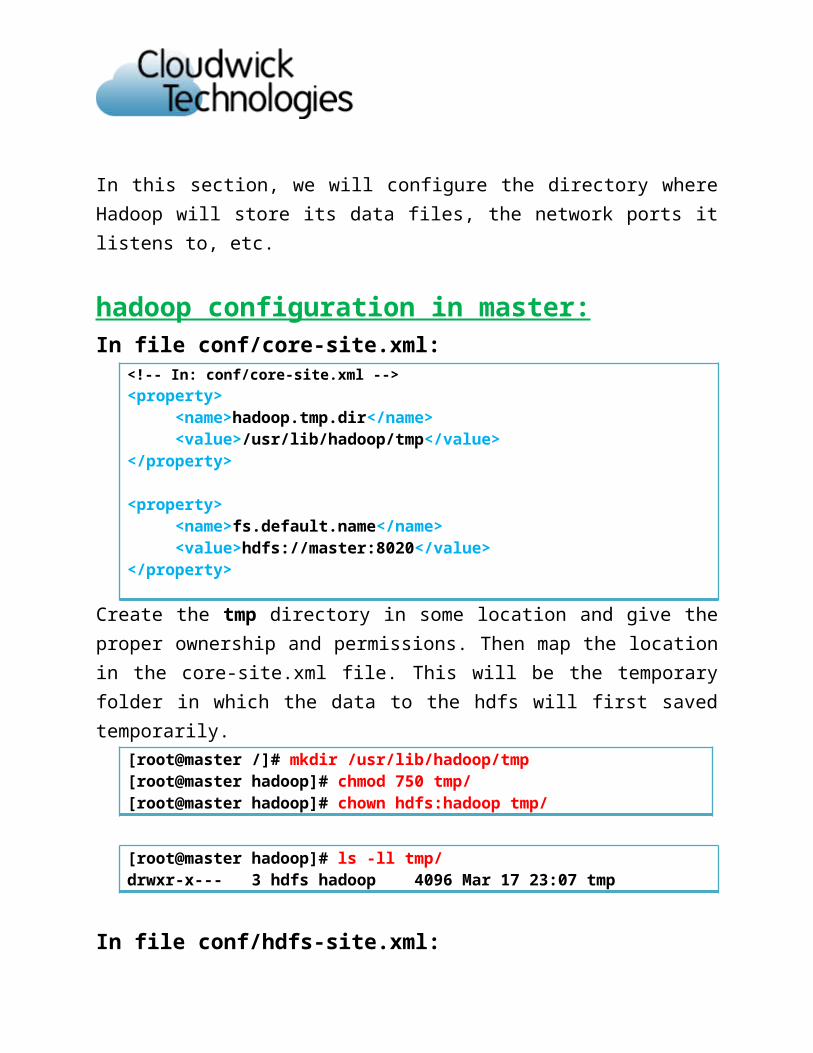
In this section, we will configure the directory where Hadoop will store its data files, the network ports it listens to, etc.
hadoop configuration in master:In file conf/core-site.xml:
<!-- In: conf/core-site.xml --><property>
<name>hadoop.tmp.dir</name><value>/usr/lib/hadoop/tmp</value>
</property>

<property><name>fs.default.name</name><value>hdfs://master:8020</value>
</property>
Create the tmp directory in some location and give the proper ownership and permissions. Then map the location in the core-site.xml file. This will be the temporary folder in which the data to the hdfs will first saved temporarily.
[root@master /]# mkdir /usr/lib/hadoop/tmp[root@master hadoop]# chmod 750 tmp/[root@master hadoop]# chown hdfs:hadoop tmp/
[root@master hadoop]# ls -ll tmp/drwxr-x--- 3 hdfs hadoop 4096 Mar 17 23:07 tmp
In file conf/hdfs-site.xml:<!-- In: conf/hdfs-site.xml -->
<property> <name>dfs.permissions</name> <value>false</value></property>
<property><name>dfs.name.dir</name><value>/storage/name </value>
</property>
<property><name>dfs.data.dir</name><value>/storage/data</value>
</property>
<property><name>dfs.replication</name><value>2</value>
</property>
Now create a new directory storage in the /(root) directory of master.
[root@master /]# mkdir /storageWe need to assign the permission to the storage directory .
[root@master /]# chmod 775 /storage/In master give the ownership of the storage directory to the hdfs user.
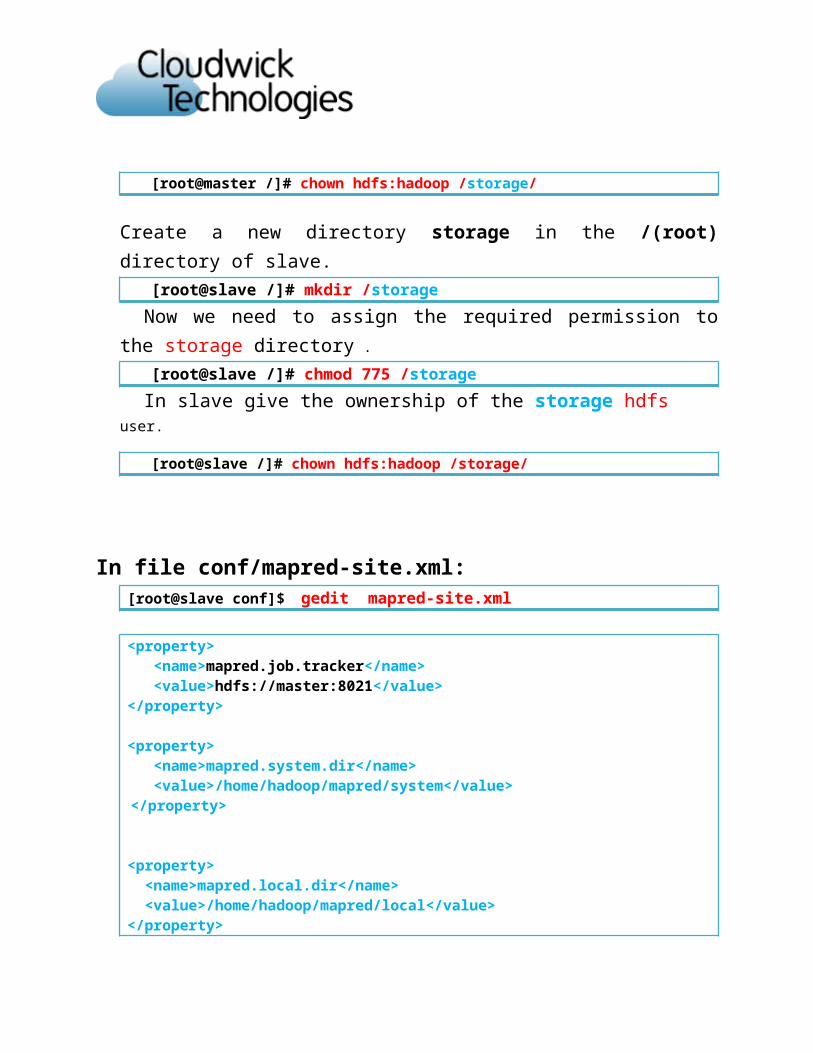
[root@master /]# chown hdfs:hadoop /storage/
Create a new directory storage in the /(root) directory of slave.[root@slave /]# mkdir /storage
Now we need to assign the required permission to the storage directory .
[root@slave /]# chmod 775 /storageIn slave give the ownership of the storage hdfs user.
[root@slave /]# chown hdfs:hadoop /storage/
In file conf/mapred-site.xml:[root@slave conf]$ gedit mapred-site.xml
<property> <name>mapred.job.tracker</name> <value>hdfs://master:8021</value></property>
<property> <name>mapred.system.dir</name> <value>/home/hadoop/mapred/system</value>
</property>

<property> <name>mapred.local.dir</name> <value>/home/hadoop/mapred/local</value></property>
<property> <name>mapred.temp.dir</name> <value>/home/hadoop/mapred/temp</value> </property>
Create a new directory mapred in the /home/hadoop directory of master and slave and perform below operations.
[root@slave /]# mkdir /home/hadoop/mapred
Now we need to assign the required permission to the storage directory .
[root@slave /]# chmod 775 /home/hadoop/mapred
In slave give the ownership of the mapred to mapred user.
[root@slave /]# chown mapred:hadoop /home/hadoop/mapred
Synchronizing the configuration files between master and the slave

To synchronize the core-site.xml,hdfs-site.xml and mapred-site.xml file between master and slave..
For core-site.xml
[root@master /]# rsync -avrt /usr/lib/hadoop/conf/core-site.xml root@<slave IP add>:/usr/lib/hadoop/conf/core-site.xml
The authenticity of host '192.168.208.216 (192.168.208.216)' can't be established.RSA key fingerprint is 6c:2a:38:e6:b3:e0:0c:00:88:56:55:df:f6:b9:a3:68.Are you sure you want to continue connecting (yes/no)? yesWarning: Permanently added '192.168.208.216' (RSA) to the list of known [email protected]'s password: sending incremental file listcore-site.xml
sent 433 bytes received 37 bytes 30.32 bytes/sectotal size is 352 speedup is 0.75
[root@master /]#
For hdfs-site.xml
[root@master /]# rsync -avrt /usr/lib/hadoop/conf/hdfs-site.xml root@<slave IP add>:/usr/lib/hadoop/conf/[email protected]'s password: sending incremental file listhdfs-site.xml
sent 561 bytes received 37 bytes 79.73 bytes/sectotal size is 480 speedup is 0.80[root@master /]#
For mapred-site.xml
[root@master /]# rsync -avrt /usr/lib/hadoop/conf/mapre-site.xml root@<slave IP add>:/usr/lib/hadoop/conf/[email protected]'s password: sending incremental file listmapred-site.xml
sent 341 bytes received 37 bytes 84.00 bytes/sec

total size is 258 speedup is 0.68[root@master conf]#
User assignment for the daemons in hdfs :
In master:[root@master /]# export HADOOP_NAMENODE_USER=hdfs[root@master /]# export HADOOP_SECONDARYNAMENODE_USER=hdfs [root@master /]# export HADOOP_DATANODE_USER=hdfs [root@master /]# export HADOOP_JOBTACKER_USER=mapred[root@master /]# export HADOOP_TASKTRACKER_USER=mapred
In Slave
[root@slave /]# export HADOOP_NAMENODE_USER=hdfs[root@slave /]# export HADOOP_DATANODE_USER=hdfs[root@slave /]# export HADOOP_JOBTACKER_USER=mapred[root@slave /]# export HADOOP_TASKTRACKER_USER=mapred
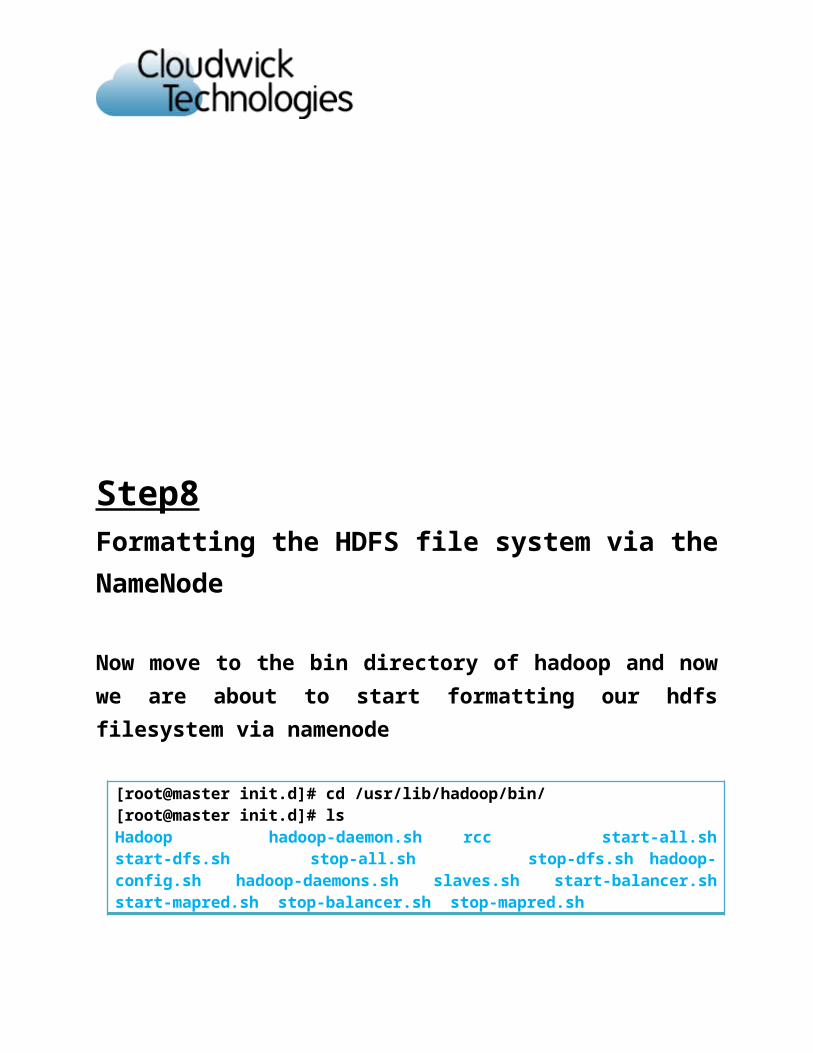
Step8
Formatting the HDFS file system via the NameNode
Now move to the bin directory of hadoop and now we are about to start formatting our hdfs filesystem via namenode
[root@master init.d]# cd /usr/lib/hadoop/bin/[root@master init.d]# lsHadoop hadoop-daemon.sh rcc start-all.sh start-dfs.sh stop-all.sh stop-dfs.sh hadoop-config.sh hadoop-daemons.sh slaves.sh start-balancer.sh start-mapred.sh stop-balancer.sh stop-mapred.sh
Let us try to format the hadoop filesystem[root@master bin]# hadoop namenode -format
12/03/21 13:29:14 INFO namenode.NameNode: STARTUP_MSG: /************************************************************STARTUP_MSG: Starting NameNodeSTARTUP_MSG: host = master/192.168.208.217STARTUP_MSG: args = [-format]STARTUP_MSG: version = 0.20.2-cdh3u3STARTUP_MSG: build = file:///data/1/tmp/topdir/BUILD/hadoop-0.20.2-cdh3u3 -r 217a3767c48ad11d4632e19a22897677268c40c4; compiled by 'root' on Thu Feb 16 10:23:06 PST 2012************************************************************/12/03/21 13:29:15 INFO util.GSet: VM type = 64-bit12/03/21 13:29:15 INFO util.GSet: 2% max memory = 19.33375 MB12/03/21 13:29:15 INFO util.GSet: capacity = 2^21 = 2097152 entries12/03/21 13:29:15 INFO util.GSet: recommended=2097152, actual=209715212/03/21 13:29:15 INFO namenode.FSNamesystem: fsOwner=hdfs (auth:SIMPLE)12/03/21 13:29:16 INFO namenode.FSNamesystem: supergroup=supergroup12/03/21 13:29:16 INFO namenode.FSNamesystem: isPermissionEnabled=false12/03/21 13:29:16 INFO namenode.FSNamesystem: dfs.block.invalidate.limit=100012/03/21 13:29:16 INFO namenode.FSNamesystem: isAccessTokenEnabled=false accessKeyUpdateInterval=0 min(s), accessTokenLifetime=0 min(s)12/03/21 13:29:17 INFO common.Storage: Image file of size 110 saved in 0 seconds.12/03/21 13:29:17 INFO common.Storage: Storage directory /storage/name has been successfully formatted.12/03/21 13:29:17 INFO namenode.NameNode: SHUTDOWN_MSG: /************************************************************SHUTDOWN_MSG: Shutting down NameNode at master/192.168.208.217************************************************************/
[root@master bin]#

Now we will start the demons one by one in the appropriate nodes if we need multinode cluster. Otherwise start all demons in the single node.
For Single-node Cluster:[hdfs@master hadoop]$ bin/start-all.sh starting namenode, logging to /usr/lib/hadoop-0.20/bin/../logs/hadoop-hdfs-namenode-master.outhdfs@master's password: master: starting datanode, logging to /usr/lib/hadoop-0.20/bin/../logs/hadoop-hdfs-datanode-master.outhdfs@master's password: master: starting secondarynamenode, logging to /usr/lib/hadoop-0.20/bin/../logs/hadoop-hdfs-secondarynamenode-master.outstarting jobtracker, logging to /usr/lib/hadoop-0.20/bin/../logs/hadoop-hdfs-jobtracker-master.outhdfs@master's password: master: starting tasktracker, logging to /usr/lib/hadoop-0.20/bin/../logs/hadoop-hdfs-tasktracker-master.out
[hdfs@master hadoop]$ jps7977 SecondaryNameNode7744 NameNode7869 DataNode8173 TaskTracker7897 JobTracker8188 Jps[hdfs@master hadoop]$
Open the browser and see the output "localhost:50070"
Here live node is 1 because we have enabled all the daemons in single node.

For Multi-Node Cluster:First we will start the namenode/secondarynamenode/jobtracker/datanode/tasktracker on the master and datanode/tasktracker on salve node.
Namenode Daemon:[root@master /]# /etc/init.d/hadoop-0.20-namenode startStarting Hadoop namenode daemon (hadoop-namenode): starting namenode, logging to /usr/lib/hadoop-0.20/logs/hadoop-hadoop-namenode-master.outnamenode (pid 30415) is running... [ OK ][root@master /]#
Secondarynamenode Daemon:
[root@master /]# /etc/init.d/hadoop-0.20-secondarynamenode startStarting Hadoop secondarynamenode daemon (hadoop-secondarynamenode): starting secondarynamenode, logging to /usr/lib/hadoop-0.20/logs/hadoop-hadoop-secondarynamenode-master.outsecondarynamenode (pid 30575) is running.. [ OK ][root@master /]#
Jobtracker Daemon:

[root@master /]# /etc/init.d/hadoop-0.20-jobtracker startStarting Hadoop namenode daemon (hadoop-namenode): starting namenode, logging to /usr/lib/hadoop-0.20/logs/hadoop-hadoop-namenode-master.outnamenode (pid 30178) is running... [ OK ][root@master /]#
Tasktracker Daemon:
[root@master /]# /etc/init.d/hadoop-0.20-tasktracker startStarting Hadoop namenode daemon (hadoop-namenode): starting namenode, logging to /usr/lib/hadoop-0.20/logs/hadoop-hadoop-namenode-master.outnamenode (pid 28193) is running... [ OK ][root@master /]#As of now we have installed datanode on master and slave; So we need to start it on both the machines.
[root@slave /]# /etc/init.d/hadoop-0.20-tasktracker startStarting Hadoop namenode daemon (hadoop-namenode): starting namenode, logging to /usr/lib/hadoop-0.20/logs/hadoop-hadoop-namenode-master.outnamenode (pid 28193) is running... [ OK ][root@master /]#
Datanode Daemon:
[root@master /]# /etc/init.d/hadoop-0.20-datanode startStarting Hadoop namenode daemon (hadoop-namenode): starting namenode, logging to /usr/lib/hadoop-0.20/logs/hadoop-hadoop-namenode-master.outdatanode (pid 30655) is running... [ OK ][root@master /]# Similarly we have installed tasktracker on master and slave; So we need to start it on both the machines.

[root@slave /]# /etc/init.d/hadoop-0.20-datanode startStarting Hadoop datanode daemon (hadoop-datanode): starting datanode, logging to /usr/lib/hadoop-0.20/logs/hadoop-hadoop-datanode-slave.outdatanode (pid 7912) is running... [ OK ][root@localhost /]#
Check the running process on master:[root@master /]# jps30575 SecondaryNameNode30415 NameNode30814 Jps30655 DataNode28193 Tasktracker30178 Jobtracker[root@master /]#
Check the running process on slave:[root@slave Desktop]# jps7915 DataNode7481 Tasktracker13025 Jps[root@slave Desktop]#
Or if you want the full details of the ports follow the command:
[root@master /]# netstat -ptlenActive Internet connections (only servers)Proto Recv-Q Send-Q Local Address Foreign Address State User Inode PID/Program name tcp 0 0 0.0.0.0:22 0.0.0.0:* LISTEN 0 9970 1615/sshd tcp 0 0 127.0.0.1:25 0.0.0.0:* LISTEN 0 10170 1691/master tcp 0 0 :::50090 :::* LISTEN 494 66492 30575/java tcp 0 0 ::ffff:192.168.208.217:8020 :::* LISTEN 494 66244 30415/java tcp 0 0 :::59284 :::* LISTEN 494 66099 30415/java tcp 0 0 :::47701 :::* LISTEN 494 66469 30575/java tcp 0 0 :::50070 :::* LISTEN 494 66255 30415/java tcp 0 0 :::22 :::* LISTEN 0 9972 1615/sshd tcp 0 0 :::56184 :::* LISTEN 494 66596 30655/java tcp 0 0 :::50010 :::* LISTEN 494 66818 30655/java tcp 0 0 :::50075 :::* LISTEN 494 66820 30655/java tcp 0 0 :::50020 :::* LISTEN 494 66836 30655/java [root@master /]#
Now open the browser and in the address bar master:50070. It should give the proper output with 2 data node running.
Let us check the status of the running nodes. click on the live nodes we will get the following details.

Multi-node cluster is ready. Just Play!