
CAPPS HR/Payroll: Payroll Course 160 - CAPPS Training -...
188
CAPPS HR/PAYROLL End-User Training (EUT) Payroll Course Number: 160 Course Name: Payroll Payroll Core Super Users This course does NOT contain audio.
Transcript of CAPPS HR/Payroll: Payroll Course 160 - CAPPS Training -...
CAPPS HR/PAYROLL End-User Training (EUT)
Payroll Course Number: 160
Course Name: Payroll
Payroll Core Super Users
This course does NOT contain audio.
Welcome
Hello, Welcome back to the CAPPS
HR/Payroll training.
Before taking this class you should have already completed the CAPPS
Fundamentals course.

Introductions
Before proceeding with the course, let’s take some time to get to know each other.
Tell us: • Your name • Your business unit and department • Your expectations from this session • An interesting fact about yourself

Greetings
Before we get started, lets go over some
housekeeping rules, along with a few pointers and tips that will help you
complete this course.
Housekeeping Rules
– Training Materials
– Restrooms
– Emergency Exits
– Please Silence Cell Phones
– Ask Questions
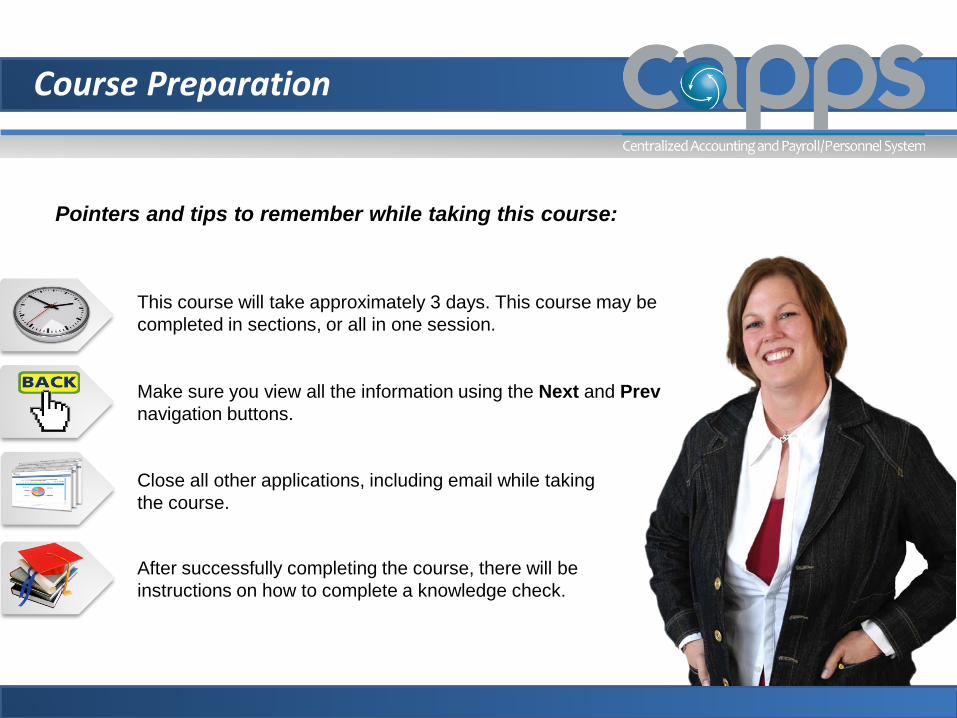
Course Preparation
Pointers and tips to remember while taking this course:
This course will take approximately 3 days. This course may be completed in sections, or all in one session.
Make sure you view all the information using the Next and Prev navigation buttons.
Close all other applications, including email while taking the course.
After successfully completing the course, there will be instructions on how to complete a knowledge check.
Course Outline
CAPPS Payroll is organized in to five sections. Throughout each section you will learn how to use CAPPS Payroll functionality. The five sections are:
• Section 1 – Payroll Overview
• Section 2 – Managing Employee Pay Data
• Section 3 – Payroll Payment Processing Cycle
• Section 4 – On/Off Cycle Payroll Processing Checklists
• Section 5 – Period End Reporting
• Section 6 – Additional Information
• Section 7 – Review
Course Objectives
After completing this course you will be able to: Understand CAPPS Payroll process and integration with HRM modules Key Definitions and Key Roles Maintain employee information including direct deposit, tax data, voluntary deductions,
and garnishments Setup TX Manager Payroll Notification Understand the Payroll Payment Processing Cycle Manage Paysheets Calculate and confirm On-Cycle and Off-Cycle Payroll Generate payroll reports and queries Review list of Quarter and Calendar Year-End Reports Adjust employee balances Learn how to create pay calendars and pay run ids (Special Exceptions only)
Section 1 PeopleSoft Payroll Overview
Section 1 – Objectives
In this section you will learn: Payroll for North America and CAPPS HRM Integration Points
Key Benefits
Key Roles and Responsibilities
Changes from Current to Future
Key Terms and Definitions
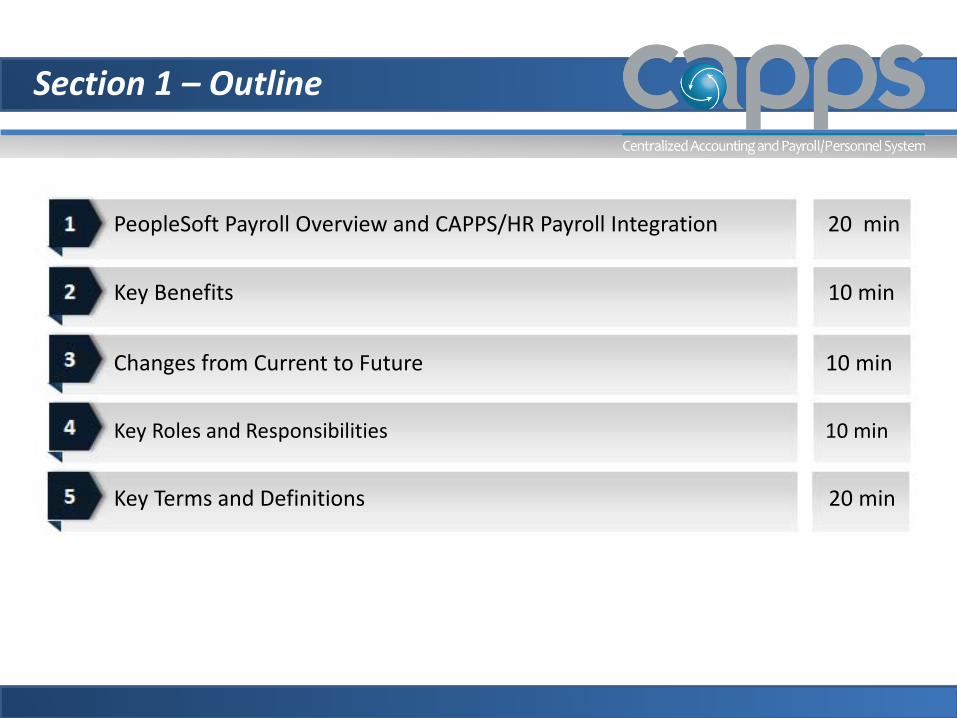
Section 1 – Outline
PeopleSoft Payroll Overview and CAPPS/HR Payroll Integration 20 min
Key Benefits 10 min
Changes from Current to Future 10 min
Key Roles and Responsibilities 10 min
Key Terms and Definitions 20 min
Section 1 – Lesson 1
Payroll for North America
PeopleSoft Payroll for North America supports business processes that are both directly and indirectly involved with payroll.
It provides the tools to calculate earnings, taxes, and deductions; maintain balances; and report payroll data. Payroll is integrated with a number of PeopleSoft and third-party solutions.
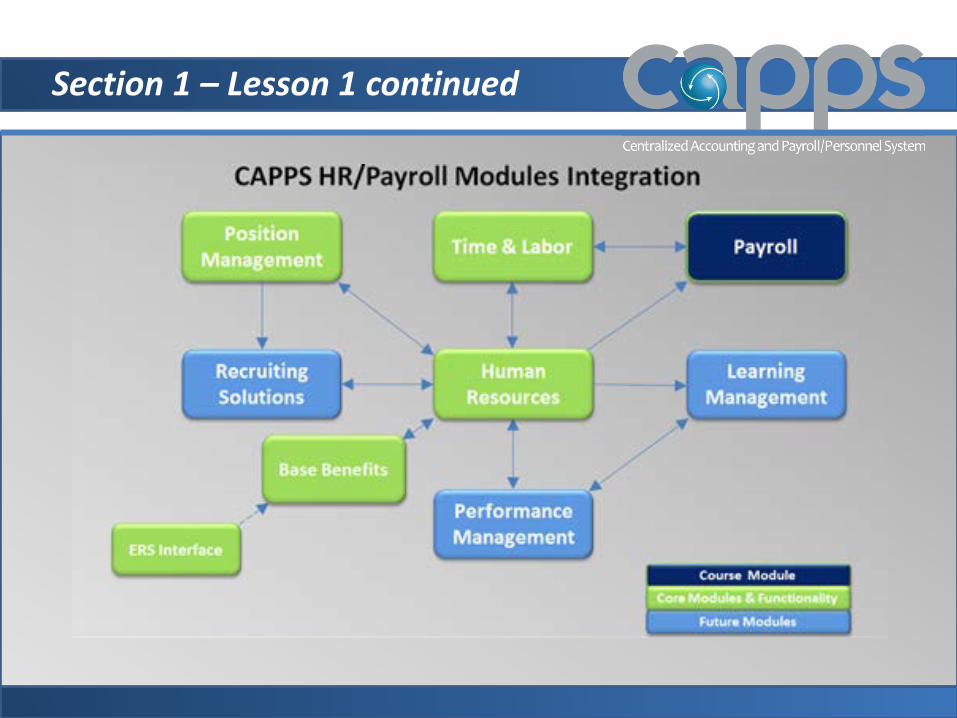
Section 1 – Lesson 1 continued
Section 1 – Lesson 2
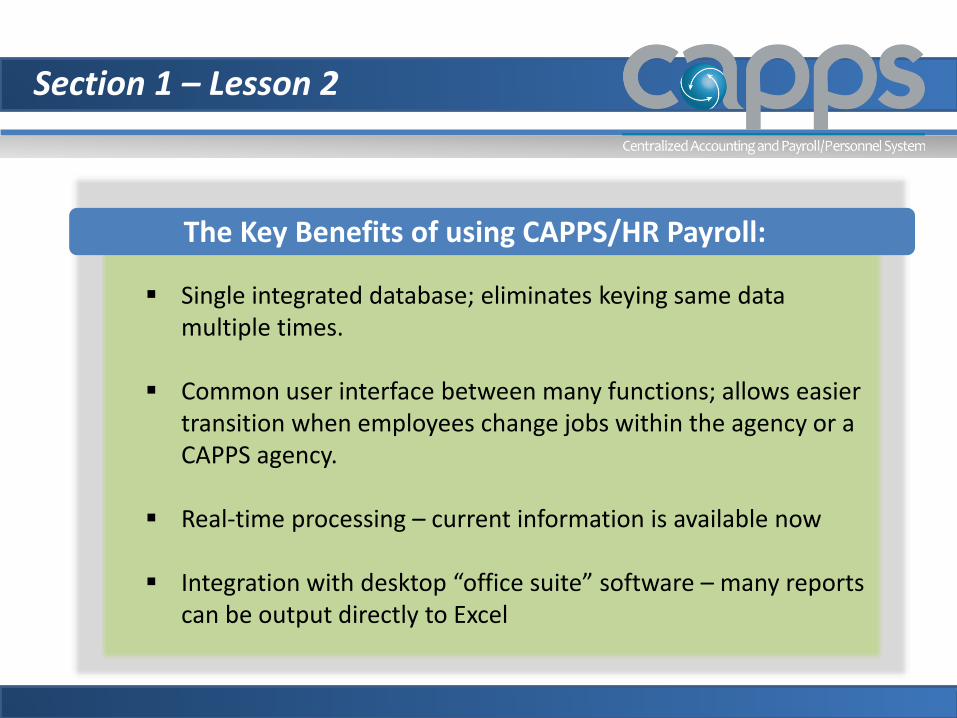
The Key Benefits of using CAPPS/HR Payroll:
Single integrated database; eliminates keying same data multiple times.
Common user interface between many functions; allows easier transition when employees change jobs within the agency or a CAPPS agency.
Real-time processing – current information is available now
Integration with desktop “office suite” software – many reports can be output directly to Excel
Section 1 – Lesson 2 continued
The Key Benefits of using CAPPS/HR Payroll :
Provide better management information
Web-enabled – allows employees easier access in a familiar Web environment.
Self-service functionality – more information available directly to owner of data (for example, employee)
Section 1 – Lesson 3
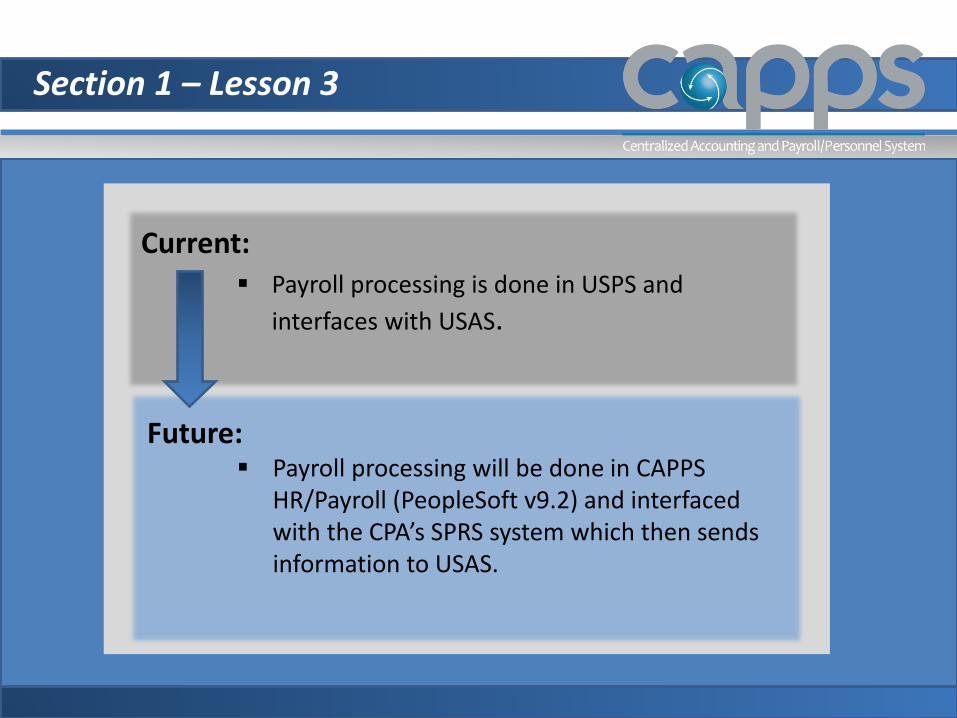
Current:
Payroll processing is done in USPS and interfaces with USAS.
Future:
Payroll processing will be done in CAPPS HR/Payroll (PeopleSoft v9.2) and interfaced with the CPA’s SPRS system which then sends information to USAS.
Section 1 – Lesson 3 continued
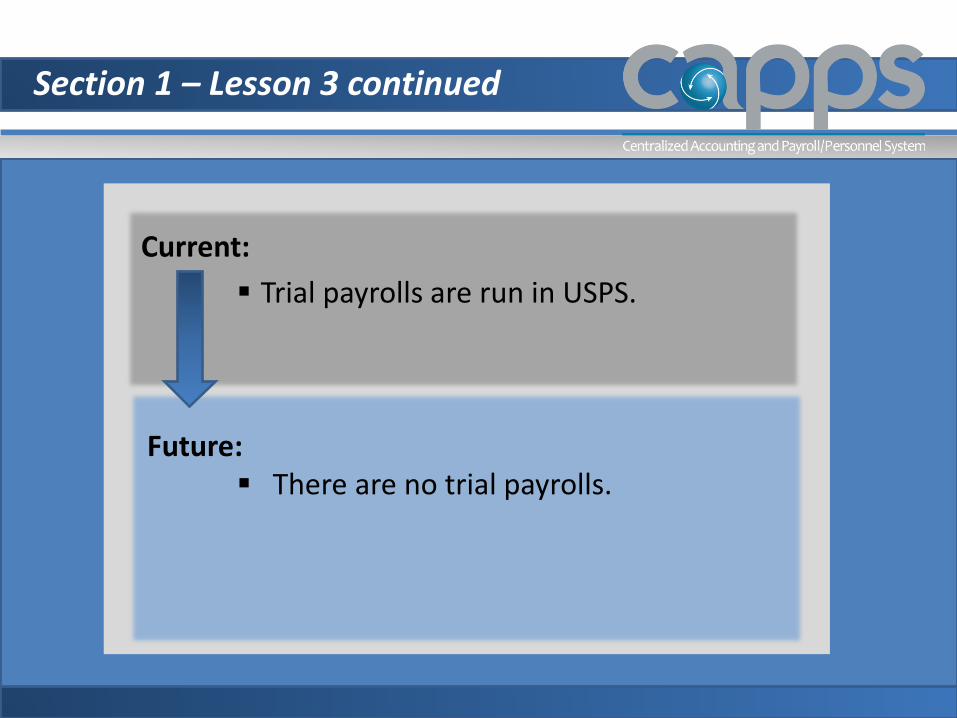
Current:
Trial payrolls are run in USPS. Future:
There are no trial payrolls.
Section 1 – Lesson 3 continued
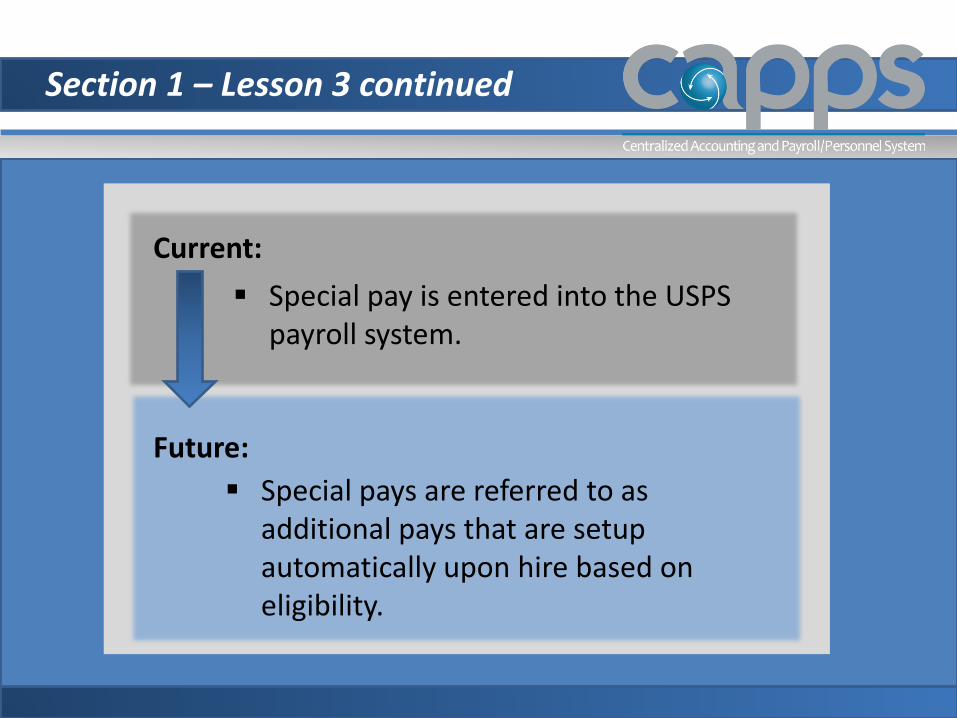
Current: Special pay is entered into the USPS
payroll system.
Future: Special pays are referred to as
additional pays that are setup automatically upon hire based on eligibility.

Section 1 – Lesson 4
Roles Responsibilities
Employee Updating Employee Pay Information Direct Deposit Voluntary Deductions Selecting charitable contributions during Open
Enrollment Period W-4 Tax Information Provide consent to receive W-2 electronically
Payroll Analyst Maintain Employee Pay Data as needed Direct Deposit Deductions Garnishments Tax Information Additional Pay
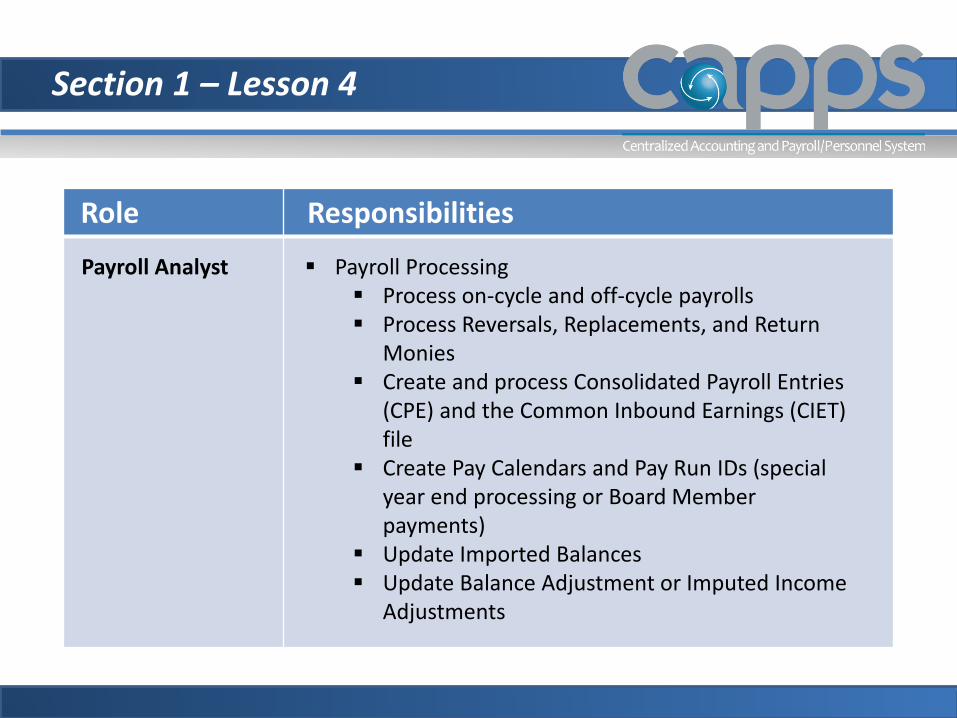
Role Responsibilities
Section 1 – Lesson 4
Payroll Analyst Payroll Processing Process on-cycle and off-cycle payrolls Process Reversals, Replacements, and Return
Monies Create and process Consolidated Payroll Entries
(CPE) and the Common Inbound Earnings (CIET) file
Create Pay Calendars and Pay Run IDs (special year end processing or Board Member payments)
Update Imported Balances Update Balance Adjustment or Imputed Income
Adjustments
Section 1 – Lesson 5
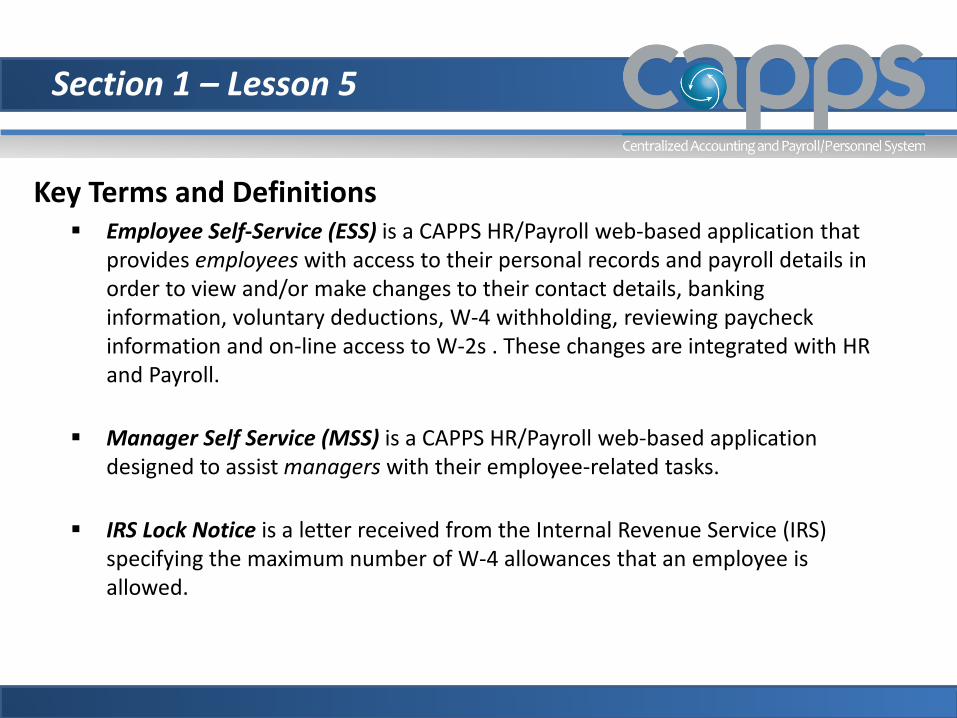
Key Terms and Definitions Employee Self-Service (ESS) is a CAPPS HR/Payroll web-based application that
provides employees with access to their personal records and payroll details in order to view and/or make changes to their contact details, banking information, voluntary deductions, W-4 withholding, reviewing paycheck information and on-line access to W-2s . These changes are integrated with HR and Payroll.
Manager Self Service (MSS) is a CAPPS HR/Payroll web-based application designed to assist managers with their employee-related tasks.
IRS Lock Notice is a letter received from the Internal Revenue Service (IRS) specifying the maximum number of W-4 allowances that an employee is allowed.
Section 1 – Lesson 5 continued
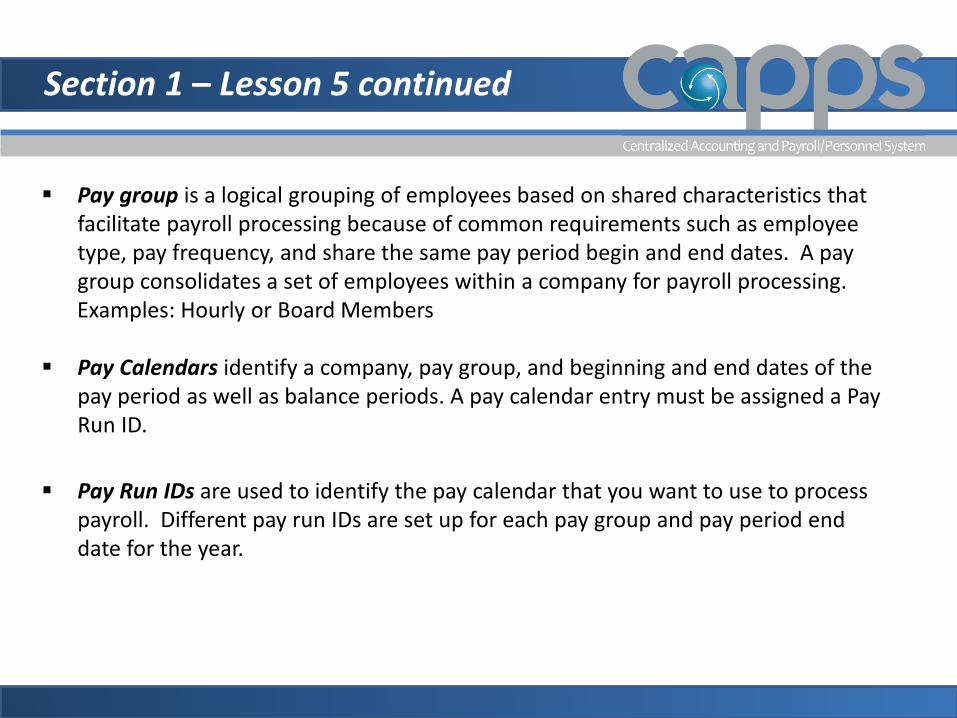
Pay group is a logical grouping of employees based on shared characteristics that facilitate payroll processing because of common requirements such as employee type, pay frequency, and share the same pay period begin and end dates. A pay group consolidates a set of employees within a company for payroll processing. Examples: Hourly or Board Members
Pay Calendars identify a company, pay group, and beginning and end dates of the pay period as well as balance periods. A pay calendar entry must be assigned a Pay Run ID.
Pay Run IDs are used to identify the pay calendar that you want to use to process
payroll. Different pay run IDs are set up for each pay group and pay period end date for the year.
Section 1 – Lesson 5 continued
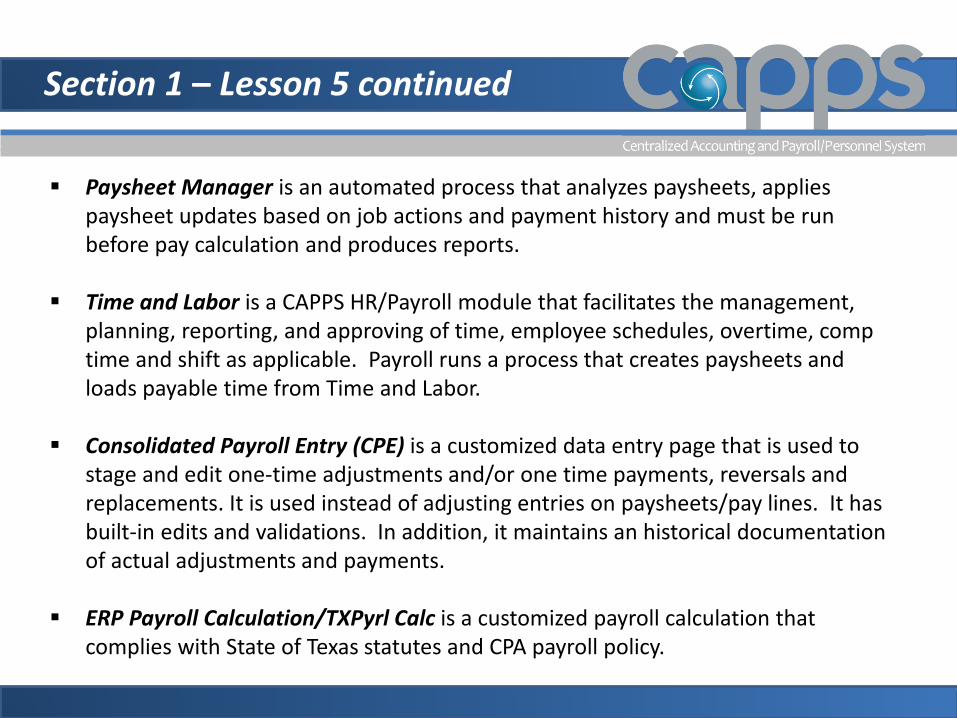
Paysheet Manager is an automated process that analyzes paysheets, applies paysheet updates based on job actions and payment history and must be run before pay calculation and produces reports.
Time and Labor is a CAPPS HR/Payroll module that facilitates the management, planning, reporting, and approving of time, employee schedules, overtime, comp time and shift as applicable. Payroll runs a process that creates paysheets and loads payable time from Time and Labor.
Consolidated Payroll Entry (CPE) is a customized data entry page that is used to stage and edit one-time adjustments and/or one time payments, reversals and replacements. It is used instead of adjusting entries on paysheets/pay lines. It has built-in edits and validations. In addition, it maintains an historical documentation of actual adjustments and payments.
ERP Payroll Calculation/TXPyrl Calc is a customized payroll calculation that complies with State of Texas statutes and CPA payroll policy.
Section 1 – Lesson 5 continued
Pay Confirmation is a process that indicates that you have reviewed and approved all payroll information for a pay run. This process also updates balances. There are many audits and error reports that need to be run and checked for accuracy prior to confirmation.
Earning codes are used to define parameters and rules for calculating earnings.
Deduction codes are used to assign deductions to an employee and specify the calculation method.
Garnishments are payroll deductions that a judicial order mandates for collection of an unpaid debt.
Check Reversal is an off-cycle process that is used when an employee was paid in error and the agency wants to reverse the check.
Section 1 – Lesson 5 continued
Replacement Check is an off-cycle process that is used when an employee check was lost or damaged and needs to be replaced.
Return Monies is an off-cycle process that is used when an overpayment went to the employee and it is remitted back to the agency. The return can be a full or partial portion of check.

Section 2 Managing Employee Pay Data
Section 2 – Objectives
After completing this section you will be able to: Update an employee’s direct deposit information Update employee W-4 withholding information
• Understand the IRS Lock Notice Update State taxes for an employee living outside of Texas Import Balances Enter an employee voluntary deduction
• Understand employee online charity deductions Set-up an employee garnishment
Section 2 – Overview
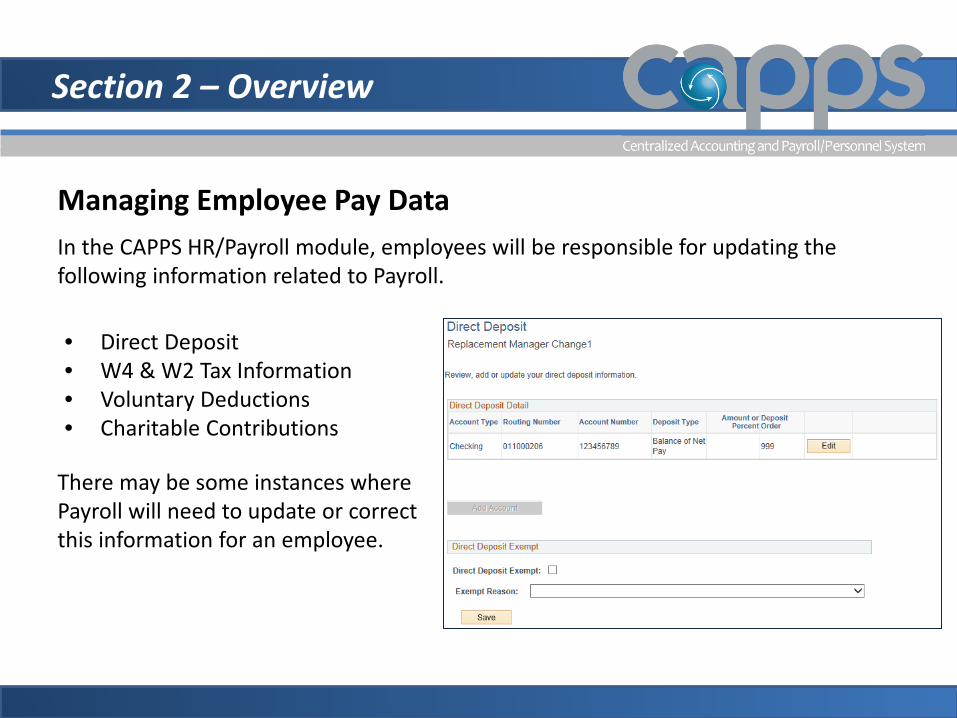
Managing Employee Pay Data In the CAPPS HR/Payroll module, employees will be responsible for updating the following information related to Payroll.
• Direct Deposit • W4 & W2 Tax Information • Voluntary Deductions • Charitable Contributions
There may be some instances where Payroll will need to update or correct this information for an employee.
Course Objectives
3
4
Section 2 – Lesson Outline
Employee Direct Deposit 30 min
Employee Tax Information 30 min
Employee Voluntary Deductions 30 min
Employee Garnishments 30 min
Section 2 – Lesson 1
Employee Direct Deposit
Payroll is responsible for managing Direct Deposit information and ensuring all employee entered data is validated.
Payroll can do the following to manage Direct Deposits:
Review the TINS Direct Deposit report and make necessary updates and changes in CAPPS HR/Payroll such as routing and account numbers.
Payroll will continue to use the current process when requesting a PayCard. Once CPA Payment Services provides the routing number and account number, Payroll will add the information to the CAPPS Request Direct Deposit page.
Currently there is only one direct deposit account allowed in CAPPS.
Section 2 – Lesson 1
TINS Direct Deposit Reports From the Blue Zone Session Icon Screen Navigation:
Click Session Type INFOSGA Press Enter Enter User Id and Password Type REPORT/TOPIC/QUEUE ID: DEP# Select the Report (TINS DAILY DD LISTING) Select your agency (depending on your access) The Report will display.
Section 2 – Lesson 1 continued
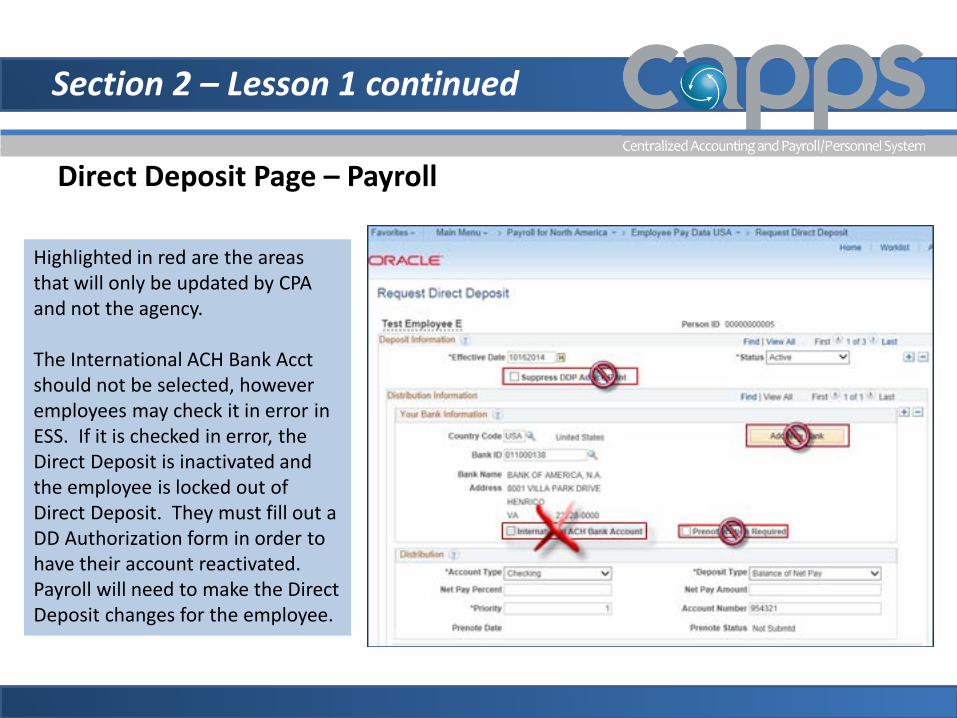
Direct Deposit Page – Payroll
Highlighted in red are the areas that will only be updated by CPA and not the agency. The International ACH Bank Acct should not be selected, however employees may check it in error in ESS. If it is checked in error, the Direct Deposit is inactivated and the employee is locked out of Direct Deposit. They must fill out a DD Authorization form in order to have their account reactivated. Payroll will need to make the Direct Deposit changes for the employee.
Section 2 – Lesson 1 Exercise
Exercise The following exercises provide step-by-step instructions on how to perform the following task(s) in CAPPS:
How to update Employee Direct Deposit Bank Information Scenario 1: Update Employee Direct Deposit
View exercise scenario (opens a new web browser). After completing the exercise, close the browser tab and return to the course.
Section 2 – Lesson 2
Employee Tax Information Employee tax data is one of the first things that must be entered into the system
soon after an employee is hired. This functionality enables you to enter and maintain the tax information that the system uses to calculate taxes from an employee’s earnings on their paycheck.
Until a W-4 is received from an employee, the default in the system is Single – 0 exemptions.
If an employee moves out of State and continues to work for the organization they may need to pay State Taxes for that State unless they have submitted a Non-Residence statement.
IRS Lock Notice is received from the IRS. It stipulates the max number of allowances allowed on a W-4. This prevents the employee from raising their allowances higher than the max stipulated.
Section 2 – Lesson 2 continued
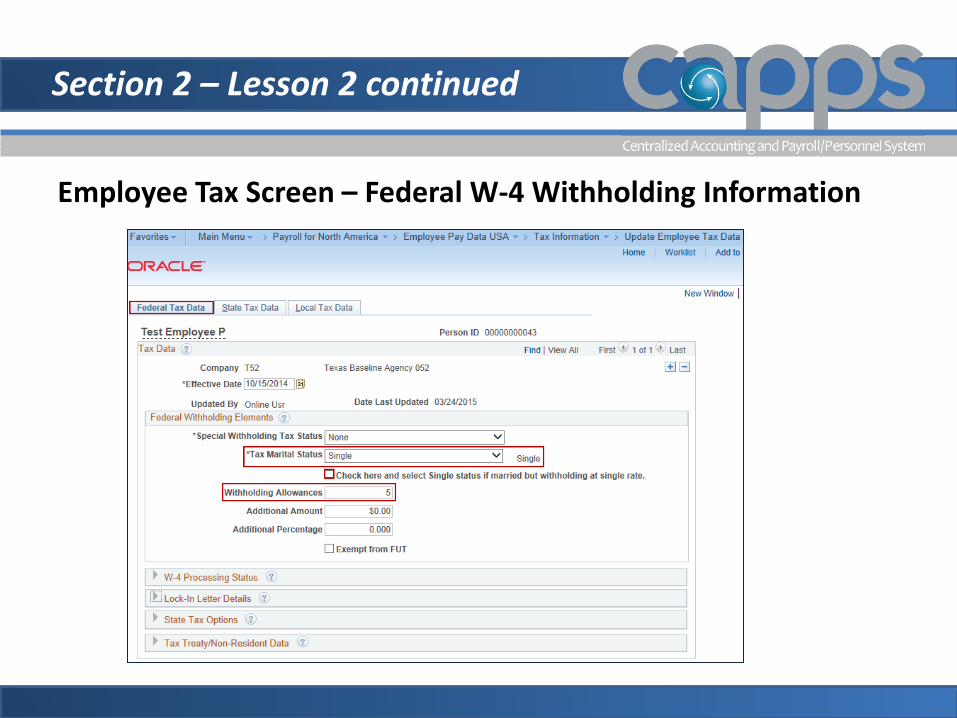
Employee Tax Screen – Federal W-4 Withholding Information
Section 2 – Lesson 2 continued
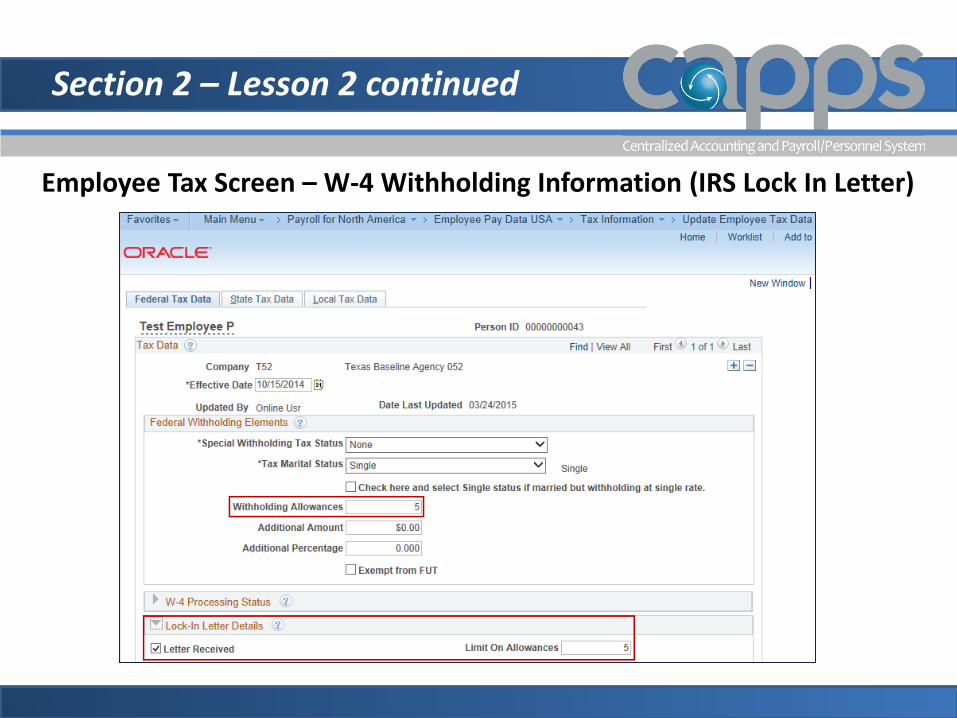
Employee Tax Screen – W-4 Withholding Information (IRS Lock In Letter)
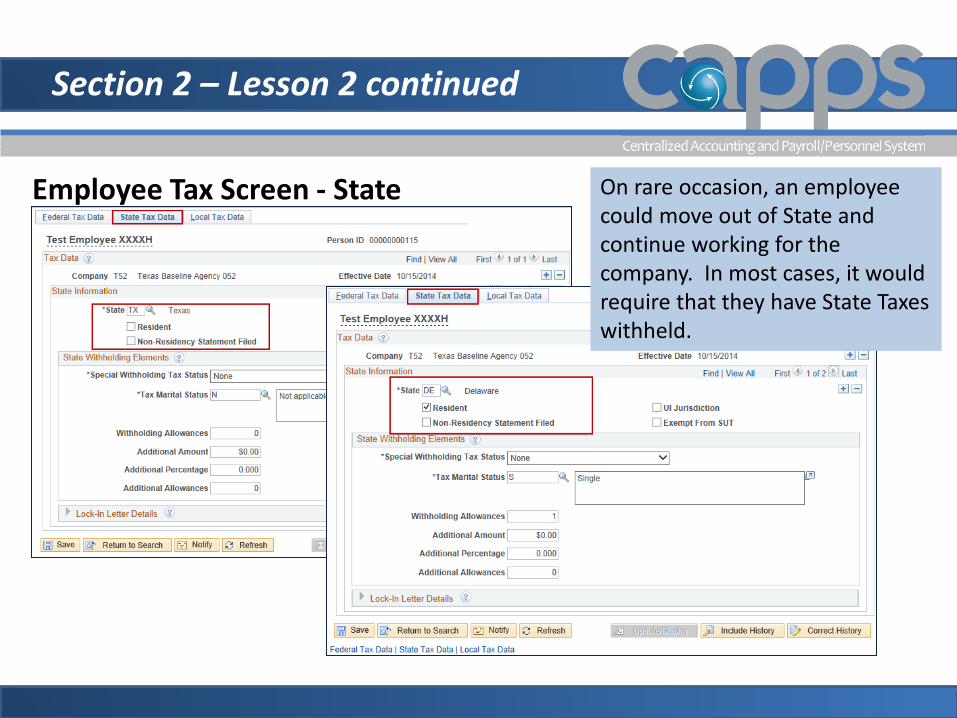
Section 2 – Lesson 2 continued
Employee Tax Screen - State On rare occasion, an employee could move out of State and continue working for the company. In most cases, it would require that they have State Taxes withheld.
Section 2 – Lesson 2
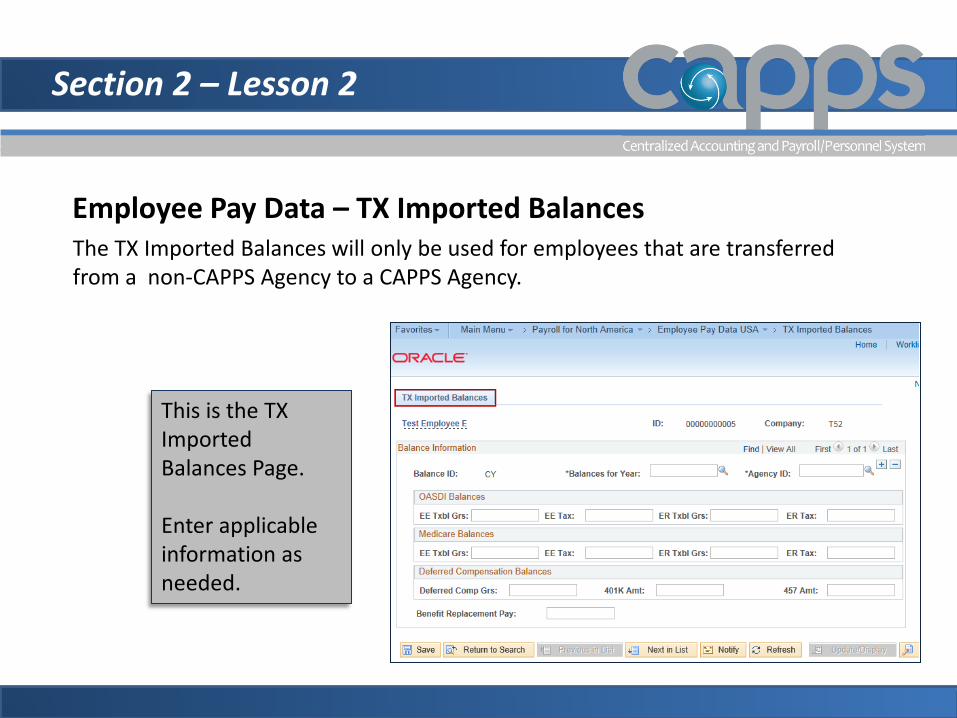
Employee Pay Data – TX Imported Balances The TX Imported Balances will only be used for employees that are transferred from a non-CAPPS Agency to a CAPPS Agency.
This is the TX Imported Balances Page. Enter applicable information as needed.
Section 2 – Lesson 2 Exercises
Exercises The following exercises provide step-by-step instructions on how to perform the following task(s) in CAPPS:
How to update W-4 Withholding Information Scenario 1: Update Employee W-4 Information Scenario 2: W-4 Lock Notice
View exercise scenario (opens a new web browser). After completing the exercise, close the browser tab and return to the course.
Section 2 – Lesson 3
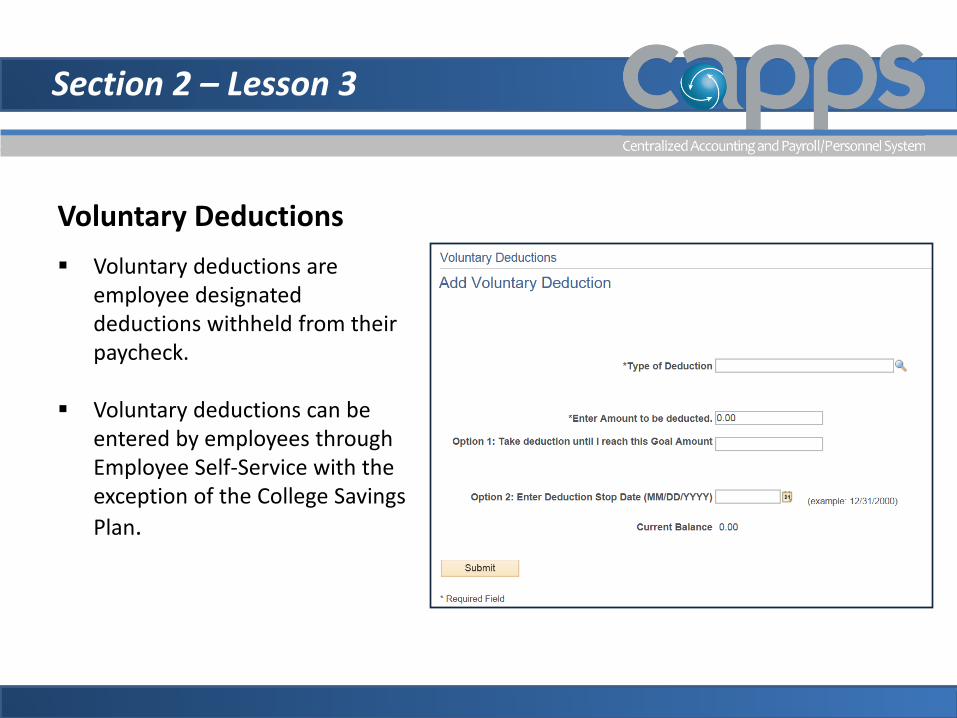
Voluntary Deductions Voluntary deductions are
employee designated deductions withheld from their paycheck.
Voluntary deductions can be entered by employees through Employee Self-Service with the exception of the College Savings Plan.
Section 2 – Lesson 3 continued
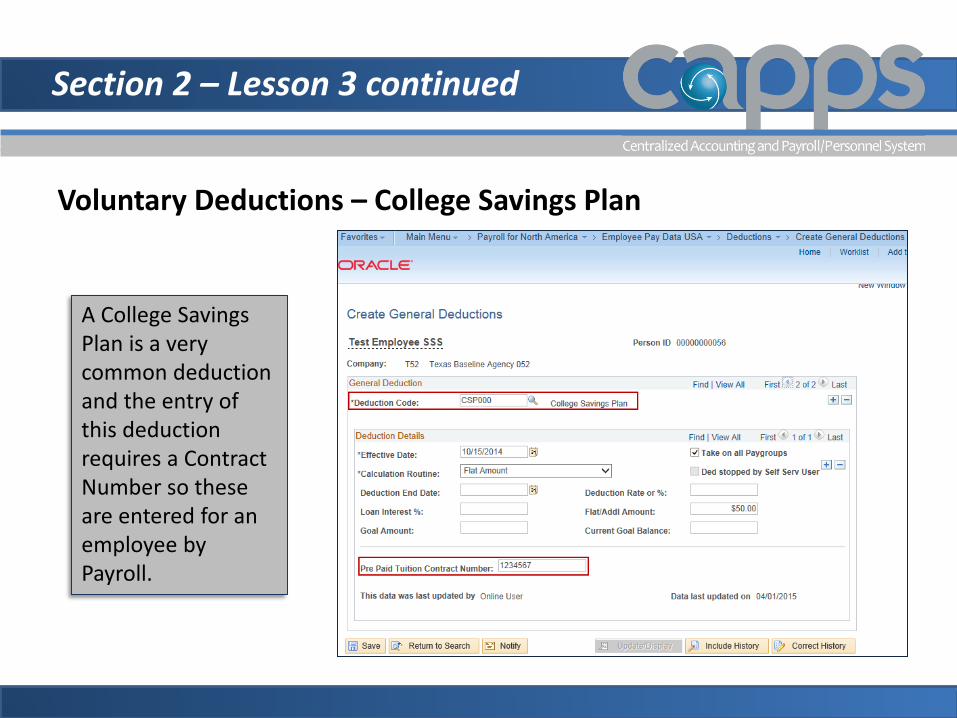
Voluntary Deductions – College Savings Plan
A College Savings Plan is a very common deduction and the entry of this deduction requires a Contract Number so these are entered for an employee by Payroll.
Section 2 – Lesson 3 continued
Voluntary Deductions – On-line Charity Charity elections are voluntary deductions as well.
Employees can elect to have up to three different charities through
Employee Self-Service (ESS), but only during the open enrollment period which is Sept – November for the following year. Changes to the amount of deduction or to stop the deduction can be entered by employees throughout the year through ESS.
If the employee is transferred from another agency and had an existing charity election then Payroll will need to enter this information for the employee.
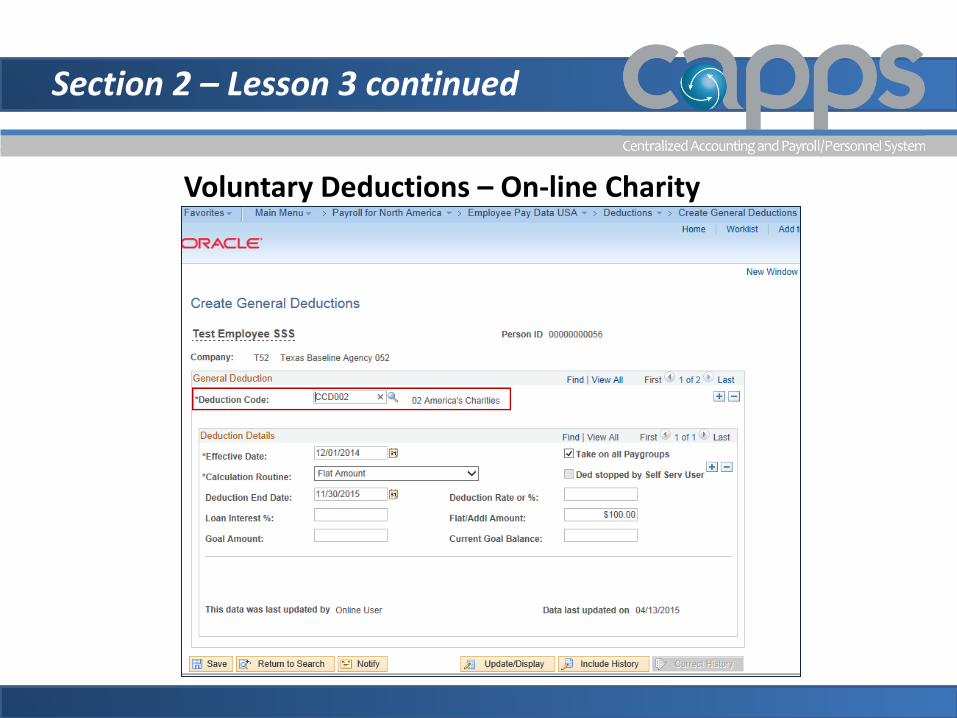
Section 2 – Lesson 3 continued
Voluntary Deductions – On-line Charity
Section 2 – Lesson 3 Exercises
Exercises The following exercises provide step-by-step instructions on how to perform the following task(s) in CAPPS:
How to enter Voluntary Deductions Scenario 1: Enter an Employee Voluntary Deduction (College Savings) Scenario 2: Enter an Employee On-line Charity Deduction
View exercise scenario (opens a new web browser). After completing the exercise, close the browser tab and return to the course.
Section 2 – Lesson 4
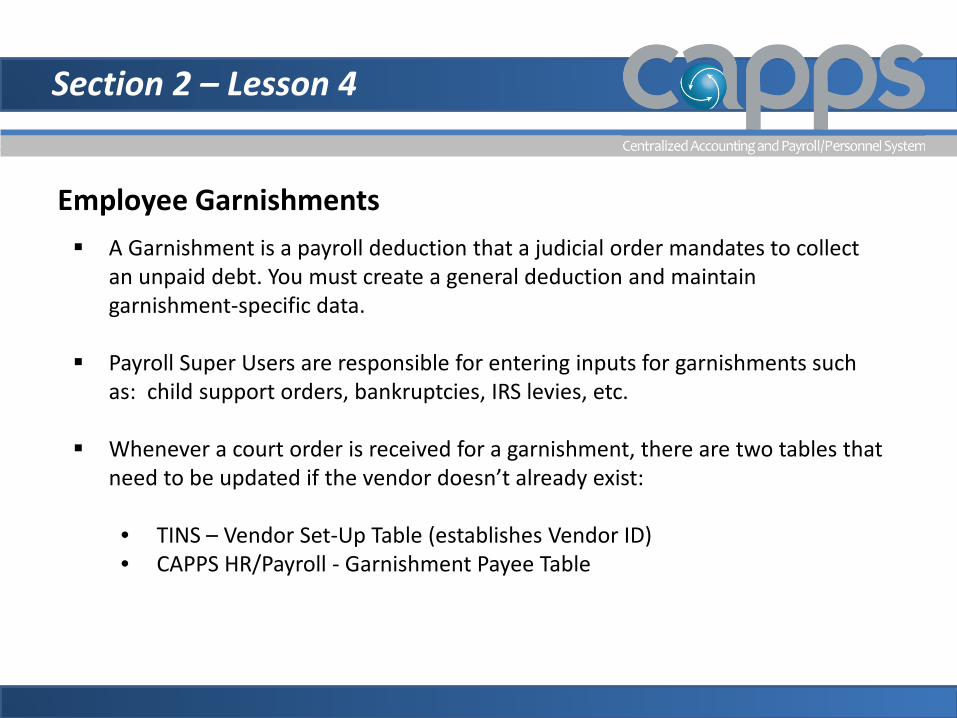
Employee Garnishments A Garnishment is a payroll deduction that a judicial order mandates to collect
an unpaid debt. You must create a general deduction and maintain garnishment-specific data.
Payroll Super Users are responsible for entering inputs for garnishments such as: child support orders, bankruptcies, IRS levies, etc.
Whenever a court order is received for a garnishment, there are two tables that need to be updated if the vendor doesn’t already exist: • TINS – Vendor Set-Up Table (establishes Vendor ID) • CAPPS HR/Payroll - Garnishment Payee Table
Section 2 – Lesson 4 continued
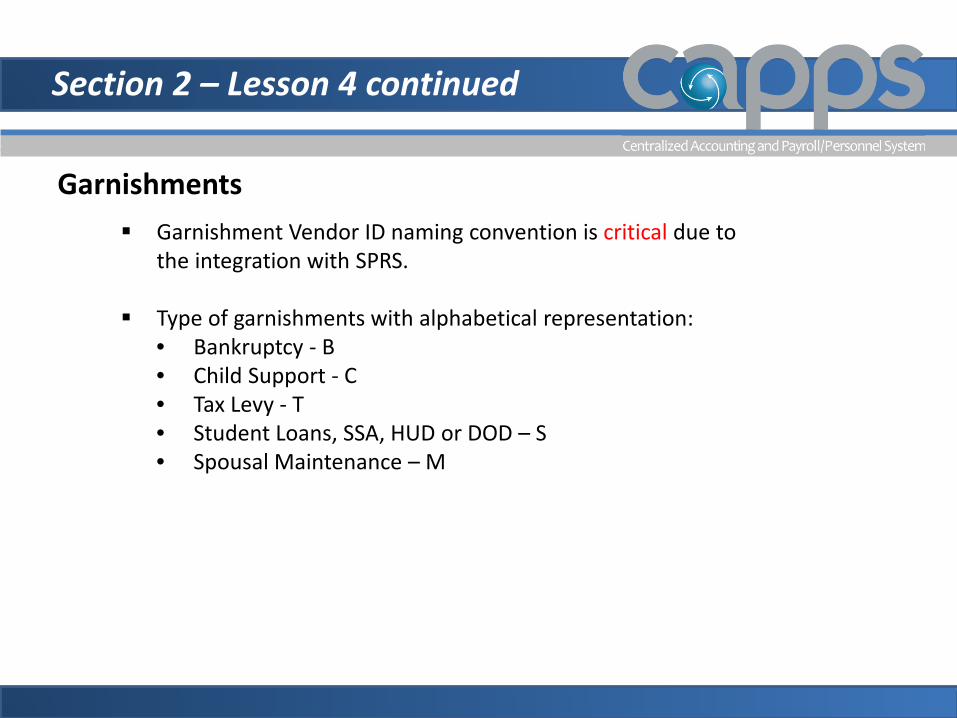
Garnishments Garnishment Vendor ID naming convention is critical due to
the integration with SPRS.
Type of garnishments with alphabetical representation: • Bankruptcy - B • Child Support - C • Tax Levy - T • Student Loans, SSA, HUD or DOD – S • Spousal Maintenance – M
Section 2 – Lesson 4 continued
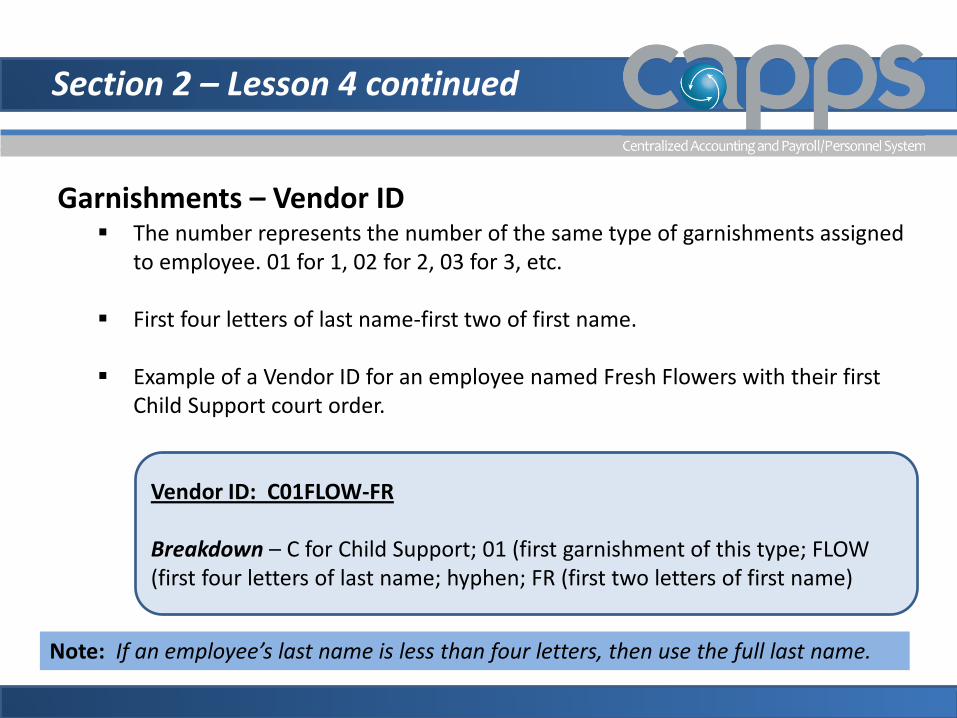
Garnishments – Vendor ID The number represents the number of the same type of garnishments assigned
to employee. 01 for 1, 02 for 2, 03 for 3, etc.
First four letters of last name-first two of first name.
Example of a Vendor ID for an employee named Fresh Flowers with their first Child Support court order.
Vendor ID: C01FLOW-FR Breakdown – C for Child Support; 01 (first garnishment of this type; FLOW (first four letters of last name; hyphen; FR (first two letters of first name)
Note: If an employee’s last name is less than four letters, then use the full last name.
Section 2 – Lesson 4 Exercises
Exercises The following exercises provide step-by-step instructions on how to perform the following task(s) in CAPPS:
How to enter Garnishment Information Scenario 1: Set-up Garnishment Vendor Scenario 2: Create Employee Garnishment Specs Scenario 3: Enter Employee Garnishment Deduction
View exercise scenario (opens a new web browser). After completing the exercise, close the browser tab and return to the course.
I hope you enjoyed your training!
This section is almost complete.
It’s now time to review what you’ve learned.
Knowledge Check
Next you will be presented with a series of questions covering important things to remember from this course.
View Knowledge Check (opens a new web browser).
After completing the knowledge check,
close the browser tab and return to the course.

Section 3 Payroll Payment Processing Cycle
Section 3 – Objectives
After completing this section you will be able to:
Understand the critical components involved in the Payroll Payment Processing Cycle.
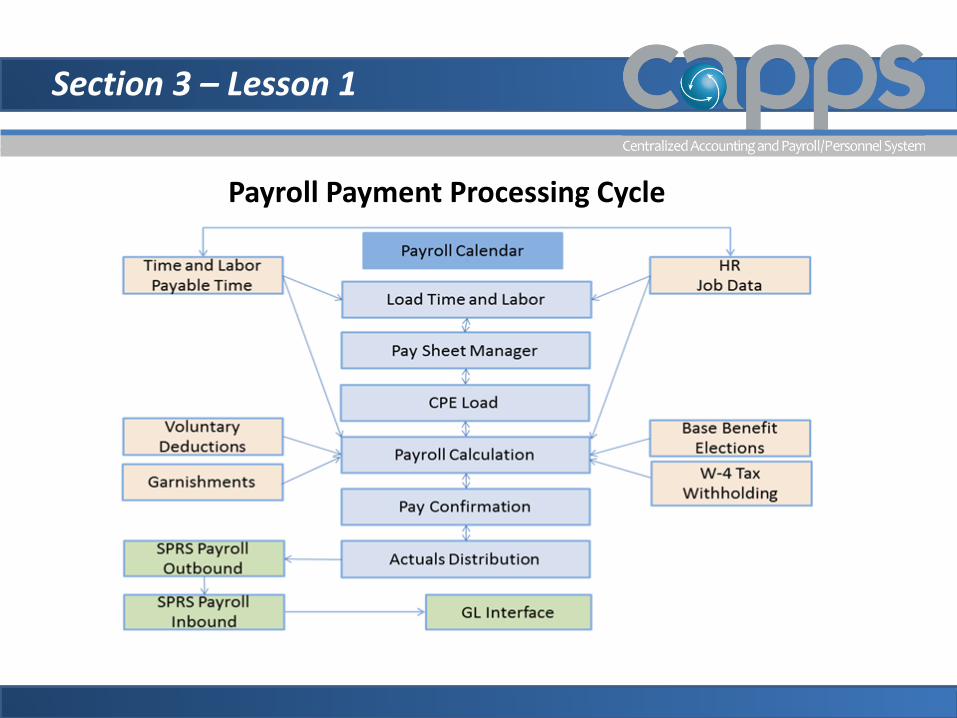
Section 3 – Lesson 1
Payroll Payment Processing Cycle
Section 3 – Lesson 2
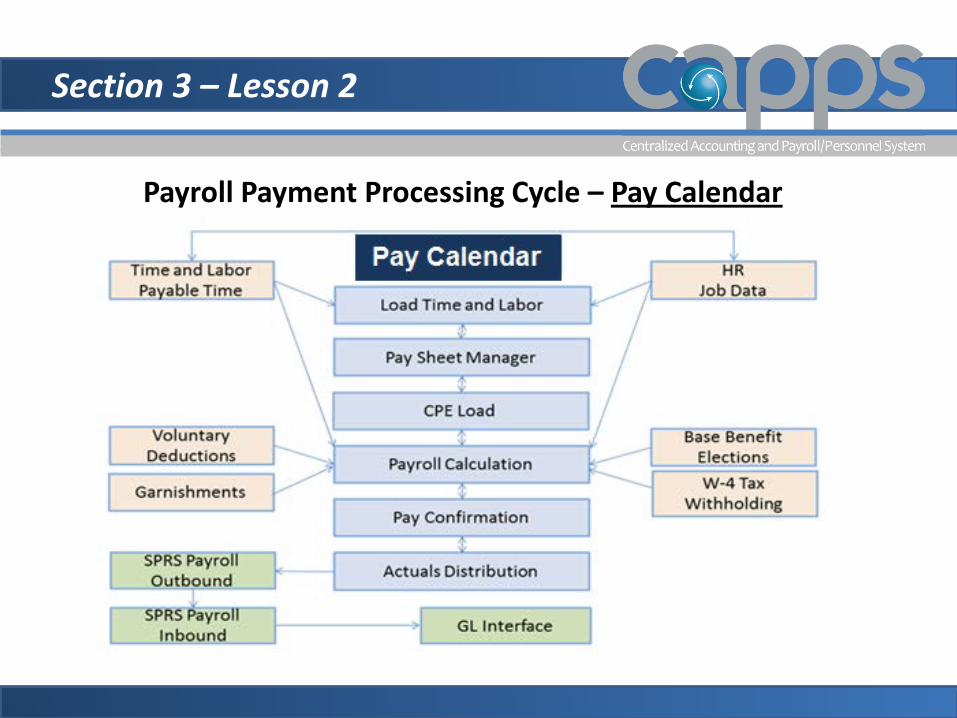
Payroll Payment Processing Cycle – Pay Calendar
Section 3 – Lesson 2 continued
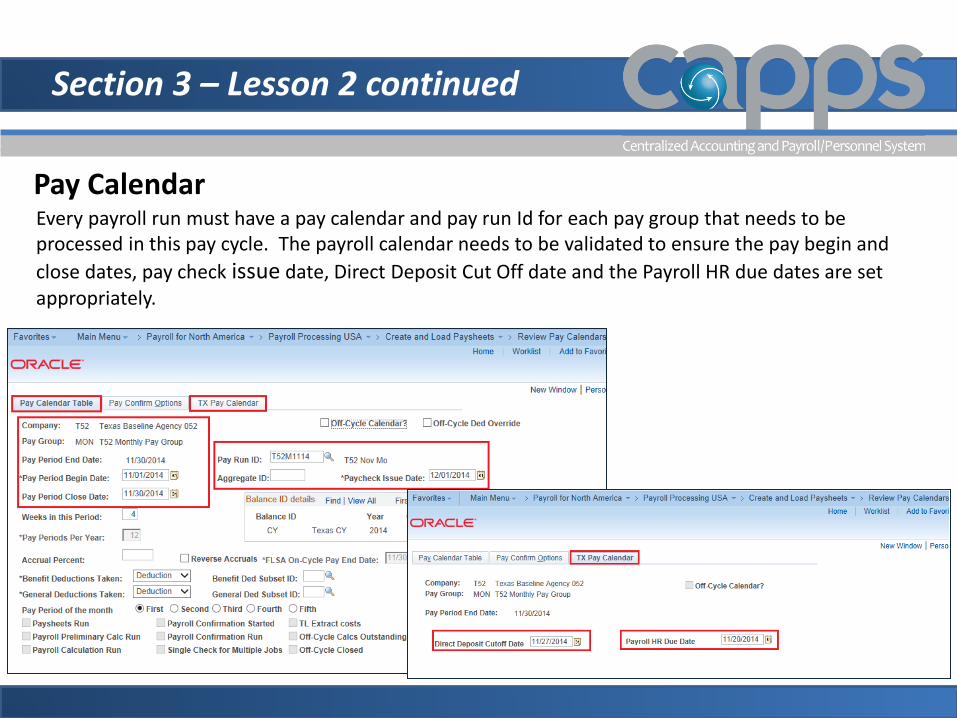
Pay Calendar Every payroll run must have a pay calendar and pay run Id for each pay group that needs to be processed in this pay cycle. The payroll calendar needs to be validated to ensure the pay begin and close dates, pay check issue date, Direct Deposit Cut Off date and the Payroll HR due dates are set appropriately.
Section 3 – Lesson 3
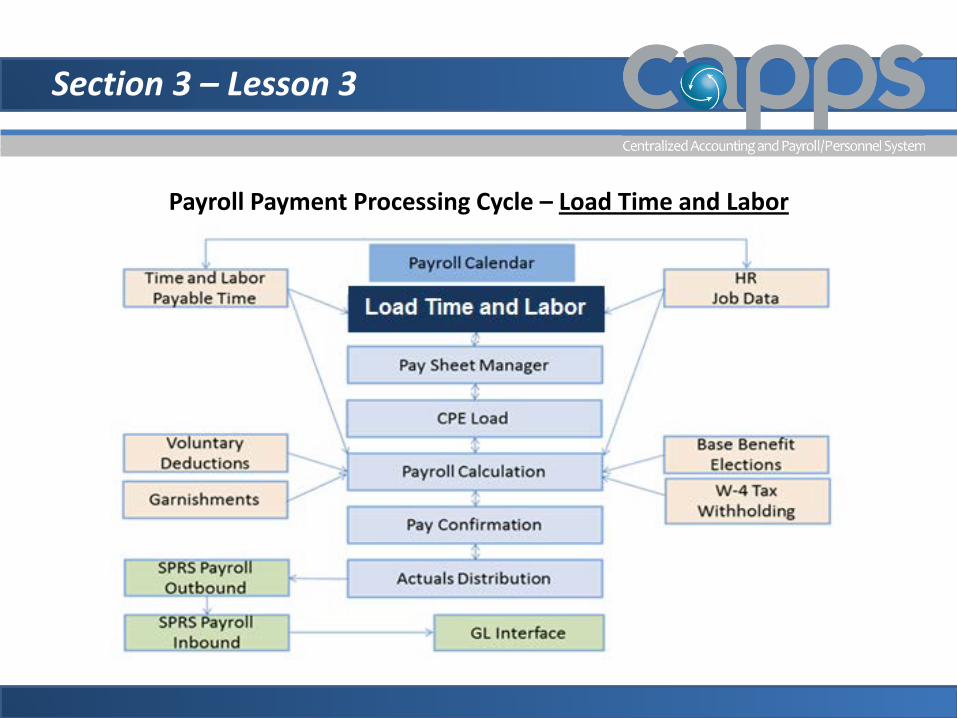
Payroll Payment Processing Cycle – Load Time and Labor

Session 3 – Lesson 3 continued
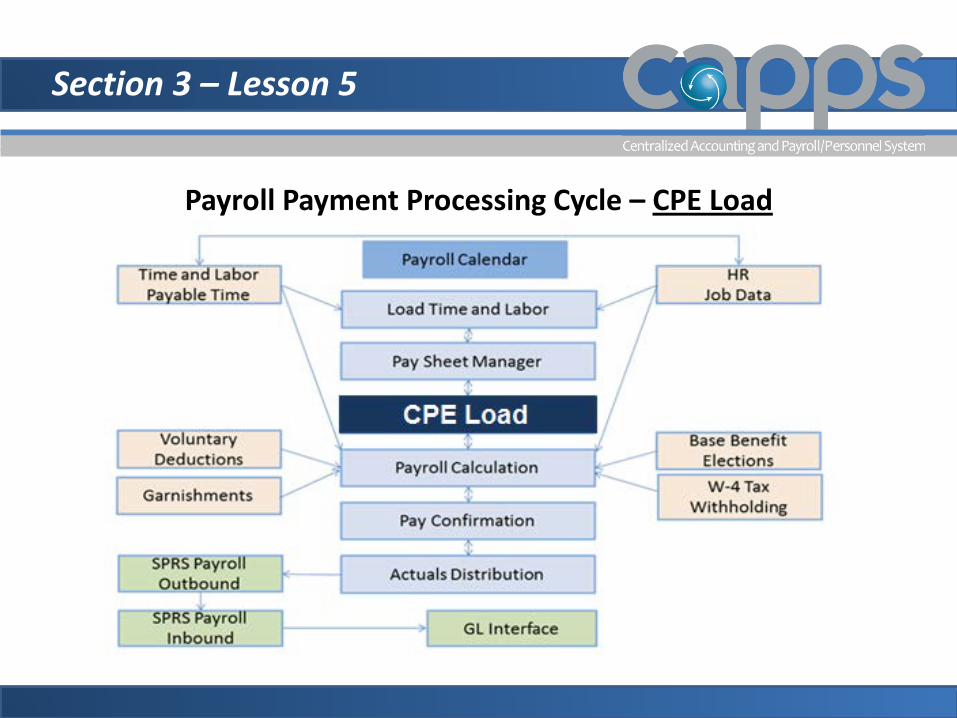
Payroll Payment Processing Cycle – Load Time and Labor The Load Time and Labor process pulls in information from HR Job Data and Time and Labor Payable Time and loads as appropriate into paysheets. This is where the integration pieces begin fitting together.
The Time and Labor Load pulls in Estimated and Rejected Time and sets it to closed status.

Section 3 – Lesson 4
Payroll Payment Processing Cycle – Paysheet Manager
Section 3 – Lesson 4 continued
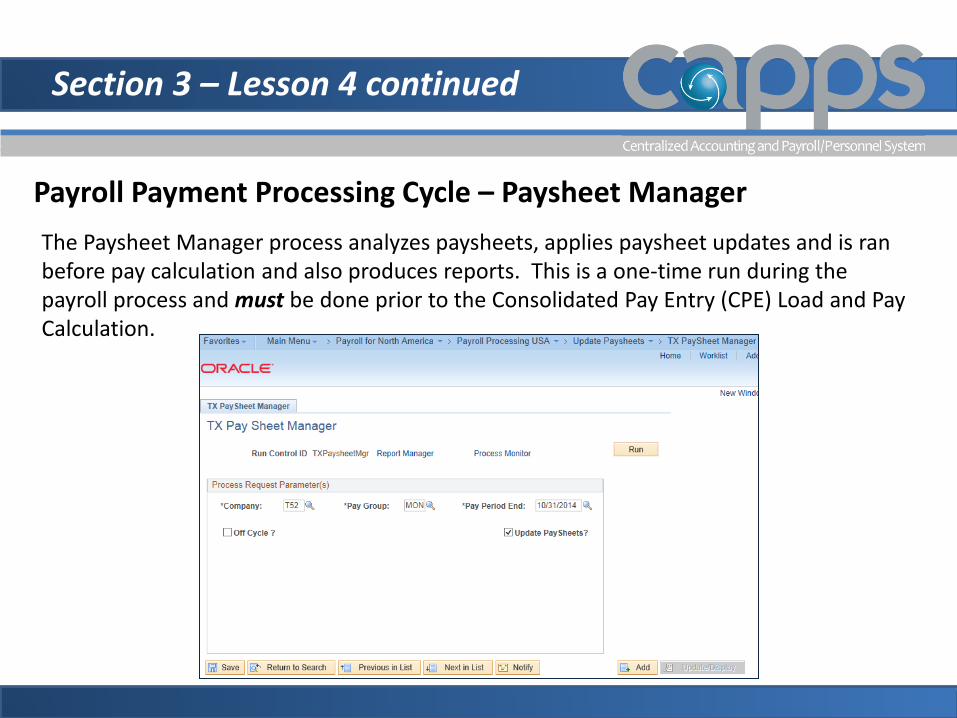
Payroll Payment Processing Cycle – Paysheet Manager The Paysheet Manager process analyzes paysheets, applies paysheet updates and is ran
before pay calculation and also produces reports. This is a one-time run during the payroll process and must be done prior to the Consolidated Pay Entry (CPE) Load and Pay Calculation.
Section 3 – Lesson 5
Payroll Payment Processing Cycle – CPE Load
Section 3 – Lesson 5 continued
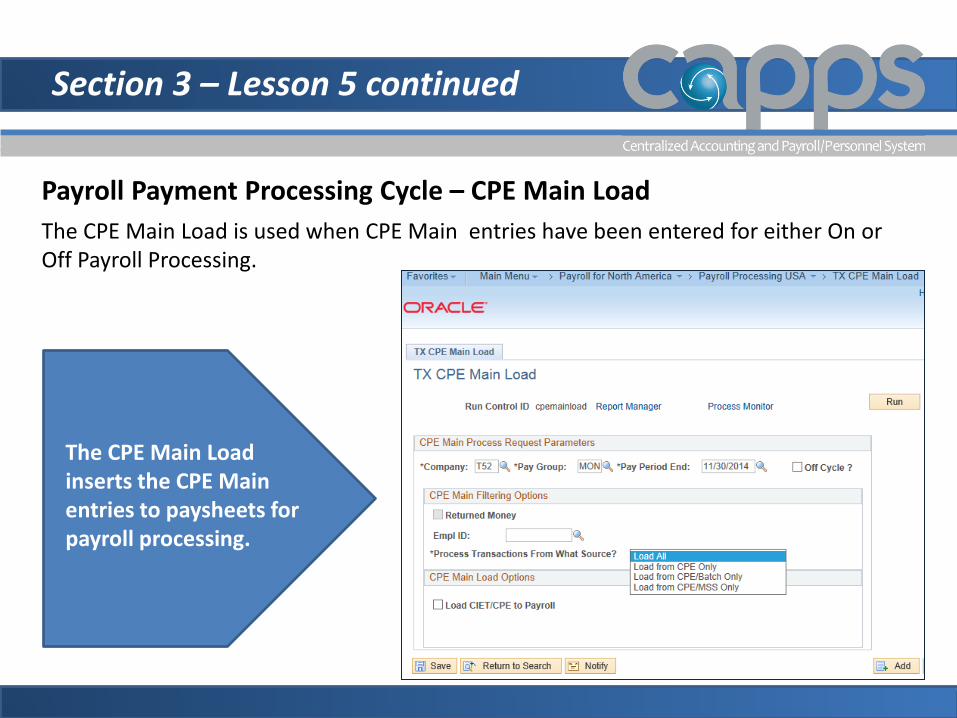
Payroll Payment Processing Cycle – CPE Main Load The CPE Main Load is used when CPE Main entries have been entered for either On or
Off Payroll Processing.
The CPE Main Load inserts the CPE Main entries to paysheets for payroll processing.
Section 3 – Lesson 5 continued
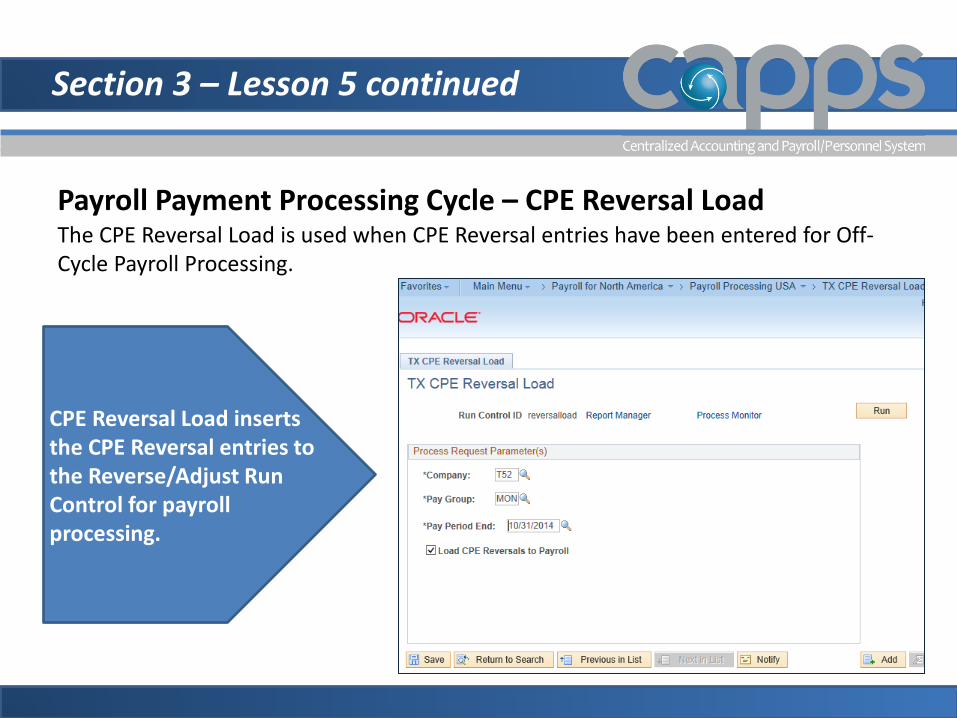
Payroll Payment Processing Cycle – CPE Reversal Load The CPE Reversal Load is used when CPE Reversal entries have been entered for Off-
Cycle Payroll Processing.
CPE Reversal Load inserts the CPE Reversal entries to the Reverse/Adjust Run Control for payroll processing.

Section 3 – Lesson 5 continued
Payroll Payment Processing Cycle – CPE Replacement Load The CPE Replacement Load is used when CPE Replacement entries have been
entered for processing.
CPE Replacement Load inserts the CPE Replacement entries for processing.
Section 3 – Lesson 6
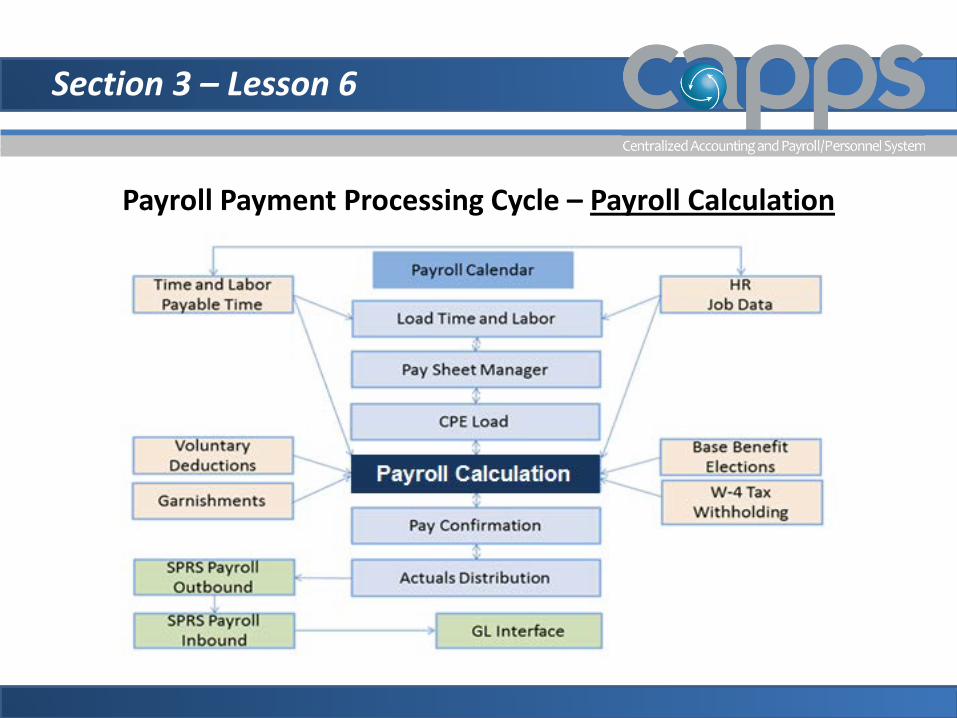
Payroll Payment Processing Cycle – Payroll Calculation
Section 3 – Lesson 6 continued
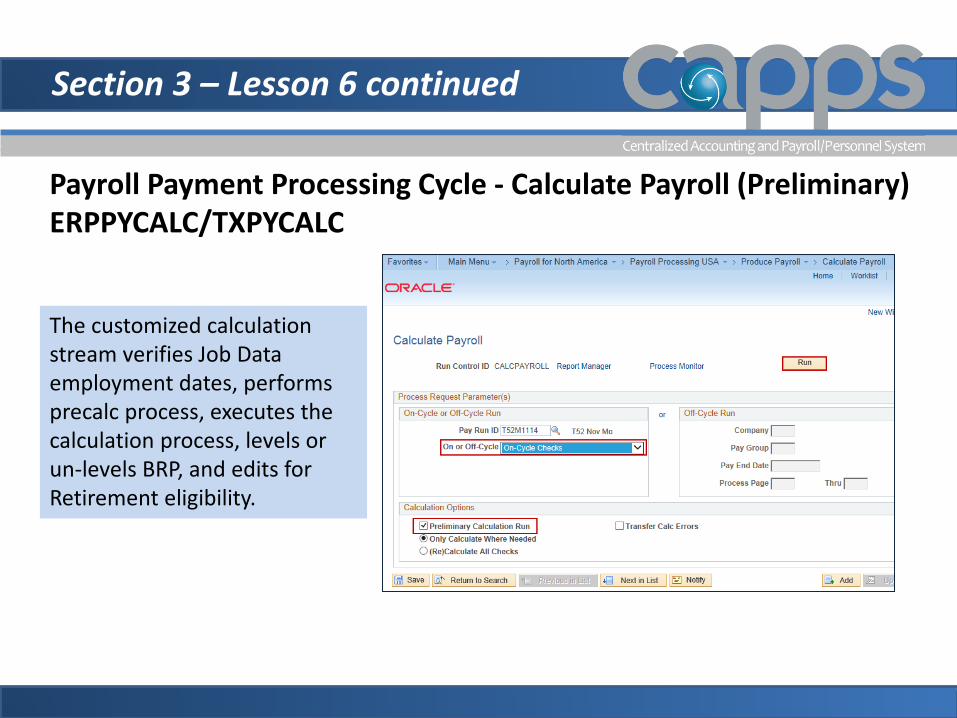
Payroll Payment Processing Cycle - Calculate Payroll (Preliminary) ERPPYCALC/TXPYCALC
The customized calculation stream verifies Job Data employment dates, performs precalc process, executes the calculation process, levels or un-levels BRP, and edits for Retirement eligibility.
Section 3 – Lesson 6 continued
Payroll Payment Processing Cycle – Payroll Calculation
Preliminary Payroll Calculation is a repetitive process. It can be run over and over until all errors have been resolved. After all have issues have been resolved Payroll Calculation is run in a Final status.
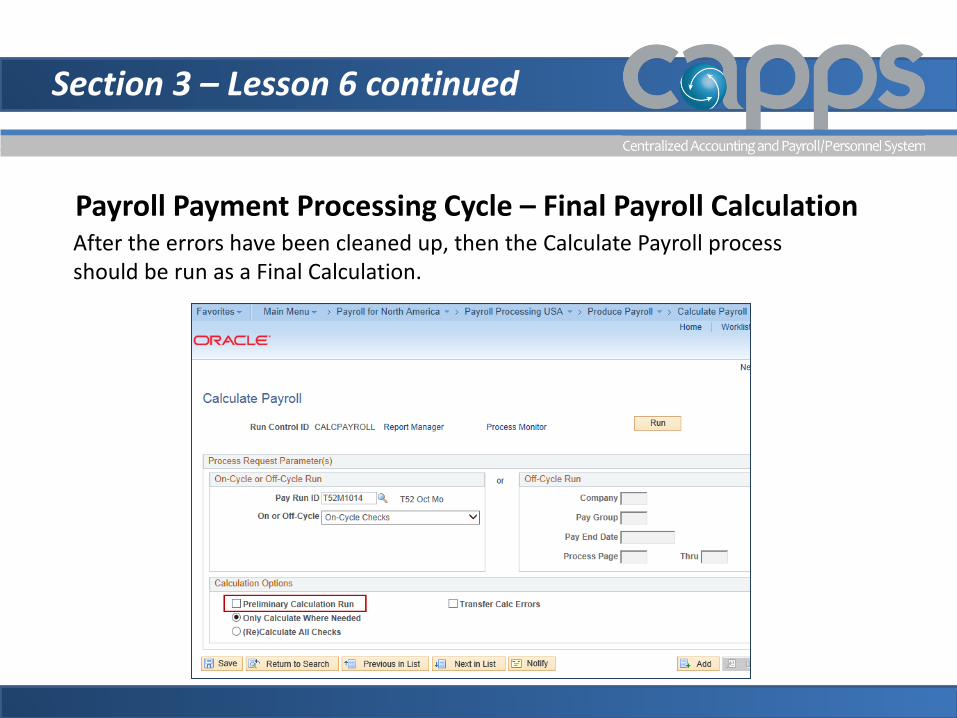
Section 3 – Lesson 6 continued
Payroll Payment Processing Cycle – Final Payroll Calculation After the errors have been cleaned up, then the Calculate Payroll process
should be run as a Final Calculation.

Section 3 – Lesson 7
Payroll Payment Processing Cycle – Payroll Confirm
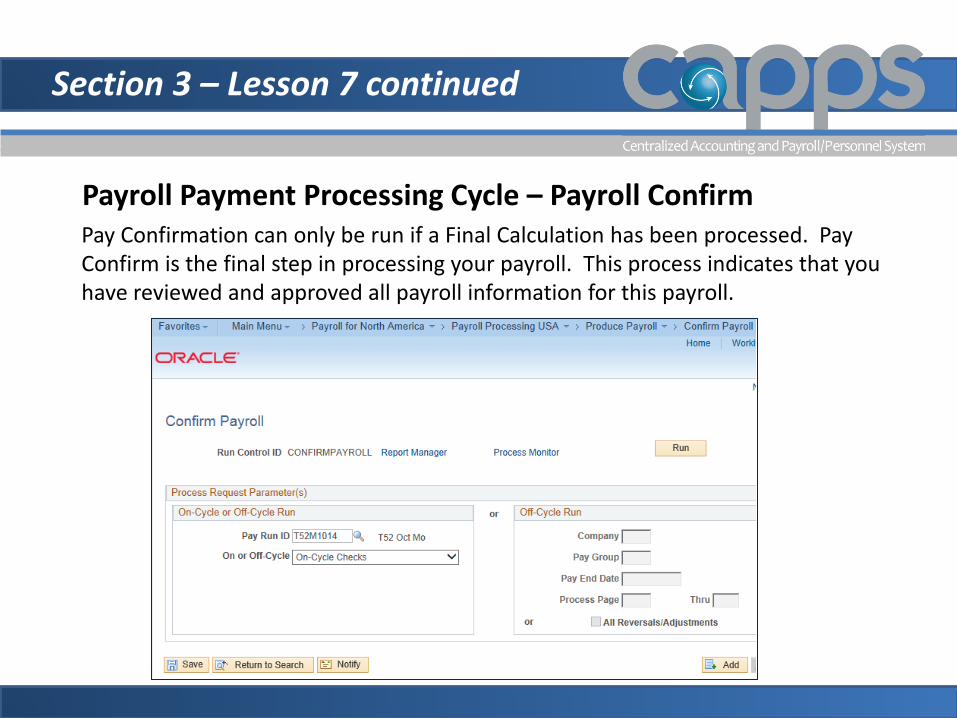
Section 3 – Lesson 7 continued
Payroll Payment Processing Cycle – Payroll Confirm Pay Confirmation can only be run if a Final Calculation has been processed. Pay
Confirm is the final step in processing your payroll. This process indicates that you have reviewed and approved all payroll information for this payroll.
Section 3 – Lesson 8
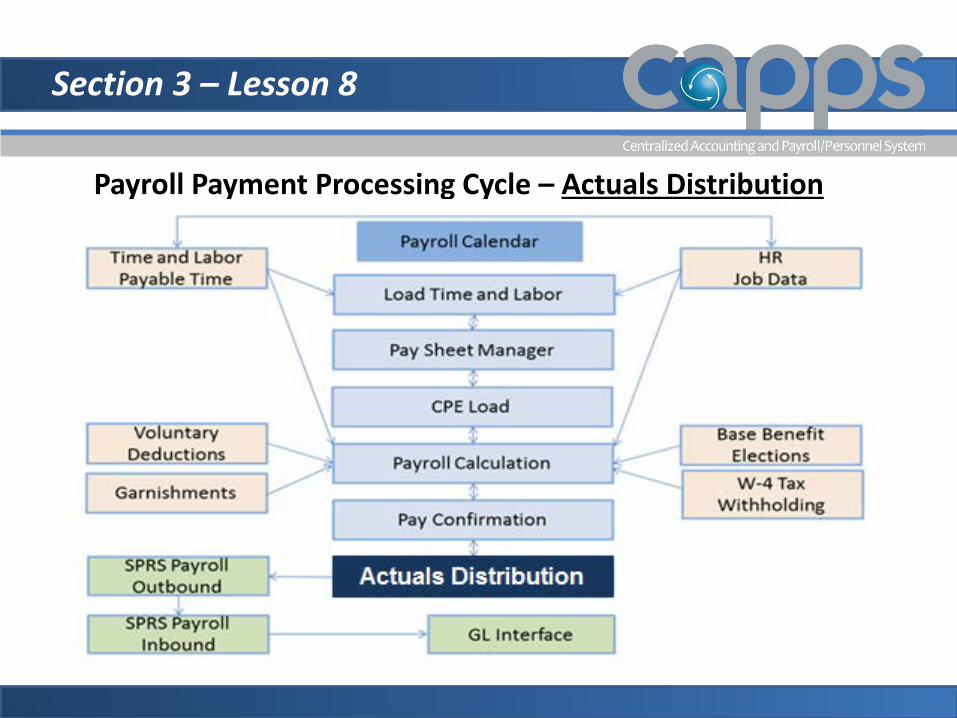
Payroll Payment Processing Cycle – Actuals Distribution
Section 3 – Lesson 8 continued
Payroll Payment Processing Cycle – Actuals Distribution There are (3) Payroll Actual Reports that are critical for ensuring that funding is
available in USAS. These reports should be run, reviewed and saved/printed, compared to the Payroll Summary and then forwarded to Commitment Accounting.
1. Actuals Fund Summary
2. Actuals Class Summary
3. Actuals by Approp/PCA
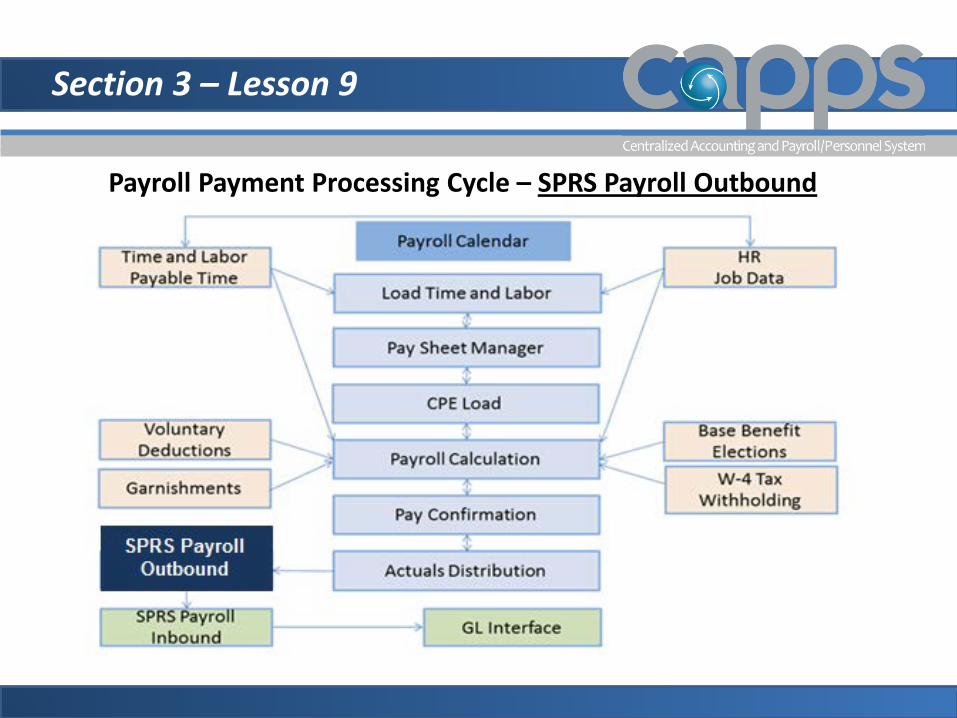
Section 3 – Lesson 9
Payroll Payment Processing Cycle – SPRS Payroll Outbound
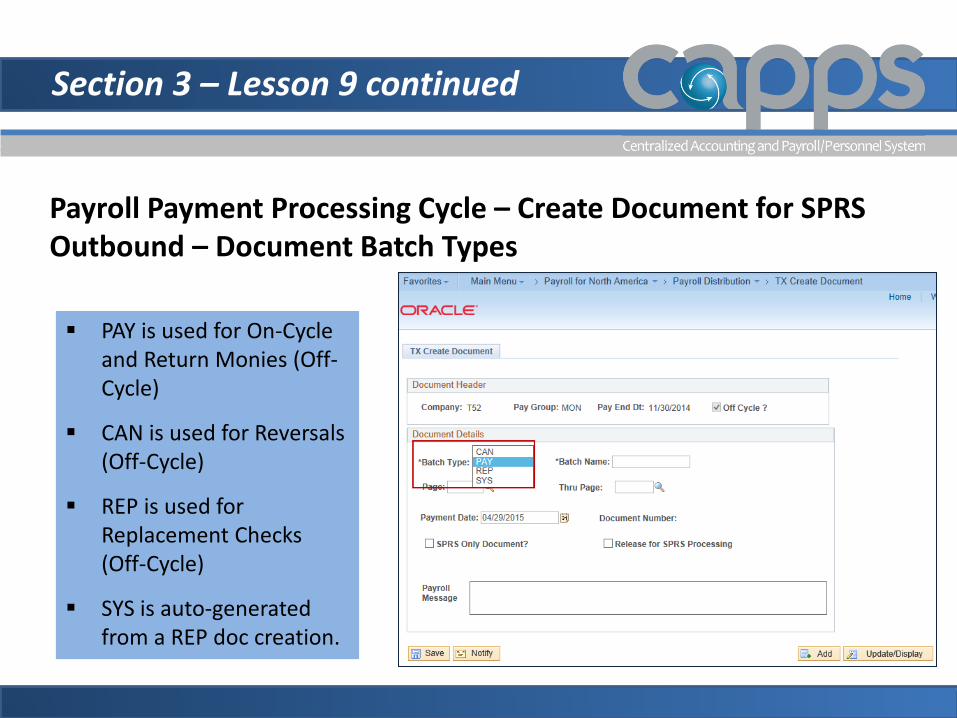
Section 3 – Lesson 9 continued
Payroll Payment Processing Cycle – Create Document for SPRS Outbound – Document Batch Types
PAY is used for On-Cycle and Return Monies (Off-Cycle)
CAN is used for Reversals (Off-Cycle)
REP is used for Replacement Checks (Off-Cycle)
SYS is auto-generated from a REP doc creation.

Section 3 – Lesson 9 continued
Payroll Payment Processing Cycle – SPRS Payroll Outbound
SPRS Outbound process creates the file and sends for processing and approval.
Section 3 – Lesson 10
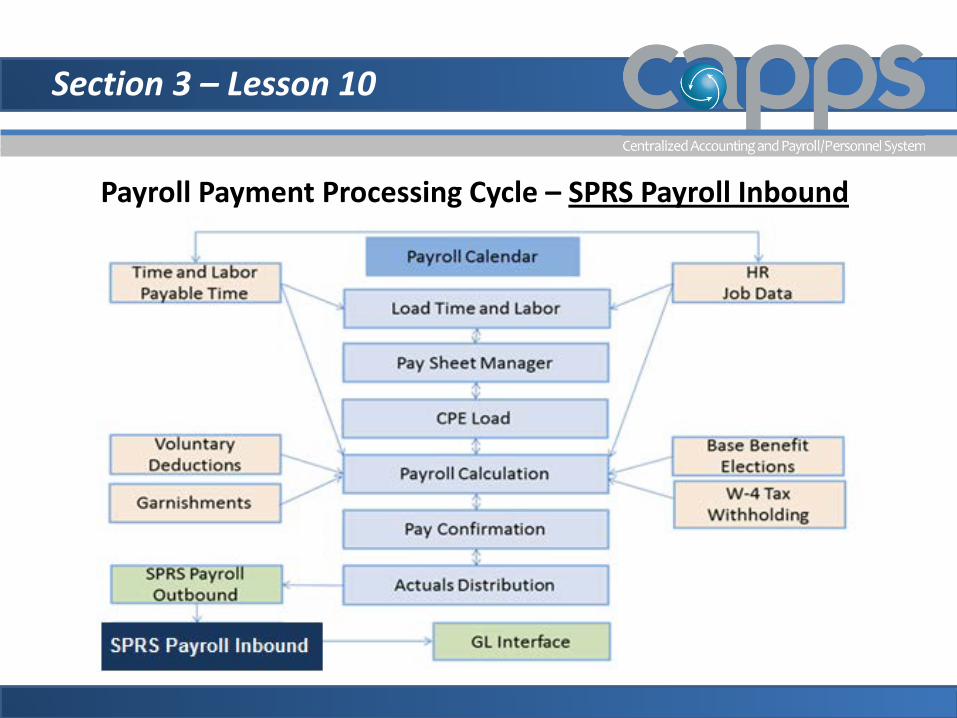
Payroll Payment Processing Cycle – SPRS Payroll Inbound

Section 3 – Lesson 10 continued
Payroll Payment Processing Cycle – SPRS Payroll Inbound Error File and Print File (Returned print file) – On
the following day, a SPRS inbound file is received with a status of USAS accepted or Rejected. If not accepted, errors must be fixed and the SPRS Outbound/Inbound process is run again. CPA Production Support will be available to provide guidance on Rejected files.
Agencies will review the returned file in the Mainframe. However they can perform the additional steps for Day Two in CAPPS such as TX Inquire/Delete Document and TX Document History.
Section 3 – Lesson 11
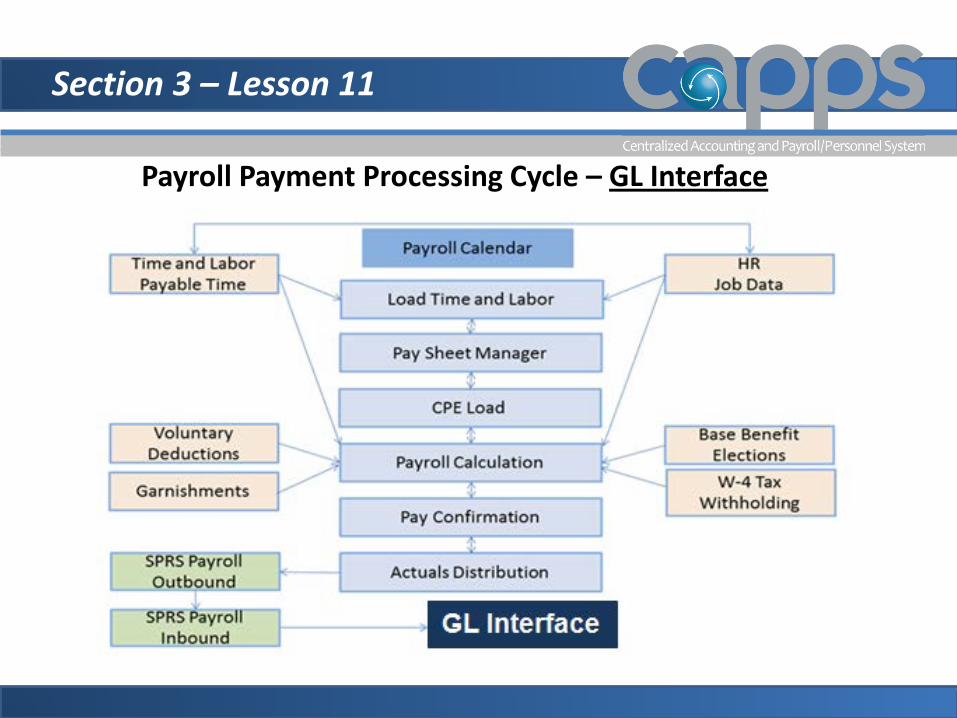
Payroll Payment Processing Cycle – GL Interface
Section 2 – Lesson 11 continued
General Ledger (GL) Interface
Once SPRS Inbound receives an Acceptance file from CPA, the General Ledger (GL) file is created and made available for processing by Financials.
Section 4 On/Off Cycle Payroll Processing Checklists
Section 4 – Objectives
After completing this section you will be able to: Validate a Pay Calendar Managing Paysheets Complete tasks required to complete an On-Cycle
and Off-Cycle Payroll Review Pay Checks Complete Off-Cycle Payroll Transactions
• Reversals • Replacements • Returned Monies
Course Objectives
1
2
3
4
5
6
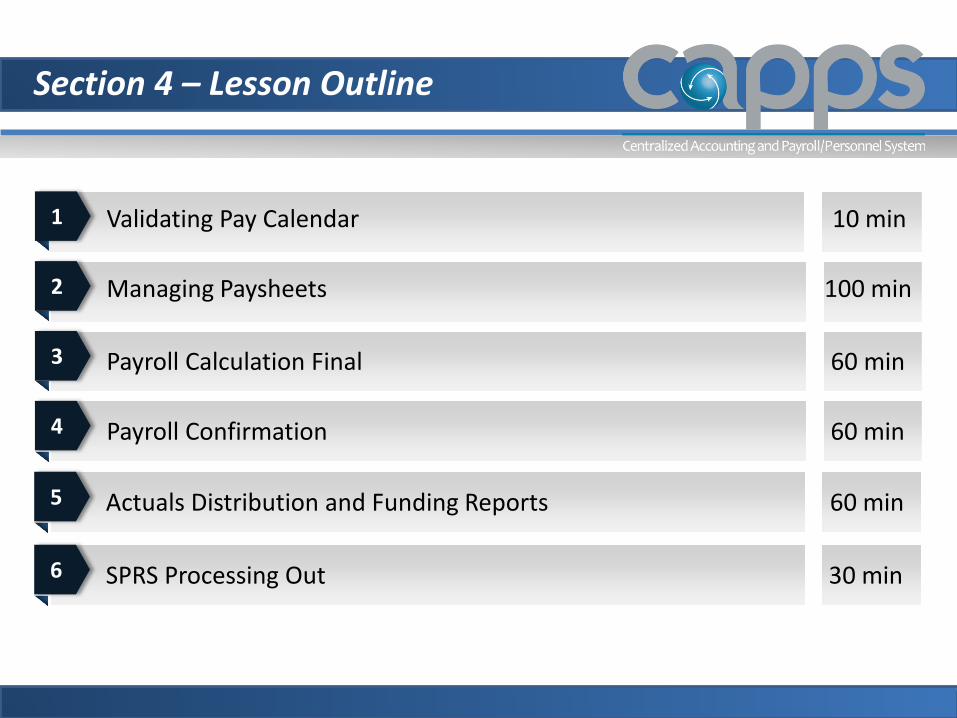
Section 4 – Lesson Outline
Validating Pay Calendar 10 min
Managing Paysheets 100 min
Payroll Calculation Final 60 min
Payroll Confirmation 60 min Actuals Distribution and Funding Reports 60 min SPRS Processing Out 30 min
Course Objectives
7
8
9
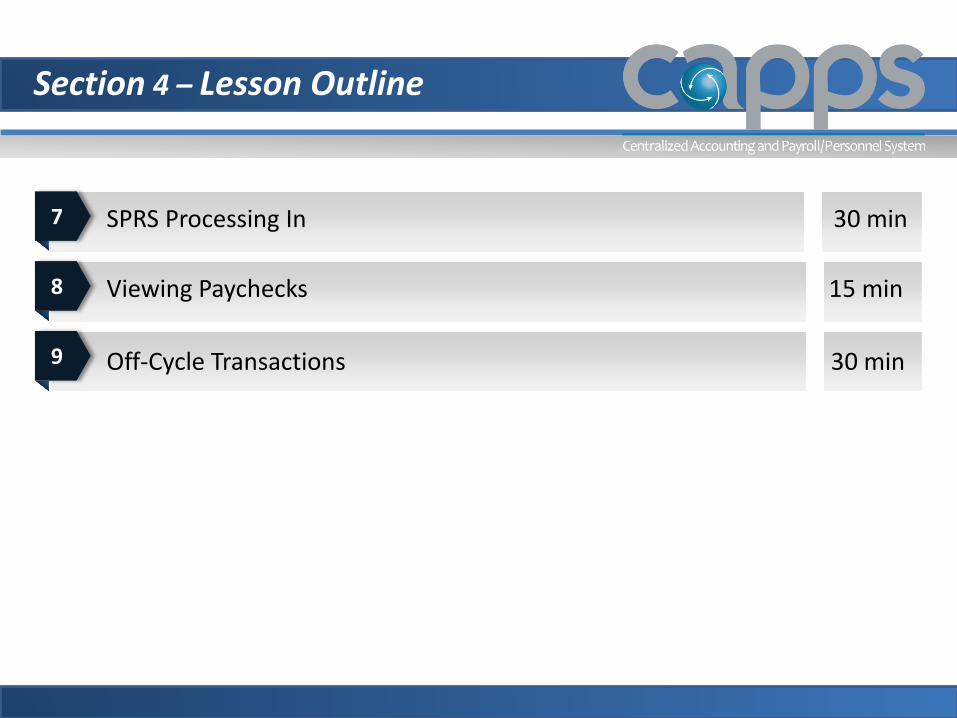
Section 4 – Lesson Outline
SPRS Processing In 30 min Viewing Paychecks 15 min Off-Cycle Transactions 30 min
Section 4 – Lesson 1
Checklist Day 1
Begin Lesson 1 Validating a Pay
Calendar (Checklist Step 1)
On Cycle Checklist (pdf) printable copy
Section 4 – Lesson 1
Validating Pay Calendar Check the Pay Group, Pay Begin, Pay Close, Pay Run ID, and Paycheck
Issue Date for accuracy On the TX Pay Calendar page check the direct deposit cutoff date and
Payroll HR Due date.
Checklist On Cycle Payroll Calculation
Navigation: Main Menu > Payroll for North America > Payroll Processing USA > Create and Load Paysheet > Review Pay Calendars
Step 1 Exercise
Section 4 – Lesson 2
Begin Lesson 2 Managing Paysheets (Checklist Steps 2 – 20)
Section 4 – Lesson 2 continued
Managing Paysheets – Query (TX_PY_UNCONFIRMED_PAYLINES)
There are specific queries that have been created to check certain payroll data. The first query that should be run prior to beginning the payroll process is the Query for Unconfirmed Pay lines. This query should be clean (doesn’t include any data).
This query should not produce any data. If it does, it means that an Off-Cycle payroll needs to be processed or cared for before the On-Cycle can be run.
Checklist On Cycle Payroll Calculation Navigation: Main Menu > Reporting Tools > Query > Query Manager > Find an existing Query
Step 2 Exercise
Section 4 – Lesson 2 continued
Managing Paysheets - Load Time and Labor The Load Time and Labor process loads all of the payable time onto Paysheets. The Load Time and Labor process is only run once during On-Cycle. If adjustments
need to be made, they must be done on an Off-Cycle payroll where the Load Time and Labor process can be run again.
Checklist On Cycle Payroll Calculation
Navigation: Main Menu > Payroll for North America > Payroll Processing USA > Create Paysheets > Load Time and Labor
Step 3 Exercise
Section 4 – Lesson 2 continued
Managing Paysheets – Paysheets/Pay Lines
Paysheets contain the data required to calculate
employee pay for each pay period.
The paysheets that are loaded from Time and Labor (TL) and should not need to be edited. Manual entry of hours on the pay line is an EXTREMELY RARE situation.
It is critical that users allow the Time and Labor system to do what it is designed to do.
If there are additional entries from prior periods to be processed on the On-Cycle, the CPE Main should be used not TL payable time.
Section 4 – Lesson 2 continued
Managing Paysheets – Paysheets/Pay Lines Differences Paysheet and Pay line pages display the same content, but
you access them differently.
The Paysheet page includes many pay lines. You can view only one pay line at a time on the Pay line page.
For the period covered by the pay calendars for which the Time and Labor process is being run, one pay line for each employee that shall be paid is created by the system.
You can access the employee much faster through the individual Pay Line so in order to review pay earnings entries for an employee or group of employees, use one of the Pay Line pages.
Section 4 – Lesson 2 continued
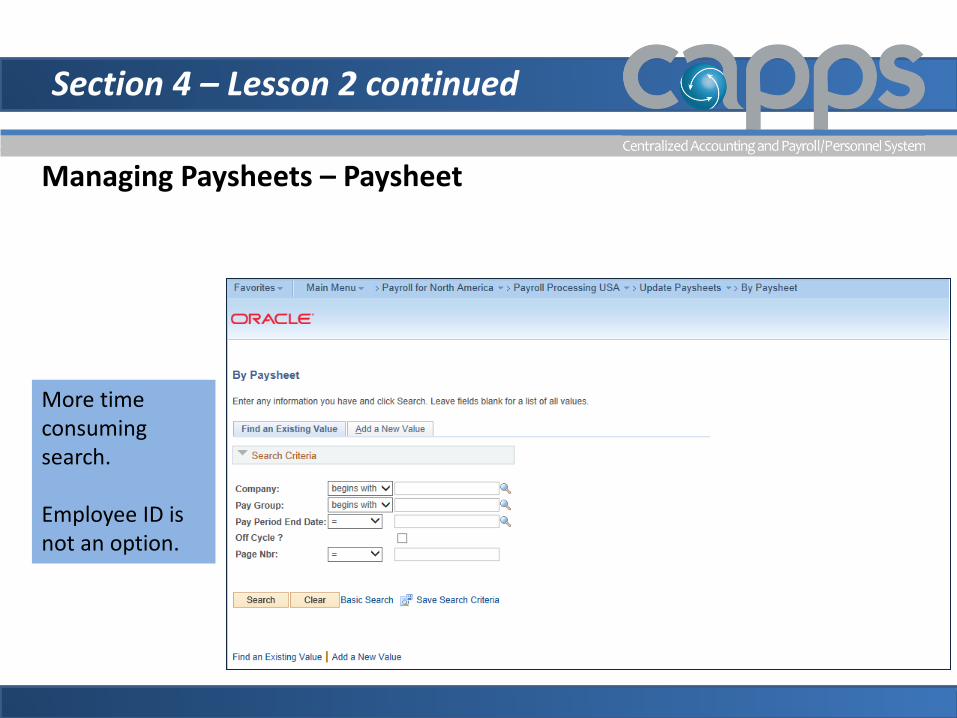
Managing Paysheets – Paysheet
More time consuming search. Employee ID is not an option.
Section 4 – Lesson 2 continued
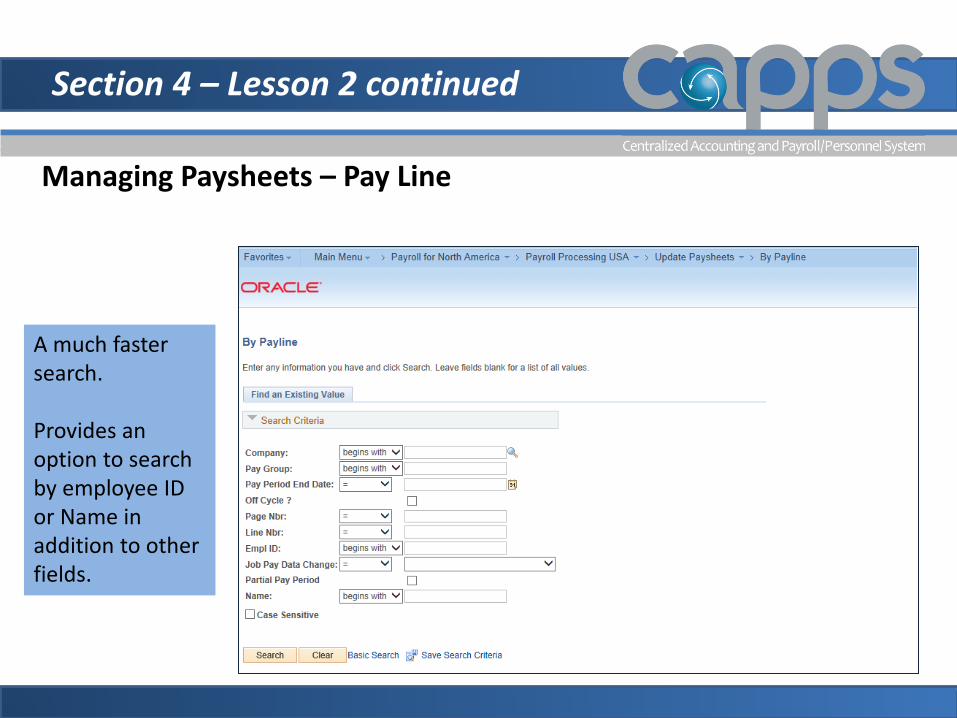
Managing Paysheets – Pay Line
A much faster search. Provides an option to search by employee ID or Name in addition to other fields.
Section 4 – Lesson 2 continued
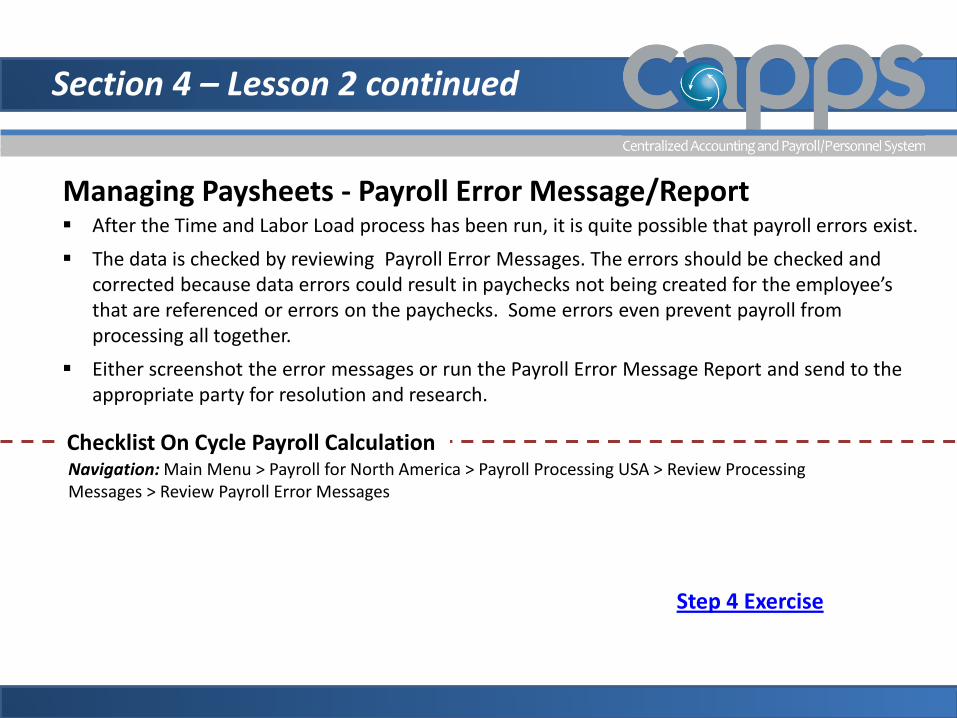
Managing Paysheets - Payroll Error Message/Report After the Time and Labor Load process has been run, it is quite possible that payroll errors exist. The data is checked by reviewing Payroll Error Messages. The errors should be checked and
corrected because data errors could result in paychecks not being created for the employee’s that are referenced or errors on the paychecks. Some errors even prevent payroll from processing all together.
Either screenshot the error messages or run the Payroll Error Message Report and send to the appropriate party for resolution and research.
Checklist On Cycle Payroll Calculation Navigation: Main Menu > Payroll for North America > Payroll Processing USA > Review Processing Messages > Review Payroll Error Messages
Step 4 Exercise
Section 4 – Lesson 2 continued
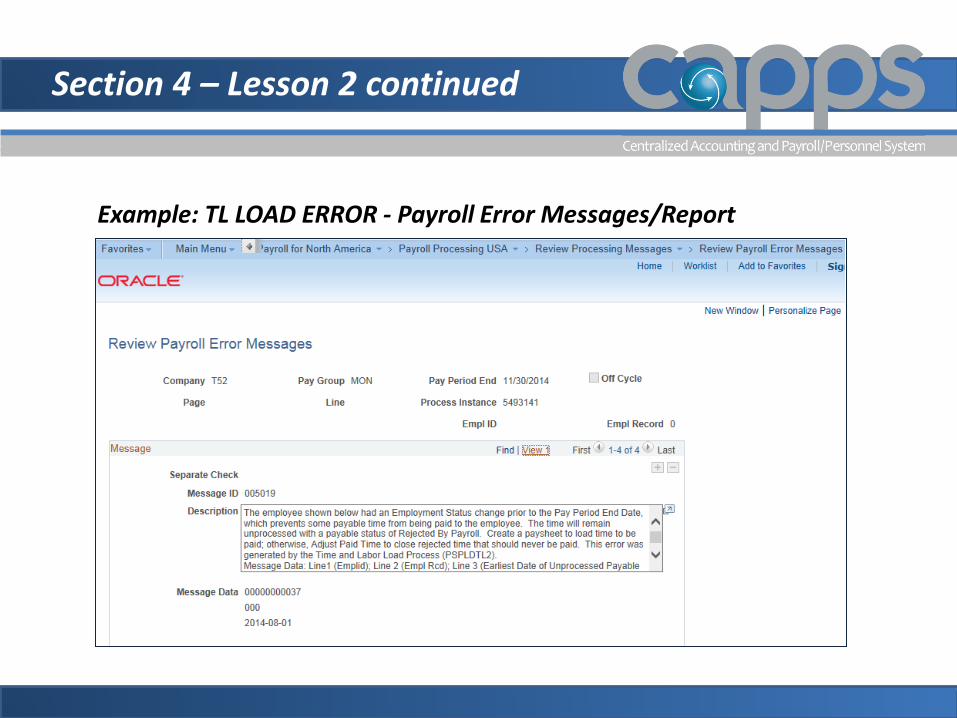
Example: TL LOAD ERROR - Payroll Error Messages/Report
Section 4 – Lesson 2 continued
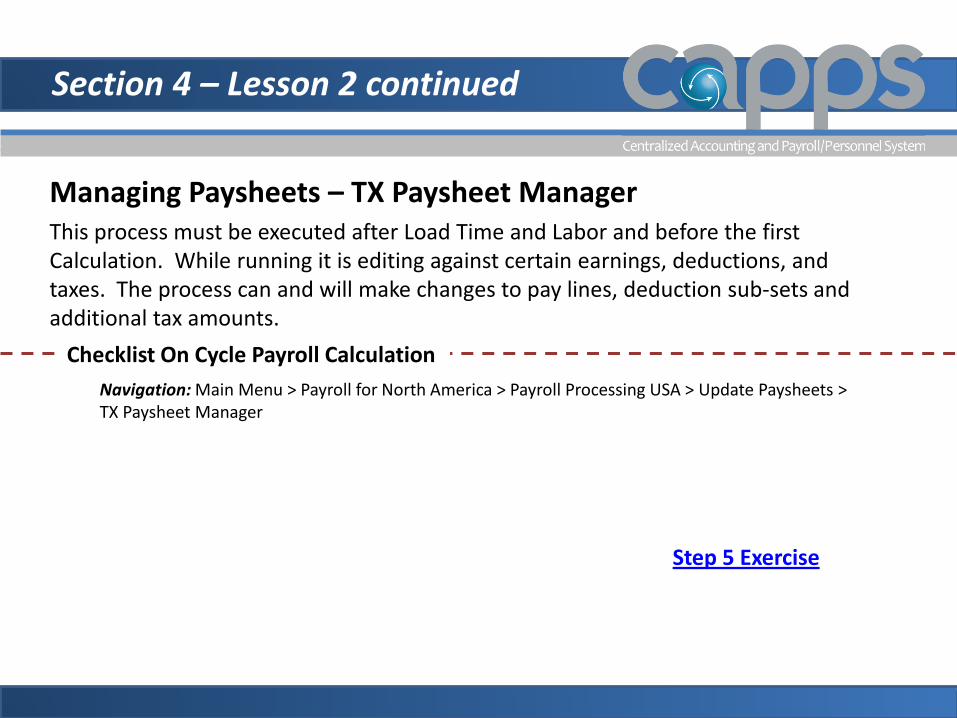
Managing Paysheets – TX Paysheet Manager This process must be executed after Load Time and Labor and before the first Calculation. While running it is editing against certain earnings, deductions, and taxes. The process can and will make changes to pay lines, deduction sub-sets and additional tax amounts.
Checklist On Cycle Payroll Calculation Navigation: Main Menu > Payroll for North America > Payroll Processing USA > Update Paysheets > TX Paysheet Manager
Step 5 Exercise
Section 4 – Lesson 2 continued
Managing Paysheets - Running Pre-Calculation Audit Report The Pre-Calculation Audit Report (PAY035) provides a detailed listing (by company pay
group, and pay end date) of information that might cause problems during the Pay Calculation process.
Checklist On Cycle Payroll Calculation
Navigation: Main Menu > Payroll for North America > Payroll Processing USA > Produce Payroll > Pre-Calculation Audit Report
Step 6 Exercise
Section 4 – Lesson 2 continued
Managing Paysheets - Calculate Payroll (Preliminary) ERPPYCALC/TXPYCALC
The Payroll Calculation process has been customized to comply with statutory and
CPA payroll policy requirements. (Example) Longevity will only be paid to employees that meet eligibility requirements.
This process produces many logs that should be reviewed and analyzed. Pay calculation is a process that can be run and rerun repeatedly until the Payroll
Analyst is confident that the payroll data is correct.
Checklist On Cycle Payroll Calculation Navigation: Main Menu > Payroll for North America > Payroll Processing USA > Produce Payroll > Calc Payroll
Step 7 Exercise
Section 4 – Lesson 2 continued
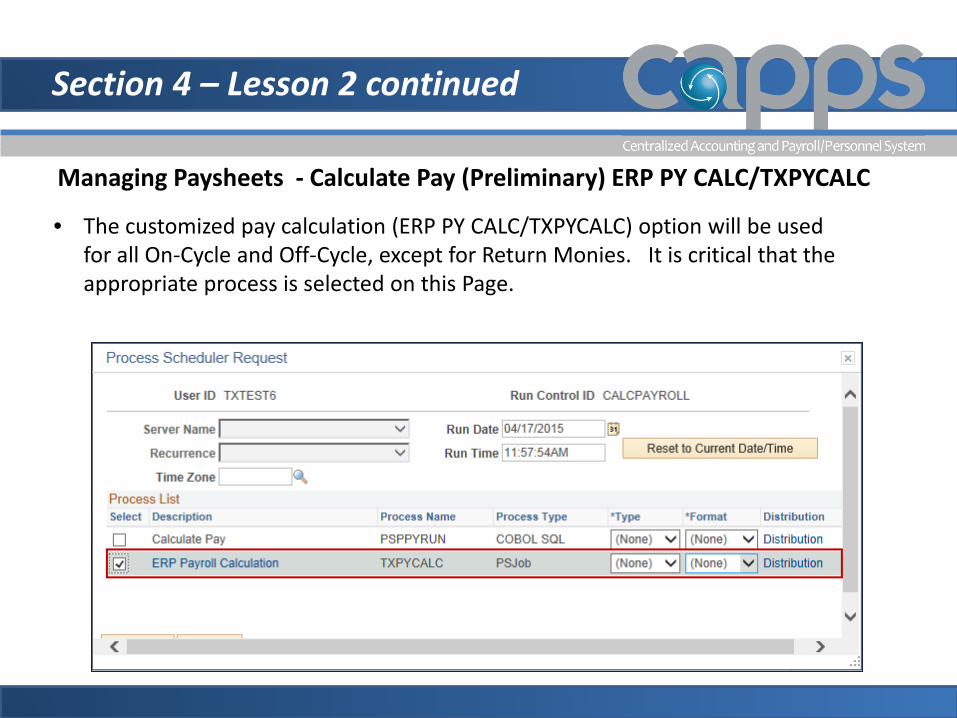
Managing Paysheets - Calculate Pay (Preliminary) ERP PY CALC/TXPYCALC • The customized pay calculation (ERP PY CALC/TXPYCALC) option will be used
for all On-Cycle and Off-Cycle, except for Return Monies. It is critical that the appropriate process is selected on this Page.

Section 4 – Lesson 2 continued
Managing Paysheets - Calculate Pay (Preliminary) ERP PY CALC/TXPYCALC This process produces many logs that are to be reviewed. They may contain errors that may not have shown up when running the Payroll Review Message Errors. All of the logs can be saved/printed for processing documentation.
TXCALWS – Lump Sum Eligibility (information and action) TXCALPRE – Pre-Calculation Paysheet Update (information and action) PSPYRUN – First Calculate Pay TXCALBRP – Benefit Replacement Pay Calculation (information) PSPYRUN – Second Calculate Pay TXCALRET – Retirement Calculation (information) PSPYRUN – Last Calculate Pay
Section 4 – Lesson 2 continued
Managing Paysheets - Calculate Payroll - Review Payroll Error Messages After running Calculate Payroll (Preliminary), it is quite possible for additional errors to exist. The messages should be reviewed and action taken to clear them up.
Checklist On Cycle Payroll Calculation Navigation: Main Menu > Payroll for North America > Payroll Processing USA > Review Processing Messages > Review Payroll Error Messages
Step 8 Exercise

Section 4 – Lesson 2 continued
Running Query – TX_PY_TIE_EARNS_TO_PYBL_TIME This query summarizes hours to granular payable time detail. Note: Run only if employee calculated to a negative gross.
Checklist On Cycle Payroll Calculation Navigation: Main Menu > Reporting Tools > Query > Query Manager > Find an existing Query
Step 9 Exercise
Section 4 – Lesson 2 continued
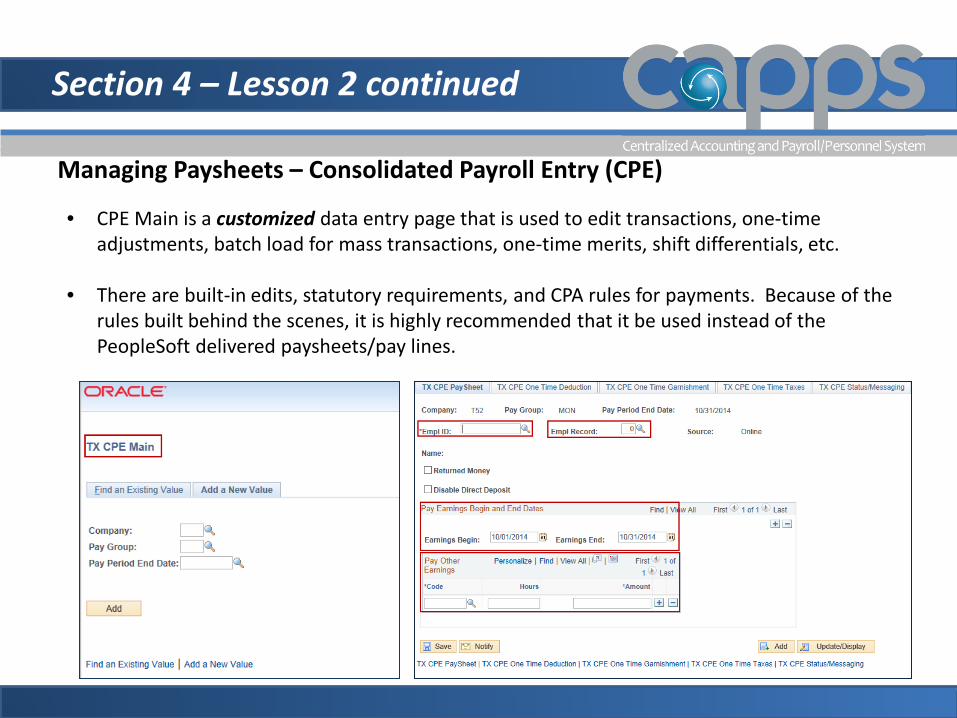
Managing Paysheets – Consolidated Payroll Entry (CPE)
• CPE Main is a customized data entry page that is used to edit transactions, one-time adjustments, batch load for mass transactions, one-time merits, shift differentials, etc.
• There are built-in edits, statutory requirements, and CPA rules for payments. Because of the rules built behind the scenes, it is highly recommended that it be used instead of the PeopleSoft delivered paysheets/pay lines.
Section 4 – Lesson 2 continued
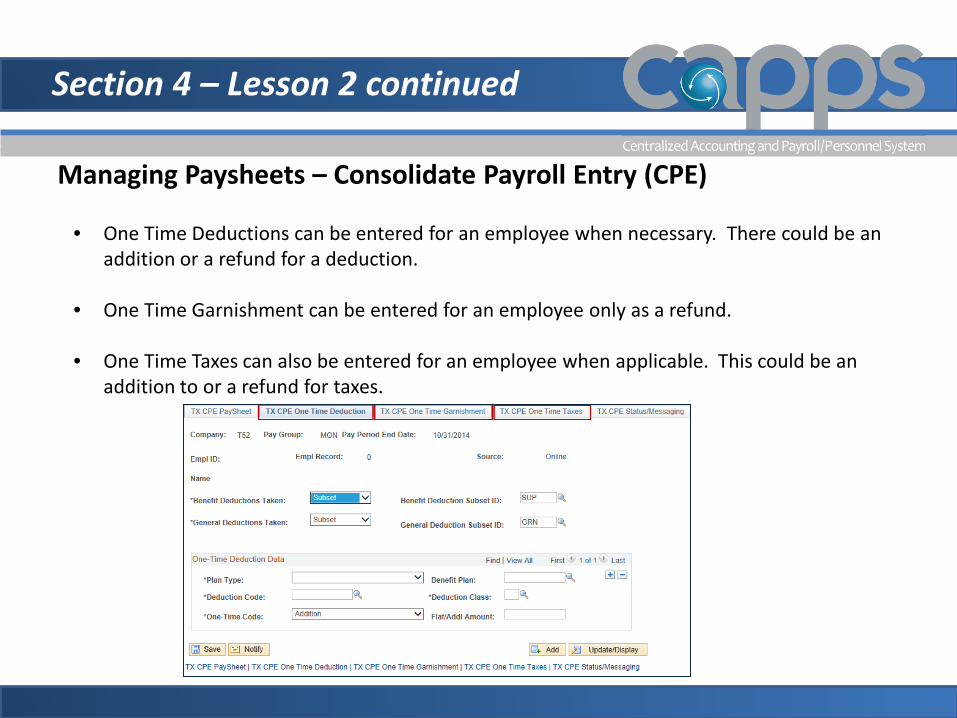
Managing Paysheets – Consolidate Payroll Entry (CPE)
• One Time Deductions can be entered for an employee when necessary. There could be an addition or a refund for a deduction.
• One Time Garnishment can be entered for an employee only as a refund.
• One Time Taxes can also be entered for an employee when applicable. This could be an addition to or a refund for taxes.
Section 4 – Lesson 2 continued
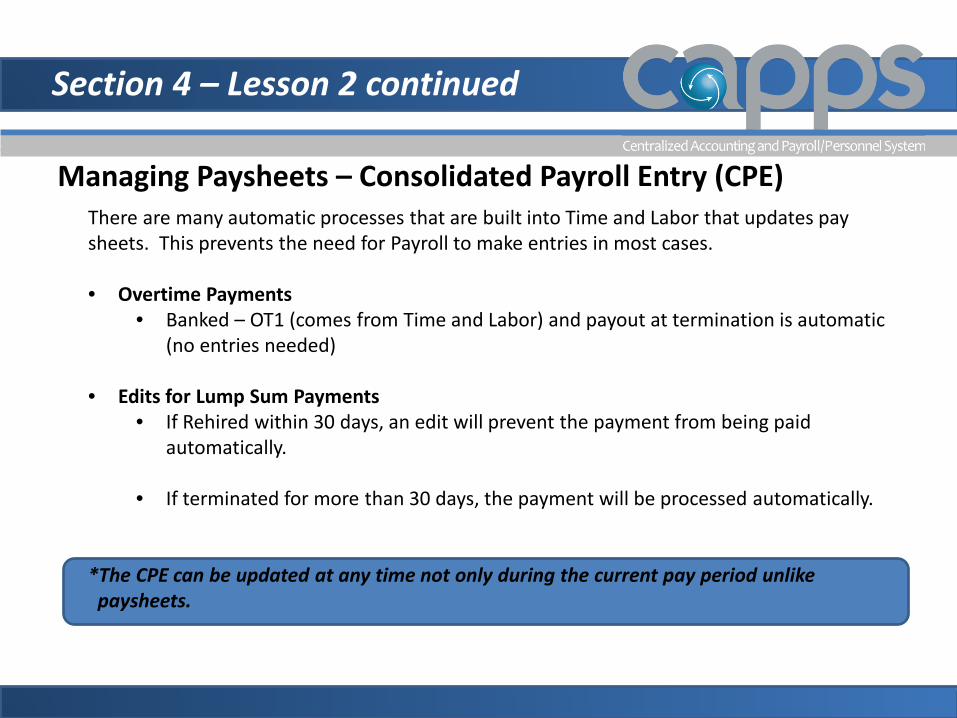
Managing Paysheets – Consolidated Payroll Entry (CPE) There are many automatic processes that are built into Time and Labor that updates pay sheets. This prevents the need for Payroll to make entries in most cases.
• Overtime Payments
• Banked – OT1 (comes from Time and Labor) and payout at termination is automatic (no entries needed)
• Edits for Lump Sum Payments
• If Rehired within 30 days, an edit will prevent the payment from being paid automatically.
• If terminated for more than 30 days, the payment will be processed automatically.
*The CPE can be updated at any time not only during the current pay period unlike paysheets.
Section 4 – Lesson 2 continued
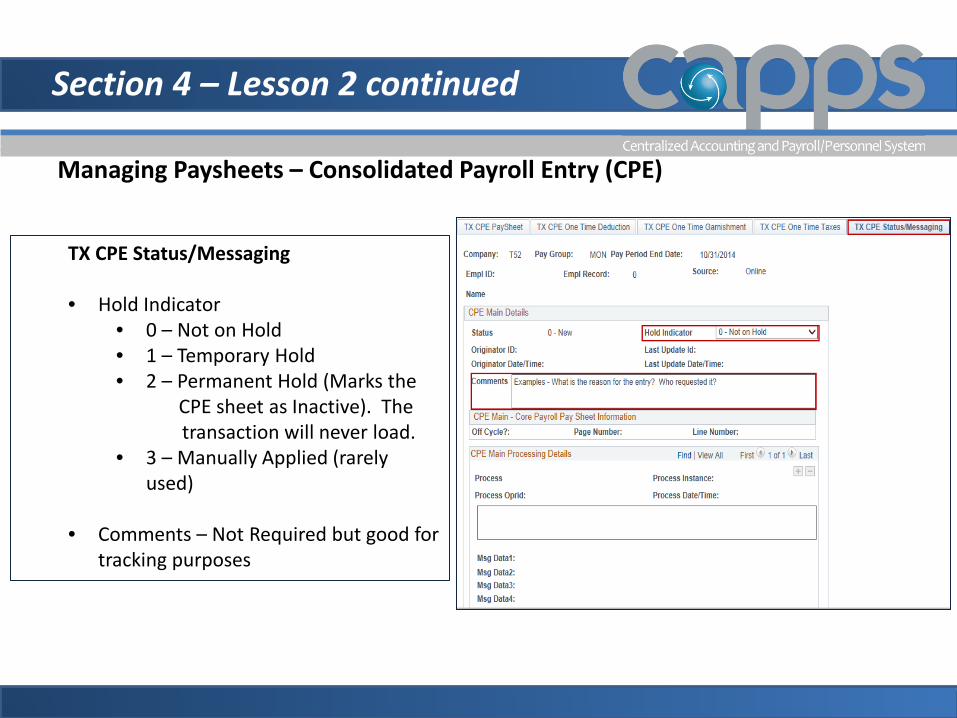
Managing Paysheets – Consolidated Payroll Entry (CPE)
TX CPE Status/Messaging • Hold Indicator
• 0 – Not on Hold • 1 – Temporary Hold • 2 – Permanent Hold (Marks the CPE sheet as Inactive). The transaction will never load. • 3 – Manually Applied (rarely
used)
• Comments – Not Required but good for tracking purposes
Section 4 – Lesson 2 continued
Managing Paysheets – Consolidated Payroll Entry (CPE)
Running a Mass Upload for One-time Merit Compensation
• One-time Merit payments are processed for eligible employees based upon the direction of management and Texas Government guidelines.
• One-time Merit increases flow automatically to the CIET/CPE from Manager Self-Service (MSS) for agencies that have MSS. For agencies with MSS Lite, One-Time Merits are entered directly in CPE.
• A spreadsheet can be used if your agency is awarding a One-time Merit to a large number of employees at one time (i.e. 50+) where manual CPE entry is not practical.
• The spreadsheet load process requires technical intervention by CPA therefore use of this spreadsheet is the exception, not the rule (infrequently used).
Section 4 – Lesson 2 continued
Managing Paysheets – Consolidated Payroll Entry (CPE)
Running a Mass Upload for One-time Merit Compensation
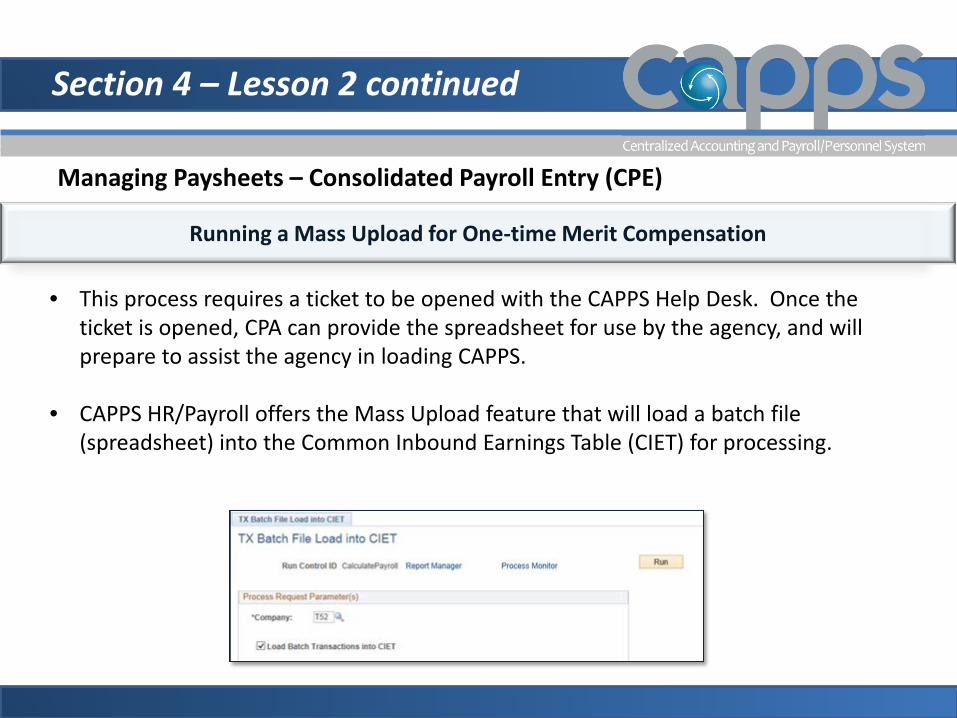
• This process requires a ticket to be opened with the CAPPS Help Desk. Once the ticket is opened, CPA can provide the spreadsheet for use by the agency, and will prepare to assist the agency in loading CAPPS.
• CAPPS HR/Payroll offers the Mass Upload feature that will load a batch file (spreadsheet) into the Common Inbound Earnings Table (CIET) for processing.
Section 4 – Lesson 2 continued
Managing Paysheets - CPE Main Load This process loads all of the CPE Main entries and if there is a CIET to be loaded it processes that
as well. Edits will be applied, reports produced, paysheets updated, and CPE transactions closed where applicable.
It is important to review the TXMAINLD.OUT and TXMAINLD.pdf as well as TXCPPULL (if applicable) for successful and failed transactions. These can be saved/printed for processing documentation.
Checklist On Cycle Payroll Calculation Navigation: Main Menu > Payroll for North America > Payroll Processing USA > TX CPE Main Load
Step 10 Exercise
Section 4 – Lesson 2 continued
Managing Paysheets - Calculation Payroll (Preliminary) Preliminary Calculation is run again since data has been updated and errors have been corrected.
Checklist On Cycle Payroll Calculation
Navigation: Main Menu > Payroll for North America > Payroll Processing USA > Produce Payroll > Calc Payroll
Step 11 Exercise
Section 4 – Lesson 2 continued
Review Payroll Error Messages After the Preliminary Payroll Calculation process has been run, it is quite possible that different errors could exist due to activity after the last error message report was run.
Checklist On Cycle Payroll Calculation
Navigation: Main Menu > Payroll for North America > Payroll Processing USA > Review Processing Messages > Review Payroll Error Messages
Step 12 Exercise
Section 4 – Lesson 2 continued
Deductions Not Taken Report The report reflects all deductions that were not taken for the pay period. Utilize this report to identify the employees for which subset changes need to be applied on the payline to enforce the 'all or none’.
Checklist On Cycle Payroll Calculation Navigation: Main Menu > Payroll for North America > Payroll Processing USA > Pay Period Reports > Deductions Not Taken
Step 13 Exercise
Section 4 – Lesson 2 continued
TX Payroll CY Audit Report Reports employees for a specified pay period that meet or exceed defined exception limits (defined on CAPPS Constants Table) for gross amount, deduction amount, net amount and tax amounts. This report also monitors BRP and Deferred Comp YTD maximums.
Checklist On Cycle Payroll Calculation Navigation: Main Menu > Payroll for North America > Payroll Processing USA > Pay Period Reports
Step 14 Exercise

Section 4 – Lesson 2 continued
TX Taxable Gross Audit Report Reports payments containing a calculated taxable gross (FIT/OASDI/HI) that exceeds the sum of the taxable gross components on the payment.
Checklist On Cycle Payroll Calculation Navigation: Main Menu > Payroll for North America > Payroll Processing USA > Pay Period Tax Reports >
Step 15 Exercise
Section 4 – Lesson 2 continued
Query – TX_PY_ZERO_CHECK_WITH_EARNS Query returns employees with a net zero check containing earnings.
Checklist On Cycle Payroll Calculation
Navigation: Main Menu > Reporting Tools > Query > Query Manager > Find an Existing Query
Step 16 Exercise
Section 4 – Lesson 2 continued
Query – TX_PY_CHILD_SUPP_LUMP_BONUS Query returns calculated payments where employee receives some sort of lump sum payment over 500 dollars and has an existing child support order in arrears.
Checklist On Cycle Payroll Calculation
Navigation: Main Menu > Reporting Tools > Query > Query Manager > Find an Existing Query
Step 17 Exercise
Section 4 – Lesson 2 continued
Query – TX_PY_DED_SUBSET_DIFF_FROM_PM Query returns paylines where the deduction subset is different from paysheet manager.
Checklist On Cycle Payroll Calculation
Navigation: Main Menu > Reporting Tools > Query > Query Manager > Find an Existing Query
Step 18 Exercise
Section 4 – Lesson 2 continued
Query – TX_PY_STATE_NOTTX_CALCD Query returns paychecks where state taxable gross or state tax is calculated.
Checklist On Cycle Payroll Calculation
Navigation: Main Menu > Reporting Tools > Query > Query Manager > Find an Existing Query
Step 19 Exercise
Section 4 – Lesson 2 continued
Query – TX_PY_PAY_OK_TO_PAY_OFF_CPE Query returns paylines with 'OK to Pay' turned off tied to a CPE entry.
Checklist On Cycle Payroll Calculation
Navigation: Main Menu > Reporting Tools > Query > Query Manager > Find an Existing Query
Step 20 Exercise

Section 4 – Lesson 3
Begin Lesson 3 Payroll Calculation
Final (Checklist Steps 21-24)
Section 4 – Lesson 3
Calculate Payroll – Final (not preliminary) When the payroll analyst is satisfied with the results of the preliminary pay calculation runs and have ensured that errors have been corrected, the Final Pay Calculation can be run before proceeding to Pay Confirmation. When a user is updating data they may see a pop-up message that payroll is processing and the changes will take place on the next payroll.
If all errors are not addressed during the Pay calculation, the following error will appear during confirmation:
“All of the checks for a pay calendar have not been calculated and therefore cannot be confirmed”
In addition, if the payroll analyst forgets to run Pay calculation in Final mode and tries
to run the Pay Confirmation, the following error will appear during confirmation: “Pay Calculation Is Not Final”
Section 4 – Lesson 3 continued
Calculate Payroll – Final (not preliminary) The same steps that were used in Running a Preliminary Calculation are used to run the
Final calculation except the Preliminary Calculation Run checkbox is unchecked. Final Calc MUST be executed before Payroll is Confirmed. running the Pay Confirmation
process indicates that you've reviewed and approved all payroll information for this pay run to be Confirmed
Checklist On Cycle Payroll Calculation Navigation: Main Menu > Payroll for North America > Payroll Processing USA > Produce Payroll > Calc Payroll (Unclick Prelim Calc radio button). This sets the calc process in Final Calc mode.
Step 21 Exercise
Section 4 – Lesson 3 continued
Review Payroll Error Messages – Final Calc Ensure all payroll errors messages have been clean.
Checklist On Cycle Payroll Calculation Navigation: Main Menu > Payroll for North America > Payroll Processing USA > Review Processing Messages > Review Payroll Error Messages
Step 22 Exercise
Section 4 – Lesson 3 continued
Query TX_PY_DED_SUBSET_DIFF_FROM_PM Query returns paylines where the deduction subset is different from paysheet manager.
Checklist On Cycle Payroll Calculation
Navigation: Main Menu > Reporting Tools > Query > Query Manager > Find an Existing Query
Step 23 Exercise
Section 4 – Lesson 3 continued
TX Pre-Distribution Audit Report This report identifies potential errors that may occur during the Actuals Distribution process. It allows budget/position control staff the ability to identify the errors and modify configurations or budgets within CAPPS in order to successful process payroll.
Checklist On Cycle Payroll Calculation Navigation: Main Menu > Payroll for North America > Payroll Distribution > Commitment Accounting > TX Pre-Distribute Audit TX Pre-
Distribution Audit Report (save/print for documentation then send to Commitment Accounting).
Step 24 Exercise

Section 4 – Lesson 4
Begin Lesson 4 Payroll Confirmation (Checklist Steps 25-26)

Section 4 – Lesson 4
Confirm Payroll Pay confirmation is the final step in processing your payroll however there are critical steps that
follow such as running additional error reports, running distribute actuals, Payroll Summary, Payroll Register, funding reports , and sending the payroll file to SPRS.
After a payroll has been confirmed, you can review payments and other payroll reports. You can review an employee's check totals and payroll balances online.
Checklist On Cycle Payroll Calculation Navigation: Main Menu > Payroll for North America > Payroll Processing USA > Produce Payroll > Confirm Payroll
Step 25 Exercise
Section 4 – Lesson 4 continued
Confirm Payroll - Payroll Error Message Report After the Payroll Confirmation, it is possible that errors could exist. The screenshot below is an error that states the final calculation process was not run. This means that the checkbox was not unchecked when the Calculation process was run.
Checklist On Cycle Payroll Calculation Navigation: Main Menu > Payroll for North America > Payroll Processing USA > Review Processing Messages > Review Payroll Error Messages
Step 26 Exercise
Section 4 – Lesson 5
Begin Lesson 5 Actuals Distribution (Checklist Steps 27-33)
Section 4 – Lesson 5
TX Distribute Actuals Distributes employee earnings and employer fringes across chartfield combinations per the department budget table configuration.
Checklist On Cycle Payroll Calculation
Navigation: Main Menu > Payroll for North America > Payroll Distribution > Commitment Accounting > TX Distribute Actuals
Step 27 Exercise
Section 4 – Lesson 5 continued
Review Payroll Error Messages Refer to Step 4
Checklist On Cycle Payroll Calculation
Navigation: Main Menu > Payroll for North America > Payroll Processing USA > Review Processing Messages > Review Payroll Error Messages
Step 28 Exercise
Section 4 – Lesson 5 continued
Running Payroll Summary Report This report summarizes, on separate pages, information about employee paycheck amounts, earnings, deductions and tax amounts. It must be compared to the Funding Reports for consistency after they are ran.
Checklist On Cycle Payroll Calculation
Navigation: Main Menu > Payroll for North America > Payroll Processing USA > Pay Period Reports > Payroll Summary
Step 29 Exercise
Section 4 – Lesson 5 continued
Running Payroll Register Report This report groups the employees by pay group and provides totals, sorted by department ID. It provides totals at the company, pay period, and pay group levels on the last page and a grand total for all paychecks.
Checklist On Cycle Payroll Calculation
Navigation: Main Menu > Payroll for North America > Payroll Processing USA > Pay Period Reports > Payroll Register
Step 30 Exercise
Section 4 – Lesson 5 continued
Actuals Distribution – Funding Reports Funding Reports provide an enormous amount of information for the Commitment Accounting side of the house in regards to Payroll. The following Funding Reports should be reviewed and compared to the Payroll Summary to ensure they are in sync. After the comparison is done the reports are printed/saved for documentation and sent to Commitment Accounting for funding.
A. TX Pyrl Actuals Fund Summary
B. Tx Pyrl Actuals Class Summary
C. Tx Pyrl Actuals by Approp/PCA
Section 4 – Lesson 5 continued
A - Running TX Pyrl Actuals Fund Summary Provides summary payroll expenditure information by fund for a specific payroll document being processed in order to aid budget and cash management staff in validating funds availability.
Checklist On Cycle Payroll Calculation
Navigation: Main Menu > Payroll for North America > Payroll Distribution > Commitment Accounting USA
Step 31 Exercise
Section 4 – Lesson 5 continued
B - Running TX Pyrl Actuals Class Summary Provides summary payroll expenditure information by class (PCA) for a specific payroll document being processed in order to aid budget and cash management staff in validating funds availability.
Checklist On Cycle Payroll Calculation
Navigation: Main Menu > Payroll for North America > Payroll Distribution > Commitment Accounting USA
Step 32 Exercise
Section 4 – Lesson 5 continued
C - Running TX Pyrl Actuals by Approp/PCA Provides summary payroll expenditure information by class (PCA) for a specific payroll document being processed in order to aid budget and cash management staff in validating funds availability.
Checklist On Cycle Payroll Calculation
Navigation: Main Menu > Payroll for North America > Payroll Distribution > Commitment Accounting USA
Step 33 Exercise

Section 4 – Lesson 6
Begin Lesson 6 Payment Processing –
SPRS Pay Processing Out (Checklist Steps 34-36)
Section 4 – Lesson 6
SPRS Payroll Outbound – Create TX Document Creates the payroll (PAY) document required for SPRS/USAS processing.
Checklist On Cycle Payroll Calculation
Navigation: Main Menu > Payroll for North America > Payroll Distribution > TX Create Document
Step 34 Exercise
Section 4 – Lesson 6 continued
SPRS Payroll Outbound – TX SPRS Pay Outbound Generates a payroll file for transmission to SPRS.
Checklist On Cycle Payroll Calculation
Navigation: Main Menu > CAPPS Interfaces > Payroll > TX SPRS Pay Outbound
Step 35 Exercise
Section 4 – Lesson 6 continued
SPRS Payroll Outbound – TX SPRS Audit Report Provides an analysis of a payroll as if it were sent to SPRS for processing. It lists any potential
errors that would not pass SPRS processing.
After the TX SPRS Outbound file is created the TX SPRS Audit Report is run and reviewed. If there happens to be errors they must be analyzed to determine how they can be fixed and/or who should be contacted. If any errors exist, they must be corrected and the Create Document and TX SPRS Outbound process will need to be rerun.
Checklist On Cycle Payroll Calculation Navigation: Main Menu > Payroll for North America > Payroll Distribution > TX SPRS Audit Report
Step 36 Exercise
Section 4 – Lesson 6 continued
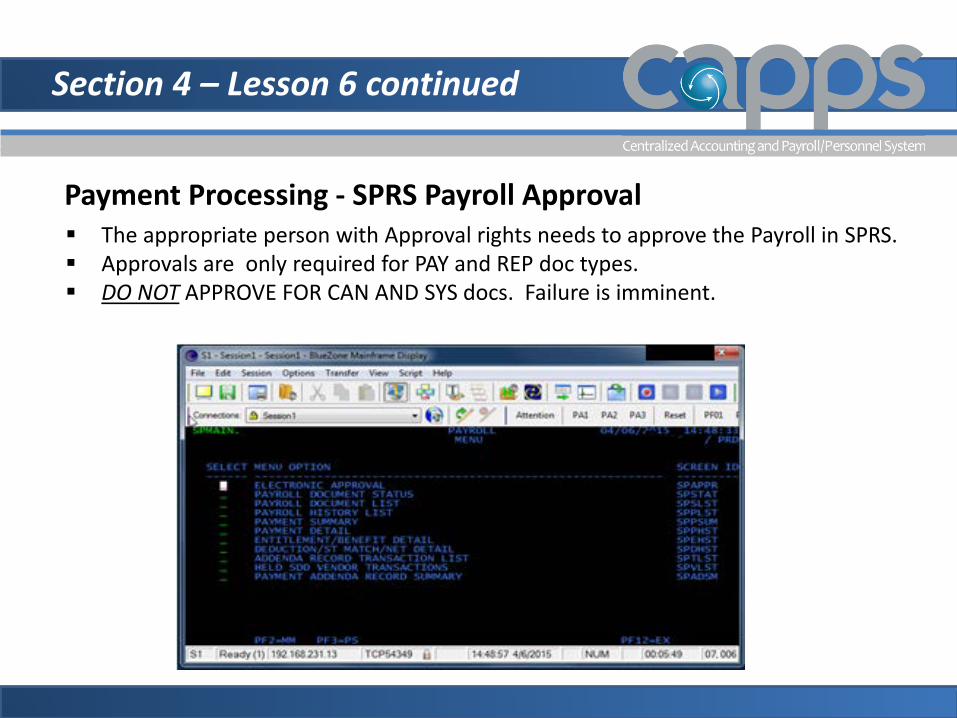
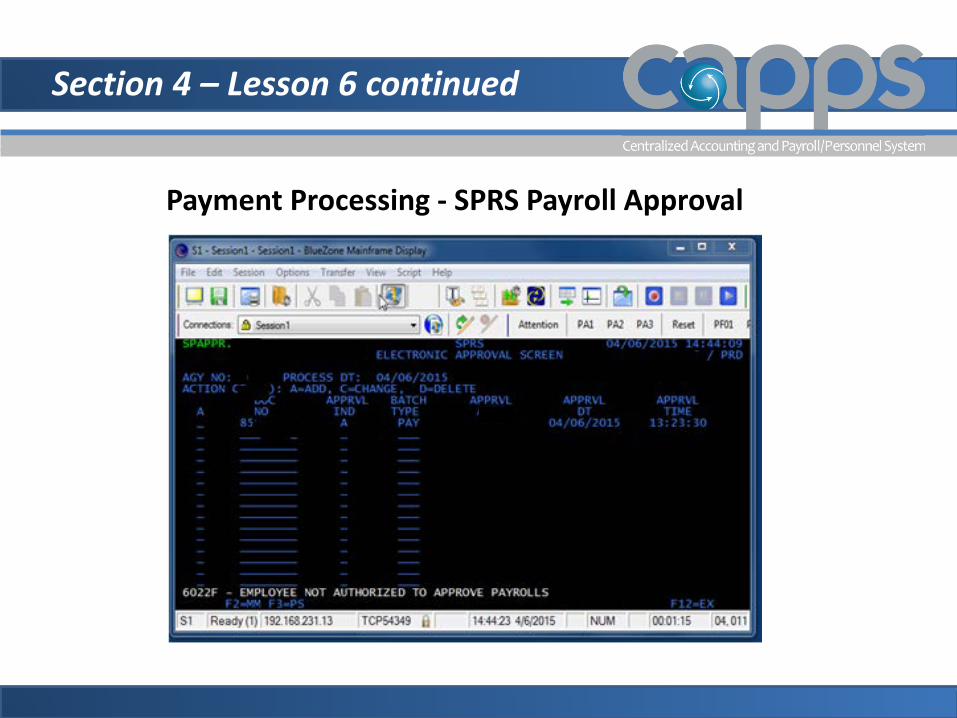
Payment Processing - SPRS Payroll Approval The appropriate person with Approval rights needs to approve the Payroll in SPRS. Approvals are only required for PAY and REP doc types. DO NOT APPROVE FOR CAN AND SYS docs. Failure is imminent.
Section 4 – Lesson 6 continued
Payment Processing - SPRS Payroll Approval
Section 4 – Lesson 7
Checklist Day 2
Begin Lesson 7 Payroll Processing -
SPRS Pay Processing In (Checklist Steps 37-38)

Section 4 – Lesson 7
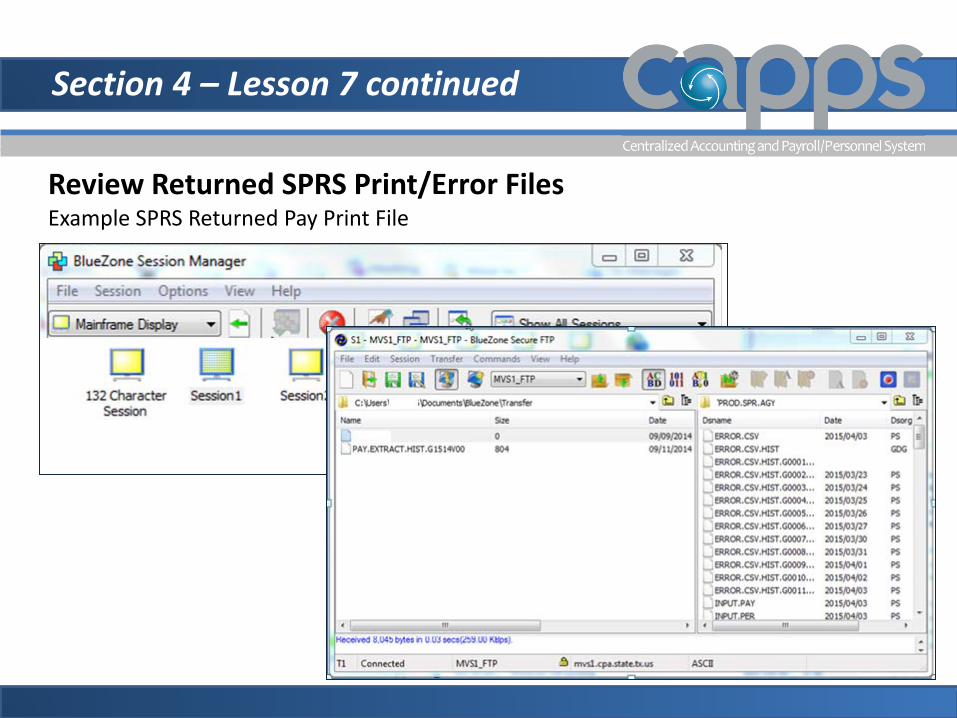
Review Returned SPRS Print/Error Files Review the SPRS Print and Error files to determine the status of transactions/payments processed through SPRS and to determine if any additional transactions are necessary to correct errors.
Checklist On Cycle Payroll Calculation Navigation: Review in SPRS
Step 37 (No Exercise) Navigation is in SPRS
Section 4 – Lesson 7 continued
Review Returned SPRS Print/Error Files Example SPRS Returned Pay Print File

Section 4 – Lesson 7 continued
SPRS Inbound Each payment that comes back will populate CAPPS
with the status on the TX SPRS Pay Check page.
USAS Accepted
SPRS/USAS Rejection from CPA If SPRS rejected, there is a problem with making payment
(PCA). IT would need to be contacted.
If USAS rejected, there is a funding problem and Commitment Accounting would need to be contacted to resolve the issue. After resolving, the payment has to be reflagged for submission.
CPA Production Support will provide direction on resolving rejections.
Section 4 – Lesson 7 continued
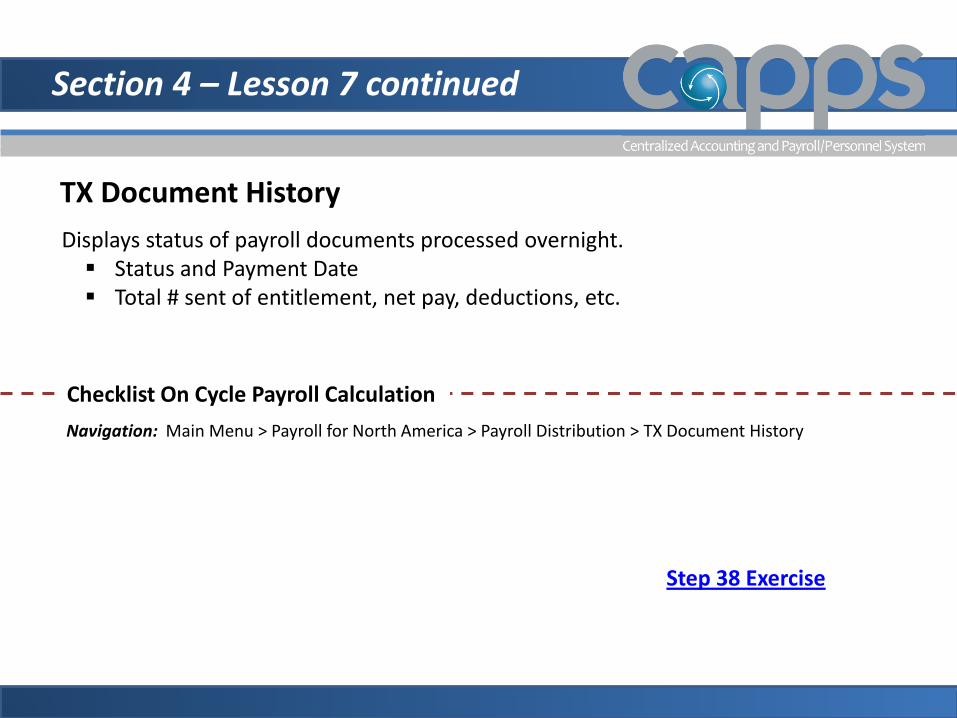
TX Document History Displays status of payroll documents processed overnight. Status and Payment Date Total # sent of entitlement, net pay, deductions, etc.
Checklist On Cycle Payroll Calculation Navigation: Main Menu > Payroll for North America > Payroll Distribution > TX Document History
Step 38 Exercise

Section 4 – Lesson 8
Begin Lesson 8 Viewing Paychecks
Section 4 – Lesson 8 continued
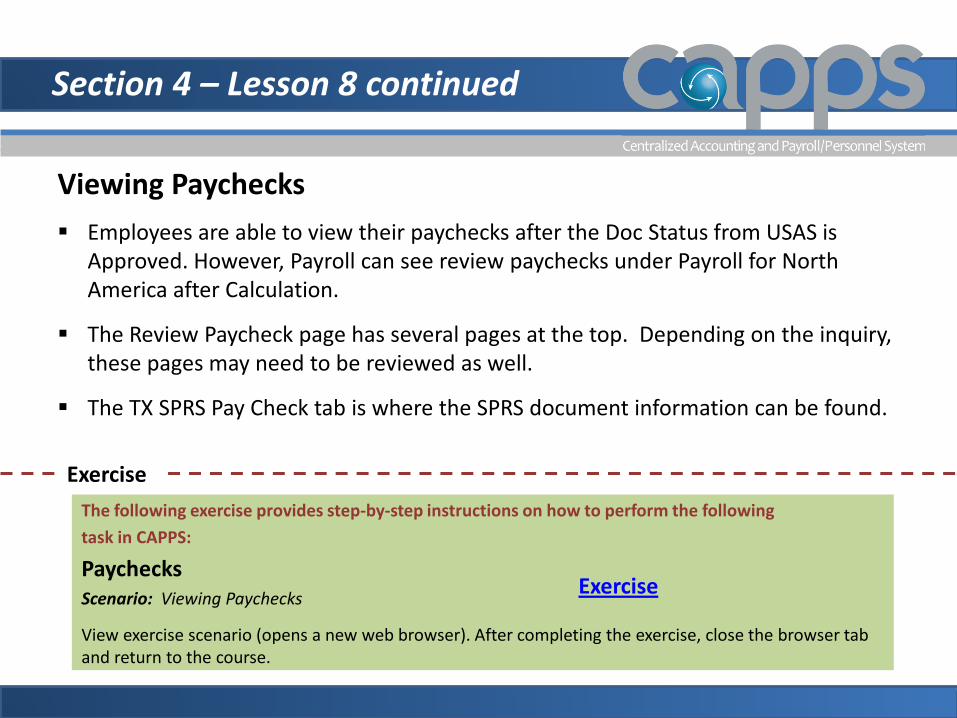
Viewing Paychecks Employees are able to view their paychecks after the Doc Status from USAS is
Approved. However, Payroll can see review paychecks under Payroll for North America after Calculation.
The Review Paycheck page has several pages at the top. Depending on the inquiry, these pages may need to be reviewed as well.
The TX SPRS Pay Check tab is where the SPRS document information can be found.
Exercise The following exercise provides step-by-step instructions on how to perform the following task in CAPPS:
Paychecks Scenario: Viewing Paychecks
View exercise scenario (opens a new web browser). After completing the exercise, close the browser tab and return to the course.
Exercise
Section 4 – Lesson 9
Begin Lesson 9 Off-Cycle Transactions
Off Cycle Checklist (pdf) printable copy
Section 4 – Lesson 9
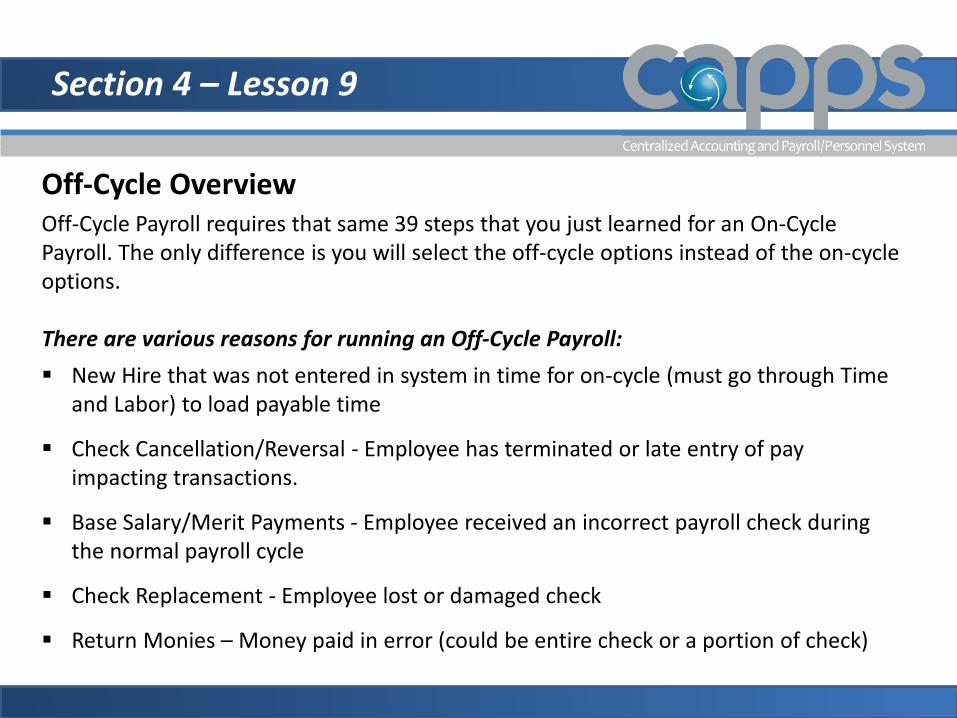
Off-Cycle Overview Off-Cycle Payroll requires that same 39 steps that you just learned for an On-Cycle Payroll. The only difference is you will select the off-cycle options instead of the on-cycle options. There are various reasons for running an Off-Cycle Payroll: New Hire that was not entered in system in time for on-cycle (must go through Time
and Labor) to load payable time
Check Cancellation/Reversal - Employee has terminated or late entry of pay impacting transactions.
Base Salary/Merit Payments - Employee received an incorrect payroll check during the normal payroll cycle
Check Replacement - Employee lost or damaged check
Return Monies – Money paid in error (could be entire check or a portion of check)
Section 4 – Lesson 9 continued
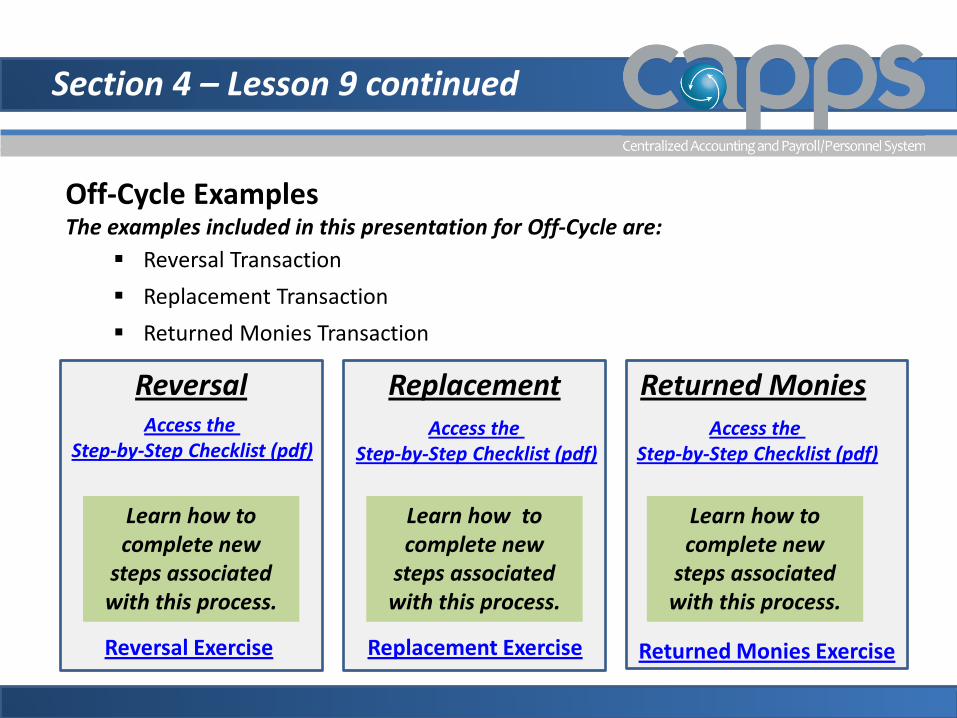
Off-Cycle Examples The examples included in this presentation for Off-Cycle are:
Reversal Transaction Replacement Transaction Returned Monies Transaction
Reversal
Learn how to complete new
steps associated with this process.
Replacement Access the
Step-by-Step Checklist (pdf)
Learn how to complete new
steps associated with this process.
Returned Monies Access the
Step-by-Step Checklist (pdf)
Learn how to complete new
steps associated with this process.
Access the Step-by-Step Checklist (pdf)
Reversal Exercise Replacement Exercise Returned Monies Exercise
I hope you enjoyed your training!
This section is almost complete.
It’s now time to review what you’ve learned.

Knowledge Check
Next you will be presented with a series of questions covering important things to remember from this course.
View Knowledge Check (opens a new web browser).
After completing the knowledge check,
close the browser tab and return to the course.

Section 5 Period End Reporting
Section 5 – Objectives
After completing this section you will be able to: Run the Quarterly 941 Report Review the list of other Quarterly Tax Report Make employee balance adjustments Create pay calendars and pay run ids Review the list of Calendar Year End Tax Reports

Course Objectives
3
4
5
6
Section 5 – Lesson Outline
Review List of Quarterly Tax Reports – Run 941 30 min Employee Balance Adjustments 30 min Pay Calendar ID (year end special exceptions only) 20 min Pay Run ID (year end special exceptions only) 15 min
Attaching Pay Run ID to a Pay Calendar 15 min Review List of Year End Tax Reports 30 min
Section 5 – Lesson 1
Quarterly Tax Reporting Activities: 941 Quarterly Federal Tax TX Employee Count TX Tax Balance Audit TX Federal Tax Summary Detail Quarterly Wage File
Section 5 – Lesson 1 continued
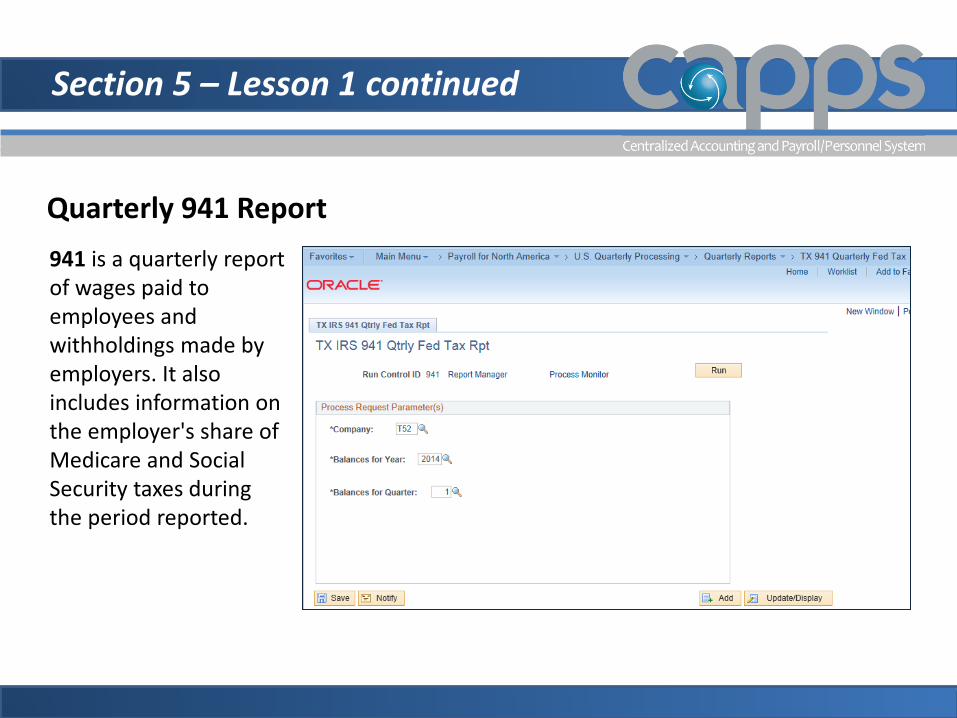
Quarterly 941 Report 941 is a quarterly report of wages paid to employees and withholdings made by employers. It also includes information on the employer's share of Medicare and Social Security taxes during the period reported.
Section 5 – Lesson 1 continued
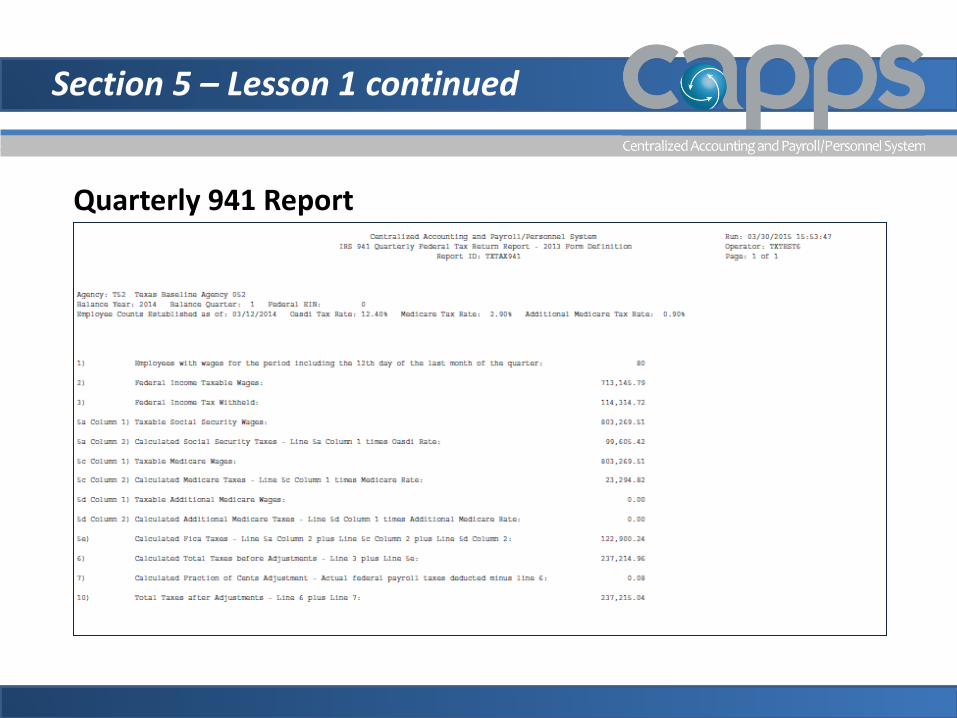
Quarterly 941 Report
Section 5 – Lesson 1 Exercise
Exercise The following exercises provide step-by-step instructions on how to perform the following task(s) in CAPPS:
Quarterly 941 Report Scenario 1: Running Quarterly 941 Report
View exercise scenario (opens a new web browser). After completing the exercise, close the browser tab and return to the course.

Section 5 – Lesson 2
Balance Adjustments
• When an employee’s earnings/deds/taxes are affected in systems outside of CAPPS, the adjustments would also need to be reflected in CAPPS for accurate quarterly and annual reporting.
The balance records in the system are cumulative totals of the various
deductions, earnings, and taxes for individual employee paychecks.
If an employee works for more than one company, the system maintains separate balance records for each.
The system creates a new balance record for each month, updates all balances when you run the Pay Confirmation process, and maintains monthly, quarterly, and year-to-date totals.
Section 5 – Lesson 2 Exercise
Exercise The following exercises provide step-by-step instructions on how to perform the following task(s) in CAPPS:
Earnings Balance Adjustments Scenario 1: Earnings Balance Adjustments
View exercise scenario (opens a new web browser). After completing the exercise, close the browser tab and return to the course.
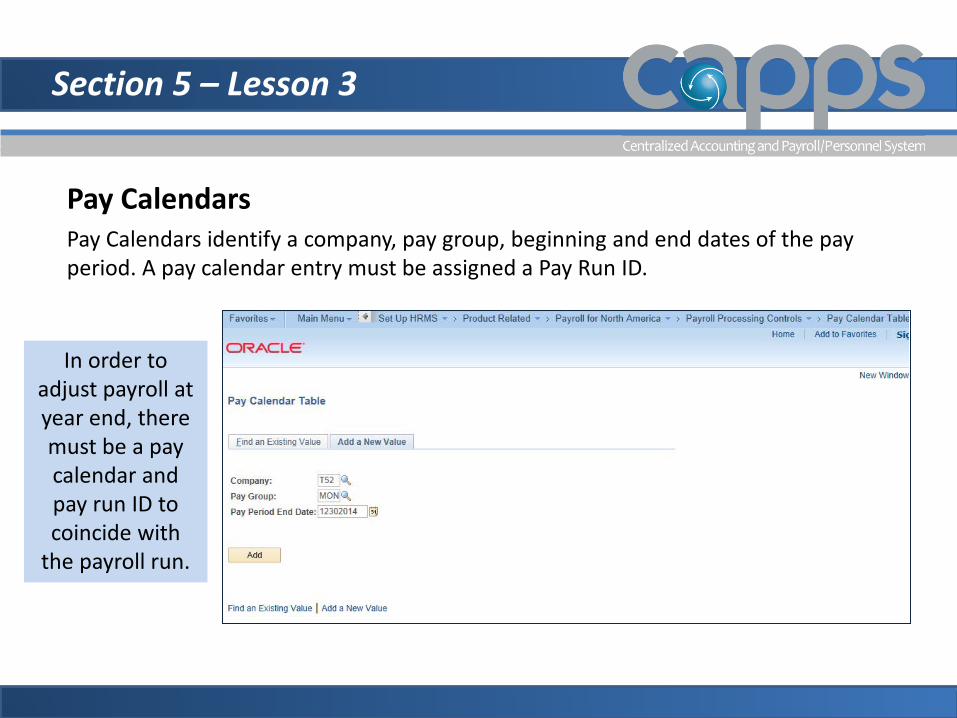
Section 5 – Lesson 3
Pay Calendars Pay Calendars identify a company, pay group, beginning and end dates of the pay period. A pay calendar entry must be assigned a Pay Run ID.
In order to adjust payroll at year end, there must be a pay calendar and pay run ID to coincide with
the payroll run.
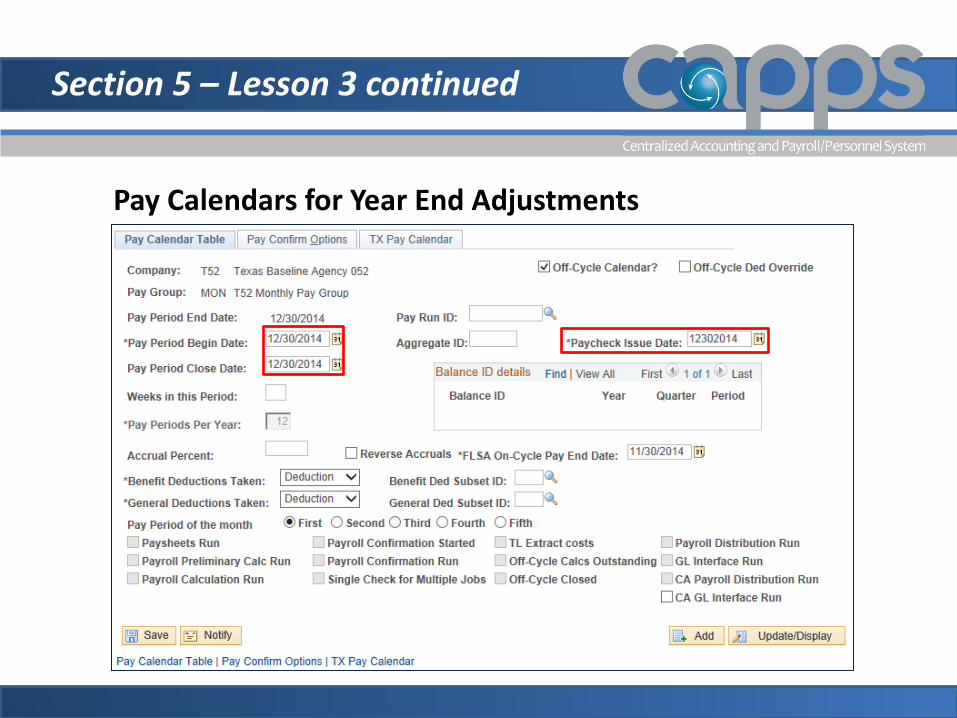
Section 5 – Lesson 3 continued
Pay Calendars for Year End Adjustments
Section 5 – Lesson 3 Exercise
Exercise The following exercises provide step-by-step instructions on how to perform the following task(s) in CAPPS:
Pay Calendars Scenario 1: Creating Pay Calendars
View exercise scenario (opens a new web browser). After completing the exercise, close the browser tab and return to the course.
Section 5 – Lesson 4
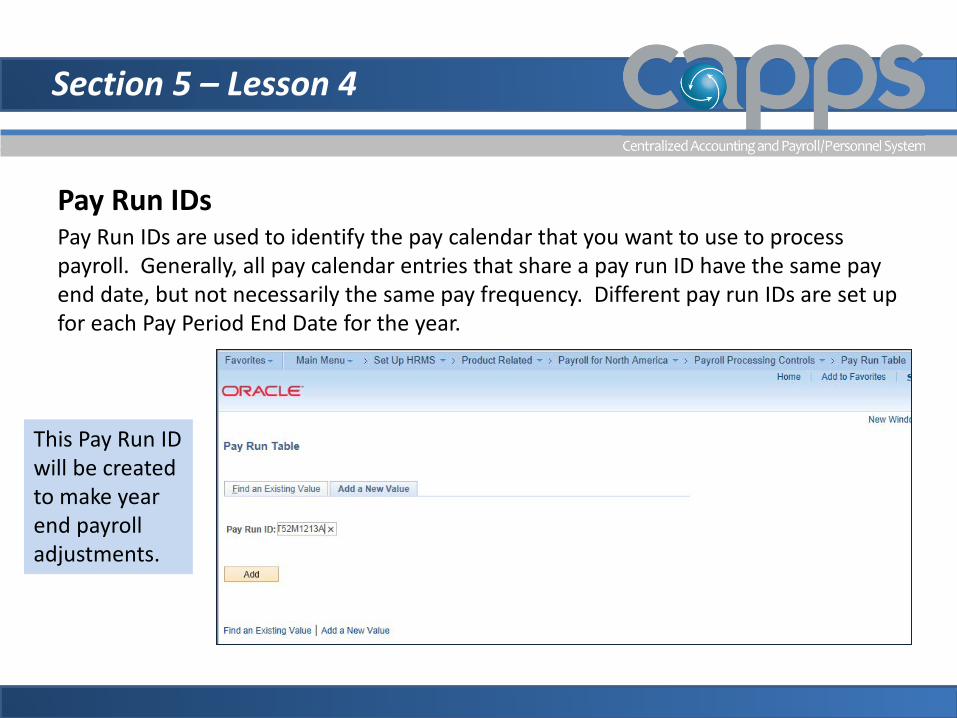
Pay Run IDs Pay Run IDs are used to identify the pay calendar that you want to use to process payroll. Generally, all pay calendar entries that share a pay run ID have the same pay end date, but not necessarily the same pay frequency. Different pay run IDs are set up for each Pay Period End Date for the year.
This Pay Run ID will be created to make year end payroll adjustments.
Section 5 – Lesson 4 Exercise
Exercise The following exercises provide step-by-step instructions on how to perform the following task(s) in CAPPS:
Pay Run IDs Scenario 1: Creating Pay Run IDs
View exercise scenario (opens a new web browser). After completing the exercise, close the browser tab and return to the course.
Section 5 – Lesson 5
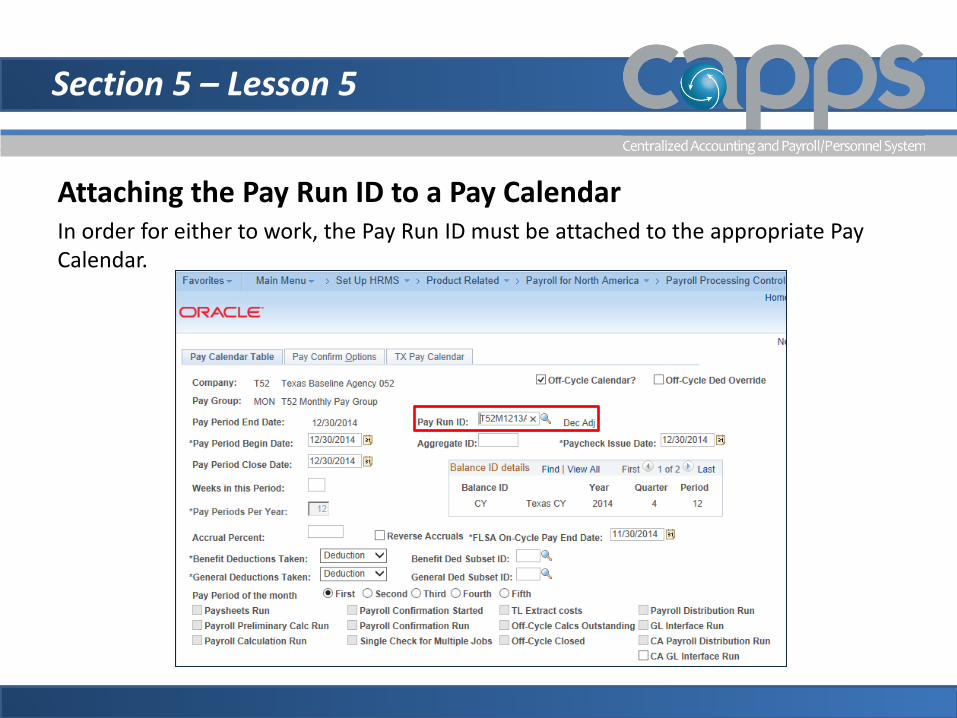
Attaching the Pay Run ID to a Pay Calendar In order for either to work, the Pay Run ID must be attached to the appropriate Pay Calendar.
Section 5 – Lesson 5 Exercise
Exercise The following exercises provide step-by-step instructions on how to perform the following task(s) in CAPPS:
Attach Pay Run ID to a Pay Calendar Scenario 1: Attaching a Pay Run ID to a Pay Calendar
View exercise scenario (opens a new web browser). After completing the exercise, close the browser tab and return to the course.
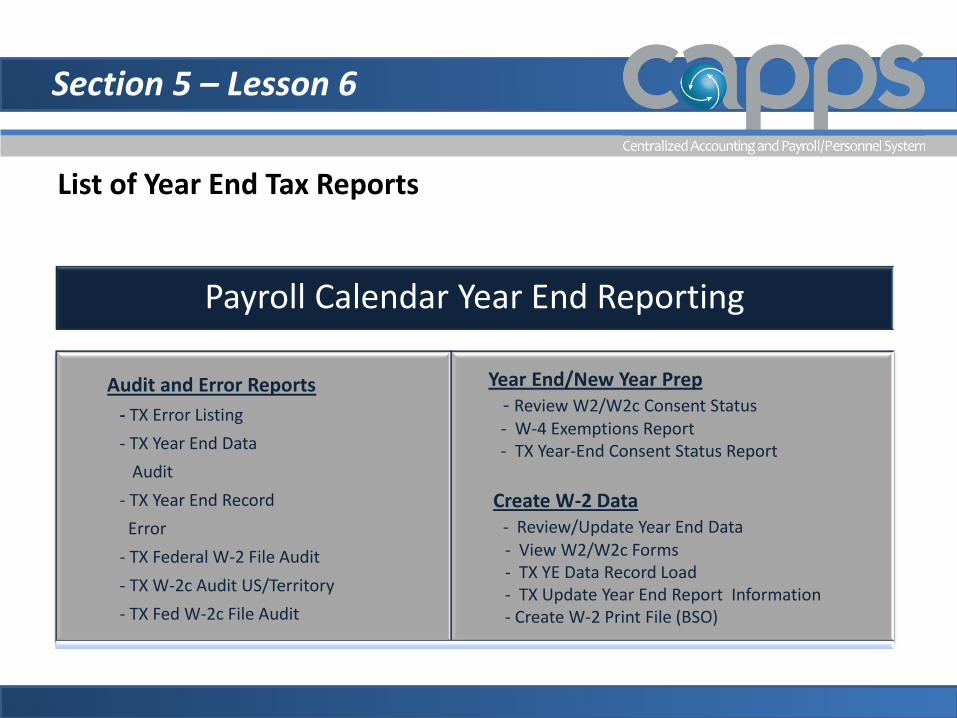
Payroll Calendar Year End Reporting
Audit and Error Reports - TX Error Listing - TX Year End Data Audit - TX Year End Record Error - TX Federal W-2 File Audit - TX W-2c Audit US/Territory - TX Fed W-2c File Audit
Section 5 – Lesson 6
List of Year End Tax Reports
Year End/New Year Prep - Review W2/W2c Consent Status - W-4 Exemptions Report - TX Year-End Consent Status Report Create W-2 Data - Review/Update Year End Data - View W2/W2c Forms - TX YE Data Record Load - TX Update Year End Report Information - Create W-2 Print File (BSO)

Section 6 Additional Information
Section 6 – Objectives
After completing this section you will be able to: Run the PreSheet Audit Report
Review the TX Mgr Payroll Notification Set-Up
Review the TX Vendor Remittance Report
Review the TX Warrant Register report
Highlight the Reconciliation Statement
Course Objectives
1
2
3
4
5
Section 6 – Additional Information
Running a PreSheet Audit Report 5 min
TX Manager Payroll Notification 5 min
TX Vendor Remittance 10 min
TX Warrant Register 10 min
Reconciliation Statement 5 min
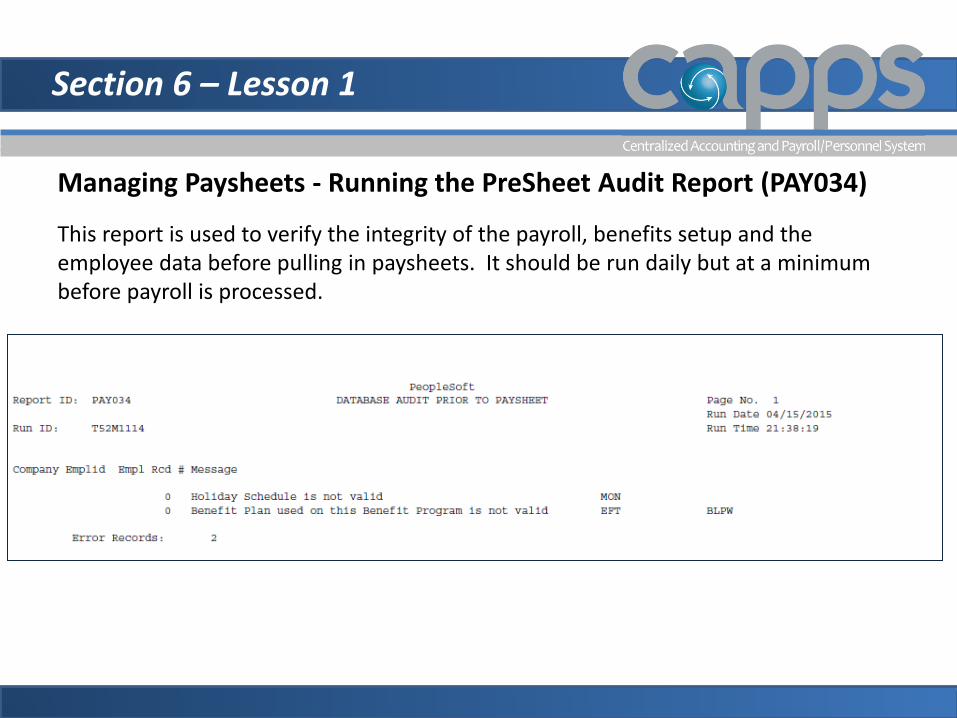
Section 6 – Lesson 1
Managing Paysheets - Running the PreSheet Audit Report (PAY034) This report is used to verify the integrity of the payroll, benefits setup and the employee data before pulling in paysheets. It should be run daily but at a minimum before payroll is processed.
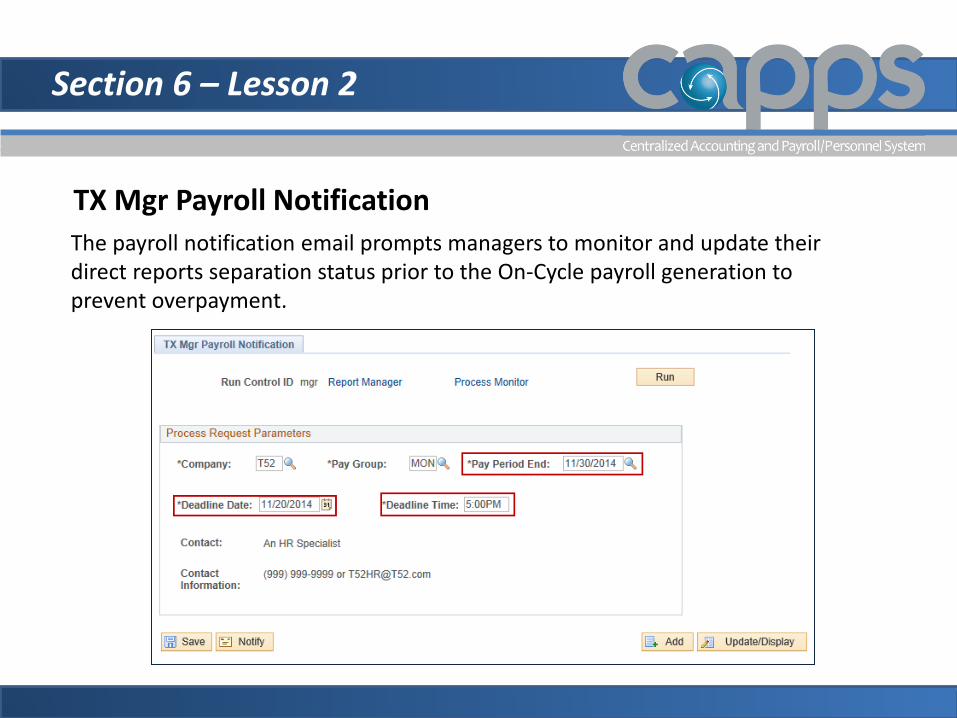
Section 6 – Lesson 2
TX Mgr Payroll Notification The payroll notification email prompts managers to monitor and update their direct reports separation status prior to the On-Cycle payroll generation to prevent overpayment.
Section 6 – Lesson 2 continued
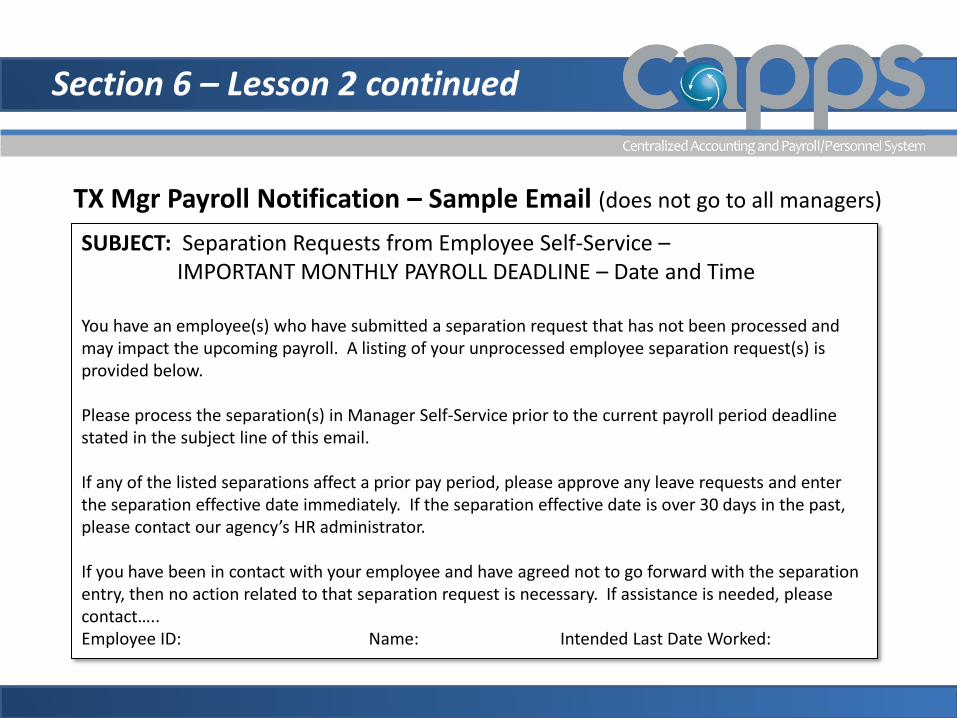
TX Mgr Payroll Notification – Sample Email (does not go to all managers)
SUBJECT: Separation Requests from Employee Self-Service – IMPORTANT MONTHLY PAYROLL DEADLINE – Date and Time You have an employee(s) who have submitted a separation request that has not been processed and may impact the upcoming payroll. A listing of your unprocessed employee separation request(s) is provided below. Please process the separation(s) in Manager Self-Service prior to the current payroll period deadline stated in the subject line of this email. If any of the listed separations affect a prior pay period, please approve any leave requests and enter the separation effective date immediately. If the separation effective date is over 30 days in the past, please contact our agency’s HR administrator. If you have been in contact with your employee and have agreed not to go forward with the separation entry, then no action related to that separation request is necessary. If assistance is needed, please contact….. Employee ID: Name: Intended Last Date Worked:
Section 6 – Lesson 2 continued
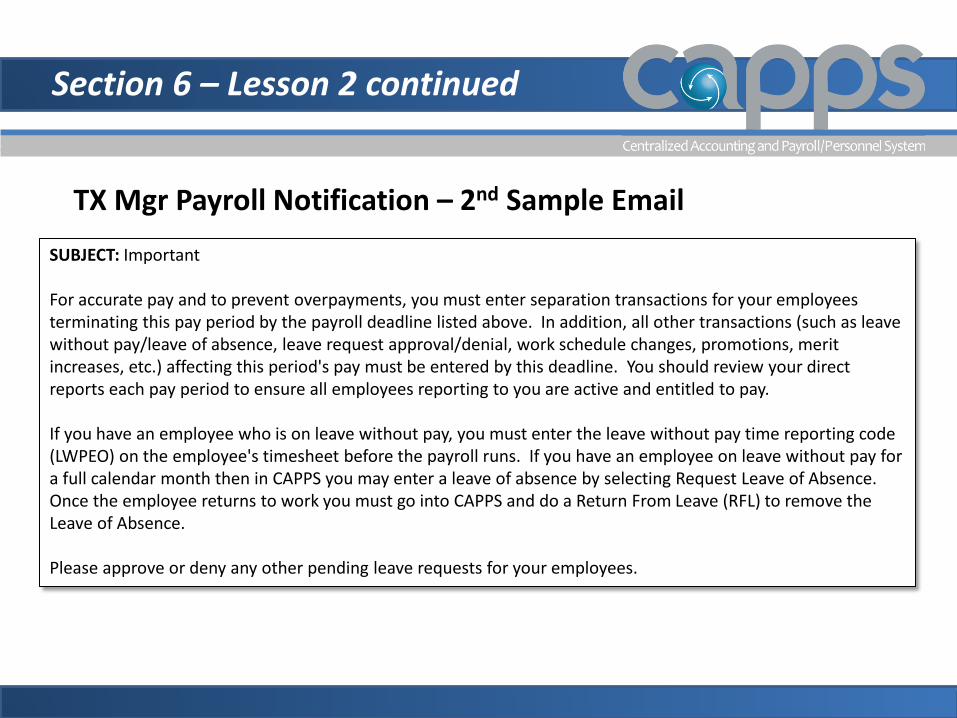
TX Mgr Payroll Notification – 2nd Sample Email
SUBJECT: Important For accurate pay and to prevent overpayments, you must enter separation transactions for your employees terminating this pay period by the payroll deadline listed above. In addition, all other transactions (such as leave without pay/leave of absence, leave request approval/denial, work schedule changes, promotions, merit increases, etc.) affecting this period's pay must be entered by this deadline. You should review your direct reports each pay period to ensure all employees reporting to you are active and entitled to pay. If you have an employee who is on leave without pay, you must enter the leave without pay time reporting code (LWPEO) on the employee's timesheet before the payroll runs. If you have an employee on leave without pay for a full calendar month then in CAPPS you may enter a leave of absence by selecting Request Leave of Absence. Once the employee returns to work you must go into CAPPS and do a Return From Leave (RFL) to remove the Leave of Absence. Please approve or deny any other pending leave requests for your employees.
Section 6 – Lesson 3
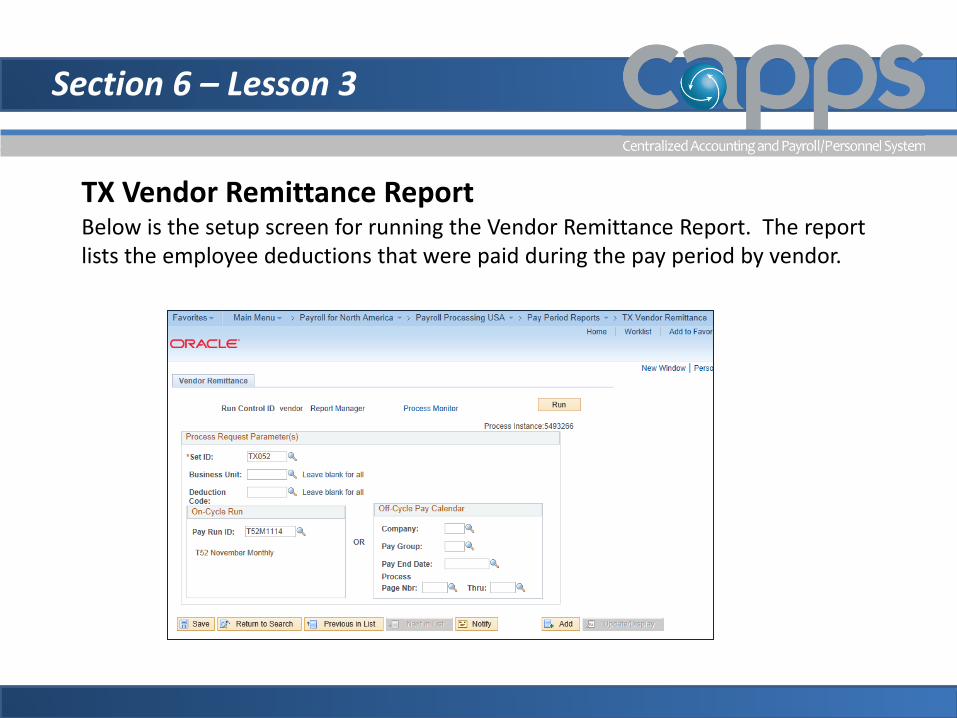
TX Vendor Remittance Report Below is the setup screen for running the Vendor Remittance Report. The report lists the employee deductions that were paid during the pay period by vendor.
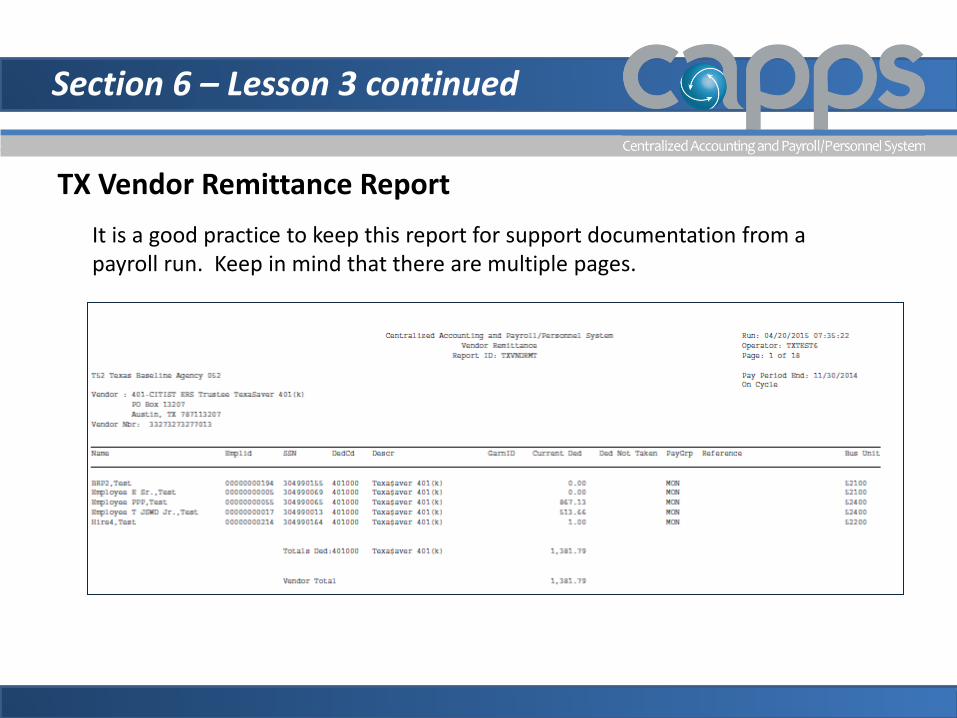
Section 6 – Lesson 3 continued
TX Vendor Remittance Report It is a good practice to keep this report for support documentation from a payroll run. Keep in mind that there are multiple pages.
Section 6 – Lesson 4
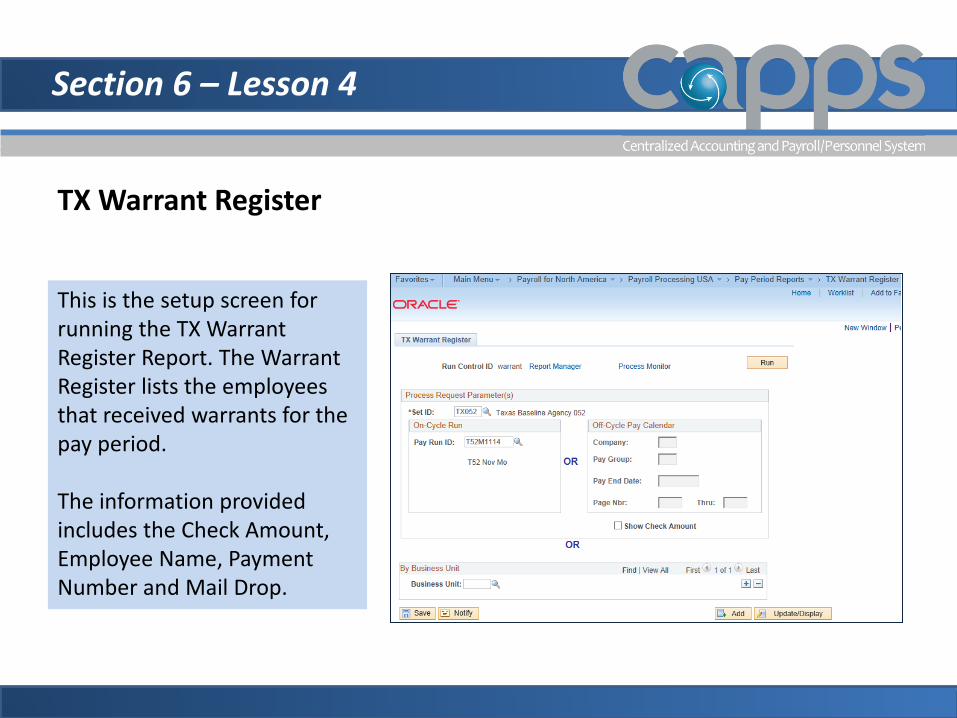
TX Warrant Register
This is the setup screen for running the TX Warrant Register Report. The Warrant Register lists the employees that received warrants for the pay period. The information provided includes the Check Amount, Employee Name, Payment Number and Mail Drop.
Section 6 – Lesson 5
Reconciliation Statement Each day after doc has cleared (paid through USAS) update the 941 SPRS history table and validate against Tax Deposits on USAS Reports.

Section 6 – Lesson Exercises
Exercises The following exercises provide step-by-step instructions on how to perform the following task(s) in CAPPS:
Additional Information Scenario 1: Running a PreSheet Audit Report Scenario 2: Running TX Vendor Remittance Report Scenario 3: TX Mgr Payroll Notification Scenario 4: TX Warrant Register
View exercise scenario (opens a new web browser). After completing the exercise, close the browser tab and return to the course.

Section 7 Review
Summary
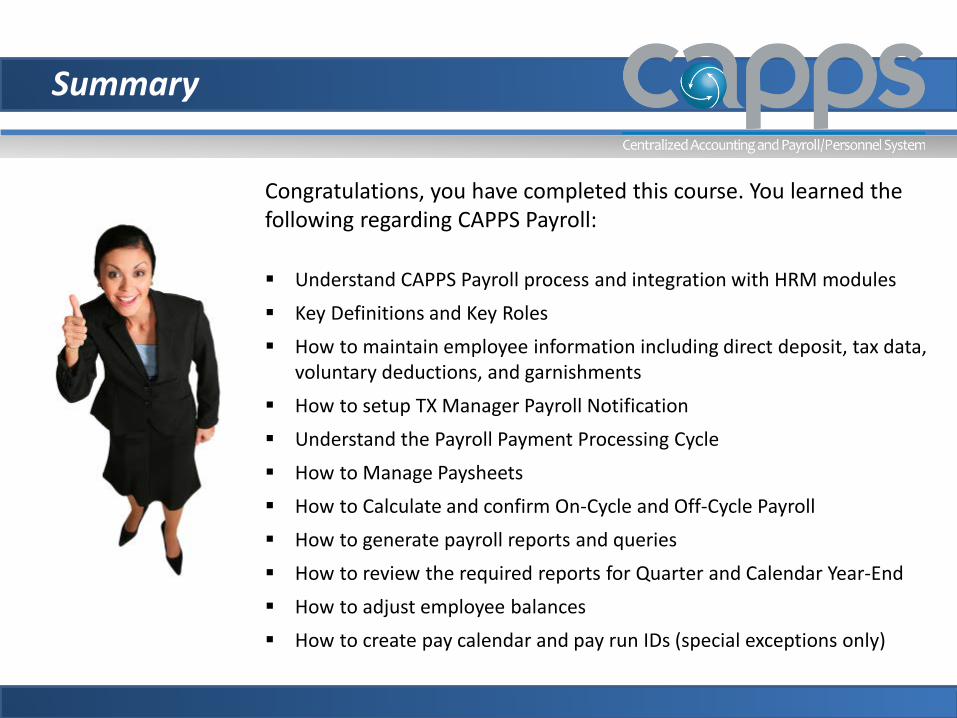
Congratulations, you have completed this course. You learned the following regarding CAPPS Payroll: Understand CAPPS Payroll process and integration with HRM modules Key Definitions and Key Roles How to maintain employee information including direct deposit, tax data,
voluntary deductions, and garnishments How to setup TX Manager Payroll Notification Understand the Payroll Payment Processing Cycle How to Manage Paysheets How to Calculate and confirm On-Cycle and Off-Cycle Payroll How to generate payroll reports and queries How to review the required reports for Quarter and Calendar Year-End How to adjust employee balances How to create pay calendar and pay run IDs (special exceptions only)

I hope you enjoyed your training!
This course is almost complete.
It’s now time to review what you’ve learned
in this course.

Knowledge Check
Next you will be presented with a series of questions covering important things to remember from this course.
View Knowledge Check (opens a new web browser).
After completing the knowledge check,
close the browser tab and return to the course.
Questions
What question do you have?
Conclusion
This completes the Payroll Course 160.
Hope you enjoyed this course, see you next time!