Relay Race Trivia: Biology & Lab Basics ETEAMS 2014 By: Kelly Correia & Kaitlyn Schroeder-Spain 1.
Upload
rita-taplinCategory
view
219download
0
By: Kaitlyn Schroeder; ETEAMS 2014Modified from Trimpe 2005 http://sciencespot.net/
1

Microscope Basics Uncover the microscope in front of you and
follow along with the lecture. Today we’ll discuss and complete:
Microscope types & partsPowers of magnification Microscope care and storage Using a microscope at lower powers (no oil
immersion) Worksheet: complete as we go, except for
drawings of 3 samples
2

Common Microscopes: Light Microscopes
Compound light Micro.*using today
Dissection Micro.
3
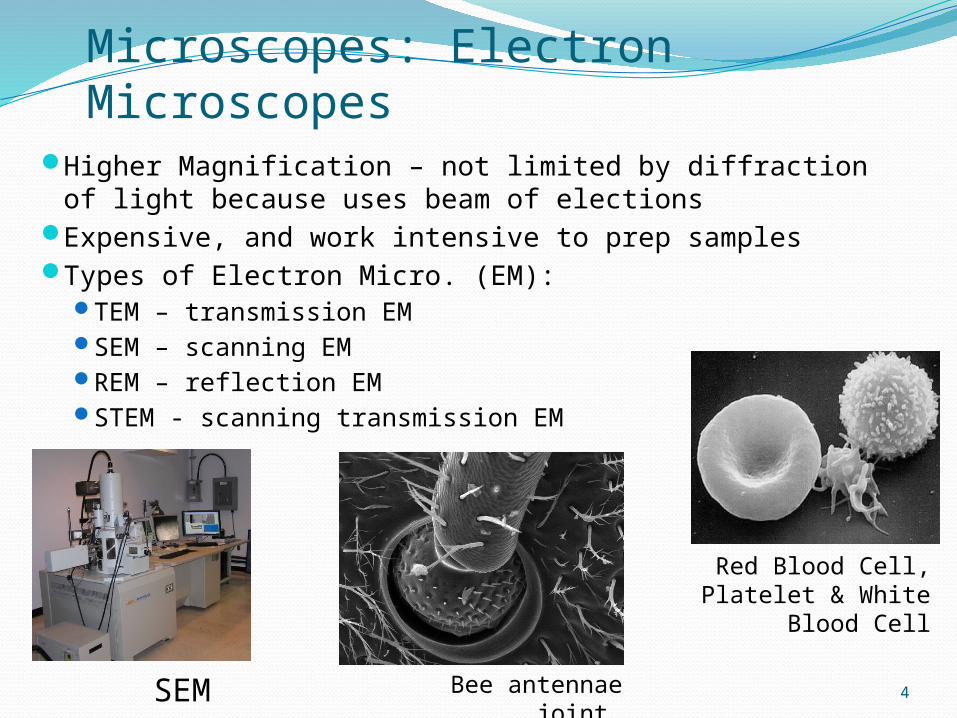
Microscopes: Electron Microscopes Higher Magnification – not limited by diffraction of light
because uses beam of electionsExpensive, and work intensive to prep samples Types of Electron Micro. (EM):
TEM – transmission EMSEM – scanning EMREM – reflection EMSTEM - scanning transmission EM
Bee antennae joint
Red Blood Cell, Platelet & White Blood Cell
SEM 4
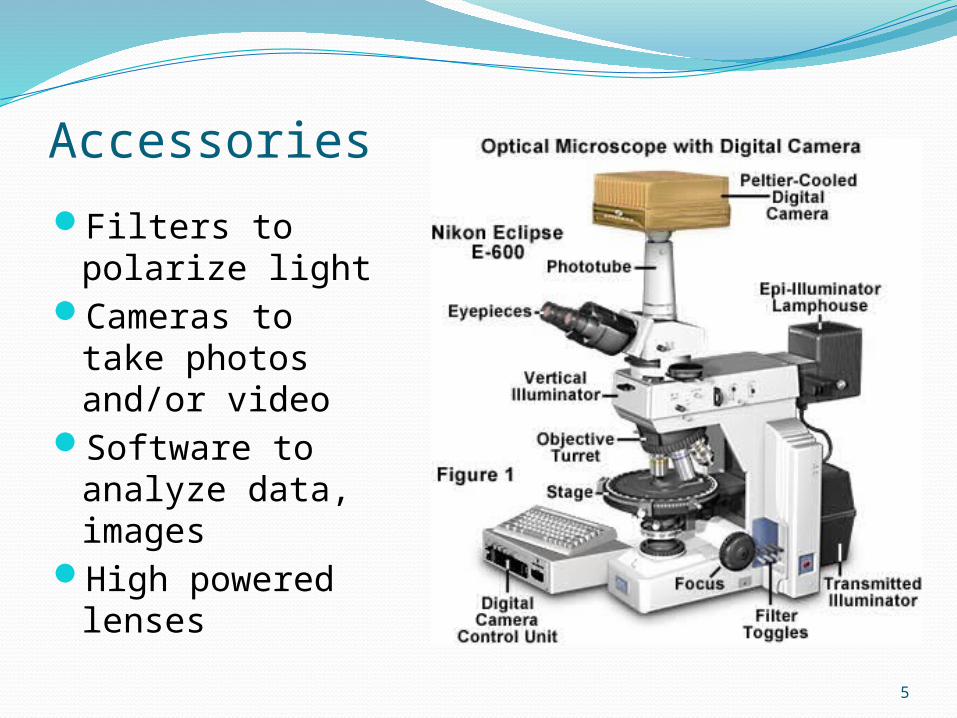
Accessories Filters to
polarize light Cameras to take
photos and/or video
Software to analyze data, images
High powered lenses
5

A B
Carrying a Microscope
6
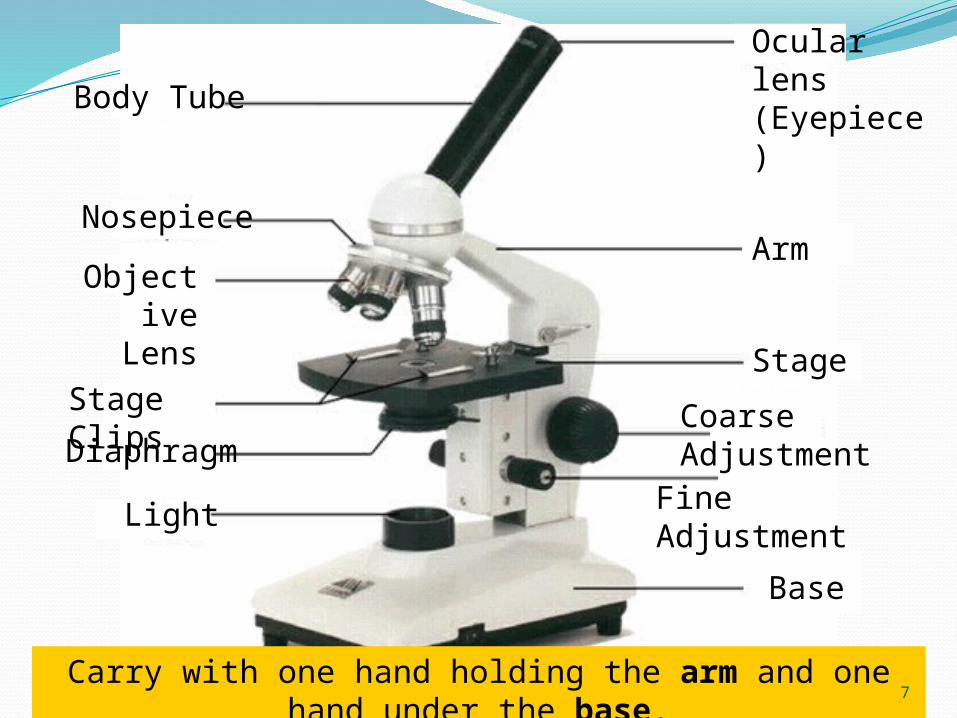
Body Tube
Nosepiece
ObjectiveLens
Stage Clips
Light
Ocular lens(Eyepiece)
Arm
Stage
Coarse Adjustment
Fine Adjustment
Carry with one hand holding the arm and one hand under the base.
Base
Diaphragm
7

What are the powers of magnification for each
of the objectives we have on our microscopes?
Fill in the table on your worksheet.
Power of Magnification Power of magnification: multiply the power of
the ocular lens by the power of the objective lens.
8

Comparing Powers of Magnification
We can see better details with higher the powers of magnification, but we cannot see as much of the image.
Lower Magnification
Higher Magnification
9

Microscope Care: Storage 1. Scopes should be covered
(dustcover) and stored in a cabinet to protect the lenses, light and stage from dust.
2. Cords should be wrapped around the back of the arm, or bundled loosely.
3. Power button should be “off”.
4. Stage should be at lowest level.
5. Nose piece should be turned so that the smallest/lowest power lens is above the stage. If there is an empty lens slot, the empty slot should be above the stage.
10
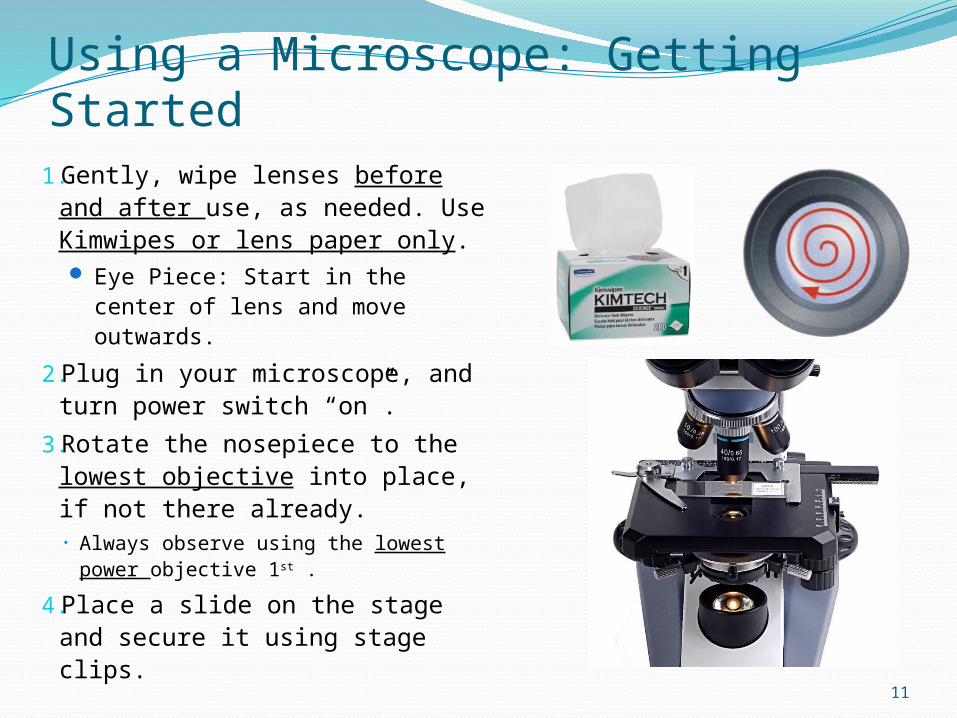
Using a Microscope: Getting Started 1.Gently, wipe lenses before
and after use, as needed. Use Kimwipes or lens paper only. Eye Piece: Start in the
center of lens and move outwards.
2.Plug in your microscope, and turn power switch “on”.
3.Rotate the nosepiece to the lowest objective into place, if not there already. • Always observe using the lowest
power objective 1st .
4.Place a slide on the stage and secure it using stage clips. 11

Using a Microscope: Getting Started 1. Use the coarse adjustment
knob (large knob) to bring the slide into focus.
2. Use the fine adjustment knob (small knob) to make the slide/object clearer.
3. Once you have the object of interest in view and focused, rotate the nosepiece to view it under higher powers.
Only use the fine adjustment knob when using higher powered lenses (e.g., above 10x)
12
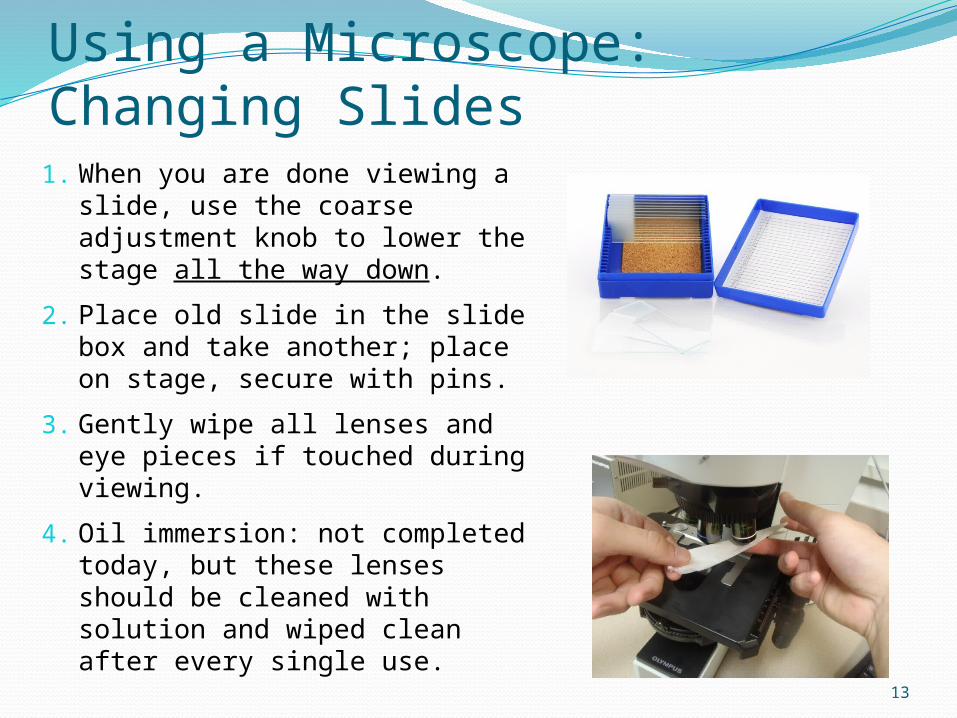
Using a Microscope: Changing Slides 1. When you are done viewing a
slide, use the coarse adjustment knob to lower the stage all the way down.
2. Place old slide in the slide box and take another; place on stage, secure with pins.
3. Gently wipe all lenses and eye pieces if touched during viewing.
4. Oil immersion: not completed today, but these lenses should be cleaned with solution and wiped clean after every single use. 13

Using a Microscope: Independent Work1. Fill in the first page of your worksheet if
you have not already
2. On your own, draw 3 (new) slides at two magnifications in the space provided on the worksheet.
1. Ask for help if needed.
2. Before you leave: worksheet needs to be checked/approved and microscope needs to be cleaned and covered.
3. Microscope may also need to be put in the cabinet, instructions will be provided.
14