Building User Interfaces React Native 1
51
Building User Interfaces React Native 1 Introductory Concepts Professor Bilge Mutlu © Building User Interfaces | Professor Mutlu | Lecture 14: React Native — Introductory Concepts 1
Transcript of Building User Interfaces React Native 1

Building User Interfaces
React Native 1Introductory ConceptsProfessor Bilge Mutlu
© Building User Interfaces | Professor Mutlu | Lecture 14: React Native — Introductory Concepts 1

Announcements
Survey findings:
— Office hours
— 21 hours/week total
— Start assignment early
— More code samples in lectures
— Online mode was easier to follow
© Building User Interfaces | Professor Mutlu | Lecture 14: React Native — Introductory Concepts 2

Office Hours
Monday
— 1:00-3:00 PM: Sanjana
— 6:00-8:00 PM: Vera
— 8:00-9:00 PM: Cole
Tuesday
— 2:30-4:30 PM: Vera
— 4:00-5:00 PM: Professor Mutlu
— 5:00-7:00 PM: Cole
Wednesday
— 2:00-4:00 PM: John
Thursday:
— 4:00-6:00 PM: Cole
— 5:15-7:15 PM: John
Friday:
— 1:00-3:00 PM: Sanjana
— 3:00-5:00 PM: Vera© Building User Interfaces | Professor Mutlu | Lecture 14: React Native — Introductory Concepts 3

What we will learn today?
— What is React Native?
— Starting a React Native project
— Differences between ReactJS and React Native
— Communicating with Server APIs
© Building User Interfaces | Professor Mutlu | Lecture 14: React Native — Introductory Concepts 4

What is React Native?
© Building User Interfaces | Professor Mutlu | Lecture 14: React Native — Introductory Concepts 5

What is React Native?
Definition: A JS framework for building native, cross-platform mobile applications using React, developed by Facebook in 2015.
Unlike ReactJS, which was a library, React Native is a framework that includes everything that we will need to build mobile applications.
React Native supports iOS and Android development.
Enables web developers using ReactJS to easily develop mobile applications.
© Building User Interfaces | Professor Mutlu | Lecture 14: React Native — Introductory Concepts 6

How does React Native work?1
As in ReactJS, React Native combines JS, JSX.
Under the hood, React Native runs the program in the JS engine of the host platform (iOS, Android, etc.), which renders and interacts with native UI components, instead of web pages, through a "bridge."
1 Image source
© Building User Interfaces | Professor Mutlu | Lecture 14: React Native — Introductory Concepts 7
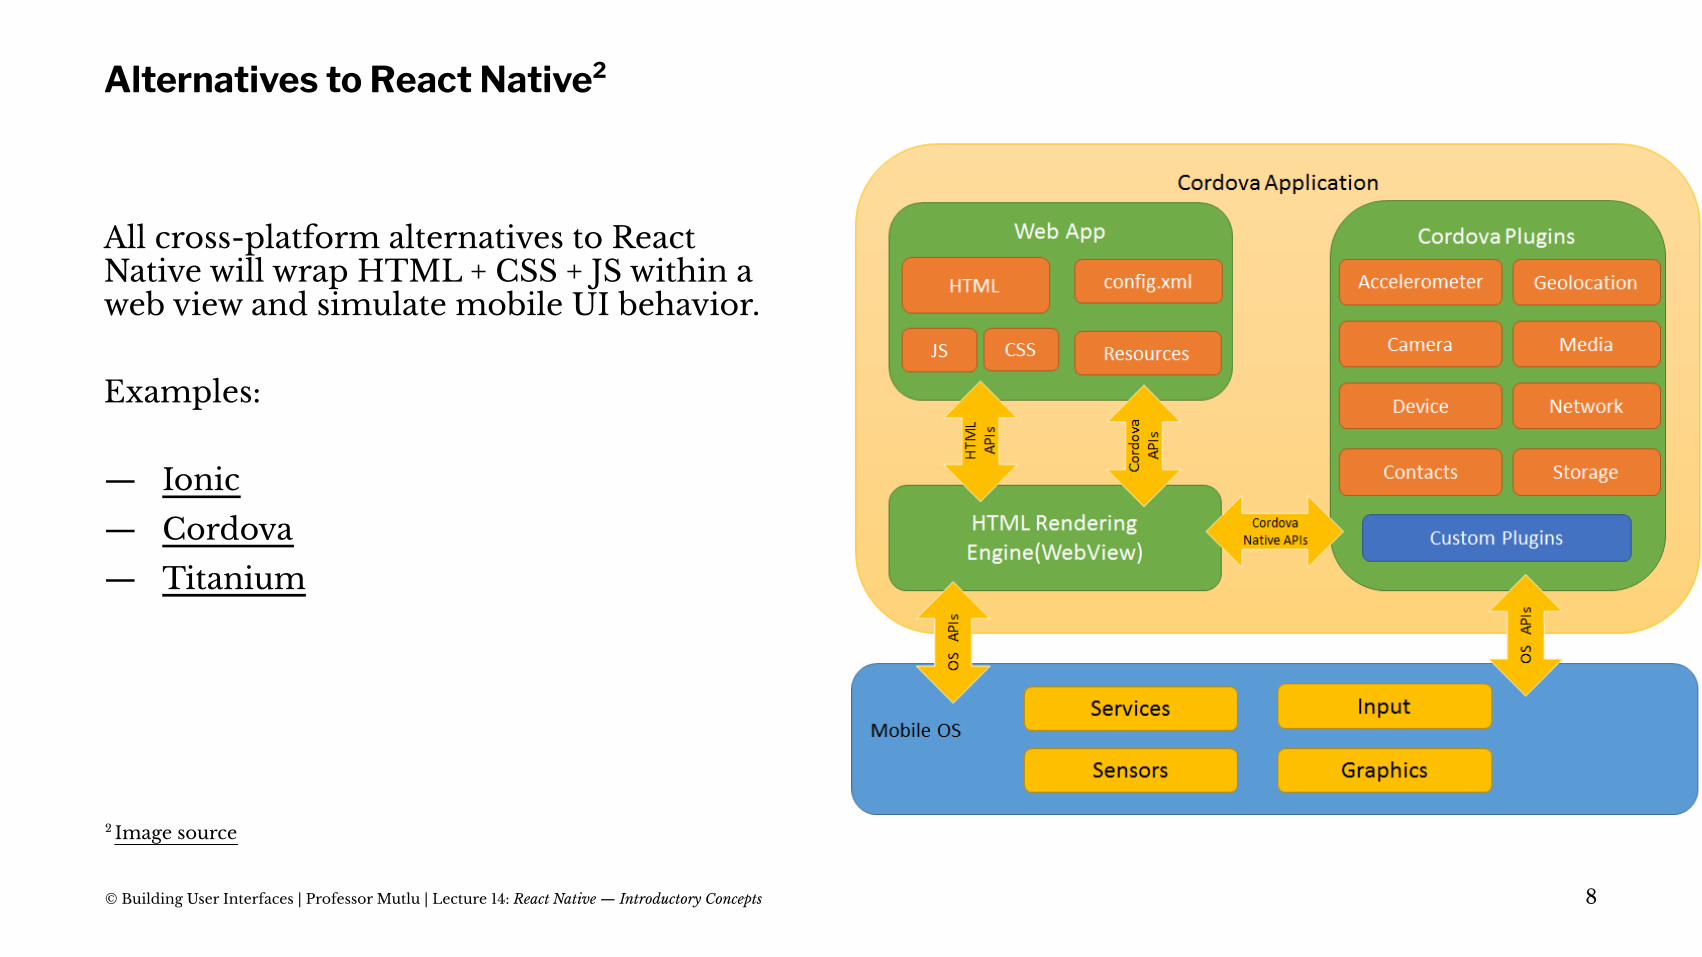
Alternatives to React Native2
All cross-platform alternatives to React Native will wrap HTML + CSS + JS within a web view and simulate mobile UI behavior.
Examples:
— Ionic
— Cordova
— Titanium
2 Image source
© Building User Interfaces | Professor Mutlu | Lecture 14: React Native — Introductory Concepts 8

© Building User Interfaces | Professor Mutlu | Lecture 14: React Native — Introductory Concepts 9

Starting a React Native project
© Building User Interfaces | Professor Mutlu | Lecture 14: React Native — Introductory Concepts 10
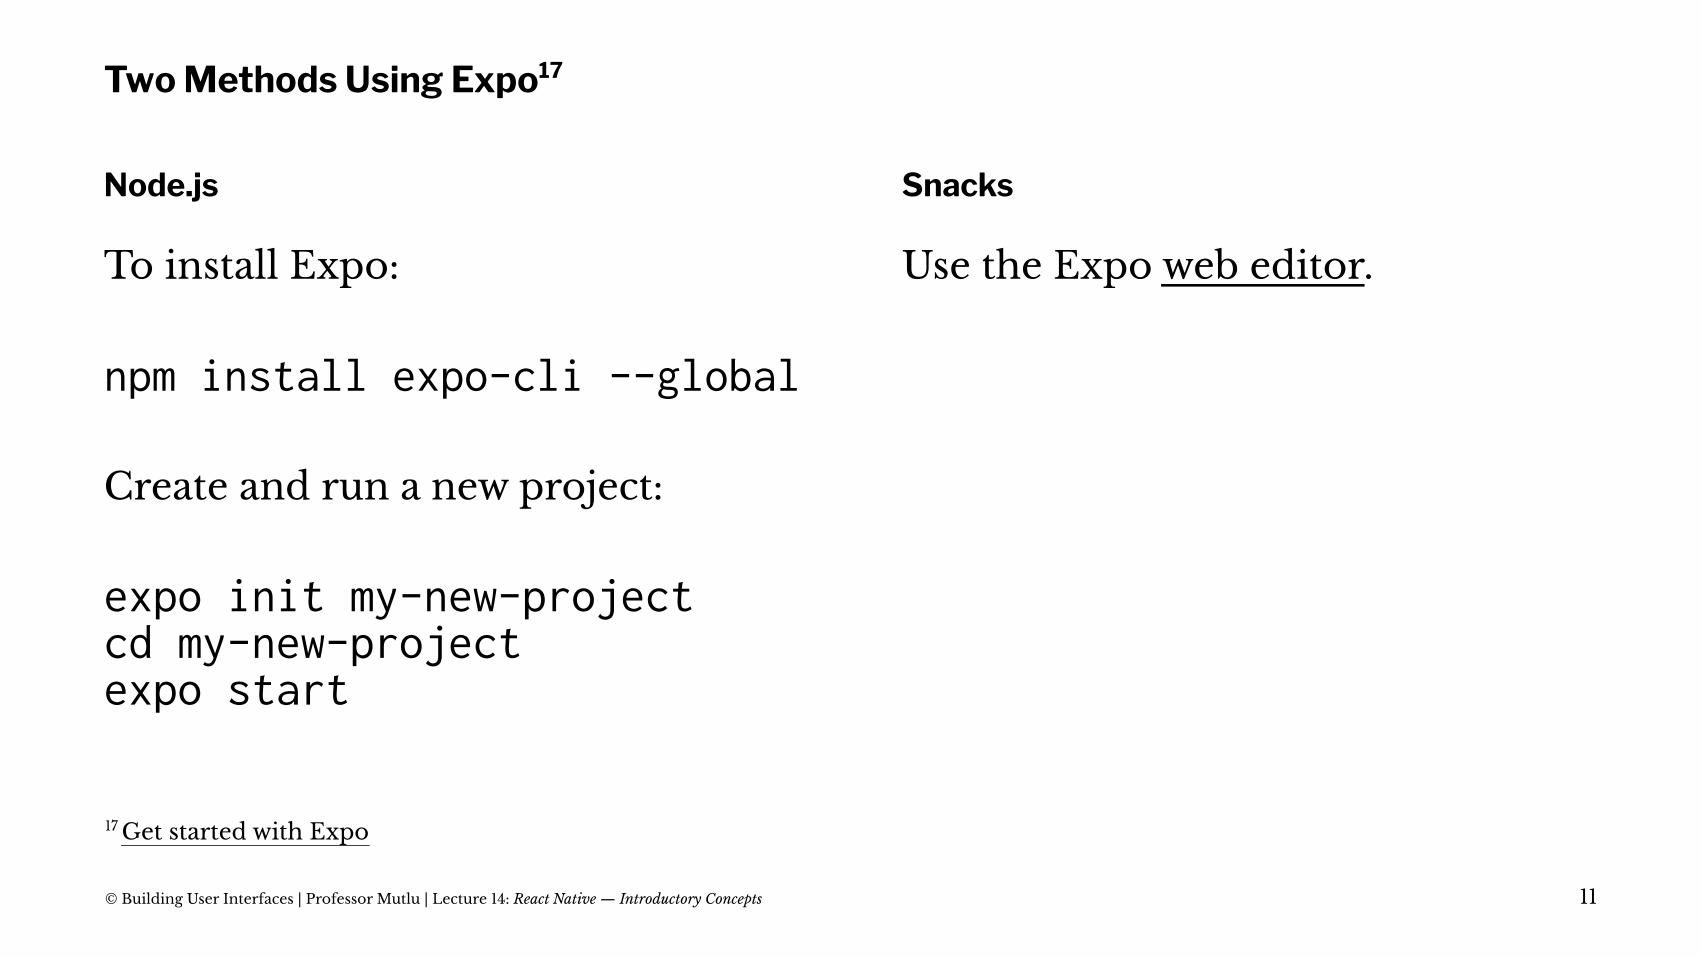
Two Methods Using Expo17
Node.js
To install Expo:
npm install expo-cli --global
Create and run a new project:
expo init my-new-projectcd my-new-projectexpo start
Snacks
Use the Expo web editor.
17 Get started with Expo
© Building User Interfaces | Professor Mutlu | Lecture 14: React Native — Introductory Concepts 11

How is React Native different from ReactJS?
© Building User Interfaces | Professor Mutlu | Lecture 14: React Native — Introductory Concepts 12

React Native-ReactJS differences3
Good news: They are very, very similar.
Minor differences stem from how React Native interacts with the native mobile platform.
3 Image source
© Building User Interfaces | Professor Mutlu | Lecture 14: React Native — Introductory Concepts 13

Instead of the HTML DOM, React Native interacts with native components through its Bridge.
Instead of React elements that will become DOM elements, React Native uses elements that are similar but better correspond with native components.
© Building User Interfaces | Professor Mutlu | Lecture 14: React Native — Introductory Concepts 14

Key difference #1: Core Components4
Instead of div, React Native uses View.
import React, { Component } from 'react';import { Text, View } from 'react-native';
export default class HelloWorldApp extends Component { render() { return ( <View style={{ flex: 1, justifyContent: "center", alignItems: "center" }}> <Text>Hello, world!</Text> </View> ); }}
4 See code in Snack
© Building User Interfaces | Professor Mutlu | Lecture 14: React Native — Introductory Concepts 15
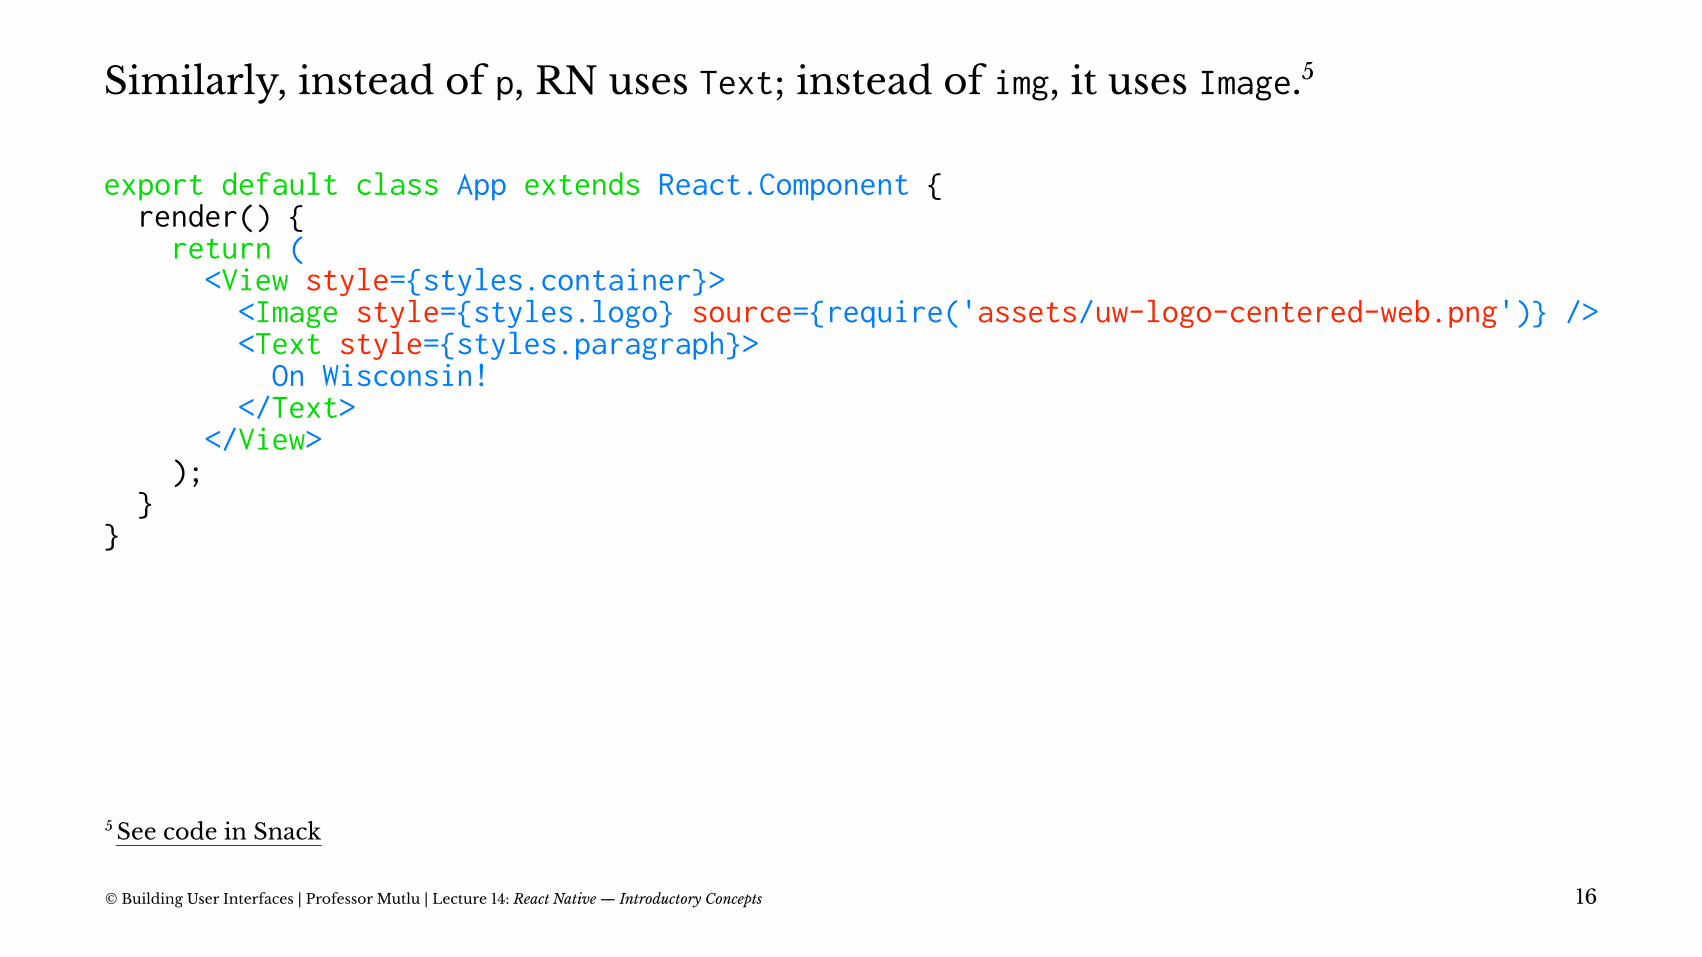
Similarly, instead of p, RN uses Text; instead of img, it uses Image.5
export default class App extends React.Component { render() { return ( <View style={styles.container}> <Image style={styles.logo} source={require('assets/uw-logo-centered-web.png')} /> <Text style={styles.paragraph}> On Wisconsin! </Text> </View> ); }}
5 See code in Snack
© Building User Interfaces | Professor Mutlu | Lecture 14: React Native — Introductory Concepts 16
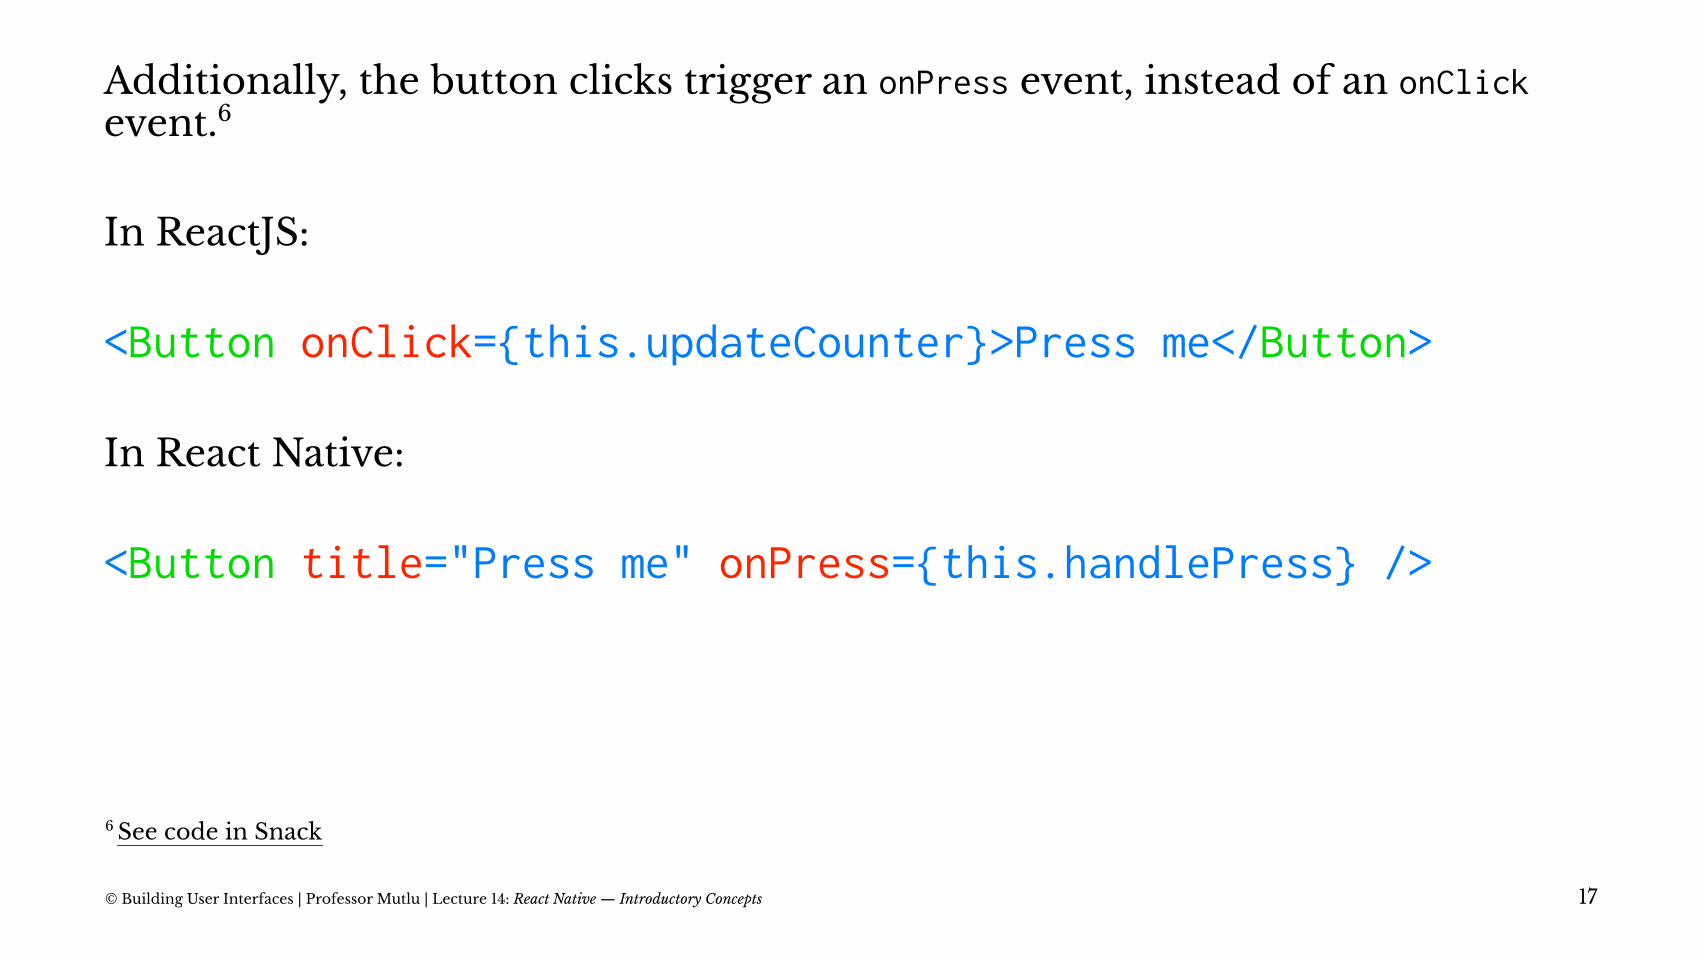
Additionally, the button clicks trigger an onPress event, instead of an onClick event.6
In ReactJS:
<Button onClick={this.updateCounter}>Press me</Button>
In React Native:
<Button title="Press me" onPress={this.handlePress} />
6 See code in Snack
© Building User Interfaces | Professor Mutlu | Lecture 14: React Native — Introductory Concepts 17

Key difference #2: Styling7
Because RN does not use web elements, we can't use CSS styles. We instead create stylesheets in JS.
const styles = StyleSheet.create({ container: { flex: 1, justifyContent: 'center', backgroundColor: '#ecf0f1', padding: 40, }, ...});
7 See code in Snack
© Building User Interfaces | Professor Mutlu | Lecture 14: React Native — Introductory Concepts 18

Pro Tip: Style definitions can be done in stylesheets or in props when components are instantiated. You can also combine both methods.8
<View> <Text style={styles.label}>First label</Text> <Text style={{fontSize: 28, color:"tomato"}}>Second label</Text> <Text style={[styles.label, {fontSize: 20, color:"gray"}]}>Third label</Text></View>
8 See code in Snack
© Building User Interfaces | Professor Mutlu | Lecture 14: React Native — Introductory Concepts 19

Flexbox is Everything9 10
Flexbox is the only standard way of creating layouts in RN, so we have to master it.
<View style={{flex: 1, flexDirection: 'column'}}> <View style={{flex: 1, backgroundColor: 'whitesmoke'}}/> <View style={{flex: 1, backgroundColor: 'gainsboro'}}/> <View style={{flex: 1, backgroundColor: 'silver'}}/></View>
10 React Native Guide to Layouts with Flexbox
9 Visual Flexbox Cheatsheet
© Building User Interfaces | Professor Mutlu | Lecture 14: React Native — Introductory Concepts 20

Below are the commonly used properties:11
flex: 1 will express how much of the container to fill.
flexDirection — row, column, row-reverse, column-reverse
alignItems — stretch, flex-start, flex-end, center, baseline
justifyContent — flex-start, flex-end, center, space-between, space-around, space-evenly
11 See code in Snack
© Building User Interfaces | Professor Mutlu | Lecture 14: React Native — Introductory Concepts 21

Getting Screen Dimension12
Mobile devices vary significantly in screen size, and we o"en need to obtain screen dimensions of the device using the Dimensions class in react-native.
getScreenSize = () => { const screenWidth = Math.round(Dimensions.get('window').width); const screenHeight = Math.round(Dimensions.get('window').height); this.setState({ screenWidth: screenWidth, screenHeight: screenHeight }) }
12 See code in Snack
© Building User Interfaces | Professor Mutlu | Lecture 14: React Native — Introductory Concepts 22

Key difference #3: Platform-specific Components
RN provides a number of components that utilize platform capabilities that may not be avialable in other platforms, thus for cross-platform development, we need to utilize multiple platform-specific components.
E.g., TouchableNativeFeedback only work on Android, and the same effect can be achieved using TouchableHighlight.
© Building User Interfaces | Professor Mutlu | Lecture 14: React Native — Introductory Concepts 23

First method: Selectively render the component based on the current platform.13
render() { if (Platform.OS === 'android') { return ( <TouchableNativeFeedback> ... </TouchableNativeFeedback> ) } else { return ( <TouchableHighlight> ... </TouchableHighlight> ) }}
13 See code in Snack
© Building User Interfaces | Professor Mutlu | Lecture 14: React Native — Introductory Concepts 24

Second method: We create two versions of the component, e.g., MyButton.ios.js and MyButton.android.js.
import MyButton from '/components/MyButton';render() { <MyButton />}
© Building User Interfaces | Professor Mutlu | Lecture 14: React Native — Introductory Concepts 25

Key difference #4: Animation & Gestures
Because of the resource-constrained nature of mobile platforms, applications heavily rely on animation and gestures. In RN, CSS animations are not available, but there are several powerful packages:
— Animated API (for animating components)
— LayoutAnimation (for layout animation)
— PanResponder (for gestures)
More on this next class!
© Building User Interfaces | Professor Mutlu | Lecture 14: React Native — Introductory Concepts 26

Key difference #5: Navigation
Most mobile applications include several screens. Using react-navigation, we can create several screens and define navigation.
import {createAppContainer} from 'react-navigation';import {createStackNavigator} from 'react-navigation-stack';
const MainNavigator = createStackNavigator({ Home: {screen: HomeScreen}, Profile: {screen: ProfileScreen},});
const App = createAppContainer(MainNavigator);export default App;
More on this next class!
© Building User Interfaces | Professor Mutlu | Lecture 14: React Native — Introductory Concepts 27

Quiz 1
Complete the Canvas quiz.
© Building User Interfaces | Professor Mutlu | Lecture 14: React Native — Introductory Concepts 28

Quiz 2
Complete the Canvas quiz.
© Building User Interfaces | Professor Mutlu | Lecture 14: React Native — Introductory Concepts 29

Communicating with Server APIs
© Building User Interfaces | Professor Mutlu | Lecture 14: React Native — Introductory Concepts 30

Almost all mobile applications offer personalized information and thus have to know who the user is through authentication.
Definition: Authentication identifying a user in the process of providing access to system data or services based on the user's identity.
© Building User Interfaces | Professor Mutlu | Lecture 14: React Native — Introductory Concepts 31

Common Authentication Methods
— Basic HTTP authenticationRequires username/password for every request
— Session-based authenticationClient receives a session ID a!er authentication, stores it in a cookie, and attaches it to every subsequent request
— Token-based authenticationClient receives a random token at the first login and passes it as request header in every request
© Building User Interfaces | Professor Mutlu | Lecture 14: React Native — Introductory Concepts 32

— JWT-based ( JSON Web Tokens) authenticationClient sends encrypted user information and receives a token, which is included in every request and decrypted by the server
— Shared Secret Based Hash AuthenticationA secret stored on the client and the server is used to hash a new token at every request and response
In this module, we will use token-based authentication.
© Building User Interfaces | Professor Mutlu | Lecture 14: React Native — Introductory Concepts 33

Token-based Authentication14
The client authenticates with a username and a password once, receives a token, and only sends the token for subsequent requests, until the token times out — works like an all inclusive resort!
14 Image source
© Building User Interfaces | Professor Mutlu | Lecture 14: React Native — Introductory Concepts 34

RESTful APIs15
Definition: REpresentational State Transfer (REST) is an architectural style for distributed hypermedia systems.
Any information, e.g., an image, can be a resource, the key abstraction of REST.
REST uses resource methods, e.g., HTTP methods, to facilitate client-server interaction.
15 More on RESTful APIs
© Building User Interfaces | Professor Mutlu | Lecture 14: React Native — Introductory Concepts 35

RESTful API Methods
In this module, we will focus on four methods:
— GET
— POST
— PUT
— DELETE
© Building User Interfaces | Professor Mutlu | Lecture 14: React Native — Introductory Concepts 36

GET
Definition: HTTP method to retrieve information from the server in a way that does not change the server (a safe method).
GET should be idempotent, returning the same information every time it is called, until another request (POST, PUT) changes the resource.
The server will return either 200 (OK) along with the data (e.g., JSON) or 404 (NOT FOUND).
HTTP GET http://<our-domain>/users
© Building User Interfaces | Professor Mutlu | Lecture 14: React Native — Introductory Concepts 37

POST
Definition: HTTP method that creates new subordinate resources, e.g., a new user in a collection of users. POST is not safe or idempotent.
The server will usually return either 201 (Created) along with information on the new resource and a location header. The server can also return 200 (OK) or 204 (No Content).
HTTP POST http://<our-domain>/users
© Building User Interfaces | Professor Mutlu | Lecture 14: React Native — Introductory Concepts 38
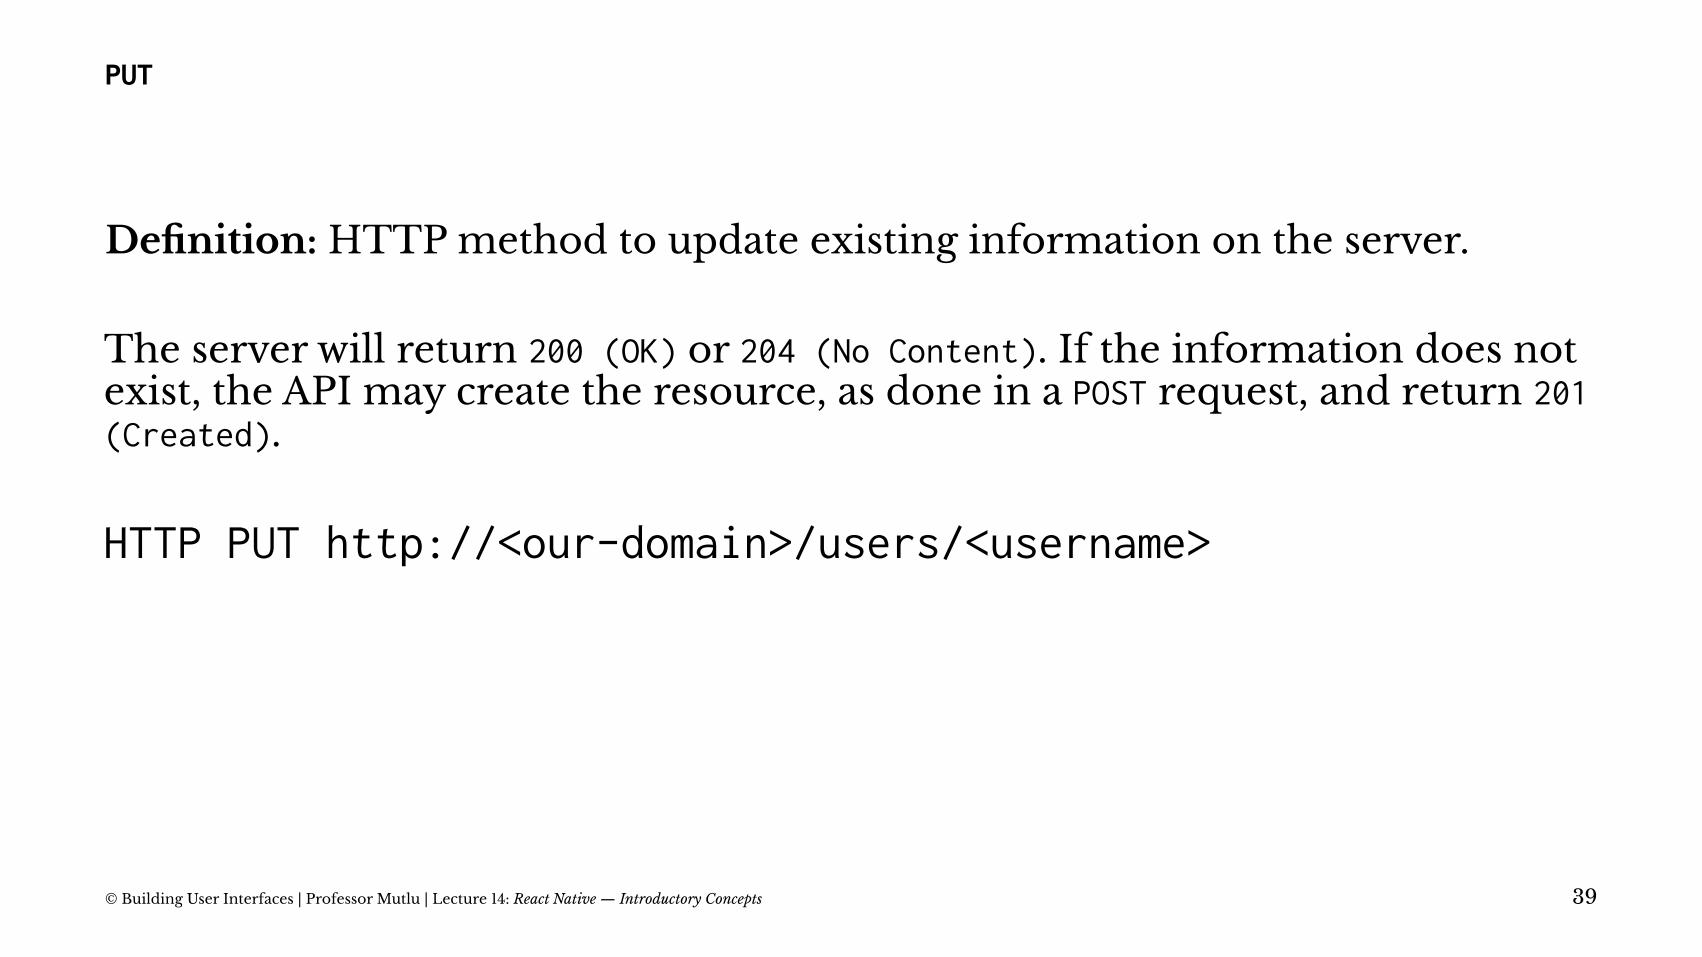
PUT
Definition: HTTP method to update existing information on the server.
The server will return 200 (OK) or 204 (No Content). If the information does not exist, the API may create the resource, as done in a POST request, and return 201 (Created).
HTTP PUT http://<our-domain>/users/<username>
© Building User Interfaces | Professor Mutlu | Lecture 14: React Native — Introductory Concepts 39

DELETE
Definition: HTTP method that deletes resources from the server.
DELETE is idempotent, as calling DELETE several times does not change the outcome.
The server will return code 200 (OK) if the response includes an entity with status, 202 (Accepted) if the request is queued, or 204 (No Content) if it is performed but an entity is not included.
HTTP DELETE http://<our-domain>/users/<username>
© Building User Interfaces | Professor Mutlu | Lecture 14: React Native — Introductory Concepts 40
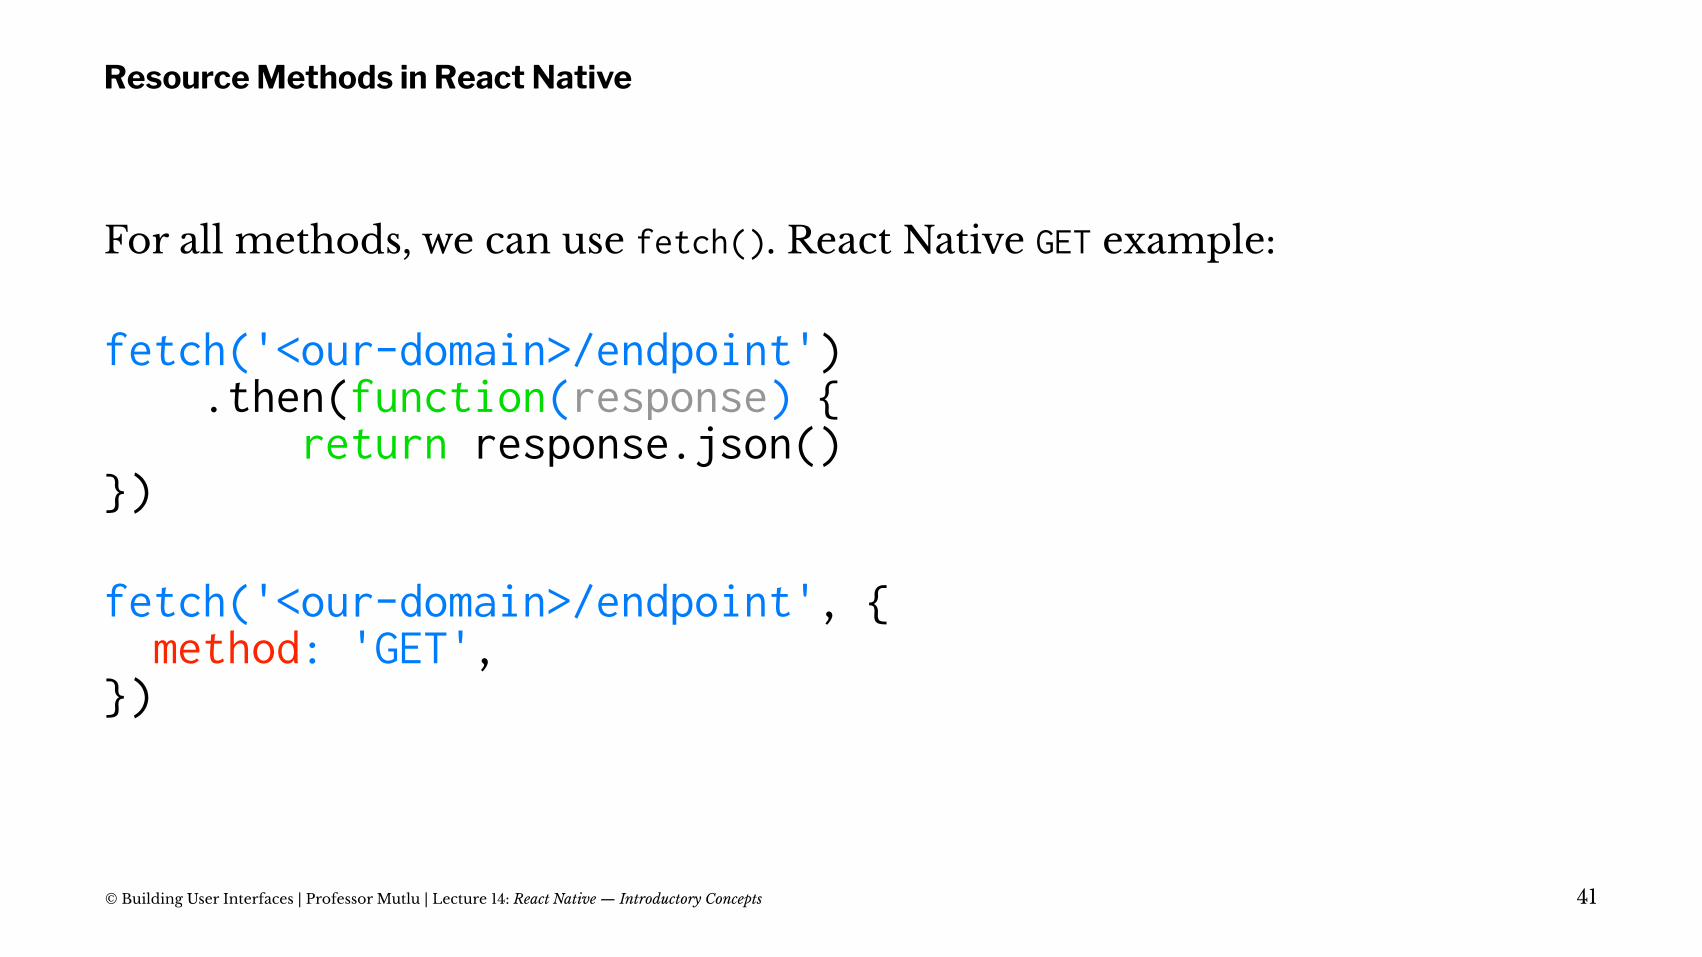
Resource Methods in React Native
For all methods, we can use fetch(). React Native GET example:
fetch('<our-domain>/endpoint') .then(function(response) { return response.json()})
fetch('<our-domain>/endpoint', { method: 'GET',})
© Building User Interfaces | Professor Mutlu | Lecture 14: React Native — Introductory Concepts 41

React Native POST example:
fetch('<our-domain>/endpoint', { method: 'POST', headers: { 'Accept': 'application/json', 'Content-Type': 'application/json' }, body: JSON.stringify({ userName: '<user-name>', password: '<password>', })})
© Building User Interfaces | Professor Mutlu | Lecture 14: React Native — Introductory Concepts 42

When we pass the userName and password and receive a token, we need to encrypt what we are passing. NPM base-64 package accomplishes that.
import base64 from 'base-64';
base64.encode(username + ":" + password);
© Building User Interfaces | Professor Mutlu | Lecture 14: React Native — Introductory Concepts 43

Passing Authentication Information
Example header to pass user credentials:
'Authorization', 'Basic ' + base64.encode(username + ":" + password)
Example header to pass token:
'x-access-token', result.token
© Building User Interfaces | Professor Mutlu | Lecture 14: React Native — Introductory Concepts 44

React Native PUT example:
fetch('<our-domain>/endpoint', { method: 'PUT', headers: { 'Accept': 'application/json', 'Content-Type': 'application/json', 'x-access-token': <my-token> }, body: JSON.stringify({ location: 'Madison, WI' })});
© Building User Interfaces | Professor Mutlu | Lecture 14: React Native — Introductory Concepts 45

React Native DELETE example:
fetch('<our-domain>/endpoint', { method: 'DELETE', headers: { 'x-access-token': <my-token> },});
© Building User Interfaces | Professor Mutlu | Lecture 14: React Native — Introductory Concepts 46

Endpoints
Different resource methods will use different endpoints at the server. For example, in React Native 1 , we will use the following endpoints for https://mysqlcs639.cs.wisc.edu:
/login — allows GET to receive the token
/users — allows POST
/users/<user-name> — allows GET, POST, PUT, DELETE
More on React Native 1 next class!
© Building User Interfaces | Professor Mutlu | Lecture 14: React Native — Introductory Concepts 47

The following API can be accessed at https://mysqlcs639.cs.wisc.edu.
© Building User Interfaces | Professor Mutlu | Lecture 14: React Native — Introductory Concepts 48

Server API Tools16
Easy to use tools help setting up server APIs for user authentication, e.g., Postman.
More on how this next class!
16 Image source
© Building User Interfaces | Professor Mutlu | Lecture 14: React Native — Introductory Concepts 49

Quiz 3
Complete the Canvas quiz.
© Building User Interfaces | Professor Mutlu | Lecture 14: React Native — Introductory Concepts 50

What did we learn today?
— What is React Native?
— Starting a React Native project
— Differences between ReactJS and React Native
— Communicating with Server APIs
© Building User Interfaces | Professor Mutlu | Lecture 14: React Native — Introductory Concepts 51