
Building a Weather Station for a Near-Space Payload AEM 1905: Spaceflight with Ballooning University...
26
Building a Weather Station for a Near-Space Payload AEM 1905: Spaceflight with Ballooning University of Minnesota
-
Upload
godfrey-bailey -
Category
Documents
-
view
213 -
download
0
Transcript of Building a Weather Station for a Near-Space Payload AEM 1905: Spaceflight with Ballooning University...

Building a Weather Stationfor a Near-Space Payload
AEM 1905: Spaceflight with BallooningUniversity of Minnesota

Weather Station kit and instructions

Parts in Weather Station kit

Printed Circuit Board (PCB)

Wires for sensor cabling (colors vary)

Pressure sensor

Relative humidity sensor

Temperature sensor

Capacitor (unpolarized)

Resistor (unpolarized)

Easy-Plug IO adapter boardfor cable to flight computer

Right angle header for cable

Solder resistor in place; snip all excess leads

Solder the capacitor in place

Insert relative humidity sensor, makingsure that the open part faces capacitor
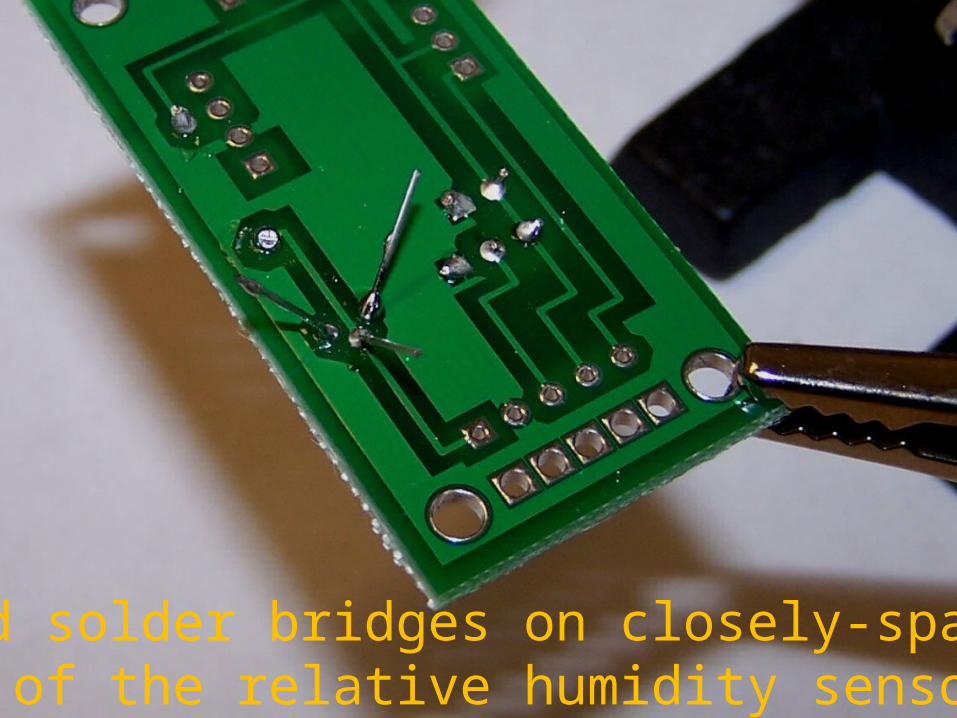
Avoid solder bridges on closely-spacedpins of the relative humidity sensor

Insert the temp sensor, watching polarity

Insert pressure sensor, right way around
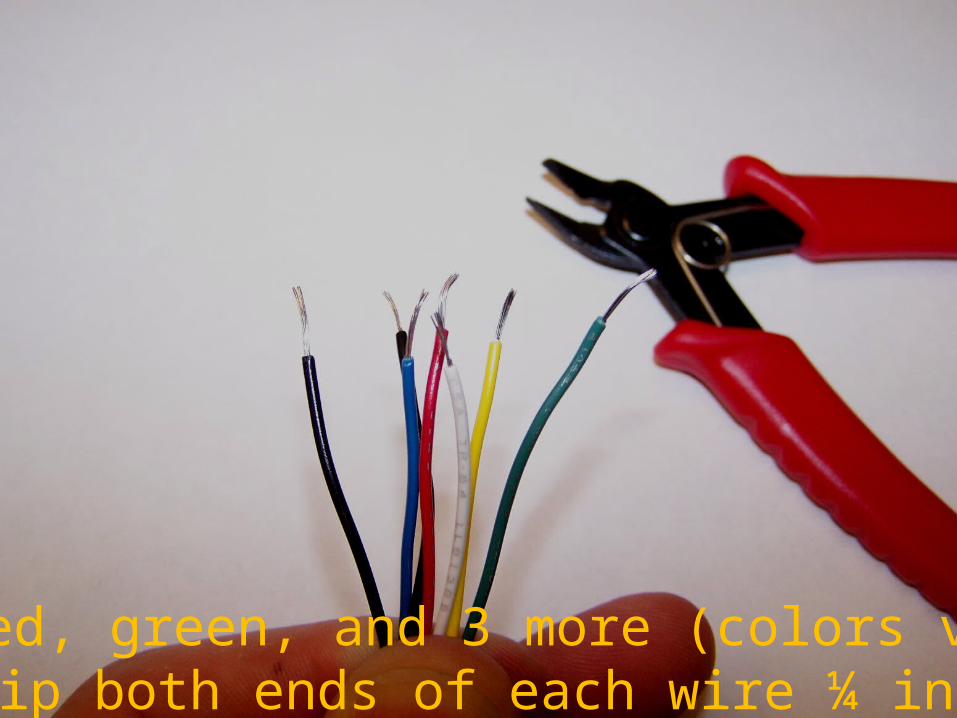
Cut red, green, and 3 more (colors vary).Strip both ends of each wire ¼ inch.
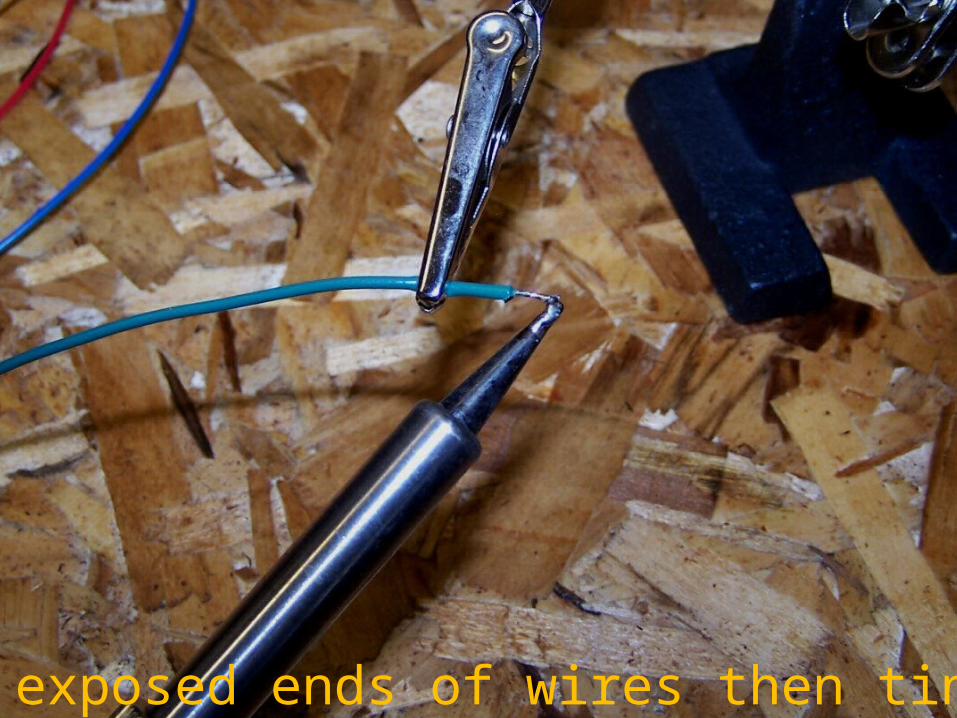
Twist exposed ends of wires then tin them

Insert one wire through large hole thenbend it over and solder – for strain relief

Repeat with other wires – use green/blackfor ground (GND) and red for +5 volts

Slide on shrink-wrap before proceeding.Use blue shrink-wrap provided at table.

Make 5-wire cable, using strain relief.Red +5 volts, green GND, 3 signal wires.

Finish cable by adding the 1 x 5 rightangle header. Be quick – don’t melt it!

Completed Weather Station (with earliercable termination style); ready for testing)