
Breath Fire 3 Puzzles
30
*Breath of Fire III: Mini-Game/Puzzle FAQ* by DavidK519 </features/recognition/23453.html> Version 6.0, Last Updated 2005-07-02 View/Download Original File <http://dw.com.com/redir?asid=0&astid=8&siteid=19&edid=107&destCat=&destURL=http %3A%2F%2Fdb.gamefaqs.com%2Fconsole%2Fpsx%2Ffile%2Fbreath_of_fire_iii_minigame.tx t> Hosted by GameFAQs </> Return to *Breath of Fire III (PSP) FAQs & Guides* </portable/psp/game/928759.html> Liked this FAQ? Click to recommend </portable/psp/file/928759/24866?rec=3784311278> it to other GameFAQs users. ======================================================================= ``````````````````````````BREATH OF FIRE III``````````````````````````` ````````````````````````Mini Game & Puzzle FAQ````````````````````````` ```````````````````````Version 6.0 by DavidK519```````````````````````` ```````````````````````E-mail- [email protected]```````````````````````` `````````````````````````Updated July 2, 2005`````````````````````````` ======================================================================= ================= Table of Contents ================= _______________________________________________________ / \ 1. Version History 2. Introduction 3. Cracking the Mini Games and Puzzles I. Wood Chopping Game II. The Tombstone Puzzle III. Hide & Seek: Part I IV. The Tower?s Crystal Challenge V. Floor Panel Puzzle VI. The Tower?s Cube Puzzle VII. The Tower?s Laser Puzzle VIII. Training Beyd IX. The Lighthouse Main Valve X. Angel Tower Cube Puzzle XI. Pushing the Mine Cart XII. Breaking the Greenhouse Windows XIII. Hide & Seek: Part II XIV. Machine Pulling Game XV. Finding the Ship Parts XVI. The Well Game XVII. Making Shisu XVIII. Beating the Tides XIX. The Black Ship Crane XX. Boost Counter XXI. Colony Portal Drive XXII. Relay Point A Beam Puzzle XXIII. Floating Platform Puzzle XXIV. Aligning the Antenna XXV. Workbot Puzzle XXVI. The Desert of Death XXVII. Myria Station Electric Floor Puzzle 4. Acknowledgments and Closing
Transcript of Breath Fire 3 Puzzles
8/8/2019 Breath Fire 3 Puzzles
http://slidepdf.com/reader/full/breath-fire-3-puzzles 1/30
*Breath of Fire III: Mini-Game/Puzzle FAQ* by DavidK519</features/recognition/23453.html>Version 6.0, Last Updated 2005-07-02 View/Download Original File<http://dw.com.com/redir?asid=0&astid=8&siteid=19&edid=107&destCat=&destURL=http%3A%2F%2Fdb.gamefaqs.com%2Fconsole%2Fpsx%2Ffile%2Fbreath_of_fire_iii_minigame.txt>
Hosted by GameFAQs </>Return to *Breath of Fire III (PSP) FAQs & Guides*</portable/psp/game/928759.html>
Liked this FAQ? Click to recommend</portable/psp/file/928759/24866?rec=3784311278> it to other GameFAQsusers.
=======================================================================``````````````````````````BREATH OF FIRE III```````````````````````````````````````````````````Mini Game & Puzzle FAQ````````````````````````````````````````````````Version 6.0 by DavidK519````````````````````````
```````````````````````E-mail- [email protected]`````````````````````````````````````````````````Updated July 2, 2005``````````````````````````=======================================================================
=================Table of Contents=================
_______________________________________________________ / \ 1. Version History 2. Introduction 3. Cracking the Mini Games and Puzzles
I. Wood Chopping Game II. The Tombstone Puzzle III. Hide & Seek: Part I IV. The Tower?s Crystal Challenge V. Floor Panel Puzzle VI. The Tower?s Cube Puzzle VII. The Tower?s Laser Puzzle VIII. Training Beyd IX. The Lighthouse Main Valve X. Angel Tower Cube Puzzle XI. Pushing the Mine Cart XII. Breaking the Greenhouse Windows
XIII. Hide & Seek: Part II XIV. Machine Pulling Game XV. Finding the Ship Parts XVI. The Well Game XVII. Making Shisu XVIII. Beating the Tides XIX. The Black Ship Crane XX. Boost Counter XXI. Colony Portal Drive XXII. Relay Point A Beam Puzzle XXIII. Floating Platform Puzzle XXIV. Aligning the Antenna XXV. Workbot Puzzle
XXVI. The Desert of Death XXVII. Myria Station Electric Floor Puzzle 4. Acknowledgments and Closing

8/8/2019 Breath Fire 3 Puzzles
http://slidepdf.com/reader/full/breath-fire-3-puzzles 2/30
\_______________________________________________________/
To find what you're looking for, use Ctrl+F and type in the name of thesection or puzzle/mini game from the Table of Contents.
=======================================================================
1. VERSION HISTORY
=======================================================================
(7/2/05) Updated to Version 6.0- Added some extra descriptions to theTower's Crystal Challenge.
(11/7/04) Updated to Version 5.0- Just fixed an error in the Desert ofDeath section. No major changes here.
(12/14/03) Updated to Version 4.0- The directions for getting the Death
Claws and Speed Boots have been added to the Desert of Death section.
(10/31/03) Updated to Version 3.0- No new information with this update.I just made some changes in the formatting and changed my e-mailaddress to my Comcast mailbox.
(8/31/03) Updated to Version 2.0- Finally added the ideal solution forthe Myria Station Electric Floor Puzzle. I also reformatted most of theFAQ.
=======================================================================
2. INTRODUCTION
=======================================================================
Throughout the excellent game that is Breath of Fire III, there are agreat number of mini games and puzzles to solve. In many cases, youmust participate in these puzzles and mini games in order to progressthrough the game. However, some of these activities are completelyoptional. These games have a vast range of difficulty, fromridiculously easy to frustratingly hard. Regardless of difficulty, thepurpose of this FAQ is to help you conquer every mini game and puzzlethe game throws at you.
=======================================================================
3. CRACKING THE MINI GAMES AND PUZZLES
=======================================================================
This is the main (and practically only) section of the FAQ, which willassist you in solving all of the game?s puzzles and mini games. Theyare arranged in basic chronological order. The following is the layoutI will use for each puzzle/mini game:
Location: Where the activity is located.
Party Requirements: List of party members (besides Ryu) that must bepresent in order to participate in the activity.Other Requirements: Anything else that you need in order to participate

8/8/2019 Breath Fire 3 Puzzles
http://slidepdf.com/reader/full/breath-fire-3-puzzles 3/30
in the activity.
How to Crack it: The meat and potatoes of the FAQ. This part will tellyou how to solve the puzzles and gives the solutions to the puzzles.With mini games, I will give my advice on how to conquer them, as wellas give solutions, if there are any.
*** NOTE- In some cases I may employ content from my own walkthrough.So if something in this FAQ seems familiar, it?s because it was takenfrom my walkthrough. In certain situations, the wording of contenttaken from my walkthrough may have been altered of the purposes of thisFAQ.
-----------------------------------------------------------------------
I. Wood Chopping Game
-----------------------------------------------------------------------
Location: At Bunyan?s house in Cedar WoodsParty Requirements: NoneOther Requirements: None
How to Crack it: This is the game?s first, and by far the game?seasiest, mini game. After Bunyan sends Rei off to Mt. Glaus, he makesRyu and Teepo stay behind at his house and do some honest work bychopping wood. This is how it works: Teepo sets the log on the stumpand tips it over so Ryu can cut it with his sword. In order to completethis game, you must cut a certain amount of logs within the time limit.To use Ryu?s sword, press the Triangle button. You?ll want to swing atthe log right after it begins to tip over. If you swing too earlyyou?ll hit Teepo, and if you swing too late you?ll miss the log
completely. The key here is to just keep your eyes on the log. Don?ttry to develop a rhythm, as sometimes Teepo waits longer to tip oversome logs than others. As long as you keep watching the log, and sliceit just after it begins to tip, you should be able to hit every singleone.
-----------------------------------------------------------------------
II. The Tombstone Puzzle
-----------------------------------------------------------------------
Location: Wyndian CatacombsParty Requirements: NoneOther Requirements: None
How to Crack it: This can be a confusing puzzle at first, but the keyto solving it is memorization. Well first of all, to start the puzzlehead left from the entrance to the catacombs and examine the bigtombstone at the end of the narrow path there and press ?7?. Now,return to the main area of the catacombs, and you?ll find seven smalltombstones scattered around the place. Each of the tombstones has twoswitches you can press, and each switch is either green or red. Goaround and examine each tombstone, pressing the GREEN switches. Ifyou hit a red switch, you?ll fall through the floor and have to climb
back up to this area (However, you can get a Glass Domino in theprocess). Here are the correct answers for all seven of the smalltombstones:
8/8/2019 Breath Fire 3 Puzzles
http://slidepdf.com/reader/full/breath-fire-3-puzzles 4/30
?above? or ?beneath?Answer- above
?climbing? or ?outside?Answer- outside
?This? or ?that?Answer- that
?Look? or ?secrets?Answer- secrets
?green? or ?red?Answer- green
?I? or ?You?Answer- You
?is? or ?not?Answer- not
Once you've hit all the green buttons, head over to the big tombstoneat the end of the narrow walkway at the west end of the room. Press thebutton on that tombstone to fall through the floor and land next to achest containing a Light Bangle.
Go inspect the last tombstone at the east end of the room and you?ll befaced with a series of switches to press. All you have to do is givethe answers that were in RED from the seven small tombstones. Here arethe answers to the big tombstone:
?red??climbing??I??is??Look??beneath??this?
Once you give all the correct answers to the big tombstone, you?ll fallthrough the floor, allowing you to exit the catacombs.
-----------------------------------------------------------------------
III. Hide & Seek: Part I
-----------------------------------------------------------------------
Location: In Wyndia near the inoculation shop.Party Requirements: NoneOther Requirements: None
How to Crack it: Once you reach the town of Wyndia for the first time,you?ll be wanting to get some information on some certain missingpeople. If you talk to the leader of the kids playing near the fountainby the inoculation shop, you?ll be forced into a game of Hide & Seek to
see if these kids will tell you anything if you play their little game.The key to finding these little tikes is to look behind walls and otherobjects using your camera angles, as none of the kids are hiding in

8/8/2019 Breath Fire 3 Puzzles
http://slidepdf.com/reader/full/breath-fire-3-puzzles 5/30
plain sight. Now, here?s where to find them all:
-Check behind the trees to the right of the fountain near theinoculation shop where you start at.
-Check near the city?s entrance gate behind the left wall to findanother one.
-Head over to where the weapon shop is and check behind wall to theleft of where the bum is.
-Finally, walk up to the café area and check behind one of the treesout in the open to find the last kid.
-----------------------------------------------------------------------
IV. The Tower?s Crystal Challenge
-----------------------------------------------------------------------
Location: Momo?s TowerParty Requirements: NinaOther Requirements: None
How to Crack it: First of all, this is an optional puzzle, so you don?thave to solve it in order to continue with the game. Also, you can dothe puzzle at any point during the game, as long as you have access toMomo?s Tower. You?ll notice that in the outside courtyard in front ofthe tower, there is a pool of water surrounded by four small crystalswith a treasure chest in it. Head through either door near the pool andhead up this path to reach a large crystal. If you light up the crystalwith Nina?s magic wand, a timer will start running, and you will have
30 seconds to go back outside and light up the four smaller crystals asfast as you can. The catch is, a laser beam will prevent you from goingout the short way. So here?s the path you have to take to get backoutside:
Ok, before you even activate the crystal, stand right near the pillarto the left of the crystal and activate it from there. This is so thatyou can get to those stairs just north of the pillar as fast aspossible. Once you begin the puzzle, bolt up the stairs and take thisnext path going southeast. Run down the hall and go through the doorleading outside along the southern wall. Now head southwest down thestair sets and double back around to reach the pool. Take note that ifyou go down stair sets at an angle going STRAIGHT DOWNWARDS you?ll gofaster. However, do NOT go UP a stair set at any odd angle like that,as it will slow you down. Now hit the crystals in the following orderaccording to the diagram shown below:
B 2 4 D Pool _____ 1 3 C_____________
A

8/8/2019 Breath Fire 3 Puzzles
http://slidepdf.com/reader/full/breath-fire-3-puzzles 6/30

8/8/2019 Breath Fire 3 Puzzles
http://slidepdf.com/reader/full/breath-fire-3-puzzles 7/30
LOCKED DOOR
B -------------------------------------O 1 2 3 4 O -------------------------------------
K 12 7,11 6,10,20 5,21 S -------------------------------------H 13 8 9,19 18 E -------------------------------------L 14 15 16 17 F -------------------------------------
In case you find this diagram hard to follow, here is a set of writtendirections. I will refer to the side of the puzzle nearest to thelocked door as north, and the side nearest to the bookshelf as west,which would make the side opposite to the locked door as south, andthe side opposite to the bookshelf as east. So, keeping that in mind,
here are the directions:
First, start in the northwest corner of the puzzle and walk east allthe way across the first row, stopping in the northeast corner. Fromthere, go south one space and head west two spaces. Now, head south onespace and then east one space. Walk north one space and then head left,all the way over to the west side of the puzzle. Go down two spaces toreach the southwest corner of the puzzle and then head east all the wayacross the bottom row, stopping in the southeast corner. Now, walknorth one space and west one space. Go north one space again and thengo east two spaces to solve the puzzle.
Once you solve the puzzle, go through the door you just unlocked and
reap your reward of Flame Chrysm, Ice Chrysm, and a Skill Ink.
-----------------------------------------------------------------------
VI. The Tower?s Cube Puzzle
-----------------------------------------------------------------------
Location: Momo?s TowerParty Requirements: NoneOther Requirements: None
How to Crack it: If you completed the previous puzzle, you can actuallyget a hint on how to solve this one. In the middle of Momo?s Tower,you?ll find yourself in a large hallway with five revolving cubes in it.This is actually a trap. There are switches on each of the four cubesnearest to you, and if you don?t hit the correct switches, then you?llfall through a hole in the floor as you try to walk by. The correctswitches to hit are the ones corresponding to the two cubes that areidentical. Look carefully to determine which two cubes are exactlyalike.
The correct switches to hit are the second and fourth cubes, going fromleft to right.
-----------------------------------------------------------------------
VII. The Tower?s Laser Puzzle

8/8/2019 Breath Fire 3 Puzzles
http://slidepdf.com/reader/full/breath-fire-3-puzzles 8/30
-----------------------------------------------------------------------
Location: Momo?s TowerParty Requirements: NinaOther Requirements: None
How to Crack it: This is the last puzzle that you have to solve inorder to complete Momo?s Tower. In the hallway right before the lastroom, you?ll find a crystal among three laser emitters. You can changewhich lasers are on by hitting the crystal with Nina?s magic wand.Refer to the diagram and directions below to solve it:
Laser 1 Laser 2 Laser 3 * + * + B * + * +
A Crystal * C +
* + * + * + * +
Now, when you first enter the room, Lasers 1 and 3 will be on, andLaser 2 will be off. Hit the crystal from point A to turn off Lasers 1and 3 and turn on Laser 2. Walk over to point B (making sure all ofyour characters are past the Laser 1 emitter) and hit the crystal toturn Lasers 1 and 3 back on and turn Laser 2 off again. Now, walk overto point C and hit the crystal one last time to turn off Lasers 1 and 3,allowing you to continue into the last room.
-----------------------------------------------------------------------
VIII. Training Beyd
-----------------------------------------------------------------------
Location: RhapalaParty Requirements: NoneOther Requirements: None
How to Crack it: Shortly after reaching the town of Rhapala, you willget into a situation in which you must train a nerdy guy named Beyd,who?s in competition with a sailor named Zig to be the Guild Master.The first thing Beyd will do is give you 1000z and ask you to buy hima weapon and a suit of armor. Although he tells you not to get himheavy equipment, don?t heed him, as his Agility is already as low as itcan get. He can use any weapon or body armor that Ryu can use, so goout and get him the best weapon and armor you can. If you?re low onmoney, you can always just give Beyd hand-me-down equipment from yourinventory and keep the 1000z zenny he gives you. Once you?ve gotten himsome equipment, go talk to him again and tell him you wish to begintraining. You?ll then meet in the town square at night for your firsttraining session.
Here?s a run down on how the training sessions work. Each session lasts
for either 20 turns, until Beyd?s HP reaches zero, or until your partyis wiped out, whichever comes first. You fight Beyd like in a normalbattle, using any combination of party members and formations that you

8/8/2019 Breath Fire 3 Puzzles
http://slidepdf.com/reader/full/breath-fire-3-puzzles 9/30
want. Beyd has three stats that can increase during his training: HP,Power, and Defense. This is what determines how each stat increases.You can see Beyd?s stat progress at the end of each session:
HP- Determined by how much damage (total) that Beyd has taken.
Power- Determined by how much damage (total) that Beyd deals to your
party.
Defense- Determined by how many times Beyd was attacked while defending.
The best way to train Beyd is to work on each stat separately. Don?tjust mindlessly fight him. Decide which stat you want to work on anddedicate an entire session to it. Use the following methods to traineach stat:
Training HP:Recommended team- Ryu, Momo, GarrNotes- Beyd is extremely weak when you first start training him (and
that?s an understatement), so keep this in mind when you begin tuninghim up. Before you even start attacking, Have Ryu and Momo cast Protecton Beyd 3 or so times so that you won?t be killing him in one hit. Then,have Ryu and Garr attack Beyd while Momo heals him. Whenever Beyd startsto get low on health, stop attacking him and heal him to full HP. Thenresume the pattern of attacking and healing Beyd. The only things youhave to fear are critical hits from Garr, which can probably kill Beydin one hit. If you don?t want to risk this, put Nina in your partyinstead and have Ryu lead an Attack Formation. When the last roundcomes up, you?ll want to deal as much damage as you can on the finalattack of the session. The best way to do this is to have Ryu useAccession the turn before last and use his most powerful dragon attackon Beyd, mainly an elemental Claw or Dragon Breath.
Training Power:Recommended team- Ryu, Momo, NinaNotes- Training Beyd?s power is easy. First of all, have Nina castWeaken on all of your party members to maximize the amount of damageBeyd deals per hit. If Momo has Might, then cast it on Beyd to have himdo some insane damage to you. Your main concern should be keeping yourparty healed while Beyd pounds you with his attacks. If anyone dies(mainly Nina or Momo), revive them with an Ammonia. Whenever you?re notpreoccupied with healing yourself, attack Beyd to give his HP a boost.Just remember to heal him if his HP gets to low.
Training Defense:Recommended team- Ryu, Momo, NinaNotes- In order to get Beyd to defend, you?ll have to bring him down toabout 1/5 or so health. To do this, first cast Protect on Beyd once ortwice and then have your party attack until you get Beyd?s HP low. OnceBeyd starts defending, have Ryu and Nina attack him as many times aspossible without killing him. Bring him down to a sliver of his healthand then heal him. Afterwards, repeat the process of bringing him downto 1/5 of his health and then attacking. Ryu should stick to his normalattacks, as well as a melee skill like Double Blow, while Nina useslevel 1 magic spells. Since Momo has the highest attack power of yourgroup, be careful when attacking with her so that you don?taccidentally kill Beyd.
Once you feel you?ve trained Beyd enough, talk to him back at the Wharfand tell him to go to the Lighthouse. Zig will overhear you and

8/8/2019 Breath Fire 3 Puzzles
http://slidepdf.com/reader/full/breath-fire-3-puzzles 10/30
challenge Beyd to a fight. The fight is supposed to be just betweenBeyd and Zig, but whenever you see Zig turn his head away to wave atShadis, help Beyd out either by healing him or having your strongestattacker (Garr) smack Zig. After Beyd bests Zig, go talk to him at theWharf the next day and he?ll give you a badge, which allows you to goto the Lighthouse. Also, you?ll notice that Beyd has put out twotreasure chests for you to plunder. The prizes in the chest depend on
what equipment Beyd had when he beat Zig. They will be the next mostexpensive weapon and the next most expensive armor.
-----------------------------------------------------------------------
IX. The Lighthouse Main Valve
-----------------------------------------------------------------------
Location: The Lighthouse near RhapalaParty Requirements: NoneOther Requirements: Flame Chrysm
How to Crack it: This is easily one of the game?s most frustratingpuzzles. While exploring the Lighthouse, you?ll come across a roomwhere you activate the Lighthouse boiler by opening the main valve. Todo this, you must first put some Flame Chrysm in the orange hatch nearthe switch for the main valve. Then, examine the switch. A wave gridwill appear, and an arch will start bouncing about the grid. You?llalso notice a little line at the top of the grid.
To open the main valve you must hit the switch (hit X) right when thearch hits that line at the top of the grid. Before you go rushing intothis, just sit there and watch the pattern of the arch. It will hit theline at the top every four runs, so watch it carefully and develop a
counting rhythm of 1,2,3,4 for each time the arch first hits the top ofthe grid. Once you get a smooth rhythm going and you?re ready toattempt to open the valve, start your counting after the arch hits theline. Count to four according to your rhythm and hit X JUST BEFORE yousee the arch hit the line, and your timing should be perfect.
It?s best to try to open the valve on your first attempt, because eachattempt at this will cost you a Flame Chrysm. If you run out of FlameChrysm, exit this room through the doorway in the lower section of theroom. Head right and go through the doorway to the south to reach threeboxes, each containing a Flame Chrysm. If you run out of them evenafter that, then you?ll have to go all the way back to Rhapala to buysome more, sorry.
-----------------------------------------------------------------------
X. Angel Tower Cube Puzzle
-----------------------------------------------------------------------
Location: Angel TowerParty Requirements: GarrOther Requirements: None
How to Crack it: As you go deeper into Angel Tower, you?ll eventually
end up in quite a large area with three big green cubes. In order toreach the basement of Angel Tower, you must use Garr to push the cubesinto position to form a path leading to the stair set at the east end

8/8/2019 Breath Fire 3 Puzzles
http://slidepdf.com/reader/full/breath-fire-3-puzzles 11/30
of the area. Refer to the following instructions in order to solve thepuzzle.
From the beginning of the area, head down the next stair set you see(to the southwest), and use your camera angles to find a chestcontaining Napalm near the stairs. Now, continue down the path, pastthe small stair set on the right to reach a big green block (similar to
the one you saw before). Have Garr push it straight against the ledgeto the far right and then up two spaces. Return to where you firstentered this room and go right. Follow this path to a stair set goingdown. Head down those stairs to reach another block. Have Garr push itto the left three times and then position yourself north of it to pushit southwards all the way it can go (to get north of the block, you?llhave to switch your lead character to Ryu, because Garr?s too big toget between it and the ledge). Once you?ve done that, get back to theeast of the block and continue down the path, hugging the rightmostwall. Walk to the left and take the upper left path to get behindanother green block. Push it up twelve times so that it forms a bridgewith the block you pushed before. Now, as you can probably see, you?ve
formed a path to the stairs going down at the east end of the room. Usethe path you?ve made to reach the stairs, and then climb down them toreach Angel Tower?s basement.
-----------------------------------------------------------------------
XI. Pushing the Mine Cart
-----------------------------------------------------------------------
Location: Dauna MineParty Requirements: GarrOther Requirements: None
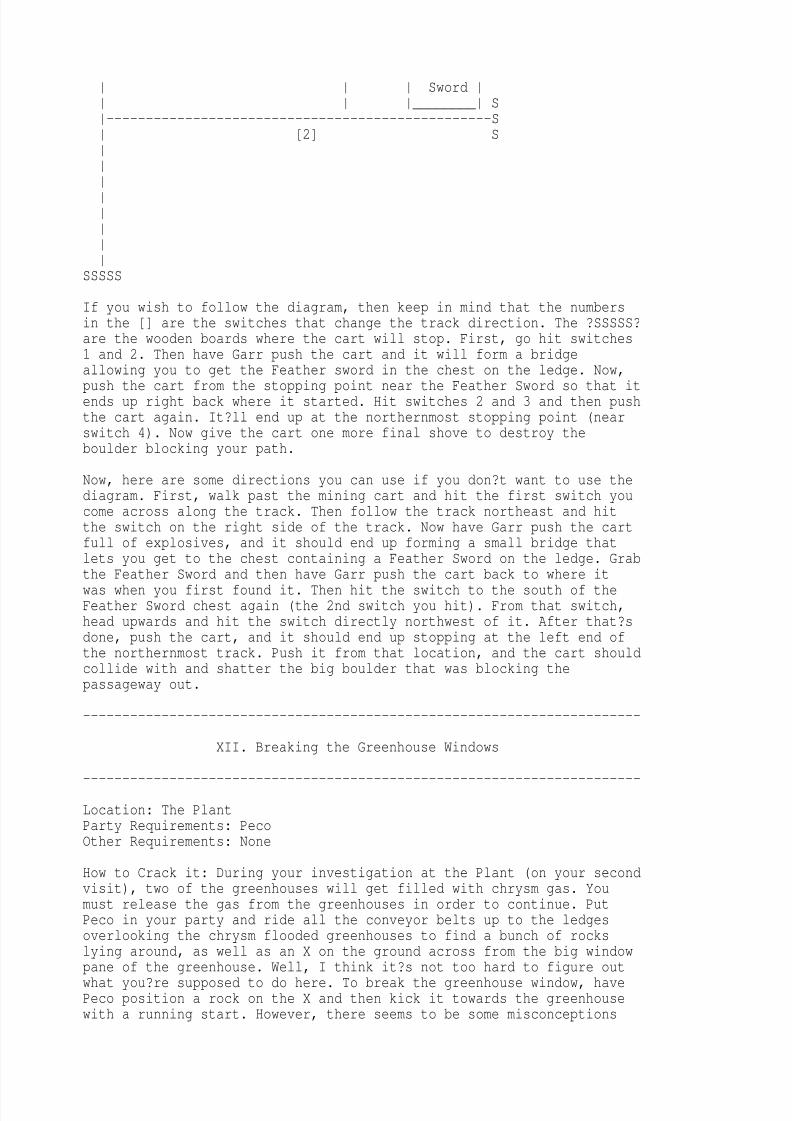
How to Crack it: This is really the first puzzle you?ll have to solveafter Ryu becomes an adult. As you?re making your way out of the DaunaMine, on floor B2 you?ll find a small network of tracks in the openarea, as well as a mine cart full of explosives. There?s a largeboulder blocking the exit to this area, so the object here is to set upthe tracks so that you can blow up the boulder using the cart ofexplosives. It?s all really a matter of looking at the track layout inorder to hit all the right switches. Refer to the crude diagram andinstructions below to help you solve it:
SS-------------S
[4 SSSSS ----------------[Boulder]
*Mine Cart Starting Point
SSSSS [3] --------
________ [1] Feather
8/8/2019 Breath Fire 3 Puzzles
http://slidepdf.com/reader/full/breath-fire-3-puzzles 12/30
Sword ________ S-------------------------------------------------S [2] S
SSSSS
If you wish to follow the diagram, then keep in mind that the numbersin the [] are the switches that change the track direction. The ?SSSSS?are the wooden boards where the cart will stop. First, go hit switches1 and 2. Then have Garr push the cart and it will form a bridgeallowing you to get the Feather sword in the chest on the ledge. Now,
push the cart from the stopping point near the Feather Sword so that itends up right back where it started. Hit switches 2 and 3 and then pushthe cart again. It?ll end up at the northernmost stopping point (nearswitch 4). Now give the cart one more final shove to destroy theboulder blocking your path.
Now, here are some directions you can use if you don?t want to use thediagram. First, walk past the mining cart and hit the first switch youcome across along the track. Then follow the track northeast and hitthe switch on the right side of the track. Now have Garr push the cartfull of explosives, and it should end up forming a small bridge thatlets you get to the chest containing a Feather Sword on the ledge. Grabthe Feather Sword and then have Garr push the cart back to where it
was when you first found it. Then hit the switch to the south of theFeather Sword chest again (the 2nd switch you hit). From that switch,head upwards and hit the switch directly northwest of it. After that?sdone, push the cart, and it should end up stopping at the left end ofthe northernmost track. Push it from that location, and the cart shouldcollide with and shatter the big boulder that was blocking thepassageway out.
-----------------------------------------------------------------------
XII. Breaking the Greenhouse Windows
-----------------------------------------------------------------------
Location: The PlantParty Requirements: PecoOther Requirements: None
How to Crack it: During your investigation at the Plant (on your secondvisit), two of the greenhouses will get filled with chrysm gas. Youmust release the gas from the greenhouses in order to continue. PutPeco in your party and ride all the conveyor belts up to the ledgesoverlooking the chrysm flooded greenhouses to find a bunch of rockslying around, as well as an X on the ground across from the big windowpane of the greenhouse. Well, I think it?s not too hard to figure out
what you?re supposed to do here. To break the greenhouse window, havePeco position a rock on the X and then kick it towards the greenhousewith a running start. However, there seems to be some misconceptions

8/8/2019 Breath Fire 3 Puzzles
http://slidepdf.com/reader/full/breath-fire-3-puzzles 13/30
about exactly how to get a ?running start?. To build up speed, all youhave to do is continuously run. You don?t necessarily have to run inone direction to do this. Since you have very limited space up on theseledges, the best way to build up speed is to run around in smallcircles and then run over and kick the rock. See the following diagramsand instructions if you?re having trouble doing this:
Greenhouse 1:
___________________
__ CONVEYOR BELT --------
__ Mach -------------- -------- G R E
__ A E _ --- -> X N _ S __ H --- O _______________ U
CONVEYOR S BELT E
--------------
First off, the S in the box is the switch for the southern conveyorbelt and the bigger box labeled Mach is the reactor in the middle ofthe ledge. First, have Peco kick a rock into the X. Then run around incircles around near point A. Then, without stopping, turn and run into
the rock in the direction the small arrow is pointing.
Greenhouse 2: --------------------------------- GREENHOUSE
CONVEYOR ---------------------------------BELT
____________________________________________________ _ X A -> -> -> -> -> B --- _________________________________________ S CONVEYOR --- BELT __
__ _ PATH
Once again, the S box stands for the switch that?s on the path. HavePeco position a rock onto the X and then head over to point A. Fromthere, run down the narrow part of the ledge in the direction the small

8/8/2019 Breath Fire 3 Puzzles
http://slidepdf.com/reader/full/breath-fire-3-puzzles 14/30
arrows are pointing. Quickly turn at point B, running into the rockgoing towards the greenhouse. Make sure you don?t stop moving as youturn, or you?ll lose all the speed you?ve built up.
-----------------------------------------------------------------------
XIII. Hide & Seek: Part II
-----------------------------------------------------------------------
Location: Wyndia (Adulthood)Party Requirements: NoneOther Requirements: None
How to Crack it: Wyndia stays pretty much the same old city, even afterRyu grows up. But it looks like some people will never grow up. Go toWyndia after Ryu becomes an adult and you?ll find the same four peoplewho you played Hide & Seek with when you were a kid. And surprise,surprise, they?re still playing Hide & Seek. However, instead of just
hiding in Wyndia, now the entire known world is their playground. Talkto their leader, Bais, and he?ll challenge you to a game. Accept theirchallenge, and they?ll all give you hints about where they?re going tohide:
Bais- ?Somewhere in the northwest where there?s lots of strong men?Lang- ?Someplace close?Wynn- ?That place that smells like oil?Lee- ?The place that connects this world with that world?
Use these hints to try to determine where they?re hiding. And whileyou?re searching for them, keep in mind that you must use your cameraangles to spot them, as none of them are hiding in plain sight. Here
are their exact locations:
Bais- He?s hid himself deep inside the Dauna Mine, so I?ll explain indetail how to find him. From the elevator on the B3 level, Follow thepath right and then northeast onto a wooden bridge. Take the bridge upto a junction and head northwest. Use you camera angles to check aroundthe last pillar along the path to find him.
Lang- Behind one of the tombstones in the Wyndian royal graveyard.
Wynn- Behind one of the houses at the west end of Junk Town.
Lee- Behind the left Eastern Checkpoint gate.
Find them all and then return to Wyndia. Talk to them and they?ll allbecome masters. Level up three levels under each of them to get thefollowing rewards:
Bais- Chain FormationLang- Cupid?s Lyre (item)Wynn- Refuge FormationLee- Magic Formation
-----------------------------------------------------------------------
XIV. Machine Pulling Game
-----------------------------------------------------------------------
8/8/2019 Breath Fire 3 Puzzles
http://slidepdf.com/reader/full/breath-fire-3-puzzles 15/30
Location: Steel BeachParty Requirements: GarrOther Requirements: None
How to Crack it: In order to get a warrant to look for parts insidethe Steel Beach freighter, you?ll have to prove your worth to the
foreman by pulling machines up out of the water. So put Garr in thelead position of your party and talk to the foreman to play the machinepulling mini game. Here?s a rundown of how the game works. Garr andthe foreman will work together pulling the machine up to the shore bytaking turns pulling their respective ropes. The little monkey guyholding the flags shows you whose turn it is. If he?s holding up thered flag it?s Garr?s turn, and if he?s holding up the white flag it?sthe foreman?s turn. If you pull the rope when it?s not your turn, it?llbreak and you?ll fail. Also, watch the rope lengths for both Garr andthe foreman. If the difference in your rope lengths exceeds 2 metersthen you?ll also fail. Pull the machine in to about 6 meters to beatthis mini game.
Now, the key to completing this mini game successfully is to alwaysstay 1 meter ahead of the foreman. Why? Well, while you can adjust thespeed at which you pull the rope to compensate for the difference inyour rope length, the foreman does not. No matter what the differencein your rope length is, the foreman will always pull at the same speed,forcing you to take some initiative. So, start out the game pulling therope as fast as you can, whenever it?s your turn, until you get 1 meterahead of the foreman at the end of your turn. After the foreman catchesup and your turn comes around again, make sure to get back ahead of himby at least 1 meter. Remember, just don?t get 2 meters ahead or therope will break. If you constantly stay ahead of the foreman in thisfashion, he?ll never get the opportunity to pull 2 meters ahead of you.
And from there, all you have to do is carefully watch the little monkeyguy to make sure you only pull the rope when it?s your turn (the redflag). Sometimes, either Garr or the foreman can get an extra turn. Ifyou get an extra turn and you?re already 1 meter ahead, then just pullthe rope slowly, putting some extra distance between you, but justdon?t get 2 meters ahead. If the foreman gets an extra turn, you?llhave some catching up to do on your next turn.
Once you complete the mini game, you?ll fight the Angler boss, so makesure you bring another good party member along with Ryu and Garr.
-----------------------------------------------------------------------
XV. Finding the Ship Parts
-----------------------------------------------------------------------
Location: Steel Beach and the freighterParty Requirements: NoneOther Requirements: Beat the Machine Pulling Game
How to Crack it: After defeating the Angler upon completion of theMachine Pulling Game, you?ll have proven yourself worthy of goinginside the freighter to look for the parts you need to fix the ship.However, before you go inside the freighter, there are a few parts
lying around outside to pick up:
-In the water just north of where the foreman is standing

8/8/2019 Breath Fire 3 Puzzles
http://slidepdf.com/reader/full/breath-fire-3-puzzles 16/30
-Behind the southern wall southeast of where the foreman is standing-In the small junk pile south of where the foreman is standing-Behind the ledge southeast of the freighter?s entrance-Hidden on the right side of the freighter near the guy using theblowtorch
Once you?ve gotten all of the parts outside, head inside the freighter
and search the place from top to bottom to find the rest of the partsyou need. Some of the parts will be lying around in plain sight, butmany of them are hidden behind crates and walls and underneath beams.Use your camera angles to check for hidden parts. Now, here are somedirections on finding all of the parts in the freighter:
When you get inside, first, take this path northwest and check behindthe short railing to the left at the end to find a part. From there,keep heading northwest until you find an ?H? shaped part on the ground.Pick it up and head back southeast. Go down the stairs to the right,and then climb down the two ladders below it. Then walk left on thisnarrow path and climb down the next ladder to reach the lower level of
the freighter. Head right and hit the blue switch there two times. Now,pass under the beam you just raised and pick up the part to the right.Head left from there to find another blue switch. Pick up the part toits left and the part hidden behind it, and then hit that switch twotimes. Return to the last ladder that you came down, climb back up it,and head right. Walk across the first beam and pick up the part on topof the crate. Go down the tiny ramp and then northwest across the nextbeam. Make your way across the beam after that and collect the part ontop of the crate. Now, go back to the lower level of the freighter.From the bottom of the ladder, walk northwest to a third and final blueswitch; hit it two times. Pass under the beam and check around for thepart hidden behind it. Head northwest a little ways and pick up thepart hidden behind the crates on the left. Then, check around the
crates to the right to find another part and a chest containing a Robeof Wind. Now, once again, climb back up the ladder you took to get downhere. Head right and walk across the three beams again to get to thelast part.
Once you find all the parts, go back to the engine room of the shipback at the Dock and give all the parts to Momo.
-----------------------------------------------------------------------
XVI. The Well Game
-----------------------------------------------------------------------
Location: Coffee ShopParty Requirements: GarrOther Requirements: Volume on your television
How to Crack it: This can be one of the most frustratingly annoyingmini games that the game has to offer. In order to get the vinegar youneed for making shisu, you?ll have to help the little cloaked guystanding near the well at the Coffee Shop. Put Garr in the leadposition of your party and talk to the little guy near the well to playthe well mini game. The object of the game, obviously, is to draw waterfrom the well. To do this, you must first lower the bucket by hitting
the X button. Once you hear a splash, swish the bucket around with thed-pad until the sound of the bucket filling up stops. Finally, pull thebucket back up by hitting the Triangle button THE SAME NUMER OF TIMES

8/8/2019 Breath Fire 3 Puzzles
http://slidepdf.com/reader/full/breath-fire-3-puzzles 17/30
AS YOU HIT THE X BUTTON. This is a very important fact to remember, asmost of the time, failure in this mini game is a result of not hittingthe Triangle button the right number of times. If you do everythingcorrectly, you?ll beat yet another mini game and get two helpings ofvinegar.
Now that you know how the game works, it?s time to learn how to conquer
it. The most common mistakes made in this game are not hitting X andTriangle fast enough, and not hitting Triangle the same number of timesas you hit X. Keeping that in mind, it?s time to go through this stepby step. First, hit the X button at a good pace. By good pace I meanhit it quickly while still being able to count the number of times youhit X before you hear the splashing sound. Once you hear the splash,stop hitting X (making sure to remember exactly how many times you hitit) and use the d-pad to fill up the bucket. You can do this part atany pace, so don?t worry about that. Now, once the sound of the bucketfilling up stops, quickly hit the Triangle button the same number oftimes you hit the X button and at relatively the same pace as you hitthe X button, then JUST STOP. Even though Garr may still be pulling on
the rope when you stop hitting the Triangle button, as long as you dideverything correctly, Garr will stop shortly and you will have done it!
-----------------------------------------------------------------------
XVII. Making Shisu
-----------------------------------------------------------------------
Location: ParchParty Requirements: NoneOther Requirements: The shisu ingredients (explained below)
How to Crack it: In your quest to cross the Outer Sea, you?ll need toseek information about someone called the Legendary Mariner, the onlyperson ever to cross the ocean. It turns out the mayor of Parch knowsquite a bit about the Legendary Mariner, but he refuses to speak withanybody due to his grumpiness over the fish he?s forced to eat there.However, he drops a hint about the Maekyss Gorge, so pay it a visit.Talk to the lady inside the house under the bridge, and she suggeststhat you feed the mayor shisu to help get him over his hatred of fish.Before you can begin making the shisu, you have to collect all theingredients, listed here:
Mackerel- You can catch these in the fishing spot that appears rightnext to the Maekyss Gorge after you?re finished talking to the lady inthe house. Look for the medium-small sized shadows and catch them withjust about any kind of bait. A simple worm will do just fine. You?llonly need to catch one of them.
Shally Seed- You?ll have to have Peco in your party to obtain theShally Seeds. Once he?s in your group, have him bash the tree in thealcove under the bridge in the Maekyss Gorge to get some Shally Seeds.You should probably get anywhere from 20-40 of these.
Vinegar- This is obtained by playing the well mini game at the CoffeeShop (explained in the previous section). You?ll receive 2 servings perplay. Pick up 4-6 servings of it.
Horseradish- Go to Ogre Road back in the Dauna region and cut down thestrange looking bushes along the northwest end of the road to pick up

8/8/2019 Breath Fire 3 Puzzles
http://slidepdf.com/reader/full/breath-fire-3-puzzles 18/30
some Horseradish. Be sure to get 5-10 helpings of it.
Return to the Maekyss Gorge once you get all the ingredients and speakwith the lady again to get some more detailed descriptions on how tomake the shisu. To make the shisu, first lay out your mackerel sliceand make your shally seed ball. Then add vinegar and horseradish, andfinally, knead it one or two times. Some key things that you need to
remember are:
-You?ll want to make the shally seed ball about as big as the mackerelslice before kneading it.-Keep the vinegar to shally seed ratio about 1:4.-Keep the vinegar to horseradish ratio about 1:2.-Be aware that you lose one shally seed every time you knead.
Once you?re actually ready to make the shisu for the mayor, go back toParch and speak with the mayor?s advisor to begin. First, select yourmackerel slice and make your shally seed ball about as big as the sliceof mackerel. Remember to count how many shally seeds you use. Also, be
sure to add slowly, as you can?t take shally seeds away if youaccidentally make the ball too big. Once your shally seed ball is done,determine right now how many times you?re planning on kneading theshisu. If you?re only going to knead it one time then subtract 1 fromyour shally seed count, and if you?re going to knead it twice thensubtract two from your seed count. Now, add vinegar equal to about afourth of your shally seeds, taking the kneading subtractions intoaccount. Then, add about twice as much horseradish as vinegar (a 2:1ratio). Then knead it one or two times, depending on what you plannedon earlier. Then hit end and see if the mayor likes it.
If you were successful, the mayor will love the shisu and give you theSea Charts, which will help you in finding the Legendary Mariner. Also,
talk to the mayor?s advisor afterwards and he?ll give you a present ofhis own as a token of his appreciation. The item he gives you dependson how well you made the shisu. Although following the basic formulathat I have presented here will probably not net you the absolute bestprize (a Shaman?s Ring), it will win you something good.
-----------------------------------------------------------------------
XVIII. Beating the Tides
-----------------------------------------------------------------------
Location: [?] area between the rocks at the edge of the Inner SeaParty Requirements: NoneOther Requirements: None
How to Crack it: This can prove to be one of the more difficult minigames if your boat driving skills are not sharp. When you enter the [?]among the crags to the far east of Parch, you?ll have 25 seconds to getwherever you need to go due to the rapid change in the tides here.Along with the Legendary Mariner?s house, there are three items to pickup in this area (Ice Shield, Blizzard Mail, and Heavy Dagger). Don?ttry to go after more than one item in one run through, because therejust isn?t enough time. Try to get all the items before going to theLegendary Mariner?s house. The key to getting around this area quickly
is to know your boat controls well, and to dash in bursts. And whenyou?re waiting for your dash bar to fill back up, make sure you?restill holding up on the d-pad so you?ll still be moving forward. Just
8/8/2019 Breath Fire 3 Puzzles
http://slidepdf.com/reader/full/breath-fire-3-puzzles 19/30
NEVER let you engine overheat, or else you be stopped dead in yourtracks for a few seconds. And remember, in order to open a chest, youmust face it and hit the X button. Now, here are some directions:
-From the start, dash straight ahead up the channel going northeast.maneuver around the rocks at the end of the channel to reach a HeavyDagger.
-Once again, head up the channel to the northeast from the beginning.Dash north at the end of the channel, passing the above chest among therocks to the right, and head for the entrance to the extremely narrowchannel there. Follow this channel all the way around to a chestcontaining a Blizzard Mail.
-Take the wide channel to the northwest from the start and dash up it.Maneuver around the rocks at the end of the channel and make your wayto the west. Continue to the west, staying on the southern side of thechannel to avoid rocks, until the Legendary Mariner?s house comes intosight. Then head down into the small channel south of the house to
reach the last chest, which contains an Ice Shield.
-To make it to the Legendary Mariner?s house, follow the abovedirections, except run towards the house when it comes into sight anddock there before the clock runs out (Note- Return to the LegendaryMariner?s house a second time later on to get a Protein).
-----------------------------------------------------------------------
XIX. The Black Ship Crane
-----------------------------------------------------------------------
Location: The Black ShipParty Requirements: NoneOther Requirements: None
How to Crack it: As you move through the Black Ship, you?ll eventuallyencounter a room full of crates along with a big crane. In order toproceed, you?ll need to use the crane to pick up the smaller crates inthe lower area to form a bridge leading to the other side of the room.This crane operates just like the standard ?prize grabber? machine.First, hold down X to move the crane across. Release X and then hold itdown again to move up. After releasing X the second time, the cranewill attempt to grab something. If it grabs a crate, it?llautomatically drop it into place to form the bridge. If it comes upempty handed, it?ll return to it?s starting position. So, you can onlymove in each direction once. Use the floor tiles in the lower area tohelp you line up the crane as you?re moving it across. First determinewhich row the crate is on, then use the laser the crane emits to stopon the right row. Then, simply move the crane up and stop it when thelaser lands right in the middle of the crate. Remember, you can onlypick up the small crates. Really the only crate you should have troublewith is the one partially hidden amongst the large crates. Since therow it lies on is hidden by the ledge you?re standing on, you?ll haveto time it moving across. Only hold down X for about a second and youshould get positioned onto the proper row. The rest is simple, justwatch the laser.
Once you successfully grab three crates, your bridge will be complete.However, by picking up a fourth crate you can get the item trapped
8/8/2019 Breath Fire 3 Puzzles
http://slidepdf.com/reader/full/breath-fire-3-puzzles 20/30
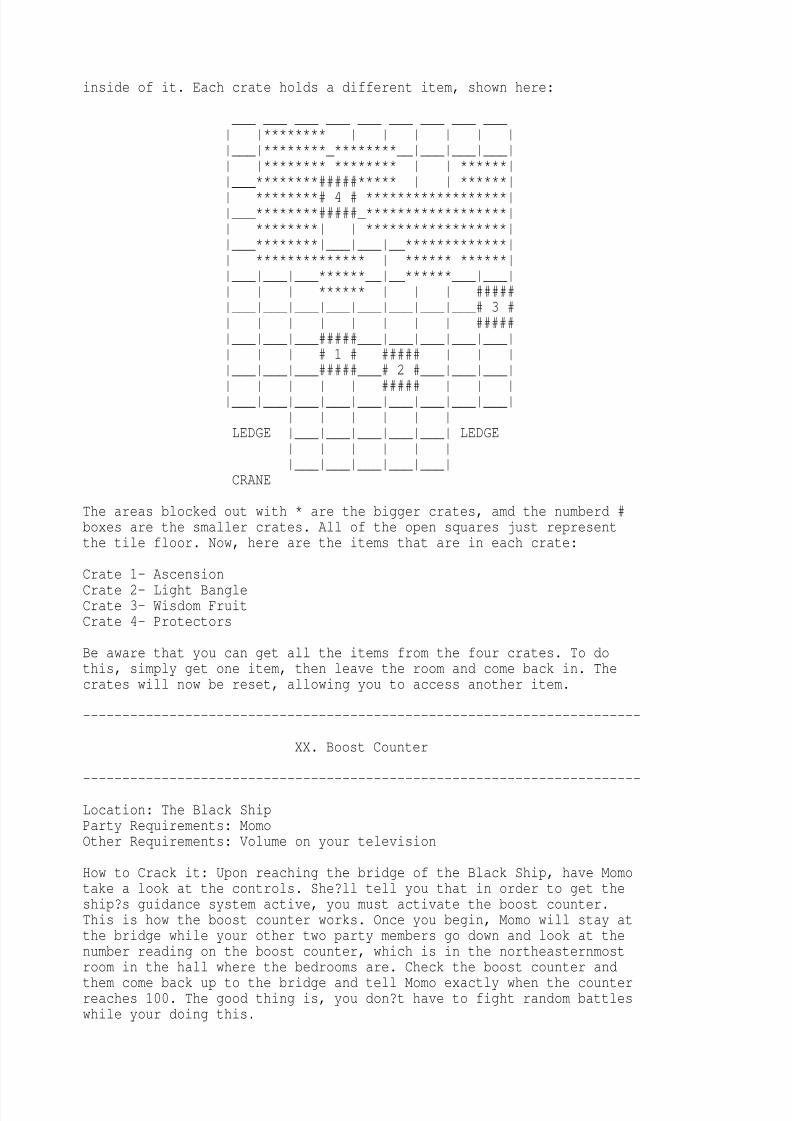
inside of it. Each crate holds a different item, shown here:
___ ___ ___ ___ ___ ___ ___ ___ ___ ******** ___********_********___________ ******** ******** ******___********#####***** ******
********# 4 # ******************___********#####_****************** ******** ******************___********________************* ************** ****** ******_________******____******______ ****** #####________________________# 3 # #####_________#####_______________ # 1 # ##### _________#####___# 2 #_________
##### ___________________________
LEDGE _______________ LEDGE _______________
CRANE
The areas blocked out with * are the bigger crates, amd the numberd #boxes are the smaller crates. All of the open squares just representthe tile floor. Now, here are the items that are in each crate:
Crate 1- Ascension
Crate 2- Light BangleCrate 3- Wisdom FruitCrate 4- Protectors
Be aware that you can get all the items from the four crates. To dothis, simply get one item, then leave the room and come back in. Thecrates will now be reset, allowing you to access another item.
-----------------------------------------------------------------------
XX. Boost Counter
-----------------------------------------------------------------------
Location: The Black ShipParty Requirements: MomoOther Requirements: Volume on your television
How to Crack it: Upon reaching the bridge of the Black Ship, have Momotake a look at the controls. She?ll tell you that in order to get theship?s guidance system active, you must activate the boost counter.This is how the boost counter works. Once you begin, Momo will stay atthe bridge while your other two party members go down and look at thenumber reading on the boost counter, which is in the northeasternmostroom in the hall where the bedrooms are. Check the boost counter and
them come back up to the bridge and tell Momo exactly when the counterreaches 100. The good thing is, you don?t have to fight random battleswhile your doing this.

8/8/2019 Breath Fire 3 Puzzles
http://slidepdf.com/reader/full/breath-fire-3-puzzles 21/30
Ok, here?s how it?s done. Leave the bridge via the stairs on the rightand ride down the elevator in this room. Go down the next set of stairsand head through the first door on the right side of this hallway toreach the boost counter room. Now, examine the panel in here and you?llsee the boost counter going up. Watch it for a little while, and whenyou?re ready to go back up to the bridge, be absolutely sure to
remember the last number you see on the counter. Also turn the on thevolume on your television. Now, when you close the counter screen,you?ll start hearing beeps. These beeps correspond to the boost counterwhere you left off after closing the screen. For example, if the lastnumber you saw on the boost counter was 40, then the first beep youhear will be 41, and the next beep will be 42, and the next 43, and soon. Now count the beeps carefully as you make your way back up the thebridge. Go stand right next to Momo when you get to the bridge and keepcounting the beeps. Once your count reaches 100, quickly talk to Momoand you will have done it!
-----------------------------------------------------------------------
XXI. Colony Portal Drive
-----------------------------------------------------------------------
Location: ColonyParty Requirements: MomoOther Requirements: None
How to Crack it: Once you pick up the Key that?s lying on the inactiveportal drive at the top of the Colony, make you way to east end of theColony and junp through the glass window near the chest containing aWisdom Fruit. Have Momo examine the controls in this room and put the
Key in. Now, you?ll notice that there are three big mirror-likereflectors in the middle of this room. In order to activate the portaldrive, you must get the laser at the southeast end of the room to hitthe fuse at the opposite end of the room. You are to use the bigmirrors to reflect the laser beam into the fuse. You can change theangle of the reflectors by hitting the buttons at their bases. In orderto reflect the laser into the fuse, you?ll want to have the mirrors setup like this:
FUSE____
___\___\____ \___\___\___\
\___\ --__ --
--__ -- --__ ----__
-- \ \ \
\ \

8/8/2019 Breath Fire 3 Puzzles
http://slidepdf.com/reader/full/breath-fire-3-puzzles 22/30
\ \ \
LASER
_______ \ \\ \\______\
If you?re having trouble with the diagram, then just turn the southernreflector two times, the eastern one two times, and the western onethree times. Then hit the switch for the laser and the portal drivewill be activated.
-----------------------------------------------------------------------
XXII. Relay Point A Beam Puzzle
-----------------------------------------------------------------------
Location: Relay Point A (Steel Beach Freighter)Party Requirements: NoneOther Requirements: None
How to Crack it: Early in your ascent of the Relay Point A antennatower, you?ll come across an area with four switches which control thefour beams in the area. You?ll need to use the switches to manipulatethe positions of the beams in order to get around in this area and
continue on with the mission. However, if you play around with theswitches you?ll notice that each switch can control more than one beam,and you can only hit each switch once without resetting them all. Toreset the switches and the beams, examine the green monument right nearthe switches. The big green monuments scattered throughout thesurrounding areas will tell you how each switch controls the beams.They are as follows:
North Switch (Brown) South Switch (Light Green)East Beam- No effect East Beam- No effectWest Beam- No effect West Beam- UpSouth Beam- No effect South Beam- UpNorth Beam- Up North Beam- Down
East Switch (Blue) West Switch (Red)East Beam- Up East Beam- DownWest Beam- Down West Beam- UpSouth Beam- No effect South Beam- No effectNorth Beam- Down North Beam- Down
Using this information, you can probably figure out how to position thebeams to get where you need to go. However, if you?re still stuck thenuse the following directions:
First, hit the blue switch, pass under the eastern beam, and go through
the door there. In this next room, head up the stairs, go to the right,and then go down the next set of stairs. Walk left along this path andpick up the Hourglass in the chest. Return to the four switches area

8/8/2019 Breath Fire 3 Puzzles
http://slidepdf.com/reader/full/breath-fire-3-puzzles 23/30

8/8/2019 Breath Fire 3 Puzzles
http://slidepdf.com/reader/full/breath-fire-3-puzzles 24/30
SS SS ------------------------
Step 2: Ride platform 2 downwards and get on platform 1 from the leftside, causing you to ride platform 3 over to the northeast corner ofthe pit.
Result of Step 2:
------------------------[1] [3]
SS SS [2] ------------------------
Step 3: Ride platform 2 up and then ride platform 3 to the left. Thiswill line up platform 3 with the pillar, allowing you to ride itdownwards to access the switch for the lock (shown by the line).
Result of Step 3:
------------------------[1][2] [3] SS SS ------------------------
Now if you?re having trouble with the diagrams, then simply followthese written directions. First, ride the platform in the northeastcorner to the left. Then ride the southernmost platform up to line upall three platforms in the northwest corner. Now, ride the rightmostplatform downward. Go back up to the northwest corner and ride the twoplatforms there to the right. Ride the southernmost platform up, andthen ride the platform in the northeast corner to the left. Get back onthat same platform and ride it downwards to reach the pillar in thecenter.
-----------------------------------------------------------------------
XXIV. Aligning the Antenna

8/8/2019 Breath Fire 3 Puzzles
http://slidepdf.com/reader/full/breath-fire-3-puzzles 25/30
-----------------------------------------------------------------------
Location: Relay Point A (Steel Beach Freighter)Party Requirements: NoneOther Requirements: Volume on your television
How to Crack it: This is quite easy. When you reach the top of Relay
Point A, you?ll have to align the big satellite dish there to get theportal drive out of auto-receive mode. To do this, simply point it inthe direction that has no static, hence why you need your television?svolume on to do this correctly. Turn the antenna so it?s facing to theleft to reduce the static and then adjust it?s position slightly untilyou hear practically no static noise at all. Once you do this you canuse all the portals in the game freely.
-----------------------------------------------------------------------
XXV. Workbot Puzzle
-----------------------------------------------------------------------
Location: FactoryParty Requirements: NoneOther Requirements: None
How to Crack it: In the last area of the Factory there are a bunch ofelectric livewire lines running along the floor, blocking your path tothe exit. The only way to turn off these livewire lines is to use theworkbot, the little robot amongst the switches in the middle of all thelivewire lines. To control the workbot, examine the panel on the bigblue platform south of where all the livewire lines are. This is how itworks. Once you activate the program, the workbot will move whenever
you move. So if you walk upwards, the workbot will move upwards as well.And if you stop moving, the workbot will also stop moving. Watch theworkbot as you move and try to position it near the switches. To hit aswitch, have the workbot face it and hit the Triangle button. Thesecret to reaching those switches is using the little cubic objects tomanipulate your range of movement. For example, move so that theworkbot gets up against one of the cubes, then keep moving in thatdirection. You?ll still be able to move and the workbot will be stuckthere. Then walk back in the opposite direction to allow the workbot tomove even farther than before.
This is how it?s done step by step, literally! Well first of all, whenI?m referring to direction, up means walking towards where the workbotis and down is walking towards the side with the stairs. Now, take twosteps to the left and one step down to end have the workbot end up onthe left side of one of the cubes. Walk right three steps and then goback left by one step. Head up one step, then left one step, and thenup one step again. Now take one more step to the left to position theworkbot in front of one of the switches. Hit it and then walk right onestep. Head south one step and then take two steps to the right to getthe workbot back behind one of the cubes. Take three steps downward,and then go back up by three steps to reach another switch. Flip theswitch and take two steps to the right to access the last switch.
-----------------------------------------------------------------------
XXVI. The Desert of Death

8/8/2019 Breath Fire 3 Puzzles
http://slidepdf.com/reader/full/breath-fire-3-puzzles 26/30
-----------------------------------------------------------------------
Location: Outside the northern side of the FactoryParty Requirements: NoneOther Requirements: Water Jug (explained below)
How to Crack it: Once you make it through the Factory wall, you?ll
emerge on the edge of the Desert of Death. Talk to Horis at the basecamp, and he?ll give you a list of help topics to choose from whichexplain how to travel in the desert. Here are the desert basics. In thedesert, you travel at night and make camp during the day. You are touse the stars in the night sky to navigate. There are three differentstars you have to worry about:
N1
3 2
W E
S
1. The North Star- This is your main navigation star. It will alwaysstay exactly to the north and never move.
2. Fake North Star- It will most always be to the northeast and itlooks very similar to the true north star. However, the fake north starcan move.
3. Evening Star- This star is usually somewhere in the northwestern or
western sky. It moves frequently depending on which direction you?rewalking in. It is easily distinguishable from the true and fake northstars.
Take note that it takes four turns to change a cardinal direction. Soif you?re facing north, it takes four turns to the right to be facingeast and four turns to the left to be facing west. Likewise, it takeseight turns to face the opposite direction.
As you walk through the desert, you?ll periodically need to drinkwater. To get some water, examine the big vase at base camp and pick up16 helpings of it. Only drink water when you are prompted to, and onlyuse one helping of water each time. If you go without water for toolong, you?ll start to take damage as you walk, and eventually your maxHP will begin to decrease, permanently! If you really want to stretchyour water supply, you can take about 20 steps after the prompt beforeyou begin to take damage. However, if you follow all the directionscarefully, you shouldn?t run the risk of running out of water. You?llend up using 1-2 servings of water per night.
You?ll also be forced into random battlefields while going through thedesert. Be aware that some of the enemies you fight in the desert areweak against ice magic, with the exception of the Scorpion, whoseweakness is electricity. Be sure to check all the random battlefieldsthoroughly, as there can be more than one prize in some instances. Also,
you may frequently come across unusually good items, such as SwallowEyes and Moon Tears. You?ll encounter about 2-3 random battlefieldsper night.

8/8/2019 Breath Fire 3 Puzzles
http://slidepdf.com/reader/full/breath-fire-3-puzzles 27/30
When exactly you make and break camp is also important. Only make campafter the sun has completely risen and you get a prompt to make camp.To set up camp, simply press start. Exactly half of a day passes whenyou rest at camp. If you make camp before the night is completely over,it?ll still be daytime after you rest. And also, do NOT follow thedirections that are on Horis?s memo. Although he gives you the right
instructions when you talk to him, the directions he has written downare wrong, so don?t heed them.
Lastly, if you get lost, simply make camp and talk to the rakda (thelittle camel looking creature), and you?ll be able to automaticallyreturn to the base camp outside the Factory (Note- If you?ve alreadymade it to the Oasis once, you may also choose to return there as well).
Directions:
The directions to the Oasis that Horis gives you can be difficult tofollow, so I have also provided two more simple methods of reaching the
Oasis. However, I?ll begin with Horis?s instructions:
First, walk north for two nights. The evening star should now bedirectly to the west. Walk east, away from the evening star, until itsinks below the horizon, which should occur after about two and a halfnights. Make sure you check the evening star periodically while doingthis. Then continue north until you reach the Oasis, which takes aboutthree nights.
Here are two quicker and simpler ways to reach the Oasis:
From the start, walk north for two nights. Now, turn twice to the rightso that you?re facing the fake north star. Follow the fake north star
and you?ll reach the Oasis after four nights.
Now, here?s the easiest way to get to the Oasis. Take one turn to theright while facing the north star, and you?ll be facing right betweenthe true north star and the fake north star. Now just walk in thatdirection to reach the Oasis within six nights.
***Note- Regardless of which directions you follow, right before youactually reach the Oasis, you?ll have to fight the Manmo boss.Afterwards, you are put into a situation in which you must kill yourrakda.
Side Trips:
After you get to the Oasis, there are a few other trips you can takeinto the desert to get some nice items, which include the Royal Sword,Life Armor, Death Claws, and Speed Boots. Talk to the strange manhanging out in the Oasis item shop to get some hints about where tolook for these items. However, I wouldn?t recommend taking these tripsunless you are unable to get these pieces of equipment by trading atthe Manillo shop near Kombinat (Note- You cannot find the Death Clawsanywhere else, and Speed Boots can be traded for at the Manillo shopnear Cliff). But if you are going to take these extra trips, be sure toget some wore water in the Oasis before heading back out. Now here arethe directions:
Royal Sword- Leave from the Oasis and head west for four nights.Afterwards walk south, and you?ll find the sword in a random

8/8/2019 Breath Fire 3 Puzzles
http://slidepdf.com/reader/full/breath-fire-3-puzzles 28/30

8/8/2019 Breath Fire 3 Puzzles
http://slidepdf.com/reader/full/breath-fire-3-puzzles 29/30
+ n n n n n + + + - - - - - - n n n n + + + + + n n n- n n n n - - - - + n n n n n - - o n n n n n + n n n
***Note- Highlighting the diagram may make it easier to read.***
To get this configuration, adjust Grid 1 two clicks to the left, Grid 2
two clicks to the right, and Grid 3 one click to the left. This willcreate a nice, clear path across the electric floor.
=======================================================================
4. Acknowledgments and Closing
=======================================================================
I?d like to thank the following for either help or inspiration on myguide:
Capcom- For making one heck of an RPG, and a heck of a series for thatmatter.
Game FAQs- For providing a website where gamers can share their secretsand expertise with others.
All the contributors to Game FAQs- The site wouldn?t exist withoutthose who put time and effort into writing the FAQs.
Neoseeker and IGN- Other great gaming websites.
AnybodyKilla- Whose frustrating struggle through some of these mini
games somewhat inspired me to make this FAQ.
----------------COPYRIGHT NOTICE----------------
This document Copyright 2003 David Kovaz. This document is not to bereproduced and/or distributed in any way for profit. It is not to bereproduced and/or distributed at all without the author's prior writtenconsent and approval. This document is not to appear anywhere withoutthe author?s alias (DavidK519, DKK5, or David Kovaz) in or attached toit. This document is not to appear anywhere in an altered or incompleteform. This document is not to be used as a reference for anypublication unless proper credit is given to the author and the source.
Most recently updated versions of this guide can be found at:
http://www.gamefaqs.comhttp://faqs.ign.comhttp://neoseeker.com
*Breath of Fire III: Mini-Game/Puzzle FAQ* by DavidK519
</features/recognition/23453.html>Version 6.0, Last Updated 2005-07-02 View/Download Original File<http://dw.com.com/redir?asid=0&astid=8&siteid=19&edid=107&destCat=&destURL=http

8/8/2019 Breath Fire 3 Puzzles
http://slidepdf.com/reader/full/breath-fire-3-puzzles 30/30
%3A%2F%2Fdb.gamefaqs.com%2Fconsole%2Fpsx%2Ffile%2Fbreath_of_fire_iii_minigame.txt>
Hosted by GameFAQs </>Return to *Breath of Fire III (PSP) FAQs & Guides*</portable/psp/game/928759.html>


![[mangá] breath of fire ryuu no senshi volume 02](https://static.fdocuments.us/doc/165x107/568ca7a41a28ab186d962694/manga-breath-of-fire-ryuu-no-senshi-volume-02.jpg)
