Bmw e39 m57 Thermostat Replacement
12
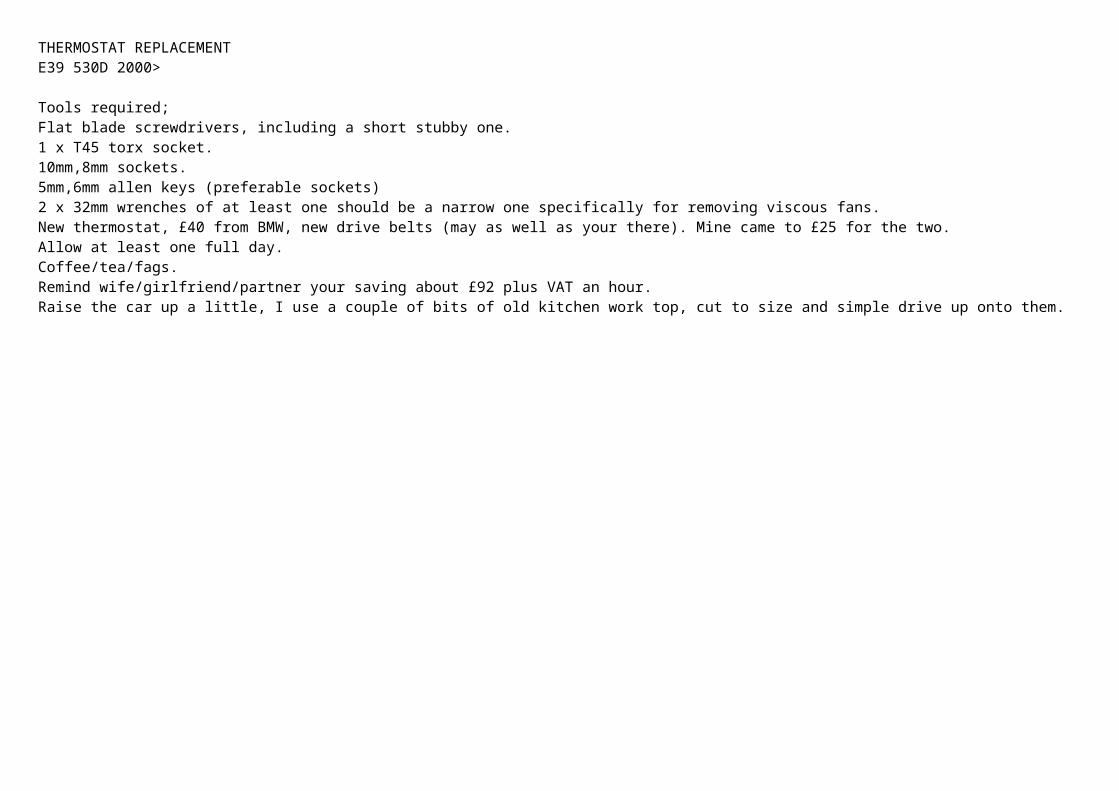
THERMOSTAT REPLACEMENT E39 530D 2000> Tools required; Flat blade screwdrivers, including a short stubby one. 1 x T45 torx socket. 10mm,8mm sockets. 5mm,6mm allen keys (preferable sockets) 2 x 32mm wrenches of at least one should be a narrow one specifically for removing viscous fans. New thermostat, £40 from BMW, new drive belts (may as well as your there). Mine came to £25 for the two. Allow at least one full day. Coffee/tea/fags. Remind wife/girlfriend/partner your saving about £92 plus VAT an hour. Raise the car up a little, I use a couple of bits of old kitchen work top, cut to size and simple drive up onto them.
-
Upload
bogdan-stefan -
Category
Documents
-
view
867 -
download
26
Transcript of Bmw e39 m57 Thermostat Replacement
THERMOSTAT REPLACEMENTE39 530D 2000>
Tools required;Flat blade screwdrivers, including a short stubby one.1 x T45 torx socket.10mm,8mm sockets.5mm,6mm allen keys (preferable sockets)2 x 32mm wrenches of at least one should be a narrow one specifically for removing viscous fans.New thermostat, £40 from BMW, new drive belts (may as well as your there). Mine came to £25 for the two.Allow at least one full day.Coffee/tea/fags.Remind wife/girlfriend/partner your saving about £92 plus VAT an hour.Raise the car up a little, I use a couple of bits of old kitchen work top, cut to size and simple drive up onto them.
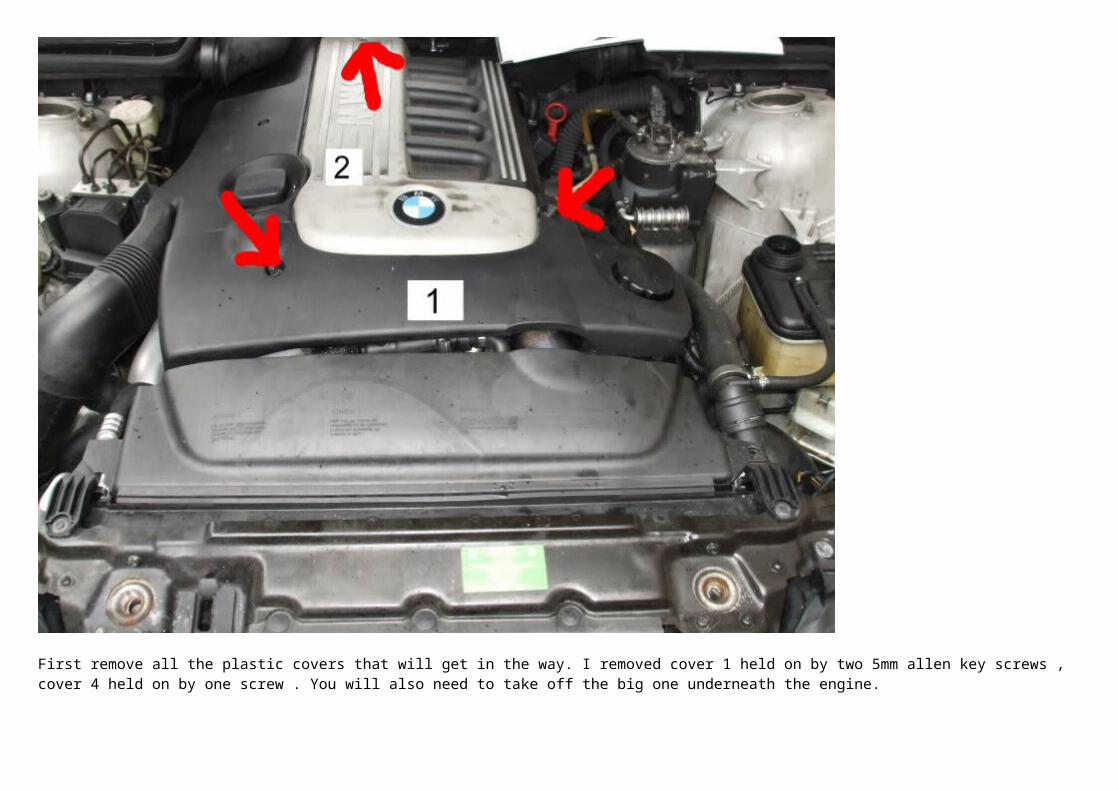
First remove all the plastic covers that will get in the way. I removed cover 1 held on by two 5mm allen key screws , cover 4 held on by one screw . You will also need to take off the big one underneath the engine.
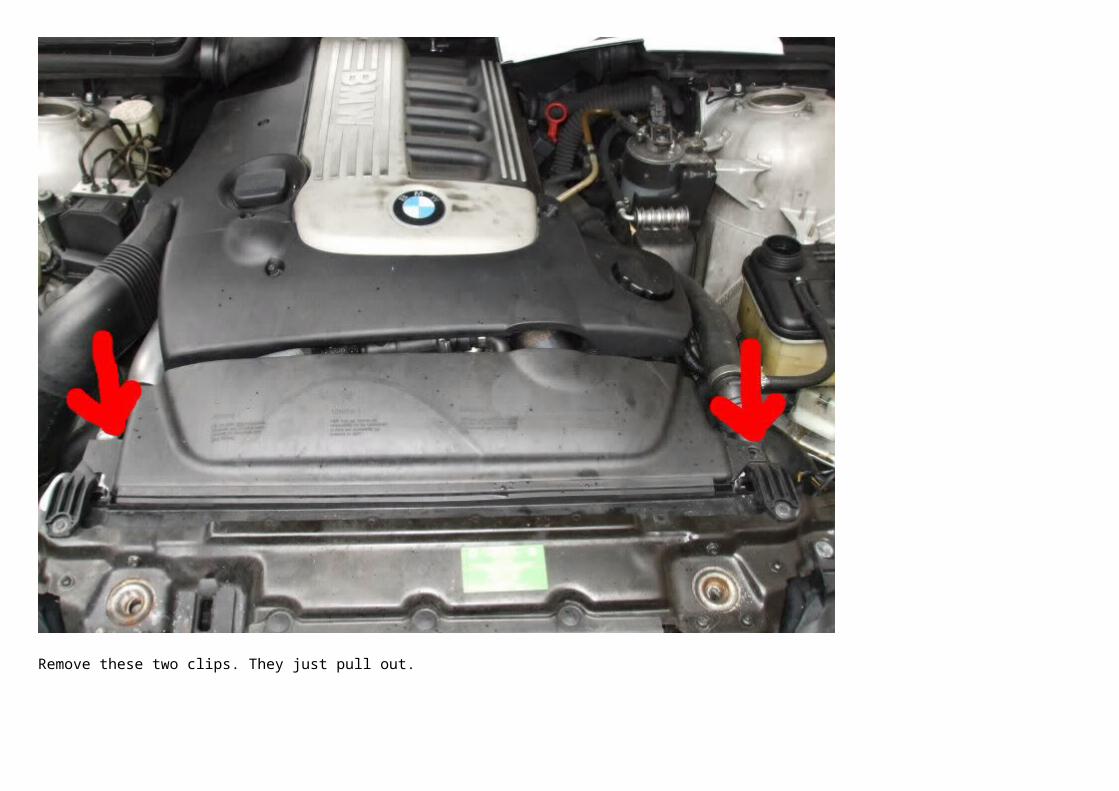
Remove these two clips. They just pull out.
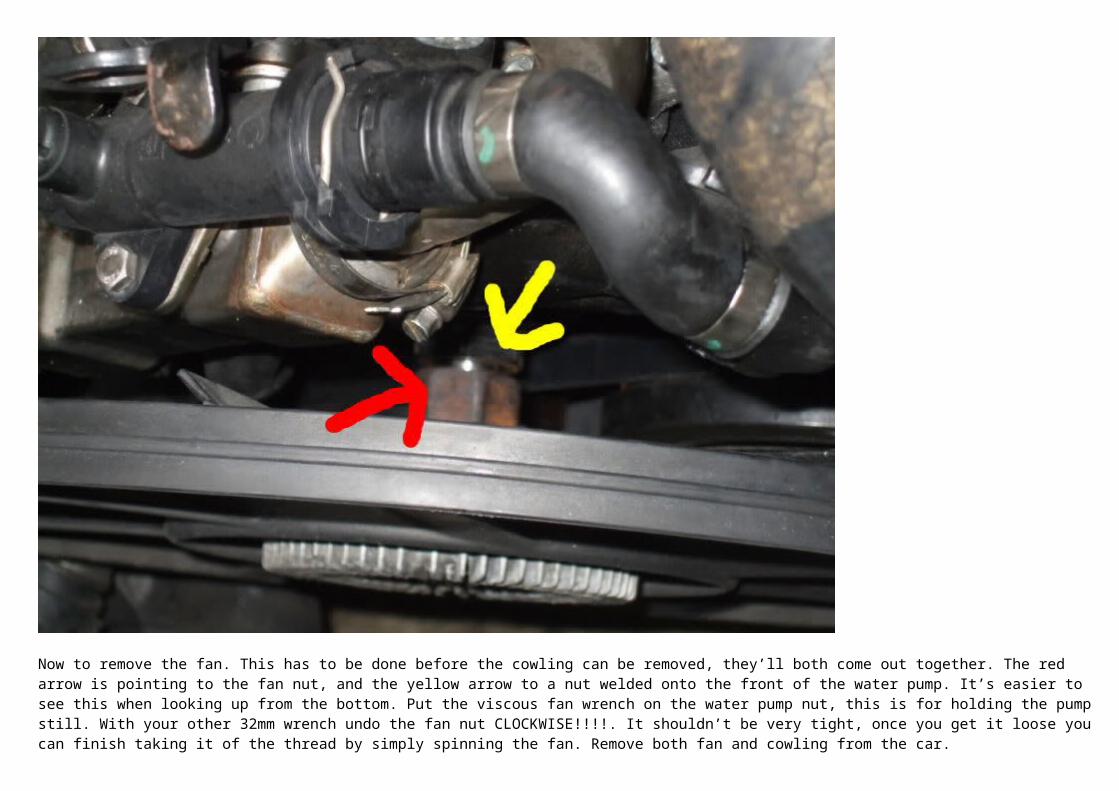
Now to remove the fan. This has to be done before the cowling can be removed, they’ll both come out together. The red arrow is pointing to the fan nut, and the yellow arrow to a nut welded onto the front of the water pump. It’s easier to see this when looking up from the bottom. Put the viscous fan wrench on the water pump nut, this is for holding the pump still. With your other 32mm wrench undo the fan nut CLOCKWISE!!!!. It shouldn’t be very tight, once you get it loose you can finish taking it of the thread by simply spinning the fan. Remove both fan and cowling from the car.
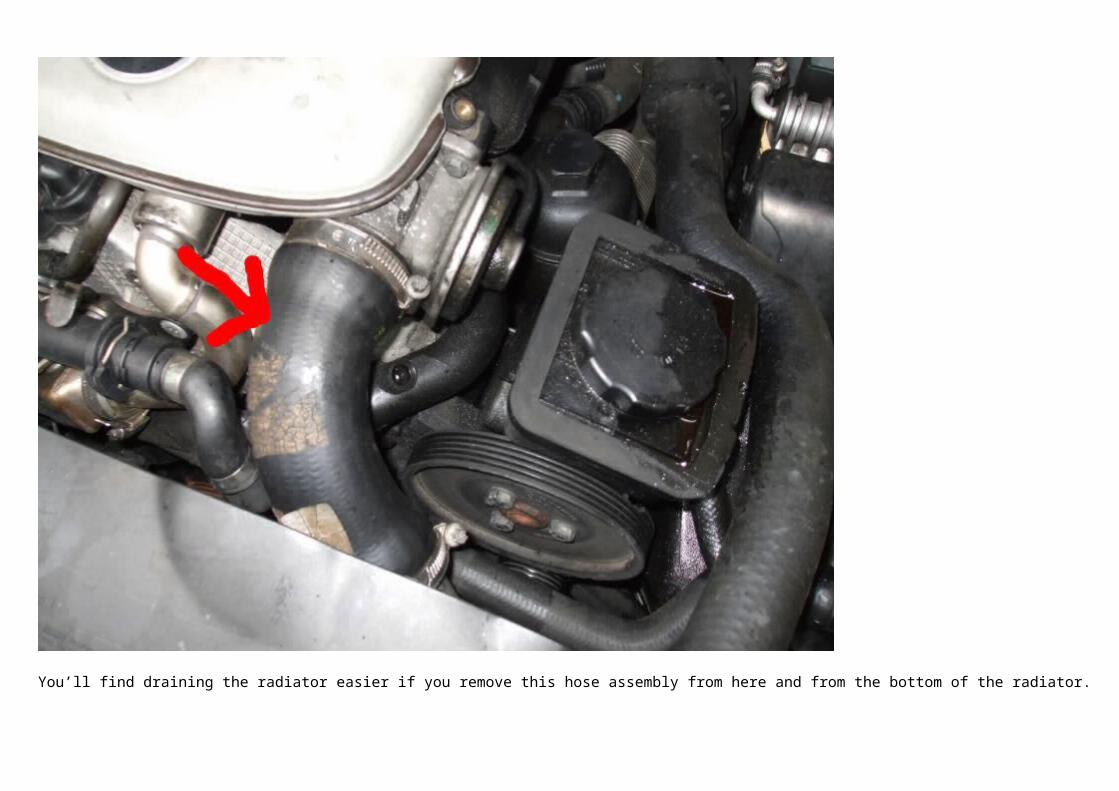
You’ll find draining the radiator easier if you remove this hose assembly from here and from the bottom of the radiator.
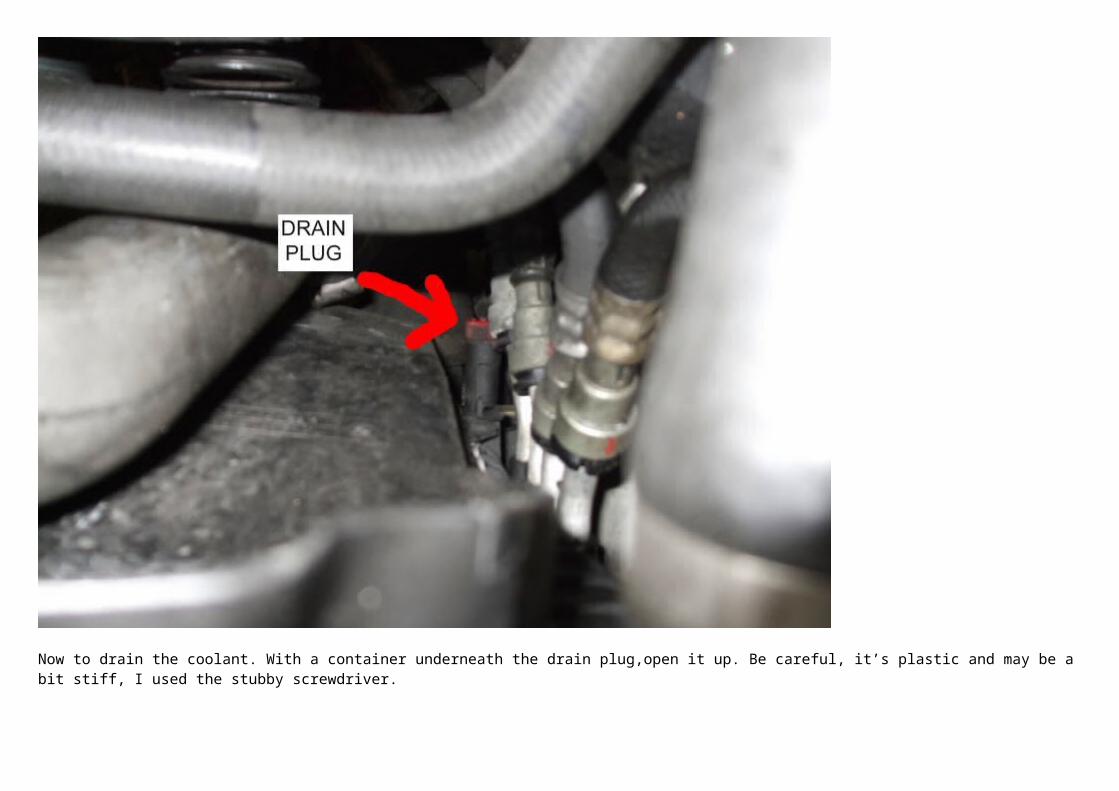
Now to drain the coolant. With a container underneath the drain plug,open it up. Be careful, it’s plastic and may be a bit stiff, I used the stubby screwdriver.
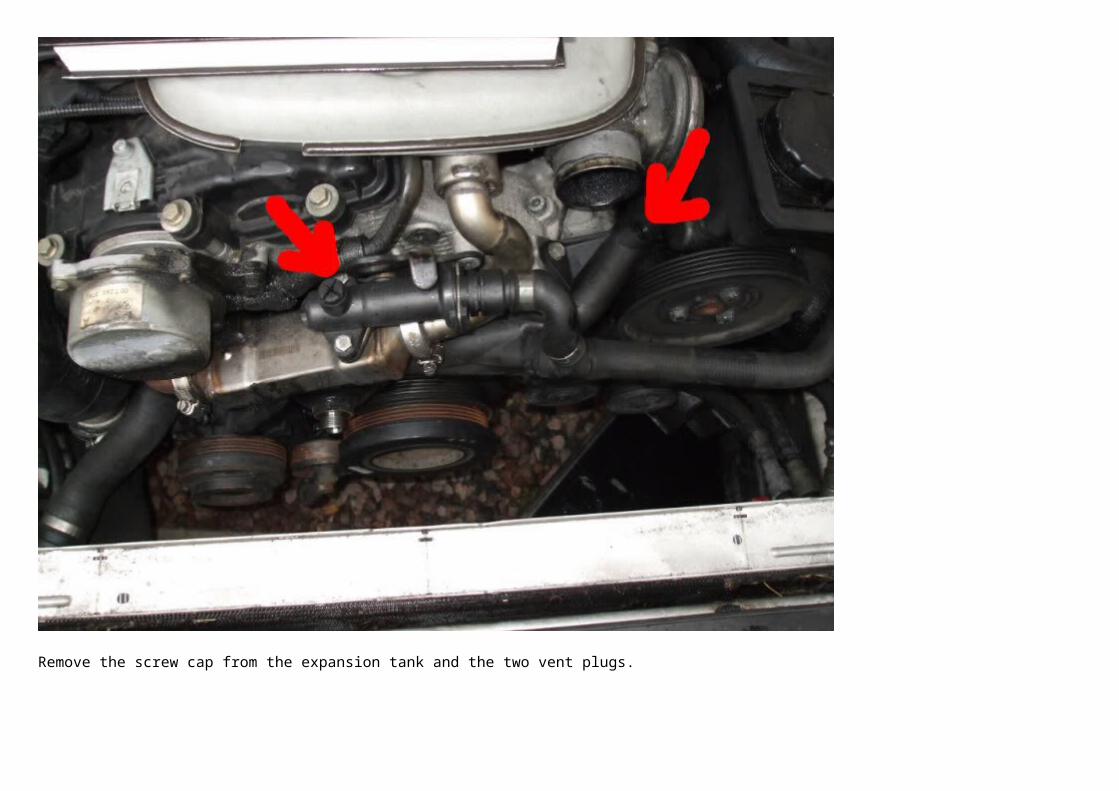
Remove the screw cap from the expansion tank and the two vent plugs.
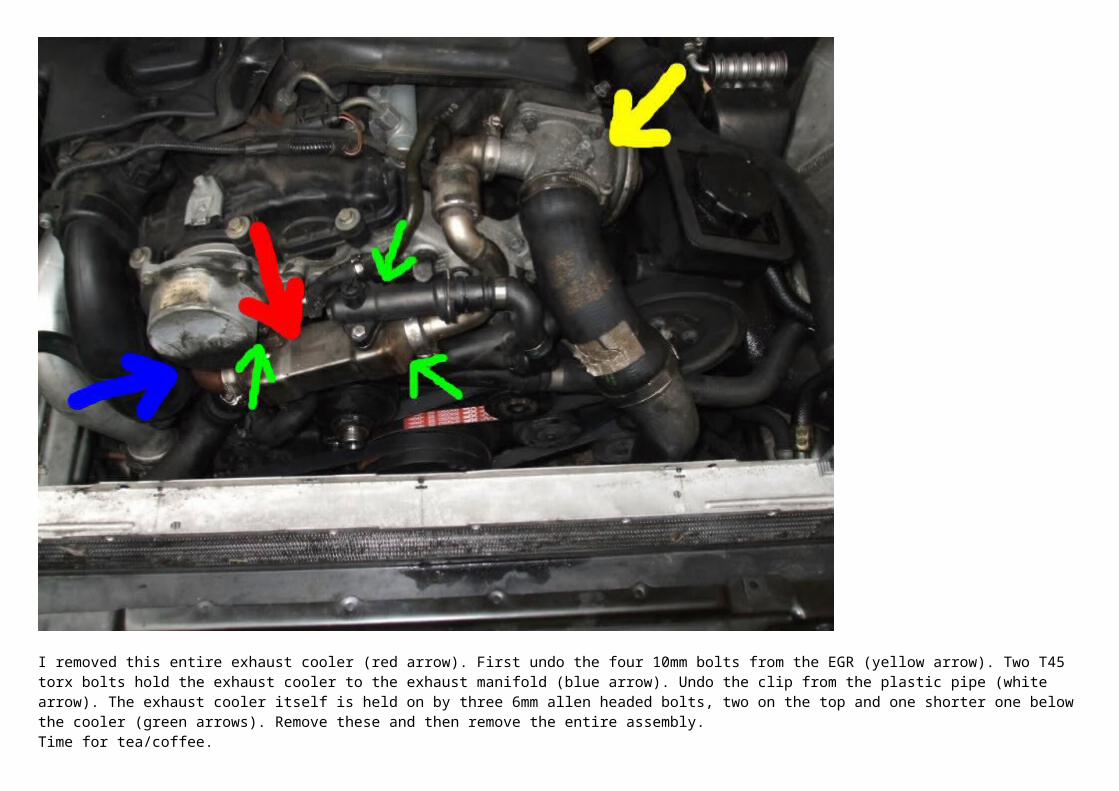
I removed this entire exhaust cooler (red arrow). First undo the four 10mm bolts from the EGR (yellow arrow). Two T45 torx bolts hold the exhaust cooler to the exhaust manifold (blue arrow). Undo the clip from the plastic pipe (white arrow). The exhaust cooler itself is held on by three 6mm allen headed bolts, two on the top and one shorter one below the cooler (green arrows). Remove these and then remove the entire assembly.Time for tea/coffee.
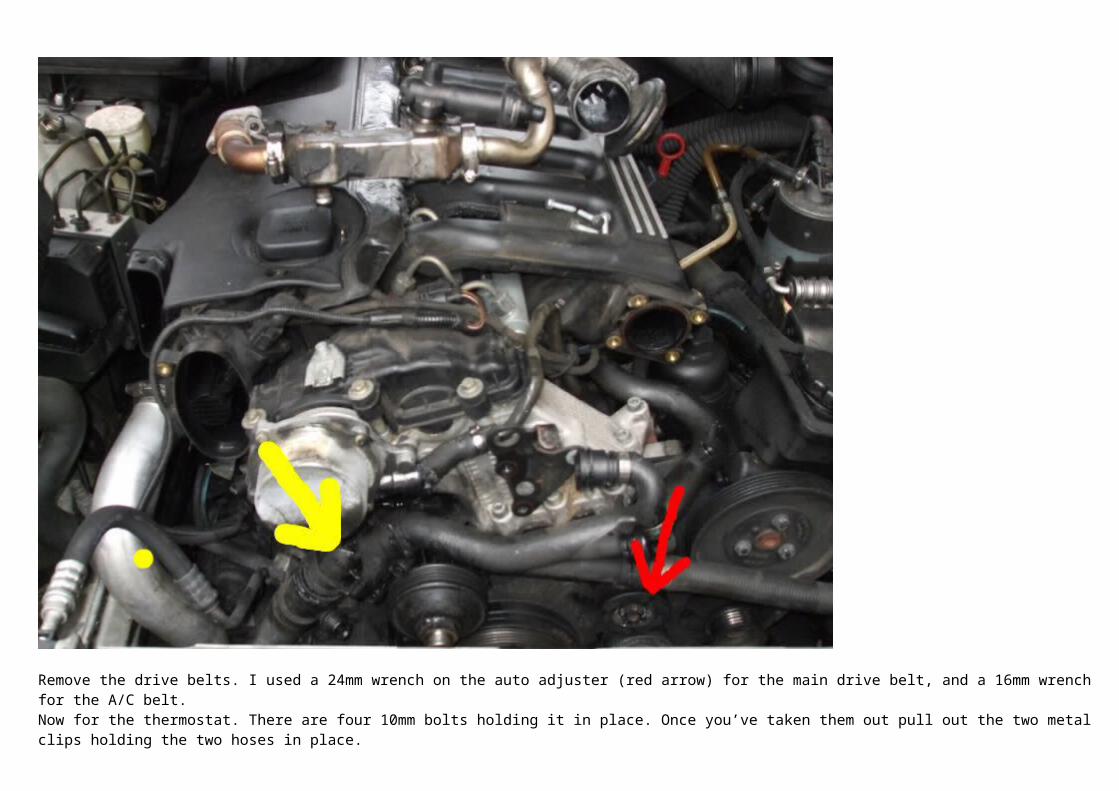
Remove the drive belts. I used a 24mm wrench on the auto adjuster (red arrow) for the main drive belt, and a 16mm wrench for the A/C belt. Now for the thermostat. There are four 10mm bolts holding it in place. Once you’ve taken them out pull out the two metal clips holding the two hoses in place.
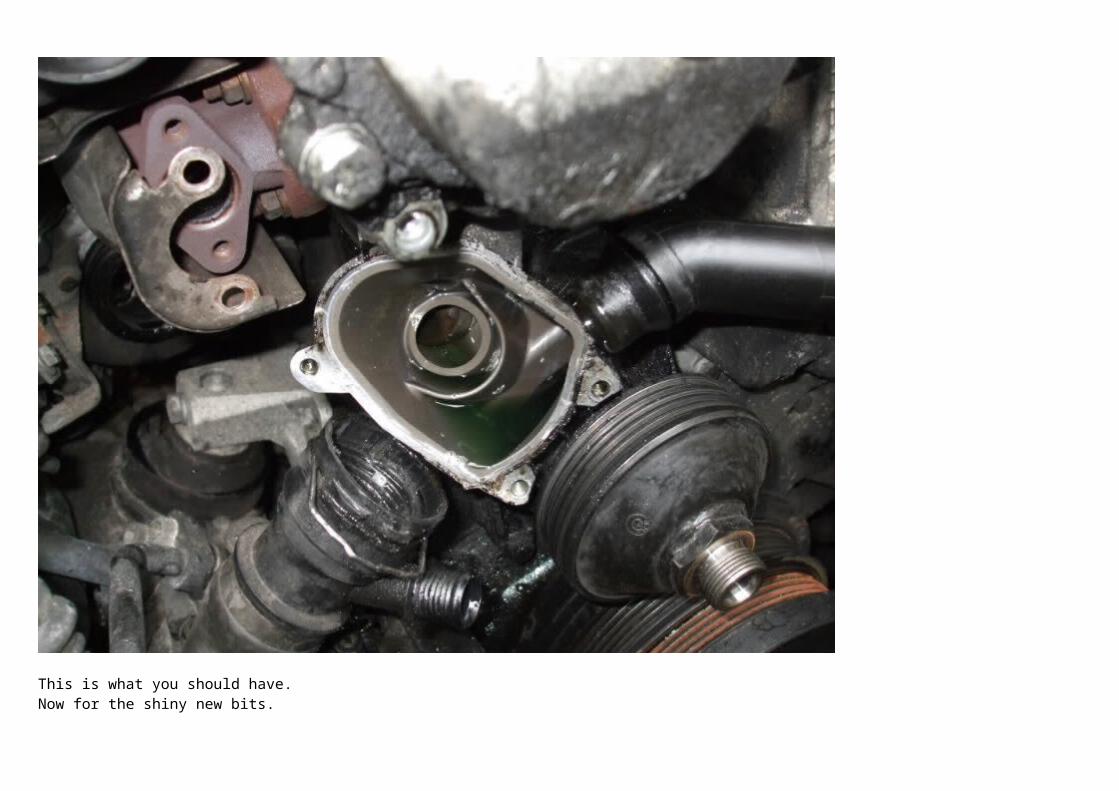
This is what you should have.Now for the shiny new bits.
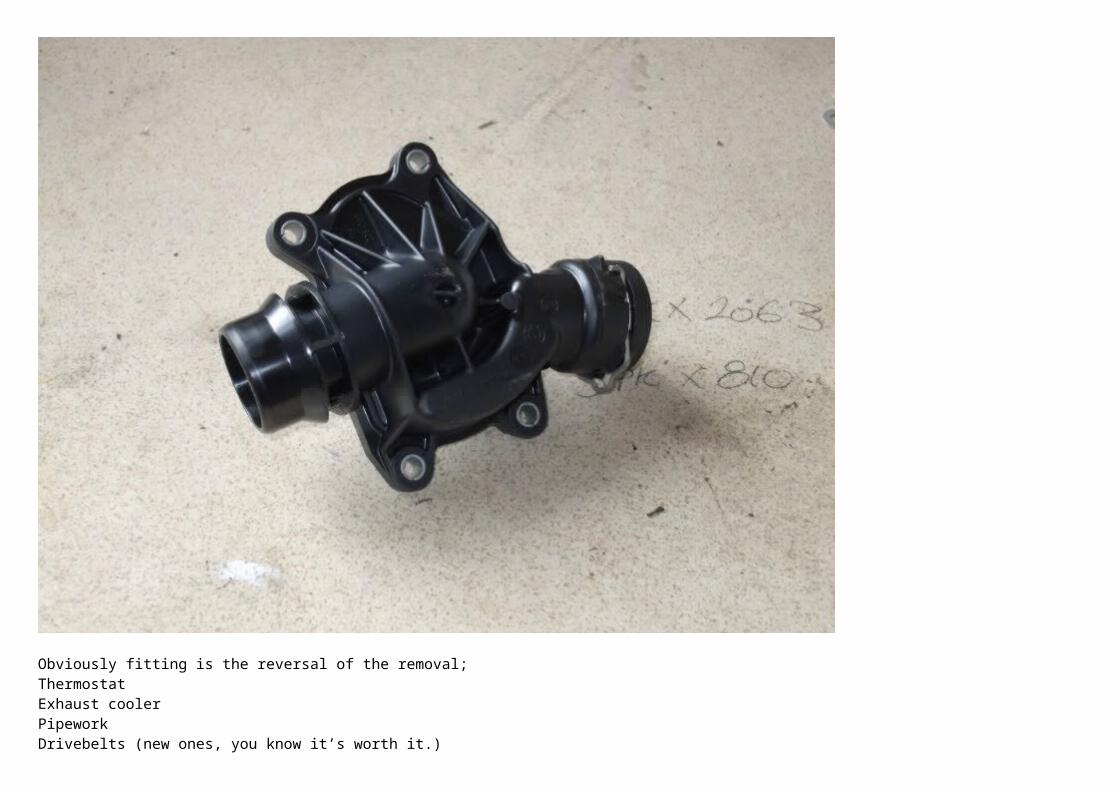
Obviously fitting is the reversal of the removal;ThermostatExhaust coolerPipeworkDrivebelts (new ones, you know it’s worth it.)
I refilled the coolant system and fitted just the fan in order to start the car and check for leaks, don’t forget the bleed plugs.Once your happy remove the fan and refit with the cowling.Lock your car go inside tell the wife/girlfriend/partner what a traumatic experience it was and could they run you a bath. Sit back, enjoy and plan what your gonna spend the several hundred quid you just saved on.


![Mounting Brackets E39-L/F39-L - ValinOnline.com Brackets E39-L/F39-L Slits/Reflectors E39-S/E39-R Mounting Brackets [Refer to Dimensions on page 5.] Model ... Iron, zinc plating Iron,](https://static.fdocuments.us/doc/165x107/5af21a677f8b9ad0619041f5/mounting-brackets-e39-lf39-l-brackets-e39-lf39-l-slitsreflectors-e39-se39-r.jpg)