Blogging Have Something to Say? -...
25
Objective During this session, we will introduce you to the fundamentals of blogging: setting up a blog, creating content, and promoting your new creation. We will also review examples of fantastic and not-so-great blogs and basic blogging etiquette. Overview Introduction Signing Out and Signing In Terms and Definitions Dashboard Example Blogs Etiquette Creating a Blog Finding other Blogs Posting Blogging Have Something to Say?
Transcript of Blogging Have Something to Say? -...
Objective During this session, we will introduce you to the fundamentals of blogging: setting up a blog, creating content, and promoting your new creation. We will also review examples of fantastic and not-so-great blogs and basic blogging etiquette.
Overview
Introduction Signing Out and Signing In Terms and Definitions Dashboard Example Blogs Etiquette Creating a Blog Finding other Blogs Posting
Blogging Have Something to Say?
©Ann Arbor District Library 1
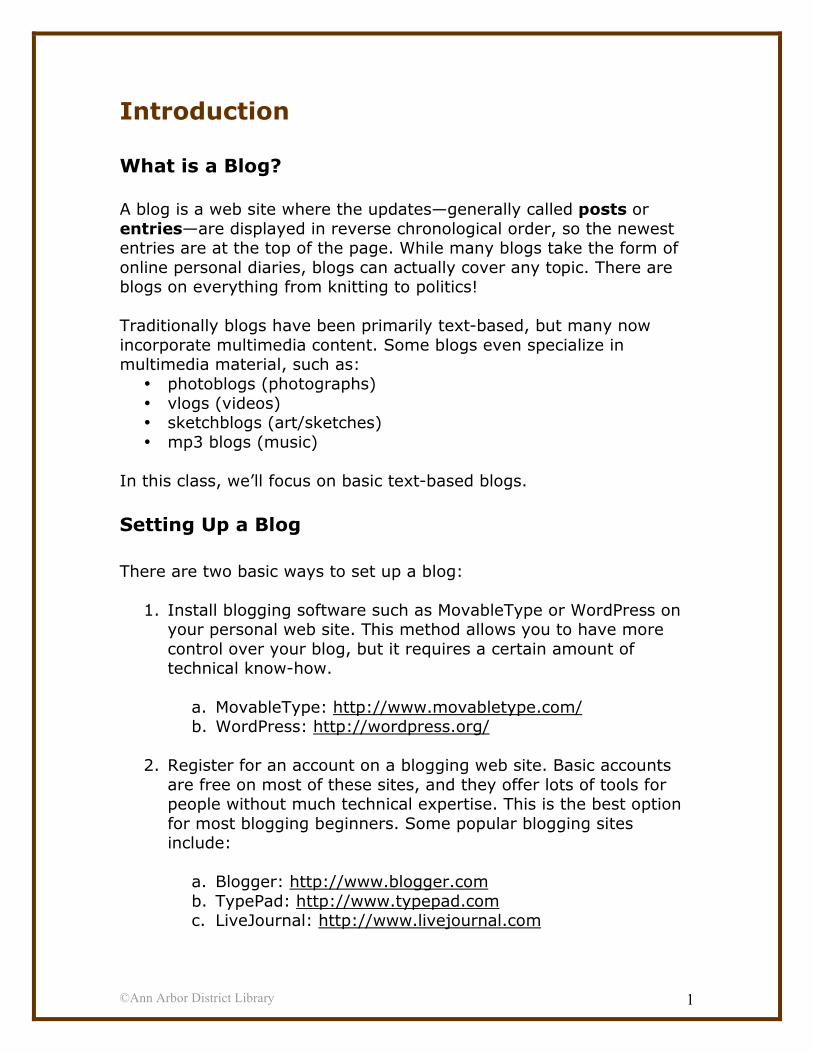
Introduction What is a Blog? A blog is a web site where the updates—generally called posts or entries—are displayed in reverse chronological order, so the newest entries are at the top of the page. While many blogs take the form of online personal diaries, blogs can actually cover any topic. There are blogs on everything from knitting to politics! Traditionally blogs have been primarily text-based, but many now incorporate multimedia content. Some blogs even specialize in multimedia material, such as:
• photoblogs (photographs) • vlogs (videos) • sketchblogs (art/sketches) • mp3 blogs (music)
In this class, we’ll focus on basic text-based blogs. Setting Up a Blog There are two basic ways to set up a blog:
1. Install blogging software such as MovableType or WordPress on your personal web site. This method allows you to have more control over your blog, but it requires a certain amount of technical know-how.
a. MovableType: http://www.movabletype.com/ b. WordPress: http://wordpress.org/
2. Register for an account on a blogging web site. Basic accounts
are free on most of these sites, and they offer lots of tools for people without much technical expertise. This is the best option for most blogging beginners. Some popular blogging sites include:
a. Blogger: http://www.blogger.com b. TypePad: http://www.typepad.com c. LiveJournal: http://www.livejournal.com

©Ann Arbor District Library 2
Terms and Definitions Did you know the Ann Arbor District Library’s web site is made up of many blogs? Let’s take a look at an AADL blog to go over the basics.
1. From the AADL.org homepage, click on the “Catalog” link at the top menu bar or type http://www.aadl.org/catalog into the address bar.
2. On the catalog page, you will see links to some of the library’s blogs on the left hand menu.
3. Click on the “Audio Blog” link. Take a look at the features of the first post.
5
3 4
2 1
©Ann Arbor District Library 3
1. Post or entry: A single update to a blog. Posts almost always have a title, a date, and a time stamp.
2. Comments: Feedback left by visitors to the blog on specific posts. You’ll usually find a link to leave comments at the end of a post.
3. Tags: Labels for posts, selected by the blogger, that describe its content. To see more posts with the same tag (that is, similar content), click on the tag link.
4. Permalink: Stands for “permanent link.” Because blogs are frequently updated, there is no guarantee that the post at the top of the page on Monday will be still be at the top of the page on Friday; it may be several posts down. For this reason, each post on a blog usually has a permalink that will take you directly to that post no matter how much time has passed. Permalinks are usually found at the beginning or end of the post. Often the post title is a permalink.
5. RSS: Stands for “RDF Site Summary” or “Really Simple Syndication.” This is a technology that allows your blog to send automatic updates or notifications to anyone who has subscribed to your blog’s RSS feed through a feed reader (also known as a “RSS reader” or “aggregator”). This functionality is generally built into a blogging site’s set of features. Browsers can tell you if an RSS feed is available for a specific web site. In Firefox, a small orange image (see right) appears in the address bar of the browser when an RSS feed is available.
6. Trackback: Also called “Linkback” or “Pingback.” This is a way for web site owners to request notification when someone links to their post. Some blogging sites have this functionality built in to their set of features. The AADL blogs don’t use Trackback. I’ll be sure to show you some blogs that do before we’re done!
©Ann Arbor District Library 4
Example Blogs What are some features of popular and well-liked blogs?
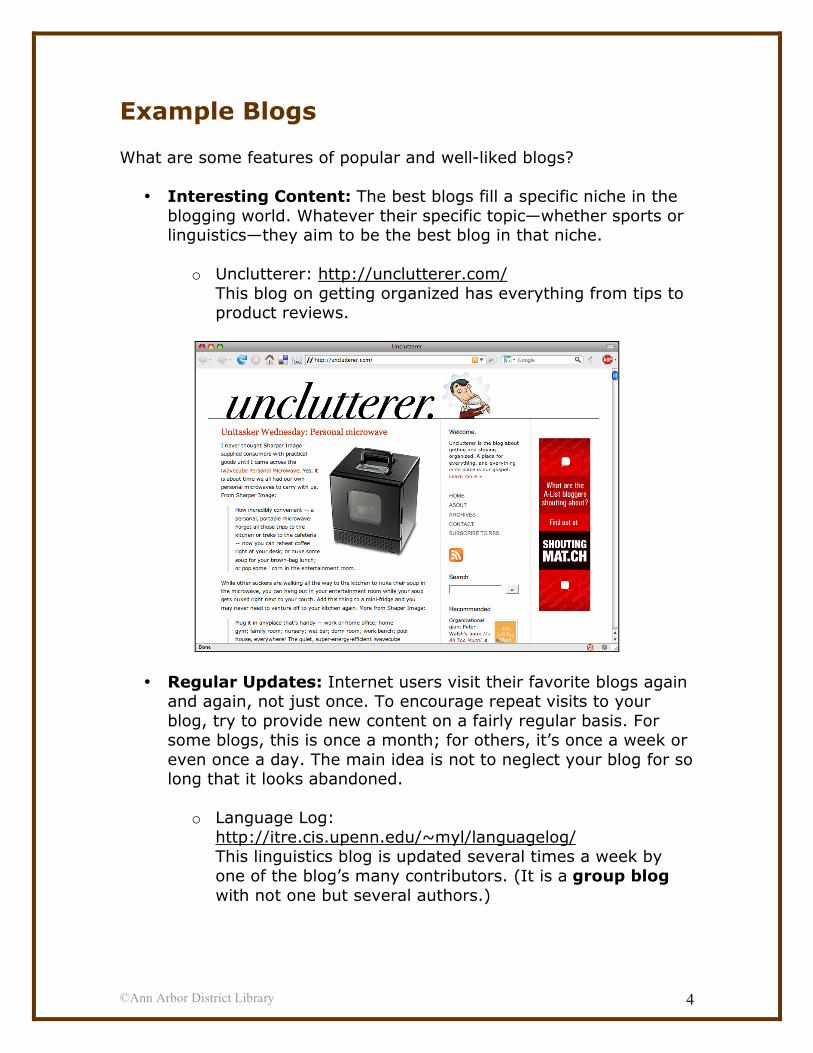
• Interesting Content: The best blogs fill a specific niche in the blogging world. Whatever their specific topic—whether sports or linguistics—they aim to be the best blog in that niche.
o Unclutterer: http://unclutterer.com/ This blog on getting organized has everything from tips to product reviews.
• Regular Updates: Internet users visit their favorite blogs again and again, not just once. To encourage repeat visits to your blog, try to provide new content on a fairly regular basis. For some blogs, this is once a month; for others, it’s once a week or even once a day. The main idea is not to neglect your blog for so long that it looks abandoned.
o Language Log: http://itre.cis.upenn.edu/~myl/languagelog/ This linguistics blog is updated several times a week by one of the blog’s many contributors. (It is a group blog with not one but several authors.)

©Ann Arbor District Library 5
• Images and Links: Enrich the content of your blog by including
images and links to other web sites. For example, if you’re writing about a book you just read, try including a link to the author’s web site or the book’s page on Amazon.com. If you’re commenting on a news article, include a link to that article.
o Brooklyn Tweed: http://brooklyntweed.blogspot.com/
This knitting blogger includes gorgeous photos of his current and completed projects
• Organization: The best blogs are organized so it’s easy for readers to find past posts of interest. Imagine a reader comes to your blog to read your excellent post on a new CD; don’t you want them to be able to find your other music reviews? Blogging software and web sites have organization features built into them, such as calendars, but the best blogs also take advantage of tagging (labeling posts by category) to improve organization.
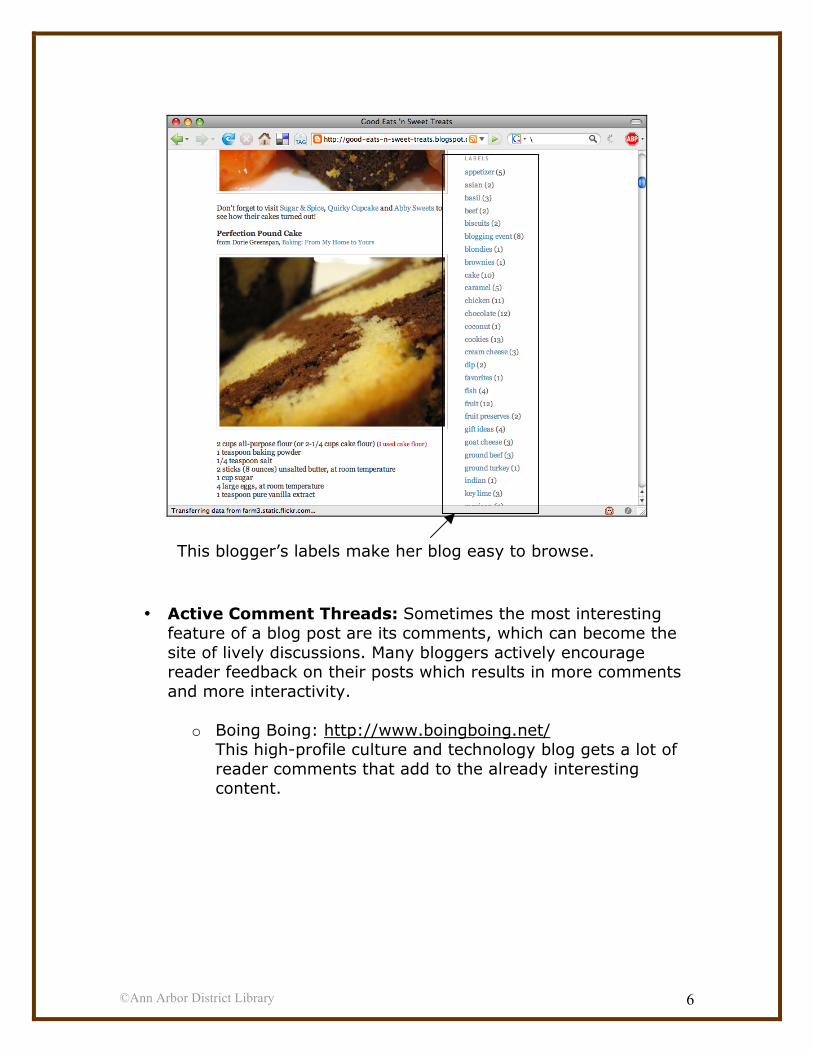
o Good Eats ‘N Sweet Treats:
http://good-eats-n-sweet-treats.blogspot.com/ This food blog uses labels (linked from the right sidebar) to help readers find past posts with recipes that will interest them.
©Ann Arbor District Library 6
• Active Comment Threads: Sometimes the most interesting
feature of a blog post are its comments, which can become the site of lively discussions. Many bloggers actively encourage reader feedback on their posts which results in more comments and more interactivity.
o Boing Boing: http://www.boingboing.net/
This high-profile culture and technology blog gets a lot of reader comments that add to the already interesting content.
This blogger’s labels make her blog easy to browse.

©Ann Arbor District Library 7
Creating a Blog In this class, we’ll be setting up a blog at Blogger, a blogging service owned by Google. All of the major blogging services are fairly similar, so learning how to set up a blog at Blogger will be helpful even if you decide to use a different service later. The first part of this process differs depending on whether you do or do not already have an existing Google account. Your Google Account First, go to the Blogger start page by typing the following URL into the address bar of your browser: http://www.blogger.com/ You’ll come to a page that looks like this.
Sign in here with your existing Google account
Click here if you don’t have a Google account.
©Ann Arbor District Library 8
If you already have a Google account, go to 1a. If you do not already have a Google account, go to 1b. 1a. Signing into your Google account
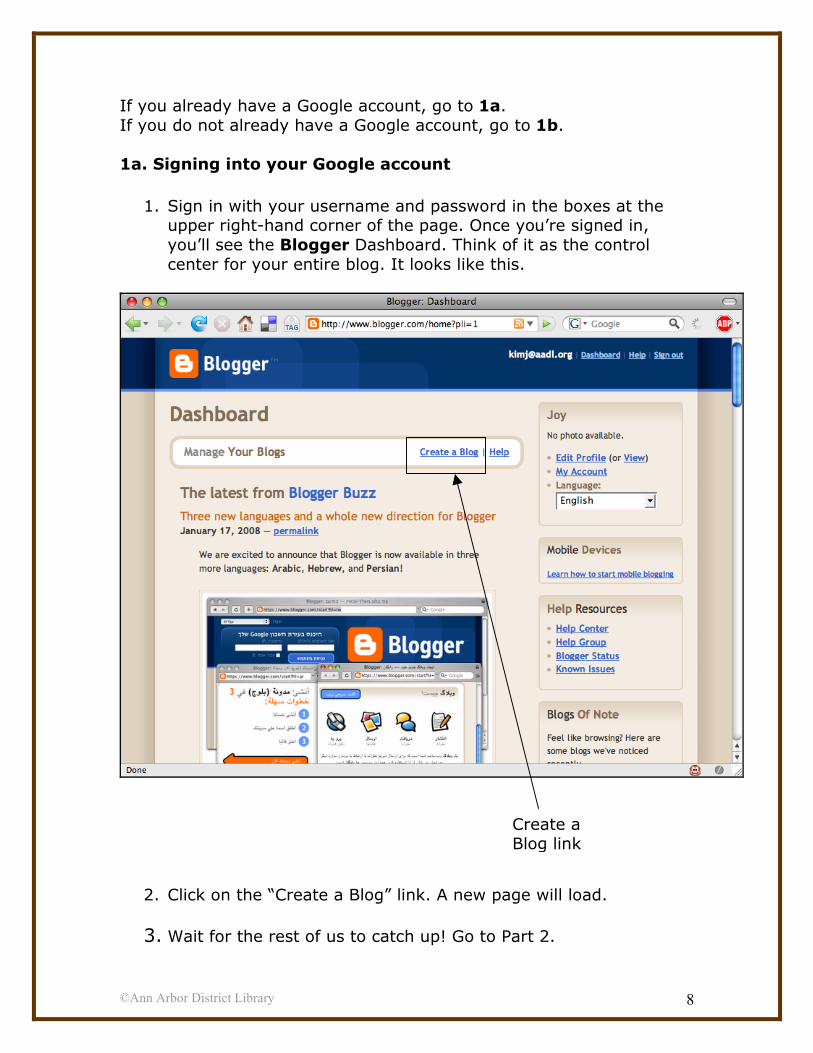
1. Sign in with your username and password in the boxes at the upper right-hand corner of the page. Once you’re signed in, you’ll see the Blogger Dashboard. Think of it as the control center for your entire blog. It looks like this.
2. Click on the “Create a Blog” link. A new page will load.
3. Wait for the rest of us to catch up! Go to Part 2.
Create a Blog link
©Ann Arbor District Library 9
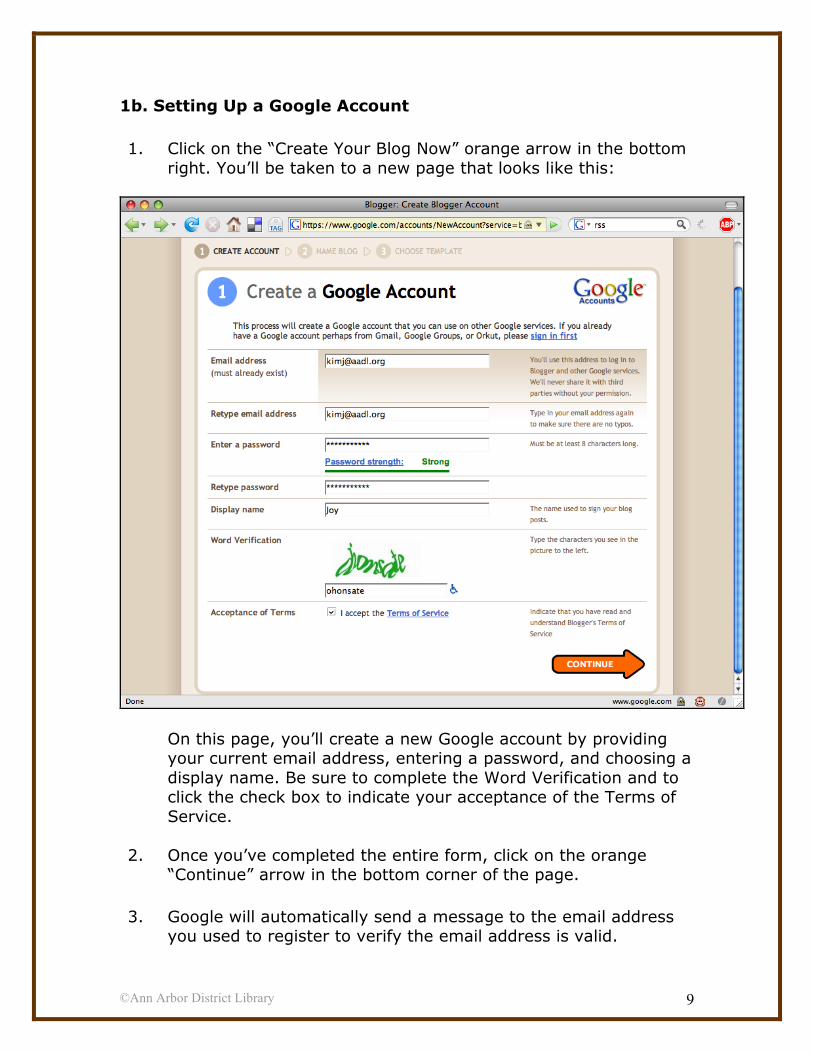
1b. Setting Up a Google Account
1. Click on the “Create Your Blog Now” orange arrow in the bottom right. You’ll be taken to a new page that looks like this:
On this page, you’ll create a new Google account by providing your current email address, entering a password, and choosing a display name. Be sure to complete the Word Verification and to click the check box to indicate your acceptance of the Terms of Service.
2. Once you’ve completed the entire form, click on the orange “Continue” arrow in the bottom corner of the page.
3. Google will automatically send a message to the email address
you used to register to verify the email address is valid.
©Ann Arbor District Library 10
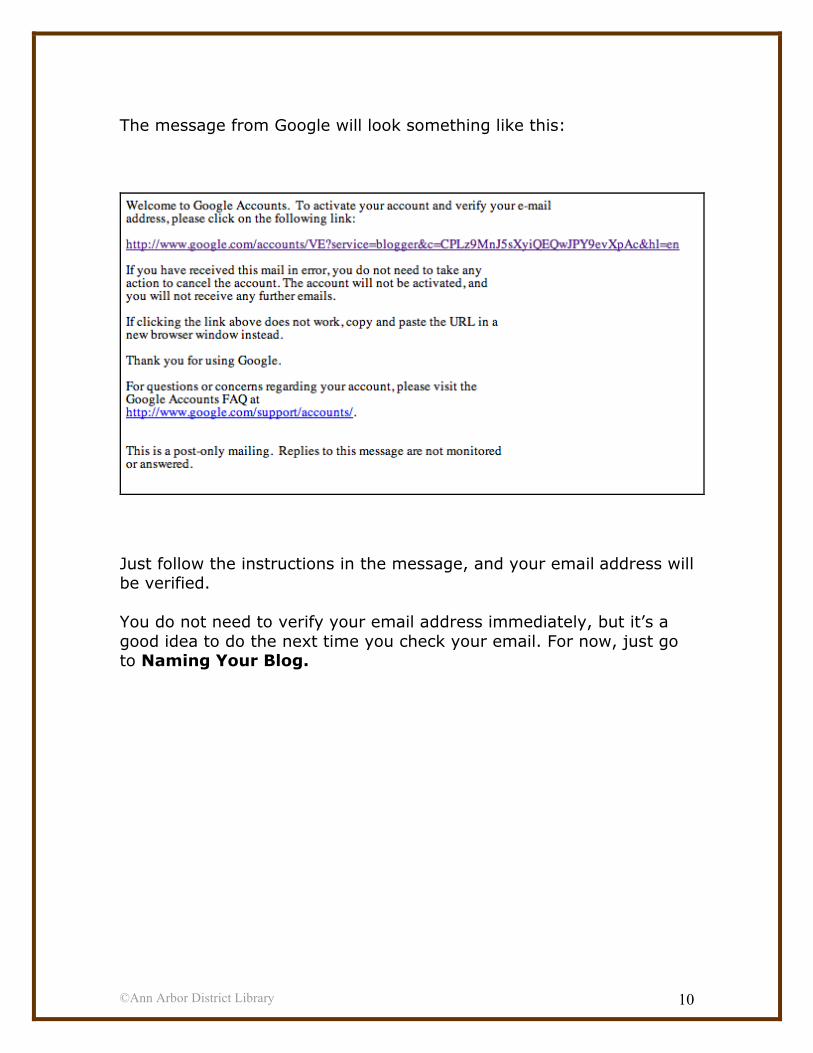
The message from Google will look something like this:
Just follow the instructions in the message, and your email address will be verified. You do not need to verify your email address immediately, but it’s a good idea to do the next time you check your email. For now, just go to Naming Your Blog.
©Ann Arbor District Library 11
Naming Your Blog
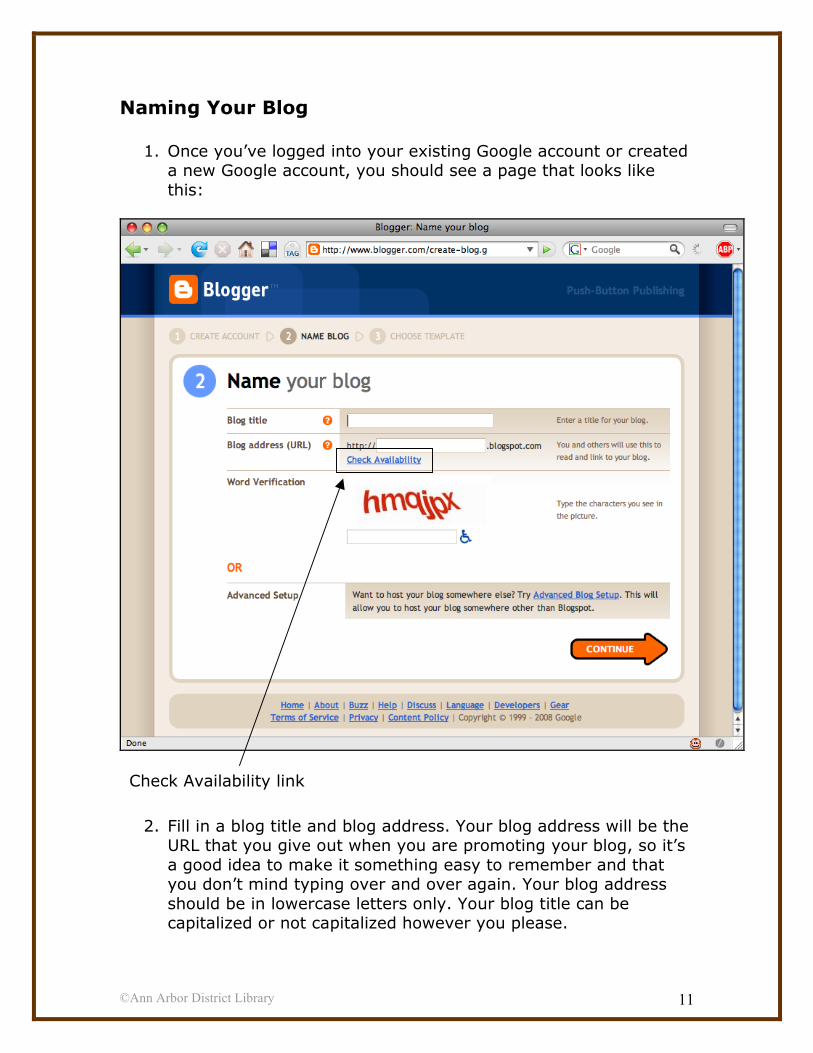
1. Once you’ve logged into your existing Google account or created a new Google account, you should see a page that looks like this:
2. Fill in a blog title and blog address. Your blog address will be the URL that you give out when you are promoting your blog, so it’s a good idea to make it something easy to remember and that you don’t mind typing over and over again. Your blog address should be in lowercase letters only. Your blog title can be capitalized or not capitalized however you please.
Check Availability link
©Ann Arbor District Library 12
3. Click on the “Check availability” link to see if someone has already claimed the name. If that’s the case, try something else until you create something unique.
4. Be sure to complete the word verification.
5. When you are done, click on the orange “Continue” arrow in the
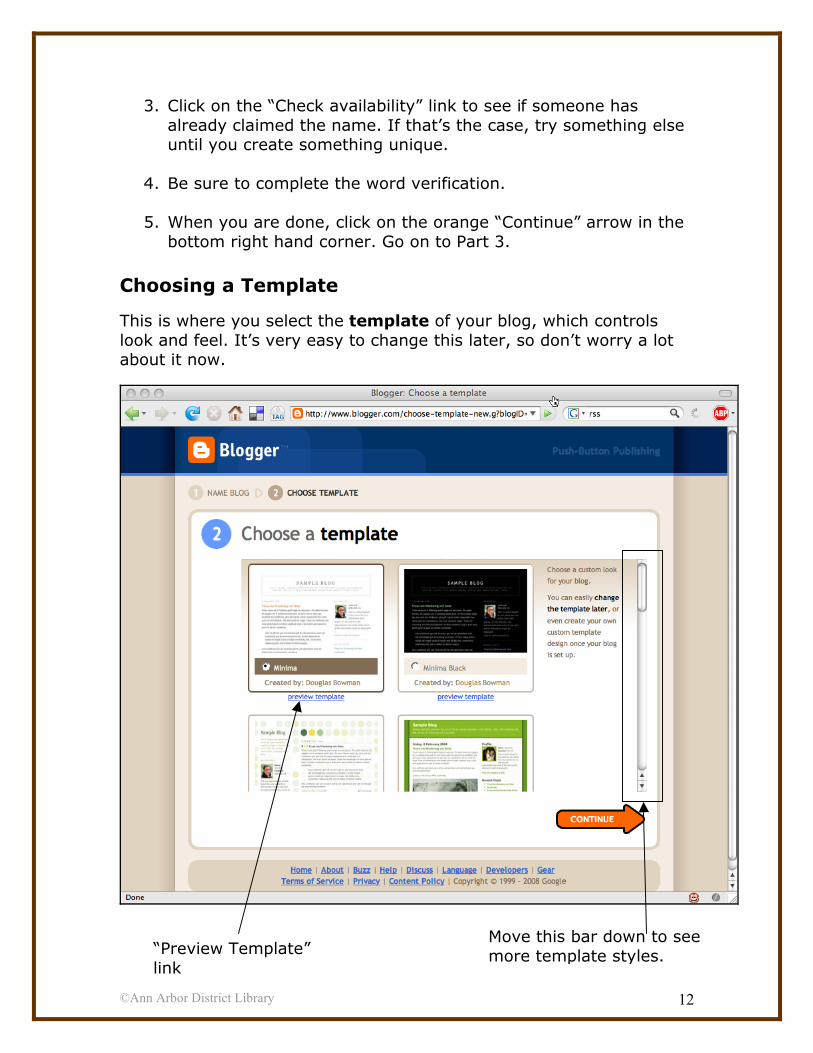
bottom right hand corner. Go on to Part 3. Choosing a Template
This is where you select the template of your blog, which controls look and feel. It’s very easy to change this later, so don’t worry a lot about it now.
“Preview Template” link
Move this bar down to see more template styles.
©Ann Arbor District Library 13
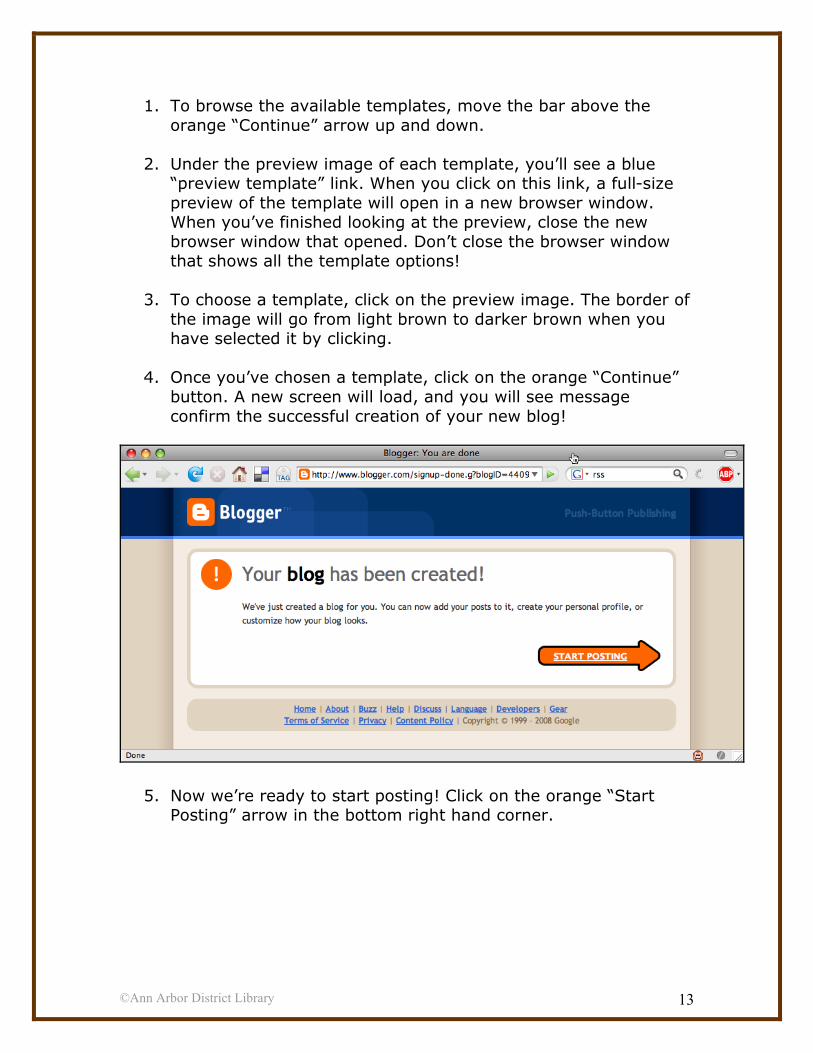
1. To browse the available templates, move the bar above the orange “Continue” arrow up and down.
2. Under the preview image of each template, you’ll see a blue “preview template” link. When you click on this link, a full-size preview of the template will open in a new browser window. When you’ve finished looking at the preview, close the new browser window that opened. Don’t close the browser window that shows all the template options!
3. To choose a template, click on the preview image. The border of the image will go from light brown to darker brown when you have selected it by clicking.
4. Once you’ve chosen a template, click on the orange “Continue” button. A new screen will load, and you will see message confirm the successful creation of your new blog!
5. Now we’re ready to start posting! Click on the orange “Start Posting” arrow in the bottom right hand corner.
©Ann Arbor District Library 14
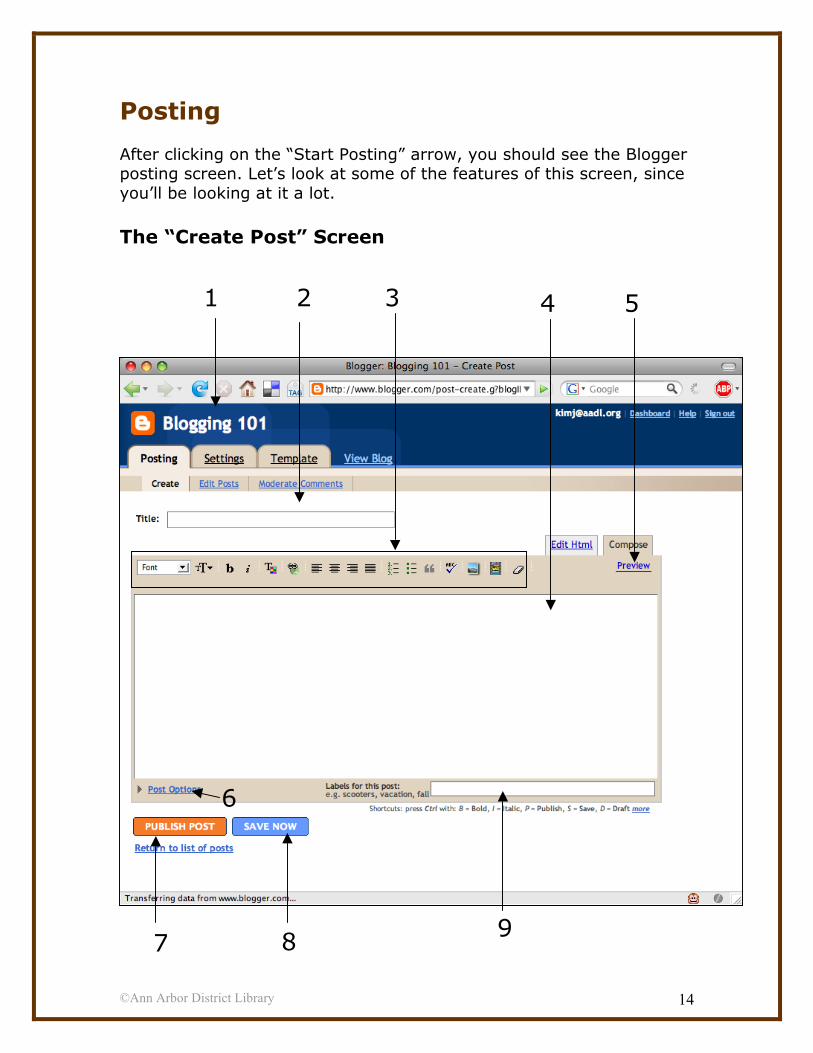
Posting After clicking on the “Start Posting” arrow, you should see the Blogger posting screen. Let’s look at some of the features of this screen, since you’ll be looking at it a lot. The “Create Post” Screen
4 3 2 1 5
6
7 8 9
©Ann Arbor District Library 15
1. Blog title: The title of your blog always appears at the top of the posting screen. If you have more than one blog, this is a good way to be sure you’re posting to the correct one.
2. Title text box: Type the title of your new post here. 3. Formatting bar: This allows you to format your text to be bold
or italic, to change the alignment, or add links. We’ll look at this more closely below.
4. Post text box: Type the main body of your new post here. 5. Preview – Preview your new post. When you click it, a preview
will appear at the bottom of the page. Click “Hide Preview” to return to the posting screen.
6. “Post Options” link: When you click on this link, you will see options to turn reader comments on or off, and to change the date and/or time of a post.
7. “Publish Post” button: Click on this button to publish what you’ve wrote.
8. “Save Now” button: Click on this button to save your current work. You will be the only person able to see it; your post will not be public until you publish it.
9. “Labels for this post” text box: Enter the labels (aka tags) for your post here.
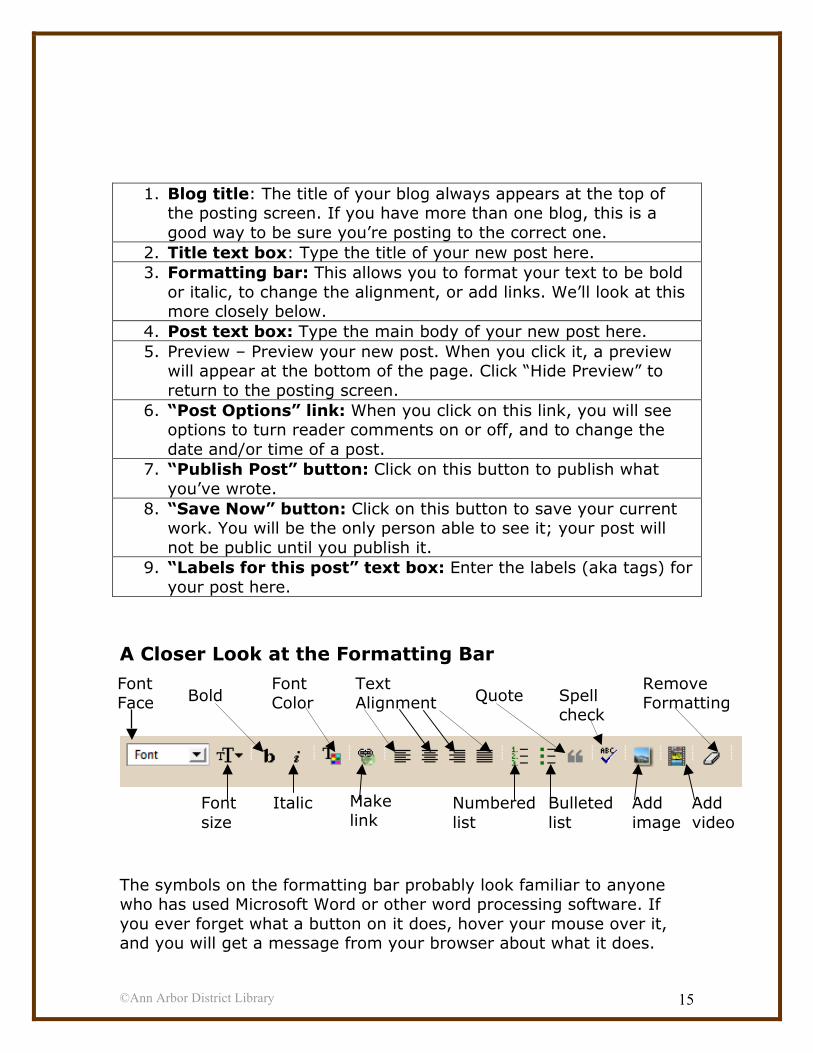
A Closer Look at the Formatting Bar
The symbols on the formatting bar probably look familiar to anyone who has used Microsoft Word or other word processing software. If you ever forget what a button on it does, hover your mouse over it, and you will get a message from your browser about what it does.
Spell check
Remove Formatting
Font Face Bold
Font Color
Text Alignment Quote
Font size
Italic Make link
Numbered list
Bulleted list
Add image
Add video
©Ann Arbor District Library 16
Writing and Publishing Your First Post Let’s write a short test post now so you can start to get comfortable with the formatting features. Don’t worry if you make mistakes, or decide you’d like something different later—it’s very easy to edit or delete posts!
1. Choose a post title and type it in the title text box. You can publish a post that has no title, but that’s not a good idea—it makes your work harder for search engines to find.
2. Write the main body of your post. Use the formatting bar to make text bold or italic; to change the text alignment; to change the font face, color, and size; to include numbered and bulleted lists; to add links; to include blockquotes; to add images and videos; and to clear previously applied formatting.
3. (Optional) Choose labels (tags) for your post, and type them into the box in the bottom right.
4. (Optional) Click on the “Post Options” link to change the comment settings or the date and time.
5. (Optional) Click the blue “Save Now” button to save your work to your account. You can skip this step if you plan to publish your post immediately. When you’re writing your post, it’s a good idea to hit the “Save Now” button often to save your work. Otherwise you run the risk of losing your hard work if your internet connection goes down or your computer crashes.
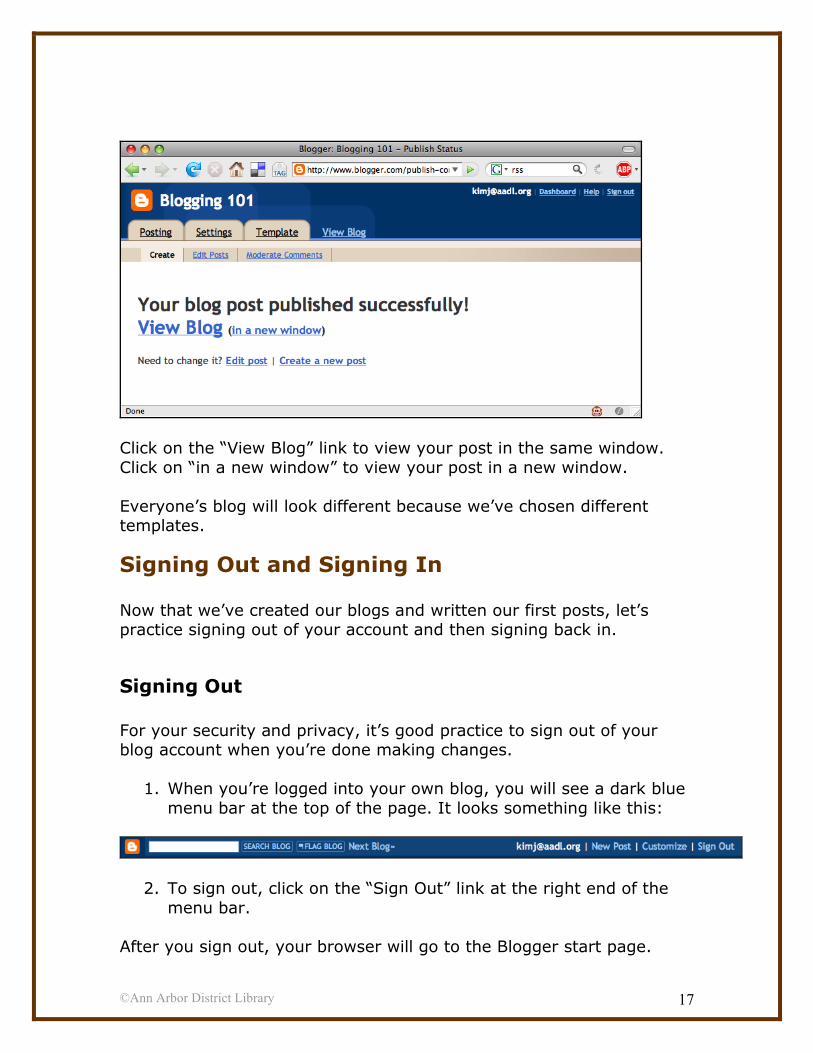
6. Click the orange “Publish Post” button to publish your work to your blog. You will see a confirmation screen that looks like this:
©Ann Arbor District Library 17
Click on the “View Blog” link to view your post in the same window. Click on “in a new window” to view your post in a new window. Everyone’s blog will look different because we’ve chosen different templates.
Signing Out and Signing In Now that we’ve created our blogs and written our first posts, let’s practice signing out of your account and then signing back in.
Signing Out For your security and privacy, it’s good practice to sign out of your blog account when you’re done making changes.
1. When you’re logged into your own blog, you will see a dark blue menu bar at the top of the page. It looks something like this:
2. To sign out, click on the “Sign Out” link at the right end of the menu bar.
After you sign out, your browser will go to the Blogger start page.
©Ann Arbor District Library 18
Signing In
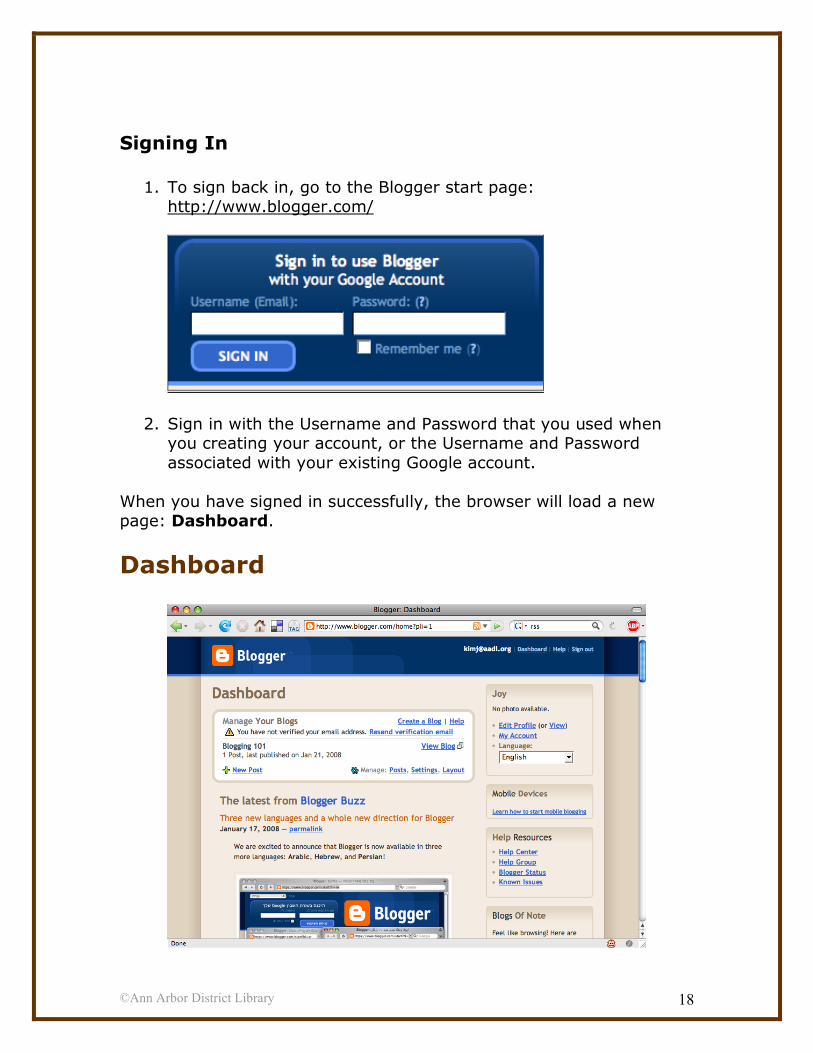
1. To sign back in, go to the Blogger start page: http://www.blogger.com/
2. Sign in with the Username and Password that you used when you creating your account, or the Username and Password associated with your existing Google account.
When you have signed in successfully, the browser will load a new page: Dashboard.
Dashboard
©Ann Arbor District Library 19
The Dashboard is the control center of your Blogger account. This is where you can do such things as:
• Write new posts • Edit or delete existing posts • Update your account information • Change your blog template
If you are logged in and you go to the Blogger home page, you will automatically be taken to the Dashboard. You can also return to the main Dashboard page by clicking on the “Dashboard” link at the top right corner.
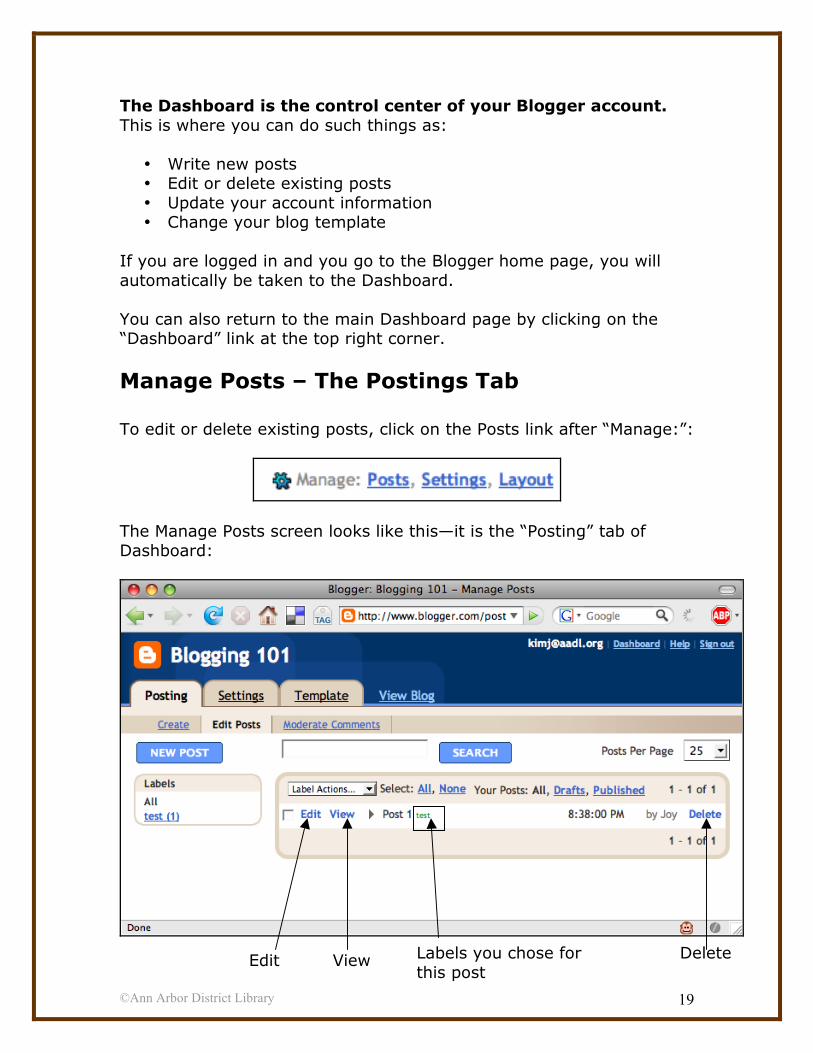
Manage Posts – The Postings Tab To edit or delete existing posts, click on the Posts link after “Manage:”:
The Manage Posts screen looks like this—it is the “Posting” tab of Dashboard:
Edit View Labels you chose for this post
Delete
©Ann Arbor District Library 20
Each of your posts will be listed on its own line, with links to:
• Edit the post • View the post • Delete the post
Beside the post title, you’ll see in small green font the labels that you chose for the post.
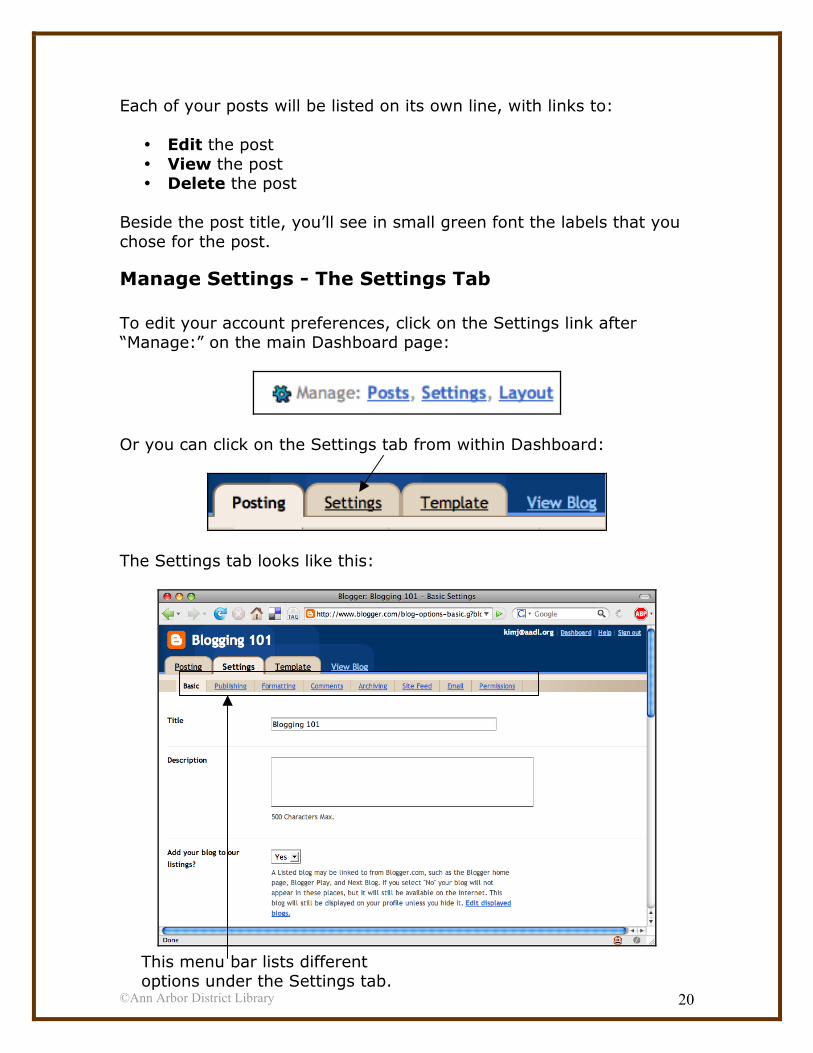
Manage Settings - The Settings Tab To edit your account preferences, click on the Settings link after “Manage:” on the main Dashboard page:
Or you can click on the Settings tab from within Dashboard:
The Settings tab looks like this:
This menu bar lists different options under the Settings tab.
©Ann Arbor District Library 21
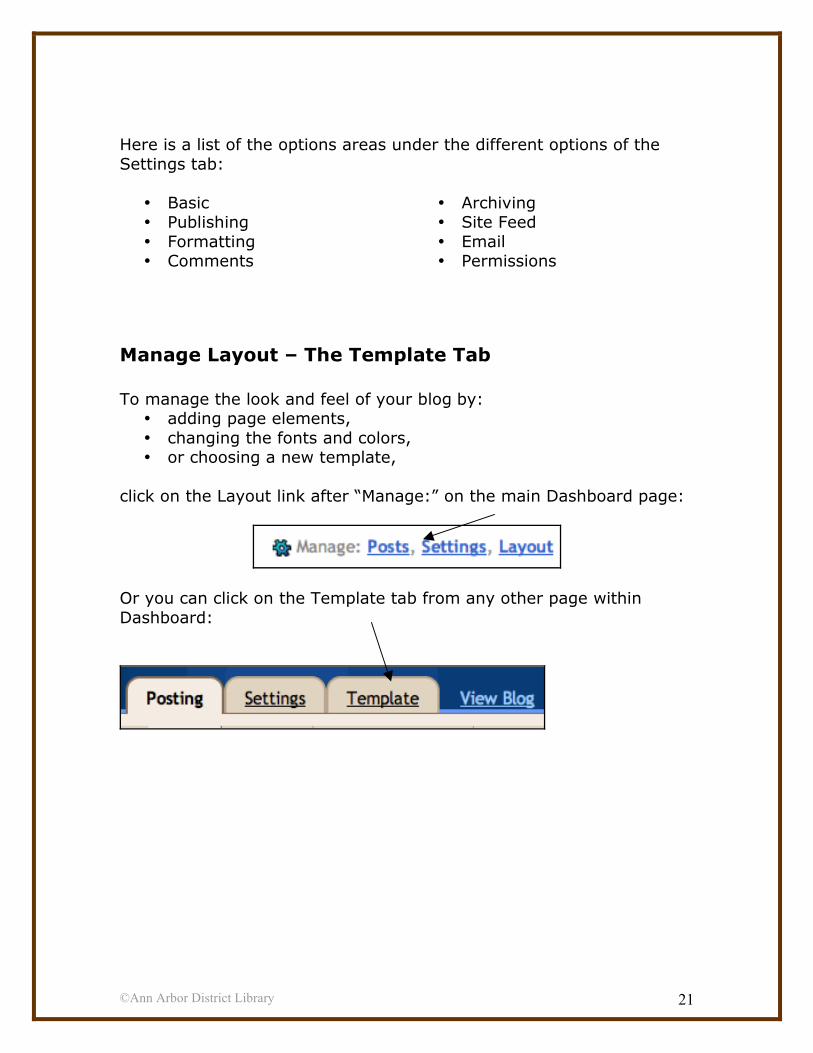
Here is a list of the options areas under the different options of the Settings tab:
• Basic • Publishing • Formatting • Comments
• Archiving • Site Feed • Email • Permissions
Manage Layout – The Template Tab To manage the look and feel of your blog by:
• adding page elements, • changing the fonts and colors, • or choosing a new template,
click on the Layout link after “Manage:” on the main Dashboard page:
Or you can click on the Template tab from any other page within Dashboard:
©Ann Arbor District Library 22
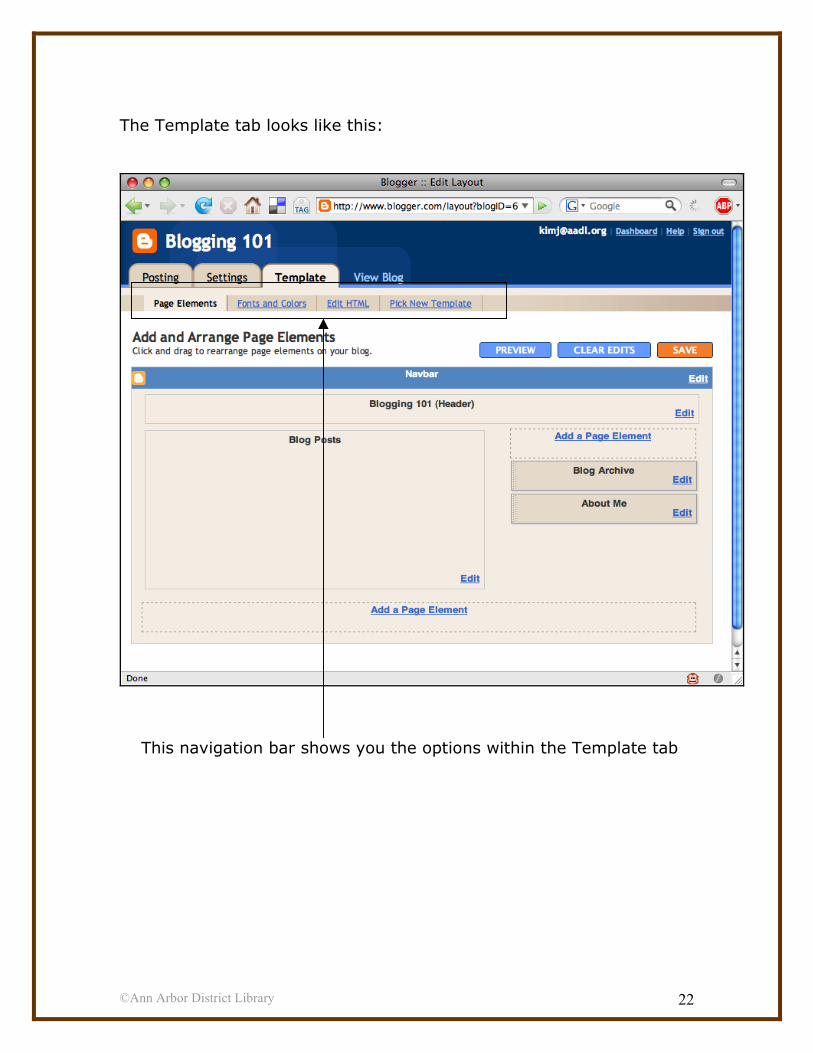
The Template tab looks like this:
This navigation bar shows you the options within the Template tab

©Ann Arbor District Library 23
Etiquette Like any social activity, blogging has its own etiquette. Master these blogging principles, and make your time online more fun and safe.
Commenting Comments are one of the best things about blogs: they make blogs more interactive and as enjoyable for the reader as the writer. For this reason, it’s often a good idea to keep comments “turned on.” It’s also considered polite to respond to comments left on your blog. If you don’t have time to manage your comments, however, you might consider turning off your comments to avoid comment spam.
Comment spam: The blog comments equivalent of e-mail spam. If you are logged in, you can delete unwanted comments by clicking on the trashcan icon beside them.
Linking The best blogs are in conversation with each other and other web sites. It’s usually considered polite to link to another blog post if you are responding to it in your post. It’s a way of promoting the other blogger’s work. However, the other blogger is not in any way obligated to link back to you; you should not expect it. Some bloggers may not want the attention that comes from a link. For that reason, if you’re linking to a little-known blog, you may want to ask their permission before linking to them.
Respecting Privacy Guard your own privacy, and be respectful of other people’s privacy. To protect your own privacy, think carefully before:
• Sharing any personal information about yourself, such as your full name, your email address, and your location
©Ann Arbor District Library 24
• Posting pictures of yourself Many bloggers set up a separate email account to use on their blog. This allows them to avoid giving out their primary email address. To protect the privacy of others, think carefully before:
• Sharing the personal information of others • Posting pictures of them • Writing about them in your posts, especially by name
Promoting Your Blog You’ve created your blog—now you need to promote it! Some good ways to promote your blog:
• Mentioning it to your friends when you see them • Including a link in your email signature
Linking to and commenting on other’s blogs is a good way to bring traffic to yours; the blogger just might link back to you. Don’t get angry if that doesn’t happen: there’s no obligation on their part. Don’t comment solely to promote your own work—make sure your comment is “on topic” at their blog.
Finding Other Blogs
1. Via other people’s links: Many bloggers maintain a blogroll, a list of links to blogs they read. If you find a blog that you really like, try visiting some of the sites on their blogroll—there’s a good chance you’ll find something else of interest to you.
2. Via blog search engines: There are a number blog-specific search engines. You can use them to find blogs on specific topics, and also to find blogs that have linked to specific posts. Some of the major blog search engines are:
a. Technorati: http://www.technorati.com/ b. Google Blogsearch: http://blogsearch.google.com/ c. BlogPulse: http://www.blogpulse.com/ d. IceRocket: http://www.icerocket.com/