BBQ GURU cybeRQ cloud MANUAL€¦ · 5 REV 0.9.5 The CyberQ Cloud Wi-Fi Contains Transmitter Module...
38
MANUAL cloud cybeRQ BBQ GURU
Transcript of BBQ GURU cybeRQ cloud MANUAL€¦ · 5 REV 0.9.5 The CyberQ Cloud Wi-Fi Contains Transmitter Module...
MANUALcloudcybeRQBBQ GURU

2REV 0.9.5
CYBERQ CLOUD WI-FI USER GUIDE
CONTENTS
1. Safety Warnings2. CyberQ Cloud Wi-Fi Features3. Probes4. Power Draft Blowers (Fans)5. Key Operation6. Powering up7. Manual Operation8. Pairing other devices to the CyberQ Cloud in Hot-spot mode9. Connecting to a Wi-Fi Network in Infrastructure Mode10. Connecting CyberQ Cloud to Share My Cook 11. Voice Control using Amazon Alexa - Initial Setups 12. Voice Control using Amazon Alexa - Voice Commands13. Building a Proper Fire for Good Control14. Firmware Updates15. Limited Warranty17. Wi-Fi Specifications18. FAQ18. Glossary of Networking Terms19. Contact The BBQ Guru
3REV 0.9.5
1. SAFETY WARNINGSINSTALLATION / SAFETY INFORMATION. READ AND UNDERSTAND THIS USERGUIDE COMPLETELY BEFORE INSTALLING OR USING THIS PRODUCT!!
WARNING: FIRE HAZARD, BURN HAZARD!! Even quality electronics can fail CAUSING THE BLOWER TO RUN CONSTANTLY, RESULTING IN EXCESSIVE TEM-PERATURES! Power Draft Fans can get the temperature of your pit higher than through natural draft, so use extra caution in opening your pit and determining its placement. Always inspect your fan and probe wires for damage. Damaged wires can cause the blower to run constantly causing your pit to become exces-sively hot.
WARNING: FIRE HAZARD, BURN HAZARD!! FLAMES, SPARKS AND LIT EMBERS CAN EXIT ANY OPENING ON YOUR PIT, CAUSING FIRES - Keep your pit located a safe distance from anything flammable like buildings, walls, solvents, cars, fuel, wood piles, furniture, etc. and always use caution when opening the pit. Be aware that an ember that has fallen or is ejected from the charcoal cook-er can be blown by a light wind into a garage or other structure, debris field, woods, or grass field and cause a fire to start. Always have a fire extinguisher and water supply close by. If the cooker is to be used on a combustible sur-face such as a wooden deck, always place the cooker on a non-flammable pad intended for this purpose.
WARNING: FIRE HAZARD, BURN HAZARD !! Even quality electronics can fail and cause the temperature to read incorrectly - BE SURE TO USE A REDUN-DANT DIAL THERMOMETER AS A BACKUP TEMPERATURE SENSOR ON YOUR PIT – This will allow you to verify your control’s temperature reading for your safety. Even though the CyberQ Cloud Wi-Fi can be controlled remotely, allowing you to cook while you are away, someone should always be present when your pit is cooking to prevent fires.
WARNING: SMOKE CAN COMBUST WHEN OXYGEN IS INTRODUCED AND PRODUCE SEVERE BURNS – ALWAYS USE CAUTION WHEN OPENING THE LID OR DOOR OF YOUR PIT.
WARNING: KEEP YOUR CONTROL DRY – Allowing your control to get wet can cause damage to its electronics and/or make it operate incorrectly CREATING A HAZARDOUS CONDITION.

4REV 0.9.5
WARNING: Pit fires can occur when liquids are spilled or when cook-ing at temperatures that cause surfaces inside the cooker to reach the ignition temperature of fats. Never pour or toss water directly into a fat fire. Reduce the temperature by cooling the fire in the firebox with a water spray. Close the cooking chamber door and the firebox while it is steaming to smother the fire. This procedure may need to be repeated several times before the pit fire is under control.
NOTE: Pit fires can be largely avoided if the cooker is kept clean and free from fat buildup during or between cooks. Changing drip trays during a cook cycle will help keep flammable fats in the cooker to a minimum. You are dealing with an open fire when you are cooking on charcoal and wood.
WARNING: There are hot surfaces on all parts of the cooker before during and after cooking. Always wear protective clothing when tending the cooker or attempting to extinguish a fire or dumping a firebox in the proper ash receptacle at the end of a cook. Always be ready to call your local Fire Company in the case of an emergency before the situation gets out of control.
CAUTION: Fire danger is always present, even in the best of conditions. There is no substitute for continuous safety scrutiny on the part of the user.
WARNING: SHOCK HAZARD, HIGH VOLTAGE!! The power supply for this product is plugged into a 120 or 240 VAC Mains. THIS VOLTAGE CAN KILL OR HURT YOU. KEEP THE POWER SUPPLY AWAY FROM WATER AND OFF OF THE GROUND - do not let it get exposed to rain or snow and NEVER TOUCH THE POWER SUPPLY IF IT GETS WET.
CAUTION: To satisfy FCC RF Exposure requirements for mobile and base station transmission devices, a separation distance of 20 cm or more should be maintained between the antenna of this device and persons during operation. To ensure compliance, operation at closer than this distance is not recommend-ed. The antenna(s) used for this transmitter must not be co-located or operating in conjunction with any other antenna or transmitter.

5REV 0.9.5
The CyberQ Cloud Wi-Fi Contains Transmitter Module FCC ID: W70MRF-24WG0MAMB with Radio regulation certification for United States (FCC), Can-ada (IC), Europe (ETSI), Korea(KC), and Japan (ARIB) 2.4 GHz, IEEE Std. 802.11b/g™, and Wi-Fi® certified (WFA ID: WFA16869)
The Wi-Fi components in this product have been certified under Wi-Fi 802.11 withWPA2™, and WPA™ System Interoperability ASD Model Test Plan with Test Engine For IEEE 802.11b and g Devices).
Other 2.4GHz devices, such as cordless phones and wireless networked devic-es, may cause interference with the CyberQ Cloud Wi-Fi and prevent a reliable connection. It is the customer’s responsibility to diagnose the source of the interference and determine which devices need to be turned off or eliminated from the installation.
2. CYBERQ CLOUD WI-FI FEATURES • Built in Wi-Fi web server allows direct or remote access from your mobile
device or PC
• 2.4 GHz, IEEE Std. 802.11g™, Wi-Fi® certified (WFA ID: WFA16869)
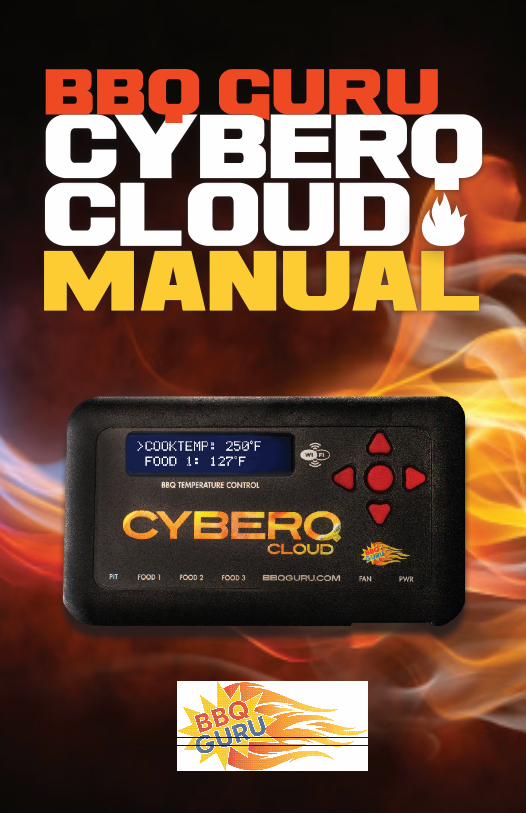
• 16 character by two line backlit LCD display
• Email alert capability
• Armored high-temperature pit and food (meat) probes
• Controls your pit and monitors up to 3 food (meat) temperatures
• All new full-time adaptive control algorithm learns your pit to provide better stability/accuracy
• Open lid detect senses when the pit’s lid is open to minimize the tempera-ture disturbance and recover quickly to the setpoint, can be turned on/off (default is ON)
This equipment has been tested and found to comply with the limits for a Class B digital device, pursuant to part 15 of the FCC Rules. These limits are designed to provide reasonable protection against harmful interference in a residential installa-tion. This equipment generates, uses and can radiate radio frequency energy, and if not installed and used in accordance with the instructions, may cause harmful interference to radio communications. However, there is no guarantee that interfer-ence will not occur in a particular installation. If this equipment does cause harmful interference to radio or television reception, which can be determined by turning the equipment off and on, the user is encouraged to try to correct the interference by one or more of the following measures: • Reorient or relocate the receiving antenna. • Increase the separation between the equipment and receiver. • Connect the equipment into an outlet on a circuit different
from that to which the receiver is connected. • Consult the dealer or an experienced radio/TV technician for help.

6REV 0.9.5
• Exclusive ramp down feature (cook and hold) lowers your pit temperature as food temperature rises, so your food doesn’t overcook
• Scrolling display shows all of your temps, time, and status
• Audible alarm sounds on food done (default is ON)
• Adjustable deviation alarm sounds when your pits temp goes either too high or low
• Real time blower status indication and output % helps you to estimate fuel use
• Display in degrees F or C
• User adjustable number of beeps setting
• 32 to 475° F range with +/- 2° F accuracy
• Runs on 100-240VAC (for worldwide use) or 12VDC for automotive supply use
3. PROBESThe probes provided with your CyberQ Cloud Wi-Fi are stainless steel precision thermocouples. The thermocouple wires have an armor braid with moisture and smoke resistant teflon insulation that is rated for temperatures up to 500 degrees F. The user can pass these thin wires under the lid of the grill or through a small hole without creating a large gap which would allow air to get through (air intru-sion). Be careful not to kink these wires or let them come in contact with flames. These probes are user-replaceable and are available at www.bbqguru.com; we recommend having a spare set for unforeseen emergencies.
IMPORTANT NOTE: Be sure to fully insert your probes into the control. Push the plug into the receptacle until you feel and hear it snap in place. If you do not plug the probes in securely, you may experience sporadic temperature readings and the CyberQ Cloud Wi-Fi will not control your cooker accurately. The temperature may also read low, causing you cooker to get excessively hot.
IMPORTANT NOTE: The pit probe must be placed in the pit for proper temperature regulation. If the pit probe is not located in the pit, proper control will not take place. This can cause the blower to run constantly causing your pit to become excessively hot.
If you decide not to use the food probe(s), they should be unplugged before applying power to the CyberQ Cloud Wi-Fi, not during operation. This will allow the CyberQ Cloud Wi-Fi time to sense how you are trying to cook and config-ure its alarm operation to prevent false food alarms. You can also leave a food probe plugged in and not use it.

7REV 0.9.5
4. POWER DRAFT BLOWERS (FANS)All blowers are equipped with an adjustable damper and an aluminum nozzle. The blower housing is constructed of stainless steel for a clean, durable and long lasting finish. The 10 CFM Pit Viper fan is good for medium grills and smokers, including all ceramic grills and bullet-style smokers. The 25 CFM Pit Bull fan is suited to offset smokers and larger cabinet smokers; two fans can be used for large custom built and trailer-based models.
All fans have an adjustable slide damper. This feature allows the user to make fine adjustments on their own grill or smoker due to natural drafts that effects cooking temperature during the blower’s off cycle. Testing on different settings is recommended. Open the damper fully for quick start-up or grilling at high tem-peratures. Close it half way for smaller cookers or low and slow cooking. Close three-quarters of the way for cold smoking. Close all the way to kill the fire.
5. KEY OPERATION UP Indexes value up / scrolls DOWN Indexes value down / scrolls LEFT Selects digit / previous menu RIGHT Selects digit / next menu MODIFY/ENTER (M/E) Selects / saves (powers up/down when held down) UP + DOWN + - Access / leave Setup menu
The Key backlight blinks when there is Wi-Fi activity.
Whenever a key is pressed, a short chirp occurs on the beeper as user feedback. The chirp can be turned off in the System Setup menu.
Anytime the beeper is sounding, pressing any key will silence it and clear the alarm condition. To turn the alarm beeper off, set the ALARM BEEPS in the System Setup menu to zero.
The contrast and brightness can be adjusted by the ‘hot keys’ described below and in the system setup menu. We suggest you exercise caution, as too large an adjustment can render the display unreadable.
Pressing the M/E KEY and UP KEY increases the Backlight brightness. Pressing the M/E KEY and DOWN KEY decreases the Backlight brightness. Pressing the M/E KEY and RIGHT KEY increases the Display contrast. Pressing the M/E KEY and LEFT KEY decreases the Display contrast.
Holding down all four arrow keys (UP, DOWN, LEFT, RIGHT) for approximately 5 seconds will reset all settings to factory defaults. The CyberQ Cloud Wi-Fi will then show RESETTING EEPROM and restart.

8REV 0.9.5
6. POWERING UP After plugging in the unit, the following screen will display:
Then the IP address, Hotspot or infrastructure (INFS), will be displayed for 5 seconds as follows:
See section 8 and 9 for more details on this screen.
TURNING OFF - To turn the CyberQ Cloud Wi-Fi off, press and hold the M/E key for 4 seconds.
TURNING ON - To turn CyberQ Cloud Wi-Fi on, press and hold the M/E key for 2 seconds.
Because of the internal EEPROM memory, if there is a power interruption at any time while cooking with your CyberQ Cloud Wi-Fi, once power is restored the unit will automatically restart and continue to control your grill/smoker at the same settings you originally set. If you are operating in infrastructure mode on your network, the network service should not be interrupted. If you are operat-ing in hotspot mode, you may need to reset power to the CyberQ Cloud Wi-Fi, then reconnect your PC or mobile device to the network.
7. MANUAL OPERATIONMAIN SCREENWhen the main screen is displayed, using the UP and DOWN keys will scroll the display up and down through the list of options. Two lines are displayed, and are scrolled through one line at a time. If scrolling is turned on, the main screen items are indexed through automatically. An arrow appears on the display next to the parameter that can be modified. The only main screen parameter that cannot be changed in the example below is ‘OUTPUT: 15 % *’ since this is just reporting the fan’s output percentage.
To change a value, scroll to the value you wish to modify using the UP/DOWN keys. The line will be denoted with an arrow. Select the value using the M/E key. Navigate to the value you wish to modify using the LEFT/RIGHT keys. Modify the value using the UP/DOWN keys, then press the M/E key to save. The labels COOKTEMP, FOOD1, FOOD2, FOOD3 may be changed via the web interface, but will always remain the same on the controller.
CyberQ CloudWiFi CONTROL 2.0
HOTSPOT PAIRING192.168.101.10
COOKTEMP : 275°FFOOD 1 : 122°FFOOD 2 : 165°FFOOD 3 : 141°FOUTPUT : 15% *TIMER 00-00-00
>

9REV 0.9.5
If a food or cook sensor is unplugged or damaged (open), it will show OPEN next to the corresponding item.
COOK TEMPScroll to COOKTEMP (pit temp) in the MAIN SCREEN using the UP/DOWN keys (arrow will display) to modify its value. Press the M/E key to modify the cook setpoint as follows:
Use the LEFT and RIGHT keys to select the digit to be modified. Adjust the val-ues using the UP and DOWN Keys. Then press the M/E key to enter and store the value and return to the main screen.
The adjustment range of the COOK SET is 32–475° F or 0-246° C. The default value for the COOK SET is 275° F.
FOOD TEMP Scroll to FOOD X (1, 2 or 3) in the MAIN SCREEN using the UP/DOWN keys (arrow will display) to modify its value. Press the M/E key to modify the setpoint of all 3 food probes individually as follows:
Use the LEFT and RIGHT keys to select the digit to be modified. Adjust the values using the UP and DOWN Keys. Press the M/E key to enter and store the value and return to the main screen.
The adjustment range is 32–475° F or 0-246° C. The default value is 180° F.
When the food temperature exceeds the setpoint, the FOOD DONE message blinks with the temperature and the beeper sounds. Please note that if you set the setpoint below the food’s actual temperature, the DONE alarm will sound (press any key to clear alarm).
OUTPUT %The output percent is not changeable by the user but is simply a display of the output percentage of the control. The ‘*’ character is shown next to the output % value when the output is energized.
TIP: During your cook if you notice the output percentage hovering around 80-100% for a long time, you may be running out of charcoal. If you notice the output % hanging around 10% for a long time and the temperature is oscillating you may want to close the blower damper adjustment slightly for better control.
COOK SET270°F
FOOD X SET121°F

10REV 0.9.5
TIMER Scroll the TIMER in the MAIN SCREEN using the UP/DOWN keys (arrow will dis-play) to modify its value. Press the M/E key:
Use the LEFT and RIGHT keys to select the digit to be changed. Adjust the values using the UP and DOWN Keys, press the M/E key to enter and store the value and return to the main screen. .
Once you enter a value, the control will begin counting down. The maximum value is 99:59:59. When the countdown finished, the action specified in TIME-OUT will be taken.
SYSTEM SETUP SCREENTo access the SYSTEM SETUP from the MAIN SCREEN display, press and hold the UP and DOWN keys together for 3 seconds.
Just as with the main screen, pressing the UP or DOWN Keys will scroll up and down through the list of shown parameters as follows:
When SYSTEM SETUP is in the top line (with arrow) pressing the LEFT or RIGHT key will index to the Control or Wi-Fi setup screens.
Scroll through the values using the UP/DOWN keys. To modify a value, press the M/E key. Use the LEFT/RIGHT keys to select the digit to be modified, then adjust the value with the UP/DOWN keys. Press the M/E key to save. To return to the MAIN SREEN press the UP and DOWN keys together.
SCROLLINGYou may select whether or not the MAIN SCREEN automatically scrolls. The default value is OFF. Set using the UP/DOWN keys as described above.
BACKLIGHTThe display backlight is adjustable from 0-100%. Select the digit using the LEFT and RIGHT keys and adjust the value using the UP/DOWN keys.
CONTRASTThe display contrast is adjustable from 0-100%. Select the digit using the LEFT and RIGHT keys and adjust the value using the UP/DOWN keys. Note that vary-ing just a small amount will make the display unreadable; we suggest leaving it at the default value of 10%.
TIMER12:01:00
SYSTEM SETUPSCROLLING: ONBACKLIGHT: 50%CONTRAST: 10%UNITS: DEG F ALARM BEEPS: 3KEY BEEPS: ON
>

11REV 0.9.5
UNITSYou may select whether to use Deg F or Deg C. Default is Deg F. Select the digit using the LEFT and RIGHT keys and adjust the value using the UP/DOWN keys.
ALARM BEEPSYou may select from OFF, 1, 2, 3, 4 and 5. Select the digit using the LEFT and RIGHT keys and adjust the value using the UP/DOWN keys.
KEY BEEPSWhenever a key is pressed, a short chirp occurs as feedback for a key press. The default value is ON. Select the digit using the LEFT and RIGHT keys and adjust the value using the UP/DOWN keys.
CONTROL SYSTEM SETUPTo access the CONTROL SETUP from the MAIN SCREEN display, press and hold the UP and DOWN keys together for 3 seconds, then press the LEFT KEY. To return to the MAIN SREEN press the UP and DOWN keys together.
Once in CONTROL SETUP, pressing the UP or DOWN keys singly will index up and down through the list of shown parameters as follows:
Scroll through values in the CONTROL SETUP SCREEN using the UP/DOWN keys. To modify a value, press the M/E key. Use the LEFT/RIGHT keys select the digit to be modified. Adjust the value with the UP/DOWN Keys. Press the M/E key to save. To return to the MAIN SREEN, press the UP and DOWN keys together.
When CONTROL SETUP is in the top line (with arrow), pressing the LEFT or RIGHT key will index to the other setup screens.
COOK HOLDCOOK HOLD defines the temperature that the cook setpoint will be reset to when the TIMER expires, if TIMEOUT action is set to HOLD. The default is 200° F. Set using the UP/DOWN keys.
TIMEOUTTIMEOUT defines the action that will be taken when the timer counts to 00:00:00. The selections are NO ACTN, HOLD, ALARM, SHDN. The default is NO ACTION. Set using the UP/DOWN keys.
CONTROL SETUPCOOKHOLD: 200°FTIMEOUT: NO ACTNALARM DEV: 50 RAMP: OFFOPEN DETECT: ONCYC TIME: 6 PROP BAND: 30
>

12REV 0.9.5
ALARM DEVIATION SETPOINTIf the temperature of the pit deviates above the setpoint by the alarm deviation setpoint, the alarm will sound and the display will blink COOK TEMP HIGH and the temperature value.
If the temperature of the pit deviates below the setpoint by the alarm deviation setpoint, the alarm will sound and the display will blink COOK TEMP LOW and the temperature value.
The alarm is only allowed once the temperature gets near the cook temperature setpoint. The alarm deviation is settable from 10-100° F and the factory default is 50° F.
RAMP (COOK AND HOLD)When the ramp is set to on, the low and slow ramp mode is enabled. The ramp selection tells the control which sensor to ramp from, so the selections are off, Food1, Food2, Food3. This mode is used for slow cooks so your food (meat) never over-cooks. This feature will gradually lower the pit temperature to the food X set point temperature when the food is within approximately 30° of be-ing done. The controller will hold the pit temperature slightly above your food set point as long as there is fuel. This feature is similar to cook and hold, but the
PIT
TEM
PERA
TURE
Gives “Hi” Alarm
FitSetpoint
Gives “Lo” Alarm Time
Deviation Alarm Setpoint
Deviation Alarm Setpoint
TIMEOUT SELECTION
CONTROL ACTION
MESSAGE DISPLAYED BEEPER ACTION
NO ACTN none none none
HOLD COOKSET is set to COOKHOLD value
TIMEOUT HOLD 200° F (or cook hold temp) Is flashed continuously until a key is pressed to clear it.
Sounds once with the number of beeps set by ALARM BEEPS
ALARM none TIMEOUT ALARM Is flashed continuously until a key is pressed to clear it.
Sounds continuously with groups of beeps set by ALARM BEEPS selection until a key is pressed to clear it.
SHDN Turns the fan output off
TIMEOUT SHDN Is flashed continuously until a key is pressed to clear it.
Sounds continuously with groups of beeps set by ALARM BEEPS selection until a key is pressed to clear it.

13REV 0.9.5
control calculates everything for you. The factory default setting is off, so you must enable this feature to use it. Note when using this feature, you may want to start your pit temperature a little higher than normal to reduce cook time and not overcook your food.
OPEN LID DETECTThis feature will allow recovery to the cooking temperature without overshoot after you open the cooker’s lid. When open lid detect is set to off and you open your pit’s lid, the temperature will drop. The inrush of oxygen can cause the blower to over-fire the coals and cause overshoot when the lid is shut again. When open lid detect mode is on, it detects when the pit’s lid has been opened and minimizes the blower running during that time. Some overshoot will always be present when your pit’s lid is opened and closed even if the blower is off, because it still introduces oxygen to the fire. The factory default is ON, so you must turn this OFF if you have problems with excess air currents in your pit.
When open lid detect is enabled during startup, the rate of temperature rise of your pit will be limited to preventing over-firing. This will make a typical startup
TEM
PERA
TURE
TIME
Pit Temperature
Food Temperature
Food/Pit Plot with Ramp Set to On (Food 1,2, or 3 selection)
TIME
TEM
PERA
TURE
Pit Temperature
Food Temperature
Food/Pit Plot with Ramp Set to Off

14REV 0.9.5
to a temperature of 250° F take a minimum of about 20-30 minutes and will also help to eliminate startup overshoot.
WI-FI SETUP SCREENTo access the Wi-Fi Setup Screen from the MAIN SCREEN display, press and hold the UP and DOWN keys together for 3 seconds. Navigate to the Wi-Fi SCREEN using the LEFT/RIGHT arrows. To return to the MAIN SCREEN, press the UP and DOWN keys together.
For ease of use, we suggest setting up your Wi-Fi link by following the instructions in section 9. The interface is much easier to use, and it can be done from any PC or mobile device equipped with a web browser.
*** It is important to remember to cycle power (turn unit off and then on again) after changing the Wi-Fi settings. They will not be used until power is cycled. If changing parameters from a hot-spot or Wi-Fi connection, you can use the reboot button at the bottom of the web page.
Just as with the main screen, pressing the UP or DOWN Keys will index up and down through the list of shown parameters as follows:
When WI-FI SETUP is in the top line (with arrow) pressing the LEFT or RIGHT key will index to the next or previous setup screens (see menu diagram).
Scroll through values in the Wi-Fi SCREEN using the UP/DOWN keys. To modify a value, press the M/E key. Use the LEFT/RIGHT keys to select the digit to be modified. Adjust the value with the UP/DOWN Keys. Press the M/E key to save. To return to the MAIN SREEN, press the UP and DOWN keys together.
8. PAIRING OTHER DEVICES TO THE CYBERQ CLOUD IN HOT-SPOT MODE
The most basic way to use the CyberQ Cloud’s features is by directly pairing it with one or more Wi-Fi devices in hot-spot mode. While this method doesn’t enable all the CyberQ Cloud’s features, direct connection can be useful. If you are at a competition where there is no Wi-Fi or AC power, or if you are tailgating or camping, for example, taking control with a portable device is handy. Nearly any device with Wi-Fi capability and a Web browser will work.
If you had previously linked your CyberQ Cloud to another WiFi network in Infrastruture mode, switch your device back to HotSpot mode. (To switch to HotSpot mode, hold down the up and down arrows until you get the advanced menu. Go to the WiFi settings, scroll down to “Load:” and change the setting to HotSpot. Then unplug your control and plug it back in to restart it.)
WiFi SETUP192.168.101GW: 192.168.101NM: 255.255.255.010DNS: 192.168.101.010MODE: AD HOBDHCP: ONSSID: XXXXXXXENC: WEP40KEY: XXXXXXXPORT: 80

15REV 0.9.5
1. Apply power to the CyberQ Cloud Wi-Fi. The following will be displayed:
2. On a smartphone or tablet, go to Settings > Wi-Fi. Make sure Wi-Fi is set to on, then select “HS-MY_CYBERQ_####”
On a PC go to the at the lower right.
On a Mac this is the at the top.
Select the“HS-MY_CYBERQ_####” as the network. If prompted for a pass-word, use the default password: 1234abcdef
3. Once connected, the CyberQ Cloud Wi-Fi will display:
4. Open a browser window and type 192.168.101.10 to load the CyberQ Cloud Wi-Fi Controller pages. From this browser window, you can monitor and control your cook and make changes to the setup of the controller. Be sure to close any applications that require internet access when using Hot-spot mode.
When a smartphone is paired to the CyberQ Cloud in hot-spot mode, it cannot receive emails because it is not connected to the Internet. You can either use another device to control the CyberQ Cloud, or periodically turn off Wi-Fi to allow emails to be received. Texts and phone calls work normally, as they use cellular transmission.
If you will be using a CyberQ Cloud in close proximity to others (at a BBQ com-petition, for example) having several units with an identical SSID and password will cause them to interfere with each other. This is easily avoided by going to the Wi-Fi setup page and changing the SSID from “my CyberQ Cloud Wi-Fi” to something more personal, such as “Bob’s BBQ Team”. In addition, you should change the security key. In hot-spot mode, the CyberQ Cloud uses WEP40 secu-rity, with a 10-character key made up of number characters and letters from A to F (case is not important), such as 12345abcde.
9. CONNECTING YOUR CYBERQ CLOUD TO YOUR WI-FI NETWORKYour CyberQ Cloud ships in what is called HotSpot mode. This will allow you to connect to it with a Wi-Fi enabled device, like a laptop or smartphone.
Some of the best features of your CyberQ Cloud require you to connect it to the
HOT-SPOT PAIRING192.168.101.10
HOT-SPOT PAIRED! 192.168.101.10

16REV 0.9.5
internet. There are several ways to do this. Start Guide will demonstrate the easi-est and fastest way to do so. (Our online manual provides additional options.)
1. Using a WIFI enabled phone, tablet or desktop, go to its WIFI settings and search for available
networks. Your CyberQ Cloud will appear on the list with a default name that will look like HS-MY_CYBERQ_####. Choose this from the list of available options.
2. Once connected, open a web browser and type in 192.168.101.10
3. You will then see the built-in CyberQ Cloud pages. Click on the link at the top that says WIFI SETUP.
4. Click on the yellow button that says Cloud Connection Wizard.
5. The CyberQ Cloud will then scan for your home WIFI router. This generally takes up to 60 seconds.
6. Scroll down to see the available networks. Find your home network and click Join.
7. If your WIFI router requires a password, type in the password and hit Submit.
10. CONNECTING CYBERQ CLOUD TO SHARE MY COOKThe CyberQ Cloud easily syncs up with ShareMyCook. The fun and easy-to-use website is a community for outdoor cooks to interact and learn from each other.
Before you register the CyberQ Cloud to ShareMyCook, your device must be setup to your wireless network. Ensure your device is in Infrastructure (INFRA) mode and the Cloud Enabled option is turned on (it should turn on by default). 1. To connect your CyberQ Cloud to ShareMyCook, go to www.sharemycook.com2. Click on ‘Register Device’.3. Create an account by filling out the form with your name, email, and password.4. Click ‘Create Account’.5. Once your account is created, you will need to sync your CyberQ
Cloud to ShareMyCook. 6. Click ‘Generate Pin’. This will create a unique 4-digit number.
(Note: This number will expire in 60 minutes.)7. Unplug your CyberQ Cloud and plug it back in. 8. Once your device powers up, the CyberQ Cloud LCD panel will display
REG PIN 0000. 9. Use the arrow keys on your device to enter the pin from ShareMyCook.
HS-MY_CYBERQ_####
ONWi-Fi

17REV 0.9.5
10. Hit the Enter (center) button on the CyberQ Cloud. (Note: Your device may take up to 2 minutes to register.)
11. Once the device is successfully registered, ShareMyCook will automatically refresh and display a picture of your device.
12. Click on ‘Continue’ to enter the dashboard.
PROFILE SETUPOnce your account is created and your CyberQ Cloud is synced to ShareMyCook, we recommend you setup your personal profile. 1. While on the dashboard, click the ‘Update Profile’ icon. (If you are not on
the main dashboard or don’t see it, you can access your profile by clicking the ‘Account’ drop down menu and then selecting ‘My Profile’.
2. The profile page allows you to store your real name and as well as a separate screen name that will be used publicly. Add any basic background informa-tion that you’d like to which will appear on your public profile page.
3. To upload a profile picture, click ‘Choose File’ and select a photo from your computer.
4. Select your Default Temperature Unit by clicking ‘Fahrenheit’ or ‘Celsius’. Fahr-enheit will default automatically. (Note: This temperature is only for ShareMy-Cook. If you want to change the temperature that displays on the device, go to ‘Manage My Devices’, click ‘Manage’ on the device you want to change, and select ‘System Setup’.)
5. Select your preferred Time Zone by clicking the drop down menu. Eastern Time will default automatically.
6. Your profile is made public by default. To change your privacy setting, click the checkbox next to ‘Make account private’. Your profile, recipes and cooks will be hidden and be made unavailable to the public.
7. You have the option to share Facebook, Twitter, Instagram, and Pinterest social media accounts to your profile. To add your accounts to ShareMyCook, enter the full URL address starting with: http, not just your username or han-dle. These will appear in your public profile page.
8. Once completed, click ‘Update Profile’ to save your updates.
VERIFY EMAIL TO RECEIVE NOTIFICATIONSShareMyCook allows users to receive email alert notifications based on cooks and/or the CyberQ Cloud. Before you can use this feature, you must verify your email. 1. Click the ‘Account’ drop down menu and select ‘Account Settings’. 2. When you first created an account, you should have received an email that
had a link in it that you could click on to verify your account. If the page says ‘Email not verified’, you still need to verify it.
3. Click on the button that says‘Send Verification’. 4. Within 1-2 minutes, you should receive an email. If you don’t see it, check your
junk mail folder. 5. In the email, click the link to automatically verify the account. You will auto-
matically be directed back to ShareMyCook.

18REV 0.9.5
6. Now you can receive alerts and notifications on your email.
VERIFY MOBILE PHONE TO RECEIVE NOTIFICATIONS ShareMyCook allows users to receive text message alert notifications based on cooks and/or the CyberQ Cloud. For example, if you want to get a text message notification when your food is ready or get an update on your timer. Before you can use this feature, you must verify your mobile phone number. 1. Click the ‘Account’ drop down menu and select ‘Account Settings’.2. To receive text message notification alerts, enter your mobile phone number
without spaces, dashes, or parentheses. Even though there may appear to be extra spaces, if you are in the US, only enter 10 digits.
3. Select your mobile phone provider from the drop down menu. Our system uses email-to-text message services to send you text messages.
4. Click the button that says ‘Send Verification’.5. Within 1-2 minutes, you will receive a text message with a 4-digit pin on your
phone. If you did not receive it after 2 minutes, check the number again and make sure you have selected the correct mobile phone company named from the drop-down. (If your company is not on the list, select Other, and follow the directions).
6. Enter the pin in the space that says ‘Verify your phone number’. 7. Click the ‘Verify’ button to complete verification.8. Now you can set your text message alert preferences for each your devices!
SETUP NOTIFICATION ALERT PREFERENCESShareMyCook allows users to receive varied email and text message alerts and notifications about pit temperature, food temperatures, fan output, and timer. The site allows you to set different notification preferences for each device you have registered on the site.1. To manage which type of alerts you would like to receive by email or text
message, click the ‘Set up Alerts’ icon from your desktop. (If you are not on the dashboard, click on ‘Manage’ and then ‘My Devices’ from the drop-down. Click on the Alerts button next to your device).
2. To select the type of alert you would like to receive, and the preferred delivery method, click the boxes under ‘Email Enable’ and ‘SMS Enable’. If a check-box is shown, you will receive that type of alert in that row. If you don’t want a specific alert, uncheck that box.
3. There is a special type of notification that is a summary of your temperatures, fan speed, and timer. You can turn this on and choose how often you want to receive these specific types of notifications. Next to ‘Notification Interval (Minute)’, choose from the drop down how often you would like to receive updates sent to your email and mobile phone. If you would like to receive summaries every 30 minutes, select 30 from the drop down. (Note: Your Cy-berQ Cloud has to be turned on, connected to Wi-Fi, and actively connected

19REV 0.9.5
to ShareMyCook so you can continue to these updates). To turn OFF these special ‘summary notifications’, set the number back to zero.
5. Make sure to click ‘Update’ to save your changes.
TYPES OF ALERTS: Cook alerts: these alerts will notify you if your cooking is too low or too high or if there is an error with the probe.
Food alerts: these alerts will notify you if your food temperatures are done or too high.
Fan shorted alerts: this is an alarm alert that tells you that your fan is malfunc-tioning. If you receive it, you should definitely check on the status of your cook and fan.
Timer alerts: this is a notification when the timer countdown had completed.
Notification interval alerts: this is a summary report that will tell you your pit (cooking) temperature, food temperatures, fan output, and timer.
If your pit or food temperature display ‘OPEN’ in these alerts, this means that temperature probe is neither plugged in or has malfunctioned.
ADD A GRILL ShareMyCook allows users to track the type of grill(s) used during your cook. To add grill(s) to your account go to the main dashboard and select the ‘Add a Grill’ icon or click on ‘Manage’ and then ‘My Grills’ from the drop down menu.1. You can enter a nickname for a grill - an easy way to remember it by. This
feature is especially convenient if you have more than one grill and want to monitor which one was used for an archived cook.
2. Because cooks perform differently based on the grill you are using, by setting your grill, this can help you make any special adjustments to your CyberQ Cloud to increase performance.
3. Use the drop down menus and select the grill make and model. If you don’t see your grill make or model, just select ‘Other’ from the drop down.
4. To upload a photo of your grill, click ‘Choose a File’ and select a photo from your computer.
4. Click ‘Save’ once completed.
ADD A RECIPE Adding a recipe to your ShareMyCook account allows users to track delicious recipes, share them with friends, and save them for future use.1. To add a recipe, go to the main dashboard and click ‘Add a Recipe’. You can
also access this page by clicking the ‘Manage’ drop down menu and select-ing ‘My Recipes’, then click on the ‘Add’ button.
2. Type in a name and describe the recipe. If you do not have your account set to private then this name and description will appear when sharing your recipe.

20REV 0.9.5
3. Enter the amount of time it takes to prepare and cook your recipe by click-ing the drop down menu next to ‘Prep Time’ and ‘Cook Time’ and select how many hours and/or minutes it takes.
4. Enter how many people the recipe serves by typing the amount next to ‘Serves’.5. If you select the ‘Is Featured’ checkbox, your recipe will appear in a priori-
tized position on your public profile. (Note: When users look at your profile, your previous four recipes will be shown. By clicking ‘Is Featured’, your recipe will become a priority so others will see it.) If you no longer want to feature your recipe, uncheck the box.
6. To enter the ingredients for your recipe, type it inside the box labeled ‘Ingre-dients’. Only list one ingredient per line. For each ingredient, add a new line by hitting the enter button on your keyboard.
7. To enter the directions for your recipe, type it inside the box labeled ‘Direc-tions’. Only have one direction step per line. For each step, add a new line by hitting the enter button on your keyboard.
8. To upload a photo of your recipe, click ‘Choose a File’ and select a photo from your computer.
9. Click ‘Save’ once completed.10. You will be automatically redirected to your recipes library page. To edit
recipes, click the ‘Edit’ button next to the recipe you want to make any adjustments to. To see how your recipe appears in the public recipe area to other ShareMyCook users, you can click the ‘View’ button next to the recipe you want to view.
You will be automatically directed to your archived recipes. To edit recipes, click ‘Edit’ to make any adjustments. To see how your recipe appears to other Share-MyCook users, click ‘View’.
CREATE A COOK A ‘cook’ is a recorded session, including graphing, of your cook. This feature allows users to track cook times, manage temperatures, add notes and descriptions to cooks, share cooks with friends and on social media, and upload pictures.
If you are recording a cook, your CyberQ Cloud must be registered on and connected to ShareMyCook. The CyberQ Cloud will send updates to ShareMy-Cook every 15 seconds during a cook with a good Wi-Fi connection. You should expect to see an update about 3 to 4 times a minute.1. To start recording a cook, go to the main dashboard and select ‘Create
Cook’. You can also access this page by clicking the ‘Manage’ drop down menu and select ‘Manage Cooks’, and then clicking on ‘Add New’ button.
2. If you want to create a cook quickly, just type in a name of the cook, select your CyberQ Cloud device, and then click ‘Save and Start Recording’. If you’re not ready to start recording, you can just hit ‘Save’, and start record-ing later.
3. If you want to track many other details of your recorded cook, you can track many other details.

21REV 0.9.5
4. Select the grill you will be using for your cook by clicking on the circle above your grill name. (If you haven’t added a grill to your profile yet, click ‘Add Grill’.)
5. Select which device you will using for your cook by clicking on the circle (ra-dio button) next to your device name. (If you haven’t added a device to your profile yet, click ‘Add Device’.)
6. To describe your cook, enter the type of food you are making and its weight next to ‘Food 1’, ‘Food 2’ or ‘Food 3’. For example, type ‘Ribs’ or ‘Pulled Pork’.
7. If you have a saved recipe you would like to select, click the drop down menu next to ‘Recipe’. (If you want to add a new recipe, click ‘Add New Recipe’.)
8. To upload an image of your cook, click ‘Choose File’ under ‘Upload Gallery Photo’. This gallery image is special because it will be the main thumbnail image of your cook and will appear in your account and publicly on ShareMy-Cook. (You can always edit and update this later.) If you don’t upload a food image, the site will display a generic image.
9. When you save your cook, it will automatically be made publicly available on ShareMyCook by default unless you change your privacy settings. If you only want specific people to view your cook, you can password protect your cook by clicking the checkbox next to ‘Password Protect Cook?’ You will then be prompted to type in a password of your choice to make the cook private. If your cook is password protected, users will need to enter your password before they can view it.
10. By default, users will be able to make comments on your cook. If you want to disable this option, uncheck the checkbox next to ‘Allow Comments’.
11. By default, users will be able to rate your cooks on a scale from 1 to 5 stars. If you want to disable this option, uncheck the checkbox next to ‘Allow Rating’.
12. If you are not ready to start recording, you can click ‘Save’ so you can start recording later.
13. If you are ready to start recording, click ‘Save and Start Recording’. Your cook will now be recording your temperatures live and you will be automatically directed to a list of your recorded cooks. (Note: You can also access this page by clicking ‘Manage’ from the drop down menu and selecting ‘My Cooks’.)
14. From the ‘My Cooks’ page (Available under ‘Manage’ drop down and ‘My Cooks’) you can Start or Stop your recording. You can also start and stop recording from the View Cook page.
MY COOK MANAGEMENTYou can manage, review, edit, and start and stop the recording of live cooks in your My Cook management area.1. You can access this page by clicking on the ‘Manage’ drop down and select-
ing ‘My Cooks’.2. From this page you will be able to add new cooks, view previous cooks, and
start and stop recording of your cooks. You will see a thumbnail of each cook along with its name and the date you created the cook.

22REV 0.9.5
3. If you click ‘Edit’ next to your cook, you will be able to edit the main details of your cook that you created when you first setup your cook. You can make adjustments and upload a new gallery image.
4. If you have a cook currently recording, a button will appear that says ‘Stop Recording’. This will stop the site from recording the temperatures from your device. If you have a previously saved cook but didn’t start recording yet, you can click ‘Start Recording’. (You can only have one cook recording at a time per device you own. If you are recording a cook with one device and start a new cook with the same CyberQ Cloud device, it will stop the recording of your previous cook).
5. If you wish to view the graphing of a specific cook, click on the ‘View Cook’ button next to the cook you wish to review.
VIEW AND GRAPH YOUR COOKOne of the most popular parts of the ShareMyCook site is the ‘View Cook’ page. Here you can watch your cook live or go back and review previously recorded cooks. If you are recording a live cook, you can see temperatures live from your CyberQ Cloud as well.1. To view a cook or graph a cook, you must first create a new cook. If you hav-
en’t already done so, please refer to the ‘Create a Cook’ section for details.2. After you’ve created a cook, go to the My Cook management area my clicking
on the ‘Manage’ drop down and selecting ‘My Cooks’.3. You will see a list of your cooks. Click ‘View Cook’ next to the one you want
to view.4. There are two ways to view a cook - while recording or without recording.
Different options will be available to you depending on whether or not you are recording.
5. View Cook Button Options: While you are recording a cook live, you will see the options to see four buttons: Cook Details, Add Note, Stop Recording, and Manage Device. When you stop recording, the ‘Manage Device’ will no longer appear and the ‘Stop Recording’ button will change to ‘Start Record-
ing’. Cook Details: If you click on the ‘Cook Details’ button the page will expand and show you details about your cook including notes you saved, the time left on your cook, and any recipes or other informa-tion you saved when initially creating your cook. To hide these details, click on the ‘Cook Details’ button again.
Add Note: If you click on this button, it allows you to add notes about your cook. You can select the date and time of your note, type in a short descrip-tion, and if you want, attach the note to a specific probe. For example, if you changed your target cooking temperature, you can make a note at that precise time and select ‘Pit’ as the note type and say what you changed it to. If the date and time you selected was within the time frame of your recorded graph, it will make a note on the graph. In addition, all of your notes are added to your ‘Cook Details’ area and can be accessed by clicking

23REV 0.9.5
the ‘Cook Details’ button. If you want to edit or delete a note, click on the ‘Cook Details’button. You will see an expanded view including your notes. Next to each note you will see an ‘Edit’ link. Click on that and you can edit or delete your note. (Customer Note: if you specify a “note type” to a food or pit probe, the site will automatically adjust the time you specified to the closest recorded data timestamp for that probe. This may cause a slight shift from the original date and time you specified)
Stop/Start Recording: If you are done recording, you can click the ‘Stop Recording’ button and it will no longer record temperatures. When you have finished your cook, we always advise that you stop recording so you have a nice clean graph of your cook. If you need to temporarily stop recording, you can hit ‘Stop Recording’. The button will change to ‘StartRecording’. If you want to resume recording on that same cook then click on ‘StartRecording’. When graphing, the site will simply graph the last recorded value to the new-est interpreting of any temperature changes. We recommend always creating a new cook if cooking a new meal and not re-using an old cook.
Manage Device: While you are recording and you want to set a timer, change your food done temperatures, or raise your pit temperature, click on ‘Man-age Device’. This button will ONLY appear when you are recording a cook. (If you wish to manage the device but not record, you can access the ‘Manage Device’ area by selecting ‘My Device’ from the ‘Manage’ drop down and then-click on the ‘Manage’ button by the device you wish to manage. See that section of the knowledgebase/manual for more information.)
6. View Cook Graphing and Temperature Gauges
Gauges: While recording your cook, temperature gauges will appear right about your graph (Gauges will ONLY appear when you are recording a cook). For a CyberQ Cloud, up to four gauges may appear: Pit, Food 1, Food 2, Food 3. If you do not have a probe plugged into the CyberQ Cloud, the corre-sponding gauge will disappear. Each gauge is calibrated so that the highest part of the range is twice your target temperature. So, if your target cooking temperature is 250, the top of the gauge of your cooking temperature will be 500. In doing this, if the arrow points straight up, you will know that tempera-ture is on target. At the same time, you may have a food target temperature of food 1 set to 190. That gauge will have a different range with the top of the gauge showing twice your target, in this case 380. That means as the arrow gets closer to pointing straight up, you are getting closer to your target tem-perature. This allows you see the values of your temperature at a quick glance.
Charting: While recording, your chart will update about every 15-30 seconds. (Note: When you first start recording, it may take a couple of minutes for data to be recorded before the graph appears normal.) On the chart you will see dotted horizontal lines. These are your target temperatures. This gives you a quick visual of how close you are to your desired temperature. The lines

24REV 0.9.5
on the graph are color-coded to the specific probes on your CyberQ Cloud. The graph will only show data for probes that you have plugged into your CyberQ Cloud. So if you only have 1 pit probe and 1 food probe plugged in, only those temperatures will display on the graph. You can hide and show different probe temperatures by clicking on the color square at the top of the chart. This way you can quickly and easily view just one temperature (this is especially helpful when recording a pit temperature and 3 food temperatures all at once). At the bottom of your chart you will see two white circles with two black horizontal lines. You can drag these left and right to zoom into specific area of your cook. There is also a ‘Zoom Out’ button. This is helpful after you’ve zoomed in or if you’re watching a cook and more data has come in. This will allow you to see the full chart with the most recent data.
Exporting Image of Graph or Cook Data: If you want to save an image of your graph, you can click on the down-arrow in the top right of your chart. This will give you the ‘Download As’ and present you with several image format types. And if you’re a real data person, you can even export your data points as a CSV and open it up in Excel.
7. Share your cook on social media by using the social media share widget under your chart. You can share previously recorded or live recordings of your cook on social media. The image used for the social share will be the Gallery Image you set in cook (which can be changed by clicking on the ‘Edit’ button in your Cook Management area. The headline of your social share will be the name of your cook. The details of your social share come from the description you have in your cook when creating the cook (this can be updated when you click on the ‘Edit’ button in your Cook Management area). So if you upload a cool gallery image, create a fun title, and put in a nice short description, then your social shares will look great.
8. Upload Images - upload images of your cook and show off what you make! Although you can only set one gallery image, you can upload additional photos. Some people show different stages of their cook or just show off the beauty shots at the end of their cook. Click on the ‘Choose image...’ button under the chart. You can add one image at a time. If you wish to delete an im-age later, click on the X in the top right of the image. Your Gallery Image will show up here as well, but you can only set that image in the Add/Edit area of the cook.
9. Cook Ratings - You can view how others rate your cook with our 1-5 star rating system. If you want to remove/add this option, go back and Edit your cook details in your Cook Management area. (Note: you have the ability to rate your own cook and use it as your own guide.)
10. Comments - Others can praise your amazing cook. If you want to remove individual comments or turn off comments entirely, go to your ‘Cook Man-agement’ area and remove/turn off comments in the edit area of your cook details.

25REV 0.9.5
MANAGE, MONITOR,AND CONTROL YOUR CYBERQ COUD USING SHAREMYCOOKFor your convenience, there are three ways you can manage the settings on your CyberQ Cloud: directly on the device using the keys, connecting to it directly using it as a WIFI access point (called Hotspot mode) and using a browser. You can also make changes to it through ShareMyCook as long as your CyberQ Cloud is registered, connected to your home WIFI and connected to the ShareMyCook website. This uses what is called Infrastructure and Cloud Enabled mode. (Please refer to the ShareMyCook registration area on how to set this up). This section describes how to manage your device through ShareMyCook.
1. Click on the ‘Manage’ drop down and select ’My Devices’.2. You can rename your device from its default name and upload a custom pho-
to as well by clicking on the ‘Edit’ button.3. If you have multiple ShareMyCook devices, you can choose which device you
want to be your default device by clicking on the ‘Make Default’ button.4. To manage, monitor, and control your CyberQ Cloud, you should click on the
‘Manage’ button next to the device you want to manage.5. You will be brought to a new page with four tabs. On each of these four tabs
you will see details: Connection Status and Last Connection from Device. Connection Status has three options: Good, Intermittent, and OFFLINE. If your status is good, that means your CyberQ Cloud has a healthy connection with ShareMyCook. This means the data you see should be recent and it also means that if you make changes on ShareMyCook, your CyberQ Cloud is ready to take those changes. If the status changes to intermittent, that means your connection is not reliable. This usually occurs if your device has a bad WIFI connection. If the status says offline, that means too much time has passed since the site heard from the device and your device is considered disconnected. The most common cause for this is a loss of internet connec-tion by your CyberQ Cloud. The “Last Connection from Device” status shows you a time stamp of the last time it received a signal from your CyberQ Cloud. This is helpful if your device is offline so you can determine when your device started to have any issues. Depending on the device’s internet connection, this page usually updates every 15-30 seconds. (Note: When you make chang-es on these pages for your device, it usually takes 1-2 minutes for the site and the device to synchronize their information.)
Current Status Page: you can monitor your current temperatures, set your target temperatures, check on your fan usage, set or check on your timer, and give names to your food probes. To change any settings, type in the new val-ues and click ‘Save Changes’. There are certain limits: names of your cook and food can only be 32 characters long and target temperatures can only be 32 to 475 degrees Fahrenheit. To set your timer, select the desired time from the drop down from the Set Timer section and click ‘Save Changes’. If you have a current timer running, it will overwrite it. (Note: when setting the timer

26REV 0.9.5
through ShareMyCook, it will not start right away. It will first synchronize with the device and then begin to count down. The timer on this page only shows the timer that is running on the device. If your device gets disconnected, the timer will not update. In addition, the timer only updates when it receives a new update from the CyberQ Cloud, which is usually every 15-30 seconds. It will not count down each second).
System Setup Page: On this page you can set several of the devices system settings:
1. Temperature Units: you can choose if you want your device (and in HotSpot mode) to display units in Celsius or Fahrenheit. IMPORTANT: this does not change how the temperatures are dis-played on ShareMyCook. (If you wish to change the way the tem-perature units are displayed on ShareMyCook, go to the ‘Account’ drop down and select ‘My Profile’, and change your temperature unit preference there.)
2. Menu Scrolling: the LCD screen of our device can scroll through your temperatures. By checking this box, the LCD screen will scroll.
3. LCD Backlight: you can increase the back panel brightness of the LCD on your device. This value can be 1-100. If using the device set-ting in direct bright sunlight, it can be helpful to change this setting to improve readability. (Note: if you set this too low, it can become very difficult to read your display, so we do not recommend setting this too low.)
4. LCD Contract: this value can be 1-100, and will adjust the contrast on your LCD screen. This can help to improve readability when using the device in direct sunlight. (Note: if you set this too high or low, it can become very difficult to read your display.)
5. Alarm Beeps: when your CyberQ Cloud has an alarm condition, it will make an audible alert. This setting will determine how many times it beeps. If you wish to disable the audible alarm, set this value to 0.
6. Factory Restore: this will erase ALL your custom settings and return your device back to factory default settings. Your device will lose connection to the internet including ShareMyCook.com until it is reconfigured. We recommend only using this option if really necessary since you will have to re-register your CyberQ Cloud again on ShareMyCook. (If you give your CyberQ Cloud away to someone else, we do recommend a factory reset). Note: A factory reset also requires a reboot of your device to take effect.
7. Reset CPU (Reboot): this will restart your device and you will lose connection to it for several minutes. You may not regain a connec-tion if you changed your WIFI settings. If you make changes to your WIFI settings a reboot is required.

27REV 0.9.5
Control Setup Page: you can change how your CyberQ behaves in certain temperature conditions and you can also adjust the device’s algorithm. Since every grill, smoker, and cooker are different, you can customize the settings here to get optimum performance on yours. The CyberQ Cloud ships with default settings that work great for most cookers.
1. Cook Hold: this is the temperature that your Cook(pit) target tem-perature will change to when the timer expires, if the timeout action is set to hold.
2. Timeout Action: this setting determines what happens when the timer counts to 00:00:00. The options are no action (default), hold, alarm, or shut down. No action means nothing will change. Hold means that the Cook (pit) target temperature will change to the Cook Hold setting. Alarm means that the device will sound an audi-ble alert. Shut down means it will completely shut off the fan.
3. Alarm Dev: your CyberQ Cloud can warn you if your pit tempera-ture gets too high or drops too low. This is important to notify you if your pit temperature gets hotter than you want or drops too low (if you ran out of charcoal, for example). This number (can be 10-100) represents the amount of degrees from your target temperature that will trigger the alarm. Read more about how this setting works in the Alarm Deviation Setpoint section of the manual.
4. Cook Ramp: When the ramp is set to on, the low and slow ramp mode is enabled. The ramp selection tells the control which sensor to ramp from, so the selections are off, Food1, Food2, Food3. This mode is used for slow cooks so your food (meat) never over-cooks. This feature will gradually lower the pit temperature to the food X set point temperature when the food is within approximately 30° of being done. The controller will hold the pit temperature slightly above your food target set point as long as there is fuel.
5. Open (Lid) Detect: This feature will allow recovery to the cooking temperature without overshoot after you open the cooker’s lid. When open lid detect is set to off and you open your pit’s lid, the temperature will drop. The inrush of oxygen can cause the blower to over-fire the coals and cause overshoot when the lid is shut again. When open lid detect mode is on, it attempts to detect when the pit’s lid has been opened and minimizes the blower running during that time. Some overshoot will always be present when your pit’s lid is opened and closed even if the blower is off, because it still intro-duces oxygen to the fire. The factory default is ON, so you must turn this OFF if you have problems with excess air currents in your pit.
6. Cyc Time: This is an advanced setting and we recommend leaving at the default and only changing if BBQ Guru customer service rec-ommend making a change.

28REV 0.9.5
7. Prop Band: This is an advanced setting and we recommend leaving at the default and only changing if BBQ Guru customer service rec-ommend making a change.
WIFI Setup: you can change several of your WIFI settings from ShareMyCook. It’s important to note that if you change settings on this page, it will require a reboot and your device may lose connection with ShareMyCook after it reboots. Your device has two types of WIFI modes: Hotspot and Infrastructure. Hotspot setting are the settings that you use to access and use your CyberQ as a WIFI access point for direct control. Infrastructure settings are those settings that your CyberQ Cloud uses to get on to your home WIFI to get it onto the internet. We generally do not recommend changing these settings directly unless instructed to by BBQ Guru customer service. Please refer to the WIFI section of the manual for more details.
11. VOICE CONTROL USING AMAZON ALEXA - INITIAL SETUP
You can monitor and update settings on your CyberQ Cloud with just the sound of your voice when you use an Amazon Alexa-enabled device (sold separately). Before you can use your voice to access your CyberQ Cloud, you need to con-figure a few settings. You also must already have your CyberQ Cloud registered in an account on ShareMyCook. (Refer to the ShareMyCook registration in your manual for directions)1. Make sure that your Amazon Alexa device is already registered and setup
with Amazon. (A good test is to ask her “Alexa, what time is it?” If she an-swers correctly, your Amazon Alexa device has internet connection).
2. You will need to add the CyberQ Cloud skill to your Amazon Alexa account.3. Open your Alexa app (or the desktop version at alexa.amazon.com),
click the ‘Skills’ tab:
4. Search for the CyberQ Cloud skill by typing in CyberQ Cloud:

29REV 0.9.5
5. You will see CyberQ Cloud appear, click on it and install it by adding it to your account.
6. Once added, you will need to link it to your ShareMyCook account. Click on the blue ‘Enable’ button. After you click on ‘Enable’, it will open a new win-dow (make sure you don’t have pop-up blocker on or disable it temporarily. Many browsers will block this by default).
7. You now need to LINK the CyberQ Cloud skill to your ShareMyCook account. By doing this, you grant the CyberQ Cloud skill access to your default CyberQ Cloud. You will be asked to login and link the accounts. Login with your Share-MyCook account information:

30REV 0.9.5
8. Once logged in, it will ask you if you grant permission. You will click ‘Yes, Allow’:
9. Once successful, you should see something similar to this:
10. You are now ready to use ‘Voice Control’! Refer to the Voice Commands section of the manual for a list of the voice commands you can use.
12. VOICE CONTROL USING AMAZON ALEXA - VOICE COMMANDS
After you have successfully linked your Amazon Alexa-enabled device (sold sep-arately) with your CyberQ Cloud (please refer to the ‘Voice Control Initial Setup’ in the manual for directions), you can start using voice commands, allowing you to monitor and control your device with just the sound of your voice.
Alexa expects commands spoken in a specific way. Often she can interpret vari-ations, but we recommend using the commands as listed below. For the food names and specific temperatures and timer settings, you should substitute with your own settings.
Alexa, Ask CyberQ Cloud, what is the pit temperature? Alexa, Ask CyberQ Cloud, what is the food 1 temperature? Alexa, Ask CyberQ Cloud, what is the food 2 temperature? Alexa, Ask CyberQ Cloud, what is the food 3 temperature?

31REV 0.9.5
Alexa, Tell CyberQ Cloud, set food 1 target temperature to 100. Alexa, Tell CyberQ Cloud, set food 2 target temperature to 130. Alexa, Tell CyberQ Cloud, set food 3 target temperature to 150. Alexa, Tell CyberQ Cloud, set food 1 name to sausage. Alexa, Tell CyberQ Cloud, set food 2 name to brisket. Alexa, Tell CyberQ Cloud, set food 3 name to hamburgers. Alexa, Tell CyberQ Cloud, set timer to 1 hour and 30 minutes. Alexa, Ask CyberQ Cloud, how much time is left on the timer?
Multiple Devices: Amazon Alexa voice control will control the default CyberQ Cloud. For our customers who own more than one CyberQ Cloud, we have add-ed the ability to change the default device in your account with the sound of your voice. This way you can switch between your device and control each one with your voice. To switch your default device say:
Alexa, Tell CyberQ Cloud, Switch Default CyberQ Cloud.
Alexa will then prompt you with the names of the different devices with a num-ber for each one. You then should respond with the number for the device you want as your new default. Once successfully changed, your voice commands will now use your new default device.
13. BUILDING A PROPER FIRE FOR GOOD CONTROLHow you build the fire in your pit is critical for good control, especially at low cooking temperatures. Stack the charcoal inside your pit so it’s shaped like a pyramid, small at the top and large at the bottom. Light the fire by lighting a few coals at the top. Do not over-fire the charcoal or light it at the bottom, be-cause this will only cause your pit to over-fire during startup. Some overshoot is normal; try setting your cook temp 15-20 degrees lower when starting and raising it after your meat is on and the temperature has stabilized.
ELIMINATING LARGE FLUCTUATIONS IN THE PIT TEMPERATURENormally, the CyberQ Cloud Wi-Fi will be able to adjust the airflow via the blower to deliver precise control and no damper adjustment will be required. If the pit has become over-fired or if you built the fire too big, you may see large temperature swings (+/- 10 degrees or more). To eliminate this you may need to restrict the airflow by adjusting the blower damper. A good rule of thumb is that if you see large temperature swings, try closing the damper to half the current setting; the pit should stabilize within 10-15 minutes after adjustment.
EXTINGUISHING THE PITIf there is fuel left over from the cook, you can save this fuel by shutting any open dampers or removing the blower and insert the kill plug into the fan adapter. This should put the fire out in about 30-45 minutes.

32REV 0.9.5
12. FIRMWARE UPDATES From time to time, BBQ Guru will release an update to the CyberQ Cloud’s operating software called firmware. If a new firmware is released, then the next time your CyberQ Cloud turns on and connects to the internet in Infrastructure mode, it will be notified there is a firmware update. On the LCD screen of your device there will be a notification that a firmware update is available. There are two types of firmware upgrades: optional and critical updates. We always rec-ommend upgrading to the most recent firmware version even if it is optional. Using the arrow keys on the device, you can select to install the update right away or to postpone it for a later time. If you choose to install the firmware, your CyberQ Cloud will download the new file update. Do not unplug your CyberQ Cloud in the process and do not disconnect it from its WiFi connection. After the files are downloaded, it will install the files. Once the files are installed, it will reboot with the update. You will then have the most up-to-date software on your device.
14. LIMITED WARRANTYReturn criteriaTo qualify, all returns and exchanges must be accompanied by the original re-ceipt, the original documentation, instruction manuals, parts and components (including probes, controller, and accessories) and the original manufacturer packaging. Failure to include such items may prevent or delay your refund or exchange.
Items must be in a condition that permits us to resell them. The BBQ Guru will not accept the following items for return: (i) items that have been personalized or customized: (ii) special order items, if not part of the BBQ Guru retail sales offering (iii) items that have been used, altered or that show wear or damage; (iv) gift cards (v) services.
DigiQ DX2, CyberQ Cloud Wi-Fi and PartyQ controls and fans (2 Year limited warranty) The BBQ Guru warrants this product to be free from defect in work-manship and materials for a period of 2 years from the date of purchase.
Pit/Food Probes, Power Packs, and other Accessories (90 day limited warran-ty) The BBQ Guru warrants these products to be free from defect in workman-ship and materials for a period of 90 days from the date of purchase.
Should the unit malfunction within the warranty period, you must get a Return Material Authorization (RMA) number to return it to the factory by emailing a description of your problem and your name, address, email, phone number, and date of purchase to [email protected]. If defective, it will be repaired or replaced (at the discretion of BBQ Guru) at no cost. There are no user serviceable parts on this unit.

33REV 0.9.5
This warranty is void if the unit shows evidence of tampering or being subject-ed to moisture, excessive heat, corrosion or other misuse. Components with excessive wear or damage due to misuse will not be covered under warranty.
If your control, probe power pack or fan is malfunctioning and is out of warran-ty, we may be able to troubleshoot it by phone or email. If it is determined that your part has been damaged in any way during use we will recommend that you purchase a new part.
The BBQ Guru shall not be responsible for any damage or losses, however caused, which may be experienced as a result of the installation or use of this product.
15. WI-FI SPECIFICATIONSUnder ideal conditions with no obstructions the CyberQ Cloud Wi-Fi can achieve a range of up to 1000 ft. (line of sight, outdoors). Indoors, the range in unpredictable and depends greatly on the building construction. The indoor range is typically 50-150 feet.
16. FAQMy monitoring device shows I am connected to the CyberQ Cloud Wi-Fi, but I can’t view the webpages.1. The CyberQ Cloud may have lost connection after a temporary signal loss.
To regain access, power-cycle the CyberQ Cloud Wi-Fi by unplugging and replugging the power cord. Check to see that your device(s) reconnect.
2. Double check the CyberQ Cloud Wi-Fi’s ip address. If you did not reserve a network address when setting up infrastructure mode, your router may assign a different address.
3. Interference from other 2.4GHz such as cordless phones and wireless net-worked devices may cause interference with the CyberQ Cloud Wi-Fi and pre-vent a reliable connection. It is the customer’s responsibility to diagnose the source of the interference and determine which devices need to be turned off or eliminated from the installation.
Why doesn’t the CyberQ Cloud Wi-Fi show up in the list of DHCP clients on my router?1. Check to make sure that your router is set to support 802.11g wireless devices.2. Check to make sure that the CyberQ Cloud Wi-Fi is set to infrastructure mode
and that the SSID, Key, and Encryption type all match your router, and that DHCP is turned on
My router shows the CyberQ Cloud Wi-Fi in the client list, but I cannot access the CyberQ Cloud Wi-Fi from a computer on the same LAN. 1. Reset the router and when it comes up, reset the CyberQ Cloud Wi-Fi.2. Try updating your router firmware.3. Try a different router.

34REV 0.9.5
I am trying to setup the CyberQ Cloud in infrastructure mode. I have verified my settings for SSID, ENCRYPTION and KEY, but no IP address is shown during power up of the CyberQ Cloud.If you have a dual-band router and use the same SSID and password for both bands, change them for the 5GHz band. If your network uses more than one router, make sure the extender routers are set up to be wireless access points (WAPs). Otherwise, the routers may firewall each other.
How do I change the Name (SSID) and Password (KEY) for my CyberQ Cloud Wi-Fi?
From the web interface: 1. Connect using hot-spot mode, enter the CyberQ Cloud’s IP
address in your browser. 2. Click on the Wi-Fi setup tab. 3. Change the SSID and the KEY entries.4. Power-cycle the CyberQ Cloud.
From the front panel keys:1. Hold down UP and DOWN until SYSTEM SETUP is displayed.2. Press RIGHT until you see WI-FI SETUP.3. Press DOWN until SSID is displayed.4. Press MODIFY/ENTER to modify the SSID. Adjust the value using the
UP/DOWN and LEFT/RIGHT. When you done changing the value, press the MODIFY/ENTER.
5. Press DOWN until KEY is displayed.6. Press MODIFY/ENTER to modify the SSID. Adjust the value using the
UP/DOWN and LEFT/RIGHT. When you done changing the value, press the MODIFY/ENTER.
7. Power-cycle the CyberQ Cloud.
Why can’t I send emails from the CyberQ Cloud Wi-Fi?The CyberQ Cloud Wi-Fi must first be linked to a router in infrastructure mode so that it has Internet access. Secondly, the CyberQ Cloud Wi-Fi only supports non-SSL SMTP email servers. We have created our own non-SSL SMTP mail server to forward your email alerts to the email address of your choice.The Email From field must have a valid email address of .com or .net.
I can’t get port forwarding working correctly to allow remote web access. I am successfully connected in infrastructure mode and I have setup incoming TCP requests at port 80 to point to the CyberQ Cloud Wi-Fi’s ip address, but I still cannot access it using my public IP address.
Check with your ISP or your router manufacturer, sometimes they block or reserve incoming ports.

35REV 0.9.5
If your network setup includes more than one router (usually to extend net-work range), they can firewall each other. You can link the CyberQ Cloud to the router that connects directly to the Internet, or set up the extension router so that its DHCP function is turned off (sometimes called Bridge or AP mode). This can be a complex process and you may have to consult your ISP or router manufacturer.
17. GLOSSARY OF NETWORKING TERMSDHCP (Dynamic Host Configuration Protocol) – This basically means that IP addresses are not static, they can changed at any time. In the case of ISP DHCP, it means that your ISP can change your public IP address. In case of DHCP en-abled on your router, it means that your router can change the local IP address-es of attached devices at any time.
DNS - Domain Name System is the method by which website or domain names are translated into IP addresses. Specify such an address manually, according to the information provided by the ISP. For 99% of applications you don’t have to deal with this; This parameter in the CyberQ Cloud Wi-Fi is reserved for advanced IT personnel.
HOT-SPOT MODE – This mode of the CyberQ Cloud Wi-Fi allows direct connection and access from mobile devices or PCs. In this mode, the CyberQ Cloud Wi-Fi actu-ally functions as a mini Wi-Fi router, though it does not provide Internet access.
INFRASTRUCTURE MODE – This mode of the CyberQ Cloud Wi-Fi links to a wireless router, providing other devices on your network access to its internal data plus features requiring Internet access.
IP ADDRESS - An IP address (Internet Protocol) address is your computer’s equivalent of your postal address and just like the mail service, each computer has to have its own address so that it will only receive the information that is meant for it and not anything that is meant for someone else.
Your Public IP address is the address that is assigned to you by your ISP. The Private IP addresses on your network is generally assigned to your computers and devices by your router.
ISP (Internet Service Provider) – The company that sells you internet service, i.e. Comcast, Verizon, etc.
KEY – This is the encryption key. The types of encryption are shown below:
WEP - Wired Equivalent Privacy. This was the original security setting on wireless networks. In the CyberQ Cloud Wi-Fi, it must be a value con-taining the characters 1,2,3,4,5,6,7,8,9,A,B,C,D,E,F (hexadecimal value). WEP 40 requires 10 Characters, WEP104 requires 26 characters.
WPA - Wi-Fi Protected Access. Provides better encryption than WEP and also has user authentication.

36REV 0.9.5
WPA2 - a more secure version of WPA which provides “government grade” security. There are two versions of WPA2 - Personal & Enterprise.
WPA AUTO – Automatically selects a WPA or WPA2 network WPA OR WPA2 PHRA – Uses a passphrase instead of hex values. OPEN – No encryption. MAC ADDRESS (Media Access Control) Tthis is the ID of computers and other network devices. It never changes and is assigned to the device when it is man-ufactured. Each device has a unique address
NET MASK ADDRESS - Bundled with an IP address there is always a “Netmask” value. The Netmask, together with the IP address, defines the network the com-puter belongs to, that is which other IP addresses the computer can touch di-rectly in the same LAN. For 99% of applications you don’t have to deal with this. This parameter in the CyberQ Cloud Wi-Fi is reserved for advanced IT personnel.
PORT - Every IP address is divided up into many ports for different functions. When one computer sends data to another computer, it sends it from a port on an IP address to a port on an IP address. A port can only be used by one program at a time. The protocol used for the CyberQ Cloud Wi-Fi’s web pages is HTTP (Hypertext Transfer Protocol)
PORT FORWARDING - Port forwarding allows remote computers, for example, computers on the Internet, to connect to a specific computer or device within a private local area network (LAN).
ROUTER – This is the device that manages and connects your local network to the internet. It may have a built in cable modem or you may have an external cable modem that connects to your ISP. It manages all of the local traffic on your network and also determines how data is passed back and forth between your local network and the internet.
SSID – (Service Set Identifier) is the name that identifies an 802.11 wireless LAN.
17. CONTACT THE BBQ GURURemember, The BBQ Guru is here to help you. Please do NOT spend more than a couple of hours trying to get the CyberQ Cloud set up. Email your problem to us at: [email protected]. We can either send back some tips or set up a remote support call so we can get you over the hump without further stress.

37REV 0.9.5
The BBQ GuruDivision of Therm-Omega-Tech, Inc.
359 Ivyland Road, Warminster, PA 189741-800-288-GURU (4878) • www.bbqguru.com
Tech Support: [email protected]/Customer service: [email protected]