Basic tutorial how to use imovie
153
HOW TO USE IMOVIE 9.0.4 VERSION?
-
Upload
cherrylin-ramos -
Category
Presentations & Public Speaking
-
view
91 -
download
0
Transcript of Basic tutorial how to use imovie
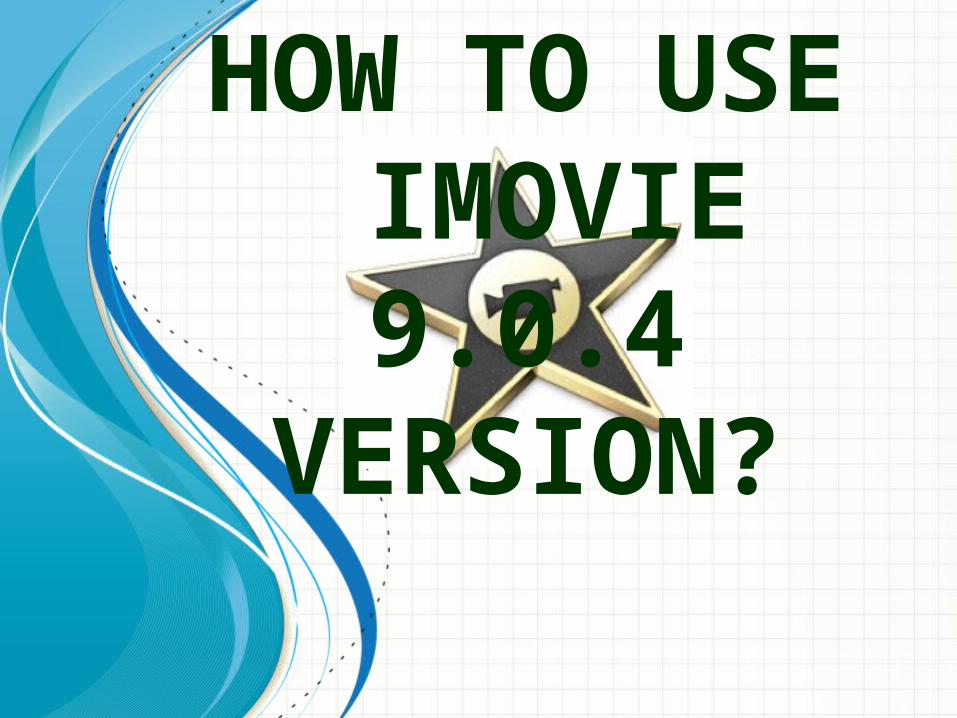
HOW TO USE IMOVIE 9.0.4
VERSION?

cherrylinramos.blogger.no 2
Overview
2015

cherrylinramos.blogger.no 32015
iMovie 09 is consumer-level
digital video editing software for Macintosh.

cherrylinramos.blogger.no 4
You can use to edit the footage
you film
2015

cherrylinramos.blogger.no 5
with digital video cameras
and HD video cameras.
2015

cherrylinramos.blogger.no 6
The sections will
help you use
2015

cherrylinramos.blogger.no 7
iMovie to edit your
video efficiently.
2015

cherrylinramos.blogger.no 8
Overview of the
iMovie screen
2015

cherrylinramos.blogger.no 92015

cherrylinramos.blogger.no 10
01. Project Library - where all movie projects on computer are displayed
2015

cherrylinramos.blogger.no 11
02. iMovie Project - shows current position in clip and for editing
2015

cherrylinramos.blogger.no 12
03. Monitor Window - views clips or your final iMovie project
2015

cherrylinramos.blogger.no 13
04. Play Project -
2015

cherrylinramos.blogger.no 14
play selected movie project either in viewer or full screen
2015

cherrylinramos.blogger.no 15
05. New Project - allows you to start a new movie project
2015

cherrylinramos.blogger.no 16
06. Frame Adjustment - allows you to see
2015

cherrylinramos.blogger.no 17
thumbnails of clips by amount of frames per thumbnail
2015

cherrylinramos.blogger.no 18
07. Import -
2015

cherrylinramos.blogger.no 19
where you import footage from your webcam or video camera
2015
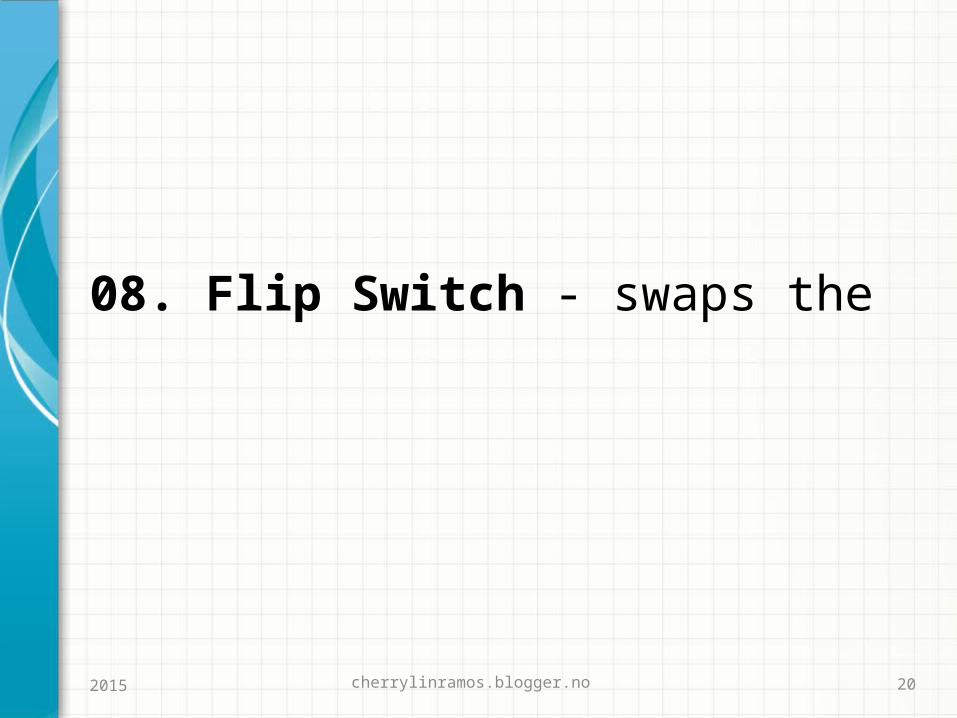
cherrylinramos.blogger.no 20
08. Flip Switch - swaps the
2015

cherrylinramos.blogger.no 21
Source Video and the iMovie Project from top to bottom
2015

cherrylinramos.blogger.no 22
09. Adjusts size of thumbnails used in iMovie
2015

cherrylinramos.blogger.no 23
10. Event Library - where
2015

cherrylinramos.blogger.no 24
all the events (groups of clips) on computer are displayed
2015

cherrylinramos.blogger.no 25
11. Add selection – allows to add clips to your project
2015

cherrylinramos.blogger.no 26
12. Favorites Tab - allows you to select
2015

cherrylinramos.blogger.no 27
favorite clips, parts of clips, or remove clips all together.
2015

cherrylinramos.blogger.no 28
13. Options Tab – where you can work on
2015

cherrylinramos.blogger.no 29
voiceovers, cropping images, to adjust audio, or adjust video
2015

cherrylinramos.blogger.no 30
14. Turns on/off Audio Skimmer
2015

cherrylinramos.blogger.no 31
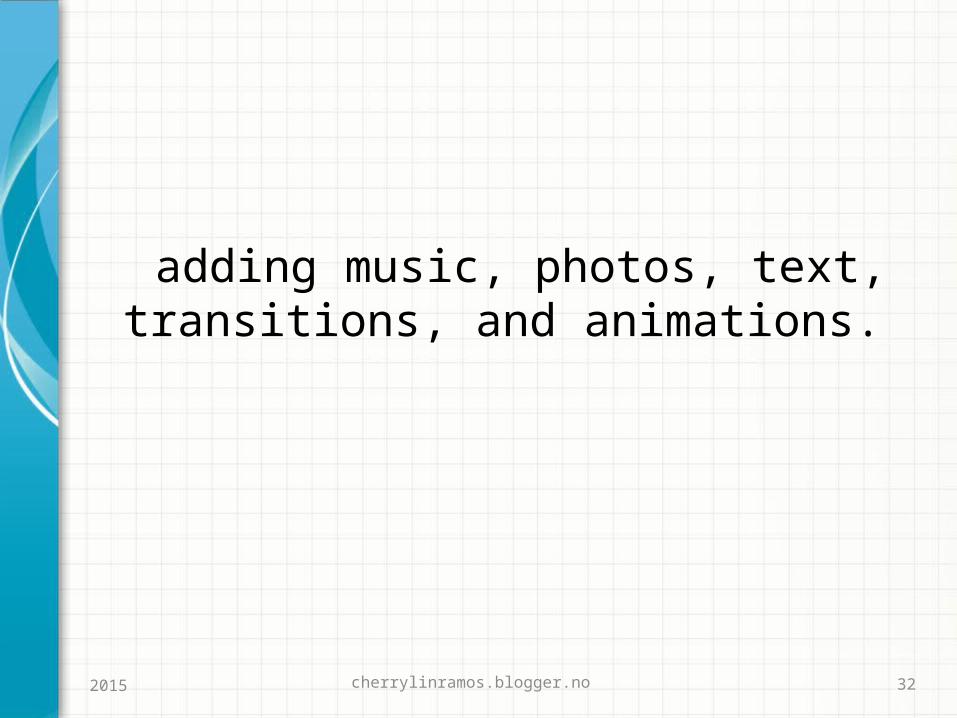
15. Edit browsers - Different editing browsers such as
2015
cherrylinramos.blogger.no 32
adding music, photos, text, transitions, and animations.
2015

cherrylinramos.blogger.no 33
16. Source Video - shows all events from
2015

cherrylinramos.blogger.no 34
a particular source that can be used for editing
2015

cherrylinramos.blogger.no 35
HOW TO ADD PHOTOS FOR
PRESENTATION?
2015

cherrylinramos.blogger.no 36
To begin adding photos,
2015

cherrylinramos.blogger.no 37
you will need to create a new project.
2015

cherrylinramos.blogger.no 38
To do this,
2015

cherrylinramos.blogger.no 39
Click Applications folder on your dock screen
2015

cherrylinramos.blogger.no 40
Click on the iMovie icon
2015

cherrylinramos.blogger.no 41
When the iMovie screen appears,
2015

cherrylinramos.blogger.no 42
Click “File” on the menu bar
2015

cherrylinramos.blogger.no 43
Click “New Project”
2015

cherrylinramos.blogger.no 44
The screen appear like this:
2015

cherrylinramos.blogger.no 45
Enter the title of the new project on the box
2015

cherrylinramos.blogger.no 46
Select the “Aspect ratio” for your project, either :
2015

cherrylinramos.blogger.no 47
4:3 Standard or 16:9 widescreen
2015

cherrylinramos.blogger.no 482015
Fullscreen footage is
shaped more like a square.

cherrylinramos.blogger.no 492015
Widescreen footage is
shaped more a like a rectangle.

cherrylinramos.blogger.no 50
You can select also the Frame rate you want
2015

cherrylinramos.blogger.no 51
Either :
2015
30 fps – NTS25 fps – PAL24 fps - Cinema

cherrylinramos.blogger.no 52
By clicking the “Frame Rate” box
2015

cherrylinramos.blogger.no 53
Once you done entering and selecting the :
2015

cherrylinramos.blogger.no 542015
Name of Project
Aspect Ratio
Frame Rate

cherrylinramos.blogger.no 55
Click the “Create” button
2015

cherrylinramos.blogger.no 56
Select photo on your file
2015

cherrylinramos.blogger.no 57
And drag them to this area
2015

cherrylinramos.blogger.no 58
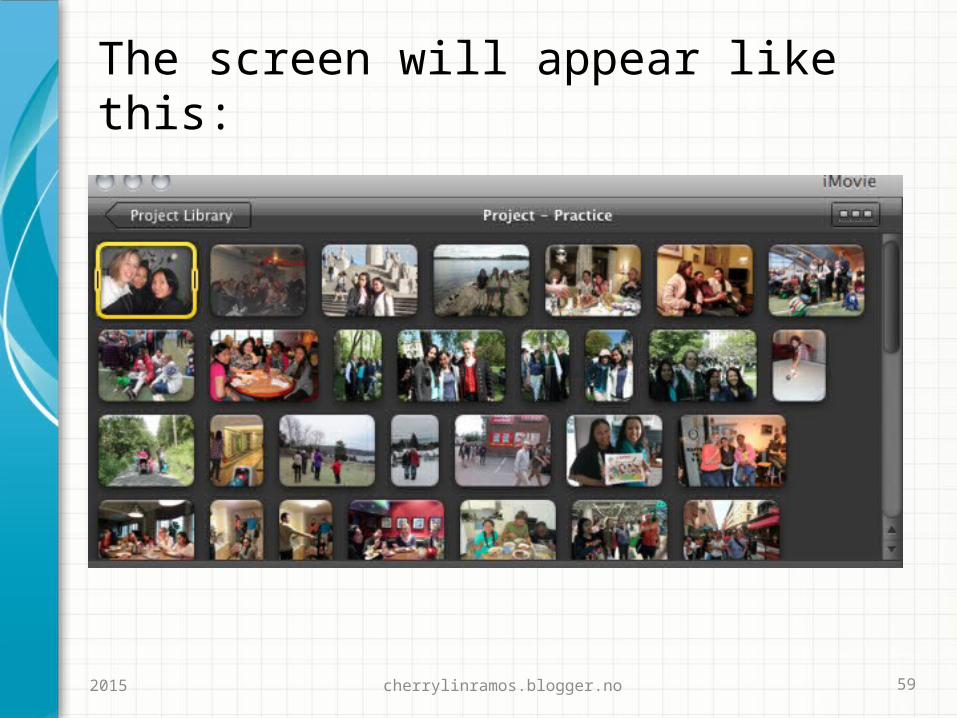
After dragging all the photos you want,
2015
cherrylinramos.blogger.no 59
The screen will appear like this:
2015

cherrylinramos.blogger.no 60
Click “Play” button to view the output
2015

cherrylinramos.blogger.no 612015
IMPORTING VIDEO /MOVIE FROM
EXISTING FOLDERS OR FILES

cherrylinramos.blogger.no 62
Click the “File” from Menu bar
2015

cherrylinramos.blogger.no 63
Click the “Import”
2015

cherrylinramos.blogger.no 64
Click the “Movies”
2015

cherrylinramos.blogger.no 65
Find the video / movie in your folder
2015

cherrylinramos.blogger.no 66
I choose from the “Desktop folder”
2015

cherrylinramos.blogger.no 67
Then I choose “preteens activity.mp4”
2015

cherrylinramos.blogger.no 68
Click “ Create new event”
2015

cherrylinramos.blogger.no 69
Click “Optimize video”
2015

cherrylinramos.blogger.no 70
Click or Choose Full-Original Size
2015
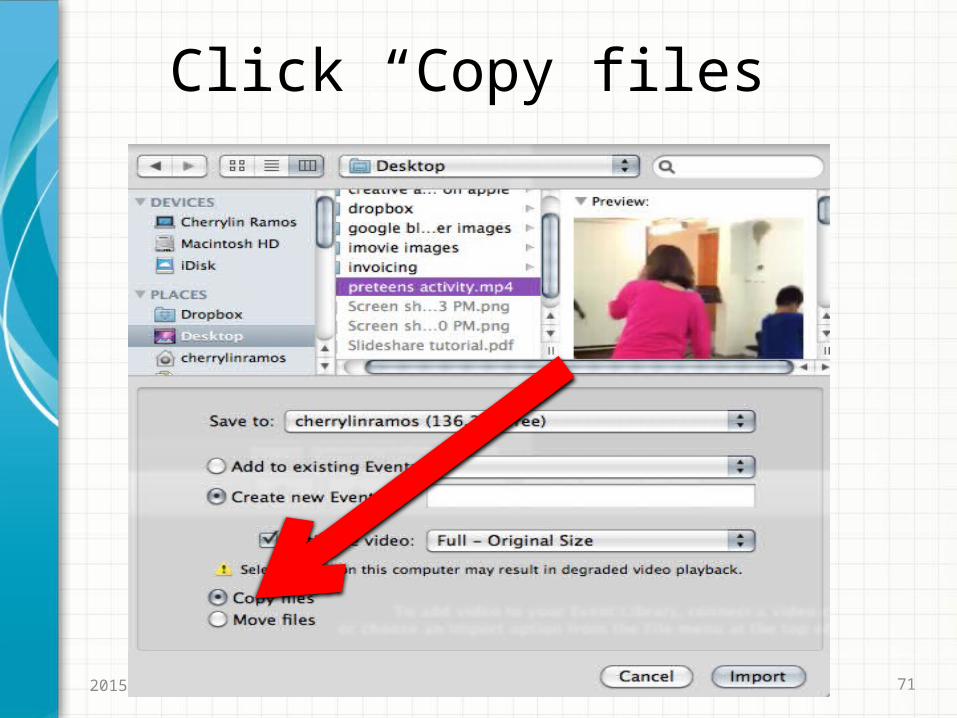
cherrylinramos.blogger.no 71
Click “Copy files”
2015
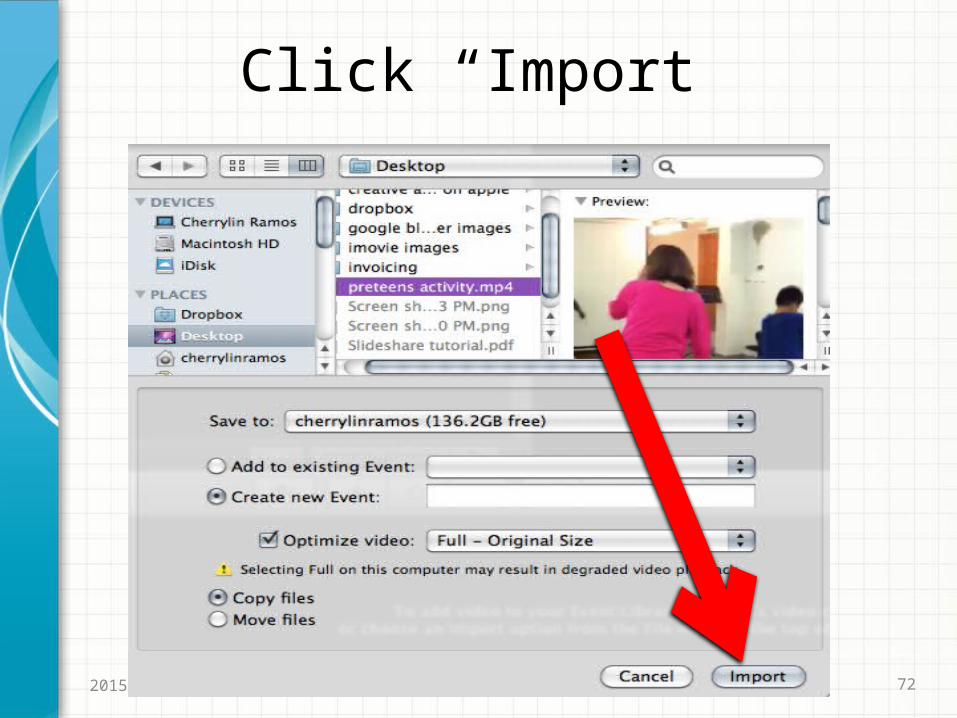
cherrylinramos.blogger.no 72
Click “Import”
2015

cherrylinramos.blogger.no 73
Rename the new event by double click “new event”
2015

cherrylinramos.blogger.no 74
Then I Rename “new event” to “Popping balloon”
2015
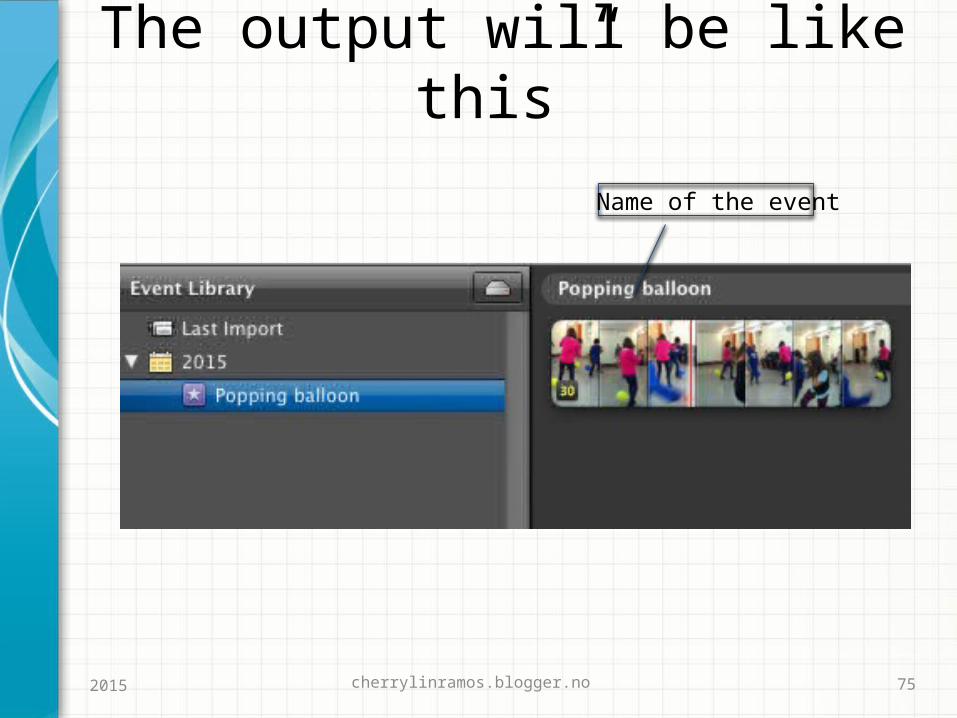
cherrylinramos.blogger.no 75
The output will be like this”
2015
Name of the event

cherrylinramos.blogger.no 76
Click play under the Event Library to preview entire movie
2015

cherrylinramos.blogger.no 77
ADDING CLIPS TO YOUR
PROJECT / EVENT
2015

cherrylinramos.blogger.no 78
Click on any of the clips within the “Event Library”
2015

cherrylinramos.blogger.no 79
A yellow box will appear on the thumbnail
2015

cherrylinramos.blogger.no 80
Adjust the edges of the box so that all of
2015

cherrylinramos.blogger.no 81
the footage you want to add to your project is
2015

cherrylinramos.blogger.no 82
within the yellow box.
2015

cherrylinramos.blogger.no 83
After you have done, your mouse pointer appear as hand.
2015

cherrylinramos.blogger.no 84
Grab the thumbnail within the yellow box and drag it
2015

cherrylinramos.blogger.no 85
to the Project Browser to add it to your movie.
2015

cherrylinramos.blogger.no 86
A confirmation box appear, click “OK”
2015

cherrylinramos.blogger.no 87
The clip adjustment bar
2015
alters how many frames of each

cherrylinramos.blogger.no 88
clip appear as a thumbnail. Adjusting this can
2015

cherrylinramos.blogger.no 89
make selecting larger or smaller portions of clips easier.
2015

cherrylinramos.blogger.no 902015
Before adjusting
After adjusting

cherrylinramos.blogger.no 91
PHOTO ADJUSTMENT
2015

cherrylinramos.blogger.no 92
Once you have placed a photo into your project..
2015

cherrylinramos.blogger.no 93
You have a variety of options for adjusting the clip.
2015

cherrylinramos.blogger.no 942015
These options include:
TRIMCROP
cherrylinramos.blogger.no 952015
To TRIM a photo:

cherrylinramos.blogger.no 96
Click the clock icon that appears when you hover
2015

cherrylinramos.blogger.no 97
your mouse over a clip in your project
2015

cherrylinramos.blogger.no 98
Just like when inserting a clip, just drag the sides
2015

cherrylinramos.blogger.no 99
of the yellow box to manipulate what portion of the
2015

cherrylinramos.blogger.no 100
video is included in your project.
2015

cherrylinramos.blogger.no 1012015
A confirmation box appear, click “OK”

cherrylinramos.blogger.no 102
Press the play button to preview your clip;
2015

cherrylinramos.blogger.no 103
To CROP a clip:
2015

cherrylinramos.blogger.no 104
Click on the cropping icon in the thumbnail of clip
2015

cherrylinramos.blogger.no 105
On the option tab, click on the clip you’d like to crop.
2015

cherrylinramos.blogger.no 106
You can then resize the green box that appears on
2015

cherrylinramos.blogger.no 107
the clip to control how much of the footage will be visible.
2015

cherrylinramos.blogger.no 108
Click “Crop” button
2015

cherrylinramos.blogger.no 109
Click “Done”
2015

cherrylinramos.blogger.no 110
ADDING MUSIC OR
IMAGES
2015

cherrylinramos.blogger.no 1112015
To add a sound file click the music note icon

cherrylinramos.blogger.no 112
Then simply browse for the sound file that you would
2015

cherrylinramos.blogger.no 113
like too add and drag it into your project.
2015
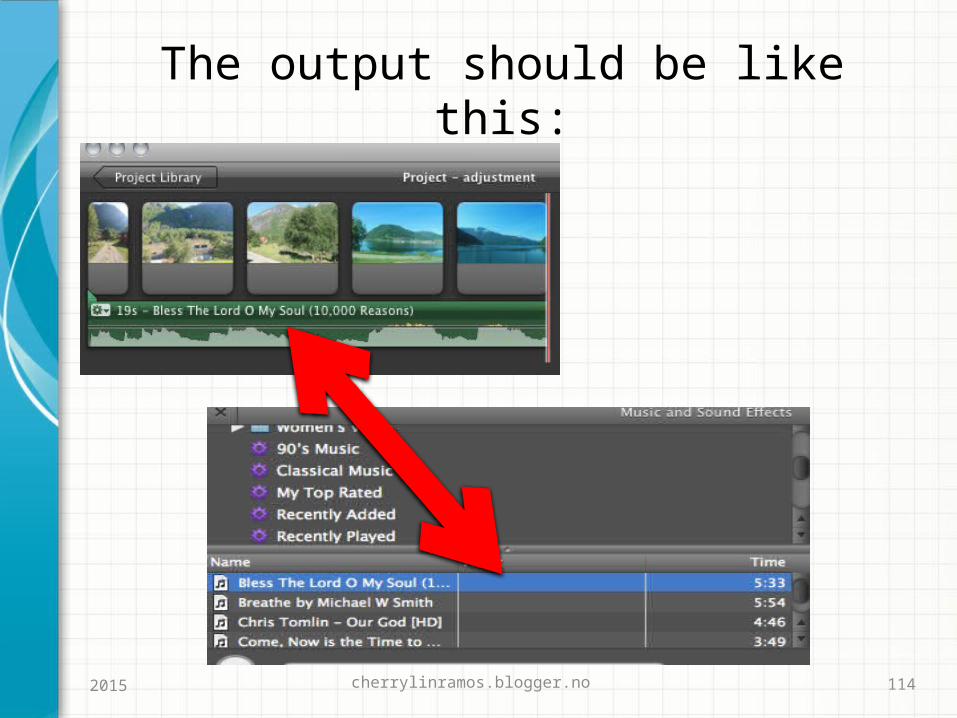
cherrylinramos.blogger.no 1142015
The output should be like this:

cherrylinramos.blogger.no 115
To add an image file, click the camera icon,
2015

cherrylinramos.blogger.no 116
browse for the photo,
2015

cherrylinramos.blogger.no 117
and then drag it into your project.
2015

cherrylinramos.blogger.no 118
The output should be like this
2015

cherrylinramos.blogger.no 119
Adding Titles
2015
To add titles to a clip,

cherrylinramos.blogger.no 120
Click the “T” icon on the Edit Browser
2015

cherrylinramos.blogger.no 121
Select the type of title you would like to add
2015

cherrylinramos.blogger.no 122
Drag the title on top of the clip you would
2015

cherrylinramos.blogger.no 123
like to add it to.
2015

cherrylinramos.blogger.no 124
Select background you want
2015

cherrylinramos.blogger.no 125
Type the title text you want in the box
2015

cherrylinramos.blogger.no 126
Click the play button to preview
2015

cherrylinramos.blogger.no 127
Click “Done ” once finish
2015

cherrylinramos.blogger.no 128
Adding transitionsTo add transitions to your
project,
2015

cherrylinramos.blogger.no 129
Click the “Transition” icon on right of the Edit Browser
2015

cherrylinramos.blogger.no 130
Select “Theme” from the Transitions box
2015

cherrylinramos.blogger.no 131
Then drag the type of transition you would like to
2015

cherrylinramos.blogger.no 132
the place in the timeline that you choose.
2015

cherrylinramos.blogger.no 133
Adding AnimationsTo add animations to your
project,
2015

cherrylinramos.blogger.no 134
Click the Animation icon on far right of the Edit Browser
2015

cherrylinramos.blogger.no 135
Select from the animation themes
2015

cherrylinramos.blogger.no 136
Then drag it into the timeline in the appropriate area.
2015

cherrylinramos.blogger.no 137
SHARING YOUR VIDEOS
2015

cherrylinramos.blogger.no 138
After you have made the finishing touches to your video
2015

cherrylinramos.blogger.no 139
it is time to share it with the World.
2015

cherrylinramos.blogger.no 140
iMovie gives you different options for
exporting your video.
2015

cherrylinramos.blogger.no 141
Click the “Share” tab
2015

cherrylinramos.blogger.no 142
Then choose from the following:
2015

cherrylinramos.blogger.no 143
SAVING YOUR PROJECT
2015

cherrylinramos.blogger.no 144
Saving in iMovie is very different.
2015

cherrylinramos.blogger.no 145
The program automatically saves your project to the
2015

cherrylinramos.blogger.no 146
computers hard drive as you are working.
2015

cherrylinramos.blogger.no 147
To see where it saves automatically,
2015

cherrylinramos.blogger.no 148
Click “Finder” on your computer dock
2015

cherrylinramos.blogger.no 149
Click the “Movie” folder
2015

cherrylinramos.blogger.no 150
In the “Movies” folder, you should see 2 folder :
2015
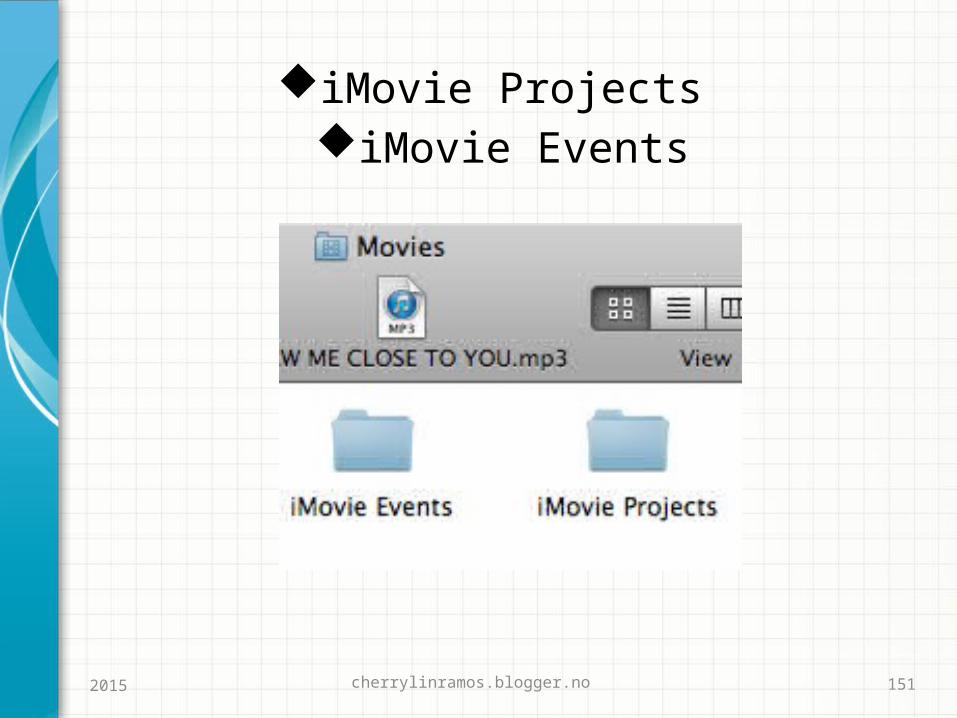
cherrylinramos.blogger.no 1512015
iMovie Projects iMovie Events
GO AHEAD AND MAKE YOUR
FIRST IMOVIE PROJECT

cherrylinramos.blogger.no 153
IT’S FUN …. ENJOY ! !
2015