
Banner ePrint Reports February 10, 2010 Penney Doughtie 1.
48
Banner ePrint Reports February 10, 2010 Penney Doughtie 1
-
Upload
jemimah-philomena-clarke -
Category
Documents
-
view
220 -
download
1
Transcript of Banner ePrint Reports February 10, 2010 Penney Doughtie 1.

Banner ePrint Reports
February 10, 2010Penney Doughtie
1
2
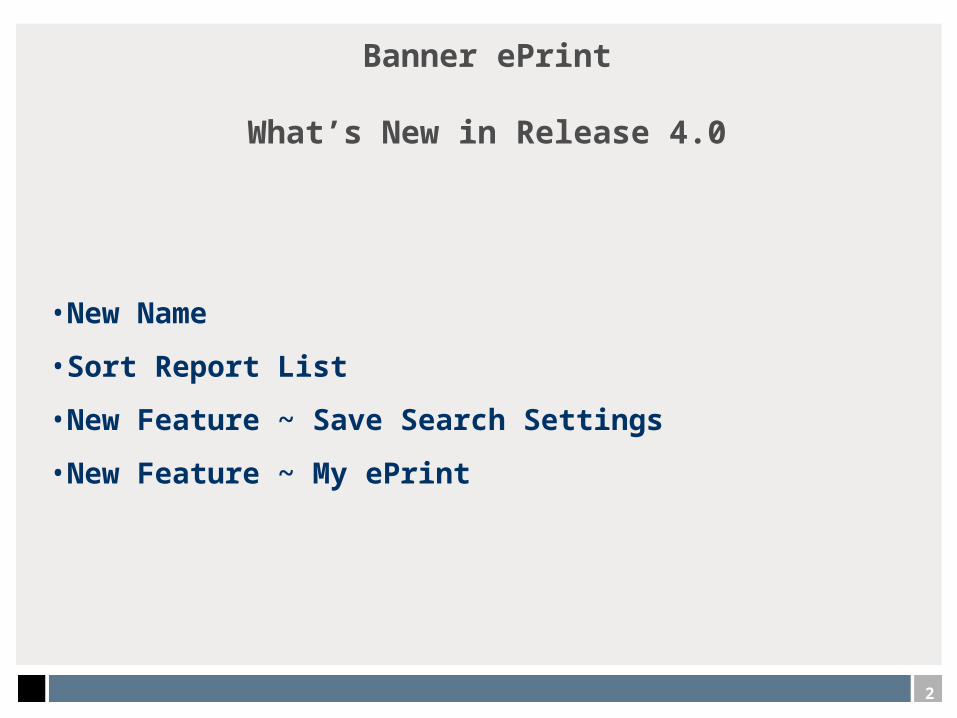
Banner ePrint
What’s New in Release 4.0
•New Name
•Sort Report List
•New Feature ~ Save Search Settings
•New Feature ~ My ePrint

3
Old Name..e~Print Reports
New Name
New Name…..Banner ePrint (effective June 11, 2009)

Sort Banner ePrint Reports(If Banner ePrint reports are not in alphabetical order follow these steps.)
•Banner ePrint reports can be sorted by “Report” or “Latest Date”
•Click the desired sort and the reports will sort by ascending or descending order.
4
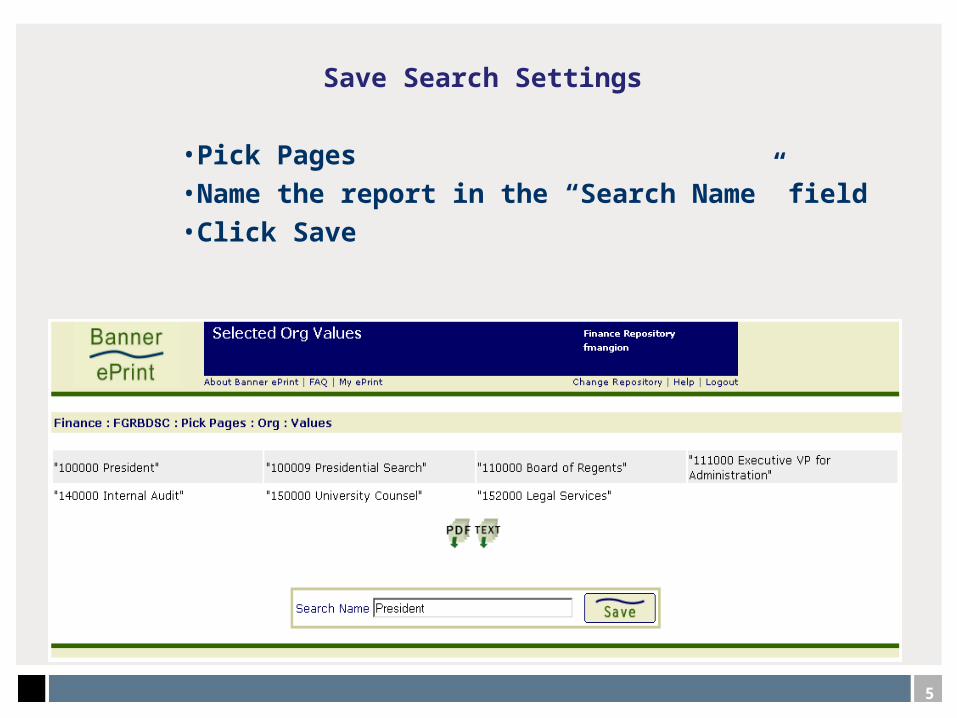
•SAVE SEARCH SETTINGSPICK PAGE
Save Search Settings
•Pick Pages•Name the report in the “Search Name” field•Click Save
5
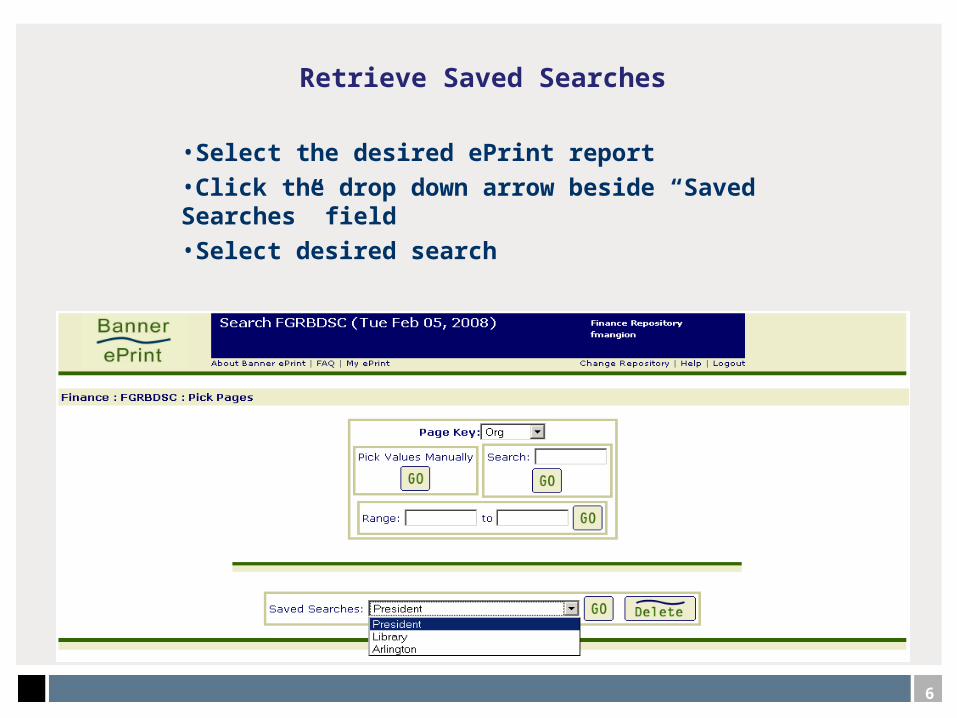
Retrieve Saved Searches
•Select the desired ePrint report
•Click the drop down arrow beside “Saved Searches” field
•Select desired search
6

Create “My ePrint”(A personal directory of the most helpful ePrint reports)
7

8
My ePrint – Create Group
•Enter the name the group of reports in the “Group Name” field
•Select the most used reports from “Available reports:” list by double clicking
•After selecting all desired reports, click the “Save” button

9
My ePrint
Modify Groups

10
My ePrint
Reorder Groups

11
My ePrint
Set Default login group

12
My ePrint
Set Default login group

13
My ePrint
Reorder Search Settings
14
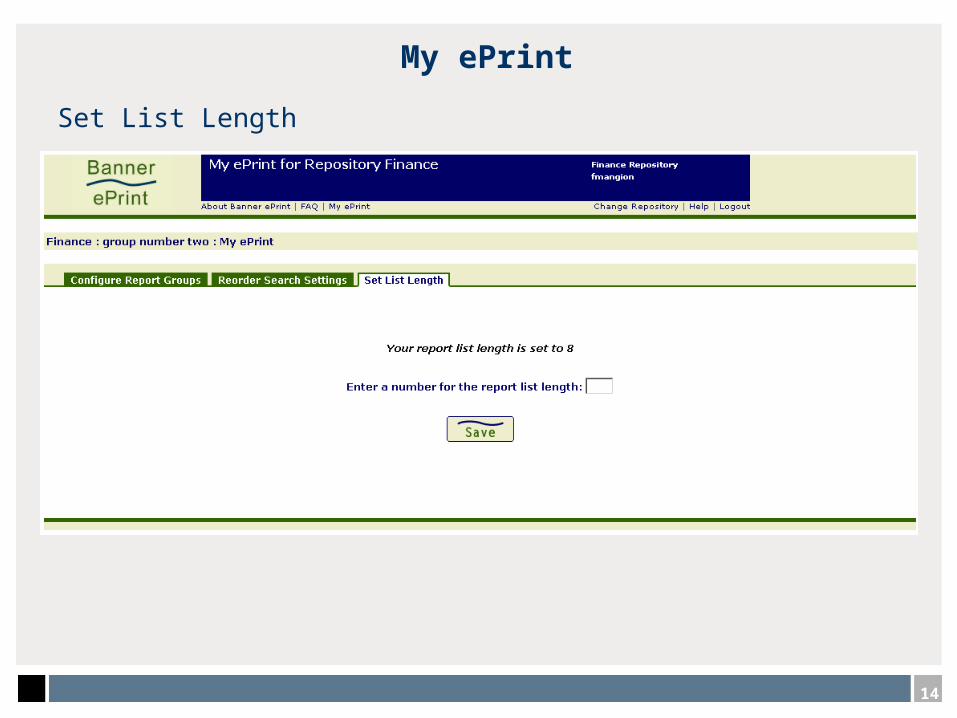
My ePrint
Set List Length

Banner ePrint Training
• Banner Finance Users can attend upcoming ePrint Training
• February 11, 2010• March 11, 2010• April 15, 2010• May 13, 2010
15

16
If you have questions regarding ePrint, please contact Penney Doughtie, Systems Coordination. [email protected] or 328-2706
ODS and Quick Queries
February 10, 2010Penney Doughtie
17

ODS Excel Settings
• Open a new Excel Spreadsheet• Click the Microsoft Office Button (in the left corner)• Click “Excel Options” at the bottom• Click “Trust Center” on the left menu• Click “Trust Center Settings” button• Click “Macro Settings”• Check “Disable all macros with notification”• Click “Add-Ins” on the left menu• Check “Require applications Add-ins to be signed by Trusted
Publisher”• Click “External Content” on the left menu• Click “Prompt user about Data Connections”• Click “OK”• Click “OK”
18
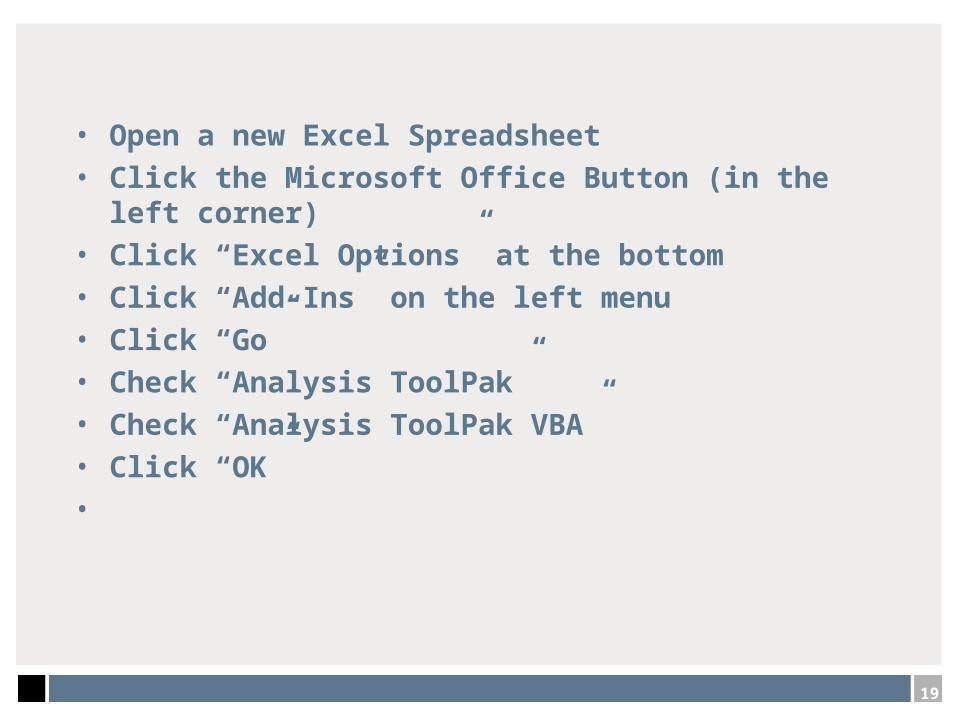
• Open a new Excel Spreadsheet
• Click the Microsoft Office Button (in the left corner)
• Click “Excel Options” at the bottom
• Click “Add-Ins” on the left menu
• Click “Go”
• Check “Analysis ToolPak”
• Check “Analysis ToolPak VBA”
• Click “OK”
•
19
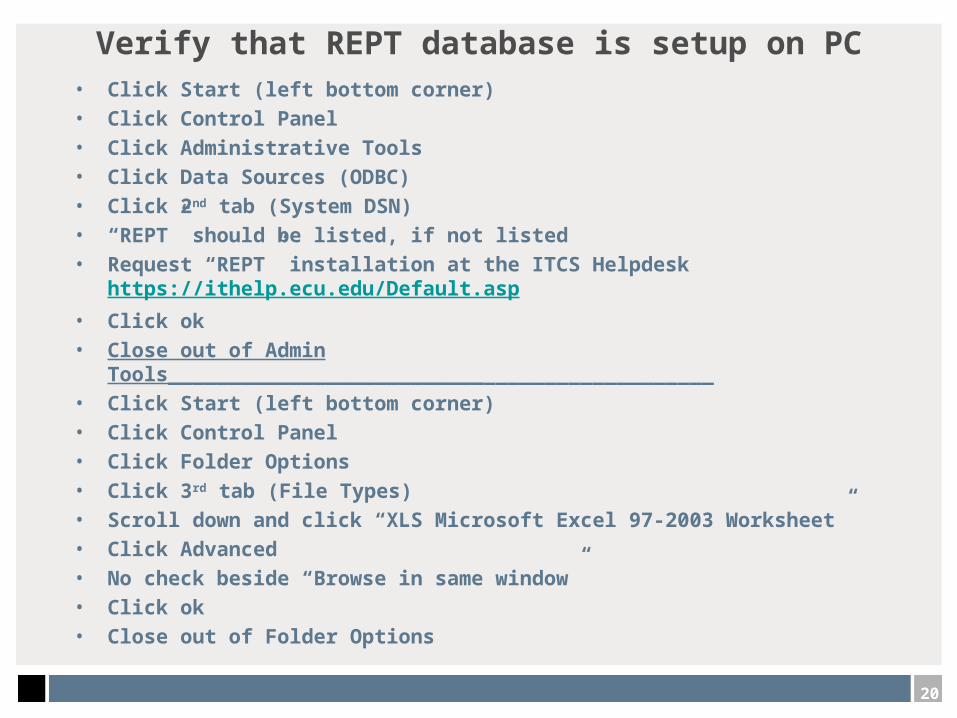
Verify that REPT database is setup on PC• Click Start (left bottom corner)• Click Control Panel• Click Administrative Tools• Click Data Sources (ODBC)• Click 2nd tab (System DSN)• “REPT” should be listed, if not listed• Request “REPT” installation at the ITCS Helpdesk
https://ithelp.ecu.edu/Default.asp• Click ok• Close out of Admin Tools_____________________________________________• Click Start (left bottom corner)• Click Control Panel• Click Folder Options• Click 3rd tab (File Types)• Scroll down and click “XLS Microsoft Excel 97-2003 Worksheet”• Click Advanced• No check beside “Browse in same window”• Click ok• Close out of Folder Options
20

• Click Start
• Click Control Panel
• Click Internet Options
• Click Advance Tab
• NO CHECK beside “Reuse windows for launching shortcuts”
• Click OK
• Shut down PC and restart
21

How Do I Get Security Access?
• Security access to Banner Finance will provide access to ODS.
• User id = PirateID• Password = Ban_XXXX (last four digits of Banner ID). If this
does not work call 328-9866 ITCS Helpdesk and request “REPT” password reset.
• An automated email will be sent to each user when Banner Finance security access is granted.
22
23
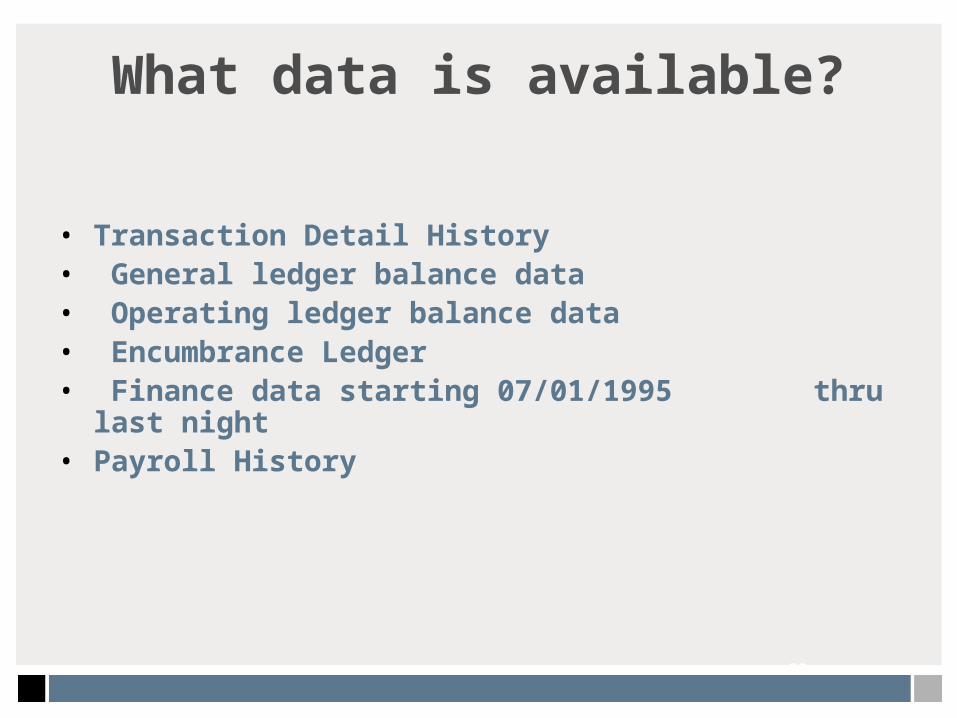
What data is available?
• Transaction Detail History• General ledger balance data• Operating ledger balance data• Encumbrance Ledger• Finance data starting 07/01/1995 thru last night• Payroll History

ODS Finance Data
Banner Finance Data• July 1, 2005 to present• Database = REPT• Owner= ECU• Table = FS_Transactions_with Check
FRS Finance Data• July 1, 1995 to January 31, 2006• Database = Rept• Owner = ECUHIST• Table = FRS_Transactions
24

ODS Human Resources Data FRS HR Data
• July 1, 1995 to January 31, 2006
• Database = Rept
• Owner = ECUHIST
• Table = FRS_Payroll_Trans
*******Payroll data from February 1, 2006 to June 30, 2007 can be requested by contacting Systems Coordination 328-2706.
Banner HR Data
• July 1, 2007 to present
• Database = Rept
• Owner = ECU
• Table = PY_PAYROLL_HISTORY
• Use transaction date
25

26
ODS Quick Queries located on the Systems Coordination website (www.ecu.edu/syscoord)
• Banner Vendor History Search• Banner Journal Voucher Search• Banner Operating Balances (with Pool Account Subtotals)
• Banner Revenue/Expense Transactions• Banner Grant Ledger Balances• Payroll History• Banner Cash Balances by Orgn
(for Foundations and Special Funds)
• Banner Account Description

27
Go to the Systems Coordination website (www.ecu.edu/syscoord)
• Scroll down to the Quick Query List
• Click “Banner Vendor History Search”
• Click “Options”, beside Security Warning
• Click “Enable” in two places in the pop up window

28
Click “Options”, beside Security WarningClick “Enable” in two places in the pop up window

Enter the Banner Vendor Number and Fiscal YearTab to cell A9, then click REFRESH
29

30
Service name will default to REPT, enter PirateID in the “User Name” field , enter REPT password. Click OK.

Query Results
31

32
Go to the Systems Coordination website (www.ecu.edu/syscoord)
• Scroll down to the Quick Query List• Click “Banner Journal Voucher Search”• Click “Options”, beside Security Warning• Click “Enable” in two places in the pop up
window

33
Click “Options”, beside Security WarningClick “Enable” in two places in the pop up window

Enter the Journal Voucher Number, Tab to cell A7, click REFRESH
34

35
Service name will default to REPT, enter PirateID in the “User Name” field, enter REPT password. Click OK.

36
Query Results
37
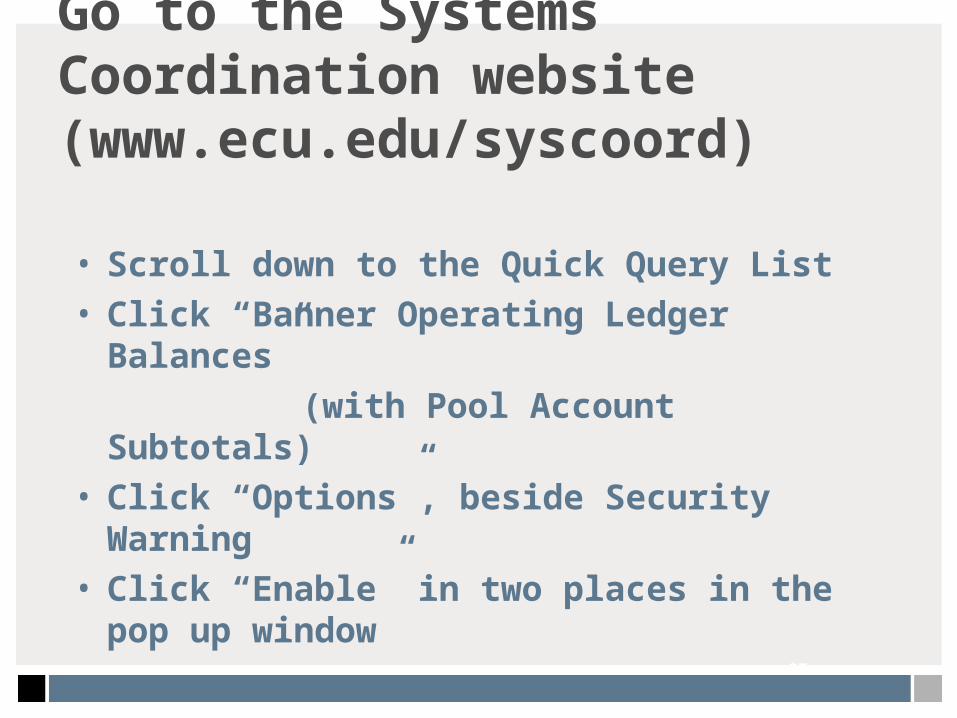
Go to the Systems Coordination website (www.ecu.edu/syscoord)
• Scroll down to the Quick Query List• Click “Banner Operating Ledger Balances”
(with Pool Account Subtotals)• Click “Options”, beside Security Warning• Click “Enable” in two places in the pop up
window

Click “Options”, beside Security WarningClick “Enable” in two places in the pop up window
38

Enter Fund, Orgn, Program, Fiscal Year and Calendar Month, Tab to cell A9,click REFRESH
39

Service name will default to REPT, enter PirateID in the “User Name” field, enter REPT password. Click OK.
40

Query Results
41
42
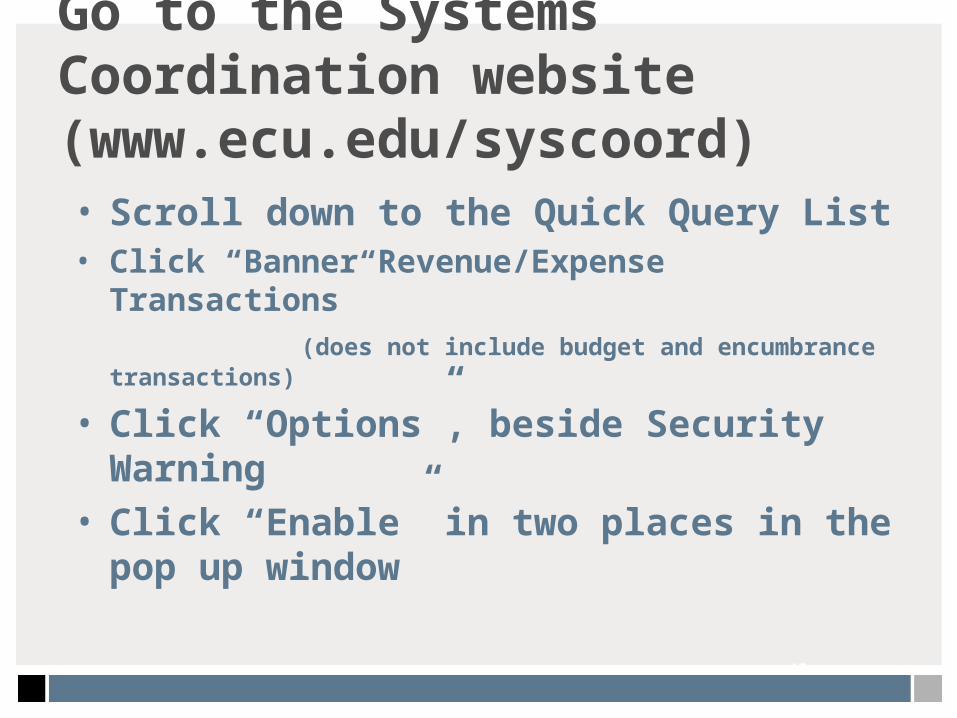
Go to the Systems Coordination website (www.ecu.edu/syscoord)
• Scroll down to the Quick Query List• Click “Banner Revenue/Expense Transactions”
(does not include budget and encumbrance transactions)
• Click “Options”, beside Security Warning• Click “Enable” in two places in the pop up
window

Click “Options”, beside Security WarningClick “Enable” in two places in the pop up window
43
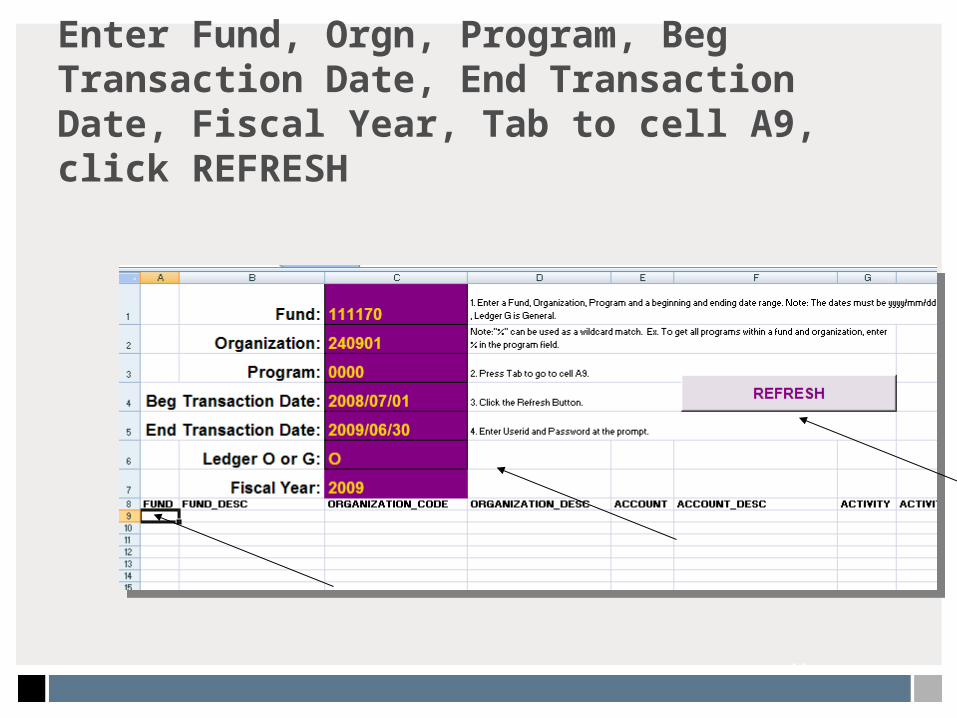
Enter Fund, Orgn, Program, Beg Transaction Date, End Transaction Date, Fiscal Year, Tab to cell A9,click REFRESH
44

Service name will default to REPT, enter in the “User Name” field, enter REPT password. Click OK.
45
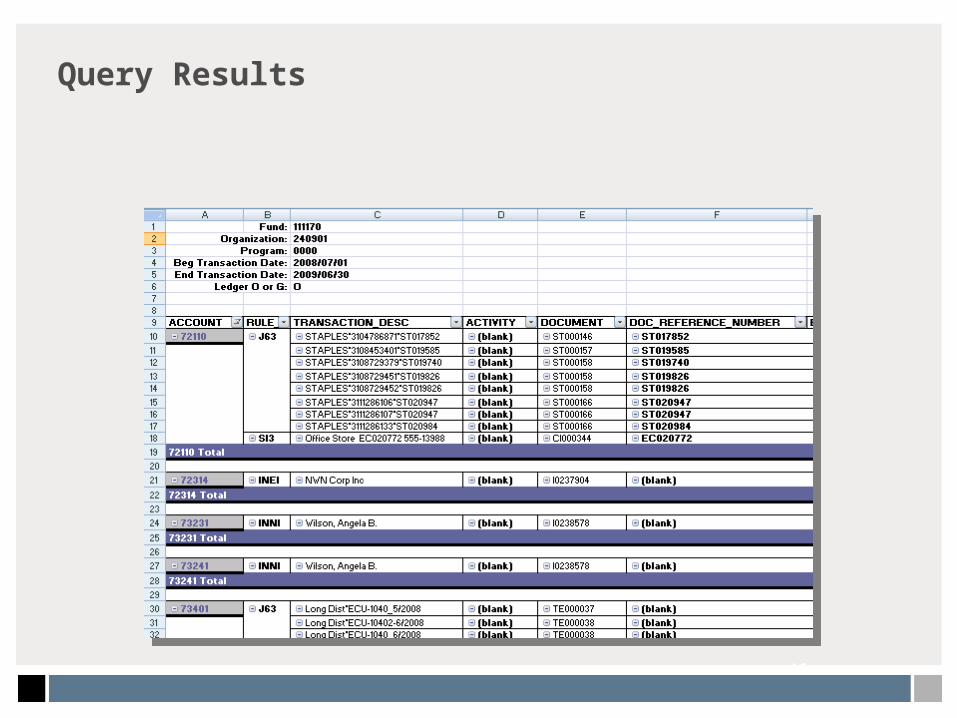
Query Results
46

ODS and Quick Query Training
• Banner Finance Users can create customized ODS queries, to learn more attend an upcoming ODS training session
• February 18, 2010• March 18, 2010• April 22, 2010• May 20, 2010
47

48
If you have questions regarding ODS or Quick Queries, please contact Penney Doughtie, Systems Coordination.
[email protected] or 328-2706