Bank / Cash / Petty Cash Entry - arc-india.comarc-india.com/BankCashPettyCashEntry.pdf · Bank /...
12
Bank / Cash / Petty Cash Entry Entries for bank , cash & petty cash payments / receipts can be done thru this module. Typical bank entry for receipt from sundry debtor, adjusting the receipt against more than one bill. If you wish to adjust a receipt against outstanding bills of a customer, after selecting the customer, press the F7 key This will pop up a form listing all the outstanding bills of that customer. Go to the cell under Adjustment Amt and hit enter against the bills that you want to adjust. You can also adjust a part of the bill by manually entering the amount to be adjusted a specific bill. When you are thru selecting the bills, click on the “Replace Details” button. AccountsMaster.doc 1
Transcript of Bank / Cash / Petty Cash Entry - arc-india.comarc-india.com/BankCashPettyCashEntry.pdf · Bank /...
Bank / Cash / Petty Cash Entry
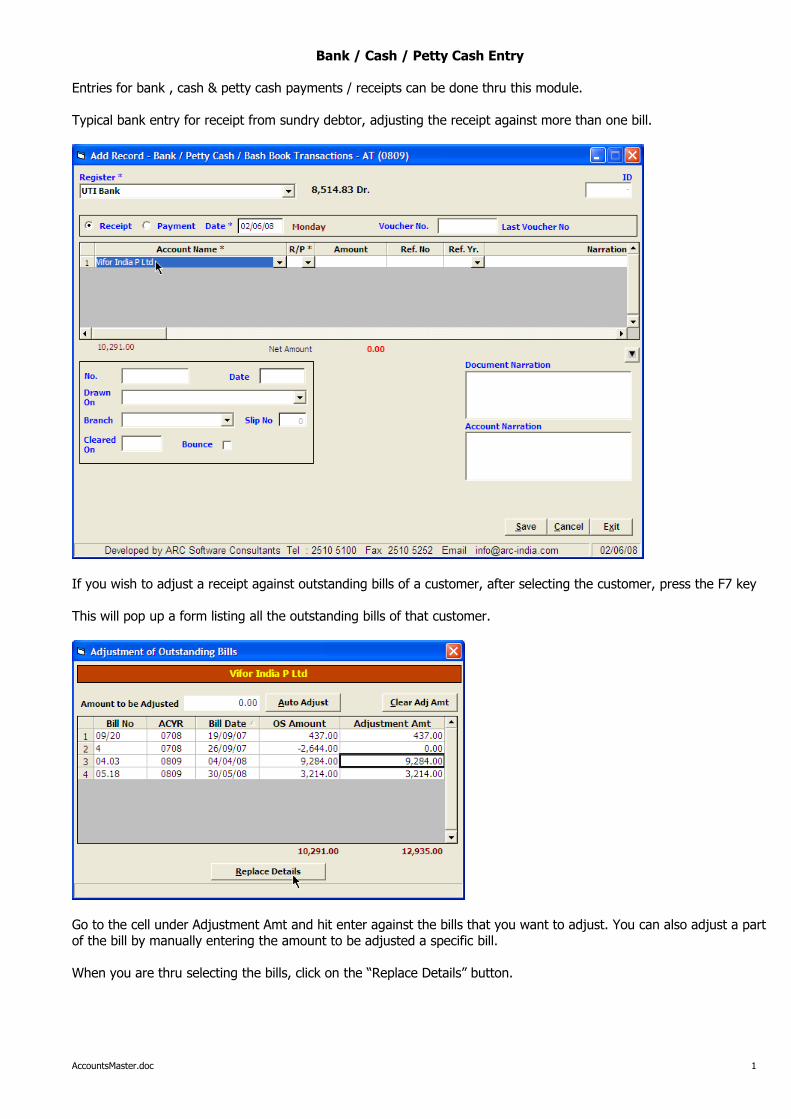
Entries for bank , cash & petty cash payments / receipts can be done thru this module.
Typical bank entry for receipt from sundry debtor, adjusting the receipt against more than one bill.
If you wish to adjust a receipt against outstanding bills of a customer, after selecting the customer, press the F7 key
This will pop up a form listing all the outstanding bills of that customer.
Go to the cell under Adjustment Amt and hit enter against the bills that you want to adjust. You can also adjust a part of the bill by manually entering the amount to be adjusted a specific bill.
When you are thru selecting the bills, click on the “Replace Details” button.
AccountsMaster.doc 1
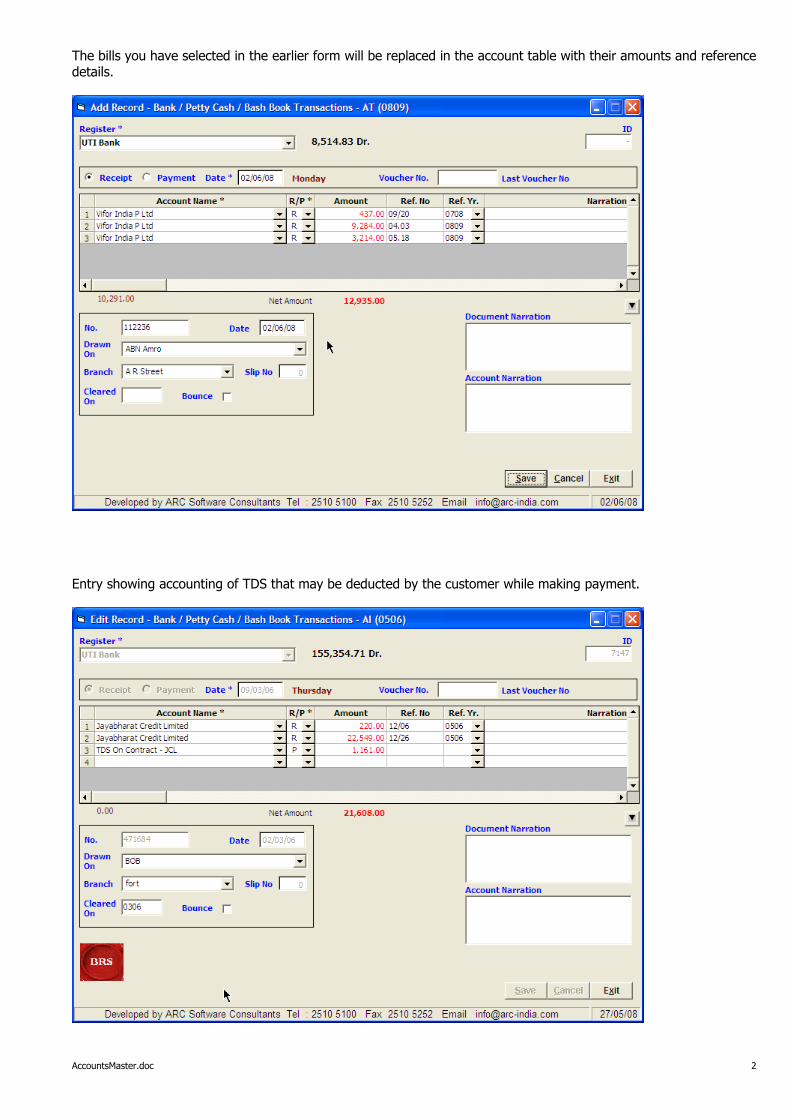
The bills you have selected in the earlier form will be replaced in the account table with their amounts and reference details.
Entry showing accounting of TDS that may be deducted by the customer while making payment.
AccountsMaster.doc 2
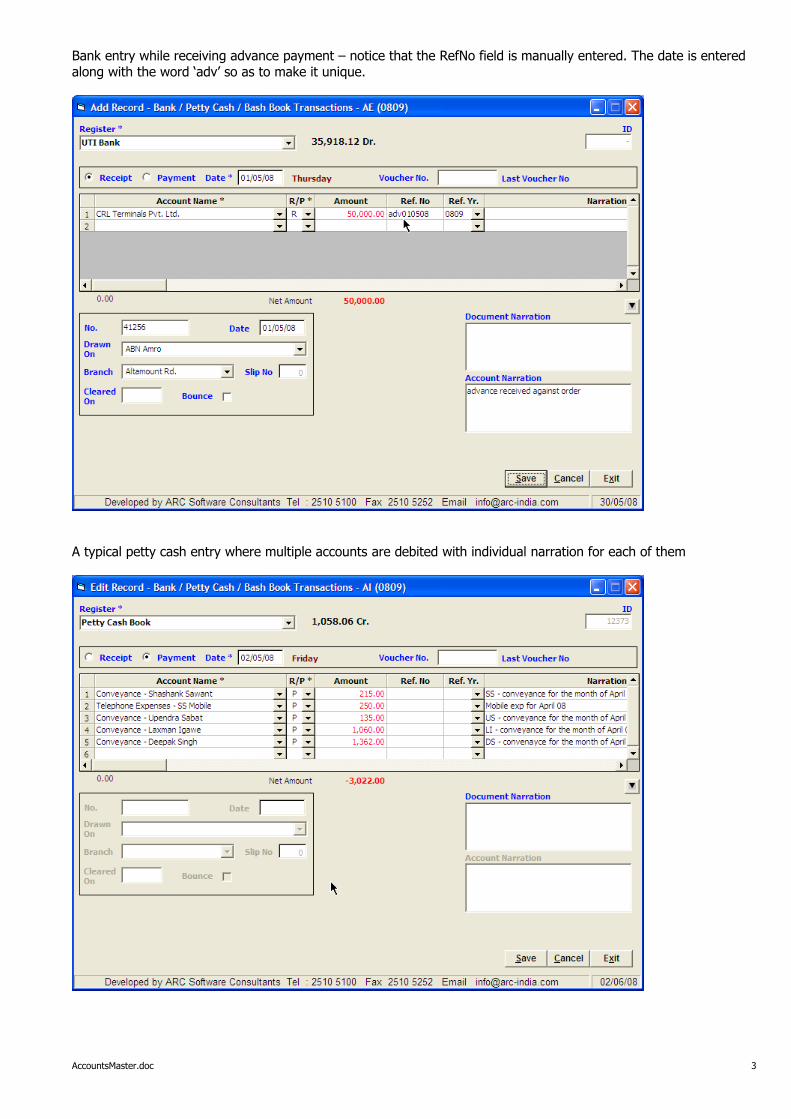
Bank entry while receiving advance payment – notice that the RefNo field is manually entered. The date is entered along with the word ‘adv’ so as to make it unique.
A typical petty cash entry where multiple accounts are debited with individual narration for each of them
AccountsMaster.doc 3
Header• Register – Select the register from the drop down list box – it displays the registers of type Bank, Cash and Petty
Cash. New registers can be defined thru Masters -> Register Module. For a detailed explanation refer RegisterMaster.doc
• Date – this is the date of the entry on which it will be accounted in the system• Voucher No – the last voucher number is displayed. You can enter a number manually. Though this is not
compulsory.
Account Details • Account – select the account from the drop down list box or start typing the name for auto selection. If the
account is new and you wish to add the same in the accounts master, press the “Ins” key while in the field, the accounts master module will pop up for you to add the account and the control will return to the bank entry form once you save the newly added account
• RefNo and RefYr – these fields can be entered manually or can be replaced automatically by using the F7 feature explained above.
• The narration in the accounts detail box is mutually exclusive with the account narration at the bottom. You can enter either of them. If you have entered any narration in the accounts details table, then the account narration is disabled.
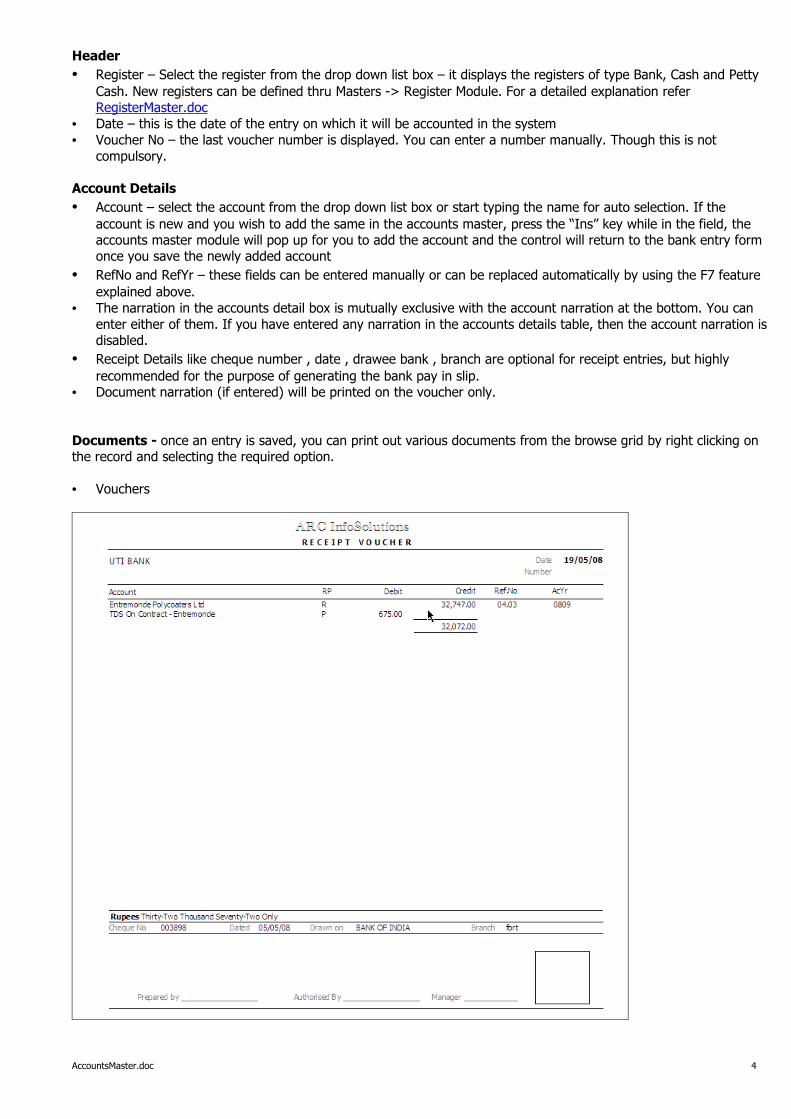
• Receipt Details like cheque number , date , drawee bank , branch are optional for receipt entries, but highly recommended for the purpose of generating the bank pay in slip.
• Document narration (if entered) will be printed on the voucher only.
Documents - once an entry is saved, you can print out various documents from the browse grid by right clicking on the record and selecting the required option.
• Vouchers
AccountsMaster.doc 4
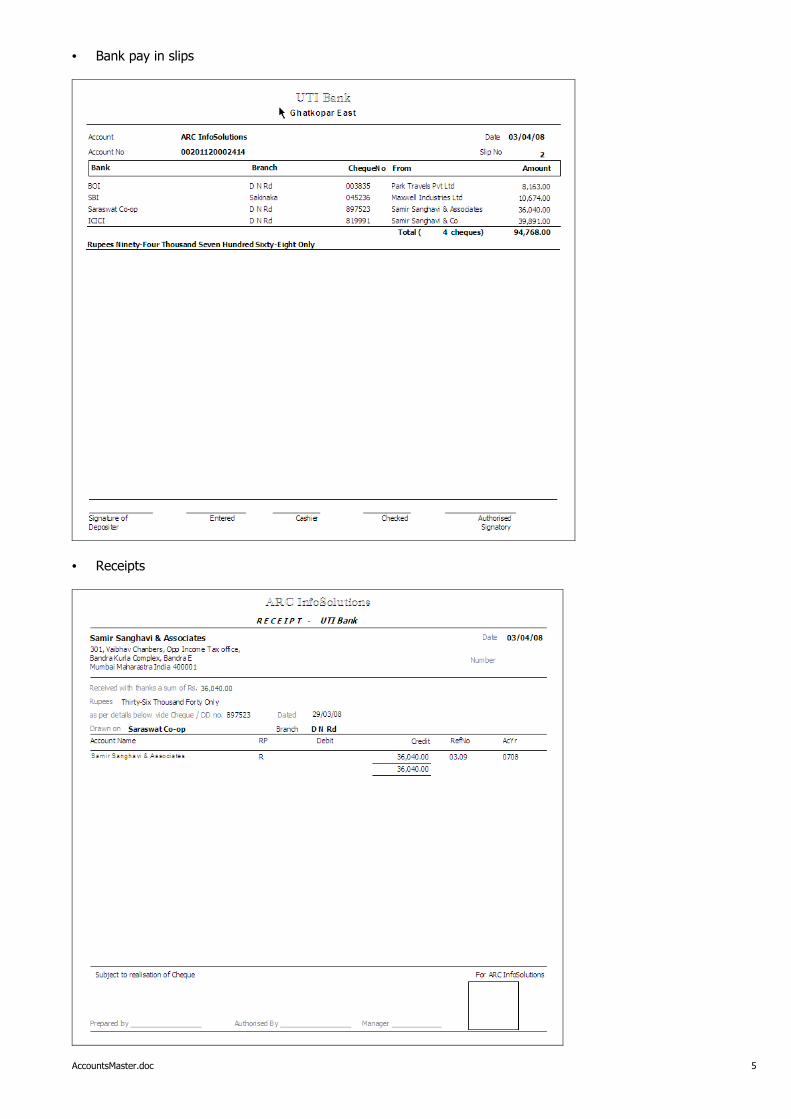
• Bank pay in slips
• Receipts
AccountsMaster.doc 5
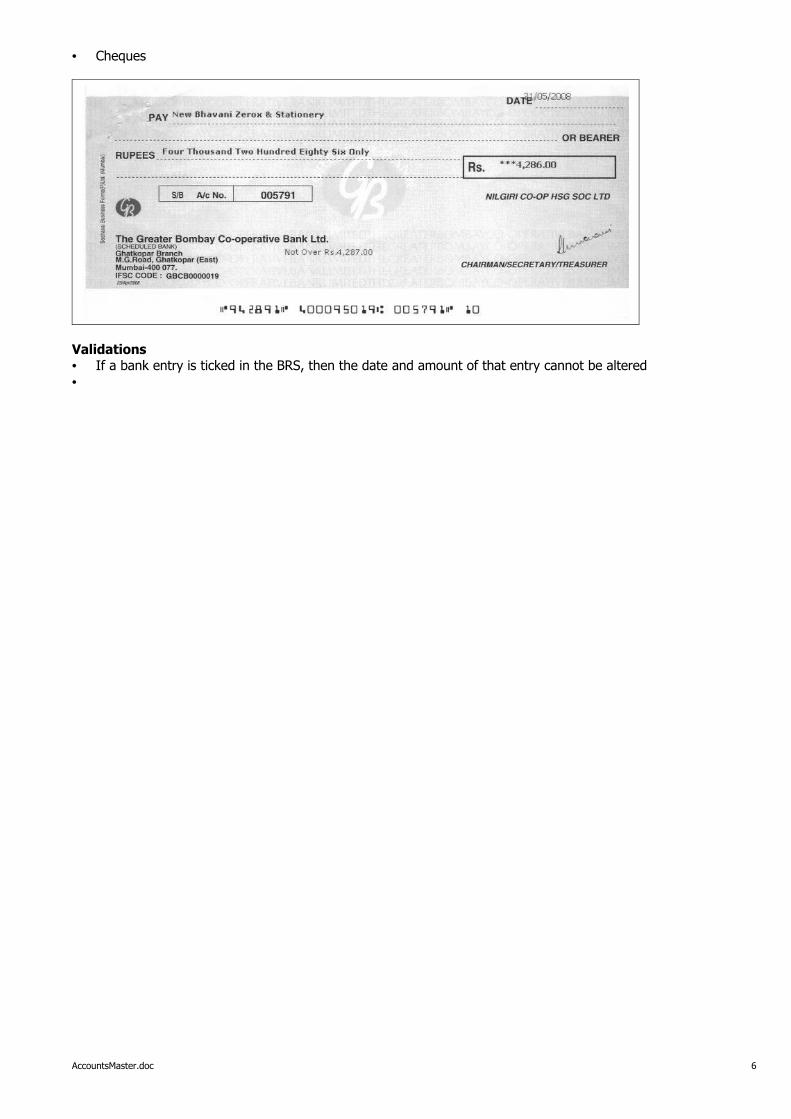
• Cheques
Validations• If a bank entry is ticked in the BRS, then the date and amount of that entry cannot be altered•
AccountsMaster.doc 6
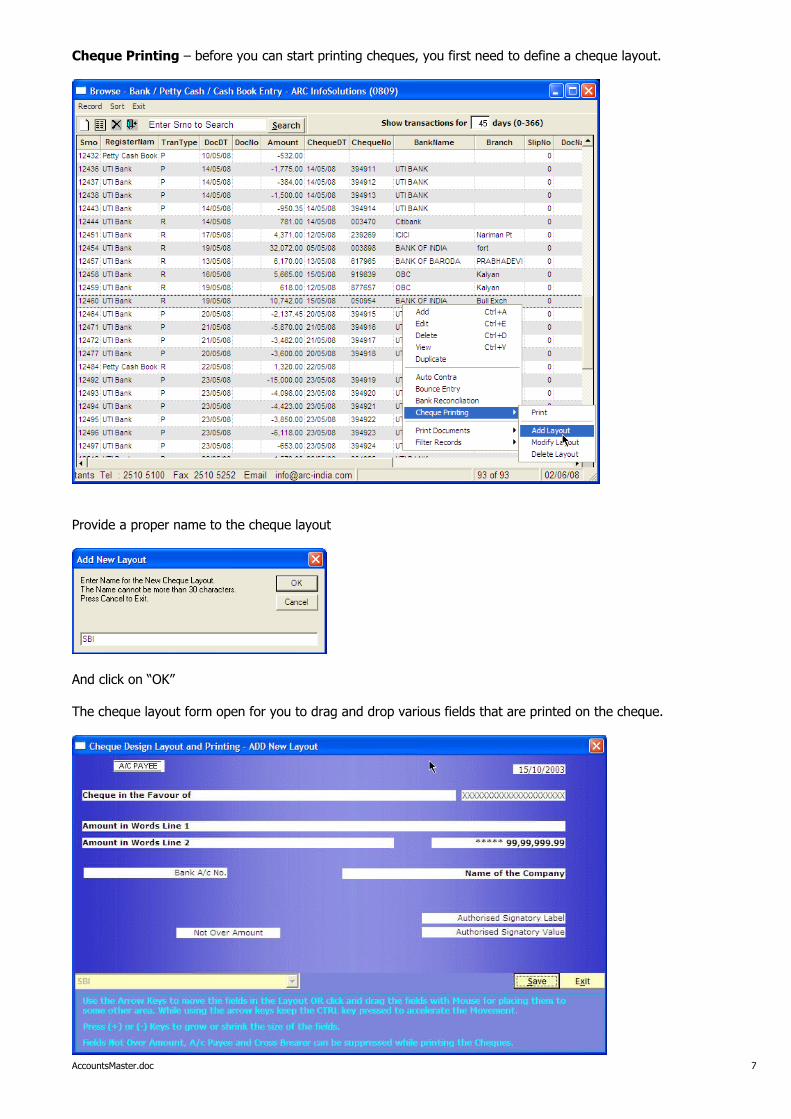
Cheque Printing – before you can start printing cheques, you first need to define a cheque layout.
Provide a proper name to the cheque layout
And click on “OK”
The cheque layout form open for you to drag and drop various fields that are printed on the cheque.
AccountsMaster.doc 7
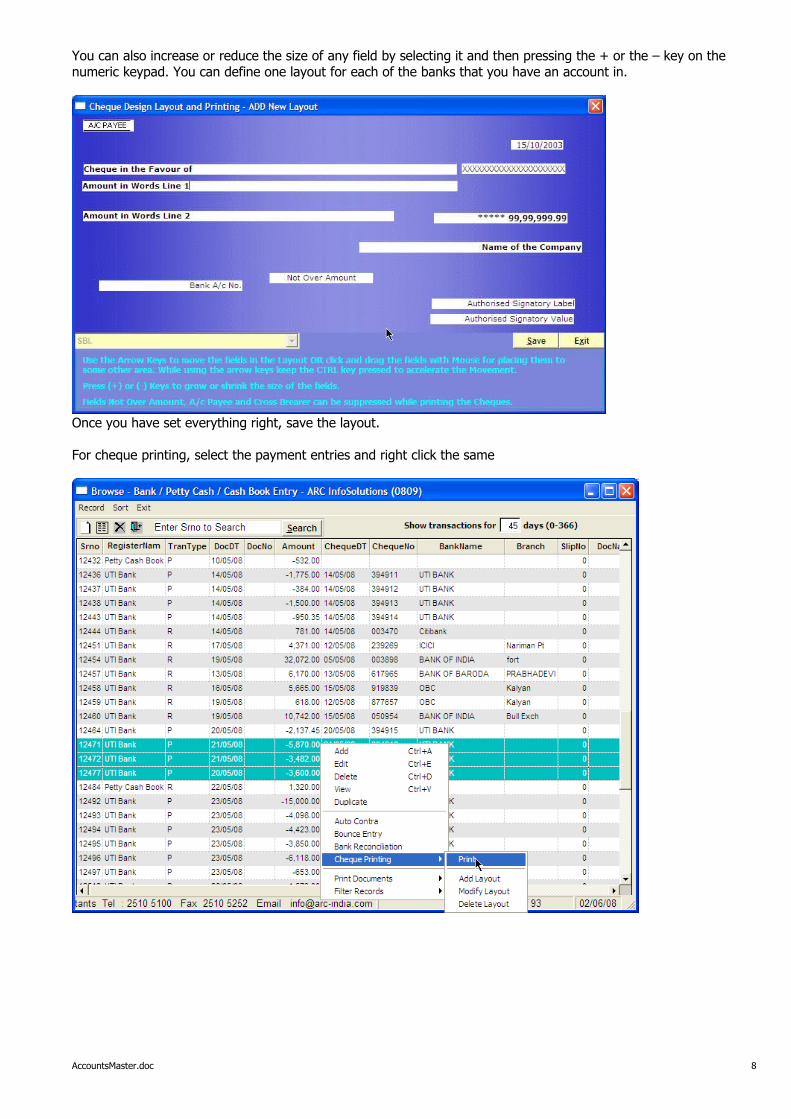
You can also increase or reduce the size of any field by selecting it and then pressing the + or the – key on the numeric keypad. You can define one layout for each of the banks that you have an account in.
Once you have set everything right, save the layout.
For cheque printing, select the payment entries and right click the same
AccountsMaster.doc 8
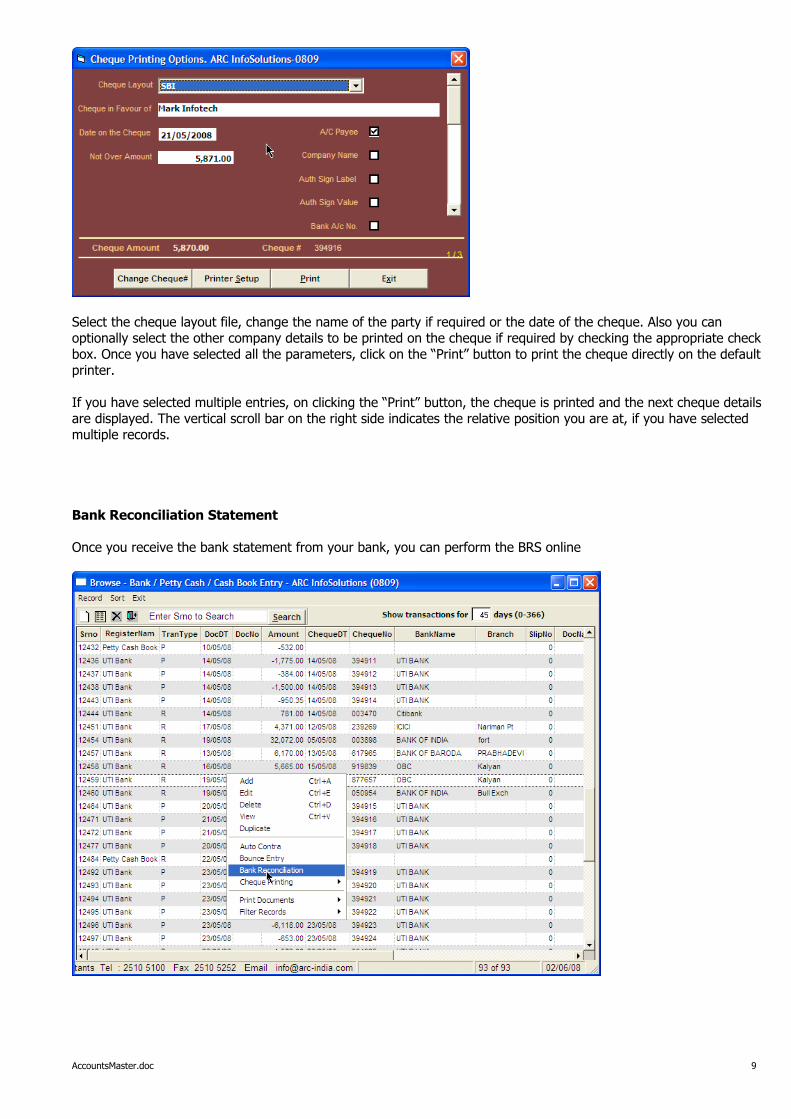
Select the cheque layout file, change the name of the party if required or the date of the cheque. Also you can optionally select the other company details to be printed on the cheque if required by checking the appropriate check box. Once you have selected all the parameters, click on the “Print” button to print the cheque directly on the default printer.
If you have selected multiple entries, on clicking the “Print” button, the cheque is printed and the next cheque details are displayed. The vertical scroll bar on the right side indicates the relative position you are at, if you have selected multiple records.
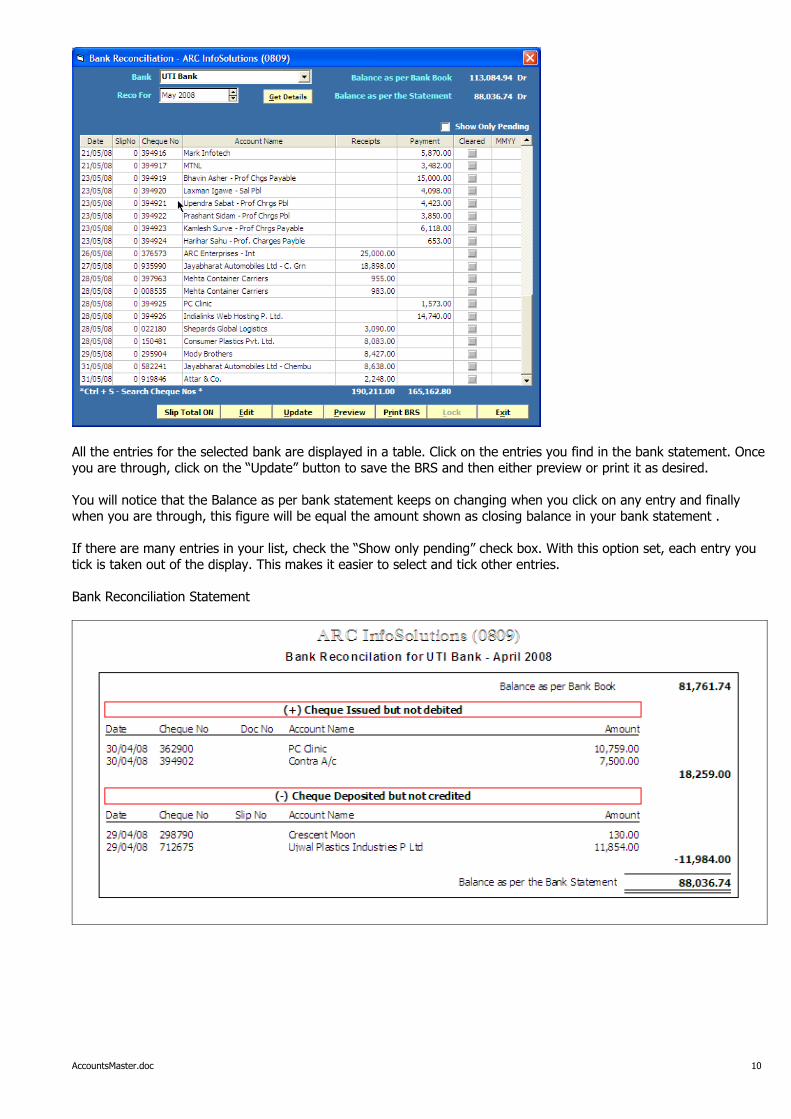
Bank Reconciliation Statement
Once you receive the bank statement from your bank, you can perform the BRS online
AccountsMaster.doc 9
All the entries for the selected bank are displayed in a table. Click on the entries you find in the bank statement. Once you are through, click on the “Update” button to save the BRS and then either preview or print it as desired.
You will notice that the Balance as per bank statement keeps on changing when you click on any entry and finally when you are through, this figure will be equal the amount shown as closing balance in your bank statement .
If there are many entries in your list, check the “Show only pending” check box. With this option set, each entry you tick is taken out of the display. This makes it easier to select and tick other entries.
Bank Reconciliation Statement
AccountsMaster.doc 10
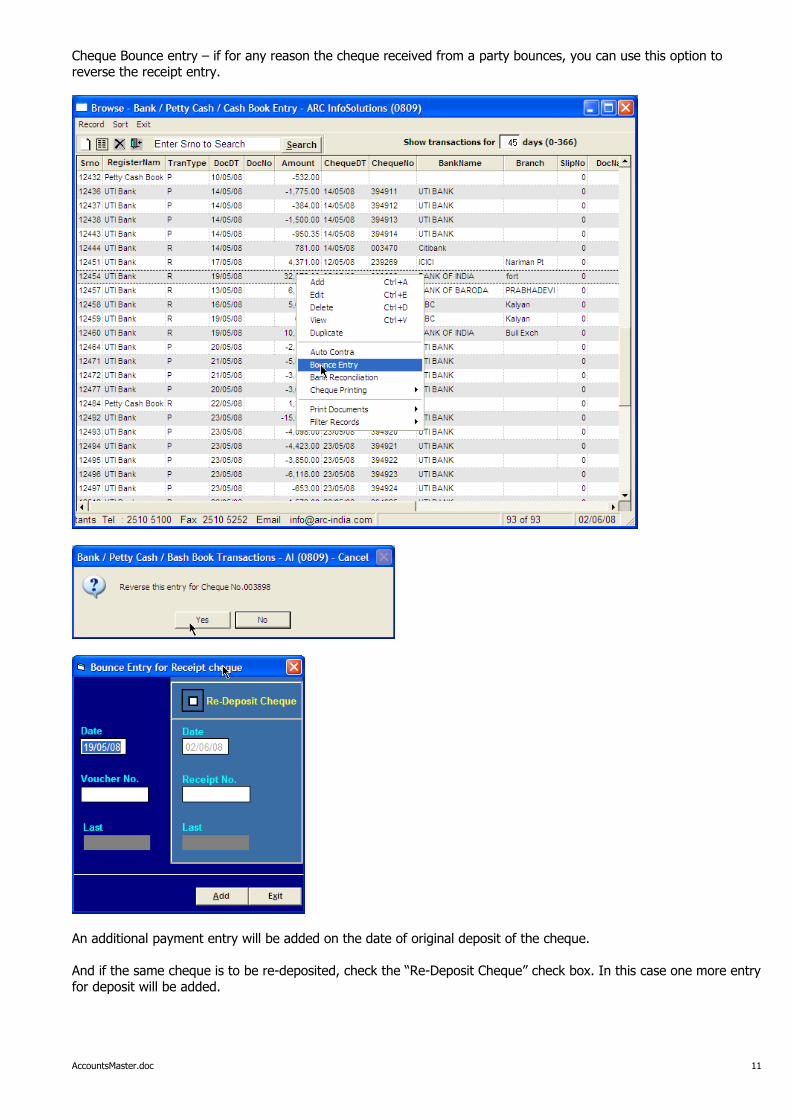
Cheque Bounce entry – if for any reason the cheque received from a party bounces, you can use this option to reverse the receipt entry.
An additional payment entry will be added on the date of original deposit of the cheque.
And if the same cheque is to be re-deposited, check the “Re-Deposit Cheque” check box. In this case one more entry for deposit will be added.
AccountsMaster.doc 11
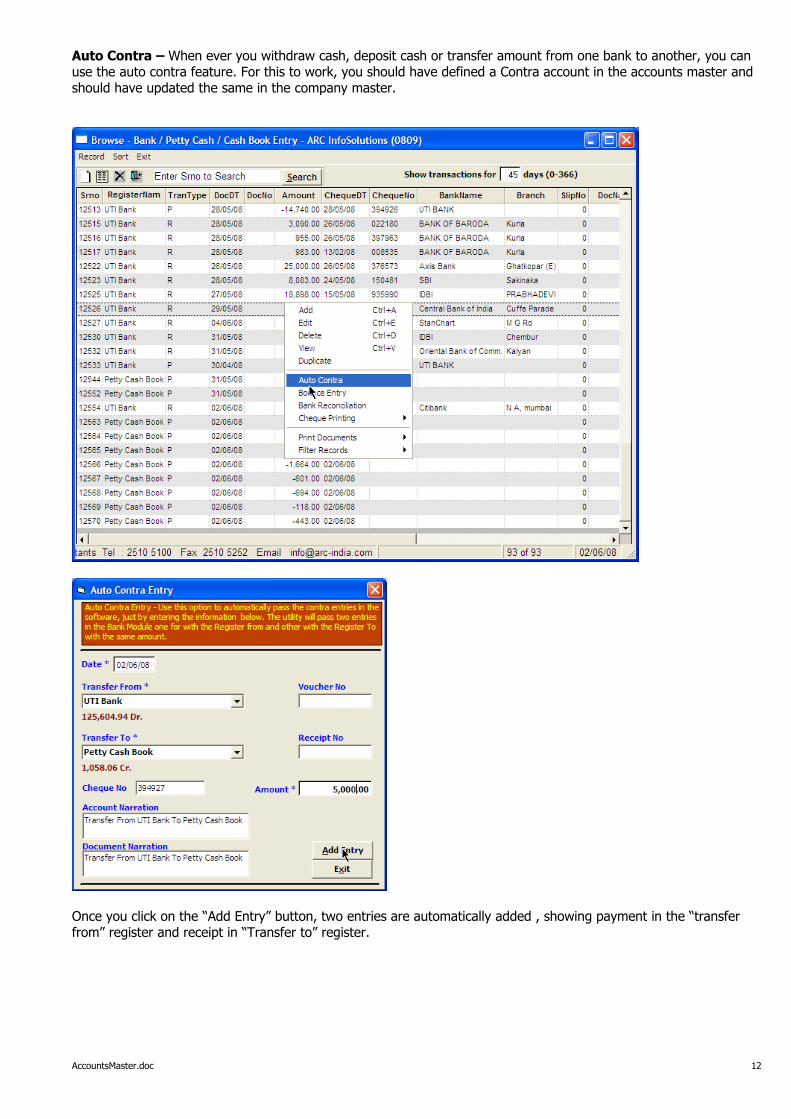
Auto Contra – When ever you withdraw cash, deposit cash or transfer amount from one bank to another, you can use the auto contra feature. For this to work, you should have defined a Contra account in the accounts master and should have updated the same in the company master.
Once you click on the “Add Entry” button, two entries are automatically added , showing payment in the “transfer from” register and receipt in “Transfer to” register.
AccountsMaster.doc 12