
Aulas de Arduino uno - Unicamp
22
3- Aulas de Arduino uno Book: Beginning Arduino- Copyright © 2010 by Michael McRoberts
Transcript of Aulas de Arduino uno - Unicamp

3- Aulas de Arduino uno
Book: Beginning Arduino- Copyright © 2010 by Michael McRoberts

Project – 12 Pitch follower using the tone() function
Hardware: 8 Ohms speaker, 100 Ohms resist., 4.7kOhms resistor, LDR.

By using “Fritzing” software, we get
the circuit layout:

/* Pitch follower. Plays a pitch that changes based on a changing analog input. circuit: 8-ohm speaker on digital pin 9 photoresistor on analog 0 to 5V, 4.7K resistor on analog 0 to ground. This example code is in the public domain. http://arduino.cc/en/Tutorial/Tone2 */ void setup() { // initialize serial communications (for debugging only): Serial.begin(9600); } void loop() { // read the sensor: int sensorReading = analogRead(A0); // print the sensor reading so you know its range Serial.println(sensorReading); // map the analog input range (in this case, 400 - 1000 from the photoresistor) // to the output pitch range (120 - 1500Hz) // change the minimum and maximum input numbers below // depending on the range your sensor's giving: int thisPitch = map(sensorReading, 400, 1000, 120, 1500); // play the pitch: tone(9, thisPitch, 10); delay(1); // delay in between reads for stability }
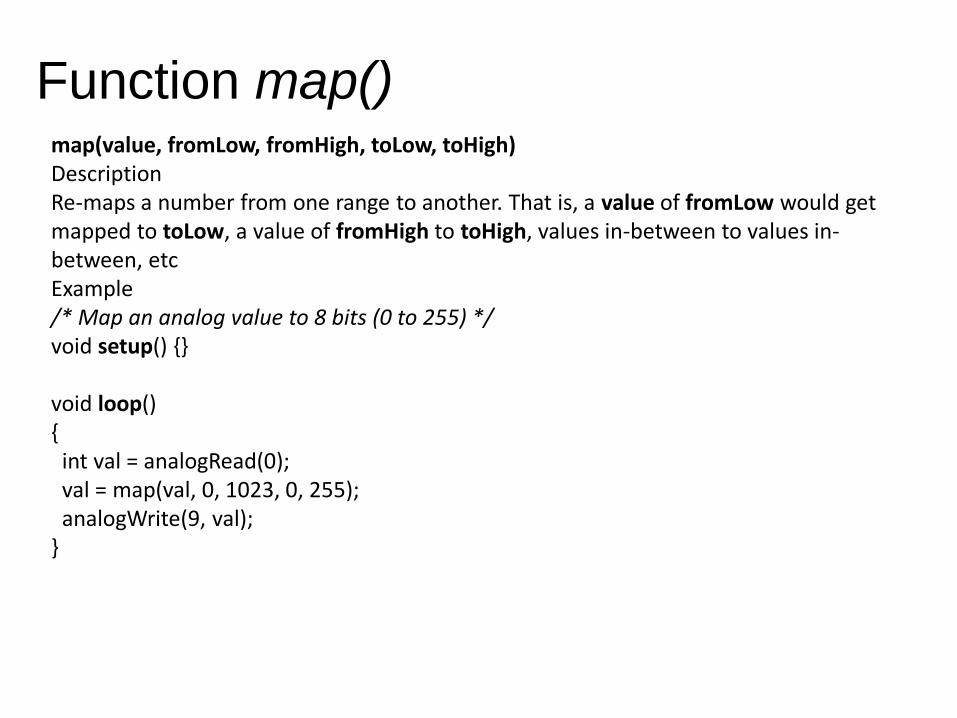
map(value, fromLow, fromHigh, toLow, toHigh) Description Re-maps a number from one range to another. That is, a value of fromLow would get mapped to toLow, a value of fromHigh to toHigh, values in-between to values in-between, etc Example /* Map an analog value to 8 bits (0 to 255) */ void setup() {} void loop() { int val = analogRead(0); val = map(val, 0, 1023, 0, 255); analogWrite(9, val); }
Function map()

project-13 Analog Read Serial-
This example
shows how to read
analog input from
the physical world
using a
potentiometer.
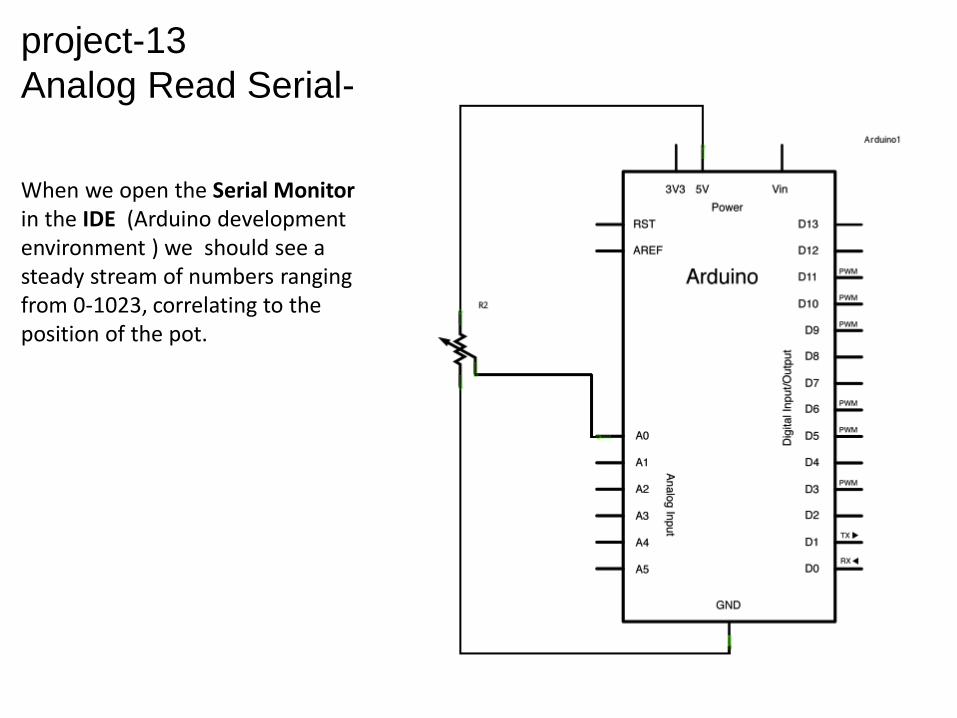
project-13
Analog Read Serial-
When we open the Serial Monitor in the IDE (Arduino development environment ) we should see a steady stream of numbers ranging from 0-1023, correlating to the position of the pot.
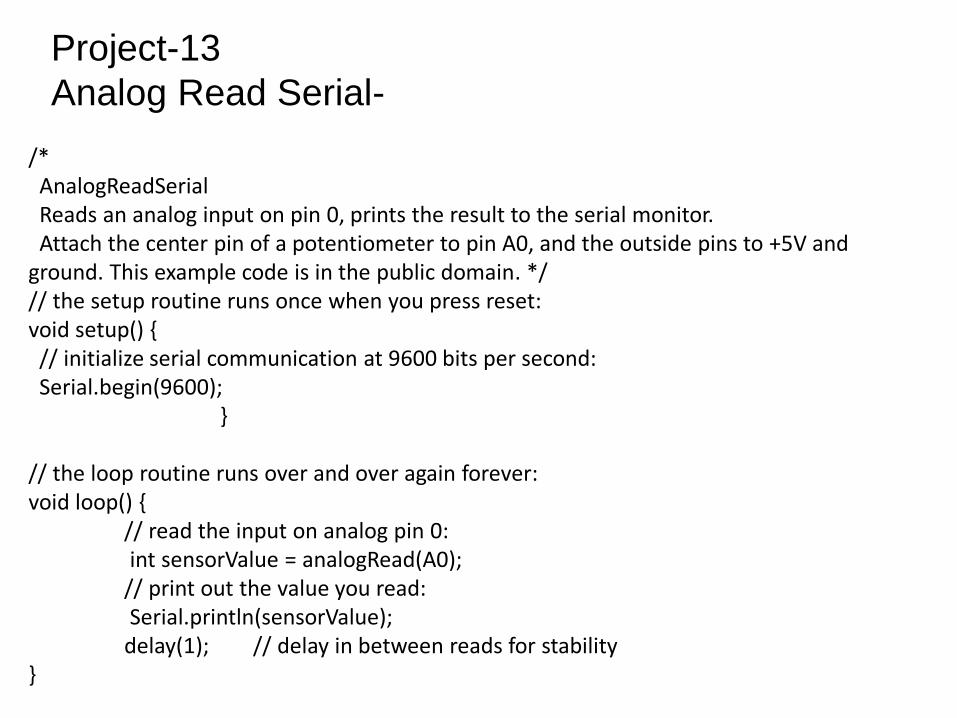
/* AnalogReadSerial Reads an analog input on pin 0, prints the result to the serial monitor. Attach the center pin of a potentiometer to pin A0, and the outside pins to +5V and ground. This example code is in the public domain. */ // the setup routine runs once when you press reset: void setup() { // initialize serial communication at 9600 bits per second: Serial.begin(9600); } // the loop routine runs over and over again forever: void loop() { // read the input on analog pin 0: int sensorValue = analogRead(A0); // print out the value you read: Serial.println(sensorValue); delay(1); // delay in between reads for stability }
Project-13
Analog Read Serial-

Project-14: DC motor control
This project allows
to control the speed
of a DC motor in
one direction, using
a power transistor,
diode, external
power supply (to
power the motor),
and a potentiometer
(to control the
speed). Any
suitable NPN power
transistor like the
TIP120 can be
used.

// Project 14 - Simple Motor Control
int potPin = 0; // Analog in 0 connected to the potentiometer
int transistorPin = 9; // PWM Pin 9 connected to the base of
//the transistor
int potValue = 0; // value returned from the potentiometer
void setup() {
// set the transistor pin as output:
pinMode(transistorPin, OUTPUT);
}
void loop() {
// read the potentiometer, convert it to 0 - 255:
potValue = analogRead(potPin) / 4;
// use that to control the transistor:
analogWrite(transistorPin, potValue);
}
Project-14. Code


Quadrupole half-H drivers


Acionamento de motor DC com L293D
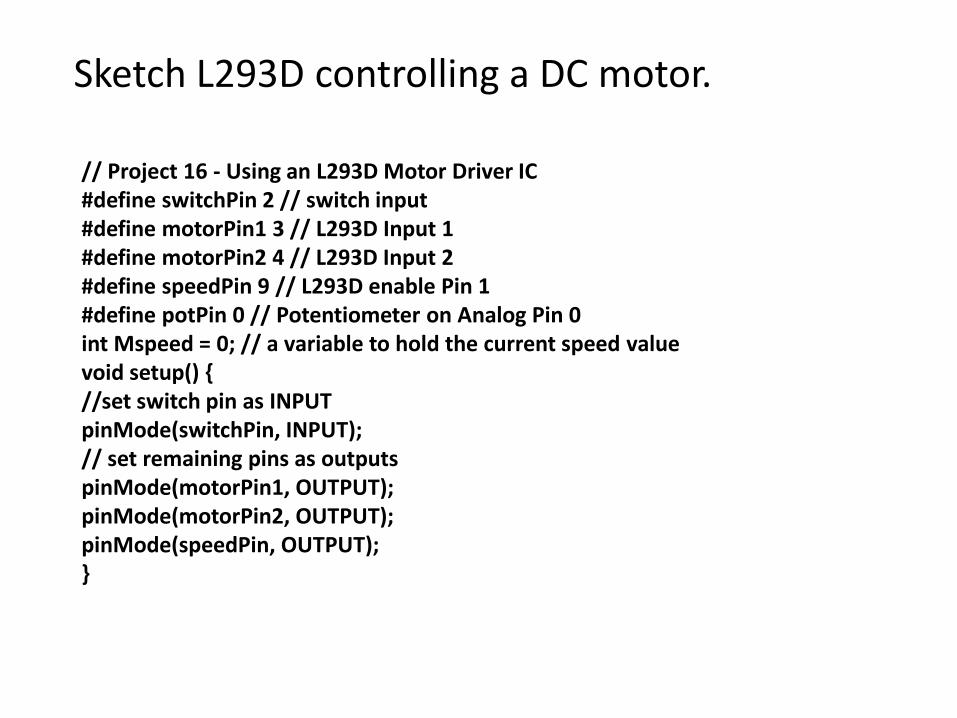
// Project 16 - Using an L293D Motor Driver IC #define switchPin 2 // switch input #define motorPin1 3 // L293D Input 1 #define motorPin2 4 // L293D Input 2 #define speedPin 9 // L293D enable Pin 1 #define potPin 0 // Potentiometer on Analog Pin 0 int Mspeed = 0; // a variable to hold the current speed value void setup() { //set switch pin as INPUT pinMode(switchPin, INPUT); // set remaining pins as outputs pinMode(motorPin1, OUTPUT); pinMode(motorPin2, OUTPUT); pinMode(speedPin, OUTPUT); }
Sketch L293D controlling a DC motor.

void loop() { Mspeed = analogRead(potPin)/4; // read the speed value from the potentiometer analogWrite(speedPin, Mspeed); // write speed to Enable 1 pin if (digitalRead(switchPin)) { // If the switch is HIGH, rotate motor clockwise digitalWrite(motorPin1, LOW); // set Input 1 of the L293D low digitalWrite(motorPin2, HIGH); // set Input 2 of the L293D high } else { // if the switch is LOW, rotate motor anti-clockwise digitalWrite(motorPin1, HIGH); // set Input 1 of the L293D low digitalWrite(motorPin2, LOW); // set Input 2 of the L293D high } }
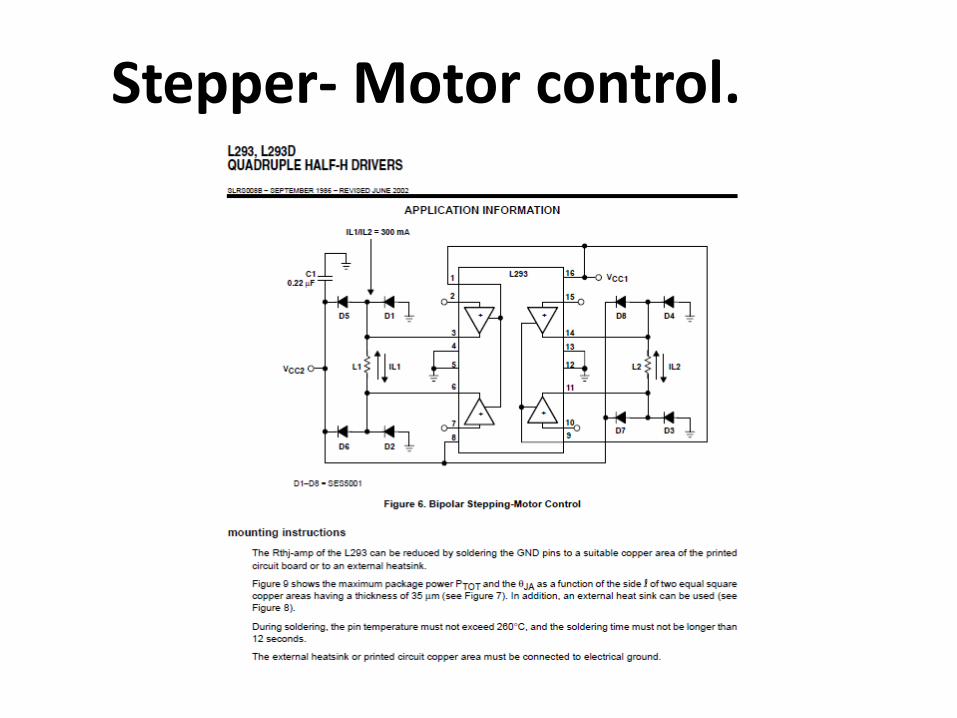
Stepper- Motor control.

End


![Tutorial c++ [Unicamp]](https://static.fdocuments.us/doc/165x107/577d2fab1a28ab4e1eb24ee2/tutorial-c-unicamp.jpg)


