ATTENDANCE SOFTWARE - Loginib.attendance.admasolutions.com/Attachments/HelpFile.pdf · want to...
24
ATTENDANCE SOFTWARE USER GUIDE
Transcript of ATTENDANCE SOFTWARE - Loginib.attendance.admasolutions.com/Attachments/HelpFile.pdf · want to...
ATTENDANCE SOFTWARE
USER GUIDE
USER GUIDE
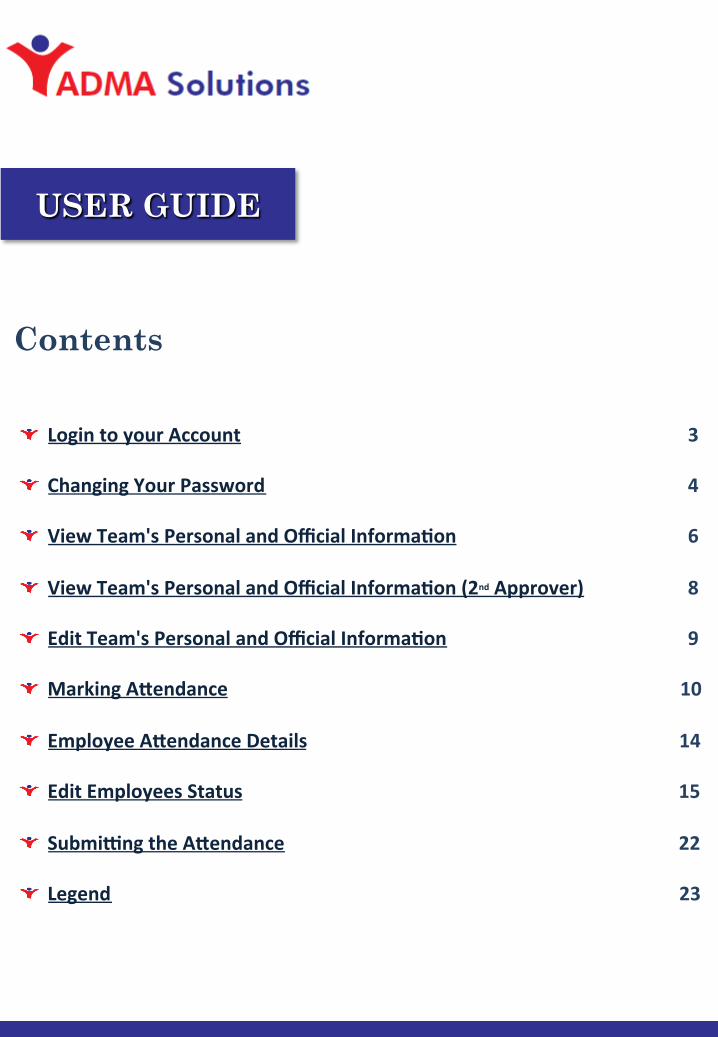
Contents
! Login to your Account 3
! Changing Your Password 4
! View Team's Personal and Official InformaAon 6
! View Team's Personal and Official InformaAon (2nd Approver) 8
! Edit Team's Personal and Official InformaAon 9
! Marking AMendance 10
! Employee AMendance Details 14
! Edit Employees Status 15
! SubmiTng the AMendance 22
! Legend 23
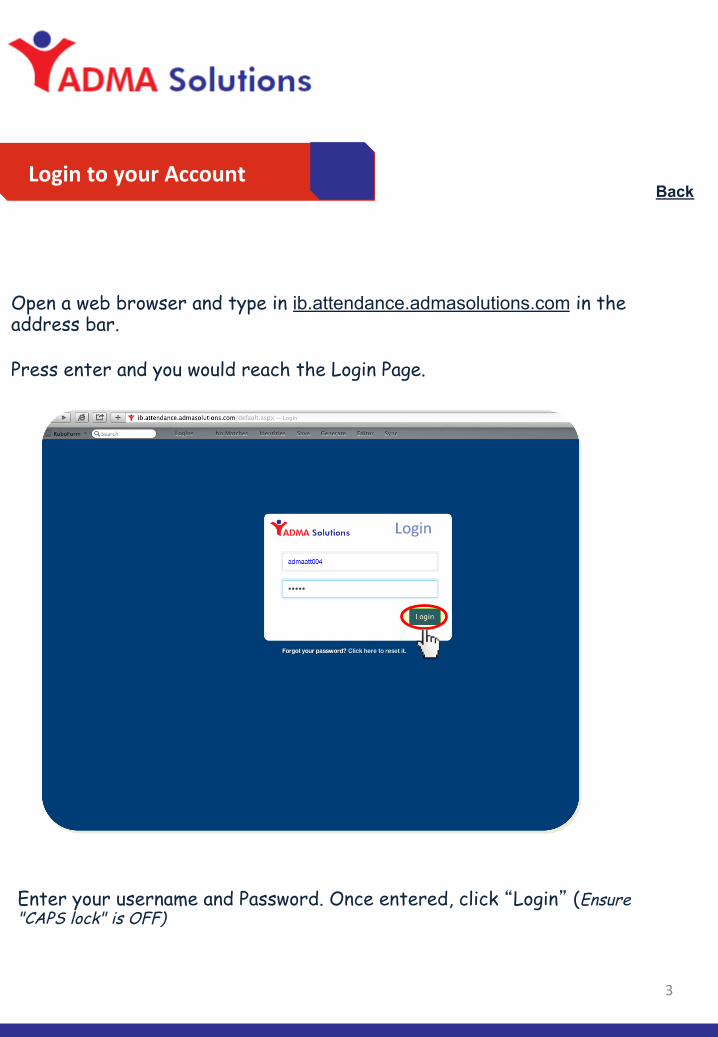
Login to your Account
Open a web browser and type in ib.attendance.admasolutions.com in the address bar. Press enter and you would reach the Login Page.
Enter your username and Password. Once entered, click “Login” (Ensure "CAPS lock" is OFF)
3
Back

Changing Your Password
On the Login Screen, enter your User ID and Click on the "Forgot Your Password? Click here to reset it " option below the Login box.
A page requesting your official email ID will appear. Enter the email ID and click “Send”. An Email will be sent to the email id entered. Close the browser and go to your Inbox.
Continued…
4
Back
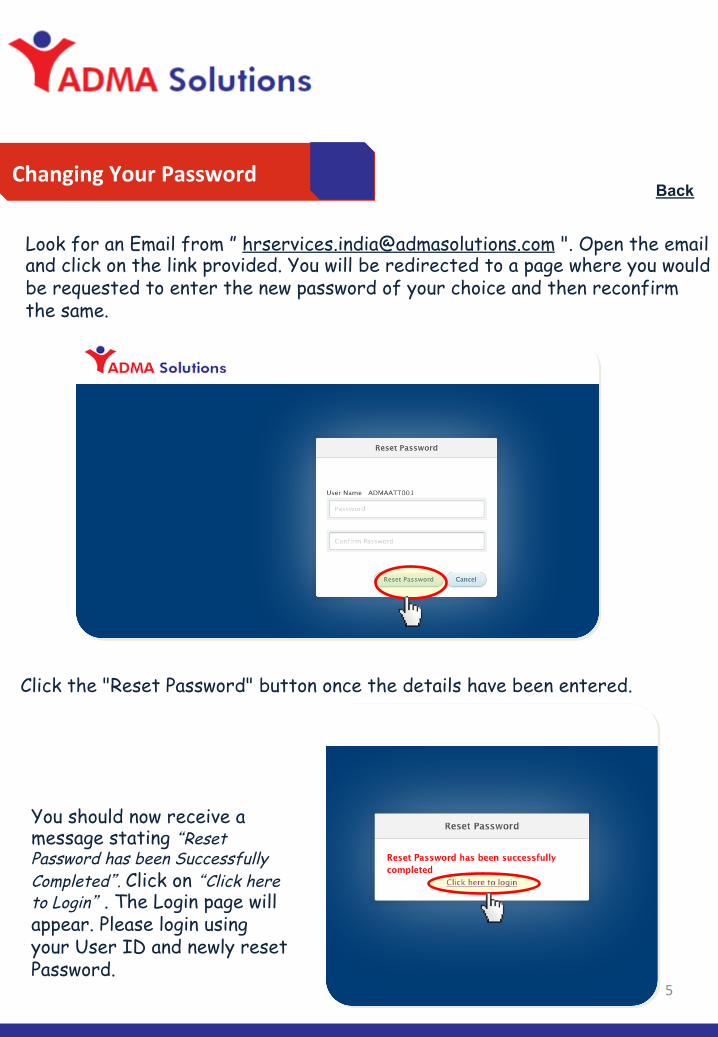
Changing Your Password
Look for an Email from ” [email protected] ". Open the email and click on the link provided. You will be redirected to a page where you would be requested to enter the new password of your choice and then reconfirm the same.
5
Click the "Reset Password" button once the details have been entered.
You should now receive a message stating “Reset Password has been Successfully Completed”. Click on “Click here to Login” . The Login page will appear. Please login using your User ID and newly reset Password.
Back
View Team's Personal and Official InformaAon
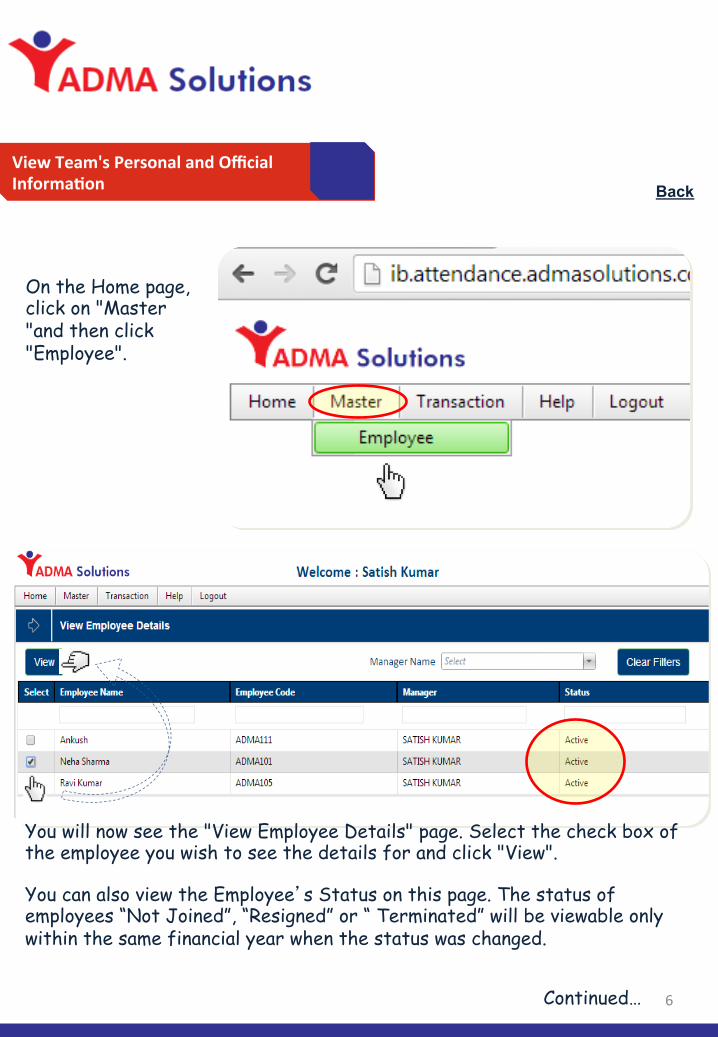
On the Home page, click on "Master "and then click "Employee".
6
You will now see the "View Employee Details" page. Select the check box of the employee you wish to see the details for and click "View".
Continued…
Back
You can also view the Employee’s Status on this page. The status of employees “Not Joined”, “Resigned” or “ Terminated” will be viewable only within the same financial year when the status was changed.

View Team's Personal and Official InformaAon
7
An "Employee Master" Page will open with the details of the selected employee.
Click "Close” to Exit Screen. The page will redirect to "View Employee Details page", where you could select another if need be.
Back
View Team's Personal and Official InformaAon (2nd Approver)
8
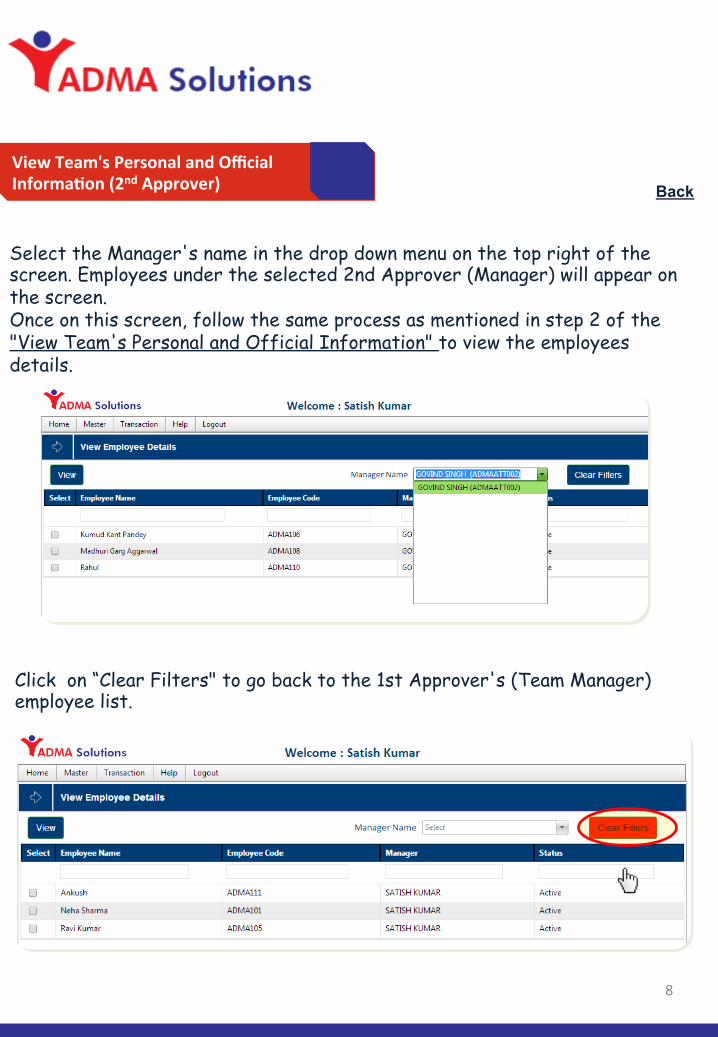
Select the Manager's name in the drop down menu on the top right of the screen. Employees under the selected 2nd Approver (Manager) will appear on the screen. Once on this screen, follow the same process as mentioned in step 2 of the "View Team's Personal and Official Information" to view the employees details.
Click on “Clear Filters" to go back to the 1st Approver's (Team Manager) employee list.
Back
Edit Team's Personal and Official InformaAon
9
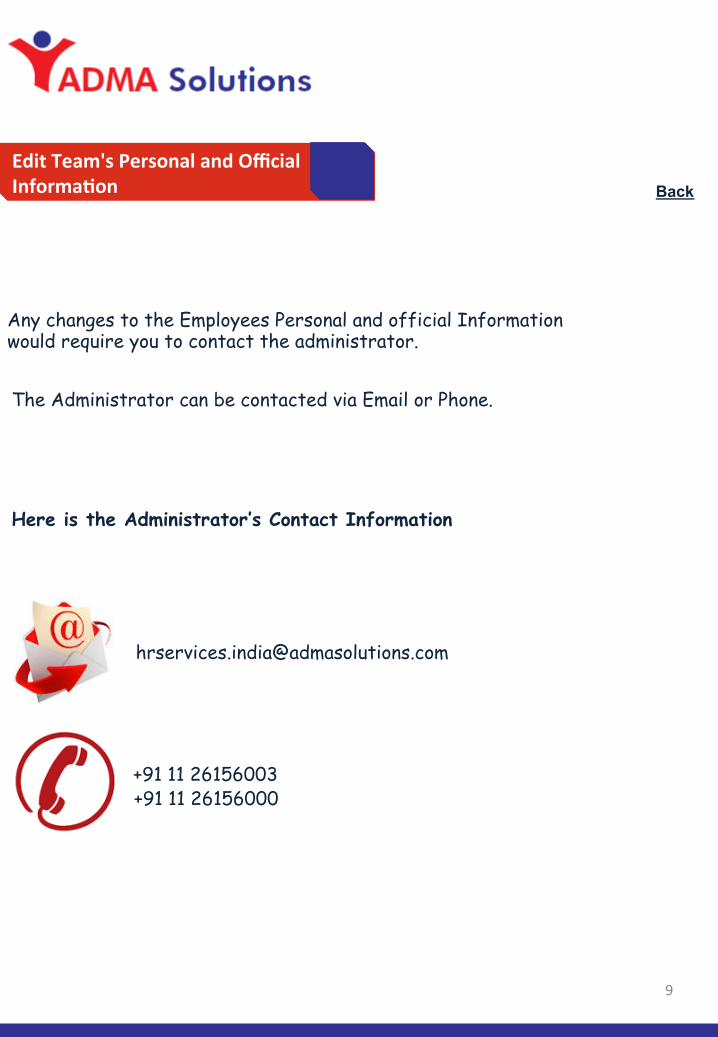
Any changes to the Employees Personal and official Information would require you to contact the administrator.
The Administrator can be contacted via Email or Phone.
Here is the Administrator’s Contact Information
+91 11 26156003 +91 11 26156000
Back

Marking AMendance
10
Click on "Transaction" on the Home Page and then click "Attendance (Manager)"
The page will redirect to the Attendance Page. On the Attendance page, select the Month from the drop down placed at the top the screen.
Continued…
Back
Marking AMendance
11
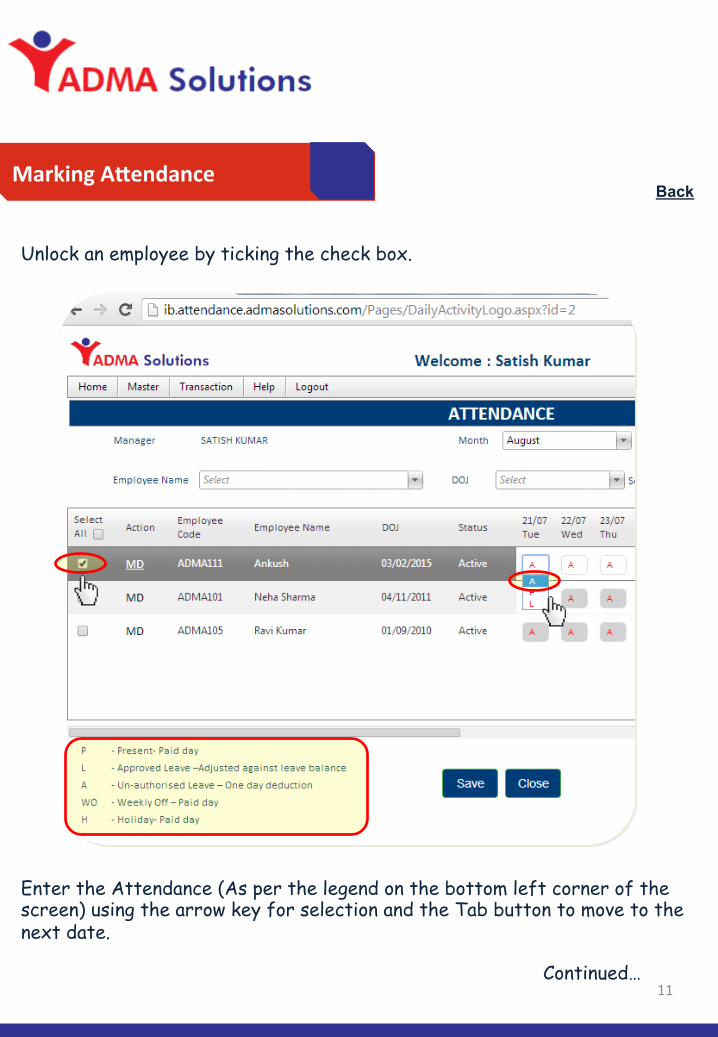
Unlock an employee by ticking the check box.
Enter the Attendance (As per the legend on the bottom left corner of the screen) using the arrow key for selection and the Tab button to move to the next date.
Continued…
Back
Marking AMendance
12
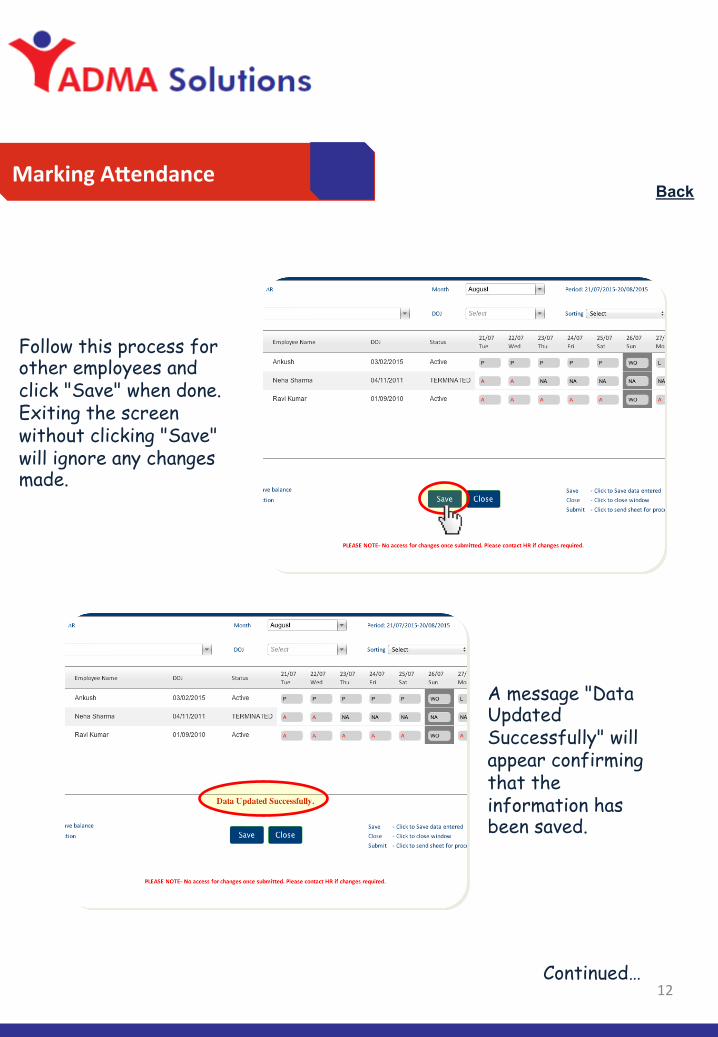
Follow this process for other employees and click "Save" when done. Exiting the screen without clicking "Save" will ignore any changes made.
A message "Data Updated Successfully" will appear confirming that the information has been saved.
Continued…
Back
Marking AMendance (2nd Approver)
13
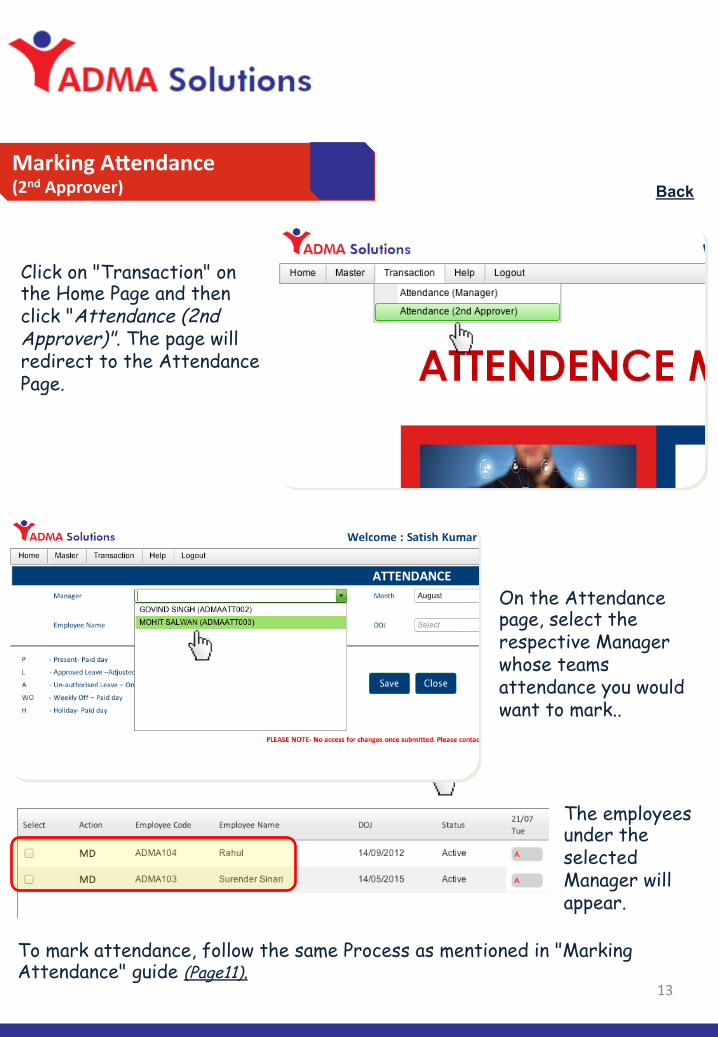
Click on "Transaction" on the Home Page and then click "Attendance (2nd Approver)". The page will redirect to the Attendance Page.
On the Attendance page, select the respective Manager whose teams attendance you would want to mark..
To mark attendance, follow the same Process as mentioned in "Marking Attendance" guide (Page11).
The employees under the selected Manager will appear.
Back

Employee AMendance Details
14
Scroll to the right of the screen to view the Attendance details and Computation.
Back
Edit Employees Status
15
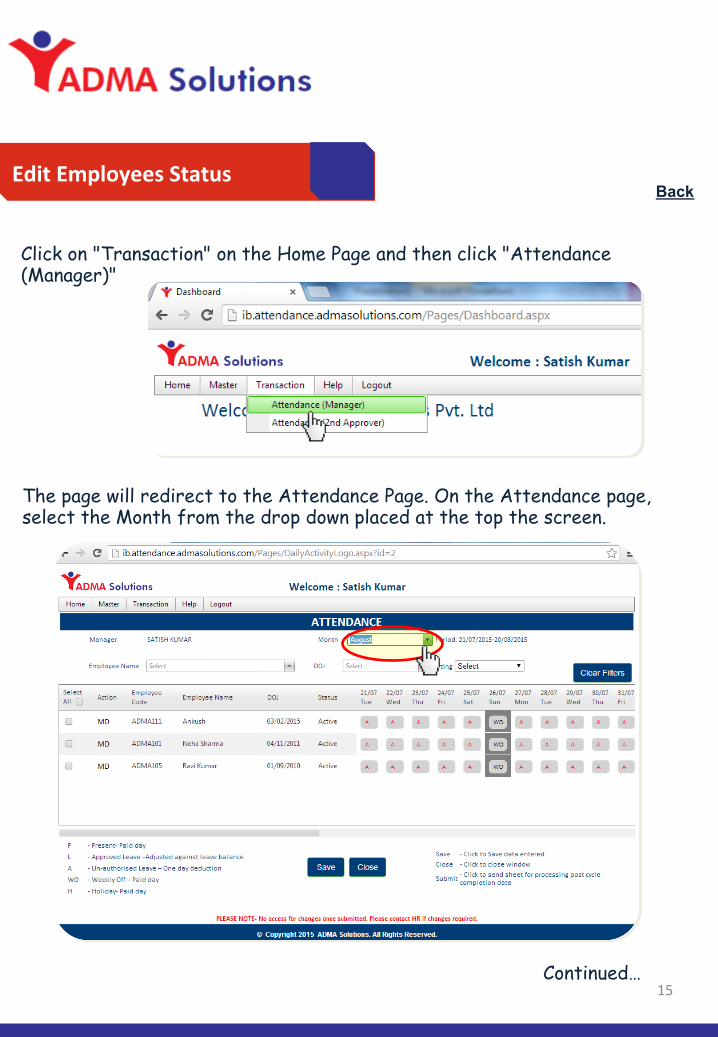
Click on "Transaction" on the Home Page and then click "Attendance (Manager)"
The page will redirect to the Attendance Page. On the Attendance page, select the Month from the drop down placed at the top the screen.
Continued…
Back
Edit Employees Status
16
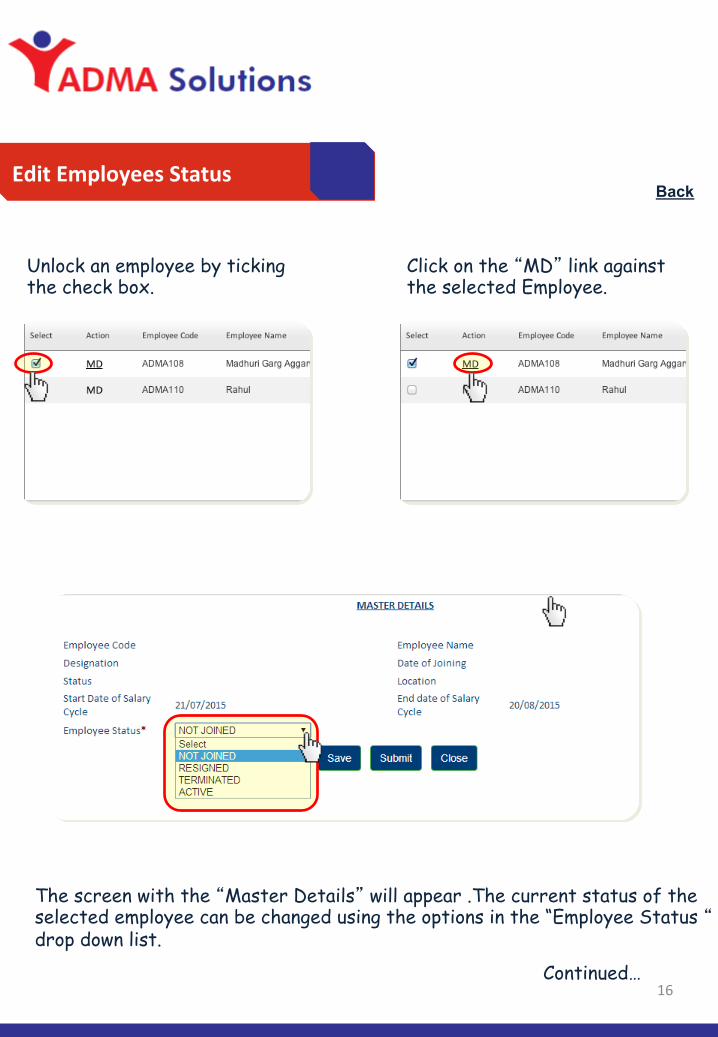
Unlock an employee by ticking the check box.
The screen with the “Master Details” will appear .The current status of the selected employee can be changed using the options in the “Employee Status “ drop down list.
Continued…
Click on the “MD” link against the selected Employee.
Back
Edit Employees Status
17
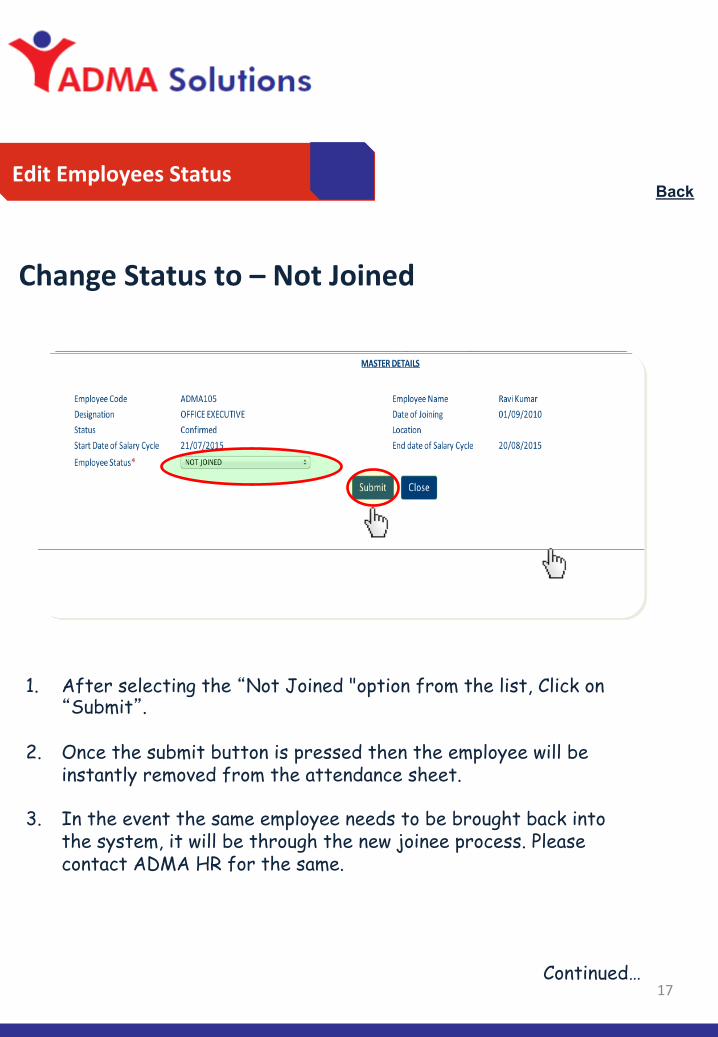
Change Status to – Not Joined
Continued…
1. After selecting the “Not Joined "option from the list, Click on “Submit”.
2. Once the submit button is pressed then the employee will be instantly removed from the attendance sheet.
3. In the event the same employee needs to be brought back into the system, it will be through the new joinee process. Please contact ADMA HR for the same.
Back

Edit Employees Status
18
Change Status to – Resigned
Continued…
After selecting the “Resigned "option from the list, Click on “Submit”.
The page will automatically extend, where a few more details would be required.
Back

Edit Employees Status
19
Change Status to – Resigned (Contd.)
Continued…
1. Input of "DOR“ (Date of Resignation) is mandatory to "Save“ the changes to avoid error pop up.
2. DOR will need to be a date within the salary cycle.
3. Employee will be in the system till LWD (Last Working Day) not marked and submitted. LWD can be a date out of the salary cycle month.
4. LWD can be beyond notice period required.
5. The employee cannot be moved out of the system till the LWD is not entered and the “Submit” button has not been pressed.
6. All fields marked "*" are mandatory before Submission.
Back
Edit Employees Status
20
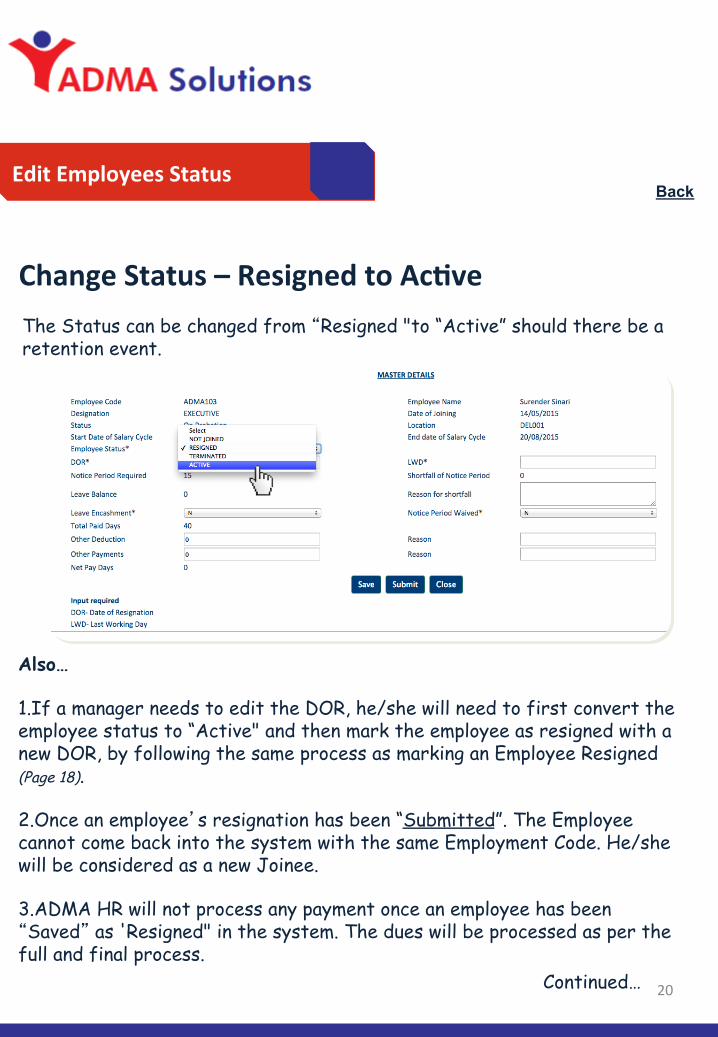
Change Status – Resigned to AcAve
Continued…
Also… 1. If a manager needs to edit the DOR, he/she will need to first convert the employee status to “Active" and then mark the employee as resigned with a new DOR, by following the same process as marking an Employee Resigned (Page 18).
2. Once an employee’s resignation has been “Submitted”. The Employee cannot come back into the system with the same Employment Code. He/she will be considered as a new Joinee.
3. ADMA HR will not process any payment once an employee has been “Saved” as 'Resigned" in the system. The dues will be processed as per the full and final process.
The Status can be changed from “Resigned "to “Active” should there be a retention event.
Back
Edit Employees Status
21
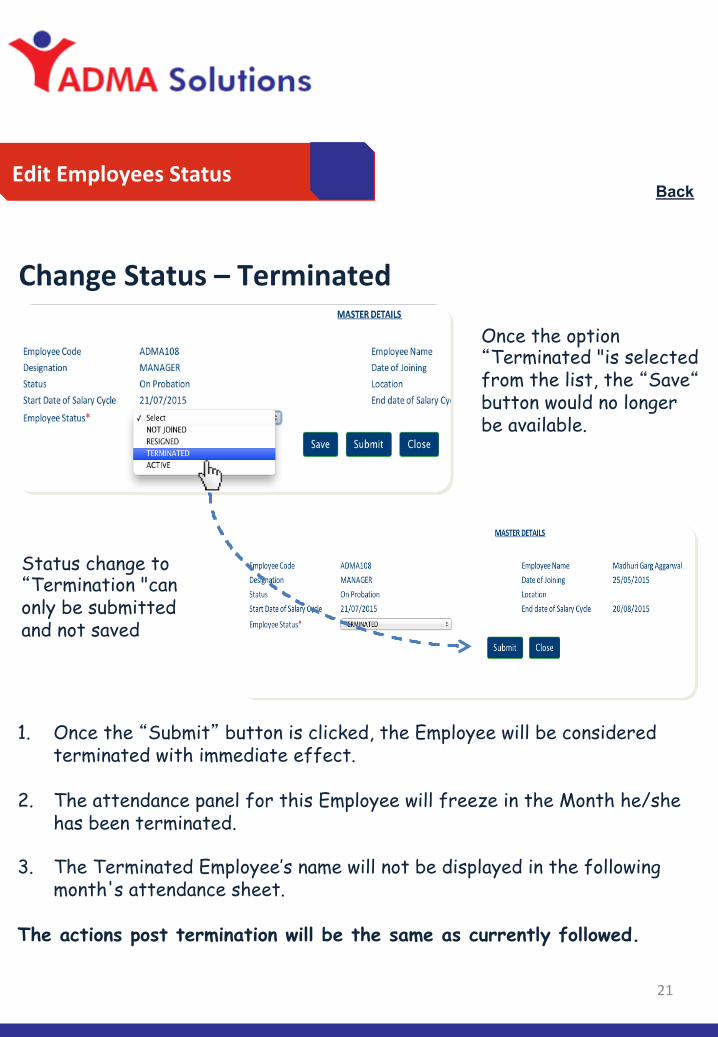
Change Status – Terminated
1. Once the “Submit” button is clicked, the Employee will be considered terminated with immediate effect.
2. The attendance panel for this Employee will freeze in the Month he/she has been terminated.
3. The Terminated Employee’s name will not be displayed in the following month's attendance sheet.
The actions post termination will be the same as currently followed.
Once the option “Terminated "is selected from the list, the “Save“ button would no longer be available.
Status change to “Termination "can only be submitted and not saved
Back
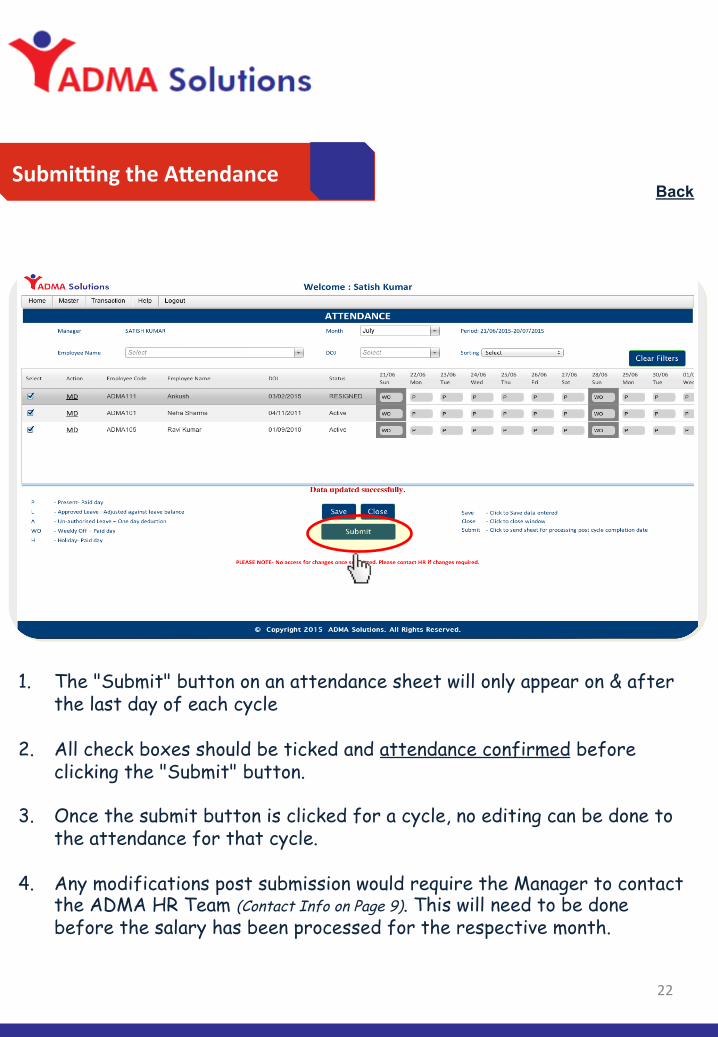
SubmiTng the AMendance
22
1. The "Submit" button on an attendance sheet will only appear on & after
the last day of each cycle
2. All check boxes should be ticked and attendance confirmed before clicking the "Submit" button.
3. Once the submit button is clicked for a cycle, no editing can be done to the attendance for that cycle.
4. Any modifications post submission would require the Manager to contact the ADMA HR Team (Contact Info on Page 9). This will need to be done before the salary has been processed for the respective month.
Back

Legend
23
DOJ Date of Joining P Present L Leave
A Absent WO Weekly Off H Holiday Leave O/B Leave opening balance- Leave not availed being brought
forward to the current cycle + leave entitlement for current Month Leave Availed Leave taken during the salary Cycle Leave C/F Leave Carry Forward- Leave opening balance less leave availed
during the salary cycle Deductions Any Absents taken + Any access Leaves taken MD MASTER DETAILS- To mark employee as “Not Joined”,
“Resigned” or “Terminated” DOR Date of Resignation LWD Last working day
Back

“Building Relationships”
ADMA SOLUTIONS PVT LTD 25-A, 1st Floor, Commercial Complex,
C-Block Market, Paschimi Marg, Vasant Vihar, New Delhi-110057 ( 011-2615 6000; 2615 6003; E – [email protected]