Asterisk Basics, and Load Balancing via DUNDi · Asterisk Basics, and Load Balancing via DUNDi 01...
28
Asterisk Basics, and Load Balancing via DUNDi 01 July 2010 Asterisk Basics, and Load Balancing via DUNDi Prepared by : Vivek Kapoor http://exain.com Prepared on : 01 July 2010 Web version : http://exain.wordpress.com/2010/07/03/asterisk-basics-and-load-balancing-via-dundi Table of Contents Asterisk Basics, and Load Balancing via DUNDi................................................................................1 Purpose of this document.................................................................................................................3 Acknowledgements..........................................................................................................................3 Disclaimer........................................................................................................................................ 3 Before we begin...............................................................................................................................4 Quick look at the steps.....................................................................................................................4 Asterisk Installation......................................................................................................................... 5 Basic SIP User Creation & Testing..................................................................................................7 Server A,B & C : /etc/asterisk/asterisk.conf................................................................................7 Server A : /etc/asterisk/sip.conf...................................................................................................7 Server A : /etc/asterisk/extensions.conf.......................................................................................7 Server B : /etc/asterisk/sip.conf...................................................................................................7 Server B : /etc/asterisk/extensions.conf...................................................................................... 8 Testing the setup..........................................................................................................................8 Making it work with DUNDi - 2 Server Setup.............................................................................. 10 Server A : /etc/asterisk/sip.conf.................................................................................................10 Server B : /etc/asterisk/sip.conf.................................................................................................10 Server A & B : /etc/asterisk/iax.conf......................................................................................... 11 DUNDi key generation............................................................................................................. 12 Server A : /etc/asterisk/dundi.conf............................................................................................ 12 Server B : /etc/asterisk/dundi.conf............................................................................................ 13 Server A : /etc/asterisk/extensions.conf.....................................................................................14 Server B : /etc/asterisk/extensions.conf.................................................................................... 15 Testing the setup........................................................................................................................15 More DUNDi - 3 Server Setup...................................................................................................... 18 Server A : /etc/asterisk/dundi.conf............................................................................................ 18 Server B : /etc/asterisk/dundi.conf............................................................................................ 19 Server C : /etc/asterisk/dundi.conf............................................................................................ 19 Testing the 3 Server Setup.........................................................................................................21 Adding RealTime to it................................................................................................................... 22 Setting up MySQL Server.........................................................................................................22 Server A : /etc/asterisk/res_mysql.conf..................................................................................... 23 Server B : /etc/asterisk/res_mysql.conf.....................................................................................24 Server A & B : /etc/asterisk/extconfig.conf...............................................................................24 Server A & B : /etc/asterisk/sip.conf......................................................................................... 24 Testing RealTime Setup............................................................................................................ 24 Page 1 of 28 By Vivek Kapoor, http://exain.com
Transcript of Asterisk Basics, and Load Balancing via DUNDi · Asterisk Basics, and Load Balancing via DUNDi 01...

Asterisk Basics, and Load Balancing via DUNDi 01 July 2010
Asterisk Basics, and Load Balancing via DUNDiPrepared by : Vivek Kapoor http://exain.com Prepared on : 01 July 2010
Web version : http://exain.wordpress.com/2010/07/03/asterisk-basics-and-load-balancing-via-dundi
Table of ContentsAsterisk Basics, and Load Balancing via DUNDi................................................................................1
Purpose of this document.................................................................................................................3Acknowledgements..........................................................................................................................3Disclaimer........................................................................................................................................3Before we begin...............................................................................................................................4Quick look at the steps.....................................................................................................................4Asterisk Installation.........................................................................................................................5Basic SIP User Creation & Testing..................................................................................................7
Server A,B & C : /etc/asterisk/asterisk.conf................................................................................7Server A : /etc/asterisk/sip.conf...................................................................................................7Server A : /etc/asterisk/extensions.conf.......................................................................................7Server B : /etc/asterisk/sip.conf...................................................................................................7Server B : /etc/asterisk/extensions.conf......................................................................................8Testing the setup..........................................................................................................................8
Making it work with DUNDi - 2 Server Setup..............................................................................10Server A : /etc/asterisk/sip.conf.................................................................................................10Server B : /etc/asterisk/sip.conf.................................................................................................10Server A & B : /etc/asterisk/iax.conf.........................................................................................11DUNDi key generation.............................................................................................................12Server A : /etc/asterisk/dundi.conf............................................................................................12Server B : /etc/asterisk/dundi.conf............................................................................................13Server A : /etc/asterisk/extensions.conf.....................................................................................14Server B : /etc/asterisk/extensions.conf....................................................................................15Testing the setup........................................................................................................................15
More DUNDi - 3 Server Setup......................................................................................................18Server A : /etc/asterisk/dundi.conf............................................................................................18Server B : /etc/asterisk/dundi.conf............................................................................................19Server C : /etc/asterisk/dundi.conf............................................................................................19Testing the 3 Server Setup.........................................................................................................21
Adding RealTime to it...................................................................................................................22Setting up MySQL Server.........................................................................................................22Server A : /etc/asterisk/res_mysql.conf.....................................................................................23Server B : /etc/asterisk/res_mysql.conf.....................................................................................24Server A & B : /etc/asterisk/extconfig.conf...............................................................................24Server A & B : /etc/asterisk/sip.conf.........................................................................................24Testing RealTime Setup............................................................................................................24
Page 1 of 28 By Vivek Kapoor, http://exain.com

Asterisk Basics, and Load Balancing via DUNDi 01 July 2010
What's next.....................................................................................................................................26Enabling actual calling out........................................................................................................26Using extensions in RealTime...................................................................................................26Securing the setup.....................................................................................................................27Do load balancing & fail over...................................................................................................28
Page 2 of 28 By Vivek Kapoor, http://exain.com

Asterisk Basics, and Load Balancing via DUNDi 01 July 2010
Purpose of this documentAsterisk is an open source PBX. Which means, you can setup your own little telephone exchange in your home/office environment. On a much larger usage, you may look forward to setting up a redundant phone setup wherein multiple boxes are interconnected with each other and provide some sort of failover capability and easier management, which is possible through something called DUNDi. This document aims to provide such a solution with a possibility of horizontal scaling instead of vertical scaling. So, this may mean that by using low-end commodity hardware, you can setup a strong telephone infrastructure which can cater to thousands of users.
Read the document carefully. Read it fully before you start implementing it. It is intentionally detailed so that you know what you're doing.
AcknowledgementsAll credit of this document goes to JR Richardson. I'm afraid I've not been able to find a suitable link for him, but his whitepapers and presentations are the ones which helped me move forward. And of course, Mark Spencer - the guy behind Asterisk. Without him this document wouldn't have existed.
The writings by JR Richardson
• http://www.voip-info.org/storage/users/813/47813/images/1654/DUNDi_So_Easy.pdf
• http://atlaug.com/stuff/Presentations/Astricon06/JR_Richardson_Whitepaper.pdf
DisclaimerThough I have significant experience doing Linux and related systems, but I'm more of a novice in Asterisk. The following may or may not work for you. I don't provide any warranty whatsoever of it being successful, or rather, consistently successful, and providing an actual load balanced solution. I've yet to implement it in a production setup, and hence all you do is at your own risk. The below procedure SHOULD work, but I CANNOT say that it WILL work.
Page 3 of 28 By Vivek Kapoor, http://exain.com

Asterisk Basics, and Load Balancing via DUNDi 01 July 2010
Before we beginA little about the nomenclature
• Asterisk : http://asterisk.org It is a PBX (Private Branch Exchange) software which runs on Linux platform. It allows you to have VOIP facility without incurring cost on proprietary hardware, and can run off a home desktop system.
• DUNDi : http://dundi.com DUNDi is a peer-to-peer system for locating Internet gateways to telephony services. Unlike traditional centralized services (such as the remarkably simple and concise ENUM standard), DUNDi is fully-distributed with no centralized authority whatsoever. We will be using it to interconnect multiple asterisk boxes and setting up a load balanced environment which will also act as a failover.
• SIP Softphone : A softphone running from your desktop which allows you to register to asterisk and enable VOIP communication. I, for this document, use Zoiper - http://zoiper.com
• RealTime : http://www.voip-info.org/wiki/view/Asterisk+RealTime It will allow us to connect to MySQL and have the users registered in there instead of being hard coded in sip configuration. This way it will be possible to have users register to any registration server and not just one on which they're configured.
You need to have some experience related to Linux systems. You should be comfortable in compiling applications from scratch. The method mentioned in this email should work as is, but if there are issues, then you would be resolving them on your own. Also, it is highly recommended to have some working knowledge about Asterisk. You should have setup some Asterisk based environment - if you've not done that yet, then I think you should first concentrate on that. You'll be delighted to see what all is possible through Asterisk.
Quick look at the stepsTo make it work with the minimum configuration, we'll proceed step by step so that we don't miss a thing. This means we'll not jump straight-away to the fully functional DUNDi setup, but do it slowly, understanding each step as we do it. Here's how we'll move forward
1. Installation of Asterisk on a Debian/Ubuntu systems (2 systems initially, later 3) 2. Basic SIP User Creation & Testing
3. Making it work with DUNDi - 2 Server Setup 4. More DUNDi - 3 Server Setup 5. Adding RealTime to it
6. What's next
Page 4 of 28 By Vivek Kapoor, http://exain.com

Asterisk Basics, and Load Balancing via DUNDi 01 July 2010
Asterisk Installation1. You need to have atleast TWO working Debian/Ubuntu machine. I will be using THREE
machines eventually, but will start with two. Though the following would work for any Linux distribution available, the steps related to installation and initialization of packages could vary - so you may refer to the documentation of your distribution.
2. I am using Virtual Machines running via KVM for this exercise. You may use Virtualbox, Xen, or any of your preferred solutions. Here's the basic structure
• Server A, IP: 192.168.1.5, MAC Address: 00:16:36:99:54:62 • Server B, IP: 192.168.1.6, MAC Address: 00:16:36:2f:11:9c • Server C, IP: 192.168.1.10, MAC Address: 00:16:36:6e:d7:dc
3. Three packages are required from the asterisk website, the asterisk package itself, dahdi & asterisk-addons for mysql support. Get them from http://asterisk.org - I chose the following versions which were the latest at the time of writing this article
• asterisk-1.6.2.8.tar.gz • dahdi-linux-complete-2.3.0.1+2.3.0.tar.gz • asterisk-addons-1.6.2.1.tar.gz
4. The installation steps are as under. The asterisk installation documents are readily available on the internet, so you may try out a more detailed ones. Here's what will get you started
5. Install the pre-requisites first apt-get install linux-headers-$(uname -r) build-essential automake autoconf bison flex libtool libncurses5-dev libssl-dev libgsm1 libgsm1-dev libgsmme-dev libgsm-tools libxml2-dev libmysqlclient-dev
6. Untar all the downloaded packages (asterisk, dahdi and asterisk-addons) into /usr/local/src and then one by one run the following
# Dahdi First cd dahdi-linux-complete-2.3.0.1+2.3.0make cleanmakemake installmake config
# Now for Asteriskcd asterisk-1.6.2.8make clean./configuremake installmake samplesmake config
# Last, the asterisk add-ons (important for MySQL support)cd asterisk-addons-1.6.2.1make clean./configuremake menuselect # Optional - I usually disable h323 supportmakemake installmake samples
Page 5 of 28 By Vivek Kapoor, http://exain.com

Asterisk Basics, and Load Balancing via DUNDi 01 July 2010
7. DAHDI may require some downloading from the Internet, so make sure you have the machine connected to the Internet, or use a proxy by using
export http_proxy=http://your.proxy.ip:port
8. That's all. Asterisk is configured. You may run the following to verify. /etc/init.d/asterisk start asterisk -r/etc/init.d/asterisk stop
Page 6 of 28 By Vivek Kapoor, http://exain.com
Asterisk Basics, and Load Balancing via DUNDi 01 July 2010
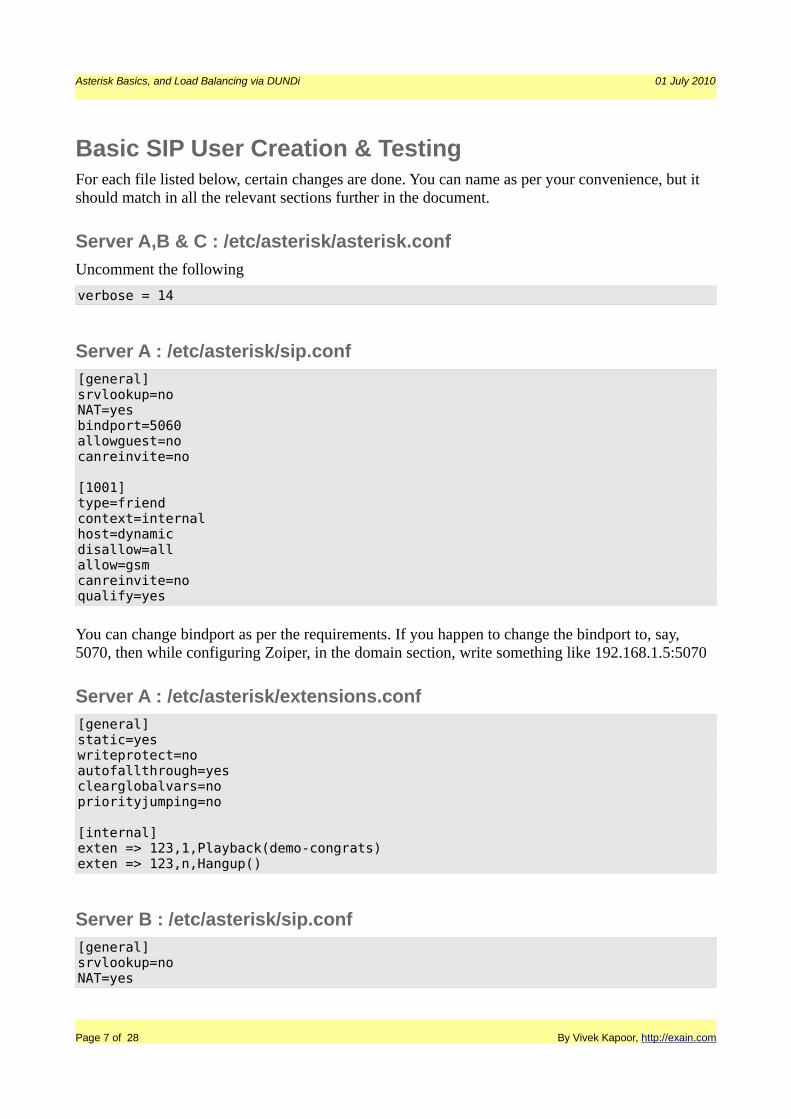
Basic SIP User Creation & TestingFor each file listed below, certain changes are done. You can name as per your convenience, but it should match in all the relevant sections further in the document.
Server A,B & C : /etc/asterisk/asterisk.conf
Uncomment the following
verbose = 14
Server A : /etc/asterisk/sip.conf
[general]srvlookup=noNAT=yesbindport=5060allowguest=nocanreinvite=no
[1001]type=friendcontext=internalhost=dynamicdisallow=allallow=gsmcanreinvite=noqualify=yes
You can change bindport as per the requirements. If you happen to change the bindport to, say, 5070, then while configuring Zoiper, in the domain section, write something like 192.168.1.5:5070
Server A : /etc/asterisk/extensions.conf
[general]static=yeswriteprotect=noautofallthrough=yesclearglobalvars=nopriorityjumping=no
[internal]exten => 123,1,Playback(demo-congrats)exten => 123,n,Hangup()
Server B : /etc/asterisk/sip.conf
[general]srvlookup=noNAT=yes
Page 7 of 28 By Vivek Kapoor, http://exain.com

Asterisk Basics, and Load Balancing via DUNDi 01 July 2010
bindport=5060allowguest=nocanreinvite=no
[1002]type=friendcontext=internalhost=dynamicdisallow=allallow=gsmcanreinvite=noqualify=yes
Server B : /etc/asterisk/extensions.conf
[general]static=yeswriteprotect=noautofallthrough=yesclearglobalvars=nopriorityjumping=no
[internal]exten => 456,1,Playback(demo-congrats)exten => 456,n,Hangup()
Testing the setup
What we see above is that there are two servers, Server A and Server B. Server A has SIP user 1001, and Server B has 1002. Both the users belong to a context called "internal", which probably means that when they dial in any extension, the first context that they'll hit is "internal", and from there onwards they'd be redirected to other contexts as per the dial plan.
The context "internal" is defined in "extensions.conf" file. There's not much in that context except one single extension, 123 in Server A and 456 in Server B. When that extension is called, a congratulations message is played. So to test it, I have used an application called Zoiper which allows two lines to be connected. You can download Zoiper from http://www.zoiper.com/softphone/ - I used Zoiper Classic for Linux.
Let's start asterisk first on Server A & Server B by using
/etc/init.d/asterisk start
and then connect to an asterisk session by using
asterisk -r
I created two SIP accounts in Zoiper, for Server A I entered 192.168.1.5 as domain, and 1001 as username, and for Server B I entered 192.168.1.6 as domain and 1002 as username. Rest of the details can be added as per your preference. I deselected the "Register on startup" option under advanced settings. Then on the Zoiper interface I registered to both the servers.
Page 8 of 28 By Vivek Kapoor, http://exain.com

Asterisk Basics, and Load Balancing via DUNDi 01 July 2010
On Server A, something like the following should appear when you list the sip peers
CLI> sip show peersName/username Host Dyn Nat ACL Port Status 1001/1001 xx.xx.xx.xx D N 5060 OK (116 ms) 1 sip peers [Monitored: 1 online, 0 offline Unmonitored: 0 online, 0 offline]CLI>
Same goes for Server B. It should show something like the following
CLI> sip show peersName/username Host Dyn Nat ACL Port Status 1002/1002 xx.xx.xx.xx D N 5060 OK (134 ms) 1 sip peers [Monitored: 1 online, 0 offline Unmonitored: 0 online, 0 offline]CLI>
Now select in Zoiper, the Server A Account and dial 123 - it should playback the congratulations message. If you try to dial 456, it'll not work. But if you select Server B in the Account, and then dial 456, it should work as expected.
A sample screenshot of Zoiper is below
Also check the messages that appear in the console that you'd opened earlier (by using asterisk -r). A sample of the same on Server A is as under
CLI> == Using SIP RTP CoS mark 5 -- Executing [123@internal:1] Playback("SIP/1001-00000001", "demo-congrats") in new stack -- <SIP/1001-00000001> Playing 'demo-congrats.gsm' (language 'en') -- Executing [123@internal:2] Hangup("SIP/1001-00000001", "") in new stack == Spawn extension (internal, 123, 2) exited non-zero on 'SIP/1001-00000001'CLI>
So, our basic configuration is working fine. If you add more SIP users in sip.conf file, and add relevant extensions in extensions.conf file, then you can have a single server PBX running perfectly fine. It is important to have the above working so that we can be sure that our setup is ready for DUNDi.
Page 9 of 28 By Vivek Kapoor, http://exain.com
Asterisk Basics, and Load Balancing via DUNDi 01 July 2010
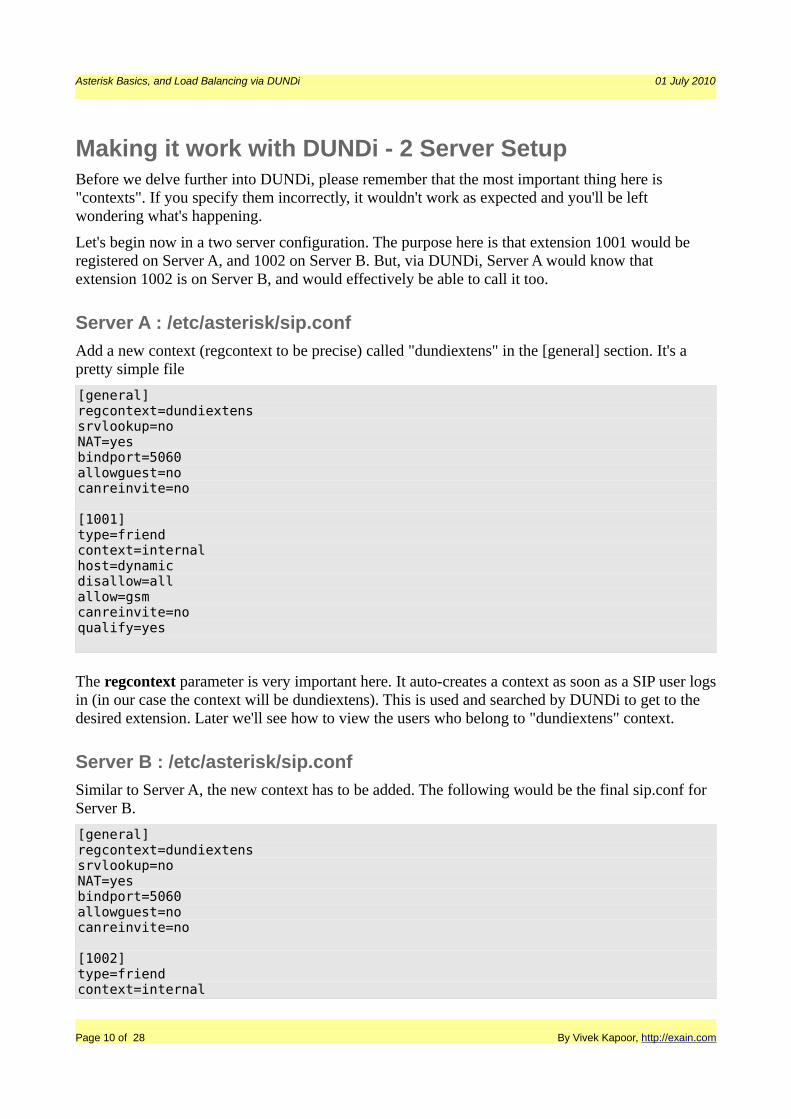
Making it work with DUNDi - 2 Server SetupBefore we delve further into DUNDi, please remember that the most important thing here is "contexts". If you specify them incorrectly, it wouldn't work as expected and you'll be left wondering what's happening.
Let's begin now in a two server configuration. The purpose here is that extension 1001 would be registered on Server A, and 1002 on Server B. But, via DUNDi, Server A would know that extension 1002 is on Server B, and would effectively be able to call it too.
Server A : /etc/asterisk/sip.conf
Add a new context (regcontext to be precise) called "dundiextens" in the [general] section. It's a pretty simple file
[general]regcontext=dundiextenssrvlookup=noNAT=yesbindport=5060allowguest=nocanreinvite=no
[1001]type=friendcontext=internalhost=dynamicdisallow=allallow=gsmcanreinvite=noqualify=yes
The regcontext parameter is very important here. It auto-creates a context as soon as a SIP user logs in (in our case the context will be dundiextens). This is used and searched by DUNDi to get to the desired extension. Later we'll see how to view the users who belong to "dundiextens" context.
Server B : /etc/asterisk/sip.conf
Similar to Server A, the new context has to be added. The following would be the final sip.conf for Server B.
[general]regcontext=dundiextenssrvlookup=noNAT=yesbindport=5060allowguest=nocanreinvite=no
[1002]type=friendcontext=internal
Page 10 of 28 By Vivek Kapoor, http://exain.com

Asterisk Basics, and Load Balancing via DUNDi 01 July 2010
host=dynamicdisallow=allallow=gsmcanreinvite=noqualify=yes
Server A & B : /etc/asterisk/iax.conf
We will be using IAX2 trunk to interconnect the DUNDi boxes. IAX2 doesn't work too well in virtual machines as it requires a timing device/timing source. For me it didn't work well as far as Playback() was concerned, but when doing a voice call everything seemed to be just fine. I've not been able to figure out if it's a timing device/virtual machine issue or it's just some setting in iax.conf that needs to be done. If I run dahdi_test in a virtual machine, the results are always above 99.6%. The same is with a dedicated machine, so I guess the timing source seems to okay.
Tried using SIP Trunk also, but it causes a number of issues when doing RealTime. When using RealTime the users were registered multiple times on Asterisk box, so 1001 which was initially registered on Server A got registered on Server B as well. Also, I wasn't able to figure out a way to send a call from Server A to a particular context on Server B. It also caused a bit of scalability issues as well since if using dedicated trunks then I'd have to provide each server's details in sip.conf of all servers. So when a new server is added, the sip.conf would need to be updated on all the servers, which isn't that elegant (because then sip reload would also be called).
Here's the content of the "iax.conf" file where [iaxuser] is added. It's the same on each server
[general]jitterbuffer=nonochecksums=nodisallow=allallow=gsm
[iaxuser]type=frienddbsecret=dundi/secretcontext=incomingdundi
So, as we see, there are three contexts we've encountered till now. Context "internal", which is associated with the SIP user being registered, context "dundiextens" which is auto-created as soon as the first user registers on a particular server, and lastly context "incomingdundi" - this is used when a call arrives via the IAX trunk. All these have to be mentioned in extensions.conf of each server.
If you notice, there's a parameter "dbsecret" in the file. I guess it allows one server to authenticate to another by using a username/password combination. The advantage is that it's just a username/password authentication and not any server information hard coded. Which has the best advantage that if any new server is added to the cluster, it'll automatically be authenticated. Also, I had read somewhere, probably in the links below, that "dundi/secret" value for "dbsecret" is to be taken literally - you shouldn't be changing it.
If you want to read about using IAX and SIP trunks in DUNDi, you can refer to the following
• http://www.voip-info.org/wiki/view/DUNDi+Enterprise+Configuration+IAX
Page 11 of 28 By Vivek Kapoor, http://exain.com

Asterisk Basics, and Load Balancing via DUNDi 01 July 2010
• http://www.voip-info.org/wiki/view/DUNDi+Enterprise+Configuration+SIP (this doesn't work yet)
• http://www.voip- info.org/wiki/view/DUNDi+Enterprise+Configuration+SIP+with+no+passwords
DUNDi key generation
Before we proceed further, we will need to create a couple of keys on one server, and COPY it to another server. I haven't tried creating different keys, so cannot confirm otherwise.
On Server A, go to /var/lib/asterisk/keys directory, and execute the following
astgenkey -n dundi
and when it asks for pressing ENTER, just do that. A couple of files would be created in that directory - dundi.key & dundi.pub. Copy both the files to Server B in the same directory - /var/lib/asterisk/keys. This essentially means that dundi.key and dundi.pub are identical on both the servers, and would remain identical as new servers join the cluster.
Server A : /etc/asterisk/dundi.conf
dundi.conf has three primary sections, [general], [mapping] and peer information to which it can place queries. Here's what needs to be in dundi.conf
; Part 1[general]department=Your Departmentorganization=Your Company, Inc.locality=Your [email protected]=+12565551212
bindaddr=192.168.1.5port=4520entityid=00:16:36:99:54:62cachetime=5ttl=2autokill=yes
; Part 2[mappings]priv => dundiextens,0,IAX2,iaxuser:${SECRET}@192.168.1.5/${NUMBER},nopartial
; Part 3[00:16:36:2f:11:9c] ; MAC Address of Server Bmodel = symmetrichost = 192.168.1.6 ;(this is the IP address of the DUNDi Server B)inkey = dundioutkey = dundiinclude = privpermit = priv
Page 12 of 28 By Vivek Kapoor, http://exain.com

Asterisk Basics, and Load Balancing via DUNDi 01 July 2010
qualify = yesorder = primary
Let's move to each item step by step
Part 1 - The [general] section is self explanatory. Following points should be looked into
• bindaddr=192.168.1.5 <- The IP Address of your existing machine
• entityid=00:16:36:99:54:62 <- The MAC address of the interface for 192.168.1.5. However, it could be any mac address that you own, that is, it should be something unique.
• cachetime=5 <- Better to have it at 5 seconds than 3600 seconds if it's a closed group network. If there's a failure of one server, the re-requests shall be redirected to other servers after 5 seconds have elapsed. May not be good if you're connecting to outside servers not in your domain as it has to potential for frequent queries if there's heavy traffic.
• ttl=2 <- The number of DUNDi lookup requests made. So, if request goes to Server B from Server A, then that's one request. Now Server B can make a maximum of 1 more request to other servers it has paired with.
Part 2 - The [mapping] section defines what you will provide as the contact address when another server gets in touch with you. So, if a SIP extension is registered with you, you will provide the server asking for that extension a complete path to your machine. If we break the following statement,
priv => dundiextens,0,IAX2,iaxuser:${SECRET}@192.168.1.5/${NUMBER},nopartial
As per the documentation, here "priv" is the DUNDi context and will be used by DUNDi. We'll see later how it's used in extensions.conf file. Then comes the local context which it'll search. In our case it's "dundiextens" which we defined in sip.conf under the regcontext parameter. Then is the weight, the technology being used, the destination that is to be sent to the server requesting information, and then further options. You can review DUNDi documentation at http://www.voip-info.org/wiki/view/DUNDi for more details on each of the parameters.
Part 3 - These are the peers that you'll register with for looking up / doing DUNDi searching. So, if you have multiple servers, then you'll need to have multiple peer definitions similar to the one mentioned earlier. Since we're using only one Server (Server B ) as the peer, we've entered that information in dundi.conf. I think the MAC addresses are more for consistency than any technical verification, so you should be able to connect machines outside your network too - across the globe maybe.
Server B : /etc/asterisk/dundi.conf
In continuation to the concept above, we'll add the dundi.conf for Server B. Here's an example
; Part 1[general]department=Your Departmentorganization=Your Company, Inc.locality=Your Citystateprov=STcountry=US
Page 13 of 28 By Vivek Kapoor, http://exain.com

Asterisk Basics, and Load Balancing via DUNDi 01 July 2010
[email protected]=+12565551212
bindaddr=192.168.1.6port=4520entityid=00:16:36:2f:11:9ccachetime=5ttl=2autokill=yes
; Part 2[mappings]priv => dundiextens,0,IAX2,iaxuser:${SECRET}@192.168.1.6/${NUMBER},nopartial
; Part 3[00:16:36:99:54:62] ; MAC Address of Server Amodel = symmetrichost = 192.168.1.5 ;(this is the IP address of the DUNDi Server A)inkey = dundioutkey = dundiinclude = privpermit = privqualify = yesorder = primary
Our DUNDi configuration is complete. Now Server A has Server B as DUNDi peer, and vice versa. This means if Server A queries Server B, then Server B would respond favorably and provide the location to the SIP extension if it exists on that server (and of course vice versa).
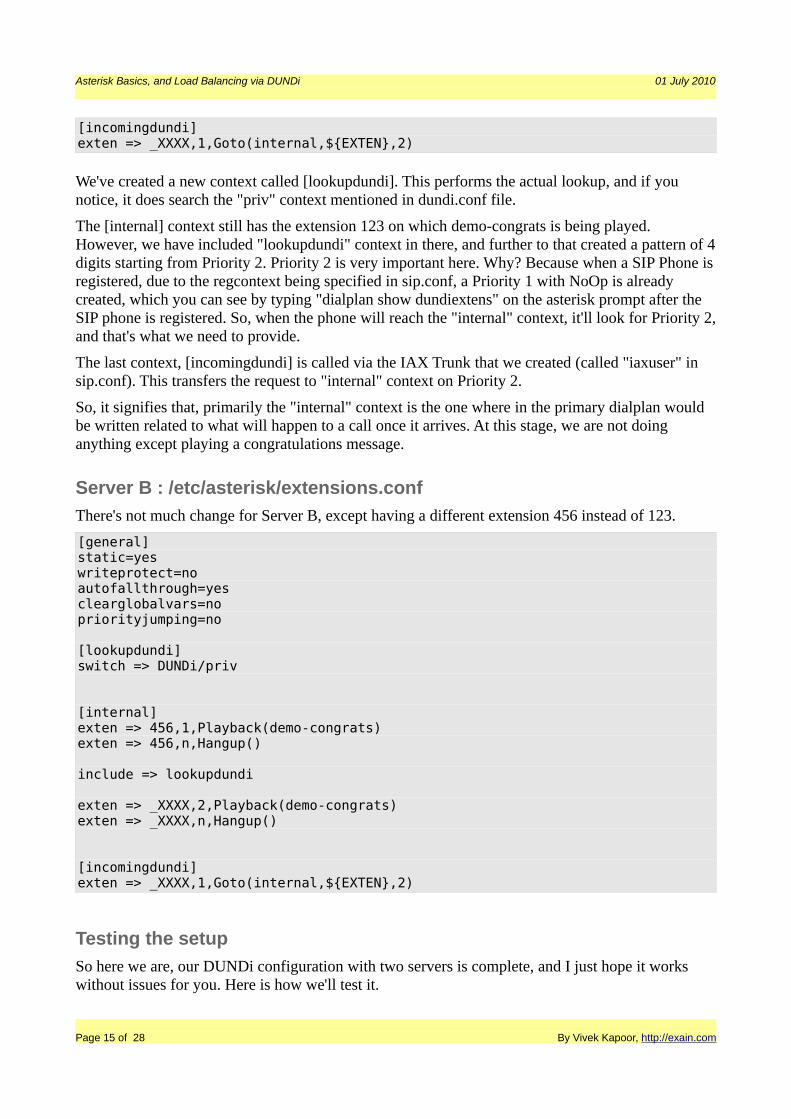
Server A : /etc/asterisk/extensions.conf
Now, for DUNDi we'll need to work up a bit more. Following is the extensions.conf for each of the contexts mentioned above, that is, internal, dundiextens, and incomingdundi
[general]static=yeswriteprotect=noautofallthrough=yesclearglobalvars=nopriorityjumping=no
[lookupdundi]switch => DUNDi/priv
[internal]exten => 123,1,Playback(demo-congrats)exten => 123,n,Hangup()
include => lookupdundi
exten => _XXXX,2,Playback(demo-congrats)exten => _XXXX,n,Hangup()
Page 14 of 28 By Vivek Kapoor, http://exain.com
Asterisk Basics, and Load Balancing via DUNDi 01 July 2010
[incomingdundi]exten => _XXXX,1,Goto(internal,${EXTEN},2)
We've created a new context called [lookupdundi]. This performs the actual lookup, and if you notice, it does search the "priv" context mentioned in dundi.conf file.
The [internal] context still has the extension 123 on which demo-congrats is being played. However, we have included "lookupdundi" context in there, and further to that created a pattern of 4 digits starting from Priority 2. Priority 2 is very important here. Why? Because when a SIP Phone is registered, due to the regcontext being specified in sip.conf, a Priority 1 with NoOp is already created, which you can see by typing "dialplan show dundiextens" on the asterisk prompt after the SIP phone is registered. So, when the phone will reach the "internal" context, it'll look for Priority 2, and that's what we need to provide.
The last context, [incomingdundi] is called via the IAX Trunk that we created (called "iaxuser" in sip.conf). This transfers the request to "internal" context on Priority 2.
So, it signifies that, primarily the "internal" context is the one where in the primary dialplan would be written related to what will happen to a call once it arrives. At this stage, we are not doing anything except playing a congratulations message.
Server B : /etc/asterisk/extensions.conf
There's not much change for Server B, except having a different extension 456 instead of 123.
[general]static=yeswriteprotect=noautofallthrough=yesclearglobalvars=nopriorityjumping=no
[lookupdundi]switch => DUNDi/priv
[internal]exten => 456,1,Playback(demo-congrats)exten => 456,n,Hangup()
include => lookupdundi
exten => _XXXX,2,Playback(demo-congrats)exten => _XXXX,n,Hangup()
[incomingdundi]exten => _XXXX,1,Goto(internal,${EXTEN},2)
Testing the setup
So here we are, our DUNDi configuration with two servers is complete, and I just hope it works without issues for you. Here is how we'll test it.
Page 15 of 28 By Vivek Kapoor, http://exain.com

Asterisk Basics, and Load Balancing via DUNDi 01 July 2010
1. Restart Asterisk and start the console on both the servers /etc/init.d/asterisk restart asterisk -r
2. Use Zoiper and register to both Server A and Server B. You should see appropriate registration messages in the asterisk console of both the servers.
3. Now we will see if on both servers the "dundiextens" has been created and if the users 1001 and 1002 are part of it.
# On Server A CLI> dialplan show dundiextens[ Context 'dundiextens' created by 'SIP' ] '1001' => 1. Noop(1001) [SIP]
-= 1 extension (1 priority) in 1 context. =-CLI>
# On Server BCLI> dialplan show dundiextens[ Context 'dundiextens' created by 'SIP' ] '1002' => 1. Noop(1002) [SIP]
-= 1 extension (1 priority) in 1 context. =-CLI>
4. All cool. Both our phones are registered and as you see the first priority of NoOp is created in there. Next is to see if the peers are displayed correctly. Server A would show Server B as its peer, and vice versa.
# Server A : Listing DUNDi peers CLI> dundi show peers EID Host Model AvgTime Status 00:16:36:2f:11:9c 192.168.1.6 (S) Symmetric Unavail OK (1 ms)1 dundi peers [1 online, 0 offline, 0 unmonitored]CLI>
# Server B : Listing DUNDi peersCLI> dundi show peers EID Host Model AvgTime Status 00:16:36:99:54:62 192.168.1.5 (S) Symmetric Unavail OK (1 ms)1 dundi peers [1 online, 0 offline, 0 unmonitored]CLI>
5. Next we will see if what happens if a lookup request is made by DUNDi from Server A to find 1001 (which is on Server A), and 1002 (which is on Server B). As you will see, Server A will not give a result of the extensions registered on its own instance, but only those which
Page 16 of 28 By Vivek Kapoor, http://exain.com

Asterisk Basics, and Load Balancing via DUNDi 01 July 2010
are registered on other servers. So, 1001 when searched doesn't retrieve any info, but 1002 does.
CLI> dundi lookup 1001@priv DUNDi lookup returned no results.DUNDi lookup completed in 7 msCLI> dundi lookup 1002@priv 1. 0 IAX2/iaxuser:[email protected]/1002 (EXISTS) from 00:16:36:2f:11:9c, expires in 5 sDUNDi lookup completed in 8 msCLI>
6. Doing the above on Server B gives the results as expected. 1002 returns no results as it is on the same machine, but 1001 does.
CLI> dundi lookup 1001@priv 1. 0 IAX2/iaxuser:[email protected]/1001 (EXISTS) from 00:16:36:99:54:62, expires in 5 sDUNDi lookup completed in 6 msCLI> dundi lookup 1002@privDUNDi lookup returned no results.DUNDi lookup completed in 8 msCLI>
7. Now let's place a call from Server A selected in Zoiper to 1001. It shouldn't play anything. Then place a call to 1002 - it should play a congratulations message, and there should be some information displayed on Server B's asterisk console.
If it works for you, then it means that the DUNDi configuration is working well. If it doesn't, then it would show some messages at the console of what didn't work. You can try enabling sip debugging through
sip set debug on
Page 17 of 28 By Vivek Kapoor, http://exain.com

Asterisk Basics, and Load Balancing via DUNDi 01 July 2010
More DUNDi - 3 Server SetupWe'll now add Server C to our existing cluster. This will be our DUNDi lookup server and no user would register to it.
JR Richardson mentioned in his document of having a separate DUNDi lookup server which will have all information about the peers. The advantages that it would have is
• There would be only one peer entered in all registration servers. So if a new registration server is added to the cluster, the other registration servers needn't have the DUNDi entry in them.
• It will be easier to manage since the new registration server would be added into the DUNDi configuration of Server C only, and all other servers would know of it instantly.
Let's move to the configuration part on each server. I am assuming that you've done the basic installation of Asterisk on Server C. There's no need for setting up sip.conf, iax.conf or extensions.conf on Server C, only "dundi.conf" is needed.
Do the following before proceeding so that you don't encounter weird behavior
• Unregister the SIP connections in Zoiper • Stop Asterisk on all three servers via
/etc/init.d/asterisk stop
Server A : /etc/asterisk/dundi.conf
We'll remove Server B's entry from dundi.conf and add Server C's entry. Here's the final dundi.conf on Server A
; Part 1[general]department=Your Departmentorganization=Your Company, Inc.locality=Your [email protected]=+12565551212
bindaddr=192.168.1.5port=4520entityid=00:16:36:99:54:62cachetime=5ttl=2autokill=yes
; Part 2[mappings]priv => dundiextens,0,IAX2,iaxuser:${SECRET}@192.168.1.5/${NUMBER},nopartial
; Part 3[00:16:36:6e:d7:dc] ; MAC Address of Server Cmodel = symmetric
Page 18 of 28 By Vivek Kapoor, http://exain.com

Asterisk Basics, and Load Balancing via DUNDi 01 July 2010
host = 192.168.1.10 ;(this is the IP address of the DUNDi Server C)inkey = dundioutkey = dundiinclude = privpermit = privqualify = yesorder = primary
Only the Peer's MAC Address and host are changed in Part 3 of the configuration. So we have added Server C as a peer having IP Address of 192.168.1.10.
Server B : /etc/asterisk/dundi.conf
The configuration is almost similar to Server A except of course the bindaddress and entityid.
; Part 1[general]department=Your Departmentorganization=Your Company, Inc.locality=Your [email protected]=+12565551212
bindaddr=192.168.1.6port=4520entityid=00:16:36:2f:11:9ccachetime=5ttl=2autokill=yes
; Part 2[mappings]priv => dundiextens,0,IAX2,iaxuser:${SECRET}@192.168.1.6/${NUMBER},nopartial
; Part 3[00:16:36:6e:d7:dc] ; MAC Address of Server Cmodel = symmetrichost = 192.168.1.10 ;(this is the IP address of the DUNDi Server C)inkey = dundioutkey = dundiinclude = privpermit = privqualify = yesorder = primary
Server C : /etc/asterisk/dundi.conf
Remember, you should have copied dundi.key and dundi.pub from either Server A or Server B to Server C's /var/lib/asterisk/keys. The two said files should be identical on all the machines. The DUNDi configuration will have information on the peers to which it will connect. Since it will connect to all asterisk registration servers, hence the peers would be Server A and Server B.
Page 19 of 28 By Vivek Kapoor, http://exain.com

Asterisk Basics, and Load Balancing via DUNDi 01 July 2010
Here's the configuration
; Part 1[general]department=Your Departmentorganization=Your Company, Inc.locality=Your [email protected]=+12565551212
bindaddr=192.168.1.10port=4520entityid=00:16:36:6e:d7:dccachetime=5ttl=1 ; You wouldn't want this server to loop, but only ask its peers ONCEautokill=yes
; Part 2[mappings]priv =>
; Part 3[00:16:36:99:54:62] ; Peer 1 : MAC Address of Server Amodel = symmetrichost = 192.168.1.5 ;(this is the IP address of the Server A)inkey = dundioutkey = dundiinclude = privpermit = privqualify = yesorder = primary
[00:16:36:2f:11:9c] ; Peer 2 : MAC Address of Server Bmodel = symmetrichost = 192.168.1.6 ;(this is the IP address of the Server B)inkey = dundioutkey = dundiinclude = privpermit = privqualify = yesorder = primary
A few details on above. The "ttl" is 1 instead of 2. Since our lookup server (Server C) is peering with all the registration servers, it should ask them only once and the registration servers shouldn't forward the request to other servers. ttl=1 ensures that. If it had been ttl=2, then registration servers (Server A & B ) would query their peers - and their peer is only 1, Server C - and thus it would get into an unwanted loop.
There's an empty "priv => " parameter. It is there because [mapping] somehow requires atleast one parameter, even if it's empty.
Peer 1 and Peer 2 are added. If you add another server to it, then you just need to add an entry in this file only and make it Peer 3 and so on.
Page 20 of 28 By Vivek Kapoor, http://exain.com

Asterisk Basics, and Load Balancing via DUNDi 01 July 2010
That's all to it. Let's test this out.
Testing the 3 Server Setup
In our test we have two servers, Server A and Server B on which the SIP phones would register. Server C would act just as a lookup server and answer requests.
1. Start Asterisk on all the three servers and connect to their consoles. /etc/init.d/asterisk start asterisk -r
2. Now use the command "dundi show peers". It should show only 1 peer on Server A & B and 2 peers on Server C. This is just fine.
3. Register your SIP Phone on Server A & B so both extensions 1001 & 1002 should be registered.
4. Now you can either do "dundi lookup 1001@priv" or "dundi lookup 1002@priv" from Server C and it'll show you both. Doing "1002@priv" from Server A or "1001@priv" from Server B would also give you results which are retrieved from the peer (Server C).
5. Make a call now from Server A selected in Zoiper to extension 1002 (on Server B).
If you've been able to do a 2 server setup, this type of setup should be trivial for you. Remember, dundi.key and dundi.pub should be identical on all three servers, so make sure you do that.
Page 21 of 28 By Vivek Kapoor, http://exain.com

Asterisk Basics, and Load Balancing via DUNDi 01 July 2010
Adding RealTime to itYeah, having users hard coded in sip.conf file is so so so uncool! Let's have them in database. Of course, for this to work you should have asterisk-addons installed on Server A and Server B. Server C is just the lookup server, so we don't need anything there as far as asterisk is concerned.
Setting up MySQL Server
You need to have some understanding of MySQL to continue. On a Debian/Ubuntu machine you can install MySQL via
apt-get install mysql-server
For our setup, we will install it on Server C as it is sitting idle in any case, doing just the lookups. You can have a dedicated machine for it depending on your requirements. Also, as JR Richardson had mentioned in one of the documents, asterisk realtime does a lot of database activity, so it is rather good to have it on other server and it should go via a separate network interface which is not being used for VOIP. Since usually all servers have atleast two ethernet cards, it should be trivial. Think about it and implement as per your requirements.
After installation, comment out "bind-address" in /etc/mysql/my.cnf file and then restart mysql through /etc/init.d/mysql restart. This is what I did on the mysql server after connecting to it
mysql> create database asterisk;mysql> grant all privileges on asterisk.* to [email protected] identified by 'secretA';mysql> grant all privileges on asterisk.* to [email protected] identified by 'secretB';
I separated the user so that if in future I need to identify which user is doing what, then it's possible. Otherwise you can have a single user, it's much more convenient that way, specially when you add more servers. You can also use '%' (quotes intended) instead of IP Address so that anyone can connect to it.
Next import the database structure in which you'll store the users. You can copy paste the following directly into mysql prompt, or save it as a file and import it later. This is copied directly from asterisk source and is in the contrib/scripts/sip-friends.sql file. A minor change you'd need is that "fullcontact" column should have a varchar(128), otherwise asterisk would complain.
CREATE TABLE `sipfriends` ( `name` varchar(40) NOT NULL default '', `type` varchar(10) NOT NULL default '', `defaultuser` varchar(40), `fromuser` varchar(40), `fromdomain` varchar(40), `secret` varchar(40), `md5secret` varchar(40), `auth` varchar(10), `mailbox` varchar(20), `subscribemwi` varchar(10), -- yes/no `vmexten` varchar(20), `callerid` varchar(40),
Page 22 of 28 By Vivek Kapoor, http://exain.com

Asterisk Basics, and Load Balancing via DUNDi 01 July 2010
`cid_number` varchar(40), `callingpres` varchar(20), `usereqphone` varchar(10), `language` varchar(10), `incominglimit` varchar(10), `context` varchar(40) NOT NULL default '', `subscribecontext` varchar(40), `amaflags` varchar(20), `accountcode` varchar(20), `musicclass` varchar(20), `mohsuggest` varchar(20), `allowtransfer` varchar(20), `callgroup` varchar(20), `pickupgroup` varchar(20), `autoframing` varchar(10), -- yes/no `disallow` varchar(20) default 'all', `allow` varchar(20), `maxcallbitrate` varchar(15), `host` varchar(40) default 'dynamic', `outboundproxy` varchar(40), `ipaddr` varchar(20) NOT NULL default '', `defaultip` varchar(20), `port` int(6) NOT NULL default '0', `fullcontact` varchar(128), `insecure` varchar(20), `qualify` varchar(15), `regseconds` int(11) NOT NULL default '0', `regexten` varchar(20), `regserver` varchar(20), `rtptimeout` varchar(15), `rtpholdtimeout` varchar(15), `rtpkeepalive` varchar(15), `lastms` int(11) NOT NULL default '-1', `setvar` varchar(200), `useragent` varchar(50), PRIMARY KEY (`name`), INDEX host (host, port), INDEX ipaddr (ipaddr, port)) TYPE=MyISAM;
Last step - add two users into it, which will be our SIP users.
mysql> insert into sipfriends set name='1001',type='friend',context='internal',host='dynamic',disallow='all',allow='gsm',qualify='yes';mysql> insert into sipfriends set name='1002',type='friend',context='internal',host='dynamic',disallow='all',allow='gsm',qualify='yes';
Let's move on to other configurations.
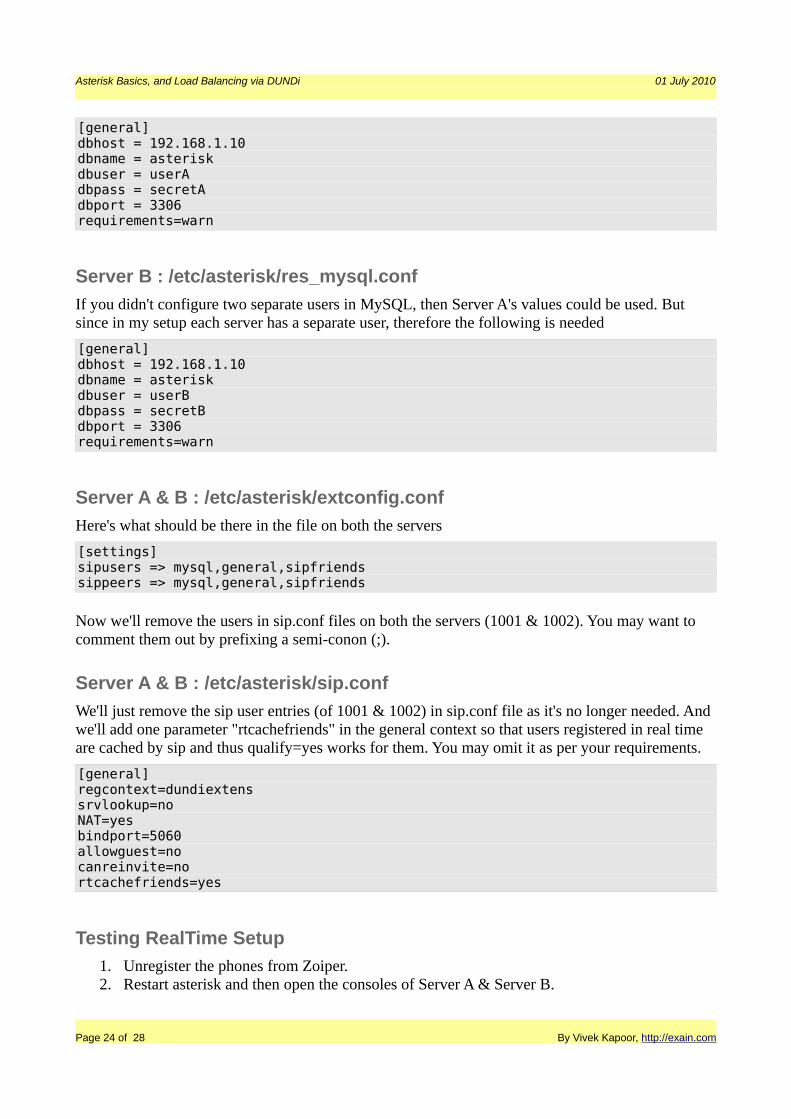
Server A : /etc/asterisk/res_mysql.conf
The file contains the database details
Page 23 of 28 By Vivek Kapoor, http://exain.com
Asterisk Basics, and Load Balancing via DUNDi 01 July 2010
[general]dbhost = 192.168.1.10dbname = asteriskdbuser = userAdbpass = secretAdbport = 3306requirements=warn
Server B : /etc/asterisk/res_mysql.conf
If you didn't configure two separate users in MySQL, then Server A's values could be used. But since in my setup each server has a separate user, therefore the following is needed
[general]dbhost = 192.168.1.10dbname = asteriskdbuser = userBdbpass = secretBdbport = 3306requirements=warn
Server A & B : /etc/asterisk/extconfig.conf
Here's what should be there in the file on both the servers
[settings]sipusers => mysql,general,sipfriendssippeers => mysql,general,sipfriends
Now we'll remove the users in sip.conf files on both the servers (1001 & 1002). You may want to comment them out by prefixing a semi-conon (;).
Server A & B : /etc/asterisk/sip.conf
We'll just remove the sip user entries (of 1001 & 1002) in sip.conf file as it's no longer needed. And we'll add one parameter "rtcachefriends" in the general context so that users registered in real time are cached by sip and thus qualify=yes works for them. You may omit it as per your requirements.
[general]regcontext=dundiextenssrvlookup=noNAT=yesbindport=5060allowguest=nocanreinvite=nortcachefriends=yes
Testing RealTime Setup
1. Unregister the phones from Zoiper. 2. Restart asterisk and then open the consoles of Server A & Server B.
Page 24 of 28 By Vivek Kapoor, http://exain.com

Asterisk Basics, and Load Balancing via DUNDi 01 July 2010
/etc/init.d/asterisk restart asterisk -r
3. On Server C's mysql prompt, if you enter "show processlist", you will two persistent connections from both the servers. All's good to go.
4. Now try registering the phones. It should register. Server A's asterisk console should print out something similar to the following
CLI> sip show peers Name/username Host Dyn Nat ACL Port Status Realtime1001/1001 xx.xx.xx.xx D N 5060 OK (122 ms) Cached RTpriv 192.168.1.6 N 5060 Unmonitored 2 sip peers [Monitored: 1 online, 0 offline Unmonitored: 1 online, 0 offline]CLI>
5. Let's try calling extension 1001 now from Server B selected in Zoiper. 6. It should playback the congratulations message that we'd defined in extensions.conf.
Page 25 of 28 By Vivek Kapoor, http://exain.com

Asterisk Basics, and Load Balancing via DUNDi 01 July 2010
What's next
Enabling actual calling out
Till now we had just used playback. If you intend to actually call out the users, which of course you'd want to do, then do the following.
/etc/asterisk/extensions.conf
[general]static=yeswriteprotect=noautofallthrough=noclearglobalvars=nopriorityjumping=no
[lookupdundi]switch => DUNDi/priv
[internal]exten => 123,1,Playback(demo-congrats)exten => 123,n,Hangup()
include => dundiextens
exten => _XXXX,2,NoOp(internal context called on Server A to ${EXTEN})exten => _XXXX,n,Dial(SIP/${EXTEN},10)exten => _XXXX,n,Hangup()
include => lookupdundi
[incomingdundi]exten => _XXXX,1,NoOp(Landed on Server A ${EXTEN})exten => _XXXX,n,Goto(internal,${EXTEN},2)
If you notice, I've included "dundiextens" in the "internal" context. This would allow you to call users who are registered on the same server as yours. If they're not registered, then "lookupdundi" would be called. The SIP extension if found would ring for 10 seconds unless answered, and then hangup would be called. This is very very basic, but it should give you an idea where to start.
Using extensions in RealTime
If you plan to use extensions also in RealTime instead of hard coding them, such as for IVR, Voicemail etc. Then the following should work. I would prefer that you don't put the user extension information in there, but rather use it as a replacement for extension 456 or extension 123 that we created above.
In database, the table structure would be
CREATE TABLE `extensions` ( `id` int(11) NOT NULL AUTO_INCREMENT, `context` varchar(20) NOT NULL DEFAULT '', `exten` varchar(20) NOT NULL DEFAULT '',
Page 26 of 28 By Vivek Kapoor, http://exain.com

Asterisk Basics, and Load Balancing via DUNDi 01 July 2010
`priority` tinyint(4) NOT NULL DEFAULT '0', `app` varchar(20) NOT NULL DEFAULT '', `appdata` varchar(128) NOT NULL DEFAULT '', PRIMARY KEY (`context`,`exten`,`priority`), KEY `id` (`id`)) ENGINE=MyISAM;
In /etc/asterisk/extconfig.conf you will add
extensions => mysql,general,extensions
In /etc/asterisk/extensions.conf, in "internal" context you will add
switch => Realtime
As an example, let's insert an Echo() application as extension 100. Enter the following information in the database
mysql> insert into extensions set context='internal',exten='100',priority='1',app='Playback',appdata='demo-echotest';mysql> insert into extensions set context='internal',exten='100',priority='2',app='Echo',appdata='';
Restart asterisk and then try dialing out extension 100 from either Server A or B. One thing to note is that we are restarting only because we've made significant changes in the configuration. The best part of RealTime is that you don't need to restart any of the services if new SIP users are added, or new extensions are added.
Securing the setup
1. Secure the SIP users. In the database, put some value for "secret" column. 2. Put firewall on your servers. You need to open ports for SIP, for RTP and DUNDi. Here's a
sample configuration # For IAX$IPTABLES -A INPUT -p tcp --dport 4569 -j ACCEPT$IPTABLES -A INPUT -p udp --dport 4569 -j ACCEPT# For DUNDi$IPTABLES -A INPUT -p tcp --dport 4520 -j ACCEPT$IPTABLES -A INPUT -p udp --dport 4520 -j ACCEPT# For SIP$IPTABLES -A INPUT -p udp --dport 5060 -j ACCEPT# In case SIP bindport is different$IPTABLES -A INPUT -p udp --dport 5070 -j ACCEPT# For SIP RTP$IPTABLES -A INPUT -p udp --dport 10000:20000 -m udp -j ACCEPT
# In case bindport is different then you can do a bit of port # forwarding. The below should be in a single line$IPTABLES -A PREROUTING -t nat -p udp --dport 5060 -j DNAT --to xxx.xxx.xxx.xxx:5070
Page 27 of 28 By Vivek Kapoor, http://exain.com

Asterisk Basics, and Load Balancing via DUNDi 01 July 2010
Do load balancing & fail over
• Round Robin DNS for poor man's load balancing. This means having two (or more) "A" records for your domain. The softphone would connect randomly to any. No failure can be detected in this scenario, but still you can maintain uptime by using linux-ha (high availability)
• DNS SRV for load balancing as well as failover. Zoiper supports DNS SRV and it's not that difficult to implement. All you need is a few SRV records in your DNS Server, and that's pretty easy via GoDaddy's DNS. You can assign weight to each server as well as port numbers, and the softphone would automatically connect to another server in case the one it's connected with goes down.
• GeoDNS in case you are having users spread across the globe. Have multiple registration servers spread all over the world and use GeoDNS to make the user register to the ones closest to them.
• Have multiple dundi lookup servers in case dundi lookup server itself goes down. Recommended is a High Availability scenario (ha - http://linux-ha.org/)
• MySQL Cluster setup for database. So you'll have high uptime. • Master Slave/Replication configuration of MySQL for better performance. JR Richardson
mentioned somewhere that we can have multiple MySQL servers running - the data is read from one database and written to another. This way we can have faster and localized reads in case the servers are geographically apart.
Hope this serves a good purpose for you. Any comments or questions are welcome.
Page 28 of 28 By Vivek Kapoor, http://exain.com