ASSIGNMENT D11 ADVANCED 3D TOOLS. ADVANCED TOOLS Sweep – Moving a cross-section through a path two...
28
ASSIGNMENT D11 ADVANCED 3D TOOLS
-
Upload
nicholas-bates -
Category
Documents
-
view
215 -
download
1
Transcript of ASSIGNMENT D11 ADVANCED 3D TOOLS. ADVANCED TOOLS Sweep – Moving a cross-section through a path two...
A S S I G N M E N T D 1 1
ADVANCED 3D TOOLS
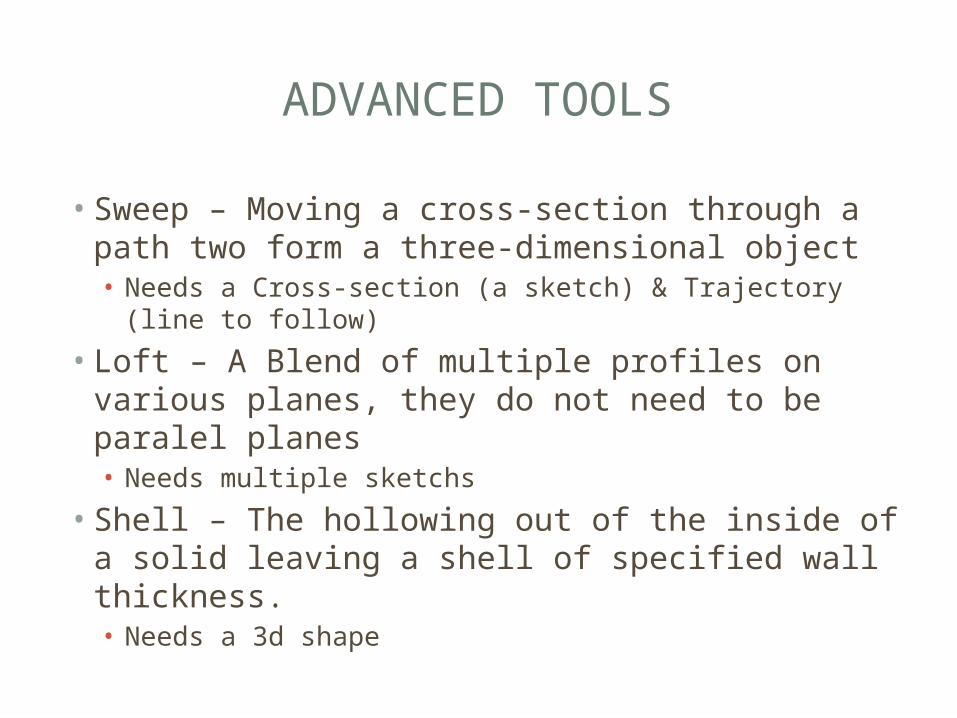
ADVANCED TOOLS
• Sweep – Moving a cross-section through a path two form a three-dimensional object• Needs a Cross-section (a sketch) & Trajectory (line to
follow)
• Loft – A Blend of multiple profiles on various planes, they do not need to be paralel planes• Needs multiple sketchs
• Shell – The hollowing out of the inside of a solid leaving a shell of specified wall thickness.• Needs a 3d shape
DO 1
• Create a new Standard(in).ipt• Turn on visibility• Create a new sketch on the XY Plane
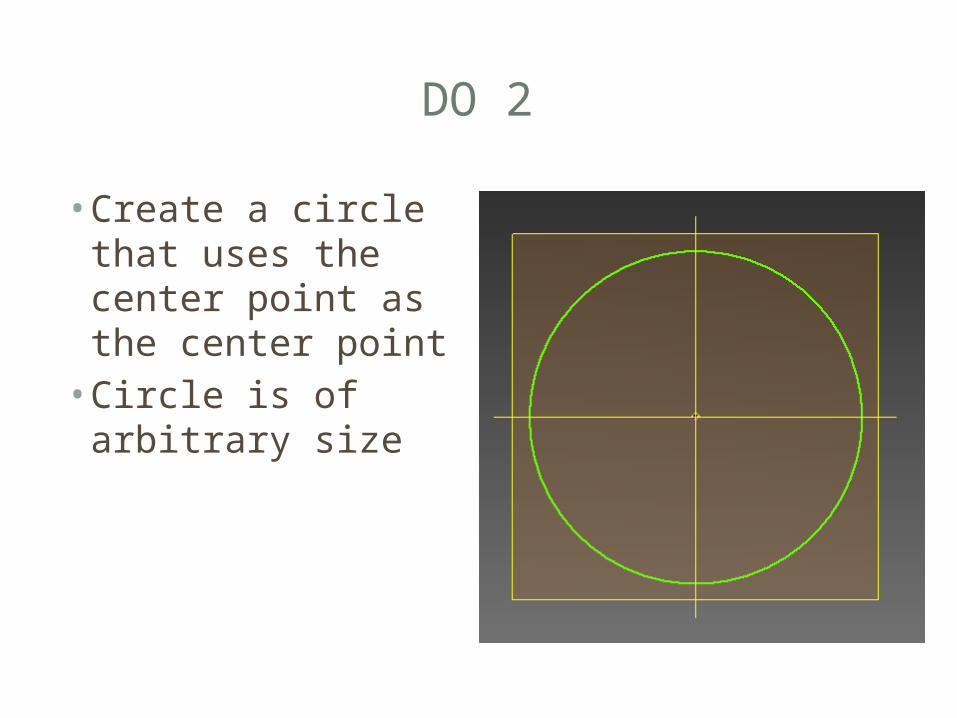
DO 2
• Create a circle that uses the center point as the center point• Circle is of arbitrary
size
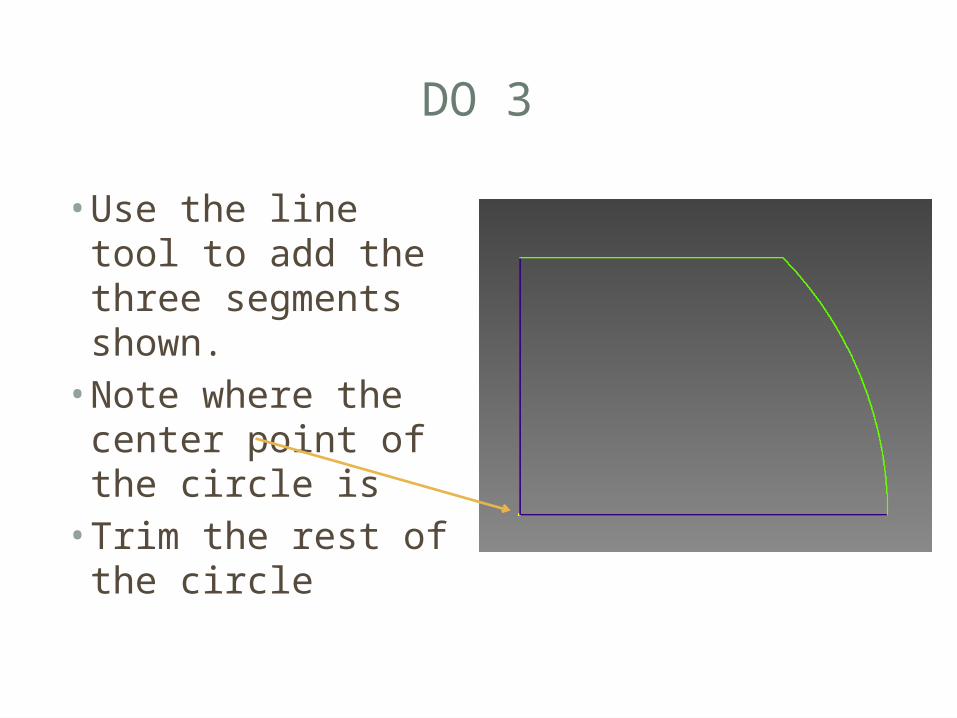
DO 3
• Use the line tool to add the three segments shown. • Note where the
center point of the circle is• Trim the rest of the
circle
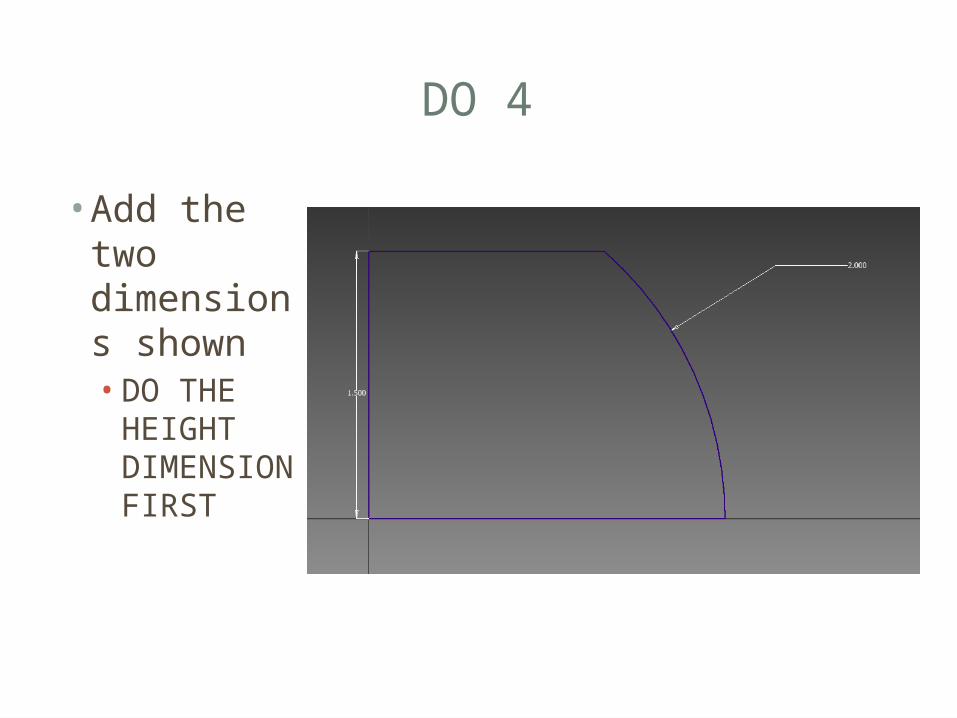
DO 4
• Add the two dimensions shown• DO THE
HEIGHT DIMENSION FIRST
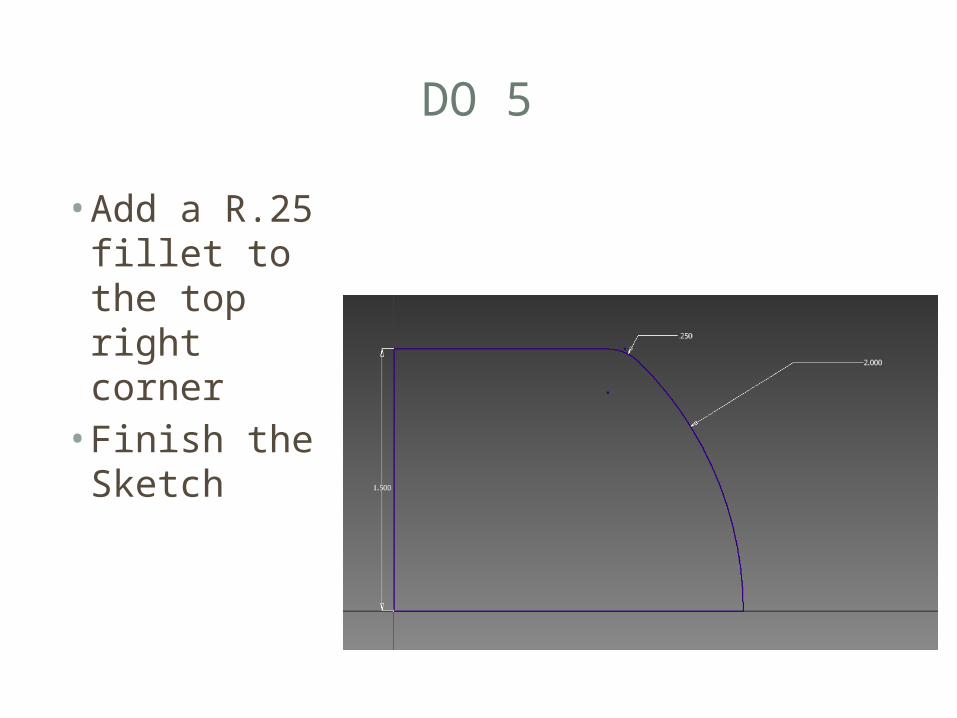
DO 5
• Add a R.25 fillet to the top right corner• Finish the
Sketch
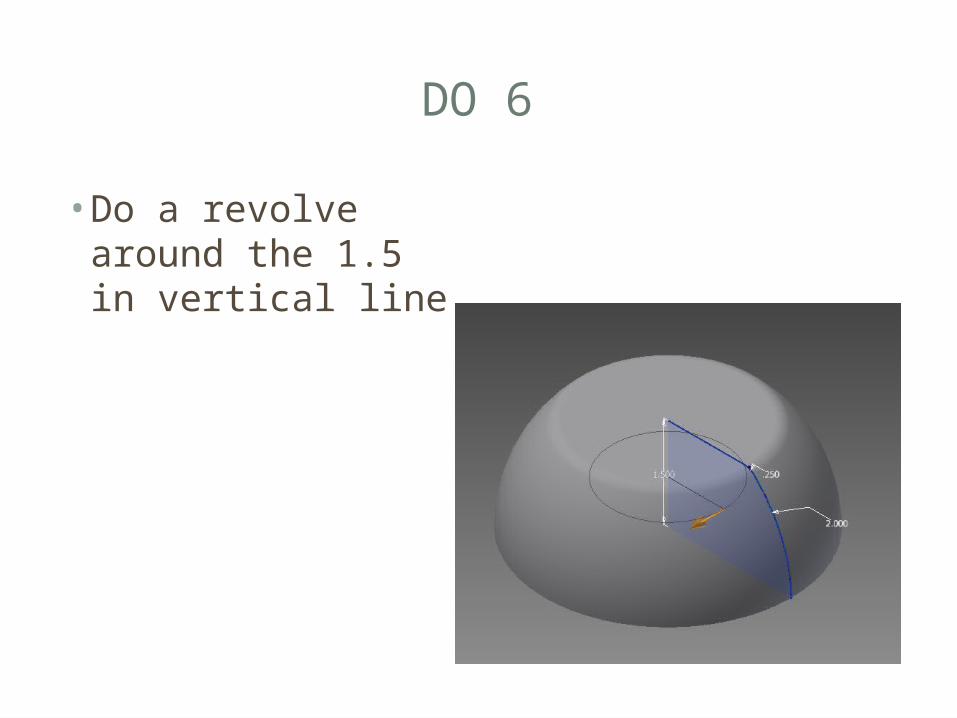
DO 6
• Do a revolve around the 1.5 in vertical line
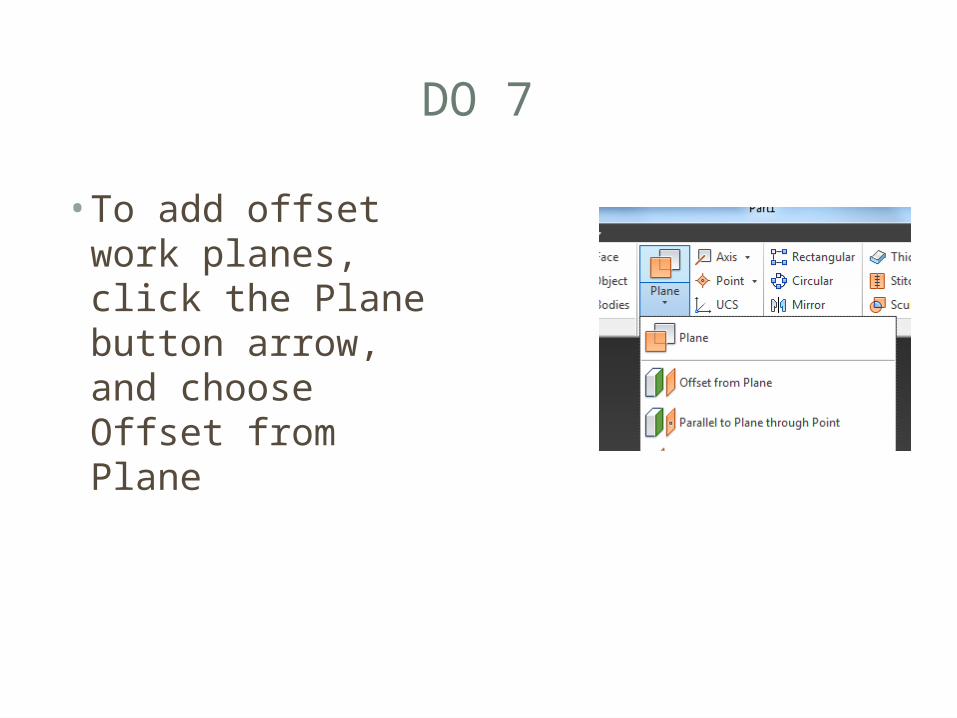
DO 7
• To add offset work planes, click the Plane button arrow, and choose Offset from Plane
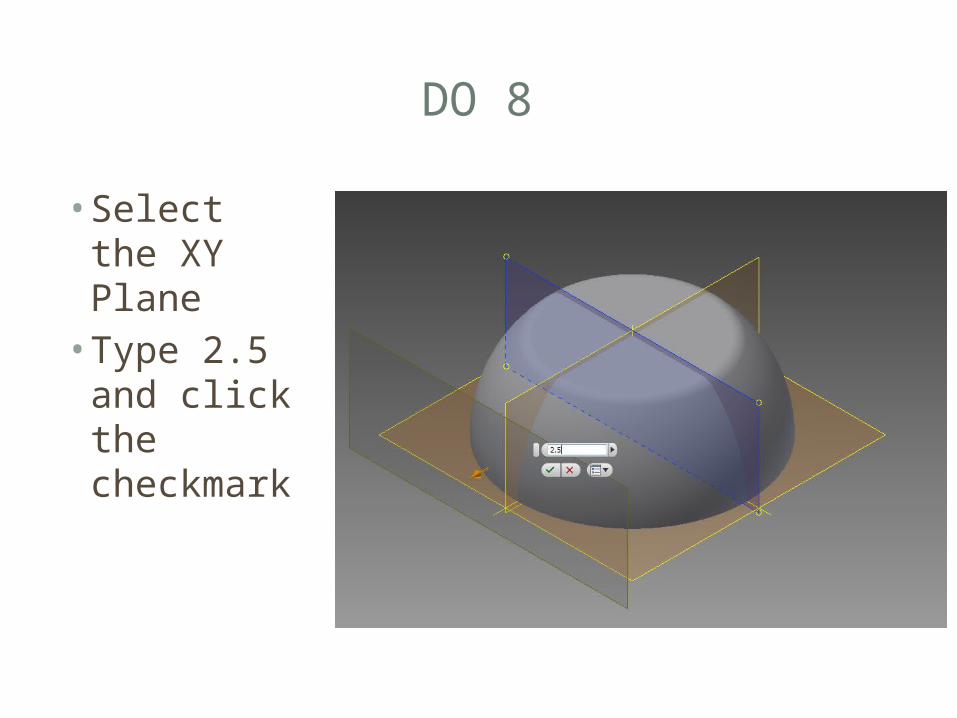
DO 8
• Select the XY Plane• Type 2.5
and click the checkmark
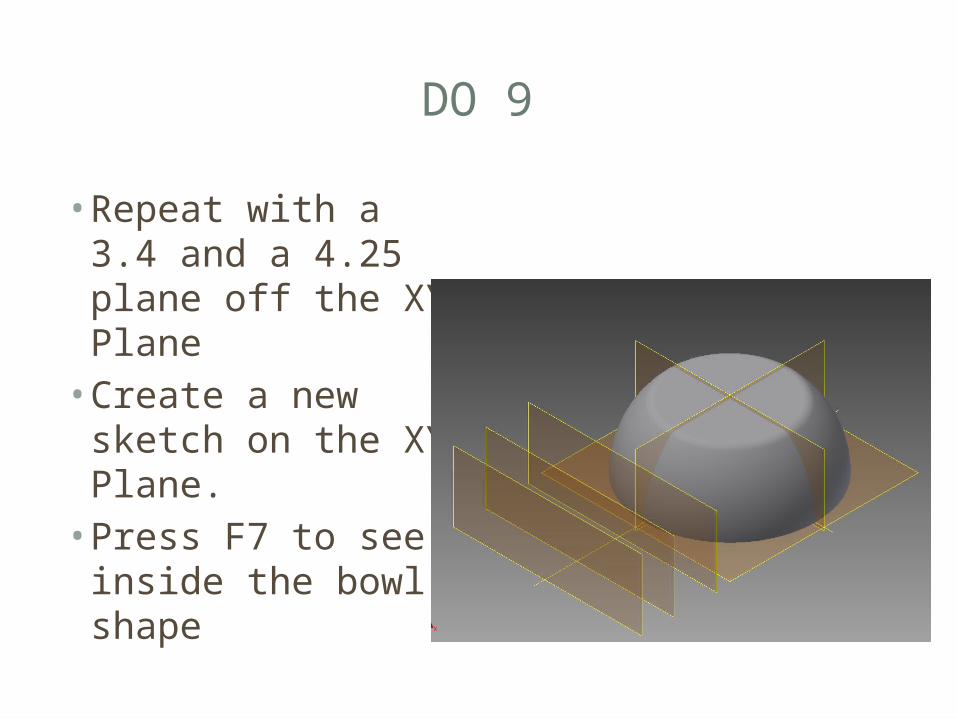
DO 9
• Repeat with a 3.4 and a 4.25 plane off the XY Plane• Create a new
sketch on the XY Plane.• Press F7 to see
inside the bowl shape
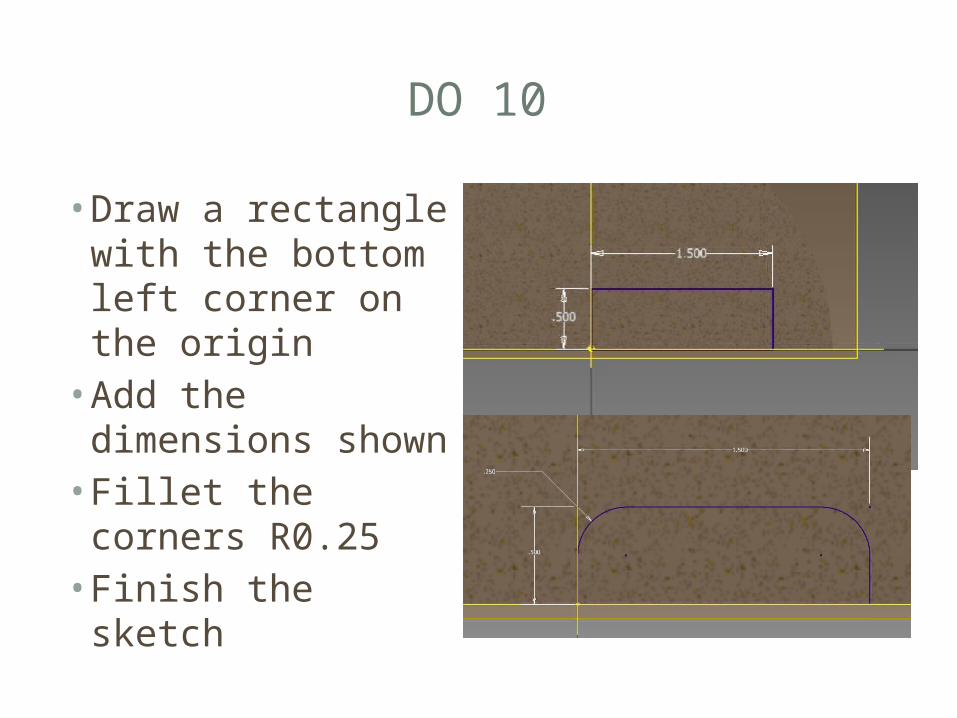
DO 10
• Draw a rectangle with the bottom left corner on the origin• Add the
dimensions shown• Fillet the corners
R0.25• Finish the sketch
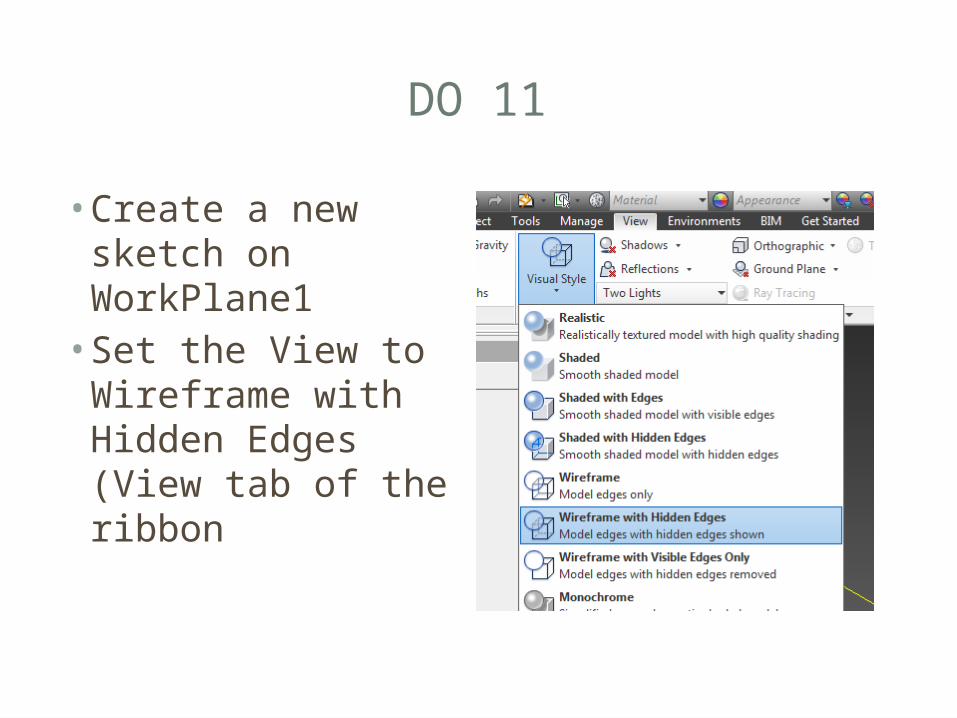
DO 11
• Create a new sketch on WorkPlane1• Set the View to
Wireframe with Hidden Edges (View tab of the ribbon
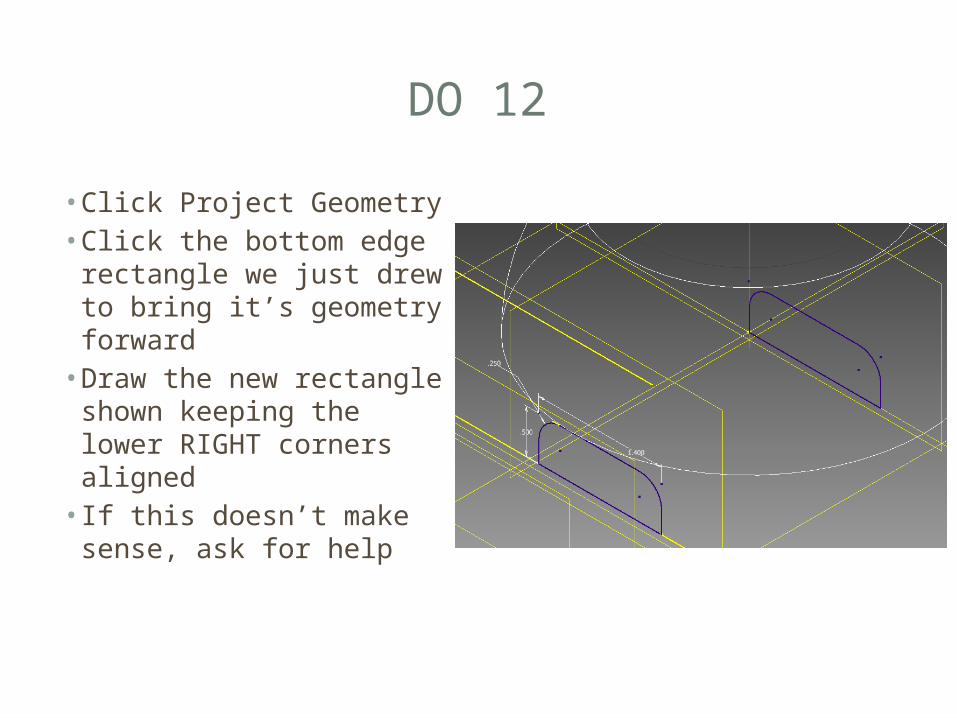
DO 12
• Click Project Geometry• Click the bottom edge
rectangle we just drew to bring it’s geometry forward• Draw the new
rectangle shown keeping the lower RIGHT corners aligned• If this doesn’t make
sense, ask for help
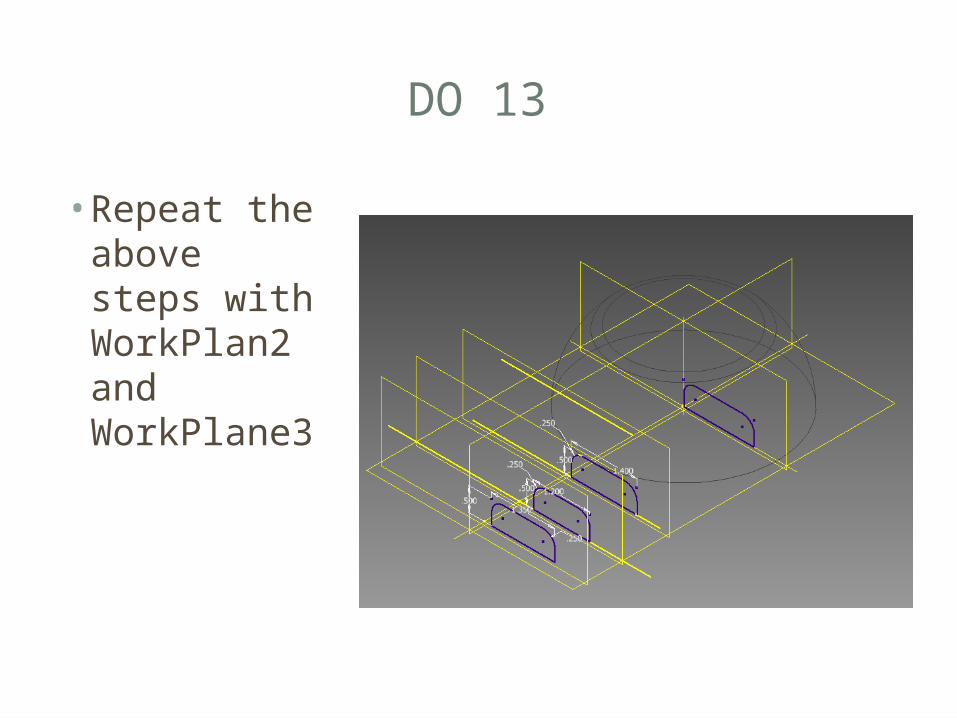
DO 13
• Repeat the above steps with WorkPlan2 and WorkPlane3

DO 14
• Now we are going to create a loft• Click Loft on the
ribbon• Click inside the
sections box• Click each of the
four sketches we just made• Then click OK

DO 15
• Change the view back to to Realistic, and you’ll see the finished Loft• Change back to
Wirefram with hidden lines• Create a new
sketch on the YZ Plane
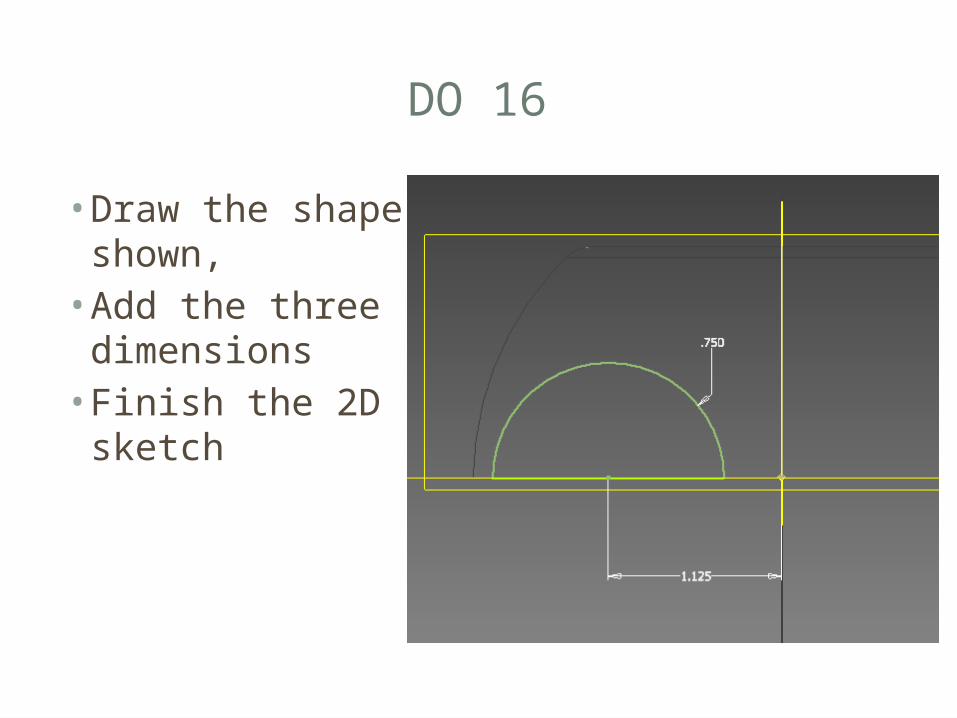
DO 16
• Draw the shape shown, • Add the three
dimensions• Finish the 2D
sketch
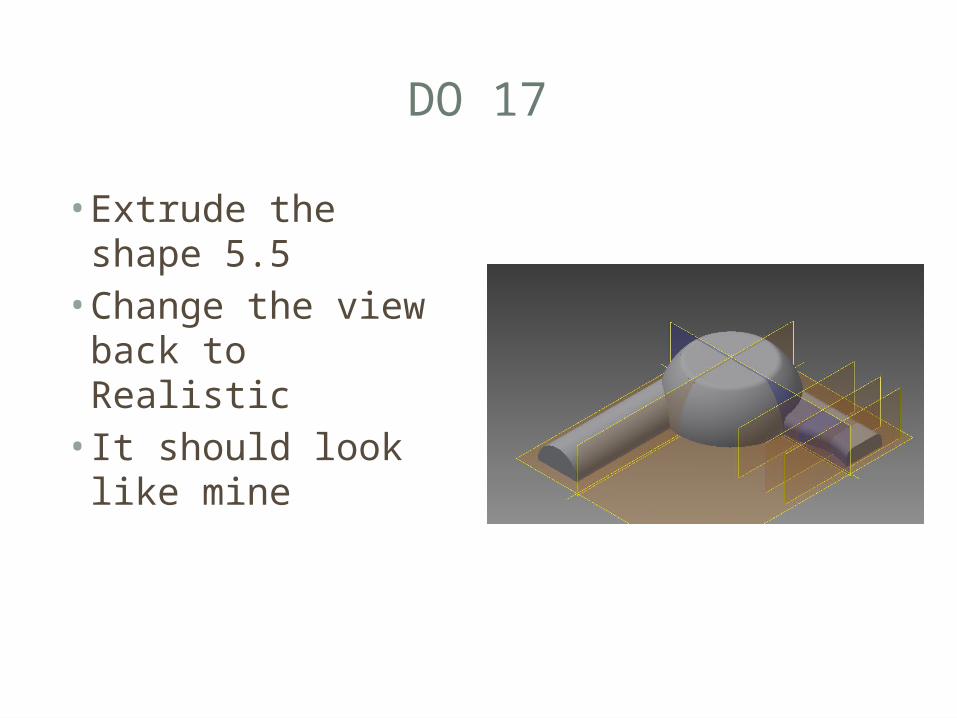
DO 17
• Extrude the shape 5.5• Change the view
back to Realistic• It should look like
mine
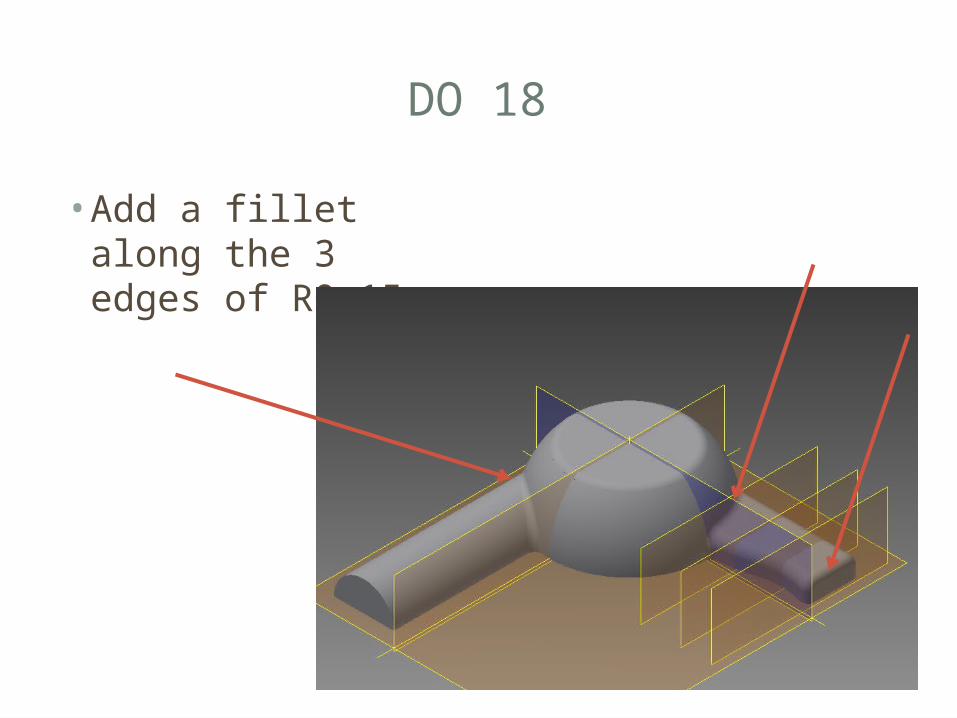
DO 18
• Add a fillet along the 3 edges of R0.15
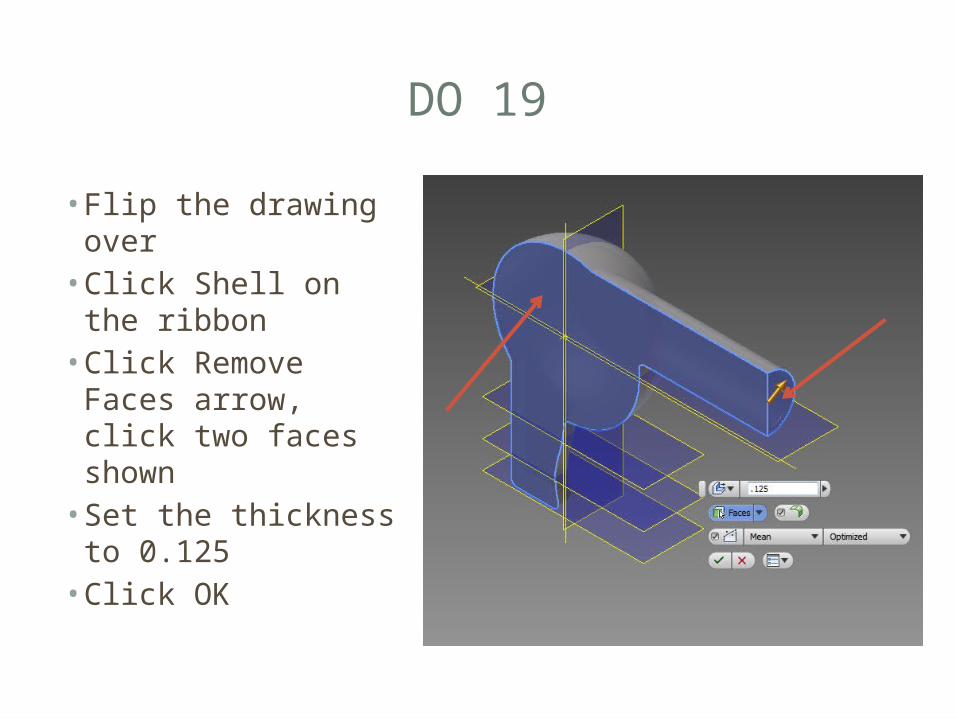
DO 19
• Flip the drawing over• Click Shell on the
ribbon• Click Remove
Faces arrow, click two faces shown• Set the thickness
to 0.125• Click OK
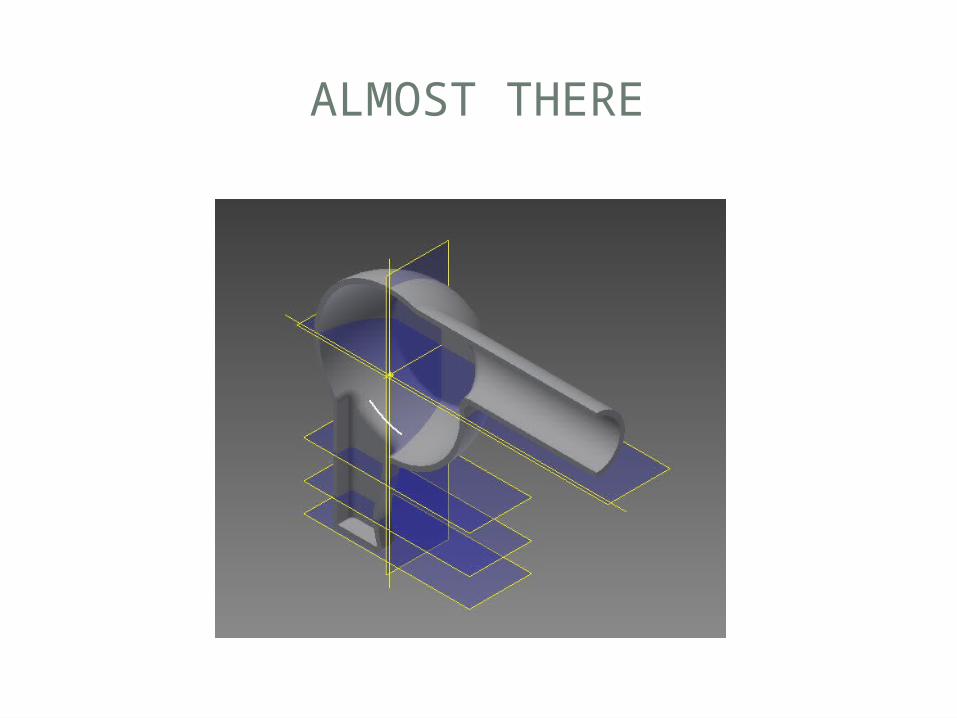
ALMOST THERE
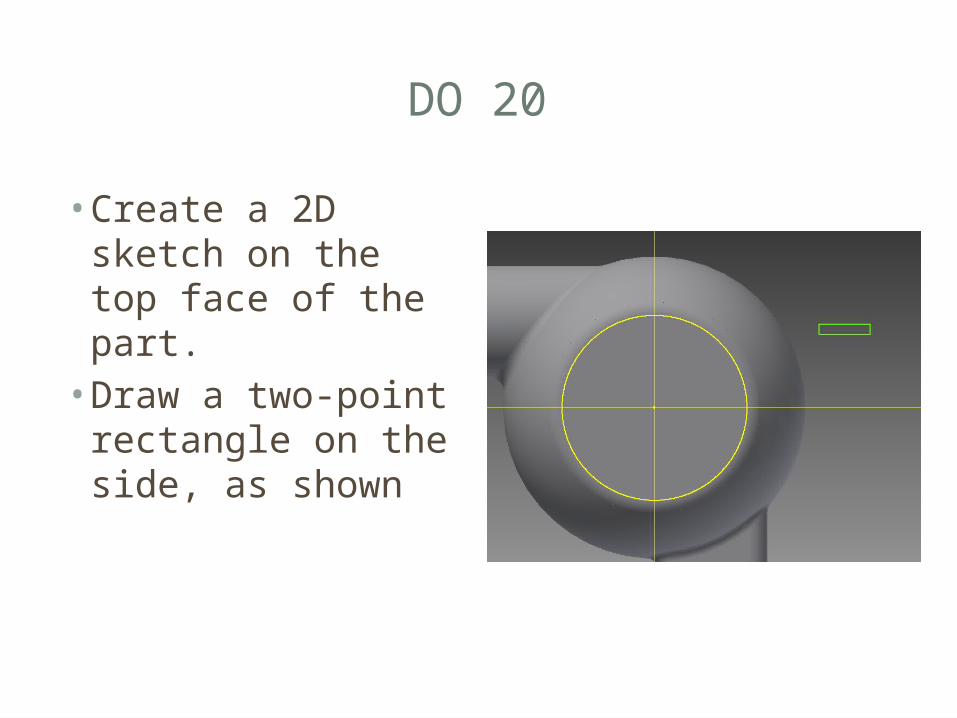
DO 20
• Create a 2D sketch on the top face of the part.• Draw a two-point
rectangle on the side, as shown
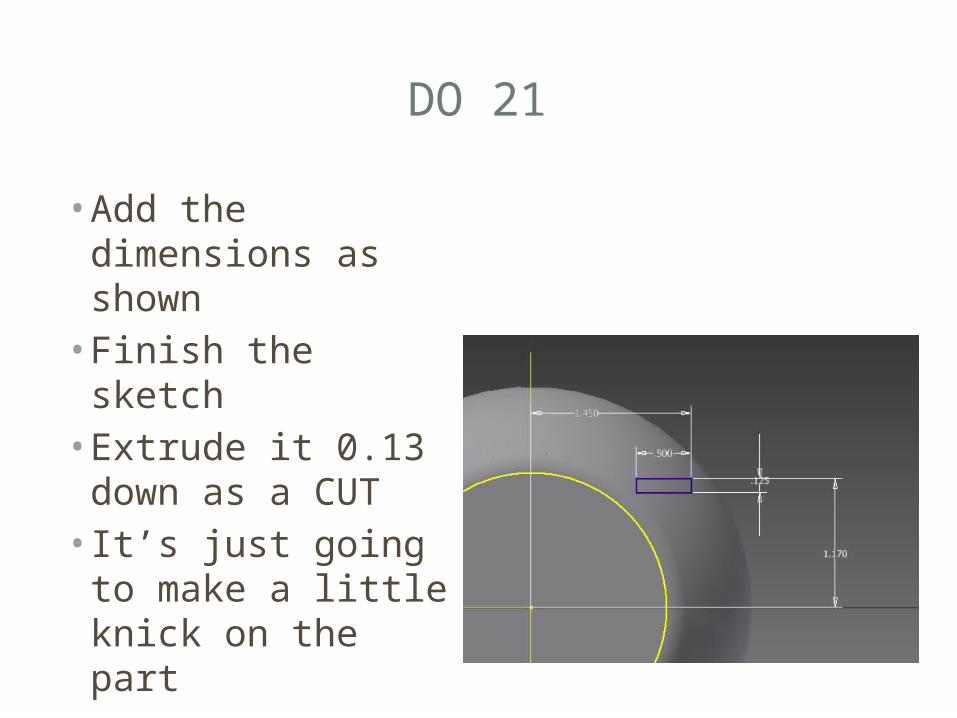
DO 21
• Add the dimensions as shown• Finish the sketch• Extrude it 0.13
down as a CUT• It’s just going to
make a little knick on the part
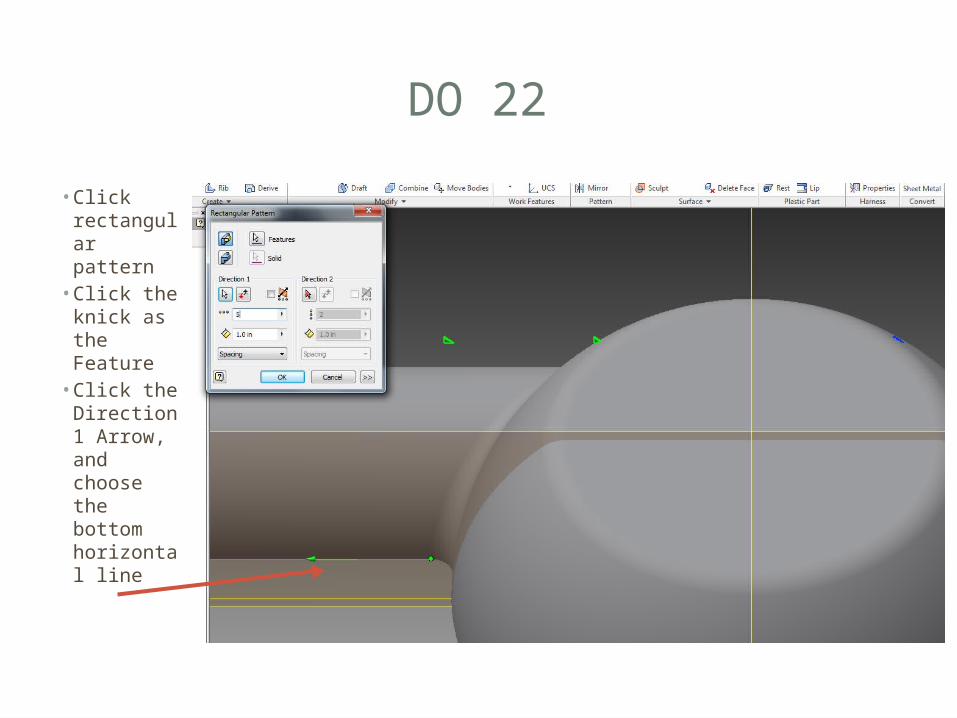
DO 22
• Click rectangular pattern
• Click the knick as the Feature
• Click the Direction 1 Arrow, and choose the bottom horizontal line
DO 23
• Set the Number of Direction 1 to five• Set the spacing to
0.6
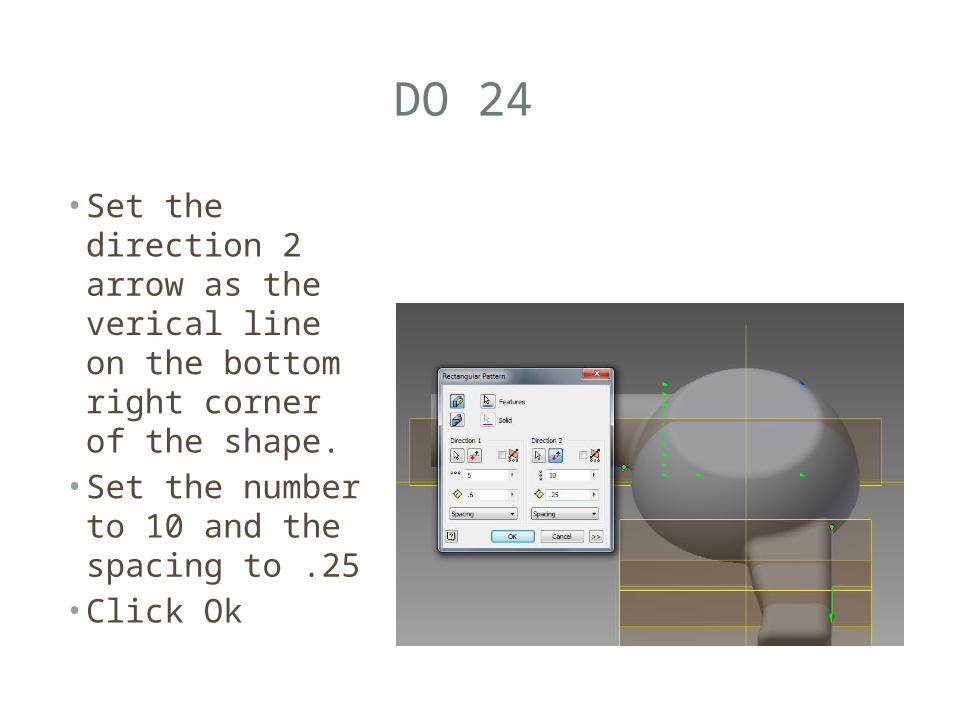
DO 24
• Set the direction 2 arrow as the verical line on the bottom right corner of the shape.• Set the number
to 10 and the spacing to .25• Click Ok
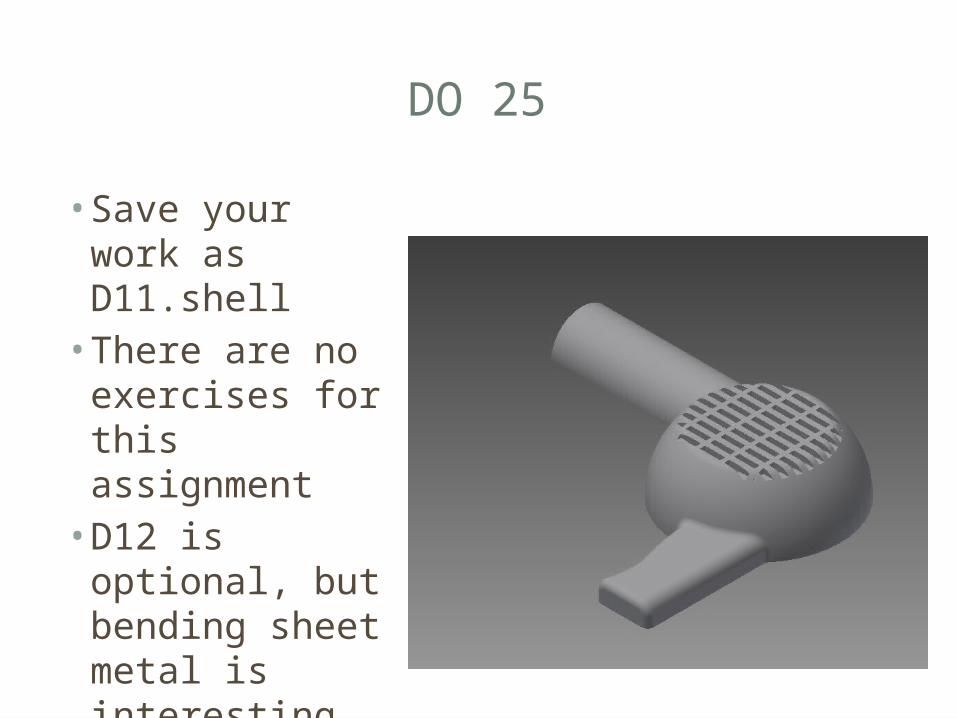
DO 25
• Save your work as D11.shell• There are no
exercises for this assignment• D12 is optional,
but bending sheet metal is interesting