ASSEMBLY AND INSTRUCTION GUIDE 44219, 46219 … - 48219... · PROBLEM POSSIBLE CAUSE POSSIBLE...
6
ABOUT YOUR LED OUTDOOR WALL SCONCE BATTERY INSTALLATION 1. To access the battery compartment, remove the 2 thumb screws from the top cover. Remove the top cover. BATTERY INSTALLATION (CONTINUED) 2. Remove the battery compartment cover by squeezing the two tabs on the cover inward and pulling up. page 1 Thumb Screw Battery Compartment Cover 4 C Batteries (not included) Squeeze tabs inward Insert four 1.5V C batteries in the proper +/ - orientation ASSEMBLY AND INSTRUCTION GUIDE Model #s 43319, 44219, 46219 and 48219 The LED Outdoor Wall Sconce is perfect for porches, doorways, or around the house. The LED Outdoor Wall Sconce has a built-in motion sensor, which automatically turns on the light when movement of a heat source (such as people, animals, or cars) is detected in the area. The light remains on while motion continues to be detected in the area. The LED Outdoor Wall Sconce also has a built-in photosensor so that the light only turns on at night. The LED Outdoor Wall Sconce may function irregularly or not at all at temperatures below 0° F / -17.8° C. Normal opera- tion will return when the temperature rises. The LED Outdoor Wall Sconce requires 4 C cell batteries (not included). The batteries typically last up to 1 year under normal use. The 2 super bright Surface Mount LEDs in the LED Outdoor Wall Sconce produce a warm white light (~3000K) and have an estimated life of 30,000 hours so they should never need changing. 3. Batteries are not included, so you will need to provide four (4) new C cell batteries. Install the 4 C cell batteries in the proper +/- polarity orienta-tion as shown in the illustration above. The positive ends of the batteries should face the low battery contacts and the negative ends of the batteries should face the elevated spring terminals in the battery compartment. If your unit includes a clear rubber spacer between the two halves of the battery compartment, please reinsert it between the two halves. 5. Reinstall the battery compartment cover by aligning the tabs and pressing the battery compartment cover down until the battery compartment cover clicks into place. NOTE: When you close the battery compartment, the light should activate immediately, regardless of lighting conditions or motion. This is a test activation to show there is power flowing from the battery to the light. It should last roughly 30 seconds. After this test activation, the light will function normally. 6. Reassemble the LED Outdoor Wall Sconce by replacing the top cover and re-installing the two thumb screws. Tighten the thumb screws by hand as tightly as possible to ensure a waterproof seal. Batteries not included NOTE: Do not mix old and new batteries. Do not mix alkaline, standard (carbon-zinc), or rechargeable (Nickel-Cadmium) batteries.
Transcript of ASSEMBLY AND INSTRUCTION GUIDE 44219, 46219 … - 48219... · PROBLEM POSSIBLE CAUSE POSSIBLE...
ABOUT YOUR LED OUTDOOR WALL SCONCE
BATTERY INSTALLATION
1. To access the battery compartment, remove the 2 thumbscrews from the top cover. Remove the top cover.
BATTERY INSTALLATION (CONTINUED)
2. Remove the battery compartment cover by squeezingthe two tabs on the cover inward and pulling up.
page 1
Thumb Screw
Battery Compartment Cover
4 C Batteries (not included)
Squeeze tabs inward
Insert four 1.5VC batteries in the proper +/-orientation
ASSEMBLY AND INSTRUCTION GUIDE Model #s 43319, 44219, 46219 and 48219
The LED Outdoor Wall Sconce is perfect for porches, doorways, or around the house.
The LED Outdoor Wall Sconce has a built-in motion sensor, which automatically turns on the light when movement of a heat source (such as people, animals, or cars) is detected in the area. The light remains on while motion continues to be detected in the area.
The LED Outdoor Wall Sconce also has a built-in photosensor so that the light only turns on at night.
The LED Outdoor Wall Sconce may function irregularly or not at all at temperatures below 0° F / -17.8° C. Normal opera-tion will return when the temperature rises.
The LED Outdoor Wall Sconce requires 4 C cell batteries (not included). The batteries typically last up to 1 year under normal use.
The 2 super bright Surface Mount LEDs in the LED Outdoor Wall Sconce produce a warm white light (~3000K) and have an estimated life of 30,000 hours so they should never need changing.
3. Batteries are not included, so you will need to provide four (4)new C cell batteries. Install the 4 C cell batteries in the proper+/- polarity orienta-tion as shown in the illustration above.The positive ends of the batteries should face the low batterycontacts and the negative ends of the batteries should facethe elevated spring terminals in the battery compartment. Ifyour unit includes a clear rubber spacer between the twohalves of the battery compartment, please reinsert it betweenthe two halves.
5. Reinstall the battery compartment cover by aligning the tabsand pressing the battery compartment cover down until thebattery compartment cover clicks into place.
NOTE: When you close the battery compartment, the lightshould activate immediately, regardless of lighting conditionsor motion. This is a test activation to show there is powerflowing from the battery to the light. It should last roughly30 seconds. After this test activation, the light will functionnormally.
6. Reassemble the LED Outdoor Wall Sconce by replacing thetop cover and re-installing the two thumb screws. Tighten thethumb screws by hand as tightly as possible to ensure awaterproof seal.
Batteries not included
NOTE: Do not mix old and new batteries. Do not mix alkaline,standard (carbon-zinc), or rechargeable (Nickel-Cadmium) batteries.
page 2
Note: If your LED Outdoor Wall Sconce does not turn on after battery installation:
• Make sure the batteries have been inserted matching thecorrect + / - polarity orientation and are making securecontact with the terminals.
• Make sure you are testing the LED Outdoor Wall Sconce ina dark area since the light will only turn on at night.
Note: Dispose of old batteries properly, following your local and state regulations. Do not dispose of batteries in regular household refuse or into a fire.
The selected location should not be near light sources such as street or porch lighting as these may cause the LED Outdoor Wall Sconce to turn off automatically. The LED Outdoor Wall Sconce should also be installed away from heaters, air conditioners, barbecues, vents, and large reflective surfaces such as swim-ming pools and jacuzzis, and white walls.
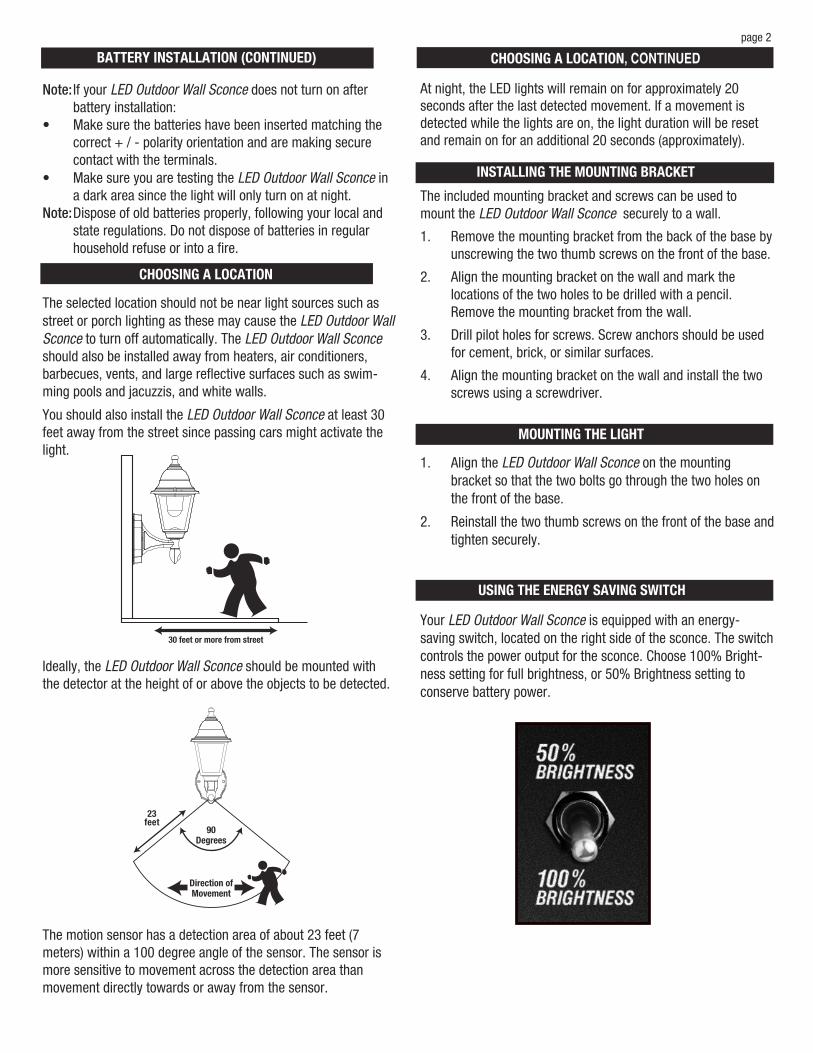
You should also install the LED Outdoor Wall Sconce at least 30 feet away from the street since passing cars might activate the light.
Ideally, the LED Outdoor Wall Sconce should be mounted with the detector at the height of or above the objects to be detected.
The motion sensor has a detection area of about 23 feet (7 meters) within a 100 degree angle of the sensor. The sensor is more sensitive to movement across the detection area than movement directly towards or away from the sensor.
At night, the LED lights will remain on for approximately 20 seconds after the last detected movement. If a movement is detected while the lights are on, the light duration will be reset and remain on for an additional 20 seconds (approximately).
The included mounting bracket and screws can be used to mount the LED Outdoor Wall Sconce securely to a wall.
1. Remove the mounting bracket from the back of the base byunscrewing the two thumb screws on the front of the base.
2. Align the mounting bracket on the wall and mark thelocations of the two holes to be drilled with a pencil.Remove the mounting bracket from the wall.
3. Drill pilot holes for screws. Screw anchors should be usedfor cement, brick, or similar surfaces.
4. Align the mounting bracket on the wall and install the twoscrews using a screwdriver.
1. Align the LED Outdoor Wall Sconce on the mountingbracket so that the two bolts go through the two holes onthe front of the base.
2. Reinstall the two thumb screws on the front of the base andtighten securely.
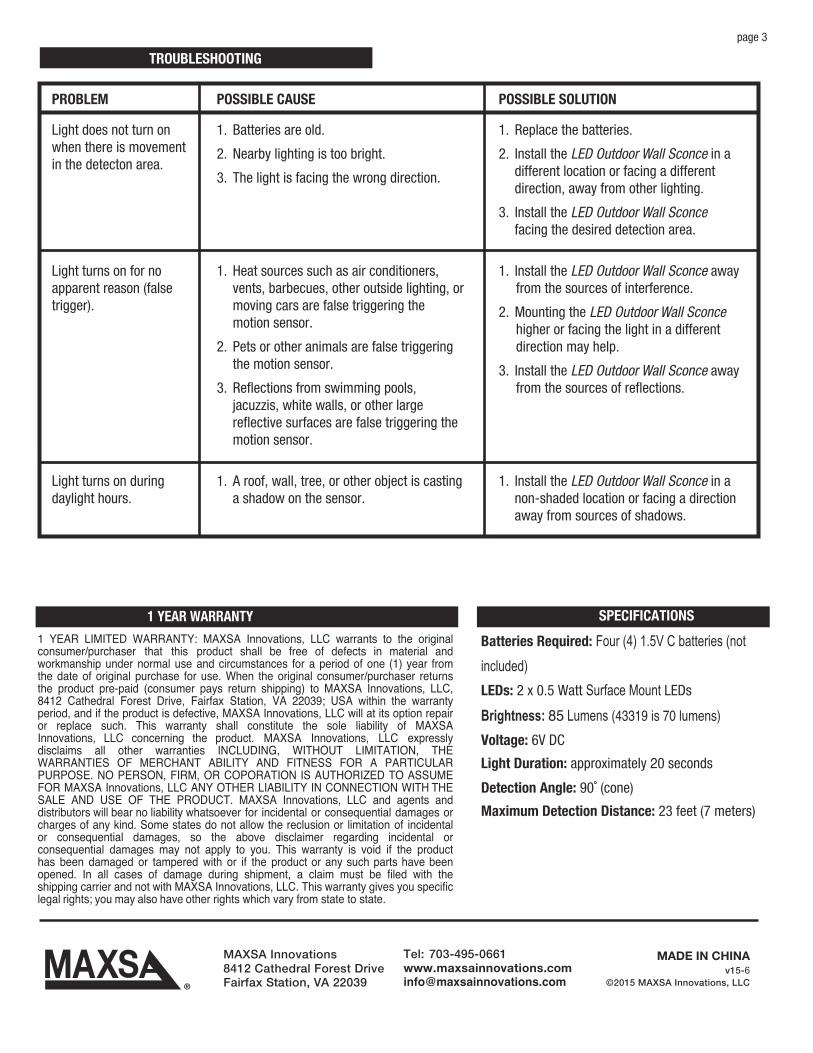
Your LED Outdoor Wall Sconce is equipped with an energy-saving switch, located on the right side of the sconce. The switch controls the power output for the sconce. Choose 100% Bright-ness setting for full brightness, or 50% Brightness setting to conserve battery power.
BATTERY INSTALLATION (CONTINUED)
CHOOSING A LOCATION
INSTALLING THE MOUNTING BRACKET
MOUNTING THE LIGHT
USING THE ENERGY SAVING SWITCH
90Degrees
23feet
Direction of Movement
30 feet or more from street
CHOOSING A LOCATION, CONTINUED
TROUBLESHOOTING
MAXSA Innovations8412 Cathedral Forest Drive Fairfax Station, VA 22039
MADE IN CHINAv15-6
©2015 MAXSA Innovations, LLC
Light does not turn on when there is movement in the detecton area.
Light turns on for no apparent reason (false trigger).
Light turns on during daylight hours.
1. Batteries are old.
2. Nearby lighting is too bright.
3. The light is facing the wrong direction.
1. Heat sources such as air conditioners,vents, barbecues, other outside lighting, ormoving cars are false triggering themotion sensor.
2. Pets or other animals are false triggeringthe motion sensor.
3. Reflections from swimming pools,jacuzzis, white walls, or other largereflective surfaces are false triggering themotion sensor.
1. A roof, wall, tree, or other object is castinga shadow on the sensor.
1. Replace the batteries.
2. Install the LED Outdoor Wall Sconce in adifferent location or facing a differentdirection, away from other lighting.
3. Install the LED Outdoor Wall Sconce facing the desired detection area.
1. Install the LED Outdoor Wall Sconce awayfrom the sources of interference.
2. Mounting the LED Outdoor Wall Sconce higher or facing the light in a differentdirection may help.
3. Install the LED Outdoor Wall Sconce awayfrom the sources of reflections.
1. Install the LED Outdoor Wall Sconce in anon-shaded location or facing a directionaway from sources of shadows.
NOITULOS ELBISSOPESUAC ELBISSOPMELBORP
SPECIFICATIONS
Batteries Required: Four (4) 1.5V C batteries (not included)LEDs: 2 x 0.5 Watt Surface Mount LEDs
Brightness: 85 Lumens (43319 is 70 lumens) Voltage: 6V DC
Light Duration: approximately 20 seconds
Detection Angle: 90˚ (cone)
Maximum Detection Distance: 23 feet (7 meters)
page 3
1 YEAR WARRANTY
Tel: [email protected]
1 YEAR LIMITED WARRANTY: MAXSA Innovations, LLC warrants to the original consumer/purchaser that this product shall be free of defects in material and workmanship under normal use and circumstances for a period of one (1) year from the date of original purchase for use. When the original consumer/purchaser returns the product pre-paid (consumer pays return shipping) to MAXSA Innovations, LLC, 8412 Cathedral Forest Drive, Fairfax Station, VA 22039; USA within the warranty period, and if the product is defective, MAXSA Innovations, LLC will at its option repair or replace such. This warranty shall constitute the sole liability of MAXSA Innovations, LLC concerning the product. MAXSA Innovations, LLC expressly disclaims all other warranties INCLUDING, WITHOUT LIMITATION, THE WARRANTIES OF MERCHANT ABILITY AND FITNESS FOR A PARTICULAR PURPOSE. NO PERSON, FIRM, OR COPORATION IS AUTHORIZED TO ASSUME FOR MAXSA Innovations, LLC ANY OTHER LIABILITY IN CONNECTION WITH THE SALE AND USE OF THE PRODUCT. MAXSA Innovations, LLC and agents and distributors will bear no liability whatsoever for incidental or consequential damages or charges of any kind. Some states do not allow the reclusion or limitation of incidental or consequential damages, so the above disclaimer regarding incidental or consequential damages may not apply to you. This warranty is void if the product has been damaged or tampered with or if the product or any such parts have been opened. In all cases of damage during shipment, a claim must be filed with the shipping carrier and not with MAXSA Innovations, LLC. This warranty gives you specific legal rights; you may also have other rights which vary from state to state.

INSTALLATION DE LA BATTERIE1. Pour accéder le compartiment de la batterie, retirez les
deux vis à oreilles du capot supérieur.
INSTALLATION DE LA BATTERIE (CONTINUÉ)
2. Pour retirer le compartiment de la batterie, serrez lesdeux onglettes au capot vers l’intérieur et tirez le compartiment.
page 4
Vis à Ailette
Couvercle du compartiment 4 C Batteries (pas incluses)
Serrer vers l'intérieur
INSTRUCTIONS D’INSTALLATION ET DE FONCTIONNEMENT
À PROPOS DE VOTRE APPLIQUE DEL EXTÉRIEUREVotre Applique DEL Extérieure est parfait pour des porches, des portes, et tout au long de la maison.L’applique possède un capteur de mouvement qui allume la lumière au moment où il détecte une source de chaleur (comme des gens, des animaux ou des voitures). La lumière dure aussi longtemps qu’elle détecte les mouvements dans la zone de détection. L’applique a aussi un photocapteur pour n'allumer la lumière dans la nuit.Il est possible que votre Applique DEL Extérieure n’aille pas fonctionner à des températures inferieurs à zéro degrés. L’applique fonctionnera normalement quand les températures reviennent à normale. Votre Applique DEL Extérieure a besoin de 4 C cell batteries (pas incluses). Elles durent typiquement jusqu’à 1 année. Il y a deux lumieres DEL de montage en surface très brillantes qui produisent une lumière blanche de 3000K. Elles vont durer pour 30,000 heures. Il ne faut pas les changer.
3. Les batteries ne sont pas incluses. Alors, il faut fournir 4 C cellBatteries nouvelles. Installez les 4 C cell batteries dans l’orientation de polarité +/- correcte. L’extrémité positive de la batterie doit faire face au contact bas, et l’extrémité négative doit faire face à la borne de ressort élevée. Si votre unit comporte une entretoise en caoutchouc clair, veuillez la réinsérer entre les deux moitiés.
5. Pour réinstaller le capot du compartiment, alignez les ongletset poussez le compartiment vers le bas jusqu’à ce qu’il clique en place.ATTENTION : Après fermer le compartiment de la batterie, la lumière activera immédiatement quelles que soient les conditions d’éclairage ou de mouvement. Ceci est un test d’activation pour montrer que l’énergie coule des batteries à la lumière. Il dure pour 30 secondes. Après le test, l'applique va fonctionner normalement.
6. Réassemblez votre Applique DEL Extérieure par remplacer lecouvercle et réinstallez les deux vis. Serrez fermement les vis pour l'imperméabiliser
Batteries pas incluses
Installer les 4 C cell batteries dans l’orientation de polarité +/- correcte
ATTENTION : Ne mélangez pas les batteries vieilles et nouvelles. Ne mélangez pas des batteries standard alcalines (carbone-zinc) avec les batteries rechargeables (nickel-cadmium).
Modèle #s 43319, 44219, 46219 and 48219
à piles activé par le mouvement
APPLIQUE DEL EXTÉRIEURE

page 5
• Vérifiez que vous les avez insérées dans l’orientation de polarité correcte. Les batteries doivent fermement connecter avec les terminales.
• Vérifiez que vous utilisez votre Applique DEL Extérieure dans une zone sombre parce qu’elle ne s’allume que dans la nuit.
Note : Ne jetez pas les batteries vieilles dans les ordures habituelles ou dans un feu. 1. Retirez le support de montage de l’arrière de la base en
dévissant les deux vis à oreilles.2. Alignez le support de montage au mur et marquez
l’emplacement des deux trous avec un crayon. Retirezle support de montage du mur.
3. Percez deux trous pour les vis. Les ancrages de vis doivent être utilisés pour le ciment, la brique ou les surfaces similaires.
4. Alignez le support de montage au mur et installez les deux vis avec un tournevis.
1. Alignez votre Applique DEL Extérieure sur le support de montage. Les deux boulons doivent percer les deux trous sur la face de la base.
2. Réinstallez les deux vis à oreilles sur la face de la base et serrez-les fermement.
INSTALLATION DE LA BATTERIE (CONTINUÉ)Note : Si votre Applique DEL Extérieure ne marche pas après l’installation des batteries :
CHOIX DE L’EMPLACEMENT
Il faut choisir un emplacement loin des autres sources de lumière, par exemple, les réverbères. Celles-ci provoquent votre Applique DEL Extérieure s’éteindre automatiquement. Il faut aussi installer votre Applique DEL Extérieure loin des chaleurs, des climatiseurs, des barbecues, des évents et des grandes surfaces réflectives comme une piscine, un jacuzzi, ou un mur blanc. Installez votre Applique DEL Extérieure à une distance de 10 mètres loin de la rue. Les voitures passantes peuvent l’activer.
MONTAGE DE L'APPLIQUE
UTILISATION D’INTERRUPTEUR D’ÉCONOMIE D’ÉNERGIE
Votre Applique DEL Extérieure est équipée avec un interrupteur d’économie d’énergie sur la côté droit de l’applique. Il contrôle la sortie d’énergie d’applique. Vous pouvez utiliser le réglage de 100% de luminosité ou le réglage de la luminosité de 50% pour économiser la batterie.
100Degrés
7 mètres
Mouvement
Le capteur de mouvement a une zone de détection de 7 mètres au sein d’un angle de 100 degrés du capteur. Le capteur est plus sensible aux mouvements qui traversent la zone de détection plutôt que les mouvements qui vont directement vers lui.
CHOIX DE L'EMPLACEMENT, SUITE
Dans la nuit, les lumières DEL durent pour 20 secondes suivant le dernier mouvement détecté. Si le capteur détecte un mouvement pendant la 20 secondes, la duration de la lumière va recommencer.
INSTALLATION DU SUPPORT DE MONTAGEVous pouvez monter fermement votre Applique DEL Extérieure au mur avec le support de montage inclus.
Plus de 10 mètres de la rue
Idéalement, Vous devez monter votre Applique DEL Extérieure avec le capteur de mouvement à la hauteur des objectes a détecter.
Direction de
RÉSOLUTION DES PROBLÈMES TYPIQUES
MAXSA Innovations8412 Cathedral Forest Drive Fairfax Station, VA 22039
FABRIQUÉ EN CHINE v15-6
©2015 MAXSA Innovations, LLC
La lumière ne s’allume pas au moment où le capteur détecte les mouvements dans la zone de détection.
La lumière s'allume sans détection du mouvement
L'applique s’allume dans le soleil.
1. Les batteries sont vieilles.2. L’éclairage proche est trop brillant.3. La lumière dirige à la mauvaise direction.
1. Des sources de chaleur comme un climatiseur, des évents, un barbecue ou d'autres lumières extérieures ou voitures en mouvement activent le capteur de mouvement.
2. Des animaux l'activent.
3. Reflets d’une piscine, un jacuzzi, des murs blancs ou d’autres surfaces réflectives activent le capteur.
1. Un toit, un mur ou un objet grand jette une ombre sur le capteur.
1. Remplacez les batteries2. Installez votre Applique DEL Extérieure
dans un emplacement différent (l’un qui fait face dans une direction différente).
3. Installez votre Applique DEL Extérieure face à la zone de détection désirée.
1. Installez votre Applique DEL Extérieure loin des sources d’interférence.
2. Réorientez le capteur.
3. Installez votre Applique DEL Extérieure loin des surfaces réflectives.
1. Réorientez le capteur ou réinstallez votreApplique DEL Extérieure loin des sources d’ombre.
SOLUTION POSSIBLECAUSE POSSIBLEPROBLÈME
SPÉCIFICATIONS
page 6
GARANTIE LIMITÉE D’UN ANNÉE
Batteries Requises : 4 1.5V C batteries (pas incluses) LEDs : 2 x 0.5 Watt Surface Mount LEDsBrillance : 85 Lumens (43319 est 70 lumens) Voltage : 6V DCDurée de la Lumière : 20 secondesAngle de Détection : 90 degrésDistance de Détection Maximale : 7 mètres
MAXSA Innovations, LLC garantie l’utilisateur/l’acheteur original que ce produit est exempt de défauts de matériaux et de maitrise dans le cadre d’une utilisation et de circonstances normales pour une période d’un (1) an après la date d’achat original. Lorsque l’utilisateur/l’acheteur original renvoie le produit prépayé (l’acheteur paie pour le renvoi du produit) à MAXSA Innovations, LLC, 8412 Cathedral Forest Dr ; Fairfax Station, VA 22039 ; USA, durant la période de garantie, et si le produit est défectueux, MAXSA Innovations, LLC, décidera de le réparer ou de le remplacer. Cette garantie constitue l’entière responsabilité de MAXSA Innovations, LLC concernant ce produit. MAXSA Innovations, LLC décline expressément toute autre garantie, INCLUANT MAIS NON LIMITEE A, LES GARANTIES DE VENTE ET D’ADAPTATIONS A UN USAGE PARTICULIER, AUCUNE PERSONNE OU ENTREPRISE N’EST AUTORISEE A ASSUMER, POUR LE COMPTE DE MAXSA Innovations, LLC, AUCUN AUTRE TYPE DE GARANTIE EN RELATION AVEC LA VENTE ET L’UTILISATION DE CE PRODUIT. MAXSA Innovations, LLC, ses agents et ses distributeurs, ne supportent aucune responsabilité pour des dégâts accidentels et indirects de quelque type que ce soit. Certains états n’autorisent pas la limitation des dégâts accidentels et indirects, donc l’avertissement ci-dessus ne s’applique peut-être pas à votre cas. La garantie est annulée si le produit a été endommagé ou altéré ou si le produit a été ouvert. Dans tous les cas de dégâts durant le transport, une plainte doit être déposée auprès de la compagnie de transport et non auprès de MAXSA Innovations, LLC. Cette garantie vous donne certains droits spécifiques, vous pourriez également avoir d’autres droits qui varient en fonction des états.
Tel: [email protected]