Ariba Buyer Configuration Guide trademarks of Ariba, Inc. Ariba Procure-to-Pay, Ariba Buyer, Ariba...
300
Ariba Buyer ™ Configuration Guide Release 9r1 Document Version 21 August 2013
-
Upload
vuongnguyet -
Category
Documents
-
view
351 -
download
19
Transcript of Ariba Buyer Configuration Guide trademarks of Ariba, Inc. Ariba Procure-to-Pay, Ariba Buyer, Ariba...
Ariba Buyer™
Configuration GuideRelease 9r1Document Version 21August 2013
9r1a.0195.en
Copyright © 1996–2012 Ariba, Inc. All rights reserved.
This documentation, as well as the Ariba software and/or services described in it, contain proprietary information. They are provided under a license or other agreement containing restrictions on use and disclosure and are also protected by copyright, patent and/or other intellectual property laws. Except as permitted by such agreement, no part of the document may be reproduced or transmitted in any form by any means, electronic, mechanical or otherwise, without the prior written permission of Ariba, Inc.
Ariba, Inc. assumes no responsibility or liability for any errors or inaccuracies that may appear in the documentation. The information contained in the documentation is subject to change without notice.
Ariba, the Ariba logo, AribaLIVE, SupplyWatch, Ariba.com, Ariba.com Network and Ariba Spend Management. Find it. Get it. Keep it. and PO-Flip are registered trademarks of Ariba, Inc. Ariba Procure-to-Pay, Ariba Buyer, Ariba eForms, Ariba PunchOut, Ariba Services Procurement, Ariba Travel and Expense, Ariba Procure-to-Order, Ariba Procurement Content, Ariba Sourcing, Ariba Savings and Pipeline Tracking, Ariba Category Management, Ariba Category Playbooks, Ariba StartSourcing, Ariba Spend Visibility, Ariba Analysis, Ariba Data Enrichment, Ariba Contract Management, Ariba Contract Compliance, Ariba Electronic Signatures, Ariba StartContracts, Ariba Invoice Management, Ariba Payment Management, Ariba Working Capital Management, Ariba Settlement, Ariba Supplier Information and Performance Management, Ariba Supplier Information Management, Ariba Discovery, Ariba Invoice Automation, Ariba PO Automation, Ariba Express Content, Ariba Ready, and Ariba LIVE are trademarks or service marks of Ariba, Inc. All other brand or product names may be trademarks or registered trademarks of their respective companies or organizations in the United States and/or other countries.
Ariba Sourcing solutions (On Demand and software) are protected by one or more of the following patents, including without limitation: U.S. Patent Nos. 6,199,050; 6,216,114; 6,223,167; 6,230,146; 6,230,147; 6,285,989; 6,408,283; 6,499,018; 6,564,192; 6,871,191; 6,952,682; 7,010,511; 7,072,061; 7,130,815; 7,146,331; 7,152,043;7,225,152; 7,277,878; 7,249,085; 7,283,979; 7,283,980; 7,296,001; 7,346,574; 7,383,206; 7,395,238; 7,401,035; 7,407,035; 7,444,299; 7,483,852; 7,499,876; 7,536,362; 7,558,746; 7,558,752; 7,571,137; 7,599,878; 7,634,439; 7,657,461; and 7,693,747. Patents pending.
Other Ariba product solutions are protected by one or more of the following patents:
U.S. Patent Nos. 6,199,050, 6,216,114, 6,223,167, 6,230,146, 6,230,147, 6,285,989, 6,408,283, 6,499,018, 6,564,192, 6,584,451, 6,606,603, 6,714,939, 6,871,191, 6,952,682, 7,010,511, 7,047,318, 7,072,061, 7,084,998; 7,117,165; 7,225,145; 7,324,936; and 7,536,362. Patents pending.
Certain Ariba products may include third party software or other intellectual property licensed from a third party. For information regarding software or other intellectual property licensed from a third party, go to http://www.ariba.com/copyrights.cfm.
Ariba Buyer Configuration Guide iii
Table of Contents
Chapter 1 Introduction. . . . . . . . . . . . . . . . . . . . . . . . . . . . . . . . . . . . . . . 13About the Configuration Process . . . . . . . . . . . . . . . . . . . . . . . . . . . . . . . . . . . . . . . . . . . . . . . 13
Ariba Spend Management Integration Configuration. . . . . . . . . . . . . . . . . . . . . . . . . . . . 13Data Integration Configuration . . . . . . . . . . . . . . . . . . . . . . . . . . . . . . . . . . . . . . . . . . . . . 13Procurement Configuration. . . . . . . . . . . . . . . . . . . . . . . . . . . . . . . . . . . . . . . . . . . . . . . . 14Catalog Configuration. . . . . . . . . . . . . . . . . . . . . . . . . . . . . . . . . . . . . . . . . . . . . . . . . . . . 14Optional Feature Configuration . . . . . . . . . . . . . . . . . . . . . . . . . . . . . . . . . . . . . . . . . . . . 15
How to Use This Document. . . . . . . . . . . . . . . . . . . . . . . . . . . . . . . . . . . . . . . . . . . . . . . . . . . 15Basic Configuration . . . . . . . . . . . . . . . . . . . . . . . . . . . . . . . . . . . . . . . . . . . . . . . . . . . . . 15Administration and Security . . . . . . . . . . . . . . . . . . . . . . . . . . . . . . . . . . . . . . . . . . . . . . . 16Final Configuration. . . . . . . . . . . . . . . . . . . . . . . . . . . . . . . . . . . . . . . . . . . . . . . . . . . . . . 16Reference Appendixes . . . . . . . . . . . . . . . . . . . . . . . . . . . . . . . . . . . . . . . . . . . . . . . . . . . 16
Chapter 2 Configuration Files and Parameters . . . . . . . . . . . . . . . . . . . . 17Configuration File Directories . . . . . . . . . . . . . . . . . . . . . . . . . . . . . . . . . . . . . . . . . . . . . . . . . 17
config Directory . . . . . . . . . . . . . . . . . . . . . . . . . . . . . . . . . . . . . . . . . . . . . . . . . . . . . . . . 17Plain Variant . . . . . . . . . . . . . . . . . . . . . . . . . . . . . . . . . . . . . . . . . . . . . . . . . . . . . . . . . . . 18None Partition . . . . . . . . . . . . . . . . . . . . . . . . . . . . . . . . . . . . . . . . . . . . . . . . . . . . . . . . . . 19List of Subdirectories . . . . . . . . . . . . . . . . . . . . . . . . . . . . . . . . . . . . . . . . . . . . . . . . . . . . 19
File Formats . . . . . . . . . . . . . . . . . . . . . . . . . . . . . . . . . . . . . . . . . . . . . . . . . . . . . . . . . . . . . . . 20CSV Files . . . . . . . . . . . . . . . . . . . . . . . . . . . . . . . . . . . . . . . . . . . . . . . . . . . . . . . . . . . . . 20Table Files . . . . . . . . . . . . . . . . . . . . . . . . . . . . . . . . . . . . . . . . . . . . . . . . . . . . . . . . . . . . . 22Metadata XML Configuration Files . . . . . . . . . . . . . . . . . . . . . . . . . . . . . . . . . . . . . . . . . 23Meta Parameter XML Files . . . . . . . . . . . . . . . . . . . . . . . . . . . . . . . . . . . . . . . . . . . . . . . 23Wizard XML Configuration Files. . . . . . . . . . . . . . . . . . . . . . . . . . . . . . . . . . . . . . . . . . . 23Workflow XML Definition Files . . . . . . . . . . . . . . . . . . . . . . . . . . . . . . . . . . . . . . . . . . . 24Administration XML Configuration Files . . . . . . . . . . . . . . . . . . . . . . . . . . . . . . . . . . . . 24JavaScript Files . . . . . . . . . . . . . . . . . . . . . . . . . . . . . . . . . . . . . . . . . . . . . . . . . . . . . . . . . 24
Parameters.table File . . . . . . . . . . . . . . . . . . . . . . . . . . . . . . . . . . . . . . . . . . . . . . . . . . . . . . . . 24File Location . . . . . . . . . . . . . . . . . . . . . . . . . . . . . . . . . . . . . . . . . . . . . . . . . . . . . . . . . . . 24Dot Notation . . . . . . . . . . . . . . . . . . . . . . . . . . . . . . . . . . . . . . . . . . . . . . . . . . . . . . . . . . . 25Parameter Metadata . . . . . . . . . . . . . . . . . . . . . . . . . . . . . . . . . . . . . . . . . . . . . . . . . . . . . 25Parameter Values in Parameters.table . . . . . . . . . . . . . . . . . . . . . . . . . . . . . . . . . . . . . . . . 26Case and Special Characters . . . . . . . . . . . . . . . . . . . . . . . . . . . . . . . . . . . . . . . . . . . . . . . 26Application and System Parameters . . . . . . . . . . . . . . . . . . . . . . . . . . . . . . . . . . . . . . . . . 26Partition-Specific Parameters . . . . . . . . . . . . . . . . . . . . . . . . . . . . . . . . . . . . . . . . . . . . . . 27Parameter Security . . . . . . . . . . . . . . . . . . . . . . . . . . . . . . . . . . . . . . . . . . . . . . . . . . . . . . 27Parameter Reference . . . . . . . . . . . . . . . . . . . . . . . . . . . . . . . . . . . . . . . . . . . . . . . . . . . . . 27How to Edit Parameters . . . . . . . . . . . . . . . . . . . . . . . . . . . . . . . . . . . . . . . . . . . . . . . . . . 27
AppInfo.xml File . . . . . . . . . . . . . . . . . . . . . . . . . . . . . . . . . . . . . . . . . . . . . . . . . . . . . . . . . . . 28Message Configuration Files . . . . . . . . . . . . . . . . . . . . . . . . . . . . . . . . . . . . . . . . . . . . . . . . . . 28Scheduled Task Configuration Files . . . . . . . . . . . . . . . . . . . . . . . . . . . . . . . . . . . . . . . . . . . . 28
iv Ariba Buyer Configuration Guide
Table of Contents
Custom Parameters. . . . . . . . . . . . . . . . . . . . . . . . . . . . . . . . . . . . . . . . . . . . . . . . . . . . . . . . . . 28Adding a Custom Parameter to Parameters.table . . . . . . . . . . . . . . . . . . . . . . . . . . . . . . . 29Defining Metadata for a Custom Parameter . . . . . . . . . . . . . . . . . . . . . . . . . . . . . . . . . . . 29
Data Formats . . . . . . . . . . . . . . . . . . . . . . . . . . . . . . . . . . . . . . . . . . . . . . . . . . . . . . . . . . . . . . 29Fax Numbers. . . . . . . . . . . . . . . . . . . . . . . . . . . . . . . . . . . . . . . . . . . . . . . . . . . . . . . . . . . 29Dates . . . . . . . . . . . . . . . . . . . . . . . . . . . . . . . . . . . . . . . . . . . . . . . . . . . . . . . . . . . . . . . . . 30Character Encoding Formats. . . . . . . . . . . . . . . . . . . . . . . . . . . . . . . . . . . . . . . . . . . . . . . 32
Chapter 3 Scheduled Tasks . . . . . . . . . . . . . . . . . . . . . . . . . . . . . . . . . . . 33Introduction to Scheduled Tasks . . . . . . . . . . . . . . . . . . . . . . . . . . . . . . . . . . . . . . . . . . . . . . . 33Scheduled Task Configuration Files . . . . . . . . . . . . . . . . . . . . . . . . . . . . . . . . . . . . . . . . . . . . 33
Location of Scheduled Task Configuration Files . . . . . . . . . . . . . . . . . . . . . . . . . . . . . . . 34Changing Scheduled Task Configuration Files. . . . . . . . . . . . . . . . . . . . . . . . . . . . . . . . . 34Reloading Scheduled Task Configuration Files . . . . . . . . . . . . . . . . . . . . . . . . . . . . . . . . 34
Scheduled Task Configuration File Format . . . . . . . . . . . . . . . . . . . . . . . . . . . . . . . . . . . . . . . 35Scheduled Task Properties . . . . . . . . . . . . . . . . . . . . . . . . . . . . . . . . . . . . . . . . . . . . . . . . 35Syntax of Schedules . . . . . . . . . . . . . . . . . . . . . . . . . . . . . . . . . . . . . . . . . . . . . . . . . . . . . 36Logical Node Assignment . . . . . . . . . . . . . . . . . . . . . . . . . . . . . . . . . . . . . . . . . . . . . . . . 37Chained Scheduled Tasks . . . . . . . . . . . . . . . . . . . . . . . . . . . . . . . . . . . . . . . . . . . . . . . . . 39Log Message Suppression . . . . . . . . . . . . . . . . . . . . . . . . . . . . . . . . . . . . . . . . . . . . . . . . 40
Reference List of Properties. . . . . . . . . . . . . . . . . . . . . . . . . . . . . . . . . . . . . . . . . . . . . . . . . . . 41Weekends and Holidays . . . . . . . . . . . . . . . . . . . . . . . . . . . . . . . . . . . . . . . . . . . . . . . . . . . . . . 41Permissions Associated with Scheduled Tasks . . . . . . . . . . . . . . . . . . . . . . . . . . . . . . . . . . . . 42Scheduled Tasks and Database Initialization . . . . . . . . . . . . . . . . . . . . . . . . . . . . . . . . . . . . . . 42Scheduled Tasks Thread Pool . . . . . . . . . . . . . . . . . . . . . . . . . . . . . . . . . . . . . . . . . . . . . . . . . 43
Chapter 4 Approvable Document Configuration . . . . . . . . . . . . . . . . . . . 45Introduction to Approvable Documents. . . . . . . . . . . . . . . . . . . . . . . . . . . . . . . . . . . . . . . . . . 45ApprovableTypePull Integration Event . . . . . . . . . . . . . . . . . . . . . . . . . . . . . . . . . . . . . . . . . . 46
Create, Query, Chooser, and Edit Permissions . . . . . . . . . . . . . . . . . . . . . . . . . . . . . . . . . 48Numbering and Naming . . . . . . . . . . . . . . . . . . . . . . . . . . . . . . . . . . . . . . . . . . . . . . . . . . 49Configuring Notification Content of Text-Format Notifications . . . . . . . . . . . . . . . . . . . 49
Approval Flow . . . . . . . . . . . . . . . . . . . . . . . . . . . . . . . . . . . . . . . . . . . . . . . . . . . . . . . . . . . . . 50Approval Diagrams . . . . . . . . . . . . . . . . . . . . . . . . . . . . . . . . . . . . . . . . . . . . . . . . . . . . . . 50Approval Flow Changes . . . . . . . . . . . . . . . . . . . . . . . . . . . . . . . . . . . . . . . . . . . . . . . . . . 51Cross-Partition Approvals. . . . . . . . . . . . . . . . . . . . . . . . . . . . . . . . . . . . . . . . . . . . . . . . . 53Performance Considerations for Status Folder . . . . . . . . . . . . . . . . . . . . . . . . . . . . . . . . . 53How to Customize Approval Rules. . . . . . . . . . . . . . . . . . . . . . . . . . . . . . . . . . . . . . . . . . 54
Navigation Panel Configuration. . . . . . . . . . . . . . . . . . . . . . . . . . . . . . . . . . . . . . . . . . . . . . . . 54Create Links . . . . . . . . . . . . . . . . . . . . . . . . . . . . . . . . . . . . . . . . . . . . . . . . . . . . . . . . . . . 54
Approvable Document Deletion. . . . . . . . . . . . . . . . . . . . . . . . . . . . . . . . . . . . . . . . . . . . . . . . 54Configuring Approvable Document Deletion. . . . . . . . . . . . . . . . . . . . . . . . . . . . . . . . . . 55
Chapter 5 Non-English Configurations. . . . . . . . . . . . . . . . . . . . . . . . . . . 57Supported Languages. . . . . . . . . . . . . . . . . . . . . . . . . . . . . . . . . . . . . . . . . . . . . . . . . . . . . . . . 57Database Character Encodings. . . . . . . . . . . . . . . . . . . . . . . . . . . . . . . . . . . . . . . . . . . . . . . . . 57Data File Encoding. . . . . . . . . . . . . . . . . . . . . . . . . . . . . . . . . . . . . . . . . . . . . . . . . . . . . . . . . . 58Database Parameter . . . . . . . . . . . . . . . . . . . . . . . . . . . . . . . . . . . . . . . . . . . . . . . . . . . . . . . . . 59Parameters in config/Parameters.table . . . . . . . . . . . . . . . . . . . . . . . . . . . . . . . . . . . . . . . . . . . 60Considerations for Asian Language Configurations . . . . . . . . . . . . . . . . . . . . . . . . . . . . . . . . 61
Requirements for Asian Language Support . . . . . . . . . . . . . . . . . . . . . . . . . . . . . . . . . . . 61
Ariba Buyer Configuration Guide v
Table of Contents
Where to Find Additional Information . . . . . . . . . . . . . . . . . . . . . . . . . . . . . . . . . . . . . . . . . . 62
Chapter 6 Notifications . . . . . . . . . . . . . . . . . . . . . . . . . . . . . . . . . . . . . . 63Introduction to Notifications . . . . . . . . . . . . . . . . . . . . . . . . . . . . . . . . . . . . . . . . . . . . . . . . . . 63Users Who Receive Notifications . . . . . . . . . . . . . . . . . . . . . . . . . . . . . . . . . . . . . . . . . . . . . . 63
Notification By Permission. . . . . . . . . . . . . . . . . . . . . . . . . . . . . . . . . . . . . . . . . . . . . . . . 64Notification To Interested Users . . . . . . . . . . . . . . . . . . . . . . . . . . . . . . . . . . . . . . . . . . . . 64
User Notification Preferences . . . . . . . . . . . . . . . . . . . . . . . . . . . . . . . . . . . . . . . . . . . . . . . . . 64Consolidated Notifications . . . . . . . . . . . . . . . . . . . . . . . . . . . . . . . . . . . . . . . . . . . . . . . . 65User Notification Preferences by Type of Approvable . . . . . . . . . . . . . . . . . . . . . . . . . . . 65
Notification Failures. . . . . . . . . . . . . . . . . . . . . . . . . . . . . . . . . . . . . . . . . . . . . . . . . . . . . . . . . 65Notification Configuration . . . . . . . . . . . . . . . . . . . . . . . . . . . . . . . . . . . . . . . . . . . . . . . . . . . . 65
Locating SMTP Server and Setting Return Address . . . . . . . . . . . . . . . . . . . . . . . . . . . . 65Disabling Notifications . . . . . . . . . . . . . . . . . . . . . . . . . . . . . . . . . . . . . . . . . . . . . . . . . . . 66
Email Approval Feature . . . . . . . . . . . . . . . . . . . . . . . . . . . . . . . . . . . . . . . . . . . . . . . . . . . . . . 67Process Flow . . . . . . . . . . . . . . . . . . . . . . . . . . . . . . . . . . . . . . . . . . . . . . . . . . . . . . . . . . . 67Email Approval Configuration . . . . . . . . . . . . . . . . . . . . . . . . . . . . . . . . . . . . . . . . . . . . . 69Troubleshooting Replies with Bad Characters . . . . . . . . . . . . . . . . . . . . . . . . . . . . . . . . . 72
Customizing HTML-Format Notifications for Approvables . . . . . . . . . . . . . . . . . . . . . . . . . . 73What Can Be Changed in Email Notifications . . . . . . . . . . . . . . . . . . . . . . . . . . . . . . . . . 73Location of Email Templates . . . . . . . . . . . . . . . . . . . . . . . . . . . . . . . . . . . . . . . . . . . . . . 73Modifying the Wording of Emails . . . . . . . . . . . . . . . . . . . . . . . . . . . . . . . . . . . . . . . . . . 74Modifying Email Templates Using Tags . . . . . . . . . . . . . . . . . . . . . . . . . . . . . . . . . . . . . 74Images and CSS . . . . . . . . . . . . . . . . . . . . . . . . . . . . . . . . . . . . . . . . . . . . . . . . . . . . . . . . 77Generic and Consolidated Templates . . . . . . . . . . . . . . . . . . . . . . . . . . . . . . . . . . . . . . . . 77Adding New Templates. . . . . . . . . . . . . . . . . . . . . . . . . . . . . . . . . . . . . . . . . . . . . . . . . . . 78Email Template Parsing Engine and Formatter . . . . . . . . . . . . . . . . . . . . . . . . . . . . . . . . 78
Customizing Text-Format Notifications for Approvables . . . . . . . . . . . . . . . . . . . . . . . . . . . . 79Configuring Sections of Notification Messages . . . . . . . . . . . . . . . . . . . . . . . . . . . . . . . . 79Groups For Customizing the Header . . . . . . . . . . . . . . . . . . . . . . . . . . . . . . . . . . . . . . . . 80Groups For Customizing the Line Items. . . . . . . . . . . . . . . . . . . . . . . . . . . . . . . . . . . . . . 80
Chapter 7 Passwords . . . . . . . . . . . . . . . . . . . . . . . . . . . . . . . . . . . . . . . . 81Introduction to Password Adapters . . . . . . . . . . . . . . . . . . . . . . . . . . . . . . . . . . . . . . . . . . . . . 81
Default Password Adapters. . . . . . . . . . . . . . . . . . . . . . . . . . . . . . . . . . . . . . . . . . . . . . . . 81Authentication of External Users . . . . . . . . . . . . . . . . . . . . . . . . . . . . . . . . . . . . . . . . . . . 82Password Update and Password Expiration . . . . . . . . . . . . . . . . . . . . . . . . . . . . . . . . . . . 82
Password Adapter Configuration . . . . . . . . . . . . . . . . . . . . . . . . . . . . . . . . . . . . . . . . . . . . . . . 83Defining Available Password Adapters . . . . . . . . . . . . . . . . . . . . . . . . . . . . . . . . . . . . . . 83Specifying an Adapter During Login . . . . . . . . . . . . . . . . . . . . . . . . . . . . . . . . . . . . . . . . 84Setting the URL For Logout . . . . . . . . . . . . . . . . . . . . . . . . . . . . . . . . . . . . . . . . . . . . . . . 84Hiding the Forgotten Password Link . . . . . . . . . . . . . . . . . . . . . . . . . . . . . . . . . . . . . . . . 84
Crypt Database Password Adapter. . . . . . . . . . . . . . . . . . . . . . . . . . . . . . . . . . . . . . . . . . . . . . 85Parameters. . . . . . . . . . . . . . . . . . . . . . . . . . . . . . . . . . . . . . . . . . . . . . . . . . . . . . . . . . . . . 85Organic Password Growth . . . . . . . . . . . . . . . . . . . . . . . . . . . . . . . . . . . . . . . . . . . . . . . . 87
SAP Password Adapter . . . . . . . . . . . . . . . . . . . . . . . . . . . . . . . . . . . . . . . . . . . . . . . . . . . . . . 88Parameters. . . . . . . . . . . . . . . . . . . . . . . . . . . . . . . . . . . . . . . . . . . . . . . . . . . . . . . . . . . . . 88
External Authentication Password Adapter . . . . . . . . . . . . . . . . . . . . . . . . . . . . . . . . . . . . . . . 89NT Domain Login Adapter Implementation . . . . . . . . . . . . . . . . . . . . . . . . . . . . . . . . . . . . . . 90
Login Screen Credentials . . . . . . . . . . . . . . . . . . . . . . . . . . . . . . . . . . . . . . . . . . . . . . . . . 91Domain Names in Configuration Files . . . . . . . . . . . . . . . . . . . . . . . . . . . . . . . . . . . . . . . 92
No Authentication Adapter Implementation . . . . . . . . . . . . . . . . . . . . . . . . . . . . . . . . . . . . . . 92
vi Ariba Buyer Configuration Guide
Table of Contents
Password Expiration. . . . . . . . . . . . . . . . . . . . . . . . . . . . . . . . . . . . . . . . . . . . . . . . . . . . . . . . . 92Immediate Password Expiration . . . . . . . . . . . . . . . . . . . . . . . . . . . . . . . . . . . . . . . . . . . . 93
Password File . . . . . . . . . . . . . . . . . . . . . . . . . . . . . . . . . . . . . . . . . . . . . . . . . . . . . . . . . . . . . . 93Changing User Passwords. . . . . . . . . . . . . . . . . . . . . . . . . . . . . . . . . . . . . . . . . . . . . . . . . 93
Password Recovery . . . . . . . . . . . . . . . . . . . . . . . . . . . . . . . . . . . . . . . . . . . . . . . . . . . . . . . . . 95Temporary Password Token Expiration . . . . . . . . . . . . . . . . . . . . . . . . . . . . . . . . . . . . . . 96Security Answer Attempts . . . . . . . . . . . . . . . . . . . . . . . . . . . . . . . . . . . . . . . . . . . . . . . . 96
Display Names for Password Adapters . . . . . . . . . . . . . . . . . . . . . . . . . . . . . . . . . . . . . . . . . . 97
Chapter 8 Security Considerations . . . . . . . . . . . . . . . . . . . . . . . . . . . . . 99Parameter Security . . . . . . . . . . . . . . . . . . . . . . . . . . . . . . . . . . . . . . . . . . . . . . . . . . . . . . . . . . 99
Options . . . . . . . . . . . . . . . . . . . . . . . . . . . . . . . . . . . . . . . . . . . . . . . . . . . . . . . . . . . . . . 100Ariba Administrator Security. . . . . . . . . . . . . . . . . . . . . . . . . . . . . . . . . . . . . . . . . . . . . . . . . 101
Restricting Access to Integration Events and Scheduled Tasks . . . . . . . . . . . . . . . . . . . 101Allowing Access to Files . . . . . . . . . . . . . . . . . . . . . . . . . . . . . . . . . . . . . . . . . . . . . . . . 102Workspace and Task Security . . . . . . . . . . . . . . . . . . . . . . . . . . . . . . . . . . . . . . . . . . . . . 104
Object Security. . . . . . . . . . . . . . . . . . . . . . . . . . . . . . . . . . . . . . . . . . . . . . . . . . . . . . . . . . . . 105Considerations for Object Level Permissions. . . . . . . . . . . . . . . . . . . . . . . . . . . . . . . . . 106
Inspector Security . . . . . . . . . . . . . . . . . . . . . . . . . . . . . . . . . . . . . . . . . . . . . . . . . . . . . . . . . 106Remote Authentication for the Inspector . . . . . . . . . . . . . . . . . . . . . . . . . . . . . . . . . . . . 107Inspector Authentication for WebLogic . . . . . . . . . . . . . . . . . . . . . . . . . . . . . . . . . . . . . 112
How Ariba Buyer Uses SSL . . . . . . . . . . . . . . . . . . . . . . . . . . . . . . . . . . . . . . . . . . . . . . . . . 113Digital Certificates . . . . . . . . . . . . . . . . . . . . . . . . . . . . . . . . . . . . . . . . . . . . . . . . . . . . . 113Security Checks For Production Instances . . . . . . . . . . . . . . . . . . . . . . . . . . . . . . . . . . . 113Performance Considerations . . . . . . . . . . . . . . . . . . . . . . . . . . . . . . . . . . . . . . . . . . . . . . 114
Parameters for SSL . . . . . . . . . . . . . . . . . . . . . . . . . . . . . . . . . . . . . . . . . . . . . . . . . . . . . . . . 114Non-Production Mode . . . . . . . . . . . . . . . . . . . . . . . . . . . . . . . . . . . . . . . . . . . . . . . . . . 115Production Mode With Secure Communication . . . . . . . . . . . . . . . . . . . . . . . . . . . . . . . 115Production Mode With Non-Secure Communication. . . . . . . . . . . . . . . . . . . . . . . . . . . 116
Security of Ariba Client Automation . . . . . . . . . . . . . . . . . . . . . . . . . . . . . . . . . . . . . . . . . . . 117Deploying to Clients . . . . . . . . . . . . . . . . . . . . . . . . . . . . . . . . . . . . . . . . . . . . . . . . . . . . 117Deploying a Digital Certificate in Your Application Server. . . . . . . . . . . . . . . . . . . . . . 117Enabling Enhanced Security . . . . . . . . . . . . . . . . . . . . . . . . . . . . . . . . . . . . . . . . . . . . . . 118Manually Installing the Client Control . . . . . . . . . . . . . . . . . . . . . . . . . . . . . . . . . . . . . . 119
How To Create and Configure Digital Certificates . . . . . . . . . . . . . . . . . . . . . . . . . . . . . . . . 121Specifying a Hostname . . . . . . . . . . . . . . . . . . . . . . . . . . . . . . . . . . . . . . . . . . . . . . . . . . 121Using the NT Domain Login Adapter . . . . . . . . . . . . . . . . . . . . . . . . . . . . . . . . . . . . . . 121Setting Parameters for Keystore Files. . . . . . . . . . . . . . . . . . . . . . . . . . . . . . . . . . . . . . . 121Setting Up Certificate Authentication. . . . . . . . . . . . . . . . . . . . . . . . . . . . . . . . . . . . . . . 122Installing a Digital Certificate. . . . . . . . . . . . . . . . . . . . . . . . . . . . . . . . . . . . . . . . . . . . . 123
Guest User Account . . . . . . . . . . . . . . . . . . . . . . . . . . . . . . . . . . . . . . . . . . . . . . . . . . . . . . . . 124
Chapter 9 Logging and Auditing . . . . . . . . . . . . . . . . . . . . . . . . . . . . . . 125Log Files and Directories . . . . . . . . . . . . . . . . . . . . . . . . . . . . . . . . . . . . . . . . . . . . . . . . . . . . 125
Application Server Logs . . . . . . . . . . . . . . . . . . . . . . . . . . . . . . . . . . . . . . . . . . . . . . . . . 126Categories and Logging Levels . . . . . . . . . . . . . . . . . . . . . . . . . . . . . . . . . . . . . . . . . . . . . . . 127
Categories . . . . . . . . . . . . . . . . . . . . . . . . . . . . . . . . . . . . . . . . . . . . . . . . . . . . . . . . . . . . 127Logging Levels . . . . . . . . . . . . . . . . . . . . . . . . . . . . . . . . . . . . . . . . . . . . . . . . . . . . . . . . 127Log Messages in Ariba Administrator . . . . . . . . . . . . . . . . . . . . . . . . . . . . . . . . . . . . . . 127
Log Message Format . . . . . . . . . . . . . . . . . . . . . . . . . . . . . . . . . . . . . . . . . . . . . . . . . . . . . . . 128Logging and Auditing Parameters . . . . . . . . . . . . . . . . . . . . . . . . . . . . . . . . . . . . . . . . . . . . . 128
Ariba Buyer Configuration Guide vii
Table of Contents
Log Appenders . . . . . . . . . . . . . . . . . . . . . . . . . . . . . . . . . . . . . . . . . . . . . . . . . . . . . . . . . . . . 129Common Parameters. . . . . . . . . . . . . . . . . . . . . . . . . . . . . . . . . . . . . . . . . . . . . . . . . . . . 129Console Log Appender . . . . . . . . . . . . . . . . . . . . . . . . . . . . . . . . . . . . . . . . . . . . . . . . . . 129J2EELogger Log Appender . . . . . . . . . . . . . . . . . . . . . . . . . . . . . . . . . . . . . . . . . . . . . . 130MainLogFile Log Appender . . . . . . . . . . . . . . . . . . . . . . . . . . . . . . . . . . . . . . . . . . . . . . 130DatabaseLog Log Appender . . . . . . . . . . . . . . . . . . . . . . . . . . . . . . . . . . . . . . . . . . . . . . 130NTServiceLogging Log Appender . . . . . . . . . . . . . . . . . . . . . . . . . . . . . . . . . . . . . . . . . 131SupplierDMLog Log Appender . . . . . . . . . . . . . . . . . . . . . . . . . . . . . . . . . . . . . . . . . . . 131ObjectArchive Log Appender. . . . . . . . . . . . . . . . . . . . . . . . . . . . . . . . . . . . . . . . . . . . . 132MappingLog Log Appender . . . . . . . . . . . . . . . . . . . . . . . . . . . . . . . . . . . . . . . . . . . . . . 132File Encoding Format . . . . . . . . . . . . . . . . . . . . . . . . . . . . . . . . . . . . . . . . . . . . . . . . . . . 133
Scheduled Tasks for Logging. . . . . . . . . . . . . . . . . . . . . . . . . . . . . . . . . . . . . . . . . . . . . . . . . 133Logging Customization in Java . . . . . . . . . . . . . . . . . . . . . . . . . . . . . . . . . . . . . . . . . . . . . . . 133Audit Log Task. . . . . . . . . . . . . . . . . . . . . . . . . . . . . . . . . . . . . . . . . . . . . . . . . . . . . . . . . . . . 133
Chapter 10 Data Archiving and Purging . . . . . . . . . . . . . . . . . . . . . . . . 135About Archive and Purge. . . . . . . . . . . . . . . . . . . . . . . . . . . . . . . . . . . . . . . . . . . . . . . . . . . . 135
Archive and Purge Process . . . . . . . . . . . . . . . . . . . . . . . . . . . . . . . . . . . . . . . . . . . . . . . 135Purge Configuration Files . . . . . . . . . . . . . . . . . . . . . . . . . . . . . . . . . . . . . . . . . . . . . . . . 136Purge Scopes. . . . . . . . . . . . . . . . . . . . . . . . . . . . . . . . . . . . . . . . . . . . . . . . . . . . . . . . . . 137Summary of Steps . . . . . . . . . . . . . . . . . . . . . . . . . . . . . . . . . . . . . . . . . . . . . . . . . . . . . . 137
Purge Configuration File . . . . . . . . . . . . . . . . . . . . . . . . . . . . . . . . . . . . . . . . . . . . . . . . . . . . 138The <purgeCandidates> Element . . . . . . . . . . . . . . . . . . . . . . . . . . . . . . . . . . . . . . . . . . 138The <keepConditions> Element . . . . . . . . . . . . . . . . . . . . . . . . . . . . . . . . . . . . . . . . . . . 140The <metadataAnnotations> Element . . . . . . . . . . . . . . . . . . . . . . . . . . . . . . . . . . . . . . 140
How to Archive to Disk . . . . . . . . . . . . . . . . . . . . . . . . . . . . . . . . . . . . . . . . . . . . . . . . . . . . . 141ObjectArchive Scheduled Task . . . . . . . . . . . . . . . . . . . . . . . . . . . . . . . . . . . . . . . . . . . . 141Format of Output Files . . . . . . . . . . . . . . . . . . . . . . . . . . . . . . . . . . . . . . . . . . . . . . . . . . 143Logging for ObjectArchive. . . . . . . . . . . . . . . . . . . . . . . . . . . . . . . . . . . . . . . . . . . . . . . 144Error Recovery . . . . . . . . . . . . . . . . . . . . . . . . . . . . . . . . . . . . . . . . . . . . . . . . . . . . . . . . 144
Chapter 11 Sample Features . . . . . . . . . . . . . . . . . . . . . . . . . . . . . . . . . 145Sample Directory . . . . . . . . . . . . . . . . . . . . . . . . . . . . . . . . . . . . . . . . . . . . . . . . . . . . . . . . . . 145Hooks . . . . . . . . . . . . . . . . . . . . . . . . . . . . . . . . . . . . . . . . . . . . . . . . . . . . . . . . . . . . . . . . . . . 146Single SignOn . . . . . . . . . . . . . . . . . . . . . . . . . . . . . . . . . . . . . . . . . . . . . . . . . . . . . . . . . . . . 146
Chapter 12 Reporting. . . . . . . . . . . . . . . . . . . . . . . . . . . . . . . . . . . . . . . 147Introduction to Reporting. . . . . . . . . . . . . . . . . . . . . . . . . . . . . . . . . . . . . . . . . . . . . . . . . . . . 147Report Configuration . . . . . . . . . . . . . . . . . . . . . . . . . . . . . . . . . . . . . . . . . . . . . . . . . . . . . . . 148
ReportQueryPull Integration Event . . . . . . . . . . . . . . . . . . . . . . . . . . . . . . . . . . . . . . . . 148ReportMetaPull Integration Event . . . . . . . . . . . . . . . . . . . . . . . . . . . . . . . . . . . . . . . . . 149ReportPermissionMap.csv File . . . . . . . . . . . . . . . . . . . . . . . . . . . . . . . . . . . . . . . . . . . . 156Reporting on Currency and Money. . . . . . . . . . . . . . . . . . . . . . . . . . . . . . . . . . . . . . . . . 157Other Parameters for Reporting . . . . . . . . . . . . . . . . . . . . . . . . . . . . . . . . . . . . . . . . . . . 158
Report Customization . . . . . . . . . . . . . . . . . . . . . . . . . . . . . . . . . . . . . . . . . . . . . . . . . . . . . . 158Adding a New Report . . . . . . . . . . . . . . . . . . . . . . . . . . . . . . . . . . . . . . . . . . . . . . . . . . . 158Customizing the Style Sheets . . . . . . . . . . . . . . . . . . . . . . . . . . . . . . . . . . . . . . . . . . . . . 161Creating Reports Based on Custom Queries. . . . . . . . . . . . . . . . . . . . . . . . . . . . . . . . . . 162Custom Filters. . . . . . . . . . . . . . . . . . . . . . . . . . . . . . . . . . . . . . . . . . . . . . . . . . . . . . . . . 162Debugging Report Changes . . . . . . . . . . . . . . . . . . . . . . . . . . . . . . . . . . . . . . . . . . . . . . 163
viii Ariba Buyer Configuration Guide
Table of Contents
Chapter 13 Remote Authentication . . . . . . . . . . . . . . . . . . . . . . . . . . . . 165About Remote Authentication . . . . . . . . . . . . . . . . . . . . . . . . . . . . . . . . . . . . . . . . . . . . . . . . 165
Overview of Authentication Options . . . . . . . . . . . . . . . . . . . . . . . . . . . . . . . . . . . . . . . 165Benefits of Remote Authentication. . . . . . . . . . . . . . . . . . . . . . . . . . . . . . . . . . . . . . . . . 166Remote Authentication Protocol. . . . . . . . . . . . . . . . . . . . . . . . . . . . . . . . . . . . . . . . . . . 166Requirements . . . . . . . . . . . . . . . . . . . . . . . . . . . . . . . . . . . . . . . . . . . . . . . . . . . . . . . . . 166Limitations . . . . . . . . . . . . . . . . . . . . . . . . . . . . . . . . . . . . . . . . . . . . . . . . . . . . . . . . . . . 167Data Needed by Ariba Applications . . . . . . . . . . . . . . . . . . . . . . . . . . . . . . . . . . . . . . . . 167
Overview of the Remote Authentication Relay Protocol. . . . . . . . . . . . . . . . . . . . . . . . . . . . 167Corporate Authentication Usage Flows . . . . . . . . . . . . . . . . . . . . . . . . . . . . . . . . . . . . . . . . . 168
Corporate Authentication Flow Using the Basic Setup . . . . . . . . . . . . . . . . . . . . . . . . . 168Corporate Authentication Flow with Third-Party Single Sign-On . . . . . . . . . . . . . . . . . 169Logout Page . . . . . . . . . . . . . . . . . . . . . . . . . . . . . . . . . . . . . . . . . . . . . . . . . . . . . . . . . . 170Non-Authorized Users . . . . . . . . . . . . . . . . . . . . . . . . . . . . . . . . . . . . . . . . . . . . . . . . . . 170
Implementations of the Protocol . . . . . . . . . . . . . . . . . . . . . . . . . . . . . . . . . . . . . . . . . . . . . . 170Redirect Examples . . . . . . . . . . . . . . . . . . . . . . . . . . . . . . . . . . . . . . . . . . . . . . . . . . . . . . . . . 171
Redirect from the Ariba Authenticator . . . . . . . . . . . . . . . . . . . . . . . . . . . . . . . . . . . . . . 171Redirect from Your Relay Page . . . . . . . . . . . . . . . . . . . . . . . . . . . . . . . . . . . . . . . . . . . 171
Example ASP Relay Page . . . . . . . . . . . . . . . . . . . . . . . . . . . . . . . . . . . . . . . . . . . . . . . . . . . 171Generating a Private/Public Key Pair. . . . . . . . . . . . . . . . . . . . . . . . . . . . . . . . . . . . . . . . . . . 172Remote Authentication Relay Example for IIS . . . . . . . . . . . . . . . . . . . . . . . . . . . . . . . . . . . 172
1. Configure IIS and Generate Keys . . . . . . . . . . . . . . . . . . . . . . . . . . . . . . . . . . . . . . . . 1722. Test . . . . . . . . . . . . . . . . . . . . . . . . . . . . . . . . . . . . . . . . . . . . . . . . . . . . . . . . . . . . . . . 173
Remote Authentication Relay Example for Apache . . . . . . . . . . . . . . . . . . . . . . . . . . . . . . . 1741. Test the Script . . . . . . . . . . . . . . . . . . . . . . . . . . . . . . . . . . . . . . . . . . . . . . . . . . . . . . . 1752. Integrate the Script with Apache. . . . . . . . . . . . . . . . . . . . . . . . . . . . . . . . . . . . . . . . . 175
Configuring Ariba Buyer Server as a Corporate Authenticator. . . . . . . . . . . . . . . . . . . . . . . 176
Chapter 14 Performance . . . . . . . . . . . . . . . . . . . . . . . . . . . . . . . . . . . . 177Java Heap and Java Stack. . . . . . . . . . . . . . . . . . . . . . . . . . . . . . . . . . . . . . . . . . . . . . . . . . . . 177Worker Threads . . . . . . . . . . . . . . . . . . . . . . . . . . . . . . . . . . . . . . . . . . . . . . . . . . . . . . . . . . . 177
Background Queue . . . . . . . . . . . . . . . . . . . . . . . . . . . . . . . . . . . . . . . . . . . . . . . . . . . . . 178cXML Object Create Queue . . . . . . . . . . . . . . . . . . . . . . . . . . . . . . . . . . . . . . . . . . . . . . 178Foreground Queue . . . . . . . . . . . . . . . . . . . . . . . . . . . . . . . . . . . . . . . . . . . . . . . . . . . . . 178Workflow Queue . . . . . . . . . . . . . . . . . . . . . . . . . . . . . . . . . . . . . . . . . . . . . . . . . . . . . . . 178
Cache Size and Cache Tuning . . . . . . . . . . . . . . . . . . . . . . . . . . . . . . . . . . . . . . . . . . . . . . . . 178Object Cache. . . . . . . . . . . . . . . . . . . . . . . . . . . . . . . . . . . . . . . . . . . . . . . . . . . . . . . . . . 178Query Result Cache . . . . . . . . . . . . . . . . . . . . . . . . . . . . . . . . . . . . . . . . . . . . . . . . . . . . 179Catalog Search Results Query Cache . . . . . . . . . . . . . . . . . . . . . . . . . . . . . . . . . . . . . . . 179Session Cache . . . . . . . . . . . . . . . . . . . . . . . . . . . . . . . . . . . . . . . . . . . . . . . . . . . . . . . . . 179
Data Queue. . . . . . . . . . . . . . . . . . . . . . . . . . . . . . . . . . . . . . . . . . . . . . . . . . . . . . . . . . . . . . . 180Catalog Load . . . . . . . . . . . . . . . . . . . . . . . . . . . . . . . . . . . . . . . . . . . . . . . . . . . . . . . . . . . . . 180Timeout Values. . . . . . . . . . . . . . . . . . . . . . . . . . . . . . . . . . . . . . . . . . . . . . . . . . . . . . . . . . . . 181Database-Related Parameters. . . . . . . . . . . . . . . . . . . . . . . . . . . . . . . . . . . . . . . . . . . . . . . . . 181
Database Connections. . . . . . . . . . . . . . . . . . . . . . . . . . . . . . . . . . . . . . . . . . . . . . . . . . . 181Tablespaces and FileGroups . . . . . . . . . . . . . . . . . . . . . . . . . . . . . . . . . . . . . . . . . . . . . . 182Read Uncommitted . . . . . . . . . . . . . . . . . . . . . . . . . . . . . . . . . . . . . . . . . . . . . . . . . . . . . 182Open Database Cursors. . . . . . . . . . . . . . . . . . . . . . . . . . . . . . . . . . . . . . . . . . . . . . . . . . 182
Search-Related Parameters. . . . . . . . . . . . . . . . . . . . . . . . . . . . . . . . . . . . . . . . . . . . . . . . . . . 182
Appendix A Login URL Reference . . . . . . . . . . . . . . . . . . . . . . . . . . . . . 183
Ariba Buyer Configuration Guide ix
Table of Contents
Webjumper Direct Action . . . . . . . . . . . . . . . . . . . . . . . . . . . . . . . . . . . . . . . . . . . . . . . . . . . 183WebJumper URL Arguments . . . . . . . . . . . . . . . . . . . . . . . . . . . . . . . . . . . . . . . . . . . . . 183Configuration for Authentication Field . . . . . . . . . . . . . . . . . . . . . . . . . . . . . . . . . . . . . 185
Locale Parameter on Login . . . . . . . . . . . . . . . . . . . . . . . . . . . . . . . . . . . . . . . . . . . . . . . . . . 185Daylight Saving Time and Macintosh Clients . . . . . . . . . . . . . . . . . . . . . . . . . . . . . . . . . . . . 186
Appendix B Command Reference. . . . . . . . . . . . . . . . . . . . . . . . . . . . . . 187Notation Conventions. . . . . . . . . . . . . . . . . . . . . . . . . . . . . . . . . . . . . . . . . . . . . . . . . . . . . . . 187aribaencrypt . . . . . . . . . . . . . . . . . . . . . . . . . . . . . . . . . . . . . . . . . . . . . . . . . . . . . . . . . . . . . . 187
Syntax . . . . . . . . . . . . . . . . . . . . . . . . . . . . . . . . . . . . . . . . . . . . . . . . . . . . . . . . . . . . . . . 187Options . . . . . . . . . . . . . . . . . . . . . . . . . . . . . . . . . . . . . . . . . . . . . . . . . . . . . . . . . . . . . . 188
runpurge . . . . . . . . . . . . . . . . . . . . . . . . . . . . . . . . . . . . . . . . . . . . . . . . . . . . . . . . . . . . . . . . . 189Syntax . . . . . . . . . . . . . . . . . . . . . . . . . . . . . . . . . . . . . . . . . . . . . . . . . . . . . . . . . . . . . . . 189Options . . . . . . . . . . . . . . . . . . . . . . . . . . . . . . . . . . . . . . . . . . . . . . . . . . . . . . . . . . . . . . 189
servermonitor . . . . . . . . . . . . . . . . . . . . . . . . . . . . . . . . . . . . . . . . . . . . . . . . . . . . . . . . . . . . . 190Syntax . . . . . . . . . . . . . . . . . . . . . . . . . . . . . . . . . . . . . . . . . . . . . . . . . . . . . . . . . . . . . . . 190Options . . . . . . . . . . . . . . . . . . . . . . . . . . . . . . . . . . . . . . . . . . . . . . . . . . . . . . . . . . . . . . 190
Appendix C Purge DTD Reference . . . . . . . . . . . . . . . . . . . . . . . . . . . . . 199<aqlQuery> . . . . . . . . . . . . . . . . . . . . . . . . . . . . . . . . . . . . . . . . . . . . . . . . . . . . . . . . . . . 199<keepConditions>. . . . . . . . . . . . . . . . . . . . . . . . . . . . . . . . . . . . . . . . . . . . . . . . . . . . . . 199<keepCondition> . . . . . . . . . . . . . . . . . . . . . . . . . . . . . . . . . . . . . . . . . . . . . . . . . . . . . . 200<class> . . . . . . . . . . . . . . . . . . . . . . . . . . . . . . . . . . . . . . . . . . . . . . . . . . . . . . . . . . . . . . 200<classAnnotation> . . . . . . . . . . . . . . . . . . . . . . . . . . . . . . . . . . . . . . . . . . . . . . . . . . . . . 201<field>. . . . . . . . . . . . . . . . . . . . . . . . . . . . . . . . . . . . . . . . . . . . . . . . . . . . . . . . . . . . . . . 201<metadataAnnotations> . . . . . . . . . . . . . . . . . . . . . . . . . . . . . . . . . . . . . . . . . . . . . . . . . 202<options> . . . . . . . . . . . . . . . . . . . . . . . . . . . . . . . . . . . . . . . . . . . . . . . . . . . . . . . . . . . . 202<partition> . . . . . . . . . . . . . . . . . . . . . . . . . . . . . . . . . . . . . . . . . . . . . . . . . . . . . . . . . . . 203<primaryClass>. . . . . . . . . . . . . . . . . . . . . . . . . . . . . . . . . . . . . . . . . . . . . . . . . . . . . . . . 203<purgeCandidates> . . . . . . . . . . . . . . . . . . . . . . . . . . . . . . . . . . . . . . . . . . . . . . . . . . . . . 204<purgeConfig> . . . . . . . . . . . . . . . . . . . . . . . . . . . . . . . . . . . . . . . . . . . . . . . . . . . . . . . . 205<relatedClasses> . . . . . . . . . . . . . . . . . . . . . . . . . . . . . . . . . . . . . . . . . . . . . . . . . . . . . . . 205<typeNarrowing> . . . . . . . . . . . . . . . . . . . . . . . . . . . . . . . . . . . . . . . . . . . . . . . . . . . . . . 206<whereCondition> . . . . . . . . . . . . . . . . . . . . . . . . . . . . . . . . . . . . . . . . . . . . . . . . . . . . . 207
Appendix D Meta Parameters DTD Reference . . . . . . . . . . . . . . . . . . . . 209Parameter Metadata . . . . . . . . . . . . . . . . . . . . . . . . . . . . . . . . . . . . . . . . . . . . . . . . . . . . 209<metadata> . . . . . . . . . . . . . . . . . . . . . . . . . . . . . . . . . . . . . . . . . . . . . . . . . . . . . . . . . . . 209<parameter> . . . . . . . . . . . . . . . . . . . . . . . . . . . . . . . . . . . . . . . . . . . . . . . . . . . . . . . . . . 209
Appendix E Configuration File Reference . . . . . . . . . . . . . . . . . . . . . . . 213Shared Configuration Files . . . . . . . . . . . . . . . . . . . . . . . . . . . . . . . . . . . . . . . . . . . . . . . . . . 213Files That Vary By Variant. . . . . . . . . . . . . . . . . . . . . . . . . . . . . . . . . . . . . . . . . . . . . . . . . . . 214Files That Vary By Partition. . . . . . . . . . . . . . . . . . . . . . . . . . . . . . . . . . . . . . . . . . . . . . . . . . 215
Appendix F Email Notification Messages. . . . . . . . . . . . . . . . . . . . . . . . 217Notification of Password Entry . . . . . . . . . . . . . . . . . . . . . . . . . . . . . . . . . . . . . . . . . . . . . . . 217Notification of Approaching Withdrawal. . . . . . . . . . . . . . . . . . . . . . . . . . . . . . . . . . . . . . . . 218Notification of Withdrawn Request . . . . . . . . . . . . . . . . . . . . . . . . . . . . . . . . . . . . . . . . . . . . 219Notification of Approaching Escalation. . . . . . . . . . . . . . . . . . . . . . . . . . . . . . . . . . . . . . . . . 219
x Ariba Buyer Configuration Guide
Table of Contents
Notification of Escalation To You . . . . . . . . . . . . . . . . . . . . . . . . . . . . . . . . . . . . . . . . . . . . . 220Notification of Escalation to Supervisor . . . . . . . . . . . . . . . . . . . . . . . . . . . . . . . . . . . . . . . . 221Notification of Modification . . . . . . . . . . . . . . . . . . . . . . . . . . . . . . . . . . . . . . . . . . . . . . . . . 221Notification of a Reply to a Comment . . . . . . . . . . . . . . . . . . . . . . . . . . . . . . . . . . . . . . . . . . 222Notification of Resubmitted Request . . . . . . . . . . . . . . . . . . . . . . . . . . . . . . . . . . . . . . . . . . . 222Notification of Approval . . . . . . . . . . . . . . . . . . . . . . . . . . . . . . . . . . . . . . . . . . . . . . . . . . . . 223Notification of Full Approval. . . . . . . . . . . . . . . . . . . . . . . . . . . . . . . . . . . . . . . . . . . . . . . . . 224Notification of Denial . . . . . . . . . . . . . . . . . . . . . . . . . . . . . . . . . . . . . . . . . . . . . . . . . . . . . . 224Notification of Watcher . . . . . . . . . . . . . . . . . . . . . . . . . . . . . . . . . . . . . . . . . . . . . . . . . . . . . 225Notification of Submittal . . . . . . . . . . . . . . . . . . . . . . . . . . . . . . . . . . . . . . . . . . . . . . . . . . . . 225Notification of Added Watcher . . . . . . . . . . . . . . . . . . . . . . . . . . . . . . . . . . . . . . . . . . . . . . . 226Notification of Deleted Watcher . . . . . . . . . . . . . . . . . . . . . . . . . . . . . . . . . . . . . . . . . . . . . . 227Notification of Required Approval . . . . . . . . . . . . . . . . . . . . . . . . . . . . . . . . . . . . . . . . . . . . 227Notification of Added Approver . . . . . . . . . . . . . . . . . . . . . . . . . . . . . . . . . . . . . . . . . . . . . . 228Notification of Deleted Approver . . . . . . . . . . . . . . . . . . . . . . . . . . . . . . . . . . . . . . . . . . . . . 229Notification of Scheduled Task Failure . . . . . . . . . . . . . . . . . . . . . . . . . . . . . . . . . . . . . . . . . 229Notification of Full Milestone Verification . . . . . . . . . . . . . . . . . . . . . . . . . . . . . . . . . . . . . . 230Notification of Required Milestone Verification . . . . . . . . . . . . . . . . . . . . . . . . . . . . . . . . . . 230Notification of Milestone Verification . . . . . . . . . . . . . . . . . . . . . . . . . . . . . . . . . . . . . . . . . . 231Notification of Unknown Supplier. . . . . . . . . . . . . . . . . . . . . . . . . . . . . . . . . . . . . . . . . . . . . 232Notification of Overdue Unknown Supplier Resolution . . . . . . . . . . . . . . . . . . . . . . . . . . . . 232Notification of Unknown Partitioned Supplier Resolution . . . . . . . . . . . . . . . . . . . . . . . . . . 233Notification of Invalid Supplier Locations. . . . . . . . . . . . . . . . . . . . . . . . . . . . . . . . . . . . . . . 233Notification of Import Mapping Failure . . . . . . . . . . . . . . . . . . . . . . . . . . . . . . . . . . . . . . . . 234
Appendix G Permissions, Roles, and Groups . . . . . . . . . . . . . . . . . . . . . 235Permissions . . . . . . . . . . . . . . . . . . . . . . . . . . . . . . . . . . . . . . . . . . . . . . . . . . . . . . . . . . . . . . 235Roles. . . . . . . . . . . . . . . . . . . . . . . . . . . . . . . . . . . . . . . . . . . . . . . . . . . . . . . . . . . . . . . . . . . . 246Groups . . . . . . . . . . . . . . . . . . . . . . . . . . . . . . . . . . . . . . . . . . . . . . . . . . . . . . . . . . . . . . . . . . 255
Appendix H Scheduled Task Reference . . . . . . . . . . . . . . . . . . . . . . . . . 259
Ariba Buyer Configuration Guide xi
Table of Contents
Global Scheduled Tasks . . . . . . . . . . . . . . . . . . . . . . . . . . . . . . . . . . . . . . . . . . . . . . . . . . . . . 259ArchiveLog . . . . . . . . . . . . . . . . . . . . . . . . . . . . . . . . . . . . . . . . . . . . . . . . . . . . . . . . . . . 259AribaNetworkOrganizationSync. . . . . . . . . . . . . . . . . . . . . . . . . . . . . . . . . . . . . . . . . . . 260AssignFeaturesToSystemRealmTask . . . . . . . . . . . . . . . . . . . . . . . . . . . . . . . . . . . . . . . 261BestPracticeGroupRoleLanguagePullTask . . . . . . . . . . . . . . . . . . . . . . . . . . . . . . . . . . . 261BestPracticeGroupRoleMappingsPullTask. . . . . . . . . . . . . . . . . . . . . . . . . . . . . . . . . . . 262BestPracticeGroupRolePullTask. . . . . . . . . . . . . . . . . . . . . . . . . . . . . . . . . . . . . . . . . . . 263CleanAuditDatabaseLog. . . . . . . . . . . . . . . . . . . . . . . . . . . . . . . . . . . . . . . . . . . . . . . . . 263CleanDatabaseLog . . . . . . . . . . . . . . . . . . . . . . . . . . . . . . . . . . . . . . . . . . . . . . . . . . . . . 264CleanExpiredAuthData . . . . . . . . . . . . . . . . . . . . . . . . . . . . . . . . . . . . . . . . . . . . . . . . . . 265CleanScheduledTaskStatus . . . . . . . . . . . . . . . . . . . . . . . . . . . . . . . . . . . . . . . . . . . . . . . 265CleanupInactiveTokens . . . . . . . . . . . . . . . . . . . . . . . . . . . . . . . . . . . . . . . . . . . . . . . . . . 265CommonSupplierSyncUsingSupplierLocationID . . . . . . . . . . . . . . . . . . . . . . . . . . . . . 266CommodityCodeReport . . . . . . . . . . . . . . . . . . . . . . . . . . . . . . . . . . . . . . . . . . . . . . . . . 266ConsolidatedNotifications. . . . . . . . . . . . . . . . . . . . . . . . . . . . . . . . . . . . . . . . . . . . . . . . 267CreateRealmProfiles . . . . . . . . . . . . . . . . . . . . . . . . . . . . . . . . . . . . . . . . . . . . . . . . . . . . 267CustomObjectPullTask . . . . . . . . . . . . . . . . . . . . . . . . . . . . . . . . . . . . . . . . . . . . . . . . . . 268CustomObjectPushTask . . . . . . . . . . . . . . . . . . . . . . . . . . . . . . . . . . . . . . . . . . . . . . . . . 268DumpAssociatedTranslationsTask . . . . . . . . . . . . . . . . . . . . . . . . . . . . . . . . . . . . . . . . . 268DumpDashboards . . . . . . . . . . . . . . . . . . . . . . . . . . . . . . . . . . . . . . . . . . . . . . . . . . . . . . 268DumpPortletConfigs . . . . . . . . . . . . . . . . . . . . . . . . . . . . . . . . . . . . . . . . . . . . . . . . . . . . 269EncryptedAttachmentUpdater . . . . . . . . . . . . . . . . . . . . . . . . . . . . . . . . . . . . . . . . . . . . 269EncryptedBlobUpdater . . . . . . . . . . . . . . . . . . . . . . . . . . . . . . . . . . . . . . . . . . . . . . . . . . 269EncryptedStringUpdater . . . . . . . . . . . . . . . . . . . . . . . . . . . . . . . . . . . . . . . . . . . . . . . . . 270ExpireDelegations. . . . . . . . . . . . . . . . . . . . . . . . . . . . . . . . . . . . . . . . . . . . . . . . . . . . . . 270FailedApprovalUpdates . . . . . . . . . . . . . . . . . . . . . . . . . . . . . . . . . . . . . . . . . . . . . . . . . 270FailedDurableEvents. . . . . . . . . . . . . . . . . . . . . . . . . . . . . . . . . . . . . . . . . . . . . . . . . . . . 271FailedObjectArchive . . . . . . . . . . . . . . . . . . . . . . . . . . . . . . . . . . . . . . . . . . . . . . . . . . . . 271GeneratingReportingEntries . . . . . . . . . . . . . . . . . . . . . . . . . . . . . . . . . . . . . . . . . . . . . . 272GetPendingAribaNetworkOrganizationSync . . . . . . . . . . . . . . . . . . . . . . . . . . . . . . . . . 272GroupListRepopulate . . . . . . . . . . . . . . . . . . . . . . . . . . . . . . . . . . . . . . . . . . . . . . . . . . . 272JobPersistTaskForAssociatedTranslationsDump . . . . . . . . . . . . . . . . . . . . . . . . . . . . . . 273JobPersistTaskForAssociatedTranslationsLoad . . . . . . . . . . . . . . . . . . . . . . . . . . . . . . . 273LoadAllRules . . . . . . . . . . . . . . . . . . . . . . . . . . . . . . . . . . . . . . . . . . . . . . . . . . . . . . . . . 273LoadAndDeleteBestPracticeMasterDataTask. . . . . . . . . . . . . . . . . . . . . . . . . . . . . . . . . 273LoadAssociatedTranslationsTask . . . . . . . . . . . . . . . . . . . . . . . . . . . . . . . . . . . . . . . . . . 274LoadBestPracticeMasterDataTask . . . . . . . . . . . . . . . . . . . . . . . . . . . . . . . . . . . . . . . . . 274LoadDashboards . . . . . . . . . . . . . . . . . . . . . . . . . . . . . . . . . . . . . . . . . . . . . . . . . . . . . . . 275LoadPortletConfigs . . . . . . . . . . . . . . . . . . . . . . . . . . . . . . . . . . . . . . . . . . . . . . . . . . . . . 275MakeDomainNameVersionExplicit . . . . . . . . . . . . . . . . . . . . . . . . . . . . . . . . . . . . . . . . 275MigrateCommodityCodesToCCCHierarchy. . . . . . . . . . . . . . . . . . . . . . . . . . . . . . . . . . 276MigrateCommodityCodesToUNSPSC . . . . . . . . . . . . . . . . . . . . . . . . . . . . . . . . . . . . . . 276ObjectArchive . . . . . . . . . . . . . . . . . . . . . . . . . . . . . . . . . . . . . . . . . . . . . . . . . . . . . . . . . 277PurgeLocalTempDirTask . . . . . . . . . . . . . . . . . . . . . . . . . . . . . . . . . . . . . . . . . . . . . . . . 278PurgeSharedTempDirTask . . . . . . . . . . . . . . . . . . . . . . . . . . . . . . . . . . . . . . . . . . . . . . . 278ReceiptNotifications . . . . . . . . . . . . . . . . . . . . . . . . . . . . . . . . . . . . . . . . . . . . . . . . . . . . 279RefreshKitsFromCatalog . . . . . . . . . . . . . . . . . . . . . . . . . . . . . . . . . . . . . . . . . . . . . . . . 279ReindexCatalogs . . . . . . . . . . . . . . . . . . . . . . . . . . . . . . . . . . . . . . . . . . . . . . . . . . . . . . . 279ReloadPasswordFile . . . . . . . . . . . . . . . . . . . . . . . . . . . . . . . . . . . . . . . . . . . . . . . . . . . . 279RoleListRepopulate . . . . . . . . . . . . . . . . . . . . . . . . . . . . . . . . . . . . . . . . . . . . . . . . . . . . 280RemoveOutdatedIR. . . . . . . . . . . . . . . . . . . . . . . . . . . . . . . . . . . . . . . . . . . . . . . . . . . . . 280RetryFailedContractSubscriptionTrackers . . . . . . . . . . . . . . . . . . . . . . . . . . . . . . . . . . . 280SourcingDataPull . . . . . . . . . . . . . . . . . . . . . . . . . . . . . . . . . . . . . . . . . . . . . . . . . . . . . . 281
xii Ariba Buyer Configuration Guide
Table of Contents
SupplierLocationCheck . . . . . . . . . . . . . . . . . . . . . . . . . . . . . . . . . . . . . . . . . . . . . . . . . 281UpdateAribaNetworkProfile . . . . . . . . . . . . . . . . . . . . . . . . . . . . . . . . . . . . . . . . . . . . . . 281UpdateContractSubscriptionTrackerStates . . . . . . . . . . . . . . . . . . . . . . . . . . . . . . . . . . . 282UpdateDatabaseStatsTask . . . . . . . . . . . . . . . . . . . . . . . . . . . . . . . . . . . . . . . . . . . . . . . . 282UpdateReactivatedCategoryData . . . . . . . . . . . . . . . . . . . . . . . . . . . . . . . . . . . . . . . . . . 283UpdateSupplierPendingItems . . . . . . . . . . . . . . . . . . . . . . . . . . . . . . . . . . . . . . . . . . . . . 283UserReplaceTask. . . . . . . . . . . . . . . . . . . . . . . . . . . . . . . . . . . . . . . . . . . . . . . . . . . . . . . 284ValidateCatalogUrl . . . . . . . . . . . . . . . . . . . . . . . . . . . . . . . . . . . . . . . . . . . . . . . . . . . . . 284VersionCommodityCodeDomainNameTask. . . . . . . . . . . . . . . . . . . . . . . . . . . . . . . . . . 284
Partitioned Scheduled Tasks . . . . . . . . . . . . . . . . . . . . . . . . . . . . . . . . . . . . . . . . . . . . . . . . . 284ArchiveApprovables . . . . . . . . . . . . . . . . . . . . . . . . . . . . . . . . . . . . . . . . . . . . . . . . . . . . 284CreateReportingSummaryTables . . . . . . . . . . . . . . . . . . . . . . . . . . . . . . . . . . . . . . . . . . 285CXMLProcessUndeliveredPayloads. . . . . . . . . . . . . . . . . . . . . . . . . . . . . . . . . . . . . . . . 286EscalateApprovables. . . . . . . . . . . . . . . . . . . . . . . . . . . . . . . . . . . . . . . . . . . . . . . . . . . . 286ProcessHeldApprovables . . . . . . . . . . . . . . . . . . . . . . . . . . . . . . . . . . . . . . . . . . . . . . . . 288TimeoutApprovables. . . . . . . . . . . . . . . . . . . . . . . . . . . . . . . . . . . . . . . . . . . . . . . . . . . . 288EDMDataExtractTask . . . . . . . . . . . . . . . . . . . . . . . . . . . . . . . . . . . . . . . . . . . . . . . . . . . 289MonitorAnalysisBgWork . . . . . . . . . . . . . . . . . . . . . . . . . . . . . . . . . . . . . . . . . . . . . . . . 289
Index. . . . . . . . . . . . . . . . . . . . . . . . . . . . . . . . . . . . . . . . . . . . . . . . . . . . 291
. . . . . . . . . . . . . . . . . . . . . . . . . . . . . . . . . . . . . . . . . . . . . . . . . . . . . . . . 293
Ariba Buyer Configuration Guide 13
Chapter 1 Introduction
This document describes how to configure features related to managing and maintaining Ariba Buyer.
This chapter serves as an introduction to the configuration process and a roadmap to the rest of the document. It includes the following sections:
• “About the Configuration Process” on page 13
• “How to Use This Document” on page 15
About the Configuration Process
When you install Ariba Buyer, the configuration program prompts for settings such as the names of databases, language and locale settings, and parameters. The configuration program uses the information you supply to create a default configuration with basic configuration settings and parameters. To configure Ariba Buyer is to adjust those initial settings by modifying configuration files and parameters.
This document assumes you have completed the Ariba Buyer installation process. This document describes configuration steps that apply to all features, such as setting up scheduled tasks, locales, user authentication, logging, performance, and security.
Ariba Spend Management Integration Configuration
You can configure Ariba Buyer to integrate with other Ariba Spend Management applications. For integration configuration information, see the Ariba Spend Management Integration Guide.
Data Integration Configuration
Data integration involves setting up your Ariba configuration with your own data, pulled from your own data sources. Ariba uses integration channels to exchange information with data sources. An integration channel is a communications channel that passes data between Ariba applications and an external system. The information sent on the integration channel is called a message.
Ariba Spend Management applications currently support the following integration channels:
Integration Channel Description
Ariba File Channel An integration channel that allows Ariba Buyer applications to exchange data with CSV files.
Ariba cXML Channel An integration channel that allows Ariba Buyer applications to exchange data with Ariba Network (Ariba Network). It is also used to communicate between Ariba Buyer and Ariba Sourcing.
Ariba Web Services Channel An integration channel that allows Ariba Buyer applications to exchange data with third-party enterprise integration products enabled for web services.

About the Configuration Process Chapter 1 Introduction
14 Ariba Buyer Configuration Guide
Different Ariba Spend Management applications use different combinations of channels. For example, a typical Ariba Spend Management application uses the Ariba HTTP Channel to read shared data such as users, addresses, and suppliers from CDS, but then reads additional data from other data sources, with other channels.
You can also use the Ariba File Channel for some integrations, and an enterprise channel, such as the Ariba Web Services Channel or the IBM WebSphere Business Integration Adapter, for others. For example, you might pull most of your user information from a Human Resource Management System (HRMS), but use a CSV file to add additional fields that aren’t available in the HRMS.
For information on integrating Ariba Buyer with specific ERP systems, see the following documents:
• Ariba Buyer PeopleSoft Integration Guide
• Ariba Buyer SAP Integration Guide
• Ariba Buyer Oracle Financials Integration Guide
For complete information on configuring data integration, see the Ariba Spend Management Channels Guide.
Procurement Configuration
Configuring Ariba Buyer for procurement involves setting up the data that your users need to create requisitions. It also involves defining how Ariba Buyer creates and sends orders, and how it handles receipts.
Optionally, you might want also want to set up your configuration for use with purchasing cards, or to integrate with Ariba Network (Ariba Network).
For information on configuring Ariba Buyer for procurement, see the Ariba Buyer Procurement Implementation Guide.
Catalog Configuration
Ariba Buyer displays catalog items in the Ariba Buyer product catalog. This catalog appears on the Add Items screen when users create a requisition. Users can also click the Catalogs link on the Ariba Buyer home page to display the catalog. Users can browse through product categories in the product catalog, or they can find items by using the Search option.
Ariba HTTP Channel An integration channel that allows Ariba Spend Management application to exchange data via the HTTP protocol. A typical use of the HTTP channel is synchronization of common data (CDSa) between Ariba Sourcing and Ariba Buyer.
IBM WebSphere Business Integration Adapter
An enterprise integration channel that Ariba Buyer applications can use to exchange data with databases and ERP systems.
a. Common Data Server (CDS) is a set of platform components that enables a common object model and Application Program interface (API) for core data that is shared across all Ariba Spend Management™ (ASM) applications.
Integration Channel Description
Ariba Buyer Configuration Guide 15
Chapter 1 Introduction How to Use This Document
Catalog configuration involves obtaining supplier products and setting up the Ariba Buyer product catalog so that users can find items quickly and easily. You obtain supplier catalogs from Ariba Network (Ariba Network) or another source and import them into the Ariba Buyer database. You can also allow users to go directly to a supplier’s site to select items using a process called PunchOut.
For information on catalog configuration, see the Ariba Buyer Catalog Administration Guide.
Optional Feature Configuration
When you purchase Ariba Buyer, you can specify one or more of the following optional features:
• Ariba Travel & Expense
• Ariba Invoice
• Ariba Contracts Solution
• Ariba Services Procurement
• eForms
To use these features, you might need to perform additional configuration tasks. For more information, see the following documents:
• Ariba Travel & Expense Guide
• Ariba Invoice Guide
• Ariba Contract Compliance Guide
• Ariba Services Procurement Guide
• Ariba Buyer Customization Guide (eForms chapter)
How to Use This Document
This early chapters of this document describe basic configuration files and configuration steps that are required to get your initial configuration up and running. Later chapters describe configuration for system administration, logging, security and performance.
This section lists the chapters and appendixes in this document, describing the type of information found in each.
Basic Configuration
The following chapters describe basic configuration files:
• Chapter 2, “Configuration Files and Parameters,” specifies where to find configuration files, the syntax rules and format restrictions, and instructions on how to modify the default configuration files.
• Chapter 3, “Scheduled Tasks,” introduces scheduled task configuration files, and describes how you use these files to set the schedule and parameters for scheduled tasks.
• Chapter 4, “Approvable Document Configuration,” describes how to define the set of approvable documents in your configuration and specify the properties of each document type.
• Chapter 5, “Non-English Configurations,” describes how to configure resource files and parameter settings for international configurations.
How to Use This Document Chapter 1 Introduction
16 Ariba Buyer Configuration Guide
Administration and Security
The following chapters describe aspects of configuration related to system administration and security:
• Chapter 6, “Notifications,” describes how to configure notifications. It also explains how to enable the email approval feature and customize the content of notification messages.
• Chapter 7, “Passwords,” describes how to configure Ariba Buyer to authenticate your users, typically by requiring passwords, but possibly by requiring other credentials as well. This chapter describes how Ariba Buyer authenticates users, and the password adapters that are supported in the default configuration.
• Chapter 8, “Security Considerations,” describes how to configure Ariba Buyer for security, including how to use Secure Sockets Layer (SSL) and how to encrypt passwords and other sensitive data.
• Chapter 9, “Logging and Auditing,” describes how to configure the logging and auditing features.
• Chapter 10, “Data Archiving and Purging,” describes tools for reducing your database size by purging old approvable documents that are no longer in use.
• Chapter 11, “Sample Features,” describes where you can find sample customizations and optional features that are not installed as part of the default Ariba Buyer configuration.
• Chapter 12, “Reporting,” describes how to set up the integration events and parameters for reporting.
• Chapter 13, “Remote Authentication,” describes how to set up corporate authentication to let users log in once and move transparently from application to application.
Final Configuration
The final chapters of this document describes performance tuning and optional features. These chapters might not be necessary during initial configuration, but you might want to refer to them later as specific issues arise:
Reference Appendixes
This document contains the following appendixes:
• Appendix A, “Login URL Reference,” provides a reference description of the parameters and settings that you can use in the login URL, to specify which password adapter or locale to use during login.
• Appendix B, “Command Reference,” provides the syntax of the commands reference in this document.
• Appendix C, “Purge DTD Reference,” provides reference information for writing purge configuration files in metadata XML.
• Appendix D, “Meta Parameters DTD Reference,” describes the elements and attributes that can appear in a meta parameter XML file.
• Appendix E, “Configuration File Reference,” lists the files in the config directory under your Ariba installation directory, and describes how to make changes to each file.
• Appendix F, “Email Notification Messages,” describes the email messages that Ariba Buyer sends to users and administrators to inform those users of status changes or problems that must be addressed.
• Appendix G, “Permissions, Roles, and Groups,” provides a list of permissions, roles and groups.
• Appendix H, “Scheduled Task Reference,” describes Ariba scheduled tasks.
Ariba Buyer Configuration Guide 17
Chapter 2 Configuration Files and Parameters
This chapter describes the configuration files and parameters you use to define your Ariba Buyer configuration. It includes the following sections:
• “Configuration File Directories” on page 17
• “File Formats” on page 20
• “Parameters.table File” on page 24
• “AppInfo.xml File” on page 28
• “Message Configuration Files” on page 28
• “Scheduled Task Configuration Files” on page 28
• “Custom Parameters” on page 28
• “Data Formats” on page 29
Configuration File Directories
After you install Ariba Buyer and load the sample data, you have a default configuration. The default configuration consists of a set of configuration files that define data and parameters.
An Ariba Buyer configuration consists of two kinds of configuration files:
To make changes, you modify files in the config directory. You never modify the files in the ariba directory.
config Directory
Within the config directory, Ariba Spend Management applications use a hierarchical structure of subdirectories to indicate which files apply to which pieces of your configuration. The structure under the config directory depends which Ariba Spend Management applications are configured in your installation.
Ariba Buyer originally established the directory structure convention that is now used by all Ariba Spend Management applications. The Ariba Buyer structure is implemented using the concept of variants and partitions. Variants and partitions are used to support pushing transaction data to different ERP systems with different physical data structures.
Type of File Description
System files System files reside under the directory BuyerServerRoot/ariba.
System files define the default Ariba Buyer configuration. You never change system files as part of an implementation.
Extension files Extension files reside under the directory BuyerServerRoot/config.
Extension files are files that you create or modify during implementation.
Configuration File Directories Chapter 2 Configuration Files and Parameters
18 Ariba Buyer Configuration Guide
Each variant typically represents a single physical ERP structure. Variants define the structure and shape of data within Ariba Buyer. For example, if your Ariba Buyer instance integrates with an Oracle Financials system, the shape of the data in Ariba Buyer must match the shape of the data in Oracle Financials.
Partitions divide data into subsets within a variant. They are used to separate data based on its content. For example, if two regions have different sets of cost centers, you would not want to display the eastern cost centers to a user in the western region. Similarly, different regions likely have different users and suppliers as well. Partitions can be used to model content-based data separation.
In Ariba Buyer, some configuration files apply to the entire configuration, and there is exactly one copy of such files in a configuration. Other configuration files apply to only one partition, and you typically have several versions of those files, one for each partition.
When you install Ariba Buyer the installation process creates a hierarchical structure of configuration files, with the files for each variant or partition grouped together in a directory. This approach makes it easy to add additional variants or partitions later without disturbing your initial configuration. In general:
• Files that are shared across your entire configuration reside at the top level, directly in config.
• Files that vary by variant reside in a subdirectory of config/variants.
• Files that vary by partition reside in a subdirectory of config/variants/variant/partitions, where variant is the variant name.
Ariba Buyer applications do not have the requirement of pushing data to different ERP systems with different data structures. However, to leverage the directory structure architecture that is already in place for Ariba Buyer, Ariba Buyer applications are implemented using the same directory structure convention as Ariba Buyer. The difference is that Ariba Buyer configurations only have the following directory structures:
config/variants/Plain
config/variants/Plain/None
Plain Variant
Every configuration includes one standard variant, called Plain.Plain acts as a template for other variants. If you make changes or customizations in the Plain variant, those changes apply throughout your configuration, to all variants. In Ariba Buyer, if you make changes or customizations to any other variant, those changes affect only the variant where you make the changes.
To make a customization that applies across your configuration, make that customization in Plain, and save your files in the following directory:
config/variants/Plain
To make a customization that affects only one piece of your configuration, you make that customization only in the appropriate variant, and save your files in the following directory:
config/variants/variant

Ariba Buyer Configuration Guide 19
Chapter 2 Configuration Files and Parameters Configuration File Directories
None Partition
Every configuration includes a directory called None, which resides in the file system in the following directory:
config/variants/Plain/partitions/None
None is a directory in the file system where you store unpartitioned data (data that is not associated with a partition).
The directory config/variants/Plain/partitions/None must exist in every configuration.
List of Subdirectories
The BuyerServerRoot directory includes the following subdirectories:Appendix E, “Configuration File
Reference,” lists the files in the config directory under your Ariba installation directory, and describes how to make changes to each file.
Directory Description and Purpose
3rdParty Third-party scripting and server management tools.
ariba Default configuration. Do not modify these files.
bin Command-line tools, such as initdb.
classes Compiled Java class files.
channels Integration channel configuration files
config Configuration files that you use to tailor your configuration.
configTemplates Template configuration files for use in creating a configuration. These files are used only by the configuration program.
docroot Web server files.
etc/certs SSL certificates. For more information, see “Security Considerations” on page 99.
internal Internal Ariba files. Do not modify these files.
lib Operating system library files.
logs Log files. For more information, see “Logging and Auditing” on page 125.
punchout Punchout Configuration files.
realm_0 For internal Ariba use only. Do not modify these files.
sample Template files for sample configurations.
searchindex Catalog index files.
servers Node Manager configuration files.
transactiondata Data generated by Ariba transactions such as attachments, excel import files, images, invoices, orders and remittance information.
File Formats Chapter 2 Configuration Files and Parameters
20 Ariba Buyer Configuration Guide
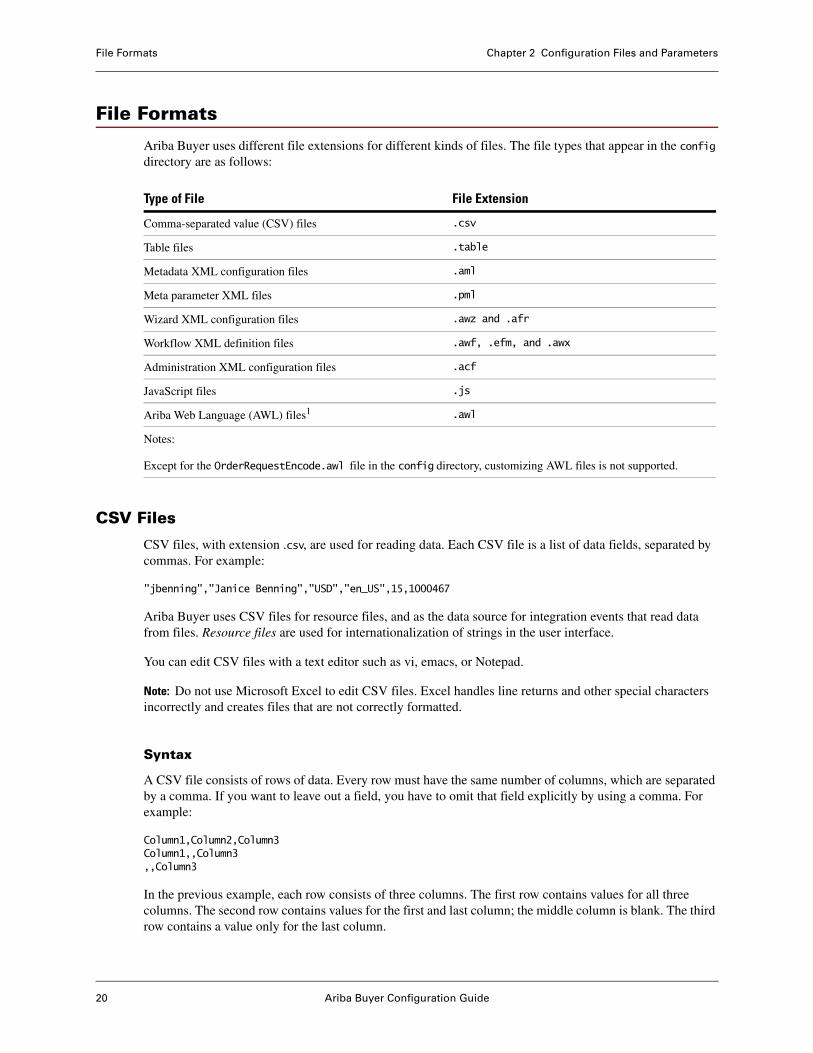
File Formats
Ariba Buyer uses different file extensions for different kinds of files. The file types that appear in the config directory are as follows:
CSV Files
CSV files, with extension .csv, are used for reading data. Each CSV file is a list of data fields, separated by commas. For example:
"jbenning","Janice Benning","USD","en_US",15,1000467
Ariba Buyer uses CSV files for resource files, and as the data source for integration events that read data from files. Resource files are used for internationalization of strings in the user interface.
You can edit CSV files with a text editor such as vi, emacs, or Notepad.
Note: Do not use Microsoft Excel to edit CSV files. Excel handles line returns and other special characters incorrectly and creates files that are not correctly formatted.
Syntax
A CSV file consists of rows of data. Every row must have the same number of columns, which are separated by a comma. If you want to leave out a field, you have to omit that field explicitly by using a comma. For example:
Column1,Column2,Column3Column1,,Column3,,Column3
In the previous example, each row consists of three columns. The first row contains values for all three columns. The second row contains values for the first and last column; the middle column is blank. The third row contains a value only for the last column.
Type of File File Extension
Comma-separated value (CSV) files .csv
Table files .table
Metadata XML configuration files .aml
Meta parameter XML files .pml
Wizard XML configuration files .awz and .afr
Workflow XML definition files .awf, .efm, and .awx
Administration XML configuration files .acf
JavaScript files .js
Ariba Web Language (AWL) files1 .awl
Notes:
Except for the OrderRequestEncode.awl file in the config directory, customizing AWL files is not supported.

Ariba Buyer Configuration Guide 21
Chapter 2 Configuration Files and Parameters File Formats
The commas are required. The lines must observe the following syntax:
• The first data row in a CSV file is a header row, listing the column names. The column names cannot contain period (.) characters. If the column names include spaces, you must surround the names in quotation marks.
• Each new line is a new entry. All white space is significant. Do not include spaces, line returns, or tabs in a CSV file unless they are part of the content of the file.
• Commas are significant. Each comma in a CSV file means “go to the next field.” If you want to include a comma in a field, surround the entire field in quotes. For example, if you wanted to include this name in your phone list:
Norman Adams, Jr.
Surround the whole field in quotation marks, like this:
adams,"Norman Adams, Jr.",(415) 964-3063, ….
A quoted field can span multiple lines in the CSV file, like this:
Field1,"Field 2 which extends overa line",Field3
• Quotes are significant. Each quote means “part of a matched pair surrounding a field.” To include a quote in a field, you have to use an extra quote immediately before it. For example, here is an item description that includes an inch measurement. Notice the four quotation marks:
Field1, "This flashlight is 5"" long",Field3,Field4
• If you want to leave out a field, delimit the field with a comma, with no space before or after it. In some cases, the result is two commas immediately next to each other. For example:
Field1,field2,,field4
• Fields are limited to 1000 characters. Any field with more than 1000 characters is truncated.
Encoding
For multilingual use, the first line of a CSV file can optionally indicate the character encoding of the data in that file. For example, if the first line of a CSV file is:
8859_1,,
• That CSV file uses ISO-8859-1 (ISO Latin 1) character encoding.
The encoding can be any value supported by the Java VM, such as 8859_1, SJIS, EUC_JP, or ISO2022JP. (For more information on character encoding standards, see “Character Encoding Formats” on page 32.)
The encoding specification appears in every CSV file used for string resources and can optionally appear in CSV files used as data sources for integrations. If a CSV file does not include an encoding, the default is to use the default encoding in the system environment where Ariba Buyer is running (that is, UTF-8).

File Formats Chapter 2 Configuration Files and Parameters
22 Ariba Buyer Configuration Guide
Table Files
Table files, with extension .table, are used for setting parameters to specified values. This format is used for a number of configuration files, such as for parameters, integration events, and scheduled tasks. The following are sample lines:
{DefaultBillToAddress = 15;DefaultLanguage = English;
}
You can edit table files with a text editor such as vi, emacs, or Notepad. You can include single-line comments or multi-line comments:
// single-line comment
/* multi-line
comment */
Syntax of Names and Values
Each line in a table file is a pair, consisting of a name and a value. For example:
{Name2 = "value2";Name1 = "value1"
}
The entire list is enclosed in braces {}. The pairs are separated with semicolons; there is no semicolon after the last pair. The entries can appear in any order.
The names are case-sensitive: choose a capitalization for each name and use it consistently. Do not use spaces or periods in names. If you need a separator, use an underscore, as in Address_Oracle. The names must be unique. If you have duplicate names, the second value overrides the first.
The value can be a string, a vector, or a nested table.
• A string. If the string includes any special characters, such as spaces, you must surround it in quotes. Quotes are always acceptable, even if the string has no special characters.
To include quotes, tabs, newlines, form feeds, or slash characters, put the backslash (\) character in front of the character you want to quote, as shown below:
\" (quote)\t (tab)\n (newline)\r (form feed)\\ (backslash)
Strings must consist only of ASCII characters. You cannot include non-ASCII characters in .table files. However, you can construct references to resource files that contain non-ASCII text. For example:
Name = "@ariba.client.admin/EM_RuleEditor";
Ariba Buyer Configuration Guide 23
Chapter 2 Configuration Files and Parameters File Formats
• A vector (or list) of values, surrounded in parentheses ("string1", "string 2", "string3"). The values are separated with commas. Do not add a comma after the last value (before the closing parenthesis). Here is an example that shows one field with a vector value (Name1) and another with a string value (Name2):
{Name1 = ( Value1, Value2, Value3, Value4 );Name2 = "This is a string"
}
• A nested table, surrounded in braces: {}. For example:
NestedTableExample= {SomeKey = {
MyBoolean = true;MyClassName = "ariba.oracle.server.OracleReceiptFormatter";AnotherValue = "Red";
}}
Metadata XML Configuration Files
Ariba Buyer uses metadata XML configuration files, with extension .aml, to describe the data in the Ariba Buyer database. Metadata XML configuration files can define behavior of data, such as the type and size of fields, and can also be used to describe the user interface properties of that data. Metadata XML configuration files provide a layer of abstraction on top of the database, so that you can describe database properties without requiring database expertise.
Metadata XML configuration files are in XML format, and you can edit them either with a structured editor or with a text editor.
For complete information on these files, see the Ariba Spend Management Customization Guide.
Meta Parameter XML Files
Ariba Buyer uses meta parameter XML files, with extension .pml, to describe metadata for parameters.
Meta parameter XML files are in XML format, and you can edit them either with a structured editor or with a text editor.
For complete information on meta parameter XML files, see “Parameter Metadata” on page 25.
Wizard XML Configuration Files
Ariba Buyer uses wizard XML configuration files, with extensions .awz and .afr, to describe the flow and structure of wizards, specifying which frames appear and in what order.
Wizard XML configuration files are in XML format, and you can edit them either with a structured editor or with a text editor.
For more information on these files, see the Ariba Buyer Data Load Guide.
Parameters.table File Chapter 2 Configuration Files and Parameters
24 Ariba Buyer Configuration Guide
Workflow XML Definition Files
Ariba Buyer uses workflow XML definition files, with extensions .awf and .efm, to define the workflow of a document after it has been fully approved. The pre-approval workflow is implemented in Java code, and cannot be customized.
Workflow XML definition files are in XML format, and you can edit them either with a structured editor or with a text editor.
For more information on these files, see the Ariba Buyer Data Load Guide.
Administration XML Configuration Files
Ariba Buyer uses administration XML configuration files, with the extension .acf, to define access control and control the behavior of object managers and workspaces in Ariba Administrator.
Administration XML configuration files are in XML format, and you can edit them either with a structured editor or with a text editor. For more information, see the Ariba Buyer Release Guide for Version 9r1 and the Ariba Buyer Administrator Customization Guide for Version 8.2. (This document is no longer provided in Version 9r1.)
JavaScript Files
JavaScript files, with extension .js, are used for approval rules. To edit approval rules, use the Rule Editor in Ariba Administrator, or the command line tool ruleeditor.
For complete information on approval rules, see the Ariba Spend Management Approval Rules Guide.
Note: You must use the Rule Editor, and not a text editor, to edit approval rules. You must never edit approval rules outside of the Rule Editor.
Parameters.table File
The file Parameters.table is the main configuration file for Ariba Buyer. It consists of a collection of parameters, which are the basic settings for Ariba Buyer. For example, you use parameters to specify:
• The names of your own database computer, accounts, and administrative accounts.
• Your preferred names for configuration files.
This section provides an overview of the Parameters.table file.
File Location
During the installation phase, the configuration tool creates an initial version of the Parameters.table file for your configuration. The Parameters.table file is located in the following directory:
BuyerServerRoot/config/Parameters.table
Note: A second Parameters.table file exists in the ariba directory. Like all other system files in the ariba directory, you never modify it.
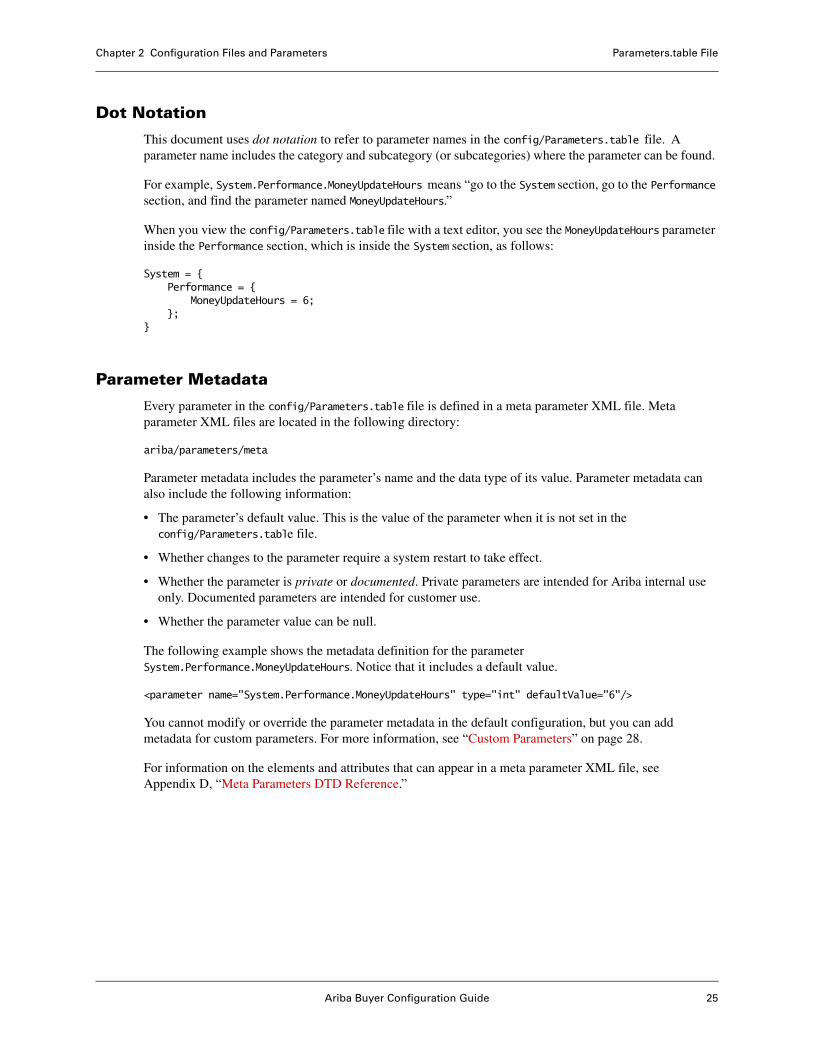
Ariba Buyer Configuration Guide 25
Chapter 2 Configuration Files and Parameters Parameters.table File
Dot Notation
This document uses dot notation to refer to parameter names in the config/Parameters.table file. A parameter name includes the category and subcategory (or subcategories) where the parameter can be found.
For example, System.Performance.MoneyUpdateHours means “go to the System section, go to the Performance section, and find the parameter named MoneyUpdateHours.”
When you view the config/Parameters.table file with a text editor, you see the MoneyUpdateHours parameter inside the Performance section, which is inside the System section, as follows:
System = {Performance = {
MoneyUpdateHours = 6;};
}
Parameter Metadata
Every parameter in the config/Parameters.table file is defined in a meta parameter XML file. Meta parameter XML files are located in the following directory:
ariba/parameters/meta
Parameter metadata includes the parameter’s name and the data type of its value. Parameter metadata can also include the following information:
• The parameter’s default value. This is the value of the parameter when it is not set in the config/Parameters.table file.
• Whether changes to the parameter require a system restart to take effect.
• Whether the parameter is private or documented. Private parameters are intended for Ariba internal use only. Documented parameters are intended for customer use.
• Whether the parameter value can be null.
The following example shows the metadata definition for the parameter System.Performance.MoneyUpdateHours. Notice that it includes a default value.
<parameter name="System.Performance.MoneyUpdateHours" type="int" defaultValue="6"/>
You cannot modify or override the parameter metadata in the default configuration, but you can add metadata for custom parameters. For more information, see “Custom Parameters” on page 28.
For information on the elements and attributes that can appear in a meta parameter XML file, see Appendix D, “Meta Parameters DTD Reference.”
Parameters.table File Chapter 2 Configuration Files and Parameters
26 Ariba Buyer Configuration Guide
Parameter Values in Parameters.table
The Parameters.table file is in table file format and consists of a collection of keys (the parameters) and values (the settings). The following example shows some config/Parameters.table parameters and their associated values:
OrderContractFile = "config/data/contract.txt";DefaultCurrency = USD;DatabaseConnections = 7;
Parameter values are usually strings, as shown in the example, but can also be lists or nested tables.
The value specified for a parameter in the config/Parameters.table file overrides the default value specified for the parameter in the parameter metadata.
Some parameters do not appear in the default config/Parameters.table file (typically private parameters and documented parameters that are not often modified). To modify these parameters, you must manually add them to the config/Parameters.table file.
Case and Special Characters
Whenever you work with parameters, note the following:
• Case. Parameter names are case-sensitive.
• Special characters. To include quotes, tabs, new lines, form feeds, or slash characters, quote those characters with a preceding backslash (\) character. As examples:
\" (quote) \\ (backslash)
Application and System Parameters
Every configuration has just one set of parameters, shared by all partitions in your configuration. Within the config/Parameters.table file, parameters are grouped into two sections:
Within the System and Application sections, parameters are grouped into categories of related parameters. For example, the Authentication category contains parameters related to authentication and the Logging category that contains parameters related to logging.
You can create custom parameter under the System or Application section. For more information, see “Custom Parameters” on page 28.
Section Description
System Contains parameters that apply across your configuration, at the server level.
When you set a value for a parameter in the System section, that value applies in every partition in your configuration. You cannot specify different values for different partitions.
Application Contains parameters that are different for different partitions.
The value you set for a parameter in the Application section initially applies to all partitions, but you can later provide different values for different partitions.
Ariba Buyer Configuration Guide 27
Chapter 2 Configuration Files and Parameters Parameters.table File
Partition-Specific Parameters
To set partition-specific parameters, you use a third category, called Partitions. Parameters in the Partitions section are overrides for parameters in the Application section.
The parameters in the Partitions section always have the same name as parameters in the Application section. The Application section defines a default. The Partitions section defines a value for one specific partition. You add parameters to the Partitions section when you want to define a setting for just one partition.
The Partitions section is optional and contains only parameters that you want to set differently for different partitions. Typically, you have only a few parameters in the Partitions section.
Parameter Security
Some Ariba Buyer configuration files include potentially sensitive information, such as computer names, passwords, or personnel information. By default, all parameter values are in plain text. For information on how to encode parameters, see “Parameter Security” on page 99.
Parameter Reference
Ariba provides an HTML reference system called Parametersdoc for the parameters in the config/Parameters.table file.
To read reference information on Ariba Buyer configuration parameters:
1 Log into Ariba Buyer as an administrator.
2 On the command bar, choose Manage > Core Administration.
3 Choose Help > Guides.
4 Click the Ariba Buyer Parametersdoc link located under Reference Documents.
5 Click the name of a parameter in the left-hand navigation pane to see reference information for that parameter.
You can use the links in the upper left corner of the reference to display All Parameters, or only Application or System parameters.
How to Edit Parameters
The recommended way to edit parameters in the config/Parameters.table file is to use the Parameters task in the Server Manager workspace in Ariba Administrator. The Parameters task displays the parameter settings in the current config/Parameters.table file. It also provides detailed descriptions of each parameter.
In general, after making changes to parameters in the System section of the config/Parameters.table file, you must restart Ariba Buyer to have your changes take effect. (There are a few system parameters that do not require a restart.) Most changes to parameters in the Application section take effect immediately and do not require a system restart.
AppInfo.xml File Chapter 2 Configuration Files and Parameters
28 Ariba Buyer Configuration Guide
You can also make changes to the config/Parameters.table file with a text editor by using the Config Files task in the Server Manager workspace. The Config Files task lets you download the config/Parameters.table file to your local hard drive for editing, and then upload your modified file to the server.
Warning: Do not manually edit the config/Parameters.table file while Ariba Buyer is running. If you do, your modifications are discarded and a warning message is logged to the main log file.
AppInfo.xml File
The AppInfo.xml file is used to integrate all Ariba Spend Management applications. The Ariba Buyer configuration program writes values to this file.
In the default configuration, the AppInfo.xml file is located in the following directory:
UpstreamPlatformInstallRoot/shared/AppInfo.xml
For complete information on the AppInfo.xml file, see the Ariba Spend Management Integration Guide.
Message Configuration Files
Ariba Buyer uses integration events to exchange data with external systems. Each integration event defines the details of one particular data exchange.
Integration event data is processed through an integration channel, which is a communication channel that passes data between Ariba Buyer and an external system. Integration events are defined in message configuration files.
For complete information on integration channels and message configuration files, see the Ariba Spend Management Channels Guide.
Scheduled Task Configuration Files
Scheduled task configuration files contain configuration information for Ariba Buyer scheduled tasks. Scheduled tasks are administrative tasks that run in the background on a regular schedule.
For more information on scheduled task configuration files, see Chapter 3, “Scheduled Tasks.”
Custom Parameters
During the customization phase, you might occasionally add custom Java to your configuration. Ariba Buyer provides API support for custom parameters in the config/Parameters.table file, created and referenced by custom Java code in your configuration.
Ariba Buyer Configuration Guide 29
Chapter 2 Configuration Files and Parameters Data Formats
Adding a Custom Parameter to Parameters.table
You put custom parameters in the Customer section under the System or Application section of the config/Parameters.table file, as appropriate. In the default configuration, there are no parameters in either Customer section.
Defining Metadata for a Custom Parameter
When you add a custom parameter to config/Parameters.table, you must also add metadata for it to a meta parameter XML extension file. Meta parameter XML extension files are located in the following directory:
config/parameters/meta
You can add your custom parameter to an existing meta parameter XML file, or create a new meta parameter XML file for your custom parameters. Except for the .pml extension, there is no convention for meta parameter XML filenames.
Note: You cannot modify or override the parameter metadata in the default configuration.
The following example shows two custom parameter definitions in a meta parameter XML extension file:
<!DOCTYPE metadata SYSTEM "../../../etc/dtds/metaParameters.dtd"><metadata>
<parameter name="System.Customer" type="Map"/><parameter name="System.Customer.SSOHost" type="String"/>
</metadata>
For information on all the elements and attributes that can appear in a meta parameter XML file, see Appendix D, “Meta Parameters DTD Reference.”
Data Formats
This section describes the formats for parsing data such as dates and fax numbers.
Fax Numbers
When you include fax numbers in configuration files, those fax numbers are typically handed directly to fax software or ordering modules, which send the fax message. It’s important that the format of the fax number in your configuration files matches the format expected by the underlying software.
The preferred format for fax numbers is either:
+1 (408) 543-4180
or
+1 408 543-4180
For backward compatibility, in the United States and Canada only, you can specify local numbers without the prefix, as in:
5551212
Data Formats Chapter 2 Configuration Files and Parameters
30 Ariba Buyer Configuration Guide
For backward compatibility, in the United States and Canada only, you can specify international numbers with the prefix 011, like this:
011<country code><area code><number>
Dates
When you enter dates in configuration files, such as config/Parameters.table or a metadata XML file, Ariba Buyer parses those dates as strings and then translates those strings into dates. The valid formats for dates vary by locale. An application can define the valid formats for dates in each locale.
Ariba Buyer uses the key SystemFormats in the resource file resource/en_US/strings/resource.date.csv to parse date strings in configuration files. This key defines a list of the possible date formats for parsing a date string, separated by a comma.
Note: Date strings in CSV files loaded through the Ariba File Channel must be in en_US format.
The following example shows a valid entry in resource.date.csv:
SystemFormats, "MMM-d-yyyy,MMM-d-yy", example of date formats
Since a comma is a separator, this example defines two distinct formats:
MMM-d-yyyyMMM-d-yy
The following table defines the symbols you can use in date formats.
Date Symbols
Key Explanation Data Type Example
G era designator (Text) AD
y year (Number) 1996
M month in year (Text & Number) July
07
d day in month (Number) 10
h hour in am/pm (1~12) (Number) 12
H hour in day (0~23) (Number) 0
m minute in hour (Number) 30
s second in minute (Number) 55
S millisecond (Number) 978
E day in week (Text) Tuesday
D day in year (Number) 189
F day of week in month (Number) 2 (2nd Wed in July)
w week in year (Number) 27
W week in month (Number) 2
Ariba Buyer Configuration Guide 31
Chapter 2 Configuration Files and Parameters Data Formats
The number of characters in each field indicates the degree of padding for that field. So, for example, MMM indicates three-digit month names (Jul, May); MM indicates month numbers padded to 2 digits (11, 04), and M indicates no padding (11, 4).
The rules for padding and number of digits are as follows:
• For text, a pattern of 4 or more pattern letters uses the full form. Less than 4 pattern letters uses the short or abbreviated form if one exists.
• For numbers, the pattern indicates the minimum number of digits. Shorter numbers are padded with zeros to fit that number of digits. For example, DD always pads to 2 digits. Year is handled specially: if the count of y is 2, the year is truncated to 2 digits.
• For a field that can be either a text or a number (such as month), the digit count indicates whether the value uses text or numbers. If the count is 3 or over, use text; otherwise, use a number. So MMM uses text for months and MM uses numbers.
The following table shows examples that use the en_US locale:
For more information on date formats, see the Javadoc for the java.text.SimpleDateFormat class, at:
http://java.sun.com/j2se/1.3/docs/api/java/text/SimpleDateFormat.html
Specifying Currency Codes
Ariba Network validates currency codes in new purchase orders. All currency values must have three-letter ISO 4217 currency codes, such as FRF, GBP, or USD.
a am/pm marker (Text) PM
k hour in day (1~24) (Number) 24
K hour in am/pm (0~11) (Number) 0
z time zone (Text) Pacific Standard Time
' escape for text (Delimiter)
'' single quote (Literal) '
Example Output
"yyyy.MM.dd G 'at' hh:mm:ss z" 2004.07.10 AD at 15:08:56 PDT
"EEE, MMM d, ''yy" Wed, July 10, '04
"h:mm a" 12:08 PM
"hh 'o''clock' a, zzzz" 12 o'clock PM, Pacific Daylight Time
"yyyyy.MMMMM.dd GGG hh:mm aaa" 2004.July.10 AD 12:08 PM
Date Symbols (continued)
Key Explanation Data Type Example
Data Formats Chapter 2 Configuration Files and Parameters
32 Ariba Buyer Configuration Guide
Ariba Network rejects purchase orders that contain invalid codes. Therefore, you need to ensure that Ariba Buyer and any connected ERP systems use ISO 4217 currency codes. For a list of these codes, see http://www.unece.org/etrades/codesindex.htm. In Ariba Buyer, you specify the default currency using the parameter Application.Base.Data.DefaultCurrency.
For test Ariba Buyer accounts, Ariba Network rejects purchase orders that contain invalid or missing currency codes. For production Ariba Buyer accounts, Ariba Network uses the following rules to resolve problems with currency codes:
Ariba Network maps obsolete currency codes to current valid codes as follows:
Character Encoding Formats
In general, Ariba uses terminology from IANA (Internet Assigned Numbers Authority) to name character sets. For a list of the official IANA names for character sets, see:
http://www.iana.org/assignments/character-sets
In a few specific instances, such as the System.Database.<schema>.AribaDBCharset parameter, Ariba uses Java names instead of IANA names. Read the documentation for each parameter to understand the required value.
Currency Code Problem Ariba Network Behavior
Missing currency code Maps to USD
Invalid currency code Rejects purchase order
Obsolete currency code Maps to current valid code
ARP to ARS CDN to CAD
ARA to ARS IRL to IEP
BGL to BGN MXP to MXN
BRE to BRL PLN to PLZ
BRR to BRL RUB to RUR
CAN to CAD
Ariba Buyer Configuration Guide 33
Chapter 3 Scheduled Tasks
This chapter introduces scheduled task configuration files and describes how to use them to set schedules and parameters for scheduled tasks. It includes the following sections:
• “Introduction to Scheduled Tasks” on page 33
• “Scheduled Task Configuration Files” on page 33
• “Scheduled Task Configuration File Format” on page 35
• “Reference List of Properties” on page 41
• “Weekends and Holidays” on page 41
• “Permissions Associated with Scheduled Tasks” on page 42
• “Scheduled Tasks and Database Initialization” on page 42
• “Scheduled Tasks Thread Pool” on page 43
Introduction to Scheduled Tasks
Scheduled tasks are processes that run on a regular basis, in the background. You use scheduled tasks for any administrative or maintenance task that must run on a regular schedule, such as daily, weekly, or monthly.
Scheduled tasks usually run on their designated schedule, in the background. An administrative user can also run a scheduled task manually, by explicitly starting it. You can start a scheduled task on demand:
• From Ariba Administrator using the Scheduled Tasks task in the Server Manager workspace.
• With the servermonitor command. For more information, see Appendix B, “Command Reference.”
Scheduled Task Configuration Files
You configure scheduled tasks by editing a scheduled task configuration file. A scheduled task configuration file is a list of scheduled tasks, together with a schedule for each and the parameters that apply to that task.
All scheduled tasks recognize a shared set of standard parameters. Most scheduled tasks also recognize additional task-specific parameters. For example, the Ariba Buyer default configuration defines a scheduled task to clean out old scheduled task status messages at regular intervals. That scheduled task takes parameters that indicate the number of days to keep messages before deleting them and whether or not to delete not run status messages.
A configuration typically has one scheduled task configuration file for each partition, plus an additional one that applies to all partitions (None partition).
Scheduled tasks themselves are not partitioned, but some scheduled tasks act on partitioned data. For example, a scheduled task that acts on approvable documents might apply only within a given partition, but scheduled tasks that operate on log files, database logs, or reports apply throughout your configuration.
Scheduled Task Configuration Files Chapter 3 Scheduled Tasks
34 Ariba Buyer Configuration Guide
Location of Scheduled Task Configuration Files
The locations of scheduled task configuration files are specified by the config/Parameters.table parameter Application.Base.ScheduledTasksFile.
The following example shows the scheduled task configuration file definition that applies to all partitions:
Partitions = {None = {
Application = {Base = {
ScheduledTasksFile = "variants/Plain/partitions/None/ScheduledTasks.table";};
};};
};
The next example shows a scheduled task configuration definition for a specific partition (in this case, the pcsv partition):
Partitions = { pcsv = {
Application = {Base = {
ScheduledTasksFile = "variants/vcsv/partitions/pcsv/ScheduledTasks.table";};
};};
};
If you decide to move or rename a scheduled task configuration file, you must adjust the entry in config/Parameters.table accordingly.
Changing Scheduled Task Configuration Files
You make changes to scheduled task configuration files by editing the default configuration files in the config directory. You can edit scheduled task configuration files with any text editor.
You can also make changes to scheduled task configuration files by using the Config Files task in the Server Manager workspace. The Config Files task lets you download the file to your local hard drive for editing, and then upload your modified file to the server.
Reloading Scheduled Task Configuration Files
Scheduled task configuration files are reloaded each time you start Ariba Buyer. If there are any errors in the scheduled task configuration file, Ariba Buyer still starts, but the scheduled tasks are not initialized. If there is an error in an individual scheduled task entry, that entry is skipped and the scheduled task is not configured. You must look at the log file, find and correct the error, and reload the scheduled tasks.
You can also reload the scheduled task list from Ariba Administrator, or with the servermonitor -refreshtasks command.
For more information on servermonitor, see Appendix B, “Command Reference.”
Ariba Buyer Configuration Guide 35
Chapter 3 Scheduled Tasks Scheduled Task Configuration File Format
Scheduled Task Configuration File Format
A scheduled task configuration file is in table file format and consists of a list of scheduled task definitions, one for each scheduled task. For example:
AribaNetworkFullSubscriptionSync = {ScheduledTaskClassName = "ariba.catalog.admin.server.SubscriptionFullSyncTask";Schedules = { Schedule1 = { DayOfWeek = Weekday; Hour = 1; } ; };
};
Each entry has a name and a collection of parameters, such as ScheduledTaskClassName.
Scheduled task names must be unique within each partition.
Scheduled Task Properties
Each scheduled task defines at least one required property, ScheduledTaskClassName, which is the name of a Java class file that runs the scheduled task. For example:
ScheduledTaskClassName = "ariba.approvable.server.EscalateApprovables";
Most scheduled tasks also have a Schedules property, which defines when and how often the scheduled task runs. If there is no Schedules property, the scheduled task does not run on a regular basis.
The following example is an entry for a scheduled task that runs an Ariba Analysis report every Monday and Thursday at 9 PM:
Report_104 = {ScheduledTaskClassName = ariba.analytics.core.ScheduledQueryOperation;UniqueReportName = Report_104;Schedules = {
Schedule1 = {DayOfWeek = Monday; Hour = 21 };Schedule2 = {DayOfWeek = Thursday; Hour = 21 };
};};
If a scheduled task is configured to run on a specific logical node but that logical node becomes unavailable before the scheduled task finishes, Ariba Buyer attempts to run the scheduled task on another available logical node.
Similarly, if a scheduled task is configured with the ExecutionNode parameter (for example, ExecutionNode = “Node1:Node2:Node3”), and the first logical node in the list goes down, Ariba Buyer selects the next logical node in the list to run the scheduled task.
If no logical node is not available to run the scheduled task, Ariba Buyer attempts to run the scheduled task again at the next scheduled time.
For more information, see “Logical Node Assignment” on page 37.
Most scheduled tasks take additional properties, which are specific to that scheduled task.
Scheduled Task Configuration File Format Chapter 3 Scheduled Tasks
36 Ariba Buyer Configuration Guide
Syntax of Schedules
The Schedules property defines the time and frequency for running a scheduled task. The Schedules key can use the following keywords:
DayOfWeek = Weekday | Everyday | Monday | Tuesday …DayOfMonth = 0..31;Hour = 0..24;Minute = 0..59;Second = 0..59;
The keys, such as DayOfWeek and Everyday, and the values are case-sensitive.
Every schedule must include either DayOfWeek or DayOfMonth.
After you have specified DayOfWeek or DayOfMonth, you can define the time with Hours, Minutes, and Seconds. The times are optional. If not set, they default to 0. For example, the following schedule runs the scheduled task at midnight every day:
Schedules = {Schedule1 = {DayOfWeek = Monday};
};
The schedule names (Schedule1 in this example) are arbitrary labels. Ariba Buyer determines the schedules for a given scheduled task by enumerating all schedules under the Schedules key, ignoring the label names.
You can schedule the same scheduled task to run at several times by defining multiple schedules. For example:
TaskA = {ScheduledTaskClassName = ariba.package.server.name;Schedules = {
Schedule1 = {DayOfWeek = Monday; Hour = 21};
Schedule2 = {DayOfWeek = Thursday; Hour = 21;
};};
}
You can also schedule a task to run periodically, with the Period parameter. For example:
TaskB = {ScheduledTaskClassName = ariba.procure.server.name;Schedules = {
Schedule1 = {DayOfWeek = Weekday;Hour = 0;Period = {
Unit = Hours; Quantity = 1;};
};}
A periodic scheduled task determines when to run by adding the time specified by the Period parameter to the time it last ran. For example, suppose TaskB in the previous example last ran on Friday at 10:30 AM. TaskB will run next at 11:30 AM., then at 12:30 PM., and so on.
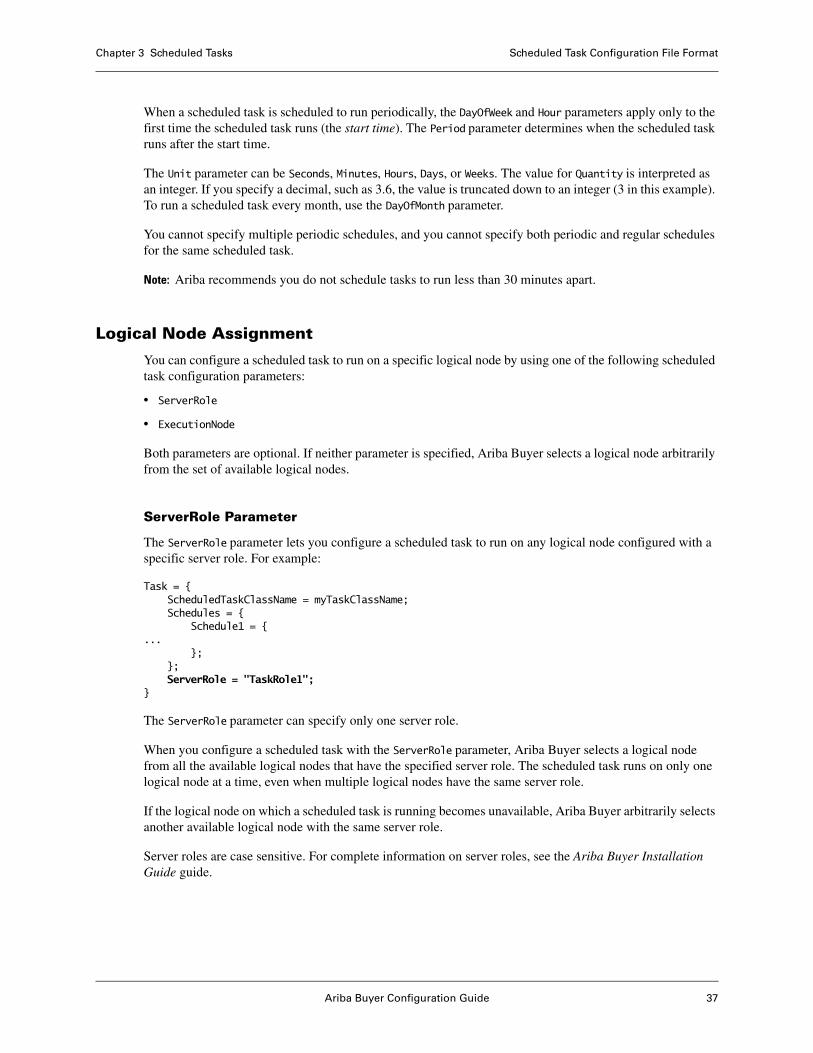
Ariba Buyer Configuration Guide 37
Chapter 3 Scheduled Tasks Scheduled Task Configuration File Format
When a scheduled task is scheduled to run periodically, the DayOfWeek and Hour parameters apply only to the first time the scheduled task runs (the start time). The Period parameter determines when the scheduled task runs after the start time.
The Unit parameter can be Seconds, Minutes, Hours, Days, or Weeks. The value for Quantity is interpreted as an integer. If you specify a decimal, such as 3.6, the value is truncated down to an integer (3 in this example). To run a scheduled task every month, use the DayOfMonth parameter.
You cannot specify multiple periodic schedules, and you cannot specify both periodic and regular schedules for the same scheduled task.
Note: Ariba recommends you do not schedule tasks to run less than 30 minutes apart.
Logical Node Assignment
You can configure a scheduled task to run on a specific logical node by using one of the following scheduled task configuration parameters:
• ServerRole
• ExecutionNode
Both parameters are optional. If neither parameter is specified, Ariba Buyer selects a logical node arbitrarily from the set of available logical nodes.
ServerRole Parameter
The ServerRole parameter lets you configure a scheduled task to run on any logical node configured with a specific server role. For example:
Task = {ScheduledTaskClassName = myTaskClassName;Schedules = {
Schedule1 = {...
};};ServerRole = "TaskRole1";
}
The ServerRole parameter can specify only one server role.
When you configure a scheduled task with the ServerRole parameter, Ariba Buyer selects a logical node from all the available logical nodes that have the specified server role. The scheduled task runs on only one logical node at a time, even when multiple logical nodes have the same server role.
If the logical node on which a scheduled task is running becomes unavailable, Ariba Buyer arbitrarily selects another available logical node with the same server role.
Server roles are case sensitive. For complete information on server roles, see the Ariba Buyer Installation Guide guide.

Scheduled Task Configuration File Format Chapter 3 Scheduled Tasks
38 Ariba Buyer Configuration Guide
Because the ServerRole parameter is supported for both scheduled tasks and integration events, you might want to use a naming convention for server roles that differentiates between the two, for example, TaskRole and EventRole. For information on using the ServerRole parameter for integration events, see the Ariba Spend Management Channels Guide.
ExecutionNode Parameter
The ExectionNode parameter can specify one logical node name, or a colon-separated list of logical node names. For example:
Task = {ScheduledTaskClassName = myTaskClassName;Schedules = {
Schedule1 = {...
};};ExecutionNode = "Node1";
}
When you configure a scheduled task with the ExecutionNode parameter, Ariba Buyer assigns the scheduled task to run on a specific logical node based on the logical node’s name. The scheduled task runs on only one logical node at a time, even when the ExecutionNode parameter specifies multiple logical nodes.
If the logical node on which a scheduled task is running becomes unavailable and only that one logical node is specified in the ExecutionNode parameter, the scheduled task does not run.
If the logical node on which a scheduled task is running becomes unavailable and more than one logical node is specified in the ExecutionNode parameter, Ariba Buyer arbitrarily assigns the scheduled task to another available logical node in the ExecutionNode list. Consider the following example:
ExecutionNode = "Node1:Node2:Node5";
In this example, if the scheduled task is running on Node1 and that logical node fails, Ariba Buyer assigns the scheduled task to run on either Node2 or Node5. If neither Node2 nor Node5 is available, the scheduled task does not run.
Because the ServerRole parameter dynamically selects a logical node on which to run the scheduled task, Ariba recommends using it instead of the ExecutionNode parameter.
Note: The ExecutionNode parameter also takes AllNodes as a value. AllNodes specifies that the scheduled task run on all logical nodes simultaneously. AllNodes is used only for the ArchiveLog scheduled task.
When Logical Node Assignment Changes
Logical node assignment stays in effect until one of the following situations occur:
• The logical node becomes unavailable.
• A new logical node joins the group.
• An administrator reinitializes the configuration file that defines the scheduled task.
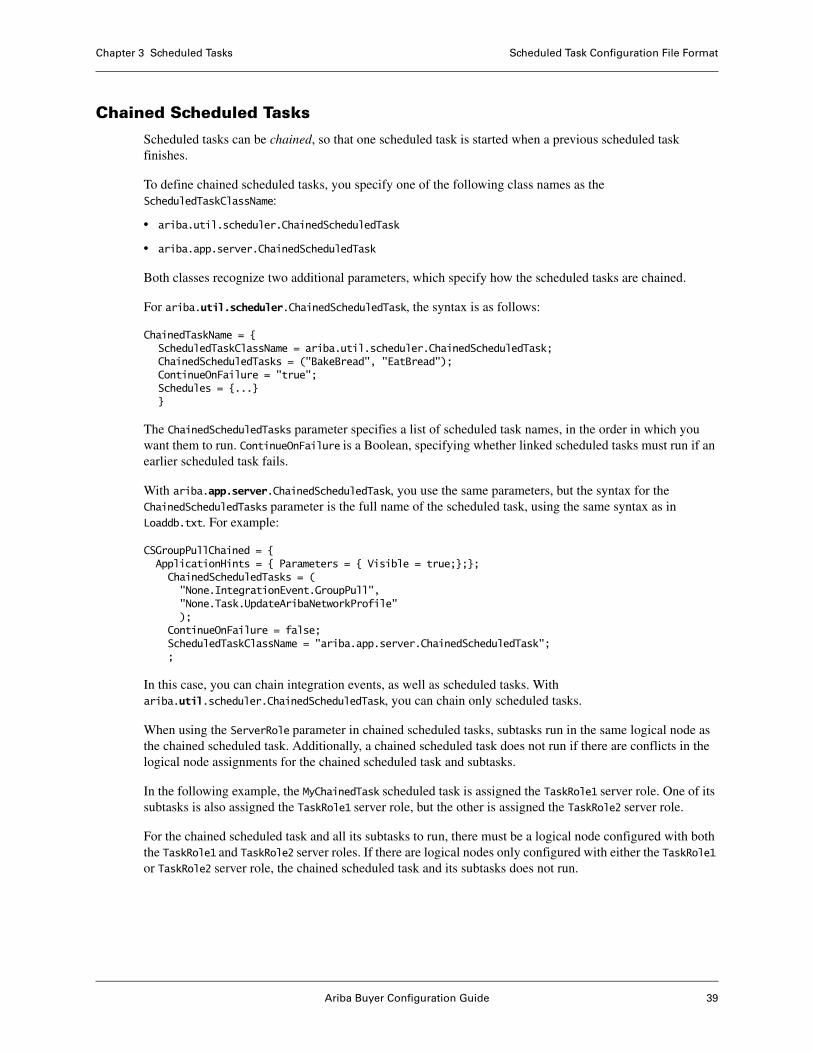
Ariba Buyer Configuration Guide 39
Chapter 3 Scheduled Tasks Scheduled Task Configuration File Format
Chained Scheduled Tasks
Scheduled tasks can be chained, so that one scheduled task is started when a previous scheduled task finishes.
To define chained scheduled tasks, you specify one of the following class names as the ScheduledTaskClassName:
• ariba.util.scheduler.ChainedScheduledTask
• ariba.app.server.ChainedScheduledTask
Both classes recognize two additional parameters, which specify how the scheduled tasks are chained.
For ariba.util.scheduler.ChainedScheduledTask, the syntax is as follows:
ChainedTaskName = {ScheduledTaskClassName = ariba.util.scheduler.ChainedScheduledTask;ChainedScheduledTasks = ("BakeBread", "EatBread");ContinueOnFailure = "true";Schedules = {...}}
The ChainedScheduledTasks parameter specifies a list of scheduled task names, in the order in which you want them to run. ContinueOnFailure is a Boolean, specifying whether linked scheduled tasks must run if an earlier scheduled task fails.
With ariba.app.server.ChainedScheduledTask, you use the same parameters, but the syntax for the ChainedScheduledTasks parameter is the full name of the scheduled task, using the same syntax as in Loaddb.txt. For example:
CSGroupPullChained = {ApplicationHints = { Parameters = { Visible = true;};};ChainedScheduledTasks = ( "None.IntegrationEvent.GroupPull", "None.Task.UpdateAribaNetworkProfile" );
ContinueOnFailure = false; ScheduledTaskClassName = "ariba.app.server.ChainedScheduledTask"; ;
In this case, you can chain integration events, as well as scheduled tasks. With ariba.util.scheduler.ChainedScheduledTask, you can chain only scheduled tasks.
When using the ServerRole parameter in chained scheduled tasks, subtasks run in the same logical node as the chained scheduled task. Additionally, a chained scheduled task does not run if there are conflicts in the logical node assignments for the chained scheduled task and subtasks.
In the following example, the MyChainedTask scheduled task is assigned the TaskRole1 server role. One of its subtasks is also assigned the TaskRole1 server role, but the other is assigned the TaskRole2 server role.
For the chained scheduled task and all its subtasks to run, there must be a logical node configured with both the TaskRole1 and TaskRole2 server roles. If there are logical nodes only configured with either the TaskRole1 or TaskRole2 server role, the chained scheduled task and its subtasks does not run.
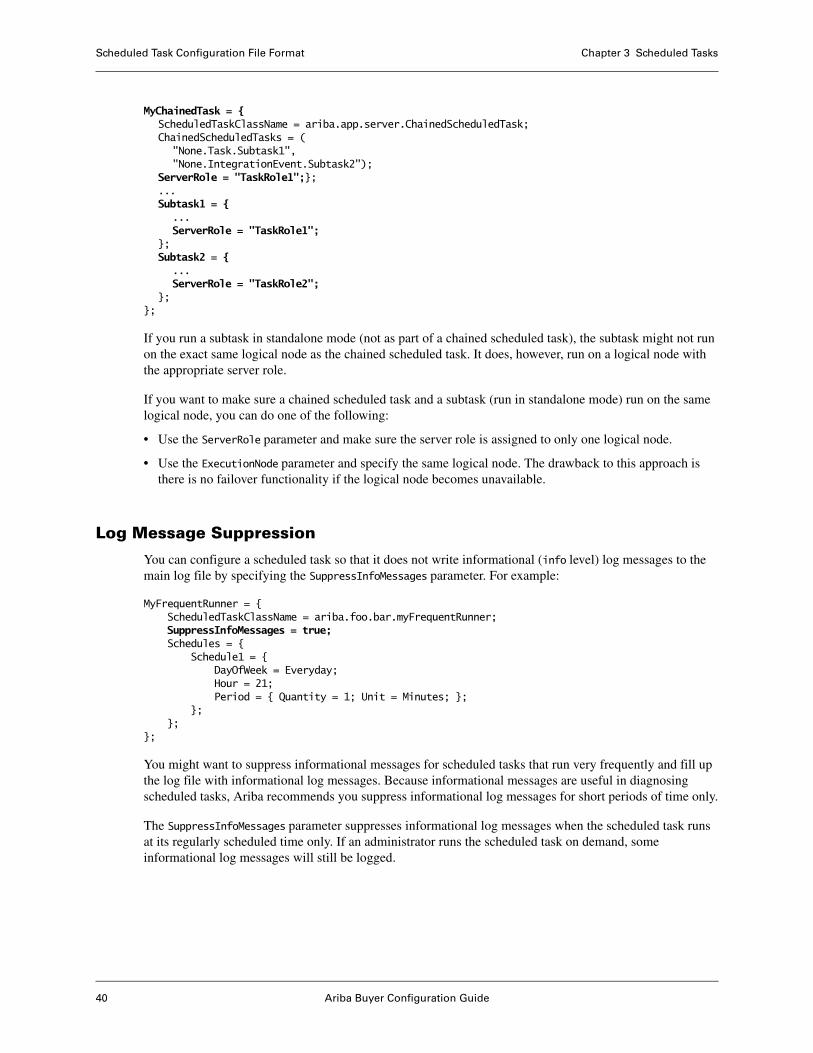
Scheduled Task Configuration File Format Chapter 3 Scheduled Tasks
40 Ariba Buyer Configuration Guide
MyChainedTask = {ScheduledTaskClassName = ariba.app.server.ChainedScheduledTask;ChainedScheduledTasks = (
"None.Task.Subtask1","None.IntegrationEvent.Subtask2");
ServerRole = "TaskRole1";};...Subtask1 = {
...ServerRole = "TaskRole1";
};Subtask2 = {
...ServerRole = "TaskRole2";
};};
If you run a subtask in standalone mode (not as part of a chained scheduled task), the subtask might not run on the exact same logical node as the chained scheduled task. It does, however, run on a logical node with the appropriate server role.
If you want to make sure a chained scheduled task and a subtask (run in standalone mode) run on the same logical node, you can do one of the following:
• Use the ServerRole parameter and make sure the server role is assigned to only one logical node.
• Use the ExecutionNode parameter and specify the same logical node. The drawback to this approach is there is no failover functionality if the logical node becomes unavailable.
Log Message Suppression
You can configure a scheduled task so that it does not write informational (info level) log messages to the main log file by specifying the SuppressInfoMessages parameter. For example:
MyFrequentRunner = {ScheduledTaskClassName = ariba.foo.bar.myFrequentRunner;SuppressInfoMessages = true;Schedules = {
Schedule1 = {DayOfWeek = Everyday;Hour = 21;Period = { Quantity = 1; Unit = Minutes; };
};};
};
You might want to suppress informational messages for scheduled tasks that run very frequently and fill up the log file with informational log messages. Because informational messages are useful in diagnosing scheduled tasks, Ariba recommends you suppress informational log messages for short periods of time only.
The SuppressInfoMessages parameter suppresses informational log messages when the scheduled task runs at its regularly scheduled time only. If an administrator runs the scheduled task on demand, some informational log messages will still be logged.
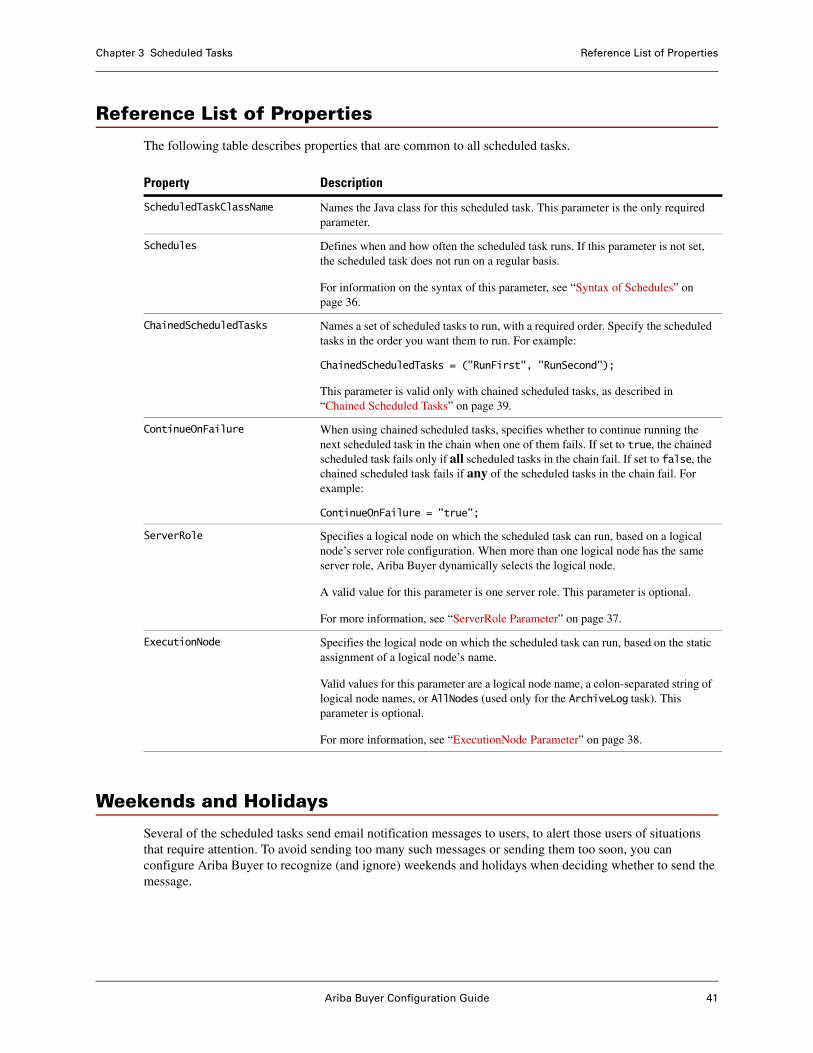
Ariba Buyer Configuration Guide 41
Chapter 3 Scheduled Tasks Reference List of Properties
Reference List of Properties
The following table describes properties that are common to all scheduled tasks.
Weekends and Holidays
Several of the scheduled tasks send email notification messages to users, to alert those users of situations that require attention. To avoid sending too many such messages or sending them too soon, you can configure Ariba Buyer to recognize (and ignore) weekends and holidays when deciding whether to send the message.
Property Description
ScheduledTaskClassName Names the Java class for this scheduled task. This parameter is the only required parameter.
Schedules Defines when and how often the scheduled task runs. If this parameter is not set, the scheduled task does not run on a regular basis.
For information on the syntax of this parameter, see “Syntax of Schedules” on page 36.
ChainedScheduledTasks Names a set of scheduled tasks to run, with a required order. Specify the scheduled tasks in the order you want them to run. For example:
ChainedScheduledTasks = ("RunFirst", "RunSecond");
This parameter is valid only with chained scheduled tasks, as described in “Chained Scheduled Tasks” on page 39.
ContinueOnFailure When using chained scheduled tasks, specifies whether to continue running the next scheduled task in the chain when one of them fails. If set to true, the chained scheduled task fails only if all scheduled tasks in the chain fail. If set to false, the chained scheduled task fails if any of the scheduled tasks in the chain fail. For example:
ContinueOnFailure = "true";
ServerRole Specifies a logical node on which the scheduled task can run, based on a logical node’s server role configuration. When more than one logical node has the same server role, Ariba Buyer dynamically selects the logical node.
A valid value for this parameter is one server role. This parameter is optional.
For more information, see “ServerRole Parameter” on page 37.
ExecutionNode Specifies the logical node on which the scheduled task can run, based on the static assignment of a logical node’s name.
Valid values for this parameter are a logical node name, a colon-separated string of logical node names, or AllNodes (used only for the ArchiveLog task). This parameter is optional.
For more information, see “ExecutionNode Parameter” on page 38.
Permissions Associated with Scheduled Tasks Chapter 3 Scheduled Tasks
42 Ariba Buyer Configuration Guide
You define your company’s holidays in the config/Parameters.table file, with the following parameters:
• Application.Base.SkipWeekendsAndHolidays is a Boolean that specifies whether scheduled tasks skip weekends and holidays when counting days.
• Application.Base.CompanyHolidays specifies the actual dates to skip. This parameter is used only when SkipWeekendsAndHolidays is true.
You specify the holidays as a string of dates, separated by colons. For example:
CompanyHolidays = "Jul-4-2004:Dec-25-2004:Jan-1-2004";
Permissions Associated with Scheduled Tasks
Many of the scheduled tasks send email notification messages to administrative users. For example, there is a scheduled task that checks for pending new catalog data and loads it into your configuration. In the event that the catalog load fails for some reason, Ariba Buyer sends a notification message alerting an administrator to the problem.
Ariba Buyer uses permissions to determine which users receive the email notification messages from scheduled tasks. For example, the catalog load scheduled task sends its notification message to users who have the permission CatalogImportFailedEmail.
As you set up your configuration, you can choose the set of administrative personnel who receives such notification messages, and set up the permissions accordingly.
Scheduled Tasks and Database Initialization
For a few of the scheduled tasks, it is appropriate to run the scheduled task during database initialization, as part of your initial configuration, rather than running it on a regular basis. An example of such a scheduled task is InitIndexLoad, which lets you import catalog files during database initialization.
To include scheduled tasks as part of the database initialization process, you add them to the configuration file LoadDB.txt. The LoadDB.txt file lists each integration event or scheduled task in the order in which you want them to run.
For example, if your configuration has one partition, called partition1, the LoadDB.txt file would include entries similar to the following—some for unpartitioned data and some for partition1:
None.IntegrationEventIntegrationEvent.LanguagePullNone.IntegrationEvent.LanguageLanguagePullNone.IntegrationEvent.CurrencyGroupPullNone.IntegrationEvent.CurrencyPull,,,partition1.ScheduledTask.SomeTaskNamepartition1.IntegrationEvent.CurrencyConversionRatePullpartition1.IntegrationEvent.PermissionPull
Ariba Buyer Configuration Guide 43
Chapter 3 Scheduled Tasks Scheduled Tasks Thread Pool
Scheduled Tasks Thread Pool
When a scheduled task runs depends on whether a thread is available for the task in the scheduled tasks thread pool. Therefore, the actual time a scheduled task runs might not be exactly the same time as the time specified in the scheduled tasks configuration file.
The scheduled tasks thread pool consists of a set of threads and a queue. The pool size is defined by two numbers: the minimum number of threads, and the maximum number of threads.
If all the threads are already busy when a scheduled task is scheduled to run, the scheduled task is queued. If the queue is full, the scheduled task is rescheduled to run at the next time it is scheduled.
You can configure the minimum number of threads, the maximum number threads, and the size of the queue when no more threads are available by modifying the following config/Parameters.table file parameters:
• System.ThreadPools.Scheduler.Min
• System.ThreadPools.Scheduler.Max
• System.ThreadPools.Scheduler.QueueSize
Scheduled Tasks Thread Pool Chapter 3 Scheduled Tasks
44 Ariba Buyer Configuration Guide
Ariba Buyer Configuration Guide 45
Chapter 4 Approvable Document Configuration
An approvable document in Ariba Buyer is a request that needs to be approved. Ariba Buyer represents your business objects with different approvable documents, and uses those approvable documents to track the approval process.
This chapter describes how to configure approvable documents in your configuration. It includes the following sections:
• “Introduction to Approvable Documents” on page 45
• “ApprovableTypePull Integration Event” on page 46
• “Approval Flow” on page 50
• “Navigation Panel Configuration” on page 54
• “Approvable Document Deletion” on page 54
Introduction to Approvable Documents
The business features of Ariba Buyer model business processes using a standard set of approvable documents, such as purchase requisitions and user profile change requests. The specific set of document types that are available depends on the features that you have installed. For example, if you have installed Ariba Travel & Expense, your configuration also includes approvable documents for tracking expense reports and travel authorizations.
The default configuration defines a standard set of approvable document types, using the ApprovableTypePull integration event. This event both defines the approvable document types for the features you have installed and sets properties for each document type. Those properties control behavior, such as the following:
• How approvable documents are numbered and named
• Which users have permission to create approvable documents, run queries to find them, or edit the approval flow
• Which information is included in notification messages
By adjusting the data source for the integration event, you can modify the properties of existing approvable document types.
Ariba Buyer also provides administrative tasks, such as scheduled tasks and notification messages, that administrators can use to manage and monitor approvable document status.
This chapter introduces approvable documents and describes how to configure and administer the document types in your configuration.

ApprovableTypePull Integration Event Chapter 4 Approvable Document Configuration
46 Ariba Buyer Configuration Guide
ApprovableTypePull Integration Event
The ApprovableTypePull integration event defines the set of approvable documents in a configuration. This integration event lists a set of document types and the properties of each such document.
The ApprovableTypePull integration event specifies properties of approvable documents, including:
• Who can create documents of that type
• How the documents are numbered
• What users have permissions to run queries to locate such documents
• What information is included in notification messages about approvables of that type
• Which users can make changes to an approvable document after it has been submitted for approval
For example, in the default configuration, users are allowed to create purchase requisitions, but are not allowed to create new purchase orders directly from the user interface. Similarly, in the default configuration, notification messages about requisitions show just a summary of the requisition, and not the full history or set of comments.
The ApprovableTypePull integration event loads partitioned data. Ariba Buyer supplies one implementation of this integration event, which reads from the following file:
config/variants/variant/partitions/partition/data/ApprovableType.csv
Every configuration uses this implementation.
The following table lists the fields in the ApprovableType.csv file.
Field Description
ApprovableClassName The Java class name for this approvable, which must be a subclass of ariba.approvable.core.Approvable.
Restricted A Boolean, to indicate if there are restrictions on who can create document of this type. If set to false, anyone can create documents of this type. If set to true, Ariba Buyer checks the Permission field to decide which users have create permission.
Permission The name of a permission, which applies only if the Restricted column is true. Only users who have this permission are able to choose this approvable document type from the Create menu. For more information, see “Create Permission” on page 48.
QueryRestricted A Boolean to indicate whether there are restrictions on queries for documents of this type. If set to false, there are no query restrictions. If set to true, Ariba Buyer checks the QueryPermission field to decide which users see this type as an option.
QueryPermission The name of a permission, specifying who can define searches on documents of this type. When a user chooses Create Search from the Ariba Buyer home page, Ariba Buyer checks this permission to determine which approvable document types to list in the menu. For more information, see “Query Permission” on page 48.
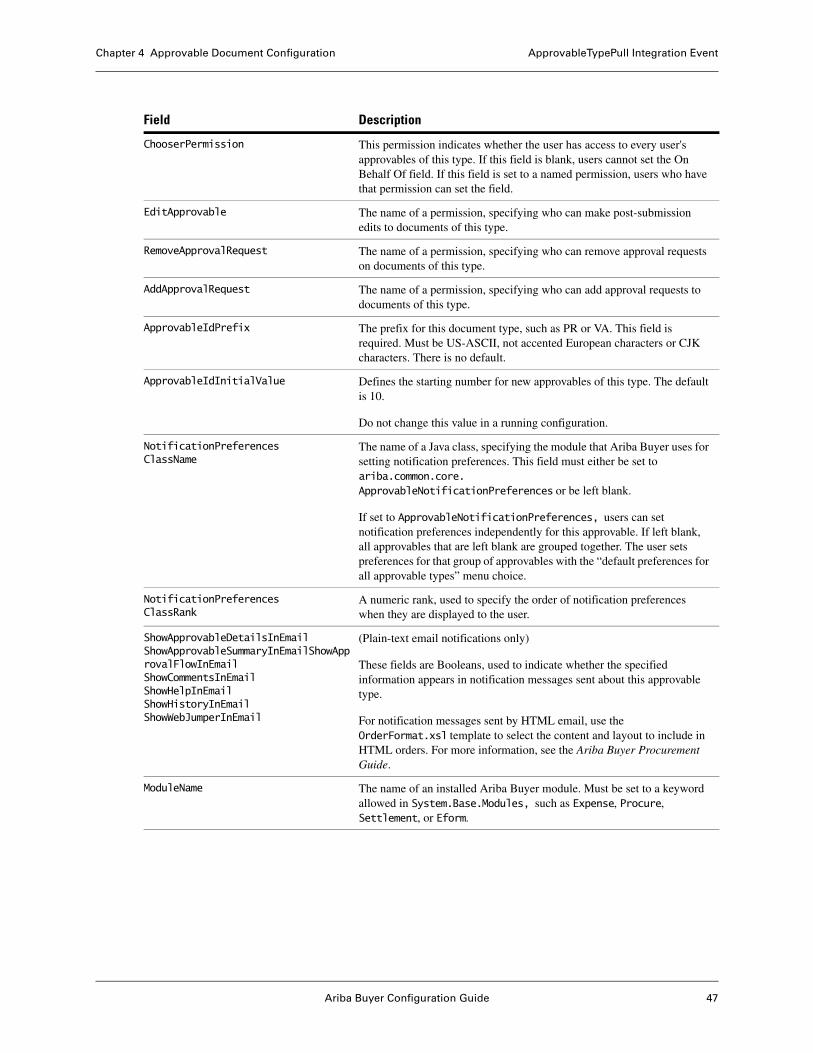
Ariba Buyer Configuration Guide 47
Chapter 4 Approvable Document Configuration ApprovableTypePull Integration Event
ChooserPermission This permission indicates whether the user has access to every user's approvables of this type. If this field is blank, users cannot set the On Behalf Of field. If this field is set to a named permission, users who have that permission can set the field.
EditApprovable The name of a permission, specifying who can make post-submission edits to documents of this type.
RemoveApprovalRequest The name of a permission, specifying who can remove approval requests on documents of this type.
AddApprovalRequest The name of a permission, specifying who can add approval requests to documents of this type.
ApprovableIdPrefix The prefix for this document type, such as PR or VA. This field is required. Must be US-ASCII, not accented European characters or CJK characters. There is no default.
ApprovableIdInitialValue Defines the starting number for new approvables of this type. The default is 10.
Do not change this value in a running configuration.
NotificationPreferencesClassName
The name of a Java class, specifying the module that Ariba Buyer uses for setting notification preferences. This field must either be set to ariba.common.core.ApprovableNotificationPreferences or be left blank.
If set to ApprovableNotificationPreferences, users can set notification preferences independently for this approvable. If left blank, all approvables that are left blank are grouped together. The user sets preferences for that group of approvables with the “default preferences for all approvable types” menu choice.
NotificationPreferencesClassRank
A numeric rank, used to specify the order of notification preferences when they are displayed to the user.
ShowApprovableDetailsInEmailShowApprovableSummaryInEmailShowApprovalFlowInEmailShowCommentsInEmailShowHelpInEmailShowHistoryInEmailShowWebJumperInEmail
(Plain-text email notifications only)
These fields are Booleans, used to indicate whether the specified information appears in notification messages sent about this approvable type.
For notification messages sent by HTML email, use the OrderFormat.xsl template to select the content and layout to include in HTML orders. For more information, see the Ariba Buyer Procurement Guide.
ModuleName The name of an installed Ariba Buyer module. Must be set to a keyword allowed in System.Base.Modules, such as Expense, Procure, Settlement, or Eform.
Field Description
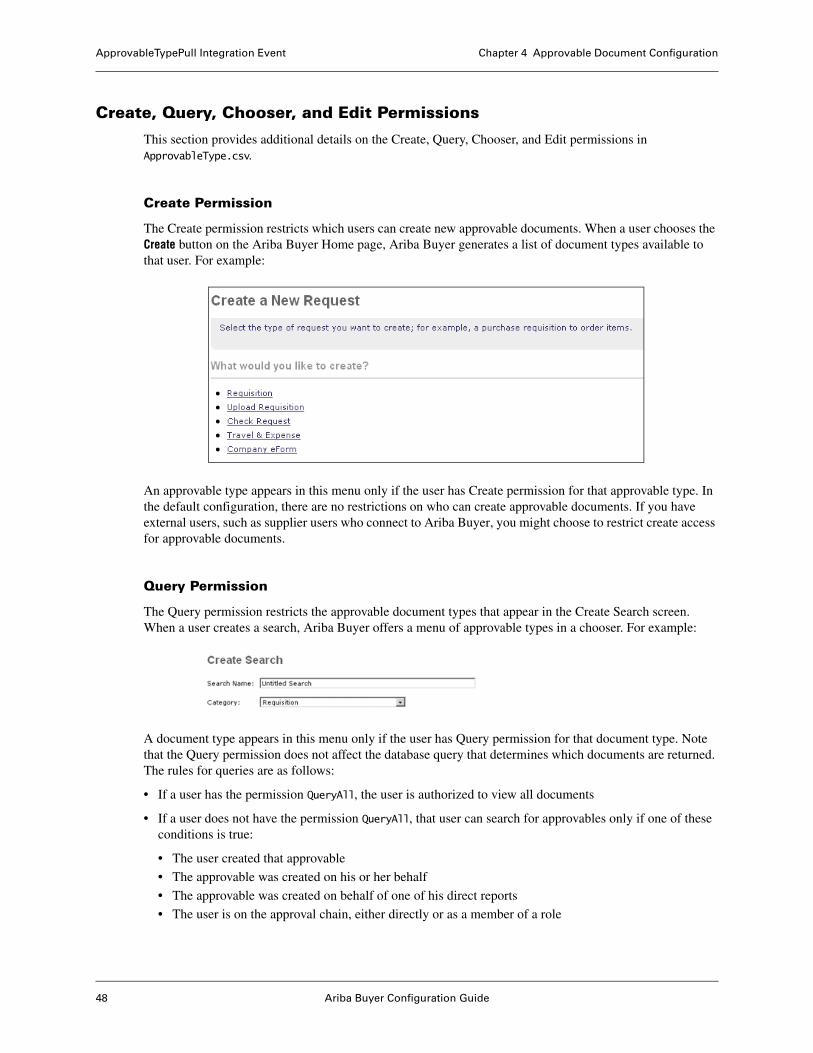
ApprovableTypePull Integration Event Chapter 4 Approvable Document Configuration
48 Ariba Buyer Configuration Guide
Create, Query, Chooser, and Edit Permissions
This section provides additional details on the Create, Query, Chooser, and Edit permissions in ApprovableType.csv.
Create Permission
The Create permission restricts which users can create new approvable documents. When a user chooses the Create button on the Ariba Buyer Home page, Ariba Buyer generates a list of document types available to that user. For example:
An approvable type appears in this menu only if the user has Create permission for that approvable type. In the default configuration, there are no restrictions on who can create approvable documents. If you have external users, such as supplier users who connect to Ariba Buyer, you might choose to restrict create access for approvable documents.
Query Permission
The Query permission restricts the approvable document types that appear in the Create Search screen. When a user creates a search, Ariba Buyer offers a menu of approvable types in a chooser. For example:
A document type appears in this menu only if the user has Query permission for that document type. Note that the Query permission does not affect the database query that determines which documents are returned. The rules for queries are as follows:
• If a user has the permission QueryAll, the user is authorized to view all documents
• If a user does not have the permission QueryAll, that user can search for approvables only if one of these conditions is true:
• The user created that approvable
• The approvable was created on his or her behalf
• The approvable was created on behalf of one of his direct reports
• The user is on the approval chain, either directly or as a member of a role
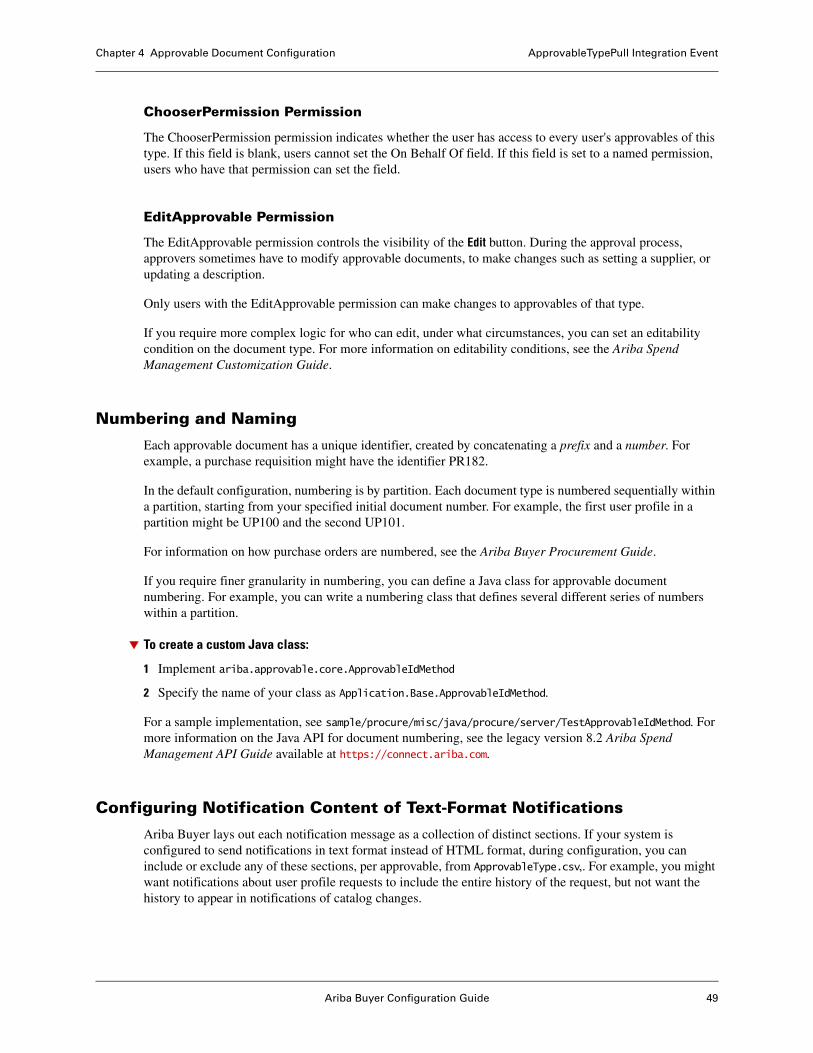
Ariba Buyer Configuration Guide 49
Chapter 4 Approvable Document Configuration ApprovableTypePull Integration Event
ChooserPermission Permission
The ChooserPermission permission indicates whether the user has access to every user's approvables of this type. If this field is blank, users cannot set the On Behalf Of field. If this field is set to a named permission, users who have that permission can set the field.
EditApprovable Permission
The EditApprovable permission controls the visibility of the Edit button. During the approval process, approvers sometimes have to modify approvable documents, to make changes such as setting a supplier, or updating a description.
Only users with the EditApprovable permission can make changes to approvables of that type.
If you require more complex logic for who can edit, under what circumstances, you can set an editability condition on the document type. For more information on editability conditions, see the Ariba Spend Management Customization Guide.
Numbering and Naming
Each approvable document has a unique identifier, created by concatenating a prefix and a number. For example, a purchase requisition might have the identifier PR182.
In the default configuration, numbering is by partition. Each document type is numbered sequentially within a partition, starting from your specified initial document number. For example, the first user profile in a partition might be UP100 and the second UP101.
For information on how purchase orders are numbered, see the Ariba Buyer Procurement Guide.
If you require finer granularity in numbering, you can define a Java class for approvable document numbering. For example, you can write a numbering class that defines several different series of numbers within a partition.
To create a custom Java class:
1 Implement ariba.approvable.core.ApprovableIdMethod
2 Specify the name of your class as Application.Base.ApprovableIdMethod.
For a sample implementation, see sample/procure/misc/java/procure/server/TestApprovableIdMethod. For more information on the Java API for document numbering, see the legacy version 8.2 Ariba Spend Management API Guide available at https://connect.ariba.com.
Configuring Notification Content of Text-Format Notifications
Ariba Buyer lays out each notification message as a collection of distinct sections. If your system is configured to send notifications in text format instead of HTML format, during configuration, you can include or exclude any of these sections, per approvable, from ApprovableType.csv,. For example, you might want notifications about user profile requests to include the entire history of the request, but not want the history to appear in notifications of catalog changes.
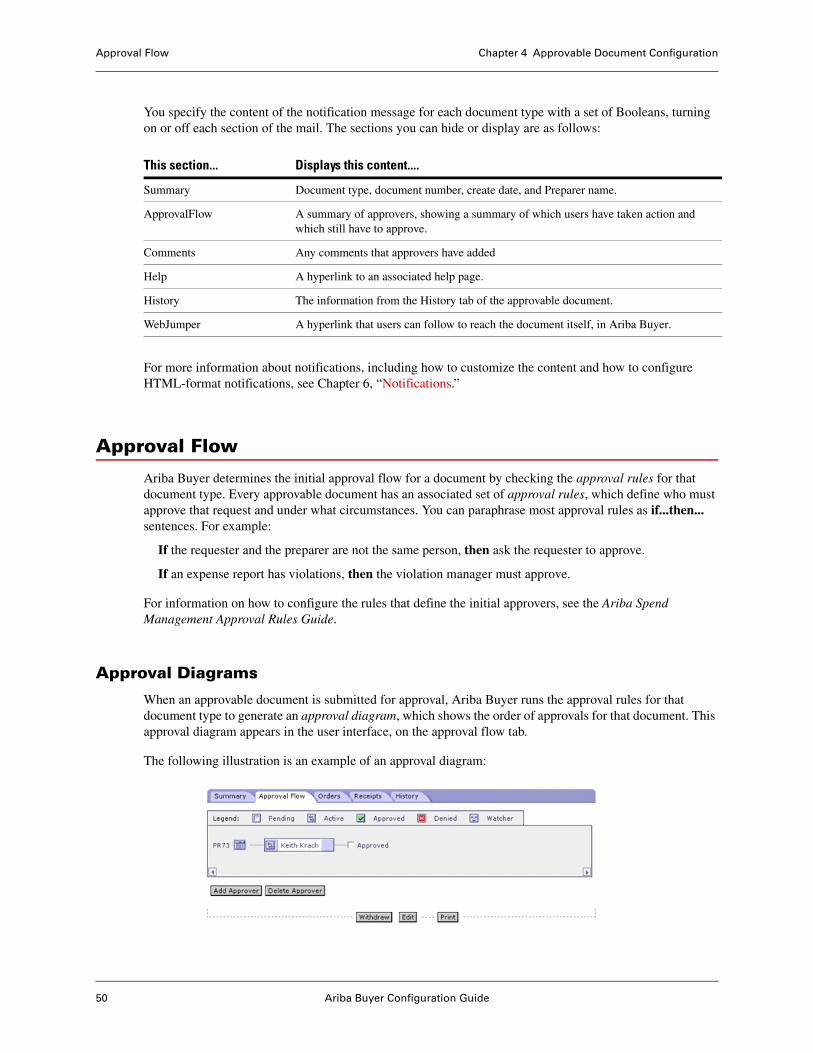
Approval Flow Chapter 4 Approvable Document Configuration
50 Ariba Buyer Configuration Guide
You specify the content of the notification message for each document type with a set of Booleans, turning on or off each section of the mail. The sections you can hide or display are as follows:
For more information about notifications, including how to customize the content and how to configure HTML-format notifications, see Chapter 6, “Notifications.”
Approval Flow
Ariba Buyer determines the initial approval flow for a document by checking the approval rules for that document type. Every approvable document has an associated set of approval rules, which define who must approve that request and under what circumstances. You can paraphrase most approval rules as if...then... sentences. For example:
If the requester and the preparer are not the same person, then ask the requester to approve.
If an expense report has violations, then the violation manager must approve.
For information on how to configure the rules that define the initial approvers, see the Ariba Spend Management Approval Rules Guide.
Approval Diagrams
When an approvable document is submitted for approval, Ariba Buyer runs the approval rules for that document type to generate an approval diagram, which shows the order of approvals for that document. This approval diagram appears in the user interface, on the approval flow tab.
The following illustration is an example of an approval diagram:
This section... Displays this content....
Summary Document type, document number, create date, and Preparer name.
ApprovalFlow A summary of approvers, showing a summary of which users have taken action and which still have to approve.
Comments Any comments that approvers have added
Help A hyperlink to an associated help page.
History The information from the History tab of the approvable document.
WebJumper A hyperlink that users can follow to reach the document itself, in Ariba Buyer.

Ariba Buyer Configuration Guide 51
Chapter 4 Approvable Document Configuration Approval Flow
Approval Flow Changes
After a document is submitted for approval, the approval flow can be changed in any of the following ways:
• Authorized users can add or remove other approvers from the approval flow.
• A user can delegate approval authority to another user, or an administrator can delegate approval authority of one user to another user, for a specified period of time.
• An approval request can be escalated to a user’s supervisor if the initial user has not taken action within a designated period of time.
• An approval request can time out, if it has remained in the system for a designated period of time without being fully approved.
This section describes how users, administrators, and scheduled tasks can modify the initial approval flow of an approvable document.
Adding or Removing Approvers
Authorized users can modify the approval flow of an approvable document dynamically, from the Approval Flow screen. For any document, the following users can make changes:
• The preparer of an approvable document can add approvers, before submitting the document.
From Ariba Buyer 9r1 SP16 and later releases, manually added approvers before submitting the document are retained when the approvable is changed or cancelled.
• Any user who is on the default approval flow can add new approvers, during the approval process.
The newly added approvers are not retained when the approvable is changed or cancelled.
To allow other authorized users to add approvers, assign to those users the AddApprovalRequest permission for the document type. To allow authorized users to remove approvers, assign to those users the RemoveAnyApprovalRequest permission for the document type.
Important: The RemoveAnyApprovalRequest permission can potentially be a security hole, because it lets a user remove the entire approval flow for an approvable document. In a typical configuration, you assign this permission to a very small set of administrative users.
Adding Approvers After an Approvable Document is Submitted
After an approvable document is submitted, manually added approvers are not retained when the approval diagram is regenerated. Whenever an approvable document is changed, its approval diagram is regenerated.
Because manually added approvers are not automatically retained in a regenerated approval diagrams, you must write a custom trigger action implementation that reinserts the approvers back into the appropriate places in the approval diagram.
You specify your custom trigger action implementation to the ApprovalGraphGenerated trigger. The ApprovalGraphGenerated trigger takes effect whenever the approval diagram is regenerated.
For more information on triggers, see the Ariba Spend Management Customization Guide. For information on writing custom Java code, see the legacy version 8.2 Ariba Spend Management API Guide available at https://connect.ariba.com.
Approval Flow Chapter 4 Approvable Document Configuration
52 Ariba Buyer Configuration Guide
Adding Approvers in the Composing State
For approvable documents that are in the Composing state, users can add approvers only at the start of, or in parallel to, the approval flow.
Important: Do not change the setting of the parameter System.Base.AllowAddApprovalRequestAnywhereInComposingState unless you are using Ariba Sourcing or Ariba Contract Management in addition to Ariba Buyer. If you are using only Ariba Buyer, the parameter must be set to the default value, false. Otherwise, approval flows might be cleared for approvable documents that are resubmitted.
Delegating Approval Authority
Delegation of approval authority allows users and administrators to temporarily assign, or delegate, approval authority from one user to another for a specified period of time.
A user can delegate his own approval authority to another user. For example, if a manager is leaving town for a vacation, he might choose to delegate approval authority during the scheduled vacation time. Any Ariba Buyer user can delegate his own approval authority to another user from the Preferences screen. A delegation of authority is a user profile change, and must be approved according to your corporation’s business rules for user profile changes.
Ariba Buyer uses the ExpireDelegations scheduled task to enable and disable delegations of approval authority. This task determines when to remove delegations that have expired, or to activate those that are scheduled to go into effect. Typically you run this task once a day, to pick up any delegation changes scheduled for that day.
An administrative user with the DelegateApprovalAuthority permission can delegate authority for another user. For example, if a manager leaves the office unexpectedly, an administrator can delegate that manager’s authority to another user. When an administrator delegates approval authority, the change takes effect immediately. Delegations that are created by administrators are tracked by the ThirdPartyDelegation class.
In Ariba Administrator, administrators with the DelegateApprovalAuthority permission have access to these tasks in the User Manager workspace:
• Create Delegation: Used to create delegations.
• List Delegation: Used to view and undo current delegations.
Scoped Delegations in Suite Integrated Systems
Starting in Service Pack 15, in suite integrated systems, you can enable users to assign separate delegatees for procurement and strategic sourcing workflows. If you set the parameter System.Base.EnableScopedDelegation to true, users who are are authorized to work with both procurement and strategic sourcing will be able to create delegations based on scope. Customers upgrading to SP15 must manually add the parameter to Parameters.table in order to use this feature.
Ariba Buyer Configuration Guide 53
Chapter 4 Approvable Document Configuration Approval Flow
Understanding Escalation and Timeout
Ariba Buyer uses scheduled tasks to handle approvable document escalation and timeout. The scheduled tasks related to approvable document handling are as follows:
For complete information on these scheduled tasks, and the associated notification messages and permission, see the Ariba Buyer Configuration Guide.
Cross-Partition Approvals
If your configuration includes multiple partitions, approvers can take action on approvable documents from all partitions, regardless of the partition in which they are currently logged in. The exception to this is invoice reconciliations, which cannot be approved cross-partition. Invoice reconciliations are accessible only from the partition in which they are created.
Note: When a user logs in to a partition, the approval rules are evaluated relative to that partition. An approval rule might be valid in some partitions, but not in partitions such as Supplier Direct, which have a more limited set of fields and objects available. For this reason, users typically avoid doing approvals in Supplier Direct.
Performance Considerations for Status Folder
By default, all approvable documents appear in the Status folder for the preparer. In the case of purchase orders, which are created by the system, the preparer is set to the user named as Application.Base.Data.AribaSystemUser (usually aribasystem). Because this user is not typically someone who logs in regularly, the Status folder can become a performance bottleneck in configurations with a large number of generated orders.
If this becomes an issue in your configuration, you can change the setting of the System.Procure.AribaNetwork.AddPurchaseOrderToOutBoxOnCreate parameter in config/Parameters.table.
Scheduled Task Description
EscalateApprovables Looks for requests waiting to be approved and escalates those requests up to the approver’s immediate supervisor. Before performing the escalation, it sends Notification 17 (Notification of Approaching Escalation) to the original approver.
Requests are not escalated if the approver has the NoEscalation permission, or if the approver is a role or group. Requests are escalated only to specific users.
EscalateTravelAuthorizations
Looks for travel authorizations that have not been approved and are approaching the expiration of the travel authorization order quote (reservations made with the travel booking provider) and escalates those requests to the approver’s immediate supervisor. Before performing the escalation, a notification message warning of the upcoming escalation is sent to the original approver.
Requests are not escalated if the approver has the NoEscalation permission, or if the approver is a role or group. Requests are escalated only to specific users.
TimeoutApprovables Withdraws requests that have been in Ariba Buyer a specified period of time without being approved. Before doing the timeout, it sends Notification 11 (Notification of Approaching Withdrawal) to the requester and all required approvers, indicating that the request is about to be withdrawn.
Navigation Panel Configuration Chapter 4 Approvable Document Configuration
54 Ariba Buyer Configuration Guide
If this parameter is set to true, the generated orders are sent to aribasystem’s Status folder. If set to false, they do not appear in the Status folder and users must set up a Saved Search to retrieve them. Set this parameter to false to avoid performance problems with the size of aribasystem’s Status folder.
How to Customize Approval Rules
Approval rules are written in JavaScript. The default configuration provides a default set of approval rules for each approvable document in your configuration. To tailor your configuration to follow your company’s business processes, you can modify or extend the rules in the default configuration with your own new JavaScript rules.
To modify or create approval rules, you can use the Rule Editor in Ariba Buyer Administrator, or the ruleeditor command.
For information on how to define and adjust the approval rules for any document type, see the Ariba Spend Management Approval Rules Guide.
Navigation Panel Configuration
This section describes how Ariba Buyer determines which links to display on the Navigation Panel, and how to configure the flashing that alerts users to requests pending attention.
You cannot customize or configure the links on the Navigation Panel. Ariba Buyer determines which links to display based on the modules you have installed, and the permissions of the logged-in user.
Create Links
The Create section of the Navigation Panel contains links for creating requests, such as requisitions, travel and expense requests, and company eForms. For some approvable documents, the link goes directly to that document. For others, the link goes to an additional page that lists the available documents.
Notes:
• If a user is logged in under delegation of approval authority, most links on the Navigation Panel are not available. A user can approve requests, but nothing else.
• If the user is logged in to the supplier direct partition, most links are not available. A user can explore folders, but nothing else.
Approvable Document Deletion
An approvable document is stored in the database and visible to users in folders. Ariba Buyer supports two methods to remove approvable documents:
• A user can delete an approvable document. Deleting a document removes it from that user’s folders, and from the database.
• An administrator can use appropriate administrative tools to purge an approvable document from the database. The purge process archives the data to disk before doing the purge.
Ariba Buyer Configuration Guide 55
Chapter 4 Approvable Document Configuration Approvable Document Deletion
This section describes how users can delete approvable documents. For information on purging old data, see Chapter 10, “Data Archiving and Purging.”
Configuring Approvable Document Deletion
In the default configuration, users can delete approvable documents that are in the Composing state, or that have been withdrawn. After a document is submitted for approval, it typically remains in the user’s folders, although the user can choose to file the document into a different folder.
You can configure Ariba Buyer to allow users to delete approvable documents with the Delete command. The Delete command removes the approvable document from an approver’s folder, and deletes it.
You can configure when the Delete command is available by setting the following parameters:
• To prevent users from deleting approvables that have been withdrawn, set System.Approvable.AllowDeletionOfWithdrawnApprovables to false.
If this parameter is set to true (the default), users can delete withdrawn approvables.
• To allow users to delete approvable documents even if they have been submitted for approval, set System.Approvable.AllowDeletionOfNonComposingApprovables to true.
If this parameter is set to true, Ariba Buyer displays a Delete command in the Approval, Status, and Watcher folders. In this case, approvers can delete an approvable document after taking action on it. When this parameter is set to false, approvers can move an approvable document to another folder after taking action, but cannot delete it.
Even if this parameter is set to true, required approvers must take action (approve or deny) a document before deleting it.
Approvable Document Deletion Chapter 4 Approvable Document Configuration
56 Ariba Buyer Configuration Guide

Ariba Buyer Configuration Guide 57
Chapter 5 Non-English Configurations
This chapter summarizes the steps involved in setting up Ariba Buyer for configurations that do not use English as the primary language or that combine Asian and Western European languages (global instance). It includes the following sections:
• “Supported Languages” on page 57
• “Database Character Encodings” on page 57
• “Data File Encoding” on page 58
• “Parameters in config/Parameters.table” on page 60
• “Considerations for Asian Language Configurations” on page 61
• “Where to Find Additional Information” on page 62
Before you begin, check the Ariba Technical Support website at https://connect.ariba.com to make sure that your configuration is certified.
For information on known limitations with any configuration, check the Ariba Buyer Release Guide.
Supported Languages
Translations of the user interface are available in the following languages:
• German
• French
• Spanish
• Italian
• Dutch
• Brazilian Portuguese
• Swedish
• Simplified Chinese
• Japanese
User interface translations are provided in the main product and updated in the standard product Service Packs.
Note: French Canadian locale users default to the standard French translation.
Database Character Encodings
In Version 9r1, Ariba Buyer supports only Unicode encoded databases (UTF-8 for Oracle, and DB2 and UCS2 for SQL Server). Latin-1 databases are no longer supported. You cannot migrate from Version 8.2.2 to Version 9r1 with a Latin-1 database. Before migrating from Version 8.2.2 to Version 9r1, you must convert
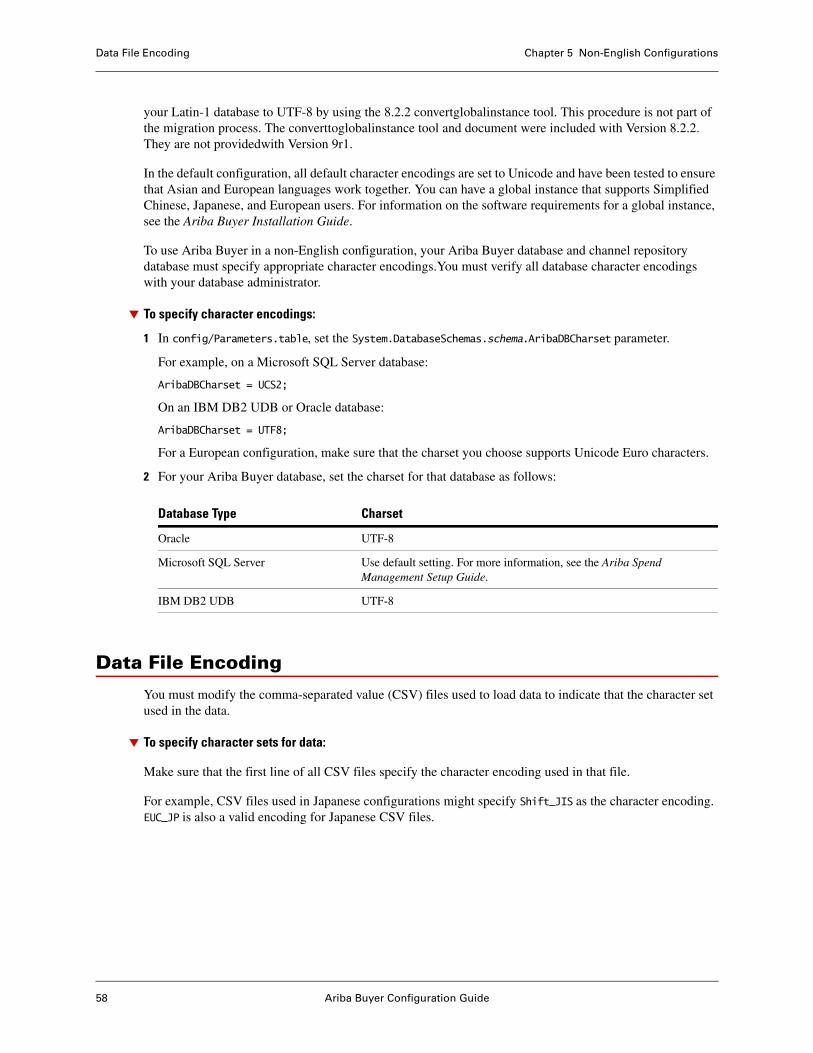
Data File Encoding Chapter 5 Non-English Configurations
58 Ariba Buyer Configuration Guide
your Latin-1 database to UTF-8 by using the 8.2.2 convertglobalinstance tool. This procedure is not part of the migration process. The converttoglobalinstance tool and document were included with Version 8.2.2. They are not providedwith Version 9r1.
In the default configuration, all default character encodings are set to Unicode and have been tested to ensure that Asian and European languages work together. You can have a global instance that supports Simplified Chinese, Japanese, and European users. For information on the software requirements for a global instance, see the Ariba Buyer Installation Guide.
To use Ariba Buyer in a non-English configuration, your Ariba Buyer database and channel repository database must specify appropriate character encodings.You must verify all database character encodings with your database administrator.
To specify character encodings:
1 In config/Parameters.table, set the System.DatabaseSchemas.schema.AribaDBCharset parameter.
For example, on a Microsoft SQL Server database:
AribaDBCharset = UCS2;
On an IBM DB2 UDB or Oracle database:
AribaDBCharset = UTF8;
For a European configuration, make sure that the charset you choose supports Unicode Euro characters.
2 For your Ariba Buyer database, set the charset for that database as follows:
Data File Encoding
You must modify the comma-separated value (CSV) files used to load data to indicate that the character set used in the data.
To specify character sets for data:
Make sure that the first line of all CSV files specify the character encoding used in that file.
For example, CSV files used in Japanese configurations might specify Shift_JIS as the character encoding. EUC_JP is also a valid encoding for Japanese CSV files.
Database Type Charset
Oracle UTF-8
Microsoft SQL Server Use default setting. For more information, see the Ariba Spend Management Setup Guide.
IBM DB2 UDB UTF-8
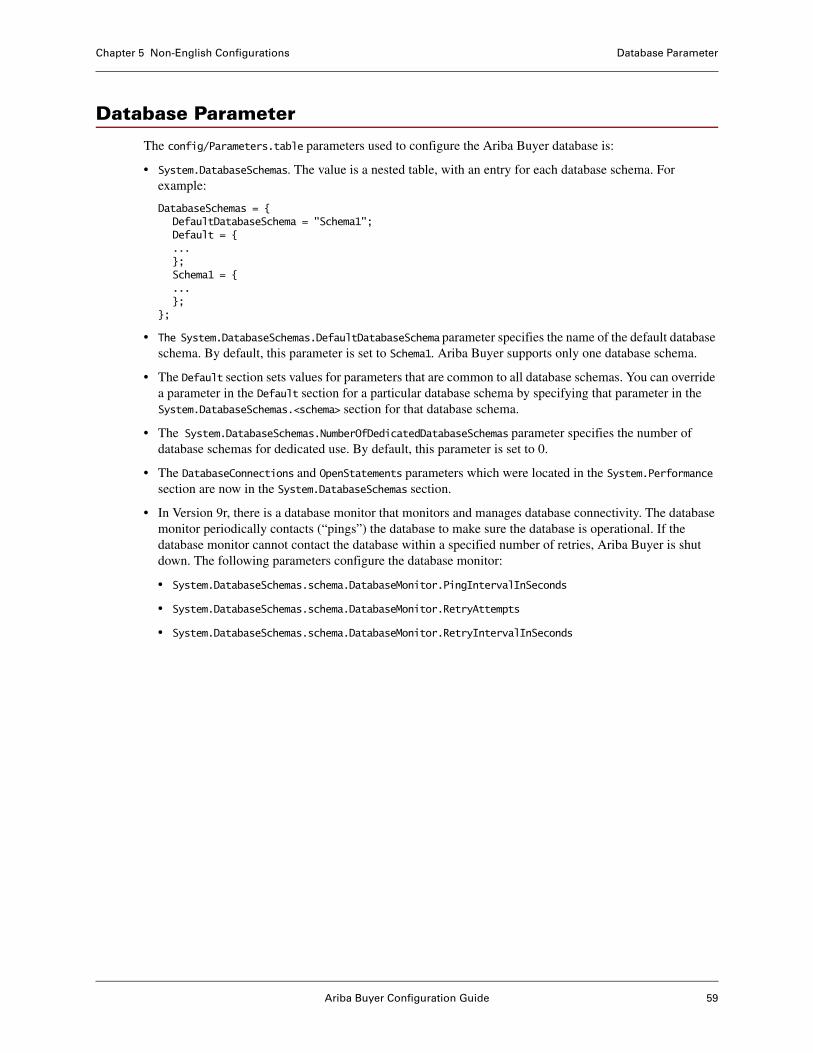
Ariba Buyer Configuration Guide 59
Chapter 5 Non-English Configurations Database Parameter
Database Parameter
The config/Parameters.table parameters used to configure the Ariba Buyer database is:
• System.DatabaseSchemas. The value is a nested table, with an entry for each database schema. For example:
DatabaseSchemas = {DefaultDatabaseSchema = "Schema1";Default = {...};Schema1 = {...};
};
• The System.DatabaseSchemas.DefaultDatabaseSchema parameter specifies the name of the default database schema. By default, this parameter is set to Schema1. Ariba Buyer supports only one database schema.
• The Default section sets values for parameters that are common to all database schemas. You can override a parameter in the Default section for a particular database schema by specifying that parameter in the System.DatabaseSchemas.<schema> section for that database schema.
• The System.DatabaseSchemas.NumberOfDedicatedDatabaseSchemas parameter specifies the number of database schemas for dedicated use. By default, this parameter is set to 0.
• The DatabaseConnections and OpenStatements parameters which were located in the System.Performance section are now in the System.DatabaseSchemas section.
• In Version 9r, there is a database monitor that monitors and manages database connectivity. The database monitor periodically contacts (“pings”) the database to make sure the database is operational. If the database monitor cannot contact the database within a specified number of retries, Ariba Buyer is shut down. The following parameters configure the database monitor:
• System.DatabaseSchemas.schema.DatabaseMonitor.PingIntervalInSeconds
• System.DatabaseSchemas.schema.DatabaseMonitor.RetryAttempts
• System.DatabaseSchemas.schema.DatabaseMonitor.RetryIntervalInSeconds

Parameters in config/Parameters.table Chapter 5 Non-English Configurations
60 Ariba Buyer Configuration Guide
Parameters in config/Parameters.table
To configure Ariba Buyer for use in a multilingual configuration, you must verify and possibly change the following parameters:
To set parameters:
1 Set Application.Base.Data.DefaultCurrency and System.Base.Data.BaseCurrency to the preferred or default currency for the partition. For example:
DefaultCurrency= JPY; BaseCurrency=JPY;
The value you specify must be a valid currency name in your configuration.
2 Set Application.Base.Data.DefaultLanguage to specify the primary or most commonly accessed language for data display.
For example:
DefaultLanguage= Japanese;
This specifies the language used as a fallback when no translated string that maps to the user’s locale is available. If neither the user’s language or the default language has an appropriate string, the empty string is used.
Any change to this parameter requires an initdb.
3 Verify that System.Logging.Encoding is set to UTF-8 (the default value). This setting ensures that log files are generated in UTF-8.
4 Set System.Base.DefaultLocale to your preferred locale. The DefaultLocale parameter determines which resources are used if resources in a user’s preferred locale are not available. For example:
DefaultLocale = fr;
The value for locale must be a supported locale, such as those listed in the following table. The default setting is en_US.
5 Set Application.Base.Data.DefaultOrganicUserLocale, and Partition.partition_name.Application.Base.Data.DefaultLocale to the locale to use for new users. For example, in a Japanese configuration:
DefaultOrganicUserLocale = ja_JP;
Language Locale
BrazilianPortuguese pt_BR
Dutch nl_NL
US English en_US
French FR_fr
German de_De
Italian it_IT
Spanish es_ES
Swedish sv_SE
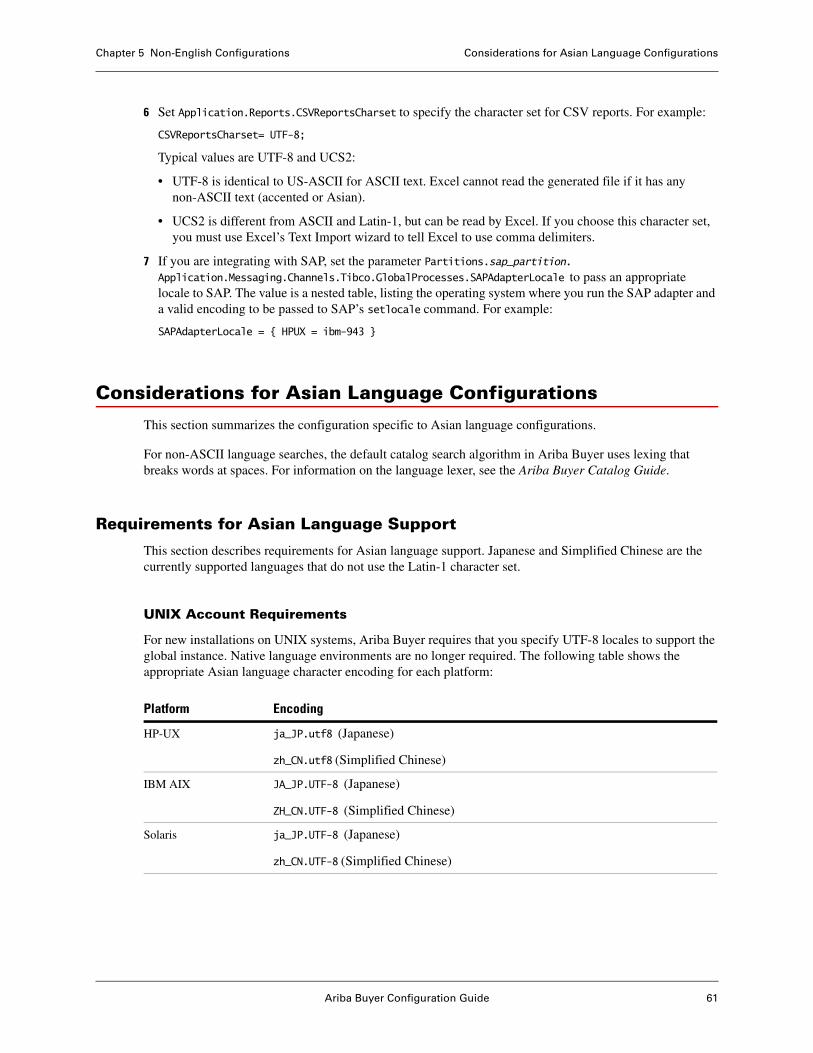
Ariba Buyer Configuration Guide 61
Chapter 5 Non-English Configurations Considerations for Asian Language Configurations
6 Set Application.Reports.CSVReportsCharset to specify the character set for CSV reports. For example:
CSVReportsCharset= UTF-8;
Typical values are UTF-8 and UCS2:
• UTF-8 is identical to US-ASCII for ASCII text. Excel cannot read the generated file if it has any non-ASCII text (accented or Asian).
• UCS2 is different from ASCII and Latin-1, but can be read by Excel. If you choose this character set, you must use Excel’s Text Import wizard to tell Excel to use comma delimiters.
7 If you are integrating with SAP, set the parameter Partitions.sap_partition.Application.Messaging.Channels.Tibco.GlobalProcesses.SAPAdapterLocale to pass an appropriate locale to SAP. The value is a nested table, listing the operating system where you run the SAP adapter and a valid encoding to be passed to SAP’s setlocale command. For example:
SAPAdapterLocale = { HPUX = ibm-943 }
Considerations for Asian Language Configurations
This section summarizes the configuration specific to Asian language configurations.
For non-ASCII language searches, the default catalog search algorithm in Ariba Buyer uses lexing that breaks words at spaces. For information on the language lexer, see the Ariba Buyer Catalog Guide.
Requirements for Asian Language Support
This section describes requirements for Asian language support. Japanese and Simplified Chinese are the currently supported languages that do not use the Latin-1 character set.
UNIX Account Requirements
For new installations on UNIX systems, Ariba Buyer requires that you specify UTF-8 locales to support the global instance. Native language environments are no longer required. The following table shows the appropriate Asian language character encoding for each platform:
Platform Encoding
HP-UX ja_JP.utf8 (Japanese)
zh_CN.utf8 (Simplified Chinese)
IBM AIX JA_JP.UTF-8 (Japanese)
ZH_CN.UTF-8 (Simplified Chinese)
Solaris ja_JP.UTF-8 (Japanese)
zh_CN.UTF-8 (Simplified Chinese)
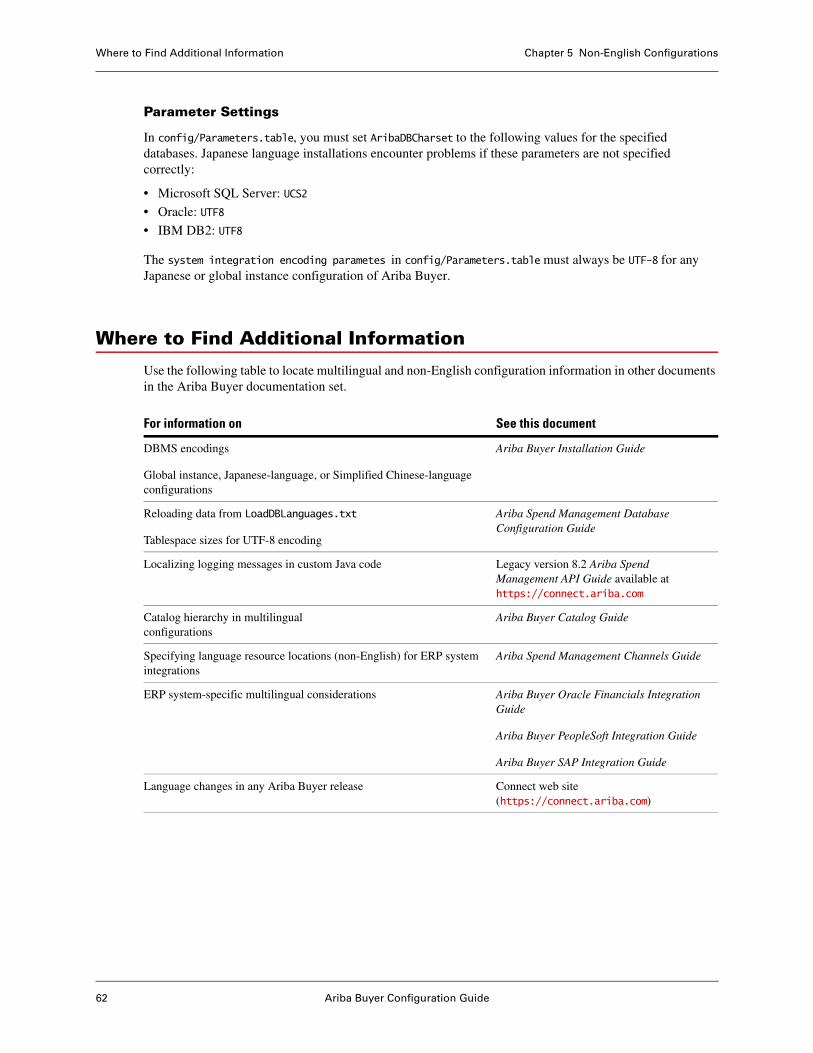
Where to Find Additional Information Chapter 5 Non-English Configurations
62 Ariba Buyer Configuration Guide
Parameter Settings
In config/Parameters.table, you must set AribaDBCharset to the following values for the specified databases. Japanese language installations encounter problems if these parameters are not specified correctly:
• Microsoft SQL Server: UCS2
• Oracle: UTF8
• IBM DB2: UTF8
The system integration encoding parametes in config/Parameters.table must always be UTF-8 for any Japanese or global instance configuration of Ariba Buyer.
Where to Find Additional Information
Use the following table to locate multilingual and non-English configuration information in other documents in the Ariba Buyer documentation set.
For information on See this document
DBMS encodings
Global instance, Japanese-language, or Simplified Chinese-language configurations
Ariba Buyer Installation Guide
Reloading data from LoadDBLanguages.txt
Tablespace sizes for UTF-8 encoding
Ariba Spend Management Database Configuration Guide
Localizing logging messages in custom Java code Legacy version 8.2 Ariba Spend Management API Guide available at https://connect.ariba.com
Catalog hierarchy in multilingual configurations
Ariba Buyer Catalog Guide
Specifying language resource locations (non-English) for ERP system integrations
Ariba Spend Management Channels Guide
ERP system-specific multilingual considerations Ariba Buyer Oracle Financials Integration Guide
Ariba Buyer PeopleSoft Integration Guide
Ariba Buyer SAP Integration Guide
Language changes in any Ariba Buyer release Connect web site (https://connect.ariba.com)

Ariba Buyer Configuration Guide 63
Chapter 6 Notifications
This chapter describes how to configure notifications. It also explains how to enable the email approval feature and customize the content of notification messages.
This chapter includes the following sections:
• “Introduction to Notifications” on page 63
• “Users Who Receive Notifications” on page 63
• “User Notification Preferences” on page 64
• “Notification Failures” on page 65
• “Notification Configuration” on page 65
• “Email Approval Feature” on page 67
• “Customizing HTML-Format Notifications for Approvables” on page 73
• “Customizing Text-Format Notifications for Approvables” on page 79
Introduction to Notifications
Notifications are email messages that Ariba Buyer sends to users and administrators to inform those users of status changes or problems that must be addressed.
For example, if Ariba Buyer encounters problems parsing data while loading charge information, it sends the following notification message to users who have the permission Level2ChargeLoader:
PR-2.0-1349a-301: Cannot load PCard statementsProblem running adapter (...)
Many notification messages include a URL in the body of the notification message. Users can follow these links directly to Ariba Buyer.
Users Who Receive Notifications
Users receive notification messages when they are involved with an approvable document, or when they have special permissions. This section uses the following terms:
• A preparer is the person who fills out and submits a request.
• A requester is the user on whose behalf the request is submitted.
Often the requester and preparer are the same, but not always. For example, if a personal assistant fills out all purchase requisitions for the Technical Publications Manager, then the assistant is the preparer and the Technical Publications Manager is the requester.
• An approver is a required approver. Required approvers must either approve or deny the request.
• A watcher is an optional approver, who is notified of changes in approval flow but does not have to take action.
User Notification Preferences Chapter 6 Notifications
64 Ariba Buyer Configuration Guide
Notification By Permission
Many notification messages are sent to users who have specific permissions. Such notification messages typically reflect administrative notifications, which require intervention from an administrative user such as a Purchasing Agent or Invoice Administrator.
Notification To Interested Users
Users who are involved with a document (requester, preparer, approvers and watchers) receive notification messages when action is required, and also when there are changes to the approval flow of a document. The following examples illustrate a few situations when notification messages are sent:
• A document is denied or becomes fully approved
• Another user modifies an approvable document
• Another user replies to a comment in an approvable document
• Ariba Buyer automatically withdraws an approvable document
• Ariba Buyer escalates an approvable document to an approver’s supervisor
• Expense report receipts are overdue in accounts payable
Notifications Received by Requesters
Requesters receive notification messages when the following events occur:
• Someone submits an approvable document on their behalf
• A purchasing card has overdue charges
Notifications Received by Watchers
Watchers receive notification messages when the following events occur:
• A user adds them as a watcher to an approvable document
• A user submits an approvable document that they are watching
Notifications Received by Approvers and Delegates
Approvers and delegates receive notification messages in situations such as the following:
• An approvable document is submitted (or resubmitted) and requires approval
• Someone withdraws an approvable document
• Ariba Buyer escalates an approvable document to them
• Ariba Buyer is preparing to escalate an approvable document to their supervisor
• Ariba Buyer escalates an approvable document to their supervisor
User Notification Preferences
From the user interface, users can specify whether they prefer to have notifications send individually, or consolidated together. Users set one set of preferences for requests where they act as approvers, and can set different preferences for situations where they act as watchers.
Ariba Buyer Configuration Guide 65
Chapter 6 Notifications Notification Failures
Consolidated Notifications
If a user specifies consolidated notifications, notifications to that user are not sent immediately, but are sent by scheduled tasks:
• The ConsolidatedNotifications scheduled task groups together notifications to a specific user and sends them out as a unit.
• The ReceiptNotifier scheduled task sends out consolidated receipt notification messages to requesters, grouping any pending receipt notification messages together as a unit.
Users always set preferences from the user interface.
User Notification Preferences by Type of Approvable
The screen for setting notification preferences provides a chooser, showing the approvable documents for which users can set preferences. By setting the NotificationClassPreferences field, you can specify whether users can set preferences for a given approvable type individually. If this field is not set, that approvable type is lumped under the choice Default preferences for all approvable types.
Notification Failures
The FailedDurableEmails scheduled task is an error-recovery task that retries the sending of notification messages. This task is intended to handle situations where the Simple Mail Transfer Protocol (SMTP) server that Ariba Buyer uses to send notifications goes down.
Notification Configuration
This section describes how to configure Ariba Buyer to send basic notification messages. It describes the following topics:
• “Locating SMTP Server and Setting Return Address” on page 65
• “Disabling Notifications” on page 66
After you have configured notifications, you can optionally configure an additional feature that lets users approve (or deny) documents by responding to email notification messages. With this feature, called email approval, users can approve or deny approvable documents by responding to email notification messages. For information on email approval, see “Email Approval Feature” on page 67.
Locating SMTP Server and Setting Return Address
To enable basic notification messages, you must configure the following:
• How to reach the SMTP server
• The email address used as the From field on notification messages
Notification Configuration Chapter 6 Notifications
66 Ariba Buyer Configuration Guide
Locating an SMTP Server
Ariba Buyer sends notification messages using a standard Simple Mail Transfer Protocol (SMTP) server on your network. You specify how to reach that SMTP server by setting the following parameters in config/Parameters.table:
• System.Base.SMTPServerName
• System.Base.SMTPDomainName
The SMTPServerName parameter can be either a simple host name or it can include the name, depending on your mail server configuration. The SMTPDomainName must be your official domain name, and not a nickname. Both parameters are required. For example:
SMTPServerName="mailhost.acome.com";
SMTPDomainName="acme.com";
Configuring the From Address for Notifications
Notification messages sent from Ariba Buyer must have a valid From field. You configure the value in the From field with the following parameters:
• Application.Base.NotificationFromAddress
• Application.Base.NotificationFromNameKey
The From address has two components: the email address itself, and a user-visible form of the name, which is defined in a resource file because it can potentially be translated. NotificationFromAddress specifies the email address and NotificationFromNameKey specifies the user-visible name. The value of NotificationFromAddress is a string. The value of NotificationFromNameKey is the name of a key in the resource file ariba.server.objectserver.csv. By default, this parameter is set to DefaultNotificationFromName.
For example:
NotificationFromAddress="[email protected]"
NotificationFromNameKey="DefaultNotificationFromName"
Disabling Notifications
You cannot completely disable notifications. You can disable one specific notification (that of approval required), and you can configure Ariba Buyer to ignore weekends and holidays when determine the schedule for sending notification messages. This section describes settings you can use for disabling or reducing notifications in specific circumstances.
Turning Off Approval Notifications
You can turn off some notification messages by specifying the NoApprovalNotification permission. This permission turns off notification messages to users when their approval is required. For example, some users might prefer not to receive these notifications, because they are logged in daily anyway.
Note: The NoApprovalNotification permission applies to approval notification messages only. You cannot turn off other types of notification messages.
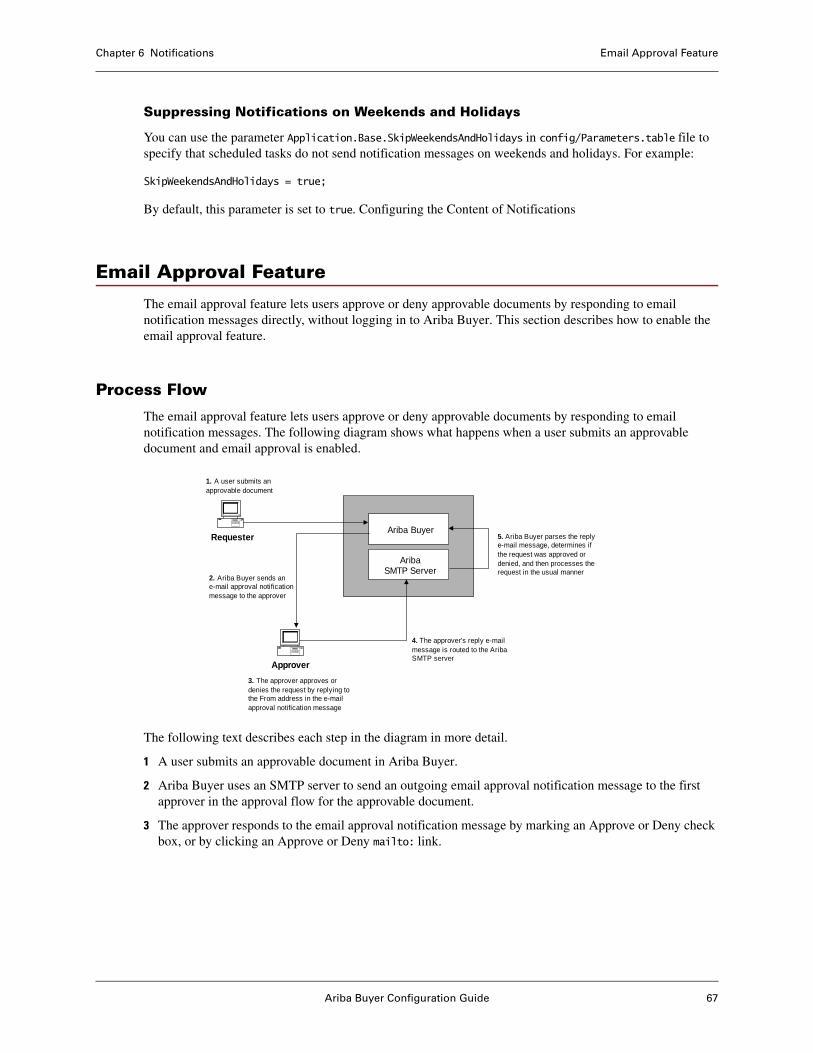
Ariba Buyer Configuration Guide 67
Chapter 6 Notifications Email Approval Feature
Suppressing Notifications on Weekends and Holidays
You can use the parameter Application.Base.SkipWeekendsAndHolidays in config/Parameters.table file to specify that scheduled tasks do not send notification messages on weekends and holidays. For example:
SkipWeekendsAndHolidays = true;
By default, this parameter is set to true. Configuring the Content of Notifications
Email Approval Feature
The email approval feature lets users approve or deny approvable documents by responding to email notification messages directly, without logging in to Ariba Buyer. This section describes how to enable the email approval feature.
Process Flow
The email approval feature lets users approve or deny approvable documents by responding to email notification messages. The following diagram shows what happens when a user submits an approvable document and email approval is enabled.
The following text describes each step in the diagram in more detail.
1 A user submits an approvable document in Ariba Buyer.
2 Ariba Buyer uses an SMTP server to send an outgoing email approval notification message to the first approver in the approval flow for the approvable document.
3 The approver responds to the email approval notification message by marking an Approve or Deny check box, or by clicking an Approve or Deny mailto: link.
Requester
Approver
AribaSMTP Server
Ariba Buyer
1. A user submits anapprovable document
2. Ariba Buyer sends ane-mail approval notificationmessage to the approver
4. The approver's reply e-mailmessage is routed to the AribaSMTP server
3. The approver approves ordenies the request by replying tothe From address in the e-mailapproval notification message
5. Ariba Buyer parses the replye-mail message, determines ifthe request was approved ordenied, and then processes therequest in the usual manner
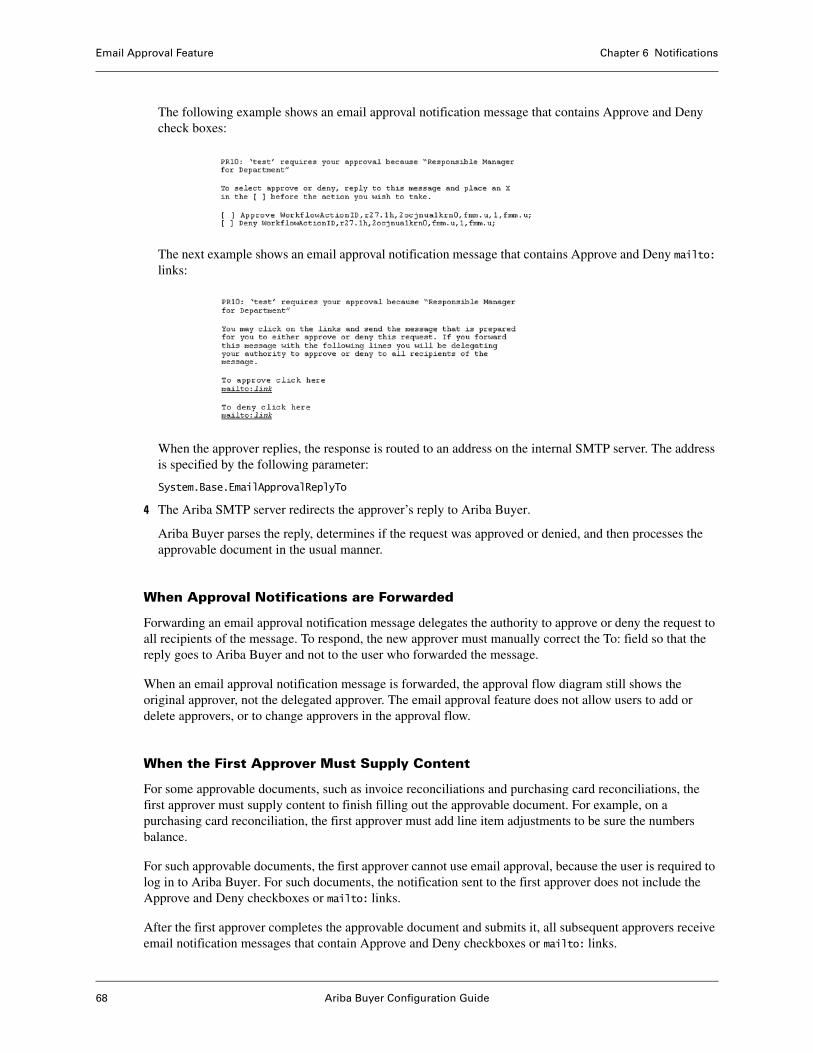
Email Approval Feature Chapter 6 Notifications
68 Ariba Buyer Configuration Guide
The following example shows an email approval notification message that contains Approve and Deny check boxes:
The next example shows an email approval notification message that contains Approve and Deny mailto: links:
When the approver replies, the response is routed to an address on the internal SMTP server. The address is specified by the following parameter:
System.Base.EmailApprovalReplyTo
4 The Ariba SMTP server redirects the approver’s reply to Ariba Buyer.
Ariba Buyer parses the reply, determines if the request was approved or denied, and then processes the approvable document in the usual manner.
When Approval Notifications are Forwarded
Forwarding an email approval notification message delegates the authority to approve or deny the request to all recipients of the message. To respond, the new approver must manually correct the To: field so that the reply goes to Ariba Buyer and not to the user who forwarded the message.
When an email approval notification message is forwarded, the approval flow diagram still shows the original approver, not the delegated approver. The email approval feature does not allow users to add or delete approvers, or to change approvers in the approval flow.
When the First Approver Must Supply Content
For some approvable documents, such as invoice reconciliations and purchasing card reconciliations, the first approver must supply content to finish filling out the approvable document. For example, on a purchasing card reconciliation, the first approver must add line item adjustments to be sure the numbers balance.
For such approvable documents, the first approver cannot use email approval, because the user is required to log in to Ariba Buyer. For such documents, the notification sent to the first approver does not include the Approve and Deny checkboxes or mailto: links.
After the first approver completes the approvable document and submits it, all subsequent approvers receive email notification messages that contain Approve and Deny checkboxes or mailto: links.
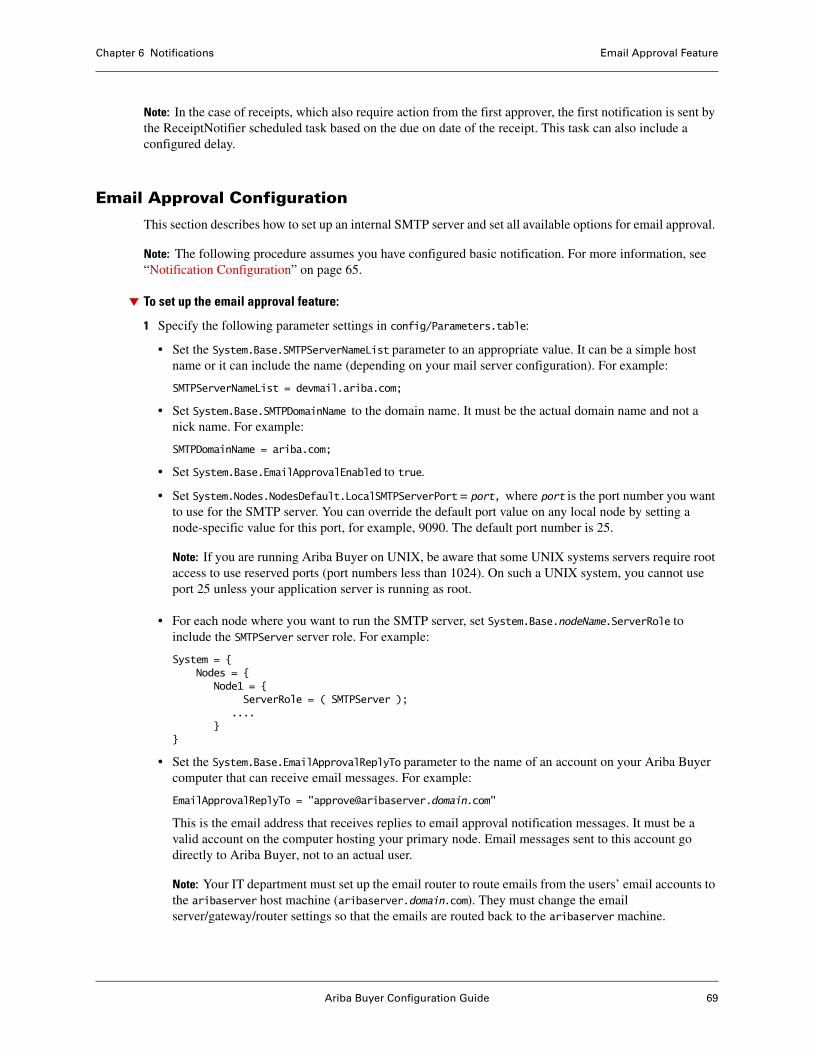
Ariba Buyer Configuration Guide 69
Chapter 6 Notifications Email Approval Feature
Note: In the case of receipts, which also require action from the first approver, the first notification is sent by the ReceiptNotifier scheduled task based on the due on date of the receipt. This task can also include a configured delay.
Email Approval Configuration
This section describes how to set up an internal SMTP server and set all available options for email approval.
Note: The following procedure assumes you have configured basic notification. For more information, see “Notification Configuration” on page 65.
To set up the email approval feature:
1 Specify the following parameter settings in config/Parameters.table:
• Set the System.Base.SMTPServerNameList parameter to an appropriate value. It can be a simple host name or it can include the name (depending on your mail server configuration). For example:
SMTPServerNameList = devmail.ariba.com;
• Set System.Base.SMTPDomainName to the domain name. It must be the actual domain name and not a nick name. For example:
SMTPDomainName = ariba.com;
• Set System.Base.EmailApprovalEnabled to true.
• Set System.Nodes.NodesDefault.LocalSMTPServerPort = port, where port is the port number you want to use for the SMTP server. You can override the default port value on any local node by setting a node-specific value for this port, for example, 9090. The default port number is 25.
Note: If you are running Ariba Buyer on UNIX, be aware that some UNIX systems servers require root access to use reserved ports (port numbers less than 1024). On such a UNIX system, you cannot use port 25 unless your application server is running as root.
• For each node where you want to run the SMTP server, set System.Base.nodeName.ServerRole to include the SMTPServer server role. For example:
System = {Nodes = {
Node1 = {ServerRole = ( SMTPServer );
....}
}
• Set the System.Base.EmailApprovalReplyTo parameter to the name of an account on your Ariba Buyer computer that can receive email messages. For example:
EmailApprovalReplyTo = "[email protected]"
This is the email address that receives replies to email approval notification messages. It must be a valid account on the computer hosting your primary node. Email messages sent to this account go directly to Ariba Buyer, not to an actual user.
Note: Your IT department must set up the email router to route emails from the users’ email accounts to the aribaserver host machine (aribaserver.domain.com). They must change the email server/gateway/router settings so that the emails are routed back to the aribaserver machine.
Email Approval Feature Chapter 6 Notifications
70 Ariba Buyer Configuration Guide
• Set System.Base.EmailApprovalMailToLink. Set the parameter to true if you want email approval notification messages to include mailto: links. Set it to false to have users select an Approve or Deny check box.
• Set System.Base.EmailApprovalIncludeComment to true to have email approval notification messages include a comments section.
• Set the System.Base.AdministratorEmailAddress parameter to the email address of an administrator who can assist users with problems arising from email approvals. For example:
AdministratorEmailAddress = “[email protected]”;
This address must be the address of a real user, using your domain.
2 (This step applies only to email approval configuration on Windows. For UNIX installations, go directly to step 3.) Setup email approval as shown in the following sample configuration, which uses an email server example named devmail.ariba.com:
SMTPDomainName = ariba.com;SMTPServerNameList = ( devmail.ariba.com );SMTPAddressBCC = "";SMTPAddressRedirect = "[email protected]";LocalSMTPServerPort = 25;EmailApprovalEnabled = true;EmailApprovalIncludeComment = true;EmailApprovalReplyTo = "[email protected]";
As this example uses an alternate email server (devmail.ariba.com), a new user account must be created on it and an email client must be set up to send and recive emails to this email server. Your IT department can set up this account on the email server.
In this example, the email approval flow is as follows:
a The email server (devmail.ariba.com) receives outgoing emails from the Ariba Buyer server and delivers it to [email protected].
b User user1 responds to the email , approves or denies the request, and replies to [email protected].
c devmail.ariba.com delivers the email sent to the address [email protected] to the server running on user1.ariba.com.
d Ariba Buyer server processes the email and approves or denies the request.
Note: If you are configuring the Ariba SMTP server to use the port 25, then make sure the Micorosft SMTP server that comes with IIS is not running, because it runs on port 25. If this is not done, Ariba SMTP server will not start properly and emails will not reach the server.
After this step, go directly to step 6 to continue with the email approval configuration.
3 Define an alias in /etc/aliases that redirects approval emails to the redirectemail command. You can install this command on any UNIX computer serving as an SMTP server. Edit /etc/aliases so the email account for email approvals points to the redirectemail command on your Ariba Buyer instance. The syntax is:
username: "|BuyerServerRoot/bin/redirectemail server port name"
where username is the username in the EmailApprovalReplyTo parameter, host is your host name, and port is the port where you are running the SMTP daemon. For example:
approve: "| /opt/ariba/app/buyer/Server/bin/redirectemail buck 9090 approve"
4 Run /usr/bin/newaliases to update your aliases.
Ariba Buyer Configuration Guide 71
Chapter 6 Notifications Email Approval Feature
5 Make sure that the PATH setting for redirectemail includes the default bin directory for your shell, for example, /usr/bin. If the path is not set by default in environment variables you can edit the redirectemail command to set PATH correctly. For example, you can add the following line to extend the existing definition of $PATH:
PATH=/usr/bin:/bin:$PATH;export PATH
6 If you have installed Ariba Buyer 9r1 Service Pack 9 or later, consider increasing the maximum allowable size of approval emails (including attachments) using the parameter System.Base.DurableEmail.MaxMailSizeInBytes. The default is 100,000 bytes (100 KB), which is smaller than ideal for PDA users.
7 Restart Ariba Buyer to apply your changes.
Note: If you want to install the redirectemail command on a computer other than your Ariba Buyer computer, you must do the following:
• Choose the files appropriate to your OS platform from the following list, and copy only those files from the BuyerServerRoot/Server directory to a directory on the computer where you want to install the SMTP redirectemail command—for example, the /home/ariba directory. When copying, preserve the ownership and permissions of the original files.
./bin/redirectemail
./bin/redirectemail.pl
./bin/runperl
./bin/HP-UX/perl
./bin/Solaris/perl
./bin/AIX/perl
./classes/ariba.util.core.zip
./classes/ariba.util.net.zip
./classes/jakarta-oro-2.0.jar
./classes/classpath.txt
• Similarly, choose the directories appropriate to your OS platform from the following list, and copy the entire directories, preserving the ownership and permissions of the original files:
lib/perllib/HP-UXlib/Solarislib/AIX./3rdParty/jre/HP-UX/1.3.1./3rdParty/jre/Solaris /1.3.1./3rdParty/jre/AIX/1.3.1
See the following additional parameters for setting up the email approval feature:
• System.Base.EmailApprovalAudit• System.Base.EmailApprovalAutoReject• System.Base.EmailApprovalAutoRejectAudit• System.Base.EmailApprovalAutoRejectNotification
System.Base.EmailApprovalAudit
A Boolean value that specifies whether incoming approval emails are tracked. This parameter applies only if you enabled the email approval feature by setting System.Base.EmailApprovalEnabled to Yes. If the value of System.Base.EmailApprovalAudit is Yes, the application keeps a record of all approval emails.
The default value is No.
Email Approval Feature Chapter 6 Notifications
72 Ariba Buyer Configuration Guide
System.Base.EmailApprovalAutoReject
A Boolean value that specifies whether the sender of an incoming approval email is checked against the recipient of the original approval request. This parameter applies only if you enabled the email approval feature by setting System.Base.EmailApprovalEnabled to Yes. If the value of System.Base.EmailApprovalAutoReject is Yes, when the sender of the approval email does not match the recipient of the approval request, the application rejects the approval. This prevents the acceptance of approvals from users to whom the approval request was forwarded.
The default value is No.
System.Base.EmailApprovalAutoRejectAudit
A Boolean value that determines whether auto-rejected approval emails are tracked. This parameter applies only if you enabled email approvals and auto-rejection of email approvals, by setting System.Base.EmailApprovalEnabled and System.Base.EmailApprovalAutoReject to Yes. If the value of Application.Base.EmailApprovalAudit is Yes, the application keeps a record of all auto-rejected approval emails.
The default value is No.
System.Base.EmailApprovalAutoRejectNotification
A Boolean value that specifies whether notification of an auto-rejected approval email is sent to the recipient of the approval request. This parameter applies only if you enabled email approvals and auto-rejection of email approvals, by setting the parameters System.Base.EmailApprovalEnabled and System.Base.EmailApprovalAutoReject to Yes. If System.Base.EmailApprovalAutoRejectNotification is set to Yes, the user to whom the approval request was sent receives a notification about the rejection.
The default value is No.
Troubleshooting Replies with Bad Characters
If approval reply messages from some locales contain garbage characters, it may be because the international characters in the mailto: link were not correctly encoded by the web browser or email client application. Incorrect encoding causes the subject and body of the reply to contain incorrect information. For the mailto: link to function correctly, UTF-8 encoding should be used. Some web browsers and email client applications do not use UTF-8 automatically.
Ariba Buyer 9r1 Service Pack 10 introduced a new system parameter for setting mailto: link encoding. The new parameter, System.Base.EmailApprovalMailToLinkEncoding, should be set to UTF8 to correct the issue. Access the parameter in the config/Parameters.table file. (If you are not experiencing this issue, you do not need to make any changes.)
If you upgraded to Service Pack 10 from a previous release of Ariba Buyer 9r1, you must manually add this parameter to your config/Parameters.table file before you can use it. The Parameters.table entry for System.Base.EmailApprovalMailToLinkEncoding should look similar to this:
System = { Base = { EmailApprovalMailToLinkEncoding = UTF-8; }; }
Ariba Buyer Configuration Guide 73
Chapter 6 Notifications Customizing HTML-Format Notifications for Approvables
Customizing HTML-Format Notifications for Approvables
By default, the preferred format for email notifications is HTML. The format is determined by the parameter Application.Base.PreferredEmailFormat.
Ariba Buyer uses simple HTML template files to generate the HTML content of email notifications sent out for approvable documents. By default, Ariba Buyer includes standard email templates for most approvable types and notification events.
The following sections explain how you can customize the templates and wording or develop new templates based on the features supported by the template parsing engine:
• “What Can Be Changed in Email Notifications” on page 73
• “Location of Email Templates” on page 73
• “Modifying the Wording of Emails” on page 74
• “Modifying Email Templates Using Tags” on page 74
• “Images and CSS” on page 77
• “Generic and Consolidated Templates” on page 77
• “Adding New Templates” on page 78
• “Email Template Parsing Engine and Formatter” on page 78
What Can Be Changed in Email Notifications
You can customize the appearance of notification email, including what information each contains, and notification wording. The appearance of each notification is controlled by its HTML notification email template. These templates are located in the directory discussed in the section “Location of Email Templates” on page 73.
Location of Email Templates
Email templates for different types of approvable documents are stored in the following directory:
BuyerServerRoot/ariba/resource/locale/templates/email
Each approvable type directory consists of templates for various notification actions. The common directory contains templates that you can reuse by including them in other templates. Examples of common templates include the header template, generic template, and consolidated template.
Note: You should never modify the templates in the directory BuyerServerRoot/ariba/resource/locale/templates/email. If you want to customize the email templates, copy the email directory to BuyerServerRoot/config/resource/locale/templates/email, and make the modifications to the copied files.
You can modify copies of the respective templates to specify the sections that you want to have appear in the notification for each approvable document type. For example, to customize the requisition approval notification, you modify the following template: /config/resource/en_US/templates/email/requisition/requisitionapprove.htm
The template mapping file, BuyerServerRoot/config/EmailSimpleTemplate.table, specifies which template to use for each approvable type and notification action.
Customizing HTML-Format Notifications for Approvables Chapter 6 Notifications
74 Ariba Buyer Configuration Guide
Modifying the Wording of Emails
The wording of each email is made up of a combination of the email templates and the information pulled into them from a resource CSV file. To make changes to the wording in a particular email, you must change the wording in the referenced CSV file.
In the default configuration, email templates reference the following string resource file:
BuyerServerRoot/ariba/resource/locale/strings/ariba.htmlemail.csv
Note: You should never modify the strings in the directory BBuyerServerRoot/ariba/resource/locale/strings/ariba.htmlemail.csv. If you want to customize the email strings, copy the ariba.htmlemail.csv file to BuyerServerRoot/config/resource/locale/strings, and make the modifications to the copied files.
Modifying Email Templates Using Tags
The HTML email template parsing engine parses through the email templates and replaces tags (for example, tags that indicate string content) with dynamic content. This section describes the tags that are supported. You can use the tags to customize email notifications.
Localization of Static Strings
Static strings used in the email templates can be tagged as resource lookups for easy localization. The default template parsing engine supports resource key lookup in the same way as the application. The resource table file located under appropriate locale contains the required key/value pair for the resource being looked up.
All resource string lookups must be placed in the @@@sometable/resourcekey@@ tag, where sometable represents a resource lookup file such as ariba.htmlemail.csv, and resourcekey identifies the string to look up within that file. In the default configuration, static string references are in the ariba.htmlemail.csv resource file under the en_US locale. All templates refer to this file for any static string reference.
For example, on encountering the following resource key lookup tag in a template:
@@@ariba.htmlemail/TotalCost@@
the parsing engine searches for the resource file ariba.htmlemail.csv under the appropriate locale directory, looks up the TotalCost key in the file, and replaces the tag with the localized value string from the file.
For example, if user locale is fr_FR, and the system default locale is ja_JP, the sequence of the locale directory look up is:
fr_FR, fr, ja_JP, ja, en, en_US
Users can add to the ariba.htmlemail.csv file in the appropriate locale for the above tag to work.
To add a localized template for a default notification, you must put the template (as indicated in the config/EmailSimpleTemplate.table configuration file) into the appropriate directory under BuyerServerRoot/config/resource/locale/templates/email/. For example, to localize header.htm for the fr_FR locale, put the updated header.htm file in the directory BuyerServerRoot/config/resource/fr/templates/email/common/.
Ariba Buyer Configuration Guide 75
Chapter 6 Notifications Customizing HTML-Format Notifications for Approvables
Web Server Resources
Resources that are served from the web server—for example, images and CSS files—must be tagged using the @@Resource@@ tag.
For example, @@Resource=template/images/test.gif@@ will be replaced by actual HTTP HREF string pointing to the image file test.gif.
Variables
All variables must be wrapped with @@. These tags are replaced with dynamic content pulled from the underlying business object, an approvable object.
For example, to specify the requester’s unique name, use the following:
@@Requester.UniqueName@@
All variables must start from the approvable object you are working with. For example, if you are working with a requisition email, every variable must originate from the Requisition object. Use dot notation to indicate multiple levels down from the approvable object. For example, to specify the requester’s address information, use the following:
@@Requester.ShipTo.Lines@@
Vectors
Vector declarations must adhere to the following rules:
• Each vector must start with StartVector<KEY> and end with EndVector<KEY>.
• <KEY> can be any number, character, or combination of both. It distinguishes the starting and ending points of a vector when sub-vectors are declared within it.
• Each vector must reference the vector object with =<FieldName>.
For example, to specify information from the LineItems vector on a requisition, use the following:
@@StartVector1=LineItems@@….@@EndVector1@@
All code within the vector tags will be repeated for each vector item. For example, for a requisition with five line items, the following code produces a table with five rows, one for each line item in the LineItems vector:
<table border=1>@@StartVector1=LineItems@@
<TR class=tableRow2><TD>@@NumberInCollection@@</TD>
</TR>@@EndVector1=LineItems@@</table>
Customizing HTML-Format Notifications for Approvables Chapter 6 Notifications
76 Ariba Buyer Configuration Guide
Conditional Statements
The default template engine supports conditional inclusions using the @@ifdef@@ tags.
The following example includes of a block of template code under the condition that the underlying approvable is in Approved state:
@@ifdef=isApproved@@<span class="brandDkText">@@DFL.LastModified@@</span><br/><span class="approved">@@DerivedApprovalState@@</span> by @@ApprovedBy.Name.PrimaryString@@
@@endifdef@@
The condition checking happens when the formatter implements the checkCondition method of the formatter interface. The engine resolves the call by looking for the corresponding method name (in this example, isApproved) and returning a Boolean value, true or false. The engine then includes the code block between @@ifdef@@ and @@endifdef@@ tags of the template.
Include Statements
Reuse of existing templates helps in designing new templates quickly and allows for a consistent look and feel across different templates. The default template engine provides support for inclusion of component templates from within other templates using the @@Include@@ tag.
For example, you could include a set of action buttons in a reusable template, buttons.html. You can then use these action buttons in any other template without having to repeat the template code. Also, if you make changes to the look and feel of the buttons, all the templates that include the buttons get the new look and feel. To include the button template within a separate template called requisitionapprove.html, embed the following snippet in the requisitionapprove.html file:
@@Include=buttons.htm@@
Date Formats
To indicate date format, use the tags @@DFS (short format) and @@DFL (long format). For example, the following code displays the Comments.Date field in the long date format:
@@StartVector5=Comments@@ <div id="reply3"><span class="brandDkText">@@DFL.Date@@</span><br />
The long and short date formats are governed by following resource keys in the resource.date.csv file:
• Long date format: LongDayDateMonthYearFmt (EEEE, MMMM d, yyyy)
• Short Date format: HourMinuteAMPM + LongDayDateMonthYearFmt (h:mm a EEEE, MMMM d, yyyy)
Functions
You can use functions in combination with variables and vectors when simple object references are not sufficient. For example, printing the requester’s name cannot be achieved with @@Requester.Name@@ because Name is of the type MultiLingualString.
Ariba Buyer Configuration Guide 77
Chapter 6 Notifications Customizing HTML-Format Notifications for Approvables
A function is always preceded with FCN. For example, the function to get the requester’s name is FCN.getMyName(). Along with the Requester variable, the complete reference is:
@@Requester.FCN.getMyName()@@
A function can be standalone, or you can combine it with variables or vectors, for example:
@@StartVector1=FCN.getCurrentChanges()@@
@@FCN.getResourceURL()@@ is a standalone function that returns the value for the parameter System.Base.ResourceURL.
When the parser encounters FCN while parsing a variable, it makes a call to the FunctionCallMap() method of the <Formatter> class, with the approvable as the argument. FunctionCallMap() checks whether the function name exists within the mapping method. If the function name exists, a call is made to the appropriate method corresponding to the function call. If the function name does not exist, an empty string is returned.
To add a new function, follow these basic steps:
1 Add more function calls to AribaSimpleTemplateFormatter.
2 Create a new formatter that extends from CommonSimpleTemplateFormatter.
3 Create a new formatter that implements SimpleTemplateFormatter. In this case, you specify the formatter in the parameter System.Base.EmailSimpleTemplateFormatter.
For information about the email template parsing engine and formatter, see “Email Template Parsing Engine and Formatter” on page 78.
Images and CSS
Customized email templates can potentially use links to any images or CSS files. In the default configuration, images and CSS files are located in the following directory:
BuyerWebComponents/images/email/
The style sheet file email.css contains various styles used by the out of the box email sample. You can add more styles to this file and use them in your templates.
Generic and Consolidated Templates
Generic Email Template
The following entry indicates a generic template (generic.htm), used when there is no entry specified for a particular approval type. For example, if there is no entry for receipts in the EmailSimpleTemplate.table configuration file, the default generic template is used to send the HTML email.
Default = {Subject = "@@@ariba.htmlemail/Notification@@: @@UniqueName@@ - @@Name@@";Body = "templates/email/common/generic.htm";
};
Customizing HTML-Format Notifications for Approvables Chapter 6 Notifications
78 Ariba Buyer Configuration Guide
Consolidated Email Template
The following entry indicates the template consolidated.htm, used for sending consolidated email to users who have set their preferences to receive consolidated (summary) email notifications.
Consolidation = {Body = "templates/email/common/consolidated.htm";
};
Adding New Templates
The config/EmailSimpleTemplate.table configuration file contains the mapping between approvable types and notification events. The format of this file is fixed. Do not change it.
For example, the following entry in this configuration file indicates that the engine uses the requisitionpushfail.htm file under WebComponents/config/resource/locale/ templates/email/requisition/ for all ERPPushFailed notification events for requisitions:
ariba.procure.core.Requisition = {Email =
{ERPPushFail = {
Subject = "@@@ariba.htmlemail/ActionRequired@@: @@UniqueName@@ - @@Name@@ (@@@ariba.htmlemail/ERPPushFailed@@)"; Body = "templates/email/requisition/requisitionpushfail.htm";
};
To add a new template:
1 Create an entry in the config/EmailSimpleTemplate.table file for the required approval type following the format shown in the preceding example.
2 Create the corresponding template file using the supported tags and object model.
3 Restart the server to use the new template.
Email Template Parsing Engine and Formatter
The following system parameters indicate the template parsing engine and formatter used.
• System.Base.EmailSimpleTemplateEngine determines the template engine. The value of this parameter is ariba.htmlui.htmlemail.AribaEmailSimpleTemplateEngine.
• System.Base.EmailSimpleTemplateFormatter determines the template formatter. The value of this parameter is ariba.htmlui.htmlemail.AribaSimpleTemplateFormatter.
The engine and formatter are Java classes. You can extend them by downloading and unzipping the following file:
BuyerServerRoot/classes/ariba.buyer.mainui.zip
In the ZIP file, the following files are under ariba/htmlui/htmlemail:
• AribaEmailSimpleTemplateEngine.class: The template engine that retrieves the template and formatter and generates the HTML email notification.
Ariba Buyer Configuration Guide 79
Chapter 6 Notifications Customizing Text-Format Notifications for Approvables
• SimpleTemplateFormatter.class: An interface that defines what a formatter does: mainly resolves function calls that fetches dynamic data used by the template. You can write your own formatter by implementing this interface. Alternatively, you can extend the default formatters described below.
• CommonSimpleTemplateFormatter.class: An abstract class that implements the SimpleTemplateFormatter interface. This class addresses function calls for most basic data, such as user name and partition.
• AribaSimpleTemplateFormatter.class: Extends the CommonSimpleTemplateFormatter. Contains more function calls to make sample HTML templates work. This is the default formatter.
• EmailTemplatesCache.class: A simple aging cache that holds various referenced templates in memory, allowing for faster email generation.
Customizing Text-Format Notifications for Approvables
If the parameter Application.Base.PreferredEmailFormat is set to Text instead of HTML, use the instructions in this section to customize email notifications.
For each outgoing notification message, Ariba Buyer formats the message dynamically, using text as the output format. You can customize the content of the notification messages, much as you can customize the content of printed output.
Ariba Buyer lays out each notification message as a collection of distinct sections. During customization and configuration, you can include or exclude any of these sections, per approvable. For any section you choose to include, you can further tailor the content of that section by adding or removing fields from groups.
Configuring Sections of Notification Messages
For each approvable document type, you specify the sections that you want to have appear in the notification message.
The sections of notification messages are as follows:
• ApprovableDetails
• ApprovableSummary
• ApprovalFlow
• Comments
• History
• WebJumper
You specify which sections to include by setting appropriate fields in ApprovableType.csv file. (For information, see “ApprovableTypePull Integration Event” on page 46.) Within the ApprovableDetails and ApprovableSummary sections, you can do further customizations by adding or removing fields from groups.
Customizing Text-Format Notifications for Approvables Chapter 6 Notifications
80 Ariba Buyer Configuration Guide
Groups For Customizing the Header
To customize the header section of a notification message, you use groups whose name is formed by appending “PrintText” to the approvable name: <Approvable>PrintText. For example:
<group name="Level2ChargePrintText"><groupClass name="ariba.l2charge.core.Level2Charge">
<groupField name="PCardNumber"/><groupField name="TransactionDate"/><groupField name="MerchantName"/><groupField name="OrderNumber"/>
</groupClass></group>
Groups For Customizing the Line Items
To customize the line items section of a notification message related to a requisition, you use the following groups:
• LineItemPrintTextDetails• LineItemPrintTextSummary
For example:
<group name="LineItemPrintTextDetails"><groupClass name "ariba.procure.core.ProcureLineItem">
<groupClassVariant name="myVariant"><groupField name="TaxCode.Name"/>
</groupClassVariant></groupClass>
</group>
To customize the details of split line item accounting, you use these groups:
• SplitLineItemPrintTextSummary• SplitLineItemPrintTextDetails
Ariba Buyer Configuration Guide 81
Chapter 7 Passwords
This chapter describes how to configure Ariba Buyer to authenticate users by checking login credentials, such as passwords. It includes the following sections:
• “Introduction to Password Adapters” on page 81
• “Password Adapter Configuration” on page 83
• “Crypt Database Password Adapter” on page 85
• “SAP Password Adapter” on page 88
• “External Authentication Password Adapter” on page 89
• “NT Domain Login Adapter Implementation” on page 90
• “No Authentication Adapter Implementation” on page 92
• “Password Expiration” on page 92
• “Password File” on page 93
• “Password Recovery” on page 95
Introduction to Password Adapters
When a user logs in, Ariba Buyer authenticates that user by checking the login credentials specified on the login screen. The credentials on the login screen are passed to a password adapter, which verifies those credentials against a data source.
The most common login credential is a password, but different password adapters can require different credentials. For example, the NT Domain Login adapter validates Ariba Buyer users using credentials from an NT Domain system, including both a password and an NT domain.
Default Password Adapters
To set up your configuration, you define one or more password adapters, as appropriate for your configuration. The default configuration supplies the following password adapter implementations:
Adapter How It Works
Crypt Database Password Adapter Authenticates buyer users using passwords loaded into the database from a password file.
SAP Password Adapter Authenticates using credentials from an SAP system.
NT Domain Login Adapter Verifies passwords and domain against an NT Lan Manager authentication source, using the Win32 API LogonUser.
External Authentication Password Adapter Verifies password credentials against an external authentication server. Typically you use this adapter to access an NTDomainLogin Password Adapter running a service on a remote Windows server.
No Authentication Password Adapter Always lets users log in, with no authentication credentials. Appropriate only for development or test instances.

Introduction to Password Adapters Chapter 7 Passwords
82 Ariba Buyer Configuration Guide
Depending on your business requirements, you can use any or all of these implementations. For specialized requirements, you can also implement a custom password adapter, in Java. For information on writing custom password adapters, refer to the 8.2 Ariba Spend Management API Guide.
Every Ariba Buyer configuration also defines the following password adapters:
• AribaSupplierNetworkUser • SourcingSupplierUser
AribaSupplierNetworkUser is used for Ariba Network users who have already been authenticated by Ariba Network. SourcingSupplierUser is used for supplier users authenticated by Ariba Sourcing.
These values are defined internally, and do not appear in config/Parameters.table. The password adapters are visible in the PasswordAdapter chooser in Ariba Administrator, and also in notification URLs.
Authentication of External Users
Ariba Buyer also uses password adapters to authenticate external users who punch in to Ariba Buyer to use specific features. For example, supplier users can punch in to Ariba Buyer to do collaborative invoicing. For information on how to configure Ariba Buyer for users who are logging in from other applications, see the version 8.2 Ariba Spend Management API Guide legacy document which is available on https://connect.ariba.com.
Ariba Buyer also provides a sample feature called Single SignOn, which illustrates how to authenticate users just once, instead of requiring users to log in each time they use Ariba Buyer. For information on the Single SignOn feature and the password adapter that it uses, see Chapter 14, Single Sign-On with Corporate Authentication and the README.txt file in sample/auth/SingleSignOn.
Password Update and Password Expiration
The implementation of a password adapter specifies whether that password adapter supports password updates and/or password expiration.
If the password adapter supports updates, users can change their password from the User Preferences screens. If the password adapter does not support updates, these screens are not accessible to users. For example, in the default configuration, the Crypt Database Password Adapter supports updates but the NT Domain Login Adapter does not.
If the password adapter supports password expiration, users are required to update their passwords on a regular basis.
This chapter describes the default behavior of the standard implementations. For information on how to modify the Java implementation of a password adapter to change its behavior for password updates or password expiration, see the version 8.2 Ariba Spend Management API Guide legacy document which is available on https://connect.ariba.com.
Ariba Buyer Configuration Guide 83
Chapter 7 Passwords Password Adapter Configuration
Password Adapter Configuration
To configure password adapters in your configuration, you define all available password adapters in config/Parameters.table and create login URLs that indicate which password adapter to use for authenticating users as they log in and log out.
Defining Available Password Adapters
You use the parameter System.PasswordAdapters to define the set of available password adapters in your configuration. The value of this parameter is a nested table, with entries for each possible password adapter. For example:
System = {....PasswordAdapters = {
PasswordAdapter1 = {AllowNoPasswordExpirationPermission = true;ClassName = "ariba.auth.password.CryptDBPasswordAdapter";Enabled = true;LegacyPasswordCheck = true;OrganicPasswordGrowth = true;PasswordExpireLimit = 90;PasswordFile = "passwd.txt";MaxPasswordLength = 16;MinPasswordLength = 4;MaxLoginAttemptAllowed = 3;LockoutPeriodInMinutes = 120;MaxAnswerAttemptAllowed = 5;MinQuestionLength = 5;MinAnswerLength = 5;PasswordTokenExpirationPeriodInHours = 24;MatchPasswordPatternEnabled = true;
}PasswordAdapter2 = {
ClassName = "ariba.sap.server.SAPPasswordAdapter";Enabled=false;
};PasswordAdapter3 = {
ClassName = "ariba.auth.external.client.ExternalAuthPasswordAdapter";Enabled=false;
ExternalPasswordAdapterHost = "localhost";ExternalPasswordAdapterPort = 8090;
}PasswordAdapter4 = {
ClassName ="ariba.auth.password.NTDomainLoginAdapter";
Enabled=true;};PasswordAdapter5 = {
ClassName = "ariba.auth.core.NoAuthenticationPasswordAdapter";Enabled=false;
};}
}
The Enabled parameter indicates whether the password adapter is initialized and in use. To enable or disable a specific password adapter in your configuration, change the value of this parameter.

Password Adapter Configuration Chapter 7 Passwords
84 Ariba Buyer Configuration Guide
For information on how to implement a custom password adapter, in Java, see the legacy version 8.2 Ariba Spend Management API Guide available at https://connect.ariba.com.
Specifying an Adapter During Login
If your configuration uses multiple password adapters, you must set up Ariba Buyer login URLs so that users are authenticated with the correct password adapter when they log in. You set up login links to different password adapters by including a password adapter as a parameter to the URL.
The following example shows how to include the password adapter on the Ariba Buyer login URL:
http://myserver/Buyer/Main/ad/webjumper?passwordadapter=PasswordAdapter1
The value you supply for the passwordadapter argument is the name of a password adapter, as defined in the System.PasswordAdapter entry in config/Parameters.table.
Setting the URL For Logout
When a user logs out from Ariba Buyer, the browser returns to a login URL. You specify the ‘return’ URL with the parameter System.UI.LogoutDestinationURL.
If this parameter is not set, or is set to an empty string, users return to the login URL specified at login, including the passwordadapter argument, if any. If this parameter is set to a URL, users return to the specified value.
For example, suppose a user logs into Ariba Buyer using the password adapter PasswordAdapter1:
http://myserver/Buyer/Main/ad/webjumper?passwordadapter=PasswordAdapter1
If LogoutDestinationURL is empty, the user is returned to this URL, including the passwordadapter, after logging out.
If LogoutDestinationURL is set to a value, such as http://myserver.mycompany.com/Buyer/Main, the password adapter information is discarded and the user is taken to the specified URL on logout.
Hiding the Forgotten Password Link
In Service Pack 5 and later, you can hide the forgotten password link on the login page for users with specific password adapters. To hide the forgotten password link, set the parameter System.PasswordAdapters.pwadapter.ShowLoginHelp to false for the password adapter value for which you want to hide the link.
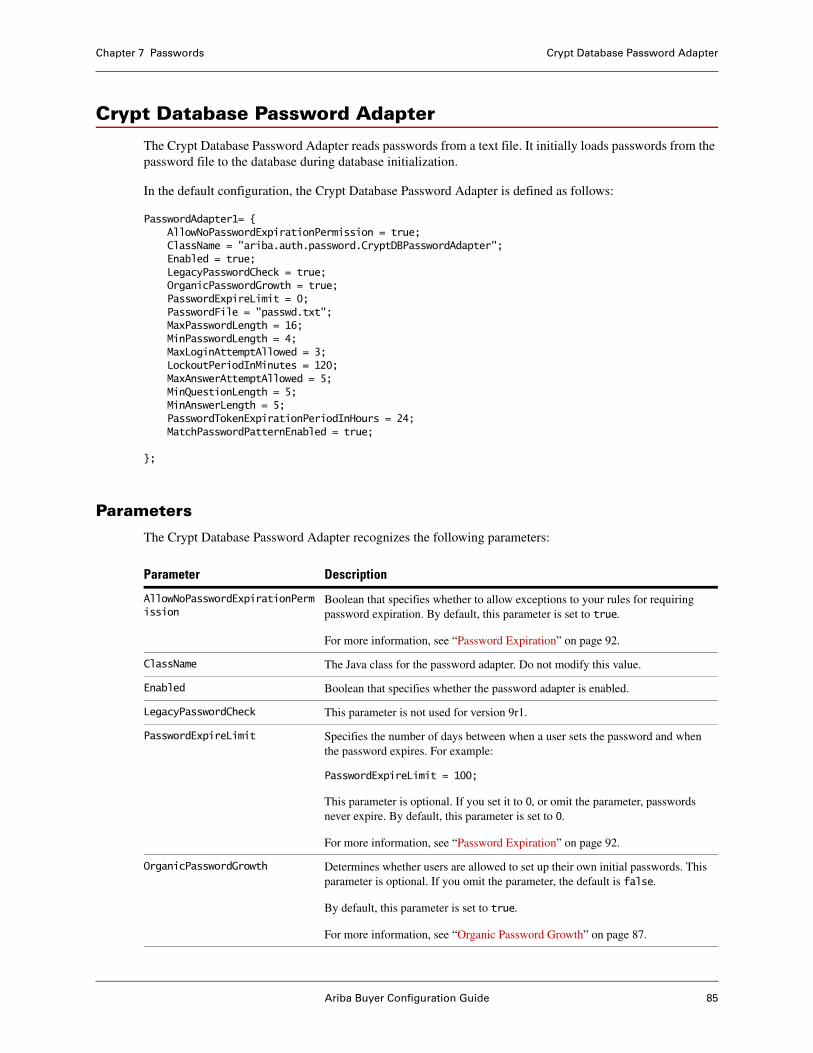
Ariba Buyer Configuration Guide 85
Chapter 7 Passwords Crypt Database Password Adapter
Crypt Database Password Adapter
The Crypt Database Password Adapter reads passwords from a text file. It initially loads passwords from the password file to the database during database initialization.
In the default configuration, the Crypt Database Password Adapter is defined as follows:
PasswordAdapter1= {AllowNoPasswordExpirationPermission = true;ClassName = "ariba.auth.password.CryptDBPasswordAdapter";Enabled = true;LegacyPasswordCheck = true;OrganicPasswordGrowth = true;PasswordExpireLimit = 0;PasswordFile = "passwd.txt";MaxPasswordLength = 16;MinPasswordLength = 4;MaxLoginAttemptAllowed = 3;LockoutPeriodInMinutes = 120;MaxAnswerAttemptAllowed = 5;MinQuestionLength = 5;MinAnswerLength = 5;PasswordTokenExpirationPeriodInHours = 24;MatchPasswordPatternEnabled = true;
};
Parameters
The Crypt Database Password Adapter recognizes the following parameters:
Parameter Description
AllowNoPasswordExpirationPermission
Boolean that specifies whether to allow exceptions to your rules for requiring password expiration. By default, this parameter is set to true.
For more information, see “Password Expiration” on page 92.
ClassName The Java class for the password adapter. Do not modify this value.
Enabled Boolean that specifies whether the password adapter is enabled.
LegacyPasswordCheck This parameter is not used for version 9r1.
PasswordExpireLimit Specifies the number of days between when a user sets the password and when the password expires. For example:
PasswordExpireLimit = 100;
This parameter is optional. If you set it to 0, or omit the parameter, passwords never expire. By default, this parameter is set to 0.
For more information, see “Password Expiration” on page 92.
OrganicPasswordGrowth Determines whether users are allowed to set up their own initial passwords. This parameter is optional. If you omit the parameter, the default is false.
By default, this parameter is set to true.
For more information, see “Organic Password Growth” on page 87.
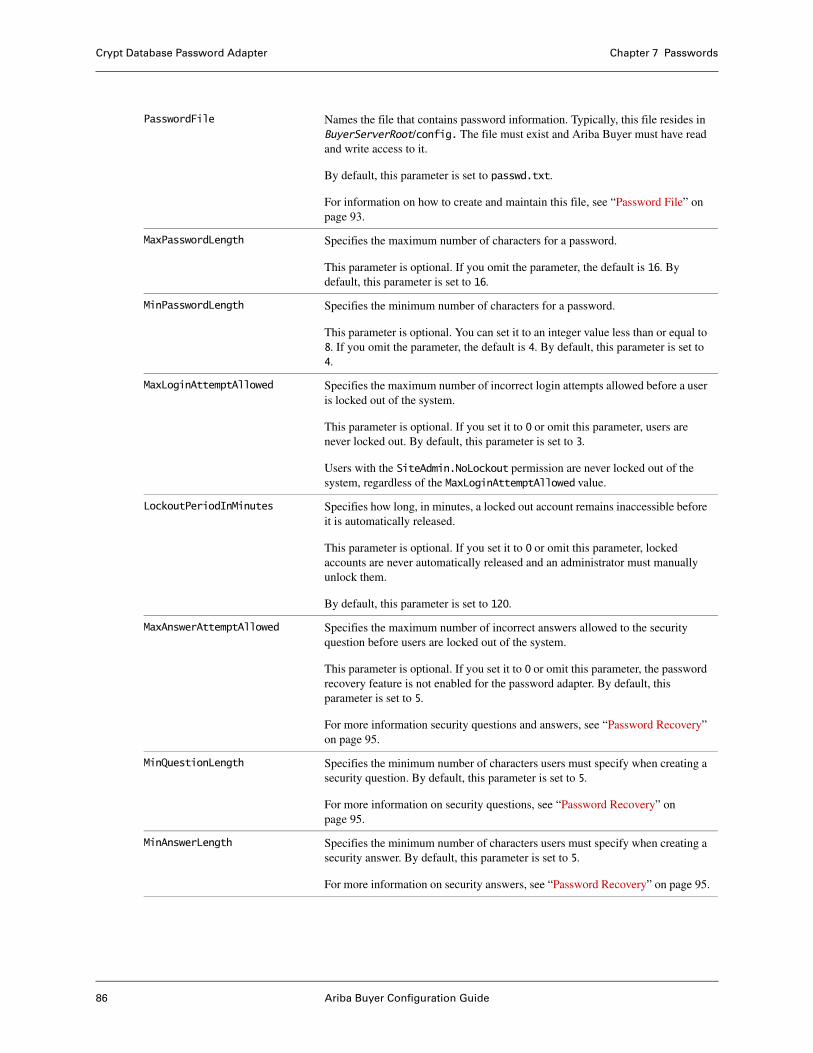
Crypt Database Password Adapter Chapter 7 Passwords
86 Ariba Buyer Configuration Guide
PasswordFile Names the file that contains password information. Typically, this file resides in BuyerServerRoot/config. The file must exist and Ariba Buyer must have read and write access to it.
By default, this parameter is set to passwd.txt.
For information on how to create and maintain this file, see “Password File” on page 93.
MaxPasswordLength Specifies the maximum number of characters for a password.
This parameter is optional. If you omit the parameter, the default is 16. By default, this parameter is set to 16.
MinPasswordLength Specifies the minimum number of characters for a password.
This parameter is optional. You can set it to an integer value less than or equal to 8. If you omit the parameter, the default is 4. By default, this parameter is set to 4.
MaxLoginAttemptAllowed Specifies the maximum number of incorrect login attempts allowed before a user is locked out of the system.
This parameter is optional. If you set it to 0 or omit this parameter, users are never locked out. By default, this parameter is set to 3.
Users with the SiteAdmin.NoLockout permission are never locked out of the system, regardless of the MaxLoginAttemptAllowed value.
LockoutPeriodInMinutes Specifies how long, in minutes, a locked out account remains inaccessible before it is automatically released.
This parameter is optional. If you set it to 0 or omit this parameter, locked accounts are never automatically released and an administrator must manually unlock them.
By default, this parameter is set to 120.
MaxAnswerAttemptAllowed Specifies the maximum number of incorrect answers allowed to the security question before users are locked out of the system.
This parameter is optional. If you set it to 0 or omit this parameter, the password recovery feature is not enabled for the password adapter. By default, this parameter is set to 5.
For more information security questions and answers, see “Password Recovery” on page 95.
MinQuestionLength Specifies the minimum number of characters users must specify when creating a security question. By default, this parameter is set to 5.
For more information on security questions, see “Password Recovery” on page 95.
MinAnswerLength Specifies the minimum number of characters users must specify when creating a security answer. By default, this parameter is set to 5.
For more information on security answers, see “Password Recovery” on page 95.
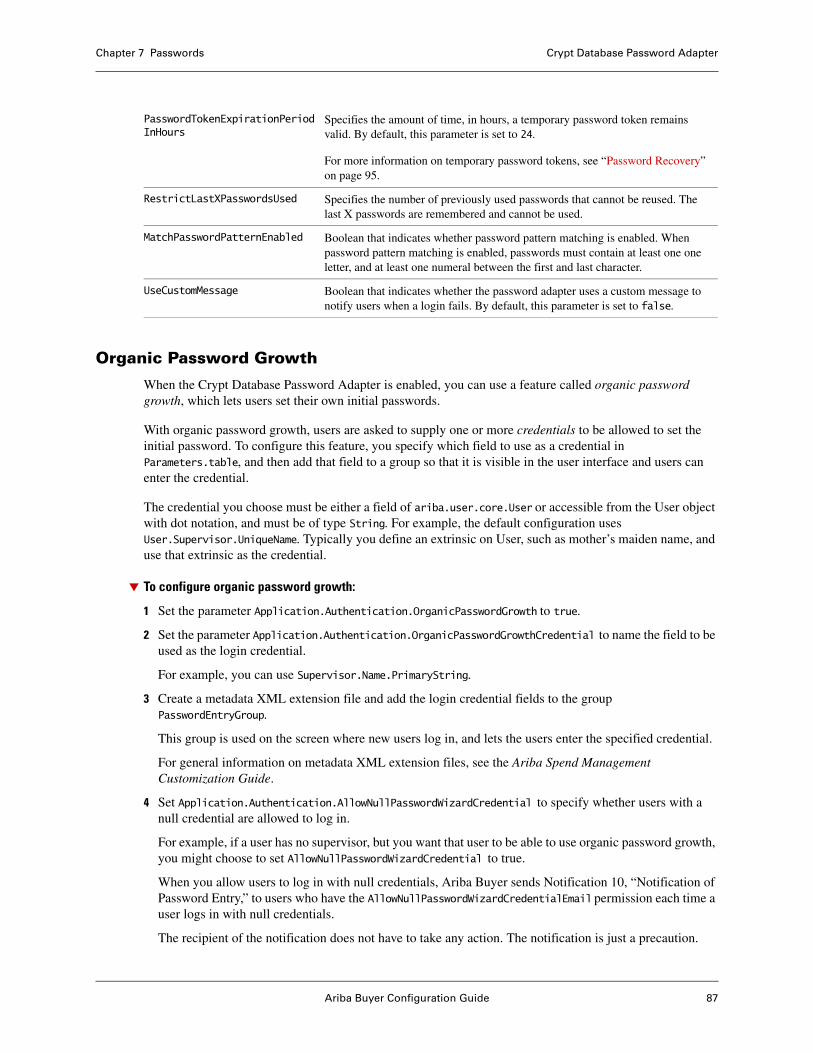
Ariba Buyer Configuration Guide 87
Chapter 7 Passwords Crypt Database Password Adapter
Organic Password Growth
When the Crypt Database Password Adapter is enabled, you can use a feature called organic password growth, which lets users set their own initial passwords.
With organic password growth, users are asked to supply one or more credentials to be allowed to set the initial password. To configure this feature, you specify which field to use as a credential in Parameters.table, and then add that field to a group so that it is visible in the user interface and users can enter the credential.
The credential you choose must be either a field of ariba.user.core.User or accessible from the User object with dot notation, and must be of type String. For example, the default configuration uses User.Supervisor.UniqueName. Typically you define an extrinsic on User, such as mother’s maiden name, and use that extrinsic as the credential.
To configure organic password growth:
1 Set the parameter Application.Authentication.OrganicPasswordGrowth to true.
2 Set the parameter Application.Authentication.OrganicPasswordGrowthCredential to name the field to be used as the login credential.
For example, you can use Supervisor.Name.PrimaryString.
3 Create a metadata XML extension file and add the login credential fields to the group PasswordEntryGroup.
This group is used on the screen where new users log in, and lets the users enter the specified credential.
For general information on metadata XML extension files, see the Ariba Spend Management Customization Guide.
4 Set Application.Authentication.AllowNullPasswordWizardCredential to specify whether users with a null credential are allowed to log in.
For example, if a user has no supervisor, but you want that user to be able to use organic password growth, you might choose to set AllowNullPasswordWizardCredential to true.
When you allow users to log in with null credentials, Ariba Buyer sends Notification 10, “Notification of Password Entry,” to users who have the AllowNullPasswordWizardCredentialEmail permission each time a user logs in with null credentials.
The recipient of the notification does not have to take any action. The notification is just a precaution.
PasswordTokenExpirationPeriodInHours
Specifies the amount of time, in hours, a temporary password token remains valid. By default, this parameter is set to 24.
For more information on temporary password tokens, see “Password Recovery” on page 95.
RestrictLastXPasswordsUsed Specifies the number of previously used passwords that cannot be reused. The last X passwords are remembered and cannot be used.
MatchPasswordPatternEnabled Boolean that indicates whether password pattern matching is enabled. When password pattern matching is enabled, passwords must contain at least one one letter, and at least one numeral between the first and last character.
UseCustomMessage Boolean that indicates whether the password adapter uses a custom message to notify users when a login fails. By default, this parameter is set to false.
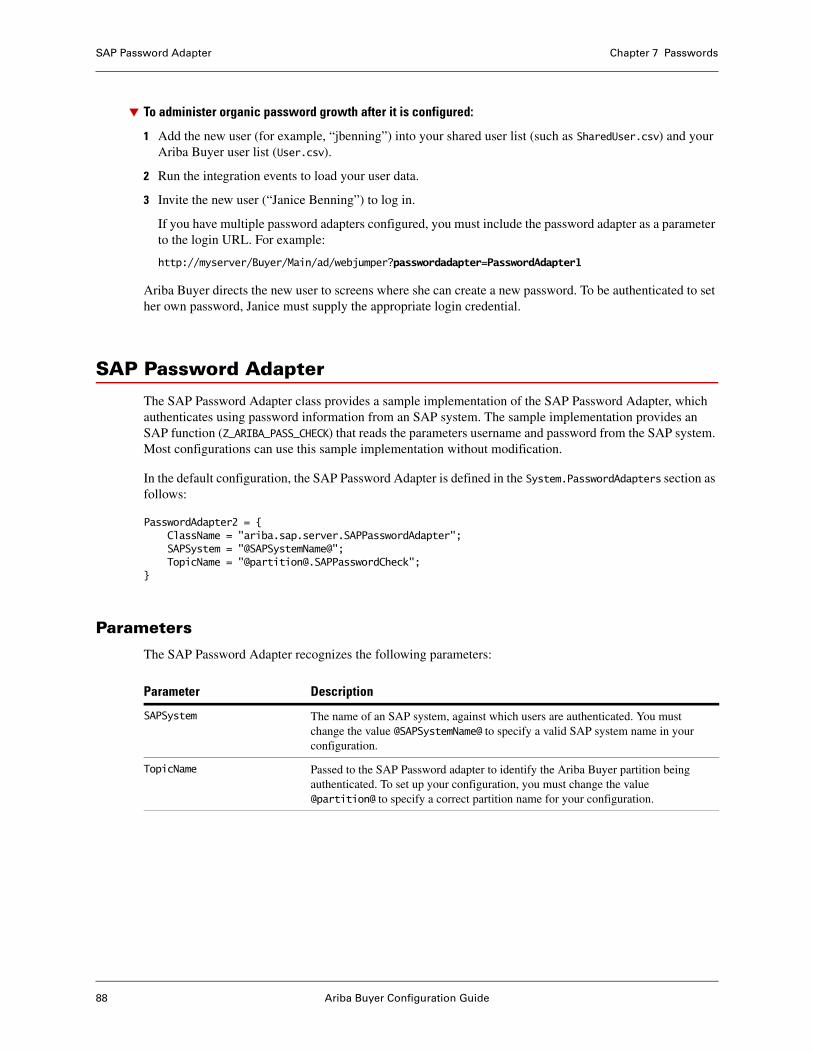
SAP Password Adapter Chapter 7 Passwords
88 Ariba Buyer Configuration Guide
To administer organic password growth after it is configured:
1 Add the new user (for example, “jbenning”) into your shared user list (such as SharedUser.csv) and your Ariba Buyer user list (User.csv).
2 Run the integration events to load your user data.
3 Invite the new user (“Janice Benning”) to log in.
If you have multiple password adapters configured, you must include the password adapter as a parameter to the login URL. For example:
http://myserver/Buyer/Main/ad/webjumper?passwordadapter=PasswordAdapter1
Ariba Buyer directs the new user to screens where she can create a new password. To be authenticated to set her own password, Janice must supply the appropriate login credential.
SAP Password Adapter
The SAP Password Adapter class provides a sample implementation of the SAP Password Adapter, which authenticates using password information from an SAP system. The sample implementation provides an SAP function (Z_ARIBA_PASS_CHECK) that reads the parameters username and password from the SAP system. Most configurations can use this sample implementation without modification.
In the default configuration, the SAP Password Adapter is defined in the System.PasswordAdapters section as follows:
PasswordAdapter2 = {ClassName = "ariba.sap.server.SAPPasswordAdapter";SAPSystem = "@SAPSystemName@";TopicName = "@[email protected]";
}
Parameters
The SAP Password Adapter recognizes the following parameters:
Parameter Description
SAPSystem The name of an SAP system, against which users are authenticated. You must change the value @SAPSystemName@ to specify a valid SAP system name in your configuration.
TopicName Passed to the SAP Password adapter to identify the Ariba Buyer partition being authenticated. To set up your configuration, you must change the value @partition@ to specify a correct partition name for your configuration.
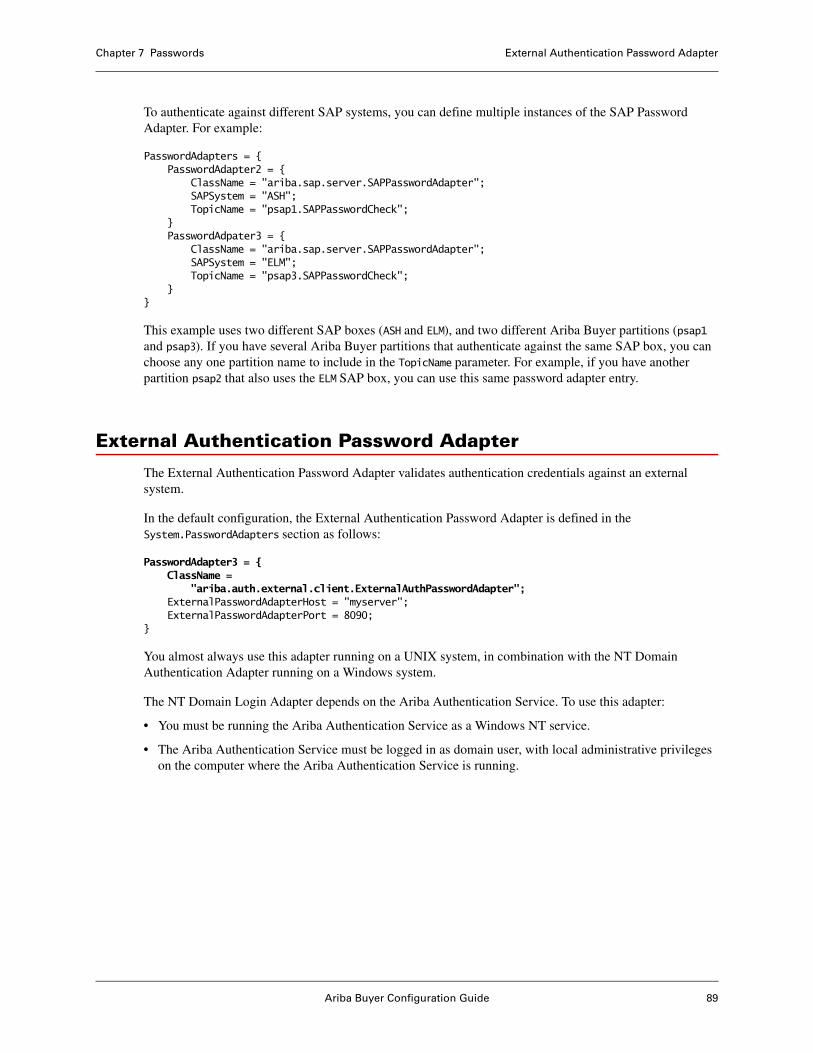
Ariba Buyer Configuration Guide 89
Chapter 7 Passwords External Authentication Password Adapter
To authenticate against different SAP systems, you can define multiple instances of the SAP Password Adapter. For example:
PasswordAdapters = {PasswordAdapter2 = {
ClassName = "ariba.sap.server.SAPPasswordAdapter";SAPSystem = "ASH";TopicName = "psap1.SAPPasswordCheck";
}PasswordAdpater3 = {
ClassName = "ariba.sap.server.SAPPasswordAdapter";SAPSystem = "ELM";TopicName = "psap3.SAPPasswordCheck";
} }
This example uses two different SAP boxes (ASH and ELM), and two different Ariba Buyer partitions (psap1 and psap3). If you have several Ariba Buyer partitions that authenticate against the same SAP box, you can choose any one partition name to include in the TopicName parameter. For example, if you have another partition psap2 that also uses the ELM SAP box, you can use this same password adapter entry.
External Authentication Password Adapter
The External Authentication Password Adapter validates authentication credentials against an external system.
In the default configuration, the External Authentication Password Adapter is defined in the System.PasswordAdapters section as follows:
PasswordAdapter3 = {ClassName =
"ariba.auth.external.client.ExternalAuthPasswordAdapter";ExternalPasswordAdapterHost = "myserver";ExternalPasswordAdapterPort = 8090;
}
You almost always use this adapter running on a UNIX system, in combination with the NT Domain Authentication Adapter running on a Windows system.
The NT Domain Login Adapter depends on the Ariba Authentication Service. To use this adapter:
• You must be running the Ariba Authentication Service as a Windows NT service.
• The Ariba Authentication Service must be logged in as domain user, with local administrative privileges on the computer where the Ariba Authentication Service is running.
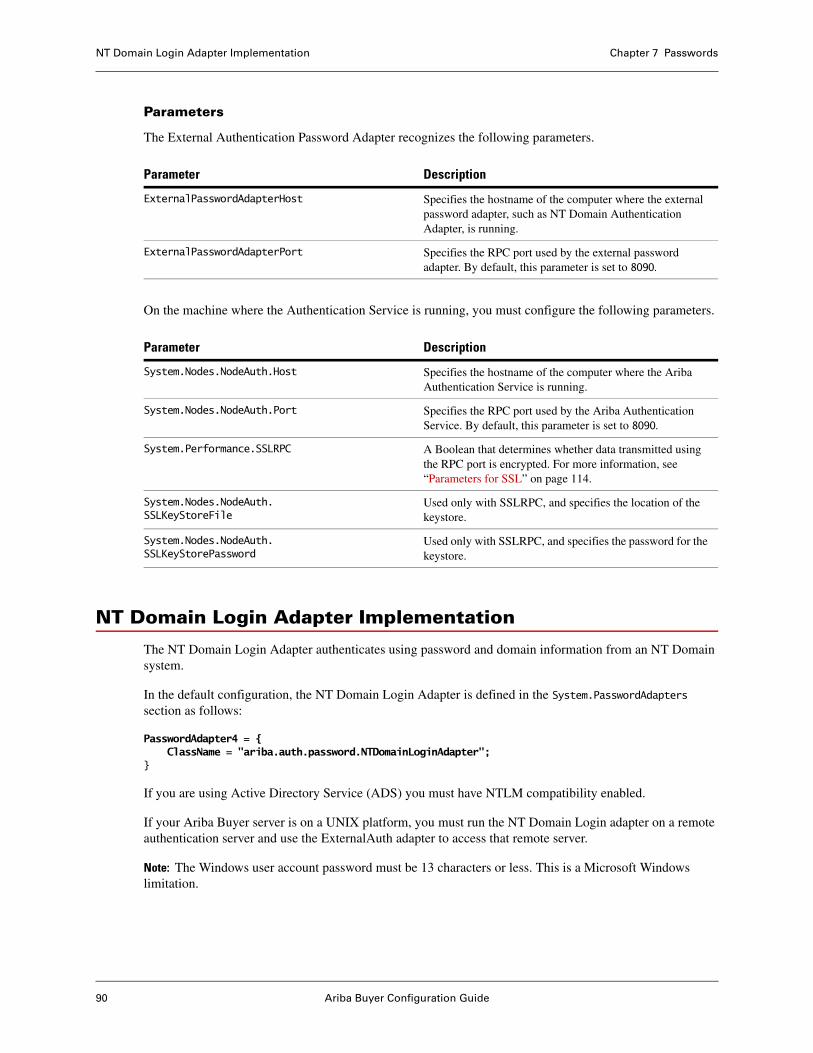
NT Domain Login Adapter Implementation Chapter 7 Passwords
90 Ariba Buyer Configuration Guide
Parameters
The External Authentication Password Adapter recognizes the following parameters.
On the machine where the Authentication Service is running, you must configure the following parameters.
NT Domain Login Adapter Implementation
The NT Domain Login Adapter authenticates using password and domain information from an NT Domain system.
In the default configuration, the NT Domain Login Adapter is defined in the System.PasswordAdapters section as follows:
PasswordAdapter4 = {ClassName = "ariba.auth.password.NTDomainLoginAdapter";
}
If you are using Active Directory Service (ADS) you must have NTLM compatibility enabled.
If your Ariba Buyer server is on a UNIX platform, you must run the NT Domain Login adapter on a remote authentication server and use the ExternalAuth adapter to access that remote server.
Note: The Windows user account password must be 13 characters or less. This is a Microsoft Windows limitation.
Parameter Description
ExternalPasswordAdapterHost Specifies the hostname of the computer where the external password adapter, such as NT Domain Authentication Adapter, is running.
ExternalPasswordAdapterPort Specifies the RPC port used by the external password adapter. By default, this parameter is set to 8090.
Parameter Description
System.Nodes.NodeAuth.Host Specifies the hostname of the computer where the Ariba Authentication Service is running.
System.Nodes.NodeAuth.Port Specifies the RPC port used by the Ariba Authentication Service. By default, this parameter is set to 8090.
System.Performance.SSLRPC A Boolean that determines whether data transmitted using the RPC port is encrypted. For more information, see “Parameters for SSL” on page 114.
System.Nodes.NodeAuth.SSLKeyStoreFile
Used only with SSLRPC, and specifies the location of the keystore.
System.Nodes.NodeAuth.SSLKeyStorePassword
Used only with SSLRPC, and specifies the password for the keystore.
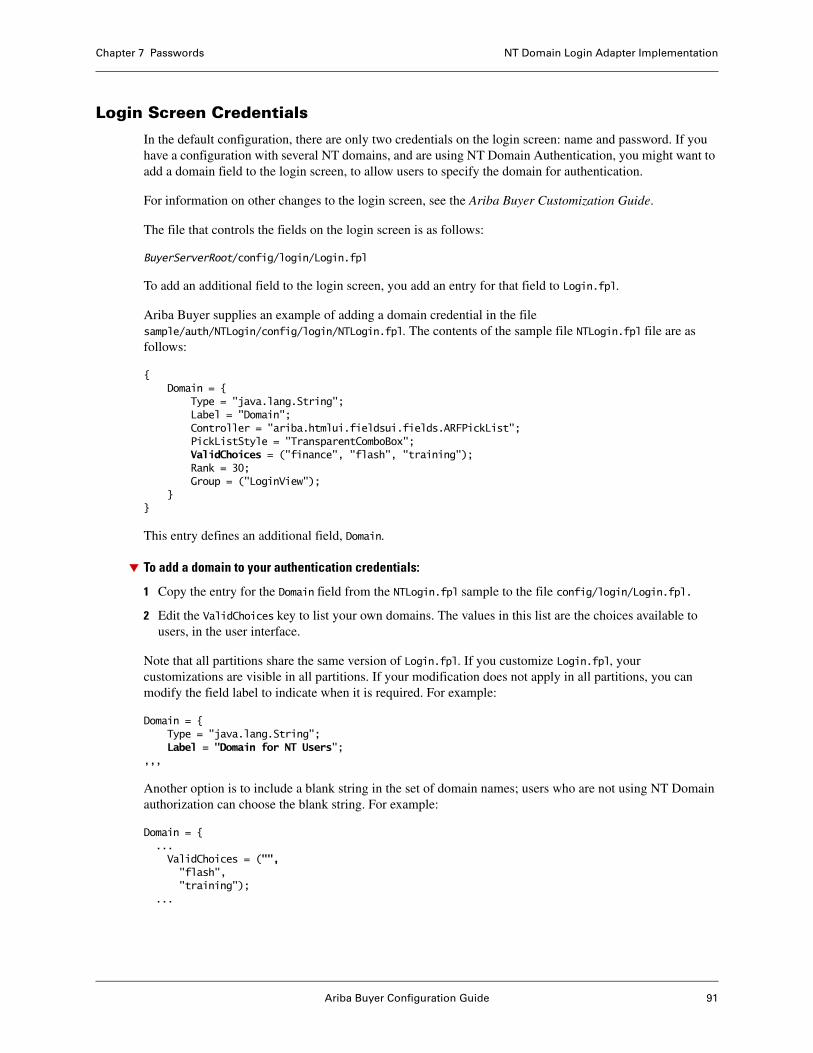
Ariba Buyer Configuration Guide 91
Chapter 7 Passwords NT Domain Login Adapter Implementation
Login Screen Credentials
In the default configuration, there are only two credentials on the login screen: name and password. If you have a configuration with several NT domains, and are using NT Domain Authentication, you might want to add a domain field to the login screen, to allow users to specify the domain for authentication.
For information on other changes to the login screen, see the Ariba Buyer Customization Guide.
The file that controls the fields on the login screen is as follows:
BuyerServerRoot/config/login/Login.fpl
To add an additional field to the login screen, you add an entry for that field to Login.fpl.
Ariba Buyer supplies an example of adding a domain credential in the file sample/auth/NTLogin/config/login/NTLogin.fpl. The contents of the sample file NTLogin.fpl file are as follows:
{ Domain = { Type = "java.lang.String"; Label = "Domain"; Controller = "ariba.htmlui.fieldsui.fields.ARFPickList"; PickListStyle = "TransparentComboBox"; ValidChoices = ("finance", "flash", "training"); Rank = 30; Group = ("LoginView"); }}
This entry defines an additional field, Domain.
To add a domain to your authentication credentials:
1 Copy the entry for the Domain field from the NTLogin.fpl sample to the file config/login/Login.fpl.
2 Edit the ValidChoices key to list your own domains. The values in this list are the choices available to users, in the user interface.
Note that all partitions share the same version of Login.fpl. If you customize Login.fpl, your customizations are visible in all partitions. If your modification does not apply in all partitions, you can modify the field label to indicate when it is required. For example:
Domain = {Type = "java.lang.String";Label = "Domain for NT Users";
,,,
Another option is to include a blank string in the set of domain names; users who are not using NT Domain authorization can choose the blank string. For example:
Domain = {...ValidChoices = ("","flash","training");
...
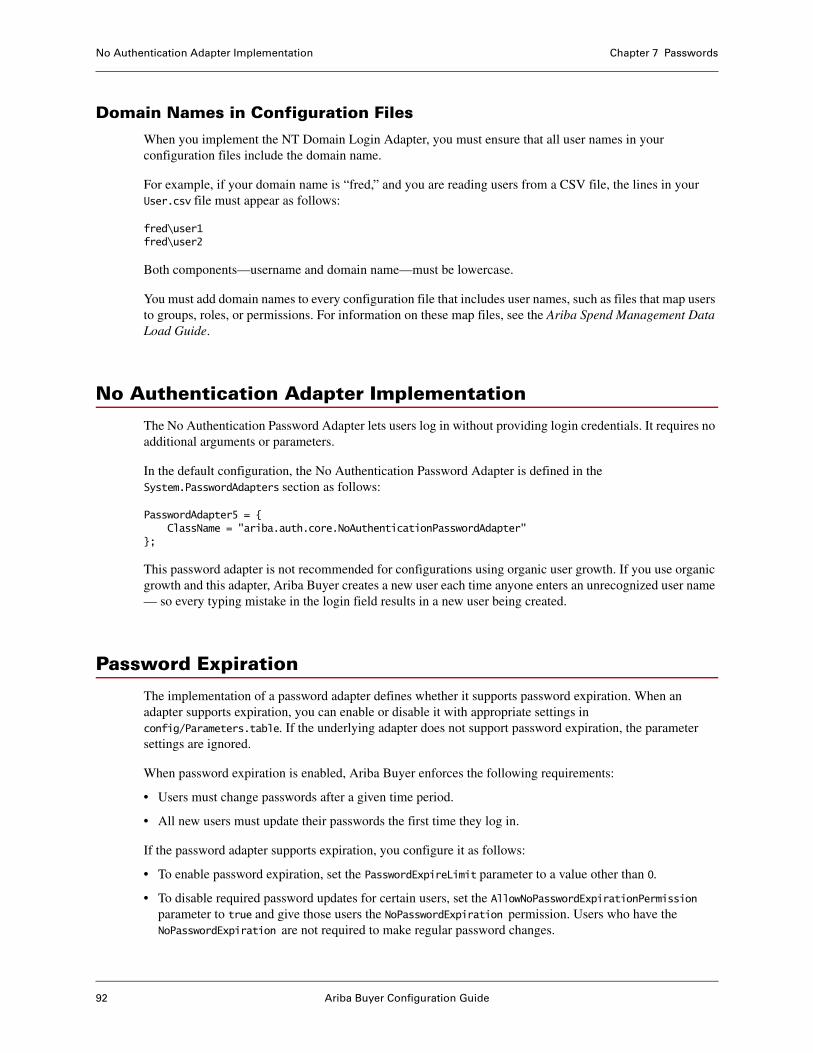
No Authentication Adapter Implementation Chapter 7 Passwords
92 Ariba Buyer Configuration Guide
Domain Names in Configuration Files
When you implement the NT Domain Login Adapter, you must ensure that all user names in your configuration files include the domain name.
For example, if your domain name is “fred,” and you are reading users from a CSV file, the lines in your User.csv file must appear as follows:
fred\user1fred\user2
Both components—username and domain name—must be lowercase.
You must add domain names to every configuration file that includes user names, such as files that map users to groups, roles, or permissions. For information on these map files, see the Ariba Spend Management Data Load Guide.
No Authentication Adapter Implementation
The No Authentication Password Adapter lets users log in without providing login credentials. It requires no additional arguments or parameters.
In the default configuration, the No Authentication Password Adapter is defined in the System.PasswordAdapters section as follows:
PasswordAdapter5 = { ClassName = "ariba.auth.core.NoAuthenticationPasswordAdapter"
};
This password adapter is not recommended for configurations using organic user growth. If you use organic growth and this adapter, Ariba Buyer creates a new user each time anyone enters an unrecognized user name — so every typing mistake in the login field results in a new user being created.
Password Expiration
The implementation of a password adapter defines whether it supports password expiration. When an adapter supports expiration, you can enable or disable it with appropriate settings in config/Parameters.table. If the underlying adapter does not support password expiration, the parameter settings are ignored.
When password expiration is enabled, Ariba Buyer enforces the following requirements:
• Users must change passwords after a given time period.
• All new users must update their passwords the first time they log in.
If the password adapter supports expiration, you configure it as follows:
• To enable password expiration, set the PasswordExpireLimit parameter to a value other than 0.
• To disable required password updates for certain users, set the AllowNoPasswordExpirationPermission parameter to true and give those users the NoPasswordExpiration permission. Users who have the NoPasswordExpiration are not required to make regular password changes.
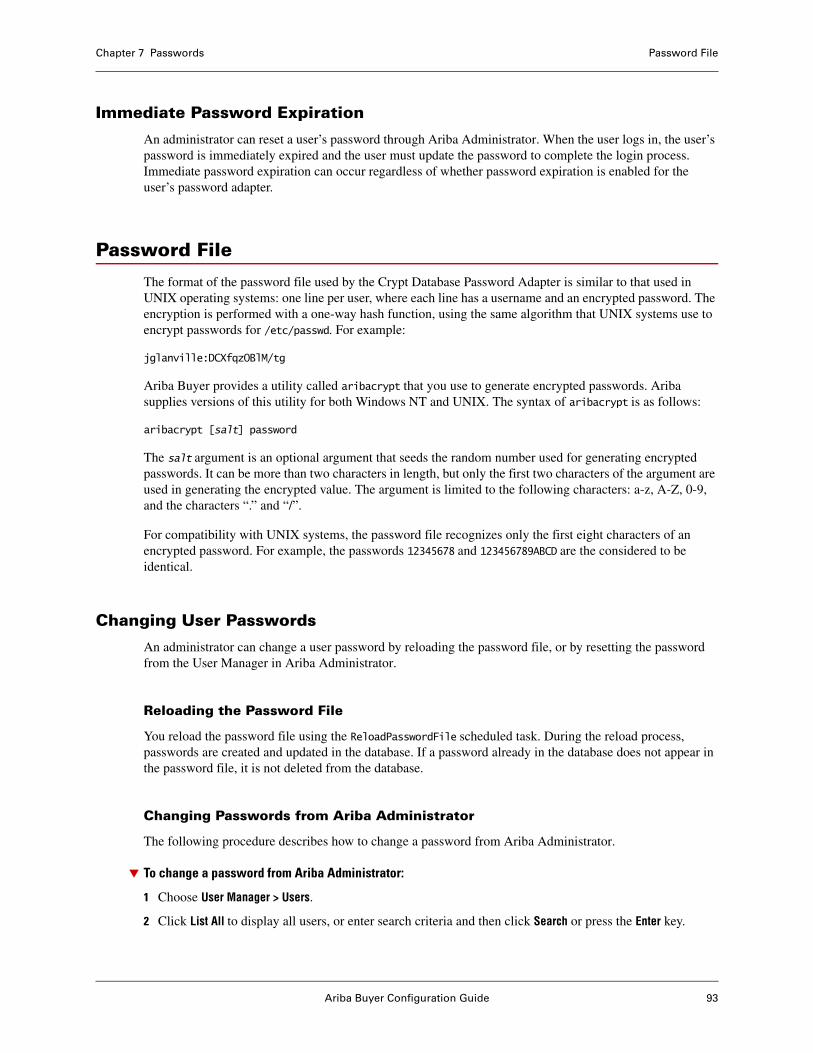
Ariba Buyer Configuration Guide 93
Chapter 7 Passwords Password File
Immediate Password Expiration
An administrator can reset a user’s password through Ariba Administrator. When the user logs in, the user’s password is immediately expired and the user must update the password to complete the login process. Immediate password expiration can occur regardless of whether password expiration is enabled for the user’s password adapter.
Password File
The format of the password file used by the Crypt Database Password Adapter is similar to that used in UNIX operating systems: one line per user, where each line has a username and an encrypted password. The encryption is performed with a one-way hash function, using the same algorithm that UNIX systems use to encrypt passwords for /etc/passwd. For example:
jglanville:DCXfqzOBlM/tg
Ariba Buyer provides a utility called aribacrypt that you use to generate encrypted passwords. Ariba supplies versions of this utility for both Windows NT and UNIX. The syntax of aribacrypt is as follows:
aribacrypt [salt] password
The salt argument is an optional argument that seeds the random number used for generating encrypted passwords. It can be more than two characters in length, but only the first two characters of the argument are used in generating the encrypted value. The argument is limited to the following characters: a-z, A-Z, 0-9, and the characters “.” and “/”.
For compatibility with UNIX systems, the password file recognizes only the first eight characters of an encrypted password. For example, the passwords 12345678 and 123456789ABCD are the considered to be identical.
Changing User Passwords
An administrator can change a user password by reloading the password file, or by resetting the password from the User Manager in Ariba Administrator.
Reloading the Password File
You reload the password file using the ReloadPasswordFile scheduled task. During the reload process, passwords are created and updated in the database. If a password already in the database does not appear in the password file, it is not deleted from the database.
Changing Passwords from Ariba Administrator
The following procedure describes how to change a password from Ariba Administrator.
To change a password from Ariba Administrator:
1 Choose User Manager > Users.
2 Click List All to display all users, or enter search criteria and then click Search or press the Enter key.
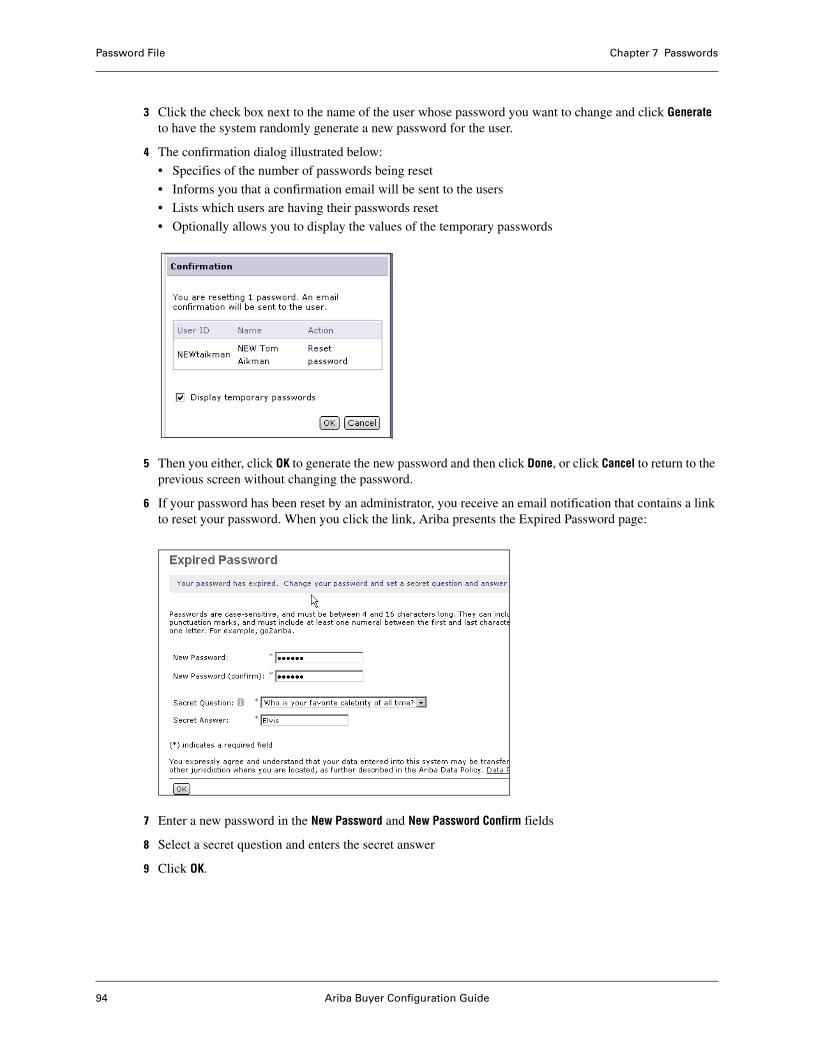
Password File Chapter 7 Passwords
94 Ariba Buyer Configuration Guide
3 Click the check box next to the name of the user whose password you want to change and click Generate to have the system randomly generate a new password for the user.
4 The confirmation dialog illustrated below:
• Specifies of the number of passwords being reset
• Informs you that a confirmation email will be sent to the users
• Lists which users are having their passwords reset
• Optionally allows you to display the values of the temporary passwords
5 Then you either, click OK to generate the new password and then click Done, or click Cancel to return to the previous screen without changing the password.
6 If your password has been reset by an administrator, you receive an email notification that contains a link to reset your password. When you click the link, Ariba presents the Expired Password page:
7 Enter a new password in the New Password and New Password Confirm fields
8 Select a secret question and enters the secret answer
9 Click OK.
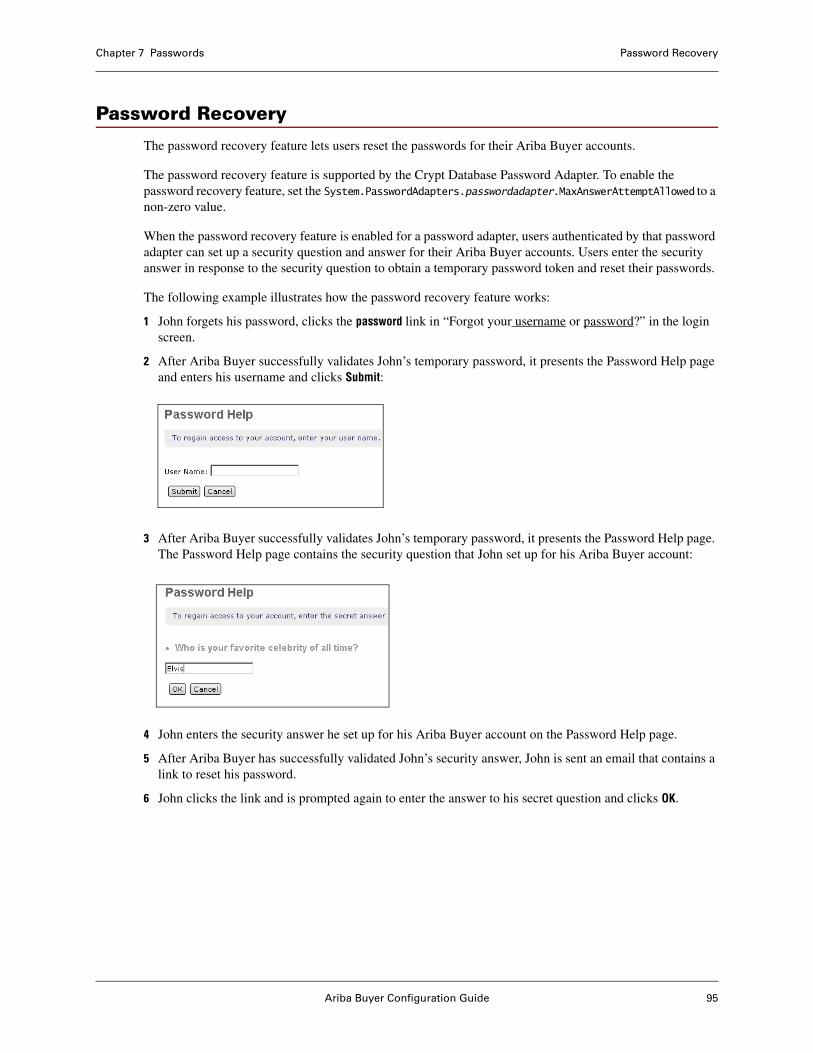
Ariba Buyer Configuration Guide 95
Chapter 7 Passwords Password Recovery
Password Recovery
The password recovery feature lets users reset the passwords for their Ariba Buyer accounts.
The password recovery feature is supported by the Crypt Database Password Adapter. To enable the password recovery feature, set the System.PasswordAdapters.passwordadapter.MaxAnswerAttemptAllowed to a non-zero value.
When the password recovery feature is enabled for a password adapter, users authenticated by that password adapter can set up a security question and answer for their Ariba Buyer accounts. Users enter the security answer in response to the security question to obtain a temporary password token and reset their passwords.
The following example illustrates how the password recovery feature works:
1 John forgets his password, clicks the password link in “Forgot your username or password?” in the login screen.
2 After Ariba Buyer successfully validates John’s temporary password, it presents the Password Help page and enters his username and clicks Submit:
3 After Ariba Buyer successfully validates John’s temporary password, it presents the Password Help page. The Password Help page contains the security question that John set up for his Ariba Buyer account:
4 John enters the security answer he set up for his Ariba Buyer account on the Password Help page.
5 After Ariba Buyer has successfully validated John’s security answer, John is sent an email that contains a link to reset his password.
6 John clicks the link and is prompted again to enter the answer to his secret question and clicks OK.
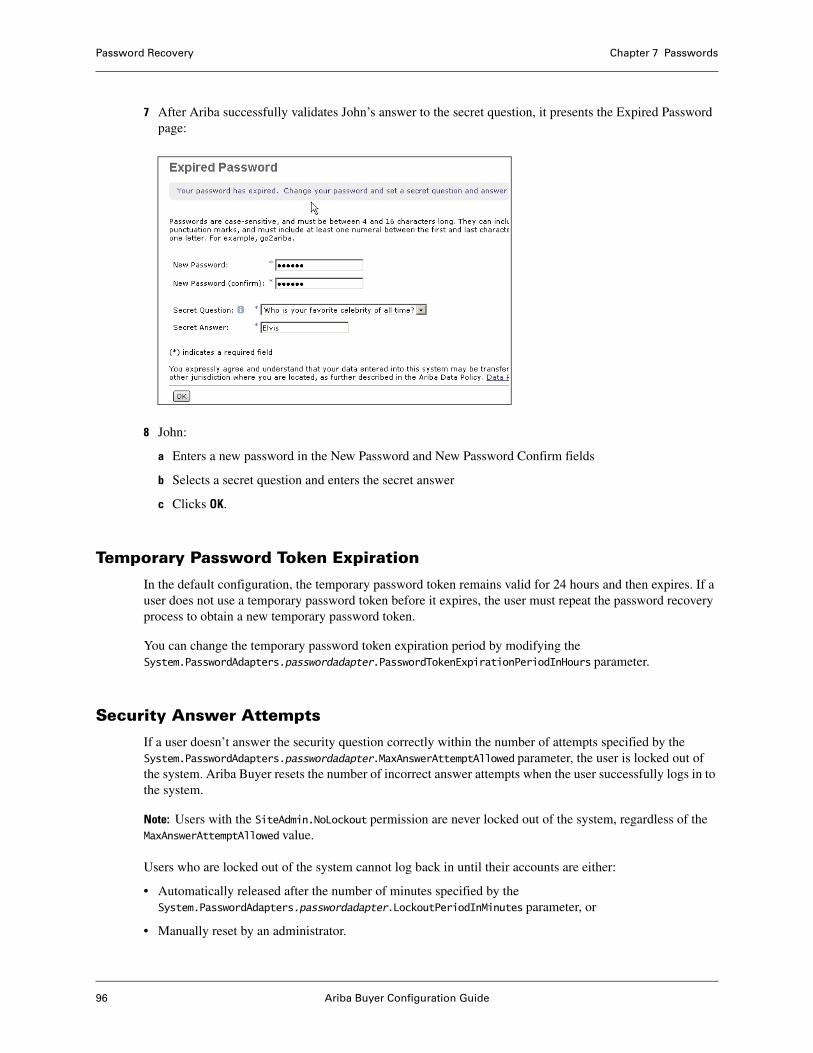
Password Recovery Chapter 7 Passwords
96 Ariba Buyer Configuration Guide
7 After Ariba successfully validates John’s answer to the secret question, it presents the Expired Password page:
8 John:
a Enters a new password in the New Password and New Password Confirm fields
b Selects a secret question and enters the secret answer
c Clicks OK.
Temporary Password Token Expiration
In the default configuration, the temporary password token remains valid for 24 hours and then expires. If a user does not use a temporary password token before it expires, the user must repeat the password recovery process to obtain a new temporary password token.
You can change the temporary password token expiration period by modifying the System.PasswordAdapters.passwordadapter.PasswordTokenExpirationPeriodInHours parameter.
Security Answer Attempts
If a user doesn’t answer the security question correctly within the number of attempts specified by the System.PasswordAdapters.passwordadapter.MaxAnswerAttemptAllowed parameter, the user is locked out of the system. Ariba Buyer resets the number of incorrect answer attempts when the user successfully logs in to the system.
Note: Users with the SiteAdmin.NoLockout permission are never locked out of the system, regardless of the MaxAnswerAttemptAllowed value.
Users who are locked out of the system cannot log back in until their accounts are either:
• Automatically released after the number of minutes specified by the System.PasswordAdapters.passwordadapter.LockoutPeriodInMinutes parameter, or
• Manually reset by an administrator.
Ariba Buyer Configuration Guide 97
Chapter 7 Passwords Display Names for Password Adapters
If LockoutPeriodInMinutes is set to 0 or is omitted, accounts are not automatically released and must be manually reset by an administrator.
Display Names for Password Adapters
When it displays password adapter names, Ariba Administrator uses the name specified in the config/Parameters.table file (for example, PasswordAdapter1) unless you configure a different display name.
To configure a display name for a password adapter, add a string for the display name to the resource file named ariba.html.commonadmin.csv. The key in the resource file must be the same as the adapter name in the config/Parameters.table file. For example:
PasswordAdapter1,"Enterprise User"
In this example, PasswordAdapter1 is the resource key and Enterprise User is the display name.
For more information on resource files, see the Ariba Spend Management Customization Guide.

Display Names for Password Adapters Chapter 7 Passwords
98 Ariba Buyer Configuration Guide
Ariba Buyer Configuration Guide 99
Chapter 8 Security Considerations
This chapter describes how to configure Ariba Buyer for security. It describes how to encrypt values in configuration files, and how to use Secure Sockets Layer (SSL) for secure communication. It includes the following sections:
• “Parameter Security” on page 99
• “Ariba Administrator Security” on page 101
• “Object Security” on page 105
• “Inspector Security” on page 106
• “How Ariba Buyer Uses SSL” on page 113
• “Parameters for SSL” on page 114
• “Security of Ariba Client Automation” on page 117
• “How To Create and Configure Digital Certificates” on page 121
• “Guest User Account” on page 124
Note: Most of the SSL implementation is handled by your web server. This chapter assumes your web server is configured for SSL. If your web server is not already SSL-enabled, consult the documentation from your web server provider for instructions on implementing SSL.
Parameter Security
Ariba Buyer configuration files can contain potentially sensitive information, such as computer names, passwords, or personnel information. By default, all parameter values are in plain text. To protect the security and privacy of your data, you can encrypt specific parameters.
You use the aribaencrypt command to encrypt a value. When you run aribaencrypt, you supply a string as argument, and aribaencrypt returns an encrypted string and automatically updates config/Parameters.table with the encrypted value.
Usage:
aribaencrypt [-key <key>] [-value <value>] [-tablefile <tablefile>][-allownewkey|-noallownewkey*] [-skipconfirm*|-noskipconfirm] [-secureparameterskey <secureparameterskey>]
To encrypt a parameter value in config/Parameters.table:
Type aribaencrypt -key <key> where key is the name of an existing parameter in Parameters.table. Your will be prompted to confirm the operation. Upon confirmation, the key is properly encrypted and stored in Parameters.table. No further steps are required.

Parameter Security Chapter 8 Security Considerations
100 Ariba Buyer Configuration Guide
To encrypt one or more values in config/Parameters.table:
Type aribaencrypt [-secureparameterskey <secureparameterskey>] where <secureparameterskey> specifies the name of the parameter whose value is a list of keys that are to be encrypted. The default value for <secureparameterskey> is "System.Base.SecureParameters". For example, to use encrypted values for your Ariba Buyer database username and password, you would add the following entry to your config/Parameters.table file:
System {Base {
SecureParameters = (System.DatabaseSchemas.Schema1.AribaDBPassword,System.DatabaseSchemas.Schema1.AribaDBUsername
);
The full set of aribaencrypt options and their descriptions follow.
Options-key <key>
Use this option to specify the key (in dotted notation) whose value is to be encrypted. For example: -key "System.Database.AribaDBPassword". If the parameter is not in the file, the encrypted value will be output to the console. Otherwise, the encrypted value will be stored in the table file as the value of the key.
-value value
Use this option to specify the clear text to encrypt. If <key> is specified and if it exists in <tablefile>, you will be prompted to select which value is used if -skipconfirm is false). If confirmation is skipped, the value parameter overrides the current key value.
Note: The value of this option cannot be an empty string. Specifying an empty string for this option is the same as not specifying this option.
-tablefile tablefile
Use this option to specify the table file in which to store the encrypted parameter. The default is config/Parameters.table. If present, this value must be a valid table file.
-allownewkey|-noallownewkey
Use this option to specify whether a new key can be added if it does not already exist in the table file. If the new key is allowed, and if the given key is not present, then the value parameter must be specified also. The default is -noallownewkey.
-skipconfirm
Use this option to skip the confirmation step. The default is to prompt for confirmation.
-secureparameterskey
Use this option to specify the name of the parameter whose value is a list of keys whose values are to be encrypted. The default parameter is "System.Base.SecureParameters". If you are using aribaencrypt on Parameters.table do not specify this parameter it will be used by default.
Ariba Buyer Configuration Guide 101
Chapter 8 Security Considerations Ariba Administrator Security
Ariba Administrator Security
Ariba Buyer provides the following methods to control access to data through Ariba Administrator:
• You can restrict access to integration events and scheduled tasks from Ariba Administrator by using the ExecutePermissionPull integration event.
• You can control which configuration files are visible to administrators in Ariba Administrator by implementing file-level security by using the EditPermissionPull integration event.
• You can change workspace and task permissions in the workspace configuration files.
Restricting Access to Integration Events and Scheduled Tasks
You can restrict access to integration events and scheduled tasks from Ariba Administrator by assigning permissions to specific events and tasks in the ExecutePermission.csv file, and then loading the CSV file through the ExecutePermissionPull integration event.
When you assign a permission to an integration event or scheduled task in the ExecutePermission.csv file, an administrator must have that permission to view and run the event or task from Ariba Administrator.
If you do not load the ExecutePermissionPull integration event, or if there are no entries in the ExecutePermission.csv file, then any administrator who has the proper workspace and task permissions can run an integration event or scheduled task from Ariba Administrator.
Note: To run an integration event or scheduled task from the serverMonitor command, an administrator must have the SiteAdmin.AdminClient permission.
In the default configuration, the ExecutePermission.csv file is located in the following directory:
config/variants/Plain/partitions/None/data
The fields in ExecutePermission.csv are as follows:
Field Description
TaskOrIntegrationEventName The name of a integration event or scheduled task. To specify an integration event, use the following format:
partition.IntegrationEvent.eventname
To specify a scheduled task, use the following format:
partition.Task.taskname
Names are case sensitive.
ExecutePermission The UniqueName of a valid permission in your configuration.

Ariba Administrator Security Chapter 8 Security Considerations
102 Ariba Buyer Configuration Guide
The following example shows sample lines from the ExecutePermission.csv file:
"TaskOrIntegrationEventName", "ExecutePermission""None.IntegrationEvent.AccountTypePull", PurchasingAgent"None.Task.SupplierLocationCheck", PurchasingAgent
To associate multiple permissions with a particular integration event or task, add a separate line for each permission. For example:
"TaskOrIntegrationEventName", "ExecutePermission""None.IntegrationEvent.AccountTypePull", PurchasingAgent"None.IntegrationEvent.AccountTypePull", ExpenseManager
Considerations for Export Events
Ariba recommends that you do not use the ExecutePermission.csv file to assign permissions to specific export events.
You can restrict access to export events by using the enableExport and exportPermission attributes. The enableExport attribute specifies whether administrators can use the object manager to export objects. When this attribute is set to true, administrators may export objects from the object manager if they have the permission specified in the exportPermission attribute for the object manager.
Allowing Access to Files
You can allow access to configuration files, log files, and rule set (.rul) files by assigning permissions to specific files in the EditPermission.csv file, and then loading the CSV file through the EditPermissionPull integration event.
When you assign a permission to a file in the EditPermission.csv file, an administrator who has that permission (or the SiteAdmin.ConfigurationFiles permission) can see the file listed and access it from Ariba Administrator.
If you do not assign an edit permission to a file, or if there are no file entries in the EditPermission.csv file, only administrators who have the SiteAdmin.ConfigurationFiles permission can access configuration files, log files, and rule set files from Ariba Administrator.
In the default configuration, the EditPermission.csv file is located in the following directory:
config/variants/Plain/partitions/None/data
The fields in EditPermission.csv are as follows:
Field Description
FileName The path name of a file. Specify the file name relative to your Ariba Spend Management application’s Server directory with percent signs (%) instead of slashes (/) as separators. For example:
config%variants%plain%rules%JavaScriptRequisitionRules.rul
EditPermission The UniqueName of a valid permission in your configuration.
Note: You would never assign the SiteAdmin.ConfigurationFiles permission to a file because administrators with this permission already have access to all files.
Ariba Buyer Configuration Guide 103
Chapter 8 Security Considerations Ariba Administrator Security
The following example shows a sample line from the EditPermission.csv file:
"FileName", "EditPermission""config%cataloghierarchy.xml", PurchasingAgent
To associate multiple permissions with a particular file, add a separate line for each permission. For example:
"FileName", "EditPermission""config%cataloghierarchy.xml", PurchasingAgent"config%cataloghierarchy.xml", ExpenseManager
Wildcards
You can use wildcards in the FileName field to specify files in multiple directories. You can use any regular expression defined by Perl 5, as long as the file name is an exact match. For example:
“config%variants%[\W\w]+%partitions%[\W\w]+%data%ExpenseGuidelines.table”,ExpenseManager
This example gives users who have the ExpenseManager permission access to the ExpenseGuidelines.table file in any variant in any partition.
You can only wildcard directory names; you cannot wildcard file names.
Note: If you change the name of a file in EditPermission.csv after running the EditPermissionPull integration event, you must manually add the new file name to EditPermission.csv and rerun EditPermissionPull.
Considerations for Configuration Files
The default Ariba Administrator configuration restricts access to the Config Files task to administrators who have the SiteAdmin.ConfigurationFiles permission (as well as the permissions required to access the Server Manager workspace). When you implement file-level security, you must edit the Server Manager workspace and Config Files task permissions so that users who do not have SiteAdmin.ConfigurationFiles permission can access the Config Files task.
For example, suppose you want an administrator who has the PurchasingAgent permission to be able to download and upload the file Organization.csv and you have already assigned this permission to the Organization.csv file. To allow an administrator with the PurchasingAgent permission to access the file through the Config Files task, you would need to add the PurchasingAgent permission to the Server Manager workspace and to the Config Files task.
Only administrators who have SiteAdmin.ConfigurationFiles permission can upload new files.
If an administrator has the ability to edit data directly in the database, then restricting access to certain configuration files might not provide the intended security.
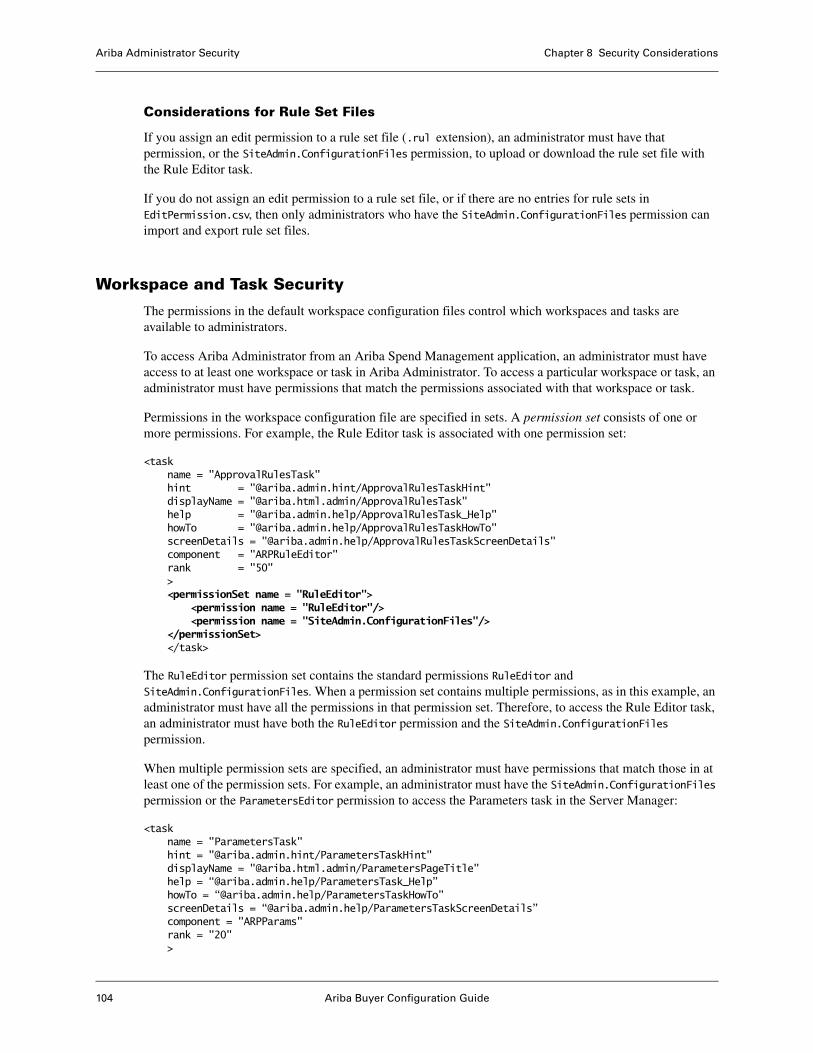
Ariba Administrator Security Chapter 8 Security Considerations
104 Ariba Buyer Configuration Guide
Considerations for Rule Set Files
If you assign an edit permission to a rule set file (.rul extension), an administrator must have that permission, or the SiteAdmin.ConfigurationFiles permission, to upload or download the rule set file with the Rule Editor task.
If you do not assign an edit permission to a rule set file, or if there are no entries for rule sets in EditPermission.csv, then only administrators who have the SiteAdmin.ConfigurationFiles permission can import and export rule set files.
Workspace and Task Security
The permissions in the default workspace configuration files control which workspaces and tasks are available to administrators.
To access Ariba Administrator from an Ariba Spend Management application, an administrator must have access to at least one workspace or task in Ariba Administrator. To access a particular workspace or task, an administrator must have permissions that match the permissions associated with that workspace or task.
Permissions in the workspace configuration file are specified in sets. A permission set consists of one or more permissions. For example, the Rule Editor task is associated with one permission set:
<taskname = "ApprovalRulesTask"hint = "@ariba.admin.hint/ApprovalRulesTaskHint"displayName = "@ariba.html.admin/ApprovalRulesTask"help = "@ariba.admin.help/ApprovalRulesTask_Help"howTo = "@ariba.admin.help/ApprovalRulesTaskHowTo"screenDetails = "@ariba.admin.help/ApprovalRulesTaskScreenDetails"component = "ARPRuleEditor"rank = "50"><permissionSet name = "RuleEditor">
<permission name = "RuleEditor"/><permission name = "SiteAdmin.ConfigurationFiles"/>
</permissionSet></task>
The RuleEditor permission set contains the standard permissions RuleEditor and SiteAdmin.ConfigurationFiles. When a permission set contains multiple permissions, as in this example, an administrator must have all the permissions in that permission set. Therefore, to access the Rule Editor task, an administrator must have both the RuleEditor permission and the SiteAdmin.ConfigurationFiles permission.
When multiple permission sets are specified, an administrator must have permissions that match those in at least one of the permission sets. For example, an administrator must have the SiteAdmin.ConfigurationFiles permission or the ParametersEditor permission to access the Parameters task in the Server Manager:
<taskname = "ParametersTask"hint = "@ariba.admin.hint/ParametersTaskHint"displayName = "@ariba.html.admin/ParametersPageTitle"help = “@ariba.admin.help/ParametersTask_Help”howTo = “@ariba.admin.help/ParametersTaskHowTo”screenDetails = “@ariba.admin.help/ParametersTaskScreenDetails”component = "ARPParams"rank = "20">
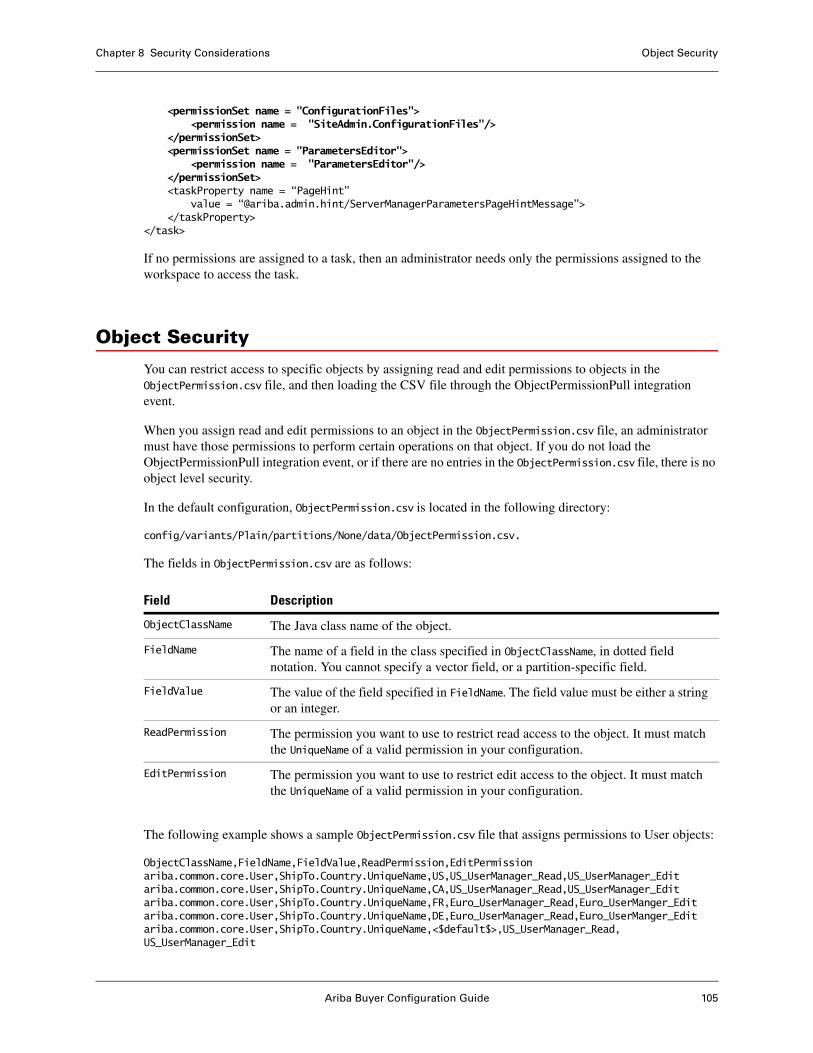
Ariba Buyer Configuration Guide 105
Chapter 8 Security Considerations Object Security
<permissionSet name = "ConfigurationFiles"><permission name = "SiteAdmin.ConfigurationFiles"/>
</permissionSet><permissionSet name = "ParametersEditor">
<permission name = "ParametersEditor"/></permissionSet><taskProperty name = “PageHint”
value = “@ariba.admin.hint/ServerManagerParametersPageHintMessage”></taskProperty>
</task>
If no permissions are assigned to a task, then an administrator needs only the permissions assigned to the workspace to access the task.
Object Security
You can restrict access to specific objects by assigning read and edit permissions to objects in the ObjectPermission.csv file, and then loading the CSV file through the ObjectPermissionPull integration event.
When you assign read and edit permissions to an object in the ObjectPermission.csv file, an administrator must have those permissions to perform certain operations on that object. If you do not load the ObjectPermissionPull integration event, or if there are no entries in the ObjectPermission.csv file, there is no object level security.
In the default configuration, ObjectPermission.csv is located in the following directory:
config/variants/Plain/partitions/None/data/ObjectPermission.csv.
The fields in ObjectPermission.csv are as follows:
The following example shows a sample ObjectPermission.csv file that assigns permissions to User objects:
ObjectClassName,FieldName,FieldValue,ReadPermission,EditPermissionariba.common.core.User,ShipTo.Country.UniqueName,US,US_UserManager_Read,US_UserManager_Editariba.common.core.User,ShipTo.Country.UniqueName,CA,US_UserManager_Read,US_UserManager_Editariba.common.core.User,ShipTo.Country.UniqueName,FR,Euro_UserManager_Read,Euro_UserManger_Editariba.common.core.User,ShipTo.Country.UniqueName,DE,Euro_UserManager_Read,Euro_UserManger_Editariba.common.core.User,ShipTo.Country.UniqueName,<$default$>,US_UserManager_Read,US_UserManager_Edit
Field Description
ObjectClassName The Java class name of the object.
FieldName The name of a field in the class specified in ObjectClassName, in dotted field notation. You cannot specify a vector field, or a partition-specific field.
FieldValue The value of the field specified in FieldName. The field value must be either a string or an integer.
ReadPermission The permission you want to use to restrict read access to the object. It must match the UniqueName of a valid permission in your configuration.
EditPermission The permission you want to use to restrict edit access to the object. It must match the UniqueName of a valid permission in your configuration.
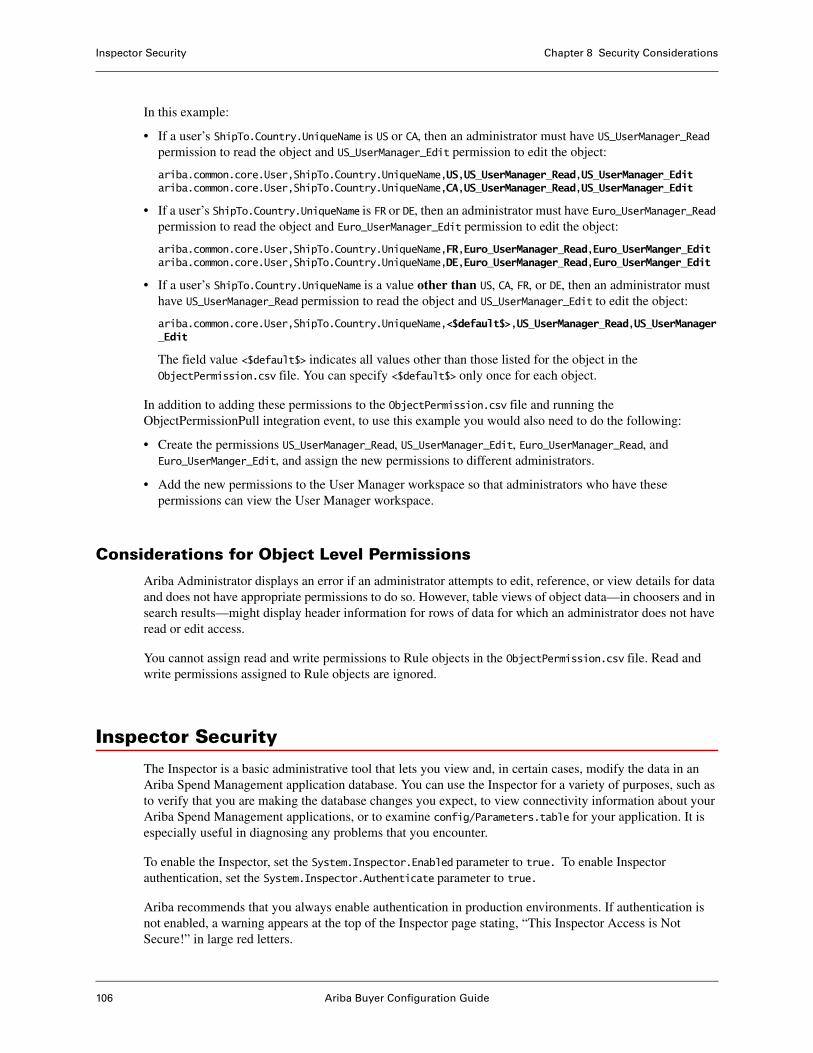
Inspector Security Chapter 8 Security Considerations
106 Ariba Buyer Configuration Guide
In this example:
• If a user’s ShipTo.Country.UniqueName is US or CA, then an administrator must have US_UserManager_Read permission to read the object and US_UserManager_Edit permission to edit the object:
ariba.common.core.User,ShipTo.Country.UniqueName,US,US_UserManager_Read,US_UserManager_Editariba.common.core.User,ShipTo.Country.UniqueName,CA,US_UserManager_Read,US_UserManager_Edit
• If a user’s ShipTo.Country.UniqueName is FR or DE, then an administrator must have Euro_UserManager_Read permission to read the object and Euro_UserManager_Edit permission to edit the object:
ariba.common.core.User,ShipTo.Country.UniqueName,FR,Euro_UserManager_Read,Euro_UserManger_Editariba.common.core.User,ShipTo.Country.UniqueName,DE,Euro_UserManager_Read,Euro_UserManger_Edit
• If a user’s ShipTo.Country.UniqueName is a value other than US, CA, FR, or DE, then an administrator must have US_UserManager_Read permission to read the object and US_UserManager_Edit to edit the object:
ariba.common.core.User,ShipTo.Country.UniqueName,<$default$>,US_UserManager_Read,US_UserManager_Edit
The field value <$default$> indicates all values other than those listed for the object in the ObjectPermission.csv file. You can specify <$default$> only once for each object.
In addition to adding these permissions to the ObjectPermission.csv file and running the ObjectPermissionPull integration event, to use this example you would also need to do the following:
• Create the permissions US_UserManager_Read, US_UserManager_Edit, Euro_UserManager_Read, and Euro_UserManger_Edit, and assign the new permissions to different administrators.
• Add the new permissions to the User Manager workspace so that administrators who have these permissions can view the User Manager workspace.
Considerations for Object Level Permissions
Ariba Administrator displays an error if an administrator attempts to edit, reference, or view details for data and does not have appropriate permissions to do so. However, table views of object data—in choosers and in search results—might display header information for rows of data for which an administrator does not have read or edit access.
You cannot assign read and write permissions to Rule objects in the ObjectPermission.csv file. Read and write permissions assigned to Rule objects are ignored.
Inspector Security
The Inspector is a basic administrative tool that lets you view and, in certain cases, modify the data in an Ariba Spend Management application database. You can use the Inspector for a variety of purposes, such as to verify that you are making the database changes you expect, to view connectivity information about your Ariba Spend Management applications, or to examine config/Parameters.table for your application. It is especially useful in diagnosing any problems that you encounter.
To enable the Inspector, set the System.Inspector.Enabled parameter to true. To enable Inspector authentication, set the System.Inspector.Authenticate parameter to true.
Ariba recommends that you always enable authentication in production environments. If authentication is not enabled, a warning appears at the top of the Inspector page stating, “This Inspector Access is Not Secure!” in large red letters.
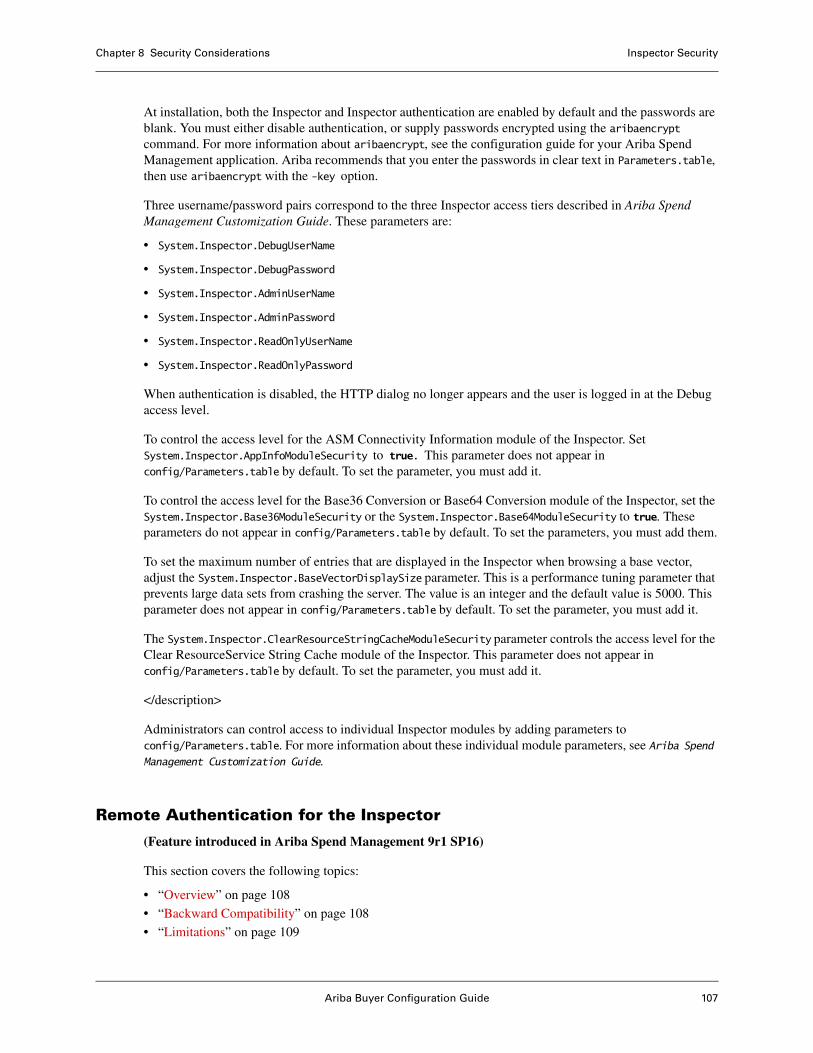
Ariba Buyer Configuration Guide 107
Chapter 8 Security Considerations Inspector Security
At installation, both the Inspector and Inspector authentication are enabled by default and the passwords are blank. You must either disable authentication, or supply passwords encrypted using the aribaencrypt command. For more information about aribaencrypt, see the configuration guide for your Ariba Spend Management application. Ariba recommends that you enter the passwords in clear text in Parameters.table, then use aribaencrypt with the -key option.
Three username/password pairs correspond to the three Inspector access tiers described in Ariba Spend Management Customization Guide. These parameters are:
• System.Inspector.DebugUserName
• System.Inspector.DebugPassword
• System.Inspector.AdminUserName
• System.Inspector.AdminPassword
• System.Inspector.ReadOnlyUserName
• System.Inspector.ReadOnlyPassword
When authentication is disabled, the HTTP dialog no longer appears and the user is logged in at the Debug access level.
To control the access level for the ASM Connectivity Information module of the Inspector. Set System.Inspector.AppInfoModuleSecurity to true. This parameter does not appear in config/Parameters.table by default. To set the parameter, you must add it.
To control the access level for the Base36 Conversion or Base64 Conversion module of the Inspector, set the System.Inspector.Base36ModuleSecurity or the System.Inspector.Base64ModuleSecurity to true. These parameters do not appear in config/Parameters.table by default. To set the parameters, you must add them.
To set the maximum number of entries that are displayed in the Inspector when browsing a base vector, adjust the System.Inspector.BaseVectorDisplaySize parameter. This is a performance tuning parameter that prevents large data sets from crashing the server. The value is an integer and the default value is 5000. This parameter does not appear in config/Parameters.table by default. To set the parameter, you must add it.
The System.Inspector.ClearResourceStringCacheModuleSecurity parameter controls the access level for the Clear ResourceService String Cache module of the Inspector. This parameter does not appear in config/Parameters.table by default. To set the parameter, you must add it.
</description>
Administrators can control access to individual Inspector modules by adding parameters to config/Parameters.table. For more information about these individual module parameters, see Ariba Spend Management Customization Guide.
Remote Authentication for the Inspector
(Feature introduced in Ariba Spend Management 9r1 SP16)
This section covers the following topics:
• “Overview” on page 108
• “Backward Compatibility” on page 108
• “Limitations” on page 109
Inspector Security Chapter 8 Security Considerations
108 Ariba Buyer Configuration Guide
• “New Parameter” on page 109
• “New Permissions, Roles, and Groups” on page 109
• “Workflow for Accessing the Inspector with Remote Authentication” on page 110
• “Enabling Remote Authentication for the Inspector” on page 110
Overview
Before remote authentication became available, access to Inspector was controlled exclusively through the parameters.table file, with no capability of incorporating third party remote authentication. Users could either have no authentication or be asked to provide an Inspector username and password as listed in the parameters.table file.
Now, you can control access to the Inspector through the corporate authenticator used by Ariba Spend Management applications. Using remote authentication for Inspector access enables you to leverage your existing authentication mechanism and set of users to control access to the Inspector tool.
When you enable remote authentication for the Inspector:
• Users access the Inspector through application authentication. With application authentication, users have Ariba application usernames and passwords that they manually enter on the Ariba application login page. The user ids and passwords are maintained by the customer administrator within the Ariba application.
• You control access to the tool by assigning new Inspector-related permissions to Ariba Spend Management application users. (In the legacy method of Inspector authentication, which is still supported, there are three separate, Inspector-specific users defined for inspector access.)
• As with the legacy method of Inspector authentication, there are three levels of access: Read Only, Admin, and Debug.
• The customer’s password authentication functionality will integrate with the Ariba corporate authenticator using an appropriate protocol.
• Users who access the Inspector through a user-entered URL are first routed to a login page before being returned to the Inspector. This way, they are authenticated by your authentication mechanism. They then access Inspector based on their Inspector access permissions.
• Remote authentication is used regardless of whether the user accesses Inspector through Ariba Administrator or a user-input URL.
• Access to the Inspector is available using a secure HTTP channel only (https://...).
• Inspector opens in the same window rather than in a new window.
For general information about remote authentication, see the Ariba Buyer Configuration Guide or the Ariba Upstream Platform Configuration Guide.
Backward Compatibility
This feature has no effect on customers who do not turn it on.
The Inspector still supports basic password authentication. However, when one authentication method is in use, the other method is turned off. That is, the Inspector does not support both the new and legacy authentication methods at the same time. If you enable remote authentication for the Inspector, but you then want to access the Inspector using the legacy password authentication, you must turn off Inspector remote authentication.
Ariba Buyer Configuration Guide 109
Chapter 8 Security Considerations Inspector Security
Enabling and disabling Inspector remote authentication does not affect the remote authentication used by Ariba Spend Management applications.
For information about legacy Inspector authentication, see the Ariba Spend Management Customization Guide.
Limitations
There is no auditing that reveals which users are logging in to the Inspector.
New Parameter
The new parameter System.Inspector.UseAppAuthentication enables the Inspector to use remote application authentication. The parameter is applicable only when the parameter System.Inspector.Authenticate is set to Yes (true).
System.Inpsector.UseAppAuthentication takes a Boolean value. The default value is No (false).
New Permissions, Roles, and Groups
Following are the new permissions, roles, and groups added to control Inspector access. The three access levels—Read Only, Admin, and Debug—provide the same access as they do with the legacy Inspector authentication. For information on Inspector access levels, see the Ariba Spend Management Customization Guide.
Permissions
Inspector Read-Only Access: Provides access to Inspector in read-only mode.
Inspector Admin Access: Provides access to Inspector in admin mode.
Inspector Debug Access: Provides access to Inspector in debug mode.
Roles
Inspector Read-Only
Inspector Admin
Inspector Debug
Groups
Inspector Users
Inspector Administrators
Inspector Debug Administrators
You can assign Inspector permissions to users regardless of the System.Inspector.UseAppAuthentication setting. However, if System.Inpsector.UseAppAuthentication is set to No (false) and System.Inspector.Authenticate is set to Yes (true), the legacy Inspector authentication is used, and the permissions have no effect.
Inspector Security Chapter 8 Security Considerations
110 Ariba Buyer Configuration Guide
Workflow for Accessing the Inspector with Remote Authentication
When the Inspector is configured to use remote authentication (System.Inspector.Authenticate = true and System.Inspector.UseAppAuthentication = true), users who need to use the Inspector must be valid Ariba Spend Management users with the appropriate Inspector group and role assignments.
Accessing the Inspector through Ariba Administrator
To access through Ariba Administrator
1 The user logs into the Ariba application and opens Ariba Administrator.
2 The user chooses Server Manager > Inspector.
3 If remote authentication is set (System.Inspector.Authenticate = true and System.Inspector.UseAppAuthentication = true), and the user is assigned Inspector permissions, the Inspector opens in one of the three modes based on the user’s level of authority (Read-Only, Debug, Admin). If the user does not have Inspector permissions, a message about lack of authorization is displayed.
Accessing the Inspector through a User-Entered URL
When the Inspector is configured to use remote authentication (System.Inspector.Authenticate = true and System.Inspector.UseAppAuthentication = true), users can specify the following new Direct Action URLs.
Note: Users who enter the old Inspector URL (https://<host>:<port>/Buyer/inspector or https://<host>:<port>/Sourcing/inspector) are redirected to the Direct Action URL.
• Direct Action URL for Ariba Buyer: https://<host>:<port>/Buyer/Main/ad/inspector/InspectorDirectAction
• Direct Action URL for Ariba Sourcing or Ariba Contract Management: https://<host>:<port>/Sourcing/Main/ad/inspector/InspectorDirectAction
To access through a User-Entered URL
1 The user opens any browser currently certified by Ariba.
2 The user enters one of the Inspector URLs listed above.
3 If remote authentication is set (System.Inspector.Authenticate = true and System.Inspector.UseAppAuthentication = true), the user is redirected to the application login page.
4 The user enters their application username and password and clicks Login.
5 The remote authentication service authenticates the user.
6 If the user is authenticated, the Inspector opens in one of the three modes based on the user’s level of authority (Read-Only, Debug, Admin).
7 If the user is not authenticated, the login page is cleared, and the user can enter the information again.
Enabling Remote Authentication for the Inspector
By default, remote authentication for the Inspector tool is turned off. To enable this feature, you must perform the following manual updates. The details are covered in this section.
Ariba Buyer Configuration Guide 111
Chapter 8 Security Considerations Inspector Security
Note: This section assumes you have already configured remote authentication for your Ariba Spend Management applications. For information, see the the Ariba Buyer Configuration Guide or the Ariba Upstream Platform Configuration Guide.
Add the System.Inpsector.UseAppAuthentication parameter and set it to true. Set the System.UI.LogoutDestinationURL parameter, if it is not already set. Add the new Inspector permissions, roles, and groups to your configuration. Assign the new permissions, roles, and groups to the appropriate users.
Important: Before making these changes, shut down the running server instances. After making the following changes, you must restart the server to have the changes take effect.
Parameter updates1 Make sure System.Inspector.Authenticate is set to Yes (true).
2 Navigate to the <ServerRoot>/config directory.
3 Open Parameters.table.
4 Under System.Inspector, add the following parameter to tell Inspector to use remote authentication: System.Inspector.UseAppAuthentication="true"
5 Make sure System.UI.LogoutDestinationURL is set correctly. This parameter specifies the URL to which a user returns after logging out.
Adding the new permissions, roles, and groups to your configuration
To add the new permissions, roles, and groups to your Ariba system, you must merge new CSV files with existing ones.
1 Navigate to the directory <ServerRoot>/ariba/variants/Plain/partitions/None/data, and make backup copies of the following files: Permission.csv Role.csv Group.csv RolePermissionMap.csv GroupRoleMap.csv
2 Navigate to the directory <ServerRoot>/bin.
3 Run the following five merge commands to merge the changes in the CSV files from the configTemplates area into the Ariba install and config areas. In these commands, replace <ServerRoot> with the directory path to the server root directory for your Ariba application. (Do not include the angle brackets.)
mergecsv -rjvmopt -Dfile.encoding=ISO-8859-1 –pf <ServerRoot>/ariba/variants/ Plain/partitions/None/data/Permission.csv –cf <ServerRoot>/config/variants/ Plain/partitions/None/data/Permission.csv –af <ServerRoot>/configTemplates/ Common-basic/plain-system/ariba/partition/data/Permission.csv –output <ServerRoot>/ariba/variants/Plain/partitions/None/data/Permission.csv –append
mergecsv -rjvmopt -Dfile.encoding=ISO-8859-1 –pf <ServerRoot>/ariba/variants/Plain/ partitions/None/data/Role.csv –cf <ServerRoot>/config/variants/Plain/partitions/ None/data/Role.csv –af <ServerRoot>/configTemplates/Common-basic/plain-system/ ariba/partition/data/Role.csv -output <ServerRoot>/ariba/variants/Plain/partitions/ None/data/Role.csv –append
mergecsv -rjvmopt -Dfile.encoding=ISO-8859-1 –pf <ServerRoot>/ariba/variants/Plain/ partitions/None/data/Group.csv –cf <ServerRoot>/config/variants/Plain/partitions/ None/data/Group.csv –af <ServerRoot>/configTemplates/Common-basic/plain-system/ ariba/partition/data/Group.csv -output <ServerRoot>/ariba/variants/Plain/partitions/ None/data/Group.csv -append
Inspector Security Chapter 8 Security Considerations
112 Ariba Buyer Configuration Guide
mergecsv -rjvmopt -Dfile.encoding=ISO-8859-1 –pf <ServerRoot>/ariba/variants/Plain/ partitions/None/data/RolePermissionMap.csv –cf <ServerRoot>/config/variants/Plain/ partitions/None/data/RolePermissionMap.csv –af <ServerRoot>/configTemplates/ Common-basic/plain-system/ariba/partition/data/RolePermissionMap.csv –output <ServerRoot>/ariba/variants/Plain/partitions/None/data/RolePermissionMap.csv -append
mergecsv -rjvmopt -Dfile.encoding=ISO-8859-1 –pf <ServerRoot>/ariba/variants/Plain/ partitions/None/data/GroupRoleMap.csv –cf <ServerRoot>/config/variants/Plain/ partitions/None/data/GroupRoleMap.csv –af <ServerRoot>/configTemplates/ Common-basic/plain-system/ariba/partition/data/GroupRoleMap.csv -output <ServerRoot>/ariba/variants/Plain/partitions/None/data/GroupRoleMap.csv -append
4 In Ariba Administrator, choose Server Manager > Data Import/Export.
5 Run the following data import tasks, choosing the data import operations indicated below. When prompted for location of the CSV file, refer to the file in the directory <ServerRoot>/ariba/variants/Plain/partitions/None/data. Import Permissions (operation = Create) Import Roles (operation = Create) Import Role Permission Map (operation = Load) Import User
Groups (operation = Create) Import Group/Role Relationships (operation = Load)
6 Restart the Ariba application.
Assigning the new permissions, roles, and groups to users1 In Ariba Administrator, use the User Manager task to assign Inspector permissions, roles, and groups to the
users who need access to the Inspector tool.
2 Restart the Ariba application again.
Inspector Authentication for WebLogic
The following information is relevant only if your application server is BEA WebLogic.
WebLogic has its own authentication mechanism which is enabled by default. If inspector authentication is enabled, users will not be able to access inspector with the Ariba authentication credentials because WebLogic's authentication mechanism takes precedence over Ariba's authentication mechanism. To resolve this conflict, you need to disable WebLogic's authentication mechanism by adding the enforce-valid-basic-auth-credentials property under security configuration in the config.xml file and setting the value to false.
Perform the following steps to add the entry to the config.xml file:
• Stop the Servers, Node Manager and the Admin Servers
• Navigate to <user_projects>/<domain>/config directory and open the config.xml file.
• Add the following tag in the <security configuration> section:
<enforce-valid-basic-auth-credentials>false</enforce-valid-basic-auth-credentials>
• Restart the Servers, Node Manager and the Admin Servers.
Ariba Buyer Configuration Guide 113
Chapter 8 Security Considerations How Ariba Buyer Uses SSL
How Ariba Buyer Uses SSL
Ariba Spend Management applications exchange data with each other by sending cXML documents over the Internet. If those documents are exchanged with the HTTP protocol, the communication is not encrypted. If they are exchanged with the HTTPS protocol, the communication is encrypted with an underlying protocol called Secure Sockets Layer (SSL).
If a URL starts with the https prefix, your web server uses SSL to establish those connections. You do not need to set any parameters explicitly to use SSL, although your web server must be configured to support SSL. If your web server is not already SSL-enabled, consult the documentation from your web server provider for instructions on implementing SSL.
Ariba Buyer also uses SSL for secure RPC in communications sent outside the firewall, in the following situations:
• For RPC requests exchanged between command-line clients, such as servermonitor, and the application server. Such requests use the port specified by the System.Nodes.nodename.Port parameter.
• For RPC requests exchanged between Ariba Buyer and the Ariba Authentication Service. Such requests use the port specified by the System.Nodes.NodeAuth.Port parameter.
Communication between individual logical nodes does not require encryption because logical nodes are inside the firewall. These requests use the port specified by the System.Nodes.nodename.InterNodePort parameter.
This section describes how to enable and disable SSL to secure the HTTP communication channel, and how to enable and disable encrypted RPC requests.
Digital Certificates
To provide a secure communication channel, you must obtain and install a valid digital server certificate. A digital server certificate identifies your server and lets users authenticate your server and establish a secure connection.
Digital certificates are usually issued and endorsed by a mutually trusted third-party organization called a certificate authority (CA). If you are using your certificate only for encrypted RPC, you might choose to use a self-signed certificate instead of using a CA. In this case, you are choosing to assume responsibility for validating identification information and issuing server certificates.
If your configuration uses the NT Domain Login adapter, you must create a second certificate (keystore) file for the Ariba Authentication Service. The NT Domain Login adapter depends on the Ariba Authentication Service. For more information on creating and using digital certificates, see “How To Create and Configure Digital Certificates” on page 121.
Security Checks For Production Instances
Ariba highly recommends that you use secure communication in all production instances of Ariba Buyer.
In the default configuration, Ariba Buyer assumes that every production instance uses secure communication and validates your configuration to make sure that your settings are consistent.
Parameters for SSL Chapter 8 Security Considerations
114 Ariba Buyer Configuration Guide
When you configure Ariba Buyer, you can disable these security checks so that it is possible to run in production mode with a non-secure communication channel. If you choose to use a non-secure communication channel in production mode, you are knowingly reducing the level of security in your system and are potentially compromising the protection of your data and your system. You are fully responsible for the security of your data and your system.
Performance Considerations
Providing secure services can impair the performance of your web server. The data encryption and decryption routines used as part of SSL consist of high-level, processor-intensive mathematical functions. Most web servers are not designed to perform these calculations in addition to providing normal page retrieval services.
Installing your web server and logical nodes on different computers improves SSL performance. You can also discuss other options with your hardware vendor, such as using an SSL accelerator, which is an optimized device built to handle the processor-intensive requirements of processing encryption and decryption.
Parameters for SSL
If the URLs you use for accessing Ariba Buyer use the prefix https, then your web server uses SSL for those connections. You do not need to explicitly set any Ariba Buyer parameters to use SSL. Ariba Buyer does provide a parameter that enables the use of encrypted RPC connections.
Ariba Buyer provides parameters that allow you to disable the security checks required in a production environment. If your configuration is in production mode, Ariba Buyer checks to make sure that the following conditions are met:
• the URLs specified for accessing Ariba Buyer use the https prefix, and not http
• the parameter System.Performance.SSLRPC is set to true
If security checks are enabled, Ariba Buyer does not start if the checks fail.
You use the following parameters to configure secure communications:
Parameter Description
System.Base.Production A Boolean that specifies whether your Ariba Buyer instance is running in production mode. Set this parameter to true for production mode. Set this parameter to false for non-production mode.
System.Performance.SSLRPC A Boolean that specifies whether RPC requests are encrypted. Set this parameter to true to use encrypted RPC. Set this parameter to false to use non-encrypted RPC.
IncomingHttpServerURL (in AppInfo.xml)
The URL specified as IncomingHttpServerURL parameter in AppInfo.xml must use https for SSL, and http if you are not using SSL.
Ariba Buyer Configuration Guide 115
Chapter 8 Security Considerations Parameters for SSL
By adjusting these parameters, you can enable or disable secure communication in different scenarios, as described in the following sections.
Non-Production Mode
In non-production mode (for example, in a development or test instance), SSL is neither expected nor required. Set the parameters as follows:
Production Mode With Secure Communication
To use secure communication for both RPC and HTTP requests, set the parameters as follows:
System.Base.DisableLoginSecurity A Boolean that enables or disables security checks for SSL in production environments. Set this parameter to false to enable security checks. Set this parameter to true to disable security checks.
System.Base.DisableRPCSecurity A Boolean that enables or disables security checks for encrypted RPC in production instances. Set this parameter to false to enable security checks. Set this parameter to true to disable security checks.
Parameter Description
Parameter Setting
System.Base.Production false
System.Performance.SSLRPC Either true or false. When Production is false, Ariba Buyer does not require SSLRPC to be true.
System.Base.DisableLoginSecurity Ignored
System.Base.DisableRPCSecurity Ignored
System.Base.ResourceURL Set to a URL that starts with http. For example:
http://myserver.mycompany.com/asmapp
IncomingHttpServerURL (in AppInfo.xml)
Set to a URL that starts with http. For example:
http://server.company.com
Parameter Setting
System.Base.Production true
System.Performance.SSLRPC true
System.Base.DisableLoginSecurity false
System.Base.DisableRPCSecurity false
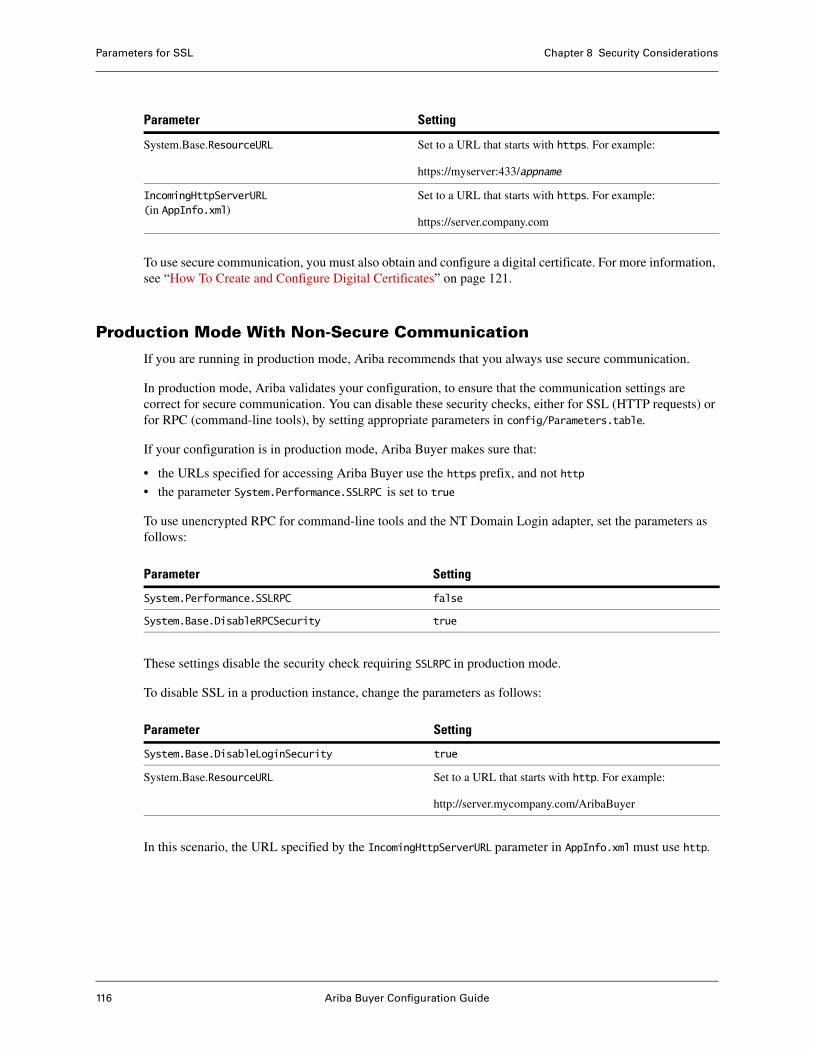
Parameters for SSL Chapter 8 Security Considerations
116 Ariba Buyer Configuration Guide
To use secure communication, you must also obtain and configure a digital certificate. For more information, see “How To Create and Configure Digital Certificates” on page 121.
Production Mode With Non-Secure Communication
If you are running in production mode, Ariba recommends that you always use secure communication.
In production mode, Ariba validates your configuration, to ensure that the communication settings are correct for secure communication. You can disable these security checks, either for SSL (HTTP requests) or for RPC (command-line tools), by setting appropriate parameters in config/Parameters.table.
If your configuration is in production mode, Ariba Buyer makes sure that:
• the URLs specified for accessing Ariba Buyer use the https prefix, and not http
• the parameter System.Performance.SSLRPC is set to true
To use unencrypted RPC for command-line tools and the NT Domain Login adapter, set the parameters as follows:
These settings disable the security check requiring SSLRPC in production mode.
To disable SSL in a production instance, change the parameters as follows:
In this scenario, the URL specified by the IncomingHttpServerURL parameter in AppInfo.xml must use http.
System.Base.ResourceURL Set to a URL that starts with https. For example:
https://myserver:433/appname
IncomingHttpServerURL (in AppInfo.xml)
Set to a URL that starts with https. For example:
https://server.company.com
Parameter Setting
Parameter Setting
System.Performance.SSLRPC false
System.Base.DisableRPCSecurity true
Parameter Setting
System.Base.DisableLoginSecurity true
System.Base.ResourceURL Set to a URL that starts with http. For example:
http://server.mycompany.com/AribaBuyer
Ariba Buyer Configuration Guide 117
Chapter 8 Security Considerations Security of Ariba Client Automation
Security of Ariba Client Automation
Ariba Client Automation is an Ariba Spend Management feature that allows Ariba applications to export data from the browser to Microsoft Office applications such as Word, Excel, and Outlook. For example, the Export to Excel capability in Ariba Analysis allows users to export data to Excel for further analysis.
With Ariba Client Automation, Ariba Spend Management applications send directives to Microsoft Office components on the client machines. The directives sent to clients are always digitally signed, to guarantee safety and security.
Deploying to Clients
To use the export capabilities, each client machine must load the Ariba Client Automation software. To distribute this software to your client machines, you have two options:
1 On-demand deployment. You can configure your applications to download Ariba Client Automation to client desktops on demand, when the user initiates an action that requires client automation. Users must acknowledge and accept the download.
2 Bulk deployment. You can distribute Ariba Client Automation to all personal computers in your organization.
Ariba recommends on-demand deployment, which ensures that client desktops are always upgraded with newer releases of Ariba Client Automation as necessary. To support this configuration, users must set the following browser options on the Internet Options (Security tab):
For more information on what happens if a user chooses the Prompt setting, and the screens visible to users in this situation, see the online help for your web server.
If your security policies do not allow on-demand deployment, you can run an installation program that installs the Ariba Client Automation software on each client desktop. With this option, your IT department (or end users) must manually install the Ariba Client Automation software on each user desktop, and must perform manual upgrades whenever the software is upgraded.
In this configuration, the browser settings for downloading and running ActiveX controls can be set to Administrator approved, which is more restrictive.
Deploying a Digital Certificate in Your Application Server
To ensure safety and security of the directives sent to client machines, Ariba Client Automation is digitally signed. To ensure security, you must deploy a digital certificate in your application server. Ariba Client Automation uses this digital certificate to initiate a session using a shared and secret session key. Once the session key is established, all server directives are digitally signed, and Ariba Client Automation validates all server directives with the session key.
For maximum security, you should acquire and install a digital certificate from a well-known Certification Authority (CA), instead of using the Ariba-signed certificate. The certificate you use can be the same one that you use to certify other applications, such as your web server.
Download signed ActiveX controls Either Prompt or EnabledRun ActiveX controls and plug-ins Either Prompt or Enabled
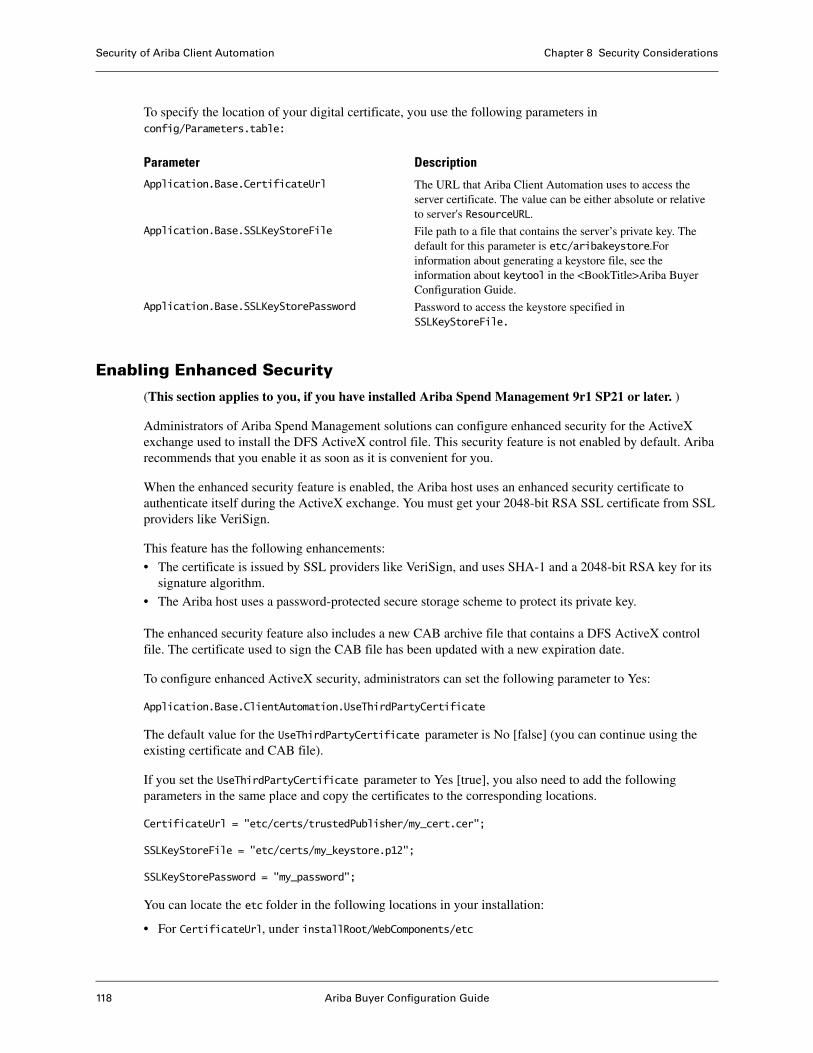
Security of Ariba Client Automation Chapter 8 Security Considerations
118 Ariba Buyer Configuration Guide
To specify the location of your digital certificate, you use the following parameters in config/Parameters.table:
Enabling Enhanced Security
(This section applies to you, if you have installed Ariba Spend Management 9r1 SP21 or later. )
Administrators of Ariba Spend Management solutions can configure enhanced security for the ActiveX exchange used to install the DFS ActiveX control file. This security feature is not enabled by default. Ariba recommends that you enable it as soon as it is convenient for you.
When the enhanced security feature is enabled, the Ariba host uses an enhanced security certificate to authenticate itself during the ActiveX exchange. You must get your 2048-bit RSA SSL certificate from SSL providers like VeriSign.
This feature has the following enhancements:
• The certificate is issued by SSL providers like VeriSign, and uses SHA-1 and a 2048-bit RSA key for its signature algorithm.
• The Ariba host uses a password-protected secure storage scheme to protect its private key.
The enhanced security feature also includes a new CAB archive file that contains a DFS ActiveX control file. The certificate used to sign the CAB file has been updated with a new expiration date.
To configure enhanced ActiveX security, administrators can set the following parameter to Yes:
Application.Base.ClientAutomation.UseThirdPartyCertificate
The default value for the UseThirdPartyCertificate parameter is No [false] (you can continue using the existing certificate and CAB file).
If you set the UseThirdPartyCertificate parameter to Yes [true], you also need to add the following parameters in the same place and copy the certificates to the corresponding locations.
CertificateUrl = "etc/certs/trustedPublisher/my_cert.cer";
SSLKeyStoreFile = "etc/certs/my_keystore.p12";
SSLKeyStorePassword = "my_password";
You can locate the etc folder in the following locations in your installation:
• For CertificateUrl, under installRoot/WebComponents/etc
Parameter Description
Application.Base.CertificateUrl The URL that Ariba Client Automation uses to access the server certificate. The value can be either absolute or relative to server's ResourceURL.
Application.Base.SSLKeyStoreFile File path to a file that contains the server’s private key. The default for this parameter is etc/aribakeystore.For information about generating a keystore file, see the information about keytool in the <BookTitle>Ariba Buyer Configuration Guide.
Application.Base.SSLKeyStorePassword Password to access the keystore specified in SSLKeyStoreFile.
Ariba Buyer Configuration Guide 119
Chapter 8 Security Considerations Security of Ariba Client Automation
• For SSLKeyStoreFile under installRoot/etc
Important:
1 The certificate used for setting the CertificateUrl parameter must be of .cer or .der type.
2 The KeyStore file used for setting the SSLKeyStoreFile parameter must be of key store type PKSC12. If your KeyStore file is in any other format, you must convert it to PKSC12. You can convert the file using open source tools like OpenSSL, or by using https://www.sslshopper.com/ssl-converter.html. Note that these options are mentioned as examples, and Ariba does not recommend any tool or site as preferred options.
You use the aribaencrypt command to encrypt a value. When you run aribaencrypt, you supply a string as the argument, and aribaencrypt returns an encrypted string and automatically updates config/Parameters.table with the encrypted value.
Run the command as shown in the following example:
aribaencrypt -key Partitions.None.Application.Base.ClientAutomation.SSLKeyStorePassword -value xyz -allownewkey
If the UseThirdPartyCertificate parameter is enabled, the Ariba solution will download a new security certificate and the new CAB file for the DFS ActiveX Control (signed by the private key associated with the certificate) when a user first enables DFS. Users who already have DFS enabled will continue to use the existing CAB file, but will be prompted to accept the new certificate and CAB file if they disable and then re-enable DFS. The new CAB file contains a DFS ActiveX control file with security enhancements that prevent the execution of unauthorized code on client systems.
Manually Installing the Client Control
This section describes how to install the Ariba Client Automation control on a user’s desktop. For general information on how to distribute software or files over a network to individual personal computers, see the Microsoft documentation.
To install this control, you must first extract the dynamic load library clientautomation.dll from the archive file. The archive file is located as follows:
InstallRoot/install/docroot/ariba/resource/locale/lib/clientautomation.cab
If you are using enhanced security for the DFS ActiveX Control (i.e. Application.Base.ClientAutomation.UseThirdPartyCertificate is set to Yes), request the following archive file:
clientautomation_v21.cab
Open the archive file using Internet Explorer or a file extraction utility.
To install the signed control on a desktop:
1 Copy the Ariba-signed control to the same directory where Internet Explorer searches for installed ActiveX controls. For example:
copy clientautomation.dll "c:\WINDOWS\Downloaded Program Files\clientautomation.dll"
Security of Ariba Client Automation Chapter 8 Security Considerations
120 Ariba Buyer Configuration Guide
2 Register the control with the Windows operating system:
regsvr32 -s "c:\WINDOWS\Downloaded Program Files\clientautomation.dll"
3 (Optional) Load or publish the Ariba certificate in a location so that it is automatically retrieved by the clients instead of requiring each user to install the certificate locally. For example, you can use the Microsoft Certificate Manager or certmgr utility to load the certificate in a folder in a server’s certificate store, such as in the Trusted People folder.
On Ariba 9r1 systems, the certificate file is available on the server in the following location:
installRoot/install/docroot/etc/certs/trustedPublisher/ariba.cer
If you are using enhanced security for the DFS ActiveX Control (i.e. Application.Base.ClientAutomation.UseThirdPartyCertificate is set to Yes), request the following certificate files:
<<ssl_cert_name>>.com.cer
Install the certificate on the Microsoft Active Directory server, or use the Microsoft certmgr utility to load the certificate in the client's certificate store, or a Microsoft Enterprise CA. You could use a syntax similar to the following:
certmgr -add -c -n commonNameInCertificate cer_file -s TrustedPeople
Where:
commonNameInCertificate is the commonName (CN) attribute of the distinguishedName (DN) of the certificate subject. Microsoft Explorer displays this in the Issued to field of a certificate.
cer_file is the name of the certificate file.
For example:
certmgr -add -c -n "analysis.ariba.com" ariba.cer -s TrustedPeople
To uninstall the signed control:
1 Unregister clientautomation.dll with the Windows operating system:
regsvr32 -s /u "c:\WINDOWS\Downloaded Program Files\clientautomation.dll"
2 (Optional) Remove the web server certificate from the certificate store.
certmgr -del -c -n [commonNameInCertificate] -s TrustedPeople
For example:
certmgr -del -c -n analysis.ariba.com -s TrustedPeople
Checking Installation
You can check if the Ariba Client Automation controls have been installed by reviewing the browser settings. You can also use these steps to delete the Ariba Client Automation control from your machine.
To see if Ariba ActiveX controls have been installed on a particular computer:
1 In Internet Explorer, in the Tools menu, choose Internet Options.
2 On the General tab of Internet Options, click Settings in the Temporary Internet Files area.
Ariba Buyer Configuration Guide 121
Chapter 8 Security Considerations How To Create and Configure Digital Certificates
3 In the Settings window, click View Objects.
4 Look for Ariba Client Automation ActiveX Control.
If that file is labelled as Installed in the Downloaded Program Files directory, the Ariba-signed control has been installed on the computer.
How To Create and Configure Digital Certificates
This section describes how to create and configure digital certificates.
Specifying a Hostname
When you create a digital certificate, you must specify a hostname as the commonName in the certificate. If your configuration includes multiple logical nodes running on different physical computers, the commonName you supply must be a DNS alias that resolves to all the physical computers.
If you have a single-server configuration, the commonName must be the hostname of your computer.
Using the NT Domain Login Adapter
The NT Domain Login Adapter depends on the Ariba Authentication Service. The Ariba Authentication service uses the parameter System.Performance.SSLRPC to determine whether to use secure or non-secure communication.
If SSLRPC is set to true and you are using the NT Domain Login Adapter, you must create and configure a separate keystore file for the Ariba Authentication Service. The hostname in the keystore file must match the hostname you specify in the System.PasswordAdapters.passwordadapter.ExternalPasswordAdapterHost parameter, which must be identical to the value of System.Nodes.NodeAuth.Host.
To ensure that the hostnames match properly, you must create a keystore file specifically for use with the Ariba Authentication Service.
Setting Parameters for Keystore Files
You use the following parameters to specify your keystore file (or files):
Parameter Setting
System.Performance.SSLKeyStorePassword Set to the password for your keystore file. The default is aribakeystore.
System.Performance.SSLKeyStoreFile Set to the name of your keystore file. The default is etc/aribakeystore.jks.
How To Create and Configure Digital Certificates Chapter 8 Security Considerations
122 Ariba Buyer Configuration Guide
Setting Up Certificate Authentication
To enable secure communication, you must obtain a digital certificate from a Certificate Authority (CA), store it in a designated file, and supply that file name as a parameter in config/Parameters.table.
The following procedure describes how to set up certificate authentication.
To set up certificate authentication:
1 Using a third party tool such as keytool or ikeyman, create a public key, a private key, and a client certificate request file.
For more information on the supported key generation tools, see the installation guide for your Ariba Spend Management application.
2 Submit the contents of the client certificate request file to a CA. The CA returns a Base64-encoded X.509 V3 Class 3 signed digital certificate.
3 Obtain the “root” certificate from the CA and put it in the /etc/certs directory under the Ariba Buyer Server installation directory. The certificate must be in DER format.
4 Paste the contents of the Base64-encoded X.509 V3 Class 3 signed certificate into a certificate file (.cer file extension) on the computer where the Ariba Buyer Server installation directory resides. The contents of the file must begin with ---- BEGIN CERTIFICATE ---- and end with ---- END CERTIFICATE ----. Make sure you save the certificate file in a secure location.
5 Using a third-party tool such as keytool or ikeyman, create a keystore file. The keystore file must meet the following requirements:
• The keystore must be of type JKS
• The keystore must contain a single key entry
• The key algorithm used must be RSA
For example:
keytool -genkey -alias myAlias -dname “cn=myHost ou=PSS o=Ariba 1=Sunnyvale s=California c=US” -keystore keystore_location -keypass password -storepass password -sigalg RSA
Note: The password must be identical for both keypass and storepass.
6 Using a third-party tool such as keytool or ikeyman, import the signed certificate, your matching private key, and the root certificate into the keystore file.
7 In config/Parameters.table, set System.Performance.KeyStoreFileName to the name of your keystore file. For example:
System.Nodes.NodeAuth.SSLKeyStorePassword If you are using the NT Domain Login adapter, set this parameter to the password for the keystore file for the Ariba Authentication Service. The default is ntauthkeystore.
System.Nodes.NodeAuth.SSLKeyStoreFile If you are using the NT Domain Login adapter, set this parameter to the name of the keystore file for the Ariba Authentication Service. The default is etc/ntauthkeystore.jks.
Ariba Buyer Configuration Guide 123
Chapter 8 Security Considerations How To Create and Configure Digital Certificates
KeyStoreFileName = "etc/aribakeystore.jks";
8 Set System.Performance.KeyStorePassword to the password you assigned to your keystore file. For example:
KeyStorePassword = "aribaKeyStore";
Note: You must encode the KeyStorePassword parameter value.
9 Restart Ariba Buyer.
If SSLRPC is set to true and you are using the NT Domain Login Adapter, you must create and configure a separate keystore file for the Ariba Authentication Service.
Creating a Self-Signed Certificate
You can extract a self-signed certificate from your keystore file. Use the following syntax:
keytool - export -keystore keystore_location -storepass password -alias alias -file location_of_the_certificate
Installing a Digital Certificate
To make your digital certificate available to the web server, or to use SSLRPC, you must export your digital certificate to BuyerServerRoot\etc\certs directory (Windows) or BuyerServerRoot/etc/certs (UNIX).
The digital certificate must be in DER format and have a .der file extension.
In Microsoft Internet Explorer, you can export a digital certificate to DER format by using the Certificate Manager Export Wizard.
To export a digital certificate using the Certificate Manager Export Wizard:
1 Start Microsoft Internet Explorer, and navigate to your Ariba Buyer login URL.
2 In the lower right corner of the browser window, double-click the padlock icon:
3 In the Certificate dialog box, click the Certification Path tab.
4 In the Certification Path property sheet, select your root digital certificate, and then click View Certificate. The root digital certificate is the top level in the tree.
5 In the new Certificate dialog box, click the Details tab.
6 In the Details property sheet, make sure <All> appears in the Show list, and then click Copy to file.
7 In the Certificate Manager Export Wizard welcome dialog box, click Next.
8 In the Certificate Export File dialog box, click the DER encoded binary X.509 (.CER) radio button, and then click Next.
9 In the Export File Name dialog box, type a name in the File name box (for example, mycertificate.cer), and then click Next.
10 In the Certificate Manager Export Wizard completion dialog box, click Finish.
Guest User Account Chapter 8 Security Considerations
124 Ariba Buyer Configuration Guide
11 Rename the CER file to a DER file. For example, rename mycertificate.cer file to mycertificate.der.
12 Copy the DER file to the Ariba Buyer etc/certs directory.
For more information on the Certificate Manager Export Wizard, see the Internet Explorer online help.
Guest User Account
Guest users have a limited view of the user interface. In the default configuration, there are no permissions, roles, or groups associated with the guest user account.
The following parameters configure the guest user account:• System.Sessions.GuestUser.EditableClasses
• Application.Base.Data.AribaGuestSystemUser
• Application.Base.Data.AribaGuestSystemUserPasswordAdapter
System.Sessions.GuestUser.EditableClasses
Specifies the objects that can be edited by the guest user. By default, this parameter is set to:• ariba.user.core.User
• ariba.user.core.Organization
• ariba.auth.password.Password
• ariba.common.core.User
Application.Base.Data.AribaGuestSystemUser
Specifies the guest user account. By default, this parameter is set to aribaguestsystem for all partitions. You can override this value at the partition level if you require different guest user accounts for different partitions.
Application.Base.Data.AribaGuestSystemUserPasswordAdapter
Specifies part of the unique lookup key to identify the guest user named by the Application.Base.Data.AribaGuestSystemUser parameter. By default, this parameter is set to PasswordAdapter1. You can override this value at the partition level.
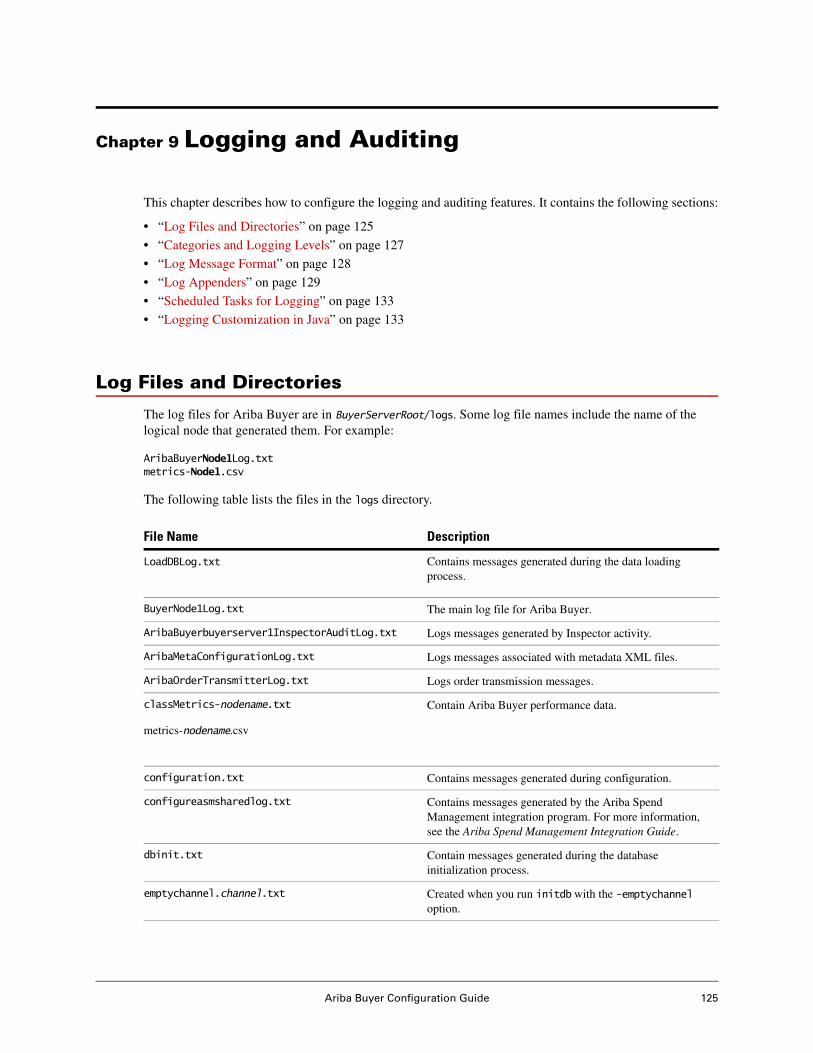
Ariba Buyer Configuration Guide 125
Chapter 9 Logging and Auditing
This chapter describes how to configure the logging and auditing features. It contains the following sections:
• “Log Files and Directories” on page 125
• “Categories and Logging Levels” on page 127
• “Log Message Format” on page 128
• “Log Appenders” on page 129
• “Scheduled Tasks for Logging” on page 133
• “Logging Customization in Java” on page 133
Log Files and Directories
The log files for Ariba Buyer are in BuyerServerRoot/logs. Some log file names include the name of the logical node that generated them. For example:
AribaBuyerNode1Log.txtmetrics-Node1.csv
The following table lists the files in the logs directory.
File Name Description
LoadDBLog.txt Contains messages generated during the data loading process.
BuyerNode1Log.txt The main log file for Ariba Buyer.
AribaBuyerbuyerserver1InspectorAuditLog.txt Logs messages generated by Inspector activity.
AribaMetaConfigurationLog.txt Logs messages associated with metadata XML files.
AribaOrderTransmitterLog.txt Logs order transmission messages.
classMetrics-nodename.txt
metrics-nodename.csv
Contain Ariba Buyer performance data.
configuration.txt Contains messages generated during configuration.
configureasmsharedlog.txt Contains messages generated by the Ariba Spend Management integration program. For more information, see the Ariba Spend Management Integration Guide.
dbinit.txt Contain messages generated during the database initialization process.
emptychannel.channel.txt Created when you run initdb with the -emptychannel option.
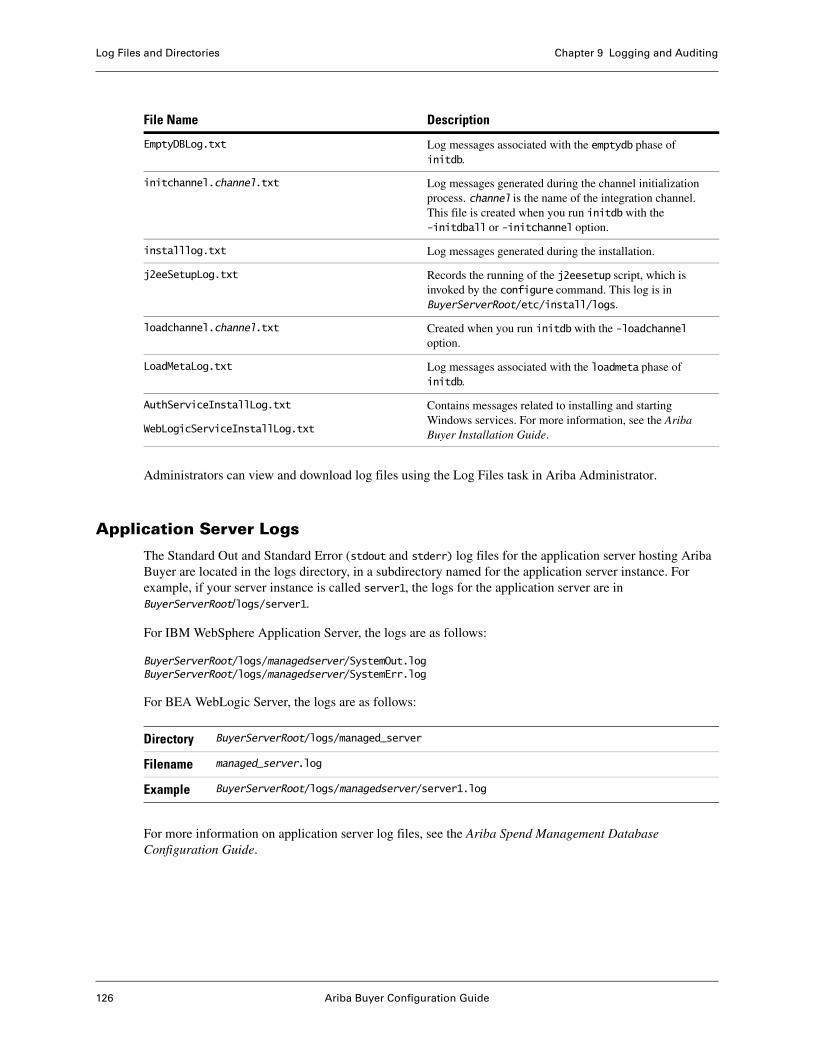
Log Files and Directories Chapter 9 Logging and Auditing
126 Ariba Buyer Configuration Guide
Administrators can view and download log files using the Log Files task in Ariba Administrator.
Application Server Logs
The Standard Out and Standard Error (stdout and stderr) log files for the application server hosting Ariba Buyer are located in the logs directory, in a subdirectory named for the application server instance. For example, if your server instance is called server1, the logs for the application server are in BuyerServerRoot/logs/server1.
For IBM WebSphere Application Server, the logs are as follows:
BuyerServerRoot/logs/managedserver/SystemOut.logBuyerServerRoot/logs/managedserver/SystemErr.log
For BEA WebLogic Server, the logs are as follows:
For more information on application server log files, see the Ariba Spend Management Database Configuration Guide.
EmptyDBLog.txt Log messages associated with the emptydb phase of initdb.
initchannel.channel.txt Log messages generated during the channel initialization process. channel is the name of the integration channel. This file is created when you run initdb with the -initdball or -initchannel option.
installlog.txt Log messages generated during the installation.
j2eeSetupLog.txt Records the running of the j2eesetup script, which is invoked by the configure command. This log is in BuyerServerRoot/etc/install/logs.
loadchannel.channel.txt Created when you run initdb with the -loadchannel option.
LoadMetaLog.txt Log messages associated with the loadmeta phase of initdb.
AuthServiceInstallLog.txt
WebLogicServiceInstallLog.txt
Contains messages related to installing and starting Windows services. For more information, see the Ariba Buyer Installation Guide.
File Name Description
Directory BuyerServerRoot/logs/managed_server
Filename managed_server.log
Example BuyerServerRoot/logs/managedserver/server1.log
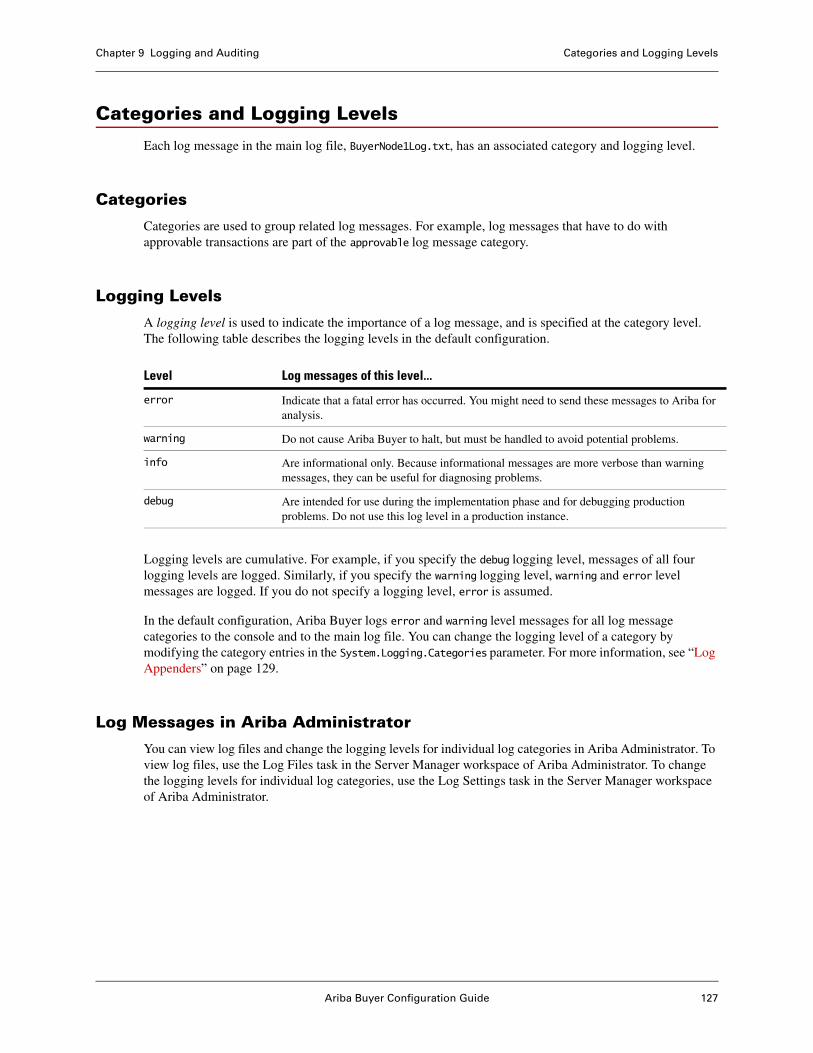
Ariba Buyer Configuration Guide 127
Chapter 9 Logging and Auditing Categories and Logging Levels
Categories and Logging Levels
Each log message in the main log file, BuyerNode1Log.txt, has an associated category and logging level.
Categories
Categories are used to group related log messages. For example, log messages that have to do with approvable transactions are part of the approvable log message category.
Logging Levels
A logging level is used to indicate the importance of a log message, and is specified at the category level. The following table describes the logging levels in the default configuration.
Logging levels are cumulative. For example, if you specify the debug logging level, messages of all four logging levels are logged. Similarly, if you specify the warning logging level, warning and error level messages are logged. If you do not specify a logging level, error is assumed.
In the default configuration, Ariba Buyer logs error and warning level messages for all log message categories to the console and to the main log file. You can change the logging level of a category by modifying the category entries in the System.Logging.Categories parameter. For more information, see “Log Appenders” on page 129.
Log Messages in Ariba Administrator
You can view log files and change the logging levels for individual log categories in Ariba Administrator. To view log files, use the Log Files task in the Server Manager workspace of Ariba Administrator. To change the logging levels for individual log categories, use the Log Settings task in the Server Manager workspace of Ariba Administrator.
Level Log messages of this level...
error Indicate that a fatal error has occurred. You might need to send these messages to Ariba for analysis.
warning Do not cause Ariba Buyer to halt, but must be handled to avoid potential problems.
info Are informational only. Because informational messages are more verbose than warning messages, they can be useful for diagnosing problems.
debug Are intended for use during the implementation phase and for debugging production problems. Do not use this log level in a production instance.

Log Message Format Chapter 9 Logging and Auditing
128 Ariba Buyer Configuration Guide
Log Message Format
Log messages in BuyerNode1Log.txt usually have the following format:
timestamp (nodename) (category:level:number): (partition): message stacktrace ]
For example:
Wed Nov 06 23:59:30 PST 2004 (*:*:vmu6dx:Node1) (general:info:1674): (None): Finished running ArchiveLog
In some cases, the logging message is followed by a stacktrace, which is used by Ariba Technical Support.
Logging and Auditing Parameters
The following parameters configure logging. They are global and are located in System.Logging:
Parameter Description
AribaAuditing.* Specifies auditing of all user activity.
AribaCommitNowAuditing Specifies auditing of database commits.
Categories Specifies the log message categories to be logged by the log listener. The syntax is a colon-separated list of categories, where each category has the form category/severity. For example:
Categories = "startup/debug:supplierdm/debug";
This parameter is required for every log listener.
Console.Disable Disables the log listener that sends log messages to the Java console. This log listener is enabled in the default configuration.
DatabaseLog.Disable It is possible to track changes made to objects and configuration settings using the audit capability. Audit activities are stored to the database instead of to files. Auditing is enabled in the default configuration. This parameter enables or disables database audit logging.
InspectorAuditFile.* Specifies auditing of all inspector activity.
J2EELogger.Disable Disables the J2EELogger that logs events to the default log files of the application server. This log listener is enabled in the default configuration, and is configured as a managed listener, so that it acts like the console logger or the main log file listener (writing error and warning messages to the console).
LocaleForLogMessages Specifies the locale to be used for choosing log messages, for internationalization. The locale must match a locale defined in your configuration. This parameter is not recognized by the DatabaseLogger.
MainLogFile.Disable Disables the log listener that is defined to require that Ariba Buyer logs error and warning level messages for all log message categories by default.
NTServiceLogging.Disable Disables log listener that sends log messages to the Windows NT Event Viewer.
SupplierDMLog.Disable Disables the a log listener that uses the FileLogger to write log messages related to catalogs to a specified file.
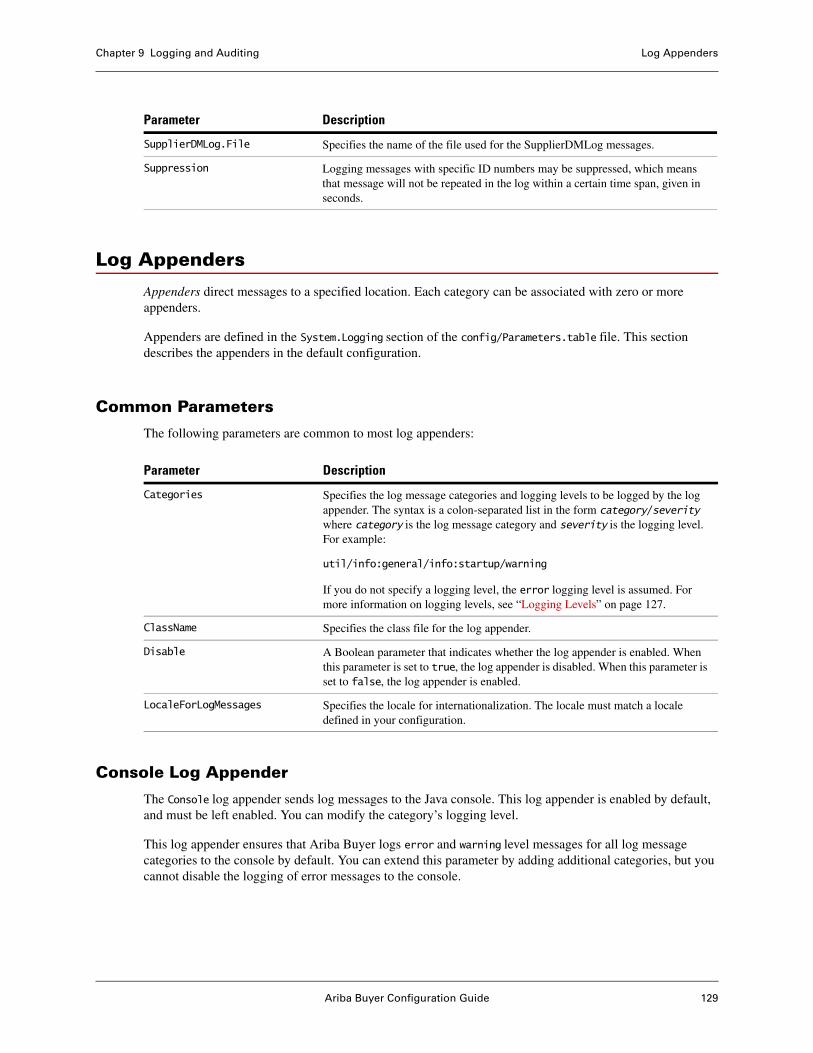
Ariba Buyer Configuration Guide 129
Chapter 9 Logging and Auditing Log Appenders
Log Appenders
Appenders direct messages to a specified location. Each category can be associated with zero or more appenders.
Appenders are defined in the System.Logging section of the config/Parameters.table file. This section describes the appenders in the default configuration.
Common Parameters
The following parameters are common to most log appenders:
Console Log Appender
The Console log appender sends log messages to the Java console. This log appender is enabled by default, and must be left enabled. You can modify the category’s logging level.
This log appender ensures that Ariba Buyer logs error and warning level messages for all log message categories to the console by default. You can extend this parameter by adding additional categories, but you cannot disable the logging of error messages to the console.
SupplierDMLog.File Specifies the name of the file used for the SupplierDMLog messages.
Suppression Logging messages with specific ID numbers may be suppressed, which means that message will not be repeated in the log within a certain time span, given in seconds.
Parameter Description
Parameter Description
Categories Specifies the log message categories and logging levels to be logged by the log appender. The syntax is a colon-separated list in the form category/severity where category is the log message category and severity is the logging level. For example:
util/info:general/info:startup/warning
If you do not specify a logging level, the error logging level is assumed. For more information on logging levels, see “Logging Levels” on page 127.
ClassName Specifies the class file for the log appender.
Disable A Boolean parameter that indicates whether the log appender is enabled. When this parameter is set to true, the log appender is disabled. When this parameter is set to false, the log appender is enabled.
LocaleForLogMessages Specifies the locale for internationalization. The locale must match a locale defined in your configuration.
Log Appenders Chapter 9 Logging and Auditing
130 Ariba Buyer Configuration Guide
J2EELogger Log Appender
The J2EELogger log appender logs events to the default log files of the application server.
In the default configuration, the J2EELogger log appender is configured as follows:
J2EELogger = {Categories = "util/info:general/info";ClassName = ariba.server.util.J2EELogAppender;Disable = false;LocaleForLogMessages = en_US;LogName = Buyer;
};
The LogName parameter specifies the name under which J2EELogger log messages are logged in the application server log files, to help differentiate Ariba Buyer log messages from other application server messages.
MainLogFile Log Appender
The MainLogFile log appender writes log messages to the main log file, BuyerNode1Log.txt. By modifying this log appender you can change the log message categories that are logged to the main log file. You must not disable this log appender.
In the default configuration, Ariba Buyer logs error and warning level messages for all log message categories to the main log file.
DatabaseLog Log Appender
The DatabaseLog log appender writes messages to the Ariba Buyer database. In the default configuration, the DatabaseLog log appender is disabled. You must explicitly enable this log appender if you want to use it.
Note: Database logging is meant to supplement file-based logging, not replace it.
In the default configuration, the disabled log appender entry is as follows:
DatabaseLog = {ClassName = "ariba.base.server.DatabaseLogger";Categories = "audit/info";Disable = true;EventsPerTransaction = 1;};
The EventsPerTransaction parameter determines how many messages are batched before writing to the database.
When the DatabaseLog log appender is enabled, Ariba Buyer adds new tasks and links to the Server workspace in Ariba Administrator. The links that appear depend on the specific categories listed:
• If you include the audit/info log category in the Categories parameter, the DB Audit Activity task and My Audit Activity link are enabled.
• If you include at least one log message category (other than audit/info), the DB Log Activity task and My Log Activity link are enabled.

Ariba Buyer Configuration Guide 131
Chapter 9 Logging and Auditing Log Appenders
Performance Considerations
In some situations, logging messages to the database might not be desirable because of performance or database space restrictions. For example, logging startup messages to the database slows start up of Ariba Buyer, and is not recommended.
If you choose to enable database logging for non-audit messages, you can minimize the performance impact by specifying less verbose log message categories and logging levels.
You cannot log debug level messages to the database. If you specify debug level messages in the Categories parameter, that setting is ignored and the following warning message is logged to the main log file:
For performance reasons DatabaseLogger does not support Debug severity logging. Please correct your Logging configuration.
NTServiceLogging Log Appender
The NTServiceLogging log appender sends messages to the Windows NT Event Viewer. In the default configuration, the NTServiceLogging log appender is configured as follows:
NTServiceLogging = {ClassName = "ariba.server.ntloggingserver.client.NTLogAppender";Categories = "startup/info:util/info";Disable = true;LocaleForLogMessages = en_US;NTLogListenerHost = localhost;NTLogListenerPort = 8093;};
This log appender is disabled by default. You can enable it by modifying the parameters.
To enable the NTServiceLogging log appender:
1 Set the Disable parameter to false.
1 Set the NTLogListenerHost parameter to the hostname of the computer where the Ariba NT Logging Service is running.
The hostname for the Ariba NT Logging Service is specified by System.Nodes.NodeLog.Host parameter in config/Parameters.table. You do not need to include a domain name.
2 Set the NTLogListenerPort parameter to the RPC port used by the Ariba NT Logging Service.
This port is specified by the System.Nodes.NodeLog.InterNodePort parameter in config/Parameters.table.
Note: Transmission through this port is always unencrypted.
This log appender must be used only in configurations that run Ariba Buyer as a Windows NT service.
SupplierDMLog Log Appender
The SupplierDMLog log appender writes log messages related to catalogs to a log file. This log appender is a variation of the FileLogger that logs only messages for debugging catalogs.
Log Appenders Chapter 9 Logging and Auditing
132 Ariba Buyer Configuration Guide
In the default configuration, the SupplierDMLog log appender is disabled and configured as follows:
SupplierDMLog = {Categories = "supplierdm/debug";ClassName = ariba.util.log.FileLogger;Disable = true;LogFileName = SupplierDMLog;};
If you want to enable catalog logging, modify this entry to enable the SupplierDMLog log appender, and use the LogFileName parameter to specify the name of the log output file. Ariba Buyer appends the extension .txt.
ObjectArchive Log Appender
The ObjectArchive scheduled task, which is run as part of the database archive and purge tools, defines two log appenders: ObjectArchiveDetailLogger and ObjectArchiveSummaryLogger. For more information on these log appenders, see “ObjectArchive Scheduled Task” on page 141.
MappingLog Log Appender
The MappingLog log appender watches the main log file for error messages pertaining to PunchOut items with commodity codes that are not mapped correctly, and sends Notification 49, “Notification of Import Mapping Failure,” to users who have the CatalogManager permission if such errors are found.
In the default configuration, the MappingLog log appender is disabled and configured as follows:
MappingLog = {Categories = "aribaMappingException/debug";ClassName = ariba.server.objectserver.NotificationLogger;Disable = true;TitleStringTable = "ariba.common.core.validator";TitleStringKey = "ImportMappingFailureTitle";PermissionGroup = "CatalogManager";};
You modify this log appender when you want to enable import mapping failure notification.
To enable the MappingLog log appender:
1 Set the Disable parameter to false.
2 Set the TitleStringTable parameter to the name of the resource file (CSV file) that contains the title string used for the email notification message.
In the default configuration, this resource file is BuyerServerRoot/resource/locale/strings/ariba.common.core.validator.
3 Set the TitleStringKey parameter to the resource key for the message title in the resource file named by TitleStringTable.
4 Set the PermissionGroup parameter to a valid permission in your configuration. Users who have that permission receive the notification message from this log appender.
Ariba Buyer Configuration Guide 133
Chapter 9 Logging and Auditing Scheduled Tasks for Logging
File Encoding Format
Most of the entries in System.Logging define log appenders. The only general parameter is System.Logging.Encoding. The default value is UTF-8.
This is an optional parameter. If it is missing, the default is UTF-8, which is the correct setting for almost all configurations.
Scheduled Tasks for Logging
To control the size of log files, Ariba Buyer uses the scheduled task ArchiveLog. This scheduled task archives BuyerNode1Log.txt into the logs/archive directory, with a timestamp, and then starts logging to a new log file.
The ArchiveLog scheduled task runs on all logical nodes in your configuration.
The default configuration of Ariba Buyer also includes the following scheduled tasks related to logging and auditing:
For a detailed description of these scheduled tasks, see Appendix H, “Scheduled Task Reference”.
Logging Customization in Java
You can customize the logging interface by using the logging API to create your own log messages and log appenders. For more information, see the Logging API chapter in the Ariba Spend Management API Guide.
Audit Log Task
It is possible to track changes made to objects and configuration settings using the audit capability. Audit activities are stored to the database instead of to files. Auditing is enabled in the default configuration.
Auditing as a feature can be turned on or off on server startup via the parameters:
• System.Logging.<logListenerName>
Scheduled Task Description
CleanDatabaseLog This scheduled task removes non-audit messages that were logged to the database by the DatabaseLog log appender. You can also configure this task to archive messages to a file.
For information on the DatabaseLog log appender, see “DatabaseLog Log Appender” on page 130.
CleanAuditDatabaseLog This scheduled task removes and optionally archives audit messages that were logged to the database by the DatabaseLog log appender. You can also configure this task to archive messages to a file.
For information on the DatabaseLog log appender, see “DatabaseLog Log Appender” on page 130.
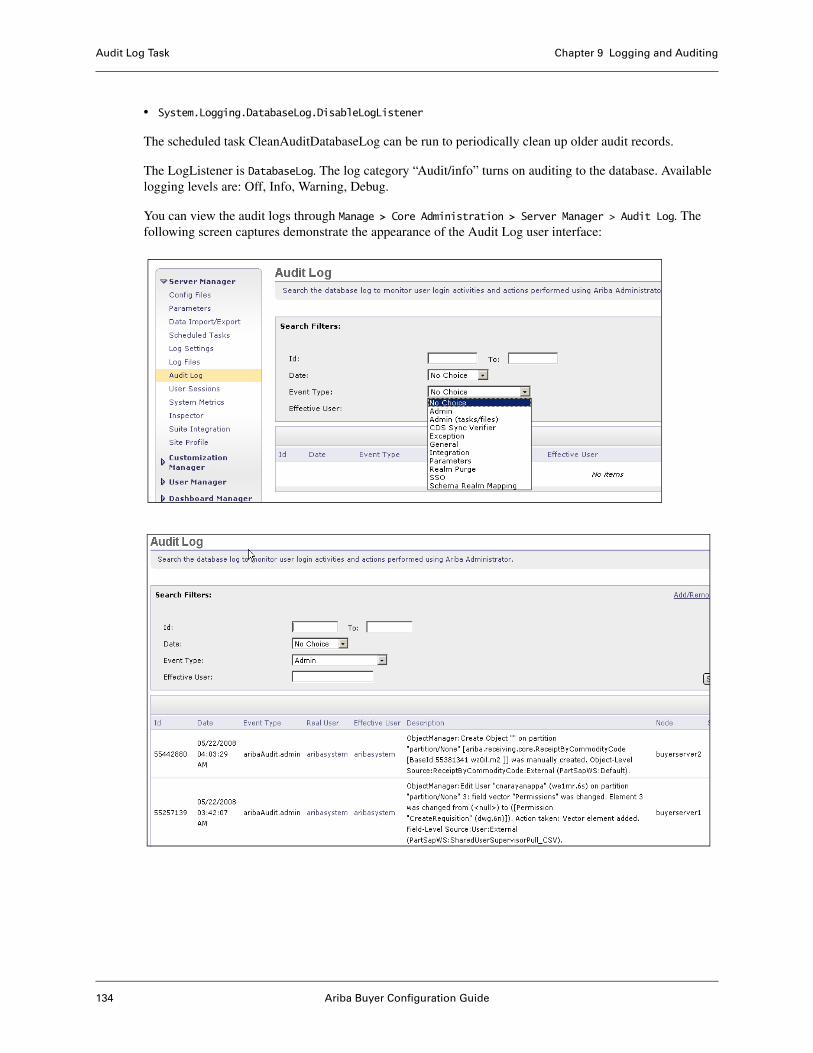
Audit Log Task Chapter 9 Logging and Auditing
134 Ariba Buyer Configuration Guide
• System.Logging.DatabaseLog.DisableLogListener
The scheduled task CleanAuditDatabaseLog can be run to periodically clean up older audit records.
The LogListener is DatabaseLog. The log category “Audit/info” turns on auditing to the database. Available logging levels are: Off, Info, Warning, Debug.
You can view the audit logs through Manage > Core Administration > Server Manager > Audit Log. The following screen captures demonstrate the appearance of the Audit Log user interface:
Ariba Buyer Configuration Guide 135
Chapter 10 Data Archiving and Purging
This chapter describes Ariba Buyer’s archive and purge tools, which enable you to remove old data from your Ariba Buyer database. It includes the following sections:
• “About Archive and Purge” on page 135
• “Purge Configuration File” on page 138
• “How to Archive to Disk” on page 141
Note: To configure purge, you must be comfortable writing Ariba Query API expressions. For information on the Ariba Query API, see the Ariba Spend Management Query API Guide.
About Archive and Purge
As you use Ariba Buyer over time, your Ariba Buyer database requires an increasing amount of space to store approvable documents and related data. To help you keep your database size in check, Ariba Buyer provides tools for archiving the data onto your disk and purging it from the database.
The archive/purge tools are configurable, allowing you to specify which data you are ready to purge. You specify that data at the approvable document level, by writing an Ariba Query API expression that specifies the set of documents to be purged. For example, you can archive all requisitions approved before a specified date, or all invoices in a specific state.
In a purge specification, you write a query that selects documents of a given primary class (such as Requisition). From that initial set of documents, the purging algorithm determines which related classes can safely be purged. For example, if you ask to purge a purchase requisition, the purge algorithm finds and purges all purchase orders, receipts, receipt trackers, file attachments, and other data related to that requisition.
Note: Flex classes cannot be archived/purged in Version 9r1. Beginning with Service Pack 2, flex fields are archived/purged if the flex field definition specifies an exact type (such as <type class=”ariba.purchasing.core.PurchaseOrder”>) rather than a generic ClusterRoot type.
The logic of locating all related business objects that can safely be purged is internal to the archive and purge tools. Your responsibility is only to specify the primary documents you want to purge.
Archive and Purge Process
The archive/purge process runs in distinct phases:
1 Preview Phase
The preview phase reads a configuration file as input, and creates a preview of the objects that would be purged. You can browse that preview from the Inspector.
The preview phase shows the data that would be purged, without actually initiating the purge. It doesn’t make any database changes. If you restart Ariba Buyer without running the mark phase, the Ariba Buyer database is unchanged.
About Archive and Purge Chapter 10 Data Archiving and Purging
136 Ariba Buyer Configuration Guide
2 Mark Phase
The mark phase reads the same configuration file as input, finds all objects that would be purged, and marks them in the database. If you restart Ariba Buyer after running the mark phase, Ariba Buyer cannot access any of the objects that are marked to be purged.
3 Sweep Phase
The sweep phase reviews the marked objects in the database and performs the actual archive/purge.
The preview and mark phases use a command-line tool called runpurge. The runpurge command initiates the purge server, which examines your database and determines the references between objects. For complete information on the options to runpurge, see “runpurge” on page 189.
The sweep phase uses a scheduled task ObjectArchive, which scans your database for the objects marked in the mark phase, and then does the archive/purge. This task runs during normal operation of Ariba Buyer. For more information on the sweep phase, see “How to Archive to Disk” on page 141.
Obtaining the Most Recent Preview Result
If you run a second preview phase, the result from the first preview phase is displayed unless you click the Repaginate button. The Repaginate button synchronizes to the latest preview result.
Purge Configuration Files
You configure archive and purge with a purge configuration file. A purge configuration file is an XML file that you pass to the archive and purge tools. It defines the objects you want to purge, and specifies the conditions under which objects must be purged or preserved.
When you start a preview or mark phase, the runpurge command reads this configuration file and does the following:
• Creates an Ariba Query API query that selects a set of candidate documents
• Traces through the database to find all objects related to those purge candidates
• Filters the candidates through any defined keep conditions, potentially removing purge candidates
Each purge configuration file centers around a specific approvable document type, and selects the documents of that type that can be purged. It includes the following kinds of information:
• An Ariba Query API expression that specifies the initial set of purge candidates.
• One or more Ariba Query API expressions used as keep conditions. You use keep conditions to filter the purge candidates and remove objects that you want to keep.
• A set of metadata annotations, which provide additional typing information for specific objects, such as type narrowing and information about whether a given field creates references outside the current cluster root.
Writing purge configuration files is the only task you perform to configure archive and purge. For full information on purge configuration files, see “Purge Configuration File” on page 138.
Ariba Buyer Configuration Guide 137
Chapter 10 Data Archiving and Purging About Archive and Purge
Purge Scopes
The archive and purge tools operate in the context of a named purge scope. A purge scope defines the relationships between primary classes and related classes, and helps the archive and purge tools to determine which objects can safely be purged.
For Version 9r1, there is just one predefined scope, Procurement. The definition of a scope is intrinsic to Ariba Buyer. You cannot define new scopes, or modify the existing scope.
To see a list of defined scopes, use the -printscopenames option to runpurge:
runpurge -printscopenames
To list the primary classes in each scope, use the -printscope scope option to runpurge. For example:
runpurge -printscope Procurement
Summary of Steps
This section summarizes the steps for using the archive and purge tools.
Ariba Buyer must always be shut down when the runpurge command is running to preview or mark.
To run archive and purge:
1 Create a purge configuration file.
2 Shut down Ariba Buyer and start the preview phase with the runpurge command, specifying the following arguments:
runpurge -configPath config/purge/YourPurgeConfig.xml
The argument after configPath names your purge configuration file.
3 Verify the marked objects, by browsing through the Inspector:
http://yourserver:yourport/inspector/purgeBrowser
4 Make any changes to the configuration file, as appropriate.
5 Start the mark phase by starting runpurge again, with the -purge option:
runpurge -configPath config/purge/YourPurgeConfig.xml -purge
6 Start Ariba Buyer.
7 Run the scheduled task ObjectArchive.
This task implements the sweep phase. It scans your database for the objects marked in the first phase, and then does the archive/purge.
This scheduled task runs during normal operation of Ariba Buyer. You can run it on a regular schedule, from Ariba Administrator, or with the servermonitor command.
8 Check the summary log file, stored as BuyerServerRoot/objectArchive/Node1.date/Log.summary.txt.
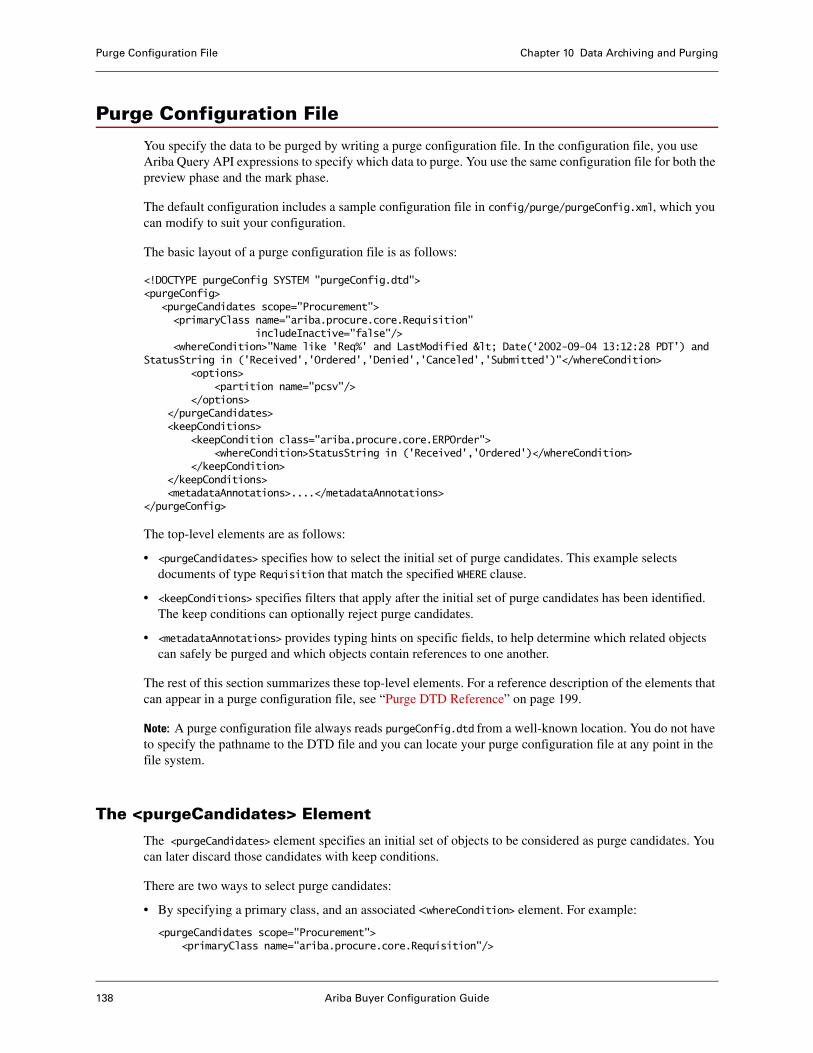
Purge Configuration File Chapter 10 Data Archiving and Purging
138 Ariba Buyer Configuration Guide
Purge Configuration File
You specify the data to be purged by writing a purge configuration file. In the configuration file, you use Ariba Query API expressions to specify which data to purge. You use the same configuration file for both the preview phase and the mark phase.
The default configuration includes a sample configuration file in config/purge/purgeConfig.xml, which you can modify to suit your configuration.
The basic layout of a purge configuration file is as follows:
<!DOCTYPE purgeConfig SYSTEM "purgeConfig.dtd"><purgeConfig>
<purgeCandidates scope="Procurement"><primaryClass name="ariba.procure.core.Requisition"
includeInactive="false"/><whereCondition>"Name like 'Req%' and LastModified < Date(‘2002-09-04 13:12:28 PDT’) and
StatusString in ('Received','Ordered','Denied','Canceled','Submitted')"</whereCondition><options>
<partition name="pcsv"/></options>
</purgeCandidates><keepConditions>
<keepCondition class="ariba.procure.core.ERPOrder"><whereCondition>StatusString in ('Received','Ordered')</whereCondition>
</keepCondition></keepConditions><metadataAnnotations>....</metadataAnnotations>
</purgeConfig>
The top-level elements are as follows:
• <purgeCandidates> specifies how to select the initial set of purge candidates. This example selects documents of type Requisition that match the specified WHERE clause.
• <keepConditions> specifies filters that apply after the initial set of purge candidates has been identified. The keep conditions can optionally reject purge candidates.
• <metadataAnnotations> provides typing hints on specific fields, to help determine which related objects can safely be purged and which objects contain references to one another.
The rest of this section summarizes these top-level elements. For a reference description of the elements that can appear in a purge configuration file, see “Purge DTD Reference” on page 199.
Note: A purge configuration file always reads purgeConfig.dtd from a well-known location. You do not have to specify the pathname to the DTD file and you can locate your purge configuration file at any point in the file system.
The <purgeCandidates> Element
The <purgeCandidates> element specifies an initial set of objects to be considered as purge candidates. You can later discard those candidates with keep conditions.
There are two ways to select purge candidates:
• By specifying a primary class, and an associated <whereCondition> element. For example:
<purgeCandidates scope="Procurement"><primaryClass name="ariba.procure.core.Requisition"/>
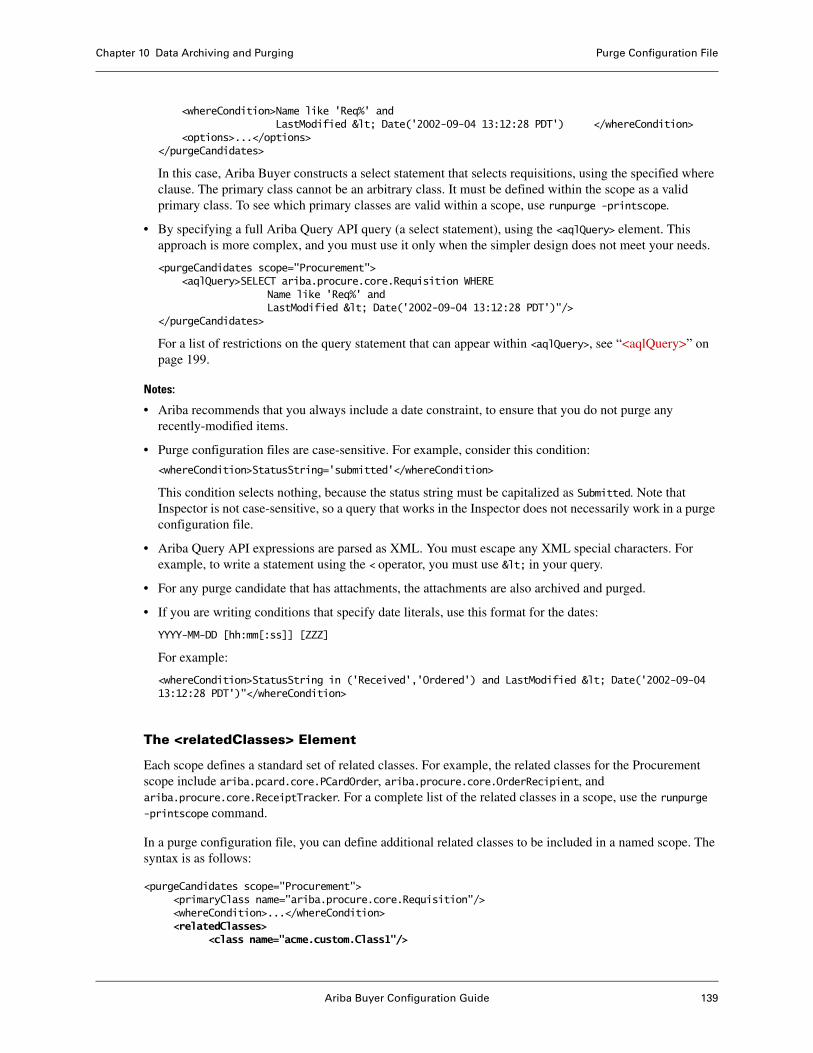
Ariba Buyer Configuration Guide 139
Chapter 10 Data Archiving and Purging Purge Configuration File
<whereCondition>Name like 'Req%' and LastModified < Date('2002-09-04 13:12:28 PDT') </whereCondition>
<options>...</options></purgeCandidates>
In this case, Ariba Buyer constructs a select statement that selects requisitions, using the specified where clause. The primary class cannot be an arbitrary class. It must be defined within the scope as a valid primary class. To see which primary classes are valid within a scope, use runpurge -printscope.
• By specifying a full Ariba Query API query (a select statement), using the <aqlQuery> element. This approach is more complex, and you must use it only when the simpler design does not meet your needs.
<purgeCandidates scope="Procurement"><aqlQuery>SELECT ariba.procure.core.Requisition WHERE
Name like 'Req%' andLastModified < Date('2002-09-04 13:12:28 PDT')"/>
</purgeCandidates>
For a list of restrictions on the query statement that can appear within <aqlQuery>, see “<aqlQuery>” on page 199.
Notes:
• Ariba recommends that you always include a date constraint, to ensure that you do not purge any recently-modified items.
• Purge configuration files are case-sensitive. For example, consider this condition:
<whereCondition>StatusString='submitted'</whereCondition>
This condition selects nothing, because the status string must be capitalized as Submitted. Note that Inspector is not case-sensitive, so a query that works in the Inspector does not necessarily work in a purge configuration file.
• Ariba Query API expressions are parsed as XML. You must escape any XML special characters. For example, to write a statement using the < operator, you must use < in your query.
• For any purge candidate that has attachments, the attachments are also archived and purged.
• If you are writing conditions that specify date literals, use this format for the dates:
YYYY-MM-DD [hh:mm[:ss]] [ZZZ]
For example:
<whereCondition>StatusString in ('Received','Ordered') and LastModified < Date('2002-09-04 13:12:28 PDT')"</whereCondition>
The <relatedClasses> Element
Each scope defines a standard set of related classes. For example, the related classes for the Procurement scope include ariba.pcard.core.PCardOrder, ariba.procure.core.OrderRecipient, and ariba.procure.core.ReceiptTracker. For a complete list of the related classes in a scope, use the runpurge -printscope command.
In a purge configuration file, you can define additional related classes to be included in a named scope. The syntax is as follows:
<purgeCandidates scope="Procurement"><primaryClass name="ariba.procure.core.Requisition"/><whereCondition>...</whereCondition><relatedClasses>
<class name="acme.custom.Class1"/>
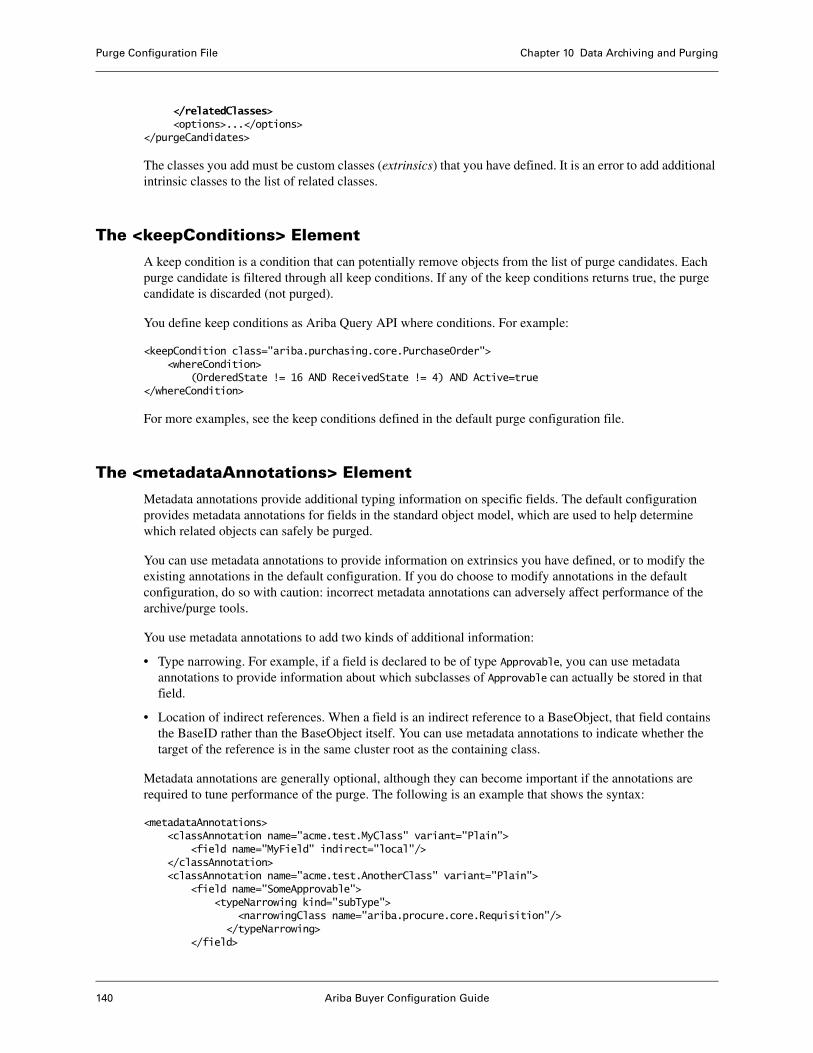
Purge Configuration File Chapter 10 Data Archiving and Purging
140 Ariba Buyer Configuration Guide
</relatedClasses><options>...</options>
</purgeCandidates>
The classes you add must be custom classes (extrinsics) that you have defined. It is an error to add additional intrinsic classes to the list of related classes.
The <keepConditions> Element
A keep condition is a condition that can potentially remove objects from the list of purge candidates. Each purge candidate is filtered through all keep conditions. If any of the keep conditions returns true, the purge candidate is discarded (not purged).
You define keep conditions as Ariba Query API where conditions. For example:
<keepCondition class="ariba.purchasing.core.PurchaseOrder"><whereCondition>
(OrderedState != 16 AND ReceivedState != 4) AND Active=true</whereCondition>
For more examples, see the keep conditions defined in the default purge configuration file.
The <metadataAnnotations> Element
Metadata annotations provide additional typing information on specific fields. The default configuration provides metadata annotations for fields in the standard object model, which are used to help determine which related objects can safely be purged.
You can use metadata annotations to provide information on extrinsics you have defined, or to modify the existing annotations in the default configuration. If you do choose to modify annotations in the default configuration, do so with caution: incorrect metadata annotations can adversely affect performance of the archive/purge tools.
You use metadata annotations to add two kinds of additional information:
• Type narrowing. For example, if a field is declared to be of type Approvable, you can use metadata annotations to provide information about which subclasses of Approvable can actually be stored in that field.
• Location of indirect references. When a field is an indirect reference to a BaseObject, that field contains the BaseID rather than the BaseObject itself. You can use metadata annotations to indicate whether the target of the reference is in the same cluster root as the containing class.
Metadata annotations are generally optional, although they can become important if the annotations are required to tune performance of the purge. The following is an example that shows the syntax:
<metadataAnnotations><classAnnotation name="acme.test.MyClass" variant="Plain">
<field name="MyField" indirect="local"/></classAnnotation><classAnnotation name="acme.test.AnotherClass" variant="Plain">
<field name="SomeApprovable"><typeNarrowing kind="subType">
<narrowingClass name="ariba.procure.core.Requisition"/></typeNarrowing>
</field>
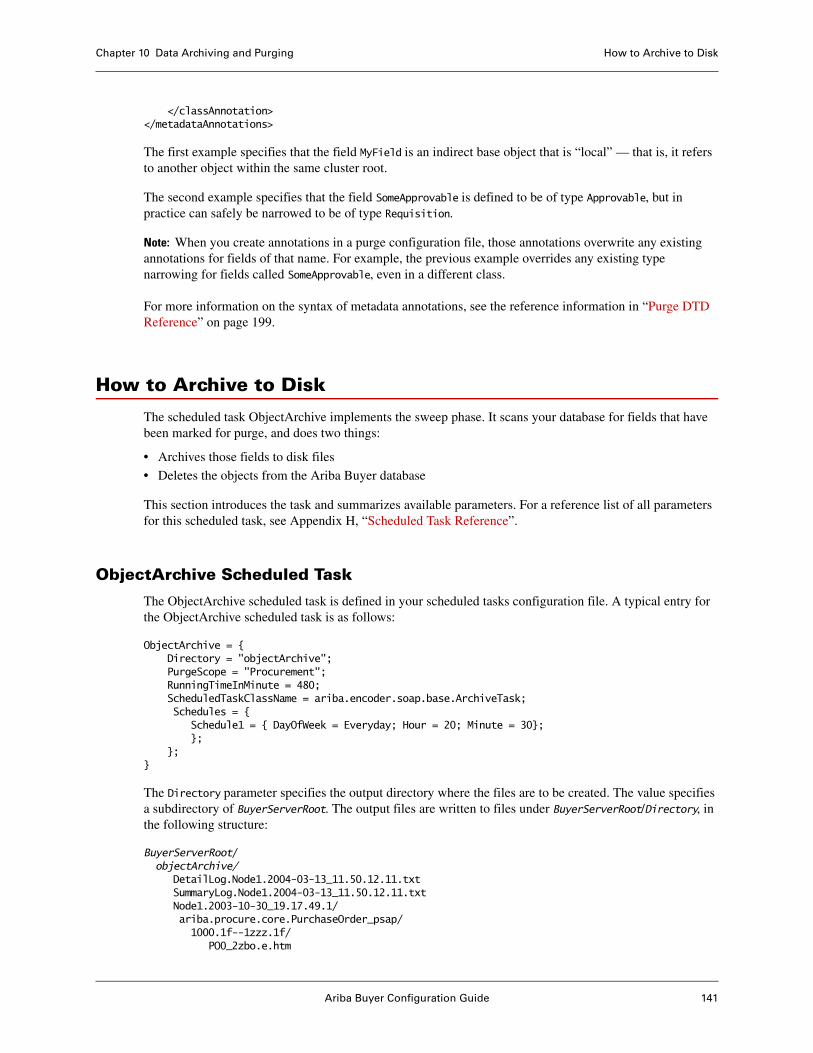
Ariba Buyer Configuration Guide 141
Chapter 10 Data Archiving and Purging How to Archive to Disk
</classAnnotation></metadataAnnotations>
The first example specifies that the field MyField is an indirect base object that is “local” — that is, it refers to another object within the same cluster root.
The second example specifies that the field SomeApprovable is defined to be of type Approvable, but in practice can safely be narrowed to be of type Requisition.
Note: When you create annotations in a purge configuration file, those annotations overwrite any existing annotations for fields of that name. For example, the previous example overrides any existing type narrowing for fields called SomeApprovable, even in a different class.
For more information on the syntax of metadata annotations, see the reference information in “Purge DTD Reference” on page 199.
How to Archive to Disk
The scheduled task ObjectArchive implements the sweep phase. It scans your database for fields that have been marked for purge, and does two things:
• Archives those fields to disk files
• Deletes the objects from the Ariba Buyer database
This section introduces the task and summarizes available parameters. For a reference list of all parameters for this scheduled task, see Appendix H, “Scheduled Task Reference”.
ObjectArchive Scheduled Task
The ObjectArchive scheduled task is defined in your scheduled tasks configuration file. A typical entry for the ObjectArchive scheduled task is as follows:
ObjectArchive = { Directory = "objectArchive"; PurgeScope = "Procurement";RunningTimeInMinute = 480;ScheduledTaskClassName = ariba.encoder.soap.base.ArchiveTask; Schedules = {
Schedule1 = { DayOfWeek = Everyday; Hour = 20; Minute = 30}; };
};}
The Directory parameter specifies the output directory where the files are to be created. The value specifies a subdirectory of BuyerServerRoot. The output files are written to files under BuyerServerRoot/Directory, in the following structure:
BuyerServerRoot/objectArchive/
DetailLog.Node1.2004-03-13_11.50.12.11.txtSummaryLog.Node1.2004-03-13_11.50.12.11.txtNode1.2003-10-30_19.17.49.1/ariba.procure.core.PurchaseOrder_psap/1000.1f--1zzz.1f/
PO0_2zbo.e.htm

How to Archive to Disk Chapter 10 Data Archiving and Purging
142 Ariba Buyer Configuration Guide
PO0_2zbo.e.xml
where:
• Node1.2003-10-30_19.17.49.1 is a directory formed from the node name and the date. Different subdirectories reflect different runs of the scheduled task.
• ariba.procure.core.PurchaseOrder_psap is a directory formed by concatenating the class name and partition name.
• 1000.1f--1zzz.1f is a subdirectory, used to limit the total number of files in any given directory.
The task generates both XML files and HTML files. For more information on the output format, see “Format of Output Files” on page 143.
Archive Parameters
Within a purge scope, certain classes can be designated as no-archive classes. The PurgeScope parameter to ObjectArchive specifies the scope, and therefore controls which classes are not archived. Within that scope, classes specified as no-archive classes are purged, but not archived. For example, in the Procurement scope, objects of type OrderRecipient can be purged without being archived, because the object has no business data.
No-archive classes are specified in metadata XML, with the generateArchive class property. You must not modify this property for any existing classes, but there might be situations in which you want to designate extrinsic classes as no-archive classes.
To mark an extrinsic as a no-archive class, create a metadata XML extension file that sets the generateArchive property for that class. For example:
<group name="ProcurementPurgeScope"><groupClass name="acme.custom.MyClassName">
<groupField name="ClassProperties"><properties generateArchive="false"/>
</groupField></groupClass>
</group>
Variant-Specific Properties
Purge scope properties must apply to all variants. A field property definition might specify a particular variant. For example:
<group name="SchoolPurgeScope"><groupClass name="test.ariba.base.core.SchoolUser">
<groupClassVariant name="vus"><groupField name="ClassProperties">
<properties purgePrimaryClass="true"generateArchive="true"/>
</groupField></groupClassVariant>
</groupClass></group>
In this case, you can either remove the <groupClassVariant> element from the field property definition or set the <groupClassVariant> to Plain.
Ariba Buyer Configuration Guide 143
Chapter 10 Data Archiving and Purging How to Archive to Disk
Error-Handling Parameters
The ObjectArchive task recognizes the following additional optional parameters related to error-handling:
• MaximumAllowedErrors ensures that the task stops quickly if there is a basic problem, such as a full disk. After the specified maximum number of errors, the taks stops.
• IgnoreBadFieldValue is a Boolean, indicating whether errors such as missing attachments or invalid links are handled as errors or warnings. If this parameter is set to false, invalid data is not ignored: it is treated as an error. If this parameter is true, the task prints a warning, but does not consider invalid data an error when counting MaximumAllowedErrors.
• ArchiveObjectsInGroups restricts the set of objects to a list of explicitly specified groups. You typically use this parameter only for error recovery, to archive a specific set of groups that previously failed. The value is a list of group IDs, separated by comma and surrounded by parentheses. For example:
ArchiveObjectsInGroups = (abc.xy, cde.xy);
You can obtain the group IDs from the Inspector, or from log file output.
Performance-Tuning Parameters
The ObjectArchive task recognizes the following optional parameters for performance-tuning:
• RunningTimeInMinute specifies a maximum running time.
• SleepIntervalInMillis specifies a delay period during archiving, to allow other processes access to system resources. After archiving each group, the task pauses for the specified number of milliseconds (5000 by default).
• DeleteOnly is a Boolean that you can use to disable archiving, if you want to purge without also writing the data out to disk. If not set, the default is false, which means to do both archive and purge.
Format of Output Files
The ObjectArchive scheduled task writes its output in two formats, HTML and XML. The HTML format is easier to browse, while the XML files are convenient for parsing.
The HTML output uses the same code that is used for printing approvable documents, and recognizes the same groups for customizing the output. For example, the archive format for requisitions includes all fields in the RequisitionPrintHTML group, including any extrinsic fields you have added to that group. For more information on customizing print output, see the Ariba Buyer Customization Guide.
Note: For some objects, such as CollaborationThreads, the archived output is empty. The reference is archived, but there is no content available to browse.
The XML output file format uses the Simple Object Access Protocol (SOAP) encoding standard. SOAP defines a set of encoding rules for translating data structures into XML elements. For more information on SOAP, refer to Internet specifications for SOAP, such as the material found at http://www.w3.org.
The SOAP output always includes all fields of the approvable, and is not customizable. For null fields, the output resembles the following:
<AmountAccepted xsi:type="xsi:null">1</AmountAccepted>
That is, the SOAP encoding writes null fields with the attribute xsi:null and 1 as the value.
How to Archive to Disk Chapter 10 Data Archiving and Purging
144 Ariba Buyer Configuration Guide
Logging for ObjectArchive
The ObjectArchive scheduled task writes two log files, one summary log and one detail log with object-by-object details. Typical path names for the log files are as follows:
BuyerServerRoot/objectArchive/Node1.2003-10-30_19.17.49.1/Log.summary.txt
BuyerServerRoot/objectArchive/Node1.2003-10-30_19.17.49.1/Log.detail.txt
Each time you run the ObjectArchive scheduled task, it writes the log files to a different subdirectory name, constructed from the date, time, and node name. The top-level directory name (objectArchive in this example) is the value specified as the Directory parameter to the ObjectArchive scheduled task.
These log files are generated by two log listener entries in config/Parameters.table, System.Logging.ObjectArchiveDetailLogger and System.Logging.ObjectArchiveSummaryLogger. For example, the entry for the detail logger is as follows:
ObjectArchiveDetailLogger = {Categories = "util/info:general/info:archiveMaster/info:soap/info";ClassName = "ariba.encoder.soap.base.ObjectArchiveLogger";DisableLogListener = false;LocaleForLogMessages = en_US;LogMode = detail;
};
Error Recovery
If the ObjectArchive task encounters errors during the archive operation, it moves the objects with errors into a failed state, and writes an appropriate message to the log file. For example, this task might fail if there is not enough disk space to finish the archiving operation.
When there are errors, fix the errors manually and then run the FailedObjectArchive scheduled task. The FailedObjectArchive task does not retry the entire archive operation, but it does retry any objects that failed the first time.
The FailedObjectArchive task recognizes the same parameters as ObjectArchive.
Ariba Buyer Configuration Guide 145
Chapter 11 Sample Features
Ariba Buyer provides a number of optional samples in the standard Ariba Buyer distribution that are not installed by default. These samples are available as examples and suggestions of ways to customize Ariba Buyer.
This chapter describes the general-purpose samples. It includes the following sections:
• “Sample Directory” on page 145
• “Hooks” on page 146
• “Single SignOn” on page 146
Samples related to specific Ariba Buyer features, such as the Procurement feature, are provided in the guides for those features.
Sample Directory
The optional features are located in the sample directory, which is located in your Ariba Buyer Server installation directory. You can install these features from the sample directory, and use them without modification, but in general consider them as starting points for additional customizations of your own. For each sample, there is a file called README.txt, which describes how to perform the basic installation and integration.
The following table provides a brief overview of some of the major features available in the sample directory. For complete information on each sample, read the README.txt file associated with the sample.
Note: Additional unsupported samples, including some samples that were available in the sample directory in earlier releases, are available on http://connect.ariba.com.
The following table describes the contents of the sample directory.
sample Subdirectory What It Contains
auth/NTLogin An example of adding a domain credential that you can use with NTDomainLogin.
auth/SingleSignOn Single SignOn feature sample, which illustrates how to configure Ariba Buyer to use existing user authentication information, and not require the user to reauthenticate to use Ariba Buyer.
branding Rebranding samples.
common/misc A sample LineItemCollection client-side approvable hook. For more information on approvable hooks, see the Ariba Buyer Customization Guide.
eforms Sample eForms. For more information, see the Ariba Buyer Customization Guide.
Hooks Chapter 11 Sample Features
146 Ariba Buyer Configuration Guide
Hooks
As a document moves through the approval process, there are a few places where you can insert custom Java code into the processing, to check requirements before you allow a document to continue through the system.
For example, you might want to insert a check just before a purchase requisition is submitted, to make sure that the items on the requisition meet your company’s budget requirements.
To make use of a hook, you write Java code that implements your preferred logic, and then specify that class in a metadata XML file, using a class property on the class Approvable.
In the default configuration, the hooks reside in sample/procure and sample/common.
Single SignOn
The Single SignOn feature illustrates how you can configure Ariba Buyer to use existing user authentication information, and not require the user to reauthenticate to use Ariba Buyer.
For complete instructions on how to set up this feature, see the README.txt file in sample/auth/SingleSignOn.
excelimport Sample Microsoft Excel spreadsheets for use with the Microsoft Excel contract request (CR) feature. For more information, see the Ariba Contract Compliance Guide.
expense Sample expense report implementation. For more information, see the Ariba Travel & Expense Guide.
invoicing Staging Table Payment Push sample, which illustrates how to use the Ariba Buyer API to export payment documents to a database staging table. For more information, see the Ariba Invoice Guide.
oracle/Oracle110CustomCatalog Sample files to implement CustomCatalogs and CustomPricing for an Oracle variant. For more information, see the legacy version 8.2 Ariba Spend Management API Guide available at https://connect.ariba.com.
procure/misc Approvable hook samples. For more information on approvable hooks, see the Ariba Buyer Customization Guide.
procure/requisitionimport Requisition Import sample, which illustrates how to pull requisitions created from an external system into Ariba Buyer. For more information, see the Ariba Buyer Procurement Guide.
sap/BudgetCheck Budget Check sample.
timesheetpull Time Sheet Pull sample, which illustrates how to import time sheets from CSV files into Ariba Buyer. For more information, see the Ariba Services Procurement Guide.
sample Subdirectory What It Contains

Ariba Buyer Configuration Guide 147
Chapter 12 Reporting
This chapter describes how to configure and customize reporting. It includes the following sections:
• “Introduction to Reporting” on page 147
• “Report Configuration” on page 148
• “Report Customization” on page 158
For a description of the standard reports packaged with Ariba Buyer and instructions on how to run them, see the Ariba Buyer online help system.
Introduction to Reporting
Ariba Buyer provides a set of prepackaged reports, which the user can adjust by specifying filters. The reporting process is as follows:
1 In Ariba Buyer, a user chooses a standard report and tailors it with filters. For example, a user might choose to view a report on a particular supplier.
2 When the user finishes setting up filters, Ariba Buyer generates an Ariba Query API query based on the user’s selected report and the filters.
3 Ariba Buyer formats the data returned from the query, as described by your report configuration files, and generates HTML, an Excel spreadsheet, or CSV.
4 Ariba Buyer displays the data to the user, for example, in a Web browser window if the report is HTML:
You can also configure reports by changing configuration files, to specify default parameters or layout, or control reporting permissions. You can create custom reports, based on existing reports. Users can configure reports from the user interface, by adding and removing filters, and changing display fields.
This chapter describes how to configure and customize reports from configuration files. For information on how users configure reports, see the online help.
Report Configuration Chapter 12 Reporting
148 Ariba Buyer Configuration Guide
Report Configuration
The default configuration supplies a standard set of reports, which are defined with integration events. You can modify the CSV files that pull report data, to specify report properties or permissions. You can configure reports in the following ways:
• “ReportQueryPull Integration Event” on page 148
• “ReportMetaPull Integration Event” on page 149
• “ReportPermissionMap.csv File” on page 156
• “Reporting on Currency and Money” on page 157
ReportQueryPull Integration Event
You use the ReportQueryPull integration event to define the Ariba Query API queries associated with each report. For information on how to write Ariba Query API queries, see the Ariba Spend Management Query API Guide.
Ariba Buyer supplies one implementation of the ReportQueryPull integration event, which reads from a CSV file. In the default configuration, the ReportQueryPull integration event reads from the following file:
BuyerServerRoot/variant/data/ReportQuery.csv.
The fields in ReportQuery.csv are as follows:
Field Description
VariantName The variant in which the report is being run.
UniqueName A unique identifier for this query. Every query in ReportQuery.csv must have a distinct UniqueName, VariantName combination.
SavedStatement The query used to generate the report. For example:
SELECT
Year(SubmitDate) * 100 + Month(SubmitDate) AS YearMonth,
LineItems.IsAdHoc AS IsAdHoc,
SUM(LineItems.Amount.ApproxAmountInBaseCurrency) AS SumExtendedPrice,
COUNT(*) AS CountLineItems
FROM
ariba.procure.core.PurchaseOrder
GROUP BY
Year(SubmitDate) * 100 + Month(SubmitDate), LineItems.IsAdHoc
For information on queries that operate on money fields, see “Reporting on Currency and Money” on page 157.
Ariba Buyer Configuration Guide 149
Chapter 12 Reporting Report Configuration
Summary Tables
For reports with long-running queries, you can improve performance by creating a summary table for the query. A summary table stores all the data specified by the query, so that when a user runs a report, the data is pulled from the summary table instead of querying the database.
The summary table is updated regularly by the CreateReportingSummaryTables scheduled task. When this task runs, it uses the properties in ReportQuery.csv to determine which reports have summary tables, and whether the data in the summary table needs to be regenerated. Because summary tables must not be regenerated more frequently than every 24 hours, you must not use a summary table for a query that requires real-time data.
Additionally, summary tables have the following restrictions:
• Summary tables can only store primitive fields. They cannot store objects. If you are using a summary table, the query must specify each field separately.
• Because summary tables do not store objects, they cannot support any custom formatting or conversions based on the Money object, such as the EuroDualCurrencyDisplay feature. For more information, see “Multi-Currency Reports” on page 157.
• Fields defined as Calendar Date are stored in the database without being offset to GMT, causing incorrect dates in the report. In the default configuration, the ExpenseReport.LineItems.Date field is the only field defined as Calendar Date. If you need to use a Calendar Date field with summary tables, you must use the formatter ariba.server.ormsserver.ReportingCalendarDate in the FormatterClassName field in ReportColumnMeta.csv.
• If you add a Boolean field to a query, it is stored as int (0, 1) in the summary table, just as it is stored in the database. If you want to include a Boolean in a report that uses summary tables, you must create a custom formatter to convert the value to true or false.
• Multilingual strings are returned in the specified locale see (see “ReportQueryPull Integration Event” on page 148), or the system locale, not the user’s locale.
ReportMetaPull Integration Event
The ReportMetaPull integration event defines the visual appearance and properties of reports.
It reads data from the following CSV files in BuyerServerRoot/variant/data:
• ReportMeta.csv, which describes attributes that apply to the entire report
• ReportColumnMeta.csv, which describes attributes of a particular column
UseToCreateSummaryTable A Boolean that specifies whether to create a summary table for this report’s query. For more information on summary tables, see “Summary Tables” on page 149.
SummaryTableLocale Specifies which locale to use in the report query if a multilingual string is present. If you do not specify a value for this field, the default system locale is used.
CreateSummaryTableFrequency The frequency in hours at which the summary table must be regenerated for this report. The value cannot be less than 24, that is, you cannot regenerate the summary table more frequently than every 24 hours.
Field Description
Report Configuration Chapter 12 Reporting
150 Ariba Buyer Configuration Guide
• ReportPermissionMap.csv, which describes how to restrict access to reports
The rest of this section describes each of these files in detail.
ReportMeta.csv File
You use ReportMeta.csv to set up the list of reports in your system and to specify report-wide details for each. ReportMeta.csv contains one line for each report in the system.
By making appropriate changes to this configuration file, you can remove a report, and change overall report properties such as report title and graph properties.
The fields in ReportMeta.csv are as follows:
The following example shows the first few lines from ReportMeta.csv:
Field Description
VariantName The variant in which the report is being run.
UniqueName A unique identifier for this report. Every line in ReportMeta.csv must have a distinct UniqueName.
QueryUniqueName An identifier for the query associated with this report. This field must match a query specified in ReportQuery.csv.
ReportTitle A resource key for the title that appears at the top of the report. The resource key matches a string resource in resource.reportmetadata.csv.
CompanyName Your company name as you want it displayed on reports.
GraphName A resource key for the label that appears above the graph in the report. The resource key matches a string resource in resource.reportmetadata.csv.
If the GraphName field is empty, the report does not have a graph.
ExtraWClause Adds an additional WHERE clause to the default query. The value of this field is added to the existing query. For example, for the Ariba Items Rejected report, you can add the following:
ReceiptItem.NumberRejected > 0
GraphType Specifies the output format for the graph. The valid values are “Pie” “Bar,” and no value.
Category Specifies a report category, such as Requisition, PCard, or Order. The categories are used to group reports in the user interface. If you specify a value that does not already exist, a new category is created. The value is typically a key in the resource file resource.reportmetadata.csv.
Restricted A Boolean that indicates whether access to this report must be restricted. If set to false, there are no restrictions. If set to true, Ariba Buyer checks ReportPermissionMap.csv to find out which permissions are required. For more information, see “ReportPermissionMap.csv File” on page 156.
Description A resource key for the report description displayed to users. The value is a key in the resource file resource.reportmetadata.csv.
IsCrossPartition A Boolean that indicates whether the query associated with the report must be run in the user’s partition or across partitions.
Ariba Buyer Configuration Guide 151
Chapter 12 Reporting Report Configuration
"VariantName","UniqueName","QueryUniqueName","ReportTitle","CompanyName","GraphName","ExtraWClause","GraphType","Category","Restricted","Description","IsCrossPartition""voracle","aribaReqDetails","ReqLISA","RequisitionDetail","Ariba","RequisitionDetail",,"Pie","Requisition_Category","FALSE","aribaReqDetails_Description","false""vorcale","aribaReqSummary","ReqHeader","RequisitionSummary","Ariba","RequisitionSummary",,"Bar","Requisition_Category","FALSE","aribaReqSummary_Description","true"
Resource Keys in ReportMeta.csv
For ReportMeta.csv fields that are displayed in the user interface, the value is a resource key that is mapped to a string in the following resource file:
BuyerServerRoot/ariba/resource/locale/strings/resource.reportmetadata.csv
The ReportMeta.csv fields that are mapped to strings in resource.reportmetadata.csv are as follows:
• ReportTitle• GraphName• Description• Category
• Column headings
For each of these fields, the value in ReportMeta.csv is interpreted as a key in the resource file. For example, consider the following values:
With these values, the user interface appears as follows:
If you specify a value that does not exist as a key in the resource file, the value appears as a literal. For example, if the key SomeKeyName did not exist, then the string SomeKeyName would appear in the user interface.
ReportColumnMeta.csv File
Each row in ReportColumnMeta.csv describes a single column in the report. You use the fields in the row to specify two kinds of information:
• Output format. Each column includes formatting information that determines how the column’s data is displayed in the report. This includes attributes such as layout, order, grouping, basic formatting, and totalling.
• Filtering. You can associate a column with a filter. For example, you can add a filter that lets the user report only on requisitions that have a status of Submitted.
This section describes these topics in more detail.
Field Value in ReportMeta.csv Value in resource.reportmetadata.csv
ReportTitle "SomeKeyName" "SomeKeyName","Requisition Detail"
Description "aribaReqDetails_Description" "Summarizes a group of requisitions, showing both header and line item information."
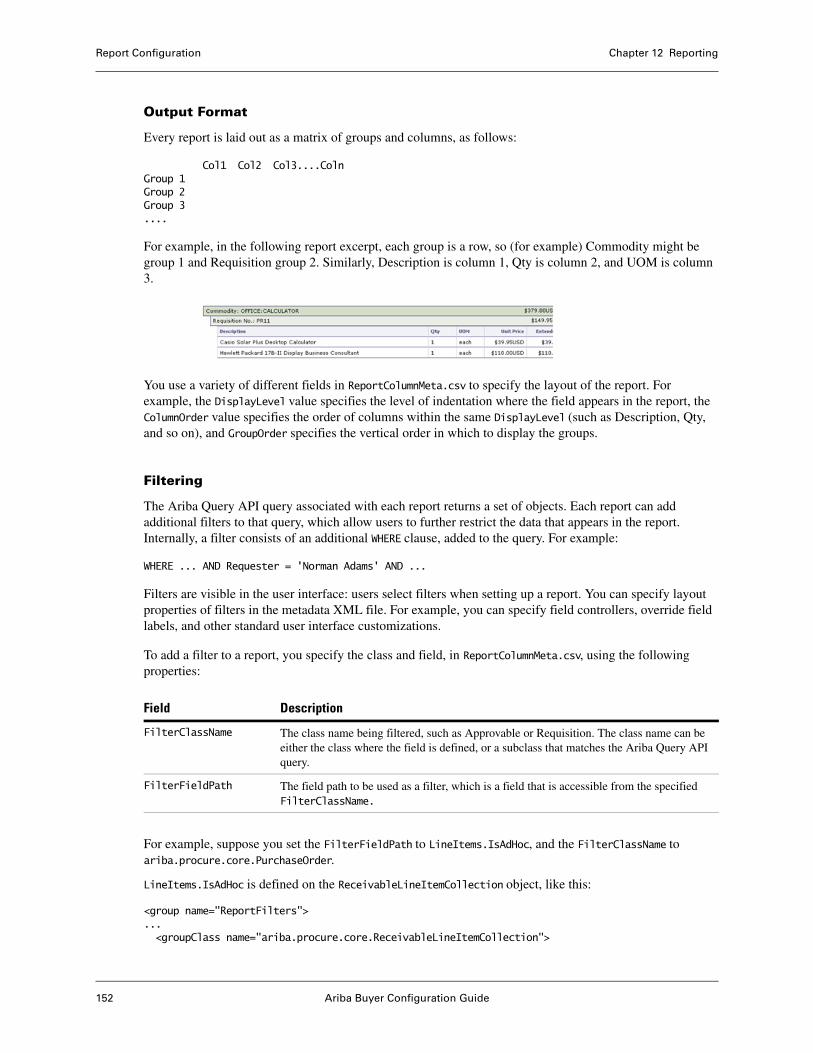
Report Configuration Chapter 12 Reporting
152 Ariba Buyer Configuration Guide
Output Format
Every report is laid out as a matrix of groups and columns, as follows:
Col1 Col2 Col3....ColnGroup 1Group 2Group 3....
For example, in the following report excerpt, each group is a row, so (for example) Commodity might be group 1 and Requisition group 2. Similarly, Description is column 1, Qty is column 2, and UOM is column 3.
You use a variety of different fields in ReportColumnMeta.csv to specify the layout of the report. For example, the DisplayLevel value specifies the level of indentation where the field appears in the report, the ColumnOrder value specifies the order of columns within the same DisplayLevel (such as Description, Qty, and so on), and GroupOrder specifies the vertical order in which to display the groups.
Filtering
The Ariba Query API query associated with each report returns a set of objects. Each report can add additional filters to that query, which allow users to further restrict the data that appears in the report. Internally, a filter consists of an additional WHERE clause, added to the query. For example:
WHERE ... AND Requester = 'Norman Adams' AND ...
Filters are visible in the user interface: users select filters when setting up a report. You can specify layout properties of filters in the metadata XML file. For example, you can specify field controllers, override field labels, and other standard user interface customizations.
To add a filter to a report, you specify the class and field, in ReportColumnMeta.csv, using the following properties:
For example, suppose you set the FilterFieldPath to LineItems.IsAdHoc, and the FilterClassName to ariba.procure.core.PurchaseOrder.
LineItems.IsAdHoc is defined on the ReceivableLineItemCollection object, like this:
<group name="ReportFilters">...<groupClass name="ariba.procure.core.ReceivableLineItemCollection">
Field Description
FilterClassName The class name being filtered, such as Approvable or Requisition. The class name can be either the class where the field is defined, or a subclass that matches the Ariba Query API query.
FilterFieldPath The field path to be used as a filter, which is a field that is accessible from the specified FilterClassName.
Ariba Buyer Configuration Guide 153
Chapter 12 Reporting Report Configuration
<groupField name="LineItems.IsAdHoc"><properties editable="true"label="@aml.Requisition/Adhoc"/>
</groupField>
In the sample entry, the FilterClassName is ariba.procure.core.PurchaseOrder. In the metadata XML, LineItems.IsAdHoc is defined on the ReceivableLineItemCollection class. Because PurchaseOrder is a subclass of ReceivableLineItemCollection, it can use any field defined in that class, including LineItems.IsAdHoc.
It is possible to filter on a field, without having that field appear in the report. For example, you might want to filter on commodities purchased from a particular supplier, but not want to display the supplier as a report column. In this case, you add a line in ReportColumnMeta.csv for the filter, but set DisplayLevel to 0 to keep the field from appearing in the report.
The fields in ReportColumnMeta.csv are as follows.
Field Description
ReportUniqueName The name of the associated report, which must match a UniqueName in ReportMeta.csv.
UniqueName A unique identifier for this entry that matches a field or alias returned by the associated Ariba Query API query. For example, suppose your report is based on this query:
“Plain","SimpleQuery","SELECT
Requester.Name AS Requester,
Requisition.SubmitDate AS SubmitDate,
FROM Requisition"
To display these columns in the report, you use the unique names Requester and SubmitDate.
ColumnLabel A resource key for the column display label, used for column headings, graph labels, and group headings. The actual text that is displayed in the user interface is typically in the resource.reportmetadata.csv file. For more information, see “Resource Keys in ReportColumnMeta” on page 156.
FilterFieldPath The path used to look up a field to be used as a filter. If you set a value for this field, it must match a groupField name specified in a ReportFilters group. For more information, see “Filtering” on page 152.
FilterOrder Specifies the order in which filters are displayed to the user, with the lowest positive value displaying first.
DisplayGroupLabel (HTML reports only) A Boolean that indicates whether to display the column as a label row at the beginning of each group. If this field is FALSE, the column displays next to other columns at the same DisplayLevel. If this field is TRUE, the column displays as a separate row containing ColumnLabel: group value at the beginning of each new group.
Report Configuration Chapter 12 Reporting
154 Ariba Buyer Configuration Guide
DisplayLevel (HTML reports only) Specifies the indentation level for this column. You use this field in conjunction with the ColumnOrder field, which specifies the order in which columns at the same DisplayLevel appear.
Fields at the same DisplayLevel display next to each other. Furthermore, Description has a ColumnOrder value of 1 so that it displays first, Qty has a ColumnOrder value of 2 so that it displays next, and so on.
If a column’s DisplayGroupLabel is set to TRUE, the column is displayed as a separate line and does not have a DisplayLevel. Instead, the GroupOrder value determines the level of indentation. If the column’s DisplayGroupLabel is set to FALSE, and the DisplayLevel is set to 0 or is left blank, the column does not appear in the report.
TotalMe (HTML reports only) A Boolean that indicates whether this is the column to add up for subtotals and the grand total in the report. Each report can have only one column with TotalMe set to TRUE.
CountRows (HTML reports only) A Boolean that indicates whether the group displays the number of rows it contains.
SubtotalGroup (HTML reports only) A Boolean that indicates whether this column displays a subtotal of the TotalMe column by group. When this field is set to TRUE, this column displays a subtotal each time the group changes.
This field applies only when this column has a GroupOrder greater than 0.
ColumnOrder (HTML reports only) Specifies the order in which to display columns that are all at the same DisplayLevel. Columns that have lower ColumnOrder numbers display to the left. Higher ones display to the right. Giving a column a ColumnOrder value of 1 indicates that it is the first column displayed at that DisplayLevel.
GroupOrder (HTML reports only) Indicates how to group the data. For example, in the Supplier Details report, the data is grouped first by Supplier (GroupOrder value of 1), then by Commodity (GroupOrder value of 2), then by Requisition Number (GroupOrder value of 3), and then by Extended Price.
Groups equate roughly to the indentation of the report. A group level of 1 is the outermost group, with each higher number indicating another level of nesting. The topmost group level must always be 1, and you cannot skip levels. For example, a sequence of 1, 2, 4 is not allowed. One column from each DisplayLevel must specify the GroupOrder.
Width (HTML reports only) The maximum width of this column, in pixels. When you set a column width, include indentation from nesting. For example, if you are setting the column width for Item 2 in the following example, and you know that it is always five digits long, you must set the width to about 75 (15 for the indentation and 60 for the content):
Item 1 12345
Item 2 67890
Typically, you set the width to between 30 and 150. All widths are approximate. If you set the width to 0, the column expands and contracts as the window is resized.
Justification (HTML reports only) Left, Right, or Center justification.
Field Description
Ariba Buyer Configuration Guide 155
Chapter 12 Reporting Report Configuration
The following example shows several lines from ReportColumnMeta.csv:
"ReportUniqueName","UniqueName","ColumnLabel","FilterFieldPath","FilterOrder","DisplayGroupLabel","DisplayLevel","TotalMe","CountRows","SubtotalGroup","ColumnOrder","GroupOrder","Width","Justification","FontSize","IsBold","IsItalic","Graph","FormatterClassName","FilterClassName","NotARequiredFilter","NotDisplayedByDefault”
"aribaCostCenterDetails","RequesterBaseID",,"Requester","1","FALSE","0","FALSE","FALSE","FALSE","0","0","0","Left","8","FALSE","FALSE",,,"ariba.procure.core.Requisition"
FontSizeIsBold, IsItalic
(HTML reports only) No longer used. To set font characteristics, use the style sheet instead. for more information, see “Customizing the Style Sheets” on page 161.
FontFace (HTML reports only) Indicates the font to use for the text. The font must be a TrueType font, such as “Arial”. If you specify a different font in a style sheet class and add that style sheet class to the ExtraCSSClasses field, the font in the style sheet class is used instead. The FontFace value is used to draw a label in the report chart.
The default FontFace value is good for Windows operating systems. For Unix and Linux, you might need to change the value, especially for Japanese and Chinese locales.
Graph (HTML reports only) Specifies the columns to use as the X axis (categories) and Y axis (totals) in the graph. In the X axis column, set the Graph value to Category; in the Y column, set it to Expression. Because the Expression column is totalled, it is appropriate only for columns of type big decimal, double, or Integer. If either the Category or the Expression is missing, the graph does not display.
For example, to display a graph of spending by Cost Center, you would set the CostCenter column to Category and set the ExtendedPrice column to Expression.
FormatterClassName The name of a Java class, which must be a subclass of Formatter. You use this field if you want to override the default formatter for the field. For more information on custom formatters, see the legacy version 8.2 Ariba Spend Management API Guide available at https://connect.ariba.com.
FilterClassName The name of a Java class, which is used to filter. Must match a groupClass name specified in ReportFilters. For more information, see “Filtering” on page 152.
ValidationClassName Specifies the name of a condition, used to validate the filter. For more information on validity conditions, see the Ariba Spend Management Customization Guide.
ValidationParameters Specifies values for the parameters required by the validation class, if any. The value is a set of key=value pairs, separated by semicolon. For example: MaxQty=100;Qty=50;
ExtraCSSClasses Specifies any style classes from the cascading style sheet that you want to apply specifically to this column. For more information, see “Customizing the Style Sheets” on page 161.
NotARequiredFilter Boolean that specifies whether this filter is required. Set this field to true if you want to make the filter optional. By default, it is false (the filter is required).
NotDisplayedByDefault Boolean that specifies whether this filter is displayed by default. When set to true, the field is unchecked in the user interface and does not appear in the report unless the user explicitly checks the box.
Field Description
Report Configuration Chapter 12 Reporting
156 Ariba Buyer Configuration Guide
"aribaCostCenterDetails","CostCenterBaseID",,"LineItems.Accountings.SplitAccountings.CostCenter","2","FALSE","0","FALSE","FALSE","FALSE","0","0","0","Left","8","FALSE","FALSE",,,"ariba.procure.core.Requisition",,,
Resource Keys in ReportColumnMeta
In ReportColumnMeta.csv, only the field ColumnLabel is mapped to a string in resource.reportmetadata.csv. The value of this field is interpreted as a resource key. If the resource key does not exist in resource.reportmetadata.csv, the value is interpreted as a literal.
ReportPermissionMap.csv File
You use ReportPermissionMap.csv to set restrictions for who can run a particular report. This information determines the set of reports that a user sees when he or she logs in to Ariba Buyer. This file is used only if the Restricted flag in ReportMeta.csv is set to TRUE.
The fields of ReportPermissionMap.csv are as follows:
The following example shows the first few lines of ReportPermissionMap.csv:
"ReportUniqueName","PermissionName""aribaCommodityBySupplier","PurchasingAgent""aribaCommodityByCC","PurchasingAgent""aribaOSummaryBySupplier","PurchasingAgent"
To make a report restricted, set its Restricted field to TRUE in ReportMeta.csv. and add an entry for the report to ReportPermissionMap.csv. If a report is not set to be restricted, it is accessible to all users.
User Access to Report Data
ReportPermissionMap.csv determines which reports users can access when they log into Ariba Buyer, but does not determine what data can be included in those reports. The rules for accessing approvable data through reports are as follows:
• In general, users can only see approvables they have created themselves.
• Supervisors can see approvable data created by their subordinates (both direct and indirect subordinates).
• Administrative users with Query All permission can see everyone’s approvable data.
• Reports generally show only approvable data that was created in the current partition. This rule does not apply to reports that are defined as cross-partition. For more information, see isCrossPartition on page 150.
Field Description
ReportUniqueName Names a report. Must match the UniqueName of a report defined in ReportMeta.csv.
PermissionName Names a permission. Must match the UniqueName of a permission defined in Permission.csv.
Ariba Buyer Configuration Guide 157
Chapter 12 Reporting Report Configuration
Reporting on Currency and Money
This section describes reporting issues related to currency and money fields.
Total Currency Parameter
You specify the currency used for report totals with the parameter Application.Reports.ReportsTotalCurrency.
If this parameter is missing, Ariba Buyer uses the currency specified as System.Base.Data.BaseCurrency.
Multi-Currency Reports
Ariba Buyer provides two options for defining reports that use multiple currencies:
• You can display reports using EMU currencies in dual currency mode, showing both the original currency and the euro
• You can display money amounts in dual currencies, showing both the transaction currency and the user currency
To enable dual currency display for EMU currencies:
1 In config/Parameters.table, set Application.Reports.EnableEuroCurrencyDisplay to true.
In this case, when the reporting currency is an EMU currency, the report displays money values in both the EMU currency and the euro.
To enable dual currency display for user currency and transaction currency:
1 In config/Parameters.table, set Application.Reports.EnableUserCurrencyDisplay to true.
2 In ReportQuery.csv, make sure that your query returns a column of type Money. Money objects include a currency, which Ariba Buyer needs to access to do the multi-currency display.
3 In ReportColumnMeta.csv, remove the formatter class for the money column, or be sure that it is set to a formatter that supports multi-currency display. Removing the formatter tells Ariba Buyer to use the default formatter for fields of type Money, which is ariba.server.ormsserver.ReportingCurrencyMoneyFormatter. This formatter implements the logic of multi-currency display.
Reporting on Money
When working with reports that include money fields, be aware that mathematical operations can be performed only on fields inside Money objects, not on Money objects themselves. If you want to do math operations on a money field, you must make sure your query includes the amount field.
For example, consider the following query:
SELECT LineItems.Amount.ApproxAmountInBaseCurrency,LineItems.Quantity,LineItems.Amount.ApproxAmountInBaseCurrency * LineItems.QuantityFROM PurchaseOrder
Report Customization Chapter 12 Reporting
158 Ariba Buyer Configuration Guide
Amount is an object of type Money, but ApproxAmountInBaseCurrency is a BigDecimal. You can perform math operations on the ApproxAmountInBaseCurrency field, as shown here ,but not on the Amount field itself because it is an object.
When formatting money amounts, however, the formatter operates on the Money object, not the BigDecimal. The default formatter for Money fields is ariba.server.ormsserver.ReportingCurrencyMoneyFormatter.
Other Parameters for Reporting
In addition to the parameters for dual-currency display, config/Parameters.table also contains the following reporting-related parameters:
• System.Reports.ReportsMaxCategories, which specifies the number of categories in a report.
• System.Reports.ReportsMaxRows, which specifies the number of rows in a report.
• Application.Reports.CSVReportsCharset, which specifies the character encoding to use when writing reports. If this parameter is missing or not specified, Ariba Buyer uses the default VM encoding.
Report Customization
To modify existing or add new reports, you make the necessary changes to the configuration files, run the ReportQueryPull and ReportMetaPull integration events, and test your changes.
You can classify customizations into several levels:
• Simple report changes, which involve ReportMeta.csv and ReportColumnMeta.csv and possibly some minor metadata XML modifications. You can change the layout of an existing report or create new reports this way. This process is described in “Adding a New Report” on page 158.
• Style sheet customizations, which involve editing the cascading style sheet (CSS) files used to format reports that display in HTML format. This process is described in “Customizing the Style Sheets” on page 161.
• Complex customizations, which require you to specify new queries, write views, or add extrinsic report filters. This process is described in “Creating Reports Based on Custom Queries” on page 162.
If you want to customize a standard report, be aware that your changes are overwritten the next time you upgrade Ariba Buyer. To avoid migration problems, consider copying the queries from the standard report into your own new report. For more information, see “Adding a New Report” on page 158.
Adding a New Report
To add a new report, you add a line to ReportMeta.csv and a series of lines to ReportColumnMeta.csv. In most cases, you create a new report that is based on an existing query.
To add a new report:
1 In ReportMeta.csv:
a Find an existing report definition that uses the query you want to use in your new report.
b Copy the entry for the existing report as a new row in ReportMeta.csv.
Ariba Buyer Configuration Guide 159
Chapter 12 Reporting Report Customization
c Change the value of the UniqueName field to a new value.
d If you want to set restrictions for who can run the report, set the Restricted field value to TRUE.
e Change the other fields as appropriate. Remember that UniqueName must be unique, and QueryUniqueName must match a query defined in ReportQuery.csv.
2 Add a row to the ReportColumnMeta.csv for each column displayed in the report, or used as a filter. Each row in this file describes a single column in the report. You can specify the layout, order, grouping, and summation. Typically, you base your column definitions on existing column definitions as follows:
a In ReportColumnMeta.csv, find the set of column definitions associated with the report you’re copying.
b Make a copy of those definitions at the end of the ReportColumnMeta.csv file.
c Change the ReportUniqueName to match the UniqueName of the report you just added to ReportMeta.csv.
d Make any other changes you need, such as to group orders, column orders, and column widths.
e Write the columns for your new report on a piece of paper so that they are indented by group and in the proper order. You can then assign numbers to each group and to each column as in the following example that corresponds to the Spending Analysis Report.
(g1) Cost Center: <value>
(g2) Requester: <value>
(c1) (c2) (c3) (c4) (c5) (total)
(g3) Item # Vendor Description Transaction Date Amount
The (g) values correspond to the group level, the ( c ) values correspond to the column order, and the total indicates the column to be totaled.
If you want a group to have a subtotal, set the SubtotalGroup value for the group name.
The g1 and g2 groups have the DisplayGroupLabel set to TRUE to indicate that the report display a ColumnLabel: group value for each group break.
The GroupOrder for Cost Center is 1. The GroupOrder for Requester is 2.
The DisplayLevel for each of the columns in g3 is 3 and the GroupOrder in this case is on Item # with a value of 3.
The widths for the columns can be whatever you choose as long as they can fit on a printed page (widths are in pixels.)
3 If you want to set restrictions for who can run the report, add an entry for the report to ReportPermissionMap.csv. For more information, see “ReportPermissionMap.csv File” on page 156.
4 After modifying the CSV files, run the ReportQueryPull and ReportMetaPull integration events to see your changes.
Using Resource Files
When you add a new report, fields such as report title and description can be string literals, or they can be keys to fields in resource.reportmeta.csv. This section describes how to put your values in a resource file.
Report Customization Chapter 12 Reporting
160 Ariba Buyer Configuration Guide
To update the string resource file:
1 Add a file called resource.reportmetadata.csv to the directory BuyerServerRoot/config/resource/locale/strings.
2 Add an entry to resource.reportmetadata.csv for the Description field in your ReportMeta.csv file. For example:
"MyPersonalReport_Description","This is my personal report",
3 Add an entry for the ReportMeta.csv ReportTitle field, for example:
"MyPersonalReport", "My Personal Report",
4 If your report includes a graph, add an entry for the ReportMeta.csv GraphName field, for example:
"MyPersonalReport Graph","My Personal Report Graph",
5 Add an entry for each ColumnLabel in the new report. For example:
"HoldUntil","Hold Until",
Adding a Filter
As described in “Filtering” on page 152, there are three fields in a ReportColumnMeta.csv entry that can be used to define filtering attributes for a column:
• FilterFieldPath
• FilterOrder
• FilterClassName
Ariba Buyer provides a set of filters for all the objects you would typically include in a report. Normally, you just use one of these predefined filters. There might be cases (for example, if you are running a report on your own custom objects) where you need to define your own filters.
To use a filter in a report, the field you want to use as a filter must be defined in the ReportFilters group, in a metadata XML file. The default configuration adds many commonly-used filter fields to this group. For example:
<group name="ReportFilters"><groupClass name="ariba.approvable.core.Approvable"><groupField name="Requester"><properties showByDefaultForSearch="true"allowNullValue="false"chooserField="Name"nameTableClass="ariba.common.core.nametable.RestrictedUserNameTable"/>
</groupField>
<groupField name="Preparer"><properties showByDefaultForSearch="false"allowNullValue="false"chooserField="Name"nameTableClass="ariba.common.core.nametable.RestrictedUserNameTable"/>
</groupField>
To add a filter to a report:
1 Find the filter you want to use, by verifying that it is defined in a metadata XML file.
2 Add the FilterFieldPath, FilterOrder, and FilterClassName to an entry in ReportColumnMeta.csv.
Ariba Buyer Configuration Guide 161
Chapter 12 Reporting Report Customization
For example, in the following entry, “SubmitDate” is the FilterFieldPath, “3” is the FilterOrder, and “ariba.procure.core.Requisition” is the FilterClassName:
"aribaReqDetails","SubmitDate","SubmitDate","SubmitDate","3","FALSE","1","FALSE","FALSE","FALSE","5","0","80","Right","8","FALSE","FALSE",,,"ariba.procure.core.Requisition"
Filters use dot notation and are relative to the FilterClassName field. For example, you might have a FilterClassName that is ariba.procure.core.Requisition, and a FitlerFieldPath that is LineItems.CommodityCode.
Removing a Filter
You can remove a filter from a report by modifying the ReportColumnMeta file. To remove a filter, you find the row associated with that filter, set the FilterOrder to 0 in the ReportColumnMeta file, and then run the ReportMetaPull integration event from Ariba Administrator.
Removing a Graph
Another simple customization is to remove a graph from one of the standard reports.
To remove a graph:
1 In ReportMeta.csv, set the GraphName field to be empty.
2 In ReportMeta.csv, set the GraphType field to be empty.
3 In ReportColumnMeta.csv, set the Graph field to be empty.
Customizing the Style Sheets
When generating reports in HTML format, Ariba Buyer uses the following cascading style sheet (CSS) file to format the report:
• report.css—formats HTML reports dispalyed on the screen
• reportPrint.css—formats HTML reports that the user prints
These files are located in BuyerServerRoot/ariba/resource/en_us/styles directory. You modify these files the same way you would modify the main Ariba Buyer style sheet, ariba.css. For more information on ariba.css, see the readme file in the BuyerServerRoot/branding/ariba directory.
The style sheets contain the following sections:
• Header. The header controls the top portion of the report, including the title and logo. There are two different logos, each of which has been carefully designed to be optimized for display or print. For best results, do not change the logo.
• Levels. You control how far a level is indented as well as its formatting. For example, you define table styles separately for each level. By default, the report stylesheets contain five levels of indentation, each of which indents the data by 15 pixels. You can add additional levels as needed. You can also modify the JavaScript for the level buttons, which, by default, show and hide levels.
• Groups. You can specify the amount of vertical space between group levels. You define label styles separately for each group.
• Footer. The footer controls the bottom portion of the report, including the grand total and the graph, if any.
Report Customization Chapter 12 Reporting
162 Ariba Buyer Configuration Guide
You can also specify the font characteristics. Note the following recommendations:
• For best results, choose one font and size. Typically, 8 or 10 point size works best.
• Because column headers are always bold, leaving the rest of the text non-bold makes the report easier to read.
• Use italics sparingly.
You can create new classes in the style sheet. To apply a class to a specific column, add the class to the ExtraCSSClasses field for the column in ReportColumnMeta.csv.
Creating Reports Based on Custom Queries
In some cases, adding a new report involves creating a custom Ariba Query API query.
To create a report based on a custom query:
1 In ReportQuery.csv, find the query that’s the closest to the one you want to create.
2 Copy the query at the end of the file.
3 Modify the query. The following example shows a simple query that returns a list of Requester names:
"Plain","SimpleQuery","SELECT Requester.Name AS Requester
FROM Requisition"
4 Test the query in the Inspector to make sure that it runs successfully.
5 Add a report to ReportMeta.csv in which the value for the QueryUniqueName field matches the UniqueName of the new query you just added to ReportQuery.csv. Using the previous example, the value for UniqueName would be SimpleQuery.
6 For every field or alias selected in the query that is to be displayed, add a corresponding entry to ReportColumnMeta.csv with a UniqueName that matches the name of the corresponding column returned by the query.
7 Add any filtering information to ReportColumnMeta.csv. For information on adding existing filters, see “Adding a Filter” on page 160.
8 In Ariba Administrator, run the ReportQueryPull and ReportMetaPull integration events to see your changes.
Custom Filters
In most cases, you can use an existing filter, as described in “Adding a Filter” on page 160. There are some times when you might need to create a custom filter. For example:
• If you add a field to an existing object
• If you create your own custom classes and want to include them in reports
To create a custom filter:
1 Create a metadata extension file, and put it in an appropriate location:
• If the filter applies to all variants, put the file in config/variants/Plain/extensions.
• If the filter applies to only one variant, put the file in config/variants/variantname/extensions.
Ariba Buyer Configuration Guide 163
Chapter 12 Reporting Report Customization
2 Add a filter definition to your extension file. For example:
<group name="ReportFilters"><groupClass name="ariba.procure.core.Requisition"><groupClassVariant name="vorcl"><groupField name="LineItems.Accountings.SplitAccountings.CostCenter"><properties chooserField="Name"label="@aml.OracleCoreExt/UserProfileDetailsCostCenterLabel"/>
</groupField></groupClassVariant>
</groupClass></group>
3 After you define a filter in metadata XML, you can reference it in ReportColumnMeta.csv, as described in “Adding a Filter” on page 160.
Debugging Report Changes
This section provides hints for debugging common problems with custom reports.
Problem:
The Report Wizard displays an error saying you attempted to execute a report name that has not been defined.
Solution:
• Check ReportMeta.csv for spelling errors.
• Look in the database to ensure that the reportname is in the reportmetatab.
Problem:
The Report Wizard displays an error that a filter has not been defined.
Solution:
• Check the ReportColumnMeta.csv file ColumnName field to ensure that the column is defined for the report.
• Check the database reportcolumnmetatab to ensure that the ColumnName was loaded.
• Try restarting Ariba Buyer. Ariba Buyer caches ReportColumnMeta.csv.
To use the Inspector to examine your report object:
1 Start the Inspector from Ariba Administrator, or point your browser to the Inspector URL. For example:
https://myserver:443/Buyer/inspector
2 Go to the “Lookup and Create ClusterRoots” label, and then choose “ReportMeta - ariba.common.core.ReportMeta” from the list.
3 Click Submit Query next to the “List ClusterRoots in Partition” field. The Inspector displays all the report objects in the system.
4 Find your custom report in the list, and click on it. The Inspector lists the current values for all the object’s fields.
5 Make sure your report’s fields have the values you expect. In particular, check the ReportColumns field to make sure the report includes columns. If it does not, your report failed to generate properly. Check your entries in ReportColumnMeta.csv to make sure they are specified correctly.

Report Customization Chapter 12 Reporting
164 Ariba Buyer Configuration Guide
Ariba Buyer Configuration Guide 165
Chapter 13 Remote Authentication
This chapter describes how to configure basic remote authentication and remote authentication with single sign-on. It includes the following sections:
• “About Remote Authentication” on page 165
• “Overview of the Remote Authentication Relay Protocol” on page 167
• “Corporate Authentication Usage Flows” on page 168
• “Implementations of the Protocol” on page 170
• “Redirect Examples” on page 171
• “Example ASP Relay Page” on page 171
• “Generating a Private/Public Key Pair” on page 172
• “Remote Authentication Relay Example for IIS” on page 172
• “Remote Authentication Relay Example for Apache” on page 174
• “Configuring Ariba Buyer Server as a Corporate Authenticator” on page 176
About Remote Authentication
Remote authentication is a session/user authentication process that allows users to access Ariba applications using the same username and password that they use for their corporate identity. Remote authentication can be integrated with a single-sign-on (SSO) authentication system in the enterprise so that users login just once in order to access all applications within the enterprise. SSO authentication systems store user credentials for multiple applications and automatically submit those credentials on behalf of users when needed. Users log in once rather than re-authenticating with a separate set of credentials for each application they access. Using remote authentication with SSO can also provide centralized control and enforcement of corporate authentication policies.
Overview of Authentication Options
Users can log in to Ariba applications using three possible methods:
• Application authentication. Users have Ariba application usernames and passwords that they manually enter on the Ariba application login page. The user ids and passwords are maintained by the customer administrator within the Ariba application.
• Corporate authentication. This is a remote authentication mechanism wherein users manually log into Ariba applications using the same username and password that they use for their corporate identity (this requires the Ariba solution usernames to be the same as the corporate usernames).
• Corporate authentication with SSO. This is a remote authentication mechanism wherein users simply log into their corporate network, which automatically logs them into Ariba applications when needed.
In order to leverage your organization’s SSO solution for Ariba applications, your network administrators need to enable communication between your user authentication systems and Ariba applications.
About Remote Authentication Chapter 13 Remote Authentication
166 Ariba Buyer Configuration Guide
Benefits of Remote Authentication
Remote authentication offers the following benefits over regular application authentication:
• Convenience for users. You do not need to remember separate usernames or passwords for your Ariba accounts. Also, if your organization uses SSO, users are automatically authenticated for Ariba applications whenever they log in to your corporate network.
• Better security control. Your organization might have greater security requirements than the authentication mechanism of Ariba applications. For example, your corporate network policy might require more frequent password changes. Or, your network might require the use of advanced authentication devices, such as RSA SecurID® devices or fingerprint scanners.
• Better account management. When users leave your organization, their access to Ariba applications is automatically revoked as part of your organization's network policy. Removing their login permission from your corporate network means that they can no longer access Ariba applications.
Remote Authentication Protocol
Remote authentication for Ariba applications uses the remote authentication relay protocol. The remote authentication relay protocol is a simple yet secure protocol based on industry-standard Public Key Infrastructure (PKI). It is easy to implement and does not require additional software from third-party vendors.
The remote authentication relay protocol is:
• Secure. It uses Public Key Infrastructure (PKI) and RSA technology, which are industry standard methods for keeping data secure on the Internet.
• Internet friendly. It integrates with your corporate network infrastructure without requiring a specialized topology. You do not need to deploy special services, such as VPNs, DMZs, or custom web services.
• Compatible with all Ariba applications. After you set it up, you can use it for additional Ariba applications without having to make modifications.
Ariba provides sample scripts for Microsoft Internet Information Services (IIS) using Active Server Pages and for Apache using Perl; alternatively, you can write your own scripts using any scripting language of your choice.
Requirements
The following components are required on your network to enable remote authentication:
• User database. You must have a system that maintains a list of your corporate users and authenticates them. This authentication can use any technology, such as LDAP or Microsoft Domain Controller.
• Web server. You must have a web server. It must accept HTTP connections from your users' web browsers.
• Cookies: User’s browser must allow first-party cookies.
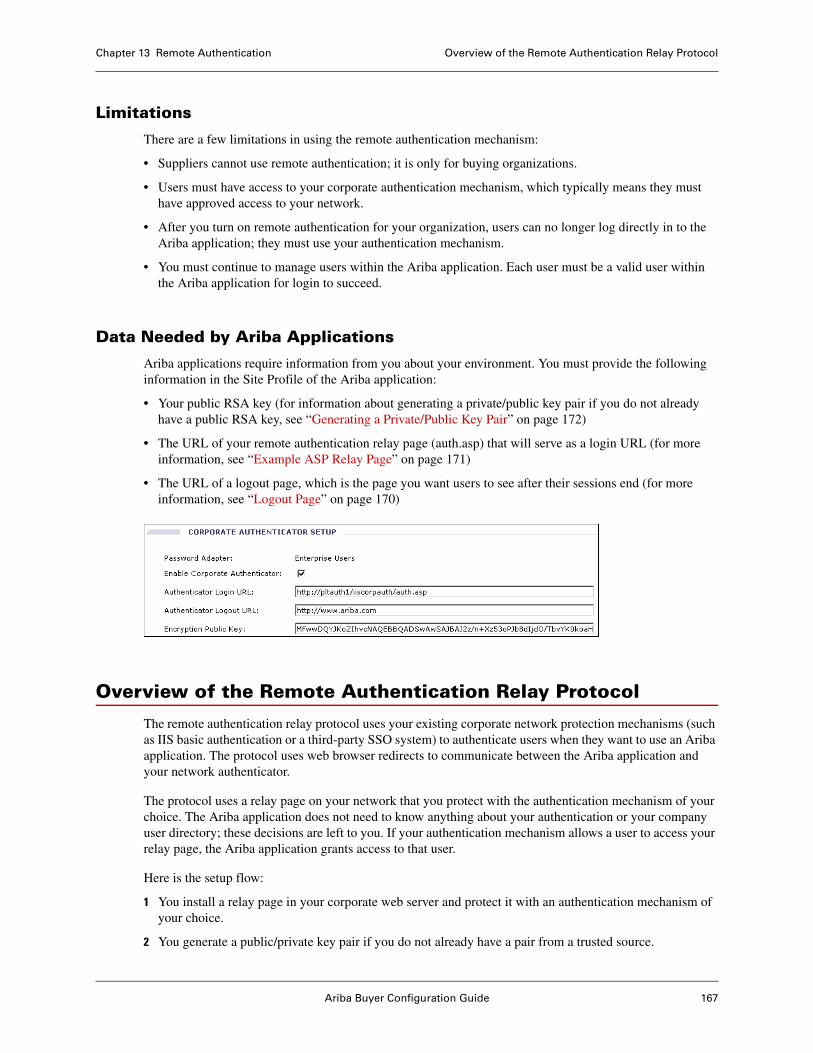
Ariba Buyer Configuration Guide 167
Chapter 13 Remote Authentication Overview of the Remote Authentication Relay Protocol
Limitations
There are a few limitations in using the remote authentication mechanism:
• Suppliers cannot use remote authentication; it is only for buying organizations.
• Users must have access to your corporate authentication mechanism, which typically means they must have approved access to your network.
• After you turn on remote authentication for your organization, users can no longer log directly in to the Ariba application; they must use your authentication mechanism.
• You must continue to manage users within the Ariba application. Each user must be a valid user within the Ariba application for login to succeed.
Data Needed by Ariba Applications
Ariba applications require information from you about your environment. You must provide the following information in the Site Profile of the Ariba application:
• Your public RSA key (for information about generating a private/public key pair if you do not already have a public RSA key, see “Generating a Private/Public Key Pair” on page 172)
• The URL of your remote authentication relay page (auth.asp) that will serve as a login URL (for more information, see “Example ASP Relay Page” on page 171)
• The URL of a logout page, which is the page you want users to see after their sessions end (for more information, see “Logout Page” on page 170)
Overview of the Remote Authentication Relay Protocol
The remote authentication relay protocol uses your existing corporate network protection mechanisms (such as IIS basic authentication or a third-party SSO system) to authenticate users when they want to use an Ariba application. The protocol uses web browser redirects to communicate between the Ariba application and your network authenticator.
The protocol uses a relay page on your network that you protect with the authentication mechanism of your choice. The Ariba application does not need to know anything about your authentication or your company user directory; these decisions are left to you. If your authentication mechanism allows a user to access your relay page, the Ariba application grants access to that user.
Here is the setup flow:
1 You install a relay page in your corporate web server and protect it with an authentication mechanism of your choice.
2 You generate a public/private key pair if you do not already have a pair from a trusted source.

Corporate Authentication Usage Flows Chapter 13 Remote Authentication
168 Ariba Buyer Configuration Guide
3 In the Site Profile of the Ariba application, you set your public key, the URL of your relay page, and the URL of your logout page.
Corporate Authentication Usage Flows
This section describes the following corporate authentication usage flows:
• Basic corporate authentication
• Corporate authentication using a third-party SSO application
Corporate Authentication Flow Using the Basic Setup
The following figure illustrates the flow for the basic corporate authentication setup.
The following steps explain the flow with basic corporate authentication:
1 A user accesses the URL of the Ariba application.
2 The Ariba application notices that your organization is configured for corporate authentication. Instead of displaying a login page, it redirects the user to your relay page (auth.asp), passing a randomly generated challenge key and a return URL. The challenge key is stored in the session during this interaction.
3 Your authentication mechanism (such as an IIS web server with basic authentication) intercepts the request from the Ariba application.
4 Your authentication mechanism checks the user against your user database (such as Active Directory). If authentication succeeds, your authentication mechanism forwards the request to your relay page.
5 Your relay page (auth.asp) receives the request from your authentication mechanism. It verifies that the request is coming from the Ariba application. After verification, it concatenates the challenge key and the username and signs the result (SHA1+RSA) with your private key. It then base64 encodes this signature. Lastly, if the relay page uses HTTP GET with the return URL, then the signature is URL-encoded.
6 Your relay page sends the username and signature back to the Ariba application, using the return URL.
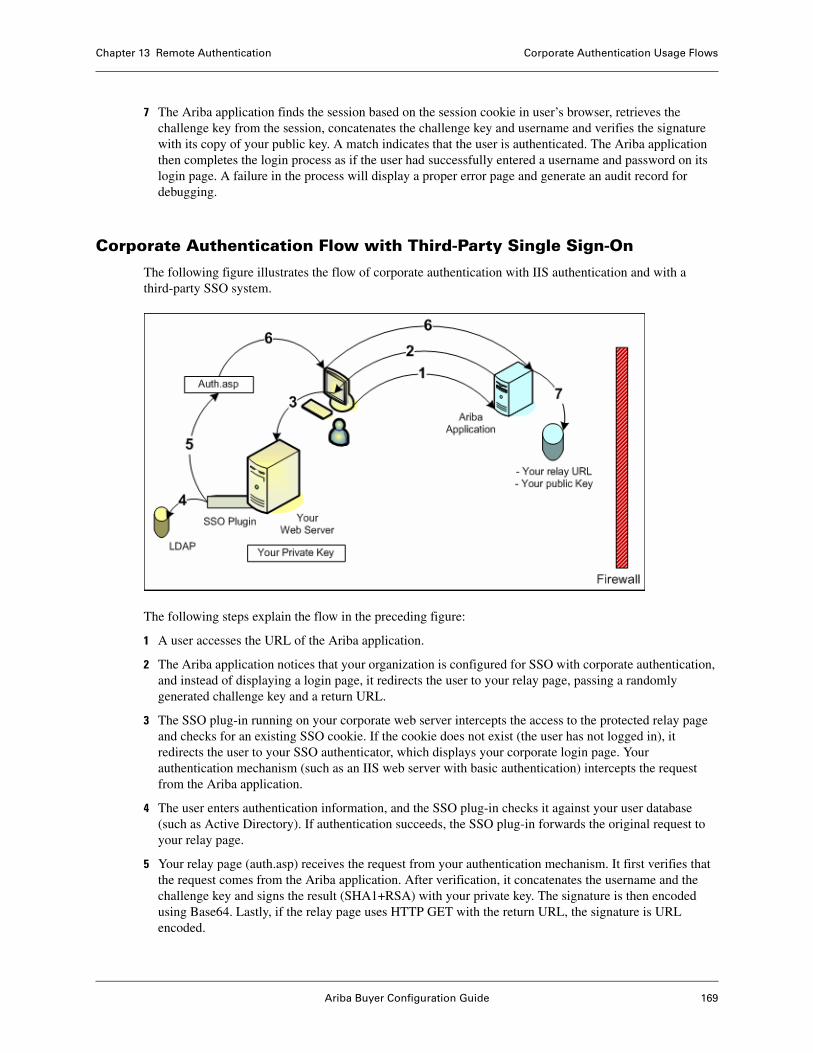
Ariba Buyer Configuration Guide 169
Chapter 13 Remote Authentication Corporate Authentication Usage Flows
7 The Ariba application finds the session based on the session cookie in user’s browser, retrieves the challenge key from the session, concatenates the challenge key and username and verifies the signature with its copy of your public key. A match indicates that the user is authenticated. The Ariba application then completes the login process as if the user had successfully entered a username and password on its login page. A failure in the process will display a proper error page and generate an audit record for debugging.
Corporate Authentication Flow with Third-Party Single Sign-On
The following figure illustrates the flow of corporate authentication with IIS authentication and with a third-party SSO system.
The following steps explain the flow in the preceding figure:
1 A user accesses the URL of the Ariba application.
2 The Ariba application notices that your organization is configured for SSO with corporate authentication, and instead of displaying a login page, it redirects the user to your relay page, passing a randomly generated challenge key and a return URL.
3 The SSO plug-in running on your corporate web server intercepts the access to the protected relay page and checks for an existing SSO cookie. If the cookie does not exist (the user has not logged in), it redirects the user to your SSO authenticator, which displays your corporate login page. Your authentication mechanism (such as an IIS web server with basic authentication) intercepts the request from the Ariba application.
4 The user enters authentication information, and the SSO plug-in checks it against your user database (such as Active Directory). If authentication succeeds, the SSO plug-in forwards the original request to your relay page.
5 Your relay page (auth.asp) receives the request from your authentication mechanism. It first verifies that the request comes from the Ariba application. After verification, it concatenates the username and the challenge key and signs the result (SHA1+RSA) with your private key. The signature is then encoded using Base64. Lastly, if the relay page uses HTTP GET with the return URL, the signature is URL encoded.
Implementations of the Protocol Chapter 13 Remote Authentication
170 Ariba Buyer Configuration Guide
6 Your relay page sends the signature back to the Ariba application, using the return URL.
7 The Ariba application finds the session based on the session cookie in user’s browser, retrieves the challenge key from the session, concatenates the challenge key and username and verifies the signature with its copy of your public key. A match indicates that the user is authenticated. The Ariba application then completes the login process as if the user had successfully entered a username and password on its login page. A failure in the process will display a proper error page and generate an audit record for debugging.
Logout Page
When users finish their sessions, they click a Logout link in the Ariba application, which redirects them to your logout page. The logout page can be any URL you determine, such as the home page on your intranet.
Typically, you would not log users out from your network. However, you might require your corporate authenticator to log users out of your network when they log out of the Ariba application. In this case, provide a logout URL that activates a script that logs users out of your corporate authenticator and redirects them to a final page.
Non-Authorized Users
If your authentication mechanism determines that a user is not authorized, your relay page displays either an error page or a login page. It does not forward the request to the Ariba application.
Implementations of the Protocol
The remote authentication relay protocol offers flexible deployment options to suit your enterprise requirements, as described in the following table.
Deployment Option Description
ASP Employs a combination of Microsoft Active Server Page technology and OpenSSL.
Perl Employs Perl scripting language and OpenSSL.
Java Employs a Java servlet-based solution together with the Java Security Package.
Ariba Buyer Configuration Guide 171
Chapter 13 Remote Authentication Redirect Examples
Redirect Examples
To better understand the communication between the Ariba application and your relay page, it helps to see realistic redirect examples.
Redirect from the Ariba Authenticator
When a user attempts to access the Ariba application, the solution redirects the user to your relay page with a randomly-generated challenge key (key) and the return URL (ret). For example:
http://www.acme.com/auth.asp?key=o82hS2aC6mKfj1aJS2f0bztErG1Jk%2FPAVKxbWgTzTP4%3D&ret=https://ariba.com/253AaHR0cDovL0tTQUxFSDI6O
Redirect from Your Relay Page
If your relay page authenticates the user, it redirects the user back to the Ariba application's return URL, with the username (user) and the encrypted signature (sig). For example:
http://ariba.com/253AaHR0cDovL0tTQUxFSDI6O&user=jsmith&sig=EGMFbimuTKHZA3J91KaDFltUyVXVwFydZNaT0D0z%2BFMj5IcZ9SzNawBdAZqD0ytZ%0A3wowO7Oh8J%2BEH2gWS1by6Q%3D%3D%0A
These redirects can be transmitted through HTTP, because they contain encrypted information.
Example ASP Relay Page
Below is pseudo code for an example relay page (auth.asp). It is implemented in a single ASP page and uses the OpenSSL command-line toolkit:
// AUTH_USER is added by a web server authentication mechanism (or // 3rd-party SSO) when the user is authenticated. The key is the // challenge key from Ariba. username = Request.ServerVariables("AUTH_USER") key = Request("key")
// Concatenate the challenge key and username and pipe the result // through OpenSSL to sign it. Pipe the result through OpenSSL // again to base64 encode it. signature = key + username | openssl "dgst -sha1 -sign " & PrivKey
| openssl enc -base64
// Redirect the user back to Ariba using Ariba's return URL and // include the username and encrypted signature. retURL = Request("ret") // return URL Response.Redirect(retURL + "user=" + username + "&sig=" Server.URLEncode(sigEncode))
The command-line arguments to the openssl utility in the above example are:
openssl "dgst -sha1 -sign" & PrivKey
Encrypt stdin using the SHA-1 algorithm and sign it with your private key
openssl enc -base64Base64 encode stdin

Generating a Private/Public Key Pair Chapter 13 Remote Authentication
172 Ariba Buyer Configuration Guide
Generating a Private/Public Key Pair
The remote authentication relay protocol requires an RSA public/private key pair. If you do not already have a pair, you can use the open source OpenSSL command-line toolkit to generate one.
To use the OpenSSL toolkit to generate public/private key pairs:
1 Download the OpenSSL toolkit from www.openssl.org. OpenSSL is also distributed by Ariba in the example remote authentication relay ZIP file.
2 Issue the following commands:
> openssl genrsa -out private.pem 1024> openssl rsa -in private.pem -out public.pem -outform PEM -pubout
The first command generates a 1,024-bit private RSA key from a random seed and stores it in a file named private.pem. The second command generates a public RSA key from the private key and stores it in a file named public.pem. The public key is in Privacy Enhanced Mail (PEM) format, which is required by the Ariba application.
Save the private key so that your relay page can use it to encrypt signatures to send to the Ariba application. Add the public key to the Site Profile so the Ariba application can decrypt signatures from your relay page.
Remote Authentication Relay Example for IIS
The following instructions describe how to install and use the example ASP remote authentication relay files for IIS on Windows Server 2003. There are two main steps:
• Configure IIS and generate keys.
• Test the configuration.
1. Configure IIS and Generate Keys
To unzip the example files, configure IIS to use them, and generate a public/private key pair:
1 Obtain the remote authentication relay ZIP file from Ariba and unzip it on your web server.
2 Open the Internet Information Services Management Console (inetmgr).
3 In the IIS Management Console, navigate to the local computer > Web Sites > Default Web Site directory.
4 Right click the Default Web Site directory and select New > Virtual Directory. Create a virtual directory named Login for the IIS-ASP folder.
5 Make the Login directory authentication-protected:
a Right-click the Login virtual directory and choose Properties.
b On the Properties panel, click the Directory Security tab.
c In the Anonymous access and authentication control area, click Edit.
d On the Authentication Methods panel, turn off Enable anonymous access and turn on Basic authentication.
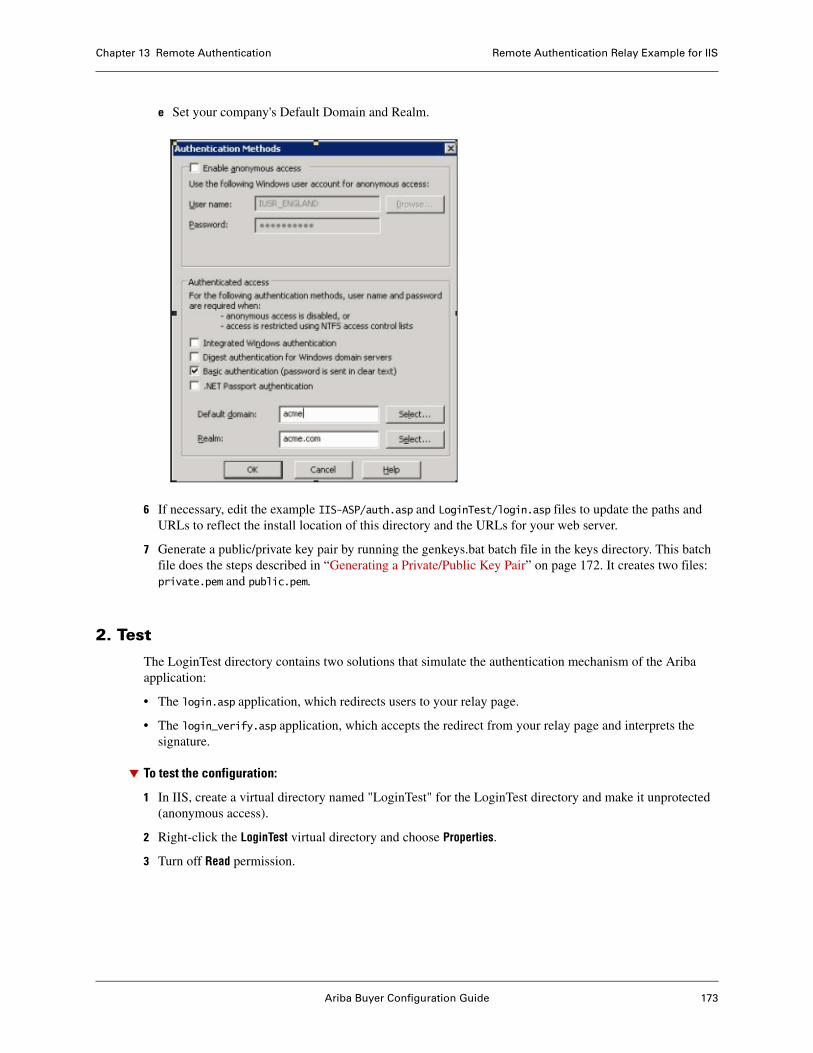
Ariba Buyer Configuration Guide 173
Chapter 13 Remote Authentication Remote Authentication Relay Example for IIS
e Set your company's Default Domain and Realm.
6 If necessary, edit the example IIS-ASP/auth.asp and LoginTest/login.asp files to update the paths and URLs to reflect the install location of this directory and the URLs for your web server.
7 Generate a public/private key pair by running the genkeys.bat batch file in the keys directory. This batch file does the steps described in “Generating a Private/Public Key Pair” on page 172. It creates two files: private.pem and public.pem.
2. Test
The LoginTest directory contains two solutions that simulate the authentication mechanism of the Ariba application:
• The login.asp application, which redirects users to your relay page.
• The login_verify.asp application, which accepts the redirect from your relay page and interprets the signature.
To test the configuration:
1 In IIS, create a virtual directory named "LoginTest" for the LoginTest directory and make it unprotected (anonymous access).
2 Right-click the LoginTest virtual directory and choose Properties.
3 Turn off Read permission.
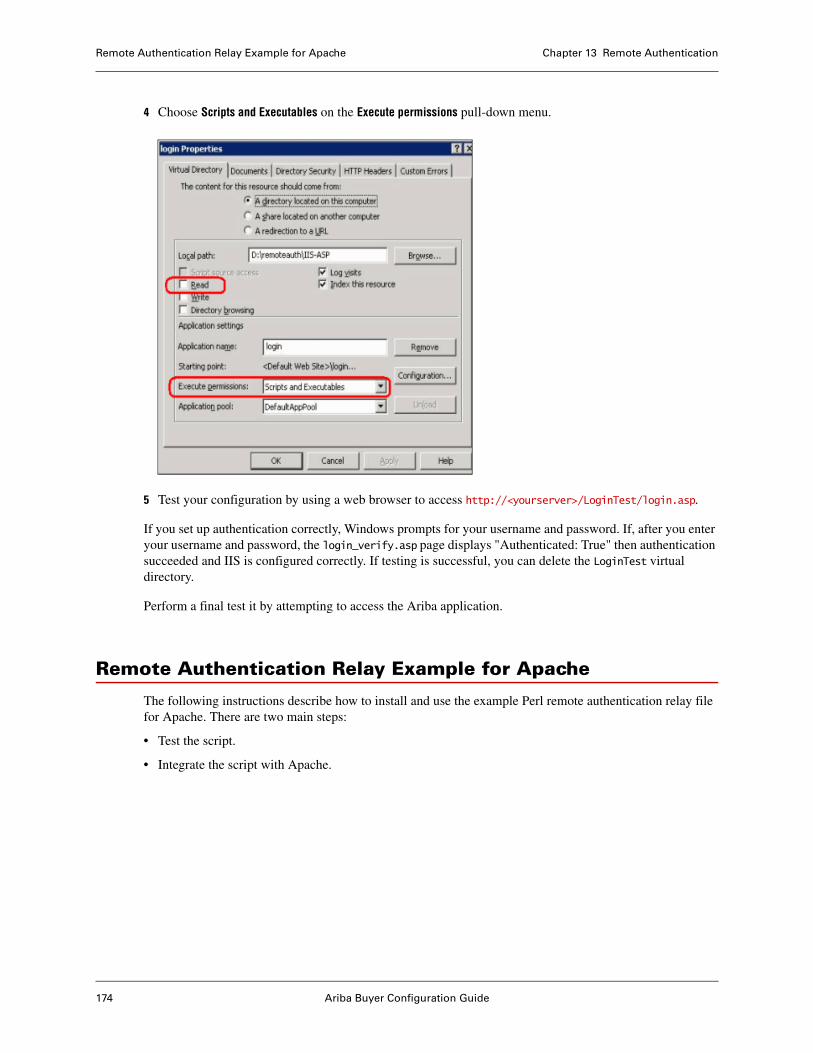
Remote Authentication Relay Example for Apache Chapter 13 Remote Authentication
174 Ariba Buyer Configuration Guide
4 Choose Scripts and Executables on the Execute permissions pull-down menu.
5 Test your configuration by using a web browser to access http://<yourserver>/LoginTest/login.asp.
If you set up authentication correctly, Windows prompts for your username and password. If, after you enter your username and password, the login_verify.asp page displays "Authenticated: True" then authentication succeeded and IIS is configured correctly. If testing is successful, you can delete the LoginTest virtual directory.
Perform a final test it by attempting to access the Ariba application.
Remote Authentication Relay Example for Apache
The following instructions describe how to install and use the example Perl remote authentication relay file for Apache. There are two main steps:
• Test the script.
• Integrate the script with Apache.
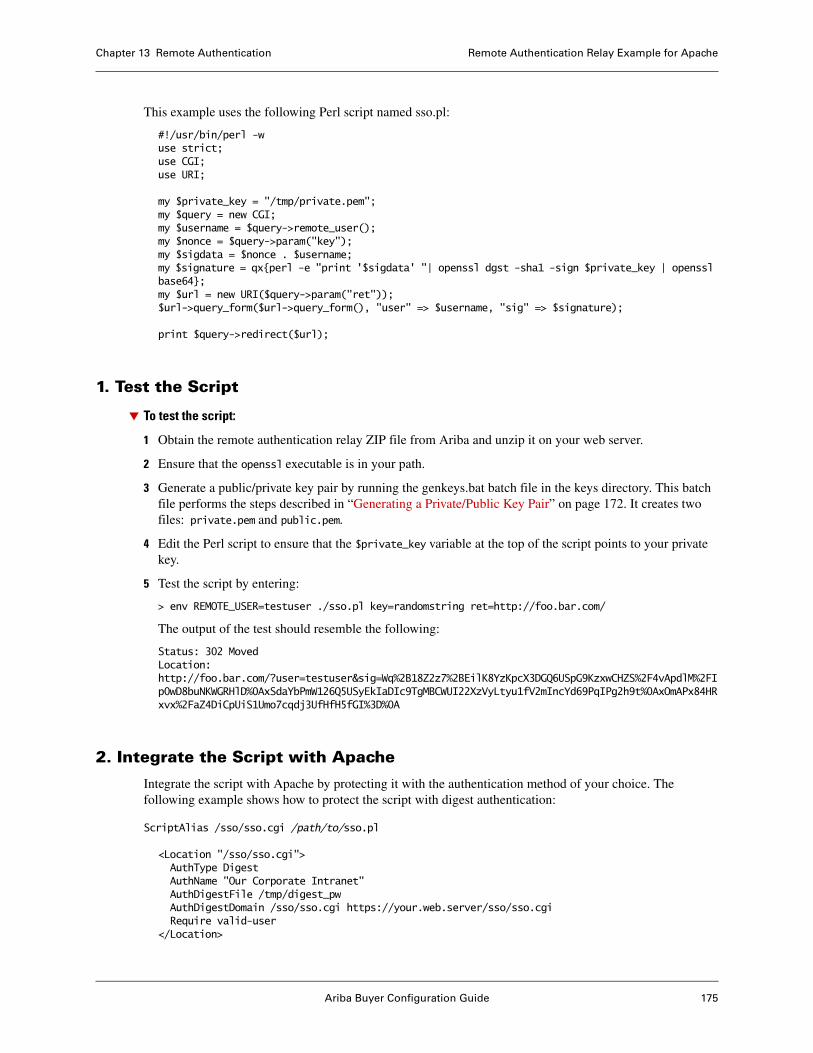
Ariba Buyer Configuration Guide 175
Chapter 13 Remote Authentication Remote Authentication Relay Example for Apache
This example uses the following Perl script named sso.pl:
#!/usr/bin/perl -wuse strict;use CGI;use URI;
my $private_key = "/tmp/private.pem";my $query = new CGI;my $username = $query->remote_user();my $nonce = $query->param("key");my $sigdata = $nonce . $username;my $signature = qx{perl -e "print '$sigdata' "| openssl dgst -sha1 -sign $private_key | openssl base64};my $url = new URI($query->param("ret"));$url->query_form($url->query_form(), "user" => $username, "sig" => $signature);
print $query->redirect($url);
1. Test the Script
To test the script:
1 Obtain the remote authentication relay ZIP file from Ariba and unzip it on your web server.
2 Ensure that the openssl executable is in your path.
3 Generate a public/private key pair by running the genkeys.bat batch file in the keys directory. This batch file performs the steps described in “Generating a Private/Public Key Pair” on page 172. It creates two files: private.pem and public.pem.
4 Edit the Perl script to ensure that the $private_key variable at the top of the script points to your private key.
5 Test the script by entering:
> env REMOTE_USER=testuser ./sso.pl key=randomstring ret=http://foo.bar.com/
The output of the test should resemble the following:
Status: 302 MovedLocation: http://foo.bar.com/?user=testuser&sig=Wq%2B18Z2z7%2BEilK8YzKpcX3DGQ6USpG9KzxwCHZS%2F4vApdlM%2FIp0wD8buNKWGRHlD%0AxSdaYbPmW126Q5USyEkIaDIc9TgMBCWUI22XzVyLtyu1fV2mIncYd69PqIPg2h9t%0AxOmAPx84HRxvx%2FaZ4DiCpUiS1Umo7cqdj3UfHfH5fGI%3D%0A
2. Integrate the Script with Apache
Integrate the script with Apache by protecting it with the authentication method of your choice. The following example shows how to protect the script with digest authentication:
ScriptAlias /sso/sso.cgi /path/to/sso.pl
<Location "/sso/sso.cgi">AuthType DigestAuthName "Our Corporate Intranet"AuthDigestFile /tmp/digest_pwAuthDigestDomain /sso/sso.cgi https://your.web.server/sso/sso.cgiRequire valid-user
</Location>
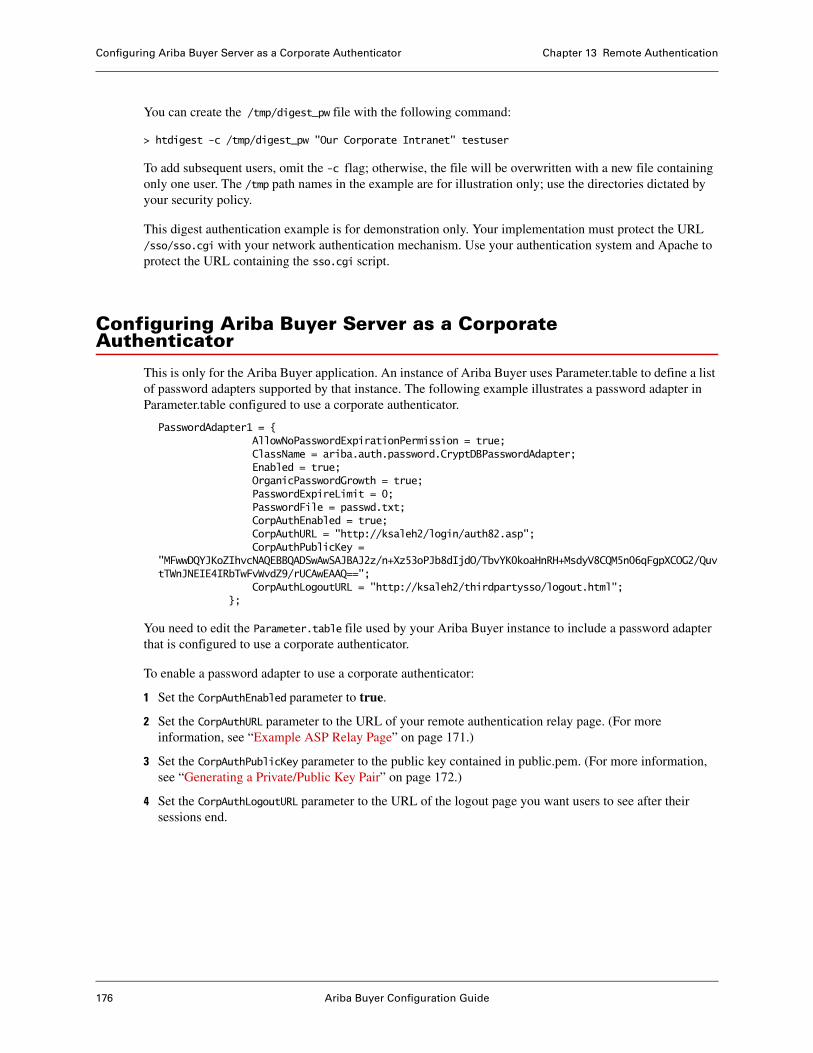
Configuring Ariba Buyer Server as a Corporate Authenticator Chapter 13 Remote Authentication
176 Ariba Buyer Configuration Guide
You can create the /tmp/digest_pw file with the following command:
> htdigest -c /tmp/digest_pw "Our Corporate Intranet" testuser
To add subsequent users, omit the -c flag; otherwise, the file will be overwritten with a new file containing only one user. The /tmp path names in the example are for illustration only; use the directories dictated by your security policy.
This digest authentication example is for demonstration only. Your implementation must protect the URL /sso/sso.cgi with your network authentication mechanism. Use your authentication system and Apache to protect the URL containing the sso.cgi script.
Configuring Ariba Buyer Server as a Corporate Authenticator
This is only for the Ariba Buyer application. An instance of Ariba Buyer uses Parameter.table to define a list of password adapters supported by that instance. The following example illustrates a password adapter in Parameter.table configured to use a corporate authenticator.
PasswordAdapter1 = { AllowNoPasswordExpirationPermission = true; ClassName = ariba.auth.password.CryptDBPasswordAdapter; Enabled = true; OrganicPasswordGrowth = true; PasswordExpireLimit = 0; PasswordFile = passwd.txt; CorpAuthEnabled = true; CorpAuthURL = "http://ksaleh2/login/auth82.asp"; CorpAuthPublicKey = "MFwwDQYJKoZIhvcNAQEBBQADSwAwSAJBAJ2z/n+Xz53oPJb8dIjdO/TbvYK0koaHnRH+MsdyV8CQM5n06qFgpXCOG2/QuvtTWnJNEIE4IRbTwFvWvdZ9/rUCAwEAAQ=="; CorpAuthLogoutURL = "http://ksaleh2/thirdpartysso/logout.html"; };
You need to edit the Parameter.table file used by your Ariba Buyer instance to include a password adapter that is configured to use a corporate authenticator.
To enable a password adapter to use a corporate authenticator:
1 Set the CorpAuthEnabled parameter to true.
2 Set the CorpAuthURL parameter to the URL of your remote authentication relay page. (For more information, see “Example ASP Relay Page” on page 171.)
3 Set the CorpAuthPublicKey parameter to the public key contained in public.pem. (For more information, see “Generating a Private/Public Key Pair” on page 172.)
4 Set the CorpAuthLogoutURL parameter to the URL of the logout page you want users to see after their sessions end.
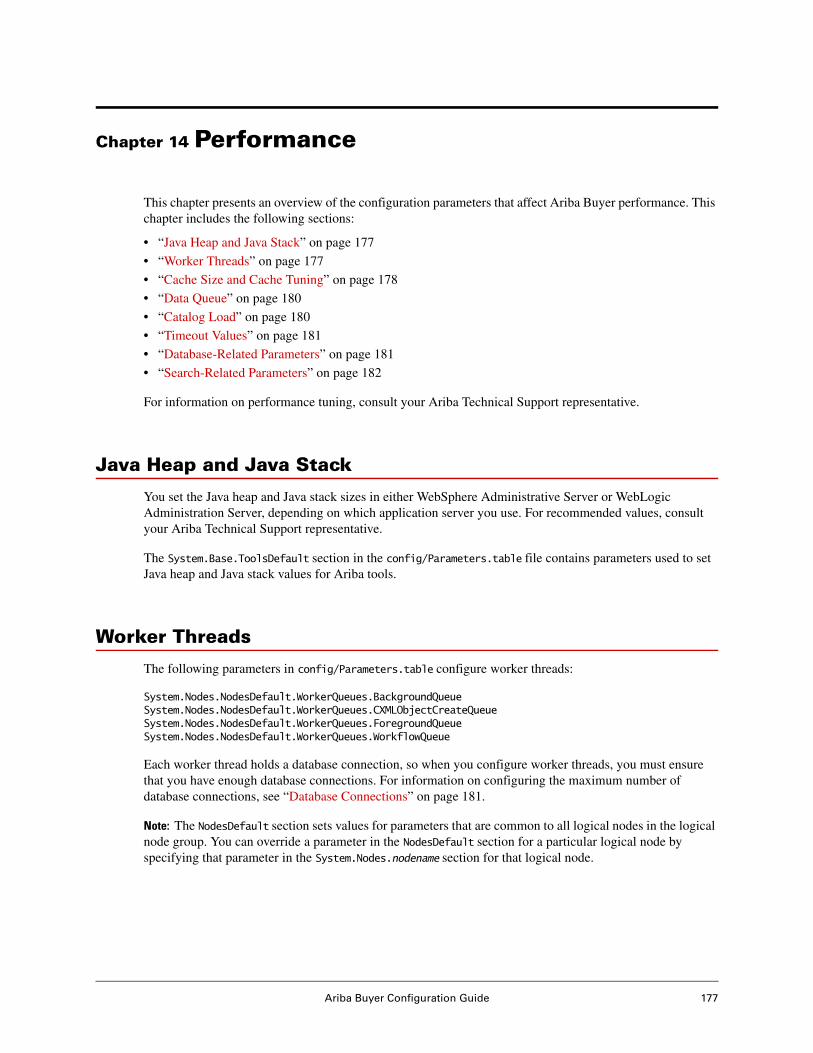
Ariba Buyer Configuration Guide 177
Chapter 14 Performance
This chapter presents an overview of the configuration parameters that affect Ariba Buyer performance. This chapter includes the following sections:
• “Java Heap and Java Stack” on page 177
• “Worker Threads” on page 177
• “Cache Size and Cache Tuning” on page 178
• “Data Queue” on page 180
• “Catalog Load” on page 180
• “Timeout Values” on page 181
• “Database-Related Parameters” on page 181
• “Search-Related Parameters” on page 182
For information on performance tuning, consult your Ariba Technical Support representative.
Java Heap and Java Stack
You set the Java heap and Java stack sizes in either WebSphere Administrative Server or WebLogic Administration Server, depending on which application server you use. For recommended values, consult your Ariba Technical Support representative.
The System.Base.ToolsDefault section in the config/Parameters.table file contains parameters used to set Java heap and Java stack values for Ariba tools.
Worker Threads
The following parameters in config/Parameters.table configure worker threads:
System.Nodes.NodesDefault.WorkerQueues.BackgroundQueueSystem.Nodes.NodesDefault.WorkerQueues.CXMLObjectCreateQueueSystem.Nodes.NodesDefault.WorkerQueues.ForegroundQueueSystem.Nodes.NodesDefault.WorkerQueues.WorkflowQueue
Each worker thread holds a database connection, so when you configure worker threads, you must ensure that you have enough database connections. For information on configuring the maximum number of database connections, see “Database Connections” on page 181.
Note: The NodesDefault section sets values for parameters that are common to all logical nodes in the logical node group. You can override a parameter in the NodesDefault section for a particular logical node by specifying that parameter in the System.Nodes.nodename section for that logical node.
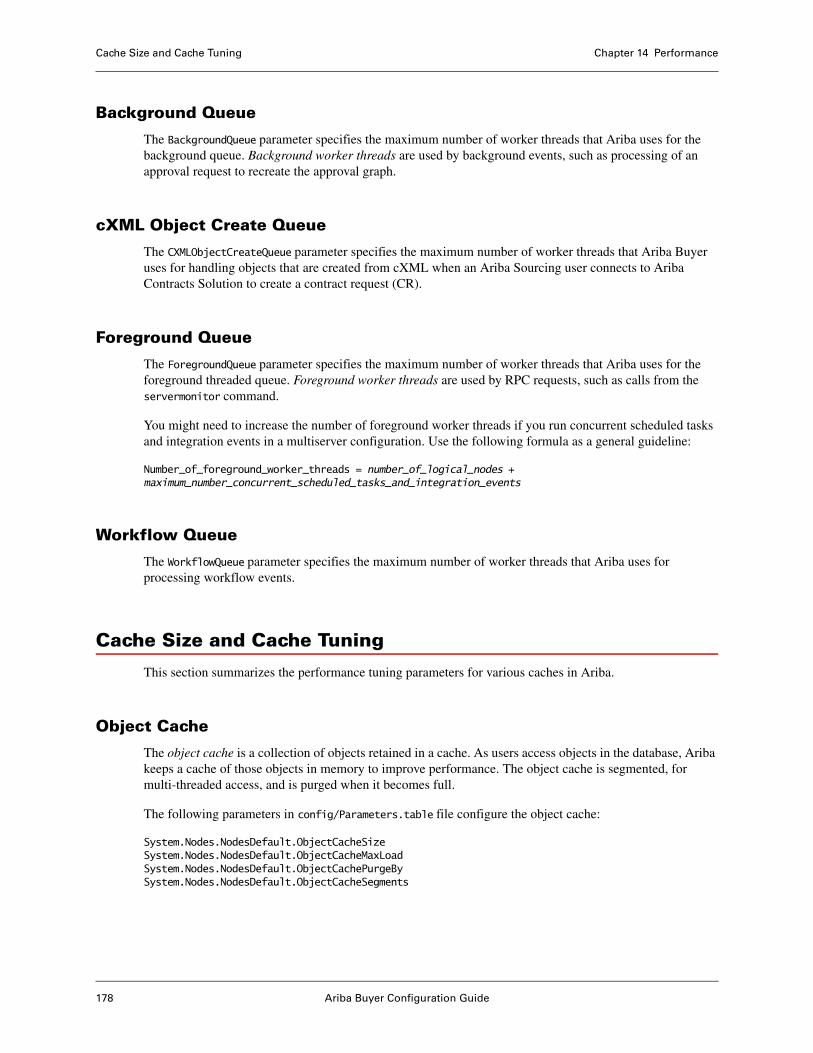
Cache Size and Cache Tuning Chapter 14 Performance
178 Ariba Buyer Configuration Guide
Background Queue
The BackgroundQueue parameter specifies the maximum number of worker threads that Ariba uses for the background queue. Background worker threads are used by background events, such as processing of an approval request to recreate the approval graph.
cXML Object Create Queue
The CXMLObjectCreateQueue parameter specifies the maximum number of worker threads that Ariba Buyer uses for handling objects that are created from cXML when an Ariba Sourcing user connects to Ariba Contracts Solution to create a contract request (CR).
Foreground Queue
The ForegroundQueue parameter specifies the maximum number of worker threads that Ariba uses for the foreground threaded queue. Foreground worker threads are used by RPC requests, such as calls from the servermonitor command.
You might need to increase the number of foreground worker threads if you run concurrent scheduled tasks and integration events in a multiserver configuration. Use the following formula as a general guideline:
Number_of_foreground_worker_threads = number_of_logical_nodes + maximum_number_concurrent_scheduled_tasks_and_integration_events
Workflow Queue
The WorkflowQueue parameter specifies the maximum number of worker threads that Ariba uses for processing workflow events.
Cache Size and Cache Tuning
This section summarizes the performance tuning parameters for various caches in Ariba.
Object Cache
The object cache is a collection of objects retained in a cache. As users access objects in the database, Ariba keeps a cache of those objects in memory to improve performance. The object cache is segmented, for multi-threaded access, and is purged when it becomes full.
The following parameters in config/Parameters.table file configure the object cache:
System.Nodes.NodesDefault.ObjectCacheSizeSystem.Nodes.NodesDefault.ObjectCacheMaxLoadSystem.Nodes.NodesDefault.ObjectCachePurgeBySystem.Nodes.NodesDefault.ObjectCacheSegments
Ariba Buyer Configuration Guide 179
Chapter 14 Performance Cache Size and Cache Tuning
ObjectCacheSize specifies the cache segment size (the number of elements in each segment), and ObjectCacheSegments defines the number of segments. ObjectCacheMaxLoad specifies when the cache is considered full and must be purged, and ObjectCachePurgeBy specifies the amount of the object cache Ariba removes when the object cache becomes full.
To tune the object cache, you typically adjust only the number of cache segments (the ObjectCacheSegments parameter). Do not adjust the object cache size.
Note: The NodesDefault section sets values for parameters that are common to all logical nodes in the logical node group. You can override a parameter in the NodesDefault section for a particular logical node by specifying that parameter in the System.Nodes.nodename section for that logical node.
Query Result Cache
The query result cache caches the results of previously-executed Ariba Query API queries. Using the cache improves performance for queries that have static data, such as queries that pull data read in by integration events. It is not appropriate for queries that change frequently, such as queries that take user parameters. Each query is explicitly tagged to indicate whether it is an appropriate candidate for the cache.
You can configure the query result cache by setting the parameter System.Performance.QueryCacheSize.
The value of the QueryCacheSize parameter is an integer, which indicates the number of entries (query results) to allocate in the query cache. When the total number of cached queries exceeds this number by 35 percent, Ariba reduces the cache size back to the value specified as QueryCacheSize.
Catalog Search Results Query Cache
The catalog search result cache caches the results of catalog queries, to improve performance of commonly-used queries.
You configure the catalog search results query cache with the following parameters in config/Parameters.table:
System.Catalog.Search.QueryCacheRowLimit
System.Catalog.Search.QueryCacheSize
The QueryCacheRowLimit parameter tunes the cache by defining which queries are “large enough” to be cached.
The QueryCacheSize parameter configures the catalog search results query cache, which is used to cache results of catalog searches. This parameter determines the amount of memory used for the cache, by specifying how many result sets are included in the cache.
For more information on the catalog search results query cache, see the Ariba Buyer Catalog Guide.
Session Cache
The session cache caches recently-used objects within a user session. You can configure this cache by setting the following parameters in config/Parameters.table:
System.Performance.SessionRecentObjectCacheSize
Data Queue Chapter 14 Performance
180 Ariba Buyer Configuration Guide
System.Performance.UseSoftReferenceForSessionCache
The SessionRecentObjectCacheSize parameter specifies how many objects are stored in the cache.The UseSoftReferenceForSessionCache parameter is a Boolean that indicates whether soft references are cached.
You must not modify these parameters unless directed to do so by Ariba Technical Support.
Data Queue
The System.Messaging.Channels.Tibco.DataQueueSize and System.Messaging.Channels.File.DataQueueSize parameters in config/Parameters.table specify a queue length for data exchanged during pull integration events. When the queue is filled to the specified size, Ariba Buyer must empty the queue before pulling more data.
If you experience time-outs from the channel, you must decrease this parameter to keep the Producer active. If you experience slower data pulls, you can try increasing this parameter. By increasing the size of the queue, you can pull more objects in each exchange, at the cost of occupying more process memory.
You can override this value for a specific integration event by specifying the DataQueueSize property in the message configuration for that event. For information on configuring integration events, see the Ariba Spend Management Channels Guide.
Catalog Load
The following parameters in config/Parameters.table configure the performance of catalog load:
System.Catalog.Workflow.IndexPromoteThreadCountSystem.Catalog.Workflow.PromoteCommitBatchSizeSystem.Catalog.Workflow.PromoteQueueLength
The IndexPromoteThreadCount parameter specifies the number of threads Ariba Buyer uses for loading catalog items. If you expect a heavy load during catalog loads, you might want to increase the value of this parameter to achieve some concurrency. Depending on what server platform you are using for your server, you might want a value of approximately 3 or 4.
The PromoteCommitBatchSize parameter specifies how many catalog items Ariba Buyer creates before each database commit. You can use this parameter to reduce the number of database round trips involved in catalog loads.
The PromoteQueueLength parameter specifies how many catalog items can be stored at a time in a memory queue during catalog load. If the threads that load the catalog items (controlled by the IndexPromoteThreadCount parameter) are not processing the items as fast as they are loaded into memory, the queue stops storing additional items when it reaches the limit set by PromoteQueueLength. When the threads catch up and the number of items in the queue drops below this limit, the queue begins storing additional items again.
Ariba Buyer Configuration Guide 181
Chapter 14 Performance Timeout Values
Timeout Values
Timeout values can affect how well the system appears to be performing. An example of a timeout value is the number of seconds an employee can keep an approvable document “locked” while editing.
The following parameters in config/Parameters.table configure timeout values:
System.Performance.EditLockTimeoutSystem.Performance.HTTPSocketTimeoutSystem.Performance.RPCIdleConnectionTimeoutSystem.Performance.WorkerThreadRunningTimeWarningThresholdSystem.Procure.AribaNetwork.RequestTimeoutSeconds System.Catalog.Publishing.Executable.TimeOutSystem.Catalog.Search.SearchTimeoutSystem.DatabaseSchemas.Default.SQLStatementTimeoutInSeconds
Database-Related Parameters
This section describes the parameters in the config/Parameters.table file that affect the performance of your underlying database.
Database Connections
The System.DatabaseSchemas.Default.DatabaseConnections parameter specifies the maximum number of transient database connections that an Ariba Buyer logical node can make to the Ariba Buyer database. The value of DatabaseConnections is based on the following factors:
• The maximum number of concurrent threads that can be used for integration events, which depends on settings in your integration events configuration file. Each thread uses one database connection.
• The number of transient database connections, such as those used for monitoring the database server. This value is typically 4.
The total number of database connections is the sum of these two numbers. For example, suppose you have the following configuration:
• You have three integration events—IntegrationEvent_1, IntegrationEvent_2, and IntegrationEvent_3—that are expected to run at the same time.
• IntegrationEvent_1 has Threads = 3.
• IntegrationEvent_2 doesn’t have a Threads parameter, or has Threads = 1.
• IntegrationEvent_3 has Threads = 4.
In this configuration, the maximum number of possible concurrent integration threads is 8 (3 + 1 + 4). Assuming that there are 5 transient connections, the DatabaseConnections parameter must be set to 12 (8 + 4).
If you receive a warning message such as “Lock Database connections wait time of 10 sec exceeded...”, you must increase the value of the DatabaseConnections parameter.
At any given time, there must be sufficient database connections to support all the integration events that can run concurrently. If any of the concurrent integration events has a Threads parameter that exceeds a value of 1, additional Java threads (not worker threads) is used. These additional Java threads require transient database connection support.

Search-Related Parameters Chapter 14 Performance
182 Ariba Buyer Configuration Guide
For information on persistent database connections, see “Worker Threads” on page 177.
Be sure to read this description if you decide to modify the DatabaseConnections parameter.
Tablespaces and FileGroups
By default, Ariba Buyer stores all Ariba Buyer database objects in a single tablespace/filegroup. For performance reasons, you might choose to spread your database objects among several tablespaces or filegroups. For example, grouping large objects together in a separate tablespace can improve performance.
For information on how to specify how to partition objects in the database into different tablespaces/filegroups, see the Ariba Spend Management Database Configuration Guide.
Read Uncommitted
When you set System.DatabaseSchemas.Default.ReadUncommitted to true, Ariba Buyer resets the transactions isolation mode of your Microsoft SQL Server database connection to Read Uncommitted. This parameter is set to false by default.
This option is available to alleviate locking contention on Microsoft SQL Server when running with a high transaction volume. Consult your Microsoft database administrator to see if this setting is appropriate in your configuration.
Open Database Cursors
The System.DatabaseSchemas.Default.OpenStatements parameter specifies the cursor cache performance of your database by specifying the maximum number of cursors that the application uses. This parameter indicates the number of cursors used by the underlying database as well as cursors used by the application.
Estimate that 25 percent of the available cursors are used by the database. For example, if you set this parameter to 40, then about 30 cursors are available.
This parameter affects performance on your database. Ariba strongly recommends you specify a maximum of five cursors. If you change this parameter, consult your database administrator.
Search-Related Parameters
The Application.UI.ShowInitialSearchResults parameter controls the search result on the Search page.
1. If this parameter is set to Yes (the default value), the Search page will display all the records of the document type when it first comes up.
2. Set this parameter to No if too many records in the result slow down the performance of the page. When setting this parameter to No, the search will be initiated only when the user hits the Search button, or when they click on a Saved Search or a Label Search.
Ariba Buyer Configuration Guide 183
Appendix A Login URL Reference
This appendix provides a reference of the configurations and features that require login URL customizations. It includes the following sections:
• “Webjumper Direct Action” on page 183
• “Locale Parameter on Login” on page 185
• “Daylight Saving Time and Macintosh Clients” on page 186
For information on setting up links to the standard login URLs, see Ariba Spend Management Application and Web Server Guide.
Webjumper Direct Action
To specify details of a login, such as specifying the destination page or the password adapter used to authenticate the user, you use the webjumper direct action. To use the webjumper, you must direct users to a URL that has the following form:
https:/myserver:444/Buyer/Main/ad/webjumper?name1=value1&name2=value2
For example:
https:/myserver:444/Buyer/Main/ad/webjumper?Page=CreateHomePageName&passwordAdapter=passwordAdapter2
The webjumper URL recognizes standard HTML query string syntax. The valid values for the query string arguments are as follows:
• Page
• partition
• passwordadapter
WebJumper URL Arguments
This section describes the arguments that can appear in the query string portion of a webjumper URL.
Destination Page Argument
The webjumper URL can include a Page argument to specify a well-known page, which is used as the destination of the login. For example:
https:/myserver:444/Buyer/Main/ad/webjumper?Page=CreateHomePageName
In this example, the user is taken to the Create a New Request page after logging in.
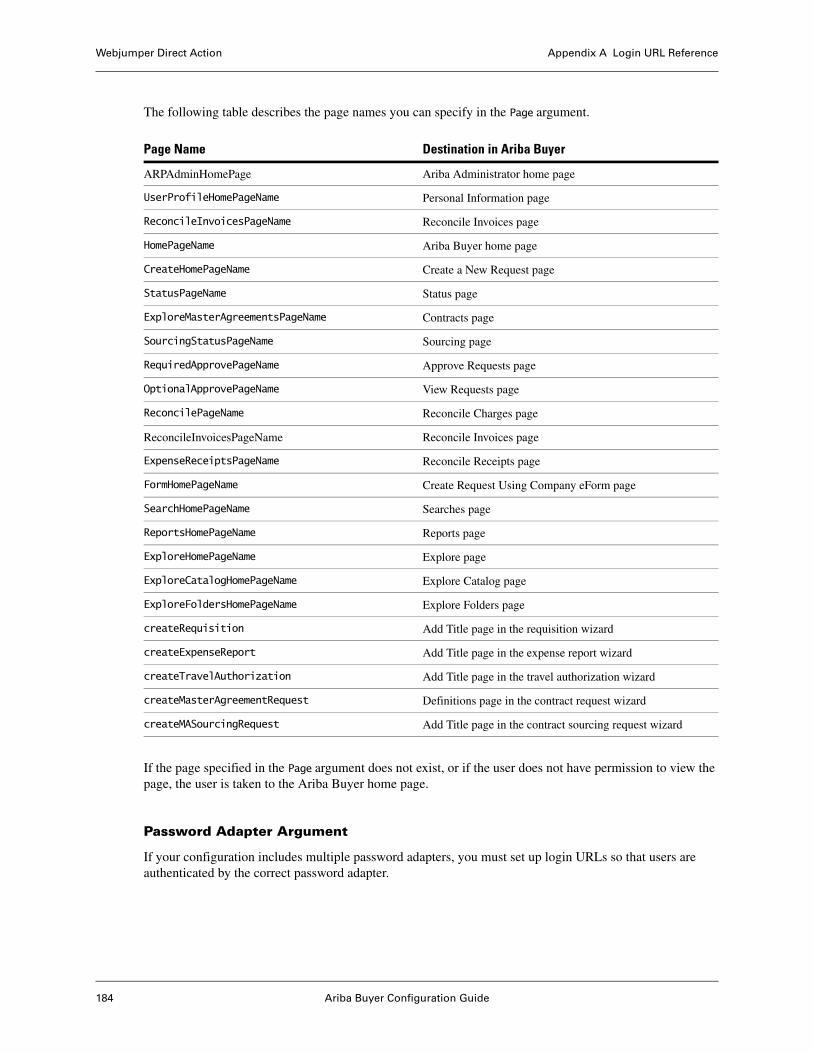
Webjumper Direct Action Appendix A Login URL Reference
184 Ariba Buyer Configuration Guide
The following table describes the page names you can specify in the Page argument.
If the page specified in the Page argument does not exist, or if the user does not have permission to view the page, the user is taken to the Ariba Buyer home page.
Password Adapter Argument
If your configuration includes multiple password adapters, you must set up login URLs so that users are authenticated by the correct password adapter.
Page Name Destination in Ariba Buyer
ARPAdminHomePage Ariba Administrator home page
UserProfileHomePageName Personal Information page
ReconcileInvoicesPageName Reconcile Invoices page
HomePageName Ariba Buyer home page
CreateHomePageName Create a New Request page
StatusPageName Status page
ExploreMasterAgreementsPageName Contracts page
SourcingStatusPageName Sourcing page
RequiredApprovePageName Approve Requests page
OptionalApprovePageName View Requests page
ReconcilePageName Reconcile Charges page
ReconcileInvoicesPageName Reconcile Invoices page
ExpenseReceiptsPageName Reconcile Receipts page
FormHomePageName Create Request Using Company eForm page
SearchHomePageName Searches page
ReportsHomePageName Reports page
ExploreHomePageName Explore page
ExploreCatalogHomePageName Explore Catalog page
ExploreFoldersHomePageName Explore Folders page
createRequisition Add Title page in the requisition wizard
createExpenseReport Add Title page in the expense report wizard
createTravelAuthorization Add Title page in the travel authorization wizard
createMasterAgreementRequest Definitions page in the contract request wizard
createMASourcingRequest Add Title page in the contract sourcing request wizard

Ariba Buyer Configuration Guide 185
Appendix A Login URL Reference Locale Parameter on Login
You set up login links to different password adapters by including a passwordadapter parameter to the webjumper URL. For example:
https://myserver:444/Buyer/Main/ad/webjumper?passwordadapter=PasswordAdapter1https://myserver:444/Buyer/Main/ad/webjumper?passwordadapter=PasswordAdapter2
The value you supply after passwordadapter is the name of the password adapter as defined in the System.Authentication section of config/Parameters.table.
If you use organic user growth in your configuration, you must ensure that all new users logging in with organic growth include the passwordadapter on the URL.
To indicate whether password adapter information is stored when a user logs out from Ariba Buyer, you use the System.UI.IgnorePasswordAdapterOnLogout parameter. For more information, see Chapter 7, “Passwords.”
Partition Argument
The partition argument is used only with organic user growth and only to restrict the partition where the user is allowed to log in. For example:
http://myserver:444/Buyer/Main/ad/webjumper?passwordadapter=PasswordAdapter4&partition=part1
If you do not specify the partition argument, organic user growth users can log in to any partition where Application.Authentication.OrganicGrowth is set to true.
Configuration for Authentication Field
When a user follows a webjumper URL, Ariba Buyer checks to see if the user associated with the webjumper is the same user who is currently logged in. If the users are the same, the webjumper takes the user to the appropriate page, without requiring reauthentication. If a different user is logged in, Ariba Buyer logs out the first user and asks the new (webjumper) user to authenticate.
In the default configuration, Ariba Buyer uses the ariba.user.core.User.UniqueName field to determine whether the two users are the same. If the user who is currently logged in has the same UniqueName as the user in the webjumper, they are considered to be the same user.
You can configure the field that is used to compare users by setting the parameter System.Base.WebjumperUserNameField.
Locale Parameter on Login
In a multilingual configuration, users can include a locale as a parameter to the Ariba Buyer login URL. The locale argument specifies the name of a locale. For example:
https://myserver:444/Buyer/Main?locale=en_US
If a user does not specify a locale in the login URL, Ariba Buyer gets the locale from the Web browser’s preference.
Daylight Saving Time and Macintosh Clients Appendix A Login URL Reference
186 Ariba Buyer Configuration Guide
Daylight Saving Time and Macintosh Clients
For Macintosh clients, you must specify the argument dayLightSaving=true in the Ariba Buyer login URL to adjust to daylight saving time changes.
For example, the dayLightSaving=true argument might appear in the Ariba Buyer login URL as follows:
https://myserver:444/Buyer/Main?dayLightSaving=true
The dayLightSaving=true argument specifies that daylight saving time is in effect. If you do not specify this argument, the time and date displayed in the Ariba Buyer and Ariba Administrator applications is not adjusted for daylight saving time.
Note: The dayLightSaving=true argument is only required for Macintosh clients.
Ariba Buyer Configuration Guide 187
Appendix B Command Reference
This appendix provides command-line reference information on the syntax of the commands referenced in this document. It includes the following sections:
• “Notation Conventions” on page 187
• “aribaencrypt” on page 187
• “runpurge” on page 189
• “servermonitor” on page 190
Notation Conventions
This following table describes the general notation conventions used in this appendix to describe command line options.
aribaencrypt
Ariba Buyer configuration files can contain potentially sensitive information, such as computer names, passwords, or personnel information. By default, all parameter values are in plain text. To protect the security and privacy of your data, you can encrypt specific parameters.
You use the aribaencrypt command to encrypt a value. When you run aribaencrypt, you supply a string as argument, and aribaencrypt returns an encrypted string and automatically updates config/Parameters.table with the encrypted value.
Syntaxaribaencrypt [-key <key>] [-value <value>] [-tablefile <tablefile>][-allownewkey|-noallownewkey*] [-skipconfirm*|-noskipconfirm] [-secureparameterskey <secureparameterskey>]
To encrypt a parameter value in config/Parameters.table:
Type aribaencrypt -key <key> where key is the name of an existing parameter in Parameters.table. Your will be prompted to confirm the operation. Upon confirmation, the key is properly encrypted and stored in Parameters.table. No further steps are required.
Notation Description
[ ] Encloses optional elements.
- Precedes all options.
| Separates either/or choices.
+ and - Turns options on and off.
: Separates multiple arguments to the same option. There must not be any spaces around the colon.
aribaencrypt Appendix B Command Reference
188 Ariba Buyer Configuration Guide
To encrypt one or more values in config/Parameters.table:
Type aribaencrypt [-secureparameterskey <secureparameterskey>] where <secureparameterskey> specifies the name of the parameter whose value is a list of keys that are to be encrypted. The default value for <secureparameterskey> is "System.Base.SecureParameters". For example, to use encrypted values for your Ariba Buyer database username and password, you would add the following entry to your config/Parameters.table file:
System {Base {
SecureParameters = (System.DatabaseSchemas.Schema1.AribaDBPassword,System.DatabaseSchemas.Schema1.AribaDBUsername
);
The full set of aribaencrypt options and their descriptions follow.
Options-key <key>
Use this option to specify the key (in dotted notation) whose value is to be encrypted. For example: -key "System.Database.AribaDBPassword". If the parameter is not in the file, the encrypted value will be output to the console. Otherwise, the encrypted value will be stored in the table file as the value of the key.
-value value
Use this option to specify the clear text to encrypt. If <key> is specified and if it exists in <tablefile>, you will be prompted to select which value is used if -skipconfirm is false). If confirmation is skipped, the value parameter overrides the current key value.
Note: The value of this option cannot be an empty string. Specifying an empty string for this option is the same as not specifying this option.
-tablefile tablefile
Use this option to specify the table file in which to store the encrypted parameter. The default is config/Parameters.table. If present, this value must be a valid table file.
-allownewkey|-noallownewkey
Use this option to specify whether a new key can be added if it does not already exist in the table file. If the new key is allowed, and if the given key is not present, then the value parameter must be specified also. The default is -noallownewkey.
-skipconfirm
Use this option to skip the confirmation step. The default is to prompt for confirmation.
-secureparameterskey
Use this option to specify the name of the parameter whose value is a list of keys whose values are to be encrypted. The default parameter is "System.Base.SecureParameters". If you are using aribaencrypt on Parameters.table do not specify this parameter it will be used by default.
Ariba Buyer Configuration Guide 189
Appendix B Command Reference runpurge
runpurge
You use the runpurge command to initiate the preview or mark phase of data archive and purge. For more information on this process, see “Data Archiving and Purging” on page 135.
Note: The runpurge command reads the parameter System.Base.PurgeFlushBatchSize for performance tuning during the mark phase. You do not need to change the value of this parameter.
Syntax
The runpurge command has three forms:
runpurge -printscope scope
runpurge -printscopenames
runpurge -configpath pathname [-purge]
The printscope* forms report information about your current configuration. The -configpath starts the purge server, either to do a mark phase or just a preview. For example:
runpurge -configpath config/purge/simplePurgeConfig.xml
Options-configpath pathname
Use this option to specify the location of a configuration file. This option either starts the mark phase or the preview phase, depending on whether -purge is present.
The value of configpath is a filename, which can be either absolute or relative to BuyerServerRoot. There is no default pathname. When you use this option to preview data, you can access the preview data from http://yourserver:8050/inspector/purgeBrowser.
If you use -configpath, you cannot specify -printscope or -printscopenames.
-printscope scope_name
Use this option to print information about the named scope. This option lists all classes in the named scope and indicates which are marked as primary and which are marked as no-archive classes. You use this information to learn the details of a scope that is defined in the default configuration.
If you use -printscope, you cannot specify -configpath or -printscopenames.
-printscopenames
Use this option to print the names of all scopes that have been defined. Use this option to verify that you have the correct name of a scope, as required in the purge configuration file. For more information on purge scopes, see “Purge Scopes” on page 137.
If you use -printscopenames, you cannot specify -configpath or -printscope
-purge
Use this option to indicate that you want to mark data for purge, and not just preview. This option is valid only when you use -configpath.
servermonitor Appendix B Command Reference
190 Ariba Buyer Configuration Guide
servermonitor
You use the servermonitor command for command-line access to basic system administration functions, such as running scheduled tasks and integration events, reloading JavaScript files, listing nodes in a configuration, and enabling or disabling log categories.
Syntax
To run servermonitor, type the following command at the command prompt in your Ariba Buyer bin directory:
servermonitor [ [ option ] [ option ] . . . ]
The general format of a typical servermonitor command is as follows:
servermonitor -username aribasystem -password aSecret -port 8052...
Most uses of the servermonitor command require a username and password and a port, followed by additional options that specify one or more operations.
• The username and password are checked to verify that the user has appropriate permissions to perform this operation. Most commands require the user to have the SiteAdmin.AdminClient permission.
• The port specifies the RPC port for connecting to Ariba Buyer. The port is usually required as an explicit argument, unless your configuration is using the default, which is port 8052.
• The remaining options are used to specify one or more operations, using the basic connection and login information.
If your configuration uses multiple password adapters, the -passwordadapter argument is required as well, to specify the password adapter to be used for authentication.
Options
This section lists the options to the servermonitor command that apply to approval rules. All options are case sensitive. The options are grouped into the following sections:
• “Standard Options” on page 190, which describes the basic options to servermonitor.
• “Options to Disable” on page 197, which lists options that act as the inverse of the basic options. For example, -listevents and -nolistevents are inverses of one another, as are -ssl and -nossl.
To display all available options, run servermonitor -usage from the command line.
Standard Options
This section lists basic options to the servermonitor command. Many of these options can be disabled by the related inverse forms, as described in “Options to Disable” on page 197.
-configDir location of the config directory
Use this option to indicate the location of the config directory. This can be a relative path like ../config if you’re running the servermonitor command from the bin directory. Alternatively, you can use an absolute path for -configDir if servermonitor is in your path and you want to run servermonitor from anywhere.
Ariba Buyer Configuration Guide 191
Appendix B Command Reference servermonitor
-disconnectuser nodename:connectionID
Use this option to disconnect a user. You indicate which user to disconnect by specifying the node name and connection ID. To find the connection ID, run the -users option first. For example:
servermonitor -username sysadmin -password aSecret -disconnectuser Node1:N1454188116
To use this option, the user specified by -username must have the permission SiteAdmin.AdminClient.
-docroot docRoot
Use this option to specify the location of the Ariba Buyer Web Components. You use this option in conjunction with -locale.
If you do not specify this option, the System.Base.DocRoot parameter value in the config/Parameters.table file is used.
-domain domain
Use this option to specify a Windows domain to use for authentication. This option is relevant only when you are using Windows NT Domain Authentication. For example:
servermonitor -username me -domain FLASH -runevent RolePull
-host hostname
Use this option to set a specific host for Ariba Buyer. The host must be explicitly specified. Do not use localhost.
-inspectorurl
Use this option to view the URL used to start the Inspector. For example:
servermonitor -username sysadmin -password aSecret -inspectorurl
The output for this command resembles the following:
https://myserver:444/Buyer/inspector
The user specified by -username must have the permission SiteAdmin.AdminClient.
-listevents
Use this option to see a list of available integration events. -listevents is useful when you want to find the names of scheduled tasks to use as arguments to the -runevent option. With this command, you must specify a partition option as well. For example:
servermonitor -username sysadmin -password xxx -partition psap -listevents
To use this option, the user specified by -username must have the permission SiteAdmin.AdminClient.
See also -nolistevents.
-listnodes
Use this option to list the logical nodes in your multiserver configuration. The output of this command resembles the following:
Node1 (Primary Server)Node2Node3
Notice that the words (Primary Server) appear next to the name of the primary logical node.
See also -nolistnodes.
servermonitor Appendix B Command Reference
192 Ariba Buyer Configuration Guide
-listpartitions
Use this option to see a list of available partitions. This option is useful when you want to find the name of a partition to use as an argument to the -partition option.
See also -partition.
-listtasks
Use this option to see a list of the available scheduled tasks. This option is particularly useful when you want to find the names of scheduled tasks to use as arguments to the -runtasks option. For example:
servermonitor -username sysadmin -password aSecret -listtasks
The output of the command resembles the following:
ArchiveLog:Node1ArchiveLog:Node1ArchiveLog:Node1AribaCommerceServicesNetworkFullSubscriptionSync:Node1
In a multiserver configuration, the name of the logical node where the scheduled task is configured to run is shown following the scheduled task name.
To use this option, the user specified by -username must have the permission SiteAdmin.AdminClient.
See also -nolisttasks.
-loadexts
Use this option to load all metadata XML extension files without stopping Ariba Buyer. You can use this option only in development mode, in a single-server configuration, and when the metadata does not change the shape of the data.
If you are running in a production mode or in a multiserver configuration, you restart Ariba Buyer instead of using -loadexts. If the metadata changes the shape of the data, you use ../bin/simplemigrator instead. Note that all regular servers must be down when simplemigrator is run.
To use this option, the user specified by -username must have the permission SiteAdmin.AdminClient.
-locale locale
Use this option to define the locale when creating a resource service. locale must correspond to a valid locale in your configuration. You use this option in conjunction with -docroot.
The default is en_US.
-log {+|-}category/levell[:{+|-}category/level] ...]
Use this option to enable and disable logging of particular categories and logging levels. You precede a logging category with a plus (+) to enable it.
Note: You cannot disable specific logging levels. You must set level to ERROR (for example, -log -query/ERROR), which disables all logging levels.
When you enable a logging level, messages at that logging level and higher are logged. For example, the command -log +query/info enables the info, warning, and error logging levels. If you do not specify a logging level, the info logging level is assumed, for example, the command -log +query is equivalent to the command -log +query/info.
You can specify multiple categories at the same time, separated by a colon. For example:
servermonitor -log +sqlio/warning:-query/info
By default, logging categories are set to display messages at the warning and error logging levels.
Ariba Buyer Configuration Guide 193
Appendix B Command Reference servermonitor
If you have a multiserver configuration, you can use the -node option in conjunction with -log to specify the logical node (or nodes) where you want the command to execute.
See also -node.
Note: The -log option changes the default log settings for Ariba Buyer, not just the logging settings for Ariba Administrator.
-passwordadapter passwordadapter
Use this option to specify a password adapter to be used for authentication. For example:
servermonitor -user fred -passwordadapter PasswordAdapter3 -partition None -runevent RolePull
-logstatus
Use this option to find out if logging is turned on for various log categories. The output from this option resembles the following:
Node Severity PrintWhere NameNode1 DEBUG ERROR aribaInternalDevNode1 DEBUG ERROR aribawebvalidation.stateNode1 DEBUG ERROR tableNode1 INFO ERROR general
• The Node column specifies the logical node name.
• The Severity column specifies the logging level set for the log category. For information on logging levels, see Chapter 9, “Logging and Auditing.”
• The PrintWhere column specifies the PrintWhere severity level. If the PrintWhere severity level is ERROR (the default), a stack trace is automatically appended to all log messages that have a logging level of error. If the PrintWhere level is WARNING, a stack trace is appended to both error and warning level log messages.
• The Name column specifies the name of the log category.
If you have a multiserver configuration, you can use the -node option in conjunction with -logstatus to specify the logical node (or nodes) where you want the command to execute.
To use this option, the user specified by -username must have the permission SiteAdmin.AdminClient.
See also -nologstatus and -node.
-logtoconsole
Use this option to send log messages only to the console. The servermonitor command runs with this option turned on unless you turn it off with the -nologtoconsole option.
See also -nologtoconsole.
-logtofile
Use this option to send log messages only to the log files. The servermonitor command runs with this option turned on unless you turn it off with the -nologtofile option.
See also -nologtofile.
-logwhere {+|-}category/level[:{+|-}category/level]...]
Use this option to enable and disable stack traces for particular logging categories and logging levels. Precede a logging category with a plus (+) to enable stack tracing, or a minus (-) to disable stack tracing.
servermonitor Appendix B Command Reference
194 Ariba Buyer Configuration Guide
You can specify multiple categories and logging levels, separated by a colon. For example:
servermonitor -logwhere +approvable/info:+sqlio/warning
If you have a multiserver configuration, you can use the -node option in conjunction with -logwhere to specify the logical node (or nodes) where you want the command to execute.
See also -node.
-metrics
Use this option to obtain general information about the load and performance of Ariba Buyer. The output from this option resembles the following:
Up Time: 1 d 23 h 30 minTotal User Connections Since Server Start: 207Concurrent User Connections At This Moment: 6Cache Size: 1110Total Memory (Kb): 14443Free Memory (Kb): 31928Number of Threads: 29BackgroundQueue,ForegroundQueue,WorkflowQueue: 0,0,0,
If you have a multiserver configuration, you can use the -node option in conjunction with -metrics to specify the logical node (or nodes) where you want the command to execute.
See also -nometrics and -node.
-node node[:node] ... ]
Use this option to specify one or more logical nodes. You use -node in conjunction with the following options:
• -log
• -logstatus and -nologstatus• -logwhere
• -metrics and -nometrics• -runtask
node can be one of the following values:
• The logical node name, for example, Node1.
• AllNodes, which specifies all the logical nodes in your configuration.
You can specify multiple node names at the same time, separated by a colon. For example:
servermonitor -logstatus -node Node2:Node4
Note: When the -users option is used with the -node option, the -node option is ignored. All logged in users from all nodes are returned.
-partition partition
Use this option to specify a partition for the following options:
• -listevents and -nolistevents
• -listtasks and -nolisttasks• -runevent• -runtask
See also -listpartitions.
Ariba Buyer Configuration Guide 195
Appendix B Command Reference servermonitor
-password password
Use this option to specify a password for use with -username. For example:
servermonitor -username sysadmin -password aSecret
-port port
Use this option to specify the RPC port Ariba Buyer is using. This option is required. The RPC port number is defined by the System.Nodes.node.Port parameter in the config/Parameters.table file.
In the default multiserver configuration, the RPC port for the logical node Node1 is 8052. For logical node Node2, the port is 8056. You can override the default port with any valid port number. If you don't explicitly set the port, port 8052 is used by default.
-refreshevents
Use this option to reload an integration event configuration file.
See also -norefreshevents.
To use this option, the user specified by -username must have the permission SiteAdmin.AdminClient.
-refreshtasks
Use this option to reload a scheduled tasks table file.
To use this option, the user specified by -username must have the permission SiteAdmin.AdminClient.
-runevent integrationEvent -partition partition
Use this option to run a specific integration event. The -partition option specifies the partition in which the integration event belongs. For example:
servermonitor -username sysadmin -password aSecret -runevent RolePull -partition CSV_1
Another integration event is SourcingDestinationPull, which uses the following syntax:
servermonitor –username username -password password -port portnumber (if different than the default port 8052) -configDir location of the config directory -runEvent integration event -partition partition in which to run the integration event
The following example assumes that you’re running servermonitor from the bin directory:
servermonitor –username admin9276 -password sm4j9_85 -port 8078 -configDir ../config -runEvent SourcingDestinationPull -partition poracle
This command forks the event asynchronously and always returns immediately, with a status code of 0 if the event is successfully forked and a status code of 1 if the event cannot be successfully forked (or an RPC error occurs). The status code indicates the status of the connection, not the status of the integration event. If the integration event is unsuccessful, the servermonitor command writes any listed errors to stdout.
For example, integration events can fail if you specify the name incorrectly, or if the command times out before the integration event finishes executing. You can extend the servermonitor command timeout by setting the -sessiontimeout option.
The -runevent option takes only one event as argument. If you run this command on different events in succession, be sure that each event completes before you start the next one. Also be aware that integration events can potentially have dependencies on other integration events and must be run in a designated order.
To use this option, the user specified by -username must have the permission SiteAdmin.AdminClient.
See also -configDir, -partition and -sessiontimeout.
servermonitor Appendix B Command Reference
196 Ariba Buyer Configuration Guide
For more information about SourcingDestinationPull, see the Ariba Spend Management Integration Guide.
-runtask scheduledtask -partition partition
Use this option to run a scheduled task. The -partition option specifies the partition in which the scheduled task belongs. You can use -listtasks first to find out which scheduled tasks are available. For example, to run a task called ReloadPasswordFile, you would type:
servermonitor -username sysadmin -password aSecret -partition myPartition -runtask ReloadPasswordFile
You can use the -node option in conjunction with -runtask to specify the name of the logical node (or nodes) where you want the command to execute. If you do not specify the -node option, the command executes on the primary logical node only.
To use this option, the user specified by -username must have the permission SiteAdmin.AdminClient.
See also -partition and -node.
-sessiontimeout timeoutseconds
Use this option to specify how long the servermonitor command can remain connected to Ariba Buyer before the connection “times out.” The timeoutSeconds value must be an integer, representing the maximum number of seconds the servermonitor command can remain connected to Ariba Buyer before the timeout takes effect. You must set timeoutseconds to at least 60 seconds.
If you do not specify this option, the default is determined by the value of the System.Performance.RPCIdleConnectionTimeout parameter in the config/Parameters.table file. By default, the RPCIdleConnectionTimeout parameter is set to 3600 (one hour).
The purpose of this option is to prevent long-running processes, such as loading integration events, from disconnecting the servermonitor command after the timeout period specified by the RPCIdleConnectionTimeout parameter.
-stopevent -stopevent eventname -partition partitionNameUse this option to stop the currently running integration event on the specified partition on the TIBCO and file channels.
-ssl
This option enables secure (encrypted) RPCs when using Secure Sockets Layer (SSL). The servermonitor command runs with this option unless you use the -nossl option.
-stdinpassword
Use this option to read a password from standard input.
See also -nostdinpassword.
-username username
Use this option to log in as a specific user. The -username option is almost always used with the -password option. The -username option is useful only in conjunction with other options. For example:
servermonitor -username sysadmin -password aSecret -runtask LoadMyFile
Ariba Buyer Configuration Guide 197
Appendix B Command Reference servermonitor
-users
Use this option to find out which users are connected to Ariba Buyer. This option is useful when you want to disconnect some users and want to know who is currently logged in. For example:
servermonitor -username sysadmin -password aSecret -users
Note: When the -users option is used with the -node option, the -node option is ignored. All logged in users from all nodes are returned.
Users must have the permission SiteAdmin.AdminClient to use this option.
See also -noUsers.
Options to Disable
This section describes options that turn off options described in the previous section. For example, the -nolistevents option is the inverse of -listevents, and -nolistnodes is the inverse of -listnodes.
-noinspectorurl
Use this option to turn off the -inspectorurl option. The servermonitor command runs with this option unless you use the -inspectorurl option.
See also -inspectorurl.
-nolistevents
Use this option to turn off the -listevents option. The servermonitor command runs with this option unless you use the -listevents option.
See also -listevents.
-nolistnodes
Use this option to turn off the -listnodes option. The servermonitor command runs with this option unless you use the -listnodes option.
See also -listnodes.
-nolistpartitions
Use this option to turn off the -listpartitions option. The servermonitor command runs with this option unless you use the -listpartitions option.
-nolisttasks
Use this option to turn off the -listtasks option. The servermonitor command runs with this option unless you use the -listtasks option.
See also -listtasks.
-nologstatus
Use this option to turn off the -logstatus option. The servermonitor command runs with this option, unless you use the -logstatus option.
If you have a multiserver configuration, you can use the -node option in conjunction with -nologstatus to specify the logical node (or nodes) where you want the command to execute.
See also -logstatus and -node.
servermonitor Appendix B Command Reference
198 Ariba Buyer Configuration Guide
-nologtoconsole
Use this option to turn off console logging.
See also -logtoconsole.
-nologtofile
Use this option to turn off the -logtofile option.
See also -logtofile.
-nometrics
Use this option to turn off the -metrics option. The servermonitor command runs with this option, unless you use the -metrics option.
If you have a multiserver configuration, you can use the -node option in conjunction with -nometrics to specify the logical node (or nodes) where you want the command to execute.
See also -metrics and -node.
-norefreshevents
Use this option to turn off the -refreshevents option. The servermonitor command runs with this option unless you use the -refreshevents option.
See also -refreshevents.
-norefreshtasks -partition partition
Use this option to turn off the -refreshtasks option. The servermonitor command runs with this option unless you use the -refreshtasks option. The -partition option specifies the partition in which you want to turn off the -refreshtasks option.
See also -refreshtasks.
-nossl
Use this option to turn off the -ssl option. The servermonitor command runs with the -ssl option unless you use the -nossl option.
Note: If you use the -nossl option when the system is configured for SSL, the servermonitor command hangs.
-nostdinpassword
Use this option to turn off the -stdinpassword option. The servermonitor command runs with this option unless you use the -stdinpassword option.
See also -stdinpassword.
-nousers
Use this option to turn off the -users option. The servermonitor command runs with this option unless you use the -users option.
See also -users.
Ariba Buyer Configuration Guide 199
Appendix C Purge DTD Reference
This appendix lists the elements and attributes of purge configuration files.
<aqlQuery>
The <aqlQuery> element appears within <purgeCandidates>. It specifies which approvable documents are purge candidates by expressing an Ariba Query API query. It has no elements or attributes.
<purgeCandidates><aqlQuery>SELECT ariba.procure.core.Requisition WHERE
Name like 'Req%' andLastModified < Date('2002-09-04 13:12:28 PDT')"/>
</aqlQuery>...
</purgeCandidates>
The query in an <aqlQuery> has the following restrictions:
• It cannot use UNION clauses.
• There can only be one select element in the select list.
• The type of the select element must be ClusterRoot.
• The select element must be a class alias or a simple class name. That is, it must refer to one of the ClusterRoots explicitly selected.
• Any query with a SUBCLASS clause is converted to SUBCLASS None. For example:
SELECT PurchaseOrder from ariba.purchasing.core.PurchaseOrder SUBCLASS PCardOrder
becomes:
SELECT PurchaseOrder from ariba.purchasing.core.PurchaseOrder SUBCLASS None
<keepConditions>
The <keepConditions> element appears within <purgeConfig> and specifies conditions that define when to keep a purge candidate (not purge it). The <keepConditions> element can include any number of keep conditions. If any of the keep conditions is valid (returns true), the candidate is kept and not purged.
<purgeConfig>...
<keepConditions><keepCondition>...</keepCondition><keepCondition>...</keepCondition>
</keepConditions></purgeConfig>
Required? Default value
Attributes
Contains
<keepCondition>+
Appendix C Purge DTD Reference
200 Ariba Buyer Configuration Guide
<keepCondition>
The <keepCondition> element appears within <keepConditions> and specifies a condition under which a purge candidate is kept, rather than purged. Each condition is expressed with a <whereCondition>, which is an Ariba Query API expression.
The class Attribute
The keepCondition attribute restricts a keep condition by specifying a class of objects. Only objects in that class are considered for this condition.
<keepCondition class="ariba.procure.core.ERPOrder"><whereCondition>StatusString in ('Received')</whereCondition>
</keepCondition>
The variant Attribute
The variant attribute restricts a keep condition, so that it applies only to the named variant.
<keepCondition variant="vfr"><javaClass name="acme.custom.CustomKeepCondition"/>
</keepCondition>
<class>
The <class> element appears within <relatedClasses>, and defines a class name that can be purged when the associated primary document type is purged. A <relatedClasses> entry can potentially contain several <class> elements.
<relatedClasses><class name="acme.custom.MyCoolClass"/><class name="acme.custom.MyCoolClass"/>
...</relatedClasses>
The name Attribute
The name attribute identifies the class. The value is a fully-qualified class name.
Required? Default value
Attributes
class
variant
Contains
<whereCondition>
Required? Default value
Attributes
name Required
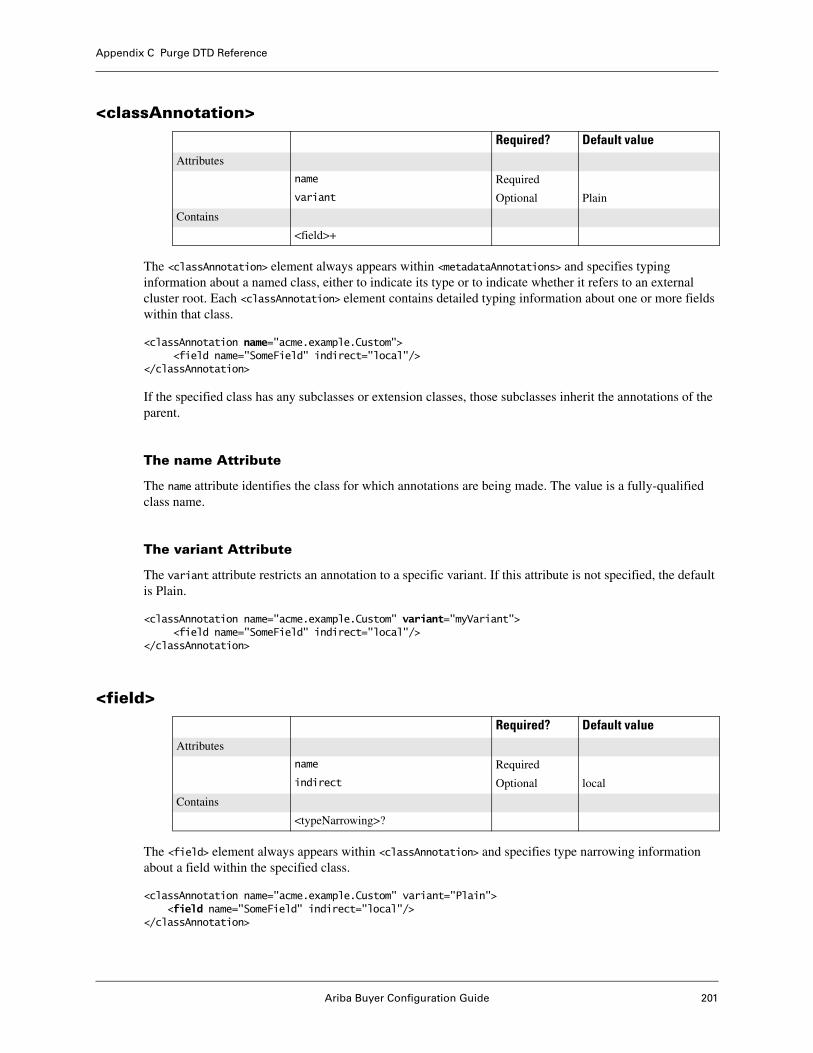
Ariba Buyer Configuration Guide 201
Appendix C Purge DTD Reference
<classAnnotation>
The <classAnnotation> element always appears within <metadataAnnotations> and specifies typing information about a named class, either to indicate its type or to indicate whether it refers to an external cluster root. Each <classAnnotation> element contains detailed typing information about one or more fields within that class.
<classAnnotation name="acme.example.Custom"><field name="SomeField" indirect="local"/>
</classAnnotation>
If the specified class has any subclasses or extension classes, those subclasses inherit the annotations of the parent.
The name Attribute
The name attribute identifies the class for which annotations are being made. The value is a fully-qualified class name.
The variant Attribute
The variant attribute restricts an annotation to a specific variant. If this attribute is not specified, the default is Plain.
<classAnnotation name="acme.example.Custom" variant="myVariant"><field name="SomeField" indirect="local"/>
</classAnnotation>
<field>
The <field> element always appears within <classAnnotation> and specifies type narrowing information about a field within the specified class.
<classAnnotation name="acme.example.Custom" variant="Plain"><field name="SomeField" indirect="local"/>
</classAnnotation>
Required? Default value
Attributes
name Required
variant Optional Plain
Contains
<field>+
Required? Default value
Attributes
name Required
indirect Optional local
Contains
<typeNarrowing>?
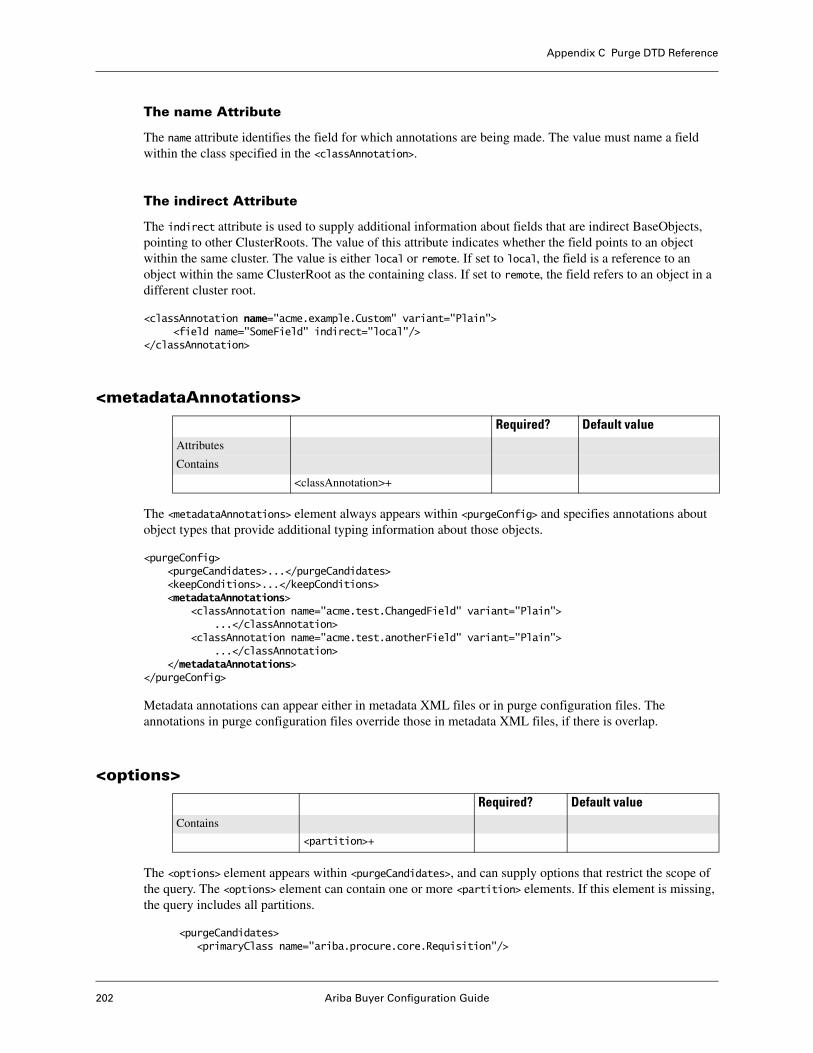
Appendix C Purge DTD Reference
202 Ariba Buyer Configuration Guide
The name Attribute
The name attribute identifies the field for which annotations are being made. The value must name a field within the class specified in the <classAnnotation>.
The indirect Attribute
The indirect attribute is used to supply additional information about fields that are indirect BaseObjects, pointing to other ClusterRoots. The value of this attribute indicates whether the field points to an object within the same cluster. The value is either local or remote. If set to local, the field is a reference to an object within the same ClusterRoot as the containing class. If set to remote, the field refers to an object in a different cluster root.
<classAnnotation name="acme.example.Custom" variant="Plain"><field name="SomeField" indirect="local"/>
</classAnnotation>
<metadataAnnotations>
The <metadataAnnotations> element always appears within <purgeConfig> and specifies annotations about object types that provide additional typing information about those objects.
<purgeConfig><purgeCandidates>...</purgeCandidates><keepConditions>...</keepConditions><metadataAnnotations>
<classAnnotation name="acme.test.ChangedField" variant="Plain">...</classAnnotation>
<classAnnotation name="acme.test.anotherField" variant="Plain">...</classAnnotation>
</metadataAnnotations></purgeConfig>
Metadata annotations can appear either in metadata XML files or in purge configuration files. The annotations in purge configuration files override those in metadata XML files, if there is overlap.
<options>
The <options> element appears within <purgeCandidates>, and can supply options that restrict the scope of the query. The <options> element can contain one or more <partition> elements. If this element is missing, the query includes all partitions.
<purgeCandidates><primaryClass name="ariba.procure.core.Requisition"/>
Required? Default value
Attributes
Contains
<classAnnotation>+
Required? Default value
Contains
<partition>+
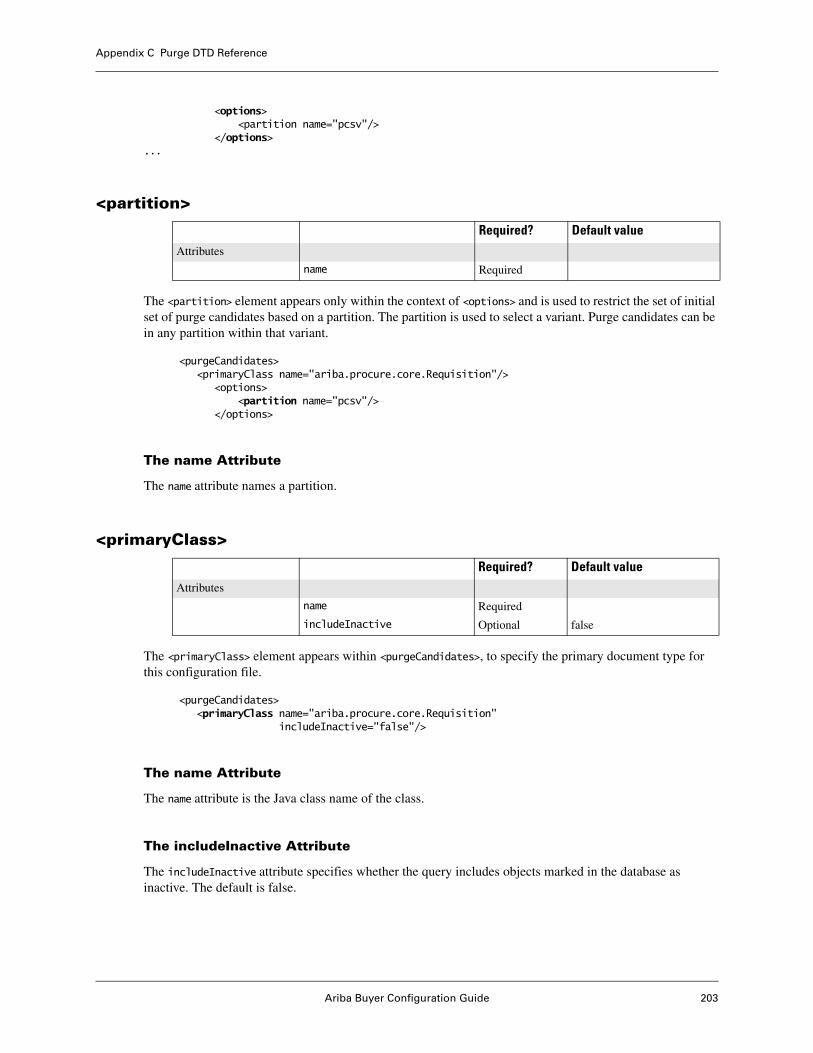
Ariba Buyer Configuration Guide 203
Appendix C Purge DTD Reference
<options><partition name="pcsv"/>
</options>...
<partition>
The <partition> element appears only within the context of <options> and is used to restrict the set of initial set of purge candidates based on a partition. The partition is used to select a variant. Purge candidates can be in any partition within that variant.
<purgeCandidates><primaryClass name="ariba.procure.core.Requisition"/>
<options><partition name="pcsv"/>
</options>
The name Attribute
The name attribute names a partition.
<primaryClass>
The <primaryClass> element appears within <purgeCandidates>, to specify the primary document type for this configuration file.
<purgeCandidates><primaryClass name="ariba.procure.core.Requisition"
includeInactive="false"/>
The name Attribute
The name attribute is the Java class name of the class.
The includeInactive Attribute
The includeInactive attribute specifies whether the query includes objects marked in the database as inactive. The default is false.
Required? Default value
Attributes
name Required
Required? Default value
Attributes
name Required
includeInactive Optional false

Appendix C Purge DTD Reference
204 Ariba Buyer Configuration Guide
The default is false because most inactive documents in the Ariba Buyer database are previous versions of existing documents. For example, if a requisition is changed, the initial version is marked as inactive. Inactive documents of this sort are found by the related classes search, and don’t need to be included in the query.
<purgeCandidates>
The <purgeCandidates> element always appears within <purgeConfig> and defines the set of candidates for purge. It can contain either a simple candidate specification (a where clause) or a full candidate specification (an Ariba Query API query).
The scope Attribute
The scope attribute restricts a set of purge candidates to a named scope. This attribute is required. For Version 9r1, the only defined scope is Procurement. For example:
<purgeCandidates scope="Procurement">
The definition of a scope determines which values are valid as the primary class (for constructing the query) and the classes that are defined as related classes.
Simple Candidate Specifications
The <purgeCandidates> element can contain either a simple candidate specification or a full candidate specification.
A simple candidate specification defines the primary document class, the WHERE condition, the related classes, and partitions used to restrict the query:
<purgeConfig><purgeCandidates scope=”Procurement”>
<primaryClass name="ariba.procure.core.Requisition"/><whereCondition>Name like 'Req%'/><relatedClasses>...</relatedClasses><options>
<partition name="pcsv"/></options>
</purgeCandidates></purgeConfig>
Required? Default value
Attributes
scope Required
(either) Contains
<primaryClass>
<whereCondition>
<relatedClasses>?
<options>?
(or) Contains
<aqlQuery>
<options>?
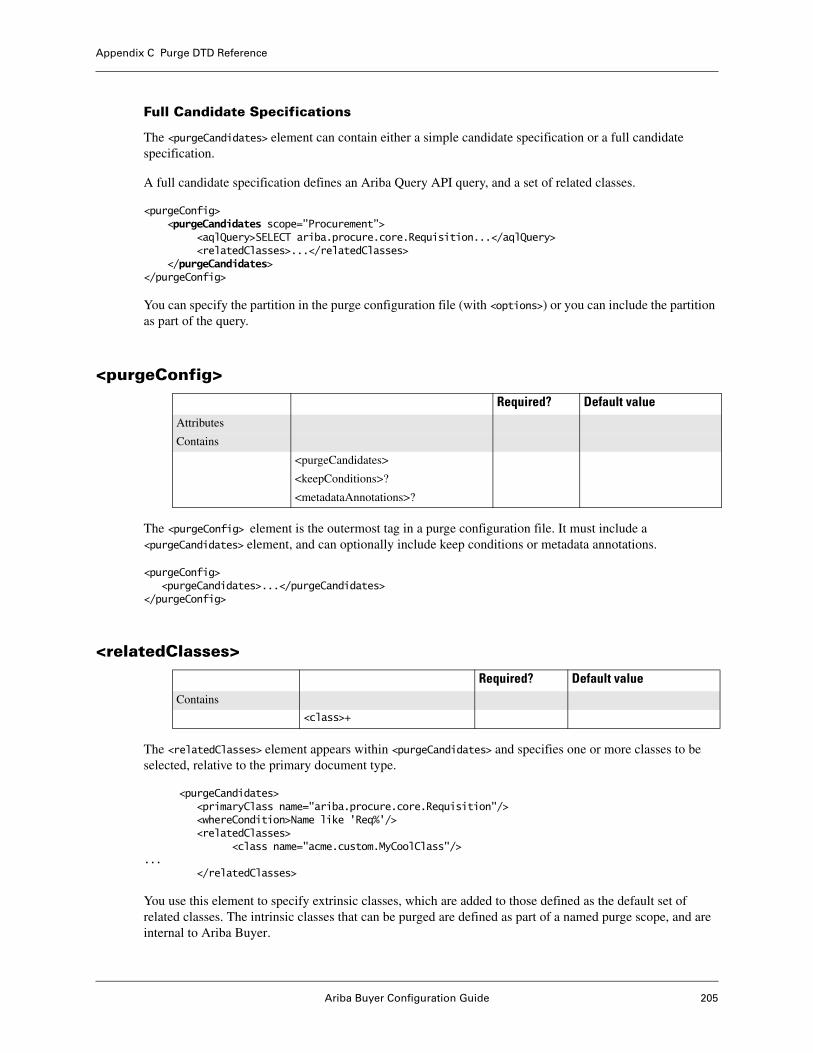
Ariba Buyer Configuration Guide 205
Appendix C Purge DTD Reference
Full Candidate Specifications
The <purgeCandidates> element can contain either a simple candidate specification or a full candidate specification.
A full candidate specification defines an Ariba Query API query, and a set of related classes.
<purgeConfig><purgeCandidates scope=”Procurement”>
<aqlQuery>SELECT ariba.procure.core.Requisition...</aqlQuery><relatedClasses>...</relatedClasses>
</purgeCandidates></purgeConfig>
You can specify the partition in the purge configuration file (with <options>) or you can include the partition as part of the query.
<purgeConfig>
The <purgeConfig> element is the outermost tag in a purge configuration file. It must include a <purgeCandidates> element, and can optionally include keep conditions or metadata annotations.
<purgeConfig><purgeCandidates>...</purgeCandidates>
</purgeConfig>
<relatedClasses>
The <relatedClasses> element appears within <purgeCandidates> and specifies one or more classes to be selected, relative to the primary document type.
<purgeCandidates><primaryClass name="ariba.procure.core.Requisition"/><whereCondition>Name like 'Req%'/><relatedClasses>
<class name="acme.custom.MyCoolClass"/>...
</relatedClasses>
You use this element to specify extrinsic classes, which are added to those defined as the default set of related classes. The intrinsic classes that can be purged are defined as part of a named purge scope, and are internal to Ariba Buyer.
Required? Default value
Attributes
Contains
<purgeCandidates>
<keepConditions>?
<metadataAnnotations>?
Required? Default value
Contains
<class>+

Appendix C Purge DTD Reference
206 Ariba Buyer Configuration Guide
<typeNarrowing>
The <typeNarrowing> element appears only within <field>. For the named field, the narrowing element indicates more specific typing information, typically used to narrow the type from a superclass to one or more of its subclasses.
<classAnnotation name="acme.test.Course" variant="Plain"><field name="MyField">
<typeNarrowing kind="subType"><narrowingClass name="acme.test.SomeType"/>
The kind Attribute
Several kinds of type narrowing are supported. The kind attribute indicates the nature of the typing information being specified. The value must be one of the following:
• containerAnchored
Indicates the type of a field can be assumed to be the same as the parent object. For example, on a Requisition, the field ApprovalRequest.Approvable can be specified as containerAnchored, to indicate that the field type is also Requisition.
• none
Disables any type narrowing previously defined. You can use this to remove typing information defined in the default configuration.
• null
Indicates that this field can be ignored for the purposes of deciding when an object can be purged.
<classAnnotation name="ariba.approvable.core.LineItem" variant="Plain"><field name="OldValues">
<typeNarrowing kind="null"/></field>
</classAnnotation>
• subType
Restricts the type of a field to one or more named subclass. Each valid subclass is specified with a <narrowingClass> element.
<classAnnotation name="acme.test.Course" variant="Plain"><field name="Instructors">
<typeNarrowing kind="subType"><narrowingClass name="acme.test.TA"/><narrowingClass name="acme.test.Professor"/>
</typeNarrowing></field>
</classAnnotation>
Required? Default value
Attributes
kind(containerAnchored|none|null|subType|)
Contains
narrowingClass

Ariba Buyer Configuration Guide 207
Appendix C Purge DTD Reference
<whereCondition>
The <whereCondition> element appears only within <purgeCandidates>. It defines the WHERE condition used in the select statement to select potential purge candidates.
<purgeCandidates><primaryClass name="ariba.procure.core.Requisition"/><whereCondition>Name like 'Req%'/>
</purgeCandidates>
Required? Default value
Attributes
text

Appendix C Purge DTD Reference
208 Ariba Buyer Configuration Guide
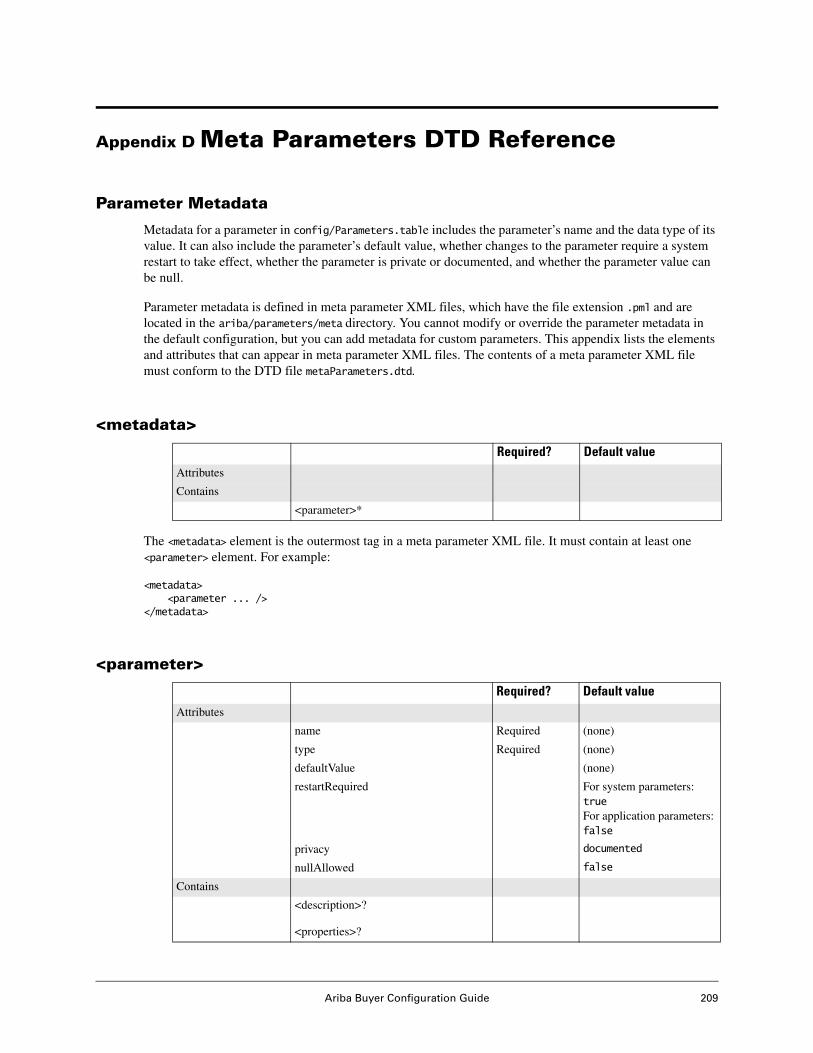
Ariba Buyer Configuration Guide 209
Appendix D Meta Parameters DTD Reference
Parameter Metadata
Metadata for a parameter in config/Parameters.table includes the parameter’s name and the data type of its value. It can also include the parameter’s default value, whether changes to the parameter require a system restart to take effect, whether the parameter is private or documented, and whether the parameter value can be null.
Parameter metadata is defined in meta parameter XML files, which have the file extension .pml and are located in the ariba/parameters/meta directory. You cannot modify or override the parameter metadata in the default configuration, but you can add metadata for custom parameters. This appendix lists the elements and attributes that can appear in meta parameter XML files. The contents of a meta parameter XML file must conform to the DTD file metaParameters.dtd.
<metadata>
The <metadata> element is the outermost tag in a meta parameter XML file. It must contain at least one <parameter> element. For example:
<metadata> <parameter ... /></metadata>
<parameter>
Required? Default value
Attributes
Contains
<parameter>*
Required? Default value
Attributes
name Required (none)
type Required (none)
defaultValue (none)
restartRequired For system parameters: trueFor application parameters: false
privacy documented
nullAllowed false
Contains
<description>?
<properties>?
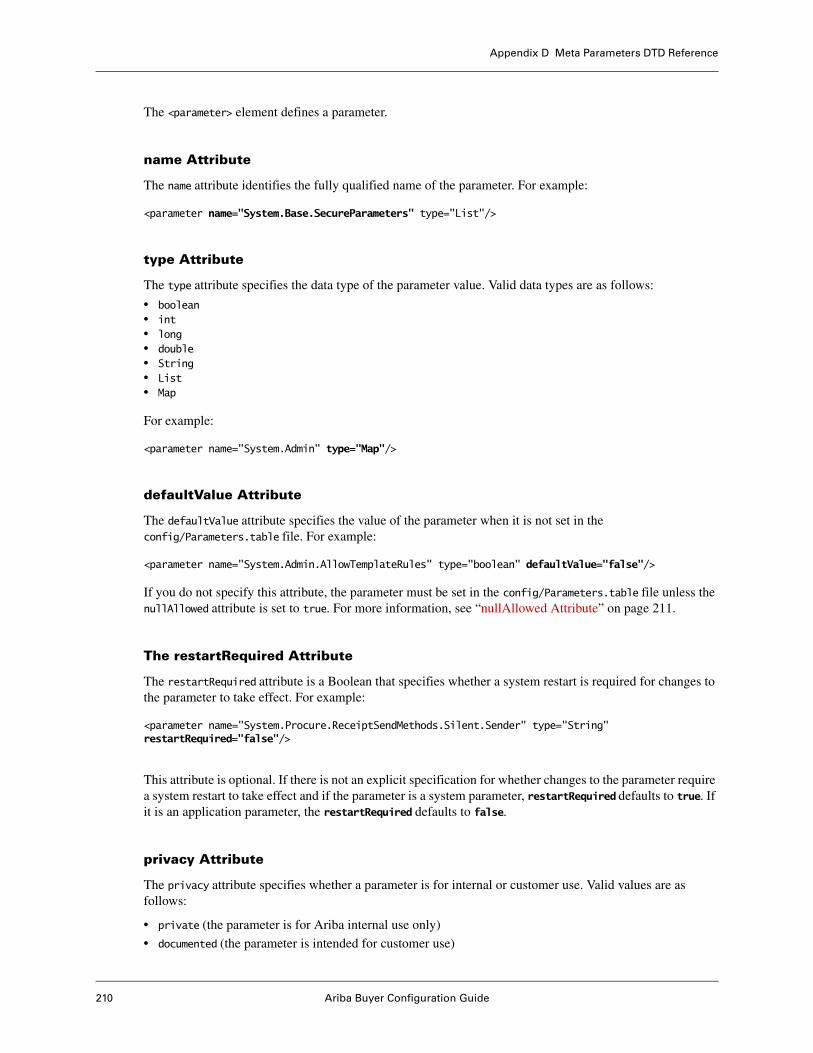
Appendix D Meta Parameters DTD Reference
210 Ariba Buyer Configuration Guide
The <parameter> element defines a parameter.
name Attribute
The name attribute identifies the fully qualified name of the parameter. For example:
<parameter name="System.Base.SecureParameters" type="List"/>
type Attribute
The type attribute specifies the data type of the parameter value. Valid data types are as follows:
• boolean• int• long• double• String• List• Map
For example:
<parameter name="System.Admin" type="Map"/>
defaultValue Attribute
The defaultValue attribute specifies the value of the parameter when it is not set in the config/Parameters.table file. For example:
<parameter name="System.Admin.AllowTemplateRules" type="boolean" defaultValue="false"/>
If you do not specify this attribute, the parameter must be set in the config/Parameters.table file unless the nullAllowed attribute is set to true. For more information, see “nullAllowed Attribute” on page 211.
The restartRequired Attribute
The restartRequired attribute is a Boolean that specifies whether a system restart is required for changes to the parameter to take effect. For example:
<parameter name="System.Procure.ReceiptSendMethods.Silent.Sender" type="String" restartRequired="false"/>
This attribute is optional. If there is not an explicit specification for whether changes to the parameter require a system restart to take effect and if the parameter is a system parameter, restartRequired defaults to true. If it is an application parameter, the restartRequired defaults to false.
privacy Attribute
The privacy attribute specifies whether a parameter is for internal or customer use. Valid values are as follows:
• private (the parameter is for Ariba internal use only)
• documented (the parameter is intended for customer use)
Ariba Buyer Configuration Guide 211
Appendix D Meta Parameters DTD Reference
For example:
<parameter name="System.Base.SecureParameters" type="List" privacy="private"/>
The privacy of a parameter does not relate to its presence in the config/Parameters.table file. For example, a private parameter might appear in the file and a documented parameter might not appear in the file.
nullAllowed Attribute
The nullAllowed attribute is a Boolean that specifies whether a parameter can have a null value. For example:
<parameter name="Application.Contract.MasterAgreement.ContractERPSendMethodName" type="String" nullAllowed="true"/>
When this attribute is set to true, the parameter does not need to be set in the config/Parameters.table file.
This attribute is valid only when the type attribute is set to String, Date, List, or Map. It is overridden if the defaultValue attribute is specified. For more information, see “defaultValue Attribute” on page 210.
For more information on parameters, see .pml files located in the ariba/parameters/meta directory and the Parametersdoc available in the Help@ariba documentation site for administrators:
To read reference information on Ariba configuration parameters:
1 In Ariba Administrator, choose Help > Guides.
2 Click the Ariba Buyer Parametersdoc link located under Reference Documents.
3 Click the name of a parameter in the left-hand navigation pane to see reference information for that parameter.
You can use the links in the upper left corner of the reference to display All Parameters, or only Application or System parameters.
Appendix D Meta Parameters DTD Reference
212 Ariba Buyer Configuration Guide
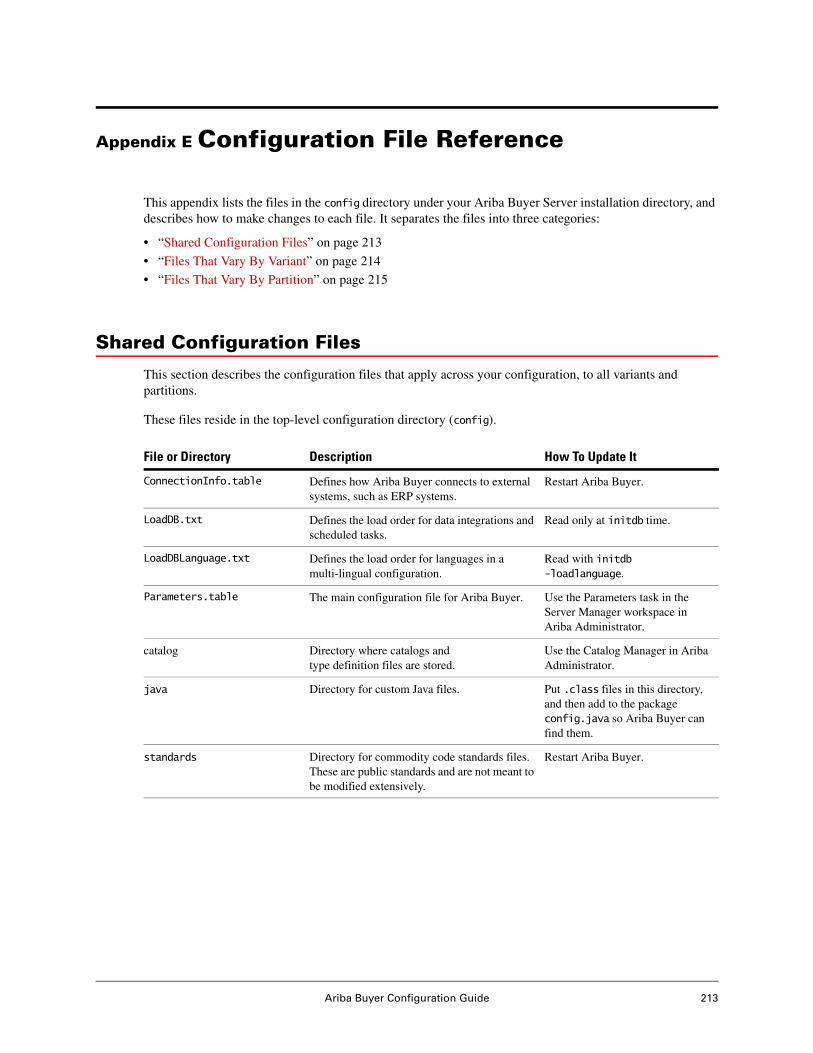
Ariba Buyer Configuration Guide 213
Appendix E Configuration File Reference
This appendix lists the files in the config directory under your Ariba Buyer Server installation directory, and describes how to make changes to each file. It separates the files into three categories:
• “Shared Configuration Files” on page 213
• “Files That Vary By Variant” on page 214
• “Files That Vary By Partition” on page 215
Shared Configuration Files
This section describes the configuration files that apply across your configuration, to all variants and partitions.
These files reside in the top-level configuration directory (config).
File or Directory Description How To Update It
ConnectionInfo.table Defines how Ariba Buyer connects to external systems, such as ERP systems.
Restart Ariba Buyer.
LoadDB.txt Defines the load order for data integrations and scheduled tasks.
Read only at initdb time.
LoadDBLanguage.txt Defines the load order for languages in a multi-lingual configuration.
Read with initdb -loadlanguage.
Parameters.table The main configuration file for Ariba Buyer. Use the Parameters task in the Server Manager workspace in Ariba Administrator.
catalog Directory where catalogs and type definition files are stored.
Use the Catalog Manager in Ariba Administrator.
java Directory for custom Java files. Put .class files in this directory, and then add to the package config.java so Ariba Buyer can find them.
standards Directory for commodity code standards files. These are public standards and are not meant to be modified extensively.
Restart Ariba Buyer.

Files That Vary By Variant Appendix E Configuration File Reference
214 Ariba Buyer Configuration Guide
Files That Vary By Variant
This section describes the configuration files that apply only to a particular variant. In a typical configuration, these files are located in the directory config/variants/variant, where variant is the name of the variant.
File or Directory Description How To Update It
admin
ObjectManager.acf Controls the appearance and behavior of object managers in Ariba Administrator.
If ReReadFiles is set to false, restart Ariba Buyer.
If ReReadFiles is set to true, log out and log back in to Ariba Buyer.
AdminConfig.acf Controls the appearance and behavior of workspaces and tasks in Ariba Administrator.
If ReReadFiles is set to false, restart Ariba Buyer.
If ReReadFiles is set to true, log out and log back in to Ariba Buyer.
data
*csv CSV data files for data that is not partitioned. Most data is by partition. Only a few files reside here.
Run the integration event from Ariba Administrator.
extensions
*aml Metadata XML extension files.
Restart Ariba Buyer or run ../bin/simplemigrator.
messages
MessageDefinition.table Configuration file that describes the integration events for a variant.
Restart Ariba Buyer.
rules
PurchaseOrderRules.jsRequistionRules.jsUserProfileRules.js...
JavaScript files for approval rules. Use the Rule Editor in Ariba Administrator.
wizards
*./*.afr
*./*.awz
Directory for each wizard in Ariba Buyer. Restart Ariba Buyer.
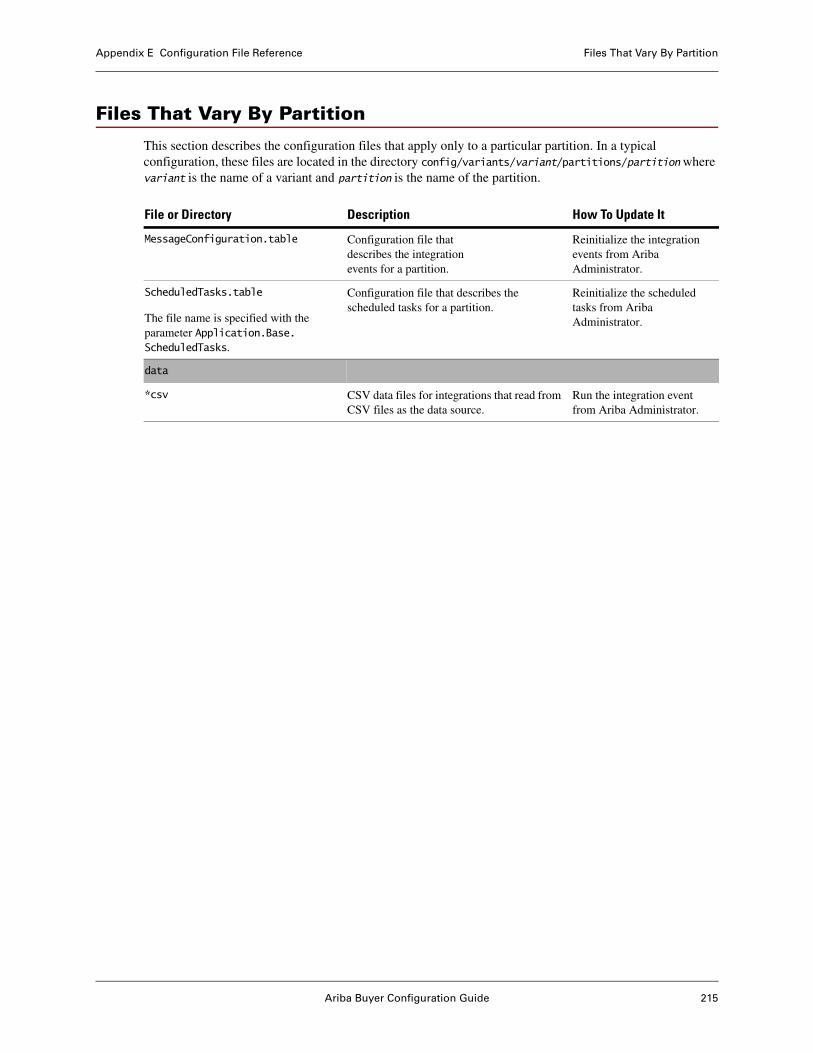
Ariba Buyer Configuration Guide 215
Appendix E Configuration File Reference Files That Vary By Partition
Files That Vary By Partition
This section describes the configuration files that apply only to a particular partition. In a typical configuration, these files are located in the directory config/variants/variant/partitions/partition where variant is the name of a variant and partition is the name of the partition.
File or Directory Description How To Update It
MessageConfiguration.table Configuration file that describes the integration events for a partition.
Reinitialize the integration events from Ariba Administrator.
ScheduledTasks.table
The file name is specified with the parameter Application.Base.ScheduledTasks.
Configuration file that describes the scheduled tasks for a partition.
Reinitialize the scheduled tasks from Ariba Administrator.
data
*csv CSV data files for integrations that read from CSV files as the data source.
Run the integration event from Ariba Administrator.
Files That Vary By Partition Appendix E Configuration File Reference
216 Ariba Buyer Configuration Guide
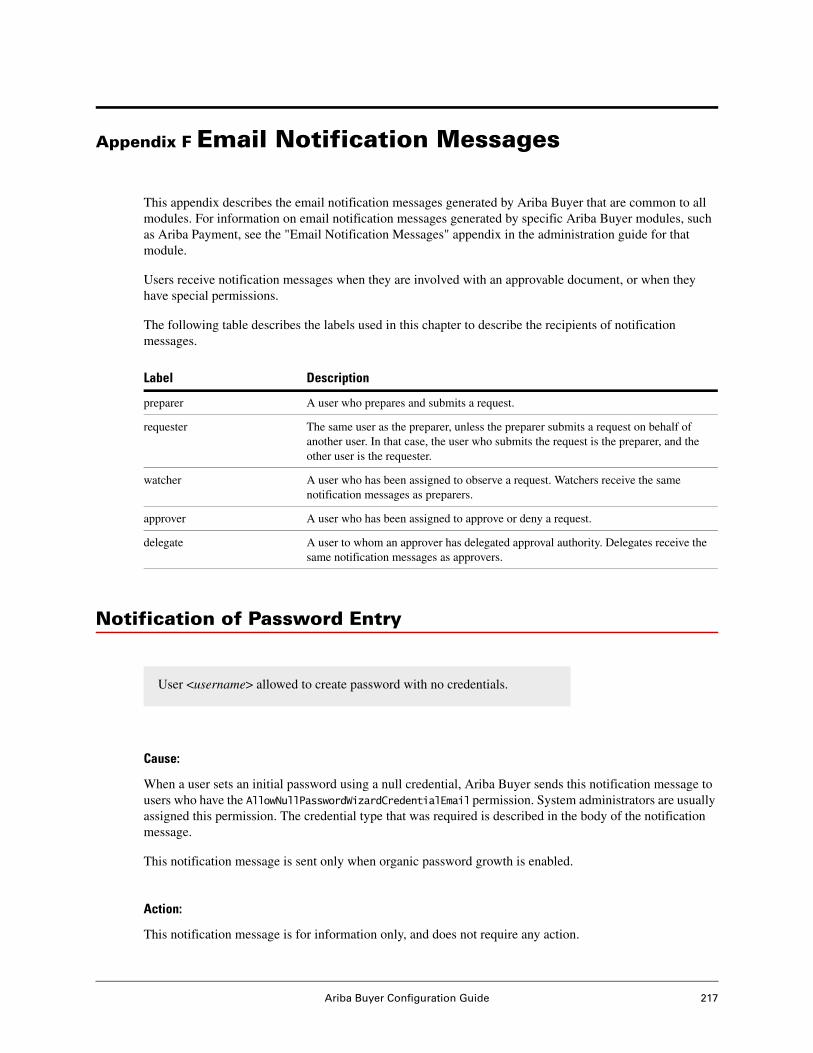
Ariba Buyer Configuration Guide 217
Appendix F Email Notification Messages
This appendix describes the email notification messages generated by Ariba Buyer that are common to all modules. For information on email notification messages generated by specific Ariba Buyer modules, such as Ariba Payment, see the "Email Notification Messages" appendix in the administration guide for that module.
Users receive notification messages when they are involved with an approvable document, or when they have special permissions.
The following table describes the labels used in this chapter to describe the recipients of notification messages.
Notification of Password Entry
Cause:
When a user sets an initial password using a null credential, Ariba Buyer sends this notification message to users who have the AllowNullPasswordWizardCredentialEmail permission. System administrators are usually assigned this permission. The credential type that was required is described in the body of the notification message.
This notification message is sent only when organic password growth is enabled.
Action:
This notification message is for information only, and does not require any action.
Label Description
preparer A user who prepares and submits a request.
requester The same user as the preparer, unless the preparer submits a request on behalf of another user. In that case, the user who submits the request is the preparer, and the other user is the requester.
watcher A user who has been assigned to observe a request. Watchers receive the same notification messages as preparers.
approver A user who has been assigned to approve or deny a request.
delegate A user to whom an approver has delegated approval authority. Delegates receive the same notification messages as approvers.
User <username> allowed to create password with no credentials.
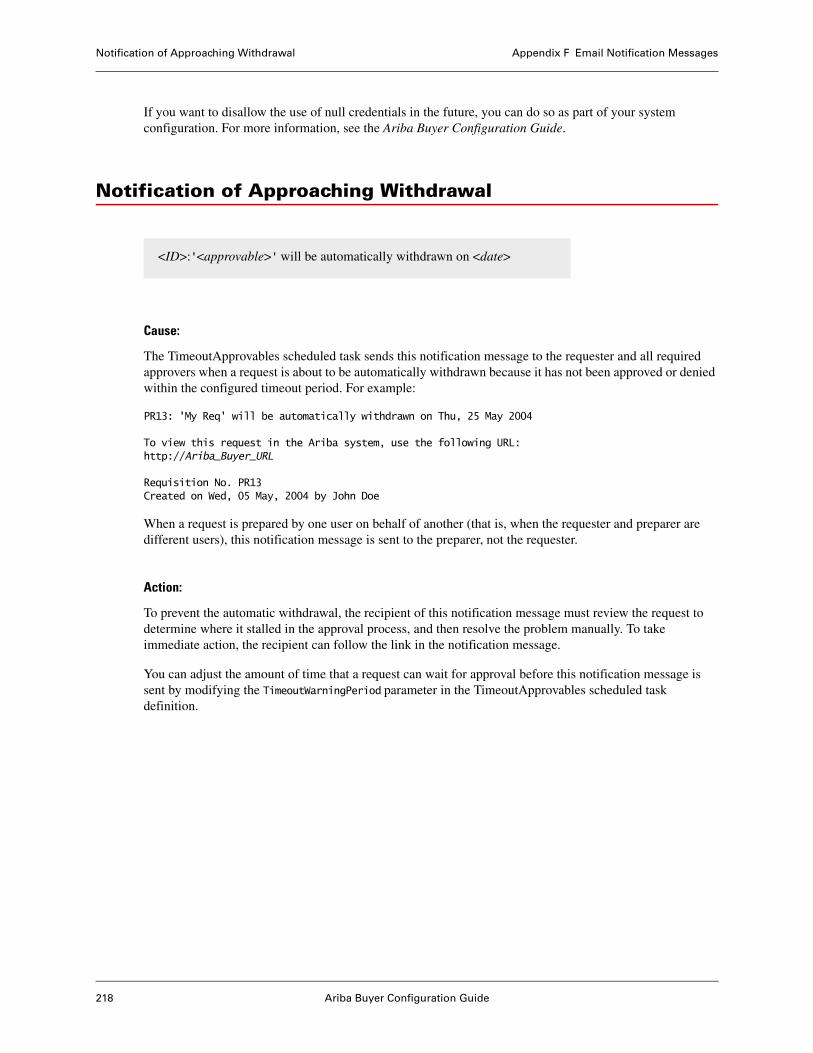
Notification of Approaching Withdrawal Appendix F Email Notification Messages
218 Ariba Buyer Configuration Guide
If you want to disallow the use of null credentials in the future, you can do so as part of your system configuration. For more information, see the Ariba Buyer Configuration Guide.
Notification of Approaching Withdrawal
Cause:
The TimeoutApprovables scheduled task sends this notification message to the requester and all required approvers when a request is about to be automatically withdrawn because it has not been approved or denied within the configured timeout period. For example:
PR13: 'My Req' will be automatically withdrawn on Thu, 25 May 2004
To view this request in the Ariba system, use the following URL: http://Ariba_Buyer_URL
Requisition No. PR13Created on Wed, 05 May, 2004 by John Doe
When a request is prepared by one user on behalf of another (that is, when the requester and preparer are different users), this notification message is sent to the preparer, not the requester.
Action:
To prevent the automatic withdrawal, the recipient of this notification message must review the request to determine where it stalled in the approval process, and then resolve the problem manually. To take immediate action, the recipient can follow the link in the notification message.
You can adjust the amount of time that a request can wait for approval before this notification message is sent by modifying the TimeoutWarningPeriod parameter in the TimeoutApprovables scheduled task definition.
<ID>:'<approvable>' will be automatically withdrawn on <date>
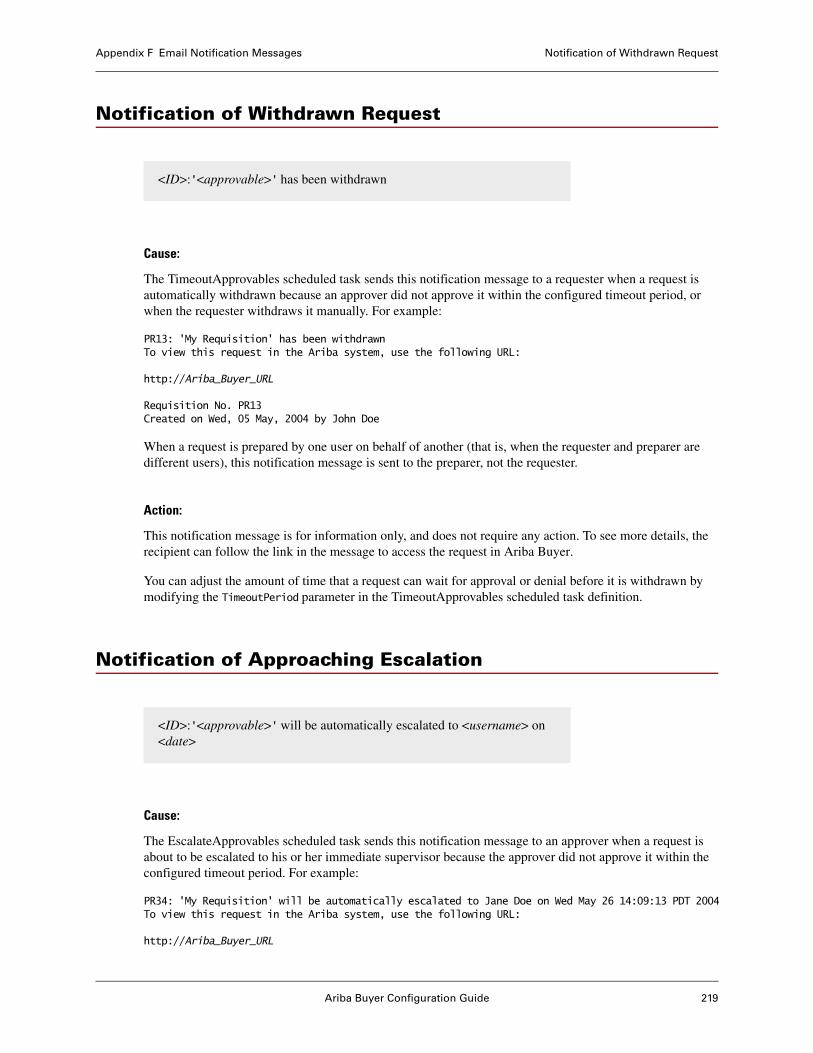
Ariba Buyer Configuration Guide 219
Appendix F Email Notification Messages Notification of Withdrawn Request
Notification of Withdrawn Request
Cause:
The TimeoutApprovables scheduled task sends this notification message to a requester when a request is automatically withdrawn because an approver did not approve it within the configured timeout period, or when the requester withdraws it manually. For example:
PR13: 'My Requisition' has been withdrawnTo view this request in the Ariba system, use the following URL:
http://Ariba_Buyer_URL
Requisition No. PR13Created on Wed, 05 May, 2004 by John Doe
When a request is prepared by one user on behalf of another (that is, when the requester and preparer are different users), this notification message is sent to the preparer, not the requester.
Action:
This notification message is for information only, and does not require any action. To see more details, the recipient can follow the link in the message to access the request in Ariba Buyer.
You can adjust the amount of time that a request can wait for approval or denial before it is withdrawn by modifying the TimeoutPeriod parameter in the TimeoutApprovables scheduled task definition.
Notification of Approaching Escalation
Cause:
The EscalateApprovables scheduled task sends this notification message to an approver when a request is about to be escalated to his or her immediate supervisor because the approver did not approve it within the configured timeout period. For example:
PR34: 'My Requisition' will be automatically escalated to Jane Doe on Wed May 26 14:09:13 PDT 2004To view this request in the Ariba system, use the following URL:
http://Ariba_Buyer_URL
<ID>:'<approvable>' has been withdrawn
<ID>:'<approvable>' will be automatically escalated to <username> on <date>

Notification of Escalation To You Appendix F Email Notification Messages
220 Ariba Buyer Configuration Guide
Requisition No. PR34 Created on Wed, 05 May, 2004 by John Doe
Action:
To prevent the automatic escalation, the recipient of this notification message must take action—approve or deny the request—before the scheduled escalation. To take immediate action, the recipient can follow the link in the notification message. The recipient can also log in to Ariba Buyer and click Approve on the Ariba Buyer Home Page.
You can adjust the amount of time that a request can wait for approval before this notification message is sent by modifying the EscalateWarningPeriod parameter in the EscalateApprovables scheduled task definition.
Notification of Escalation To You
Cause:
The EscalateApprovables scheduled task sends this notification message to an approver when a request is escalated to him or her. For example:
PR-2.0-1349a-301: 'My Requisition' has been automatically escalated to you from Jane Doe
http://Ariba_Buyer_URL
Requester: John Doe
Action:
To take immediate action, the recipient can follow the link in the notification message. The recipient can also log in to Ariba Buyer and click Approve on the Ariba Buyer Home Page.
You can adjust the amount of time that a request can wait for approval before it is escalated by modifying the EscalatePeriod parameter in the EscalateApprovables scheduled task definition.
<ID>:'<approvable>' has been automatically escalated to you from <username>
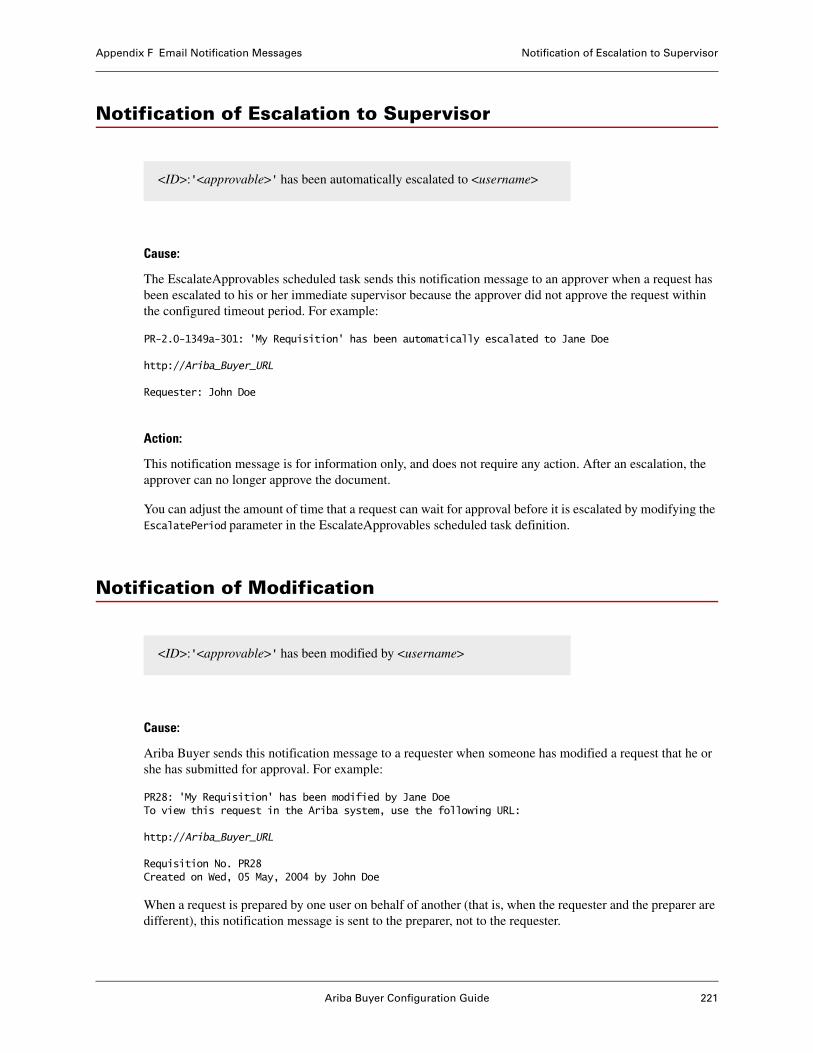
Ariba Buyer Configuration Guide 221
Appendix F Email Notification Messages Notification of Escalation to Supervisor
Notification of Escalation to Supervisor
Cause:
The EscalateApprovables scheduled task sends this notification message to an approver when a request has been escalated to his or her immediate supervisor because the approver did not approve the request within the configured timeout period. For example:
PR-2.0-1349a-301: 'My Requisition' has been automatically escalated to Jane Doe
http://Ariba_Buyer_URL
Requester: John Doe
Action:
This notification message is for information only, and does not require any action. After an escalation, the approver can no longer approve the document.
You can adjust the amount of time that a request can wait for approval before it is escalated by modifying the EscalatePeriod parameter in the EscalateApprovables scheduled task definition.
Notification of Modification
Cause:
Ariba Buyer sends this notification message to a requester when someone has modified a request that he or she has submitted for approval. For example:
PR28: 'My Requisition' has been modified by Jane DoeTo view this request in the Ariba system, use the following URL:
http://Ariba_Buyer_URL
Requisition No. PR28Created on Wed, 05 May, 2004 by John Doe
When a request is prepared by one user on behalf of another (that is, when the requester and the preparer are different), this notification message is sent to the preparer, not to the requester.
<ID>:'<approvable>' has been automatically escalated to <username>
<ID>:'<approvable>' has been modified by <username>
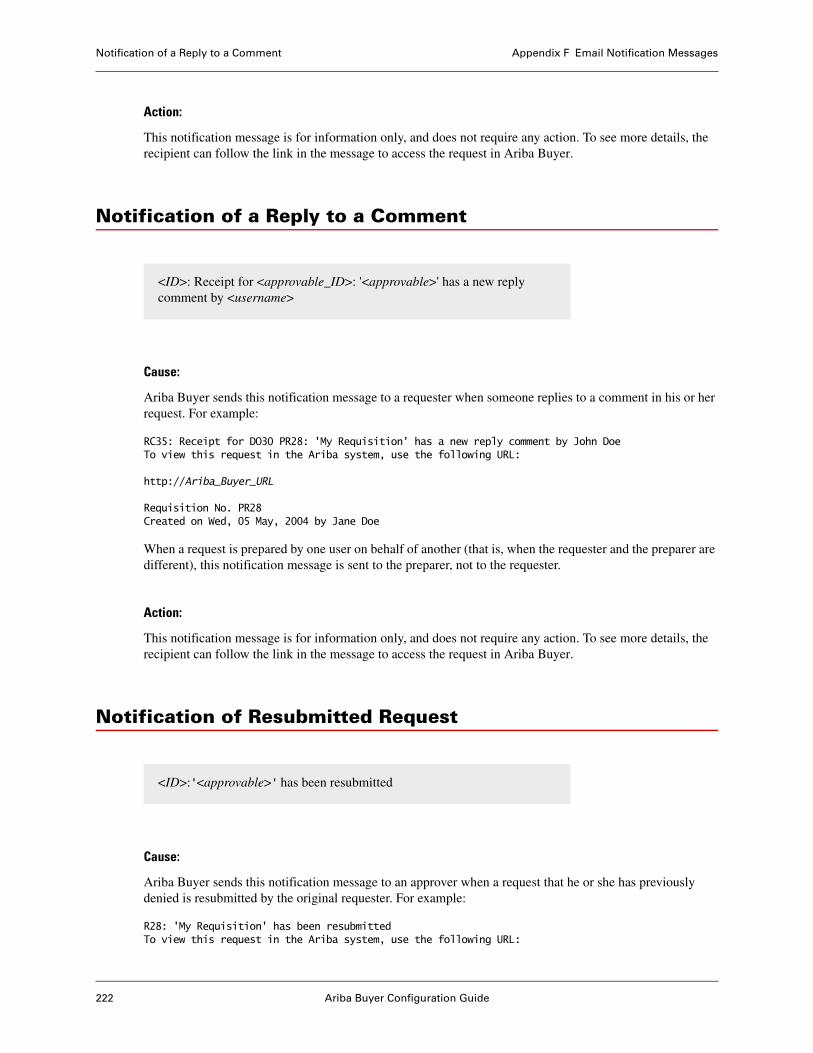
Notification of a Reply to a Comment Appendix F Email Notification Messages
222 Ariba Buyer Configuration Guide
Action:
This notification message is for information only, and does not require any action. To see more details, the recipient can follow the link in the message to access the request in Ariba Buyer.
Notification of a Reply to a Comment
Cause:
Ariba Buyer sends this notification message to a requester when someone replies to a comment in his or her request. For example:
RC35: Receipt for DO30 PR28: 'My Requisition' has a new reply comment by John DoeTo view this request in the Ariba system, use the following URL:
http://Ariba_Buyer_URL
Requisition No. PR28 Created on Wed, 05 May, 2004 by Jane Doe
When a request is prepared by one user on behalf of another (that is, when the requester and the preparer are different), this notification message is sent to the preparer, not to the requester.
Action:
This notification message is for information only, and does not require any action. To see more details, the recipient can follow the link in the message to access the request in Ariba Buyer.
Notification of Resubmitted Request
Cause:
Ariba Buyer sends this notification message to an approver when a request that he or she has previously denied is resubmitted by the original requester. For example:
R28: 'My Requisition' has been resubmittedTo view this request in the Ariba system, use the following URL:
<ID>: Receipt for <approvable_ID>: '<approvable>' has a new reply comment by <username>
<ID>:'<approvable>' has been resubmitted

Ariba Buyer Configuration Guide 223
Appendix F Email Notification Messages Notification of Approval
http://Ariba_Buyer_URL
Requisition No. R28 Created on Wed, 05 May, 2004 by Jane Doe
Action:
To review the request immediately, the recipient can follow the link in the notification message. The recipient can also log in to Ariba Buyer and click Approve on the Ariba Buyer Home Page.
Notification of Approval
Cause:
Ariba Buyer sends this notification to a requester when an approver in the approval flow approves his or her request. For example:
For example:
PR173265: 'My Requisition' has been approved by John DoeTo view this request in the Ariba system, use the following URL:
http://Ariba_Buyer_URL
Requisition No. PR173265Created on Wed, 05 May, 2004 by Jane Doe
When a request is prepared by one user on behalf of another (that is, when the requester and the preparer are different), this notification message is sent to the preparer, not to the requester.
Action:
This notification message is for information only, and does not require any action. To see more details, the recipient can follow the link in the message to access the request in Ariba Buyer.
<ID>:'<approvable>' has been approved by <username>
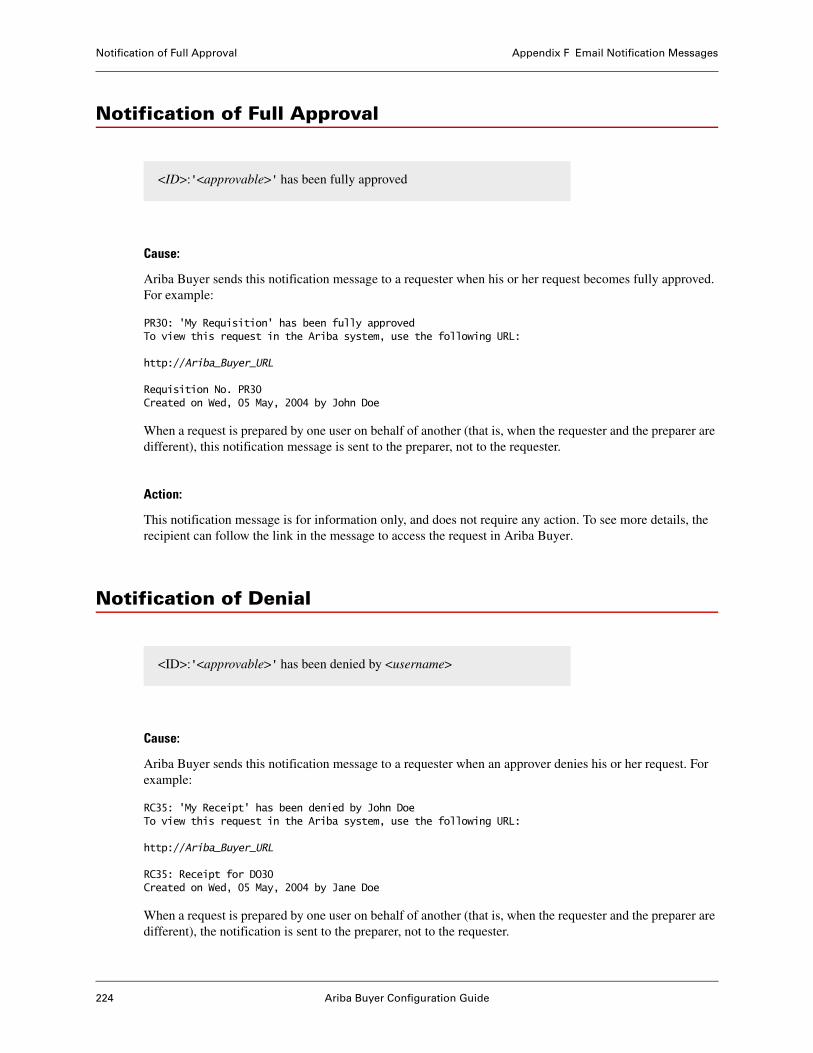
Notification of Full Approval Appendix F Email Notification Messages
224 Ariba Buyer Configuration Guide
Notification of Full Approval
Cause:
Ariba Buyer sends this notification message to a requester when his or her request becomes fully approved. For example:
PR30: 'My Requisition' has been fully approved To view this request in the Ariba system, use the following URL:
http://Ariba_Buyer_URL
Requisition No. PR30Created on Wed, 05 May, 2004 by John Doe
When a request is prepared by one user on behalf of another (that is, when the requester and the preparer are different), this notification message is sent to the preparer, not to the requester.
Action:
This notification message is for information only, and does not require any action. To see more details, the recipient can follow the link in the message to access the request in Ariba Buyer.
Notification of Denial
Cause:
Ariba Buyer sends this notification message to a requester when an approver denies his or her request. For example:
RC35: 'My Receipt' has been denied by John DoeTo view this request in the Ariba system, use the following URL:
http://Ariba_Buyer_URL
RC35: Receipt for DO30Created on Wed, 05 May, 2004 by Jane Doe
When a request is prepared by one user on behalf of another (that is, when the requester and the preparer are different), the notification is sent to the preparer, not to the requester.
<ID>:'<approvable>' has been fully approved
<ID>:'<approvable>' has been denied by <username>
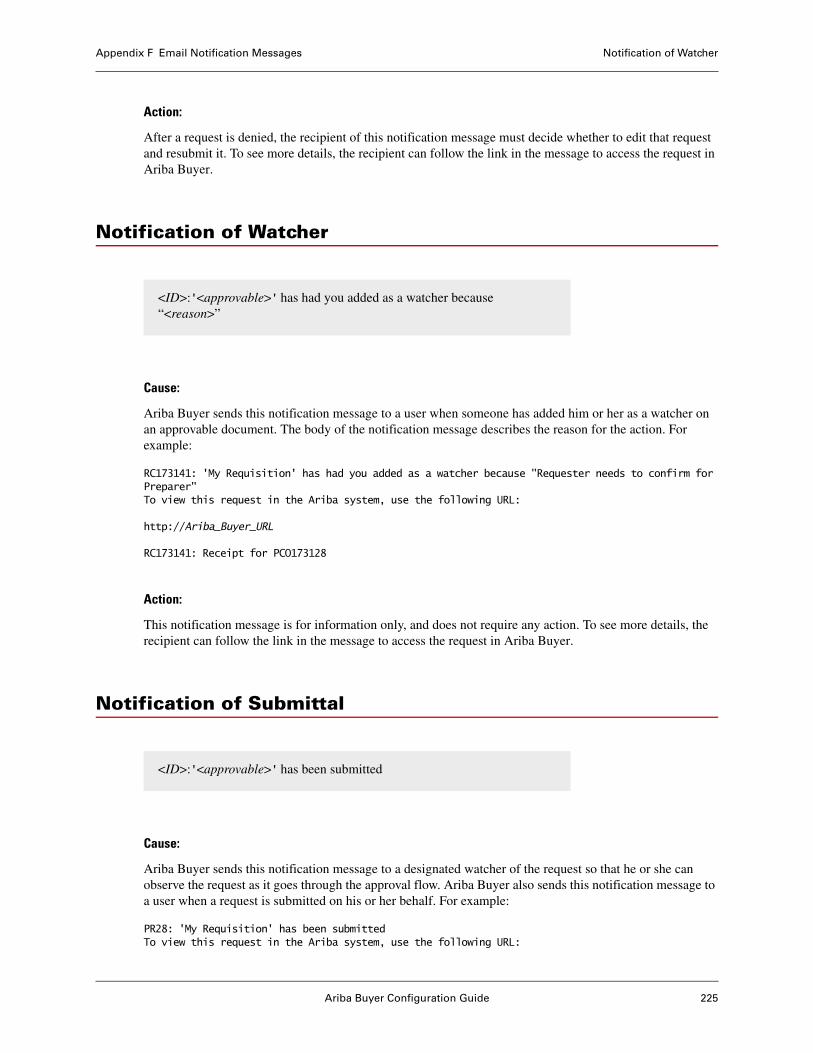
Ariba Buyer Configuration Guide 225
Appendix F Email Notification Messages Notification of Watcher
Action:
After a request is denied, the recipient of this notification message must decide whether to edit that request and resubmit it. To see more details, the recipient can follow the link in the message to access the request in Ariba Buyer.
Notification of Watcher
Cause:
Ariba Buyer sends this notification message to a user when someone has added him or her as a watcher on an approvable document. The body of the notification message describes the reason for the action. For example:
RC173141: 'My Requisition' has had you added as a watcher because "Requester needs to confirm for Preparer"To view this request in the Ariba system, use the following URL:
http://Ariba_Buyer_URL
RC173141: Receipt for PCO173128
Action:
This notification message is for information only, and does not require any action. To see more details, the recipient can follow the link in the message to access the request in Ariba Buyer.
Notification of Submittal
Cause:
Ariba Buyer sends this notification message to a designated watcher of the request so that he or she can observe the request as it goes through the approval flow. Ariba Buyer also sends this notification message to a user when a request is submitted on his or her behalf. For example:
PR28: 'My Requisition' has been submittedTo view this request in the Ariba system, use the following URL:
<ID>:'<approvable>' has had you added as a watcher because “<reason>”
<ID>:'<approvable>' has been submitted
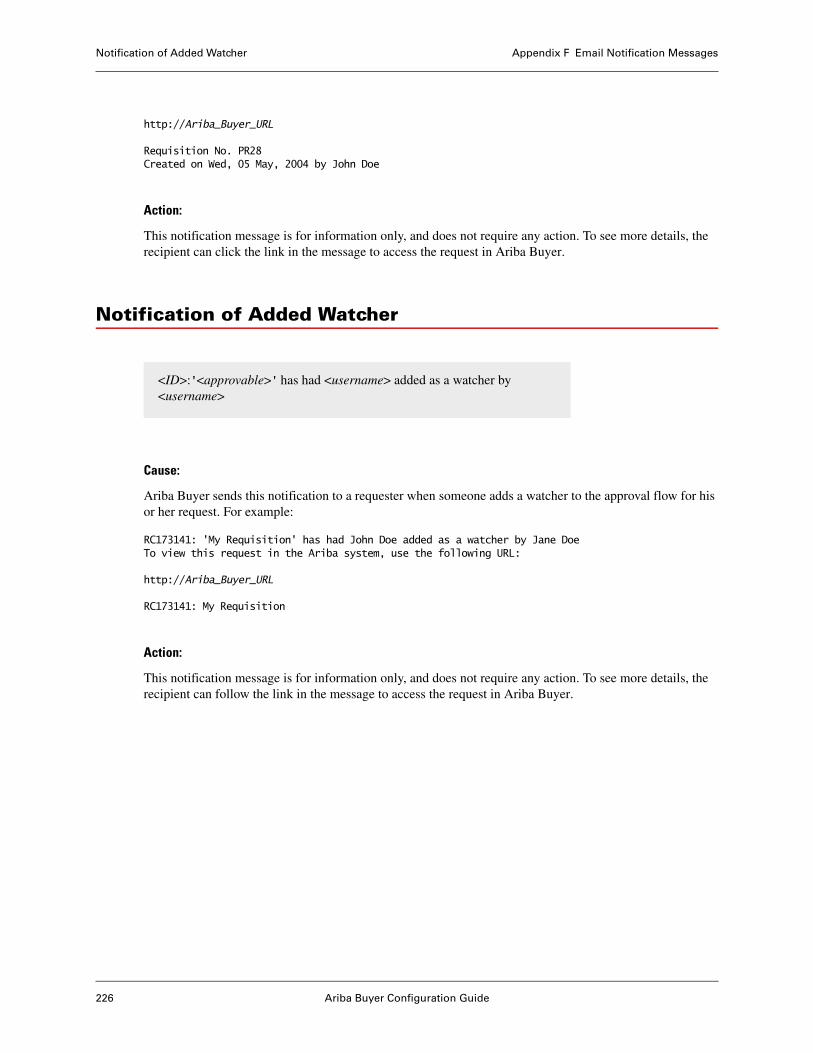
Notification of Added Watcher Appendix F Email Notification Messages
226 Ariba Buyer Configuration Guide
http://Ariba_Buyer_URL
Requisition No. PR28Created on Wed, 05 May, 2004 by John Doe
Action:
This notification message is for information only, and does not require any action. To see more details, the recipient can click the link in the message to access the request in Ariba Buyer.
Notification of Added Watcher
Cause:
Ariba Buyer sends this notification to a requester when someone adds a watcher to the approval flow for his or her request. For example:
RC173141: 'My Requisition' has had John Doe added as a watcher by Jane DoeTo view this request in the Ariba system, use the following URL:
http://Ariba_Buyer_URL
RC173141: My Requisition
Action:
This notification message is for information only, and does not require any action. To see more details, the recipient can follow the link in the message to access the request in Ariba Buyer.
<ID>:'<approvable>' has had <username> added as a watcher by <username>
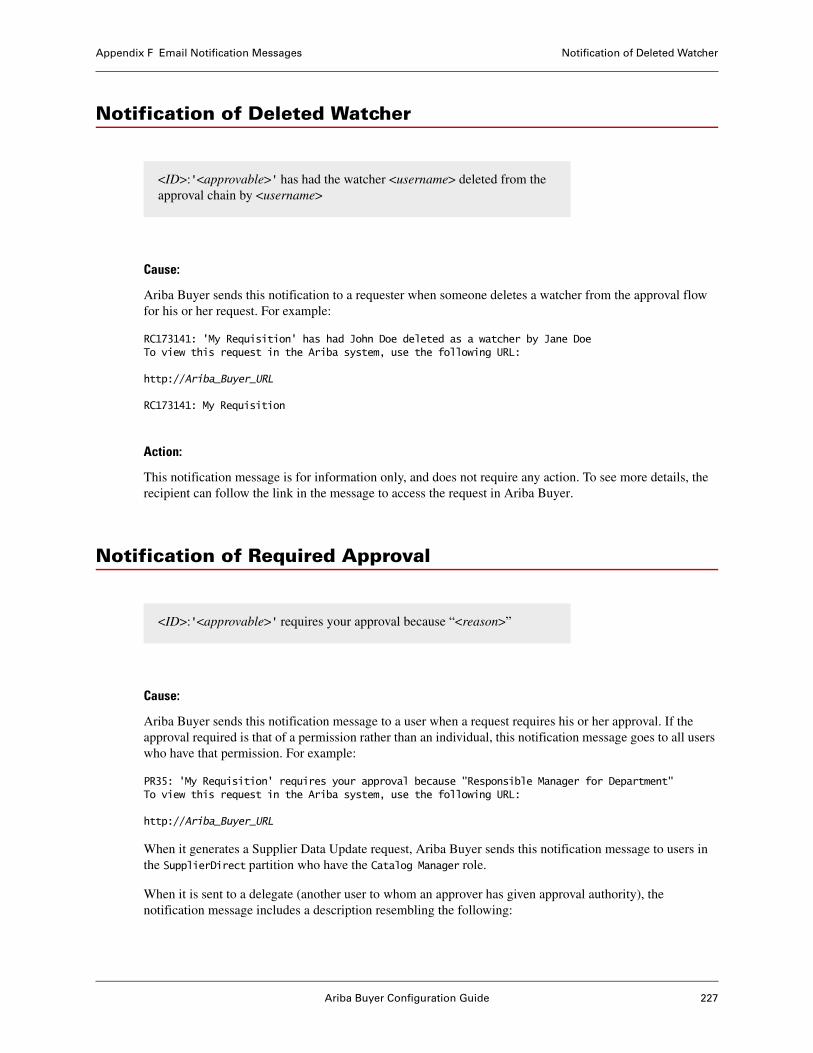
Ariba Buyer Configuration Guide 227
Appendix F Email Notification Messages Notification of Deleted Watcher
Notification of Deleted Watcher
Cause:
Ariba Buyer sends this notification to a requester when someone deletes a watcher from the approval flow for his or her request. For example:
RC173141: 'My Requisition' has had John Doe deleted as a watcher by Jane DoeTo view this request in the Ariba system, use the following URL:
http://Ariba_Buyer_URL
RC173141: My Requisition
Action:
This notification message is for information only, and does not require any action. To see more details, the recipient can follow the link in the message to access the request in Ariba Buyer.
Notification of Required Approval
Cause:
Ariba Buyer sends this notification message to a user when a request requires his or her approval. If the approval required is that of a permission rather than an individual, this notification message goes to all users who have that permission. For example:
PR35: 'My Requisition' requires your approval because "Responsible Manager for Department"To view this request in the Ariba system, use the following URL:
http://Ariba_Buyer_URL
When it generates a Supplier Data Update request, Ariba Buyer sends this notification message to users in the SupplierDirect partition who have the Catalog Manager role.
When it is sent to a delegate (another user to whom an approver has given approval authority), the notification message includes a description resembling the following:
<ID>:'<approvable>' has had the watcher <username> deleted from the approval chain by <username>
<ID>:'<approvable>' requires your approval because “<reason>”
Notification of Added Approver Appendix F Email Notification Messages
228 Ariba Buyer Configuration Guide
John Doe has been asked to act on the following request, but has delegated approval authority to you temporarily. To fill in for John Doe, please use one of the links below to log into the Ariba Buyer, to act as a temporary delegate.
Users who have the NoApprovalNotification permission do not receive this notification message. The NoApprovalNotification permission turns off notification messages to users when their approval is required.
Action:
To take immediate action, the recipient can follow the link in the notification message. The recipient can also log in to Ariba Buyer and choose Approve on the Ariba Buyer Home Page.
Notification of Added Approver
Cause:
Ariba Buyer sends this notification to a requester when someone adds an approver to the approval flow for his or her request. For example:
PR15: 'My Requisition' has had the approver John Doe added to the approval chain by Jane DoeTo view this request in the Ariba system, use the following URL:
http://Ariba_Buyer_URL
Requisition No. PR15Created on Wed, 05 May, 2004 by John Doe
When a request is prepared by one user on behalf of another (that is, when the requester and the preparer are different), this notification message is sent to the preparer, not to the requester.
Action:
This notification message is for information only, and does not require any action. To see more details, the recipient can follow the link in the message to access the request in Ariba Buyer.
<ID>:'<approvable>' has had <username> added as an approver by <username>
Ariba Buyer Configuration Guide 229
Appendix F Email Notification Messages Notification of Deleted Approver
Notification of Deleted Approver
Cause:
Ariba Buyer sends this notification to a requester when someone deletes an approver from the approval flow for his or her request. For example:
PR15: 'My Requisition' has had the approver John Doe deleted from the approval chain by Jane DoeTo view this request in the Ariba system, use the following URL:
http://Ariba_Buyer_URL
Requisition No. PR15Created on Wed, 05 May, 2004 by John Doe
Action:
This notification message is for information only, and does not require any action. To see more details, the recipient can follow the link in the message to access the request in Ariba Buyer.
Notification of Scheduled Task Failure
Cause:
The CleanDatabaseLog and CleanAuditDatabaseLog scheduled tasks send this notification message to users who have a specified permission when Ariba Buyer is unable to delete non-audit or audit messages from the database, and when it cannot write deleted messages to the specified archive file.
The body of the notification message describes the type of error that was encountered. For example:
There were errors writing to the archive file.
Check that the location is valid, there is enough disk space, and system permissions allow writing to this location.
The permission to which this notification message is sent is specified in the NotifyErrorsPermission parameter and the archive file name is specified in the ArchiveDirectory parameter in the scheduled task definition. If an invalid permission is specified in NotifyErrorsPermission, this notification is sent to users who have the SystemAdministrator permission.
<ID>:'<approvable>' has had the approver <username> deleted from the approval chain by <username>
Scheduled task failure.
Notification of Full Milestone Verification Appendix F Email Notification Messages
230 Ariba Buyer Configuration Guide
Action:
The body of the notification message includes suggested actions to correct the problem.
Notification of Full Milestone Verification
Cause:
This notification is sent to a requester when a milestone tracker has been verified and approved. For example:
MT32: 'Milestone: Milestone#1' has been verified and approvedTo view this request in the Ariba system, use the following URL:
http://Ariba_Buyer_URL
MT32: Milestone: Milestone#1
When a request is prepared by one user on behalf of another (that is, when the requester and the preparer are different), this notification message is sent to the preparer, not to the requester.
Action:
This notification message is for information only, and does not require any action. To see more details, the recipient can follow the link in the message to access the request in Ariba Buyer.
Notification of Required Milestone Verification
Cause:
The MilestoneNotifier scheduled task sends this notification message to the verifier of a milestone tracker a specified number of days before the milestone completion due date. For example:
MT24: 'Milestone#1' requires your verification because "Milestone verifier must verify".To view this request in the Ariba system, use the following URL:
<ID>: '<milestone>' Milestone verified
<ID>: <approvable> requires your verification because <reason>.
Ariba Buyer Configuration Guide 231
Appendix F Email Notification Messages Notification of Milestone Verification
http://Ariba_Buyer_URL
MT24: Milestone: Milestone#1
Users specify the number of days before the milestone completion due date to send this notification message when defining the milestone item in the contract request (CR) or requisition.
Action:
The recipient of this notification message should verify the milestone tracker before the milestone completion due date. To take immediate action, the recipient can follow the link in the notification message.
Notification of Milestone Verification
Cause:
This notification is sent to a requester when a milestone tracker has been verified by an approver in the approval flow. For example:
MT32: 'Milestone: Milestone#1' has been verified by Jane Doe.To view this request in the Ariba system, use the following URL:
http://Ariba_Buyer_URL
MT32: Milestone: Milestone#1
When a request is prepared by one user on behalf of another (that is, when the requester and the preparer are different), this notification message is sent to the preparer, not to the requester.
Action:
This notification message is for information only, and does not require any action. To see more details, the recipient can follow the link in the message to access the request in Ariba Buyer.
<ID>: '<milestone>' has been verified by <username>.
Notification of Unknown Supplier Appendix F Email Notification Messages
232 Ariba Buyer Configuration Guide
Notification of Unknown Supplier
Cause:
Ariba Buyer sends this notification message to users who have the SupplierManager permission when it determines that a supplier needs to be added to your Ariba Buyer configuration. This notification can be sent in the following situations:
• When loading a catalog from Ariba Network, if the Ariba Network catalog references a supplier that is not defined in your Ariba Buyer configuration.
• With Catalog Item PunchOut, if the supplier’s organization ID on the PunchOut item is not defined on a partitioned supplier in Ariba Buyer. For more information on Catalog Item PunchOut and loading catalogs from Ariba Network, see the Ariba Spend Management Data Load Guide.
• When Ariba Contract Compliance is integrated with Ariba Category Management, and the supplier selected for a contract in the Ariba Category Management is not defined in your configuration.
The body of the notification message includes the supplier involved, the name of the requester, the title of the request, and the associated partition. If a supplier profile for the new supplier is available, the profile is attached to the notification message.
Action:
The body of the notification message describes the required action, which is to load the new supplier into Ariba Buyer, or add appropriate supplier organization IDs.
Notification of Overdue Unknown Supplier Resolution
Cause:
The UpdateSupplierPendingItems scheduled task sends this notification message when it determines that a supplier in Ariba Buyer is still unknown, after the overdue time limit has been reached.
If the supplier originated from the load of an Ariba Network catalog, the message is sent to users who have the CatalogManager permission.
The overdue time limit is specified by the System.Procure.PendingUnknownSupplierOverdueLimitInDays parameter in the config/Parameters.table file. In the default configuration, this parameter is set to 14 days.
Unknown Supplier
Unknown Supplier Resolution Overdue
Ariba Buyer Configuration Guide 233
Appendix F Email Notification Messages Notification of Unknown Partitioned Supplier Resolution
Action:
The recipient of this notification message can do one of the following:
• Choose to buy the item from a different supplier.
• Ask the Supplier Manager to add the supplier to Ariba Buyer.
Notification of Unknown Partitioned Supplier Resolution
Cause:
The UpdateSupplierPendingItems scheduled task sends this notification message when it determines that the Supplier Manager has resolved an unknown supplier by creating a partitioned supplier.
If the supplier originated from the load of an Ariba Network catalog, the message is sent to users who have the CatalogManager permission.
Action:
In the case of a catalog load from Ariba Network, no action is required.
Notification of Invalid Supplier Locations
Cause:
When a supplier has invalid contact information, the SupplierLocationCheck scheduled task sends this notification message to users who have the SupplierLocationCheckEmail permission. Purchasing managers are usually assigned this permission.
The body of the notification message lists the suppliers and error messages. For example:
15 Phil Brinkley : BRACKNELL: Value does not have an e-mail address.1000018 Sue : LONDON: Value does not have a preferred ordering method.1001034 Charly : LONDON: Value does not have a preferred ordering method.1001055 Anish Badwani : LONDON: Value does not have a preferred ordering method.1001074 Anish Badwani : SAN JOSE: Value does not have a preferred ordering method.1000007 Mike Jones : ODIHAM: Value does not have a preferred ordering method.1000006 John Smith : BRACKNELL: Value does not have a preferred ordering method.
Unknown Partitioned Supplier Resolved
Invalid Supplier Locations
Notification of Import Mapping Failure Appendix F Email Notification Messages
234 Ariba Buyer Configuration Guide
Action:
The purchasing manager (or other administrator) should use the Supplier Manager in Ariba Buyer Administrator to correct the information for the supplier.
For more information on the SupplierLocationCheck scheduled task, see the Ariba Spend Management Data Load Guide.
Note: The Supplier Manager is not appropriate for making changes to supplier information that is pulled from an underlying ERP system through an integration event. If you try to make such changes, you see error messages explaining why you should not overwrite suppliers loaded from an integration event.
Notification of Import Mapping Failure
Cause:
When the MappingLog log listener detects error messages pertaining to PunchOut items with commodity codes that are not mapped correctly, it sends this notification message to users who have the CatalogManager permission. The body of the notification message contains the error messages.
This notification message is sent only if the MappingLog log listener is enabled in the System.Logging section of the config/Parameters.table file.
Note: You can customize the subject of this notification message, and the permission to which it is sent, by setting parameters in the MappingLog log listener definition in config/Parameters.table.
Action:
The catalog manager (or other administrator) should examine the error messages in this notification message to determine the commodity codes that caused the problem.
For information on mapping commodity codes, see the Ariba Spend Management Data Load Guide.
Import Mapping Failure Report
Ariba Buyer Configuration Guide 235
Appendix G Permissions, Roles, and Groups
• “Permissions” on page 235
• “Roles” on page 246
• “Groups” on page 255
Permissions
This section describes the Ariba Buyer best practice permissions in the default configuration.
Note: Unless stated otherwise, this appendix describes a stand-alone Ariba Buyer configuration. If your instance is integrated with other Ariba Spend Management applications, you may see additional permissions, roles and groups. For more information, see the Ariba Upstream Platform Configuration Guide.
AccessibilityEnabled
This permission is for users who require or prefer the accessibility-enabled user interface. This enhanced user interface changes the page layouts and makes navigation easier for users with disabilities, such as vision or motor ability limitations. For example, when this parameter is enabled, large volumes of data will be displayed in multiple pages without scroll bars. The page number is displayed and users can select the page number to view a particular page.
In the default configuration, this permission is not assigned to any users or roles. An administrator assigns this permission to the appropriate users, or users can add the permission manually and would have to get the addition approved by an administrator. In the default configuration, this permission is not assigned to any roles.
ActOnBehalf
This permission authorizes users to initiate a delegation as someone else. In the default configuration, this permission is assigned to the Administrator role. For more information, see the section on acting as another user in the Ariba Spend Management Data Load Guide.
AddApprovalRequest
This permission authorizes users to add approvers to the approval chain for approvable documents. In the default configuration, this permission is assigned to the Edit Approvable role.
AddApprovalRequestER
Users who have this permission are authorized to add approvers to expense report. In the default configuraiton, this permission is assigned to the Executive Approver and Expense Manaer roles.
Permissions Appendix G Permissions, Roles, and Groups
236 Ariba Buyer Configuration Guide
AddApprovalRequestTA
Users who have this permission are authorized to add approvers to a travel authorization. In the default configuraiton, this permission is assigned to the Executive Approver and Expense Manaer roles.
AddCustomInvitedSupplier
Users who have this permission are able to add custom invited suppliers to a collaborative requisition. In the default configuraiton, this permission is assigned to the Add Custom Invited Supplier role.
AdjustExpenseReport
Users who have this permission are able to adjust or reject individual expense items. In the default configuraiton, this permission is not assigned to any role.
AdjustExpenseReportNotAllowed
Users who have this permission are prevented from adjusting or rejecting individual expense items. In the default configuraiton, this permission is not assigned to any role.
AdvancedAdmin
This permission authorizes users to perform advanced administration tasks. For example, in the default Ariba Buyer configuration, you must have this permission to run the VersionCommodityCodeDomainNameTask scheduled task. In the default configuration, this permission is assigned to the Administrator role.
AdvancedShipNoticeErrorNotification
Users who have this permission receive Notification 75 (Notification of Ship Notice Error). In the default configuraiton, this permission is assigned to the Purchasing Administrator and Receiving Manager roles.
AdvancedShipNoticeSuccessNotification
Users who have this permission receive Notification 78 (Notification of Ship Notice Received) when a ship notice message for a purchase order is successfully received from Ariba Network. In the default configuraiton, this permission is assigned to the Purchasing Administrator and Receiving Manager roles.
AllowNullPasswordWizardCredentialEmail
This permission is used for notifications and applies only to configurations using organic password growth to allow users to set their own new passwords after supplying appropriate credentials. Users who have this permission receive Notification 10 (Notification of Password Entry) when a new user logs in to the Password Entry Wizard to set an initial password and uses a null credential as verification.
AML Uploader
This permission authorizes users to upload AML files. In the default configuration, this permission is assigned to the Administrator and AMLEditor roles.
Ariba Buyer Configuration Guide 237
Appendix G Permissions, Roles, and Groups Permissions
AnalysisAdmin
This permission gives users access to the Ariba Administrator Reporting Manager, which allows users to perform reporting-related administrative tasks in Ariba Analysis. Users with this permission can also debug slow-running reports using the Show Report Query link on the Refine Data page of the report wizard. In the default configuration, this permission is assigned to the Analysis Administrator and Report Administrator roles.
AnalysisAuthorized
This permission authorizes users to view Ariba Analysis report pages. In the default configuration, this permission is assigned to the Analyst, Report Administrator, Reporting, Report Manager and Report User roles.
AnalysisCreateCompoundReports
This permission authorizes users to create and edit Ariba Analysis compound reports. In the default configuration, this permission is assigned to the Report Administrator, Report Manager and Senior Analyst roles.
AnalysisCreateReports
This permission authorizes users to create and edit analytical reports in Ariba Analysis, including single and multi-fact reports. They can also edit Excel template for report export. In the default configuration, this permission is assigned to the Report Administrator, Report Manager and Senior Analyst roles.
AnalysisPublishReport
This permission authorizes users to save Ariba Analysis reports to the Public folder, where they are available for use by other users. In the default configuration, this permission is assigned to the Senior Analyst role.
AnalysisRunCompoundReports
This permission authorizes users to run and save Ariba Analysis compound reports. In the default Ariba Strategic Sourcing configuration, this permission is assigned to the Analyst, Reporting, Report Manager, Report User and Senior Analyst roles.
AnalysisRunReports
This permission authorizes users to run the Ariba Analysis prepackaged reports that they are authorized to use, save them, and export them to Microsoft Excel. In the default configuration, this permission is assigned to the Analyst, Reporting, Report Manager, Report User and Senior Analyst roles.
AnalysisScheduleReport
This permission authorizes users to schedule Ariba Analysis reports to run at specified times. In the default configuration, this permission is assigned to the Senior Analyst role.
Permissions Appendix G Permissions, Roles, and Groups
238 Ariba Buyer Configuration Guide
AnalysisViewAllAvailableFields
This permission authorizes users to view all available fields in Ariba Analysis reports, including slow fields (fields that, with the current filters on the report, contain large data sets and produce a report query that might time out) and dimensions that contain no data. Users with this permission can set a reporting preference on the command bar in order to view slow fields and empty dimensions, which are hidden by default. In the default configuration, this permission is assigned to the Senior Analyst role.
ASMDashboardAuthorized
This permission determines that a user is authorized for a dashboard and gives the user a dashboard home on the Ariba Strategic Sourcing. Users with the ASMDashboardAuthorized permission have a dashboard home in Ariba Strategic Sourcing application. In the absence of both the ASMDashboardAuthorized and P2PDashboardAuthorized permissions, users have a dashboard home based on the value of the FallbackDashboardHome parameter.
In the default configuration, this permission is assigned to the Buyer, Event Administrator, Junior SPM Manager, Professional Buyer, Sourcing Manager, SPM Authorized and Sourcing Manager roles.
AuditorOnDemand
This permission authorizes users to query and audit expense reports that are flagged through on demand audit policies. In the default configuration, this permission is assigned to the Auditor On Demand role.
AuditorRealTime
This permission authorizes users to query and audit expense reports that are flagged through on demand audit policies. In the default configuration, this permission is assigned to the Auditor Real Time role.
AuditViewer
This permission authorizes users to see the audit logs. In the default configuration, this permission is assigned to the Administrator role.
BatchDataNotify
This permission authorizes users to receive notifications for data loads. In the default configuration, this permission is assigned to the Batch Data Notification role.
BatchDataPost
This permission authorizes users to post data files to the data drop servlet. In the default configuration, this permission is assigned to the Batch Data Post role.
BusinessContactManager
This permission authorizes users to administer business contacts. In the default configuration, this permission is assigned to the Administrator and Customer User Admin roles.
Ariba Buyer Configuration Guide 239
Appendix G Permissions, Roles, and Groups Permissions
BuyerAuthorized
This permission authorizes users to view links to access and work with Ariba Buyer. It is assigned to users of Ariba Spend Management applications who should have access to Ariba Buyer. In the default configuration this permission is not assigned to any roles.
BuyerReportsQueryAll
This permission authorizes Ariba Buyer users to run Ariba Analysis reports with report queries that include data created by other users. Without this permission, any report a user runs will only include data for that user and his or her subordinates. In the default configuration, this permission is assigned to the Report Manager role.
CatalogAuthorized
This permission authorizes users to view Global Catalog Reports. In the default configuration, this permission is not assigned to any roles. In the default configuration, this permission is assigned to the Catalog Manager, Report Administrator, Report Manager and Report User roles.
CatalogImportFailedEmail
Users who have this permission receive the following notifications: Notification 15 (Notification of Supplier Data Import Failure) Notification 73 (Notification of Ariba Network Subscription Delete).
CatalogManager
This permission is used for notification and authorization. In the default configuration, this permission is assigned to the Catalog Manager role. Users who have this permission receive the following notifications:
• Notification 49 (Notification of Import Mapping Failure) when the MappingLog log listener detects error messages pertaining to PunchOut items with commodity codes that are not mapped correctly.
• Notification 60 (Notification of Unknown Supplier Resolution), when the Supplier Manager has added a supplier profile that is required for loading a new catalog from Ariba Network.
• Notification 61 (Notification of Unknown Partitioned Supplier Resolution), when the Supplier Manager has added a partitioned supplier profile that is required for loading a new catalog from Ariba Network. Users who have this permission receive notification messages related to problems loading catalogs.
CommodityCodeManager
This permission authorizes users to administer commodity codes and related mappings. In the default configuration, this permission is assigned to the Administrator, Category Manager, and Commodity Code Manager roles.
CreateContract
This permission authorizes users to create contract requests (CRs) and to create and edit contracts. In the default configuration, this permission is assigned to the Contract Agent role
Permissions Appendix G Permissions, Roles, and Groups
240 Ariba Buyer Configuration Guide
DashboardAdmin
This permission gives users access to the Dashboard Manager workspace in Ariba Administrator. In the default configuration, this permission is assigned to the Customer Dashboard Admin role.
DashboardAuthorized
This permission authorizes users to view and work with their own Ariba Spend Management dashboards. In the default configuration, this permission is assigned to the following roles:
• Analyst
• Category Management
• Contract Agent
• Contract Authorized
• Contract Manager
• Expense Manager
• Expense User
• Invoice Manager
• Payment Agent
• Payment Manager
• Report Administrator
• Report Manager
• Reporting
• Tax Manager
DiscoveryAuthorized
Note: This permission is available on SP26 or higher.
DelegateApprovalAuthority
An administrative user who has this permission can delegate authority for another user. For example, if a manager leaves the office unexpectedly for an emergency, an administrator can delegate that manager’s authority to another user. When an administrator delegates approval authority, the change takes effect immediately. Delegations that are created by administrators are tracked by the ThirdPartyDelegation class.
In Ariba Administrator, administrators with this permission have access to these tasks in the User Manager workspace:
• Create Delegation: Used to create delegations.
• List Delegation: Used to view and undo current delegations.
In the default configuration, this permission is assigned to the CustomerUserAdmin role.
ExpenseManager
Users who have this permission are authorized to log in to Ariba Buyer Administrator and use the Ariba Travel & Expense workspace to perform administrative tasks. In the default configuration, this permission is assigned to the Expense Manager role.
Ariba Buyer Configuration Guide 241
Appendix G Permissions, Roles, and Groups Permissions
External
This permission defines external users of Ariba Spend Management systems, who are typically suppliers and other outside entities, and is used to distinguish them from users with Internal permission, who are usually members of buying organizations.
In the default configuration, this permission is assigned to the Supplier Collaboration User, Supplier Invoice Entry User, and Supplier Manage Order User roles.
GroupEditor
This permission authorizes users to edit Group Views at runtime, directly from the user interface. In the default configuration, this permission is assigned to the AMLEditor role.
IntegrationEvents
This permission authorizes users to run integration events from Ariba Administrator. In the default configuration, this permission is assigned to the Administrator and Catalog Manager roles.
Internal
This permission defines internal users of Ariba Spend Management systems, and is used to distinguish them from users with External permission, who are typically suppliers and other outside entities. In the default configuration, this permission is assigned to the Internal role.
NoApprovalNotification
Users who have this permission don’t receive notification messages when their approval is required. In the default configuration, this permission is not assigned to any role.
NoEscalation
Users who have this permission don’t have approvables escalated to them. In the default configuration, this permission is assigned to the No Escalation role.
NoNonCatalogItems
Users who have this permission cannot order non-catalog items and are restricted to ordering only catalog items. In the default configuration, this permission is assigned to the No Ad-hoc Item role.
NoPasswordExpiration
Users who have this permission are exempt from password expirations and are not required to make regular password changes. This permission applies only in configurations where passwords expire and users are required to make regular password changes. In the default configuration, this permission is not assigned to any role.
Permissions Appendix G Permissions, Roles, and Groups
242 Ariba Buyer Configuration Guide
NoSupervisor
This permission authorizes users to have an account without having a supervisor. Supervisors are usually required, because they’re used in approval escalation and often in other approval rules as well. In the default configuration, this permission is assigned to the No Supervisor role.
NoWatcherNotification
By default, users receive notifications when they are listed as a watcher on an approvable document. Users who have this permission don’t receive such notifications. In the default configuration, this permission is not assigned to any role.
P2PAuthorized
This permission grants user access to Ariba Buyer and authorizes users to view the following default prepackaged reports in Ariba Analysis:
• Ariba Buyer Operational Reports
• Contingent Labor Analysis
• Contract Analysis
• Contract Savings Analysis
• Demand Aggregation
• Invoice Exception Analysis
• Invoice Processing Analysis
• PCard Reports
• PO Analysis
• Requisition Reports
• Supplier Order Delivery Analysis
• Travel and Expense Reports
In the default configuration, this permission is assigned to the Report Administrator, Report Manager, Report User and Reporting roles.
P2PDashboardAuthorized
This permission determines that a user is authorized for an Ariba Buyer dashboard. In the absence of the ASMDashboardAuthorized permission, the P2PDashboardAuthorizedPermission gives the user a home dashboard in Ariba Buyer. In the absence of both the ASMDashboardAuthorized and P2PDashboardAuthorized permissions, a user will have a dashboard home based on the value of the FallbackDashboardHome parameter. In the default configuration, this permission is assigned to the Expense Admininstrator, Expense Manager, Expense Receipt Manager, Expense User, Expense Violation Manager, Invoice Administrator, Invoice
Agent, Invoice Entry User, Invoice Manager, Payment Agent, Payment Manager, PCard Manager,
Professional Buyer, Purchasing Manager, Purchasing User, Receiving Manager, Report Administrator,
Report Manager, and Tax Manager.
Ariba Buyer Configuration Guide 243
Appendix G Permissions, Roles, and Groups Permissions
ParametersEditor
This permission authorizes users to add, edit, and delete parameters in Ariba Administrator. In the default configuration, this permission is assigned to the Administrator role.
ProcurementAuthorized
This permission authorizes users to view Ariba Buyer data in Ariba Analysis reports. In the default configuration, this permission is assigned to the Catalog Manager, Report Administrator, Report Manager, Report User and Reporting roles.
RuleEditor
This permission authorizes users to make changes to company business rules using the Rule Editor. In the default configuration, this permission is assigned to the Administrator role.
ScheduledTasks
This permission authorizes users to run scheduled tasks in Ariba Administrator. In the default configuration, this permission is assigned to the Administrator role.
SiteAdmin.AdminClient
This permission authorizes users to perform the system administration functions, such as running scheduled tasks and integration events. In the default configuration, this permission is assigned to the Administrator role.
SiteAdmin.ClassEditor
This permission authorizes users to customize the application. In the default configuration, this permission is assigned to the AMLEditor role.
SiteAdmin.ConfigurationFiles
This permission authorizes users to:
• Access all files in the config and logs directories in Ariba Administrator
• Edit all rules, regardless of other permissions
The SiteAdmin.ConfigurationFiles permission is also used in combination with other permissions to allow administrative users access to various Ariba Administrator functions. In the default configuration, this permission is assigned to the Administrator role.
SiteAdmin.LogFilesandSettings
This permission gives users access to log files and authorizes them to modify log settings. In the default configuration, this permission is assigned to the Administrator role.
Permissions Appendix G Permissions, Roles, and Groups
244 Ariba Buyer Configuration Guide
SiteAdmin.NoLockout
Users who have this permission are not locked out of the system, even after exceeding the maximum number of failed login attempts. In the default configuration, this permission is assigned to the Administrator role.
SiteAdmin.SiteAdmin
Users who have this permission manage the use of permissions that begin with SiteAdmin, for example, SiteAdmin.ConfigurationFiles. In the default configuration, this permission is assigned to the Administrator role.
SiteAdmin.TemplateEditor
This permission authorizes users to edit JavaScript templates. In the default configuration, this permission is assigned to the Administrator role.
SourcingAuthorized
This permission authorizes users to punch out to Ariba Sourcing to view sourcing information. Users with this permission can also view the default Health Check, Sourcing Project Analysis, and Event Reports prepackaged reports in Ariba Analysis. In the default configuration, this permission is assigned to the Sourcing Authorized role.
Note: In a stand-alone Ariba Buyer installation, this permission will not appear in the default configuration. It is defined only in Ariba Strategic Sourcing and integrated Ariba Spend Management configurations.
SuiteIntegration
This permission authorizes users to integrate the Ariba Strategic Sourcing with Ariba Buyer. In the default configuration, this permission is assigned to the aribasystem role.
SupplierManager
This permission authorizes users to administer supplier profile information. In the default configuration, this permission is assigned to the Buyer Administrator and Supplier Manager roles.
Support administrator
This permission authorizes users to administer/support the application and administer all projects in the application. In the default configuration, this permission is not assigned to any roles.
This permission has the same capabilities as a permission assigned to the ProjectAdminPermission parameter in previous releases. (The ProjectAdminPermission parameter is obsolete.)
SVAuthorized
This permission authorizes users to use Ariba Spend Analysis features and data, and to view the default Spend Visibility prepackaged reports. In the default configuration, this permission is not assigned to any roles.
Ariba Buyer Configuration Guide 245
Appendix G Permissions, Roles, and Groups Permissions
SVSupplierDiversityAuthorized
This permission authorizes users to view prepackaged Ariba Spend Analysis supplier diversity certificate reports. In the default configuration, this permission is not assigned to any roles.
TEAuthorized
This permission grants user access to the Travel & Expense feature. In the default configuration, this permission is not assigned to any roles.
UserManager
This permission enables users to view the User Manager workspace of the Ariba Administrator to view, add, edit, and delete users, groups, roles and permissions. In the default configuration, this permission is assigned to the Administrator and Customer User Admin roles.
UserManager_Group
This permission enables users to view the Groups task in the User Manager workspace of the Ariba Administrator to view, add, edit, and delete groups. In the default configuration, this permission is assigned to the Administrator role.
UserManager_Organization
This permission enables users to view the Organizations task in the User Manager workspace of the Ariba Administrator to view, add, edit, and delete to add, edit, and delete organizations. In the default configuration, this permission is assigned to the Administrator role.
UserManager_Role
This permission enables users to view the Roles task in the User Manager workspace of the Ariba Administrator to view, add, edit, and delete roles. In the default configuration, this permission is assigned to the Administrator and Customer User Admin roles.
UserManager_User
This permission enables users to view the Users task in the User Manager workspace of the Ariba Administrator to view, add, edit, and delete users. In the default configuration, this permission is assigned to the Administrator and Customer User Admin roles.
UserSessions
This permission authorizes users to view a list of the existing sessions and force the termination of sessions. In the default configuration, this permission is assigned to the Administrator role.
View Secure Parameter
This permission authorizes users to view secure parameters in plain text. In the default configuration, this permission is assigned to the Administrator role.
Roles Appendix G Permissions, Roles, and Groups
246 Ariba Buyer Configuration Guide
Roles
This section describes the Ariba Buyer best practice roles in the default configuration. Ariba Spend Management roles can include child roles; a role includes all of the permissions it inherits from all child roles.
Administrator
In the default configuration, this role serves as the administrator role for all Ariba Spend Management applications.
This role contains the following permissions:• AMLUploader
• ASMDashboardAuthorized
• ActOnBehalf
• AdvancedAdmin
• AnalysisAdmin
• AnalysisAuthorized
• AnalysisCreateCompoundReports
• AnalysisCreateReports
• AnalysisPublishReport
• AnalysisRunCompoundReports
• AnalysisRunReports
• AnalysisScheduleReport
• AnalysisViewAllAvailableFields
• AuditViewer
• BusinessContactManager
• CommodityCodeManager
• CreateContract
• DashboardAdmin
• DashboardAuthorized
• IntegrationEvents
• Internal
• ParametersEditor
• RuleEditor
• SVAuthorized
• ScheduledTasks
• SiteAdmin.AdminClient
• SiteAdmin.ConfigurationFiles
• SiteAdmin.LogFilesAndSettings
• SiteAdmin.NoLockout
• SiteAdmin.SiteAdmin
• SiteAdmin.TemplateEditor
• SourcingAuthorized
• SupplierManager
• UserManager
• UserManager_Group
• UserManager_Organization
• UserManager_Role
• UserManager_User
• UserSessions
• ViewSecureParameter
Ariba Buyer Configuration Guide 247
Appendix G Permissions, Roles, and Groups Roles
AML Editor
Users with this role can customize the application. In the default configuration, this role contains the following permissions:
• AMLUploader
• GroupEditor
• SiteAdmin.ClassEditor
Analysis Administrator
This role is for users who log into Ariba Administrator to perform administrative tasks in the Reporting Manager and to manage other users. In the default configuration, this role contains the following permissions:
• AnalysisAdmin
• AnalysisAuthorized
• AnalysisCreateCompoundReports
• AnalysisCreateReports
• AnalysisPublishReport
• AnalysisRunCompoundReports
• AnalysisRunReports
• AnalysisScheduleReport
• DashboardAuthorized
• Internal
• SourcingAuthorized
• SVAuthorized
• UserManager_Group
• UserManager_Role
• UserManager_User
Analyst
This role enables users to run prepackaged Ariba Analysis reports. In the default configuration, this role contains the following permissions:
• AnalysisAuthorized
• AnalysisRunCompoundReports
• AnalysisRunReports
• DashboardAuthorized
• Internal
aribasystem
This role is a “superuser” role for those who can perform any system administrative task and business-specific administrative functions. This role contains the following permissions:
• AMLUploader
• ASMDashboardAuthorized
• ActOnBehalf
• AdvancedAdmin
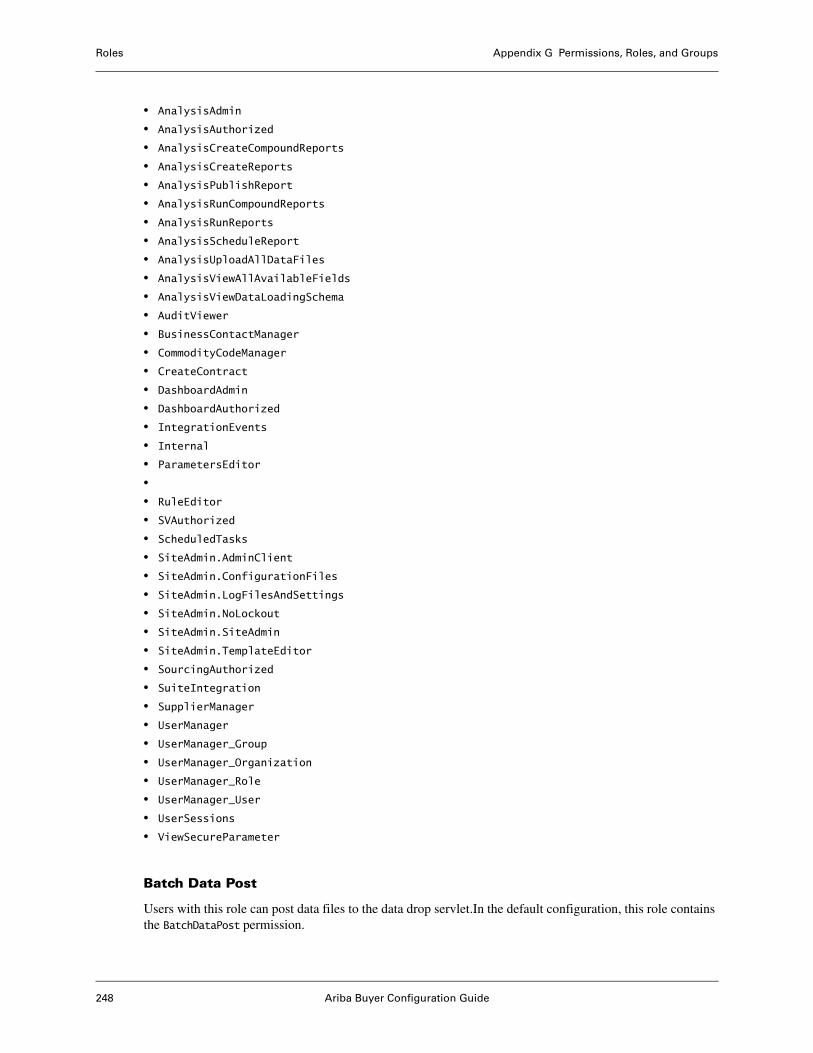
Roles Appendix G Permissions, Roles, and Groups
248 Ariba Buyer Configuration Guide
• AnalysisAdmin
• AnalysisAuthorized
• AnalysisCreateCompoundReports
• AnalysisCreateReports
• AnalysisPublishReport
• AnalysisRunCompoundReports
• AnalysisRunReports
• AnalysisScheduleReport
• AnalysisUploadAllDataFiles
• AnalysisViewAllAvailableFields
• AnalysisViewDataLoadingSchema
• AuditViewer
• BusinessContactManager
• CommodityCodeManager
• CreateContract
• DashboardAdmin
• DashboardAuthorized
• IntegrationEvents
• Internal
• ParametersEditor
•• RuleEditor
• SVAuthorized
• ScheduledTasks
• SiteAdmin.AdminClient
• SiteAdmin.ConfigurationFiles
• SiteAdmin.LogFilesAndSettings
• SiteAdmin.NoLockout
• SiteAdmin.SiteAdmin
• SiteAdmin.TemplateEditor
• SourcingAuthorized
• SuiteIntegration
• SupplierManager
• UserManager
• UserManager_Group
• UserManager_Organization
• UserManager_Role
• UserManager_User
• UserSessions
• ViewSecureParameter
Batch Data Post
Users with this role can post data files to the data drop servlet.In the default configuration, this role contains the BatchDataPost permission.
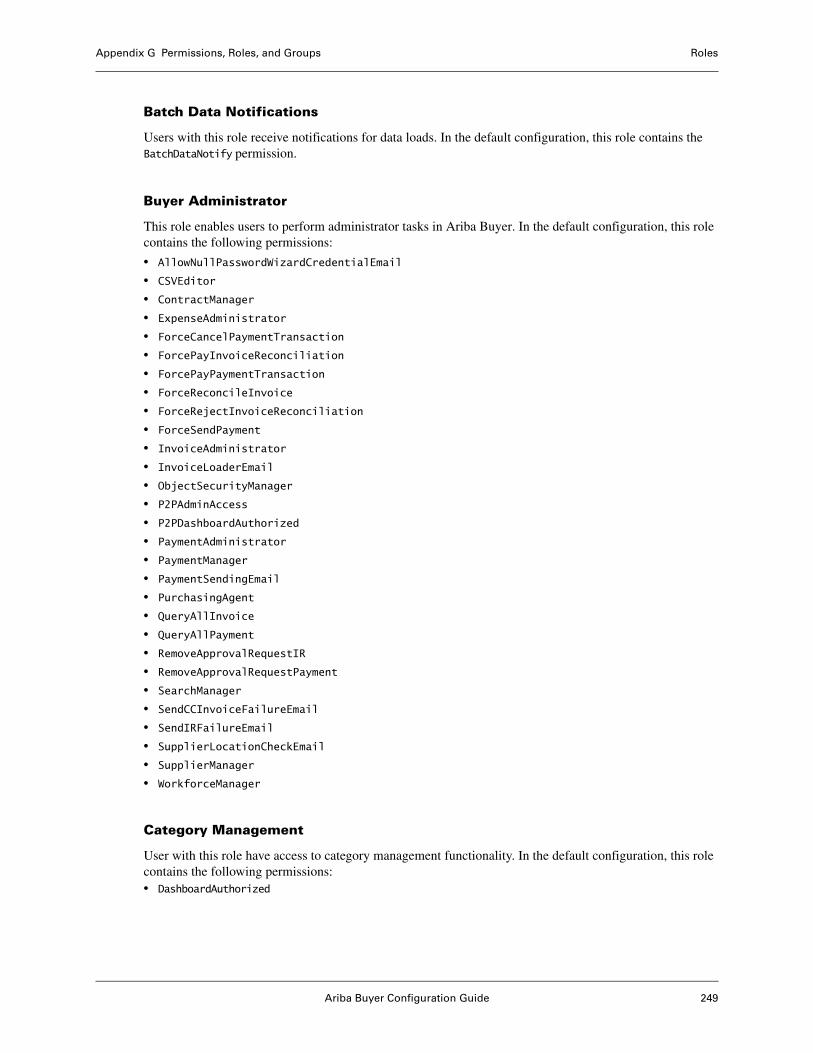
Ariba Buyer Configuration Guide 249
Appendix G Permissions, Roles, and Groups Roles
Batch Data Notifications
Users with this role receive notifications for data loads. In the default configuration, this role contains the BatchDataNotify permission.
Buyer Administrator
This role enables users to perform administrator tasks in Ariba Buyer. In the default configuration, this role contains the following permissions:
• AllowNullPasswordWizardCredentialEmail
• CSVEditor
• ContractManager
• ExpenseAdministrator
• ForceCancelPaymentTransaction
• ForcePayInvoiceReconciliation
• ForcePayPaymentTransaction
• ForceReconcileInvoice
• ForceRejectInvoiceReconciliation
• ForceSendPayment
• InvoiceAdministrator
• InvoiceLoaderEmail
• ObjectSecurityManager
• P2PAdminAccess
• P2PDashboardAuthorized
• PaymentAdministrator
• PaymentManager
• PaymentSendingEmail
• PurchasingAgent
• QueryAllInvoice
• QueryAllPayment
• RemoveApprovalRequestIR
• RemoveApprovalRequestPayment
• SearchManager
• SendCCInvoiceFailureEmail
• SendIRFailureEmail
• SupplierLocationCheckEmail
• SupplierManager
• WorkforceManager
Category Management
User with this role have access to category management functionality. In the default configuration, this role contains the following permissions:• DashboardAuthorized
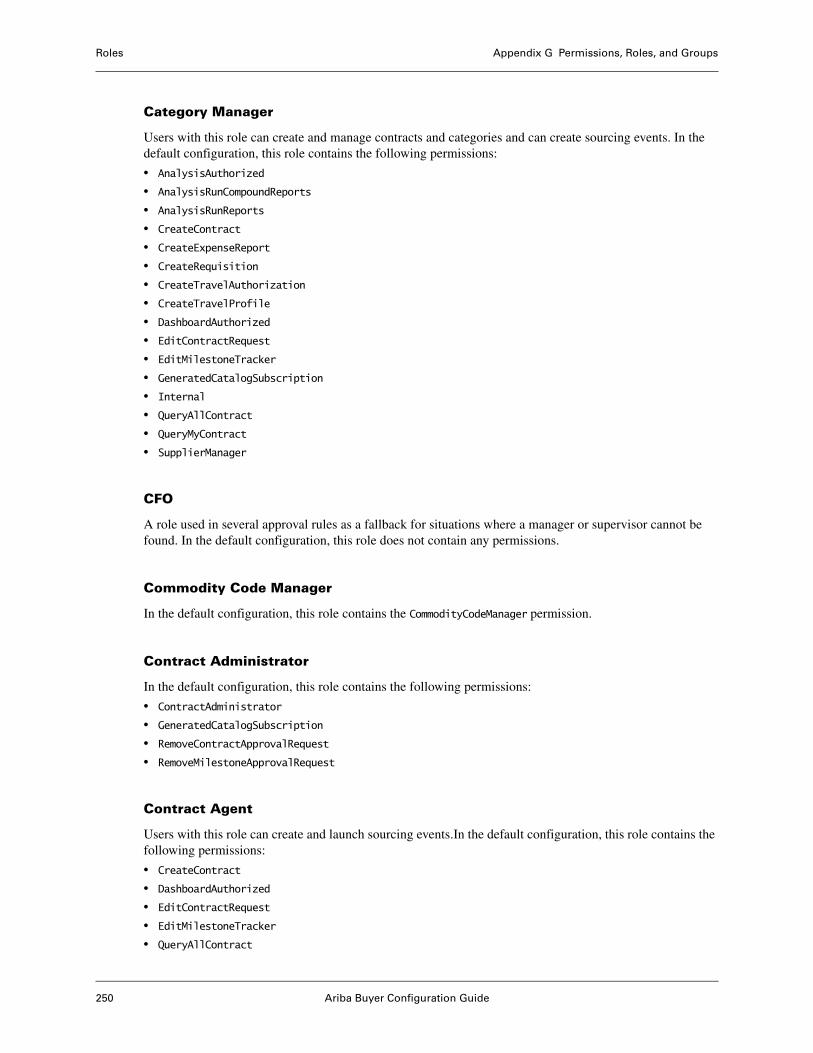
Roles Appendix G Permissions, Roles, and Groups
250 Ariba Buyer Configuration Guide
Category Manager
Users with this role can create and manage contracts and categories and can create sourcing events. In the default configuration, this role contains the following permissions:
• AnalysisAuthorized
• AnalysisRunCompoundReports
• AnalysisRunReports
• CreateContract
• CreateExpenseReport
• CreateRequisition
• CreateTravelAuthorization
• CreateTravelProfile
• DashboardAuthorized
• EditContractRequest
• EditMilestoneTracker
• GeneratedCatalogSubscription
• Internal
• QueryAllContract
• QueryMyContract
• SupplierManager
CFO
A role used in several approval rules as a fallback for situations where a manager or supervisor cannot be found. In the default configuration, this role does not contain any permissions.
Commodity Code Manager
In the default configuration, this role contains the CommodityCodeManager permission.
Contract Administrator
In the default configuration, this role contains the following permissions:
• ContractAdministrator
• GeneratedCatalogSubscription
• RemoveContractApprovalRequest
• RemoveMilestoneApprovalRequest
Contract Agent
Users with this role can create and launch sourcing events.In the default configuration, this role contains the following permissions:
• CreateContract
• DashboardAuthorized
• EditContractRequest
• EditMilestoneTracker
• QueryAllContract
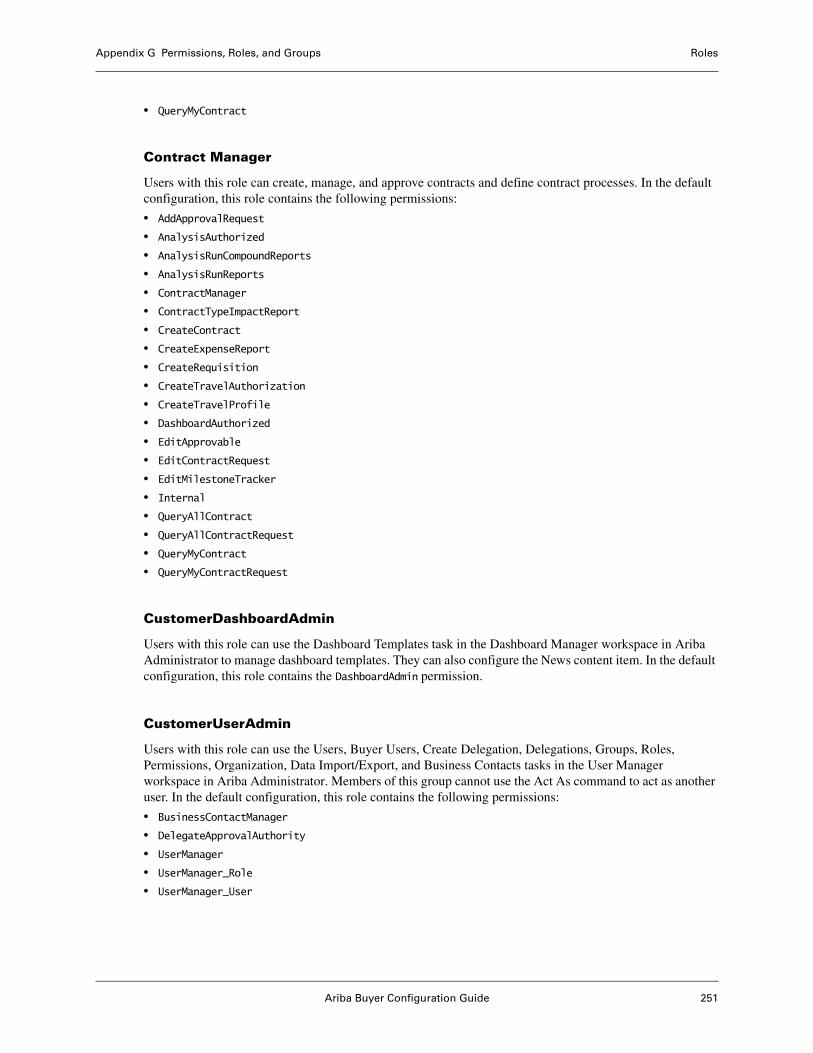
Ariba Buyer Configuration Guide 251
Appendix G Permissions, Roles, and Groups Roles
• QueryMyContract
Contract Manager
Users with this role can create, manage, and approve contracts and define contract processes. In the default configuration, this role contains the following permissions:
• AddApprovalRequest
• AnalysisAuthorized
• AnalysisRunCompoundReports
• AnalysisRunReports
• ContractManager
• ContractTypeImpactReport
• CreateContract
• CreateExpenseReport
• CreateRequisition
• CreateTravelAuthorization
• CreateTravelProfile
• DashboardAuthorized
• EditApprovable
• EditContractRequest
• EditMilestoneTracker
• Internal
• QueryAllContract
• QueryAllContractRequest
• QueryMyContract
• QueryMyContractRequest
CustomerDashboardAdmin
Users with this role can use the Dashboard Templates task in the Dashboard Manager workspace in Ariba Administrator to manage dashboard templates. They can also configure the News content item. In the default configuration, this role contains the DashboardAdmin permission.
CustomerUserAdmin
Users with this role can use the Users, Buyer Users, Create Delegation, Delegations, Groups, Roles, Permissions, Organization, Data Import/Export, and Business Contacts tasks in the User Manager workspace in Ariba Administrator. Members of this group cannot use the Act As command to act as another user. In the default configuration, this role contains the following permissions:
• BusinessContactManager
• DelegateApprovalAuthority
• UserManager
• UserManager_Role
• UserManager_User
Roles Appendix G Permissions, Roles, and Groups
252 Ariba Buyer Configuration Guide
Discovery Authorized
Note: This role is available on SP26 or higher.
EditApprovable
In the default configuration of Ariba Buyer, this role contains the following permissions for business process experts who are allowed to make post-submission edits to approvable documents:
• AddApprovalRequest
• EditApprovable
Expense Manager
Users with this role can:
• Create expense reports and travel authorizations
• Query all the expense reports and travel authorizations in the system
• Add approval requests to the approval flow for expense reports and travel authorizations
• Make post-submission edits to expense reports and travel authorizations
This role contains the Analyst subrole and the following permissions:
• AddApprovalRequestER
• AddApprovalRequestTA
• AnalysisAuthorized
• AnalysisRunCompoundReports
• AnalysisRunReports
• CreateExpenseReport
• CreateRequisition
• CreateTravelAuthorization
• CreateTravelProfile
• DashboardAuthorized
• EditExpenseReport
• EditTravelAuthorization
• ExpenseManager
• Internal
• P2PDashboardAuthorized
• QueryAllExpenseReport
• QueryAllTravelAuthorization
External
This role is generally applied to suppliers and other users of an Ariba Spend Management who are not part of the buyer organization. In the default configuration, this role contains the External permission.
Ariba Buyer Configuration Guide 253
Appendix G Permissions, Roles, and Groups Roles
Facilities Manager
A role used in the Facilities Capper approval rule, which is a filter rule that removes any approver who has an approval limit less than $50,000, if the approver has the Facilities Manager role. In the default Ariba Buyer configuration, this role contains no permissions.
HR Manager
A role used to approve specific commodity codes. See the BuyerServerRoot/ConfigTemplates/Common-demo/default/config/variant/data/
CommodityApprovers.csv file for more information. In the default Ariba Buyer configuration, this role contains no permissions.
Internal
This role is generally applied to any user of the system that is not a supplier. In the default configuration, this role contains the Internal permission.
IS Manager
A role used to approve specific commodity codes. See the BuyerServerRoot/ConfigTemplates/Common-demo/default/config/variant/data/
CommodityApprovers.csv file for more information. In the default Ariba Buyer configuration, this role contains no permissions.
Professional Buyer
This role allows users to perform purchasing agent functions, including negotiating prices with suppliers, analyzing purchasing data, creating projects, reconciling invoice exceptions, and launching sourcing events. In the default configuration, this role contains the following permissions:
• ChangeAutoSelectedContract
• DashboardAuthorized
• DirectReleaseContract
• EditReq
• ModifyCommentsAndAttachments
• P2PDashboardAuthorized
• PurchasingAgent
• QueryAllPurchasing
Reporting
This role allows users to run prepackaged Ariba Analysis reports. In the default configuration, it contains the following permissions:
• AnalysisAuthorized
• AnalysisRunCompoundReports
• AnalysisRunReports
• DashboardAuthorized
• P2PAuthorized
Roles Appendix G Permissions, Roles, and Groups
254 Ariba Buyer Configuration Guide
• ProcurementAuthorized
Senior Analyst
This role is for advanced users of Ariba Analysis, who create reports for themselves and other users. In the default configuration, this role contains the following permissions:
• AnalysisAuthorized
• AnalysisCreateCompoundReports
• AnalysisCreateReports
• AnalysisPublishReport
• AnalysisRunCompoundReports
• AnalysisRunReports
• AnalysisScheduleReport
• AnalysisViewAllAvailableFields
• CreateExpenseReport
• CreateRequisition
• CreateTravelAuthorization
• CreateTravelProfile
• DashboardAuthorized
• Internal
• QueryAll
Sourcing Authorized
This role is for users who are authorized to view links to access and work with Ariba Sourcing. In a stand-alone Ariba Buyer instance, this role does not contain any permissions.
Sourcing Manager
This role is for users who manage and analyze Ariba Sourcing project activity. In the default configuration, this role contains the following permissions:
• AnalysisAuthorized
• AnalysisRunCompoundReports
• AnalysisRunReports
• CreateContract
• CreateExpenseReport
• CreateRequisition
• CreateTravelAuthorization
• CreateTravelProfile
• DashboardAuthorized
• EditContractRequest
• EditMilestoneTracker
• GeneratedCatalogSubscription
• Internal
• QueryAllContract
• QueryMyContract
Ariba Buyer Configuration Guide 255
Appendix G Permissions, Roles, and Groups Groups
• SupplierManager
Supplier Manager
This role is for users who manage suppliers in Ariba Spend Management. In the default configuration, this role contains the following permissions:
• DashboardAuthorized
• SupplierManager
Groups
This section describes the Ariba Buyer best practice groups in the default configuration. Ariba Spend Management groups can contain child groups; a group includes all of the roles it inherits from all parent groups.
Analysis Administrator
In the default configuration of Ariba Analysis, this group contains the Analysis Administrator role.
Commodity Code Manager
In the default configuration, this group contains the Commodity Code Manager role.
Contract Administrator
In the default configuration, this group contains the Contract Administrator role.
Contract Agent
In the default configuration, this group contains the Contract Agent role.
Contract Approver
In the default configuration, there are no roles assigned to this group.
Contract Manager
In the default configuration, this group contains the Contract Manager and Senior Analyst roles.
Customer Administrator
In the default configuration, this group includes the following roles:
• Administrator
• aribasystem
• BatchDataNotify
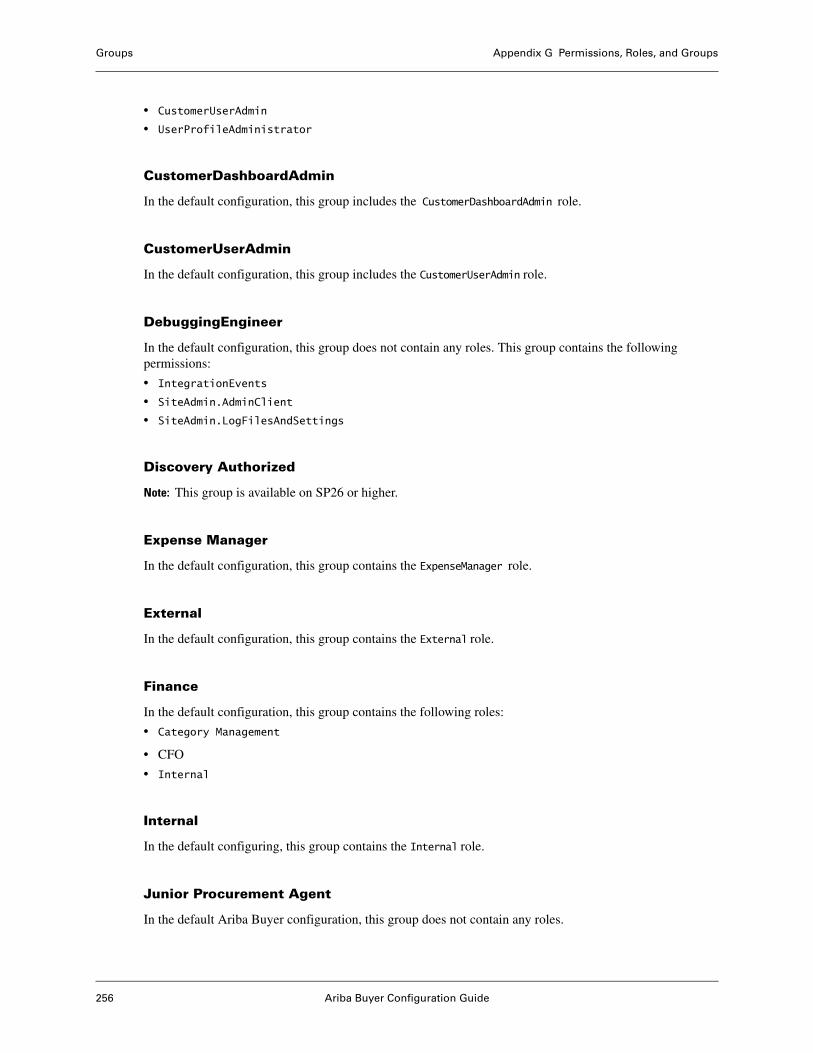
Groups Appendix G Permissions, Roles, and Groups
256 Ariba Buyer Configuration Guide
• CustomerUserAdmin
• UserProfileAdministrator
CustomerDashboardAdmin
In the default configuration, this group includes the CustomerDashboardAdmin role.
CustomerUserAdmin
In the default configuration, this group includes the CustomerUserAdmin role.
DebuggingEngineer
In the default configuration, this group does not contain any roles. This group contains the following permissions:
• IntegrationEvents
• SiteAdmin.AdminClient
• SiteAdmin.LogFilesAndSettings
Discovery Authorized
Note: This group is available on SP26 or higher.
Expense Manager
In the default configuration, this group contains the ExpenseManager role.
External
In the default configuration, this group contains the External role.
Finance
In the default configuration, this group contains the following roles:
• Category Management
• CFO
• Internal
Internal
In the default configuring, this group contains the Internal role.
Junior Procurement Agent
In the default Ariba Buyer configuration, this group does not contain any roles.
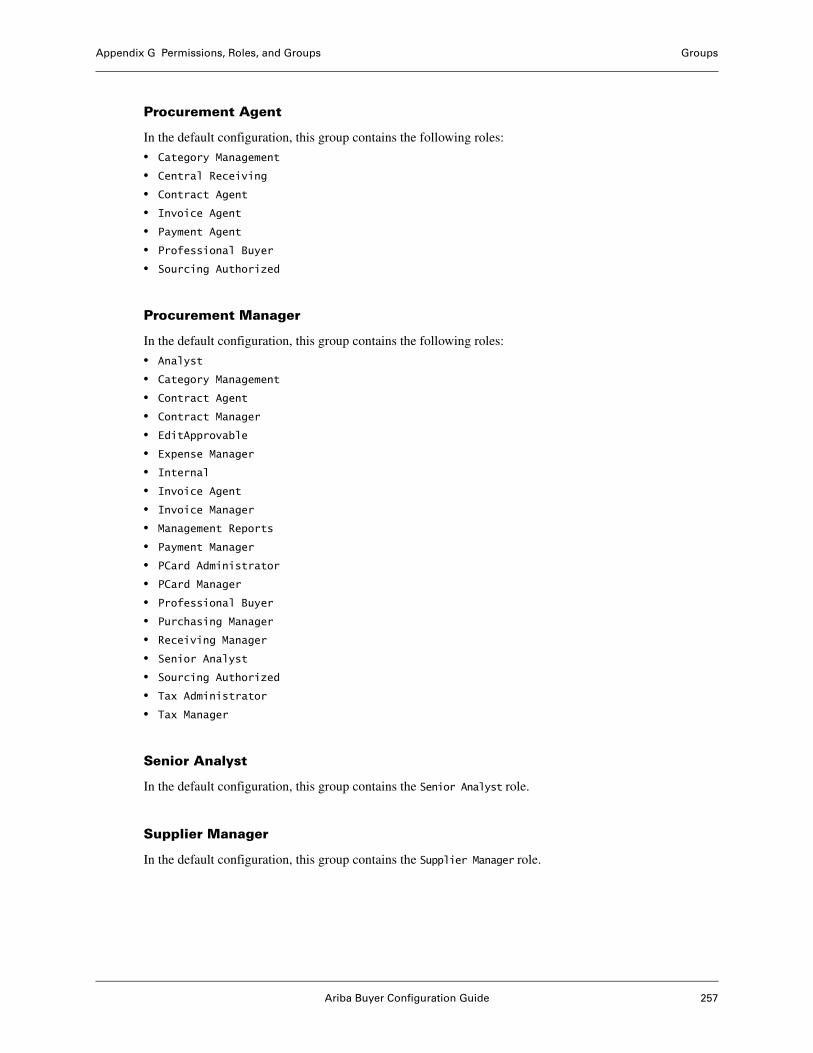
Ariba Buyer Configuration Guide 257
Appendix G Permissions, Roles, and Groups Groups
Procurement Agent
In the default configuration, this group contains the following roles:
• Category Management
• Central Receiving
• Contract Agent
• Invoice Agent
• Payment Agent
• Professional Buyer
• Sourcing Authorized
Procurement Manager
In the default configuration, this group contains the following roles:
• Analyst
• Category Management
• Contract Agent
• Contract Manager
• EditApprovable
• Expense Manager
• Internal
• Invoice Agent
• Invoice Manager
• Management Reports
• Payment Manager
• PCard Administrator
• PCard Manager
• Professional Buyer
• Purchasing Manager
• Receiving Manager
• Senior Analyst
• Sourcing Authorized
• Tax Administrator
• Tax Manager
Senior Analyst
In the default configuration, this group contains the Senior Analyst role.
Supplier Manager
In the default configuration, this group contains the Supplier Manager role.
Groups Appendix G Permissions, Roles, and Groups
258 Ariba Buyer Configuration Guide
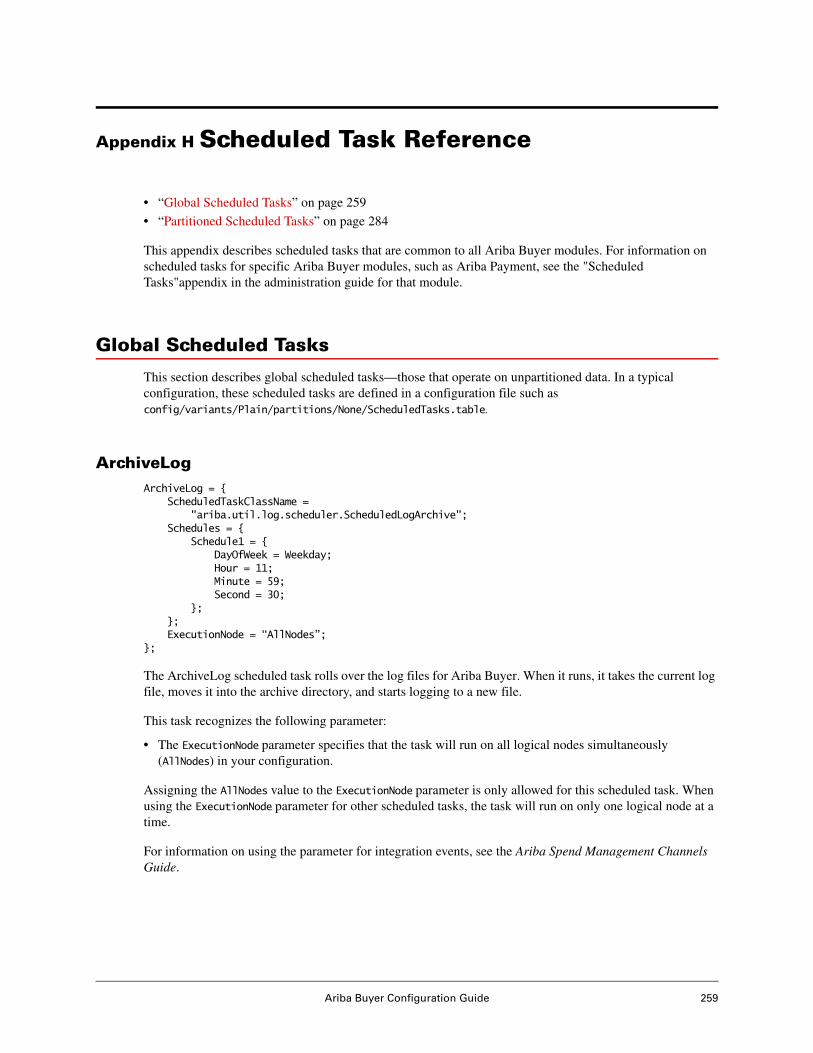
Ariba Buyer Configuration Guide 259
Appendix H Scheduled Task Reference
• “Global Scheduled Tasks” on page 259
• “Partitioned Scheduled Tasks” on page 284
This appendix describes scheduled tasks that are common to all Ariba Buyer modules. For information on scheduled tasks for specific Ariba Buyer modules, such as Ariba Payment, see the "Scheduled Tasks"appendix in the administration guide for that module.
Global Scheduled Tasks
This section describes global scheduled tasks—those that operate on unpartitioned data. In a typical configuration, these scheduled tasks are defined in a configuration file such as config/variants/Plain/partitions/None/ScheduledTasks.table.
ArchiveLogArchiveLog = {
ScheduledTaskClassName ="ariba.util.log.scheduler.ScheduledLogArchive";
Schedules = {Schedule1 = {
DayOfWeek = Weekday;Hour = 11;Minute = 59;Second = 30;
};};ExecutionNode = “AllNodes”;
};
The ArchiveLog scheduled task rolls over the log files for Ariba Buyer. When it runs, it takes the current log file, moves it into the archive directory, and starts logging to a new file.
This task recognizes the following parameter:
• The ExecutionNode parameter specifies that the task will run on all logical nodes simultaneously (AllNodes) in your configuration.
Assigning the AllNodes value to the ExecutionNode parameter is only allowed for this scheduled task. When using the ExecutionNode parameter for other scheduled tasks, the task will run on only one logical node at a time.
For information on using the parameter for integration events, see the Ariba Spend Management Channels Guide.

Global Scheduled Tasks Appendix H Scheduled Task Reference
260 Ariba Buyer Configuration Guide
AribaNetworkOrganizationSyncAribaNetworkOrganizationSync = {
BatchSize = 10;SyncANSuppliersWithDunsNumbers = true;ScheduledTaskClassName =
"ariba.user.messaging.AribaNetworkOrganizationSyncScheduledTask";Schedules = {
Schedule1 = { DayOfWeek = Saturday; Hour = 08; Minute = 59; Second = 30};
}; };
The AribaNetworkOrganizationSync scheduled task downloads supplier profile information from Ariba Network and uses it to update supplier organization information in Ariba Buyer.
AribaNetworkOrganizationSync determines which suppliers to download information for based on the supplier organization ID, which must be either an Ariba Network ID (networkid domain) or a D-U-N-S ID (duns domain).
For each supplier organization that has either an Ariba Network ID or D-U-N-S ID, AribaNetworkOrganizationSync sends an organization data request to Ariba Network. Ariba Network replies with the following information about the supplier:
• Name
• Credentials (domain and value)
• Postal address
• Telephone and fax numbers
• Corporate URL
• Corporate information (year founded, number of employees, minimum and maximum annual revenue, state of incorporation, ownership type)
• Payment provider information (provider ID, payment method)
• Contact information (name, postal address, email address, telephone and fax numbers)
• Industry classification
• Classification code information
• Payment information (preferred payment method, payment method type, remittance address)
This task recognizes the following parameters:
• BatchSize, which determines how many items to include in each cXML message. This parameter effectively controls the load placed on Ariba Network from supplier profiles. If Ariba Network times out, and you see an error to that effect in the Ariba Buyer log file, you can adjust this parameter to be smaller. A smaller value increases the network traffic, however, since more messages are exchanged.
• SyncANSuppliersWithDunsNumbers, which specifies whether to pull data for suppliers with D-U-N-S numbers. Suppliers with Ariba Network ID are always pulled; suppliers with D-U-N-S numbers are pulled only if this parameter is true.
For more information on how to load and update supplier data, see the Ariba Spend Management Data Load Guide.
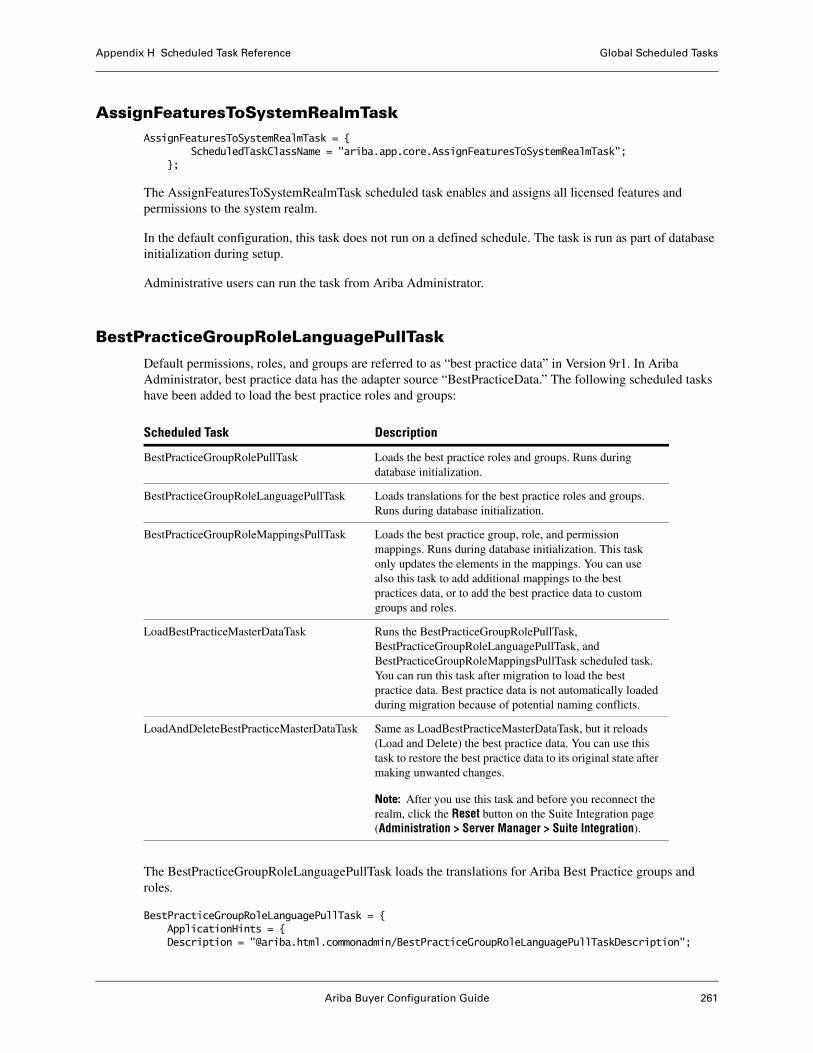
Ariba Buyer Configuration Guide 261
Appendix H Scheduled Task Reference Global Scheduled Tasks
AssignFeaturesToSystemRealmTaskAssignFeaturesToSystemRealmTask = { ScheduledTaskClassName = "ariba.app.core.AssignFeaturesToSystemRealmTask"; };
The AssignFeaturesToSystemRealmTask scheduled task enables and assigns all licensed features and permissions to the system realm.
In the default configuration, this task does not run on a defined schedule. The task is run as part of database initialization during setup.
Administrative users can run the task from Ariba Administrator.
BestPracticeGroupRoleLanguagePullTask
Default permissions, roles, and groups are referred to as “best practice data” in Version 9r1. In Ariba Administrator, best practice data has the adapter source “BestPracticeData.” The following scheduled tasks have been added to load the best practice roles and groups:
The BestPracticeGroupRoleLanguagePullTask loads the translations for Ariba Best Practice groups and roles.
BestPracticeGroupRoleLanguagePullTask = {ApplicationHints = {Description = "@ariba.html.commonadmin/BestPracticeGroupRoleLanguagePullTaskDescription";
Scheduled Task Description
BestPracticeGroupRolePullTask Loads the best practice roles and groups. Runs during database initialization.
BestPracticeGroupRoleLanguagePullTask Loads translations for the best practice roles and groups. Runs during database initialization.
BestPracticeGroupRoleMappingsPullTask Loads the best practice group, role, and permission mappings. Runs during database initialization. This task only updates the elements in the mappings. You can use also this task to add additional mappings to the best practices data, or to add the best practice data to custom groups and roles.
LoadBestPracticeMasterDataTask Runs the BestPracticeGroupRolePullTask, BestPracticeGroupRoleLanguagePullTask, and BestPracticeGroupRoleMappingsPullTask scheduled task. You can run this task after migration to load the best practice data. Best practice data is not automatically loaded during migration because of potential naming conflicts.
LoadAndDeleteBestPracticeMasterDataTask Same as LoadBestPracticeMasterDataTask, but it reloads (Load and Delete) the best practice data. You can use this task to restore the best practice data to its original state after making unwanted changes.
Note: After you use this task and before you reconnect the realm, click the Reset button on the Suite Integration page (Administration > Server Manager > Suite Integration).
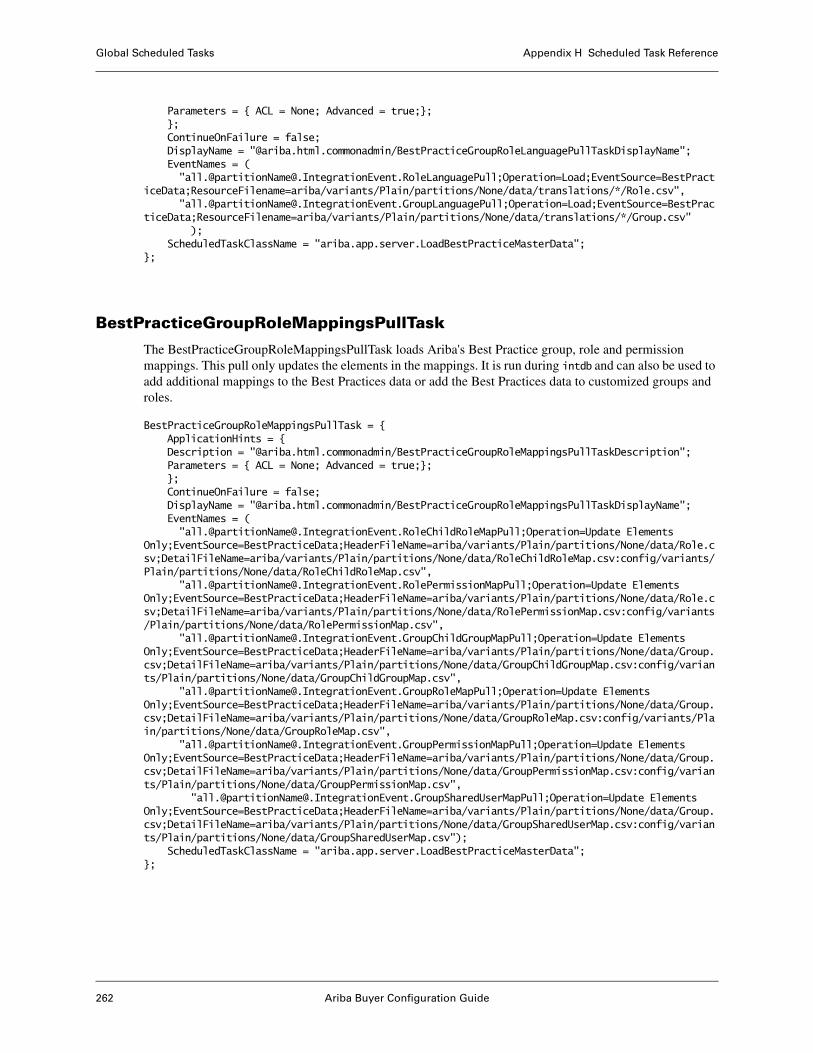
Global Scheduled Tasks Appendix H Scheduled Task Reference
262 Ariba Buyer Configuration Guide
Parameters = { ACL = None; Advanced = true;};};ContinueOnFailure = false;DisplayName = "@ariba.html.commonadmin/BestPracticeGroupRoleLanguagePullTaskDisplayName";EventNames = ("all.@[email protected];Operation=Load;EventSource=BestPract
iceData;ResourceFilename=ariba/variants/Plain/partitions/None/data/translations/*/Role.csv","all.@[email protected];Operation=Load;EventSource=BestPrac
ticeData;ResourceFilename=ariba/variants/Plain/partitions/None/data/translations/*/Group.csv" );
ScheduledTaskClassName = "ariba.app.server.LoadBestPracticeMasterData";};
BestPracticeGroupRoleMappingsPullTask
The BestPracticeGroupRoleMappingsPullTask loads Ariba's Best Practice group, role and permission mappings. This pull only updates the elements in the mappings. It is run during intdb and can also be used to add additional mappings to the Best Practices data or add the Best Practices data to customized groups and roles.
BestPracticeGroupRoleMappingsPullTask = {ApplicationHints = {Description = "@ariba.html.commonadmin/BestPracticeGroupRoleMappingsPullTaskDescription";Parameters = { ACL = None; Advanced = true;};};ContinueOnFailure = false;DisplayName = "@ariba.html.commonadmin/BestPracticeGroupRoleMappingsPullTaskDisplayName";EventNames = ("all.@[email protected];Operation=Update Elements
Only;EventSource=BestPracticeData;HeaderFileName=ariba/variants/Plain/partitions/None/data/Role.csv;DetailFileName=ariba/variants/Plain/partitions/None/data/RoleChildRoleMap.csv:config/variants/Plain/partitions/None/data/RoleChildRoleMap.csv",
"all.@[email protected];Operation=Update Elements Only;EventSource=BestPracticeData;HeaderFileName=ariba/variants/Plain/partitions/None/data/Role.csv;DetailFileName=ariba/variants/Plain/partitions/None/data/RolePermissionMap.csv:config/variants/Plain/partitions/None/data/RolePermissionMap.csv",
"all.@[email protected];Operation=Update Elements Only;EventSource=BestPracticeData;HeaderFileName=ariba/variants/Plain/partitions/None/data/Group.csv;DetailFileName=ariba/variants/Plain/partitions/None/data/GroupChildGroupMap.csv:config/variants/Plain/partitions/None/data/GroupChildGroupMap.csv",
"all.@[email protected];Operation=Update Elements Only;EventSource=BestPracticeData;HeaderFileName=ariba/variants/Plain/partitions/None/data/Group.csv;DetailFileName=ariba/variants/Plain/partitions/None/data/GroupRoleMap.csv:config/variants/Plain/partitions/None/data/GroupRoleMap.csv",
"all.@[email protected];Operation=Update Elements Only;EventSource=BestPracticeData;HeaderFileName=ariba/variants/Plain/partitions/None/data/Group.csv;DetailFileName=ariba/variants/Plain/partitions/None/data/GroupPermissionMap.csv:config/variants/Plain/partitions/None/data/GroupPermissionMap.csv",
"all.@[email protected];Operation=Update Elements Only;EventSource=BestPracticeData;HeaderFileName=ariba/variants/Plain/partitions/None/data/Group.csv;DetailFileName=ariba/variants/Plain/partitions/None/data/GroupSharedUserMap.csv:config/variants/Plain/partitions/None/data/GroupSharedUserMap.csv");
ScheduledTaskClassName = "ariba.app.server.LoadBestPracticeMasterData";};
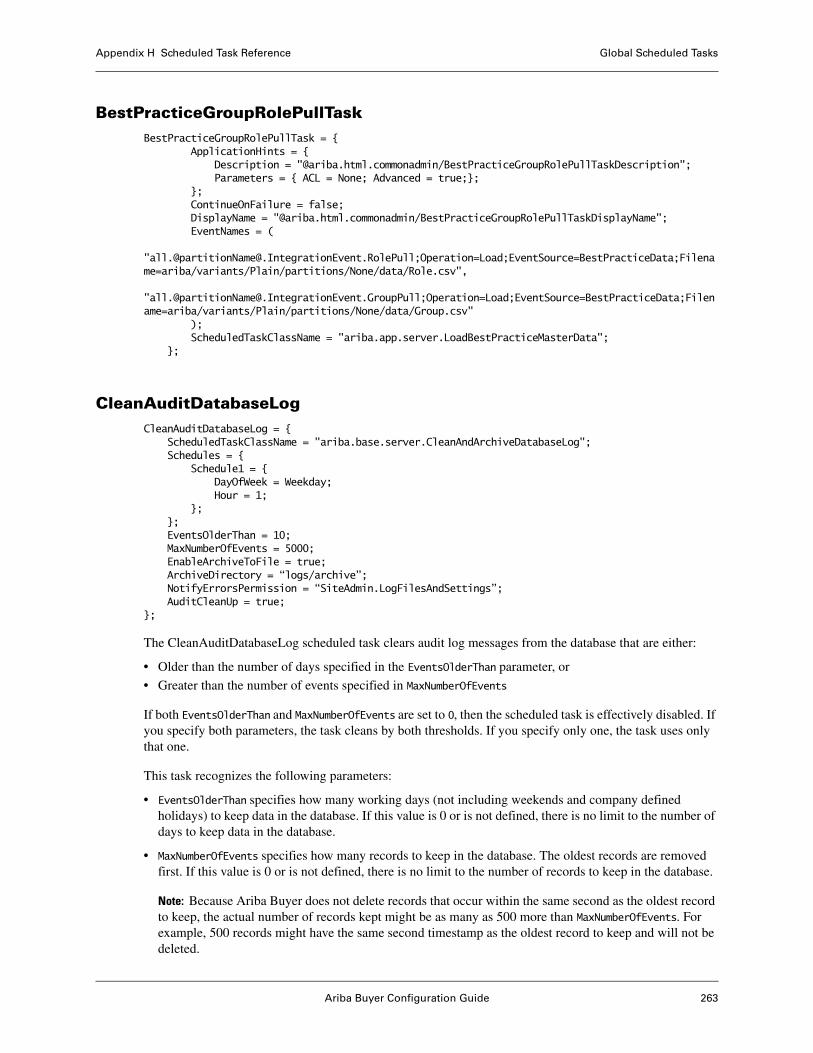
Ariba Buyer Configuration Guide 263
Appendix H Scheduled Task Reference Global Scheduled Tasks
BestPracticeGroupRolePullTaskBestPracticeGroupRolePullTask = { ApplicationHints = { Description = "@ariba.html.commonadmin/BestPracticeGroupRolePullTaskDescription"; Parameters = { ACL = None; Advanced = true;}; }; ContinueOnFailure = false; DisplayName = "@ariba.html.commonadmin/BestPracticeGroupRolePullTaskDisplayName"; EventNames = ( "all.@[email protected];Operation=Load;EventSource=BestPracticeData;Filename=ariba/variants/Plain/partitions/None/data/Role.csv", "all.@[email protected];Operation=Load;EventSource=BestPracticeData;Filename=ariba/variants/Plain/partitions/None/data/Group.csv" ); ScheduledTaskClassName = "ariba.app.server.LoadBestPracticeMasterData"; };
CleanAuditDatabaseLogCleanAuditDatabaseLog = {
ScheduledTaskClassName = "ariba.base.server.CleanAndArchiveDatabaseLog";Schedules = {
Schedule1 = {DayOfWeek = Weekday;Hour = 1;
};};EventsOlderThan = 10;MaxNumberOfEvents = 5000;EnableArchiveToFile = true;ArchiveDirectory = “logs/archive”;NotifyErrorsPermission = “SiteAdmin.LogFilesAndSettings”;AuditCleanUp = true;
};
The CleanAuditDatabaseLog scheduled task clears audit log messages from the database that are either:
• Older than the number of days specified in the EventsOlderThan parameter, or
• Greater than the number of events specified in MaxNumberOfEvents
If both EventsOlderThan and MaxNumberOfEvents are set to 0, then the scheduled task is effectively disabled. If you specify both parameters, the task cleans by both thresholds. If you specify only one, the task uses only that one.
This task recognizes the following parameters:
• EventsOlderThan specifies how many working days (not including weekends and company defined holidays) to keep data in the database. If this value is 0 or is not defined, there is no limit to the number of days to keep data in the database.
• MaxNumberOfEvents specifies how many records to keep in the database. The oldest records are removed first. If this value is 0 or is not defined, there is no limit to the number of records to keep in the database.
Note: Because Ariba Buyer does not delete records that occur within the same second as the oldest record to keep, the actual number of records kept might be as many as 500 more than MaxNumberOfEvents. For example, 500 records might have the same second timestamp as the oldest record to keep and will not be deleted.
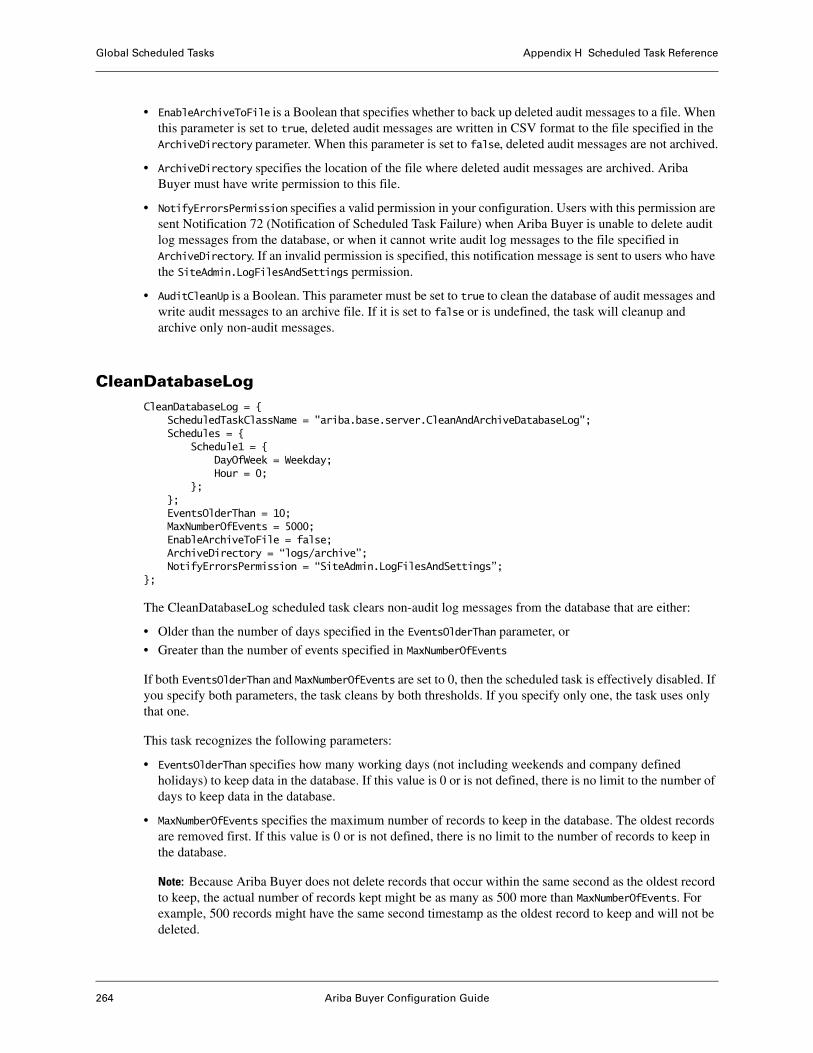
Global Scheduled Tasks Appendix H Scheduled Task Reference
264 Ariba Buyer Configuration Guide
• EnableArchiveToFile is a Boolean that specifies whether to back up deleted audit messages to a file. When this parameter is set to true, deleted audit messages are written in CSV format to the file specified in the ArchiveDirectory parameter. When this parameter is set to false, deleted audit messages are not archived.
• ArchiveDirectory specifies the location of the file where deleted audit messages are archived. Ariba Buyer must have write permission to this file.
• NotifyErrorsPermission specifies a valid permission in your configuration. Users with this permission are sent Notification 72 (Notification of Scheduled Task Failure) when Ariba Buyer is unable to delete audit log messages from the database, or when it cannot write audit log messages to the file specified in ArchiveDirectory. If an invalid permission is specified, this notification message is sent to users who have the SiteAdmin.LogFilesAndSettings permission.
• AuditCleanUp is a Boolean. This parameter must be set to true to clean the database of audit messages and write audit messages to an archive file. If it is set to false or is undefined, the task will cleanup and archive only non-audit messages.
CleanDatabaseLogCleanDatabaseLog = {
ScheduledTaskClassName = "ariba.base.server.CleanAndArchiveDatabaseLog";Schedules = {
Schedule1 = {DayOfWeek = Weekday;Hour = 0;
};};EventsOlderThan = 10;MaxNumberOfEvents = 5000;EnableArchiveToFile = false;ArchiveDirectory = “logs/archive”;NotifyErrorsPermission = “SiteAdmin.LogFilesAndSettings”;
};
The CleanDatabaseLog scheduled task clears non-audit log messages from the database that are either:
• Older than the number of days specified in the EventsOlderThan parameter, or
• Greater than the number of events specified in MaxNumberOfEvents
If both EventsOlderThan and MaxNumberOfEvents are set to 0, then the scheduled task is effectively disabled. If you specify both parameters, the task cleans by both thresholds. If you specify only one, the task uses only that one.
This task recognizes the following parameters:
• EventsOlderThan specifies how many working days (not including weekends and company defined holidays) to keep data in the database. If this value is 0 or is not defined, there is no limit to the number of days to keep data in the database.
• MaxNumberOfEvents specifies the maximum number of records to keep in the database. The oldest records are removed first. If this value is 0 or is not defined, there is no limit to the number of records to keep in the database.
Note: Because Ariba Buyer does not delete records that occur within the same second as the oldest record to keep, the actual number of records kept might be as many as 500 more than MaxNumberOfEvents. For example, 500 records might have the same second timestamp as the oldest record to keep and will not be deleted.
Ariba Buyer Configuration Guide 265
Appendix H Scheduled Task Reference Global Scheduled Tasks
• EnableArchiveToFile is a Boolean that specifies whether to archive deleted non-audit log messages to a file. When this parameter is set to true, deleted non-audit log messages are written in CSV format to the file specified in the ArchiveDirectory parameter. When this parameter is set to false, deleted non-audit log messages are not archived.
• ArchiveDirectory specifies the location of the file where deleted non-audit log messages are archived. Ariba Buyer must have write permission to this file.
• NotifyErrorsPermission specifies a valid permission in your configuration. Users with this permission are sent Notification 72 (Notification of Scheduled Task Failure) when Ariba Buyer is unable to delete non-audit log messages from the database, or when it cannot write non-audit log messages to the file specified in ArchiveDirectory. If an invalid permission is specified, this notification message is sent to users who have the SiteAdmin.LogFilesAndSettings permission.
CleanExpiredAuthDataCleanExpiredAuthData = { ScheduledTaskClassName = "ariba.auth.server.CleanExpiredAuthData"; Schedules = { Schedule1 = { DayOfWeek = Weekday; Hour = 22; Minute = 58; Second = 30; }; };};
The CleanExpiredAuthData scheduled task removes expired AuthData objects. When a user is authenticated via the Authentication API, and the authentication succeeds, an AuthData object is instantiated and stored in the database. This object has an associated timestamp that specifies how long the authentication remains valid. The CleanExpiredAuthData scheduled task looks for AuthData objects that have expired, and removes them from the database.
This task is relevant only for configurations using the Authentication EJBs. For more information on the Authentication API, see the 8.2 Ariba Spend Management API Guide.
CleanScheduledTaskStatusCleanScheduledTaskStatus = {
ApplicationHints = { Parameters = { Advanced = true;};};DeleteNotRunStatus = true; DeleteOldStatusDays = 90;ScheduledTaskClassName = "ariba.base.server.CleanScheduledTaskStatus";Schedules = { Schedule1 = { DayOfWeek = Saturday; Hour = 23;};};
The CleanScheduledTaskStatus scheduled task clears scheduled task status messages from that are older than the number of days specified in the DeleteOldDays parameter and when the DeleteNotRunStatus is true.
CleanupInactiveTokensCleanupInactiveTokens = { ScheduledTaskClassName = "ariba.app.util.CleanupInactivePersistedTokens"; Schedules = { Schedule1 = {
Global Scheduled Tasks Appendix H Scheduled Task Reference
266 Ariba Buyer Configuration Guide
DayOfWeek = Everyday; Hour = 1; Period = { Unit = Hours; Quantity = 12; } } } };
The CleanupInactiveTokens scheduled task deletes expired security tokens. In the default configuration, the task runs every 12 hours.
CommonSupplierSyncUsingSupplierLocationIDCommonSupplierSyncUsingSupplierLocationID = {
BatchSize = 10;SyncANSuppliersWithDunsNumbers = true;ScheduledTaskClassName =
"ariba.server.ormsserver.CommonSupplierReconcilerTask";Schedules = {
Schedule1 = { DayOfWeek = Saturday; Hour = 15; Minute = 59; Second = 30};
}; };
The CommonSupplierSyncUsingSupplierLocationID scheduled task is a variation of the AribaNetworkOrganizationSync task, but is specialized for the situation of a supplier that has different Ariba Network ID or a D-U-N-S ID.
CommonSupplierSyncUsingSupplierLocationID creates a new supplier organization when a supplier organization does not have an Ariba Network ID or a D-U-N-S ID, and the supplier organization includes a supplier that has a supplier location with an Ariba Network ID. You can see the Ariba Network ID for a supplier location when you view supplier location details in Ariba Administrator.
This task recognizes the following parameters:
• BatchSize, which determines how many items to include in each cXML message. This parameter effectively controls the load placed on Ariba Network from supplier profiles. If Ariba Network times out, and you see an error to that effect in the Ariba Buyer log file, you can adjust this parameter to be smaller. A smaller value increases the network traffic, however, since more messages are exchanged.
• SyncANSuppliersWithDunsNumbers, which specifies whether to pull data for suppliers with D-U-N-S numbers. Suppliers with Ariba Network ID are always pulled; suppliers with D-U-N-S numbers are pulled only if this parameter is true.
For more information on how to load and update supplier data, see the Ariba Spend Management Data Load Guide.
CommodityCodeReport CommodityCodeReport = {
ReportFileName = "config/variants/Plain/partitions/None/data/CommodityCodeExportMapReport.csv";
CEMEFieldExtensions = {psoft1 = ("SetId");mypar1 = ("extField1");
Ariba Buyer Configuration Guide 267
Appendix H Scheduled Task Reference Global Scheduled Tasks
};ScheduledTaskClassName = "ariba.common.core.CommodityCodeReport";
};
The CommodityCodeReport scheduled task is an administrative task that writes a report showing the mappings between partitioned commodity codes and commodity codes. During certain operations, such as sending commodity codes to an ERP system, Ariba Buyer must be able to map directly from commodity codes to partitioned commodity codes. If the mapping is not 1:1, there is no way to determine which partitioned commodity code to use.
This task writes a CSV file listing the existing mapping. Administrators can review this report to find erroneous mappings that should be corrected.
In the default configuration, this task does not run on a pre-defined schedule. Administrative users can run it on demand, from Ariba Administrator.
This task recognizes the following parameters:
• CEMEFieldExtensions, which lists any extrinsic fields on the commodity export map entry (CEME).
• ReportFileName, which specifies the name of the output file. The output file location is relative to BuyerServerRoot.
For more information on commodity codes and partitioned commodity codes, see the Ariba Spend Management Data Load Guide.
ConsolidatedNotificationsConsolidatedNotifications = {
ScheduledTaskClassName ="ariba.approvable.server.ConsolidatedNotifications";
Schedules = {Schedule1 = {
DayOfWeek = Weekday;Hour = 0;
};};
};
The ConsolidatedNotifications scheduled task tells Ariba Buyer when to group together notifications to a single user and send them out as a unit. Typically you run this task once a day during the week.
Individual users can choose whether to have notification messages consolidated by choosing the Send email summary option in the Set email Notifications Preferences screen in the Ariba Buyer user interface. If a user has chosen not to enable consolidated notifications, the notification messages are sent as soon as they are created.
The ConsolidatedNotifications scheduled task groups and sends all types of notification messages except those for Receivables, which are grouped and sent by the ReceiptNotifications scheduled task.
CreateRealmProfilesCreateRealmProfiles = {
ScheduledTaskClassName = "ariba.base.core.CreateRealmProfiles";};
Global Scheduled Tasks Appendix H Scheduled Task Reference
268 Ariba Buyer Configuration Guide
This scheduled task is for Ariba internal use only.
CustomObjectPullTaskCustomObjectPullTask = { ExternalRelationPullTopics = ( ); PullTopics = ( CDSHttpEditPermissionPull ); ScheduledTaskClassName = ariba.asm.tasks.CustomPull; };
The CustomObjectPullTask allows you to do pull customization by adding new events on CustomObjectPullTask task in the ScheduledTasks.table file. All the user defined pull tasks should have ScheduledTaskClassName as ariba.asm.tasks.CustomPull. You can add the topics on PullTopics. These topics run sequentially to perform the pull task. You can also add entries to ExternalRelationPullTopics (this is optional however), to indicate the external relation topics.
CustomObjectPushTaskCustomObjectPushTask = {
ScheduledTaskClassName = "ariba.asm.tasks.CommonPush"; // add customized pushes here.
PushTopics = ();};
The CustomObjectPushTask allows you to do push customization by adding new events on CustomObjectPushTask in the ScheduledTasks.table file. All the user defined push tasks should have ScheduledTaskClassName as ariba.asm.tasks.CustomPush. You can add the topics on PushTopics. These topics run sequentially to perform the push task. You can also add entries to ExternalRelationPushTopics (this is optional however), to indicate the external relation topics.
DumpAssociatedTranslationsTask
This task is for internal Ariba personnel only.
DumpAssociatedTranslationsTask = { IsSampleOnly = false; MaxTaskTimeInMillis = 14400000; ObjectsToReconstituteInBatch = 100; ScheduledTaskClassName = "ariba.base.core.DumpAssociatedTranslationsTask"; TaskDumpFile = DumpMLSMLocS.csv; TaskSleepTimeInMillis = 10000; };
The DumpAssociatedTranslationsTask scheduled task (display name Dump Associated Translations) is used by Ariba Quality Assurance personnel to test the LoadAssociatedTranslationsTask scheduled task.
Never run this scheduled task.
DumpDashboardsDumpDashboards = { Directory = "ariba/variants/Plain/exportedDashboards";
Ariba Buyer Configuration Guide 269
Appendix H Scheduled Task Reference Global Scheduled Tasks
ObjectType = ariba.dashboard.core.Dashboard; Operation = Export; ScheduledTaskClassName = ariba.dashboard.core.ObjectEncoding; Versioning = false; ApplicationHints = { Parameters = { Advanced = true;};}; };
The DumpDashboards scheduled task exports dashboard templates to an XML file. You can import the exported XML file by running the LoadDashboards scheduled task.
DumpPortletConfigsDumpPortletConfigs = { Directory = "ariba/variants/Plain/exportedPortletConfigs"; ObjectType = ariba.portlet.core.PortletConfig; Operation = Export; ScheduledTaskClassName = ariba.dashboard.core.ObjectEncoding; Versioning = false; ApplicationHints = { Parameters = { Advanced = true;};}; };
The DumpPortletConfigs scheduled task exports dashboard portlets to an XML file. You can import the exported XML file by running the LoadPortletConfigs scheduled task.
EncryptedAttachmentUpdaterEncryptedAttachmentUpdater = { ScheduledTaskClassName = "ariba.approvable.core.EncryptedAttachmentUpdater"; RequiresPrivilegedSession = true; Schedules = { Schedule1 = { DayOfWeek = Saturday; Hour = 20; Minute = 59; Second = 30; }; }; };
The EncryptedAttachementUpdater scheduled task scans through all the attachments in the system and updates them to the latest encryption key.
This task runs once every Saturday starting at 8:59:30 PM.
EncryptedBlobUpdaterEncryptedBlobUpdater = { ApplicationHints = { Description = "@ariba.html.commonadmin/EncryptedBlobUpdaterDescription"; }; BatchSize = 100; DisplayName = "@ariba.html.commonadmin/EncryptedBlobUpdaterDisplayName"; IntervalBetweenEncryptionsInMillis = 3000; MaxRunTimeInMinutes = 360; RequiresPrivilegedSession = true; ScheduledTaskClassName = "ariba.cxml.base.client.EncryptedBlobUpdater"; Schedules = { Schedule1 = { DayOfWeek = Everyday; Hour = 23;};};
Global Scheduled Tasks Appendix H Scheduled Task Reference
270 Ariba Buyer Configuration Guide
};
The UpdateEncryptedBLOBS scheduled task (display name Update Encrypted Blobs) scans the database for encrypted BLOBs and attempts to re-encrypt the data using the latest crypt.
EncryptedStringUpdaterEncryptedStringUpdater
ScheduledTaskClassName = "ariba.base.server.EncryptedStringUpdater";RequiresPrivilegedSession = true;Schedules = {
Schedule1 = DayOfWeek = Saturday;Hour = 21;Minute = 59;Second = 30;
};};
};
The EncryptedStringUpdater scheduled task scans all database tables that contain encrypted strings and attempts to re-encrypt the data using the latest crypt. Crypt keys are changed periodically for security reasons. This scheduled task ensures that sensitive data is encrypted with the latest crypt.
ExpireDelegationsExpireDelegations = {
ScheduledTaskClassName = "ariba.user.server.ExpireDelegations";Schedules = {
Schedule1 = {DayOfWeek = Weekday;Hour = 0
}; };};
The ExpireDelegations scheduled task determines when to remove delegations of approval authority that have expired (based on the end date) or activate those that should go into effect (based on the start date). This task applies to both delegations made by users (reassigning their own approval authority) and by administrators (reassigning other users’ approval authority). When an administrator undoes a delegation, the delegation automatically expires.
Typically you run this task once a day, to pick up any delegation changes scheduled for that day.
This task does not send any notification messages.
FailedApprovalUpdatesFailedApprovalUpdates = {
ScheduledTaskClassName = "ariba.approvable.server.FailedApprovalUpdates";Schedules = {
Schedule1 = {DayOfWeek = Weekday;Hour = 1;
};};
Ariba Buyer Configuration Guide 271
Appendix H Scheduled Task Reference Global Scheduled Tasks
};
Ariba Buyer makes approval updates (approving and denying requests) in the background, using a separate process. Since those updates may occasionally fail due to a situation such as a power failure or a machine crash, the FailedApprovalUpdates scheduled task is an error-recovery task that retries the processing of approval updates that have not completed successfully.
Each time it runs, this task scans the database for all such events (approve or deny approvables) and tries to process any such events that it finds. It can potentially retry the same event each time it runs, as long as the event remains unprocessed.
FailedDurableEventsFailedDurableEvents = {
ScheduledTaskClassName = "ariba.server.workflowserver.FailedDurableEvents";Schedules = {
Schedule1 = {DayOfWeek = Weekday; Hour = 1;Period = {
Unit = Hours;Quantity = 6;
};};
};};
The FailedDurableEvents scheduled task is an error-recovery task that retries the processing of approvable documents that have reached the Approved state but not successfully transitioned to the Processed state. This task is intended to handle situations where the approvable processor was unable to process a document due to a situation such as a power failure, machine crash, or a node going down in the middle of processing the approvable.
Each time it runs, this task scans the database for all such documents and tries to process any such documents that it finds. It can potentially retry the same document each time it runs, as long as the document remains unprocessed.
FailedObjectArchiveFailedObjectArchive = {
ScheduledTaskClassName = ariba.encoder.soap.base.FailedObjectArchiveTask; Directory = "objectArchive"; PurgeScope=”Procurement”;RunningTimeInMinute = 480;MaximumAllowedErrors = 15;
}
The FailedObjectArchive scheduled task is associated with database purge and archive. The scheduled task ObjectArchive (see “ObjectArchive” on page 277) runs on a regular schedule, and writes all documents marked for archiving out to disk. If that task fails to archive any marked items, it moves those items to an error state. The FailedObjectArchive task looks for objects in that error state, and retries the archive operation.
This task recognizes the same parameters as ObjectArchive, as described on page 277.
Global Scheduled Tasks Appendix H Scheduled Task Reference
272 Ariba Buyer Configuration Guide
Note: For FailedObjectArchive, the default value of IgnoreBadFieldValue is true; for ObjectArchive, the default value of IgnoreBadFieldValue is false. For all other parameters, the defaults are the same.
GeneratingReportingEntriesGenerateReportingEntries = {
ScheduledTaskClassName = "ariba.procure.server.GenerateCatalogEntriesForReporting";};
The GeneratingReportingEntries scheduled task is run to update catalog data before running the Global Catalog report in Ariba Buyer. This scheduled task must be run to convert catalog date to a form that Ariba Buyer’s reporting infrastructure can consume. Run this scheduled task before running the Global Catalog report for the first time and then as often as needed to refresh catalog data before running the report. However, depending on the number of catalogs in your Ariba Buyer instance, this task can take up to several hours to run, and thus you should run it during hours that are not peak user load.
Even after running this scheduled task, the Global Catalog report does not have the ability to report on extrinsics. If you have extended the catalog reporting entry, that information is not pulled into Ariba Buyer during this task.
For more information on customizing with extension files, see the Ariba Spend Management Customization Guide.
GetPendingAribaNetworkOrganizationSyncGetPendingAribaNetworkOrganizationSync = {
ScheduledTaskClassName = "ariba.user.messaging.GetPendingNetworkOrganizationUpdatesTask";
};
The GetPendingAribaNetworkOrganizationSync scheduled task polls Ariba Network for recent updates to supplier information. When a supplier profile changes on Ariba Network, those updates are queued up on the Ariba Network side. Each time this task runs, it downloads updates to supplier information that have been made on Ariba Network.
For more information on synchronizing supplier information, see the Ariba Spend Management Data Load Guide.
GroupListRepopulateGroupListRepopulate= {
ClassName = "ariba.user.core.Group"; ScheduledTaskClassName = "ariba.user.core.GroupAndRoleVectorRepopulate";Schedules = {
Schedule1 = { DayOfWeek = Weekday; Hour = 02; Minute = 59; }; };
};
The GroupListRepopulate scheduled task is a system maintenance task that maintains data related to groups. Every configuration should run this task. You should not typically need to change the configuration entry for this task, except possibly to choose a different schedule.
Ariba Buyer Configuration Guide 273
Appendix H Scheduled Task Reference Global Scheduled Tasks
This task should be scheduled so that it does not conflict with administrators making manual changes to groups.
JobPersistTaskForAssociatedTranslationsDump
This task is for internal Ariba personnel only.
"JobPersistTaskForAssociatedTranslationsDump" = { ScheduledTaskClassName = "ariba.base.core.JobPersistTaskForAssociatedTranslationsDump"; };
The JobPersistTaskForAssociatedTranslationsDump scheduled task creates a job that triggers the DumpAssociatedTranslationsTask scheduled task, which is used by Ariba Quality Assurance personnel to test the LoadAssociatedTranslationsTask scheduled task.
Never run this scheduled task.
JobPersistTaskForAssociatedTranslationsLoad
This task is for internal Ariba personnel only.
"JobPersistTaskForAssociatedTranslationsLoad" = { ScheduledTaskClassName = "ariba.base.core.JobPersistTaskForAssociatedTranslationsLoad"; };
The JobPersistTaskForAssociatedTranslationsLoad scheduled task creates a job that triggers the LoadAssociatedTranslationsTask scheduled task.
Never run this scheduled task.
LoadAllRulesLoadAllRules = {
AllVariants = true;ScheduledTaskClassName = "ariba.approvable.server.LoadRules";
};
The LoadAllRules scheduled task loads approval rules.
LoadAndDeleteBestPracticeMasterDataTask
Same as LoadBestPracticeMasterDataTask, but it reloads (Load and Delete) the best practice data. You can use this task to restore the best practice data to its original state after making unwanted changes.
Note: After you use this task and before you reconnect the realm, click the Reset button on the Suite Integration page (Administration > Server Manager > Suite Integration).
LoadAndDeleteBestPracticeMasterDataTask = {ApplicationHints = {Description = "@ariba.html.commonadmin/LoadAndDeleteBestPracticeMasterDataTaskDescription";Parameters = { ACL = None; Advanced = true;};};ContinueOnFailure = false;
Global Scheduled Tasks Appendix H Scheduled Task Reference
274 Ariba Buyer Configuration Guide
DisplayName = "@ariba.html.commonadmin/LoadAndDeleteBestPracticeMasterDataTaskDisplayName";EventNames = ("all.@[email protected];Operation=Load And
Delete;EventSource=BestPracticeData;Filename=ariba/variants/Plain/partitions/None/data/Role.csv","all.@[email protected];Operation=Load;EventSource=BestPract
iceData;ResourceFilename=ariba/variants/Plain/partitions/None/data/translations/*/Role.csv","all.@[email protected];Operation=Update;EventSource=Bes
tPracticeData;HeaderFileName=ariba/variants/Plain/partitions/None/data/Role.csv;DetailFileName=ariba/variants/Plain/partitions/None/data/RoleChildRoleMap.csv:config/variants/Plain/partitions/None/data/RoleChildRoleMap.csv",
"all.@[email protected];Operation=Update;EventSource=BestPracticeData;HeaderFileName=ariba/variants/Plain/partitions/None/data/Role.csv;DetailFileName=ariba/variants/Plain/partitions/None/data/RolePermissionMap.csv:config/variants/Plain/partitions/None/data/RolePermissionMap.csv",
"all.@[email protected];Operation=Load And Delete;EventSource=BestPracticeData;Filename=ariba/variants/Plain/partitions/None/data/Group.csv",
"all.@[email protected];Operation=Load;EventSource=BestPracticeData;ResourceFilename=ariba/variants/Plain/partitions/None/data/translations/*/Group.csv",
"all.@[email protected];Operation=Update;EventSource=BestPracticeData;HeaderFileName=ariba/variants/Plain/partitions/None/data/Group.csv;DetailFileName=ariba/variants/Plain/partitions/None/data/GroupChildGroupMap.csv:config/variants/Plain/partitions/None/data/GroupChildGroupMap.csv",
"all.@[email protected];Operation=Update;EventSource=BestPracticeData;HeaderFileName=ariba/variants/Plain/partitions/None/data/Group.csv;DetailFileName=ariba/variants/Plain/partitions/None/data/GroupRoleMap.csv:config/variants/Plain/partitions/None/data/GroupRoleMap.csv",
"all.@[email protected];Operation=Update;EventSource=BestPracticeData;HeaderFileName=ariba/variants/Plain/partitions/None/data/Group.csv;DetailFileName=ariba/variants/Plain/partitions/None/data/GroupPermissionMap.csv:config/variants/Plain/partitions/None/data/GroupPermissionMap.csv",
"all.@[email protected];Operation=Update;EventSource=BestPracticeData;HeaderFileName=ariba/variants/Plain/partitions/None/data/Group.csv;DetailFileName=ariba/variants/Plain/partitions/None/data/GroupSharedUserMap.csv:config/variants/Plain/partitions/None/data/GroupSharedUserMap.csv"
);ScheduledTaskClassName = "ariba.app.server.LoadBestPracticeMasterData";
};
LoadAssociatedTranslationsTaskLoadAssociatedTranslationsTask = { MaxTaskTimeInMillis = 21600000; ObjectsToReconstituteInBatch = 100; ScheduledTaskClassName = "ariba.base.core.LoadAssociatedTranslationsTask"; Schedules = { Schedule1 = { DayOfWeek = Everyday; Hour = 23;};}; TaskSleepTimeInMillis = 10000; };
The LoadAssociatedTranslationsTask scheduled task (display name Load Associated Translations) updates and fixes the default MultiLocaleString and MultiLingualString translations.
LoadBestPracticeMasterDataTask
Runs the BestPracticeGroupRolePullTask, BestPracticeGroupRoleLanguagePullTask, and BestPracticeGroupRoleMappingsPullTask scheduled task. You can run this task after migration to load the best practice data. Best practice data is not automatically loaded during migration because of potential naming conflicts.
Ariba Buyer Configuration Guide 275
Appendix H Scheduled Task Reference Global Scheduled Tasks
LoadBestPracticeMasterDataTask = {ApplicationHints = {Description = "@ariba.html.commonadmin/LoadBestPracticeMasterDataTaskDescription";Parameters = { ACL = None; Advanced = true;};};ChainedScheduledTasks = (BestPracticeGroupRolePullTask,BestPracticeGroupRoleLanguagePullTask,BestPracticeGroupRoleMappingsPullTask
);ContinueOnFailure = false;DisplayName ="@ariba.html.commonadmin/LoadBestPracticeMasterDataTaskDisplayName";ScheduledTaskClassName = "ariba.util.scheduler.ChainedScheduledTask";
};
LoadDashboardsLoadDashboards = { Directory = "ariba/variants/Plain/dumpDashboards"; ObjectType = "ariba.dashboard.core.Dashboard"; Operation = "Import"; ScheduledTaskClassName = "ariba.dashboard.core.ObjectEncoding"; Versioning = "true"; };
The LoadDashboards scheduled task imports a dashboard XML file. This task does not run on a defined schedule. Administrative users can run it from Ariba Administrator.
LoadPortletConfigsLoadPortletConfigs = { Directory = "ariba/variants/Plain/dumpPortletConfigs"; ObjectType = "ariba.portlet.core.PortletConfig"; Operation = "Import"; ScheduledTaskClassName = "ariba.dashboard.core.ObjectEncoding"; Versioning = "true"; };
The LoadPortletConfigs scheduled task imports a portlet configuration XML file. This task does not run on a defined schedule. Administrative users can run it from Ariba Administrator.
MakeDomainNameVersionExplicitMakeDomainNameVersionExplicit = {
ScheduledTaskClassName = "ariba.basic.core.MakeDomainNameVersionExplicit";Classes = {
ariba.basic.core.CommodityCode = {Fields = ( "Domain" );UpdateSystemDomainParam = true;
};ariba.basic.core.ClassificationCodeMap = {
Fields = ( "DomainFrom", "DomainTo" );};
};};
Global Scheduled Tasks Appendix H Scheduled Task Reference
276 Ariba Buyer Configuration Guide
The MakeDomainNameVersionExplicit scheduled task transforms implicit commodity code domain versions to explicit commodity code domain versions (for example, unspsc to unspsc_v12.2) for all domains. It also changes the Application.ClassificationCodes.SystemCommodityCodeDomainName parameter setting to an explicit commodity code domain version.
This MakeDomainNameVersionExplicit scheduled task recognizes the following parameters:
• Fields, which specifies the fields to be modified in the domain. In the default configuration, the MakeDomainNameVersionExplicit scheduled task modifies the CommodityCode.Domain, ClassificationCodeMap.DomainFrom, and ClassificationCodeMap.DomainTo fields.
• UpdateSystemDomainParam, which is a Boolean that specifies whether the system domain should be updated. In the default configuration, this parameter is set to true for the CommodityCode.Domain field.
You must restart Ariba Buyer after running the MakeDomainNameVersionExplicit scheduled task.
The MakeDomainValueVersionExplicit scheduled task changes domain versions in memory only. It does not modify the contents of CSV files. After running the MakeDomainValueVersionExplicit scheduled task, you must manually modify the domain versions in the following CSV files so that the data in memory and the data in the CSV files is identical:
• CommodityCode.csv
• ClassificationCodeMap.csv
• ClassificationDomainMeta.csv
You must run the MakeDomainNameVersionExplicit scheduled task before changing the commodity code system domain. For information on changing the commodity code system domain, see the Ariba Spend Management Data Load Guide.
MigrateCommodityCodesToCCCHierarchyMigrateCommodityCodesToCCCHierarchy = {
ScheduledTaskClassName = "ariba.common.migrate.ConvertDefaultCCCodesToHierarchyTask"; FileName = "CommodityCodeNames.csv"; OutputFileName = "HierarchyCommodityCodes.csv";ColumnName = "Name";SeparatorChar = ";";DomainName = "ccc";
}
The MigrateCommodityCodesToCCCHierarchy scheduled task is an optional scheduled task that you can use to help convert your commodity code data during the process of migrating to Version 9r1. For more information on this scheduled task, see the appropriate Ariba Buyer Migration Guide.
MigrateCommodityCodesToUNSPSCMigrateCommodityCodesToUNSPSC = {
FileName = CommodityCodeNames.csv; OutputFileName = HierarchyUnspscCommodityCodes.csv;ColumnName = Name;DomainName = ccc; ScheduledTaskClassName =
"ariba.common.migrate.ConvertDefaultUnspcCodesToHierarchyTask"; UnspscCodeFileName = "config/standards/unspscaudit122.csv"; };

Ariba Buyer Configuration Guide 277
Appendix H Scheduled Task Reference Global Scheduled Tasks
The MigrateCommodityCodesToUNSPSC scheduled task is an optional scheduled task that you can use to help convert your commodity code data during the process of migrating to Version 9r1. For more information on this scheduled task, see the Ariba Buyer Migration Guide.
ObjectArchiveObjectArchive = {
Directory = "objectArchive"; RunningTimeInMinute = 480;MaximumAllowedErrors = 15;DeleteOnly="false";PurgeScope = ProcurementScheduledTaskClassName = ariba.encoder.soap.base.ArchiveTask; Schedules = {
Schedule1 = { DayOfWeek = Everyday; Hour = 20; Minute = 30}; };
};}
The ObjectArchive scheduled task is associated with database purge and archive. It looks for data in the Ariba Buyer database that has been marked for purging, writes that data out to disk files as an archive, and then purges it from the database.
This task recognizes the following parameters:
• ArchiveObjectsInGroups restricts the set of objects to a list of explicitly specified groups. You typically use this parameter only for error recovery, to archive a specific set of groups that previously failed. The value is a list of group IDs, separated by comma and surrounded by parentheses. For example:
ArchiveObjectsInGroups = (abc.xy, cde.xy);
• DeleteOnly is a Boolean, indicating whether to archive data before the purge. If set to true, data is purged but not archived. If set to false, data is archived to disk before purging. The default is false.
• Directory specifies the output directory, where the files are to be created. The path name is relative to BuyerServerRoot.
• IgnoreBadFieldValue is a Boolean, indicating whether invalid data is handled as an error or a warning. This parameter determines the severity of errors such as invalid links or missing attachments. If this parameter is set to false, invalid data is treated as an error (and included when counting MaximumAllowedErrors). If it is set to true, invalid data generates a warning only. In the default configuration, this parameter is set to false.
• MaximumAllowedErrors is a performance-tuning parameter. If the task encounters errors as it runs, it stops after encountering MaximumAllowedErrors. You use this parameter to ensure that the task stops quickly in the event of a serious error such as a full disk. In the default configuration, this parameter is set to 10.
• PurgeScope names a purge scope, such as Procurement. Within each scope, certain objects are tagged to indicate that they can be purged wtihout being archived; the PurgeScope parameter is used to identify those objects. For example, in the Procurement scope, workflow state objects can be purged without being archived.
• RunningTimeInMinute is a performance -ttuning parameter that specifies a maximum running time. In the default configuration, the value is 480 minutes, or 8 hours. If the task is still running when the specified number of minutes have elapsed, the task will terminate and start again at the next scheduled time.
Global Scheduled Tasks Appendix H Scheduled Task Reference
278 Ariba Buyer Configuration Guide
• SleepIntervalInMillis is a performance-tuning parameter. During the archiving phase, the task “sleeps” for the specified number of milliseconds after archiving each group. The point of this parameter is to reduce the overall system load so that resources are available to other processes, if necessary. The default is 5000 milliseconds (5 seconds).
If the archive operation fails, the FailedObjectArchive task is used to retry the failed items. For more information on this task, see “FailedObjectArchive” on page 271.
PurgeLocalTempDirTaskPurgeLocalTempDirTask = {
ScheduledTaskClassName = "ariba.base.server.PurgeLocalTempDir";MinimumFileAge = 72;ExceptionSuffixList = (".lob");Schedules = {
Schedule1 = {DayOfWeek = Everyday;Hour = 1;
};};ExecutionNode = "AllNodes";
};
The PurgeLocalTempDirTask scheduled task removes files from the temporary directory specified by the config/Parameters.table parameter System.Base.LocalTempDirectory.
This task recognizes the following parameters
• MinimumFileAge, which specifies the minimum age, in hours, of files that should be purged.
• ExceptionSuffixList, which specifies file types that should not be purged.
PurgeSharedTempDirTaskPurgeSharedTempDirTask = {
ScheduledTaskClassName = "ariba.base.server.PurgeSharedTempDir";MinimumFileAge = 72;ExceptionSuffixList = (".lob");Schedules = {
Schedule1 = {DayOfWeek = Everyday;Hour = 1;
};};ExecutionNode = "AllNodes";
};
The PurgeSharedTempDirTask scheduled task removes files from the temporary directory specified by the config/Parameters.table parameter System.Base.SharedTempDirectory.
This task recognizes the following parameters
• MinimumFileAge, which specifies the minimum age, in hours, of files that should be purged.
• ExceptionSuffixList, which specifies file types that should not be purged.
Ariba Buyer Configuration Guide 279
Appendix H Scheduled Task Reference Global Scheduled Tasks
ReceiptNotificationsReceiptNotifications = { ScheduledTaskClassName = ariba.receiving.ReceiptNotifications; Schedules = { Schedule1 = { DayOfWeek = Weekday; Hour = 0;};}; };
The ReceiptNotifications scheduled task processes receipt notifications.
RefreshKitsFromCatalogRefreshKitsFromCatalog = { ApplicationHints = { Description = "@ariba.catalog.admin/RefreshKitsFromCatalogTaskDescription"; }; DisplayName = "@ariba.catalog.admin/RefreshKitsFromCatalog"; ScheduledTaskClassName = "ariba.kitting.core.RefreshKitsFromCatalog"; Schedules = { Schedule1 = { DayOfWeek = Weekday; Hour = 5;};}; };
The RefreshKitsFromCatalog scheduled task Updates the price of individual catalog items in catalog kits, as well as the entire catalog kit price.
ReindexCatalogsReindexCatalogs = { ApplicationHints = { Description = "@ariba.catalog.admin/ReindexCatalogsTaskDescription"; }; DisplayName = "@ariba.catalog.admin/ReindexCatalogs"; ScheduledTaskClassName = "ariba.catalog.admin.server.ReindexCatalogsTask";};
The ReindexCatalogs scheduled task generates a new index from all the activated catalogs. This is necessary when changes are made to the catalog hierarchy.
ReloadPasswordFileReloadPasswordFile = {
ScheduledTaskClassName = "ariba.auth.server.ReloadPasswordFile";PasswordAdapterName="PasswordAdapter1";Schedules = {
Schedule1 = {DayOfWeek = Weekday;Hour = 0;
};};
};
The ReloadPasswordFile scheduled task reads password information from a text file and loads it into the database. This task runs during the database initialization process. An administrator might want to run this task after database initialization to reload password information.
The ReloadPasswordFile scheduled task is relevant only for the Crypt Database Password Adapter. If you are not using the Crypt Database Password Adapter, you can either remove this scheduled task from your configuration or set its schedule so that it never runs.
Global Scheduled Tasks Appendix H Scheduled Task Reference
280 Ariba Buyer Configuration Guide
This task recognizes the following parameter:
• PasswordAdapterName, which specifies the password adapter to be reloaded. The value must match a password adapter name, as defined in System.PasswordAdapters.
RoleListRepopulateRoleListRepopulate= {
ClassName = "ariba.user.core.Role"; ScheduledTaskClassName = "ariba.user.core.GroupAndRoleVectorRepopulate";Schedules = {
Schedule1 = { DayOfWeek = Weekday; Hour = 02; Minute = 39; }; };
};
The RoleListRepopulate scheduled task is a system maintenance task that maintains data related to roles. Every configuration should run this task. You should not typically need to change the configuration entry for this task, except possibly to choose a different schedule.
This task should be scheduled so that it does not conflict with administrators making manual changes to roles.
RemoveOutdatedIRRemoveOutdatedIR = {ScheduledTaskClassName = ariba.approvable.server.RemoveOutdatedIR;};
The RemoveOutdatedIR scheduled task removes invoice reconciliations from a user's To Do list when the invoice reconciliationss have reached a final state of Rejected, Paying Failed, Paying, and Paid.
RetryFailedContractSubscriptionTrackersRetryFailedContractSubscriptionTrackers = {
ApplicationHints = {Description = "@ariba.contract.core/RetryFailedContractSubscriptionTrackersTaskDescription";
Parameters = {Feature = (AribaP2PBasic,AribaP2PProfessional,AribaContractCompliance
);};};DisplayName = "@ariba.contract.core/RetryFailedContractSubscriptionTrackersTaskDisplayName";
ScheduledTaskClassName = "ariba.contract.RetryFailedContractSubscriptionTrackers";Schedules = { Schedule1 = { DayOfWeek = Weekday; Hour = 3;};};
};
The RetryFailedContractSubscriptionTrackers scheduled task retrieves all contract subscription trackers that are in the LoadFailed, ActivateFailed, and DeactivateFailed states, and then retries the load, activate, or deactivate operation.reprocesses failed attempts for generating contract subscriptions.
Ariba Buyer Configuration Guide 281
Appendix H Scheduled Task Reference Global Scheduled Tasks
SourcingDataPullSourcingDataPull = {
ScheduledTaskClassName = ariba.server.ormsserver.ChainedScheduledTask;ChainedScheduledTasks = (
"None.IntegrationEvent.SourcingAddressPull","None.IntegrationEvent.SourcingCurrencyPull","None.IntegrationEvent.SourcingCurrencyConversionRatePull","None.IntegrationEvent.SourcingUserRoleMapPull",...
);ContinueOnFailure = "true";ReportFailure = "true";
The SourcingDataPull scheduled task is an administrative task that you run when setting up integration with Ariba Sourcing. This entry is a chained scheduled task that runs a set of integration events, which read data generated from Ariba Sourcing and load that data into Ariba Buyer.
You run this task manually, during migration or initial integration between Ariba Sourcing and Ariba Buyer. For more information, see the Ariba Spend Management Integration Guide.
SupplierLocationCheckSupplierLocationCheck = {
ScheduledTaskClassName = "ariba.procure.server.SupplierLocationCheck";Schedules = {
Schedule1 = {DayOfWeek = Weekday;Hour = 4;
};};
};
The SupplierLocationCheck scheduled task is a routine administration task, used to check that every supplier location has valid contact information (fax number or email address, depending on the supplier).
Although supplier configuration information is partitioned, this scheduled task is not. When it runs, it checks through the supplier profile information for each partition in your configuration.
If there are errors, the scheduled task sends a notification message to users who have the SupplierLocationCheckEmail permission.
For more information on validation at submission, see the Ariba Spend Management Data Load Guide.
UpdateAribaNetworkProfileUpdateAribaNetworkProfile = {
ScheduledTaskClassName = "ariba.procure.server.UpdateAribaNetworkProfile";Schedules = {
Schedule1 = {DayOfWeek = Weekday;Hour = 1;
};};
};
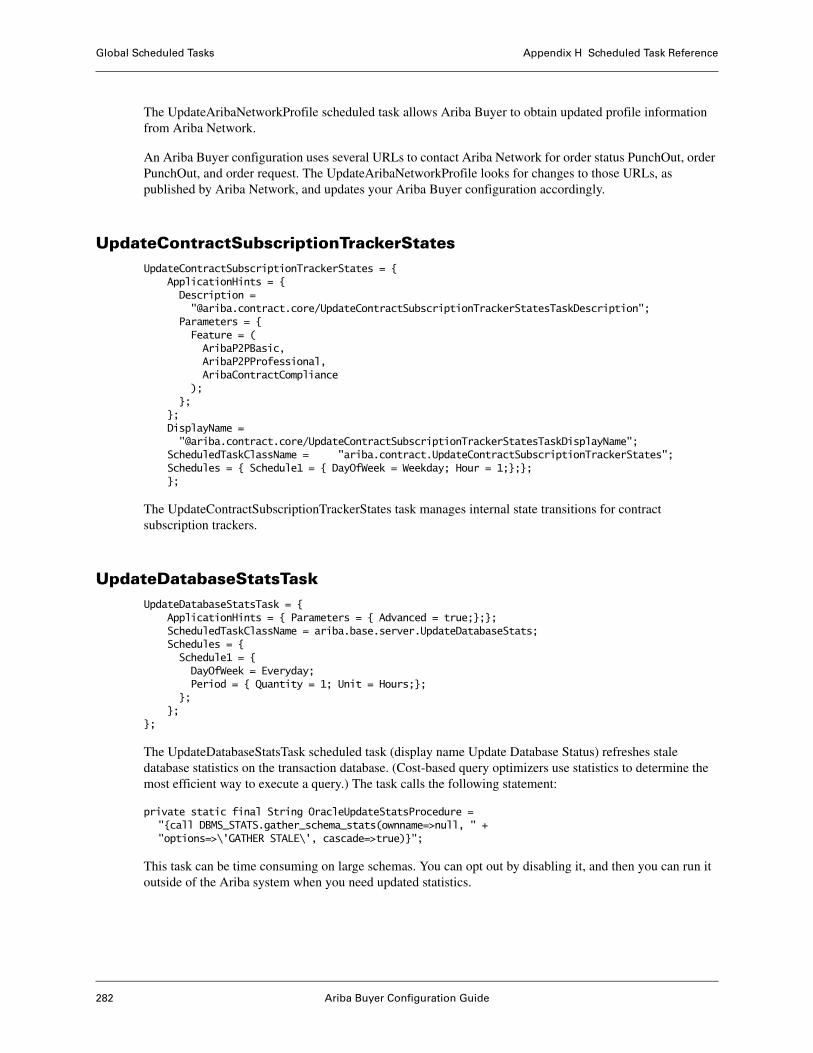
Global Scheduled Tasks Appendix H Scheduled Task Reference
282 Ariba Buyer Configuration Guide
The UpdateAribaNetworkProfile scheduled task allows Ariba Buyer to obtain updated profile information from Ariba Network.
An Ariba Buyer configuration uses several URLs to contact Ariba Network for order status PunchOut, order PunchOut, and order request. The UpdateAribaNetworkProfile looks for changes to those URLs, as published by Ariba Network, and updates your Ariba Buyer configuration accordingly.
UpdateContractSubscriptionTrackerStatesUpdateContractSubscriptionTrackerStates = {
ApplicationHints = {Description = "@ariba.contract.core/UpdateContractSubscriptionTrackerStatesTaskDescription";
Parameters = {Feature = (AribaP2PBasic,AribaP2PProfessional,AribaContractCompliance
);};
};DisplayName = "@ariba.contract.core/UpdateContractSubscriptionTrackerStatesTaskDisplayName";
ScheduledTaskClassName = "ariba.contract.UpdateContractSubscriptionTrackerStates";Schedules = { Schedule1 = { DayOfWeek = Weekday; Hour = 1;};};
};
The UpdateContractSubscriptionTrackerStates task manages internal state transitions for contract subscription trackers.
UpdateDatabaseStatsTaskUpdateDatabaseStatsTask = {
ApplicationHints = { Parameters = { Advanced = true;};};ScheduledTaskClassName = ariba.base.server.UpdateDatabaseStats;Schedules = {Schedule1 = {DayOfWeek = Everyday;Period = { Quantity = 1; Unit = Hours;};
};};
};
The UpdateDatabaseStatsTask scheduled task (display name Update Database Status) refreshes stale database statistics on the transaction database. (Cost-based query optimizers use statistics to determine the most efficient way to execute a query.) The task calls the following statement:
private static final String OracleUpdateStatsProcedure ="{call DBMS_STATS.gather_schema_stats(ownname=>null, " +"options=>\'GATHER STALE\', cascade=>true)}";
This task can be time consuming on large schemas. You can opt out by disabling it, and then you can run it outside of the Ariba system when you need updated statistics.
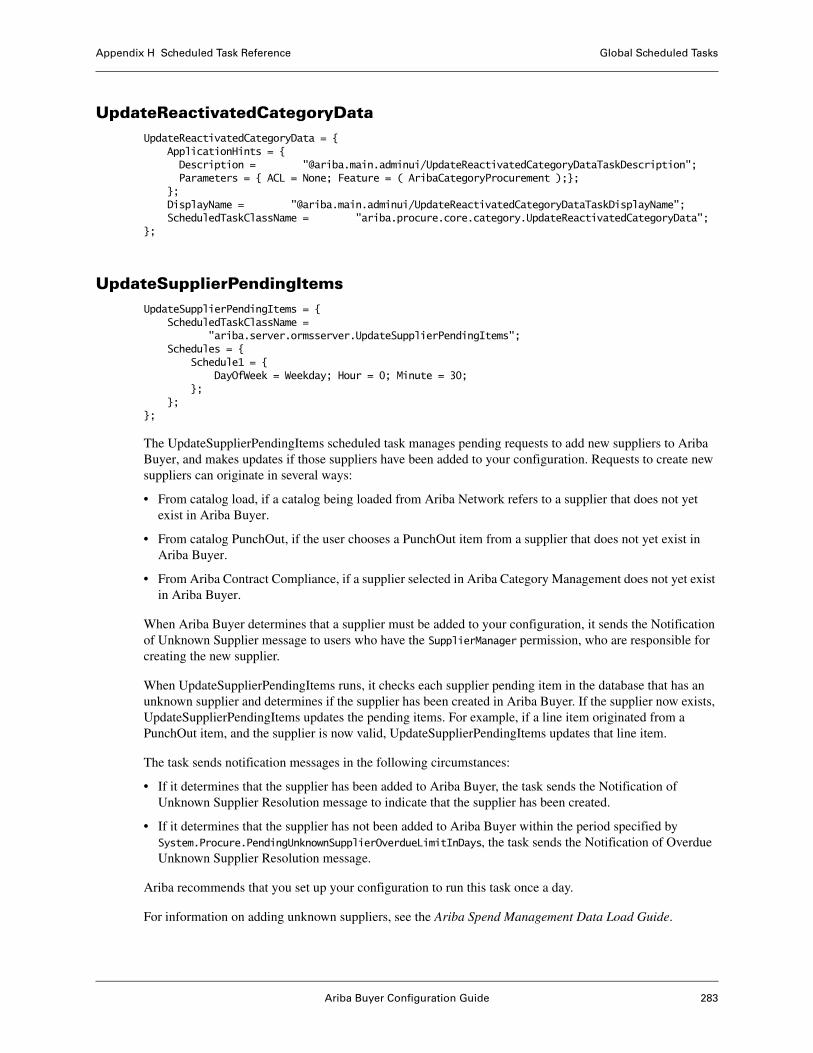
Ariba Buyer Configuration Guide 283
Appendix H Scheduled Task Reference Global Scheduled Tasks
UpdateReactivatedCategoryDataUpdateReactivatedCategoryData = {
ApplicationHints = {Description = "@ariba.main.adminui/UpdateReactivatedCategoryDataTaskDescription";Parameters = { ACL = None; Feature = ( AribaCategoryProcurement );};
};DisplayName = "@ariba.main.adminui/UpdateReactivatedCategoryDataTaskDisplayName";ScheduledTaskClassName = "ariba.procure.core.category.UpdateReactivatedCategoryData";
};
UpdateSupplierPendingItemsUpdateSupplierPendingItems = {
ScheduledTaskClassName ="ariba.server.ormsserver.UpdateSupplierPendingItems";
Schedules = {Schedule1 = {
DayOfWeek = Weekday; Hour = 0; Minute = 30;};
};};
The UpdateSupplierPendingItems scheduled task manages pending requests to add new suppliers to Ariba Buyer, and makes updates if those suppliers have been added to your configuration. Requests to create new suppliers can originate in several ways:
• From catalog load, if a catalog being loaded from Ariba Network refers to a supplier that does not yet exist in Ariba Buyer.
• From catalog PunchOut, if the user chooses a PunchOut item from a supplier that does not yet exist in Ariba Buyer.
• From Ariba Contract Compliance, if a supplier selected in Ariba Category Management does not yet exist in Ariba Buyer.
When Ariba Buyer determines that a supplier must be added to your configuration, it sends the Notification of Unknown Supplier message to users who have the SupplierManager permission, who are responsible for creating the new supplier.
When UpdateSupplierPendingItems runs, it checks each supplier pending item in the database that has an unknown supplier and determines if the supplier has been created in Ariba Buyer. If the supplier now exists, UpdateSupplierPendingItems updates the pending items. For example, if a line item originated from a PunchOut item, and the supplier is now valid, UpdateSupplierPendingItems updates that line item.
The task sends notification messages in the following circumstances:
• If it determines that the supplier has been added to Ariba Buyer, the task sends the Notification of Unknown Supplier Resolution message to indicate that the supplier has been created.
• If it determines that the supplier has not been added to Ariba Buyer within the period specified by System.Procure.PendingUnknownSupplierOverdueLimitInDays, the task sends the Notification of Overdue Unknown Supplier Resolution message.
Ariba recommends that you set up your configuration to run this task once a day.
For information on adding unknown suppliers, see the Ariba Spend Management Data Load Guide.
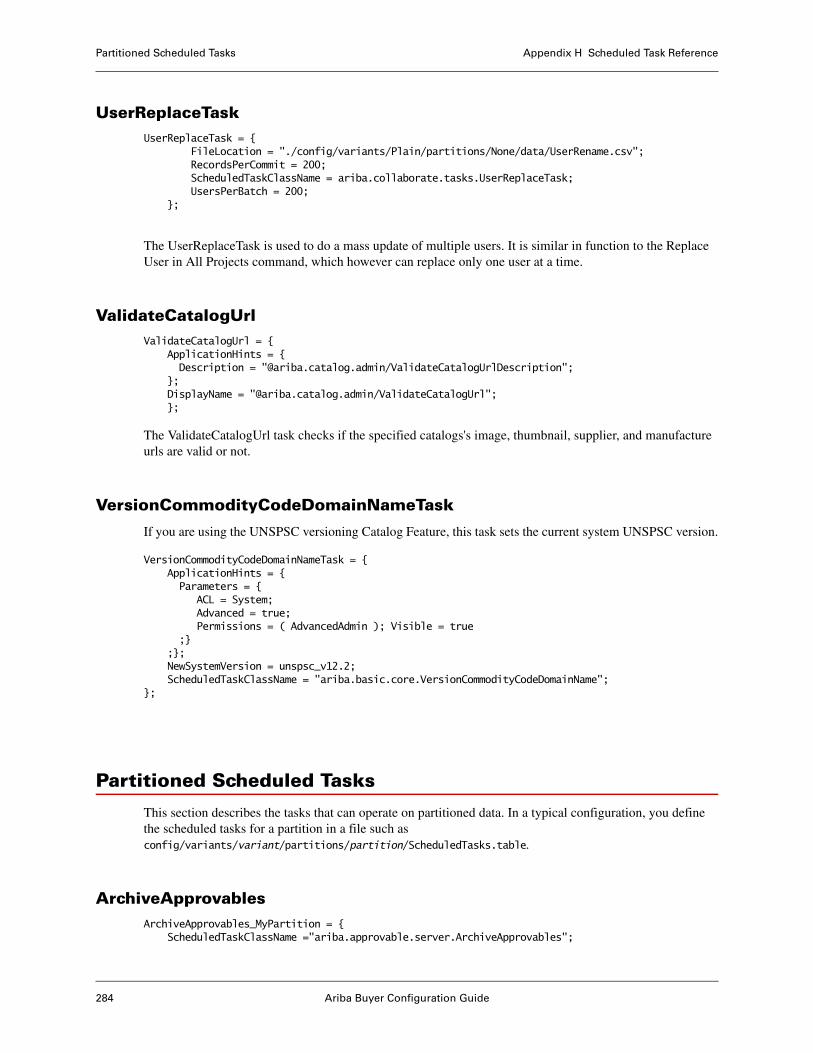
Partitioned Scheduled Tasks Appendix H Scheduled Task Reference
284 Ariba Buyer Configuration Guide
UserReplaceTaskUserReplaceTask = { FileLocation = "./config/variants/Plain/partitions/None/data/UserRename.csv"; RecordsPerCommit = 200; ScheduledTaskClassName = ariba.collaborate.tasks.UserReplaceTask; UsersPerBatch = 200; };
The UserReplaceTask is used to do a mass update of multiple users. It is similar in function to the Replace User in All Projects command, which however can replace only one user at a time.
ValidateCatalogUrlValidateCatalogUrl = {
ApplicationHints = {Description = "@ariba.catalog.admin/ValidateCatalogUrlDescription";
};DisplayName = "@ariba.catalog.admin/ValidateCatalogUrl";
};
The ValidateCatalogUrl task checks if the specified catalogs's image, thumbnail, supplier, and manufacture urls are valid or not.
VersionCommodityCodeDomainNameTask
If you are using the UNSPSC versioning Catalog Feature, this task sets the current system UNSPSC version.
VersionCommodityCodeDomainNameTask = { ApplicationHints = {Parameters = {
ACL = System;Advanced = true;Permissions = ( AdvancedAdmin ); Visible = true
;};};NewSystemVersion = unspsc_v12.2;ScheduledTaskClassName = "ariba.basic.core.VersionCommodityCodeDomainName";
};
Partitioned Scheduled Tasks
This section describes the tasks that can operate on partitioned data. In a typical configuration, you define the scheduled tasks for a partition in a file such as config/variants/variant/partitions/partition/ScheduledTasks.table.
ArchiveApprovablesArchiveApprovables_MyPartition = {
ScheduledTaskClassName ="ariba.approvable.server.ArchiveApprovables";
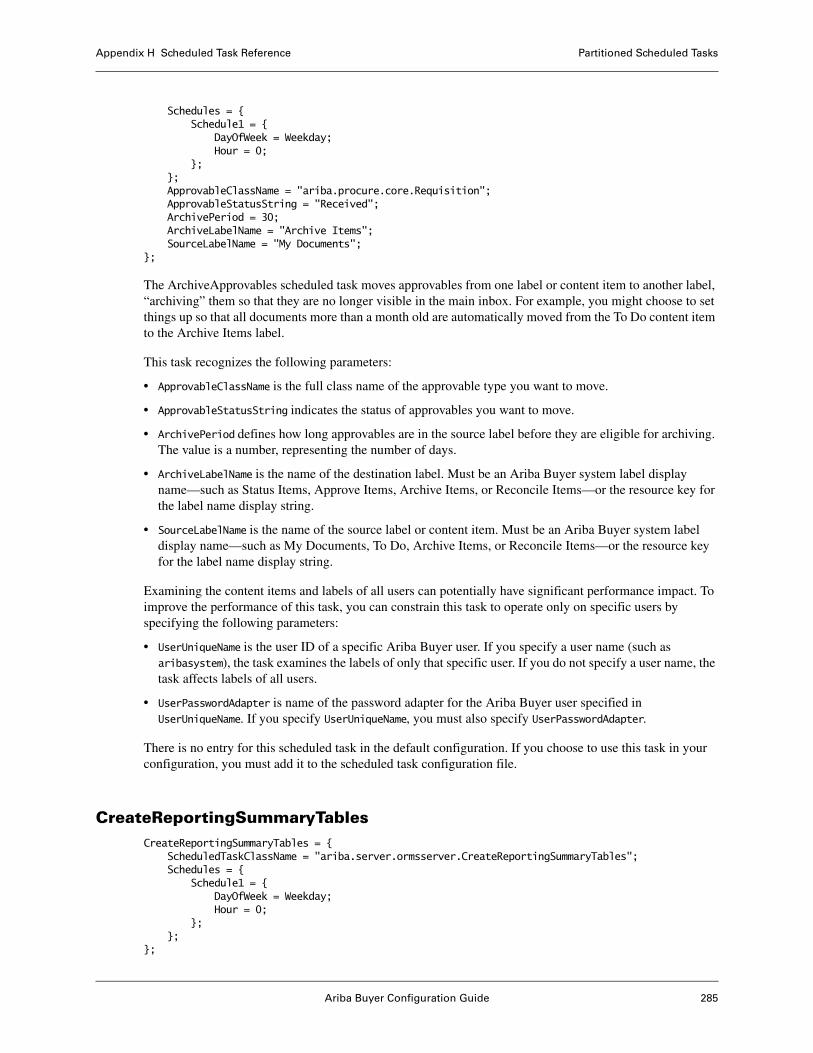
Ariba Buyer Configuration Guide 285
Appendix H Scheduled Task Reference Partitioned Scheduled Tasks
Schedules = {Schedule1 = {
DayOfWeek = Weekday;Hour = 0;
};};ApprovableClassName = "ariba.procure.core.Requisition";ApprovableStatusString = "Received";ArchivePeriod = 30;ArchiveLabelName = "Archive Items";SourceLabelName = "My Documents";
};
The ArchiveApprovables scheduled task moves approvables from one label or content item to another label, “archiving” them so that they are no longer visible in the main inbox. For example, you might choose to set things up so that all documents more than a month old are automatically moved from the To Do content item to the Archive Items label.
This task recognizes the following parameters:
• ApprovableClassName is the full class name of the approvable type you want to move.
• ApprovableStatusString indicates the status of approvables you want to move.
• ArchivePeriod defines how long approvables are in the source label before they are eligible for archiving. The value is a number, representing the number of days.
• ArchiveLabelName is the name of the destination label. Must be an Ariba Buyer system label display name—such as Status Items, Approve Items, Archive Items, or Reconcile Items—or the resource key for the label name display string.
• SourceLabelName is the name of the source label or content item. Must be an Ariba Buyer system label display name—such as My Documents, To Do, Archive Items, or Reconcile Items—or the resource key for the label name display string.
Examining the content items and labels of all users can potentially have significant performance impact. To improve the performance of this task, you can constrain this task to operate only on specific users by specifying the following parameters:
• UserUniqueName is the user ID of a specific Ariba Buyer user. If you specify a user name (such as aribasystem), the task examines the labels of only that specific user. If you do not specify a user name, the task affects labels of all users.
• UserPasswordAdapter is name of the password adapter for the Ariba Buyer user specified in UserUniqueName. If you specify UserUniqueName, you must also specify UserPasswordAdapter.
There is no entry for this scheduled task in the default configuration. If you choose to use this task in your configuration, you must add it to the scheduled task configuration file.
CreateReportingSummaryTablesCreateReportingSummaryTables = {
ScheduledTaskClassName = "ariba.server.ormsserver.CreateReportingSummaryTables";Schedules = {
Schedule1 = { DayOfWeek = Weekday; Hour = 0;
};};
};
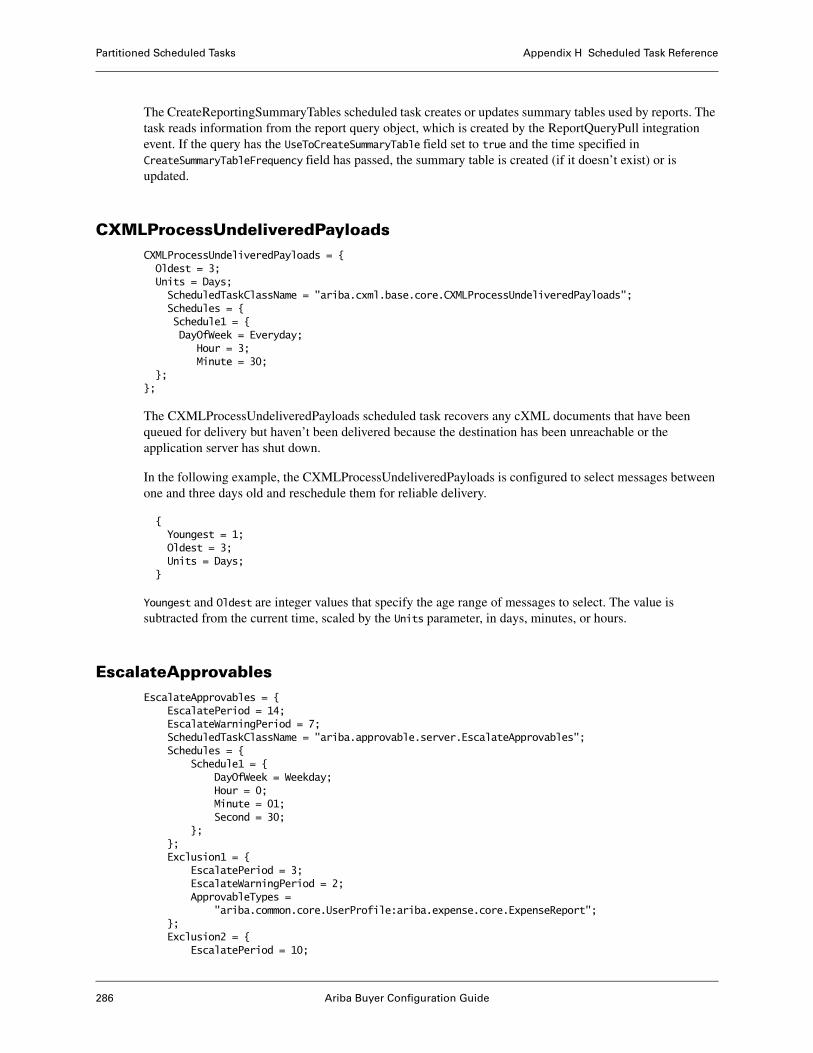
Partitioned Scheduled Tasks Appendix H Scheduled Task Reference
286 Ariba Buyer Configuration Guide
The CreateReportingSummaryTables scheduled task creates or updates summary tables used by reports. The task reads information from the report query object, which is created by the ReportQueryPull integration event. If the query has the UseToCreateSummaryTable field set to true and the time specified in CreateSummaryTableFrequency field has passed, the summary table is created (if it doesn’t exist) or is updated.
CXMLProcessUndeliveredPayloadsCXMLProcessUndeliveredPayloads = {Oldest = 3;Units = Days;ScheduledTaskClassName = "ariba.cxml.base.core.CXMLProcessUndeliveredPayloads"; Schedules = { Schedule1 = {DayOfWeek = Everyday;
Hour = 3; Minute = 30;
};};
The CXMLProcessUndeliveredPayloads scheduled task recovers any cXML documents that have been queued for delivery but haven’t been delivered because the destination has been unreachable or the application server has shut down.
In the following example, the CXMLProcessUndeliveredPayloads is configured to select messages between one and three days old and reschedule them for reliable delivery.
{Youngest = 1;Oldest = 3;Units = Days;
}
Youngest and Oldest are integer values that specify the age range of messages to select. The value is subtracted from the current time, scaled by the Units parameter, in days, minutes, or hours.
EscalateApprovablesEscalateApprovables = {
EscalatePeriod = 14;EscalateWarningPeriod = 7;ScheduledTaskClassName = "ariba.approvable.server.EscalateApprovables";Schedules = {
Schedule1 = {DayOfWeek = Weekday;Hour = 0;Minute = 01;Second = 30;
};};Exclusion1 = {
EscalatePeriod = 3;EscalateWarningPeriod = 2;ApprovableTypes =
"ariba.common.core.UserProfile:ariba.expense.core.ExpenseReport";};Exclusion2 = {
EscalatePeriod = 10;

Ariba Buyer Configuration Guide 287
Appendix H Scheduled Task Reference Partitioned Scheduled Tasks
EscalateWarningPeriod = 8;ApprovableTypes = "ariba.procure.core.Requisition";Condition = "Requisition.LineItems.CommodityCode LIKE ‘1122%'";
};};
The EscalateApprovables scheduled task looks for requests that are waiting to be approved and escalates those requests to the approver’s immediate supervisor. Before doing the escalation, it sends a notification message to the original approver, with a warning about the upcoming escalation.
Notes:
• Escalation occurs only when the approver is a User, and not when the approver is a role, group, custom approver, or approver list. If the approver is not a user, EscalateApprovables does nothing. (If the active approver is not a single User, the task is unable to determine the supervisor, and thus cannot escalate the request.)
• Requests are not escalated to approvers who have the NoEscalation permission; the escalation process ends and the request remains in the approval folder of the delinquent approver.
Escalation Periods
This task recognizes the following parameters:
• EscalatePeriod, which is the amount of time that a request can wait for a particular approver before it is escalated. The value is in days. You can specify decimals to indicate partial days. For example, a value of 1.5 days means every 36 hours. The minimum period is 1 day.
In the case of a receipt, the escalation period does not start until the “first approver” has filled out the receipt. That is, the period during which approvers are expected to take action on a receipt starts only after the requester has filled out the receipt.
• EscalateWarningPeriod, which is the amount of time that a request can wait for a particular approver before that approver is warned of a coming escalation. The value is in days. You can specify decimals to indicate partial days. For example, a value of 1.5 days means every 36 hours. The minimum period is 1 day.
EscalateWarningPeriod should typically be less than the EscalatePeriod (so that the warning arrives before the escalation occurs). If the two are equal, there is no warning. If they are set up backwards (so that the EscalateWarningPeriod is larger than the EscalatePeriod), the task does not run at all.
Because it affects users (by expecting them to take action), the schedule ignores weekends and your company’s holidays.
Exclusions
The EscalateApprovables task can include any number of named exclusions, which specify different time periods for certain types of approvables. Each exclusion defines an Ariba Query API query that specifies which approvables are covered by that exclusion, and then specifies an escalation and warning period for those designated approvables. For example:
Exclusion1 = {EscalatePeriod = 21;EscalateWarningPeriod = 18;ApprovableTypes = "ariba.procure.core.Requisition";Condition = "Requisition.LineItems.CommodityCode LIKE ‘1122%'";
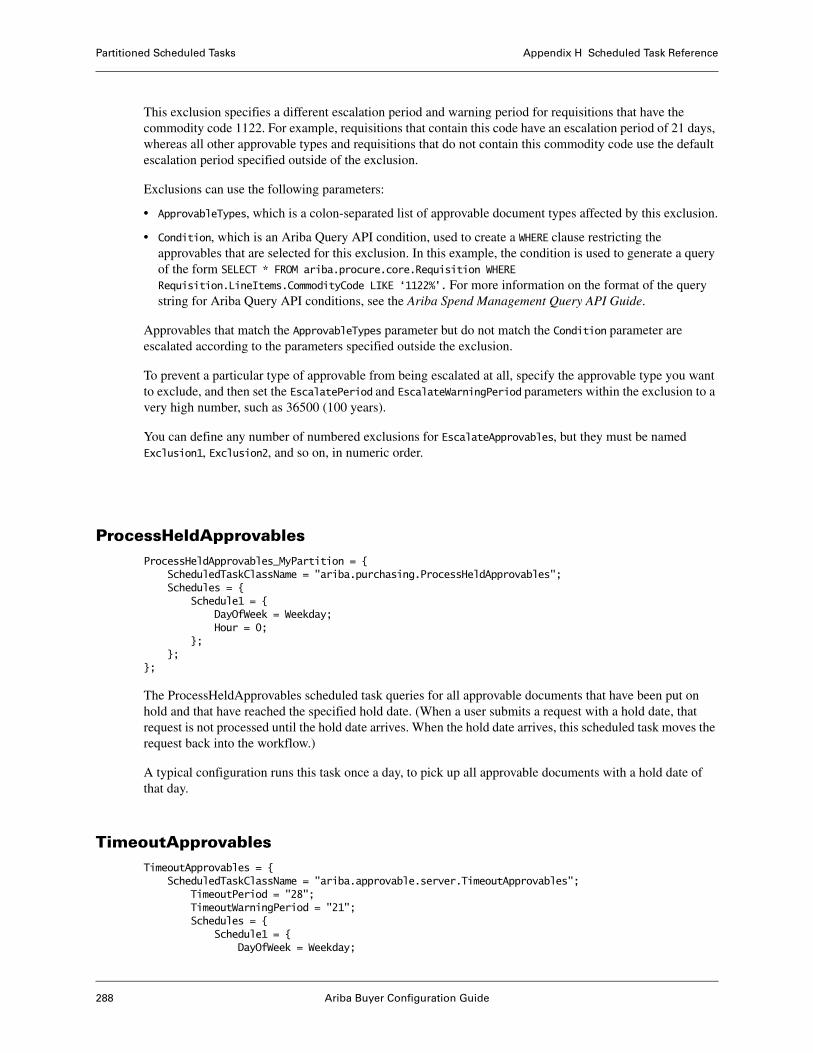
Partitioned Scheduled Tasks Appendix H Scheduled Task Reference
288 Ariba Buyer Configuration Guide
This exclusion specifies a different escalation period and warning period for requisitions that have the commodity code 1122. For example, requisitions that contain this code have an escalation period of 21 days, whereas all other approvable types and requisitions that do not contain this commodity code use the default escalation period specified outside of the exclusion.
Exclusions can use the following parameters:
• ApprovableTypes, which is a colon-separated list of approvable document types affected by this exclusion.
• Condition, which is an Ariba Query API condition, used to create a WHERE clause restricting the approvables that are selected for this exclusion. In this example, the condition is used to generate a query of the form SELECT * FROM ariba.procure.core.Requisition WHERE Requisition.LineItems.CommodityCode LIKE ‘1122%'. For more information on the format of the query string for Ariba Query API conditions, see the Ariba Spend Management Query API Guide.
Approvables that match the ApprovableTypes parameter but do not match the Condition parameter are escalated according to the parameters specified outside the exclusion.
To prevent a particular type of approvable from being escalated at all, specify the approvable type you want to exclude, and then set the EscalatePeriod and EscalateWarningPeriod parameters within the exclusion to a very high number, such as 36500 (100 years).
You can define any number of numbered exclusions for EscalateApprovables, but they must be named Exclusion1, Exclusion2, and so on, in numeric order.
ProcessHeldApprovablesProcessHeldApprovables_MyPartition = {
ScheduledTaskClassName = "ariba.purchasing.ProcessHeldApprovables";Schedules = {
Schedule1 = {DayOfWeek = Weekday;Hour = 0;
};};
};
The ProcessHeldApprovables scheduled task queries for all approvable documents that have been put on hold and that have reached the specified hold date. (When a user submits a request with a hold date, that request is not processed until the hold date arrives. When the hold date arrives, this scheduled task moves the request back into the workflow.)
A typical configuration runs this task once a day, to pick up all approvable documents with a hold date of that day.
TimeoutApprovablesTimeoutApprovables = {
ScheduledTaskClassName = "ariba.approvable.server.TimeoutApprovables";TimeoutPeriod = "28";TimeoutWarningPeriod = "21";Schedules = {
Schedule1 = {DayOfWeek = Weekday;
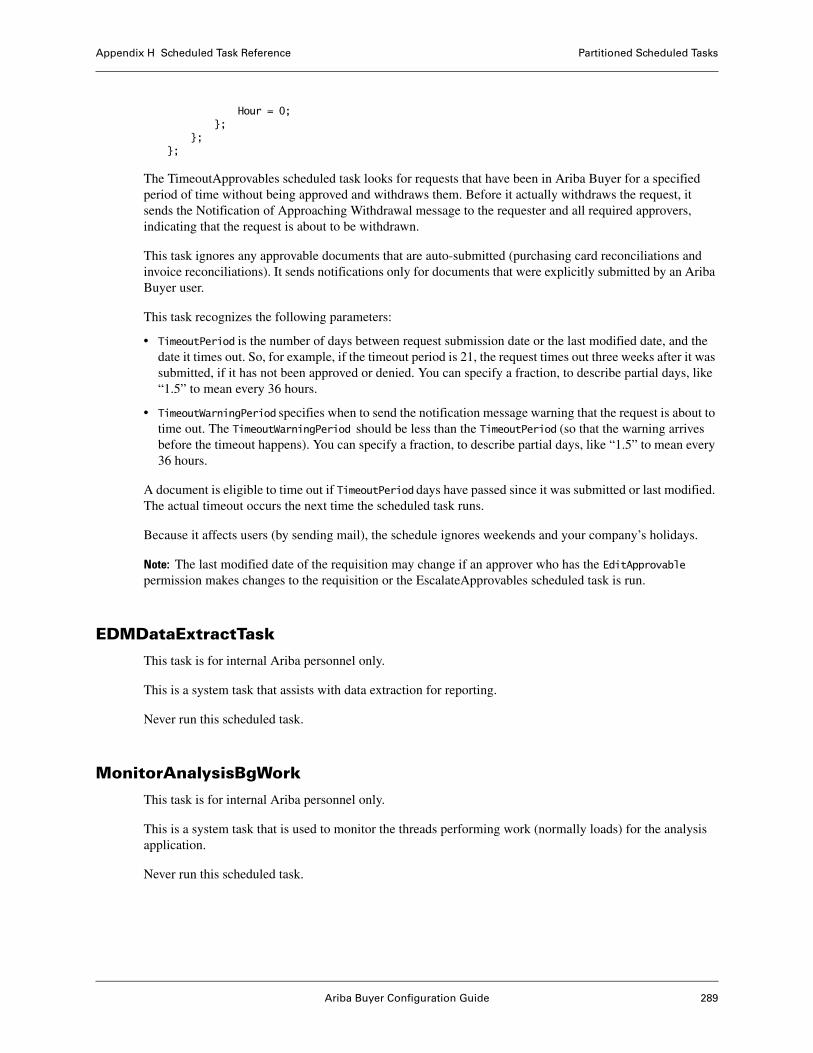
Ariba Buyer Configuration Guide 289
Appendix H Scheduled Task Reference Partitioned Scheduled Tasks
Hour = 0;};
};};
The TimeoutApprovables scheduled task looks for requests that have been in Ariba Buyer for a specified period of time without being approved and withdraws them. Before it actually withdraws the request, it sends the Notification of Approaching Withdrawal message to the requester and all required approvers, indicating that the request is about to be withdrawn.
This task ignores any approvable documents that are auto-submitted (purchasing card reconciliations and invoice reconciliations). It sends notifications only for documents that were explicitly submitted by an Ariba Buyer user.
This task recognizes the following parameters:
• TimeoutPeriod is the number of days between request submission date or the last modified date, and the date it times out. So, for example, if the timeout period is 21, the request times out three weeks after it was submitted, if it has not been approved or denied. You can specify a fraction, to describe partial days, like “1.5” to mean every 36 hours.
• TimeoutWarningPeriod specifies when to send the notification message warning that the request is about to time out. The TimeoutWarningPeriod should be less than the TimeoutPeriod (so that the warning arrives before the timeout happens). You can specify a fraction, to describe partial days, like “1.5” to mean every 36 hours.
A document is eligible to time out if TimeoutPeriod days have passed since it was submitted or last modified. The actual timeout occurs the next time the scheduled task runs.
Because it affects users (by sending mail), the schedule ignores weekends and your company’s holidays.
Note: The last modified date of the requisition may change if an approver who has the EditApprovable permission makes changes to the requisition or the EscalateApprovables scheduled task is run.
EDMDataExtractTask
This task is for internal Ariba personnel only.
This is a system task that assists with data extraction for reporting.
Never run this scheduled task.
MonitorAnalysisBgWork
This task is for internal Ariba personnel only.
This is a system task that is used to monitor the threads performing work (normally loads) for the analysis application.
Never run this scheduled task.
Partitioned Scheduled Tasks Appendix H Scheduled Task Reference
290 Ariba Buyer Configuration Guide
Ariba Buyer Configuration Guide 291
Symbols.aml files 23.cer files 122.der file extension 123.jks files 121/etc/certs directory 123< character, purge configuration files 139> character, purge configuration files 139
Aaccess permissions
AccessibilityEnabled 235AnalysisAuthorized 237
access restrictions, reports 150accessibility enabled user interface 235AccessibilityEnabled permission 235accessing
Administrator user interface 104workspace or task 104
.acf files 24Active Directory Service (ADS) 90ActOnBehalf permission 235Add ApprovalRequest permission 47AddApprovalRequest permission 51, 235, 236Added Approver notification 228AddPurchaseOrderToOutBoxOnCreate parameter 53AdminConfig.acf file 214Administrator role 246Administrator user interface, access to 104AdministratorEmailAddress parameter 70AdvancedShipNoticeErrorNotification permission 236AdvancedShipNoticeSuccessNotification permission
236.afr files 23AllowDeletionOfNonComposingApprovables
parameter 55AllowNullPasswordWizardCredentialEmail permission
217, 236AML Editor role 247AMLUploader permission 236Analysis Administrator
group, for Ariba Analysis 255role 247
AnalysisAdmin permission 237AnalysisAuthorized permission 237AnalysisCreateCompoundReports permission 237AnalysisCreateReports permission 237
AnalysisPublishReports permission 237AnalysisRunCompoundReports permission 237AnalysisRunReports permission 237AnalysisScheduleReport permission 237AnalysisViewAllAvailableFields permission 238Analyst role 247Appender 129AppInfo.xml file 28application server
log files for 126approvable documents
changing prefixes 49create permission 48deleting 55editing after submission 49escalation 53numbering 49permissions to edit 47prefixes for 49
ApprovableIDMethod parameter 49approvables
auto-archive of 285escalation of 286withdrawing automatically 288
ApprovableType.csv 46ApprovableTypePull integration event 46approval diagrams 50approval rules
customizing 54examples of 50
approved documents, handling of 271approvers
disabling notifications 66notifications received by 64
ApproxAmountInBaseCurrency field 157archive and purge tools 135ArchiveApprovables scheduled task 284ArchiveLog scheduled task 133, 259Ariba Administrator
editing parameters with 27Ariba Authentication Server. See Ariba Authentication
ServiceAriba Authentication Service 89Ariba Client Automation 117Ariba Contracts 15Ariba cXML Channel
about 13ariba directory, files in 17Ariba Enterprise Sourcing, data integration 281
Index
292 Ariba Buyer Configuration Guide
Index
Ariba File Channelabout 13
Ariba HTTP Channelabout 14
Ariba Invoice 15Ariba Network
Ariba cXMLChannel 13integration with 14sychronizing with 260update profile 281updating profile information 282
Ariba Query API queries, in reports 148Ariba Travel & Expense 15Ariba Web Services Channel
about 13aribacrypt utility 93AribaDBCharset parameter 58aribaencode command 99, 187AribaGuestSystemUser parameter 124AribaGuestSystemUserPasswordAdapter parameter 124aribakeystore.jks file 121AribaMetaConfigurationLog.txt 125AribaNetworkOrganizationSync scheduled task 260AribaSupplierNetworkUser password adapter 82aribasystem role 247Asian language configurations
character encodings 58considerations 61
ASMDashboardAuthorized permission 238attachments, in purge and archive 135AuditViewer permission 238authentication 165
disabling 92SAP login adapter 88supplier users 82
authorization permissionsAddApprovalRequest 235, 236AnalysisAuthorized 237
AuthServiceInstallLog.txt 126auto-receiving, scheduled tasks for 288.awf files 24.awz files 23
BBackgroundQueue parameter 177BatchDataNotify permission 238BatchDataNotify role 249BatchDataPost permission 238, 248BusinessContactManager permission 238Buyer Administrator role 249BuyerAuthorized permission 239BuyerReportsQueryAll permission 239
Ccase-sensitivity
of parameters 26purge configuration files 139scheduled task files 36
catalog configuration 14catalog searching, Asian languages 61CatalogAuthorized permission 239catalogs
defining Ariba Network catalogs 260refresh catalog kits 279
catalogs, performance parameters 180Category Management role 249Category Manager role 250Category Template Manager role 250CFO role 250chained scheduled tasks 41
behavior on failure 41ChainedScheduledTasks parameter 41character encoding formats 32character encodings
Asian configurations 58specifying 58
character sets, specifying 58charsets, databases 58CheckLatestCatalogImages scheduled task 263Chinese configurations 58classMetrics.txt 125CleanAuditDatabaseLog scheduled task 133, 263CleanDatabaseLog scheduled task 133, 264CleanExpiredAuthDate scheduled task 265commands 187
runpurge 189servermonitor 190
commas, in CSV files 21Commodity Code Manager group 255Commodity Code Manager role 250commodity codes, migration tasks for 277CommodityCodeManager permission 239CommodityCodeReport scheduled task 267CommonSupplierSyncUsingSupplierLocationID
scheduled task 266config directory 17Config Files task
in Ariba Administrator 28configuration files
formats of 20purge tools 136reference list of 213scheduled tasks 33security for 27, 99, 187
configuration files, allowing access to 102configuration.txt 125configureasmsharedlog.txt file 125ConnectionInfo.table file 213connections (database connections) 181Console log listener 129ConsolidatedNotifications scheduled task 65, 267ContinueOnFailure parameter 41Contract Administrator group 255
Ariba Buyer Configuration Guide 293
Contract Administrator role 250Contract Agent group 255Contract Approver group 255Contract Manager 251Contract Manager group 255corporate authentication 165CreateContract permission 239CreateRealmProfiles scheduled task 267CreateReportingSummaryTables scheduled task 285credentials, custom login credentials 91Crypt Database Password Adapter 85CSV files 20
commas 21white space 21
CSVReportsCharset parameter 158currency
currency parameters 60in Asian configurations 60
currency codes 31custom Java code 28Customer Administrator group 255Customer section
in Parameters.table 29CustomerDashboardAdmin group 256CustomerDashboardAdmin role 251CustomerUserAdmin role 251CXMLObjectCreateQueue parameter 177CXMLPaymentProposalLoader scheduled task 286CXMLProcessUndeliveredPayloads scheduled task 286
DDashboardAdmin permission 240DashboardAuthorized permission 240data
specifying character sets 58data file encoding 58data formats
currency codes 31dates 30resource.date.csv file 30
data integration 13database
connections 181database logging 130purging old data 135updating statistics 282
database cleanup, Authentication API 265database log, cleaning 263, 264
DatabaseConnections parameter 181DatabaseLog log listener 130databases, charset 58DataQueueSize parameter 180dates
calendar dates 149company holidays 42in purge configuration files 139reporting summary tables and 149
dates, valid formats 30daylight savings time (Macintosh clients) 186dbinit.txt 125debug log messages 127DebuggingEngineer group 256default configuration 17DelegateApprovalAuthority permission 52DelegateOnBehalfOfAnotherUser permission 52delegation of approval authority
about 52by administrators 52by users 52DelegateApprovalAuthority permission 52
delegation of authority 52Deleted Approver notification 229deleting approvables 55Denial notification 224DER file format 123destination page, specifying at login 183development mode, parameters for 115digital certificate authentication 113digital certificate, for Ariba Client Automation 117digital certificates
creating and configuring 121exporting 123hostname in 121installing 123
DisableLoginSecurity parameter 115DisableLogListener parameter 129disabling login security 115disconnecting users 191domain name, in login credentials 92dot notation 25
EEdit command 49EditApprovable permission 47, 49EditApprovable role 252editing approvables 47
294 Ariba Buyer Configuration Guide
Index
EditLockTimeout parameter 181EditPermission.csv file 102EditPermissionPull integration event 102.efm files 24eForms 15, 145email approval
configuring 67forwarded messages 68including comments 70parameters for configuring 70receipt notifications 69
EnableEuroCurrencyDisplay parameter 157encrypted passwords 93EncryptedStringUpdater scheduled task 270error handling
error level log messages 127failed notification messages 65ObjectArchive scheduled task 143
EscalateApprovables scheduled task 219, 220, 221, 286EscalateApprovables task 53escalation
delay period 287disabling 287
European configurations, Unicode Euro characters 58Excel export 117ExecutePermission.csv file 101ExecutePermissionPull integration event 101ExecutionNode for scheduled tasks 41ExecutionNode parameter 259Expense Manager group 256expense reports 146expense reports, dates in 149ExpenseManager permission 240ExpenseManager role 252expiration of passwords 85ExpireDelegations scheduled task 270export events, security for 102extension files 17extension files, reloading 192External
group 256permission 241role 252
External Authentication Password Adapter 89ExternalPasswordAdapterHost parameter 90, 121ExternalPasswordAdapterPort parameter 90
FFailedApprovalUpdates scheduled task 270FailedCollaborationRequests scheduled task 271FailedContractDurableEvents scheduled task 271FailedDurableEmails scheduled task 65FailedDurableEvents scheduled task 271FailedObjectArchive scheduled task 144, 271file formats
character encoding formats 32file-level security 101
filtersadding report filters 160creating custom report filters 162removing report filters 161using in reports 152
Finance group 256fonts, in report files 155ForegroundQueue parameter 177From address, for notifications 66
GGeneratingReportingEntries scheduled task 272GetPendingAribaNetworkOrganizationSync scheduled
task 272global instance
about 57, 58parameter settings 62
global permissionsAnalysisAuthorized 237
global rolesAdministrator 246aribasystem 247
graphsremoving 161using in reports 150
GroupEditor permission 241GroupListRepopulate scheduled task 272groups
PasswordEntryGroup 87GuestUser.EditableClasses parameter 124
Hholidays, ignoring in schedules 41hooks, samples of 146HR Manager role 253HTTPS
about 113URLs 113
https URLS 114HTTPSocketTimeout parameter 181
IIBM WebSphere Business Integration Adapter channel
14IdleConnectionTimeout parameter 181IgnorePasswordAdapterOnLogout parameter 185ikeyman program 122IncomingHttpServerURL parameter 114, 115, 116IndexPromoteThreadCount parameter 180info log messages 127Inspector
testing queries 139using to debug reports 163
integration channels 28
Ariba Buyer Configuration Guide 295
Index
list of 13integration events 28
stopping from servermonitor 196integration events, chaining 39integration events, how to list 191integration events, security for 101IntegrationEvents permission 241Internal
group 256permission 241role 253
Invoice Administrator role 253Invoice Agent role 253Invoice Manager role 253invoices
administration for invoicing 288IS Manager role 253
JJapanese-language configurations
encodings for 58requirements 61
JavaScript files 24.js files 24Junior Procurement Agent group 256
Kkeep conditions (database purge) 136key generation tools 122keystore files
creating 122parameters for 121
keytool program 118, 122
Llanguage considerations, Asian language configurations
61LoadAllRules scheduled task 273LoadDB.txt 125
including scheduled tasks in 42LoadDB.txt file 213LoadDBLanguage.txt file 213locale
considerations for SAP integrations 61for non-English configurations 60setting locale parameters 60
locale, specifying at login 185localization 156
ReportColumnMeta.csv and 156log categories, enabling from servermonitor 192log files
application server 126log files, allowing access to 102log listeners
writing your own 133log messages
categories 127logging levels 127
loggingconfiguration for 125for ObjectArchive scheduled task 144
logincredentials for login 81customizing login credentials 91destination page for login 183locale for login 185login URL 183password adapters and 184
Login.fpl 91logout URL 84LogoutDestinationURL parameter 84logs directory 125
MMacintosh clients
daylight savings time 186MainLogFile log listener 130MakeDomainNameVersionExplicit scheduled task 275managed_server.log 126mapping errors, commodity codes 267MappingLog log listener 132message configuration files
about 28MessageConfiguration.table file 215MessageDefinition.table file 214messages, defined 13metadata annotations 136metadata XML configuration files 23metrics, from servermonitor 194metrics-.txt 125Microsoft applications, exporting data to 117MigrateCommodityCodesToCCCHierarchy scheduled
task 276MigrateCommodityCodesToUNSPSC scheduled task
276, 277migration, commodity codes 277money, reporting on 157multilingual configurations
See also global instancegetting more information 62overview 57
Nnested tables, in table files 23No Authentication Password Adapter 92NoApprovalNotification permission 66, 228, 241nodes
listing from servermonitor 191NoEscalation permission 53, 287

296 Ariba Buyer Configuration Guide
Index
None partition 19non-English configurations
character encodings 58getting more information 62overview 57
non-production mode, parameters for 115NoPasswordExpiration permission 92NoSupervisor permission 242notation, dot 25notification
null password credentials 87notification messages
See also individual notification messagesconsolidated notification messages 267recipients 217scheduled tasks for 267
notification messages, customizing 79notification permissions
AdvancedShipNoticeErrorNotification 236AdvancedShipNoticeSuccessNotification 236AllowNullPasswordWizardCredentialEmail 236SendCCInvoiceFailureEmail 243
NotificationFromAddress parameter 66NotificationFromNameKey parameter 66notifications
configuring 63consolidating notifications 65disabling 66error recovery 65permissions for 42receipt notifications 65suppressing on holidays 67turning off 66
NoWatcherNotification permission 242NT Domain Login Adapter
SSL and 121NT Domain Login password adapter 90
digital certificates for 113user name restrictions 92
NTLogin.fpl 91NTServiceLogging log listener 131null fields, in purge and archive 143
Oobject level security 105ObjectArchive scheduled task 132, 141, 277
error handling 143logging 144output format 143performance tuning 143
ObjectCacheMaxLoad parameter 178ObjectCachePurgeBy parameter 178ObjectCacheSegments parameter 178ObjectCacheSize parameter 178ObjectManager.acf file 214ObjectPermission.csv 105ObjectPermissionPull integration event 105
OpenStatements parameter 182organic growth
login partition 185login URL for 184
organic password growth 87
PP2PAuthorized permission 242P2PDashboardAuthorized permission 242Page argument
login page 184webjumper 183
parametersAddPurchaseOrderToOutBoxOnCreate 53AribaDBCharset 58case-sensitivity of 26catalog query cache 179DisableLoginSecurity 115EmailApprovalEnabled 69EnableEuroCurrencyDisplay 157ExternalPasswordAdapterHost 121keystore parameters 121ObjectCache parameters 178PasswordAdapter 83performance 177Production 114Reports parameters 158RPCIdleConnectionTimeout 196SAPAdapterLocale 61ScheduledTasksFile 34ServerRole 69SkipWeekendsAndHolidays 42SMTPServerName 66SSLKeystore parameters 121SSLRPC 114ToolsDefault 177
Parameters taskin Ariba Administrator 27
Parameters.table fileediting 27, 213parameters in 24
ParametersEditor permission 243partitioned commodity codes, detecting errors 267partitions
listing with servermonitor 192None 19reports and 150scheduled tasks and 33
Partitions sectionin Parameters.table 27
partition-specific parameters 27password adapters
authentication from SAP system 88custom Java adapters 84generating encrypted passwords 93login and 184login URL and 84
Ariba Buyer Configuration Guide 297
Index
organic growth 87password expiration 85reading from NT Domain system 90
Password Entry notification 217passwordadapter argument
servermonitor command 190PasswordAdapters parameter 83PasswordEntryGroup 87passwords
password expiration 92updates 82
performanceSSL and 114Status folder for aribasystem 53
periodic scheduled tasks 36permission sets
understanding 104permissions
See also access permissions; administrator permissions; authorization permissions; contract permissions; global permissions; manager permissions; notification permissions
for delegation of approval authority 52for editing approvables 47for queries 46notification messages by permission 66reports 156scheduled tasks and 42servermonitor command 191to add approval request 47
Plain variant 18port
servermonitor command 190ports, for Ariba Authentication Service 90prefixes for approvable documents 49primary classes (archive and purge) 189ProcessAutoReceipts scheduled task 288ProcessERPHeaderStatusPull scheduled task 288ProcessHelpApprovables scheduled task 288procurement configuration 14Procurement Manager group 257Procurement scope (archive and purge) 137ProcurementAuthorized permission 243production mode
security checks for 113Production parameter 114Professional Buyer role 253PromoteCommitBatchSize parameter 180PromoteQueueLength parameter 180purchase orders, numbering of 49purge and archive
preview 136Procurement scope 137PurgeFlushBatchSize parameter 189related classes 140restrictions on query 199sweep phase 141
purge configuration file 136
purge scopes 137listing 189
PurgeSharedTempDirTask scheduled task 278PurgeTempDirTask scheduled task 278
Qqueries
approvable document queries 46case-sensitivity 139purge and archive 199QueryAll permission 48
QueryCacheRowLimit parameter 179QueryCacheSize parameter 179quotes, in table files 22, 26quoting in purge configuration files 139
RReadUncommitted parameter 182ReceiptNotifier scheduled task 65receipts
email approval for 69receiving
scheduled tasks for 288refreshing scheduled task list 34RefreshKitsFromCatalog scheduled task 279related classes (purge and archive) 140ReloadPasswordFile scheduled task 93, 279remote authentication 165RemoveAnyApprovalRequest permission 51RemoveApprovalRequest permission 47ReportColumnMeta.csv file 151ReportFilters group 160Reporting role 253ReportMeta integration event 149ReportMetaPull integration event 149ReportPermissionMap.csv file 156ReportQueryPull integration event 148reports
access restrictions on 150adding new 158controlling access to 156creating custom queries for 162formatting 152partition for 150rules for data access in 156system parameters for 158
ReportsMaxCategories parameter 158ReportsTotalCurrency parameter 157ReportUniqueName field
in ReportPermissionMap.csv 156RequestTimeoutSeconds parameter 181requirements, Japanese-language configurations 61resource.date.csv file 30resource.reportmetadata.csv file 151restrictions on report access 150
298 Ariba Buyer Configuration Guide
Index
RetryFailedInvoiceDurableEvents scheduled task 288RoleListRepopulate scheduled task 280roles
Administrator 246aribasystem 247Buyer Administrator 249Category Manager 250Category Template Manager 250CFO 250EditApprovable 252HR Manager 253Invoice Administrator 253Invoice Agent 253Invoice Manager 253IS Manager 253
RPC, secure RPC 115RPCIdleConnectionTimeout parameter 196Rule Editor
in Ariba Administrator 24rule set files
allowing access to 102ruleeditor command 24RuleEditor permission 243runpurge command 136, 189
options 189
Ssample features 145
approval flow hooks 146Single SignOn 146
SAP Password Adapter 88SAP systems
locale considerations 61SAPAdapterLocale parameter 61scheduled task security 101scheduled tasks 33
chaining 39configuration file name 34configuration files 33configuration parameters 41EscalateApprovables 53FailedObjectArchive 144ignoring weekends and holidays 41list of tasks 34listing with servermonitor 192loading at initdb 42node for running 41ObjectArchive 132partitions and 33periods scheduling 36reloading configuration file 34running from servermonitor 196running on demand 33TimeoutApprovables 53
ScheduledTaskClassName parameter 41
ScheduledTaskFile parameter 34ScheduledTasks permission 243ScheduledTasks.table file 215schedules
specifying units 37Schedules parameter 41scopes
listing purge scopes 137purge and archive 137
SearchTimeout parameter 181Section 508 compliance. See accessibility enabled user
interfacesecure communication, parameters for 115Secure Sockets Layer configuration
disabling 116modifying config/Parameters.table 116performance considerations 114using in production instance 113
Secure Sockets Layer. See SSLsecurity
for configuration files 102for export events 102for integration events 101for log files 102for objects 105for rule set files 102for scheduled tasks 101for workspaces 104
security checks, disabling 115self-signed certificates 113, 123SendCCInvoiceFailureEmail permission 243Senior Analyst
group 257Senior Analyst role 254Server Manager workspace
in Ariba Administrator 27servermonitor
disconnectuser option 191listnodes command 191listpartitions command 192listtasks option 192logging options 192metrics option 194runtask option 196sessiontimeout option 196stopevent option 196users option 197
serverMonitor command 101servermonitor command 190
listing events 191loading extensions 192running integration events 195running scheduled tasks 33
ServerRole parameter 41session timeout, specifying from servermonitor 196SessionRecentObjectCacheSize parameter 179, 180single sign-on (SSO) 165Single SignOn feature 145
Ariba Buyer Configuration Guide 299
Index
configuring 146SingleSignOn feature 82SiteAdmin.AdminClient permission 191SiteAdmin.ClassEditor permission 243SiteAdmin.LogFilesandSettings permission 243SiteAdmin.NoLockout permission 86, 96SiteAdmin.TemplateEditor permission 244SkipWeekendsAndHolidays parameter 42, 67SMTP server
SMTPDomainName parameter 66SMTPServerName parameter 66
SOAP encodingprint and archive 143
SorucingDestinationPull 195Sourcing Authorized role 254Sourcing Manager role 254SourcingAuthorized permission 244SourcingDataPull scheduled task 281SourcingSupplierUser password adapter 82spaces, in .table files 22special characters 26, 139SQLStatementTimeoutInSeconds parameter 181SSL
parameters for configuration 113SSLKeyStoreFile parameter 90SSLKeyStorePassword parameter 90SSLRPC parameter 90, 114SSO (single sign-on) 165status codes, server monitor return values 195Status folder, performance issues for 53stopping integration events 196SUBCLASS
in purge configuration files 199SuiteIntegration permission 244superuser. See aribasystem roleSupplier Manager group 257Supplier Manager role 255supplier users, authentication 82SupplierDMLog log listener 131SupplierLocationCheck scheduled task 233, 281SupplierLocationCheckEmail permission 233SupplierManager permission 244SupportAdmin permission 244SVAuthorized permission 244SVSupplierDiversityAuthorized permission 245sweep phase of purge and archive 141system files
about 17System.PasswordAdapters parameter 83SystemErr.log 126SystemOut.log 126
Ttable files 22
names 22nested tables 23quotes 22, 26
spaces 22string 22values 22vectors 23
tasksaccess to 104security for 104
TEAuthorized permission 245TIBCO integration channel 14TimeOut parameter 181TimeoutApprovables scheduled task 53, 218, 219, 288
UUnicode
Euro characters 58UpdateAribaNetworkProfile scheduled task 281UpdateSupplierPendingItems scheduled task 283URLs, for contacting Ariba Network 282user interface, accessibility enabled 235User Preferences, password updates 82UserManager permission 245UserManager_Group permission 245UserManager_Organization permission 245UserManager_Role permission 245UserManager_User permission 245UserReplaceTask 284users
listing logged-in users 197login access for 81password updates 82reauthenticating 185supplier users 82
UserSessions permission 245UseSoftReferenceForSessionCache parameter 180
Vvariants
Plain 18vectors, in table files 23ViewSecureParameter permission 245
Wwarning log messages 127web servers, installing digital certificates 123webjumper URL
login 183requiring reauthentication 185
webjumpers, on login URL 84WebjumperUserNameField parameter 185WebLogicServiceInstallLog.txt 126white space, in CSV files 21Withdrawn Request notification 219wizard XML configuration files 23workflow XML definition files 24
300 Ariba Buyer Configuration Guide
Index
WorkflowQueue parameter 177workspaces
access to 104security for 104
XXML files
purge and archive output 143purge configuration 136