Application Basics CIS 100: Introduction to Computers Mr. A. Craig Dixon Spring 2006.
33
Application Basics CIS 100: Introduction to Computers Mr. A. Craig Dixon Spring 2006
-
Upload
phoebe-stone -
Category
Documents
-
view
218 -
download
0
Transcript of Application Basics CIS 100: Introduction to Computers Mr. A. Craig Dixon Spring 2006.
Application Basics
CIS 100: Introduction to Computers
Mr. A. Craig Dixon
Spring 2006
Application Basics 2
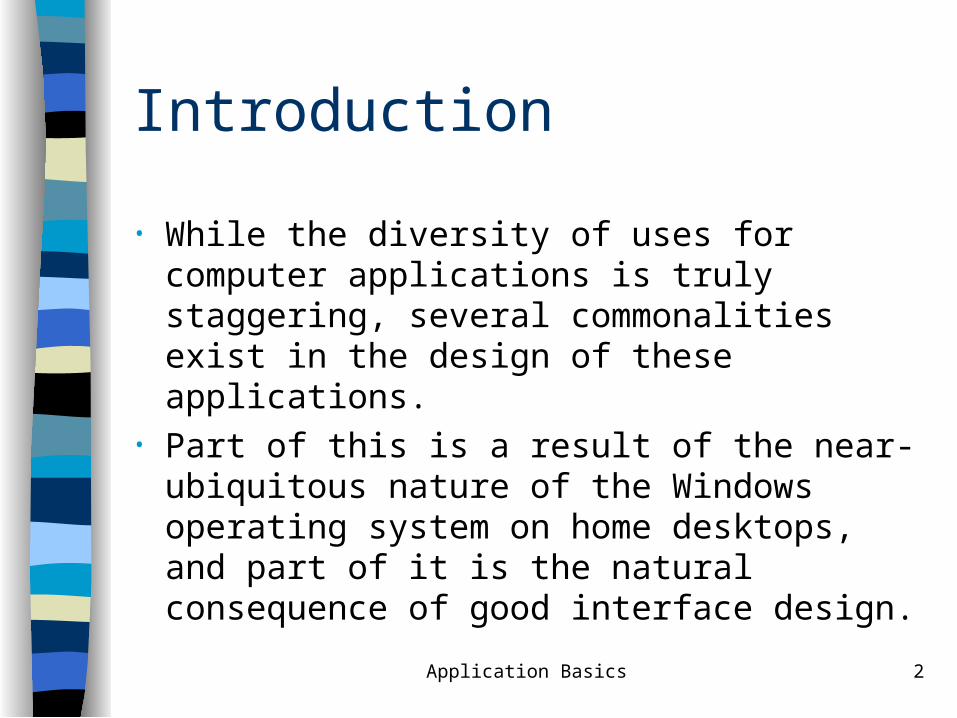
Introduction
• While the diversity of uses for computer applications is truly staggering, several commonalities exist in the design of these applications.
• Part of this is a result of the near-ubiquitous nature of the Windows operating system on home desktops, and part of it is the natural consequence of good interface design.
Application Basics 3
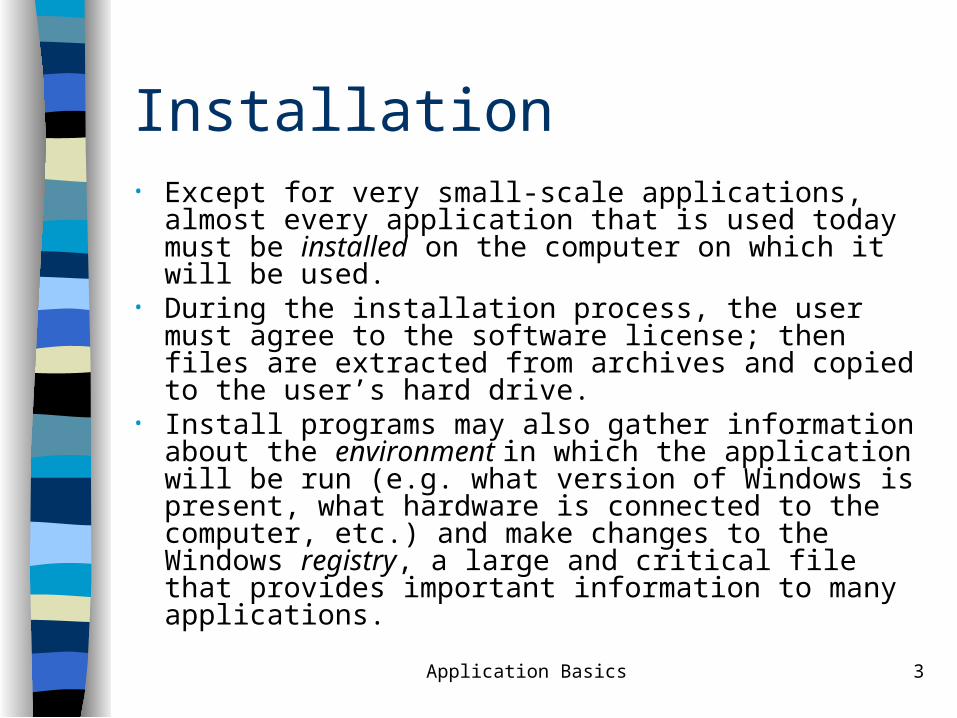
Installation• Except for very small-scale applications, almost every
application that is used today must be installed on the computer on which it will be used.
• During the installation process, the user must agree to the software license; then files are extracted from archives and copied to the user’s hard drive.
• Install programs may also gather information about the environment in which the application will be run (e.g. what version of Windows is present, what hardware is connected to the computer, etc.) and make changes to the Windows registry, a large and critical file that provides important information to many applications.
Application Basics 4
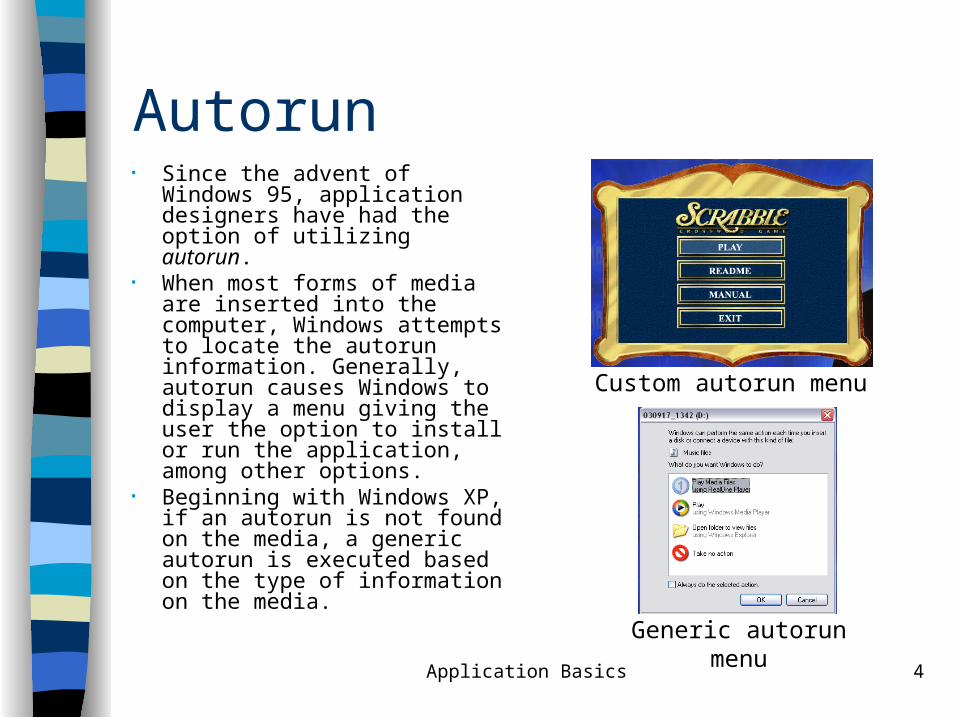
Autorun• Since the advent of Windows
95, application designers have had the option of utilizing autorun.
• When most forms of media are inserted into the computer, Windows attempts to locate the autorun information. Generally, autorun causes Windows to display a menu giving the user the option to install or run the application, among other options.
• Beginning with Windows XP, if an autorun is not found on the media, a generic autorun is executed based on the type of information on the media.
Custom autorun menu
Generic autorun menu
Application Basics 5
Size vs. Speed• There is a fundamental trade-off that manifests itself
in nearly every facet of computer science – size vs. speed.
• Because hard disks have faster access times than any removable media, the program will run faster if all pertinent files are copied to the hard drive; however, this can require more than a gigabyte of hard disk space for each program.
• Because of this trade-off, many install programs give the user the option of a minimal (smaller and slower) or full (bigger and faster) install. In addition, some install programs provide a custom or expert install so the user can specifically control what is copied to the hard disk.
Application Basics 6
Uninstalling
• Because install programs have become so complex, it is no longer sufficient for the user to simply delete the files associated with a program in order to remove it. (In fact, doing so may create errors in Windows.)
• Some applications provide uninstall programs to remove all files and registry entries related to the application.
• Other programs utilize InstallShield, a feature of Windows that monitors most install programs so their applications can be uninstalled later.
Application Basics 7
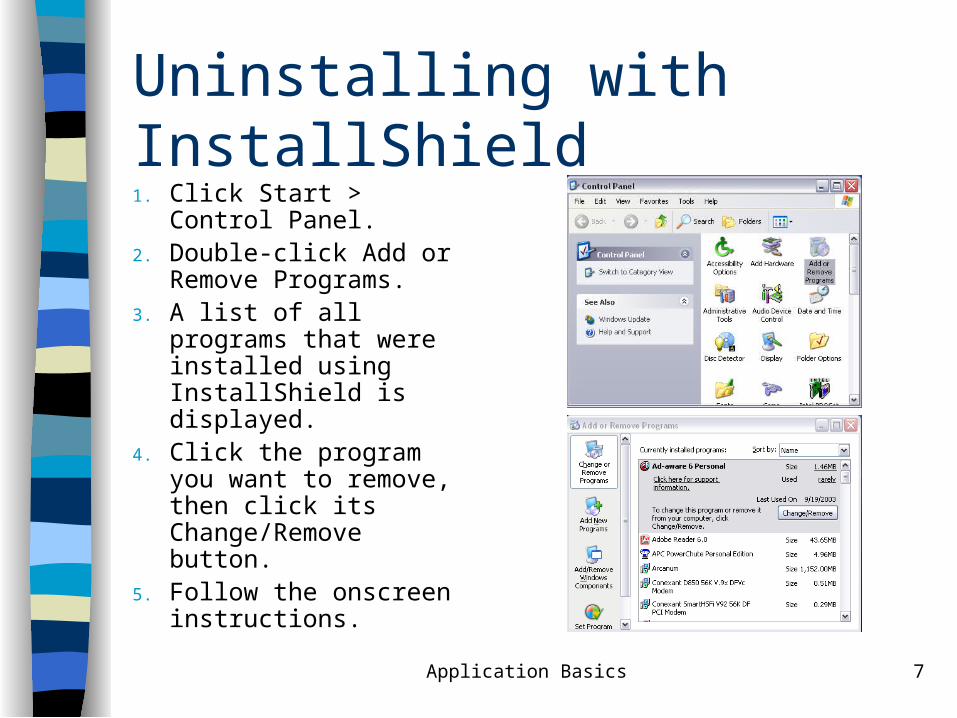
Uninstalling with InstallShield1. Click Start > Control
Panel.2. Double-click Add or
Remove Programs.3. A list of all programs that
were installed using InstallShield is displayed.
4. Click the program you want to remove, then click its Change/Remove button.
5. Follow the onscreen instructions.
Application Basics 8
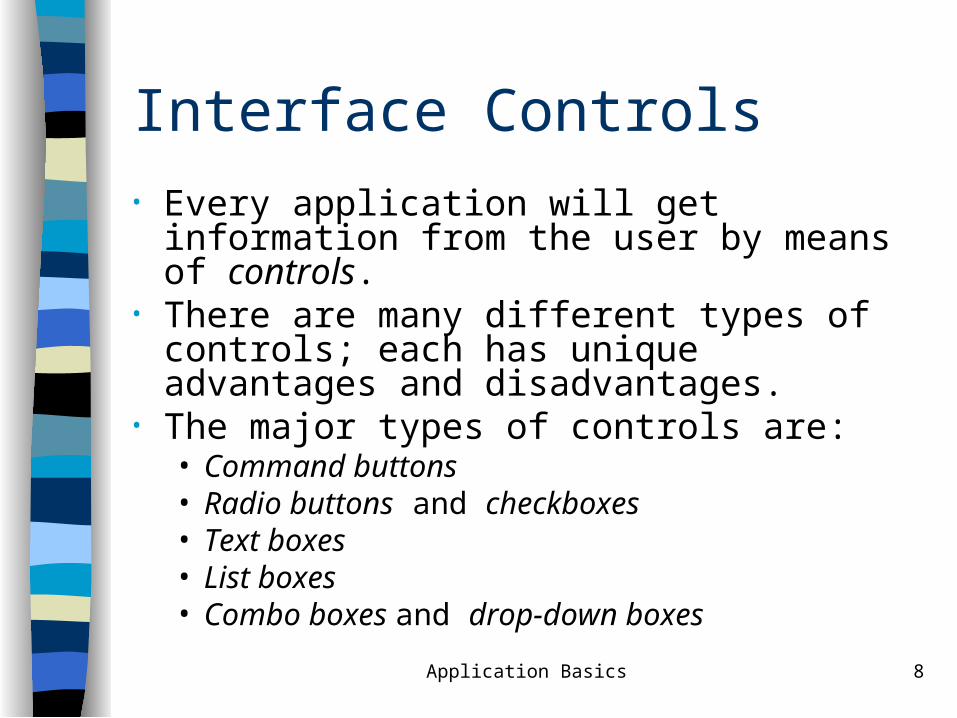
Interface Controls• Every application will get information from the
user by means of controls. • There are many different types of controls;
each has unique advantages and disadvantages.
• The major types of controls are:• Command buttons• Radio buttons and checkboxes• Text boxes• List boxes• Combo boxes and drop-down boxes
Application Basics 9
Command Buttons
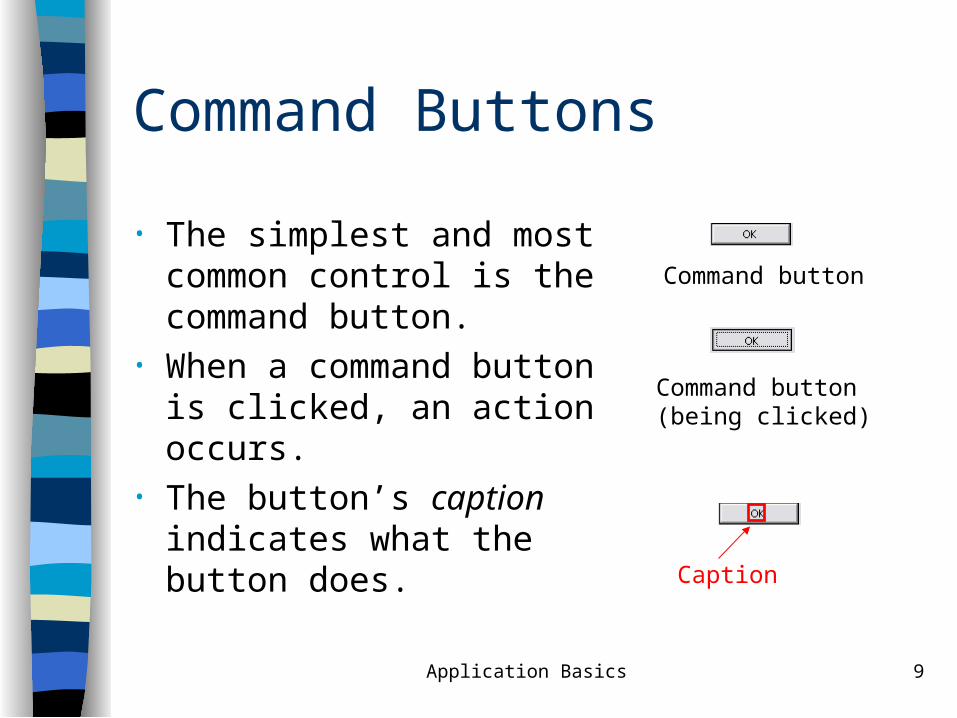
• The simplest and most common control is the command button.
• When a command button is clicked, an action occurs.
• The button’s caption indicates what the button does.
Command button
Command button(being clicked)
Caption
Application Basics 10
Radio Buttons
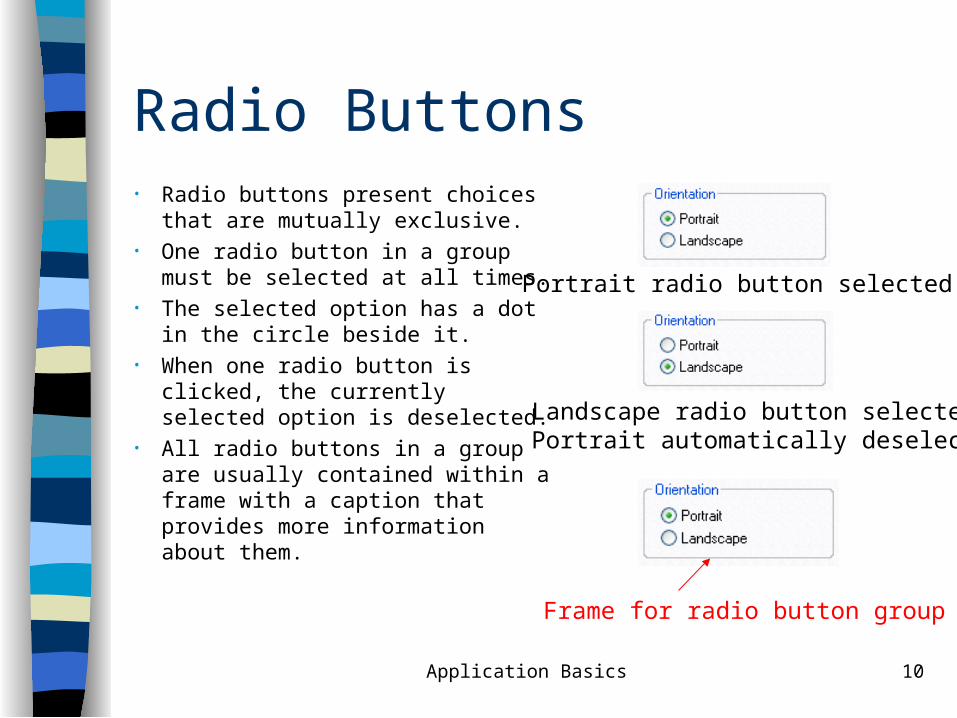
Portrait radio button selected
Landscape radio button selected;Portrait automatically deselected
Frame for radio button group
• Radio buttons present choices that are mutually exclusive.
• One radio button in a group must be selected at all times.
• The selected option has a dot in the circle beside it.
• When one radio button is clicked, the currently selected option is deselected.
• All radio buttons in a group are usually contained within a frame with a caption that provides more information about them.
Application Basics 11
Checkboxes
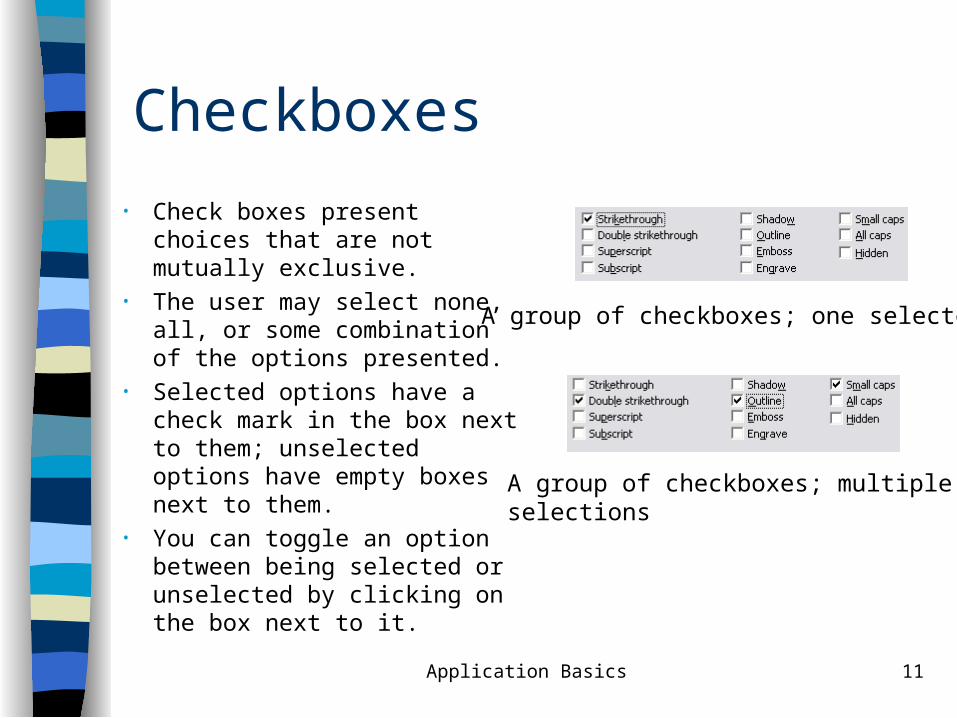
• Check boxes present choices that are not mutually exclusive.
• The user may select none, all, or some combination of the options presented.
• Selected options have a check mark in the box next to them; unselected options have empty boxes next to them.
• You can toggle an option between being selected or unselected by clicking on the box next to it.
A group of checkboxes; one selected
A group of checkboxes; multipleselections
Application Basics 12
Text boxes
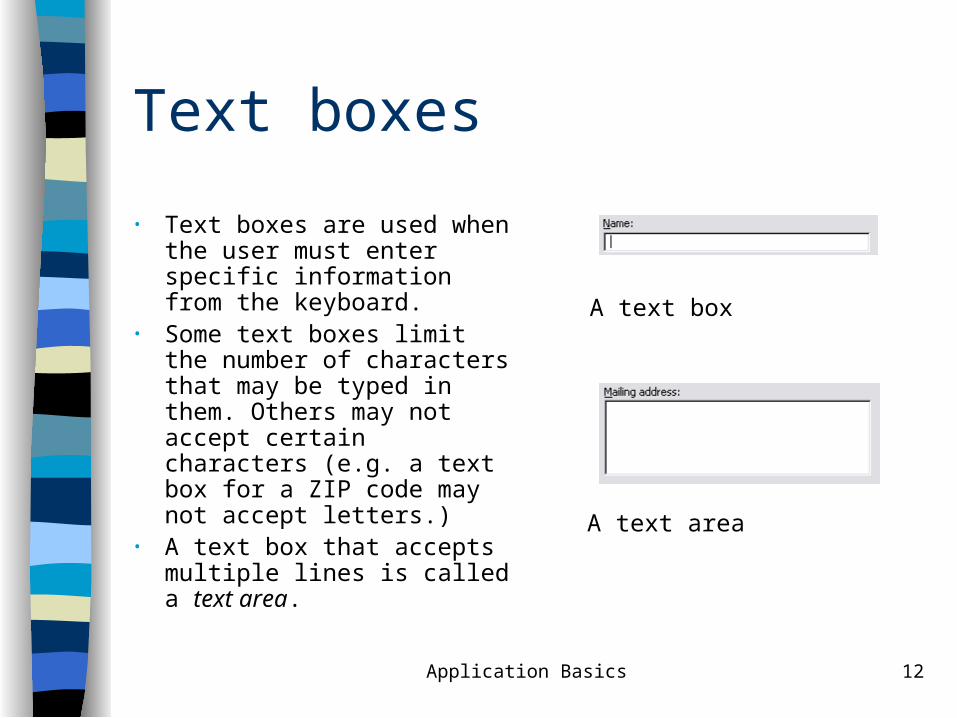
• Text boxes are used when the user must enter specific information from the keyboard.
• Some text boxes limit the number of characters that may be typed in them. Others may not accept certain characters (e.g. a text box for a ZIP code may not accept letters.)
• A text box that accepts multiple lines is called a text area.
A text box
A text area
Application Basics 13
List boxes
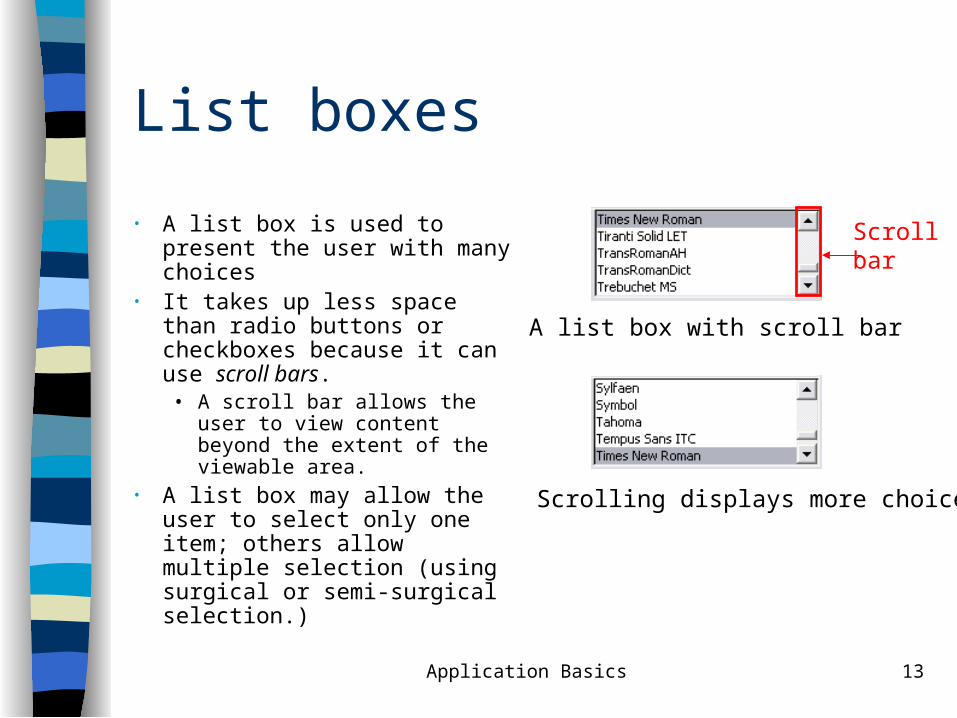
• A list box is used to present the user with many choices
• It takes up less space than radio buttons or checkboxes because it can use scroll bars.• A scroll bar allows the user
to view content beyond the extent of the viewable area.
• A list box may allow the user to select only one item; others allow multiple selection (using surgical or semi-surgical selection.)
A list box with scroll bar
Scrolling displays more choices
Scroll bar
Application Basics 14
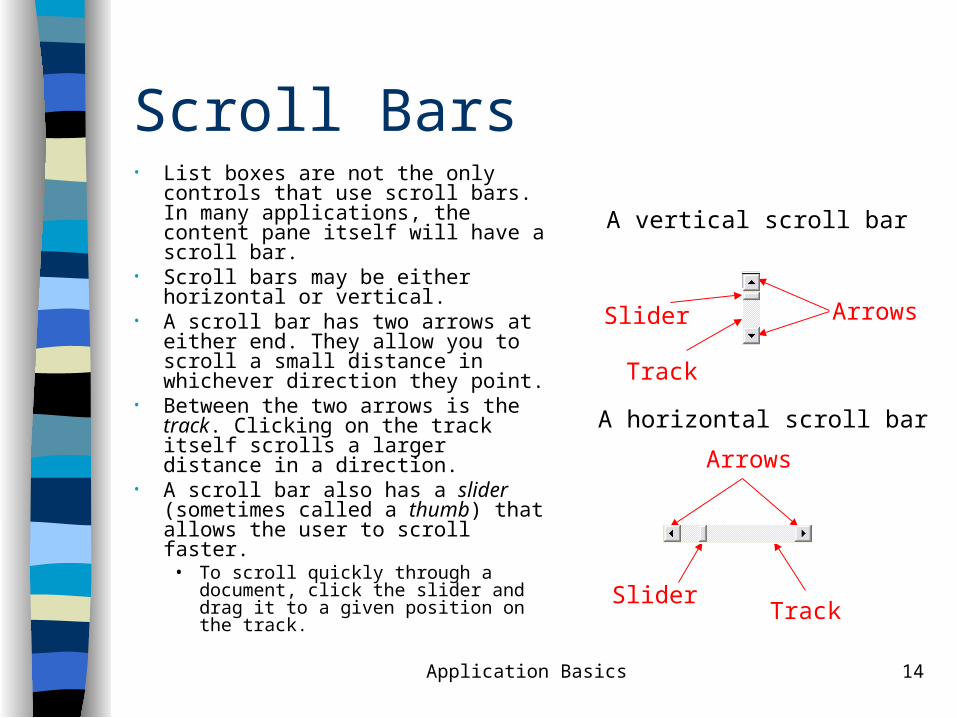
Scroll Bars• List boxes are not the only controls
that use scroll bars. In many applications, the content pane itself will have a scroll bar.
• Scroll bars may be either horizontal or vertical.
• A scroll bar has two arrows at either end. They allow you to scroll a small distance in whichever direction they point.
• Between the two arrows is the track. Clicking on the track itself scrolls a larger distance in a direction.
• A scroll bar also has a slider (sometimes called a thumb) that allows the user to scroll faster.
• To scroll quickly through a document, click the slider and drag it to a given position on the track.
Arrows
Track
Slider
Arrows
TrackSlider
A vertical scroll bar
A horizontal scroll bar
Application Basics 15
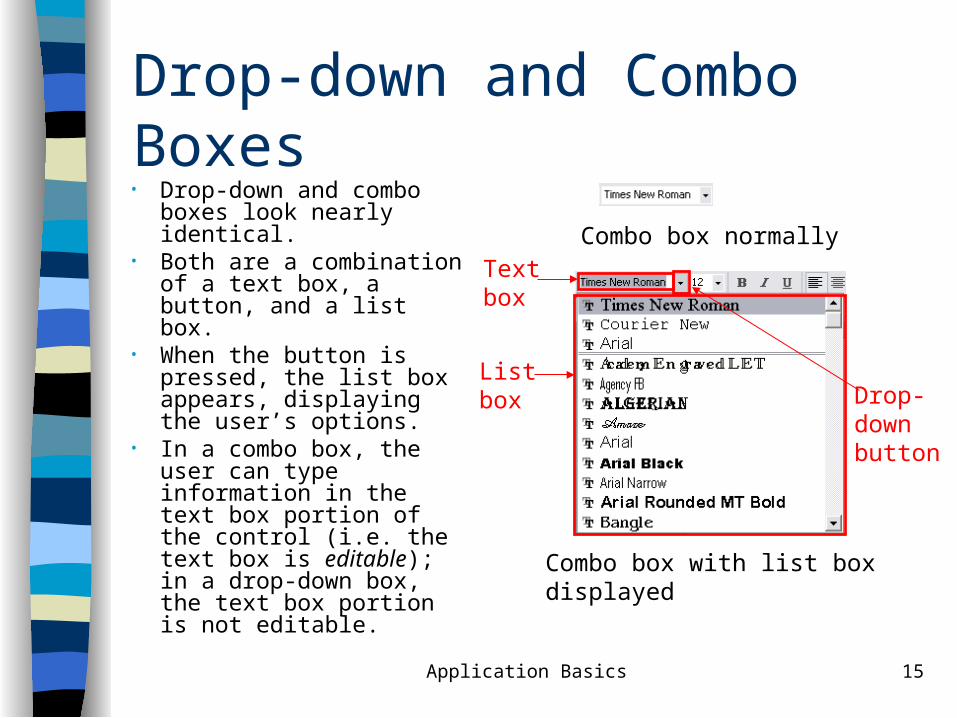
Drop-down and Combo Boxes• Drop-down and combo
boxes look nearly identical.
• Both are a combination of a text box, a button, and a list box.
• When the button is pressed, the list box appears, displaying the user’s options.
• In a combo box, the user can type information in the text box portion of the control (i.e. the text box is editable); in a drop-down box, the text box portion is not editable.
Combo box normally
Combo box with list boxdisplayed
Textbox
Listbox Drop-
downbutton
Application Basics 16
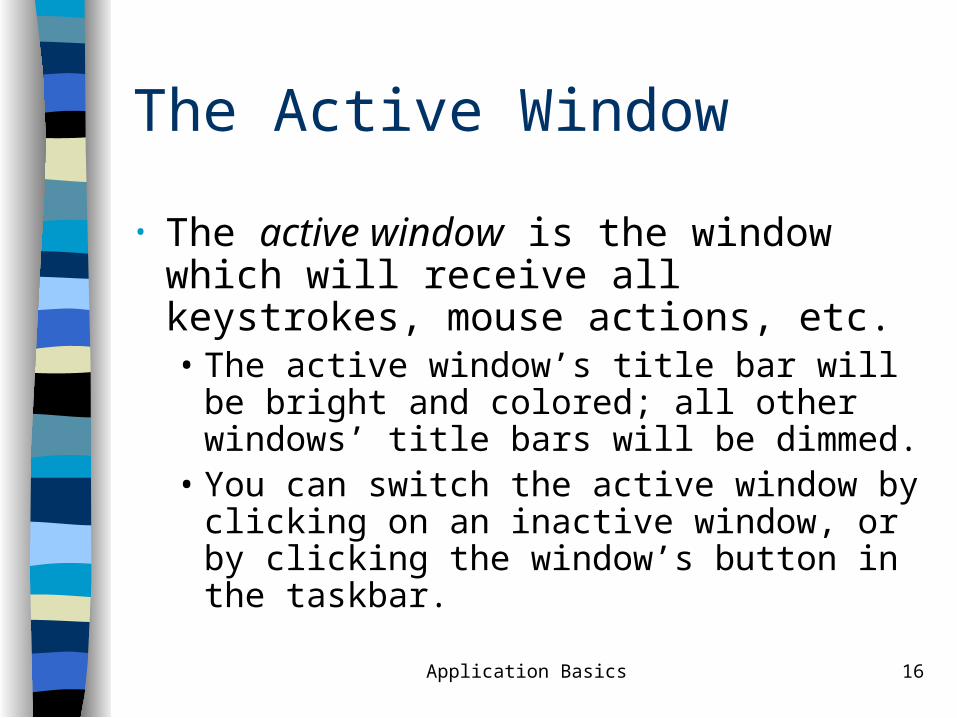
The Active Window
• The active window is the window which will receive all keystrokes, mouse actions, etc.• The active window’s title bar will be bright
and colored; all other windows’ title bars will be dimmed.
• You can switch the active window by clicking on an inactive window, or by clicking the window’s button in the taskbar.
Application Basics 17
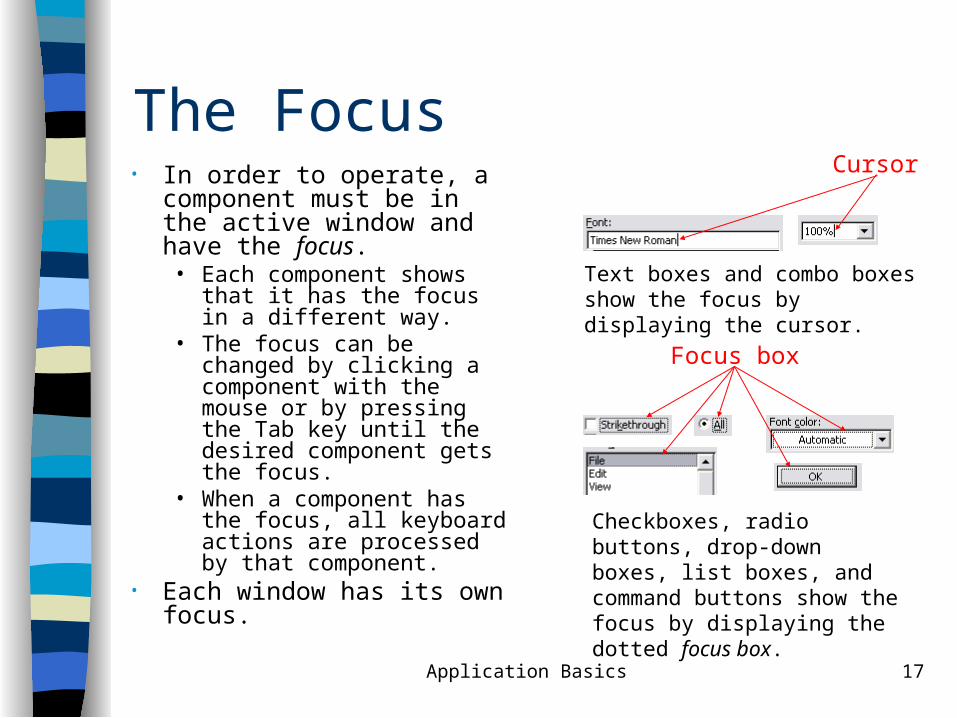
The Focus• In order to operate, a
component must be in the active window and have the focus.• Each component shows that
it has the focus in a different way.
• The focus can be changed by clicking a component with the mouse or by pressing the Tab key until the desired component gets the focus.
• When a component has the focus, all keyboard actions are processed by that component.
• Each window has its own focus.
Text boxes and combo boxes show the focus by displaying the cursor.
Cursor
Checkboxes, radio buttons, drop-down boxes, list boxes, and command buttons show the focus by displaying the dotted focus box.
Focus box
Application Basics 18
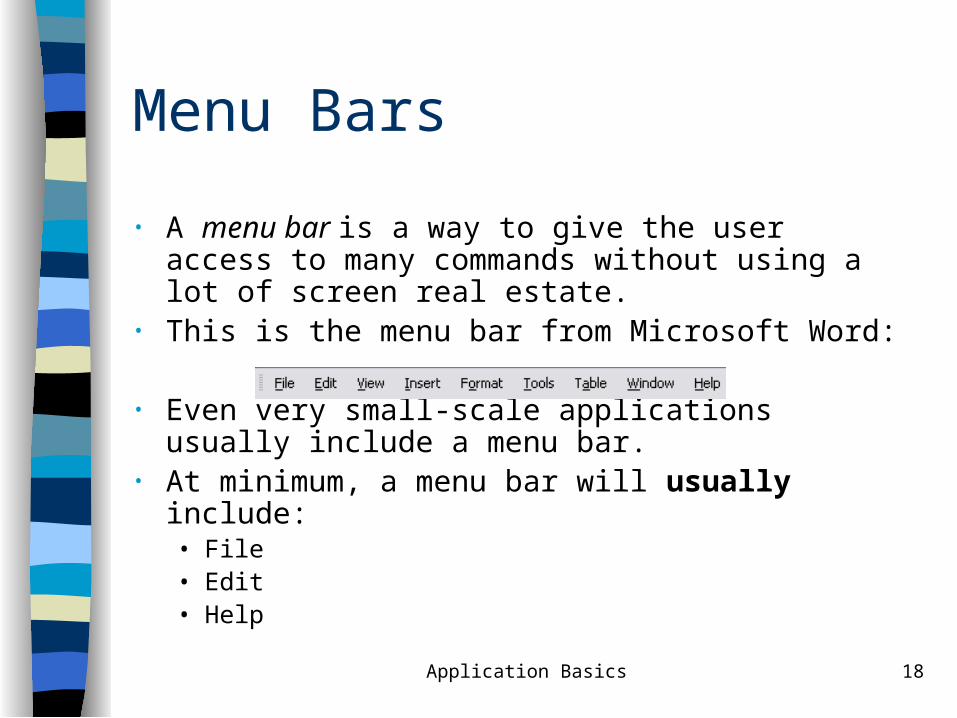
• A menu bar is a way to give the user access to many commands without using a lot of screen real estate.
• This is the menu bar from Microsoft Word:
• Even very small-scale applications usually include a menu bar.
• At minimum, a menu bar will usually include:• File• Edit• Help
Menu Bars
Application Basics 19
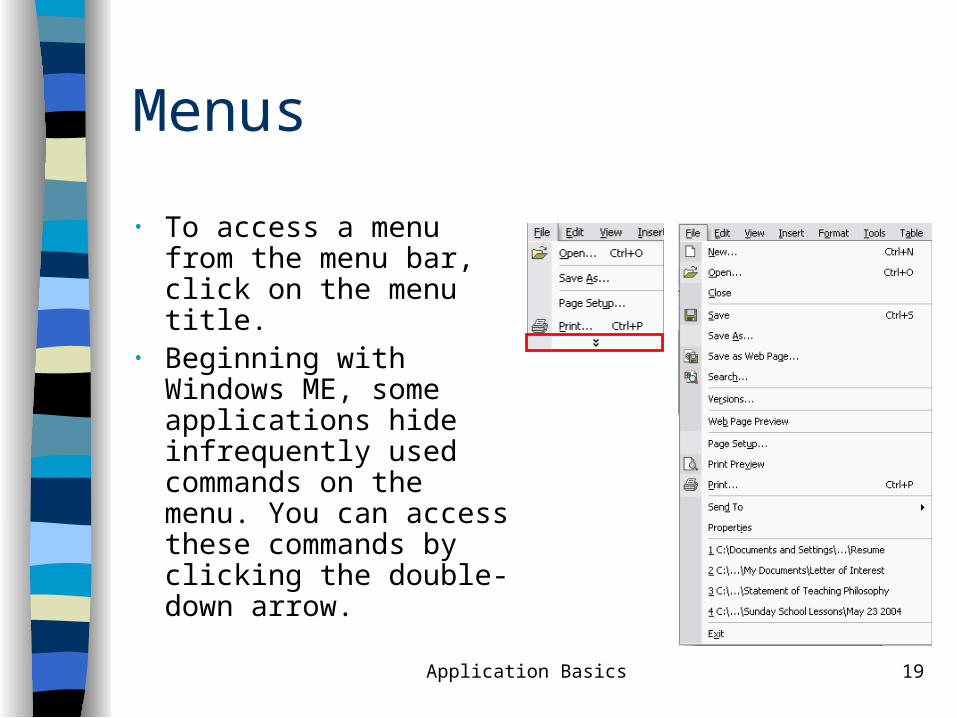
Menus
• To access a menu from the menu bar, click on the menu title.
• Beginning with Windows ME, some applications hide infrequently used commands on the menu. You can access these commands by clicking the double-down arrow.
Application Basics 20
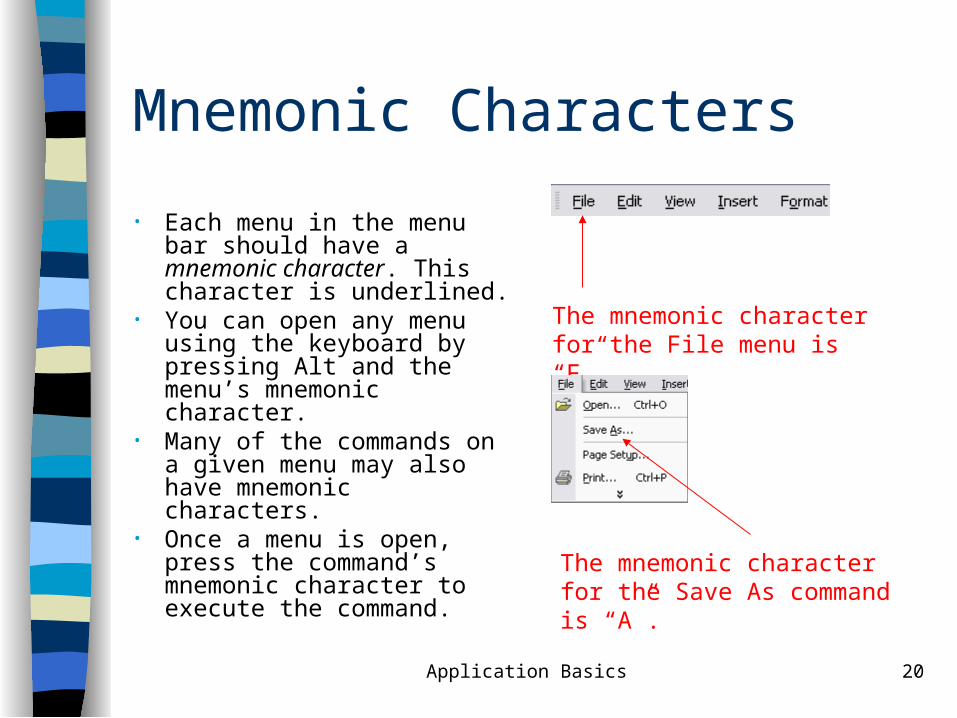
Mnemonic Characters
• Each menu in the menu bar should have a mnemonic character. This character is underlined.
• You can open any menu using the keyboard by pressing Alt and the menu’s mnemonic character.
• Many of the commands on a given menu may also have mnemonic characters.
• Once a menu is open, press the command’s mnemonic character to execute the command.
The mnemonic character for the File menu is “F”.
The mnemonic character for the Save As command is “A”.
Application Basics 21
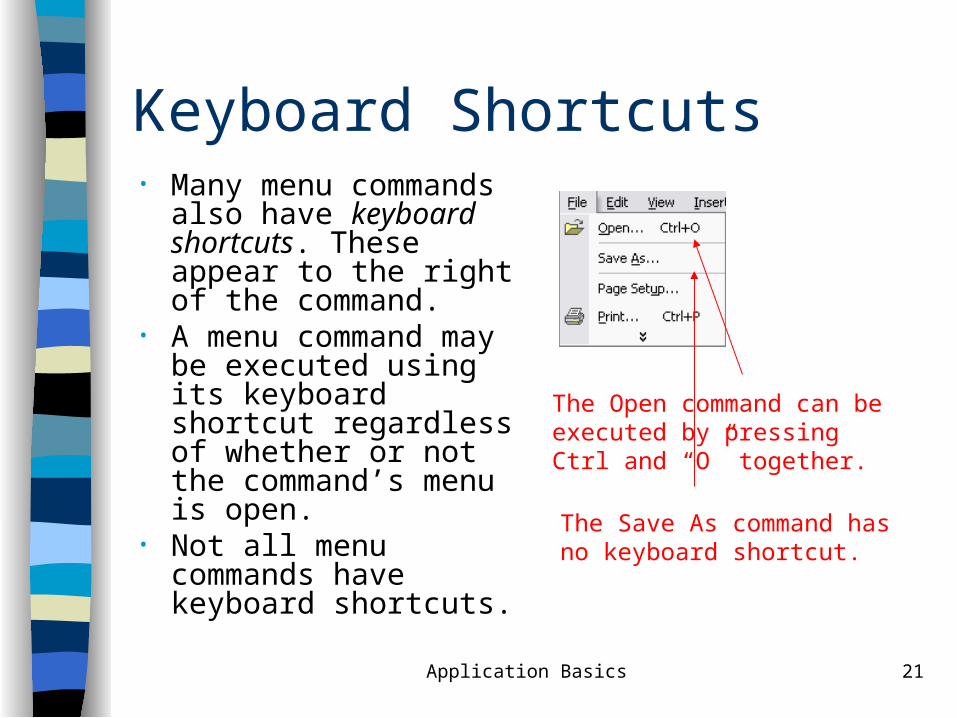
Keyboard Shortcuts• Many menu commands
also have keyboard shortcuts. These appear to the right of the command.
• A menu command may be executed using its keyboard shortcut regardless of whether or not the command’s menu is open.
• Not all menu commands have keyboard shortcuts.
The Open command can be executed by pressing Ctrl and “O” together.
The Save As command has no keyboard shortcut.

Application Basics 22
The Ellipsis• Some commands
require additional information before being executed. These commands are denoted by the ellipsis (…).
• The presence of the ellipsis usually means that executing this command causes a dialog box to be displayed.
The Open command displays a dialog box.
The Close command executes immediately.
Application Basics 23
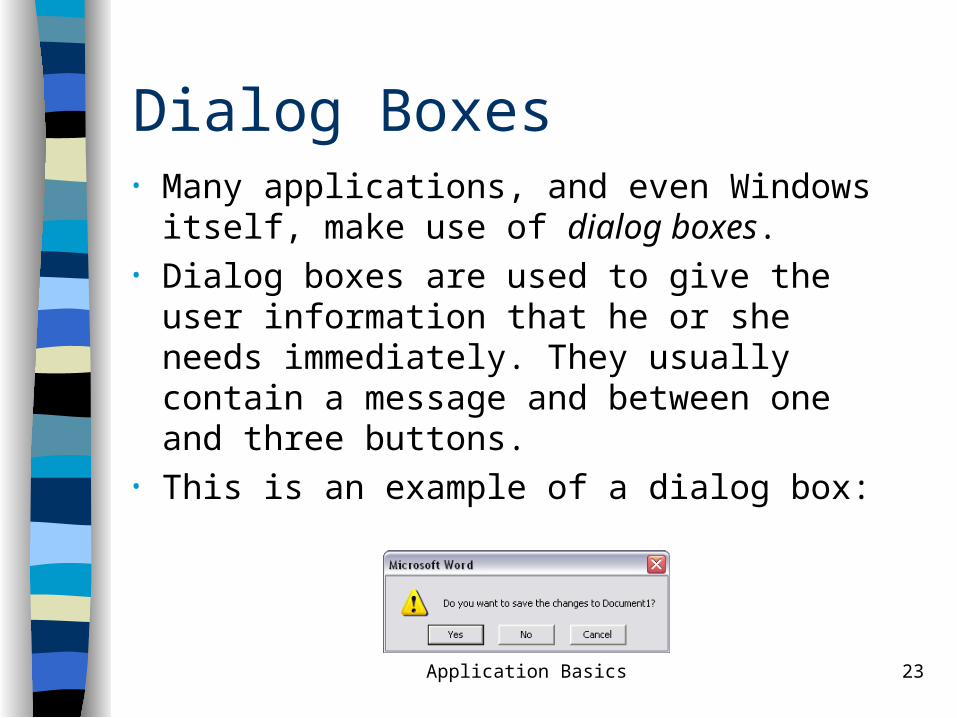
Dialog Boxes• Many applications, and even Windows
itself, make use of dialog boxes.• Dialog boxes are used to give the user
information that he or she needs immediately. They usually contain a message and between one and three buttons.
• This is an example of a dialog box:
Application Basics 24
Types of Dialog Boxes
• There are three types of dialog boxes:• Non-modal – this dialog is displayed, but can be
ignored by the user by moving it out of the way and continuing to work.
• Application modal – this dialog freezes all input to the application that displayed it until it is dismissed (i.e. one of its buttons is clicked.) The user may still work in other applications.
• System modal – this dialog freezes all input to everything but itself. It must be dismissed before any other work may be done on the system.
Application Basics 25
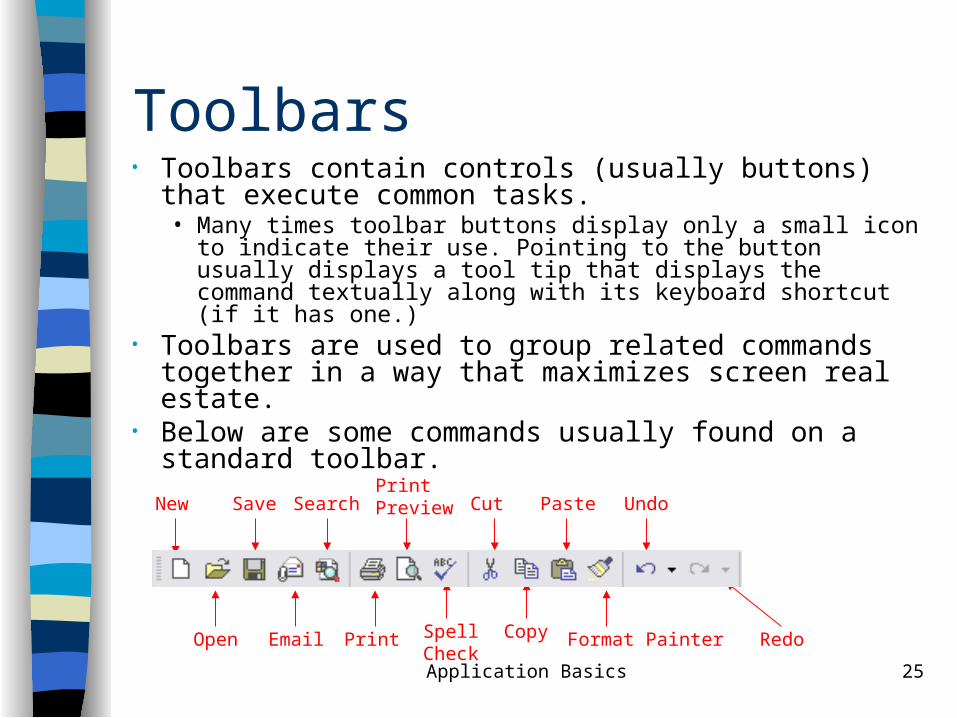
Toolbars• Toolbars contain controls (usually buttons) that
execute common tasks.• Many times toolbar buttons display only a small icon to
indicate their use. Pointing to the button usually displays a tool tip that displays the command textually along with its keyboard shortcut (if it has one.)
• Toolbars are used to group related commands together in a way that maximizes screen real estate.
• Below are some commands usually found on a standard toolbar.
New
Open
Save
Email Print SpellCheck
Copy Format Painter Redo
SearchPrintPreview Cut Paste Undo
Application Basics 26
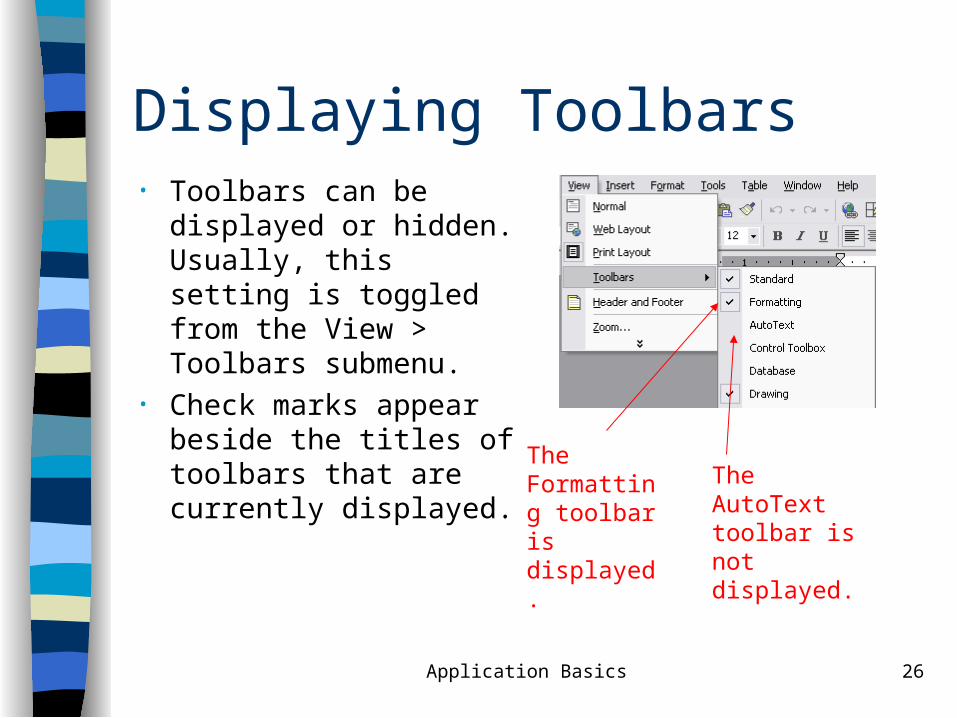
Displaying Toolbars• Toolbars can be
displayed or hidden. Usually, this setting is toggled from the View > Toolbars submenu.
• Check marks appear beside the titles of toolbars that are currently displayed.
The Formatting toolbar is displayed.
The AutoText toolbar is not displayed.
Application Basics 27
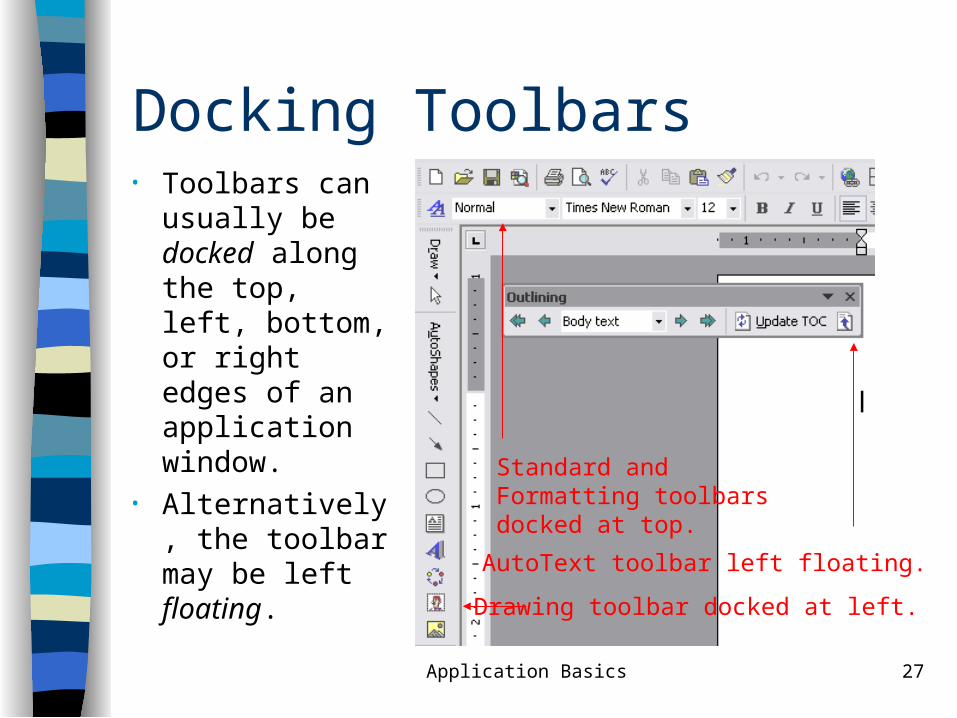
Docking Toolbars• Toolbars can
usually be docked along the top, left, bottom, or right edges of an application window.
• Alternatively, the toolbar may be left floating.
Drawing toolbar docked at left.
AutoText toolbar left floating.
Standard and Formatting toolbars docked at top.
Application Basics 28
File Menu Commands
• Many commands may appear on the File menu, but the following are the most common:• New – create a new document• Open – load a previously saved document• Close – unload the current document• Save – save the current document with its current title (if it
has one)• Save as – save the current document with a name other
than its current title• Print – send the current document to the printer• Exit – quit the current application
Application Basics 29
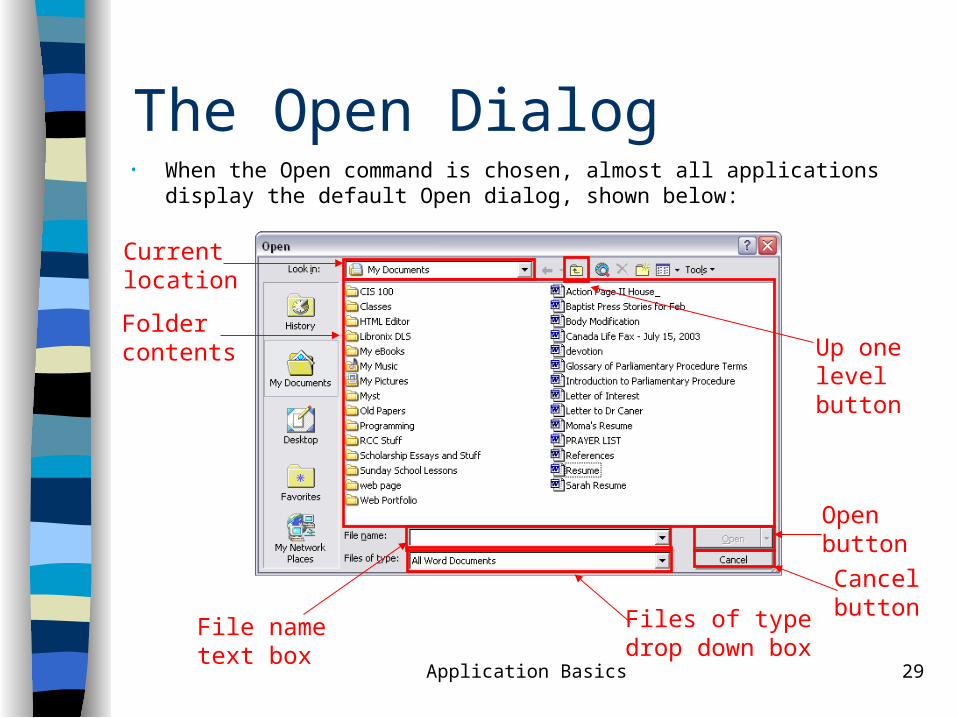
The Open Dialog• When the Open command is chosen, almost all applications display the default
Open dialog, shown below:
Current location
Foldercontents
File nametext box
Files of typedrop down box
Cancelbutton
Openbutton
Up onelevelbutton
Application Basics 30
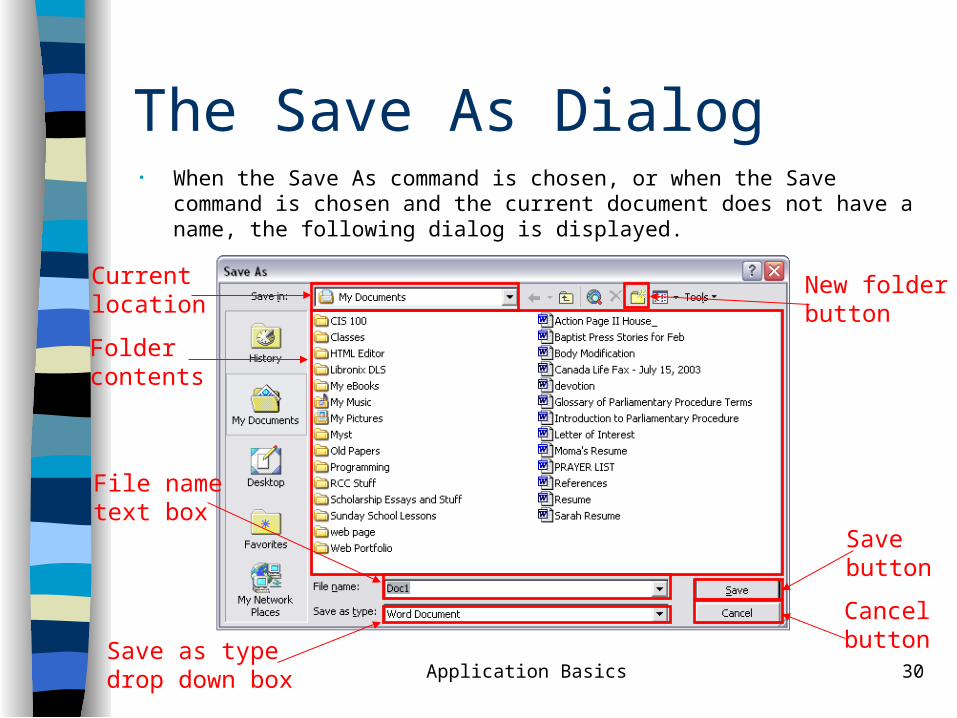
The Save As Dialog• When the Save As command is chosen, or when the Save command is chosen
and the current document does not have a name, the following dialog is displayed.
New folderbutton
Current location
Foldercontents
File nametext box
Save as typedrop down box
Cancelbutton
Savebutton
Application Basics 31
Edit Menu Commands
• The most common commands on the Edit menu are:• Undo – undoes the last performed action (if
possible)• Redo – redoes the last undone action (if possible)• Copy – copies the selected content to the system
clipboard (discussed later)• Cut – removes the selected content from the
document and places it on the system clipboard• Paste – copies the content of the system clipboard
into the document
Application Basics 32
The System Clipboard
• The system clipboard is a conceptual space that can hold almost any type of content, including text, graphics, and even entire files.
• When content is copied or cut, it is sent to the system clipboard.• The system clipboard can only hold one object at a time;
therefore, when something is copied or cut, the previous clipboard contents are discarded.
• When content is pasted from the clipboard, a copy of the content is placed at the paste location, but the content remains on the clipboard; therefore the same content can be pasted multiple times.• Some content cannot be pasted into certain programs.
Application Basics 33
Selecting Content
• In order to perform a copy or cut (and a host of other operations,) you must first select some content.
• Often, the content you are selecting will be text. To select text, position the cursor at one end of the text you want to select, then drag the cursor to the other end and release the mouse button.• As you drag, the text background will change color to show the
selection. Appropriately, this process is called highlighting.• When text is highlighted, anything you type will replace the
highlighted text. BE CAREFUL! If you do replace something by accident, use the undo button.
• You can usually select other types of content (such as graphics) by just clicking on them.
• You can clear the current selection by clicking elsewhere in the content area, or by making a new selection.


![U.S. v. Dixon, 509 U.S. 688 (1993) - Columbus School of Lawclinics.law.edu/res/docs/US-v-Dixon.pdfU.S. v. Dixon, 509 U.S. 688 (1993) Dixon, Dixon. and [1] Dixon. *698. order. Dixon.](https://static.fdocuments.us/doc/165x107/5ac1e6007f8b9ad73f8d6ea8/us-v-dixon-509-us-688-1993-columbus-school-of-v-dixon-509-us-688.jpg)