
Appendix B with slings shackles and side foot shields
11
Installation guide S41i Stacking Stand English (EN) 1 Installation instructions The S41i incubator shaker is designed to be stackable with another S41i. The upper and lower stacking stand is designed for two S41i incubator shaker to be stacked on top of each other. The stacking stand is not meant for transportation. Before using the stacking stand, read and observe the following general safety instructions. Observe the safety instructions in the operating manual. CAUTION! Risk of equipment damage! NEVER try to stack the S41i with another shaker, incubator or other type of equipment. WARNING! Crush hazard! Risk of personal injury! A mechanical lifting device is required to safely lift the shaker. Only a qualified operator should use the lifting device. CAUTION! Risk of equipment damage! NEVER try to lift the shaker by its door; this would cause permanent damage to the shaker. CAUTION! Poor safety due to incorrect accessories and spare parts. The use of accessories and spare parts other than those recommended by Eppendorf may impair the safety, functioning and precision of the device. Eppendorf cannot be held liable or accept any liability for damage resulting from the use of incorrect or non-recommended accessories and spare parts, or from the improper use of such equipment. Only use accessories and original spare parts recommended by Eppendorf. Only use screws from Eppendorf
Transcript of Appendix B with slings shackles and side foot shields
Installation guide S41i Stacking Stand English (EN)
1
Installation instructions The S41i incubator shaker is designed to be stackable with another S41i. The upper and lower stacking stand is designed for two S41i incubator shaker to be stacked on top of each other. The stacking stand is not meant for transportation. Before using the stacking stand, read and observe the following general safety instructions. Observe the safety instructions in the operating manual.
CAUTION! Risk of equipment damage! NEVER try to stack the S41i with another shaker, incubator or other type of
equipment.
WARNING! Crush hazard! Risk of personal injury! A mechanical lifting device is required to safely lift the shaker. Only a qualified operator should use the lifting device.
CAUTION! Risk of equipment damage! NEVER try to lift the shaker by its door; this would cause permanent damage to the
shaker.
CAUTION! Poor safety due to incorrect accessories and spare parts. The use of accessories and spare parts other than those recommended by Eppendorf may impair the safety, functioning and precision of the device. Eppendorf cannot be held liable or accept any liability for damage resulting from the use of incorrect or non-recommended accessories and spare parts, or from the improper use of such equipment.
Only use accessories and original spare parts recommended by Eppendorf. Only use screws from Eppendorf
Installation guide S41i Stacking Stand
English (EN)
2
1.1 Tools required
You will need the following tools to stack the shakers: Automated handling equipment with a safe working load of 200 kg (440 lb) mass A 10 mm spanner/wrench A 19 mm spanner/wrench A 6 mm Allen key A magnetic Torx 40 key with a length of min. 7 cm 4 M10 Eyebolts (provided) 4 M10 protective washers (provided) 4 Shackles (provided) 2 Slings (provided) A level A PoziDriv® (star type) screwdriver
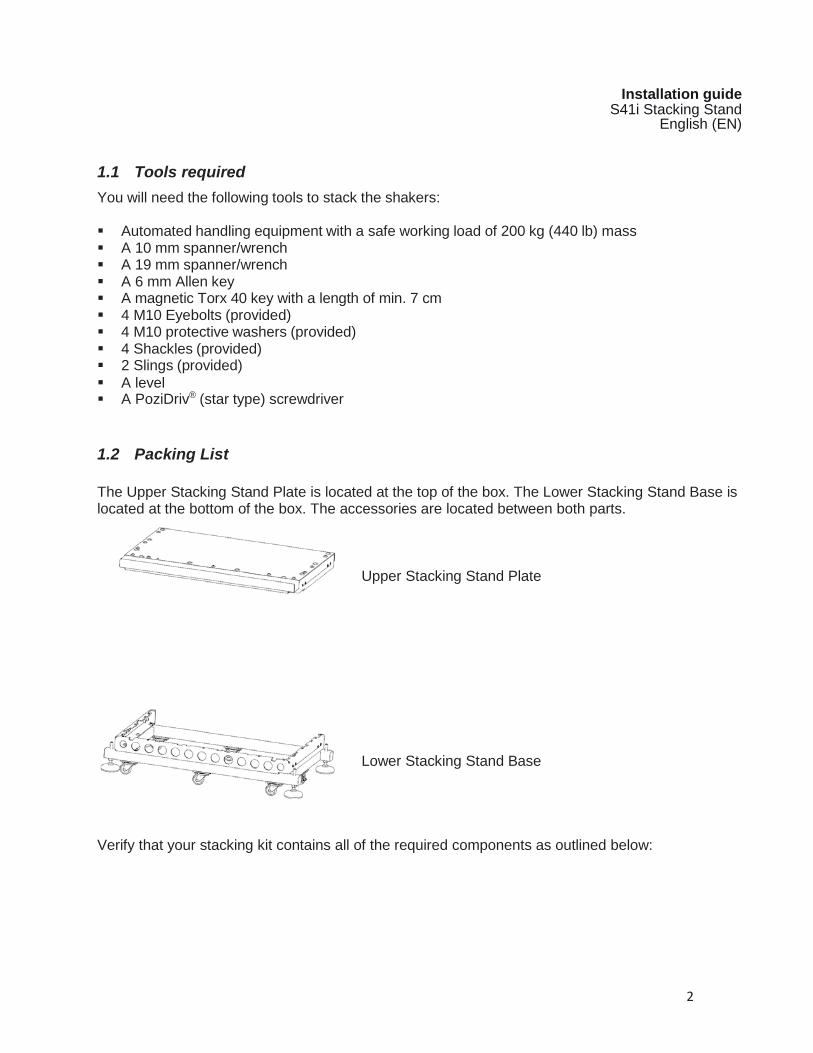
1.2 Packing List The Upper Stacking Stand Plate is located at the top of the box. The Lower Stacking Stand Base is located at the bottom of the box. The accessories are located between both parts.
Upper Stacking Stand Plate Lower Stacking Stand Base
Verify that your stacking kit contains all of the required components as outlined below:
Installation guide S41i Stacking Stand English (EN)
3
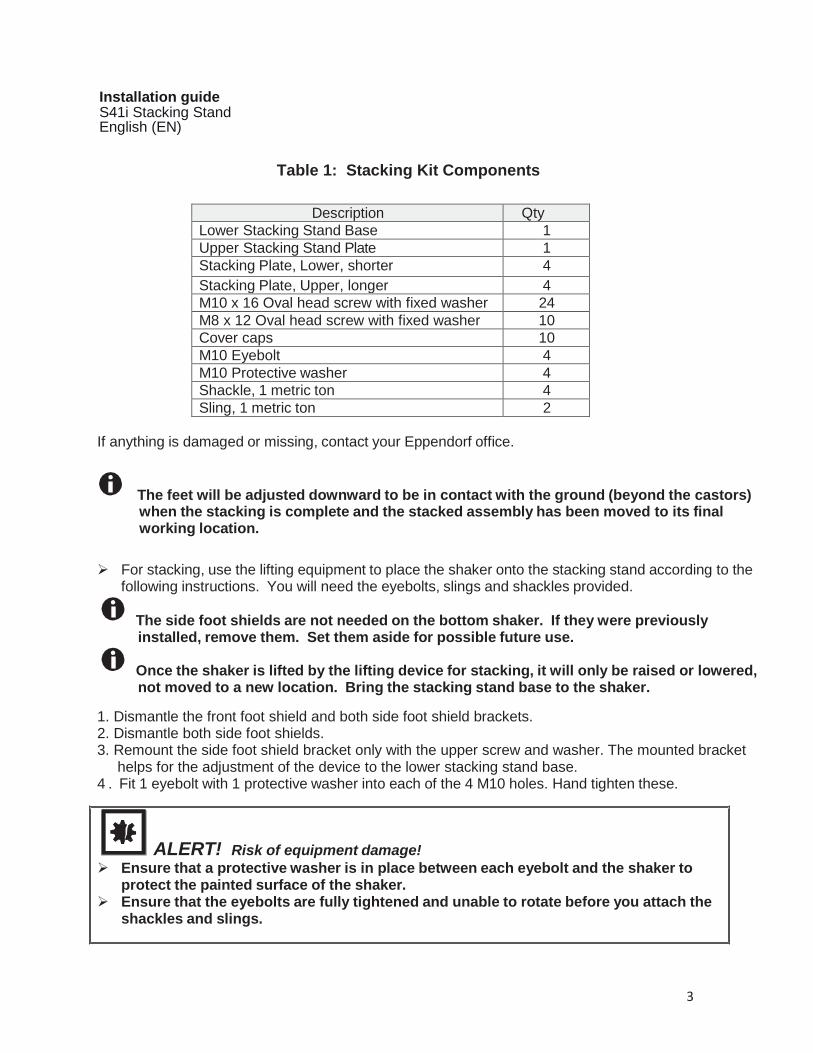
Table 1: Stacking Kit Components
Description Qty Lower Stacking Stand Base 1 Upper Stacking Stand Plate 1 Stacking Plate, Lower, shorter 4 Stacking Plate, Upper, longer 4 M10 x 16 Oval head screw with fixed washer 24 M8 x 12 Oval head screw with fixed washer 10 Cover caps 10 M10 Eyebolt 4 M10 Protective washer 4 Shackle, 1 metric ton 4 Sling, 1 metric ton 2
If anything is damaged or missing, contact your Eppendorf office.
The feet will be adjusted downward to be in contact with the ground (beyond the castors) when the stacking is complete and the stacked assembly has been moved to its final working location.
For stacking, use the lifting equipment to place the shaker onto the stacking stand according to the
following instructions. You will need the eyebolts, slings and shackles provided.
The side foot shields are not needed on the bottom shaker. If they were previously installed, remove them. Set them aside for possible future use.
Once the shaker is lifted by the lifting device for stacking, it will only be raised or lowered, not moved to a new location. Bring the stacking stand base to the shaker.
1. Dismantle the front foot shield and both side foot shield brackets. 2. Dismantle both side foot shields. 3. Remount the side foot shield bracket only with the upper screw and washer. The mounted bracket
helps for the adjustment of the device to the lower stacking stand base. 4 . Fit 1 eyebolt with 1 protective washer into each of the 4 M10 holes. Hand tighten these.
ALERT! Risk of equipment damage! Ensure that a protective washer is in place between each eyebolt and the shaker to
protect the painted surface of the shaker. Ensure that the eyebolts are fully tightened and unable to rotate before you attach the
shackles and slings.
Installation guide S41i Stacking Stand
English (EN)
4
ALERT! Risk of equipment damage! Be careful not to damage the shaker with the metal shackles. Lifting devices must be inspected by a competent. Inspect the slings visually for damage. If there is any sign of damage, do not
attempt to use them. Contact Eppendorf for replacement
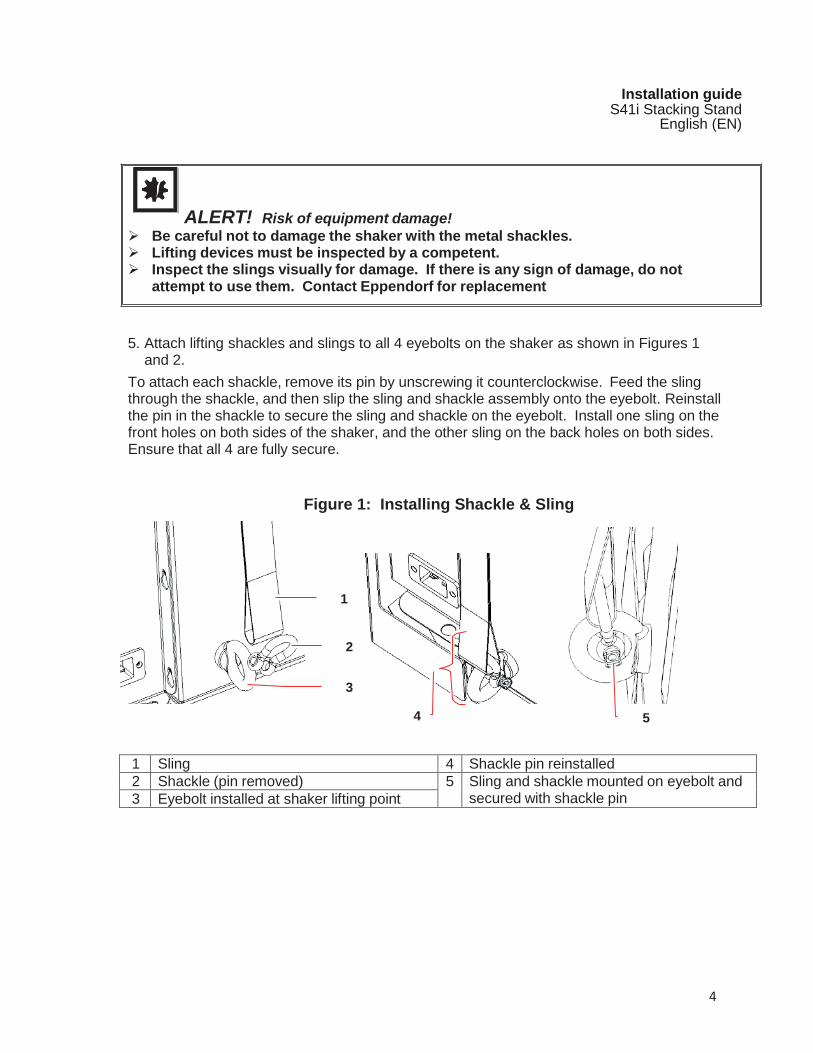
5. Attach lifting shackles and slings to all 4 eyebolts on the shaker as shown in Figures 1 and 2. To attach each shackle, remove its pin by unscrewing it counterclockwise. Feed the sling through the shackle, and then slip the sling and shackle assembly onto the eyebolt. Reinstall the pin in the shackle to secure the sling and shackle on the eyebolt. Install one sling on the front holes on both sides of the shaker, and the other sling on the back holes on both sides. Ensure that all 4 are fully secure.
Figure 1: Installing Shackle & Sling
1
2
3
4 5
1 Sling 4 Shackle pin reinstalled 2 Shackle (pin removed) 5 Sling and shackle mounted on eyebolt and
secured with shackle pin 3 Eyebolt installed at shaker lifting point
Installation guide S41i Stacking Stand English (EN)
5
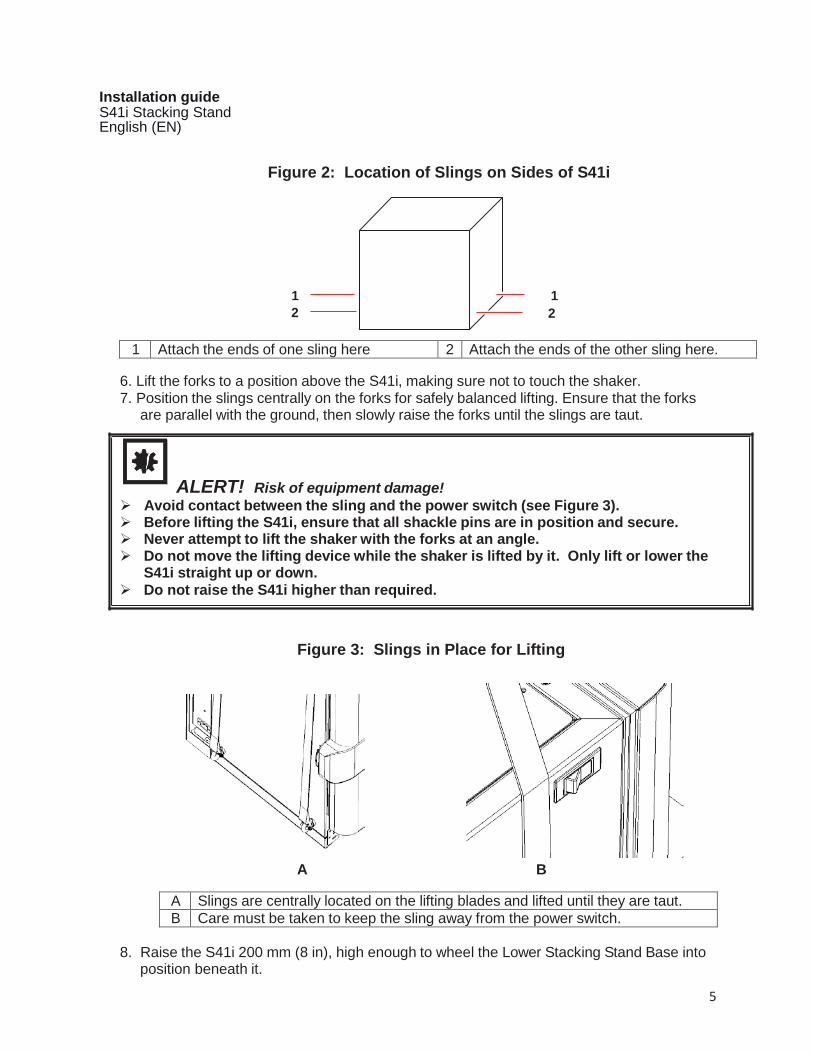
Figure 2: Location of Slings on Sides of S41i
1 1 2 2
1 Attach the ends of one sling here 2 Attach the ends of the other sling here.
6. Lift the forks to a position above the S41i, making sure not to touch the shaker. 7. Position the slings centrally on the forks for safely balanced lifting. Ensure that the forks
are parallel with the ground, then slowly raise the forks until the slings are taut.
ALERT! Risk of equipment damage! Avoid contact between the sling and the power switch (see Figure 3). Before lifting the S41i, ensure that all shackle pins are in position and secure. Never attempt to lift the shaker with the forks at an angle. Do not move the lifting device while the shaker is lifted by it. Only lift or lower the
S41i straight up or down. Do not raise the S41i higher than required.
Figure 3: Slings in Place for Lifting
A B
A Slings are centrally located on the lifting blades and lifted until they are taut. B Care must be taken to keep the sling away from the power switch.
8. Raise the S41i 200 mm (8 in), high enough to wheel the Lower Stacking Stand Base into
position beneath it.
Installation guide S41i Stacking Stand
English (EN)
6
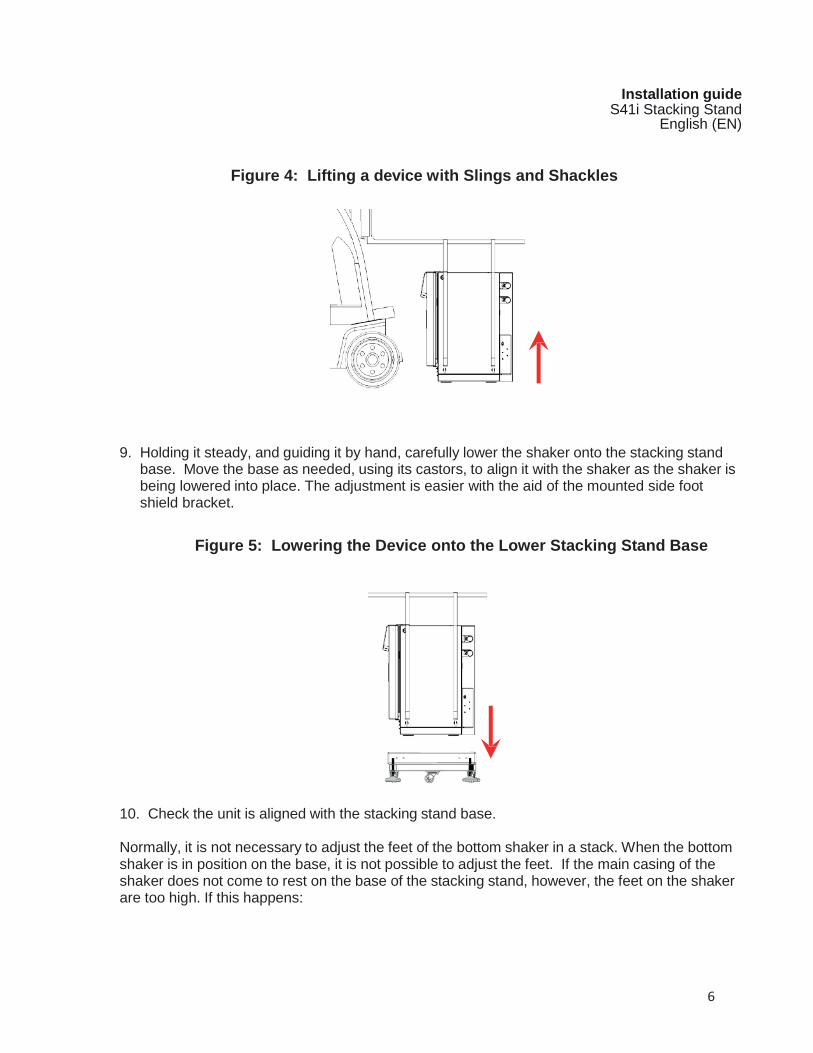
Figure 4: Lifting a device with Slings and Shackles 9. Holding it steady, and guiding it by hand, carefully lower the shaker onto the stacking stand
base. Move the base as needed, using its castors, to align it with the shaker as the shaker is being lowered into place. The adjustment is easier with the aid of the mounted side foot shield bracket.
Figure 5: Lowering the Device onto the Lower Stacking Stand Base 10. Check the unit is aligned with the stacking stand base.
Normally, it is not necessary to adjust the feet of the bottom shaker in a stack. When the bottom shaker is in position on the base, it is not possible to adjust the feet. If the main casing of the shaker does not come to rest on the base of the stacking stand, however, the feet on the shaker are too high. If this happens:
Installation guide S41i Stacking Stand English (EN)
7
a. Lift the device up, off the base. b. With the shaker suspended from the lifting equipment, adjust the feet:
Loosen the M12 nut which secures the foot to the underside of the shaker using a 19 mm spanner/wrench. Use a 10 mm spanner/wrench against the flats of the foot thread to turn the foot further into the shaker. When the feet are suitably readjusted, be sure to retighten the M12 nut against the bottom of the shaker.
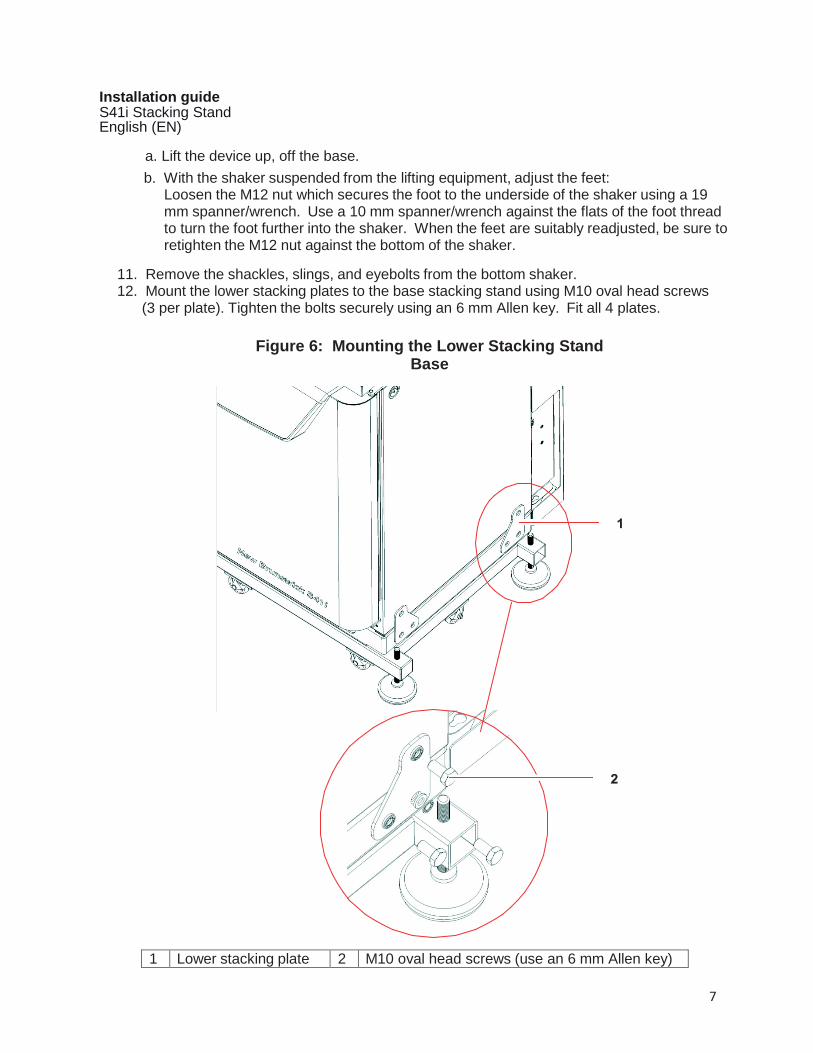
11. Remove the shackles, slings, and eyebolts from the bottom shaker. 12. Mount the lower stacking plates to the base stacking stand using M10 oval head screws (3 per plate). Tighten the bolts securely using an 6 mm Allen key. Fit all 4 plates.
Figure 6: Mounting the Lower Stacking Stand
Base
1 Lower stacking plate 2 M10 oval head screws (use an 6 mm Allen key)
Installation guide S41i Stacking Stand
English (EN)
8
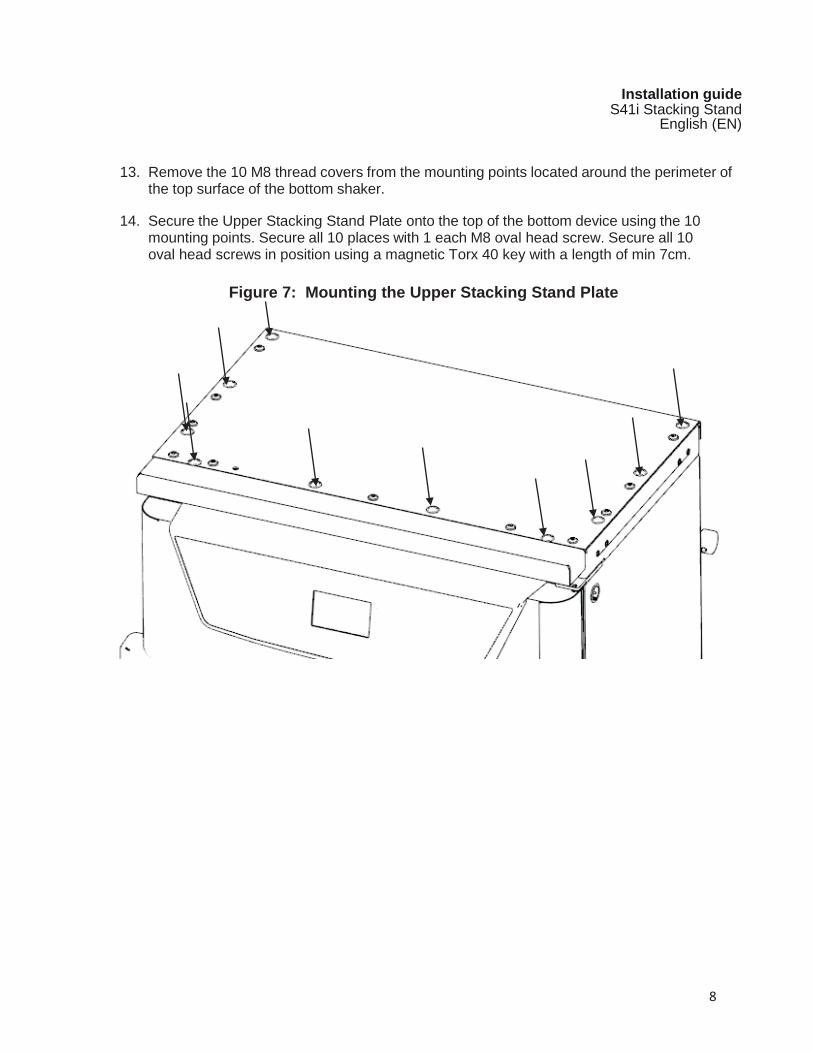
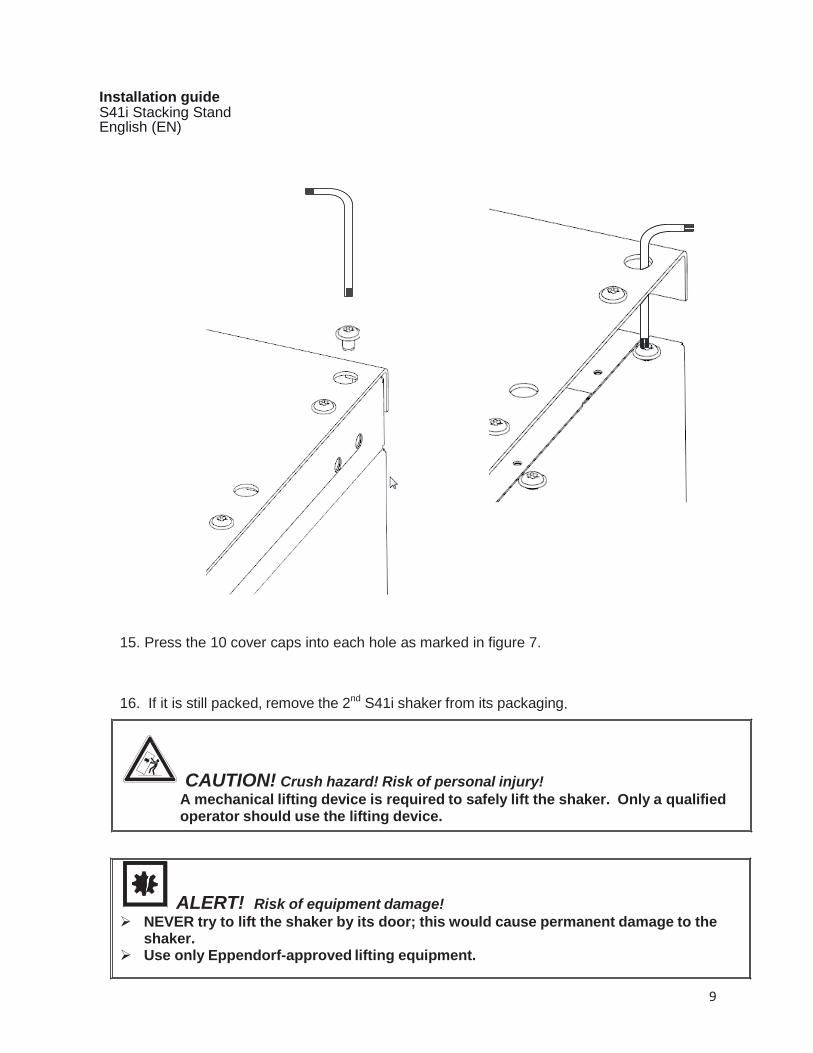
13. Remove the 10 M8 thread covers from the mounting points located around the perimeter of
the top surface of the bottom shaker. 14. Secure the Upper Stacking Stand Plate onto the top of the bottom device using the 10
mounting points. Secure all 10 places with 1 each M8 oval head screw. Secure all 10 oval head screws in position using a magnetic Torx 40 key with a length of min 7cm.
Figure 7: Mounting the Upper Stacking Stand Plate
Installation guide S41i Stacking Stand English (EN)
9
15. Press the 10 cover caps into each hole as marked in figure 7. 16. If it is still packed, remove the 2nd S41i shaker from its packaging.
CAUTION! Crush hazard! Risk of personal injury! A mechanical lifting device is required to safely lift the shaker. Only a qualified operator should use the lifting device.
ALERT! Risk of equipment damage! NEVER try to lift the shaker by its door; this would cause permanent damage to the
shaker. Use only Eppendorf-approved lifting equipment.
Installation guide S41i Stacking Stand
English (EN)
10
17. If there is enough head space to lift the top shaker with the slings, install the slings and
shackles on the 2nd S41i (as explained in Steps 1 - 3 ), then carefully lift the 2nd shaker, guiding it and holding it steady by hand, to bring it safely above the bottom shaker. It is best to have at least 2 persons, one on either side of the shaker.
Push the bottom shaker to the proper position underneath the top shaker. Do not move the lifting device with the top shaker suspended.
18. Align the sides of the top S41i with the bottom device, and align both front doors so that they are sitting flush with each other. It should not be necessary to adjust the feet on the top shaker (they are preset at the factory). If the top shaker is not new out of the box, however, check the height of the feet; adjust if necessary.
19. Withdraw the forklift blades. Remove the slings, shackles and eyebolts.
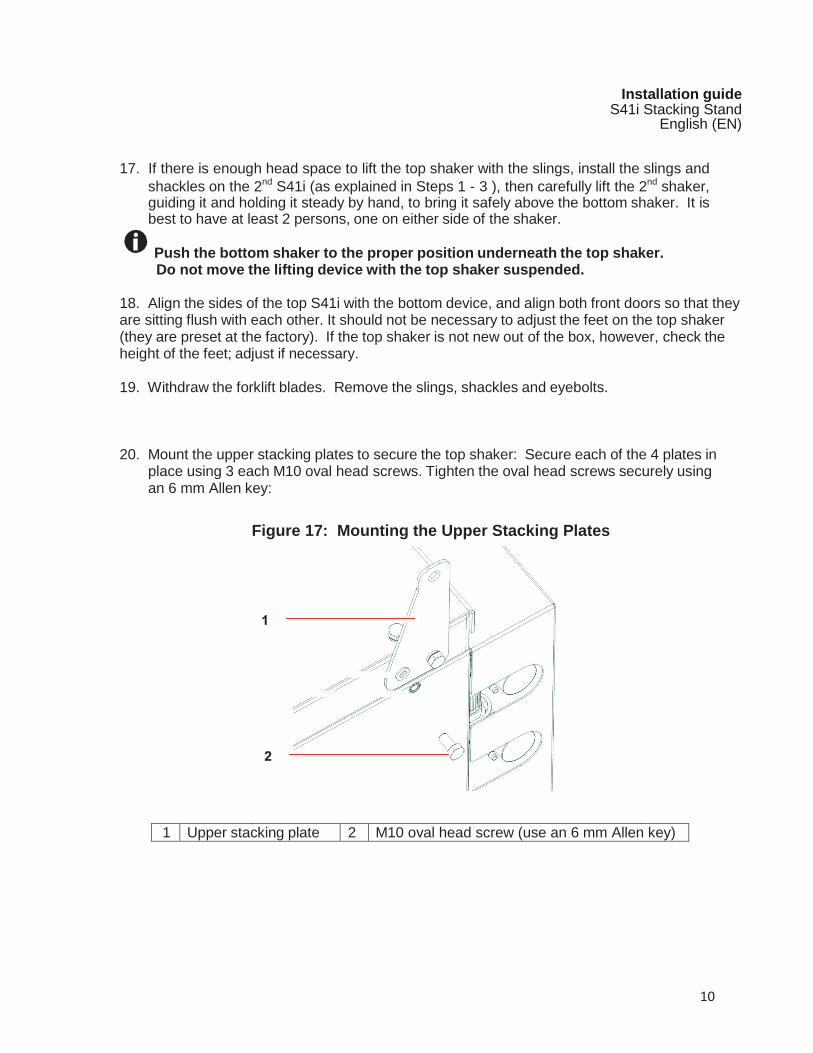
20. Mount the upper stacking plates to secure the top shaker: Secure each of the 4 plates in
place using 3 each M10 oval head screws. Tighten the oval head screws securely using an 6 mm Allen key:
Figure 17: Mounting the Upper Stacking Plates
1 Upper stacking plate 2 M10 oval head screw (use an 6 mm Allen key)

Installation guide S41i Stacking Stand English (EN)
11
©20
16 ·
90
0.30
9-00
/062
016
CAUTION! ALERT! Risk of personal injury and/or equipment damage! Exercise extreme caution when moving the stack on its castors. Choose a route which is as flat as possible and without obstruction. Move the stack very slowly. If passing through doorways is required, be very careful to avoid squashing hands
or fingers between the stack and the doorframe. 21. Move the stack very slowly and carefully to its final location: The 8 castors on the stacking
stand base allow the stacked assembly to be moved. 22. Before moving the stack into its final working position, connect all gas supply tubes and
power leads (according to the Operating Manual), taking advantage of easy access to the rear of the shakers.
23. Move the stack into its final position and adjust the feet on the stacking stand base. These
are the same as the feet on the shaker. Adjust all feet so that they are in contact with the floor and secure them to the underside of the stacking stand base using the M12 nut which is already assembled on the thread of the foot.
24. Once the shaker platforms have been installed, verify that the platforms are level using a
spirit level. If the bottom shaker requires levelling, adjust the feet on the base of the stacking stand. If the top shaker requires levelling, remove the side foot shields of the top shaker and adjust the feet of that shaker as required.
The maximum shaking speed when shakers are stacked is 250 rpm.
Your local distributor: www.eppendorf.com/contact Eppendorf AG · 22331 Hamburg · Germany [email protected] · www.eppendorf.com