APPENDIX A: MODEL USER GUIDE
10
GEORGIA STATEWIDE TRAVEL DEMAND MODEL REPORT APPENDIX A September 2019 A1 APPENDIX A: MODEL USER GUIDE
Transcript of APPENDIX A: MODEL USER GUIDE

GEORGIA STATEWIDE TRAVEL DEMAND MODEL REPORT
APPENDIX A
September 2019 A1
APPENDIX A: MODEL USER GUIDE

GEORGIA STATEWIDE TRAVEL DEMAND MODEL REPORT
APPENDIX A
September 2019 A2
1. MODEL USER GUIDE
This document outlines step-by-step guidance to perform a model run. The process can be divided into following steps:
Opening the interface Checking the variables Running the model Checking input and output files in model directories
1.1 OPENING THE INTERFACEThe project files will have the directory structure as shown in Figure 1-1. The main directory within which all subdirectories and files exist, is called Root Directory.
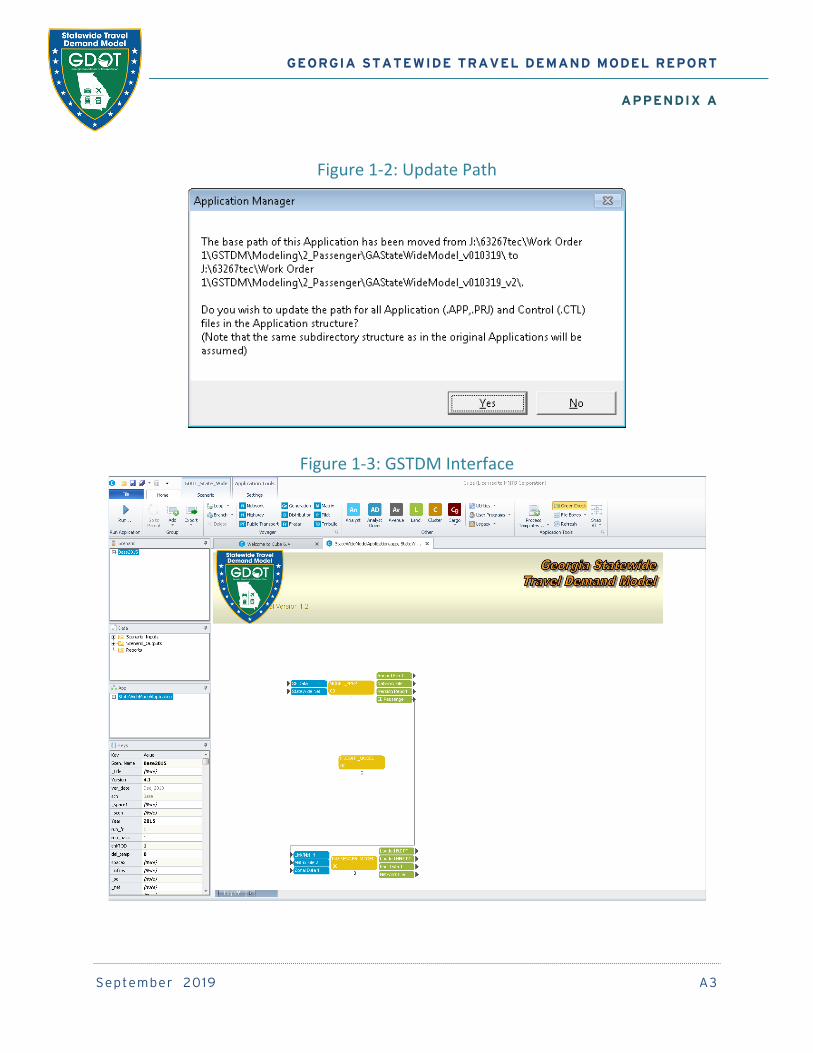
Double click the catalog file GDOT_State_Wide.cat. The first-time catalog is opened, it updates the path where the user has saved the
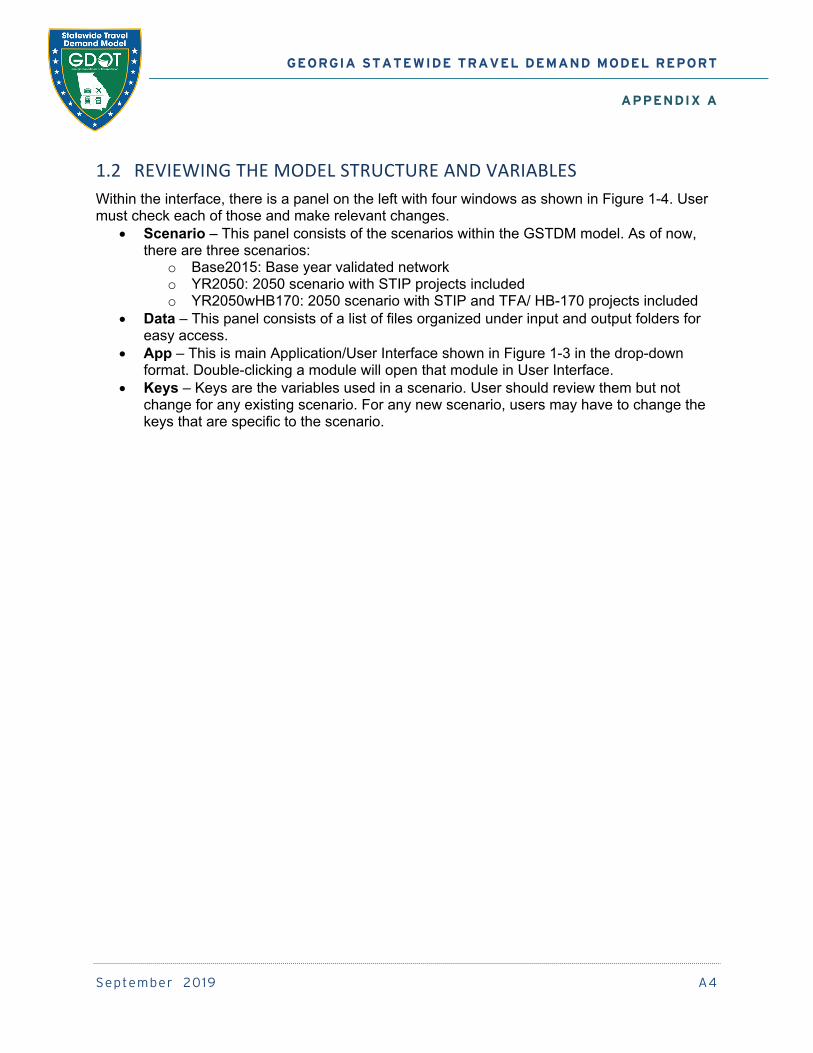
complete setup (Figure 1-2). Click Yes to continue. The GSTDM interface will open as shown in Figure 1-3.
Figure 1-1: Directory Structure
GEORGIA STATEWIDE TRAVEL DEMAND MODEL REPORT
APPENDIX A
September 2019 A3
Figure 1-2: Update Path
Figure 1-3: GSTDM Interface
GEORGIA STATEWIDE TRAVEL DEMAND MODEL REPORT
APPENDIX A
September 2019 A4
1.2 REVIEWING THE MODEL STRUCTURE AND VARIABLESWithin the interface, there is a panel on the left with four windows as shown in Figure 1-4. User must check each of those and make relevant changes.
Scenario – This panel consists of the scenarios within the GSTDM model. As of now, there are three scenarios:
o Base2015: Base year validated networko YR2050: 2050 scenario with STIP projects includedo YR2050wHB170: 2050 scenario with STIP and TFA/ HB-170 projects included
Data – This panel consists of a list of files organized under input and output folders for easy access.
App – This is main Application/User Interface shown in Figure 1-3 in the drop-down format. Double-clicking a module will open that module in User Interface.
Keys – Keys are the variables used in a scenario. User should review them but not change for any existing scenario. For any new scenario, users may have to change the keys that are specific to the scenario.

GEORGIA STATEWIDE TRAVEL DEMAND MODEL REPORT
APPENDIX A
September 2019 A5
Figure 1-4: GSTDM Interface Windows
GEORGIA STATEWIDE TRAVEL DEMAND MODEL REPORT
APPENDIX A
September 2019 A6
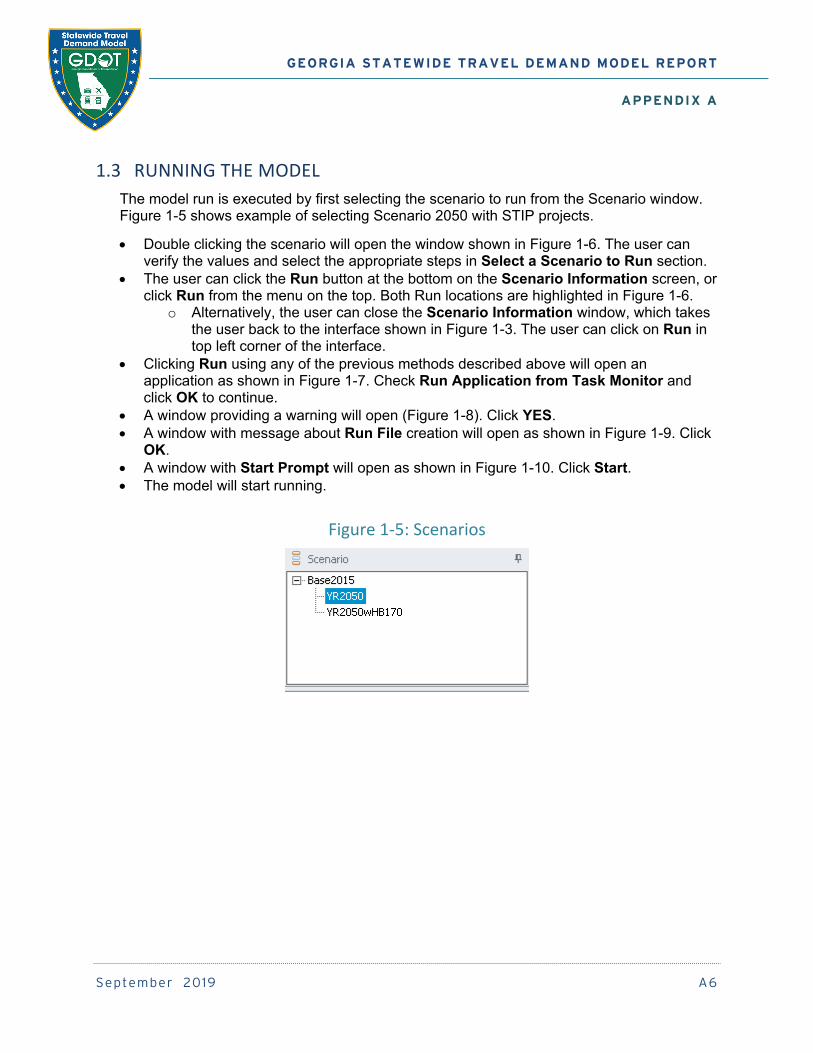
1.3 RUNNING THE MODELThe model run is executed by first selecting the scenario to run from the Scenario window. Figure 1-5 shows example of selecting Scenario 2050 with STIP projects.
Double clicking the scenario will open the window shown in Figure 1-6. The user can verify the values and select the appropriate steps in Select a Scenario to Run section.
The user can click the Run button at the bottom on the Scenario Information screen, or click Run from the menu on the top. Both Run locations are highlighted in Figure 1-6.
o Alternatively, the user can close the Scenario Information window, which takes the user back to the interface shown in Figure 1-3. The user can click on Run in top left corner of the interface.
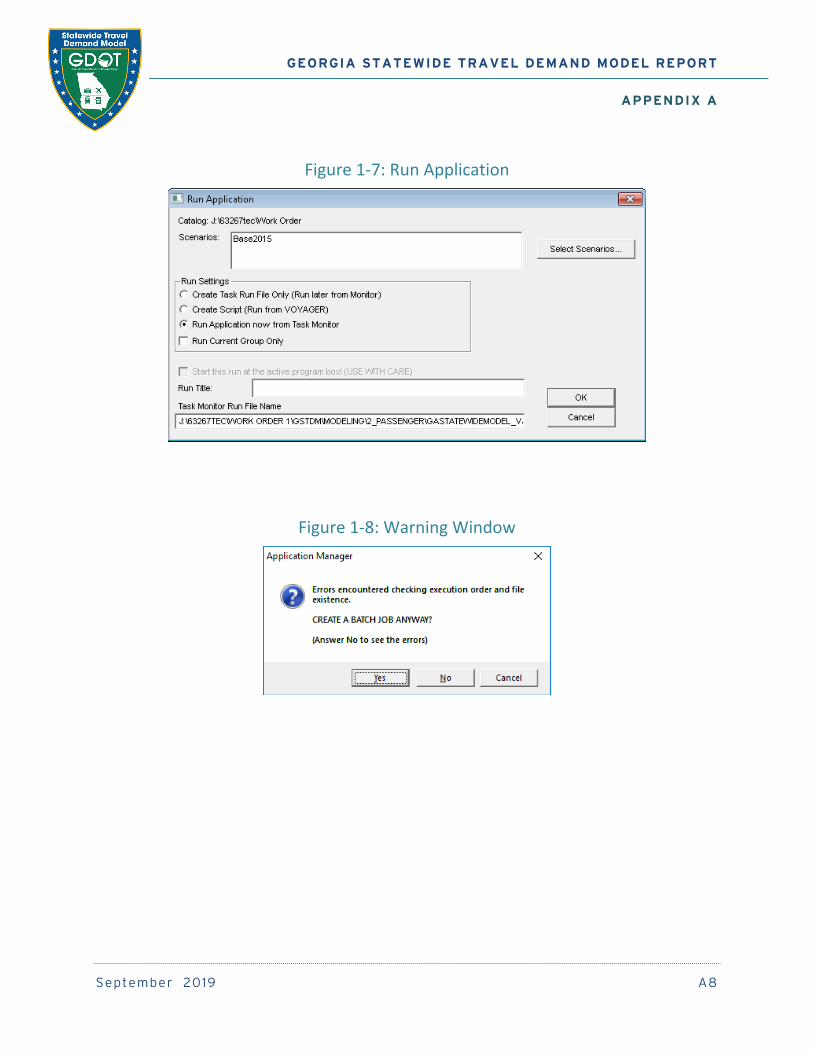
Clicking Run using any of the previous methods described above will open an application as shown in Figure 1-7. Check Run Application from Task Monitor and click OK to continue.
A window providing a warning will open (Figure 1-8). Click YES. A window with message about Run File creation will open as shown in Figure 1-9. Click
OK. A window with Start Prompt will open as shown in Figure 1-10. Click Start. The model will start running.
Figure 1-5: Scenarios

GEORGIA STATEWIDE TRAVEL DEMAND MODEL REPORT
APPENDIX A
September 2019 A7
Figure 1-6: Scenario Information
GEORGIA STATEWIDE TRAVEL DEMAND MODEL REPORT
APPENDIX A
September 2019 A8
Figure 1-7: Run Application
Figure 1-8: Warning Window

GEORGIA STATEWIDE TRAVEL DEMAND MODEL REPORT
APPENDIX A
September 2019 A9
Figure 1-9: Message for Run File Creation
Figure 1-10: Start Prompt for Model Run
GEORGIA STATEWIDE TRAVEL DEMAND MODEL REPORT
APPENDIX A
September 2019 A10
1.3.1 Troubleshooting Early Model Crashes
Please note that if there are issues running the model (due to bug in Cube), an alternate way is provided below.
If Run Application from Task Monitor crashes, select Create Script (Run from VOYAGER) as shown in Figure 1-7.
The next three windows will be the same as shown in Figure 1-8, Figure 1-9, and Figure 1-10.
Proceed as described earlier and the model will start running.
1.4 CHECKING INPUT AND OUTPUT FILES IN MODEL DIRECTORIESThis section describes the directory structure with the Root Directory. The root directory has three main directories:
Applications – Consists of all applications and scripts Parameters – Files common to all scenarios Base2015 – Base 2050 inputs and outputs
Base 2015 has following directories: Inputs Outputs Passenger Any future scenario (YR2050 & YR2050wHB170)
The future scenarios will have: Inputs Outputs Passenger
Following is description about the files and their folders: For any scenario, all the input files are in Inputs folder or in Parameters in the root
directory The output files are in Outputs and Passenger.
Loaded volumes are in final output network loaded.lod in Passenger.