“I Saw Three Ships” Table Runner - Bustle &...
10
1 © Bustle & Sew 2012 “I Saw Three Ships” Table Runner This is a wonderful pattern for using up all those tiny scraps of fabric - and for turning not very much indeed into a unique Christmas work of art - sure to be treasured and brought out year after year! Finished size 50” x 18” (approx)
Transcript of “I Saw Three Ships” Table Runner - Bustle &...

1
© Bustle & Sew 2012
“I Saw Three Ships” Table RunnerThis is a wonderful pattern for using up all those tiny scraps of fabric - and for turning not very
much indeed into a unique Christmas work of art - sure to be treasured and brought out year afteryear!
Finished size 50” x 18” (approx)

2
© Bustle & Sew 2012
You will need:
30 x 5” squares festive fabrics for thepatchwork border (I used a Moda charmpack: Dear Mr Claus by Cosmo Cricket)� 32” x 12” cream medium weight fabric for
background (quilting weight will not bestrong enough to take all the machineembroidery/applique)� 52” x 20” medium weight fabric for backing� 32” x 4” strip of dark blue fabric for sea� Lots of scraps of felt, fabrics and some ric rac
braid to create your applique picture.� Stranded cotton floss in light gold-brown,
brown, black, pink and gold� Bondaweb and temporary fabric adhesive� Temporary fabric marker pen� Embroidery/darning foot for your machine� Black and cream thread for your machine
Applique Panel:
This is huge fun to create. There’s nothingparticularly difficult about it - simply stick yourpieces down and stitch … but there are lots oflayers and some of the pieces are quite small, so Iwould recommend setting aside some clear timeto concentrate on one ship at a time to make surethat, for example, you don’t suddenly discoveryou’ve stuck down an angel’s head without firstapplying the halo behind it!
If you’re not sure about this technique, then youmight find my video tutorials useful:
CLICK HERE FOR PART ONE
CLICK HERE FOR PART TWO
� Take your cream fabric and fold the two shortedges together to find the centre point.Measure 2” up from the bottom edge and markthis point. This will be the position of thecentre of the bottom edge of your middle ship(Mary and Jesus).
� Using the templates (they are given at 75% ofactual size) at the end of the pattern, trace theship body and sail onto your bondaweb andfuse to the back of the fabric you have chosenfor these shapes. Cut out the shapes but do notremove the Bondaweb at this point. (from nowon I will assume you will always trace and fusethe Bondaweb before cutting out your shapes).
� Now cut out and position your shapes for Jesusand Mary - keep checking they fit correctlyinto the ship by placing your ship sail and bodyaround them as you work
� Note: work from the back forwards - soposition your halo first - cutting a little extraso it will underlap the heads, then the heads,with slightly longer necks to underlap thebodies. This avoids any awkward joins or uglygaps.
� When you’re happy with the positioningremove Bondaweb and fuse into place.

3
� Then the trims and decorations on the ship - besure to fuse the ends of the ric-rac braid beneaththe fabric rectangles at either end of the ship.
� Draw in the lines for the mast and rigging withyour temporary fabric marker pen.
� Machine stitch around the edges of your shapes,going around twice (except for figures) andaiming for a scribbled effect.
� Machine stitch the rigging. DO NOT stitch themast and spar at the front of the ship - you willhand embroider these
� Then hand stitch the mast (using parallel rows ofchain stitch and dark brown) and the spar (chainstitch and light golden brown). Stitch the figures’hair. Add rosy cheeks and little black eyes
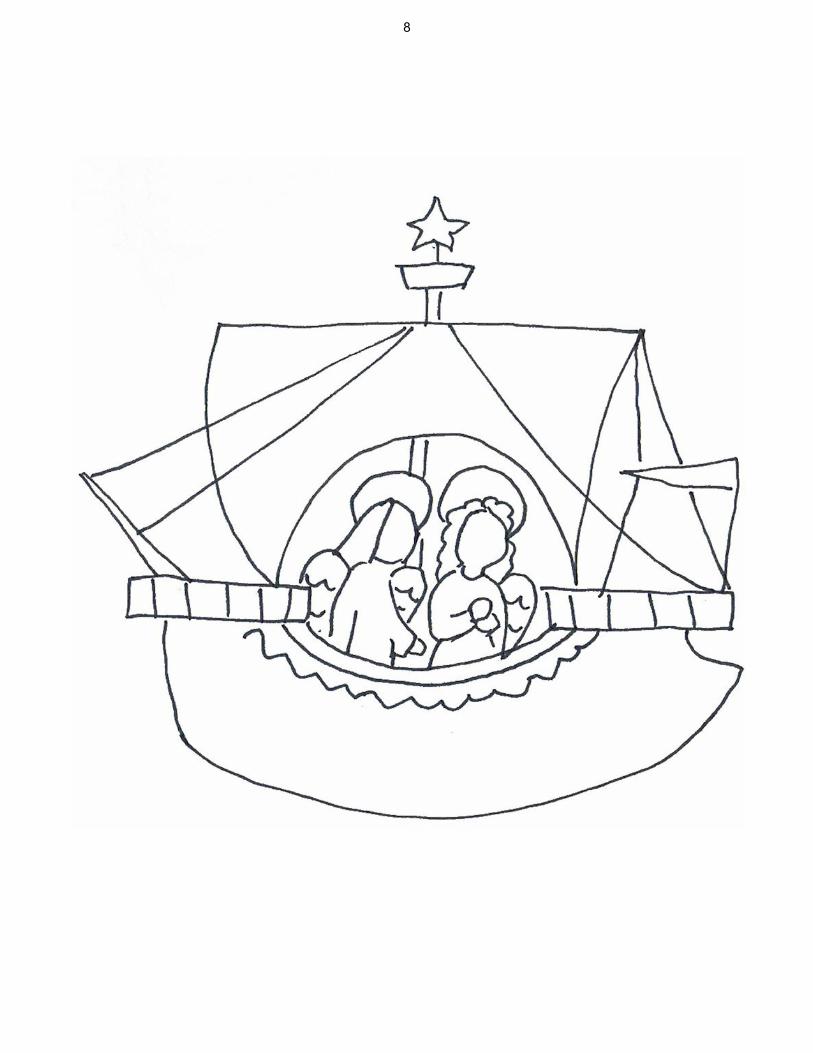
� Repeat these stages with the other two ships. Theships are positioned 3” apart and there are closeup photos of the appliques on the next pages tofollow.� The angel in the first ship is blowing a trumpet
- I added some musical notes in black floss to mydesign.� When your ship appliques are complete, cut a
wavy edge along the top of your dark blue fabricand position to cover the bottom edges of theships. You might also like to add some greenfelt shapes as extra waves.� When happy with your sea, stitch into place. (you
could add some fish too, if you wanted!)
© Bustle & Sew 2012

4
© Bustle & Sew 2012

5
Assemble your table runner:
� When your applique is finished press lightlyon the reverse
� Take your 5” squares and arrange themaround the edge of your applique to decideupon the layout you would like - there will be7 along the top and bottom of your panel andtwo and blocks of 8 at each side.
Note: all seam allowances are ¼”
� Join the bottom 7 squares into a strip andusing the stitch and flip technique sew themto your applique panel. Position the strip sothat just a small amount of sea is showing.
� When you’ve stitched this strip, then trimaway any excess applique fabric to ¼”
� Sew your squares into 2 blocks of 3 x 2 forthe sides, then stitch to your applique in thesame way, trimming away excess appliquefabric.
� Finally add your top 11 squares as a singlestrip so you’ve created your patchworkborder for your table runner.
� Place your backing fabric and panel rightsides together and stitch around the edges,leaving a 6” gap for turning.
� Clip corners and turn right side out. Press,then top stitch around edges ¼” from edge,including over your turning gap.
� Press again - FINISHED!!
© Bustle & Sew 2012

6

7
8

9

10
Why do we love to stitch? After all, you canpurchase mass-produced embroidered itemsat many high street stores. These days,handmade means something special – aunique item created with love, a gift from theheart, not one that can be bought. Handstitching is also a great way to personalize anitem, or even to breathe new life into an oldfavourite that has seen better days.
Bustle & Sew offers my own uniquepatterns, designed to appeal to all skill levelsand bring out your natural creativity. Andyou can keep up-to- date with all the latestnews on the Bustle & Sew Blog.
But none of this would mean anything without you, the stitcher.
So I’d like to say “thank you” for purchasing this pattern. Please respect my copyright anddo not copy and/or circulate this pattern for any purpose whatsoever. You may sell itemsyou personally make using it, but you are not licensed to go into mass production.
Best wishes
PS : If you love stitching then you’re sure to enjoymy Bustle & Sew Magazine. It’s my own e-zinedelivered monthly to your in-box stuffed with ideas,projects, features, articles, patterns and more.Your family and friends will be queuing up to takedelivery of your new Bustle & Sew creations.
To learn more, please visit my website.
http://bustleandsew.com/magazine