Angelo Gordon Hire Direct User Guide · ANGELO GORDON HIRE DIRECT USER GUIDE . Step1: Initial Setup...
13
Jiacong Sophie Xu, Hui Zheng ANGELO, GORDON & CO. 245 Park Ave, New York City, NY ANGELO GORDON HIRE DIRECT USER GUIDE
Transcript of Angelo Gordon Hire Direct User Guide · ANGELO GORDON HIRE DIRECT USER GUIDE . Step1: Initial Setup...

Jiacong Sophie Xu, Hui Zheng
ANGELO, GORDON & CO. 245 Park Ave, New York City, NY
ANGELO GORDON HIRE DIRECT USER GUIDE

Step1: Initial Setup Please log into the system to view all processes.
Click on the Settings tab on the upper right corner of the home page, the Hiring Information Settings modal window will pop up on top of the main page. The detailed information of project managers, vendors, potential position titles, and email templates are all listed within the same page.
The blue Edit button is for editing information for each row. The red Del button helps delete the unwanted entries. Save the entries by clicking on the Save button.
Add an application form by clicking on the dashed boxes to select a file, and then save it to the system.
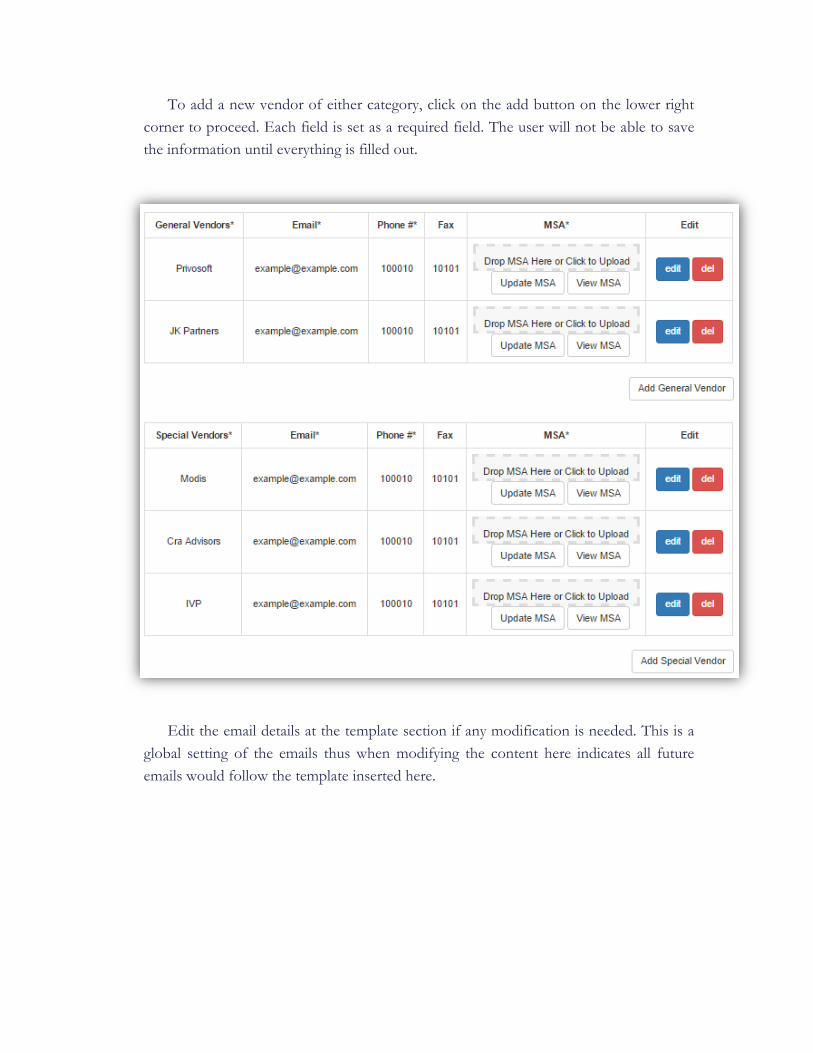
To add a new vendor of either category, click on the add button on the lower right corner to proceed. Each field is set as a required field. The user will not be able to save the information until everything is filled out.
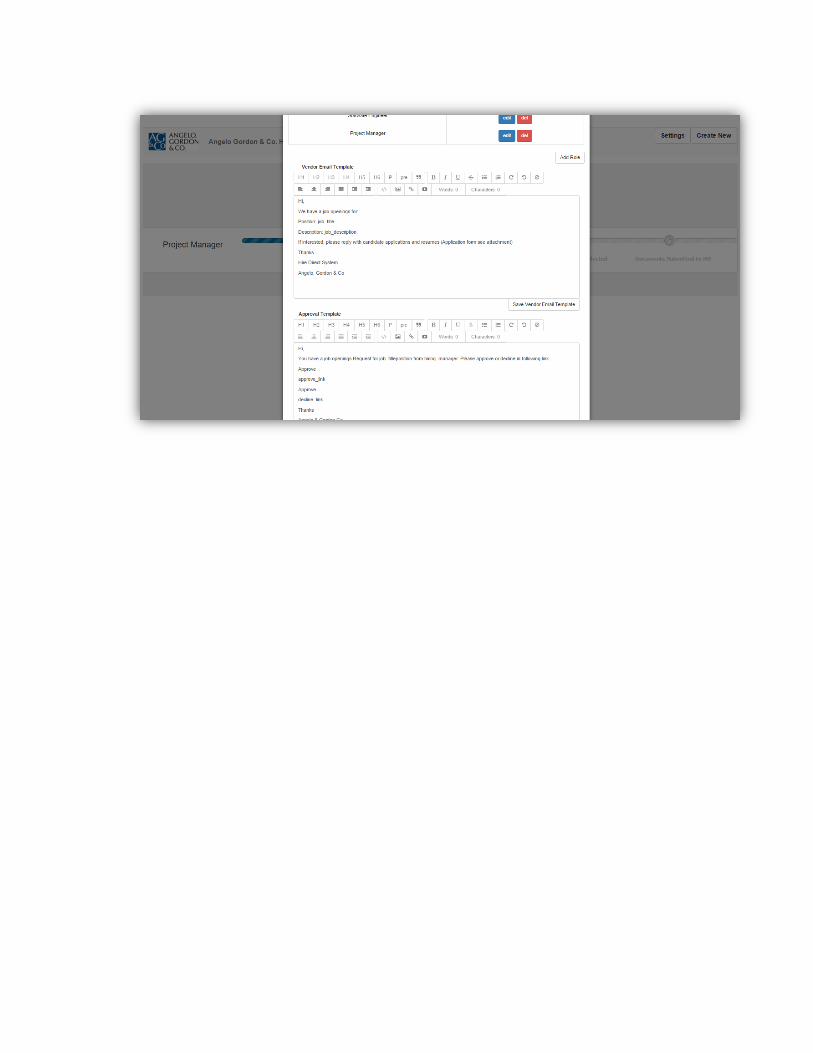
Edit the email details at the template section if any modification is needed. This is a global setting of the emails thus when modifying the content here indicates all future emails would follow the template inserted here.

Step2: Create New Process
Click on the Create New button to add a new searching process. A modal window with a blank form looks as follows:
Choose from the drop-down lists of the first two categories. This can be modified in the Settings page. All of the employee detailed information is built into the system thus the user may simply choose from a list of Hiring Managers.
The example shows the result of adding a new process to the system: to create a process called Software Engineer, Reports to Scott Burton, IT department, with a skill of Programming. The new process looks as follows:

Click on Save & Submit to initiate the process. It will automatically jump to the vendor selection step. The user may select desired vendors to proceed.

Step3: Vendor Selection
The General Vendors category is selected by default and cannot be deselected. The user may choose as many Specialty Vendors as he/she wants. All vendor listings can be modified in the Settings Page.
Click on the email icon to edit the content of the emails sent to vendors. Then click on the Save button to save and continue. The submit button would generate the edited email to the selected vendors.
You may go back to the last step by clicking on the Go Back button in the lower left corner, and cancel this entire process by pressing the Cancel Process button in the lower right corner. These actions function at any time of the entire process. If a process is cancelled by the user, it would show up under the Cancelled tab. All information will be stored and the cancelled processes can be re-initiated at any time.

Step4: Create New Candidate Click on Create New to add a new candidate. We add a candidate named John Doe as
an example, titled as Consultant. To add a resume and application form, click on the dashed boxes or drag the file and release. An unfilled required field will be marked red and the system would stop the user from proceeding.

After saving the information, the candidate will show up in the table. The uploaded information can be viewed by the View buttons. The file will show up on a separate browser tab.
Step5: Schedule for Interviews

Click on the Add button located within the Add Interview Category to schedule for an interview.
To create a new interview schedule, select the interviewer from the drop down list, and then select an appropriate date and time for interviews. Then click on Save.
In the Interview Scheduler section, we can see the scheduled date and time. The user can use the red dashed button to remove the interview time, and schedule as many interviews by as many interviewers as he/she may. The same interviewer can appear more than one time for the same candidate.
To reject a candidate, toggle the Interview/Reject button off to the Reject side. Click on Finished All Interviews to proceed.


Step6: Final Selection Click on Finished All Interviews button to stop interviewing all candidates and move
on to the next step. The interview scheduler section may disappear from the current page. Select or reject John Doe for final decisions. Here let’s accept John Doe as a desired candidate for this position.
Press Candidate Selected to proceed from the current step. This step only provides the user buttons to make final decisions. Then it comes to the onboarding processes.

Step7: Send Files to HR In the table below, click on View Resume to view the uploaded resume as pdf on a
separate tab, and View Application would bring you to the application form on a separate tab.
To upload a Background Check or Work Order, click on the dashed box to upload from personal devices, or drag the existed files into the dashed boxes and release. After the files have been uploaded to the database, two view buttons would appear to authorize the user to double check the files and proceed.
A text box with HR Email label is placed before the final action button. It allows the user to add as many targeted email addresses to send all files to as he/she wants.
Press Submit button to end the candidate seeking process and send all files to the HR Department and proceed.