An Introduction to Ruby on Rails - University of Illinois ... · PDF fileSo what is Ruby on...
28
An Introduction to Ruby on Rails ACM Webmonkeys 2011
Transcript of An Introduction to Ruby on Rails - University of Illinois ... · PDF fileSo what is Ruby on...
An Introduction to Ruby on Rails
ACM Webmonkeys 2011
Background: the Ruby language
Ruby is a general-purpose scripting language, developed in 1995 by Yukihiro MatsumotoSimilar to Python, but with more support for functional programming
Blocks (aka closures) are a basic featureDoesn't have the same support for numerical analysis
The most common use of Ruby is with Rails, but Ruby can be used for essentially any purpose
The Ruby logo
So what is Ruby on Rails?
"Ruby on Rails" is the name for the Ruby implementation of the Rails framework
At the moment, Rails is not implemented in any other language, but it hypothetically could be
Rails is a web framework (more on this on the next slide) first released by David Heinemeier Handsson of 37signals in 2005.The latest version of Rails is Rails 3.0, released in August of last year.
Definition: Website framework
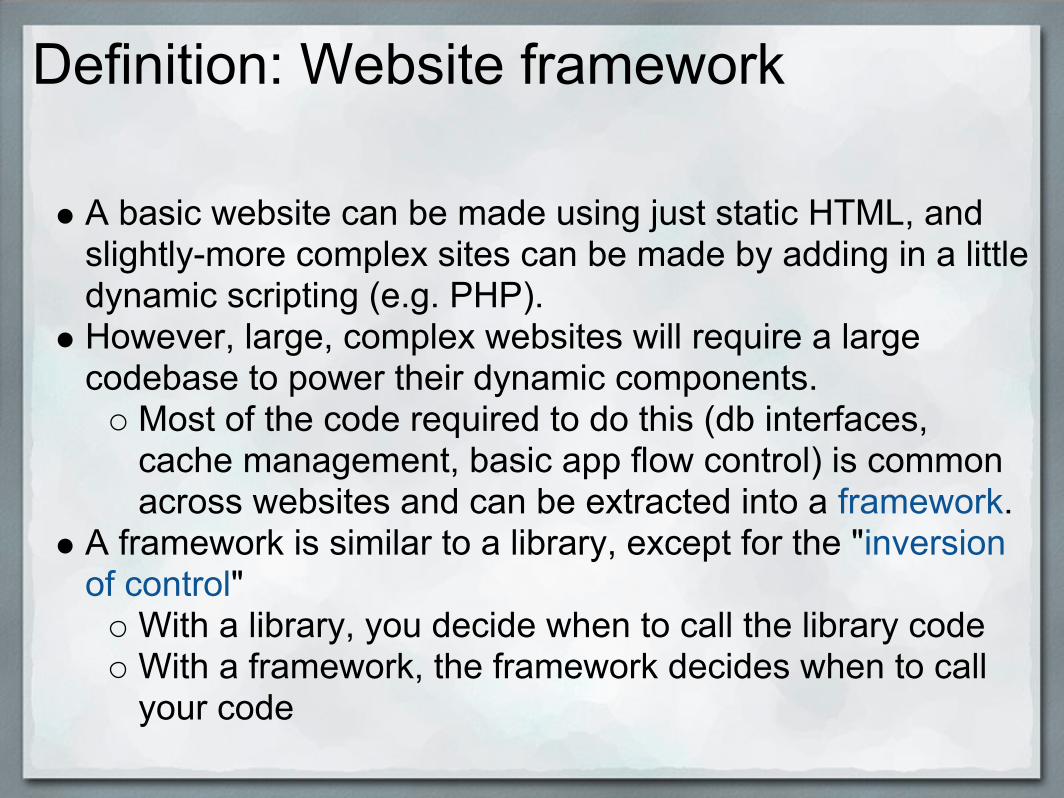
A basic website can be made using just static HTML, and slightly-more complex sites can be made by adding in a little dynamic scripting (e.g. PHP).However, large, complex websites will require a large codebase to power their dynamic components.
Most of the code required to do this (db interfaces, cache management, basic app flow control) is common across websites and can be extracted into a framework.
A framework is similar to a library, except for the "inversion of control"
With a library, you decide when to call the library codeWith a framework, the framework decides when to call your code
So, Rails is...
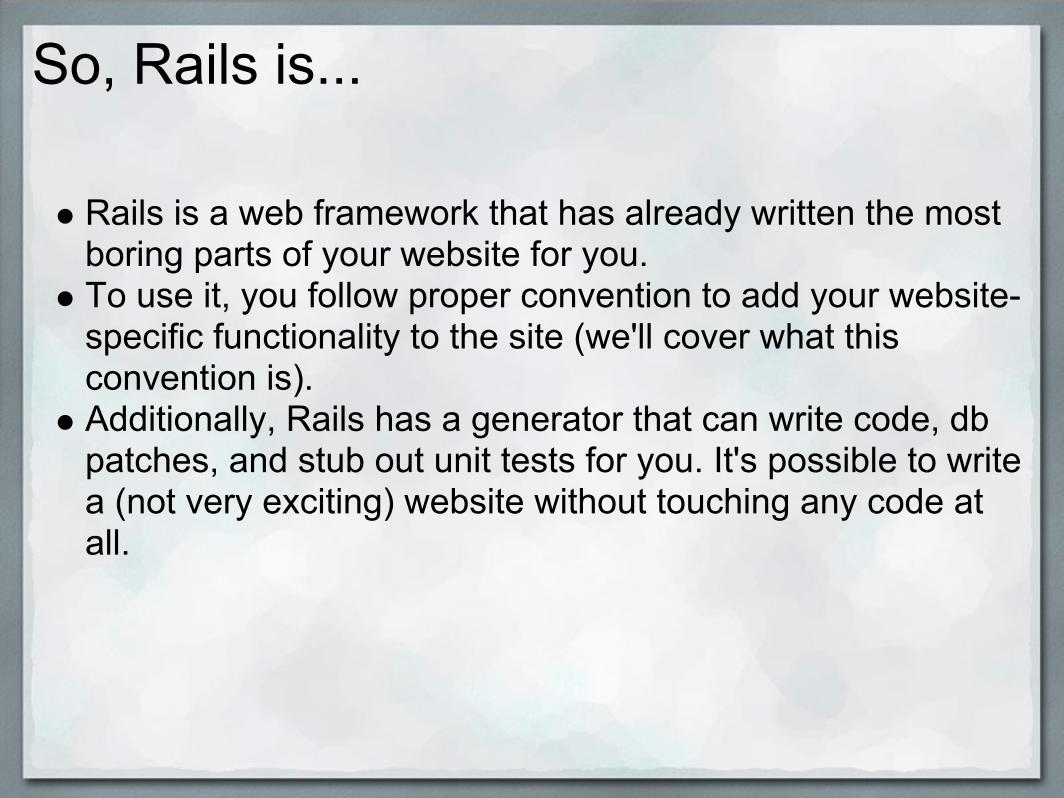
Rails is a web framework that has already written the most boring parts of your website for you. To use it, you follow proper convention to add your website-specific functionality to the site (we'll cover what this convention is).Additionally, Rails has a generator that can write code, db patches, and stub out unit tests for you. It's possible to write a (not very exciting) website without touching any code at all.
How Rails works
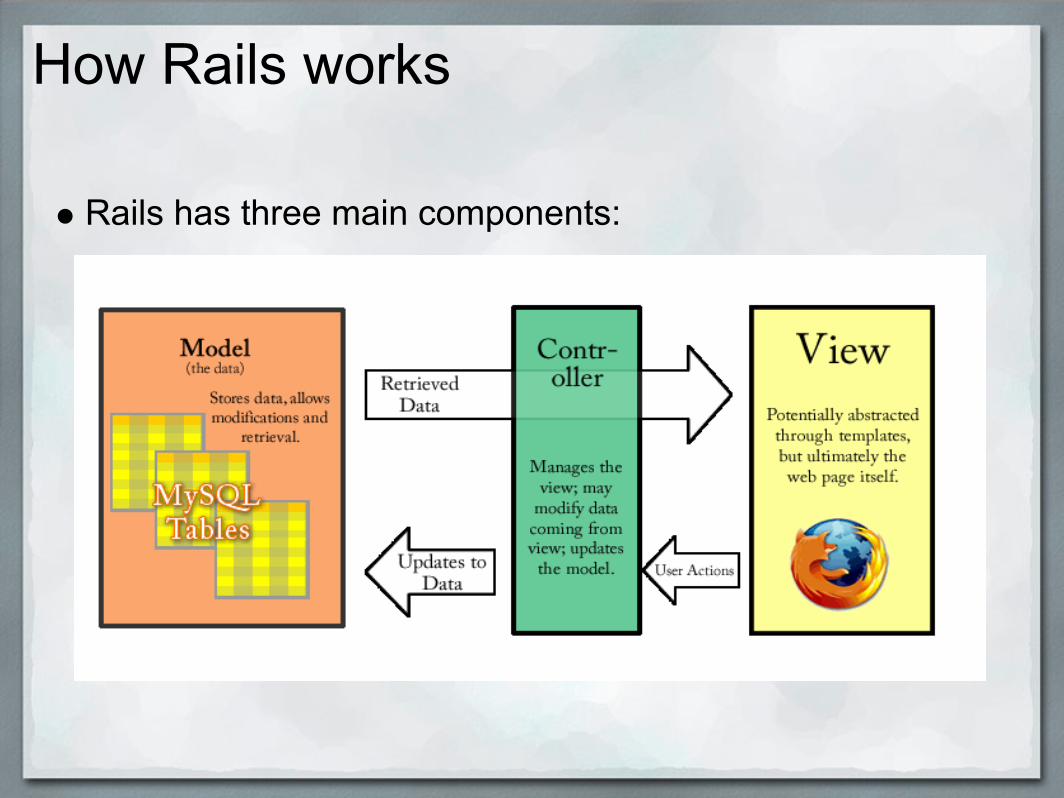
Rails has three main components:
Representing data: the Model
In Rails, a model represents a data entity. For example, you might have a Customer model, a Product model, a Category model, etc.
A model has properties, methods that can be performed on it, and relations to other models.
Rails hides exactly how these models are implemented from you (on purpose), but their data is stored in a database (SQLite by default, but most databases can be used)
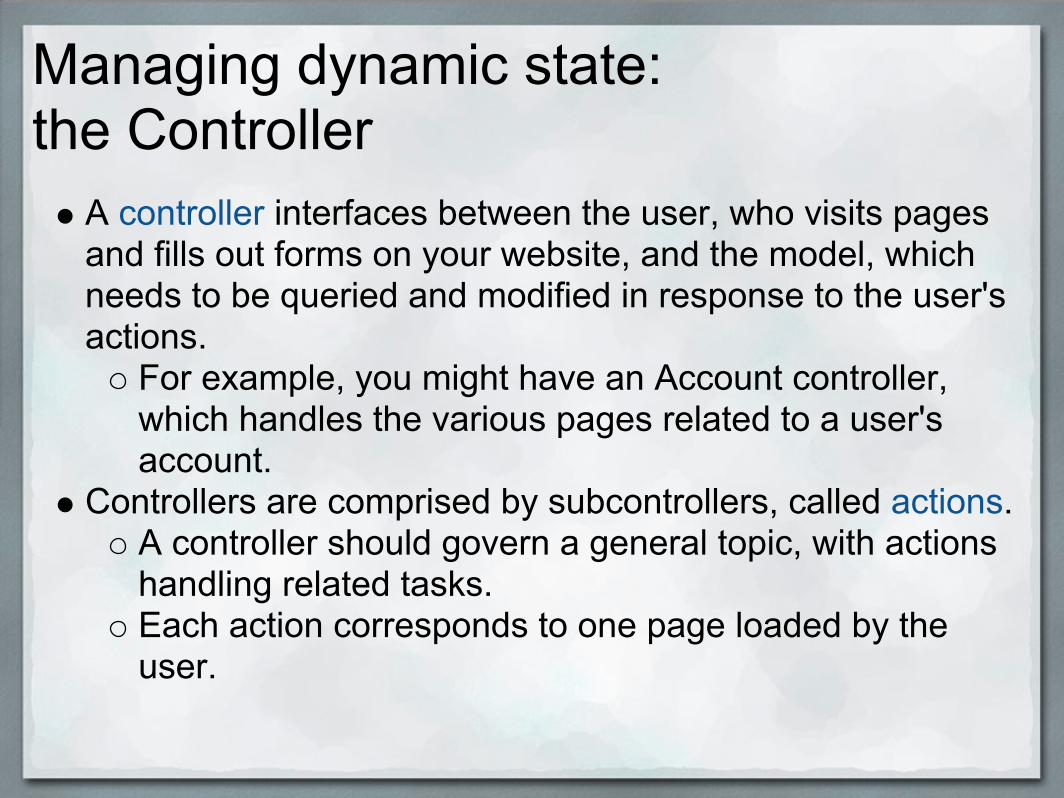
Managing dynamic state: the Controller
A controller interfaces between the user, who visits pages and fills out forms on your website, and the model, which needs to be queried and modified in response to the user's actions.
For example, you might have an Account controller, which handles the various pages related to a user's account.
Controllers are comprised by subcontrollers, called actions.A controller should govern a general topic, with actions handling related tasks.Each action corresponds to one page loaded by the user.
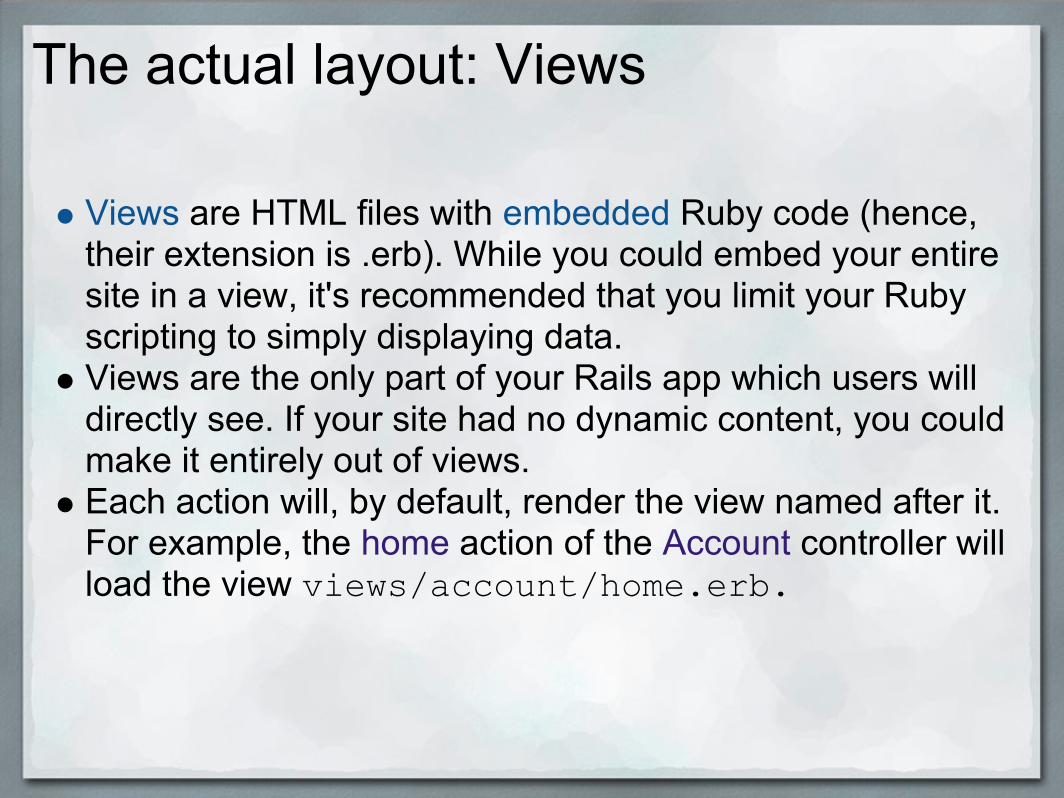
The actual layout: Views
Views are HTML files with embedded Ruby code (hence, their extension is .erb). While you could embed your entire site in a view, it's recommended that you limit your Ruby scripting to simply displaying data.Views are the only part of your Rails app which users will directly see. If your site had no dynamic content, you could make it entirely out of views.Each action will, by default, render the view named after it. For example, the home action of the Account controller will load the view views/account/home.erb.
Getting started
It's easier to understand how these components fit together with a concrete example. Let's walk through how to get started writing a Rails app, taking an opportunity to examine the generator commands while we do.You will need:
Ruby installed (and RubyGems, Ruby's package manager)Rails 3.0 (installed via RubyGems)Links to each at: http://rubyonrails.org/download
Create a new Rails app
First, make sure RubyGems is installed (download, extract, then run ruby setup.rb)Then, in your command prompt, run the command:
gem install railsNext, go to wherever you want to create the project (My Documents or your home directory is fine) and type:
rails new MyRailsApp(the last argument is the path to create the site in)
You'll notice that the MyRailsApp now contains a full folder structure, plus a number of files. These all define the framework that is Ruby on Rails.

Install SQLite (a lightweight database)
Before we can test our app, though, we need to take care of another dependency.Run the command:
gem install sqlite3And then download the sqlite3 DLL from http://www.sqlite.org/download.html
Place the DLL into your C:\Ruby\bin folder.Note: if on Linux, use your package manager to install the sqlite3 package (you might not need to) Note 2: SQLite does not "install" like MySQL does; it only runs when needed, and Rails will take care of starting it up/shutting it down.
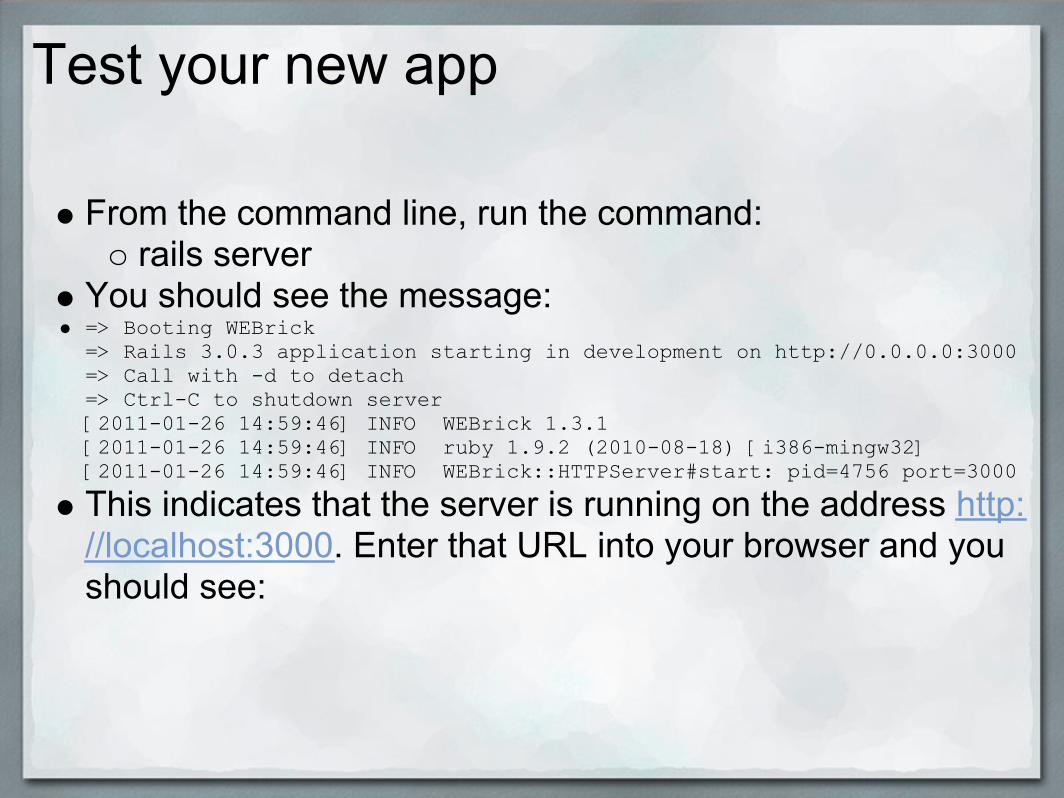
Test your new app
From the command line, run the command:rails server
You should see the message:=> Booting WEBrick=> Rails 3.0.3 application starting in development on http://0.0.0.0:3000=> Call with -d to detach=> Ctrl-C to shutdown server[2011-01-26 14:59:46] INFO WEBrick 1.3.1[2011-01-26 14:59:46] INFO ruby 1.9.2 (2010-08-18) [i386-mingw32][2011-01-26 14:59:46] INFO WEBrick::HTTPServer#start: pid=4756 port=3000This indicates that the server is running on the address http://localhost:3000. Enter that URL into your browser and you should see:
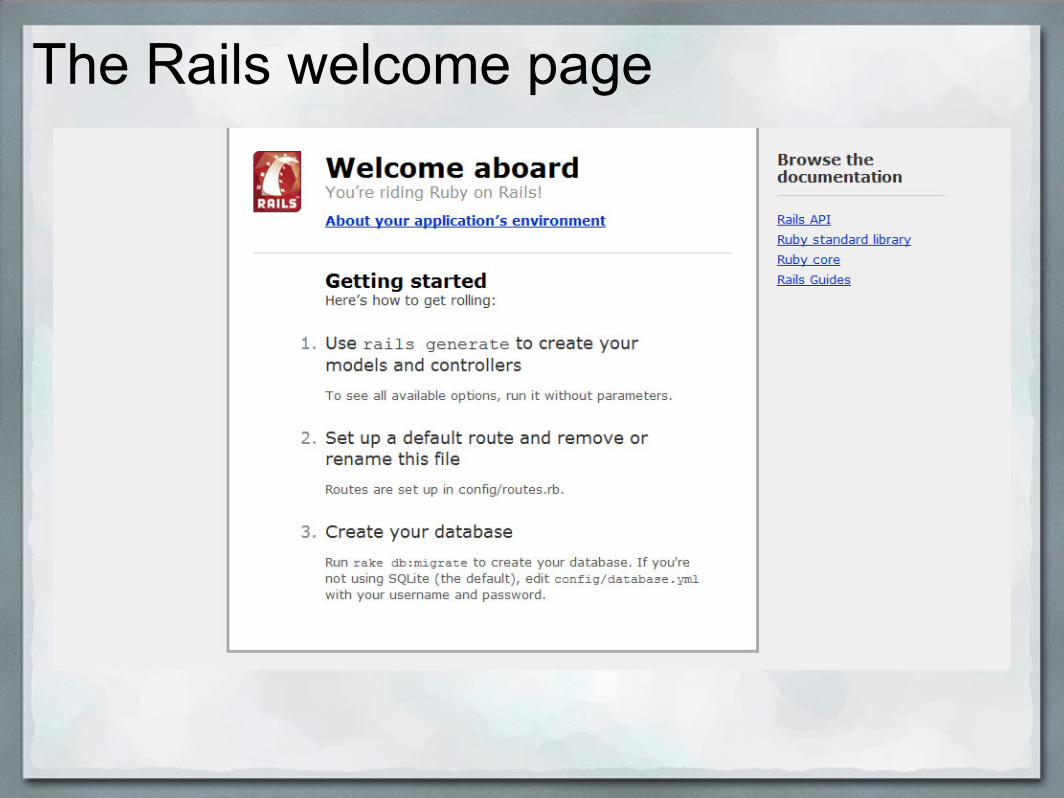
The Rails welcome page
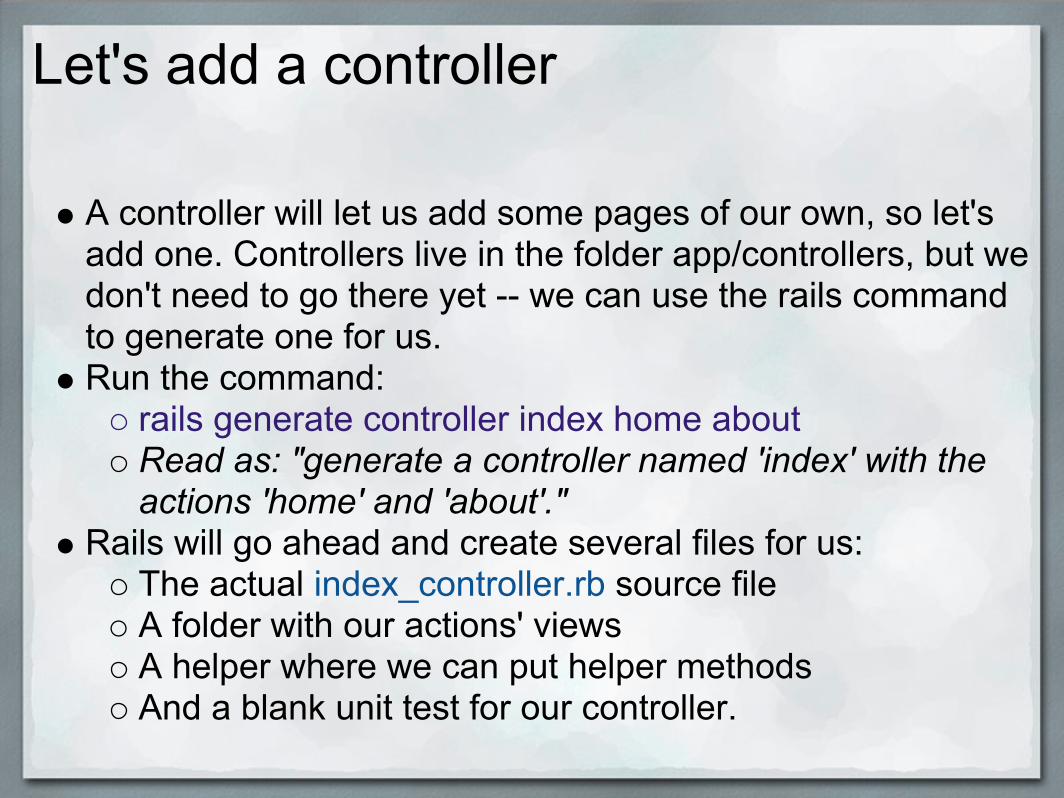
Let's add a controller
A controller will let us add some pages of our own, so let's add one. Controllers live in the folder app/controllers, but we don't need to go there yet -- we can use the rails command to generate one for us.Run the command:
rails generate controller index home aboutRead as: "generate a controller named 'index' with the actions 'home' and 'about'."
Rails will go ahead and create several files for us:The actual index_controller.rb source file A folder with our actions' viewsA helper where we can put helper methodsAnd a blank unit test for our controller.
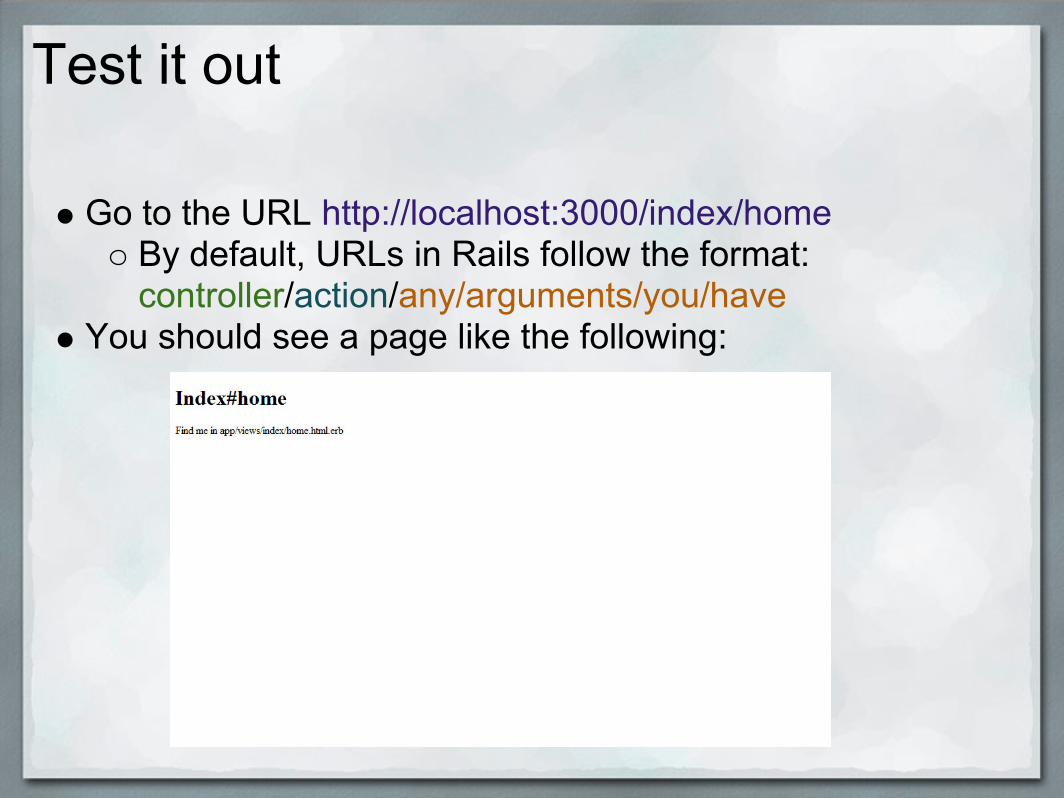
Test it out
Go to the URL http://localhost:3000/index/homeBy default, URLs in Rails follow the format: controller/action/any/arguments/you/have
You should see a page like the following:
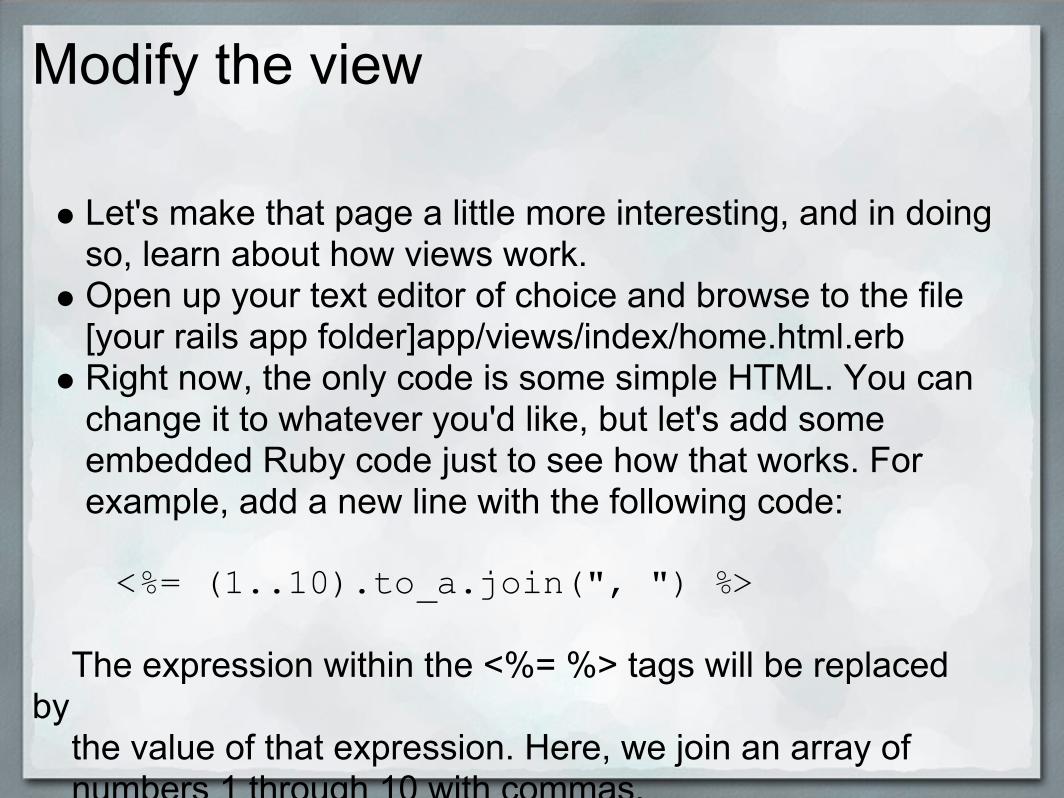
Modify the view
Let's make that page a little more interesting, and in doing so, learn about how views work.Open up your text editor of choice and browse to the file [your rails app folder]app/views/index/home.html.erbRight now, the only code is some simple HTML. You can change it to whatever you'd like, but let's add some embedded Ruby code just to see how that works. For example, add a new line with the following code:
<%= (1..10).to_a.join(", ") %>
The expression within the <%= %> tags will be replaced by the value of that expression. Here, we join an array of numbers 1 through 10 with commas.
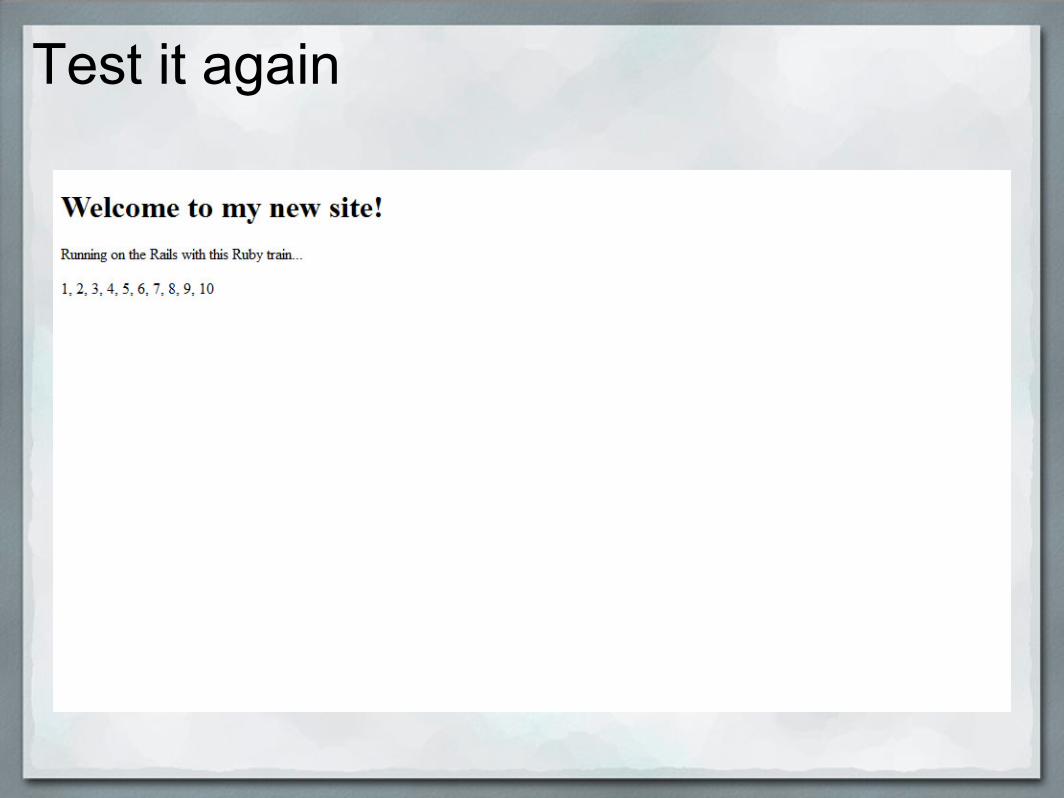
Test it again
So that's how we modify views.
To use variables from your controller's code in your view, define them as instance variables of the class (that is, put an @ before the variable name).
E.g., in the controller: @foo = "bar"In the view: The value of foo is <%= @foo %>
Note that, if you want to use images, CSS, JS, etc., all these should go inside the app/public folder. The app/public folder is where the HTML files your app ultimately generates are assumed to run "from", so static resources should go in there.
What you've been waiting for: models
Controllers and views are nice and all, but they don't mean much if we can't store and manipulate data. Let's create a model, to see where Rails really shines.Go into the command prompt and run the command:
rails generate model blogpost title:string text:stringRead as "generate a model named blogpost with two fields, 'title' and 'text' which are both strings.
Rails will create a few files for us, one of which is the model's source file (app/models/blogpost.rb) and another of which is the migration file.
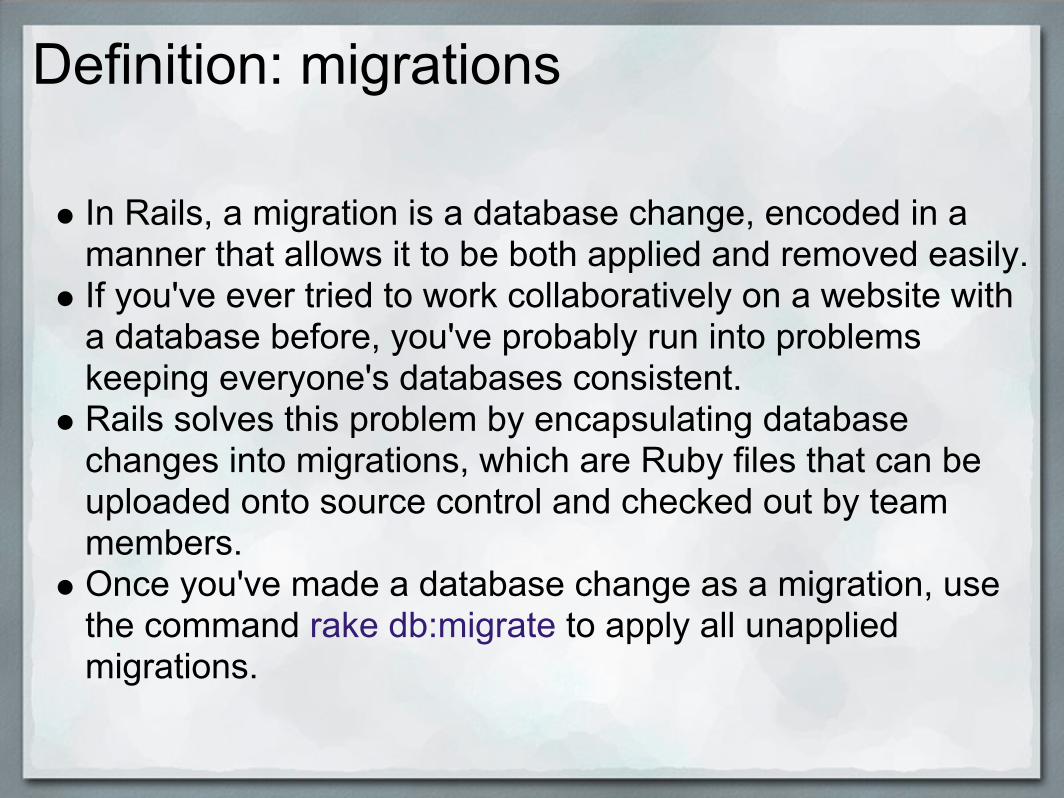
Definition: migrations
In Rails, a migration is a database change, encoded in a manner that allows it to be both applied and removed easily.If you've ever tried to work collaboratively on a website with a database before, you've probably run into problems keeping everyone's databases consistent.Rails solves this problem by encapsulating database changes into migrations, which are Ruby files that can be uploaded onto source control and checked out by team members.Once you've made a database change as a migration, use the command rake db:migrate to apply all unapplied migrations.
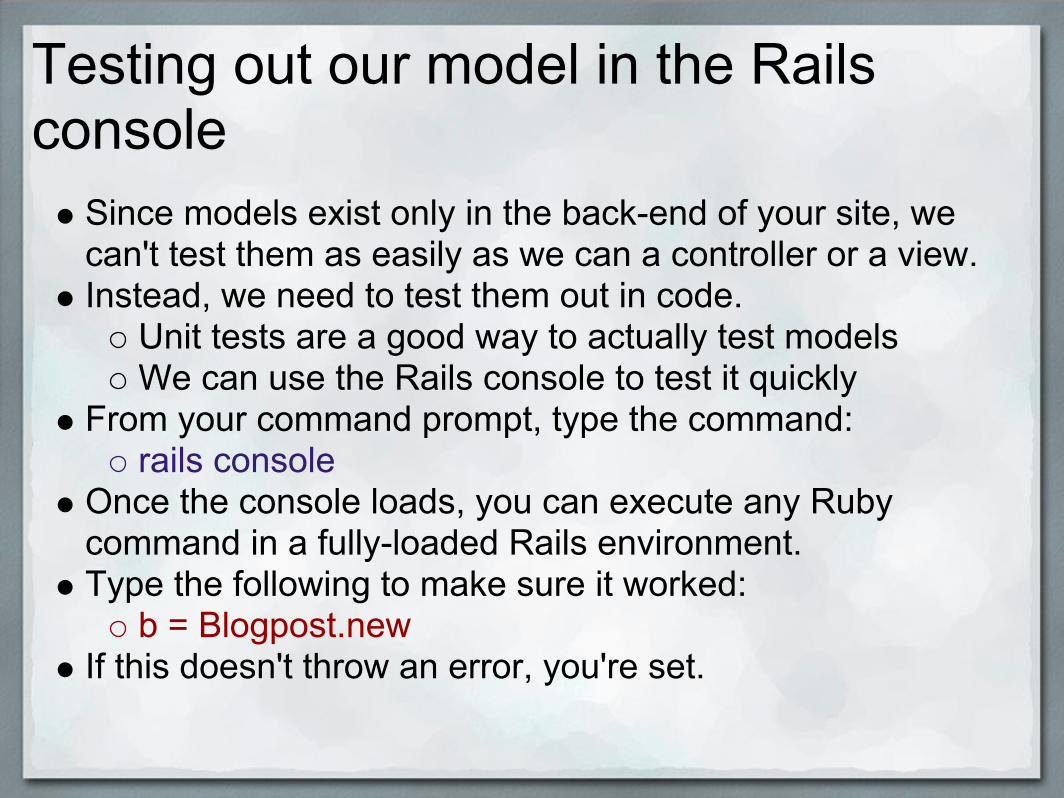
Testing out our model in the Rails console
Since models exist only in the back-end of your site, we can't test them as easily as we can a controller or a view.Instead, we need to test them out in code.
Unit tests are a good way to actually test modelsWe can use the Rails console to test it quickly
From your command prompt, type the command:rails console
Once the console loads, you can execute any Ruby command in a fully-loaded Rails environment.Type the following to make sure it worked:
b = Blogpost.newIf this doesn't throw an error, you're set.
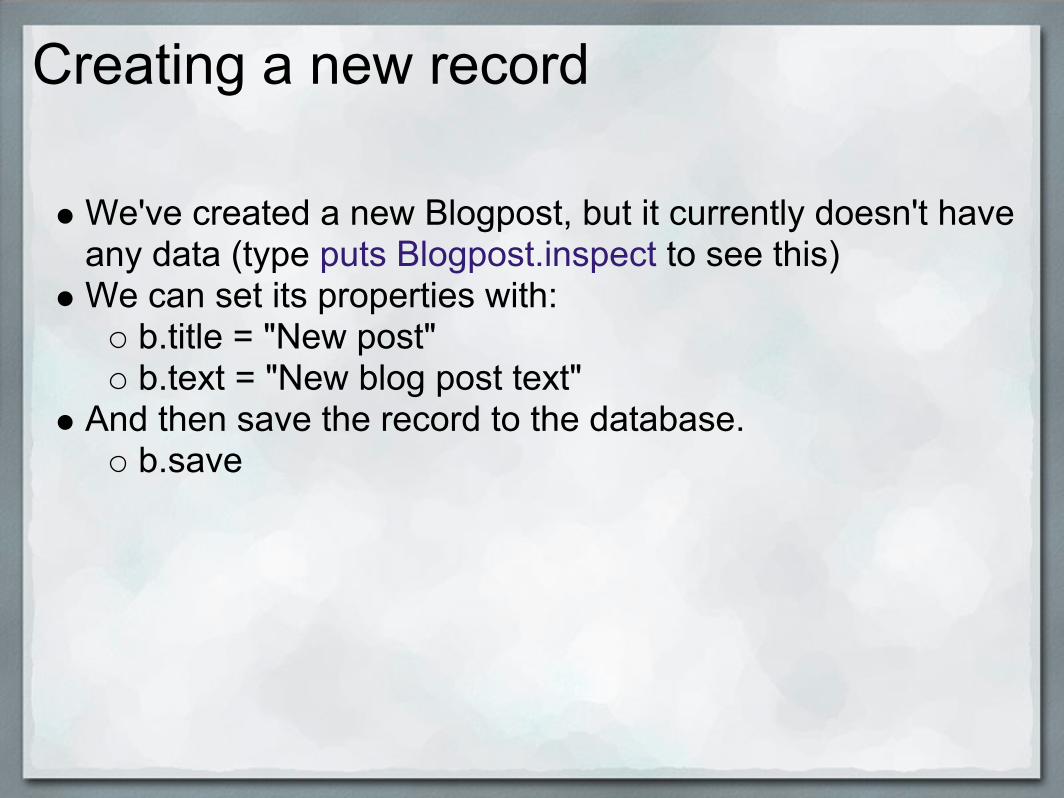
Creating a new record
We've created a new Blogpost, but it currently doesn't have any data (type puts Blogpost.inspect to see this)We can set its properties with:
b.title = "New post"b.text = "New blog post text"
And then save the record to the database.b.save
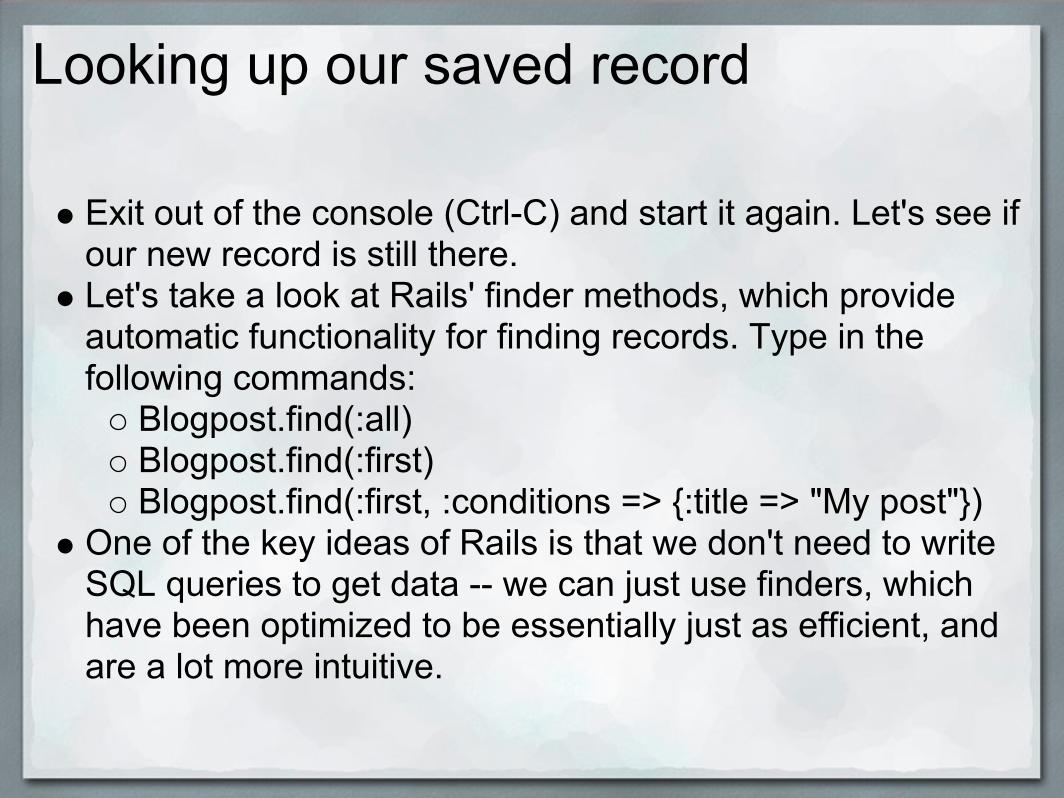
Looking up our saved record
Exit out of the console (Ctrl-C) and start it again. Let's see if our new record is still there.Let's take a look at Rails' finder methods, which provide automatic functionality for finding records. Type in the following commands:
Blogpost.find(:all)Blogpost.find(:first)Blogpost.find(:first, :conditions => {:title => "My post"})
One of the key ideas of Rails is that we don't need to write SQL queries to get data -- we can just use finders, which have been optimized to be essentially just as efficient, and are a lot more intuitive.
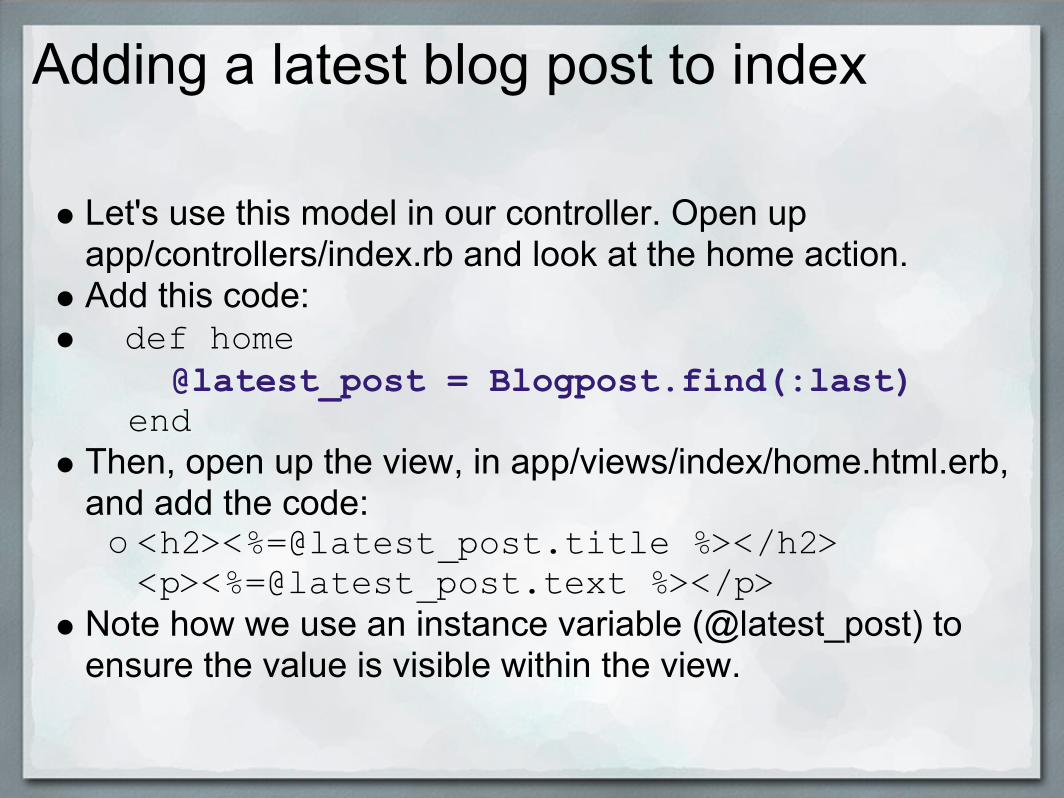
Adding a latest blog post to index
Let's use this model in our controller. Open up app/controllers/index.rb and look at the home action.Add this code: def home @latest_post = Blogpost.find(:last) endThen, open up the view, in app/views/index/home.html.erb, and add the code:
<h2><%=@latest_post.title %></h2><p><%=@latest_post.text %></p>
Note how we use an instance variable (@latest_post) to ensure the value is visible within the view.
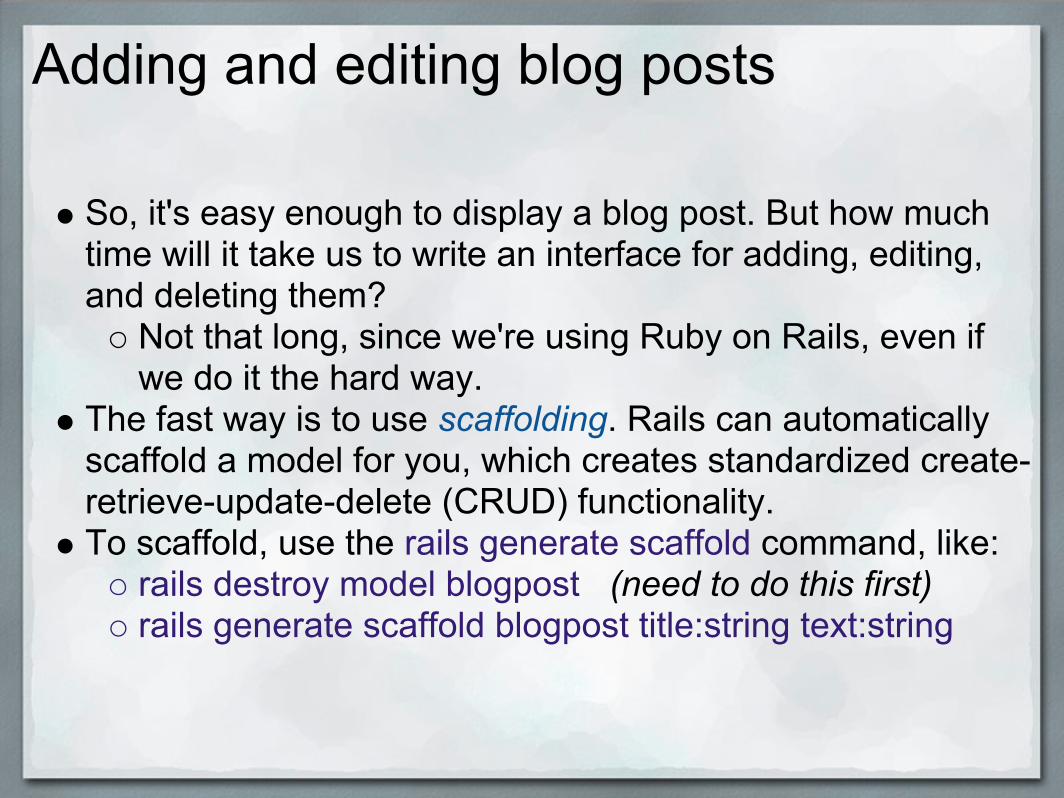
Adding and editing blog posts
So, it's easy enough to display a blog post. But how much time will it take us to write an interface for adding, editing, and deleting them?
Not that long, since we're using Ruby on Rails, even if we do it the hard way.
The fast way is to use scaffolding. Rails can automatically scaffold a model for you, which creates standardized create-retrieve-update-delete (CRUD) functionality.To scaffold, use the rails generate scaffold command, like:
rails destroy model blogpost (need to do this first) rails generate scaffold blogpost title:string text:string
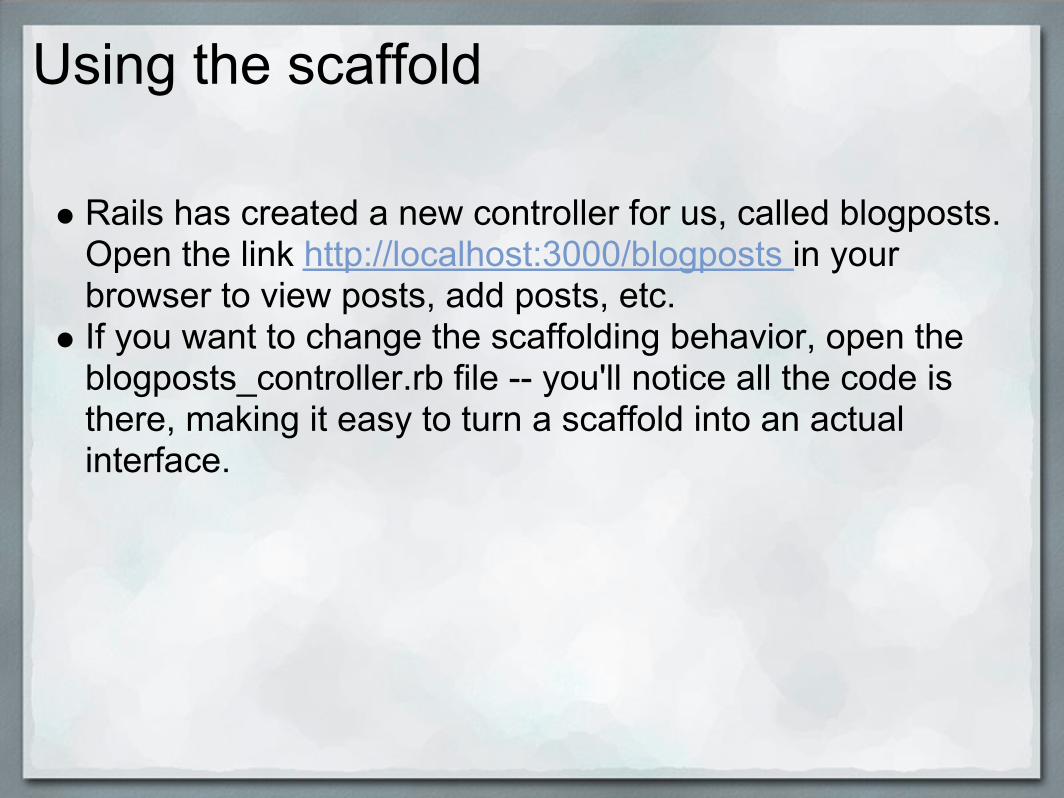
Using the scaffold
Rails has created a new controller for us, called blogposts. Open the link http://localhost:3000/blogposts in your browser to view posts, add posts, etc.If you want to change the scaffolding behavior, open the blogposts_controller.rb file -- you'll notice all the code is there, making it easy to turn a scaffold into an actual interface.
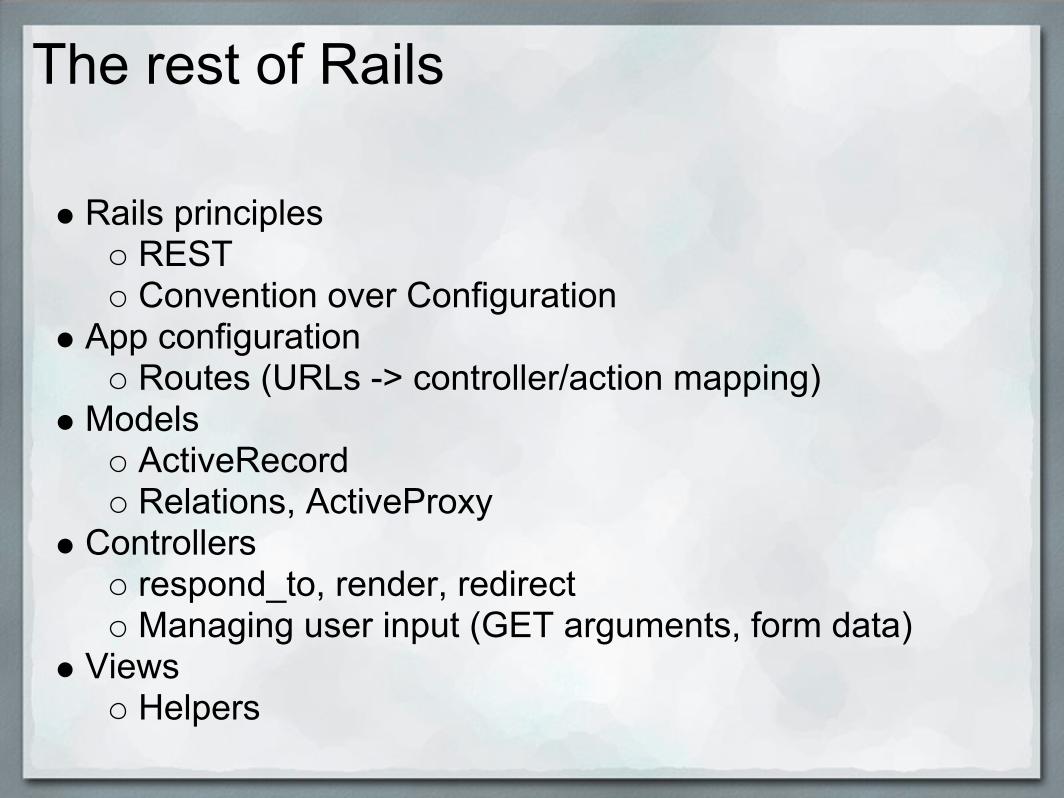
The rest of Rails
Rails principlesRESTConvention over Configuration
App configurationRoutes (URLs -> controller/action mapping)
ModelsActiveRecord Relations, ActiveProxy
Controllersrespond_to, render, redirectManaging user input (GET arguments, form data)
ViewsHelpers


![Ruby on Rails [ Ruby On Rails.ppt ] - [Ruby - [Ruby-Doc.org ...](https://static.fdocuments.us/doc/165x107/5491e450b479597e6a8b57d5/ruby-on-rails-ruby-on-railsppt-ruby-ruby-docorg-.jpg)