ALTENEW PRESENTS CREATE & INSPIRE...front using glue tape. 12. Stamp a sentiment from Magnolias For...
14
ALTENEW PRESENTS CREATE & INSPIRE EDITION 43
Transcript of ALTENEW PRESENTS CREATE & INSPIRE...front using glue tape. 12. Stamp a sentiment from Magnolias For...

ALTENEW PRESENTS
CREATE & INSPIREEDITION 43

CONTENTS
Follow Your Dreams 4
I Be-leaf in You! 5
Happy New Year 6
Miss You 7

Thank You 8
Winter Thank You 9
You Are In My Thoughts 10
Have a Nice Day! 11

FOLLOW YOUR DREAMSBY MAY PARK
4
SEE MORE ON OUR BLOG
INSTRUCTIONS1. Create a 4 ¼” by 5 ½” card base out of Classic
Crest Solar White Cardstock. Set aside.2. Onto a piece of A2-sized Lagoon Cardstock,
blend the following ink colors from the Sweet Dreams Oval Ink Set: Aqualicious, Teal Cave, and Galactic Stream using mini ink blending tools.
3. Stamp the solid images from the Leaf Canopy Stamp Set with Galactic Stream Ink around the edges of the Lagoon panel using the Original MISTI.
4. Then, stamp the sentiment from Happy Dreams Stamp Set in the middle of the card panel with Embossing Ink. Sprinkle it with some Antique Gold Embossing Powder and heat set.
5. To finish off the card, add some tiny dots between the images using a white gel pen.
STAMPS Happy Dreams Stamp Set Leaf Canopy Stamp Set
CARDSTOCK Classic Crest Solar White Cardstock Lagoon Cardstock
MIXED MEDIA Crisp Dye Inks: Aqualicious, Teal Cave, and Galactic Stream
Embossing Ink Antique Gold Embossing Powder
ADDITIONAL SUPPLIES MISTI White Gel Pen Mini Ink Blending Tools
I BE-LEAF IN YOU!BY NORINE BORYS
5
SEE MORE ON OUR BLOG
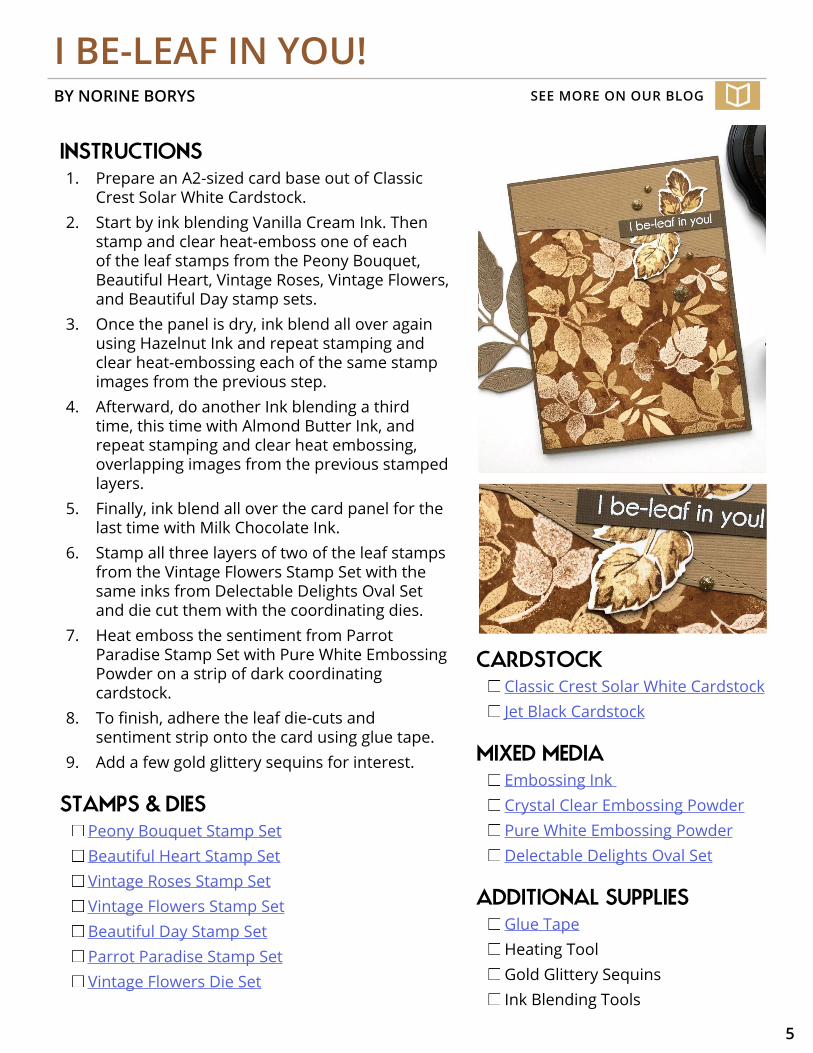
INSTRUCTIONS1. Prepare an A2-sized card base out of Classic
Crest Solar White Cardstock. 2. Start by ink blending Vanilla Cream Ink. Then
stamp and clear heat-emboss one of each of the leaf stamps from the Peony Bouquet, Beautiful Heart, Vintage Roses, Vintage Flowers, and Beautiful Day stamp sets.
3. Once the panel is dry, ink blend all over again using Hazelnut Ink and repeat stamping and clear heat-embossing each of the same stamp images from the previous step.
4. Afterward, do another Ink blending a third time, this time with Almond Butter Ink, and repeat stamping and clear heat embossing, overlapping images from the previous stamped layers.
5. Finally, ink blend all over the card panel for the last time with Milk Chocolate Ink.
6. Stamp all three layers of two of the leaf stamps from the Vintage Flowers Stamp Set with the same inks from Delectable Delights Oval Set and die cut them with the coordinating dies.
7. Heat emboss the sentiment from Parrot Paradise Stamp Set with Pure White Embossing Powder on a strip of dark coordinating cardstock.
8. To finish, adhere the leaf die-cuts and sentiment strip onto the card using glue tape.
9. Add a few gold glittery sequins for interest.
STAMPS & DIES Peony Bouquet Stamp Set Beautiful Heart Stamp Set Vintage Roses Stamp Set Vintage Flowers Stamp Set Beautiful Day Stamp Set Parrot Paradise Stamp Set Vintage Flowers Die Set
CARDSTOCK Classic Crest Solar White Cardstock Jet Black Cardstock
MIXED MEDIA Embossing Ink Crystal Clear Embossing Powder Pure White Embossing Powder Delectable Delights Oval Set
ADDITIONAL SUPPLIES Glue Tape Heating Tool Gold Glittery Sequins Ink Blending Tools

HAPPY NEW YEARBY AGNIESZKA MALYSZEK
INSTRUCTIONS1. Prepare an A2-sized card base out of Classic
Crest Solar White Cardstock.2. Cover another piece of white cardstock with
Glitter Flurries Washi Tape.3. Then use the washi tape cardstock to die cut
the letters N, E and W from the Mega Alphabet Die Set.
4. Mat the letters with Kraft Cardstock and then attach them to the card base using glue tape.
5. Stamp a sentiment from the Happy Holidays Stamp Set onto a piece of white cardstock using Permanent Black Ink. Pop it up onto the card front with foam tape.
STAMPS & DIES Happy Holidays Stamp Set Mega Alphabet Dies - N, E, W
CARDSTOCK Classic Crest Solar White Cardstock Parchment Cardstock
MIXED MEDIA Permanent Black Crisp Ink Glitter Flurries Washi Tape
ADDITIONAL SUPPLIES Glue Tape Foam Tape
6
SEE MORE ON OUR BLOG
MISS YOU
7
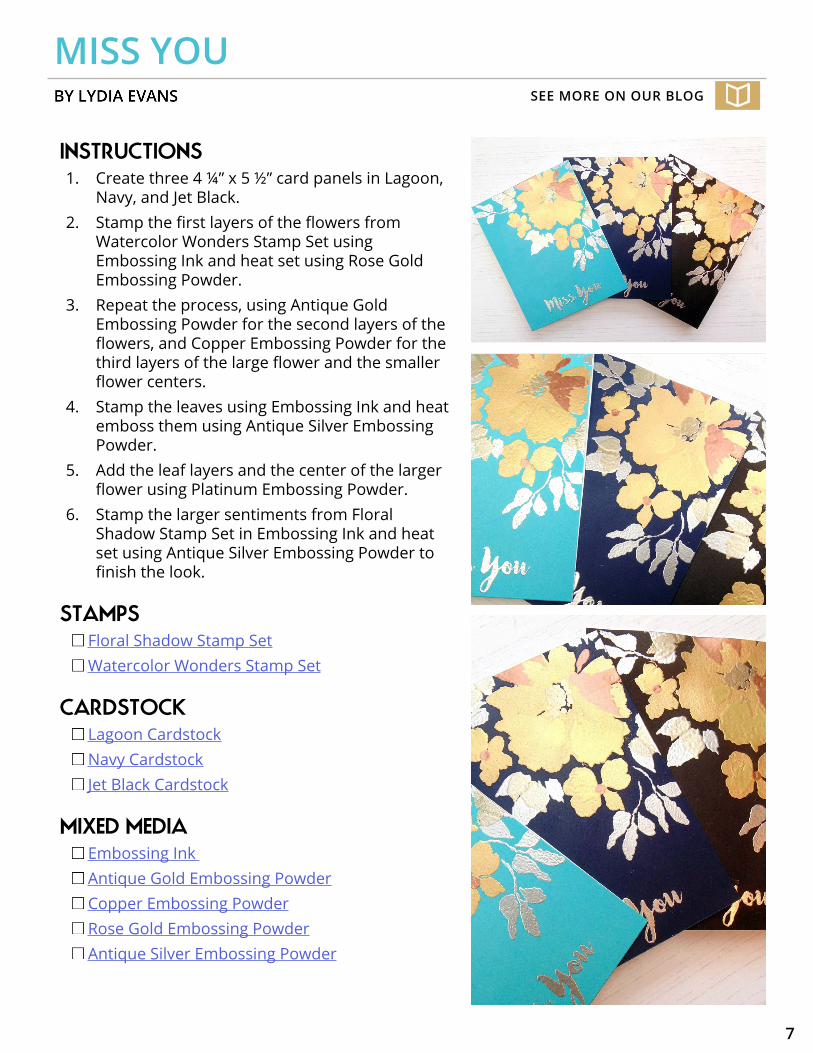
INSTRUCTIONS1. Create three 4 ¼” x 5 ½” card panels in Lagoon,
Navy, and Jet Black.2. Stamp the first layers of the flowers from
Watercolor Wonders Stamp Set using Embossing Ink and heat set using Rose Gold Embossing Powder.
3. Repeat the process, using Antique Gold Embossing Powder for the second layers of the flowers, and Copper Embossing Powder for the third layers of the large flower and the smaller flower centers.
4. Stamp the leaves using Embossing Ink and heat emboss them using Antique Silver Embossing Powder.
5. Add the leaf layers and the center of the larger flower using Platinum Embossing Powder.
6. Stamp the larger sentiments from Floral Shadow Stamp Set in Embossing Ink and heat set using Antique Silver Embossing Powder to finish the look.
STAMPS Floral Shadow Stamp Set Watercolor Wonders Stamp Set
CARDSTOCK Lagoon Cardstock Navy Cardstock Jet Black Cardstock
MIXED MEDIA Embossing Ink Antique Gold Embossing Powder Copper Embossing Powder Rose Gold Embossing Powder Antique Silver Embossing Powder
SEE MORE ON OUR BLOG

BY ERUM TASNEEM
8
SEE MORE ON OUR BLOG
INSTRUCTIONS1. Take out a pre-scored notecard from the Sunlit
Flowers Card Making Kit and fold it in half; this will be your card front.
2. Stamp the images from Sunlit Flowers Stamp Set onto a piece of Classic Crest Solar White Cardstock with Permanent Black Ink.
3. Color in the images using Artist Markers in Mango Smoothie and Cotton Candy.
4. First, lay down the yellow color from Mango Smoothie Artist Marker in a flicking motion, moving towards the edge of the petal. Then, add a layer of Cotton Candy Artist Marker in the same flicking motion.
5. Use the Colorless Blender to soften the tips of the petals.
6. For the leaves, use Frayed Leaf Artist Marker. In order to get a darker shade at the midrib, go over the area a few extra times.
7. Use Frayed Leaf Artist Marker to color the flower centers as well.
8. Fussy cut the images and set aside.9. Add a few black paint splatters on the card
front using the Watercolor 36 Pan Set.10. Next, adhere the flowers with foam tape and
use hot glue to adhere the leaves.11. Stamp the sentiment onto the card front using
Permanent Black Ink.12. Then die cut the solid layer of the Sunlit
Butterfly Die and color it with Mango Smoothie and Frayed Leaf Artist Markers.
13. Add a bit of doodling to the butterfly die-cut and adhere it to the card front using glue tape.
14. Add some sequins for interest.
STAMPS & DIES Sunlit Flowers* Sunlit Butterflies Die Set*
*(from Sunlit Flowers Cardmaking Kit)
THANK YOU
CARDSTOCK Classic Crest Solar White Cardstock A2-Sized Card Blanks*
MIXED MEDIA Permanent Black Crisp Ink Artist Marker Starter Set Colorless Blender
ADDITIONAL SUPPLIES Glue Tape Sequins

WINTER THANK YOUBY SVITLANA SHAYEVICH
9
SEE MORE ON OUR BLOG
INSTRUCTIONS1. Prepare an A2-sized card base out of Classic
Crest Solar White Cardstock.2. Add clear water to a watercolor panel. 3. Scribble Dusk and Sea Breeze watercolor
brush markers from the Spring Garden Set onto the backside of a fold top sandwich bag.
4. Spray some water onto the bag and place it onto the panel with the backside down – the side with the markers’ scribbles.
5. Rub the bag with your fingers, spreading pigment around.
6. Next, dry the panel a bit with a heat gun. 7. Place the bag with leftover pigment onto
the panel again, adding the second layer of watercolor.
8. Foam mount the watercolor panel onto the white card base.
9. Onto another panel of watercolor cardstock, make a similar watercolor background. Let this piece dry completely.
10. Die cut a couple of snowflakes from the Layered Snowflakes Die Set out of this watercolor panel.
11. Adhere the die-cut snowflakes onto the card front using glue tape.
12. Stamp a sentiment from Magnolias For Her Stamp Set using Dusk Ink onto a strip of white cardstock. Adhere the sentiment strip onto the card front using foam tape.
13. To finish, add some splatters using Pure White Ink Spray and some clear droplets.
STAMPS & DIES Magnolias For Her Stamp Set Layered Snowflakes Die Set
CARDSTOCK Classic Crest Solar White Cardstock Watercolor Cardstock
MIXED MEDIA Dusk Crisp Dye Ink Watercolor Brush Markers - Spring Garden Set
Pure White Ink Spray
ADDITIONAL SUPPLIES Glue Tape Foam Tape Heating Tool Sandwich Bag Clear Droplets
YOU ARE IN MY THOUGHTSBY VIRGINIA LU
10
SEE MORE ON OUR BLOG
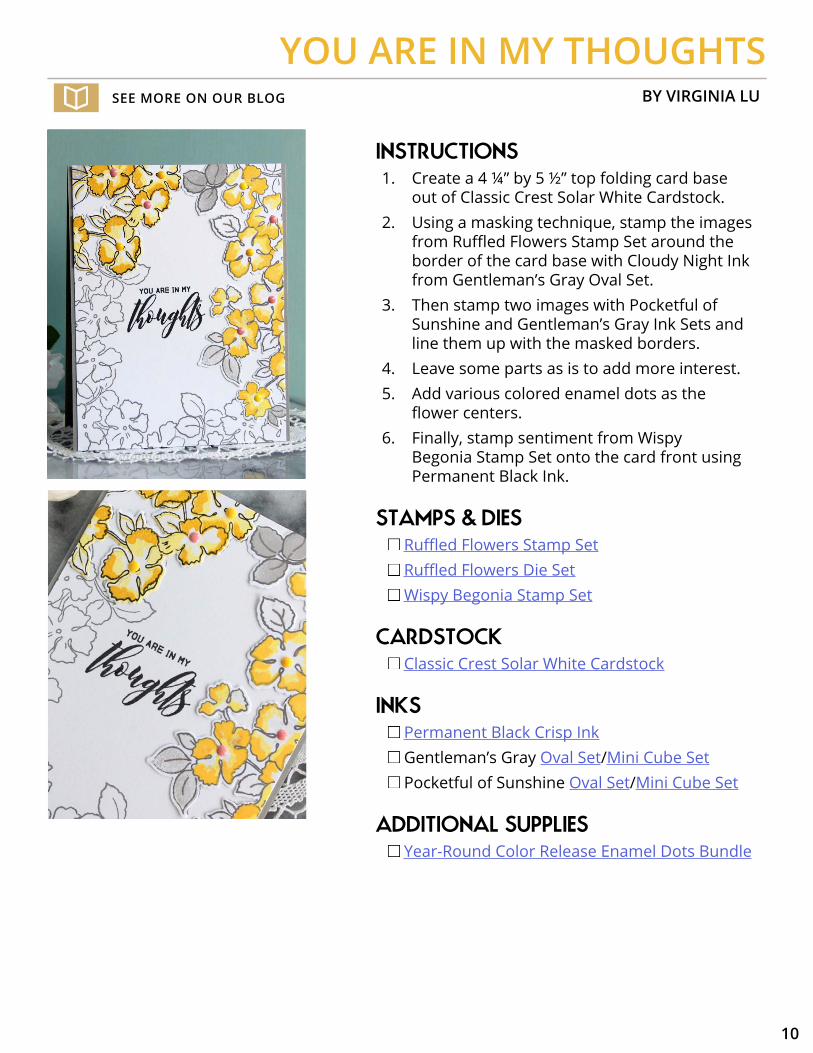
INSTRUCTIONS1. Create a 4 ¼” by 5 ½” top folding card base
out of Classic Crest Solar White Cardstock.2. Using a masking technique, stamp the images
from Ruffled Flowers Stamp Set around the border of the card base with Cloudy Night Ink from Gentleman’s Gray Oval Set.
3. Then stamp two images with Pocketful of Sunshine and Gentleman’s Gray Ink Sets and line them up with the masked borders.
4. Leave some parts as is to add more interest.5. Add various colored enamel dots as the
flower centers.6. Finally, stamp sentiment from Wispy
Begonia Stamp Set onto the card front using Permanent Black Ink.
STAMPS & DIES Ruffled Flowers Stamp Set Ruffled Flowers Die Set Wispy Begonia Stamp Set
CARDSTOCK Classic Crest Solar White Cardstock
INKS Permanent Black Crisp Ink Gentleman’s Gray Oval Set/Mini Cube Set Pocketful of Sunshine Oval Set/Mini Cube Set
ADDITIONAL SUPPLIES Year-Round Color Release Enamel Dots Bundle
HAVE A NICE DAY!BY LYDIA EVANS
11
SEE MORE ON OUR BLOG
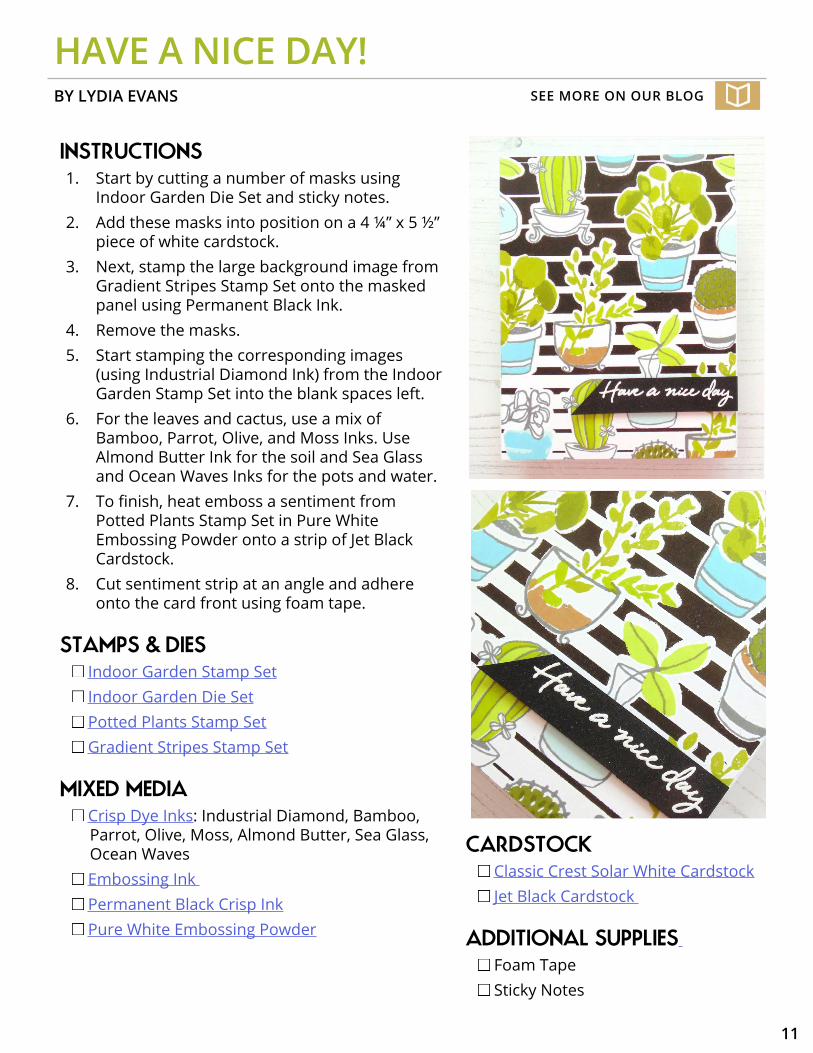
INSTRUCTIONS1. Start by cutting a number of masks using
Indoor Garden Die Set and sticky notes. 2. Add these masks into position on a 4 ¼” x 5 ½”
piece of white cardstock.3. Next, stamp the large background image from
Gradient Stripes Stamp Set onto the masked panel using Permanent Black Ink.
4. Remove the masks.5. Start stamping the corresponding images
(using Industrial Diamond Ink) from the Indoor Garden Stamp Set into the blank spaces left.
6. For the leaves and cactus, use a mix of Bamboo, Parrot, Olive, and Moss Inks. Use Almond Butter Ink for the soil and Sea Glass and Ocean Waves Inks for the pots and water.
7. To finish, heat emboss a sentiment from Potted Plants Stamp Set in Pure White Embossing Powder onto a strip of Jet Black Cardstock.
8. Cut sentiment strip at an angle and adhere onto the card front using foam tape.
STAMPS & DIES Indoor Garden Stamp Set Indoor Garden Die Set Potted Plants Stamp Set Gradient Stripes Stamp Set
MIXED MEDIA Crisp Dye Inks: Industrial Diamond, Bamboo, Parrot, Olive, Moss, Almond Butter, Sea Glass, Ocean Waves
Embossing Ink Permanent Black Crisp Ink Pure White Embossing Powder
CARDSTOCK Classic Crest Solar White Cardstock Jet Black Cardstock
ADDITIONAL SUPPLIES Foam Tape Sticky Notes

Featured Products
BEAUTIFUL DAY
ALT1023 RETAIL $21ALT1160 RETAIL $21
BEAUTIFUL HEART
ALT2414 RETAIL $23.99ALT2415 RETAIL $15
FLORAL SHADOW
ALT1039 RETAIL $21ALT1383 RETAIL $39
GRADIENT STRIPES
ALT2217 RETAIL $21
HAPPY DREAMS
ALT1481 RETAIL $21ALT1530 RETAIL $12
INDOOR GARDEN
ALT1756 RETAIL $21ALT1778 RETAIL $23.99
LEAF CANOPY
ALT2330 RETAIL $21ALT2331 RETAIL $16.99
MAGNOLIAS FOR HER
ALT1003 RETAIL $15ALT1169 RETAIL $18
PARROT PARADISE
ALT1763 RETAIL $21ALT2005 RETAIL $23.99
PEONY BOUQUET
ALT1030 RETAIL $21ALT1173 RETAIL $21
POTTED PLANTS
ALT2698 RETAIL $23.99ALT2699 RETAIL $32.99
RUFFLED FLOWERS
ALT2858 RETAIL $23.99 ALT2859 RETAIL $15
Note: Gray SKU represents coordinating die set.
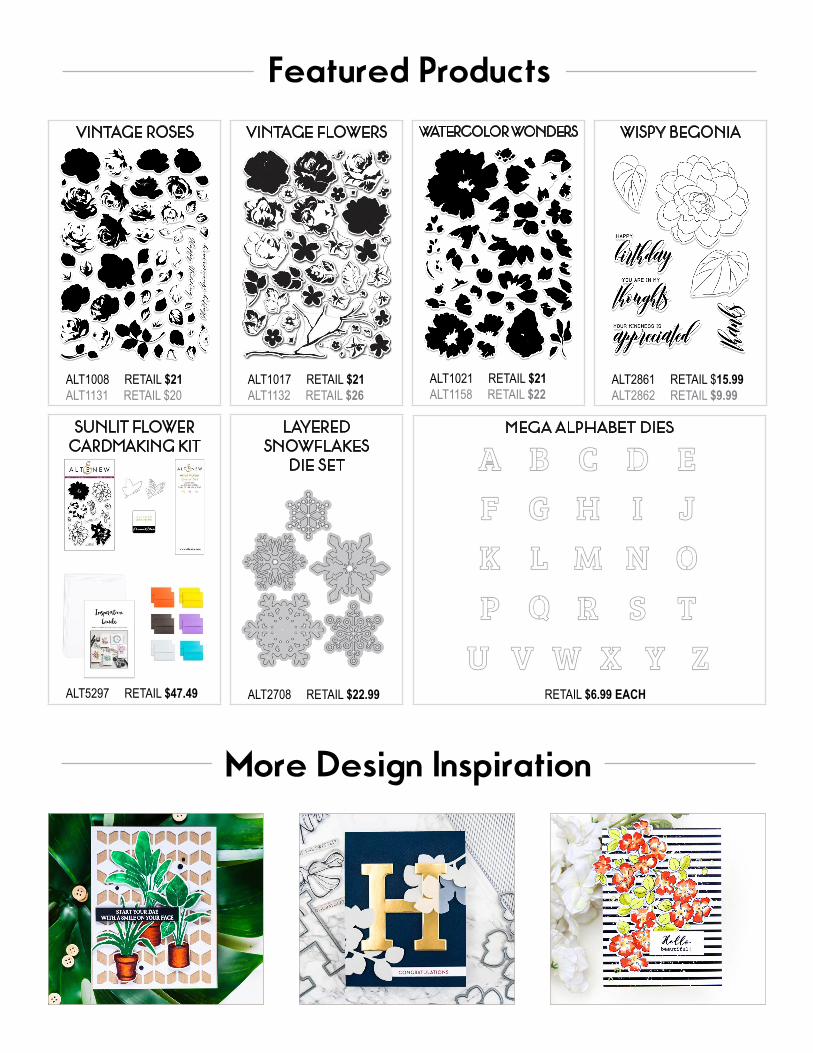
VINTAGE ROSES
ALT1008 RETAIL $21ALT1131 RETAIL $20
VINTAGE FLOWERS
ALT1017 RETAIL $21ALT1132 RETAIL $26
WATERCOLOR WONDERS
ALT1021 RETAIL $21ALT1158 RETAIL $22
WISPY BEGONIA
ALT2861 RETAIL $15.99ALT2862 RETAIL $9.99
SUNLIT FLOWER CARDMAKING KIT
ALT5297 RETAIL $47.49
LAYERED SNOWFLAKES
DIE SET
ALT2708 RETAIL $22.99
MEGA ALPHABET DIES
RETAIL $6.99 EACH
Featured Products
More Design Inspiration

STAY CONNECTED
altenew.com
altenewblog.com altenewscrapbook.com
facebook.com/altenew
instagram.com/altenewllc
pinterest.com/altenew
youtube.com/altenew
(800) 593-1089
Download our FREE mobile app!