Affidavit of Gideon Braver Vandenburg - Sierra Help of Gideon Braver Vandenburg ... mere's manual,...
24
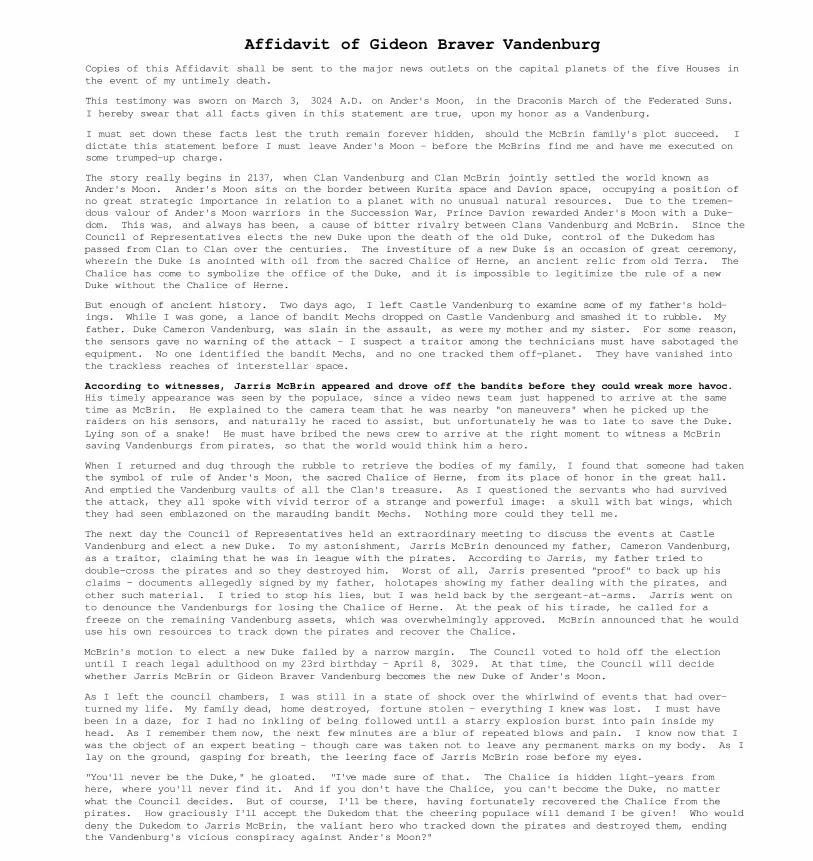
Affidavit of Gideon Braver Vandenburg Copies of this Affidavit shall be sent to the major news outlets on the capital planets of the five Houses in the event of my untimely death. This testimony was sworn on March 3, 3024 A.D. on Ander's Moon, in the Draconis March of the Federated Suns. I hereby swear that all facts given in this statement are true, upon my honor as a Vandenburg. I must set down these facts lest the truth remain forever hidden, should the McBrin family's plot succeed. I dictate this statement before I must leave Ander's Moon - before the McBrins find me and have me executed on some trumped-up charge. The story really begins in 2137, when Clan Vandenburg and Clan McBrin jointly settled the world known as Ander's Moon. Ander's Moon sits on the border between Kurita space and Davion space, occupying a position of no great strategic importance in relation to a planet with no unusual natural resources. Due to the tremen- dous valour of Ander's Moon warriors in the Succession War, Prince Davion rewarded Ander's Moon with a Duke- dom. This was, and always has been, a cause of bitter rivalry between Clans Vandenburg and McBrin. Since the Council of Representatives elects the new Duke upon the death of the old Duke, control of the Dukedom has passed from Clan to Clan over the centuries. The investiture of a new Duke is an occasion of great ceremony, wherein the Duke is anointed with oil from the sacred Chalice of Herne, an ancient relic from old Terra. The Chalice has come to symbolize the office of the Duke, and it is impossible to legitimize the rule of a new Duke without the Chalice of Herne. But enough of ancient history. Two days ago, I left Castle Vandenburg to examine some of my father's hold- ings. While I was gone, a lance of bandit Mechs dropped on Castle Vandenburg and smashed it to rubble. My father. Duke Cameron Vandenburg, was slain in the assault, as were my mother and my sister. For some reason, the sensors gave no warning of the attack — I suspect a traitor among the technicians must have sabotaged the equipment. No one identified the bandit Mechs, and no one tracked them off-planet. They have vanished into the trackless reaches of interstellar space. According to witnesses, Jarris McBrin appeared and drove off the bandits before they could wreak more havoc. His timely appearance was seen by the populace, since a video news team just happened to arrive at the same time as McBrin. He explained to the camera team that he was nearby "on maneuvers" when he picked up the raiders on his sensors, and naturally he raced to assist, but unfortunately he was to late to save the Duke. Lying son of a snake! He must have bribed the news crew to arrive at the right moment to witness a McBrin saving Vandenburgs from pirates, so that the world would think him a hero. When I returned and dug through the rubble to retrieve the bodies of my family, I found that someone had taken the symbol of rule of Ander's Moon, the sacred Chalice of Herne, from its place of honor in the great hall. And emptied the Vandenburg vaults of all the Clan's treasure. As I questioned the servants who had survived the attack, they all spoke with vivid terror of a strange and powerful image: a skull with bat wings, which they had seen emblazoned on the marauding bandit Mechs. Nothing more could they tell me. The next day the Council of Representatives held an extraordinary meeting to discuss the events at Castle Vandenburg and elect a new Duke. To my astonishment, Jarris McBrin denounced my father, Cameron Vandenburg, as a traitor, claiming that he was in league with the pirates. According to Jarris, my father tried to double-cross the pirates and so they destroyed him. Worst of all, Jarris presented "proof" to back up his claims — documents allegedly signed by my father, holotapes showing my father dealing with the pirates, and other such material. I tried to stop his lies, but I was held back by the sergeant-at-arms. Jarris went on to denounce the Vandenburgs for losing the Chalice of Herne. At the peak of his tirade, he called for a freeze on the remaining Vandenburg assets, which was overwhelmingly approved. McBrin announced that he would use his own resources to track down the pirates and recover the Chalice. McBrin's motion to elect a new Duke failed by a narrow margin. The Council voted to hold off the election until I reach legal adulthood on my 23rd birthday - April 8, 3029. At that time, the Council will decide whether Jarris McBrin or Gideon Braver Vandenburg becomes the new Duke of Ander's Moon. As I left the council chambers, I was still in a state of shock over the whirlwind of events that had over- turned my life. My family dead, home destroyed, fortune stolen - everything I knew was lost. I must have been in a daze, for I had no inkling of being followed until a starry explosion burst into pain inside my head. As I remember them now, the next few minutes are a blur of repeated blows and pain. I know now that I was the object of an expert beating - though care was taken not to leave any permanent marks on my body. As I lay on the ground, gasping for breath, the leering face of Jarris McBrin rose before my eyes. "You'll never be the Duke," he gloated. "I've made sure of that. The Chalice is hidden light-years from here, where you'll never find it. And if you don't have the Chalice, you can't become the Duke, no matter what the Council decides. But of course, I'll be there, having fortunately recovered the Chalice from the pirates. How graciously I'll accept the Dukedom that the cheering populace will demand I be given! Who would deny the Dukedom to Jarris McBrin, the valiant hero who tracked down the pirates and destroyed them, ending the Vandenburg's vicious conspiracy against Ander's Moon?"
Transcript of Affidavit of Gideon Braver Vandenburg - Sierra Help of Gideon Braver Vandenburg ... mere's manual,...
Affidavit of Gideon Braver Vandenburg
Copies of this Affidavit shall be sent to the major news outlets on the capital planets of the five Houses inthe event of my untimely death.
This testimony was sworn on March 3, 3024 A.D. on Ander's Moon, in the Draconis March of the Federated Suns.I hereby swear that all facts given in this statement are true, upon my honor as a Vandenburg.
I must set down these facts lest the truth remain forever hidden, should the McBrin family's plot succeed. Idictate this statement before I must leave Ander's Moon - before the McBrins find me and have me executed onsome trumped-up charge.
The story really begins in 2137, when Clan Vandenburg and Clan McBrin jointly settled the world known asAnder's Moon. Ander's Moon sits on the border between Kurita space and Davion space, occupying a position ofno great strategic importance in relation to a planet with no unusual natural resources. Due to the tremen-dous valour of Ander's Moon warriors in the Succession War, Prince Davion rewarded Ander's Moon with a Duke-dom. This was, and always has been, a cause of bitter rivalry between Clans Vandenburg and McBrin. Since theCouncil of Representatives elects the new Duke upon the death of the old Duke, control of the Dukedom haspassed from Clan to Clan over the centuries. The investiture of a new Duke is an occasion of great ceremony,wherein the Duke is anointed with oil from the sacred Chalice of Herne, an ancient relic from old Terra. TheChalice has come to symbolize the office of the Duke, and it is impossible to legitimize the rule of a newDuke without the Chalice of Herne.
But enough of ancient history. Two days ago, I left Castle Vandenburg to examine some of my father's hold-ings. While I was gone, a lance of bandit Mechs dropped on Castle Vandenburg and smashed it to rubble. Myfather. Duke Cameron Vandenburg, was slain in the assault, as were my mother and my sister. For some reason,the sensors gave no warning of the attack — I suspect a traitor among the technicians must have sabotaged theequipment. No one identified the bandit Mechs, and no one tracked them off-planet. They have vanished intothe trackless reaches of interstellar space.
According to witnesses, Jarris McBrin appeared and drove off the bandits before they could wreak more havoc.His timely appearance was seen by the populace, since a video news team just happened to arrive at the sametime as McBrin. He explained to the camera team that he was nearby "on maneuvers" when he picked up theraiders on his sensors, and naturally he raced to assist, but unfortunately he was to late to save the Duke.Lying son of a snake! He must have bribed the news crew to arrive at the right moment to witness a McBrinsaving Vandenburgs from pirates, so that the world would think him a hero.
When I returned and dug through the rubble to retrieve the bodies of my family, I found that someone had takenthe symbol of rule of Ander's Moon, the sacred Chalice of Herne, from its place of honor in the great hall.And emptied the Vandenburg vaults of all the Clan's treasure. As I questioned the servants who had survivedthe attack, they all spoke with vivid terror of a strange and powerful image: a skull with bat wings, whichthey had seen emblazoned on the marauding bandit Mechs. Nothing more could they tell me.
The next day the Council of Representatives held an extraordinary meeting to discuss the events at CastleVandenburg and elect a new Duke. To my astonishment, Jarris McBrin denounced my father, Cameron Vandenburg,as a traitor, claiming that he was in league with the pirates. According to Jarris, my father tried todouble-cross the pirates and so they destroyed him. Worst of all, Jarris presented "proof" to back up hisclaims — documents allegedly signed by my father, holotapes showing my father dealing with the pirates, andother such material. I tried to stop his lies, but I was held back by the sergeant-at-arms. Jarris went onto denounce the Vandenburgs for losing the Chalice of Herne. At the peak of his tirade, he called for afreeze on the remaining Vandenburg assets, which was overwhelmingly approved. McBrin announced that he woulduse his own resources to track down the pirates and recover the Chalice.
McBrin's motion to elect a new Duke failed by a narrow margin. The Council voted to hold off the electionuntil I reach legal adulthood on my 23rd birthday - April 8, 3029. At that time, the Council will decidewhether Jarris McBrin or Gideon Braver Vandenburg becomes the new Duke of Ander's Moon.
As I left the council chambers, I was still in a state of shock over the whirlwind of events that had over-turned my life. My family dead, home destroyed, fortune stolen - everything I knew was lost. I must havebeen in a daze, for I had no inkling of being followed until a starry explosion burst into pain inside myhead. As I remember them now, the next few minutes are a blur of repeated blows and pain. I know now that Iwas the object of an expert beating - though care was taken not to leave any permanent marks on my body. As Ilay on the ground, gasping for breath, the leering face of Jarris McBrin rose before my eyes.
"You'll never be the Duke," he gloated. "I've made sure of that. The Chalice is hidden light-years fromhere, where you'll never find it. And if you don't have the Chalice, you can't become the Duke, no matterwhat the Council decides. But of course, I'll be there, having fortunately recovered the Chalice from thepirates. How graciously I'll accept the Dukedom that the cheering populace will demand I be given! Who woulddeny the Dukedom to Jarris McBrin, the valiant hero who tracked down the pirates and destroyed them, endingthe Vandenburg's vicious conspiracy against Ander's Moon?"
"The Dukedom will never be yours, Jarris," I said, fighting for breath. "I'll stop you.'
He laughed. "No, my dear Gideon, you'll die a pauper on some distant world. I'd rather dispose of your bodyright now — but I might have to answer some awkward questions. A pity you weren't at home when my friends'dropped in' on your miserable family . . . but no matter." His eyes narrowed. "You have 24 hours to getoff the planet. Pray that I never run across you again, or you too will wish that you had died with yourfamily." And with that he and his goons disappeared into the darkness while I struggled to get to my handsand knees.
Somehow, I managed to stumble to a combooth. I realized that there was nothing further I could do on Ander'sMoon, and the only way I could defeat Jarris was to lay low for a while. I needed help, and there wereprecious few people that I could turn to in my hour of need. I called Jordan Rowe, leader of the Vandenburgfaction in the Council. He took me to his home, where we talked late into the night as he nursed my wounds.
Jordan's belief is that Jarris couldn't be the brains behind this operation - it's too big, too well-fundedfor his brand of petty thievery. Jordan mentioned certain information he had come across, rumors of radioac-tive mineral deposits in the highlands, and of Kurita's need for such fuel for their insatiable war machine.He speculated that Kurita was behind the whole plot, and that eventually their machinations would be exposed.But I remain unconvinced - there's no proof of Kurita involvement, though Jordan said he will try to find it.
Jordan has provided me with an old Jenner Mech and some C-bills, as well as passage off-planet. He suggestedthat I travel under the abbreviated name of Gideon Braver, to avoid any "complications'" that might arisebecause of the Vandenburg name. I'm not even"sure where this old space scow is taking me, but it doesn'tmatter. I'll find where Jarris has hidden the Chalice. But it must be guarded, and guarded well, so I'llneed to recruit a lance of Mechs to help me in the battles ahead. But first I need money - and for that, Ihave to become a mercenary, selling my war skills to the highest bidder. Jordan has given me a copy of an oldmere's manual, which should tell me all I need to know.
Jarris McBrin, I am coming back, and not all the Mechs in the Star League are enough to stop me.
(signed) Gideon Bravar Vandenburg
PD-204-04
MechWarriorDesigned by John A.S. Skeel, Paul Bowman, Terry Ishida. Damon SlyeProgramming by Paul Bowman, Pete FokosGraphics by Peter Mitchel-Dayton. Caitlin Mitchel-Dayton, Cyrus Kanga, MarkBrenneman, Steve Snyder, Ron Winnick, Chuck Austen, Kobi MillerMusic and sound effects by Russell Lieblich, Bryce Morcello, Michael LathamProduced by John A.S. Skeel. Steve AckrichProduct management by Kelly FlockPlaytesting by Tom Bellamy, Stew Perkins, Larry Weissenborn, John Van
"Affidavit of Gideon Braver" and Mercenary's Handbook by Steve Peterson. Designand production by Leslie Roth. Production management by Sally Locke and NancyWaisanen. Editorial management by Steven Young.
For technical help, call Consumer Services between 8:00 a.m. and 5:00 p.m. Pacifictime Monday through Friday: 415 329-7630.
For recorded game hints and information about our newest software, call415 329-7699 any time from a touch-tone phone.
If you have a modem, you can contact Activision Entertainment Software throughour Product Support electronic Bulletin Board System at 415 329-7684.
For information about our products, write to:
Consumer ServicesActivision Entertainment Software
P.O. Box 3048Menlo Park. CA 94025
For the best service, be sure to note the subject of your inquiry on the outsideof the envelope.
Please do not make ILLEGAL COPIES OF THIS SOFTWAREThe software you are using was produced through the efforts of many people:designers, artists, programmers, distributors, retailers, and other dedicatedworkers.
The costs of developing this and other software programs are recovered throughsoftware sales. The unauthorized duplication of personal computer software raisesthe cost to all legitimate users.
This software is protected by federal copyright law. Copying software for any reasonother than to make a backup is a violation of law. Individuals who make unauthor-ized copies of software may be subject to civil and criminal penalties.
as a member of the Software Publishers Association (SPA), supports the industry'seffort to fight the illegal copying of personal computer software.
Report copyright violations to:SPA, 1101 Connecticut Avenue, NW, Suite 901
Washington, DC 20036
Software ©1989 by Dynamix, Inc. Packaging and documentation (c) 1989 ActivisionEntertainment Software. All rights reserved. MECHWARRIOR and BATTLETECH areregistered trademarks and Mercenary's Handbook, BattleMech and Mech are trade-marks of FASA Corporation. Board game design, characters, and universe (c) 1988FASA. MS-DOS is a trademark of Microsoft Corp. All other trademarks and brandnames are the property of their respective holders.
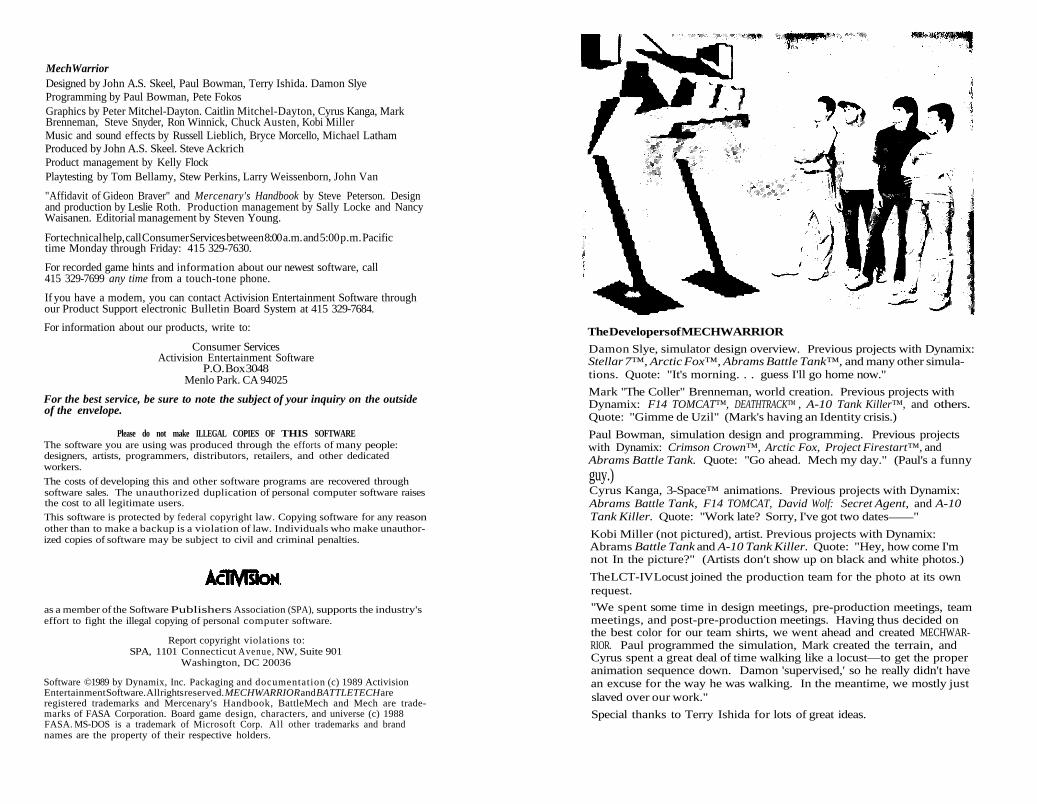
The Developers of MECHWARRIOR
Damon Slye, simulator design overview. Previous projects with Dynamix:Stellar 7™, Arctic Fox™, Abrams Battle Tank™, and many other simula-tions. Quote: "It's morning. . . guess I'll go home now."
Mark "The Coller" Brenneman, world creation. Previous projects withDynamix: F14 TOMCAT™, DEATHTRACK™ , A-10 Tank Killer™, and others.Quote: "Gimme de Uzil" (Mark's having an Identity crisis.)
Paul Bowman, simulation design and programming. Previous projectswith Dynamix: Crimson Crown™, Arctic Fox, Project Firestart™, andAbrams Battle Tank. Quote: "Go ahead. Mech my day." (Paul's a funny
guy.)Cyrus Kanga, 3-Space™ animations. Previous projects with Dynamix:Abrams Battle Tank, F14 TOMCAT, David Wolf: Secret Agent, and A-10Tank Killer. Quote: "Work late? Sorry, I've got two dates "
Kobi Miller (not pictured), artist. Previous projects with Dynamix:Abrams Battle Tank and A-10 Tank Killer. Quote: "Hey, how come I'mnot In the picture?" (Artists don't show up on black and white photos.)
The LCT-IV Locust joined the production team for the photo at its ownrequest.
"We spent some time in design meetings, pre-production meetings, teammeetings, and post-pre-production meetings. Having thus decided onthe best color for our team shirts, we went ahead and created MECHWAR-RIOR. Paul programmed the simulation, Mark created the terrain, andCyrus spent a great deal of time walking like a locust—to get the properanimation sequence down. Damon 'supervised,' so he really didn't havean excuse for the way he was walking. In the meantime, we mostly justslaved over our work."
Special thanks to Terry Ishida for lots of great ideas.
MERCENARY'SHANDBOOK
Notice: This handbook is entirely unoffi-cial, and is under interdict in multiplesystems. Do not reveal its contents, oreven talk about its existence, to anyonewhom you don't completely trust. A healthydose of paranoia will add to your life ex-pectancy in this universe.
This handbook has been distilled, likequanga nut liquer, from the experiences ofmany meres over hundreds of years. Hereyou'll find all the essentials for being asuccessful mercenary — how to negotiatecontracts, how to get and keep the bestMechs, and the basics of how to operate aMech.
Of course, there's no substitute for expe-rience. Once you've spent a few years onthe mercenary trail, gunning your Mechthrough a rain of shrapnel and bolts oflaser lightning, you'll have a knowledge ofwhat it's like that no book can give you.Maybe you can pick up a pointer or two fromthese pages that will help you through someof the rough spots. No guarantees, though.In this universe, you're oh your own.
ContentsThe Years 2014—3024 A.D 9The Successor States 10Getting Started 13
Your Authorization Code 14The Mercenary's Life 14
Blazing Aces 14Mech Complex 16Contracts 18Travel................................................. 21The Bar 22Game Options 23
Mechs 24Mech Controls 26Command Screen 31Damage Screen 33
In Battle 34Jumpjets.. 34Combat Tips 35
BattleMech Descriptions 35Glossary 40Appendix 44
Making Back-Up Copies 44Options at Start-Up 44
Centering the Joystick 45
The Years 2014 — 3024 A.D.After the Western Alliance enforced a world peace in 2014, theunification of the world under its banner was inevitable. By2086 most of the world belonged to the Western Alliance. Thedevelopment of faster-than-light travel in 2108 launched an eraof interstellar colonization. As the cost of FTL travel dropped,colonization proceeded apace, so that by 2235 there were morethan 600 inhabited worlds. In 2236 the colonies rebelled againstthe dominion of Terra, and by 2242 Alliance holdings hadshrunk to a sphere less than 60 light years across. Over thenext 50 years, the Exodus of Earth's population took place andmore than 1500 new planets were settled.
With the collapse of the Terran Alliance in 2314, hostilities brokeout. The establishment of the Terran Hegemony as a replace-ment sparked years of war. In fact, the period until 2550 wasmarked by an almost continuous series of small battles underthe peculiarities of the Ares Conventions. The BattleMechsbecame the standard instrument of the highly ritualized warfareduring this time. The founding of the Star League in 2571sparked the Unification War; when that war ended in 2597, aperiod of relative peace began. The Star League developed thefirst FTL transmitters, cutting the average communication timefrom Terra to the Periphery from 1 year to less than five months.The Star League went on for over 150 years in peace before itwas torn apart by treachery and rebellion. In 2785 the FirstSuccession War raged through known space, as the five lords ofthe High Council all declared themselves ruler of the StarLeague. The Ares Conventions were cast aside, and hundreds ofmillions perished in the brutal warfare that ensued. For the nextseveral hundred years, a series of Succession Wars brought thetechnology to a level barely above that of the 21st century. TheWarlords of the Successor States, unable to manufacture the ad-vanced computers, fusion plants, and starships that their civili-zation depended on, took to cannibalizing existing equipment tomaintain their armies.
Now that the Third Succession War is over, the new alliancebetween the Federated Suns and the Lyran Commonwealthportends a new era of peace and trade among the SuccessorStates.
—from The Succession Wars: A History,by Dr. B. Banzai, New AvalonInstitute of Science
'Don't bet on it. The smart credits are betting on more employmentfor meres than ever. It's just the calm before, the storm, pal. Keepyour batteries charged, and your eyes open.
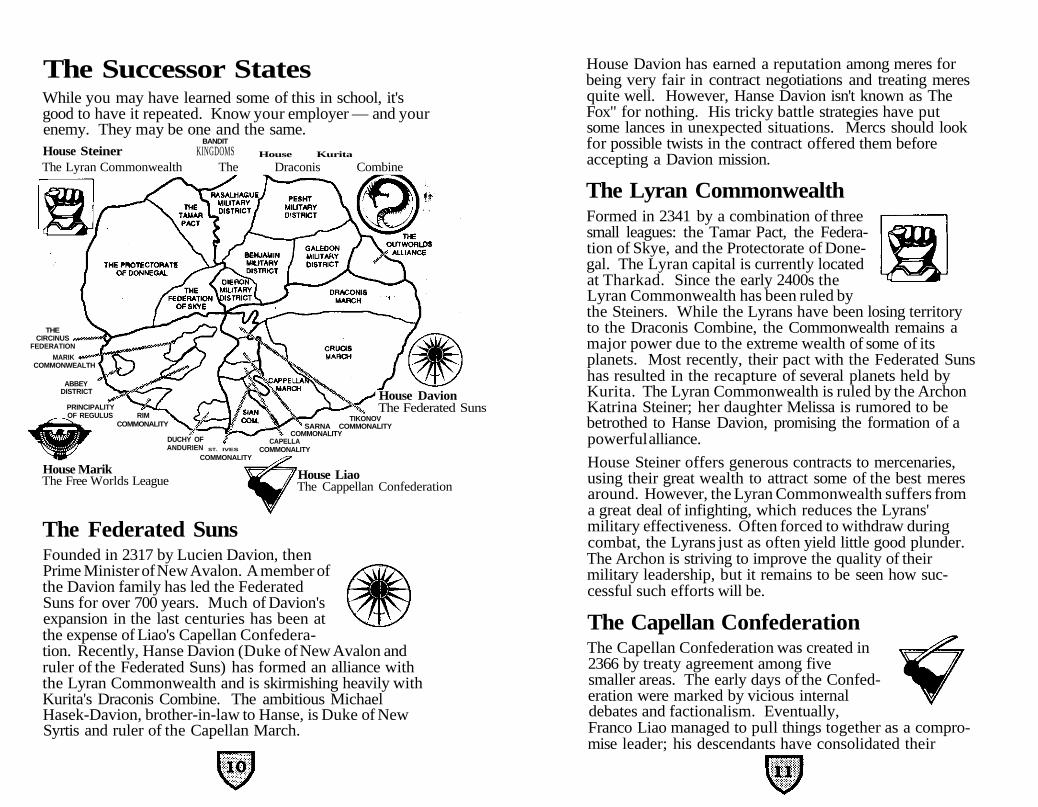
The Successor StatesWhile you may have learned some of this in school, it'sgood to have it repeated. Know your employer — and yourenemy. They may be one and the same.
BANDIT
House Steiner KINGDOMS House Kurita
The Lyran Commonwealth The Draconis Combine
THECIRCINUS
FEDERATION
MARIKCOMMONWEALTH
ABBEYDISTRICT
PRINCIPALITYOF REGULUS RIM
COMMONALITY
DUCHY OFANDURIEN ST. IVES
COMMONALITY
House MarikThe Free Worlds League
House DavionThe Federated Suns
TIKONOVSARNA COMMONALITY
COMMONALITYCAPELLA
COMMONALITY
House LiaoThe Cappellan Confederation
The Federated SunsFounded in 2317 by Lucien Davion, thenPrime Minister of New Avalon. A member ofthe Davion family has led the FederatedSuns for over 700 years. Much of Davion'sexpansion in the last centuries has been atthe expense of Liao's Capellan Confedera-tion. Recently, Hanse Davion (Duke of New Avalon andruler of the Federated Suns) has formed an alliance withthe Lyran Commonwealth and is skirmishing heavily withKurita's Draconis Combine. The ambitious MichaelHasek-Davion, brother-in-law to Hanse, is Duke of NewSyrtis and ruler of the Capellan March.
House Davion has earned a reputation among meres forbeing very fair in contract negotiations and treating meresquite well. However, Hanse Davion isn't known as TheFox" for nothing. His tricky battle strategies have putsome lances in unexpected situations. Mercs should lookfor possible twists in the contract offered them beforeaccepting a Davion mission.
The Lyran CommonwealthFormed in 2341 by a combination of threesmall leagues: the Tamar Pact, the Federa-tion of Skye, and the Protectorate of Done-gal. The Lyran capital is currently locatedat Tharkad. Since the early 2400s theLyran Commonwealth has been ruled bythe Steiners. While the Lyrans have been losing territoryto the Draconis Combine, the Commonwealth remains amajor power due to the extreme wealth of some of itsplanets. Most recently, their pact with the Federated Sunshas resulted in the recapture of several planets held byKurita. The Lyran Commonwealth is ruled by the ArchonKatrina Steiner; her daughter Melissa is rumored to bebetrothed to Hanse Davion, promising the formation of apowerful alliance.
House Steiner offers generous contracts to mercenaries,using their great wealth to attract some of the best meresaround. However, the Lyran Commonwealth suffers froma great deal of infighting, which reduces the Lyrans'military effectiveness. Often forced to withdraw duringcombat, the Lyrans just as often yield little good plunder.The Archon is striving to improve the quality of theirmilitary leadership, but it remains to be seen how suc-cessful such efforts will be.
The Capellan ConfederationThe Capellan Confederation was created in2366 by treaty agreement among fivesmaller areas. The early days of the Confed-eration were marked by vicious internaldebates and factionalism. Eventually,Franco Liao managed to pull things together as a compro-mise leader; his descendants have consolidated their
power over the major worlds of the Capellan Confedera-tion. The Capellans have always fought fiercely with theFree Worlds League. Over the centuries of bitter warfare,the Capellan Confederation has come out on the shortend. losing many of its most valuable territories to HouseDavion and House Marik. However, the now muchshrunken Capellan realm is heavily fortified, and theyhave been mostly peaceful for the last fifty years. Max-imilian Liao currently rules the Capellan Confederation,spending much effort in shrewd diplomatic maneuveringdesigned to bring the lost glory back to Capella and espe-cially to House Liao.
For meres, it's enough to know that the Capellans are theweakest among the Successor States. While they tend tooffer excellent terms when contracts are available, thereare many stories of Capellan contracts that looked good atthe start but soon turned sour. When dealing with theCapellans, more than one merc has found himself unableto collect on a technicality or two.
The Draconis CombineFounded in 2319 after a brutal militarycampaign led by Shiro Kurita. The vastreaches of the Draconis Combine arecontrolled by Kuritas to this day; TakashiKurita is the current iron-fisted ruler.Luthien is now the capital world, but New Samarkand stillwields great power as the home base for the InternalSecurity Force (ISF).
House Kurita issues many mercenary contracts, but theyhave a widespread reputation for being ruthless andarrogant. They don't like to dicker, and they drive a hardbargain. Nonetheless, they do have a way of winning,which keeps the meres coming back for more contracts.
The Free Worlds LeagueCreated in 2271 by the Treaty of Marik,which unified the Grand Duchy of Oriente,the Principality of Regulus, and the MarikCommonwealth. Largely based on mer-chant organizations, the Free Worlds League
has maintained a strong trade with the Successor States.The Captain-Generalship of the Free Worlds League hasbecome a hereditary post held by House Marik. The FreeWorlds League suffers from increasing balkanization, andJanos Marik (current Captain-General) faces mountingdifficulties as he tries to hold things together from hiscapital on Atreus.
Contracts are common in the Free Worlds League, as theinternal bickering constantly erupts into combat. Thereare often good contracts and rich plunder available, butthe unstable political situation makes it a dangerousplayground for the unwary merc.
Getting StartedYour package includes four 5 1/4-inch floppy disks andtwo 3 1/2-inch floppy disks. Make back-up copies ofthese disks before you begin play—see the appendix forinstructions on making back-ups.
Also see the appendix for configuration options availableto you when loading MECHWARRIOR.
To load MECHWARRIOR from floppy disks:
1. Turn on your computer and monitor and load DOS.
2. Insert your backup copy of disk 1 in drive A andswitch to that drive by typing A: and pressing Enter.
3. At the A prompt, type mw and press Enter.
You may use the spacebar or fire button to skip past thecredits. At this point you will be asked to enter an au-thorization code. See below for details.
JIMTo install MECHWARRIOR on a hard disk:
1. Insert your backup copy of disk 1 in drive A andswitch to that drive by typing A: and pressing Enter.
2. Type install followed by the hard drive designation (forexample, C:) and press Enter.
This will create a new directory, called mechwar, and copyall the files from the floppy disk into that directory on thehard drive. You'll be prompted to insert the other disks asrequired.
To start from the hard drive, switch to the mechwardirectory by typing CD mechwar and pressing Enter.Then, to begin the game, type mw and press Enter.
Your Authorization CodeEach time you start MECHWARRIOR, you'll be asked for anauthorization code that matches the code check patternfor a particular Mech shown on the screen. The codes areincluded for each Mech in the section "BattleMech De-scriptions" on page 35. Enter the correct code, then pressEnter. Failure to enter the correct code 3 times in a rowwill result in your returning to DOS.
Once you've entered the correct code, you'll be dirtside.Check out the following section for the options available toyou.
The Mercenary's LifeThere are many things you need to know to be a success-ful mercenary—more details than there's space for here.Besides, you'll learn the details yourself through (some-times bitter) experience. These pages cover only theessentials of what you can do dirtside.
Whenever you're moving around dirtside, you can useeither a joystick, a mouse, or the arrow keys on yourconsole keyboard to move the pointer to one of the icons. ,Press the joystick fire button (button 1), the mouse but-ton, or the Enter key to enter the section represented bythe selected icon.
The instructions that follow refer only to the keyboardcommands, but the mouse or joystick can be used equallywell anywhere dirtside.
Blazing AcesThis is your personal database. Of all yourbasic personal data, perhaps the most impor-tant item is your wealth. Like all meres, youhave a software agent who synthesizes dataoff the NewsNet and posts readings of how thevarious families feel about you. These atti-
tudes, based on previous contracts you've handled forthem, will of course affect your contract negotiations. Playit smart, pal. Keep your eye on these readings and don'texpect too much from the families that hate you.
CrewThis is your Lance command roster. When you highlightthe word and press Enter, you'll see your current crewroster along with their gunnery and pilot ratings, theirwages, and the Mech they've been assigned by you. Ofcourse, if you're the only one in your lance, then you'rethe only one that shows up. You can change the Mechsassigned to each crew member, or even dismiss a crewmember if you're not happy with his performance. When-ever you buy a new Mech, you'll have to assign it to a crewmember (including yourself); otherwise it won't be utilized.
Changing Mech assignments is simple. Move to eachpilot's Mech and highlight it, then press Enter and use theup or down arrow keys to choose among the Mechs youhave (one of the choices always available is to Dismiss thecrew member). Once you have the Mech you want toassign to that pilot, press Enter again. Note that if thatMech is already assigned to some other pilot, then the twopilots swap Mechs. Use the down arrow to highlight theDone button, then press Enter to leave the Crew roster.
NewsNetThis is your access to news items of interest selected byyour Comstar news filter on the interplanetary telecom-munications network. Personal messages for you can alsobe found here. The information you find here can becrucial to getting the best contracts by finding out wherethe action is. If you have any other goals in mind, yournews filter is also selecting news items that can help youachieve your goals.
Use the arrow keys to highlight your choices, and pressEnter to execute each choice. Previous shows you anymessages you've had before; Next shows you the nextmessage (if any); and Done takes you back to your per-sonal database.
DoneExit from your database and get back to wanderingaround dirtside.
Mech ComplexThis is where you go to view, repair, buy, sell,and re-arm your Mechs. Of course, things aredifferent on every planet. Prices change de-pending on local availability of supplies. Youwon't be able to get Mechs on some worlds.The parts you need to repair your Mech mightnot be available. So make the most of what's available, be-cause you might not be able to get it when you need it.Those C-bills in your bank account won't do you any goodwhen you're staring down the muzzle of a PPC and wishingyou'd repaired that frontal armor.
Review MechsThis shows a listing of the Mechs you own, with the pilotsassigned to them. Select a Mech and press Enter to takea closer look. A picture of the Mech appears with its basicarmaments and speed listings. Here you can choose to dothe following things:
Repair: This shows a complete listing of the Mech'ssystems and their current operational status. As youcycle through the systems, if a repair is required the costis shown at the bottom of the screen. If you want torepair that system, press Enter. Otherwise, press the upor down arrow key to move to another system. Note thateach time you repair a system it gets a little better, movingup one damage class (from Junk to Heavy Damage toLight Damage to Functional). So if a system is Junk, thecost shown is one-third of what it takes to make it fullyoperational. Sometimes, the parts needed to repair asystem won't be available, and you'll have to wait for someto come in or try another planet. Or take your chancesand go into battle anyway. Sure, it's a risk, but so's life.
Repair All: You can use this option to automatically repairall damaged systems without having to select each one.Note that the repair cost displayed on this screen is onlyan estimate of the actual total repair cost and the final bill
may be lower or higher than estimated. This functionworks like the regular Repair function: if you don't haveenough money or the parts aren't available, you're out ofluck.
Reload: If you're fully loaded, you'll be told that yourammo bay is full when you press Enter. If you needammo, the cost of reloading is shown; you can choose toreload and pay the cost, or cancel without reloading.
Sell: If you want to sell your Mech, choose this item andpress Enter. If there's an offer, it appears before you.You can accept or reject the offer. The price offered foryour Mech depends on its condition and on the demandfor Mechs on that particular planet. Some meres canmake a tidy sum just by buying Mechs where they'recheap, maybe fixing them up a bit, and selling them wherethey're scarce. Of course, if you're not careful the trans-portation costs will eat you alive. Best to leave trading tothe merchants and concentrate on the business of war.
Done: Gets you back to the Review Mechs choices.
Extra AmmoWhile your Mechs can carry a full combat load of ammuni-tion, when you're going on a long campaign you'll need tostock extra ammo if you can afford it. On an extendedcampaign, you may go through several combats before youcan get back to a civilized place to repair and reload.You'll feel more than foolish if you use up all your ammoduring your first combat, only to face another — you'll feeldead. So spend some C-bills on extra ammo before head-ing out on one of those extended campaign contracts.
Extra Ammo shows a display of the different kinds ofammo available for the different Mechs (if you own one ofthe Mechs listed, it will be highlighted). As you scrolldown the list, the types of Mechs that can use that ammoare displayed. If you press Enter, the ammo is purchasedand stored for future use. You can sell back any extraammo by using the right arrow key to highlight the ammostored in the hold; the prices change to show what youwill get if you sell. Press Enter to sell the ammo. SelectDone and press Enter to return to the Mech Complexchoices.
Buy MechsWhen you select this item, a list of the Mechs currentlyoffered for sale is displayed. (Of course, sometimes therejust aren't any Mechs for sale at all.) Select any Mech andpress Enter to check out the price and condition. You'llsee a picture of the Mech and its operational ratings.Choose Damage Levels to see the condition of the Mech,and just how much repair it's going to take before you canhaul it onto the battlefield. Select Buy to acquire theMech for the price shown. Select Done to return to theMechs For Sale listings. When you're finished shopping,choose Done to return to the Mech Complex choices.Don't be surprised if the choice of Mechs is limited or evennonexistent. After all, these things are scarce and valu-able, and not every podunk planet has Mechs for sale.The bigger Mechs are even harder to find.
The smart merc will notice that Mechs are cheaper onsome worlds. When a world is small and there's a short-age of Mechs, the price is higher—it may be a great placeto sell an extra Mech. Keep your eye on the prices, anddon't let some backwater planet charge you too much.Buy your Mechs when they're cheap. Remember, every C-bill you save could save your life by enabling you to buy alittle more ammo or some repairs.
DoneSelect this item to return to your other dirtside choices.
ContractsOn many planets (but not all), you'll find merccontracts offered by the ruling House. SelectContracts to see the latest contract postings.Sometimes there's only one contract beingoffered; at other times or places, there may bemore. Read each one carefully, and don't getin over your head. No matter how tough, experienced, andwell-armed you are, there's always somebody better.
Request MissionHere's where you get your contracts. Any current con-tracts available on the planet are displayed one at a time.Of course, contracts are not always available, so you caneither wait around till one shows up or haul mass toanother planet with better opportunities. Check theNewsNet for some idea of where the action can be found.
If you've got a contract offer, don't leap at it right away —that's the mark of a real amateur. First, check out all thecontracts being offered by selecting the Next button andpressing Enter. If you don't see anything you like, selectLeave and press Enter to go back to your other dirtsideactivities. Look carefully at the odds. Balance your forcesagainst the enemy forces. Sure, you know your crew isgood, but take care not to bite off too big a job.
Once you've found a contract you like, then it's time to getthe best price. You can negotiate over the price, thepercentage of the confiscated equipment you'll get (assum-ing you win, that is), and how much up front money you'llget for outfitting. Since all haggling over contracts isconducted via computer, all you do is use the arrow keysto point to the item you want to negotiate and pressEnter. The item turns yellow; use the up arrow key toincrease the number, and use the down arrow key todecrease the number. When you've got the number youwant, press Enter again. When you've modified all thefigures to your satisfaction, highlight the Submit buttonand press Enter. The figures change to show the counter-offer. If the counter-offer is not to your liking, change thefigures again and re-submit the contract.
Some families don't have a lot of patience, and they mayjust withdraw the contract if you haggle too much. And ofcourse the terms vary depending on the job and thereputation you have with the individual family. Experi-ence can guide you on just how flexible each House willbe, and what kind of terms you can expect.
Mission TypesThere are several different types of missions that might beoutlined in the typical mercenary contract. The payoffconditions (what NewsNet types like to call "Victory") are
different for each type, so pay careful attention when younegotiate each contract.
A few missions, like suppressing a rebellion or eliminatingenemy forces, are simple, clean, and not too hard tofigure—immobilize all enemy Mechs, and you win. That'sall there is to it.
When an enemy base is involved, things get more difficult.You may be asked to capture an enemy base—in order torescue a kidnap victim, say, or retrieve captured equip-ment. On such missions, you'll have to fight your way tothe base and ram it with one of your Mechs; as soon asyou breach the walls, surrender is immediate, and youshould be able to collect on your contract. When yourmission calls for you to destroy or disable an enemy base,you'll have to fight your way through opposing Mechs andpound the hostile base with several rounds of high-pow-ered ammo.
If a contract calls on you to defend a base against enemyforces, you must immobilize all enemy Mechs that don'tpermanently flee the scene. On missions that involvecrossing territory, like a reconnaissance raid, you mustmove all the Mechs in your lance across the line indicatedon the Mission Briefing screen, fighting off enemies as yougo, in order to collect. Conversely, some types of con-tracts, such as the relief of engaged forces, require thatyou prevent enemy forces from crossing a dashed lineindicated on the Mission Briefing screen (also shown onthe Command Screen)—again, you'll have to immobilizeany hostile Mechs that don't flee.
Extended campaigns are the most difficult. Each oneinvolves two or three separate encounters; in betweenthem, you'll have a chance only to re-arm with any extraammo you bought at the start of the campaign, and tomake field repairs to your Mechs. There will be no chanceto return to a civilized area for extensive repairs—unlessand until the campaign is successfully concluded.
LeaveGet back to your other dirtside business.
TravelFor those farm boys out there who may notknow the ins and outs of interstellar travel.Someone should lay out the basics for you.First, there are jumpships and dropships. Drop-ships are those metal beasts you see standingon every launch pad throughout known space.They take you off planet and carry you out to the Jumppoints where the jumpships sit. The distance from aplanet to its system's Jump point varies depending on thesize of the star, position of the planet in the system, andvelocity of the dropship. That means it can take youanywhere from a few days to three weeks to get there.
Once the dropship gets to the jump point, it links up witha jumpship. Jumpships use the Kearny-Fuchida drivesystem to make near instantaneous jumps to anotherjump point. Jumpships are limited to single jumps ofaround 30 light years. So to travel to a system 60 lightyears away requires two jumps. The jumpship mustrecharge its engines in between jumps with a device calleda jump sail. The recharge process takes about one week.
So, to travel to a system 60 light years away requires atleast one week for the jump, plus the amount of timeneeded to travel to and from the jump point in thedropship.
Using the Star MapYou're shown a map of the major planetary systemsthroughout known space—it's very helpful in making yourtravel decisions. Here you can make your travel arrange-ments, find out a bit about the planets you're traveling to,determine the cost of your journey, and go.
The name of the highlighted planet is shown in the upperleft corner. The type of planet (for example, tropical or ice)is shown to the right of the name, and the population isshown in the upper righthand corner. Below this is a briefdescription of the planet as found in Stoner's GalacticTravel Guide, 4th edition. The icon of the ruling House forthe planet is shown on the righthand side. Below thisicon appears the cost in C-bills to travel to a designatedplanet.
Note that travel costs are based on several factors: num-ber of Mechs, crew, extra ammo being transported, anddistance traveled. You pay by the jump. A planet twojumps away doubles the cost (mechs, personnel, ammo).Your current wealth is shown below the cost.
Use the up and down arrow keys to highlight either thename of the planet in the upper left corner, or the Travel,Planets, or Cancel button.
The left arrow key will move the cursor off the currentplanet selection and free it up so you can use all fourarrow keys to move the cursor around on the map. Placingthe cursor on a planet and pressing Enter causes thatplanet to be selected. All the data on the screen willchange to reflect the new choice.
TravelWhen you've chosen your destination, highlight thisbutton and press Enter to travel there. Your wealth will bereduced by the amount displayed under cost.
PlanetsUse this button to find a particular planet. Highlight thisbutton and press Enter to get a list of the differentHouses. Select the House you want using the arrow keys,then press Enter. A list of available planets in that Houseappears. Select your destination using the arrow keys;press Enter when the planet you want is highlighted.
You can also locate a planet directly. When Planet Nameis highlighted, press Enter, and the box will clear. Type inthe name of the planet you're looking for and press Enter.If the name you typed in is not recognized, the currentlyselected planet will reappear in the box.
CancelReturn to dirtside activities.
The BarHere you can get some refreshment and maybecatch some useful rumors — the kind of thingsthat don't appear on the NewsNet.
And of course all the best merc pilots hang out herebetween jobs.
Order DrinkSometimes, the bartender will slip you a little informationand maybe some answers to your questions. Go ahead, befriendly — it could save your life.
Recruit CrewIf there are any merc pilots looking for work, you can betthey'll be here at the bar. Check out their references, lookover their skill ratings. Watch their pay rates, and re-member that you'll have to shell out that much everymonth. And when you're just a rookie, don't expect thebest pilots to sign up with you. If you want to hire aparticular merc, just say Yes. Saying No puts you backinto circulation at the bar.
LeaveGo outside and look for other dirtside activities.
Game OptionsHere's where you can take care of some house-keeping matters, like storing data or alteringyour personal data environment.
Save GameIf you want to check out of reality and enter a simulationof 20th-century Earth life, choose Save Game. You'll beasked to enter a name for your "saved game." This willeffect the storing of all current data on your career, andyou can use the same name as your "password" when youwant to return to the reality of the 30th century, just theway you left it. You can save and resume up to 12 sepa-rate "games."
Restore GameBrings you back to the real world of the 30th century.Choose the "game" that you want to "restore" and pressEnter.
Restart GameChoose this to start your career as a merc all over again.
Turn Sound Off/OnControls the sound output to your cockpit when you're ina Mech, and any other incidental music.
Detail LevelAllows you to adjust the complexity of the combat simula-tion display to suit your particular computer console.Especially on slower computers, it's important to matchthe simulation level to the speed of your processing hard-ware for maximum control and maneuverability. Yourchoices are High, Low, and Med. A High detail levelshows all landscape items such as mountains and ridges.Choosing Low will remove these items from the display,allowing for faster updates to the screen.
Exit To DOSLeave the program and visit the mysterious dimension ofMS-DOS. See "Getting Started" to get back to reality.
ContinueReturn to normal dirtside activities.
MechsHere are the basics of owning and operating a Mech. Andno, they don't teach you this stuff in school, so don't thinkyou know it all.
BattleMechs 101First, a quick refresher course. BattleMechs, the mostpowerful war machines ever built, dominate the battle-fields of the Succession Wars. These huge man-shapedvehicles are faster, more maneuverable, better armored,and carry heavier weaponry than any other combat unit.Equipped with particle projection cannons, lasers, rapid-fire autocannons, and missiles, these behemoths packenough firepower to flatten everything but another Mech.
Mechs break down into four basic categories: light, me-dium, heavy, and assault. Light mechs range in weightfrom 20 tons to almost 40 tons. They are the most inex-pensive and common type found on the battlefield today.Light Mechs are used mostly in reconnaissance. Theirspeed and jump capability usually allow them to skirtheavy fighting to get a look at enemy formations or toperform deep penetration raids.
Medium Mechs are the real workhorses of the armies ofthe Inner Sphere. They range in weight from 40 tons toalmost 60 tons. They provide a wide variety of design andusually end up doing the real dirty work.
Heavy Mechs range in weight from 60 tons up to 80 tons.They are usually piloted by commanders and the mostexperienced warriors and are the major force on thebattlefield. With their capacity to give and take enormousamounts of damage, their deployment and use in combatis critical.
Assault Mechs are the lords of the battlefield. Althoughrare, and hence often kept out of battle altogether, one as-sault Mech is equal to a whole lance of other Mechs. Theyrange in tonnage from 80 to 100.
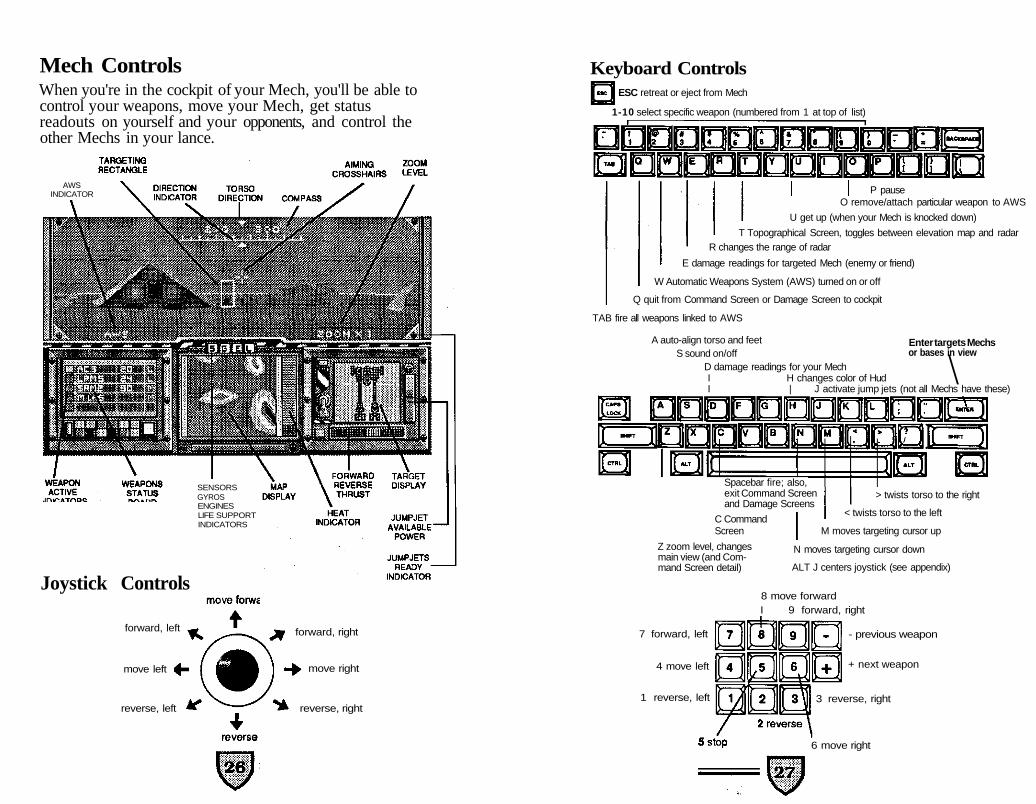
Mech ControlsWhen you're in the cockpit of your Mech, you'll be able tocontrol your weapons, move your Mech, get statusreadouts on yourself and your opponents, and control theother Mechs in your lance.
AWSINDICATOR
SENSORSGYROSENGINESLIFE SUPPORTINDICATORS
Joystick Controls
forward, left
move left
reverse, left
forward, right
move right
reverse, right
Keyboard ControlsESC retreat or eject from Mech
1-10 select specific weapon (numbered from 1 at top of list)
P pauseO remove/attach particular weapon to AWS
U get up (when your Mech is knocked down)
T Topographical Screen, toggles between elevation map and radarR changes the range of radar
E damage readings for targeted Mech (enemy or friend)
W Automatic Weapons System (AWS) turned on or off
Q quit from Command Screen or Damage Screen to cockpit
TAB fire all weapons linked to AWS
Enter targets Mechsor bases in view
A auto-align torso and feetS sound on/off
D damage readings for your MechI H changes color of HudI | J activate jump jets (not all Mechs have these)
\
Spacebar fire; also,exit Command Screenand Damage Screens
C CommandScreen
Z zoom level, changesmain view (and Com-mand Screen detail)
7 forward, left
4 move left
1 reverse, left
> twists torso to the right
< twists torso to the left
M moves targeting cursor up
N moves targeting cursor down
ALT J centers joystick (see appendix)
8 move forwardI 9 forward, right
- previous weapon
+ next weapon
3 reverse, right
6 move right
The CockpitThe top area of the screen shows the battlefield as dis-played through the external video sensors of your Mech.The image display can be sped up by selecting a lowerDetail Level through the Options menu (see above); thisremoves the mountains and ridges from the screen,resulting in a faster screen display.
The Direction Indicator or compass is shown in the dis-play area, marked off in 5-degree increments for a full 360degrees. The top arrow indicates the direction of yourMech's torso, while the bottom arrow shows the directionof your Mech.The Enter key on the combat keyboardcontrols your targeting rectangle. Each time you pressEnter, a new target is acquired and displayed, showingcurrent damage levels as detected by your sensor array.There are two targeting rectangles around a friendlyMech, one targeting rectangle around an enemy Mech.This is important enough to repeat: One rectangle, theirMechs—two rectangles, our Mechs. In a military organiza-tion, forgetting this kind of information is a court-martialoffense.
The display may be magnified by a factor of 1X, 2X, or 3Xby pressing the Z key. When your view is magnified thetargeting cursor will be disabled.
The crosshairs may be moved by pressing M or N, to movethe cursor up and down, or > and < to twist the Mechstorso left and right. Also, the left and right arrow keys maybe used to pivot or steer your Mech in those directions. Ifyou need to get straightened out in a hurry, the A key willauto-align the feet and torso of your Mech.
Weapon Status BoardYour weapon status board is shown next to the mapdisplay. On some Mechs the weapon status board is onthe left, while other models place it on the right. Yourweapons are listed here. The lights next to each weaponshow whether the weapon is attached to the AWS (seebelow), and the one for the currently selected weapon Islit. Pressing the trigger (spacebar or fire button) will firethis weapon.
Ammo (if the weapon requires it) is listed with its currentstatus next to the weapon name. The final letter Indicatesthe range of the weapon—Short, Medium, or Long. Whenthe target is out of range, these letters are black. Whenthe target is at long range for the weapon, the letterschange to red; at medium range, yellow; and at shortrange, blue.
Weapons that are reloading or recharging have theirnames shown in red, and cannot be fired during this time.A weapon shown in black is unusable, due either todamage or lack of ammo. To select a weapon, you mayeither press the corresponding number key (1 for the firstweapon, 2 for the second weapon, and so forth), or pressthe - and + keys on the number keypad to cycle back andforth through the listed weapons.
Pressing W will toggle the Automatic Weapons System onand off. AWS does two things: it automatically chooses thenext available weapon after the current weapon has beenfired, and it provides a second trigger.
When the system is on, the letters AWS appear in thedisplay over the weapons list, and all weapons attachedto the AWS are surrounded by a highlight box. These arethe weapons the AWS will look at when choosing the nextweapon to fire.
To remove specific weapons from AWS control, use the +and - keys to advance to the weapon to remove and pressO. The highlight around the weapon will disappear andthe AWS will skip over the weapon. To attach a weapon tothe AWS, use the same process. The letter O works as atoggle for on and off.
The Tab key works as a second trigger for the AWS weap-ons. Pressing Tab will cause all of the available weaponsunder AWS control to fire at once.
To override the AWS and select a specific weapon, pressthat weapon's corresponding number key. You may alsouse the + and - keys to advance, or back up to the nextweapon regardless of whether it's AWS controlled or not.
Map DisplayAt the center of your cockpit is your map display. Togglebetween a topographical map view and a radar view bypressing the T key. The topo map shows the terrain withelevations (the highest points in red), your Mech as ablack dot (always in the center), other Mechs on your teamas white, and enemy Mechs as red dots. The topo maporientation always has North (0 degrees) at the top of thedisplay, regardless of your Mech's orientation. The radarmap shows you the Mechs in your front arc. Pressing theR key zooms the radar display.
Sensors and Damage IndicatorsJust above the map display are a set of indicator lightswhich give you information about the status of your majorsystems. From left to right they are Sensors, Gyros, En-gines, and Life Support. These lights change color fordifferent levels of damage: green—functional, yellow—lightdamage, red—heavy damage, and black—destroyed. Awarning tone is sounded when one of these systems be-comes damaged.
Sensors are for targeting and detecting damage of otherMechs. When damaged, your sight will not always bevisible and you will not always be able to target otherMechs. Also, the topo map will not be visible when yoursensors are completely damaged.
Gyros are for balance during movement. When they'redamaged you move slower; when they're destroyed, youstop moving.
IEngines drive everything. If they become damaged heatbuildup is increased, and if they're destroyed you shut-down. During shutdown your only option is the CommandScreen to lead your lance or retreat (Esc).
Life Support keeps the heat level in the cockpit down,and lets you breathe. Although you can survive with thissystem damaged you'll die without it, no matter how longyou can hold your breath.
Heat IndicatorNext to the map display is your heat indicator, which is of
extreme importance in combat. If your heat build-up istoo great (when you've fired your weapons too fast or areunder heavy fire, or when you've overused your jumpjets—see page 34), your fusion reactor will shut down to preventa catastrophic meltdown. A shutdown means you can'tmove, fire, or do much of anything (except use the com-mand and damage screens) until your heat has fallen toworkable level. Experienced pilots soon learn to pace theirweapon usage to avoid this condition. Of course, weaponslike machine guns, missiles, and autocannon contributelittle to heat build-up, while PPCs and lasers add vastamounts of waste heat.
Your heat dissipates based on the number of working heatsinks your Mech has. In arctic conditions your heat willdissipate twice as fast.
Command ScreenPressing C displays the Command Screen, where you'll seea strategic overview of the entire area of engagement,showing terrain features and the disposition of knownforces. From here you can command the other crewmembers of your lance (provided you have some).
Your Mech is shown as a black or white square, dependingon the type and color of the terrain; your crew members'Mechs appear as small icons (matching the icons shownfor each crew member to the right of their names on thecrew screens). Enemy Mechs are red; bases are blue.When a hostile Mech disappears around the side of amountain and goes out of your radar's effective range, ablinking red square marks its last known location until itreappears.
(Note to CGA computer console operatives: Your Mechand your bases will usually appear as white squares,depending on the type and color of the terrain; enemyMechs will appear as black or contrasting squares.)
Mountains are multi-colored; ridges are one or two colors.It's important that you distinguish between the two, sinceMechs can walk over ridges, but must go around—or jumpover—mountains.
From the individual Crew Screens, you can review the
members of your lance and issue them new Instructions. ?The first three items (displayed in blue) provide generalinformation: crew member, Mech, and current status(what he's doing.) The next two lines, displayed in white,show the last order given to the crew member and his cur-rent target. The last two lines, shown in green, are weaponand systems status for the crew member's Mech.
Use the arrow keys to move among the choices (right andleft for different crew members, up and down for options),and press the Enter key to activate a choice. The optionsavailable are described below.
OrdersOrders are activated by selecting the current order (suchas Act on Own) and pressing Enter. A list of possibleorders is then presented. Scroll through the list with thearrow keys until the one you want is highlighted and pressEnter. Every order except Act on Own requires you tospecify a location or target. A line appears from the crewmember's Mech to its current target or destination, whichis highlighted by a targeting box. Use the arrow keys tochange the target. If it's a location (Ambush, Defend,Move), the keys will move the targeting box anywhere onthe battlefield. If it's a Mech or base, the arrow keys willcause the targeting box to jump between possible targets.When the targeting box is where you want the crew mem-ber to go, press Enter.Remember that your crew members are human. If you givethem a command that looks like suicide, they may backout, or they may not be able to get to a location because ofsuperior firepower in the way. Know the limitations of yourcrew and their equipment.Act On Own: Your crew members are automatically set tothis order when they start a mission. When acting on thiscommand, they'll do their best to achieve the goals of themission. For example, if the mission is to destroy a base,that base will be their main target and they will only en-gage enemy Mechs if they get in the way. You may changetheir target under this command by highlighting the cur-rent target listed and pressing Enter. Use the arrow keysto switch targets and press Enter when done. This willcause them to immediately charge the enemy you select.
Ambush: Under this command the crew member will go tothe specified location and wait until the enemy is near oruntil his Mech is spotted. He will then attack the nearestenemy. This works best, of course, in a situation wherethe Mech cannot be seen by the enemy (such as when it'sbehind a behind mountain.)
Defend: A defend command directs the crew member to goto the indicated location and wait. The mech may move ina small patrol circle while waiting. When an enemy ap-proaches the location the crew member will attack.
Attack Enemy: Causes the crew member to move towarda specific Mech or base and attack when in range.
Move (attack): Under this command the crew memberwill move toward a specified location, attacking any enemyencountered along the way.
Move (avoid): This command is good for directing crewmembers to get behind enemy lines to attack a base whileother Mechs draw the enemy away, or perhaps to getacross the territory as fast as possible with as little dam-age as possible. With this command the crew member willmove toward the indicated location, avoiding any enemyengagements if possible.
Damage: This gives a status report on the crew member'sMech's damage levels, showing the internal and externalcondition and the condition of important subsystems likethe engines, gyros, sensors, and life support. The wordson the list change color to show different levels of damage:green for functional, yellow for light damage, red for heavydamage, and black for destroyed.
Weapons: This shows the current status of all weaponssystems.
Press Q or space to return to the Main Battle Screen.
Damage ScreenPress D to display a screen showing the damage to yourMech. Damage levels are shown for all areas, and thedamage is shown visually to the right. You may press C toget to the Command Screen or Q or space to return to thecockpit display.
Pressing E when you're in the cockpit brings up a displayof the targeted Mech's damage levels (whether friend orfoe) as determined by your sensors and extrapolated byyour onboard computer systems. The controls are the *same as for your own Damage Screen.
In BattleOnce again, there's no substitute for experience when itcomes to learning the mere's trade. But you probablywon't live long enough to gain any experience if you don't'learn quickly how to use your jumpjets, and pick up atleast a few basic techniques for surviving combat.
JumpjetsJumpjets enable you to avoid enemy firestorms and toscale and traverse mountains. In other words, they canmean the difference between collecting on a contract andending up a smoking ruin of mangled metal.
You control your Jumpjets from the cockpit. Press J toactivate jumpjets. The up and down arrow keys are yourthrust controls. Press the up arrow key and hold it downto engage and maintain upward and forward thrust. Dothe same with the down arrow key to thrust straight upinto the air. While in the air, use the left and right arrowkeys to turn. To land, simply release the active thrust keyand use the down arrow key intermittently during yourdescent to soften your landing.
Always keep an eye on the two gauges in the lower rightcorner of the screen. The vertical bar indicates how muchpower is available for using your jumpjets. The lightabove the gauge glows red when there's insufficient poweravailable for activating jumpjets; when it glows green,you're powered up to go flying. The hairline on the gaugeindicates the amount of power you need to activate thejets.
Always take care to set your Mech down before youravailable power runs out, indicated by the bar inside thejump gauge—if you run out of thrust while you're air-borne, you'll crash-land and damage your Mech.
Remember, too, that using your jumpjets contributes toheat build-up in your Mech, which can lead to reactorshut-down; see "Heat Indicator" on page 30.
If you land on top of a mountain, you won't be able towalk around on top of it or to walk off it; you'll have towait for the jets to recharge and then jump off. The samegoes for landing on top of a base.
Combat TipsHere are a few tips to help get you through your first fewmissions—
• Aim for the head of enemy Mechs, or try shooting offtheir legs. Either way, you'll have to aim carefully, butthe results can be more gratifying—and waste lessammo—than simply hammering away at the heavilyarmored torso of a hostile Mech.
• The rear armor on a Mech is weaker than that in thefront. This is true of both friendly and hostile Mechs.So don't let enemy Mechs get behind you—and youcan bet your next contract that they'll try to—and doget behind them (if you can) and blast away.
• Walking in one direction while turning your torso inanother direction makes it difficult for enemy Mechs todraw a bead on you. If you charge straight on at ahostile Mech, you're going to take a lot of firepowerstraight on, too. So try the zig-zag approach, layingdown fire as you go.
• Use your AWS to put missiles and lasers on separatetriggers. If you fire a laser right behind a missile youmight destroy it in mid-flight and so waste both shots.
BattleMech DescriptionsA merc needs to know his equipment. If you want tosurvive, you'll learn fast about the Mechs and their capa-bilities. The following technical readouts give you a goodidea of each Mech's capabilities.
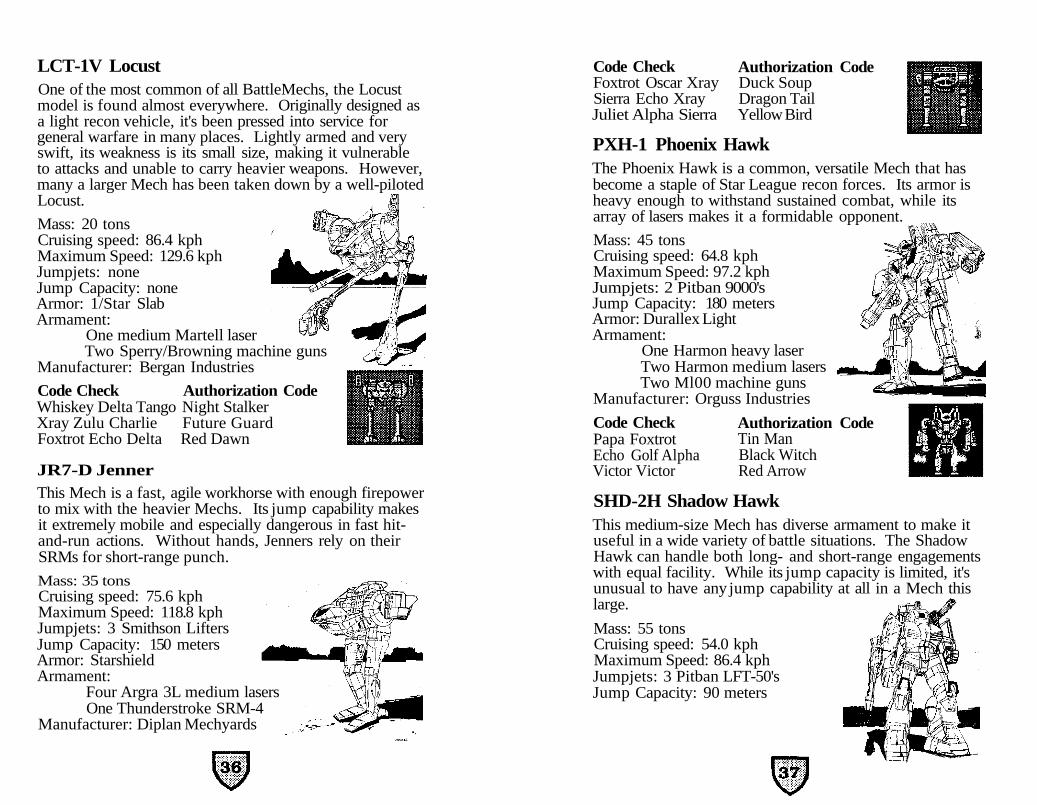
LCT-1V LocustOne of the most common of all BattleMechs, the Locustmodel is found almost everywhere. Originally designed asa light recon vehicle, it's been pressed into service forgeneral warfare in many places. Lightly armed and veryswift, its weakness is its small size, making it vulnerableto attacks and unable to carry heavier weapons. However,many a larger Mech has been taken down by a well-pilotedLocust.
Mass: 20 tonsCruising speed: 86.4 kphMaximum Speed: 129.6 kphJumpjets: noneJump Capacity: noneArmor: 1/Star SlabArmament:
One medium Martell laserTwo Sperry/Browning machine guns
Manufacturer: Bergan Industries
Code Check Authorization CodeWhiskey Delta Tango Night StalkerXray Zulu Charlie Future GuardFoxtrot Echo Delta Red Dawn
JR7-D JennerThis Mech is a fast, agile workhorse with enough firepowerto mix with the heavier Mechs. Its jump capability makesit extremely mobile and especially dangerous in fast hit-and-run actions. Without hands, Jenners rely on theirSRMs for short-range punch.
Mass: 35 tonsCruising speed: 75.6 kphMaximum Speed: 118.8 kphJumpjets: 3 Smithson LiftersJump Capacity: 150 metersArmor: StarshieldArmament:
Four Argra 3L medium lasersOne Thunderstroke SRM-4
Manufacturer: Diplan Mechyards
Code CheckFoxtrot Oscar XraySierra Echo XrayJuliet Alpha Sierra
Authorization CodeDuck SoupDragon TailYellow Bird
PXH-1 Phoenix HawkThe Phoenix Hawk is a common, versatile Mech that hasbecome a staple of Star League recon forces. Its armor isheavy enough to withstand sustained combat, while itsarray of lasers makes it a formidable opponent.
Mass: 45 tonsCruising speed: 64.8 kphMaximum Speed: 97.2 kphJumpjets: 2 Pitban 9000'sJump Capacity: 180 metersArmor: Durallex LightArmament:
One Harmon heavy laserTwo Harmon medium lasersTwo Ml00 machine guns
Manufacturer: Orguss Industries
Code CheckPapa FoxtrotEcho Golf AlphaVictor Victor
Authorization CodeTin ManBlack WitchRed Arrow
SHD-2H Shadow HawkThis medium-size Mech has diverse armament to make ituseful in a wide variety of battle situations. The ShadowHawk can handle both long- and short-range engagementswith equal facility. While its jump capacity is limited, it'sunusual to have any jump capability at all in a Mech thislarge.
Mass: 55 tonsCruising speed: 54.0 kphMaximum Speed: 86.4 kphJumpjets: 3 Pitban LFT-50'sJump Capacity: 90 meters
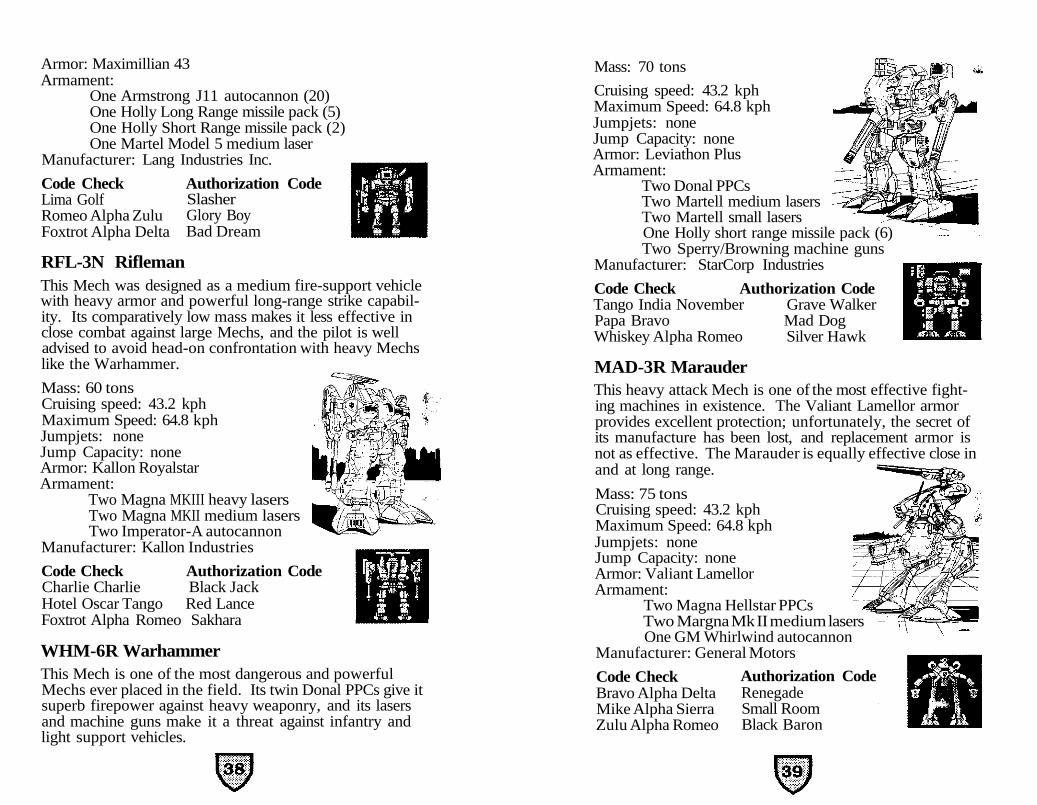
Armor: Maximillian 43Armament:
One Armstrong J11 autocannon (20)One Holly Long Range missile pack (5)One Holly Short Range missile pack (2)One Martel Model 5 medium laser
Manufacturer: Lang Industries Inc.
Code CheckLima GolfRomeo Alpha ZuluFoxtrot Alpha Delta
RFL-3N Rifleman
Authorization CodeSlasherGlory BoyBad Dream
This Mech was designed as a medium fire-support vehiclewith heavy armor and powerful long-range strike capabil-ity. Its comparatively low mass makes it less effective inclose combat against large Mechs, and the pilot is welladvised to avoid head-on confrontation with heavy Mechslike the Warhammer.
Mass: 60 tonsCruising speed: 43.2 kphMaximum Speed: 64.8 kphJumpjets: noneJump Capacity: noneArmor: Kallon RoyalstarArmament:
Two Magna MKIII heavy lasersTwo Magna MKII medium lasersTwo Imperator-A autocannon
Manufacturer: Kallon Industries
Code Check Authorization CodeCharlie Charlie Black JackHotel Oscar Tango Red LanceFoxtrot Alpha Romeo Sakhara
WHM-6R WarhammerThis Mech is one of the most dangerous and powerfulMechs ever placed in the field. Its twin Donal PPCs give itsuperb firepower against heavy weaponry, and its lasersand machine guns make it a threat against infantry andlight support vehicles.
Mass: 70 tons
Cruising speed: 43.2 kphMaximum Speed: 64.8 kphJumpjets: noneJump Capacity: noneArmor: Leviathon PlusArmament:
Two Donal PPCsTwo Martell medium lasersTwo Martell small lasersOne Holly short range missile pack (6)Two Sperry/Browning machine guns
Manufacturer: StarCorp Industries
Code Check Authorization CodeTango India November Grave WalkerPapa Bravo Mad DogWhiskey Alpha Romeo Silver Hawk
MAD-3R MarauderThis heavy attack Mech is one of the most effective fight-ing machines in existence. The Valiant Lamellor armorprovides excellent protection; unfortunately, the secret ofits manufacture has been lost, and replacement armor isnot as effective. The Marauder is equally effective close inand at long range.
Mass: 75 tonsCruising speed: 43.2 kphMaximum Speed: 64.8 kphJumpjets: noneJump Capacity: noneArmor: Valiant LamellorArmament:
Two Magna Hellstar PPCsTwo Margna Mk II medium lasersOne GM Whirlwind autocannon
Manufacturer: General Motors
Code CheckBravo Alpha DeltaMike Alpha SierraZulu Alpha Romeo
Authorization CodeRenegadeSmall RoomBlack Baron
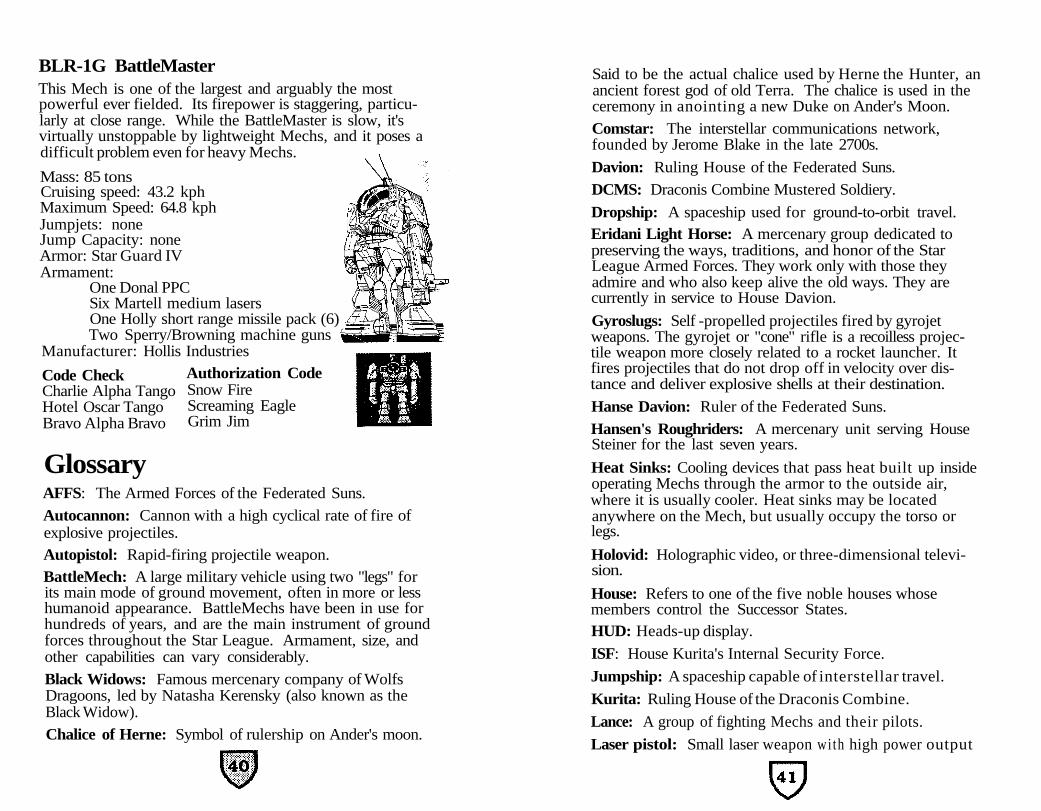
BLR-1G BattleMasterThis Mech is one of the largest and arguably the mostpowerful ever fielded. Its firepower is staggering, particu-larly at close range. While the BattleMaster is slow, it'svirtually unstoppable by lightweight Mechs, and it poses adifficult problem even for heavy Mechs.
Mass: 85 tonsCruising speed: 43.2 kphMaximum Speed: 64.8 kphJumpjets: noneJump Capacity: noneArmor: Star Guard IVArmament:
One Donal PPCSix Martell medium lasersOne Holly short range missile pack (6)Two Sperry/Browning machine guns
Manufacturer: Hollis IndustriesAuthorization CodeSnow FireScreaming EagleGrim Jim
Code CheckCharlie Alpha TangoHotel Oscar TangoBravo Alpha Bravo
GlossaryAFFS: The Armed Forces of the Federated Suns.
Autocannon: Cannon with a high cyclical rate of fire ofexplosive projectiles.Autopistol: Rapid-firing projectile weapon.BattleMech: A large military vehicle using two "legs" forits main mode of ground movement, often in more or lesshumanoid appearance. BattleMechs have been in use forhundreds of years, and are the main instrument of groundforces throughout the Star League. Armament, size, andother capabilities can vary considerably.
Black Widows: Famous mercenary company of WolfsDragoons, led by Natasha Kerensky (also known as theBlack Widow).
Chalice of Herne: Symbol of rulership on Ander's moon.
Said to be the actual chalice used by Herne the Hunter, anancient forest god of old Terra. The chalice is used in theceremony in anointing a new Duke on Ander's Moon.
Comstar: The interstellar communications network,founded by Jerome Blake in the late 2700s.
Davion: Ruling House of the Federated Suns.
DCMS: Draconis Combine Mustered Soldiery.
Dropship: A spaceship used for ground-to-orbit travel.Eridani Light Horse: A mercenary group dedicated topreserving the ways, traditions, and honor of the StarLeague Armed Forces. They work only with those theyadmire and who also keep alive the old ways. They arecurrently in service to House Davion.
Gyroslugs: Self -propelled projectiles fired by gyrojetweapons. The gyrojet or "cone" rifle is a recoilless projec-tile weapon more closely related to a rocket launcher. Itfires projectiles that do not drop off in velocity over dis-tance and deliver explosive shells at their destination.
Hanse Davion: Ruler of the Federated Suns.
Hansen's Roughriders: A mercenary unit serving HouseSteiner for the last seven years.
Heat Sinks: Cooling devices that pass heat built up insideoperating Mechs through the armor to the outside air,where it is usually cooler. Heat sinks may be locatedanywhere on the Mech, but usually occupy the torso orlegs.
Holovid: Holographic video, or three-dimensional televi-sion.
House: Refers to one of the five noble houses whosemembers control the Successor States.HUD: Heads-up display.
ISF: House Kurita's Internal Security Force.
Jumpship: A spaceship capable of interstellar travel.
Kurita: Ruling House of the Draconis Combine.
Lance: A group of fighting Mechs and their pilots.
Laser pistol: Small laser weapon with high power output
weighing about 1000 grams.
LAW: Light Anti-vehicle Weapon. A development of thePortable Rocket Launcher and similar support weapons,LAWs and V(Very)-LAWs can fire only once, after whichthey are discarded.
LCAF: Lyran Commonwealth Armed Forces.
Liao: Ruling House of the Capellan Confederation.
Lostech: The lost technology of the Star League.
LRM: Long-Range Missiles.
Marik: Ruling House of the Free Worlds League.
Mech: See BattleMech.
Mech complex: An industrial area where Mechs arerepaired and serviced.
Merc: Short for Mercenary.
Mercenary: A free-lancer who hires out his militaryservices to various organizations.
MIIO: The Ministry of Intelligence, Investigations andOperations is the name given to various departments andsecret agencies that the Davion government has createdover the centuries to gather information and to actcovertly against their enemies.
MI6: The name given to teams of elite saboteurs andterrorists who conduct missions into enemy realms. These"hit teams" carry out missions ranging from abductionsand assassinations to demolitions and random murders toterrorize civilian populations. Any use of the hit teamsrequires Prince Davion's approval. Because the FederatedSuns' peace-loving propaganda is so successful, fewoutside the MI6 or MIIO realize to what extent Davioncondones terrorist activities.
Natasha Kerensky: Leader of the Black Widows.
Needlegun: One of the most vicious weapons ever devel-oped. Instead of firing a single bullet or burst of energy, itfires a spray of plastic flechettes. Needlegun ammunitionconsists of a small block of plastic that the gun shredsand fires out at high velocity.
Periphery: Hundreds of worlds on the edge of the starsystems of the Inner Sphere; many have fallen into barba-rism.
PPC: Particle Projection Cannon. A particularly powerfullong-range weapon mounted on some Mechs.
Quintus Allard: Head of Davion counter-intelligence.
Smithson's Chinese Bandits: Famous mercenary unitcurrently working for House Marik.
Solaris VII: The gaming world, where Mechs compete forsport and profit.
SRM: Short-Range Missiles.
Star League: The ruling interstellar government from2571 to 2751.
Steiner: Ruling House of the Lyran Commonwealth.
Stun Lance: A full-size martial arts lance that delivers apowerful neural impulse on impact, designed to render thetarget unconscious.
Subhash Indrahar: Director of the ISF (Kurita internalsecurity force).
Successor States: The five main governments formedafter the collapse of the Star League: the Federated Suns,the Lyran Commonwealth, the Capellan Confederation,the Draconis Combine, and the Free Worlds League.
Takeshi Kurita: Ruler of the Draconis Combine.
Team Banzai: Mercenaries and expert techs under long-term contract to House Davion.
Theodore Kurita: Prince of Luthien and heir-designate ofHouse Kurita.
Vibroblade: A bulky version of a standard sword or otherblade. When activated, it vibrates at an extremely highfrequency, making it a very effective cutting tool.
VTOL: Vertical take-off and landing aircraft.
Wolf's Dragoons: The most widely renowned mercenaryregiment in the Successor States.
AppendixMaking Back-Up CopiesTo make backup copies of your MECHWARRIOR disks—
On a single floppy system:
1. Boot your system and load DOS.
2. At the A> prompt, type Diskcopy A: A: and pressEnter.
3. Follow the screen prompts—the source disk is youroriginal MECHWARRIOR disk and the target disk is ablank disk.
Repeat this procedure for each original MECHWARRIOR disk.
On a double floppy System:
1. Boot your system and load DOS.
2. At the A> prompt, type Diskcopy A: B: and pressEnter.
3. Follow the screen prompts—the source disk is youroriginal MECHWARRIOR disk and the target disk is ablank disk.
Repeat this procedure for each original MECHWARRIOR disk.
Options at Start-UpDepending on your system configuration, you may en-counter problems loading MECHWARRIOR or, after loadingthe game, with its performance or appearance. Or youmay want to set up the game to perform in a certain wayon your system. Follow this procedure every time you loadMECHWARRIOR.
Graphic Mode Options: To select a different graphicsmode, enter one of the options below after typing mw.
The game automatically selects the best graphics mode foryou. If you like, however, you can manually select the
mode by typing one of these options after mw:
1=EGA (Enhanced Graphics Adaptor, 16-color)
2=TGA (Tandy 1000 series, 16 color)
3=CGA (Composite Graphics Adaptor, 4-color)
Note: CGA will only work in certain areas of the program.The program must be run with an EGA compatible card.
For example, typing
mw (Space) 1
and pressing Enter will load the game with 16-color EGAgraphics.
Sound and music options: To force MECHWARRIOR torecognize a particular sound board, type the followingafter mw:
A=Adlib Board
T=Tandy MT-32
R=Roland
S=PC Speaker
Any of the above options can be combined when startingup MechWarrior. For example, typing
mw (space) 3 (Space) A
and pressing Enter will load the game in CGA's 4-colormode and force the program to look for an Adlib board.
Centering the JoystickIf you find that your Mech is moving when the joystick iscentered, simply push the joystick in the direction theMech tends to move and press Alt and J simultaneouslyto correct the problem. For example, if the Mech is drift-ing to the left, push the joystick to the left and press Alt J.