Act! Premium Web Administrator's Guide · ©2013SwiftpageACT!LLC.AllRightsReserved....
29
Act! Premium Web Administrator's Guide
-
Upload
nguyenhanh -
Category
Documents
-
view
216 -
download
0
Transcript of Act! Premium Web Administrator's Guide · ©2013SwiftpageACT!LLC.AllRightsReserved....

Act! PremiumWebAdministrator's Guide
© 2013 Swiftpage ACT! LLC. All Rights Reserved.Swiftpage, Act!, Saleslogix, and the Swiftpage product and service names mentioned herein are registeredtrademarks or trademarks of Swiftpage ACT! LLC, or its affiliated entities.Microsoft® SQL Server®, Windows Vista® and the Windows logo are either registered trademarks or trademarks ofMicrosoft Corporation in the United States and/or in other countries.All other trademarks are the property of their respective owners.
Released 08/2013 for Act! Premium v16 (access via web)Version: UA07_082013Important NoteReview system requirements at www.act.com/systreq. You must purchase one license of Act! per user. Scalabilityvaries based on hardware, size, and usage of your database. Visit Act! Marketplace or contact your add-on productprovider to determine compatibility for your add-on products.
This material may not, in whole or in part, be copied, photocopied, reproduced, translated, or reduced to anyelectronic medium or computer-readable form without prior consent in writing from Swiftpage ACT! LLC, 8800 N.Gainey Center Drive, Suite 200, Scottsdale, Arizona 85258 ATTN: Legal Department.ALL EXAMPLES WITH NAMES, COMPANY NAMES, OR COMPANIES THAT APPEAR IN THIS MANUAL AREFICTIONAL AND DO NOT REFER TOOR PORTRAY IN NAME OR SUBSTANCE ANY ACTUAL NAMES,COMPANIES, ENTITIES, OR INSTITUTIONS. ANY RESEMBLANCE TO ANY REAL PERSON, COMPANY, ENTITY,OR INSTITUTION IS PURELY COINCIDENTAL.Every effort has been made to ensure the accuracy of this material. However, Swiftpage ACT! LLC makes nowarranties with respect to this documentation and disclaims any implied warranties of merchantability and fitness fora particular purpose. Swiftpage ACT! LLC shall not be liable for any errors or for incidental or consequentialdamages in connection with the furnishing, performance, or use of this material or the examples herein. Theinformation in this material is subject to change without notice.
End User License AgreementThis product is protected by an End User License Agreement. To view the agreement, go to the Help menu in theproduct, click About Act!, and then click the View End User License Agreement link.Published bySwiftpage ACT! LLC8800 N. Gainey Center Drive, Suite 200Scottsdale, AZ 8525810 9 8 7 6 5 4 3 2 1

Contents
Introduction iGetting Started 1Setting Up Act! Premium (access via web) 5Integrating With Other Applications 12Troubleshooting Act! Premium (access via web) 17Index 24

Introduction#1 for over 25 years, Act! is the trusted choice for individuals, small businesses, and sales teams to getorganized and take the guesswork out of marketing to drive sales results.
Act! Premium lets users access the database using a supported browser. It is important that you review the fullsystem requirements and supported compatibility list at www.act.com/systreq.
Whether you are installing Act! for the first time or upgrading from an earlier version, this guide provides theinformation to:
l Plan and organize your installation.
l Set up user access.
l Install the Act! Scratchpad and set up integration with supported applications, such as Microsoft®Outlook® or Google®.
l Troubleshoot the software.
Upgrade Web User. When you see this icon throughout the guide, it indicates information that is applicable to you.
IMPORTANT INFORMATION TO KNOW BEFORE YOU STARTUse the following information to determine what guides to use when installing Act!.
If your current version is... Then use these guides...
I do not have any version of Act!installed. I am a "New User."
1. Use the Installing Act! for New Users guide to install, register, and activateAct!.2. Use the Act! Premium Web Administrator's Guide to configure access via theweb.
I have an ACT! 2005 (7.x) through SageACT! 2013 (15.x) version installed.My installation may or may not includethe web.
1. Use the Upgrading to Act! v16 from ACT! versions 2005 (7.x) and Later guideto upgrade to Act! 2014.2. Use the Act! Premium Web Administrator's Guide to configure access via theweb.
I have an ACT! 3.x, 4.x, 5.x (2000), or 6.x(2004) version installed.
1. Use the Upgrading to Act! v16 from ACT! versions 3.x, 4.x, 5.x (2000), or 6.x(2004) guide to upgrade to Act! 2014 and convert your database.2. Use the Act! Premium Web Administrator's Guide to configure access via theweb.
The guides are available on the installation panel under Product Documentation. Adobe® Reader® isrequired to access and view product documentation from the installation panel.
Act! Premium Web Administrator's Guide i
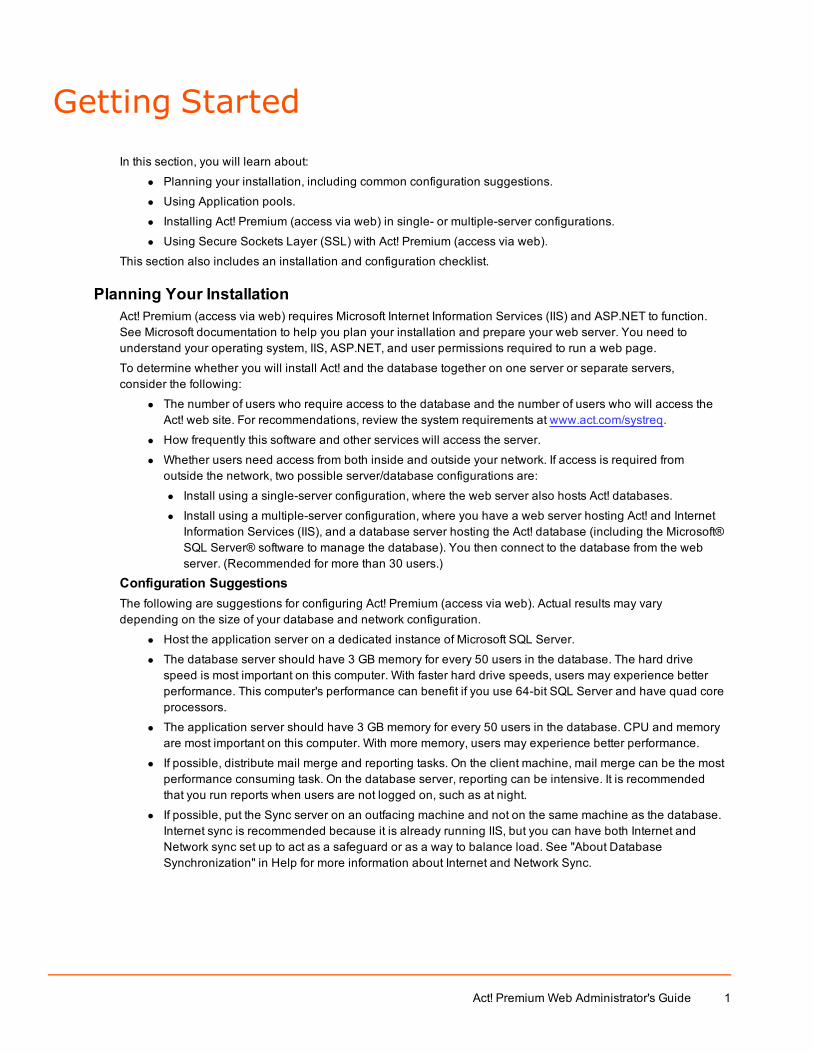
Getting StartedIn this section, you will learn about:
l Planning your installation, including common configuration suggestions.
l Using Application pools.
l Installing Act! Premium (access via web) in single- or multiple-server configurations.
l Using Secure Sockets Layer (SSL) with Act! Premium (access via web).
This section also includes an installation and configuration checklist.
Planning Your InstallationAct! Premium (access via web) requires Microsoft Internet Information Services (IIS) and ASP.NET to function.See Microsoft documentation to help you plan your installation and prepare your web server. You need tounderstand your operating system, IIS, ASP.NET, and user permissions required to run a web page.
To determine whether you will install Act! and the database together on one server or separate servers,consider the following:
l The number of users who require access to the database and the number of users who will access theAct! web site. For recommendations, review the system requirements at www.act.com/systreq.
l How frequently this software and other services will access the server.
l Whether users need access from both inside and outside your network. If access is required fromoutside the network, two possible server/database configurations are:
l Install using a single-server configuration, where the web server also hosts Act! databases.
l Install using a multiple-server configuration, where you have a web server hosting Act! and InternetInformation Services (IIS), and a database server hosting the Act! database (including the Microsoft®SQL Server® software to manage the database). You then connect to the database from the webserver. (Recommended for more than 30 users.)
Configuration SuggestionsThe following are suggestions for configuring Act! Premium (access via web). Actual results may varydepending on the size of your database and network configuration.
l Host the application server on a dedicated instance of Microsoft SQL Server.
l The database server should have 3 GB memory for every 50 users in the database. The hard drivespeed is most important on this computer. With faster hard drive speeds, users may experience betterperformance. This computer's performance can benefit if you use 64-bit SQL Server and have quad coreprocessors.
l The application server should have 3 GB memory for every 50 users in the database. CPU and memoryare most important on this computer. With more memory, users may experience better performance.
l If possible, distribute mail merge and reporting tasks. On the client machine, mail merge can be the mostperformance consuming task. On the database server, reporting can be intensive. It is recommendedthat you run reports when users are not logged on, such as at night.
l If possible, put the Sync server on an outfacing machine and not on the same machine as the database.Internet sync is recommended because it is already running IIS, but you can have both Internet andNetwork sync set up to act as a safeguard or as a way to balance load. See "About DatabaseSynchronization" in Help for more information about Internet and Network Sync.
Act! Premium Web Administrator's Guide 1

Using Application PoolsAn Internet Information Services (IIS) application pool is used to isolate ASP.NET web applications and helpincrease the stability and security of the applications. An application pool can include one or moreapplications. You can configure the level of isolation between them. For example, you can create anapplication pool for each application running on the same computer. If errors occur in one pool, they will notaffect applications running in other pools. By default, the installation creates an application pool named ACT.To create a custom application pool for Act!, see Knowledgebase Article #29044 for instructions.
Each application pool has one or more worker processes. A worker process is a process that runs the web site.The worker processes are unique to the application pool and are not shared across application pools. Aworker process is responsible for handling requests sent to a web server for a specific application pool.
Application Pool RecyclingApplication pools can be periodically recycled to avoid unstable states that can lead to application crashes,hangs, or memory leaks. By default, Microsoft sets application pool worker processes to recycle every 29 hoursor 1,740 minutes.
Note:We recommend that you reset the default recycling interval for the application pool assigned to Act! torecycle every 24 hours or 1,440 minutes. To do this, see "Changing the Default Recycling Interval for anApplication Pool" on page 16.
If desired, you can perform an on-demand recycle. An on-demand recycle is recommended after web usershave installed the Act! Scratchpad and/or configured integration with Google or Outlook. For steps on how toperform an on-demand recycle, see "Recycling an Application Pool" on page 16.
For more information about application pools, see Microsoft documentation.
Installing in Single- or Multiple-Server ConfigurationsThe following explains the differences and recommendations for installing Act! Premium (access via web) insingle- or multiple-server configurations.
Single-Server ConfigurationsYou can install Act! Premium (access via web) using a single-server configuration, where the web server alsohosts the database.
Note: If you are also using Act! Premium (Desktop) version, you cannot install Act! Premium (access via web)on the same server.
To deploy Act! Premium (access via web) in a single-server configuration, the impersonation user account youcreate should:
l Be added to the local Administrators group.
l Have permission to access the Act! database and database supplemental files.
Multiple-Server ConfigurationsFor scalability and enhanced performance, you can configure Act! Premium (access via web) to use multipleservers. The most common types of server configurations used are:
l One web server and one database server.
l Multiple web servers (with or without a database server).
l One or more web servers running multiple application pools. For more information about managingapplication pools in IIS, see Microsoft Help.
For a multiple-server configuration, the impersonation user account you create should:
l Be a standard domain user.
l Be added to the local Administrators group on all servers that are part of the Act! Premium (access viaweb) deployment.
l Have permission to access the database supplemental files for your Act! database on the databaseserver.
l Have permission to access all Act! files on the web server.
Act! Premium Web Administrator's Guide 2

You may have two or more instances of Act! Premium (access via web) hosted on one web server. In suchcases, you can use virtual directories or application pools to distinguish and secure each Act! Premium(access via web) web site.
Multiple Virtual DirectoriesYou can create multiple virtual directories within your default web site. For example, you may have twodirectories — one called Sales and one called Service. Users access the sites using a URL followed by thevirtual directory name (for example, http://domain.com/sales). You point each virtual directory to the Act!Premium (access via web) installation directory. The installation directory differs for your operating system.
TIP: For more information about configuring Act! Premium (access via web) using multiple virtual directories,see the Knowledgebase Article #14868.
Recommendations When Installing in Multiple-Server ConfigurationsThe following are recommendations when installing Act! Premium (access via web) in a multiple-serverconfiguration:
l If you have more than 50 users on a single web server, use multiple application pools.
l You may have two or more instances of Act! Premium (access via web) hosted on one web server. Insuch cases, you can use virtual directories or application pools to distinguish and secure each Act!Premium (access via web) site. You should also isolate any supplemental data for each web site.
l Disable all unnecessary Windows services on the web server, such as Network News Transfer Protocol(NNTP) or File Transfer Protocol (FTP).
l Allow access through the firewall only to the web server. Do not allow access to the database server.See your firewall documentation for instructions.
l When using more than one web server, you can set user preferences to be shared across multiple webservers. For more information, see "About User Preferences" on page 8.
Using Secure Sockets Layer (SSL) with Act! Premium (access via web)Secure Sockets Layer (SSL) uses an encryption key to encrypt data between a web server and client so thatothers cannot access it. You may want to configure SSL in your version of IIS if you plan to integrate Act! withanother application, such as Outlook. With SSL, communications between Act! Premium (access via web) andOutlook are secure. In IIS, you specify which portions of your Default Web Site to secure with SSL. You cansecure the entire Default Web Site or only a specific virtual directory or page.
Consider the following scenarios:
l If your web server only hosts Act! Premium (access via web), you can use SSL to secure the entireDefault Web Site. The Act! logon page and all child pages will be secured with SSL. You must precedeall URLs with "https" rather than "http."
l If other web pages are hosted on your web server, you can use SSL to secure only the virtual directorywhere the Act! software logon page is set up. The logon page and all pages within Act! Premium (accessvia web) will be secured with SSL. You must precede all URLs with "https" rather than "http."
Best practices if you plan to use SSL with Act! Premium (access via web):
l Add an exception for port 443 (the default port for SSL).
l If you plan to integrate with another application, such as Outlook, open the Web.config located at\\<install folder>\ApfwoutlookSrvc\ and comment out the UnSecured section and uncomment theSecured one. See "Editing the Outlook Service Web.config File to Use a Secured Service" on page 12.
l Have caching of encrypted pages/files turned On. Users accessing the web site will need to check theirbrowser settings to allow caching. See "Browser Requirements for Act! Premium (access via web)Users" on page 10.
To configure SSL on IIS, see Microsoft documentation.
Act! Premium Web Administrator's Guide 3

Using Act! Premium (access via web) in a 64-bit EnvironmentAct! is a 32-bit application. Depending on your version of IIS, additional steps may be required to ensure Act!Premium (access via web) and your other web applications run correctly.
l IIS 7 allows both 32-bit and 64-bit processes to run simultaneously. The Act! installation is optimized torun Act! on the same server as 64-bit operating systems. However, if you install some Microsoft products,such as SharePoint®, Exchange Server, or Outlook® Web Access, after you install Act! Premium (accessvia web), additional steps may be required. For help, see "Troubleshooting Act! Premium (access viaweb)" on page 17.
l IIS 6 does not allow 64-bit and 32-bit processes to run on the same server in their native modes. Wheninstalling Act! Premium (access via web) on IIS 6, you will receive a prompt to switch your 64-bit IIS andASP.NET applications to 32-bit compatibility mode. For help, see "Troubleshooting Act! Premium(access via web)" on page 17.
Installation and Configuration ChecklistThe following checklist outlines the tasks to install and configure Act! Premium (access via web).
ü Task Page#
Install or upgrade Act! using one of the following guides:
l Installing Act! for New Users
l Upgrading to Act! v16 from ACT! versions 2005 (7.x) and Later
l Upgrading to Act! v16 from ACT! versions 3.x, 4.x, 5.x (2000), or 6.x (2004)
Determine whether you will use a single-server or multiple-server configuration. 2
Create a Windows user account for ASP.NET impersonation. 5
Use the Web Site Administration tool to configure the web site. Provide users with access information. 6
ACT! for Web 2005 or 2006 users only: Copy files and folders for user preferences. 8
Set up shared preferences across web servers. 9
Have users configure supported browsers. 10
Have users integrate Act! Premium (access via web) with other applications. Important: Be sure to recycle theapplication pool after users have installed integration components. 12
Act! Premium Web Administrator's Guide 4

Setting Up Act! Premium (access via web)Administrators must perform several steps to set up and configure Act! Premium (access via web). Users mustconfigure a supported browser and get the web address URL from the Administrator.
In this section, Administrators will learn how to:
l Understand the ASP.Net process and impersonation user accounts
l Create a Windows user account for ASP.NET impersonation.
Upgrade Web User. Youwill have aWindowsuser account for ASP.NET impersonation already set up for yourexisting web site. This impersonation user should not be affected during upgrade or previous version uninstall. Youmaywant to test theWindowsuser account after upgrading.
l Use the Web Site Administration tool to set up access to Act! Premium (access via web).
l Provide access to the software from inside and outside a common network.
l Provide access to the software from a mobile device.
l Set up shared user preferences across web servers (optional).
l Instruct users how to configure supported browsers to allow access to Act!.
Understanding the ASP.NET Process and Impersonation User AccountsAn ASP.NET process account is required for ASP.NET to function. It is usually managed by Windows®, and itrequires the permission: Impersonate a client after authentication. The default account name varies,depending on the operating system on your web server. The Web Site Administration tool lets you test theASP.NET process account to verify it exists and is properly configured. For more information about configuringand troubleshooting the ASP.NET process account and service, see the Knowledgebase atwww.act.com/knowledgebase.
The Act! Premium (access via web) software uses ASP.NET to access the database and other files. You createa Windows user account, and then use the Web Site Administration tool to configure the software to use thataccount. An impersonation account is required to let a user who does not have access to the networkimpersonate a user who does. This gives an ASP.NET application access to Windows resources using theaccount you provide.
Upgrade Web User. Youmaynot need to create a new impersonation user when upgrading Act!. The impersonationuser assigned in your previous version should be retained and usable after upgrading the software.
Creating a Windows User Account for ASP.NET ImpersonationThe following section explains how an Administrator creates a Windows user account for ASP.NETimpersonation. In a multiple-server configuration, the impersonation user account should:
l Be a standard domain user.
l Be added to the local Administrators group on all servers that are part of the Act! Premium (access viaweb) deployment.
Note: Depending on your operating system, the following steps may differ.
Create a Windows user account for ASP.NET impersonation1. To create a new user account, open Local Users and Groups. Specific steps to do this depend on
your operating system. For example, on Windows Server® 2008, you can use the ServerManager>Configuration menu to access Local Users and Groups.
2. Expand Local Users and Groups, and then click the Users folder.
Act! Premium Web Administrator's Guide 5

3. Use your operating system's menus to create a new user. For example, on Windows Server 2008, youclick the Actionmenu, then click New User.a. Type a User name (this would be the user’s logon name, for example, "actimpersonator") and a
Full name (this can be the same as the User name).b. Type a password and confirm it.
c. Clear the User must change password at next logon check box.d. Click Create. Then, click Close.e. Write down the User name and password because you will need it later when you use the Web
Site Administration tool to test the impersonation user.
Next, add the new user to a group that has access permissions. For the impersonation account, add itto the Administrators group.
4. Right-click on the name of the user you created. Click Properties. (The step might differ for youroperating system.)
a. In the Properties dialog box, click the Member Of tab. Click Add.b. In the Select Groups dialog box, in the Enter the object names to select box, type the word
Administrators.c. Click Check Names to resolve the Administrator’s group. (The group name will appear
underlined.)
d. Click OK.5. Close all dialog boxes.
Using the Web Site Administration ToolUse the Web Site Administration tool to:
l Validate that an ASP.NET process account exists and is correctly configured on the web server.
l Specify and test the Windows user account for ASP.NET impersonation.
l Assign an Act! database to a virtual directory.
You do not need to exit the tool as you move through the tabs to complete the setup. For more informationabout using the features in the Web Site Administration tool, see "About the Web Site Administration Tool" inHelp.
Upgrade Web User. If you removed the database from your Act! web site before upgrading, you will need to assignthe upgraded database to the web site so that users can access it.
For the first task, an Administrator must validate that an ASP.NET process account exists and is correctlyconfigured on the web server.
Note: To access this feature, you must be running Windows as an administrator or disable User AccessControl (UAC). See your operating system's help for how to do these tasks first.
Test the ASP.NET process account1. On the Tools menu, clickWeb Site Administration.2. On theWeb Server tab, click Test. A message appears.
l If the test is successful, click OK.l If the test is not successful, an error message appears. This may indicate that an ASP.NET process
account does not exist or is incorrectly configured. Click OK to close the message. For help, see"Troubleshooting Act! Premium (access via web)" on page 17.
Correct any errors and repeat step 2 until the test is successful. The test must be successful beforeyou can access the User Account tab.
The second task is to specify and test the Windows user account for ASP.NET impersonation.
Act! Premium Web Administrator's Guide 6

Upgrade Web User. Your existingWindowsuser account for use in ASP.NET impersonation that you set up for yourWeb version should be available after installation. You will not need to clickEdit or make changes. Proceed to the teststep. If the test is not successful, youmayhave to create a newWindowsuser account for ASP.NET impersonation.
Specify and test the Windows user account for ASP.NET impersonation1. Click the User Account tab.2. Click Edit.
a. From theWindows Domain list, select the domain for your impersonation user. (Your domain mayalready appear in the list.) If you receive an error message that the Web Site Administration tool isunable to access the Windows domain, the Windows User Name does not exist, or you entered aninvalid password, correct the errors, and try again.
b. Type the user name and password you set up for the Windows user account. Click OK.3. Click Test. A message appears.
l If the test is successful, click OK.l If the test is not successful, or the ASP.NET process account does not have the required access to
the registry key, an error message appears. This may indicate that the impersonation user doesnot have the required access to files and folders. Click OK to close the message. For help, see"Troubleshooting Act! Premium (access via web)" on page 17.
If necessary, correct errors and repeat the steps until the test is successful. The test must besuccessful before you can access the Add/Remove Database tab.
During installation, Act! Premium (access via web) creates a default virtual directory called "apfw". Users willneed this default virtual directory name and the URL of your web server to access the product.
On the Add/Remove Database tab of the Web Site Administration tool, you assign Act! Premium databases tothis virtual directory. Then, users can open their web browser and type in the web address to open the productand log on to an assigned database.
Assign a database to a virtual directory1. On the Add/Remove Database tab, in theWeb site list, the name Default Web Site appears. This
means the application is looking in the Default Web Site directory of IIS. If you created a custom website, select it from the list.
A list of available virtual directories for the selected web site appears in the Virtual directories box.
2. In the Virtual directories box, by default, APFW appears for Default Web Site. If you have a customweb site and virtual directory, select the virtual directory from the list.
3. To add a database to the virtual directory, click Add.a. Browse to the database to associate with your selected virtual directory. Click OK.b. When prompted to log on, enter your user name and password. Click OK.c. A Test is Successful message should appear. If it does not appear, click TestDB.
l If the test is successful, click OK.l If the test is not successful, an error message appears. This may indicate that the
impersonation user account does not have the required access. Click OK to close themessage. For help, see "Troubleshooting Act! Premium (access via web)" on page 17.
Act! Premium Web Administrator's Guide 7

Changing the Session Timeout LimitIf desired, you can change the default session timeout limit which controls how long users can be idle andremain logged on to Act! Premium (access via web). The default setting is 20 minutes. For security purposes,we recommend a maximum limit of two hours.
Change the session timeout limit1. On the Options tab, from the Session timeout list, select a timeout limit. Click Apply.2. If a message appears, click Yes to continue.3. Click Close.
Microsoft IIS services are automatically restarted so the new session timeout limit can take effect.
How Users Access Act! Premium (access via web) and Act! Premium MobileFor users to have access to Act! Premium (access via web) using a browser or mobile device, an Administratormust add them to the database and assign them a user role. The number of users is dependent on thepurchased licenses and how many users have "Active" status. For more information on adding users, see"Adding, Editing, or Deleting Users" in Help.
After adding the user to the database, provide the web address for Act! Premium (access via web). Thisaddress consists of the virtual directory name appended to the web site URL. When accessing Act! PremiumMobile, Act! automatically adds /m to the web address.
Access from Inside a Common NetworkIf the web server and users are on a common network, users can access the software using the networkcomputer name of the web server. In the two examples below, that name is “salesweb” and “teamwebserver.”
Examples are:
l http://salesweb/apfw, where “salesweb” is your site URL, and “apfw” is the virtual directory name
l http://teamwebserver/apfw
Access from Outside a Common NetworkUsers cannot use the network machine name to access the software from outside the common network.Instead, provide an external IP address or a URL for a registered domain name. In the examples below, thatinformation is "12.129.78.35" or "www.yourcompanyname.com."
Examples are:
l http://www.xxx.com:8080/apfw, where "www.xxx.com" is your site domain name and "8080" is the portnumber used to access the site
l https://www.xxx.com:443/apfw, where "www.xxx.com" is your site domain name and "443" is the securedport used to access the site
l http://12.129.78.35/apfw, where "12.129.78.35" is the external IP Address
l http://www.yourcompanyname.com/apfw
Setting up external Internet access to Act! Premium (access via web) may require additional configuration.Refer to Microsoft IIS Help or contact your Internet Service Provider for assistance.
Act! Premium Web Administrator's Guide 8
About User PreferencesAct! Premium (access via web) stores user preferences in a WebPreferences.xml file on the web server thathosts the product. Preferences let users customize name and salutation settings, change background colorsand fonts, create custom spelling check dictionaries, and set other options for how they use Act! Premium(access via web). In some cases, you may want to distribute web requests across multiple web servers. If youdo this, each web server will have a unique set of stored user preferences. If a user changes a preferencewhen logged onto server 1, that change will not be reflected on server 2.
To make sure users have the same settings, you can set up a shared location to store user preferences. Then,when a user logs on, their user preferences will be the same no matter what server responds to their logonrequest.
Depending on your operating system, user preferences are stored at:
l \\Windows\System32\inetsrv\ACT\ACT forWeb\Preferences
l \\Users\[Impersonation User]\AppData\Roaming\ACT\ACTfor Web\Preferences.
ACT! for Web 2005 or 2006 Upgrade Users Only.Because the storage location for user preferences changed afterthe ACT! for Web 2006 release, some preferencesmaybe lost after upgrading. To restore these user preferences,copyall files and folders from the old preference location to the new preference location and reset IIS. See Help for stepson how to reset IIS.
Setting Up Shared User Preferences Across Web ServersThe following section explains how to set up a shared location to store user preferences for web users. Youwould want to do this if you distribute web requests across multiple web servers.
Note: If the shared preference storage location is offline when a web user logs on, the preferences that arestored locally on the user’s system are accessed for the duration of the session.
Set up shared user preferences1. Identify the web servers that host Act! Premium (access via web).
2. Verify that the impersonation user is the same for each web server in the cluster.
3. Select a computer that all of the web servers can access (for example, Preference_Server).
a. On this computer, create and name a folder to store the shared preferences. (For example,SharedPrefs.)
b. Share the folder you created. Grant Change and Read permission to your impersonation useraccount.
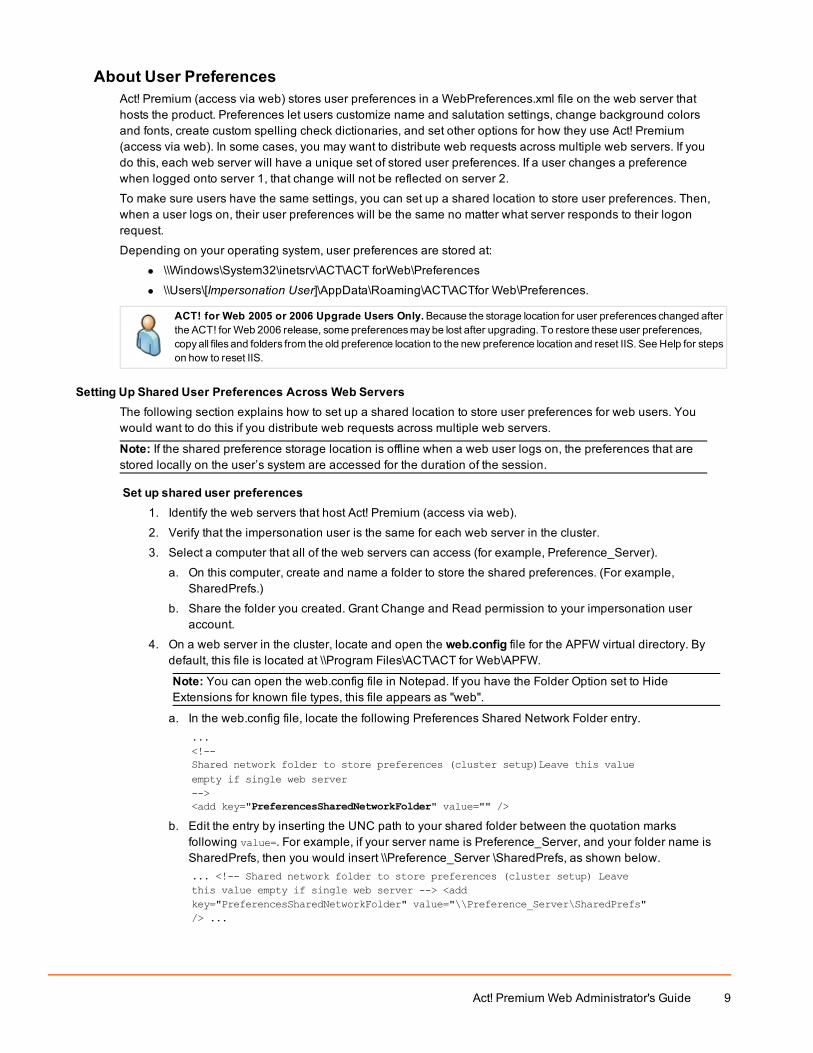
4. On a web server in the cluster, locate and open the web.config file for the APFW virtual directory. Bydefault, this file is located at \\Program Files\ACT\ACT for Web\APFW.
Note: You can open the web.config file in Notepad. If you have the Folder Option set to HideExtensions for known file types, this file appears as "web".
a. In the web.config file, locate the following Preferences Shared Network Folder entry....<!--Shared network folder to store preferences (cluster setup)Leave this valueempty if single web server--><add key="PreferencesSharedNetworkFolder" value="" />
b. Edit the entry by inserting the UNC path to your shared folder between the quotation marksfollowing value=. For example, if your server name is Preference_Server, and your folder name isSharedPrefs, then you would insert \\Preference_Server \SharedPrefs, as shown below.... <!-- Shared network folder to store preferences (cluster setup) Leavethis value empty if single web server --> <addkey="PreferencesSharedNetworkFolder" value="\\Preference_Server\SharedPrefs"/> ...
Act! Premium Web Administrator's Guide 9

c. Save and close the web.config file.5. Repeat Steps 4a-c on the remaining web servers in the cluster. If all web servers in the cluster use the
same configuration, you can copy the modified web.config file to the other web servers.
Tip: You can use Windows Distributed File Services (DFS) to replicate one web.config file across allservers. See Windows documentation for help.
Configuring Supported Browsers (Web Users)To open Act! Premium (access via web), users must have a supported web browser. To see supportedversions, go to www.act.com/systreq. For Act! Premium (access via web) to function properly, each browserhas required settings. In addition, depending on your browser choice, some features are not available.
The following sections describe the required settings and feature limitations for each browser.
Required Browser SettingsTo access and use Act! Premium (access via web) with a supported browser, the following settings arerequired.
BrowserOption Setting
Internet Explorer®Generaltab l Under Browsing History, click Settings. Select Check for newer versions of stored pages Automatically.
Securitytab
l Under Trusted Sites, click Sites and clear Require server verification (https:) for all sites on this zone.l To the list of trusted sites, add Act! Premium (access via web) and about: internet.(1)
l Use the Default Level for security (Low).
l Click Custom level and enable (or set to prompt) Initialize and script ActiveX controls not marked safefor scripting(2) and Drag and drop or copy and paste files (allows access to Windows clipboard).
Privacytab
l Click Advanced. Enable Override automatic cookie handling, Accept First-Party Cookies, and AcceptThird-Party Cookies.
l Clear Turn on Popup Blocker.
Advancedtab
l If your Act! Premium (access via web) web site is configured to use Secure Sockets Layer (SSL), underSecurity, clear Do not save encrypted pages/files to disk. It is best practice to have caching of encryptedpages/files turned on when using Act! Premium (access via web) over SSL.
Mozilla® Firefox®Privacypanel
l Under History, from the Firefox will list, select Use custom settings for history.l Select Accept cookies from sites and Accept third-party cookies.
Contentpanel
l If selected, clear Block pop-up windows.l Click Exceptions and add the Act! Premium (access via web) site domain to the list.
l Select Enable JavaScript.
SSLcaching
If your Act! Premium (access via web) web site is using Secure Sockets Layer (SSL), ensure thecaching for SSL is set to "True".
1. Open Firefox and in the address bar of the browser, type about:config.2. Scroll down to browser.cache.disk_cache_ssl, and double-click it to change the setting:
l “True” indicates SSL content will be cached.
l “False” indicates SSL content will not be cached.Mobile Browsers
l Turn JavaScript On.l Accept Cookies "Always" or "From Visited"
l Turn Private BrowsingOff.
*Mozilla and Firefoxare registered trademarksof theMozilla Foundation.
Act! Premium Web Administrator's Guide 10

Browser LimitationsEach supported browser has limitations when used with Act!. This means there are certain features orfunctions you cannot perform in Act! Premium (access via web).
Internet Explorer
l View Source function is not available.
l Right-click shortcut menu is not available
Firefox and Chrome
l The Act! Word Processor is not available.
l Mail Merge is not available.
l Mobile device browser versions are not supported.(1) Required for WebHelp to open onWindowsServer® 2003 or WindowsServer 2008. The Help file is an uncompiledWebHelpsystemwhich includes theMarkof theWeb (MOTW) setting in each Help topic (.htm). TheMOTWsetting has the "about:internet"text embedded into each Help topic.
(2) Configuring ActiveX® security is required to allow install of word processing controls to create templatesand documents. Usersneed to install two ActiveX controls. If your client-side web security policies prohibit users from installing ActiveX controls, add boththe domain associated with your Act! Premium (access via web) server installation andMicrosoft.com to the Trusted Sites zone inInternet Explorer. Configure Internet Explorer to prompt userswhen installing ActiveX controls only for sites in the Trusted Siteszone. Doing this bypasses the ActiveX security constraints only for the necessary controls.
Act! Premium Web Administrator's Guide 11
Integrating With Other ApplicationsYou can integrate Act! Premium (access via web) with:
l The Act! Scratchpad.
l Microsoft Word, Outlook, and Excel®.
l Google.
The Act! Scratchpad is a separate application that lets users enter and manage tasks, to-do items, and more.They can enter personal or work-related items in the Act! Scratchpad and create notes, histories, and activitiesin Act! Premium (access via web) from items entered. Integration with the Act! Scratchpad requires that usersmust install Act! Scratchpad to place an icon on their desktop. Users open Act! Scratchpad and set their Sendto Act! preferences to specify a database to receive the note, history, or activity.
Integration with Word, Outlook, and Google requires configuration by an Administrator and users. Some of theAdministrator tasks must be done before users can set up integration with other applications. Integration withExcel does not require any configuration; however, all Microsoft applications must be installed on the computerbefore installing Act!.
This section explains the Outlook and Google requirements as well as the tasks for an Administrator and usersto set up integration with other applications.
Tasks an Administrator can do before users set up integration are:
l Edit the Outlook Service web.config file to use a secured service if you have configured IIS to SecureSockets Layer (SSL).
l Edit the web.config file to allow users access to Outlook from outside the network.
Tasks a user can do are:
l Install the Act! Scratchpad and set Send to Act! preferences.
l Install the Microsoft Word component.
l Install the integration component to use with Outlook integration (email, contacts and calendar sync) orGoogle integration (contacts and calendar sync and Gmail record history).
After users have installed the integration component and set up their integration preferences with eitherOutlook or Google, an Administrator can recycle the Act! application pool so that the application refreshes andintegration tools and menus are available.
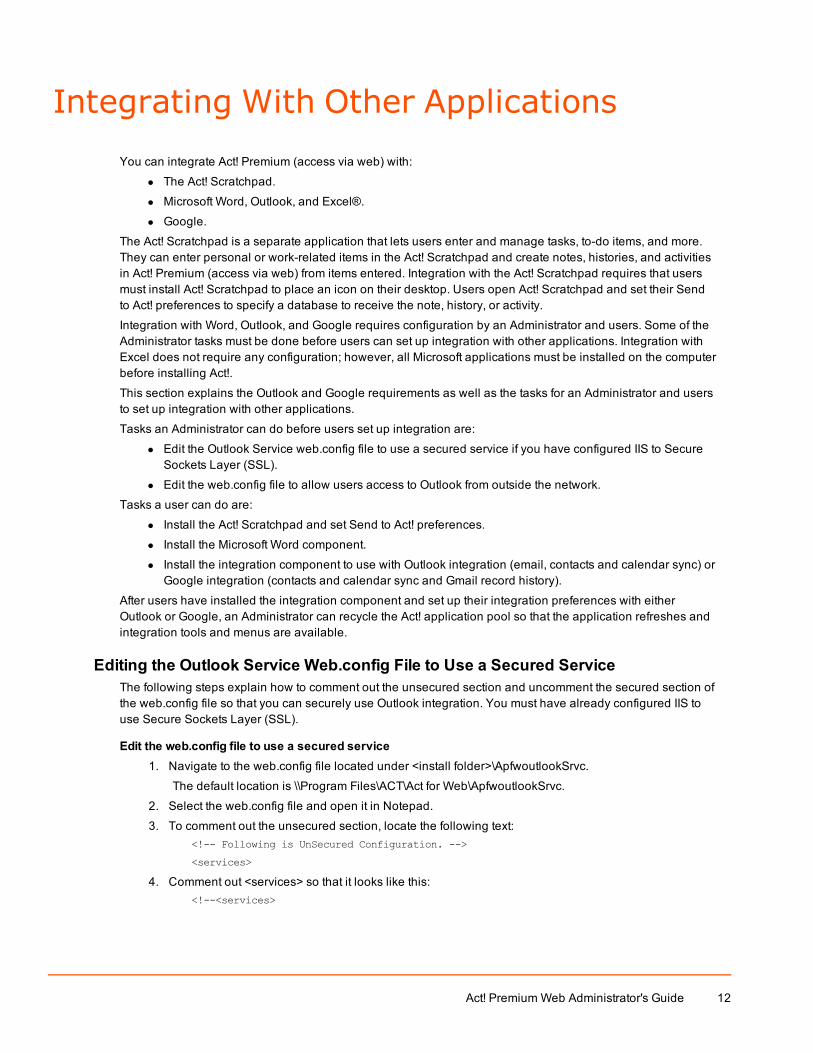
Editing the Outlook Service Web.config File to Use a Secured ServiceThe following steps explain how to comment out the unsecured section and uncomment the secured section ofthe web.config file so that you can securely use Outlook integration. You must have already configured IIS touse Secure Sockets Layer (SSL).
Edit the web.config file to use a secured service1. Navigate to the web.config file located under <install folder>\ApfwoutlookSrvc.
The default location is \\Program Files\ACT\Act for Web\ApfwoutlookSrvc.
2. Select the web.config file and open it in Notepad.
3. To comment out the unsecured section, locate the following text:<!-- Following is UnSecured Configuration. -->
<services>
4. Comment out <services> so that it looks like this:<!--<services>
Act! Premium Web Administrator's Guide 12

5. Locate the following text:</services>
<!-- End of Unsecured Configuration. -->
6. Change </services> so that it looks like this:</services> -->
7. To uncomment the secured section, locate the following text:<!-- Following is SSL Secured Configuration. Please comment UnsecuredConfiguration above and un-comment SSL secured configuration below in orderto enable Security over SSL -->
<!--<services>
8. Uncomment <!--<services> so that it looks like this:<services>
9. Save the file.
10. Reset IIS.
Editing the Web.config File for Outlook IntegrationThe following steps explain how to edit the web.config file located under the APFW directory to allow usersaccess to Outlook from outside the network.
Note: You must also configure your firewall to permit access from outside the network. For more information,see your firewall documentation.
Edit the web.config file1. Navigate to the APFW folder on the server where Act! Premium (access via web) is installed. By
default, the file is located at \\Program Files\ACT\Act for Web\APFW.
2. Select the web.config file. Open it in Notepad.3. Locate the Act.Web.OutlookWebServiceAddress parameter, which looks similar to the following:
<add key="Act.Web.OutlookWebServiceAddress" value="http://www.xxx.com:8080/apfw"/>
4. Replace the text following "value=" with the IP address or domain name for the Act! Premium (accessvia web) site.
5. On the File menu, click Save.After editing the web.config file, let users know they can install the integration component.
Installing the Act! ScratchpadThe following steps explain how a user installs the Act! Scratchpad to use it with Act! Premium (access viaweb). It only needs to be installed once.
Install Act! Scratchpad1. On the Tools menu, click Install Act! Scratchpad.2. At the message prompt, click Yes.3. On the dialog box that appears, click Save to save the compressed (.zip) file to a location on your
computer. For example, save it to the Desktop.
4. When the process is complete, extract the files. Use a program like WinZip® to extract the files.
5. Double-click the setup.exe file to install the Act! Scratchpad. Select or accept all actions required foryour operating system to install it.
After installation, a shortcut named Act! Scratchpad (Web) is placed on your desktop. Double-click theshortcut to open Act! Scratchpad.
Act! Premium Web Administrator's Guide 13

Next Stepl Open Act! Scratchpad and set your Send to Act! preferences. For more information, see "Setting My
Send to Act! Preferences" in Help.
Installing a Mail Merge Component to Use Microsoft WordThe following steps explain how users can install a mail merge component to use Microsoft Word for creatingletters and other documents, and performing mail merges. If users plan to use the Act! Word Processor insteadof Word, skip this installation.
Upgrade Web User. To record history and editWord documents, usersmust first uninstall the existingMailMergecomponent, and then download and install the current version of the component. Use Add/Remove Programs touninstall the existing version.
Install the Mail Merge component to use Microsoft Word1. Close Word.
2. Open Act!.
3. On the Tools menu, click Preferences.4. Click theWord Processor hyperlink.5. In theWord Processor Preferences dialog box, selectMicrosoft Word from the list.
6. Click the Download button.
Note: If the integration component cannot be downloaded, check to see if the Act! site URL is addedto the Trusted Sites zone.
7. When prompted to run or save the file, click Run. Follow all remaining prompts to install the integrationcomponent. Click Finish.
8. Click OK.
Setting Up Integration with Outlook or GoogleUsers can integrate Act! Premium (access via web) with Microsoft Outlook or Google. Integration allows Act! toadd to and use features of Outlook or Google, such as:
l Outlook email including Act! address books (contacts) and Quick Attach for emails.
l Outlook calendar and/or contacts synchronization.
l Google integration including calendar and/or contact synchronization and recording history of Gmailmessages to contacts.
Users can install the integration component once to use it with either Outlook or Google.
Note: Users should synchronize their calendar and contacts with either Outlook or Google, but not both.Synchronizing with both applications may cause duplicate data.
The following sections describe the integration requirements and how users can install the integrationcomponent.
Outlook Integration RequirementsTo set up integration between Act! and Outlook, users need:
l A compatible version of Microsoft Outlook. For supported versions, see system requirements at:www.act.com/systreq.
l Outlook installed and working correctly.
l An Outlook profile set up.
Google Integration RequirementsTo set up the integration connection between Act! and Google, users need:
l Internet access to a Google account.
l A Google account username and password.
l Authorization for Act! to access the Google account.
Act! Premium Web Administrator's Guide 14

l To have logged on to their Google calendar at least once before setting up calendar integration withAct!.
l (Recommended) Google added to their web browser's Trusted Sites list.
l .NET Framework 4.0. If .NET Framework is not detected, it will be installed with the Google Integrationcomponents.
Installing the Integration ComponentUsers only need to install the integration component once to use it with either Outlook or Google.
Install the integration component1. Close the application to integrate with. For example, if users plan to integrate with Outlook, close it.
2. Open Act! Premium (access via web).
3. Depending on the task users are attempting, have them do one of the following:
l If users are setting up Outlook email: On the Tools menu, click Preferences. Click the E-mailhyperlink. Then, in the E-mail Integration box, click the Download button.
l If users are setting up Outlook contacts/calendar sync: On the Tools menu, click Preferences.Click the Outlook Synchronization hyperlink.
l If users are setting up Google integration: On the Tools menu, point to Integrate with Google, andthen click Google Integration Preferences.
Note: If the integration component cannot be downloaded, check to see if the Act! Premium(access via web) site URL is added to the Trusted Sites zone.
4. If a message appears, read it and click Install.5. When prompted to run or save the file, click Run. Follow all remaining prompts to install the integration
component. Click Finish.
Important: After the first user downloads and installs the integration component, the Administratormust now reset IIS on the web server to complete Google or Outlook integration setup. Anysubsequent downloads and installs of the integration component by other web users do not requirean IIS reset.
6. If users are setting up Outlook contacts/calendar sync and have installed the integration componentusing the Outlook Synchronization hyperlink, users must then install the APFWOutlookDetect add-on.
a. Click the browser information bar.
If the browser information bar does not display, go to the Tools menu and click Preferences. ClickNo when prompted to install additional software.
b. Click Run Add-on.c. When the security warning appears, click Run.
Next Stepsl Open Act! Premium (access via web) and set up email and calendar/contacts synchronization with
Outlook or integration with Google. See Help for steps on how to do this.
l An Administrator must recycle the application pool so that integration tools and menus are available inAct!. See the next section.
Act! Premium Web Administrator's Guide 15
Recycling an Application PoolAn Administrator may have to immediately recycle an application pool instead of waiting for the nextconfigured recycle. Rather than abruptly stopping it, which can cause service interruptions, you can use on-demand recycling. You would do an on-demand recycle after users have installed the Act! Scratchpad and/orinstalled integration components.
The following steps explain how to use the IIS Manager to recycle an application pool on demand.
Recycle an application pool using the IIS Manager1. To open IIS Manager using the Run dialog box, do one of the following for your operating system:
l On the Start menu, click All Programs, click Accessories, and then click Run.l On the Start menu, click Run.In the Open dialog box, type inetmgr. Click OK.
2. Expand the local computer and click Application Pools.3. Select the Act! Premium (access via web) application pool. By default, it is ACT. If you have created a
custom application pool, select it.
4. On the Actions menu, or on the right pane, under Application Pool Tasks, click Recycle. If aconfirmation message appears, click Yes
5. Close IIS Manager.
If desired, you can change the default recycling interval. The next section describes why and how.
Changing the Default Recycling Interval for an Application PoolMicrosoft sets the default recycling interval at 1,740 minutes (29 hours) to restart an application pool. Werecommend you change the interval to 1,440 minutes (24 hours). A shorter recycling interval may help withapplication crashes and recovery of system resources.
Change the default recycling interval for an application pool1. To open IIS Manager using the Run dialog box, do one of the following for your operating system:
l On the Start menu, click All Programs, click Accessories, and then click Run.l On the Start menu, click Run.In the Open dialog box, type inetmgr. Click OK.
2. Expand the local computer and click Application Pools.3. Do one of the following:
l Right-click the Act! application pool, and select Properties. By default, Act! Premium (access viaweb) uses the ACT application pool. On the Recycling tab, for Recycle worker processes (inminutes), change 1740 to 1440. Click OK.
l On the right pane, under Edit Application Pool, click Recycling. Under Fixed Intervals, forRegular time intervals, change 1740 to 1440. Click Next. Click Finish.
4. Close IIS Manager.
Act! Premium Web Administrator's Guide 16
Troubleshooting Act! Premium (access viaweb)
This section helps you identify solutions to:
l Web Site Administration tool errors.
l General configuration issues or errors.
Troubleshooting Web Site Administration Tool ErrorsThis section describes how to troubleshoot error messages received while configuring your software. Whentroubleshooting, you may also refer to the Web Site Administration tool log file (AFWAdminLog.log) and thevalidation log file (validate.txt). These files may provide information about user permissions and errorsdisplayed in the tool, such as ASP.NET and HTTP errors. The Web Site Administration tool must be closed tocreate an updated log file. Log files are located in: <Act! installation path>\ACT\ACT for Web\Logs.
Additional information for troubleshooting the Web Site Administration tool is provided in the Act!Knowledgebase.
Tip: To bypass errors in the Web Site Administration tool, hold down the SHIFT or CTRL key and clickanother tab. For example, you may want to view information on another tab before completing theconfiguration.
Web Server and User Account Tabs
Microsoft SharePoint® software detected. Additional configuration may be required toenable Act! Premium (access via web) to run.
Cause:l SharePoint was detected on the web server. Some installations of SharePoint modify the
default web site and ASP.NET service configuration.
Solution:l You many need to perform additional steps for the Act! Premium (access via web) web
site and other applications to function. The following commands may help resolve issuesthat may occur if you install some Microsoft products after installing Act!.REM - Enable Act! for Web to run on SBS server 2011 which has 64 bit Web appsExchange and Outlook Web Access installed. It should also apply to situationswhere Exchange or Outlook has been installed on other versions of server OSbefore or after installing Act!.REM - This only applies to Act! Premium (access via web) 2013 Service Pack 1and later. Act! uses a new AppPool separate from the Default App Pool to allow32 and 64-Bit apps to run on the same server.
REM - Making prior versions of Act! (2013 and earlier) work in concert withExchange and Outlook requires creating and configuring a new AppPool for Act!to run in 32-Bit compatibility mode and reverting that setting on all the existingAppPools (i.e. restore the "Enable 32-Bit Applications" setting to False for theexisting AppPools.). If any AppPools or Virtual Directories have been customizedin your environment, please make changes accordingly.REM - Make a backup of the IIS config file.%SystemRoot%\System32\inetsrv\appcmd.exe add backupACTapphostconfigbackup
Act! Premium Web Administrator's Guide 17

Microsoft SharePoint® software detected. Additional configuration may be required toenable Act! Premium (access via web) to run.
REM - Several modules on a 64-Bit server cause conflicts with 32-Bit web apps.They are each handled differently. Unlock the Static and Dynamic compressionmodules globally, so that they can be configured individually for each virtual site.%SystemRoot%\System32\inetsrv\appcmd.exe set config -section:system.webServer/modules/[name='DynamicComp(acceressionModule'].lockItem:false /commit:apphost%SystemRoot%\System32\inetsrv\appcmd.exe set config -section:system.webServer/modules/[name='StaticCompressionModule'].lockItem:false /commit:apphostREM - Remove the Static and Dynamic compression modules from each Act!virtual site/virtual directory.%SystemRoot%\System32\inetsrv\appcmd.exe delete moduledynamiccompressionmodule /app.name:"Default Web Site/APFW"%SystemRoot%\System32\inetsrv\appcmd.exe delete modulestaticcompressionmodule /app.name:"Default Web Site/APFW"%SystemRoot%\System32\inetsrv\appcmd.exe delete moduledynamiccompressionmodule /app.name:"Default Web Site/AFWValidationSrvc"%SystemRoot%\System32\inetsrv\appcmd.exe delete modulestaticcompressionmodule /app.name:"Default Web Site/AFWValidationSrvc"%SystemRoot%\System32\inetsrv\appcmd.exe delete moduledynamiccompressionmodule /app.name:"Default Web Site/APFWMailMergeSrvc"%SystemRoot%\System32\inetsrv\appcmd.exe delete modulestaticcompressionmodule /app.name:"Default Web Site/APFWMailMergeSrvc"%SystemRoot%\System32\inetsrv\appcmd.exe delete moduledynamiccompressionmodule /app.name:"Default Web Site/APFWOutlookSrvc"%SystemRoot%\System32\inetsrv\appcmd.exe delete modulestaticcompressionmodule /app.name:"Default Web Site/APFWOutlookSrvc"REM - Add a pre-Condition for 64-bit only on these modules, so that they will notload with the ACT appPool. These are authentication modules for ExchangeServer.%SystemRoot%\System32\inetsrv\appcmd.exe set config -section:system.webServer/globalModules/[name='PasswordExpiryModule'].preCondition:bitness64 /commit:apphost%SystemRoot%\System32\inetsrv\appcmd.exe set config -section:system.webServer/globalModules/[name='kerbauth'].preCondition:bitness64 /commit:apphost%SystemRoot%\System32\inetsrv\appcmd.exe set config -section:system.webServer/globalModules/[name='exppw'].preCondition:bitness64 /commit:apphostREM - Add a pre-Condition for 64-bit only on these isapiFilters. Be sure to includethe "Default Web Site" on the end of the command.%SystemRoot%\System32\inetsrv\appcmd.exe set config -section:system.webServer/isapiFilters /["name='Exchange OWA CookieAuthentication ISAPI Filter'"].preCondition:bitness64 /commit:apphost "DefaultWeb Site"%SystemRoot%\System32\inetsrv\appcmd.exe set config -section:system.webServer/isapiFilters /["name='Exchange ActiveSync ISAPIFilter'"].preCondition:bitness64 /commit:apphost "Default Web Site"REM - Disable Rapid Fail Protection mode for the ACT appPool. This protectionwill terminate the appPool if it throws a number of errors. This can cause users toreceive a 505/503 Service Unavailable response from the web with no usefulinformation as to why.
Act! Premium Web Administrator's Guide 18

Microsoft SharePoint® software detected. Additional configuration may be required toenable Act! Premium (access via web) to run.
%SystemRoot%\System32\inetsrv\appcmd.exe set config -section:system.applicationHost/applicationPools/[name='ACT'].failure.rapidFailProtection:False /commit:apphostREM - Use the following command to undo the changes made to the IIS config fileif necessary.REM - %SystemRoot%\System32\inetsrv\appcmd.exe restore backupACTapphostconfigbackup
The ASP.NET process account does not exist or is not configured properly.
Causes:l The ASP.NET service is not available.
l Non-default IIS settings, such as an assigned IP address or host headers, are configured.
l Read permissions are not set.
Solutions:l Verify that the ASP.NET service is available.
l Verify the configuration of the ASP.NET process account.
l Manually configure users and permissions as described in Knowledgebase Article#14867.
User Account Tab
Unable to retrieve Windows domain information at this time. This information is required toedit the Windows User Account. Please check with your network administrator and tryagain later.
Cause:l The Windows domain information is unavailable.
Solution:l See your network administrator to verify that you have access to the domain.
The ASP.NET process does not have permission to access or run Act! Premium (accessvia web).
Cause:l The ASP.NET process account does not have the permissions on the web server to run
Act! Premium (access via web).
Solution:l This account requires Read permission for the registry key that contains the encrypted
impersonation user credentials. Verify the correct account for your web serverconfiguration.
Act! Premium Web Administrator's Guide 19

The impersonation user account does not have access to files and folders required to runAct! Premium (access via web) on your web server.
Cause:l The Access to program files and folders or registry permissions required to run Act!
Premium (access via web) has not been granted to the impersonation user account.
Solution:l Verify that the user is at least a domain user and part of the local Administrators group,
and then set the appropriate permissions to the Act! files and folders on the server.
The Windows user account information you have entered is invalid. Please check the username and password and try again.
Causes:l The Windows user name or password you entered does not exist in the selected
Windows domain.
l The option to force users to change their password at logon has been selected.
Solutions:l Verify that you entered the correct user name for the selected domain. If you did, you may
need to create a user. For more information, see "Creating a Windows ImpersonationUser Account" on page 5.
l For the impersonation user account, clear the User must change password at next logoncheck box.
Add/Remove Databases Tab
The impersonation user account does not have access to the database you selected.
Cause:l The impersonation user specified on the User Account tab does not have permission to
access the program files and folders or registry permissions required to run Act! Premium(access via web).
Solution:l Verify that the user has the appropriate permission to access all Act! files and database
supplemental files on the server.
The web page fails to load after selecting a web site and virtual directory.
Causesl Various.
Solutions:l If you are testing a web site that was working previously, execute the tests on the Web
Server and User Account tabs to determine the cause of the issue. Your web serverconfiguration may have changed, for example:
l The password for the impersonation user account was changed or has expired.
l New software or services, such as SharePoint or Active Directory, were installed on theweb server.
l The application pool where the Act! Premium (access via web) virtual directory runswas modified.
Act! Premium Web Administrator's Guide 20
The web page fails to load after selecting a web site and virtual directory.
l If you just created the impersonation user account, you may not have cleared the optionto force the user to change the password at the next logon. Clear the User must changepassword at next logon check box.
l If you just successfully executed the tests on the Web Server and User Accounts tabs,restart IIS on the web server. See Help for how to do this.
Troubleshooting General Errors and IssuesThis section describes how to troubleshoot general issues and errors with regard to installation, configuration,security, and so on.
General Errors and Issues
Problem:l To continue with the installation, you receive a prompt to let Act! Premium (access
via web) switch your 64-bit IIS and ASP.NET applications to 32-bit compatibility mode.You do not want to automatically switch the mode. The web page fails to load afterselecting a web site and virtual directory.
Reason:l Automatically switching the mode will cause other web applications on your computer to
run in 32-bit mode. If those applications require 64-bit mode, they will cease running; ifnot, they should continue running, however, they will have less RAM to access.
Solution:l Set up one web server to run the web application that requires 64-bit IIS and ASP.NET.
Set up a second web server to run Act! Premium (access via web), InternetSynchronization and any other 32-bit IIS and ASP.NET applications.
Problem:l Act! Help is not opening when you click Help topics or the Help menu.
Reason:l Act! Premium (access via web) Help is a Web Help help system containing the Mark of
the Web (MOTW) setting in each Help topic (.htm). On some server operating systemsusing Internet Explorer, a blank page appears when Help is accessed.
Solution:l Add the about:internet site to your Trusted Sites zone or your local intranet zone. The
about:internet setting refers to the MOTW security setting in each help topic.
Problem:l You receive the message: "Web site is not running".
Reason:l IIS may not be running.
Solution:l Verify that IIS and the default web site are running.
Act! Premium Web Administrator's Guide 21

Problem:l Errors appear on a remote browser, but not while using the browser on the server.
Reasons:l Pop-up blockers are enabled.
l The web site is not a trusted site on client computers.
l Your Internet security software does not allow access.
Solution:l Disable pop-up blockers in your browser.
l Add the web site to the list of trusted sites on all client computers.
l Shut down the Internet security software to allow access.
Problem:l You receive the message: "400 - Bad Request" or "404 - File not found".
Reason:l The Web Site Administration tool tests the site using "localhost."
Solution:l If the Act! Premium (access via web) site is configured to use an IP address, it will not use
"localhost".
Problem:l You receive the message: "500 - Internal server error".
Reason:l Windows Server 2003 contains a section of IIS that deals with web service extensions.
Solution:l Make sure that ASP.NET version 2.0.50727 is set to Allowed.
Problem:l You can access the web site internally, but not externally.
Reason:l Your router may not be configured correctly.
Solution:l Ensure your router is forwarded to port 80. For more information, see your router
documentation.
Problem:l You receive a message saying "... If you continue to see this message, please
recycle your IIS application pool, restart IIS, or contact your Administrator".
Reason:l You have just installed the Act! Scratchpad or the integration component to use supported
applications with Act! Premium (access via web) and this message appears.
Solution:l An Administrator needs to recycle the application pool as it is less disruptive than
resetting IIS. See "Recycling an Application Pool" on page 16.
Act! Premium Web Administrator's Guide 22

Problem:l You receive the message: "403 - Forbidden".
Reason:l You do not have permission to access a file.
Solutions:l Ensure the impersonation user is a Windows Administrator.
l If you created a custom virtual directory, ensure the Read and Run Scripts (such as ASP)are enabled. See Knowledgebase Article #14868.
Problem:l You are accessing Act! Premium (access via web) using a secured connection
(https://) and settings are not being retained. For example, you are scheduling anactivity and as you move through the Schedule Activity tabs, settings are changingback to the defaults.
Reason:l Your browser may not have the correct setting to allow caching of pages/files when using
Secure Sockets Layer (SSL). It is a best practice to have caching of encrypted pages/filesturned on when using Act! Premium (access via web) over SSL.
Solution:l For Internet Explorer: Click Tools>Internet Options. Click the Advanced tab. Under
Security, clear Do not save encrypted pages/files to disk.
l For Firefox: Open Firefox and in the address bar, type about:config. Scroll to thebrowser.cache.disk_cache_ssl setting. It should be set to True. If it is False, double-click itto change the setting.
l See Knowledgebase Article #28245.
Act! Premium Web Administrator's Guide 23

Act! Premium Web Administrator's Guide 24
Index
A
Act! PremiumMobileaccessing 8
Act! Scratchpadinstalling 13
Act!Word Processorconfiguring ActiveX security to use 11
ActiveX security 10setting for Act!Word Processor 11
Add/RemoveDatabase tabassigning databases to virtual directories 7
application poolschanging the recycling interval 16overview 2recycling on demand 16using to isolateWeb applications 2
ASP.NET impersonationcreating aWindowsuser account 5
ASP.NET impersonation user accountoverview 5testing 6
ASP.NET user accounttesting 6
B
browsersChrome limitations 11Firefox limitations 11Internet Explorer limitations 11Internet Explorer required settings 10
C
changing session timeout limit 8Chromebrowser limitations 11
copyinguser preferences for ACT! for Web 2005 -2006 users 9
creating aWindowsuser account for ASP.NET impersonation 5
D
databasesassigning to virtual directories 7
default virtual directory 7
E
e-mailinstalling components to useOutlook 15
examplesURLsand IP addresses for web site access 8
F
Firefoxbrowser limitations 11setting to cache pagesover SSL 10
G
Googleinstalling integration components 15integration requirements 14
I
impersonationfor single-server configurations 2inmultiple-server configurations 2
impersonation user accountcreating 5overview 5testing 6
installationconfiguration suggestions 1planning 1
installingAct! Scratchpad 13integration components 15mailmerge component to useWord 14multiple-server configurations 2single-server configuration 2
Internet Explorerbrowser settings 10limitations 11SSL setting to cache pages 10
M
Markof theWeb (MOTW) setting 11mobileaccessing Act! PremiumMobile 8
mobile accessexamples 8
multiple-server configurations 2multiple virtual directories 3recommendations 3
Act! Premium Web Administrator's Guide 25
O
Options tabchanging the session timeout limit for a web site 8
Outlookallowing accessoutside network 13installing integration components 15integration requirements 14
Outlook integrationediting the web.config file when using a secured service 12
P
planning your installation 1preferencesfor users 9locationsof 9sharing acrossweb servers 9
R
recycling application poolschanging the interval 16on demand 16
requirementsGoogle integration 14Outlook integration 14supported browsers 10
S
Secure Sockets Layer (SSL)editing the Outlook service web.config file 12Firefox setting to cache pages 10IE setting to cache pages 10overview 3troubleshooting caching pages 23
setting upWord integration 14
single-server configurationimpersonation user account recommendations 2
specifying theWindowsuser account for ASP.NETimpersonation
6
SSLediting the OutlookService web.config file 12Firefox setting to cache pages 10IE setting to cache pages 10overview 3troubleshooting caching pages 23
T
testingWindowsuser account for ASP.NET impersonation 6
timeout limitchanging 8
troubleshootinggeneral errors and issues 21SSL and caching pages 23Web Site Admin tool errors 17
Trusted Sites zone 10
U
User Account tabspecifying and testingWindowsuser account for ASP.NETimpersonation
6
usersaccessing the web site 8adding to databasesand assigning roles 8allowing access to Outlook (outside network) 13installing Act! Scratchpad 13installing integration components 15preferences for 9
V
virtual directoriesassigning databases to 7default for Act! Premium (access via web) 7inmultiple-server configurations 3
W
WebServer tabtesting your ASP.NET user account 6
web site accesschanging session timeout limit 8changing the session timeout limit 8examplesof URLsand IPs 8for users 8from inside common network 8from outside common network 8using amobile device 8
web.config fileediting for Outlookaccess 13
Wordinstalling themailmerge component 14
word processorinstallingmailmerge component for Word 14