A/C Recovery Recycling and Recharge Machine EKM pluselcielektronik.com/doc/PLUS_İNG.A5.pdf · EKM...
35
A/C Recovery, Recycling and Recharge Machine Operating And Service Manual EKM plus ENGLISH
Transcript of A/C Recovery Recycling and Recharge Machine EKM pluselcielektronik.com/doc/PLUS_İNG.A5.pdf · EKM...

A/C Recovery, Recycling and Recharge Machine
Operating And Service Manual
EKM plus
ENGLISH

Contents
Technical Specifications .........................3
Safety .....................................................4
Vehicle A/C System ................................5
Components ...........................................6
Control Panel .........................................7
Setup ......................................................8
Operations .............................................9
Recover Refrigerant .....................9
Charge Refrigerant ......................10
Recover from new tube ................16
Air purge .......................................17
Usage Information .................................17
Setting ....................................................18
Calibration .............................................20
Weight calibration ........................20
Vacuum calibration ..................... 21
Pressure calibration ..................... 22
Inverter ................................................ 23
Maintenance ....................................... 15
Compressor Maintenance ......... 24
Filtre change .............................. 25
Vacuum pump Maint. ................ 26
Troubleshooting .................................... 27
Warranty ............................................... 28
Warranty terms ......................... 28
Warranty certificate .................. 30
Suggestion ............................................. 31
About US ............................................... 32
Muniments ............................................ 33

www.elcielektronik.com 3/35
Technical Specifications
Model ....................................................... EKM PLUS
Refrigerant type ....................................... R134a
Power supply ........................................... 220 V ±10% / 50Hz
Display ...................................................... 4x20 character LCD
Storage tank capacity .............................. 6 kg
Scale resolution........................................ ±5 gr
Compressor .............................................. 1/4 HP 8 cc hermetic
Recovery rate ........................................... 250 gr/min maximum
Operating range ....................................... 8°C to 49°C
Low pressure gauge ................................. 15 bar
High pressure gauge ................................ 34 bar
Hose length .............................................. 180 cm (optional 250 cm & 300 cm)
Dimensions .............................................. 47 cm x 90cm x 57 cm
Weight...................................................... 62 kg

www.elcielektronik.com 4/35
Safety
Read this manual carefully and understand all the procedures outlines in this manual before operating the unit. Failure to follow these procedures could result in personal injury or property damage.
Allow only qualified personnel to operate this unit. The operator must have basic knowledge of air conditioning and refrigeration systems, including potential hazards associated with the handling of refrigerants and systems under high pressure.
Always wear safety goggles and appropriate protective clothing. Avoid contact of liquid refrigerant with the eyes and prolonged skin exposure.
Pressurized tank contains liquid refrigerant. Never fill the refrigerant tank to more than 80% of its maximum capacity. Hoses may contain refrigerant under pressure. Make sure to use a properly grounded AC outlet. Do not operate the unit with a damaged cord or plug. Extension cords should not be used unless
absolutely necessary. Disconnect unit from power supply before removing any protective cover. Do not expose the unit to wet environment. Only use the correct refrigerants. Avoid breathing in refrigerant vapors. Use only in well ventilated areas. The unit must be transported in a vertical position. The refrigerant scale must be fixed in place before transport.

www.elcielektronik.com 5/35
Vehicle A/C System
COMPRESSOR : It increase pressure of refrigerant. Mean while refrigerant temparature increase too DRYER FILTER: The refrigerant which coming from radiator is dryed by the filter. Allows to pass liquid refrigernt through it and also Works a refrigerant tank in the system.
EVAPORATOR: An evaporator is a device in a process used to turn the liquid form of a chemical substance such as water into its gaseous-form/vapor. The liquid is evaporated, or vaporized, into a gas form of the targeted substance in that process.
CONDENSER: Role of this unit transition refrigerant to liquid state from gaseous state EXPANSION VALVE: A expansion valve is a component in refrigeration and air conditioning systems that controls the amount of refrigerant released into the evaporator thereby controlling superheat

www.elcielektronik.com 6/35
Components
1 Pressure Gaugess 6 Dryer Filter 11 Compressor 2 On/Off button 7 İnverter (optional) 12 Condenser 3 Control Panel 8 Oil Seperator 13 Vacuum Pump 4 New oil bottle 9 Gas tank 14 5 Used oil bottle 10 Power Switch
www.elcielektronik.com 8/35
Setup
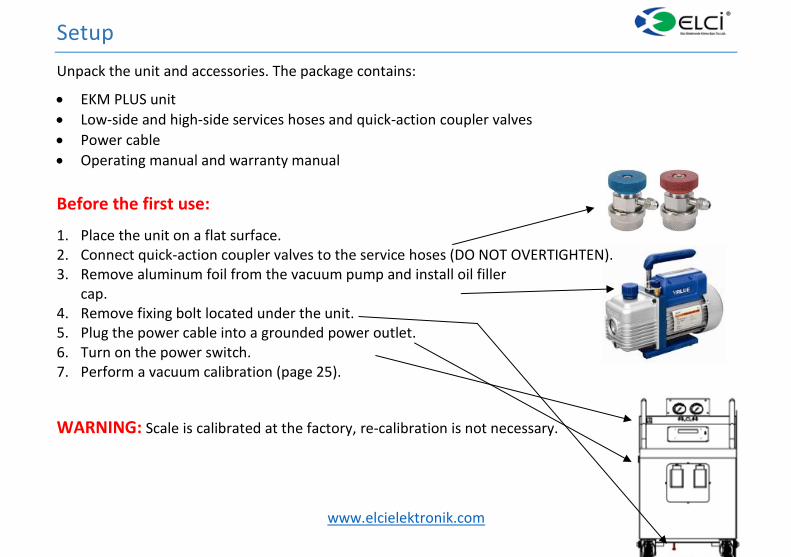
Unpack the unit and accessories. The package contains:
EKM PLUS unit
Low-side and high-side services hoses and quick-action coupler valves
Power cable
Operating manual and warranty manual
Before the first use:
1. Place the unit on a flat surface. 2. Connect quick-action coupler valves to the service hoses (DO NOT OVERTIGHTEN). 3. Remove aluminum foil from the vacuum pump and install oil filler
cap. 4. Remove fixing bolt located under the unit. 5. Plug the power cable into a grounded power outlet. 6. Turn on the power switch. 7. Perform a vacuum calibration (page 25).
WARNING: Scale is calibrated at the factory, re-calibration is not necessary.

www.elcielektronik.com 9/35
Operations
1- Recover Refrigerant The device draws gas from the air conditioning system of the vehicle, separates it from oil and particles, trap the passed acid and moisture through by the filter, purifies it and transfers it to its own tank.
1. Connect service hoses to the vehicle and open adapters. 2. Select REC FROM VEHICLE then press ENTER. 3. device will start recovering refrigerant from the A/C system. 4. If you see the warning OPEN USED OIL VALVE,
open used oil valve SLOWLY. 5. If you see the warning CLOSE USED OIL VALVE,
close used oil valve then press ENTER. 6. Screen will display PROCESS COMPLETE.
WARNING:
Some refrigerant will remain in the compressor, hoses or heat exchangers. The amount is dependant on the ambient temperature and last operation performed.
If you operate the vehicle until the normal operating temperature before operation, the gas in the air conditioning system will heat up and the duration of gas extraction from the car will be shortened. The vehicle A/C must be off.

www.elcielektronik.com 10/35
Operations
2- Charge Refrigerant Uses to charge vehicle A/C system with refrigerant.
1. Connect service hoses to the vehicle and open adapters.
2. Select CHARGE REFRIGERANT then press ENTER. 3. There is two choice
A. MANUAL B. AUTO DATA

www.elcielektronik.com 11/35
Operations
A. MANUAL
Operator must include the (vacuum time, Leak control, amount of gas) manually
1- VACUUM TIME Vacuum time entered to make the air conditioning system vacuum.
NOTE: The purpose of this process is to remove the air, water
vapor and other non-condensable gases from the air conditioning system.
www.elcielektronik.com 12/35
Operations
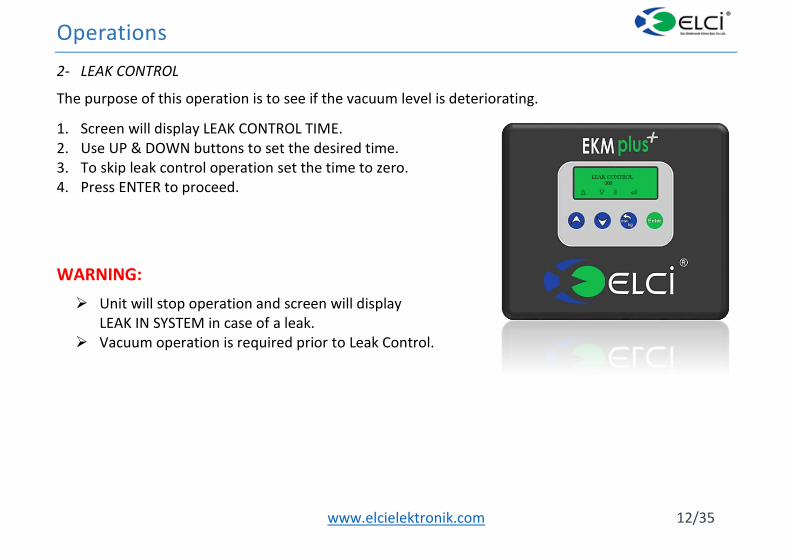
2- LEAK CONTROL
The purpose of this operation is to see if the vacuum level is deteriorating.
1. Screen will display LEAK CONTROL TIME. 2. Use UP & DOWN buttons to set the desired time. 3. To skip leak control operation set the time to zero. 4. Press ENTER to proceed.
WARNING:
Unit will stop operation and screen will display LEAK IN SYSTEM in case of a leak.
Vacuum operation is required prior to Leak Control.
www.elcielektronik.com 13/35
Operations
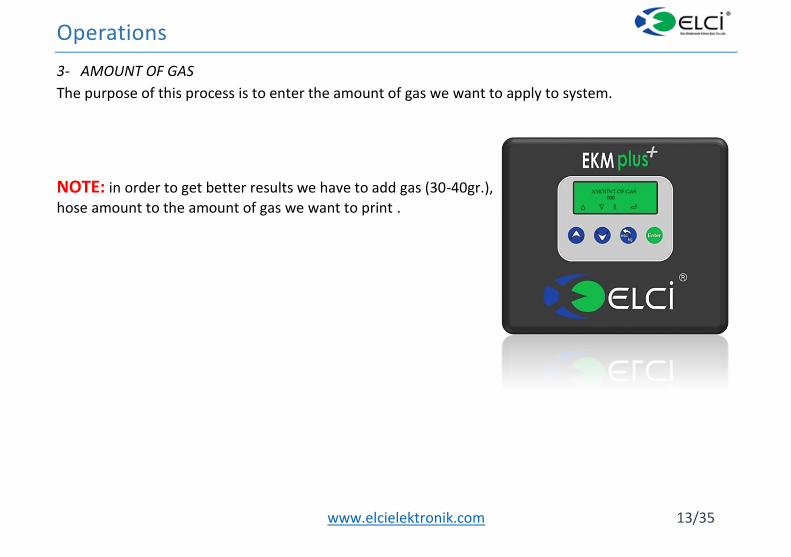
3- AMOUNT OF GAS
The purpose of this process is to enter the amount of gas we want to apply to system.
NOTE: in order to get better results we have to add gas (30-40gr.),
hose amount to the amount of gas we want to print .
www.elcielektronik.com 14/35
Operations
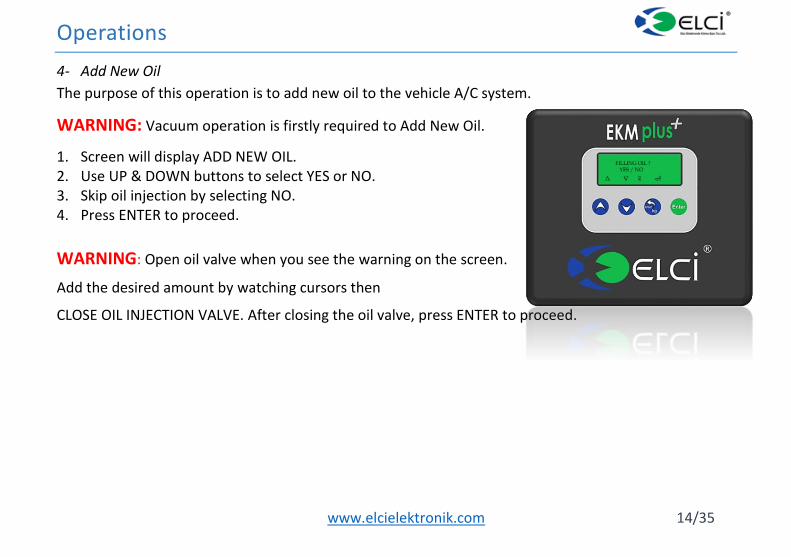
4- Add New Oil
The purpose of this operation is to add new oil to the vehicle A/C system.
WARNING: Vacuum operation is firstly required to Add New Oil.
1. Screen will display ADD NEW OIL. 2. Use UP & DOWN buttons to select YES or NO. 3. Skip oil injection by selecting NO. 4. Press ENTER to proceed.
WARNING: Open oil valve when you see the warning on the screen.
Add the desired amount by watching cursors then
CLOSE OIL INJECTION VALVE. After closing the oil valve, press ENTER to proceed.

www.elcielektronik.com 15/35
Operations
B. AUTO DATA In this option, the gas filling process will be done completely automatically.
NOTE: it is not necessary to add the amount of gas which is the hose
share in this process.
Vehicle Database
Select vehicle brand and model to charge vehicle A/C system with refrigerant.
1. Select VEHICLE DATABASE then press ENTER. 2. Use UP & DOWN buttons to select vehicle brand and model then press ENTER. 3. Unit will proceed with Vacuum, Leak Control, Add New Oil and Charge operations.

www.elcielektronik.com 16/35
Operations
3- RECOVER FROM NEW TUBE
Add refrigerant to the storage tank.
WARNING:
Do not fill the own storage tank to its full capacity. Turn the external tank upside down to speed up the process.
1. Connect any one of the service hoses to the external tank and open tank's valve. 2. Open the valve of the connected service hose, close the other one on manifold. 3. Use UP & DOWN buttons to select REC FROM VEHICLE then press ENTER. 4. Unit will start transferring refrigerant to the own storage tank. 5. Operation will automatically stop when the storage tank is full or the external tank is empty. 6. Stop the operation by closing external tank's valve. 7. screen will display COMPLETED.

www.elcielektronik.com 17/35
Operations
Air Purge
Excess air in the storage tank is purged. During recovery, air might be sucked into the storage tank with refrigerant due to leaks in the system. The unit will perform automatic air purge when sensors detect excess air in the storage tank. Operation time might differ depending on the amount of air in the tank.
Usage information
This menu contains the following information:
Last recovered amount
Total vacuum time
Filter usage
Tank refilled amount
Total amount recovered
Total amount charged
www.elcielektronik.com 18/35
Setting
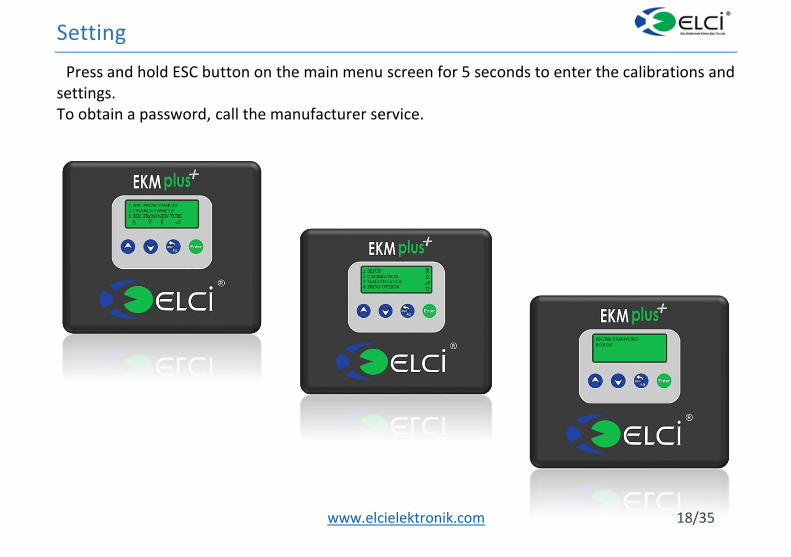
Press and hold ESC button on the main menu screen for 5 seconds to enter the calibrations and settings. To obtain a password, call the manufacturer service.

www.elcielektronik.com 19/35
Setting
1- DATE / TIME
To adjust the date and time of machine.
2- DIL – LANGUAGE Turkish and English languages are registered in it’s own memory. User's request the desired language is loaded onto
3- SYSTEM VACUUMING It is a process used to vacuum the system
4- SERVICE( ciphered ) Uses to Usage reset, Tank capacity, Filter capacity and oil container setting

www.elcielektronik.com 20/35
Calibrations
1- WEIGHT CALIBRATION
To do this, firstly we need an object that we know the net weight.
A. TARE: to reset the weight of machine own tank weight.
B. WEIGHT CALIBRATION: when you choose this menu it is automatically measured and the object which you know the weight of it, put it on the tank and press Enter to complete.
NOTE: the own tank must be completely empty.

www.elcielektronik.com 21/35
Calibrations
2- VACUUM CALIBRATION
a. Select vacuum calibration option. b. For calibration open manifold valves and press ENTER. c. After a beep warning close the manifold valves and press ENTER. d. Machine automatically starts to countdown a timer and the number beside it also will
decrease to a certain number. e. After finishing the operation screen will display COMPLETED.

www.elcielektronik.com 22/35
Calibrations
3- PRESSURE CALIBRATION
Select pressure calibration option
1. ZERO: By selecting this the pressure of machine is equalized to the atmospheric press.
2. GAIN: to perform this operation
Combine manifold outlets with a single hose and open manifold valves.
Charge 100 gr. Refrigerant Note the pressure of gauge Select the GAIN option. By using the arrows, insert the Pressure which you noticedbefore
in the bar section. To COMPLETE press Enter.

www.elcielektronik.com 23/35
Inverter
İnverter (optional )
Since our EKM PLUS devices are portable land, mountain, etc. Where the electric power is not
available, is used to provide 220 volts of energy required for operation of the device.
Usage:
Attach the power cable of the device to the socket on the back of the device. Attach the RED wire of the inverter to the (+) side of the battery Attach the BLACK wire of the inverter to the (-) side of the battery start the vehicle engine Turn on EKM PLUS
Socket on the back of the device

www.elcielektronik.com 24/35
Maintenance
Compressor Maintenance
Should be performed when screen displays CHANGE COMPRESSOR OIL.
1. Detach the hose from the drier filter to the compressor. 2. Use new oil bottle to fill in approximately 70 gr of oil with the help of TEST menu. 3. Re-attach the hose. 4. Go to main menu. 5. Press ESC for 5 seconds. 6. Select COMPRESSOR MAINTENANCE and press ENTER. 7. Screen will display COMPLETED.

www.elcielektronik.com 25/35
Maintenance
Filter Change
Drier filter keeps recovered refrigerant clean and moisture free. Filter must be replaced periodically in order to ensure the unit is working properly. Using expired filters voids warranty. EKM plus filters need to be replaced every 100 kg of operation. After 80 kgs of operation, the unit will start reminding the user at every start up. When the filter reaches 100 kg, the unit will be locked.
1. Order a new filter. 2. Replace the filter. 3. Turn on the unit. 4. Hold ESC for 5 seconds. 5. Select FILTER CHANGE and press ENTER. 6. Use UP & DOWN buttons to write password then press ENTER.

www.elcielektronik.com 26/35
Maintenance
Vacuum Pump Oil Change
In order to maintain pump efficiency, vacuum pump oil must be changed regularly. Contaminated oil might lead to irreversible damage to mechanical components of the vacuum pump. Change vacuum pump oil under the following conditions:
Every 30 working hours or when filter drier is replaced When the color of the oil becomes dark or cloudy 1. Obtain an empty container to collect the used oil. 2. Disconnect the unit from the electrical supply. 3. Unscrew the oil filler cap. 4. Unscrew the drain plug. 5. Allow the oil to drain out. 6. Close the drain plug. 7. Pour in new vacuum pump oil through the fill hole until mid level. 8. Replace oil filler cap. 9. Turn on the unit. 10. Press ESC for 5 seconds. 11. Select VACUUM OIL CHANGE to erase the warning.

www.elcielektronik.com 27/35
TROUBLESHOOTING PROBLEM CAUSE SOLUTION PROBLEM CAUSE SOLUTION
Unit does not
turn on
Power cord not
plugged in
Plug in the power
cord
Unit does
not charge
No refrigerant in tank Fill tank with
refrigerant
Power switch off Turn the power
switch on
Tank valve closed Open valve
Circuit breaker error Replace circuit
breaker
Service hose couplers
closed
Open couplers
No power in AC
outlet
Check power
source
Service hose
constricted
Straighten hose
Unit does not
recover
Manifold valve closed Open valve Leak in vehicle AC
system
Find and repair
leak
Service adapters
closed
Open adapters Scale calibration
error
Re-calibrate scale
Storage tank full Empty Storage Tank
Unit cannot
pull vacuum
Loose hose
connection
Tighten hose
connections
Vacuum calibration
error
Re-calibrate
vacuum
Leak in vehicle AC
system
Find and repair
leak
Weight
inaccuracies
Unit moving Do not move unit Oil injection valve
open
Close oil injection
valve
Storage tank touching
the unit
Prevent contact Leak in hoses Find and repair
leak
Contaminated
vacuum pump oil
Change vacuum
pump oil

www.elcielektronik.com 28/35
Warranty
WARRANTY TERMS
1. Warranty period is (...) years and commences on the delivery date of the product.
2. The entire product except the hoses and the adapters is warranted by our company. 3. The warranty certificates without the sales date written by the seller/dealer and stamp and
signature are invalid. 4. If the product becomes defective within the warranty period, the time elapsed during repair
is added to the warranty period. The repair period of the product is maximum 30 (thirty) working days. This period starts as of the date the defect of the product is notified to the service station, or if a service station is not available, to any one of the product’s seller, distributor, agency, representative, importer or manufacturer. If defect of the product is not remedied within 15 working days, the manufacturer and importer must allocate another industrial product with similar functions to the use of the consumer until repair of product is completed. National, legal and religious holidays and weekends are not considered as working days.
5. If the product becomes defective within its warranty period due to faults of material and
workmanship or assembly, its repair shall be performed without demanding any charges as a cost of workmanship or replaced part, or by any other means.
6. Malfunctions taking place due to the use that is other than the ones stated in the operating
manual of the product will not be covered under the scope of the warranty.
7. The warranty will expire automatically whenever one of the following occurs: failure to perform maintenance; use of non-original spare parts, non recommended oils and/or gases; use of expired filters; use of unsuitable refrigerants and/or lubricants; damage caused by shocks, fires, or other accidental events.

www.elcielektronik.com 29/35
Warranty
8. The manufacturer declines any and all responsibility for damage to vehicles on which recovery/recycling and recharging are performed if said damage is the result of unskillful handling by the operator or of failure to observe the basic safety rules set forth in the instruction manual.
9. This warranty does not cover damage arising during transportation. The product for which
repair under guarantee is requested must be shipped to the manufacturer under the customer’s exclusive responsibility.
10. The manufacturer shall not be responsible for any additional costs associated with a product
failure including, but not limited to, loss of work time, loss of refrigerant, cross-contamination of refrigerant, and unauthorized shipping and/or labor charges.
11. For the problems that may arise concerning the certificate of warranty, you may refer to the
General Directorate for the Protection of Consumers and Competition of the Ministry of Industry and Trade.
12. Even though the consumer uses its right of repair, if; As of the delivery date of the product to the consumer, within one year, provided that the
determined warranty period is valid; the same failure recurs more than twice, or different failures occur more than four times, or total of different failures within the determined warranty period is more than six, and also if these failures prevent benefiting from the product continuously;
The required maximum repair period is exceeded; It is determined that the defect cannot be remedied with a report prepared by the service
station of the company, and if a service station is not available, by any one of the product's seller, distributor, agency, representative, importer or manufacturer, respectively; the consumer may request the replacement of the product free of charge, or return of the cost or a discount in the cost at the rate of defect.
www.elcielektronik.com 30/35
Warranty
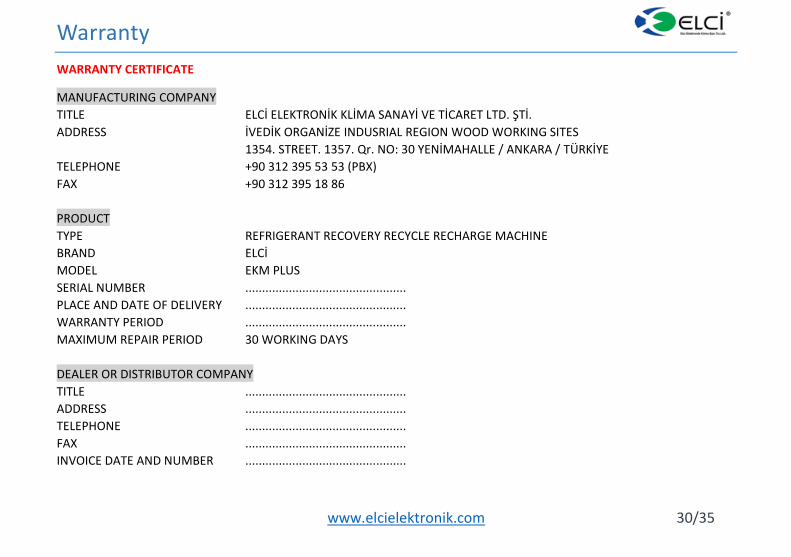
WARRANTY CERTIFICATE
MANUFACTURING COMPANY
TITLE ELCİ ELEKTRONİK KLİMA SANAYİ VE TİCARET LTD. ŞTİ.
ADDRESS İVEDİK ORGANİZE INDUSRIAL REGION WOOD WORKING SITES
1354. STREET. 1357. Qr. NO: 30 YENİMAHALLE / ANKARA / TÜRKİYE
TELEPHONE +90 312 395 53 53 (PBX)
FAX +90 312 395 18 86
PRODUCT
TYPE REFRIGERANT RECOVERY RECYCLE RECHARGE MACHINE
BRAND ELCİ
MODEL EKM PLUS
SERIAL NUMBER ................................................
PLACE AND DATE OF DELIVERY ................................................
WARRANTY PERIOD ................................................
MAXIMUM REPAIR PERIOD 30 WORKING DAYS
DEALER OR DISTRIBUTOR COMPANY
TITLE ................................................
ADDRESS ................................................
TELEPHONE ................................................
FAX ................................................
INVOICE DATE AND NUMBER ................................................

www.elcielektronik.com 31/35
Suggestion
Gases and oils recommended by the manufacturer;
Refrigerant: Tazetti Solkane AG Adge Arkema Honeywell Chemours
Compressor oils:
PAO compressor oil Reniso PAG Reniso Triton SEZ 68 POE Reniso Triton SE 170 POE
Vacuum pomp oils: ELCİ vacuum oil Value vacuum pomp oil.

www.elcielektronik.com 32/35
About Us
ELCİ Electronic Air Conditioning Industry Trade Limited Company was founded in 2003 and has become the leader in the production of Air Conditioning Service Stations in a short time.
Since its foundation, ELCİ had contributed to continuous development with production according to Turkish Standards and European norms.
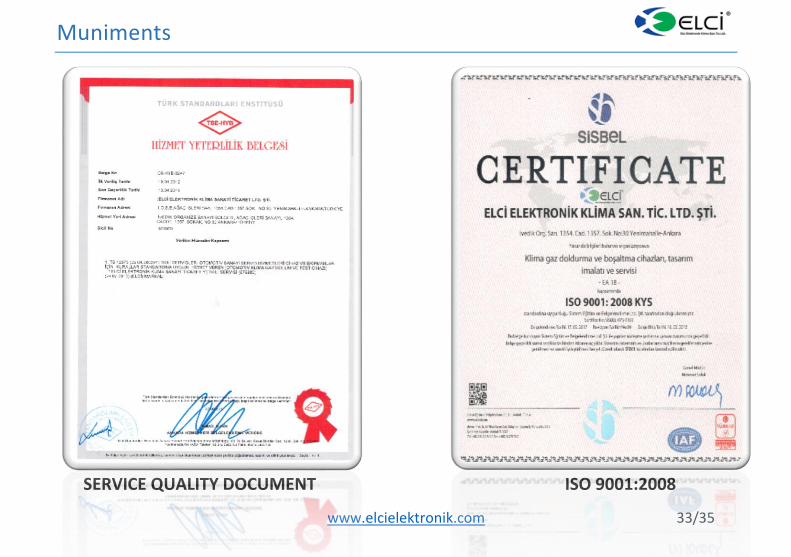
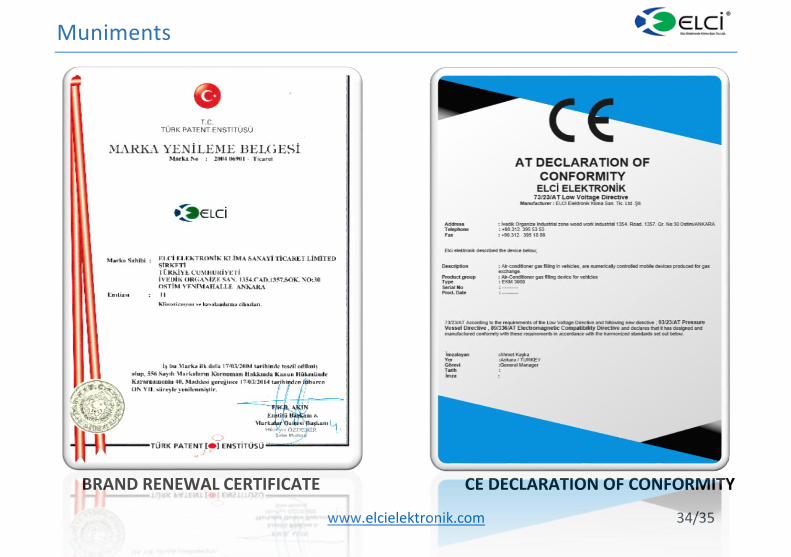
We are awarded with ISO 9001:2008 that has the validity all around the world and CE certificate that satisfies all quality and safety requirements necessary for European Union (EU) countries.
Our customer oriented management system and continuous research and development activities enable us to offer the best price to meet the expectations of the customers at highest level, without compromising the quality. From design to after sales in every stage of production, we are contributed to Total Quality Management System.
The first full automatic recharge station in Turkey was developed and produced by ELCİ in 2003 with a great success. And in 2013 another milestone in the company’s history, is the design and production of the first recharge station operating by a tablet via Bluetooth technology. From the beginning, our experienced team dedicated to follow the technological developments to produce more user friendly products for more environmentally friendly world.
www.elcielektronik.com 33/35
Muniments
SERVICE QUALITY DOCUMENT ISO 9001:2008
www.elcielektronik.com 34/35
Muniments
BRAND RENEWAL CERTIFICATE CE DECLARATION OF CONFORMITY

www.elcielektronik.com 35/35
NOTE
. . . . . . . . . . . . . . . . . . . . . . . . . . . . . . . . . . . . . . . . . . . . . . . . . . . . . . . . . . . . .
. . . . . . . . . . . . . . . . . . . . . . . . . . . . . . . . . . . . . . . . . . . . . . . . . . . . . . . . . . . . . . . . . .
. . . . . . . . . . . . . . . . . . . . . . . . . . . . . . . . . . . . . . . . . . . . . . . . . . . . . . . . . . . . . . . . . .
. . . . . . . . . . . . . . . . . . . . . . . . . . . . . . . . . . . . . . . . . . . . . . . . . . . . . . . . . . . . . . . . . .
. . . . . . . . . . . . . . . . . . . . . . . . . . . . . . . . . . . . . . . . . . . . . . . . . . . . . . . . . . . . . . . . . .
. . . . . . . . . . . . . . . . . . . . . . . . . . . . . . . . . . . . . . . . . . . . . . . . . . . . . . . . . . . . . . . . . .
. . . . . . . . . . . . . . . . . . . . . . . . . . . . . . . . . . . . . . . . . . . . . . . . . . . . . . . . . . . . . . . . . .
. . . . . . . . . . . . . . . . . . . . . . . . . . . . . . . . . . . . . . . . . . . . . . . . . . . . . . . . . . . . . . . . . .
. . . . . . . . . . . . . . . . . . . . . . . . . . . . . . . . . . . . . . . . . . . . . . . . . . . . . . . . . . . . . . . . . .
. . . . . . . . . . . . . . . . . . . . . . . . . . . . . . . . . . . . . . . . . . . . . . . . . . . . . . . . . . . . . . . . . .
. . . . . . . . . . . . . . . . . . . . . . . . . . . . . . . . . . . . . . . . . . . . . . . . . . . . . . . . . . . . .
. . . . . . . . . . . . . . . . . . . . . . . . . . . . . . . . . . . . . . . . . . . . . . . . . . . . . . . . . . . . . . . . . .
. . . . . . . . . . . . . . . . . . . . . . . . . . . . . . . . . . . . . . . . . . . . . . . . . . . . . . . . . . . . . . . . . .
. . . . . . . . . . . . . . . . . . . . . . . . . . . . . . . . . . . . . . . . . . . . . . . . . . . . . . . . . . . . . . . . . .
. . . . . . . . . . . . . . . . . . . . . . . . . . . . . . . . . . . . . . . . . . . . . . . . . . . . . . . . . . . . . . . . . .
. . . . . . . . . . . . . . . . . . . . . . . . . . . . . . . . . . . . . . . . . . . . . . . . . . . . . . . . . . . . . . . . . .
. . . . . . . . . . . . . . . . . . . . . . . . . . . . . . . . . . . . . . . . . . . . . . . . . . . . . . . . . . . . . . . . . .
. . . . . . . . . . . . . . . . . . . . . . . . . . . . . . . . . . . . . . . . . . . . . . . . . . . . . . . . . . . . . . .
. . . . . . . . . . . . . . . . . . . . . . . . . . . . . . . . . . . . . . . . . . . . . . . . . . . . . . . . . . . . . . . . . .
. . . . . . . . . . . . . . . . . . . . . . . . . . . . . . . . . . . . . . . . . . . . . . . . . . . . . . . . . . . . . . . . . .