
A VITAL SIGNS UPDATE -...
13
877.809.5515 www.knowingmore.com [email protected] A VITAL SIGNS UPDATE A Client Care Module: ©1998‐201ϲ May be copied for use within each physical location that purchases this inservice.
Transcript of A VITAL SIGNS UPDATE -...
877.809.5515
www.knowingmore.com
A VITAL SIGNS UPDATEA Client Care Module:
©1998‐201сMay be copied for use within each physical
location that purchases this inservice.
A Client Care Module:
A Vital Signs Update
A CRITICAL MEDICAL EVALUATION!
Inside This Inservice:
Fun Facts! 2
Focus on Temperature 3-4
Focus on Pulse 5
Focus on Respirations 6
Focus on Blood Pressure 7-8
Focus on Pain 9
Documenting Vital Signs 10
Cleaning Your Equipment 11
Final Tips 12
© 201 In the Know, Inc. www.knowingmore.com
May be copied for use within each physical location that
purchases this inservice from In the Know. All other copying
or distribution is strictly prohibited.
Developing Top-Notch CNAs, One Inservice at a Time
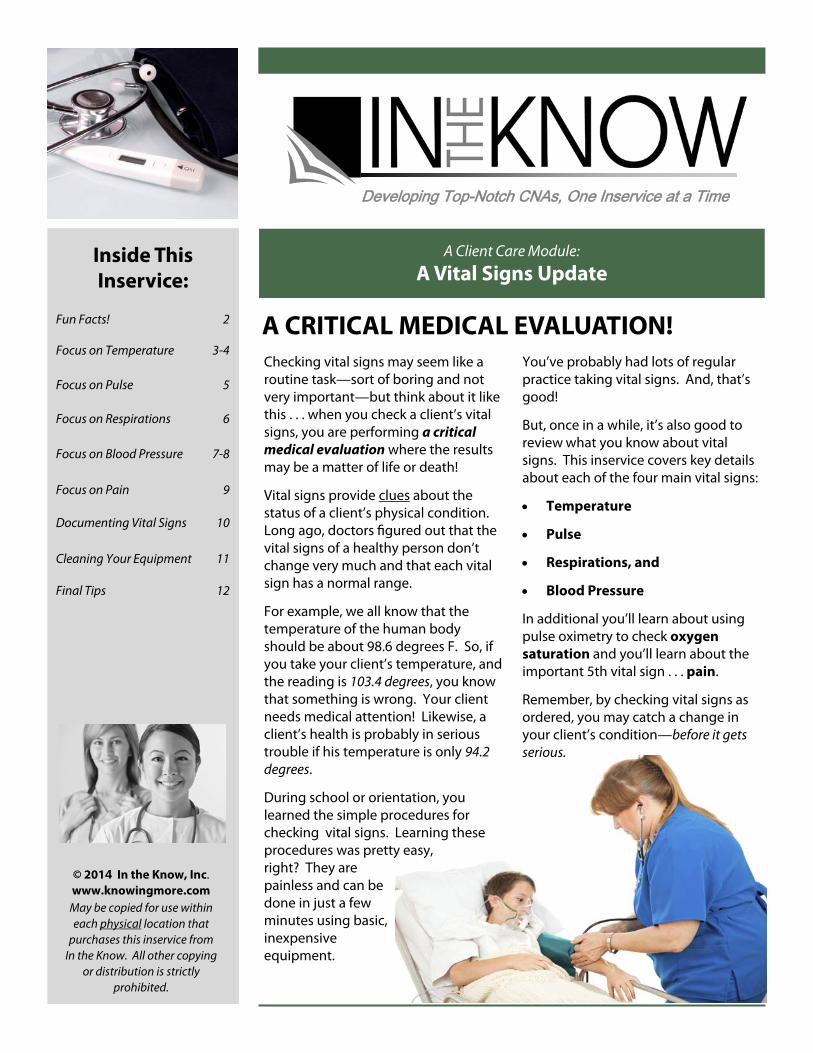
Checking vital signs may seem like a routine task—sort of boring and not very important—but think about it like this . . . when you check a client’s vital signs, you are performing a critical medical evaluation where the results may be a matter of life or death!
Vital signs provide clues about the status of a client’s physical condition. Long ago, doctors figured out that the vital signs of a healthy person don’t change very much and that each vital sign has a normal range.
For example, we all know that the temperature of the human body should be about 98.6 degrees F. So, if you take your client’s temperature, and the reading is 103.4 degrees, you know that something is wrong. Your client needs medical attention! Likewise, a client’s health is probably in serious trouble if his temperature is only 94.2 degrees.
During school or orientation, you learned the simple procedures for checking vital signs. Learning these procedures was pretty easy, right? They are painless and can be done in just a few minutes using basic, inexpensive equipment.
You’ve probably had lots of regular practice taking vital signs. And, that’s good!
But, once in a while, it’s also good to review what you know about vital signs. This inservice covers key details about each of the four main vital signs:
Temperature
Pulse
Respirations, and
Blood Pressure
In additional you’ll learn about using pulse oximetry to check oxygen saturation and you’ll learn about the important 5th vital sign . . . pain.
Remember, by checking vital signs as ordered, you may catch a change in your client’s condition—before it gets serious.
FUN FACTS ABOUT VITAL SIGNS!
A Client Care Module: A Vital Signs Update © 201 In the Know, Inc. Page 2
Grab your favorite highlighter! As you read through this inservice, highlight five things you learn that you didn’t know before. Share this new information with your supervisor and co-workers!
Over 1800 years ago, a Roman doctor wrote sixteen books all about pulse! He believed that the pulse was caused by “spirits” flowing through a person’s blood vessels.
In 1553, a Swiss scientist figured out that the heart and lungs work together to circulate blood and oxygen throughout the body. But, no one believed him. In fact, he was burnt alive for daring to talk about his ideas!
The very first thermometer was invented by Galileo in the 1500’s. However, it was not used on people. The first medical thermometer was developed about three hundred years later. It was over twelve inches long and doctors carried it under their arms like a rifle. It took twenty minutes for the thermometer to show a person’s temperature.
Most glass thermometers contain mercury—one of the most toxic elements in the world! Glass thermometers only hold a tiny amount of mercury, so there shouldn’t be a problem, right? Well. . . studies have shown that old glass thermometers add several tons of mercury to our environment every year. You may have heard about fish being poisoned by mercury in the water. Unfortunately, mercury can kill people, too. So, follow your workplace policy for disposing of broken or old glass thermometers—and never touch mercury with your bare hands.
In the old days, doctors listened to their patients’ hearts by placing their ear against each person’s chest.
The stethoscope was invented in 1812 by a French doctor so that he could examine his female patients without getting so “fresh”!
The name “stethoscope” came from the Greek words for “explore” and “chest.” Early stethoscopes were long tubes made out of wood. Doctors used them by listening with just one ear.
In 1726, an Englishman became the first person to measure blood pressure—but his “patient” wasn’t a person—it was a horse!
A blood pressure gauge was invented in 1876. Twenty years later, an Italian developed a blood pressure cuff similar to the kind we use today.
At first, doctors measured blood pressure by feeling the pulse with their fingers as they watched the needle on the blood pressure dial. It wasn’t until 1905 that a Russian doctor figured out how to use a stethoscope to listen for the stop and start of blood flow.
Researchers in Georgia have invented a special T-shirt that can monitor vital signs! A small wireless “computer” is built into the shirt. It keeps track of a person’s temperature, pulse and blood pressure. Someday, these special shirts may be used by your clients!
© 201 In the Know, Inc. Page 3 A Client Care Module: A Vital Signs Update
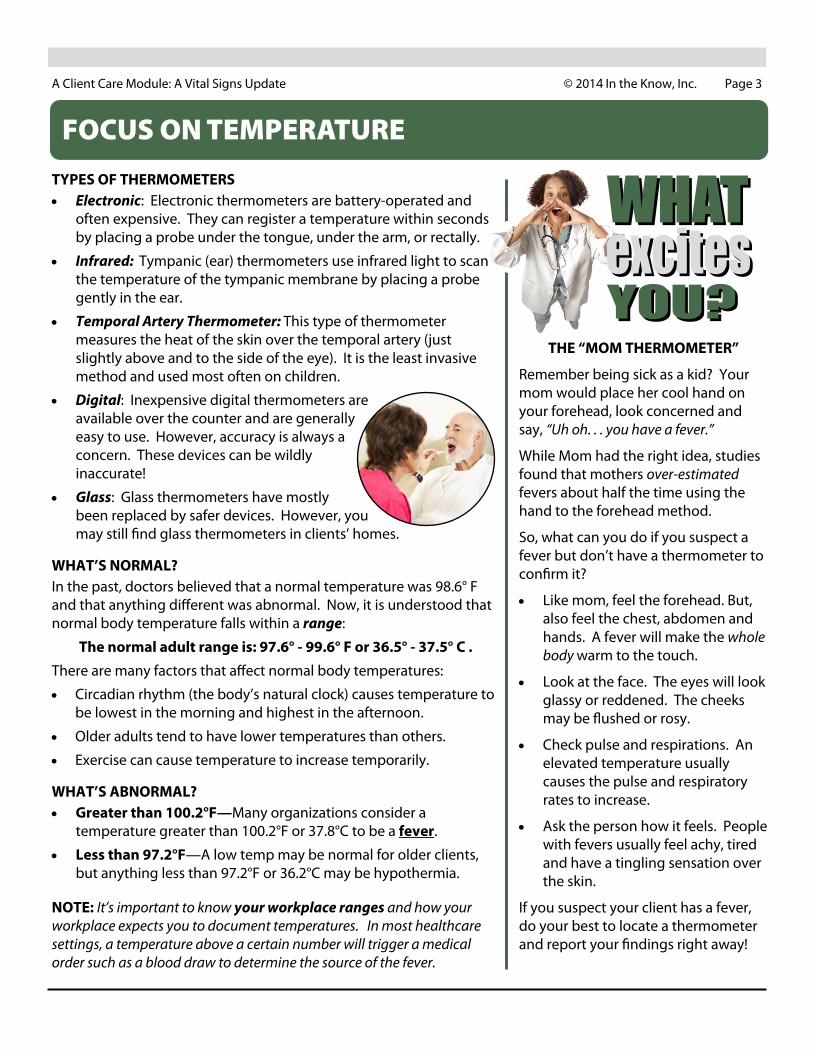
TYPES OF THERMOMETERS Electronic: Electronic thermometers are battery-operated and
often expensive. They can register a temperature within seconds by placing a probe under the tongue, under the arm, or rectally.
Infrared: Tympanic (ear) thermometers use infrared light to scan the temperature of the tympanic membrane by placing a probe gently in the ear.
Temporal Artery Thermometer: This type of thermometer measures the heat of the skin over the temporal artery (just slightly above and to the side of the eye). It is the least invasive method and used most often on children.
Digital: Inexpensive digital thermometers are available over the counter and are generally easy to use. However, accuracy is always a concern. These devices can be wildly inaccurate!
Glass: Glass thermometers have mostly been replaced by safer devices. However, you may still find glass thermometers in clients’ homes.
WHAT’S NORMAL? In the past, doctors believed that a normal temperature was 98.6° F and that anything different was abnormal. Now, it is understood that normal body temperature falls within a range:
The normal adult range is: 97.6° - 99.6° F or 36.5° - 37.5° C .
There are many factors that affect normal body temperatures:
Circadian rhythm (the body’s natural clock) causes temperature to be lowest in the morning and highest in the afternoon.
Older adults tend to have lower temperatures than others.
Exercise can cause temperature to increase temporarily.
WHAT’S ABNORMAL? Greater than 100.2°F—Many organizations consider a
temperature greater than 100.2°F or 37.8°C to be a fever.
Less than 97.2°F—A low temp may be normal for older clients, but anything less than 97.2°F or 36.2°C may be hypothermia.
NOTE: It’s important to know your workplace ranges and how your workplace expects you to document temperatures. In most healthcare settings, a temperature above a certain number will trigger a medical order such as a blood draw to determine the source of the fever.
FOCUS ON TEMPERATURE
THE “MOM THERMOMETER”
Remember being sick as a kid? Your mom would place her cool hand on your forehead, look concerned and say, “Uh oh. . . you have a fever.”
While Mom had the right idea, studies found that mothers over-estimated fevers about half the time using the hand to the forehead method.
So, what can you do if you suspect a fever but don’t have a thermometer to confirm it?
Like mom, feel the forehead. But, also feel the chest, abdomen and hands. A fever will make the whole body warm to the touch.
Look at the face. The eyes will look glassy or reddened. The cheeks may be flushed or rosy.
Check pulse and respirations. An elevated temperature usually causes the pulse and respiratory rates to increase.
Ask the person how it feels. People with fevers usually feel achy, tired and have a tingling sensation over the skin.
If you suspect your client has a fever, do your best to locate a thermometer and report your findings right away!
© 201 In the Know, Inc. Page 4 A Client Care Module: A Vital Signs Update
PROCEDURE: TAKING A TEMPERATURE
Wash your hands and put on gloves! Taking an oral, rectal or tympanic temperature is considered an invasive procedure. This means you are placing something inside the client’s body. Always wash hands and put on gloves for an invasive procedure!
Prepare the thermometer. Place a disposable probe cover on the device and turn it on. Some devices require you to indicate what type of temperature you are taking (oral or axillary).
Position the thermometer. For an oral temperature: Make sure the person has not had
anything to eat or drink in the last 15 minutes. Insert the thermometer under the tongue, slightly to the side. (Your clients shouldn’t hold or bite the thermometer with their teeth.) It’s best to hold the thermometer steady.
For an axillary temperature: Raise the arm and place the probe snugly against the center of the armpit. Lower the arm and hold it close to the client’s body.
For a tympanic (ear) temperature: Straighten the ear canal by pulling the ear up and back. Then, place the earpiece gently into ear. The ear canal needs to be straight so the infrared light can reach the tympanic membrane.
For a rectal temperature: Be sure you are using a dedicated rectal thermometer. Rectal thermometers are usually indicated by a red band or cap on the handle of the probe. Position client on the left side (Sims position). Apply lubricant to the tip of the probe and insert the tip about 1 inch into the rectum (1/2 inch for children).
Read the thermometer. When the device beeps, carefully, remove the thermometer (along with the plastic cover) from the client’s mouth, axilla, ear or rectum. Remove the plastic cover—without touching the part that’s been inside the client—and throw it away. Read the digital display.
Remove your glove and wash your hands!
Record your results. Follow your workplace guidelines for recording results. This may include a verbal report of any abnormal results to the nurse right away.
You may have heard that you should add or subtract a degree depending on where you take the temperature . . . DON’T DO IT! Always report the exact results and how you took the temperature. For example, an axillary temperature of 99.2 should be reported as “99.2 (Axillary).”
FOCUS ON TEMPERATURE—CONTINUED
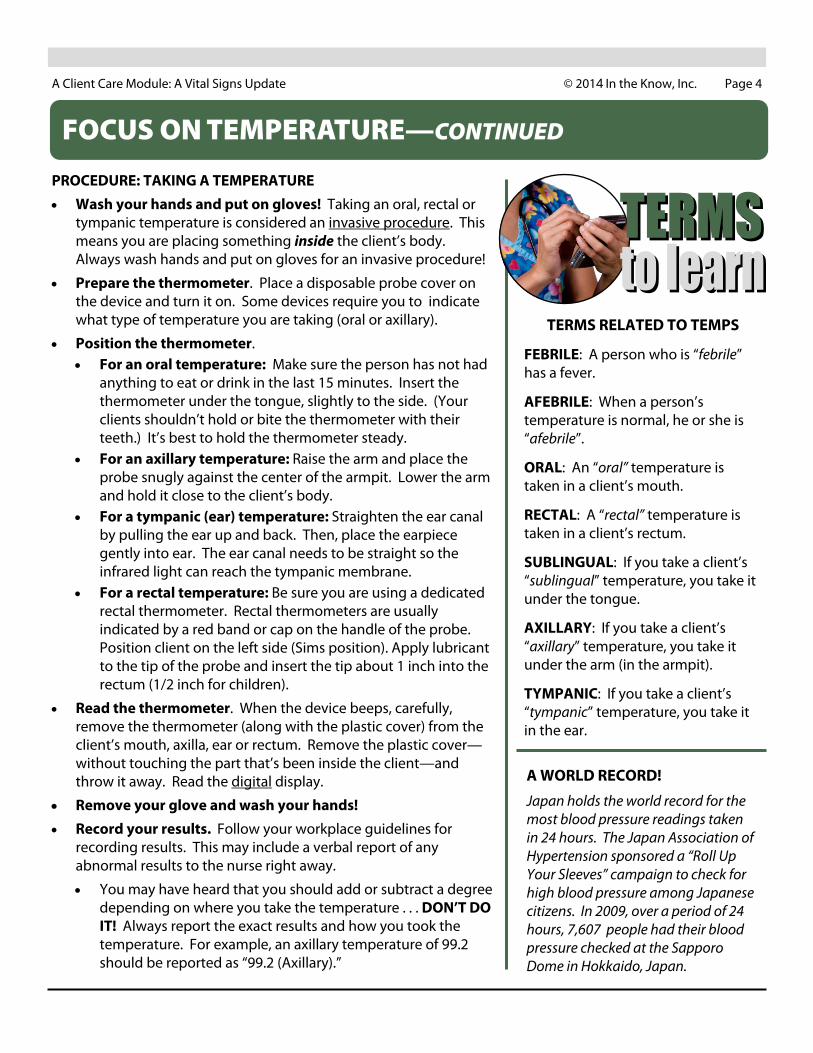
TERMS RELATED TO TEMPS
FEBRILE: A person who is “febrile” has a fever.
AFEBRILE: When a person’s temperature is normal, he or she is “afebrile”.
ORAL: An “oral” temperature is taken in a client’s mouth.
RECTAL: A “rectal” temperature is taken in a client’s rectum.
SUBLINGUAL: If you take a client’s “sublingual” temperature, you take it under the tongue.
AXILLARY: If you take a client’s “axillary” temperature, you take it under the arm (in the armpit).
TYMPANIC: If you take a client’s “tympanic” temperature, you take it in the ear.
A WORLD RECORD!
Japan holds the world record for the most blood pressure readings taken in 24 hours. The Japan Association of Hypertension sponsored a “Roll Up Your Sleeves” campaign to check for high blood pressure among Japanese citizens. In 2009, over a period of 24 hours, 7,607 people had their blood pressure checked at the Sapporo Dome in Hokkaido, Japan.

© 201 In the Know, Inc. Page 5 A Client Care Module: A Vital Signs Update
WHAT IS PULSE? Every time the heart beats, it sends a rush of blood into the
arteries. Each of these “rushes” can be felt as a pulse. The number of times a heart beats per minute is called the pulse rate.
The pulse can be felt at many different points on the body, but for vital signs, it is usually taken at the radial artery. The radial artery is named for the bone—the radius—that runs between the elbow and the thumb-side of the hand.
WHAT’S NORMAL? A normal adult pulse ranges from 60 to 100 beats per minute. It
should be “regular,” and should be easy to find and count.
Pulse rates can be effected by exercise, stress, illness and medication.
WHAT’S ABNORMAL? Greater than 100: This is “tachycardia.” “Tachy” means fast.
Less than 60: This is known as “bradycardia.” “Brady” means slow.
Irregular Rhythm: Beats do not fall in a predictable pattern.
Bounding (forceful) or thready (weak)
PROCEDURE: COUNTING A PULSE Feel for the pulse. Hold the client’s wrist in a comfortable
position. Feel for the pulse just above the thumb.
NOTE: Never use your thumb when taking pulses. (Your thumb has a pulse of its own and you may confuse your pulse with the client’s.) Instead, always use your first two or three fingers to feel the radial artery. Be sure to press gently.
Get ready to count. Locate the second hand on your watch or a nearby clock and wait for it to reach an easy starting point. For example, when the second hand reaches the 12 on your watch, start counting. Then, stop counting when it reaches 6.
Count. In most cases, you’ll count for 30 seconds . . . and then multiply that number by 2. For example, you count for 30 seconds and get 40. Multiply this number by 2 to get a pulse of 80 beats per minute.
NOTE: Your workplace may have a different policy about how long you need to count each client’s pulse. You may be asked to count for a full minute or it may be okay to count for fifteen seconds (and multiply by 4). If you’re not sure how long you should count, ask your supervisor.
FOCUS ON PULSE
PULSE OXIMETRY
Clients who are on oxygen, or have certain respiratory or cardiac problems may have orders to check an additional vital sign called oxygen saturation (O2 sat, for short).
The O2 sat is checked using a pulse oximeter (pulse ox, for short). It’s a small clip with an infrared sensor that fits on the finger tip.
The light shines through the skin and detects the amount of oxygen in the blood.
The clip may be attached for a continuous reading or just checked each time vitals are taken.
A normal O2 sat is 95-100%. But, clients with chronic respiratory conditions like COPD may have a much lower number.
Pulse oximeters also measure pulse rates. So, if you ever have trouble counting a pulse, attach the pulse ox machine for an accurate reading.
Clean the clip with an alcohol swab between uses.
©201 In the Know, Inc. Page 6 A Client Care Module: A Vital Signs Update
FOCUS ON RESPIRATIONS
WHAT IS RESPIRATION? The process of breathing in and out is called respiration. The
number of breaths a person takes each minute is called the respiratory rate.
One rise and fall of the chest counts as one breath. You can count breaths by watching someone’s chest go up and down or by feeling the movement with your hand.
WHAT’S NORMAL? Normal adult respirations range from 12 to 20 per minute. The
rhythm should be regular. Breathing should be effortless and quiet.
Respiratory rates can be affected by exercise, fever, medications, illness and stress.
WHAT’S ABNORMAL? Greater than 20: This is called tachypnea. “Tachy” means “fast.”
Less than 12: This is called bradypnea. “Brady” means “slow.”
Dyspnea: “Dys” means “difficult,” so someone with dyspnea is having trouble breathing.
Retractions: Skin pulling in at neck and ribs on inspiration.
Wheezing: A high pitched whistling sound during breathing.
PROCEDURE: COUNTING RESPIRATIONS Plan to count respirations as soon as you’ve finished counting
the pulse—but before you let go of the client’s wrist! If a client thinks you are still counting the pulse, he will continue to breathe normally.
Count. One rise and fall of the chest is counted as one breath. Start your counting when the second hand reaches an easy mark and continue for 30 seconds.
Multiply the number you got by 2. This gives you the number of breaths per minute. For example, a client who took 8 breaths in 30 seconds has a respiratory rate of 16 breaths per minute.
Avoid staring at the client’s chest while counting breaths. Instead, watch the chest rise and fall by looking at it out of the corner of your eye. If you can’t get a good look at the chest, try watching the nostrils or placing your hand gently on the client’s chest so that you can feel his or her breathing.
1. What is the normal range for a temperature on an adult?
______________________________
2. List three factors that may cause a false temperature reading.
______________________________
______________________________
______________________________
3. What is the normal range for an adult radial pulse?
______________________________
4. List three factors that may cause an elevated pulse rate.
______________________________
______________________________
______________________________
5. What is the normal range for adult respirations?
______________________________
6. List three factors that may cause an elevated respiratory rate.
______________________________
______________________________
______________________________
©201 In the Know, Inc. Page 7 A Client Care Module: A Vital Signs Update
FOCUS ON BLOOD PRESSURE
WHAT IS BLOOD PRESSURE? As blood is pumped through the body, it puts pressure against
the walls of arteries. When you check blood pressure, you are measuring how forcefully the blood is pushing on the artery.
During each beat of the heart, the heart muscle does two things—first it contracts and then it relaxes. When the heart contracts, it empties itself, forcing blood into the arteries. This is when blood pressure is the highest. When the heart relaxes, it’s taking time to fill up with more blood. This is when the blood pressure is the lowest.
Healthy people with normal blood pressure have thin, flexible arteries. Blood pumps easily through their bodies.
People who have high blood pressure tend to have thick, stiff arteries. For example, people with heart disease may have a thick build up of cholesterol inside their blood vessels. And, as people age, they often get “hardening of the arteries.” When the arteries aren’t healthy, it’s harder for the heart to push blood through the body—and the blood pressure goes up!
So, how does a blood pressure cuff work? When the cuff is placed on the arm and pumped up, it flattens a large artery in the arm—stopping the blood flow. As you release the air in the cuff, the blood starts to flow again. This makes a sound that can be heard with a stethoscope. You can continue to hear these “swishing” sounds until the artery has “unflattened” all the way.
WHAT’S NORMAL? For an adult: 100-139 Systolic (top number)
60-89 Diastolic (bottom number)
Normal blood pressure rises and falls throughout the day. It can even change from minute to minute depending on stress level and activity level.
WHAT’S ABNORMAL? Greater than 140/90: Hypertension (high BP).
Lower than 100/60: Hypotension (low BP).
Orthostatic Hypotension: A drop in blood pressure when changing from a sitting to a standing position.
Blood pressure may go up if a client is nervous about it being checked. So, a diagnosis of hypertension is never made on a single high reading, alone. BP is usually be measured on two or three different occasions to make a diagnosis of hypertension.
Out of the four vital signs, it’s most important for you to practice taking blood pressures—even if you’ve been checking blood pressures for years.
Consider this: One study found that 57% of nursing students did not follow the correct procedure for taking a patient’s blood pressure.
Another study found that out of 172 doctors and nurses, only 3% of them got an accurate blood pressure reading!
When you have some down-time, check your co-workers blood pressure!
First, check the BP manually. Then, a few minutes later check it with an automated BP machine. Be sure to use the same arm and place the co-worker in the same position.
Chances are the readings won’t be exact. BP can fluctuate slightly within minutes. But, you should be close! Record your results:
Manual Reading: ________________
Automated Reading: _____________
If your manual reading is off by more than 8 points . . . keep practicing!
©201 In the Know, Inc. Page 8 A Client Care Module: A Vital Signs Update
FOCUS ON BLOOD PRESSURE—CONTINUED
Working with clients in the home often requires coming up with creative
solutions to uncommon problems.
THE PROBLEM: You care for a 70 year old woman who lives alone but receives several visitors each day. The home can become quite crowded and noisy at times.
You like to check vital signs as soon as you arrive to get your client’s baseline. But, today, her three grandchildren are in the room playing and watching cartoons.
You attempt to collect vital signs but are unable to get accurate readings because of the distractions.
WHAT YOU KNOW: You know your client does not like to ask her grandchildren to leave the room. But, you really would like to know your client’s vitals before you do anything else.
GET CREATIVE: Think of 3 creative solutions you might try to respect your client’s right to have her grandchildren in the room while still getting the vitals you need.
TALK ABOUT IT: Share your ideas with your co-workers and supervisor and find out how they would solve the problem.
PROCEDURE: MEASURING BLOOD PRESSURE MANUALLY Position the Client. A client may sit or lie down for this test.
Either way, the lower part of the arm should be at the same level as the heart. (Don’t let the arm hang down.) The arm should be bare. You may roll the sleeve up if it can be done easily. However, if rolling up the sleeve causes the arm to be squeezed, your blood pressure reading may be affected.
Apply the cuff. Place the cuff snugly around the client’s arm with the arrow on the cuff pointing to the client’s inner elbow. The bottom of the cuff should be about an inch above the fold of the elbow. NOTE: Make sure the cuff fits your client properly. Blood pressure cuffs come in different sizes. There are small ones for use on children and adults with very thin arms. And, there are large cuffs for use on people with big or heavy arms.
Feel for the brachial pulse. You should be able to feel it right under where the “arrow” on the cuff is pointing. Take your time and feel for the pulse gently.
Place the head of the stethoscope flat on the site of the brachial pulse, and put the tips of the stethoscope in your ears. But, don’t let the stethoscope rub against the blood pressure cuff or the client’s clothes or you may not be able to hear the pulse.
Close the valve on the rubber bulb and pump up the cuff. Pump quickly until the needle on the blood pressure gauge is up to about 180.
Release the valve slowly...using your thumb and index finger. The air will begin to escape from the cuff. If you hear a sound right away, stop and increase the air in the cuff to about 200.
Listen carefully as you watch the needle on the blood pressure gauge. Look at the number that the needle is pointing to when you first hear a clear sound. That’s the top number (or systolic blood pressure). Keep listening until the sound disappears—watching the gauge the whole time. Make note of the number the needle was pointing to when you heard the last sound. This is the bottom number (or diastolic blood pressure).
Remove the blood pressure cuff. To deflate the cuff completely, open the valve on the rubber bulb. As the air is being released, loosen the cuff from the client’s arm.
Make the client comfortable. Help to replace clothing as necessary and assist the client into a comfortable position.
© 201 In the Know, Inc. Page 9 A Client Care Module: A Vital Signs Update
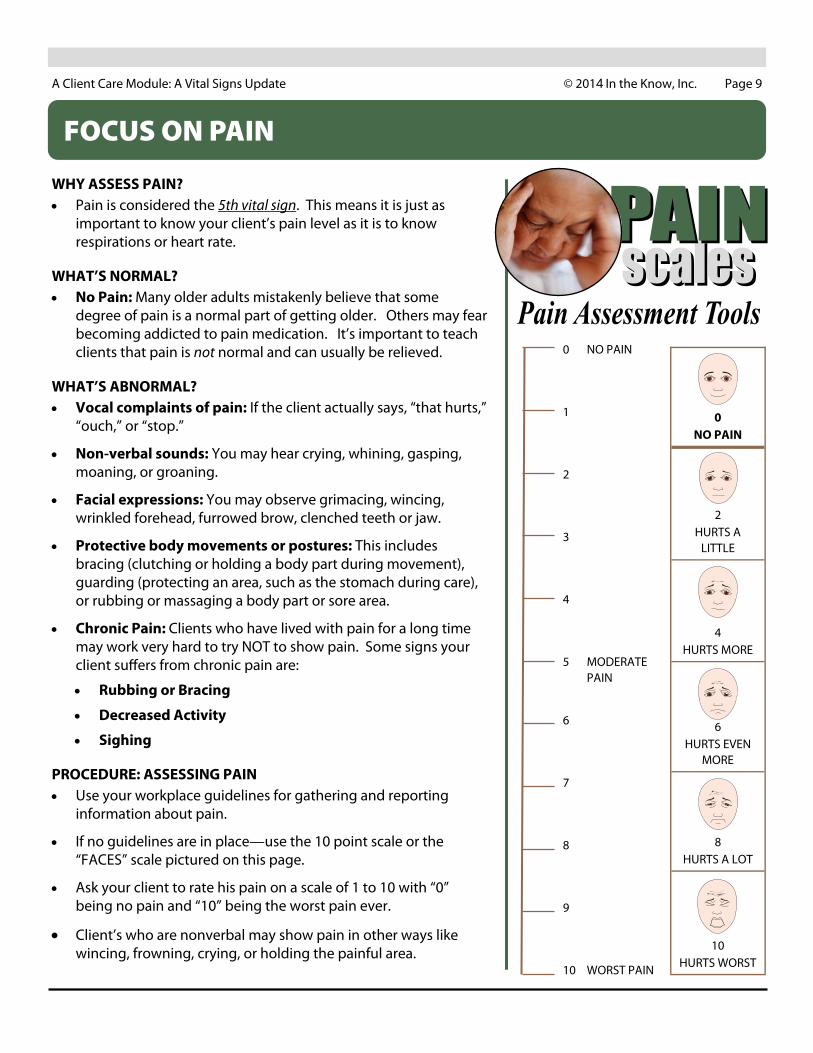
FOCUS ON PAIN
WHY ASSESS PAIN? Pain is considered the 5th vital sign. This means it is just as
important to know your client’s pain level as it is to know respirations or heart rate.
WHAT’S NORMAL? No Pain: Many older adults mistakenly believe that some
degree of pain is a normal part of getting older. Others may fear becoming addicted to pain medication. It’s important to teach clients that pain is not normal and can usually be relieved.
WHAT’S ABNORMAL? Vocal complaints of pain: If the client actually says, “that hurts,”
“ouch,” or “stop.”
Non-verbal sounds: You may hear crying, whining, gasping, moaning, or groaning.
Facial expressions: You may observe grimacing, wincing, wrinkled forehead, furrowed brow, clenched teeth or jaw.
Protective body movements or postures: This includes bracing (clutching or holding a body part during movement), guarding (protecting an area, such as the stomach during care), or rubbing or massaging a body part or sore area.
Chronic Pain: Clients who have lived with pain for a long time may work very hard to try NOT to show pain. Some signs your client suffers from chronic pain are:
Rubbing or Bracing
Decreased Activity
Sighing
PROCEDURE: ASSESSING PAIN Use your workplace guidelines for gathering and reporting
information about pain.
If no guidelines are in place—use the 10 point scale or the “FACES” scale pictured on this page.
Ask your client to rate his pain on a scale of 1 to 10 with “0” being no pain and “10” being the worst pain ever.
Client’s who are nonverbal may show pain in other ways like wincing, frowning, crying, or holding the painful area.
0 NO PAIN
2 HURTS A
LITTLE
4 HURTS MORE
6 HURTS EVEN
MORE
8 HURTS A LOT
10 HURTS WORST
0 NO PAIN
1
2
3
4
5 MODERATE PAIN
6
7
8
9
10 WORST PAIN
© 201 In the Know, Inc. Page 10 A Client Care Module: A Vital Signs Update
REPORTING AND DOCUMENTING VITAL SIGNS
Checking your client’s vital signs is important. But, what you do with that information is just as important. Record your client’s vital signs by following the documentation policies at your workplace.
Be sure to note if your client has had alcohol, tobacco or caffeine within thirty minutes of your vital signs check. If a client has just been exercising or taking a hot bath, document that as well. Any of these things can cause an abnormal vital sign result.
Remember that when you document information about your clients, you are trying to create a picture about the client’s condition. You want the people who read your documentation to know exactly what you mean.
PROCEDURE: DOCUMENTING T, P, R & BP
Before you check your client’s vital signs, make sure you have paper and pen handy. Don’t try to remember the numbers until later. Instead, write the results down as soon as you finish.
It doesn’t matter what order you go in . . . but, it’s best to pick a routine and stick to it. That way you will be sure do each check, every time, on every client.
ATTENTION: Abnormal vital signs are considered “URGENT.” If you observe an abnormal vital sign . . . STOP what you are doing and VERBALLY REPORT to a nurse or your supervisor right away. Abnormal vital signs may be immediately life threatening!
Documenting Temperature: It’s not enough to just document the temperature. You must also make a note of where it was taken (oral, axillary, rectal, tympanic).
Documenting Pulse: Documenting just a number for pulse won’t paint the complete picture. You should also make a note if the heart beats feel regular (evenly spaced) or irregular (without any pattern or with just a few skipped beats).
Documenting Respirations: Again, just a number is not enough! You should also mention if the breaths were regular, shallow or deep. Did you hear any gurgling, rattling, or wheezing? Document and immediately report to the nurse if the client is struggling to breathe.
Documenting Blood Pressure: Along with the BP result, you must also document which arm was used and the client’s position (lying, sitting, standing).
What do you do when your client has abnormal vital signs?
If your client is in immediate distress (no breathing, no pulse), call for help! DO NOT LEAVE THE CLIENT ALONE.
Start CPR (unless a DNR or do not resuscitate order is in place.
Continue CPR until help arrives.
If you feel the abnormal vital sign does not match how your client appears . . . then recheck the measurement to confirm your initial observation. (For example, if you felt a pulse rate of 40 but your client is sitting up and chatting with you, recheck the pulse.)
Ask a co-worker to check the client if you are having trouble getting a measurement.
Use different equipment or take a manual measurement if it seems your equipment may be giving a false reading.
Report the abnormal value to the nurse or supervisor right away. Then, record the value in the chart along with the date, time, name and title of person you reported to.
© 201 In the Know, Inc. Page 11 A Client Care Module: A Vital Signs Update
ABOUT YOUR EQUIPMENT
1. Checking vital signs is a critical medical evaluation where the results may be a matter of life or death!
2. Vital signs include temperature, pulse, respirations and blood pressure. In addition, oxygen saturation and pain are considered vital signs you should be prepared to measure.
Before you check your client’s vital signs, make sure you have paper and pen handy. Don’t try to remember the numbers until later. Instead, write the results down as soon as you finish.
4. In this inservice you learned normal ranges for vital signs and general guidelines for documenting and reporting. However, your workplace may have different policies. FOLLOW YOUR WORKPLACE GUIDELINES!
5. When you document information about your clients, you are trying to create a picture about the client’s condition. Be sure to be as exact and thorough as possible so others will know exactly what you mean!
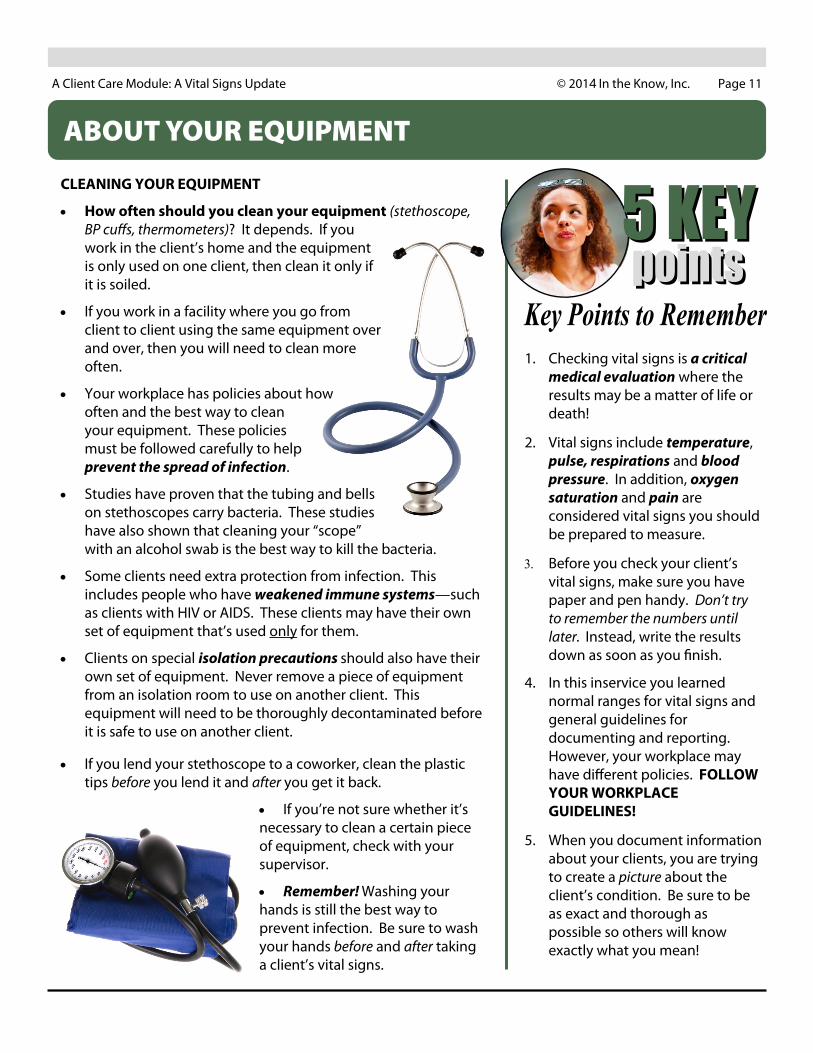
CLEANING YOUR EQUIPMENT
How often should you clean your equipment (stethoscope, BP cuffs, thermometers)? It depends. If you work in the client’s home and the equipment is only used on one client, then clean it only if it is soiled.
If you work in a facility where you go from client to client using the same equipment over and over, then you will need to clean more often.
Your workplace has policies about how often and the best way to clean your equipment. These policies must be followed carefully to help prevent the spread of infection.
Studies have proven that the tubing and bells on stethoscopes carry bacteria. These studies have also shown that cleaning your “scope” with an alcohol swab is the best way to kill the bacteria.
Some clients need extra protection from infection. This includes people who have weakened immune systems—such as clients with HIV or AIDS. These clients may have their own set of equipment that’s used only for them.
Clients on special isolation precautions should also have their own set of equipment. Never remove a piece of equipment from an isolation room to use on another client. This equipment will need to be thoroughly decontaminated before it is safe to use on another client.
If you lend your stethoscope to a coworker, clean the plastic tips before you lend it and after you get it back.
If you’re not sure whether it’s necessary to clean a certain piece of equipment, check with your supervisor.
Remember! Washing your hands is still the best way to prevent infection. Be sure to wash your hands before and after taking a client’s vital signs.
© 201 In the Know, Inc. Page 12 A Client Care Module: A Vital Signs Update
FINAL TIPS
Now that you‘ve read this inservice on vital signs, take a moment to jot down a
couple of things you learned that you didn’t know before.
FOR ALL VITAL SIGNS Be sure to explain to your clients what you are going to do—
before you do it.
Make sure you know how to operate every piece of equipment. For example, if your workplace gets a new kind of electronic thermometer, don’t be shy about asking for a demonstration.
Ask your clients not to talk to you while you are taking their vital signs. You’ll get a more accurate reading if the client is quiet and you can concentrate.
Remember to make the client comfortable after you’ve finished taking the vital signs.
TEMPERATURE Many electronic thermometers turn on automatically when you
insert the probe into a probe cover. Be sure the thermometer is ready before inserting it in the client’s mouth.
PULSE Press gently. If you press too hard on a client’s wrist, you might
stop the flow of blood. If this happens, you won’t feel a pulse.
If your client has just been exercising, you might want to wait ten minutes before checking the pulse. Otherwise, the client’s pulse might seem abnormally high.
If you know that a client has an irregular pulse, count his or her pulse for a full minute. This helps you get a more accurate result.
RESPIRATIONS Remember that babies and young children tend to breathe with
their abdominal muscles. This means you may see their bellies rise and fall more than their chests.
BLOOD PRESSURE Don’t pump the blood pressure cuff up too high. You only need
to pump the cuff up about 30mm HG higher than the client’s top number. For example, if you know your client’s systolic BP is usually 124, then you only need to pump the cuff up to 160 Making the cuff too tight can be painful.
If you take a client’s blood pressure regularly, make sure you always take it in the same position. For example, don’t have the client stand one day and sit the next.