A Coming of Age for Australia and its Air...
68
A Coming of Age for Australia and its Air Force
Transcript of A Coming of Age for Australia and its Air...

A Coming of Age for Australia and its Air Force
© Commonwealth of Australia 2013
This work is copyright. Apart from any use as permitted under the Copyright Act 1968, no part may be reproduced by any process without prior written permission. Inquiries should be made to the publisher.
Disclaimer
The views expressed in this work are those of the author and do not necessarily reflect the official policy or position of the Department of Defence, the Royal Australian Air Force or the Government of Australia. The Commonwealth of Australia will not be legally responsible in contract, tort or otherwise, for any statements made in this document.
All imagery contained in this publication has been approved for use.
National Library of Australia Cataloguing-in-Publication entry
Author: Weston, Brian.
Title: A coming of age for Australia and its Air Force: the air campaign over Northern Australia - 1943 / Brian Weston.
Publisher: Air Power Development Centre
ISBN: 9781920800963 (paperback)
Notes: Includes bibliographical references.
Subjects: Australia. Royal Australian Air Force.
World War, 1939–1945--Aerial operations, Japanese--History.
World War, 1939–1945--Aerial operations, Australian--History.
Bombing, Aerial--Australia, Northern--History.
Air power--Australia--History.
Dewey Number: 358.42
Published and distributed by:Air Power Development CentreF3-G, Department of DefencePO Box 7932CANBERRA BC 2610 AUSTRALIA
Telephone: + 61 2 6128 7041 Facsimile: + 61 2 6128 7053Email: [email protected]: www.airforce.gov.au/airpower

A Coming of Age for Australia and its Air ForceThe Air Campaign over Northern Australia – 1943
Brian Weston
War for Air Supremacy over Northern Australiaand
Lessons for Defence Preparedness in the 21st Century

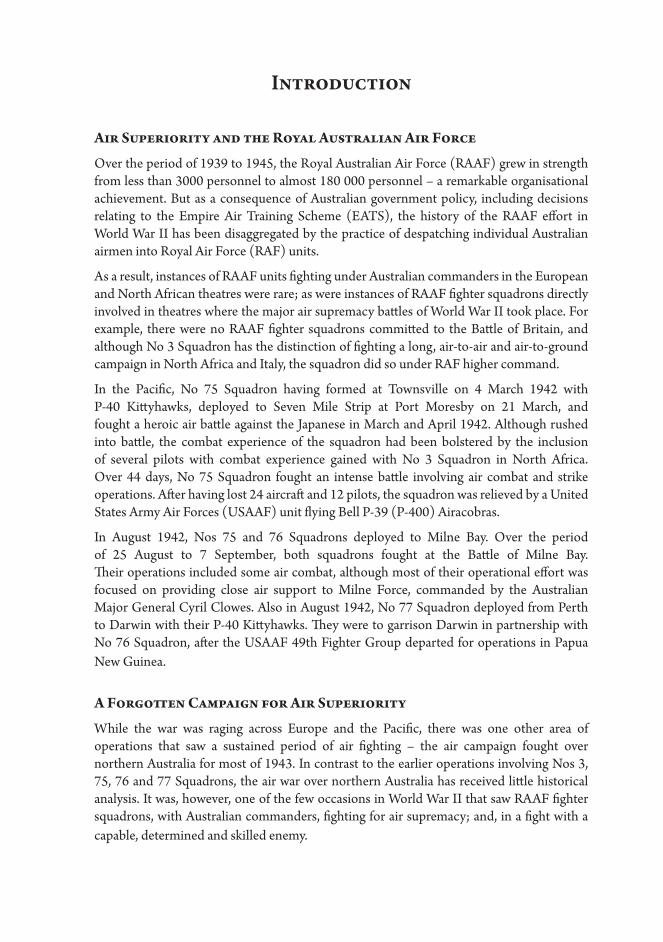
About the Author
Brian Weston’s air force career included postings to all four RAAF fighter squadrons, including as a RAAF fighter combat instructor. He commanded No 75 Squadron when equipped with Mirage 111O aircraft and flew Hunter, Avon Sabre, Mirage 111O and F/A-18 aircraft.
He is a graduate of the United States Air Force, Air Warfare College, and of the Royal College of Defence Studies, London. He commanded the RAAF Tactical Fighter Group and served as Assistant Chief of Defence Force for Operations. In 1997 he transferred to the RAAF Reserve and following the Black Hawk mid-air collision, he and John Faulkner - Deputy Chair of Air Services Australia, conducted an Independent Review of ADF Airworthiness.
His later career involved working as a defence and industry consultant, and as a company director. He held the appointment of Executive Director of the Association of Australian Aerospace Industries and was the inaugural “Industry Chair” of the Defence Capability Advisory Forum.
He was a non-executive director of National Air Support when operating the Coastwatch fleet of aircraft for Customs Australia and consulted to the Australian Strategic Policy Institute on their 2002 review of the Joint Strike Fighter – The Big Deal. In 2003 he published a concise history of the Australian aviation industry for the RAAF Aerospace Centre and recently drafted an essay on the future utility of Unmanned Aerial Systems, posted on the Sir Richard Williams Foundation website.
He was an honorary visiting fellow at the Aerospace, Mechanical and Civil Engineering School at UNSW@ADFA over the period 2005-2012 and was appointed as Chair of the SAI Global Certification Board in 2002. He has been consulting to Northrop Grumman since 2004.

Pressure Point by Drew Harrison. Second Place Winner, 2012 RAAF Heritage Awards.


viii
Introduction
Air Superiority and the Royal Australian Air Force
Over the period of 1939 to 1945, the Royal Australian Air Force (RAAF) grew in strength from less than 3000 personnel to almost 180 000 personnel – a remarkable organisational achievement. But as a consequence of Australian government policy, including decisions relating to the Empire Air Training Scheme (EATS), the history of the RAAF effort in World War II has been disaggregated by the practice of despatching individual Australian airmen into Royal Air Force (RAF) units.
As a result, instances of RAAF units fighting under Australian commanders in the European and North African theatres were rare; as were instances of RAAF fighter squadrons directly involved in theatres where the major air supremacy battles of World War II took place. For example, there were no RAAF fighter squadrons committed to the Battle of Britain, and although No 3 Squadron has the distinction of fighting a long, air-to-air and air-to-ground campaign in North Africa and Italy, the squadron did so under RAF higher command.
In the Pacific, No 75 Squadron having formed at Townsville on 4 March 1942 with P-40 Kittyhawks, deployed to Seven Mile Strip at Port Moresby on 21 March, and fought a heroic air battle against the Japanese in March and April 1942. Although rushed into battle, the combat experience of the squadron had been bolstered by the inclusion of several pilots with combat experience gained with No 3 Squadron in North Africa. Over 44 days, No 75 Squadron fought an intense battle involving air combat and strike operations. After having lost 24 aircraft and 12 pilots, the squadron was relieved by a United States Army Air Forces (USAAF) unit flying Bell P-39 (P-400) Airacobras.
In August 1942, Nos 75 and 76 Squadrons deployed to Milne Bay. Over the period of 25 August to 7 September, both squadrons fought at the Battle of Milne Bay. Their operations included some air combat, although most of their operational effort was focused on providing close air support to Milne Force, commanded by the Australian Major General Cyril Clowes. Also in August 1942, No 77 Squadron deployed from Perth to Darwin with their P-40 Kittyhawks. They were to garrison Darwin in partnership with No 76 Squadron, after the USAAF 49th Fighter Group departed for operations in Papua New Guinea.
A Forgotten Campaign for Air Superiority
While the war was raging across Europe and the Pacific, there was one other area of operations that saw a sustained period of air fighting – the air campaign fought over northern Australia for most of 1943. In contrast to the earlier operations involving Nos 3, 75, 76 and 77 Squadrons, the air war over northern Australia has received little historical analysis. It was, however, one of the few occasions in World War II that saw RAAF fighter squadrons, with Australian commanders, fighting for air supremacy; and, in a fight with a capable, determined and skilled enemy.

2
A COMING OF AGE FOR AUSTRALIA AND ITS AIR FORCE
Make no mistake: although not well known by Australians, the air battle over northern Australia was a life and death struggle for the pilots of No 1 Fighter Wing, who from January 1943, had assumed responsibility for the air defence of northern Australia. Over the next year, this RAAF fighter wing of 75 Spitfires with support from RAAF air warning and fighter direction radar assets and a repair and salvage unit, engaged in a deadly campaign for air supremacy, all conducted under RAAF higher command.
Anthony Cooper’s book, Darwin Spitfires: The Real Battle for Australia, is of special interest to those seeking an understanding of the performance of the Spitfire in a theatre well removed from England. It is also of interest to students of air power strategies and air fighting tactics, and it also provides an insight into Australian leadership issues, especially RAAF command and leadership. Darwin Spitfires has stimulated this study, in two parts, about the campaign for air superiority over northern Australia in 1943.
Part One offers a short commentary on the campaign and is based on the extensive research done by Anthony Cooper. It contains selective comment on the war in the air over northern Australia. It is by no means a comprehensive analysis, merely a commentary on some of the issues of interest.
Part Two is an opinion piece discussing the policy implications and lessons that flowed from the campaign. It attempts to place the 1943 air campaign within a wider national security framework, and discusses it from an air power and air doctrine perspective. Part Two also reviews how other air forces were flying and fighting in 1943, so as to enable a better understanding of the conduct of the Australian air campaign in a global perspective.
Although many of the historical aspects, especially in Part One, draw on the extensive research done by Anthony Cooper, the responsibility for the opinions expressed and the conclusions drawn lie with the author of this paper. Notwithstanding, this paper could not have been written without the research, factual presentation, and comprehensive dissection of each air battle already completed by Anthony Cooper.

Part One
The Air Campaign over Northern Australia in 1943
Spitfires for Australia – A Prelude
Australia was unprepared for World War II, indeed hopelessly so; and history has been too kind to those in government and public office who were responsible for the wanton neglect of Australia’s interests in the late 1930s and early 1940s. It was not as if there was an absence of warning signs about the coming world crisis. Australia’s greatest industrialist, Essington Lewis, who in 1934, on returning from a visit to Europe, the US and Japan, reported his grave fears about the latent aggression festering in Japan and of Australia’s unpreparedness for conflict. Yet despite the Japanese having invaded Manchuria in 1931 and China in 1937, the Australian Government remained wilfully blind to Australia’s changing geostrategic environment and the emerging threat.
Lewis continued to express his concerns, including to government. He stated that his concerns about Australia’s defence policy were fourfold: Britain’s steel industry was on the wane and Australians seemed unaware of this; he doubted that Britain could defend Australia; he was concerned about the industrial capacity of Japan and the latent aggression resident there; and, he had concluded that aircraft would play a major part in the defence of Australia, yet the nation seemed totally unprepared for such a technological development. 1
The depth of the national security illusion indulged in by successive Australian Governments in the period before World War II, while passed on to Australians as a coherent and credible defence policy, is concisely reviewed by Paul Kelly in his political history covering Australia’s first 100 years. Official war historian, Bob O’Neill, also comments that: ‘Australia did indulge in a great deal of self-delusion over the whole Singapore issue’. Kelly also documents the shrill responses by Australia’s leaders when Singapore fell and reality dawned – he also comments on how an uncharacteristic pessimism swept across the nation in the face of the advancing Japanese threat. It was not Australia’s proudest moment. 2
Some Australians, however, were more perceptive than their government. Lewis, along with several other leading Australian industrialists such as W.S. Robinson, were so concerned that in October 1936, they used their influence and resources to establish
1 Brian Hill, Wirraway to Hornet: A History of the Commonwealth Aircraft Corporation Pty Ltd, Southern Cross Publications, Bulleen, Victoria, 1998, p. 4. See also: Geoffrey Blainey, The Steel Master: a Life of Essington Lewis, Macmillan, South Melbourne, 1971; and, Clive Turnbull, Great Australians: Essington Lewis, Oxford University Press, Melbourne, 1963.
2 Paul Kelly, 100 Years: The Australian Story, Allen & Unwin, Crows Nest, 2001, especially the chapter Farewell Great and Powerful Friends, and pp. 218–224.

4
A COMING OF AGE FOR AUSTRALIA AND ITS AIR FORCE
the Commonwealth Aircraft Corporation (CAC) – a private company that would build military aircraft in Australia. Lewis, supported by Richard Williams, RAAF Chief of the Air Staff (CAS), badgered and cajoled the Australian Government for an order to build the North American NA-23. In January 1937, the government placed an order with CAC to build under licence the improved North American Aviation NA-33. The decision to establish CAC and to order the NA-33 was openly and strongly criticised in Britain.
In one of Australia’s most auspicious industrial achievements, CAC constructed a plant at Fishermens Bend in Melbourne to manufacture both aircraft and aircraft engines. In a little over two years, CAC flew the prototype Wirraway on 27 March 1939. This was an achievement that enhanced Australia’s capacity to manufacture, assemble, repair and maintain combat aircraft during World War II; but surprisingly, the first flight of the Wirraway was not witnessed by even a single minister of the Australian Government. 3
Even after war broke out in Europe in September 1939 and after Japan had invaded Indo-China in September 1940, Australia’s political leaders still neglected their responsibilities for national defence until they were jolted out of their complacency on the night of 7/8
3 Dr Peter Ewer, Wounded Eagle: The Bombing of Darwin and Australia’s Air Defence Scandal, New Holland Publishers Pty Ltd, 2009, Wounded Eagle, pp. 108–109.
The word ‘Commonwealth’ has led many Australians to believe that the CAC was a government-owned business entity. It was not. The CAC was a private company with the following shareholders: BHP Pty Ltd – 33 per cent; BHP Associated Smelters Pty Ltd – 25 per cent; ICI of Australia and New Zealand – 15 per cent; General Motors Holden Ltd – 10 per cent; Electrolytic Zinc of Australasia – 8 per cent; and, Orient Steam Navigation Co Ltd – 8 per cent.
As a consequence of the preferential trade provisions in place across the British Empire, the Society of British Aircraft Constructors (SBAC) regarded Australia as their ‘protected’ marketplace. The manufacture of an American aircraft by an Australian company in which an American company (GMH) had a 10 per cent shareholding, was seen as a threat to British mercantile interests. In the next few years, British interests attempted to isolate CAC and to neutralise its influence in Australian aviation matters—they largely succeeded.*
*Hill, Wirraway to Hornet, pp. 8, 12, 18–22; Dr Peter Ewer, Wounded Eagle: The Bombing of Darwin and Australia’s Air Defence Scandal, New Holland Publishers Pty Ltd, 2009, pp. 104–107; and, W.S. Robinson, If I Remember Rightly: The Memoirs of W.S. Robinson 1876–1963, Geoffrey Blainey (ed.), Cheshire Publications, Melbourne, 1967, pp. 173–176.

5
PART ONE: THE AIR CAMPAIGN IN NORTHERN AUSTRALIA – 1943
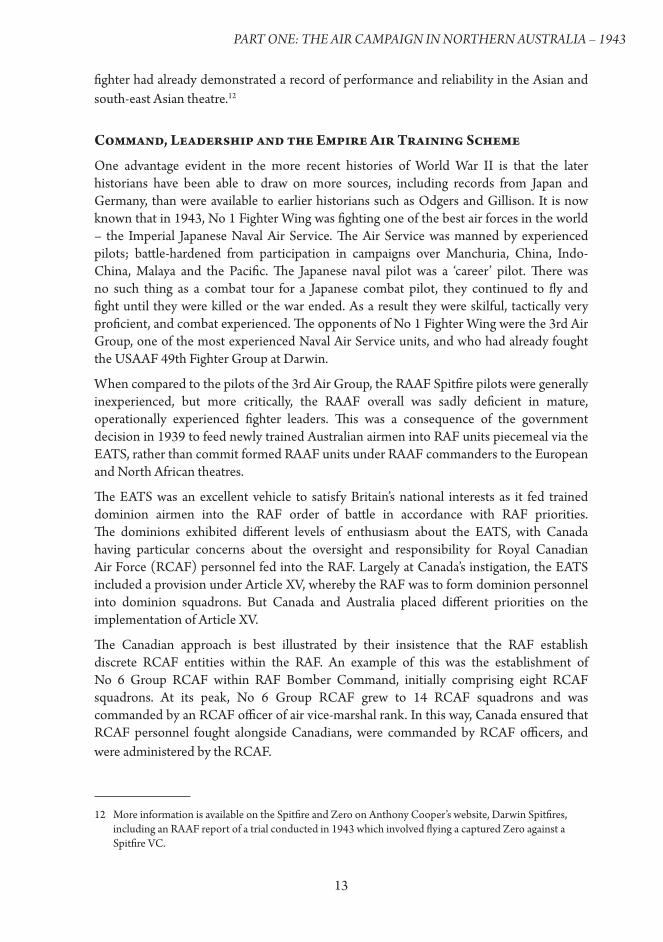
December 1941, when the Japanese suddenly launched their pre-emptive attack on Pearl Harbor. Not long afterwards, on 19 February 1942, the Japanese attacked an undefended Darwin, decimating Major Floyd Pell’s USAAF 33rd Pursuit Squadron and its 10 P-40 Kittyhawks on transit to Java.
For decades, the magnitude of the first air raid on Darwin has been grossly under-estimated. Gillison’s official history reports that the Japanese Naval Air Service raid conducted on the morning of 19 February 1942 comprised 81 aircraft consisting of 27 level bombers, 27 dive-bombers and 27 fighters.
But Lewis and Ingman writing in 2013 with the aid of extensive Japanese historical documents conclude that the attacking naval air force comprised 81 Nakajima B5N2 ‘Kate’ level bombers, 71 Aichi D3A1 “Val” dive-bombers and 36 Zero fighters; a total of 188 aircraft.
This force was launched from four aircraft carriers, with each Kate bomber carrying one 800 kilogram bomb and each Val dive-bomber carrying one 250 kilogram bomb.*
*Dr Tom Lewis, and Peter Ingham, Carrier Attack – Darwin 1942: The Complete Guide to Australia’s own Pearl Harbor, Avonmore Books, Kent Town, South Australia, 2013, p. 88.
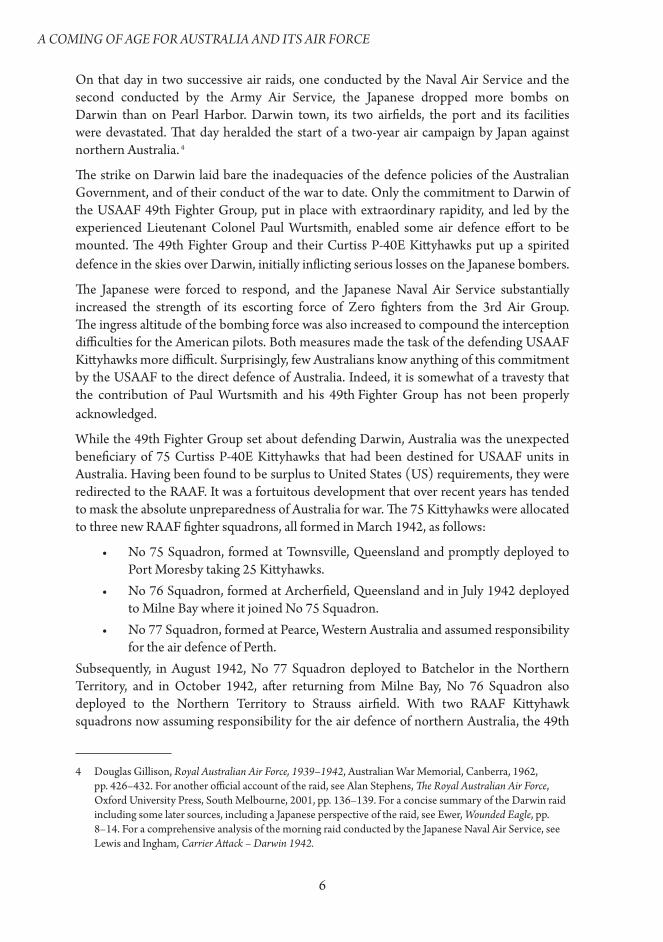
Ruins of main hangar at RAAF Base Darwin, 19 February, 1942
6
A COMING OF AGE FOR AUSTRALIA AND ITS AIR FORCE
On that day in two successive air raids, one conducted by the Naval Air Service and the second conducted by the Army Air Service, the Japanese dropped more bombs on Darwin than on Pearl Harbor. Darwin town, its two airfields, the port and its facilities were devastated. That day heralded the start of a two-year air campaign by Japan against northern Australia. 4
The strike on Darwin laid bare the inadequacies of the defence policies of the Australian Government, and of their conduct of the war to date. Only the commitment to Darwin of the USAAF 49th Fighter Group, put in place with extraordinary rapidity, and led by the experienced Lieutenant Colonel Paul Wurtsmith, enabled some air defence effort to be mounted. The 49th Fighter Group and their Curtiss P-40E Kittyhawks put up a spirited defence in the skies over Darwin, initially inflicting serious losses on the Japanese bombers.
The Japanese were forced to respond, and the Japanese Naval Air Service substantially increased the strength of its escorting force of Zero fighters from the 3rd Air Group. The ingress altitude of the bombing force was also increased to compound the interception difficulties for the American pilots. Both measures made the task of the defending USAAF Kittyhawks more difficult. Surprisingly, few Australians know anything of this commitment by the USAAF to the direct defence of Australia. Indeed, it is somewhat of a travesty that the contribution of Paul Wurtsmith and his 49th Fighter Group has not been properly acknowledged.
While the 49th Fighter Group set about defending Darwin, Australia was the unexpected beneficiary of 75 Curtiss P-40E Kittyhawks that had been destined for USAAF units in Australia. Having been found to be surplus to United States (US) requirements, they were redirected to the RAAF. It was a fortuitous development that over recent years has tended to mask the absolute unpreparedness of Australia for war. The 75 Kittyhawks were allocated to three new RAAF fighter squadrons, all formed in March 1942, as follows:
• No 75 Squadron, formed at Townsville, Queensland and promptly deployed to Port Moresby taking 25 Kittyhawks.
• No 76 Squadron, formed at Archerfield, Queensland and in July 1942 deployed to Milne Bay where it joined No 75 Squadron.
• No 77 Squadron, formed at Pearce, Western Australia and assumed responsibility for the air defence of Perth.
Subsequently, in August 1942, No 77 Squadron deployed to Batchelor in the Northern Territory, and in October 1942, after returning from Milne Bay, No 76 Squadron also deployed to the Northern Territory to Strauss airfield. With two RAAF Kittyhawk squadrons now assuming responsibility for the air defence of northern Australia, the 49th
4 Douglas Gillison, Royal Australian Air Force, 1939–1942, Australian War Memorial, Canberra, 1962, pp. 426–432. For another official account of the raid, see Alan Stephens, The Royal Australian Air Force, Oxford University Press, South Melbourne, 2001, pp. 136–139. For a concise summary of the Darwin raid including some later sources, including a Japanese perspective of the raid, see Ewer, Wounded Eagle, pp. 8–14. For a comprehensive analysis of the morning raid conducted by the Japanese Naval Air Service, see Lewis and Ingham, Carrier Attack – Darwin 1942.

7
PART ONE: THE AIR CAMPAIGN IN NORTHERN AUSTRALIA – 1943
Fighter Group deployed to eastern Papua and New Guinea. The last three months of 1942 coincided with a lull in Japanese operations over northern Australia as Japan prioritised its operations towards Papua, New Guinea and the Solomon Islands, especially Guadalcanal. Both RAAF Kittyhawk squadrons had a relatively quiet time at Darwin as the 1942/1943 wet season approached.
Prior to Nos 76 and 77 Squadrons assuming responsibility for the air defence of northern Australia, the Australian Government initiated action to strengthen Australia’s air defences. In May 1942 with the Japanese firmly established in Timor only 600 kilometres from Darwin, Dr Evatt, Attorney-General and Minister for External Affairs, visited London and pressed Prime Minister Churchill to approve the despatch of Spitfire fighters to Australia. There is little to suggest that Evatt had any rational basis on which to select the Spitfire for the defence of Australia, or that he had taken Australian military advice on the issue. Evatt seems to have simply presumed the iconic fighter that had done well in the skies over southern England in 1940 would also do well in Australia.
Certainly Australia desperately needed fighters to provide air defence against the proximate Japanese threat; and having identified the Spitfire as the solution, the politician Evatt played a hard political game including causing some disquiet at senior levels in Britain with his references to the possible withdrawal of Australian troops from North Africa. But irrespective of his methods, Evatt achieved his aim. A reluctant Churchill approved the despatch of 75 Spitfires to Australia, although they would take time to arrive.
The first of the Spitfires left Britain for Australia in June 1942, although delivery was delayed after some aircraft were diverted to other theatres. Training for both aircrew and technical personnel was also required, so it was not until January 1943 that No 1 Fighter Wing RAAF took up its air defence task at Darwin.
Given the initial reluctance in supplying Spitfires to Australia, it was probably somewhat of a surprise (especially to the personnel of No 54 Squadron RAF) that Churchill also decided to deploy an RAF Spitfire unit to Australia. So in addition to the aircraft, a squadron of RAF personnel also left the green fields of England and were transported by sea to the frontier town of Darwin for duty until war’s end. Some might see irony in this.
The Spitfire in Northern Australia
In the northern hemisphere summer of 1940 at the height of the Battle of Britain, the Supermarine Spitfire, although available in lesser numbers than its fighter-in-arms the Hawker Hurricane, gained a legendary reputation in the skies over southern England. But subsequently, the fighter received mixed reviews especially over Darwin. This has generated much debate and considerable emotion given the Spitfire’s iconic reputation.
The Spitfire was designed as a point-defence interceptor fighter by a relatively small aircraft company – Supermarine – in a period when the British aircraft industry had fallen behind technological developments in aviation. For instance, the fast, all-metal, twin-engine Douglas DC-2 flew in 1934, marking a huge leap forward in the capability and technology of air transport. Among the advanced technologies used on the DC-2 was the constant-

8
A COMING OF AGE FOR AUSTRALIA AND ITS AIR FORCE
speed propeller, widely used in the US. When the prototype Spitfire flew some two years later, it was fitted with a two-blade, fixed-pitch propeller; one example illustrating how far Britain’s aviation industry had fallen behind developments in the US.
The Spitfire was not without developmental difficulties which the small industrial entity Supermarine struggled to resolve, and the aircraft was not built in a way that facilitated mass production. Many of these difficulties were still not sorted when the new ‘shadow factory’5 at Castle Bromwich, near Birmingham, began to mass-produce the aircraft.
5 ‘Shadow factory’ is a term assigned to a number of additional production locations created from existing automobile factories across Britain during World War II. Not all were covert as the term implies, though some were, with the Rover facility built entirely underground.
In July 1938, the British industrialist William Morris, then Lord Nuffield, working under instructions from the British government, commenced the construction of the Spitfire ‘shadow factory’ at Castle Bromwich. Two years later, not one Spitfire had been built. Indeed the factory was not even complete and the project was over budget by a factor of two.
A multitude of factors were to blame. Supermarine did not have the production engineering skills and processes for Castle Bromwich to establish tooling and production. Continuing changes in Spitfire specification and production management precluded the start of standardised mass production. The Air Ministry kept changing Castle Bromwich factory requirements. The workforce lacked training, discipline and motivation, and Nuffield himself – largely through failing to manage his workload and relationship with the Air Ministry – failed to appoint and oversee competent management at Castle Bromwich.
In May 1940, after Lord Beaverbrook had taken charge of the Ministry of Aircraft Production, Beaverbrook terminated Nuffield’s responsibility for Castle Bromwich. Slowly, the ‘shadow factory’ came online and by war’s end, had produced 12 000 Spitfires.*
*Jon Pressnell, Morris: The Cars and the Company, Haynes Publishing, Yeovil, Somerset, 2013, pp. 192–204.

9
PART ONE: THE AIR CAMPAIGN IN NORTHERN AUSTRALIA – 1943
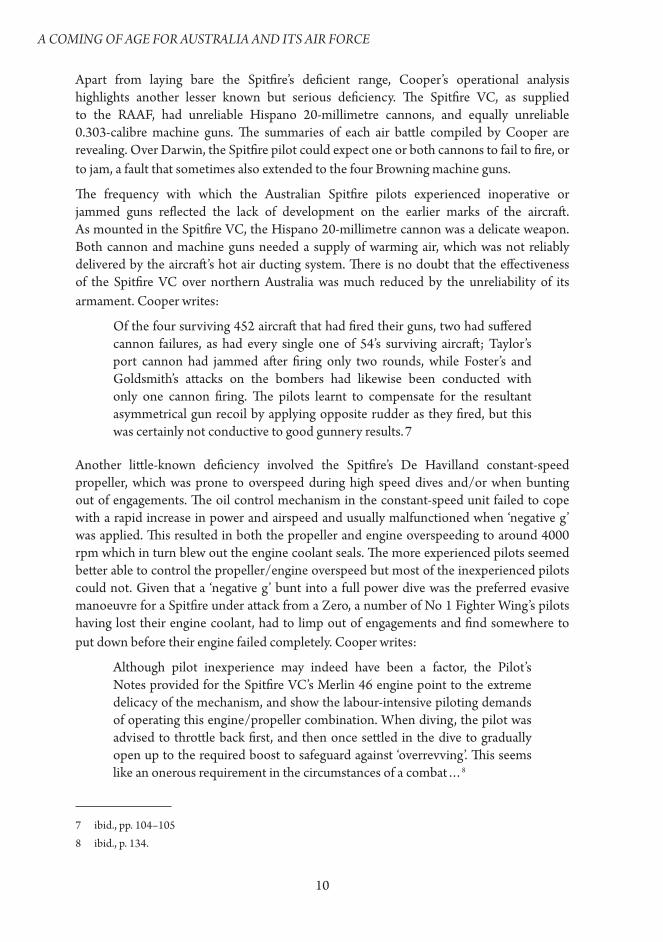
Australia was to receive the Spitfire VC, the tropicalised version of the fighter. Although the Spitfire came with a substantial reputation, it was well known that the aircraft was a short-range fighter. Unsurprisingly, the range of the Spitfire was quickly found to be inadequate for the air defence of northern Australia. Even when carrying its external, conformal belly tank, which held 30 gallons of fuel, the range of the Spitfire stood in stark contrast to the range of its adversary, the Mitsubishi A6M Zero – a fighter with seven league boots that could fly missions involving durations longer than seven hours.
Anthony Cooper writes:
Darwin’s Spitfires could fly up to 160 kilometres from base, fight, and get back to base with fuel in their tanks – but only just. By contrast, the Zeros were flying 600 kilometres, fighting, and flying home without apparent trouble. 6
6 Anthony Cooper, Darwin Spitfires: The Real Battle for Australia, New South Publishing, University of New South Wales, Sydney, 2011, p. 116.
Mitsubishi A6M2 Zero
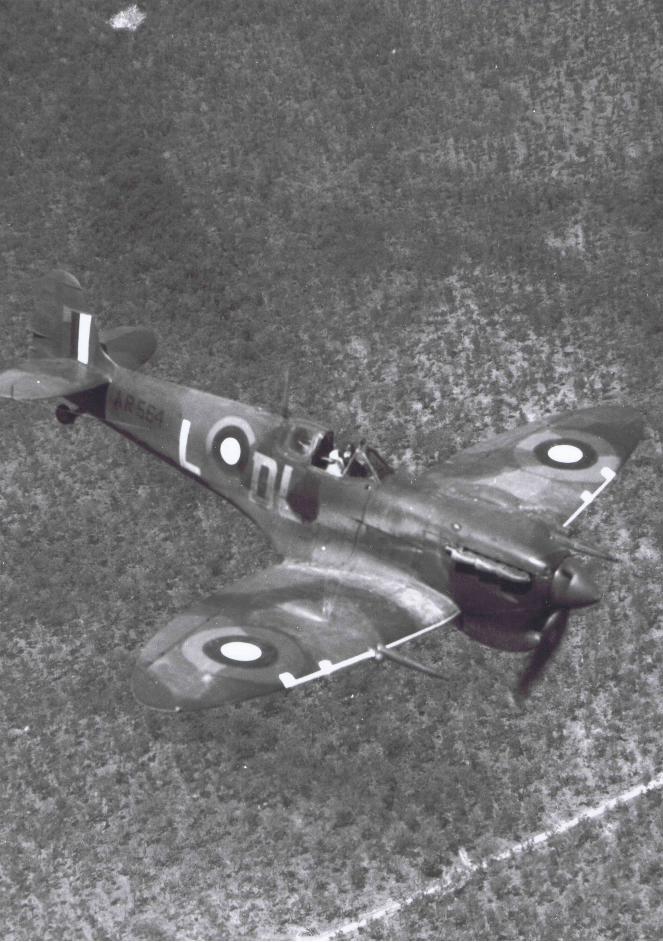
RAAF Supermarine Spitfire VC (Tropical) A58-31
10
A COMING OF AGE FOR AUSTRALIA AND ITS AIR FORCE
Apart from laying bare the Spitfire’s deficient range, Cooper’s operational analysis highlights another lesser known but serious deficiency. The Spitfire VC, as supplied to the RAAF, had unreliable Hispano 20-millimetre cannons, and equally unreliable 0.303-calibre machine guns. The summaries of each air battle compiled by Cooper are revealing. Over Darwin, the Spitfire pilot could expect one or both cannons to fail to fire, or to jam, a fault that sometimes also extended to the four Browning machine guns.
The frequency with which the Australian Spitfire pilots experienced inoperative or jammed guns reflected the lack of development on the earlier marks of the aircraft. As mounted in the Spitfire VC, the Hispano 20-millimetre cannon was a delicate weapon. Both cannon and machine guns needed a supply of warming air, which was not reliably delivered by the aircraft’s hot air ducting system. There is no doubt that the effectiveness of the Spitfire VC over northern Australia was much reduced by the unreliability of its armament. Cooper writes:
Of the four surviving 452 aircraft that had fired their guns, two had suffered cannon failures, as had every single one of 54’s surviving aircraft; Taylor’s port cannon had jammed after firing only two rounds, while Foster’s and Goldsmith’s attacks on the bombers had likewise been conducted with only one cannon firing. The pilots learnt to compensate for the resultant asymmetrical gun recoil by applying opposite rudder as they fired, but this was certainly not conductive to good gunnery results. 7
Another little-known deficiency involved the Spitfire’s De Havilland constant-speed propeller, which was prone to overspeed during high speed dives and/or when bunting out of engagements. The oil control mechanism in the constant-speed unit failed to cope with a rapid increase in power and airspeed and usually malfunctioned when ‘negative g’ was applied. This resulted in both the propeller and engine overspeeding to around 4000 rpm which in turn blew out the engine coolant seals. The more experienced pilots seemed better able to control the propeller/engine overspeed but most of the inexperienced pilots could not. Given that a ‘negative g’ bunt into a full power dive was the preferred evasive manoeuvre for a Spitfire under attack from a Zero, a number of No 1 Fighter Wing’s pilots having lost their engine coolant, had to limp out of engagements and find somewhere to put down before their engine failed completely. Cooper writes:
Although pilot inexperience may indeed have been a factor, the Pilot’s Notes provided for the Spitfire VC’s Merlin 46 engine point to the extreme delicacy of the mechanism, and show the labour-intensive piloting demands of operating this engine/propeller combination. When diving, the pilot was advised to throttle back first, and then once settled in the dive to gradually open up to the required boost to safeguard against ‘overrevving’. This seems like an onerous requirement in the circumstances of a combat…8
7 ibid., pp. 104–1058 ibid., p. 134.
11
PART ONE: THE AIR CAMPAIGN IN NORTHERN AUSTRALIA – 1943
Cooper has also helped understand the differing fighting characteristics of the Spitfire and the Zero, a topic where much has been written and asserted, sometimes with more emotion than fact. The heavier Spitfire had a slight edge in speed and a clear advantage in altitude; its high-altitude performance benefitting from the excellent two-speed supercharger fitted to its Rolls-Royce Merlin 46 engine. At high speed, the Spitfire could maintain a slightly higher rate of climb than the Zero, and it could dive at speeds considerably beyond the Zero’s ‘never exceed’ airspeed. Notwithstanding, it is important not to overstate this diving speed advantage, as even with a speed differential of 50 kilometres per hour (25 knots), it still takes 18 seconds to gain a distance advantage of 250 metres; ample time for a Zero pilot to fire several bursts of cannon fire at an egressing Spitfire.
On the other hand, the lightly built Zero, with its low wing loading and low stalling speed, could turn inside a Spitfire. This advantage was magnified at high altitude where an aircraft flies at a high ‘true’ airspeed, but at a low ‘indicated’ airspeed – a consequence of air density decreasing with altitude. As a result, fighting at high altitude involved fighting at lower indicated air speeds, a regime advantageous to the Zero. So tactically, the Spitfire should exploit its ability to fly higher, and thus dictate the terms and timing of the initial engagement. After attacking, the Spitfire should disengage from a Zero by diving away.
Cooper’s analysis of each air battle supports the validity of this assessment. Firstly, it highlights that a Spitfire pilot who turned for a second pass, or turned to fight a Zero, would open a window of opportunity for an escorting Zero to exploit its turning advantage. But more importantly, Cooper’s analysis illustrates the quickness with which an unsighted Zero could turn and fire at a Spitfire. The frequency with which the combat reports of No 1 Fighter Wing record that the first sign of a Zero fighter’s presence was the impact of bullets striking a Spitfire is noteworthy; certainly it was evidence that the experienced pilots of the Japanese 3rd Air Group could shoot accurately.
Fortunately for many No 1 Fighter Wing pilots, the Spitfire was built with a measure of armour protection. The Zero had none. Its designers preferred the virtues of lightness, including not using weighty and fuel capacity limiting, self-sealing fuel tanks. Armour plating provided some measure of protection to the Spitfire pilot, but some of that advantage was offset by the vulnerability of the Spitfire’s liquid-cooled engine to battle damage. A bullet strike on any element of the coolant plumbing or wing-mounted radiator meant terminal failure of the engine was imminent. Air-cooled engines did not have a complex cooling system that could be hit, which was an advantage for the Zero and its Nakajima Sakae air-cooled radial engine.
At lower altitude the Zero still turned better than a Spitfire. But as the fighting was now at much higher indicated airspeeds, the Spitfire pilot had more tactical options available, especially if the Spitfire did not slow below 184 knots, the ‘corner’ speed for a Spitfire turning at six gs. It is noteworthy that the Kittyhawk pilots of No 75 Squadron and the USAAF 49th Fighter Group also found that speed was essential when confronting Zeros. Kittyhawk pilots also had to cope with a generally more adverse tactical scenario, as they
12
A COMING OF AGE FOR AUSTRALIA AND ITS AIR FORCE
rarely had the advantage of altitude; a product of the performance of their Allison V-1710 engine falling away badly with altitude. 9
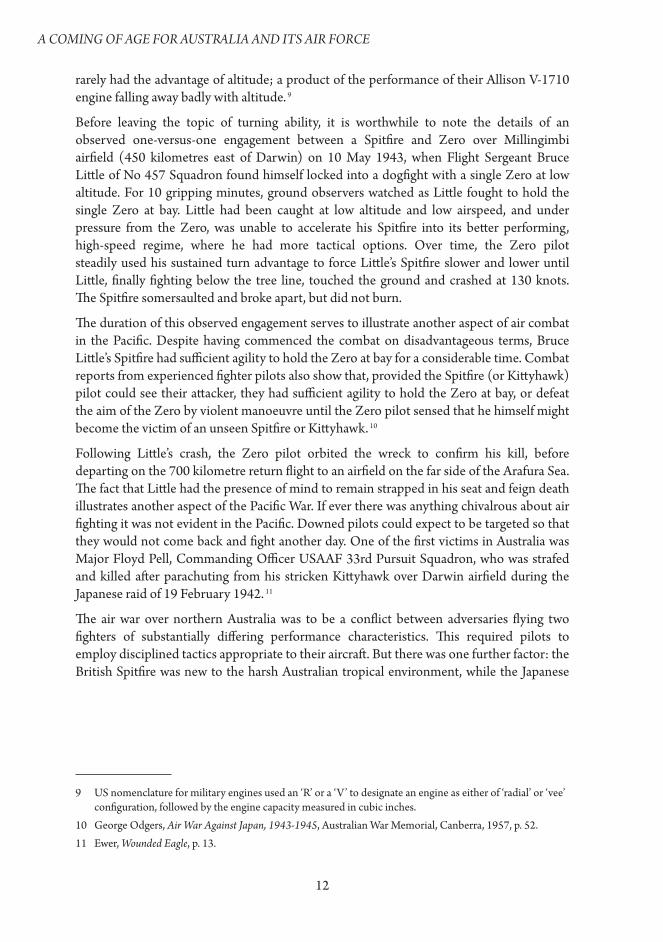
Before leaving the topic of turning ability, it is worthwhile to note the details of an observed one-versus-one engagement between a Spitfire and Zero over Millingimbi airfield (450 kilometres east of Darwin) on 10 May 1943, when Flight Sergeant Bruce Little of No 457 Squadron found himself locked into a dogfight with a single Zero at low altitude. For 10 gripping minutes, ground observers watched as Little fought to hold the single Zero at bay. Little had been caught at low altitude and low airspeed, and under pressure from the Zero, was unable to accelerate his Spitfire into its better performing, high-speed regime, where he had more tactical options. Over time, the Zero pilot steadily used his sustained turn advantage to force Little’s Spitfire slower and lower until Little, finally fighting below the tree line, touched the ground and crashed at 130 knots. The Spitfire somersaulted and broke apart, but did not burn.
The duration of this observed engagement serves to illustrate another aspect of air combat in the Pacific. Despite having commenced the combat on disadvantageous terms, Bruce Little’s Spitfire had sufficient agility to hold the Zero at bay for a considerable time. Combat reports from experienced fighter pilots also show that, provided the Spitfire (or Kittyhawk) pilot could see their attacker, they had sufficient agility to hold the Zero at bay, or defeat the aim of the Zero by violent manoeuvre until the Zero pilot sensed that he himself might become the victim of an unseen Spitfire or Kittyhawk. 10
Following Little’s crash, the Zero pilot orbited the wreck to confirm his kill, before departing on the 700 kilometre return flight to an airfield on the far side of the Arafura Sea. The fact that Little had the presence of mind to remain strapped in his seat and feign death illustrates another aspect of the Pacific War. If ever there was anything chivalrous about air fighting it was not evident in the Pacific. Downed pilots could expect to be targeted so that they would not come back and fight another day. One of the first victims in Australia was Major Floyd Pell, Commanding Officer USAAF 33rd Pursuit Squadron, who was strafed and killed after parachuting from his stricken Kittyhawk over Darwin airfield during the Japanese raid of 19 February 1942. 11
The air war over northern Australia was to be a conflict between adversaries flying two fighters of substantially differing performance characteristics. This required pilots to employ disciplined tactics appropriate to their aircraft. But there was one further factor: the British Spitfire was new to the harsh Australian tropical environment, while the Japanese
9 US nomenclature for military engines used an ‘R’ or a ‘V’ to designate an engine as either of ‘radial’ or ‘vee’ configuration, followed by the engine capacity measured in cubic inches.
10 George Odgers, Air War Against Japan, 1943-1945, Australian War Memorial, Canberra, 1957, p. 52.11 Ewer, Wounded Eagle, p. 13.
13
PART ONE: THE AIR CAMPAIGN IN NORTHERN AUSTRALIA – 1943
fighter had already demonstrated a record of performance and reliability in the Asian and south-east Asian theatre.12
Command, Leadership and the Empire Air Training Scheme
One advantage evident in the more recent histories of World War II is that the later historians have been able to draw on more sources, including records from Japan and Germany, than were available to earlier historians such as Odgers and Gillison. It is now known that in 1943, No 1 Fighter Wing was fighting one of the best air forces in the world – the Imperial Japanese Naval Air Service. The Air Service was manned by experienced pilots; battle-hardened from participation in campaigns over Manchuria, China, Indo-China, Malaya and the Pacific. The Japanese naval pilot was a ‘career’ pilot. There was no such thing as a combat tour for a Japanese combat pilot, they continued to fly and fight until they were killed or the war ended. As a result they were skilful, tactically very proficient, and combat experienced. The opponents of No 1 Fighter Wing were the 3rd Air Group, one of the most experienced Naval Air Service units, and who had already fought the USAAF 49th Fighter Group at Darwin.
When compared to the pilots of the 3rd Air Group, the RAAF Spitfire pilots were generally inexperienced, but more critically, the RAAF overall was sadly deficient in mature, operationally experienced fighter leaders. This was a consequence of the government decision in 1939 to feed newly trained Australian airmen into RAF units piecemeal via the EATS, rather than commit formed RAAF units under RAAF commanders to the European and North African theatres.
The EATS was an excellent vehicle to satisfy Britain’s national interests as it fed trained dominion airmen into the RAF order of battle in accordance with RAF priorities. The dominions exhibited different levels of enthusiasm about the EATS, with Canada having particular concerns about the oversight and responsibility for Royal Canadian Air Force (RCAF) personnel fed into the RAF. Largely at Canada’s instigation, the EATS included a provision under Article XV, whereby the RAF was to form dominion personnel into dominion squadrons. But Canada and Australia placed different priorities on the implementation of Article XV.
The Canadian approach is best illustrated by their insistence that the RAF establish discrete RCAF entities within the RAF. An example of this was the establishment of No 6 Group RCAF within RAF Bomber Command, initially comprising eight RCAF squadrons. At its peak, No 6 Group RCAF grew to 14 RCAF squadrons and was commanded by an RCAF officer of air vice-marshal rank. In this way, Canada ensured that RCAF personnel fought alongside Canadians, were commanded by RCAF officers, and were administered by the RCAF.
12 More information is available on the Spitfire and Zero on Anthony Cooper’s website, Darwin Spitfires, including an RAAF report of a trial conducted in 1943 which involved flying a captured Zero against a Spitfire VC.

14
A COMING OF AGE FOR AUSTRALIA AND ITS AIR FORCE
In contrast to the rigorous approach taken by Canada, Australia simply accepted that Australian EATS personnel would be posted by the RAF to RAAF Article XV squadrons on a ‘best efforts’ basis. There were no RAAF wings or RAAF groups established within the RAF, and generally RAAF Article XV squadrons were fully integrated into the RAF – administratively, logistically and operationally. The RAAF Article XV squadrons were usually formed around a genesis of RAF personnel, including commanders and key appointees, and depending on RAF requirements, they were slowly bolstered by the gradual inclusion of RAAF personnel; their maintenance staff was often RAF technical airmen. The RAAF Article XV fighter squadrons were numbered as follows: Nos 450 and 451 Squadrons RAAF, which fought in North Africa and Italy; and Nos 452, 453, 456 and 457 Squadrons formed within RAF Fighter Command. But there were substantial differences between the RAAF Article XV squadrons and the two ‘true’ RAAF squadrons: No 3 Squadron (fighter) and No 10 Squadron (anti-submarine). In 1940 these squadrons were, largely by chance, committed to North Africa and RAF Coastal Command respectively, as already extant RAAF squadrons.
The decision by the Australian government to commit to the EATS had grave consequences for the RAAF, as it largely precluded the experienced pre-war career RAAF officers from gaining wartime operational experience as either commanders or executives of RAAF units. The problem was compounded as the RAAF had only a small pool of pre-war officers, and their inability to lead squadrons and flights of newly recruited RAAF personnel abroad consigned them to non-operational support and administrative roles. What a contrast to the situation in World War I, when Richard Williams and others had the opportunity to gain early operational experience at the head of Australian Flying Corps (AFC) units, which was of so much benefit to Australia in the wartime leadership of the AFC.
The circumstances and consequences of the EATS decision are best detailed by Air Marshal Sir Richard Williams and Douglas Gillison, the official RAAF Historian. Williams highlights the rejection by Australia of a similar proposal by Britain in 1915, and of the strong conditional position taken by Canada regarding the operation of the EATS and of the RCAF Article XV squadrons.13 Gillison details the political nature of the EATS decision, the concerns of Canada, the consequences of side-lining experienced pre-war RAAF officers from operational experience, and of the implications of a loss of Australian national identity.14
The consequences of the EATS decision were to hang over the RAAF for the duration of the war. The decision not only deprived the pre-war career RAAF officers of operational experience, but also helped create dissatisfaction, frustration and inter-personal conflict within the middle and higher levels of the RAAF when those officers should have been exerting themselves at the head of RAAF units on operations. The poor inter-relationship
13 Sir Richard Williams, These Are Facts: The Autobiography of Air Marshal Sir Richard Williams, KBE, CB, DSO, Australian War Memorial and Australian Government Publishing Service, Canberra, 1977, Chapters 19, 20 and 21.
14 Gillison, Royal Australian Air Force, 1939-1942, pp. 74–120.

15
PART ONE: THE AIR CAMPAIGN IN NORTHERN AUSTRALIA – 1943
between senior RAAF officers and their continual inability to put personal issues aside and work in the greater interests of Australia and the RAAF is a constant theme in Joe Hewitt’s memoirs, Adversity in Success.15 During World War II, Joe Hewitt fastidiously maintained a diary which is the basis of his later book. His candid observations provide an extraordinary insight into the personal issues that afflicted much of the senior leadership of the fledgling RAAF in World War II.
Now, after three years of war, the RAAF, already under the pump over its command and leadership performance during the massive air raid on Darwin of 19 February 1942, had a major problem. It needed to select a well-qualified and operationally experienced RAAF officer to command No 1 Fighter Wing. That officer needed a grounding of pre-war training and flying experience that had been rounded out by three years of operational fighter command and operational staff experience. But there was no exemplary or even adequate candidate to lead No 1 Fighter Wing to war. The RAAF solved this problem by breaking one of the Principles of War – Unity of Command.
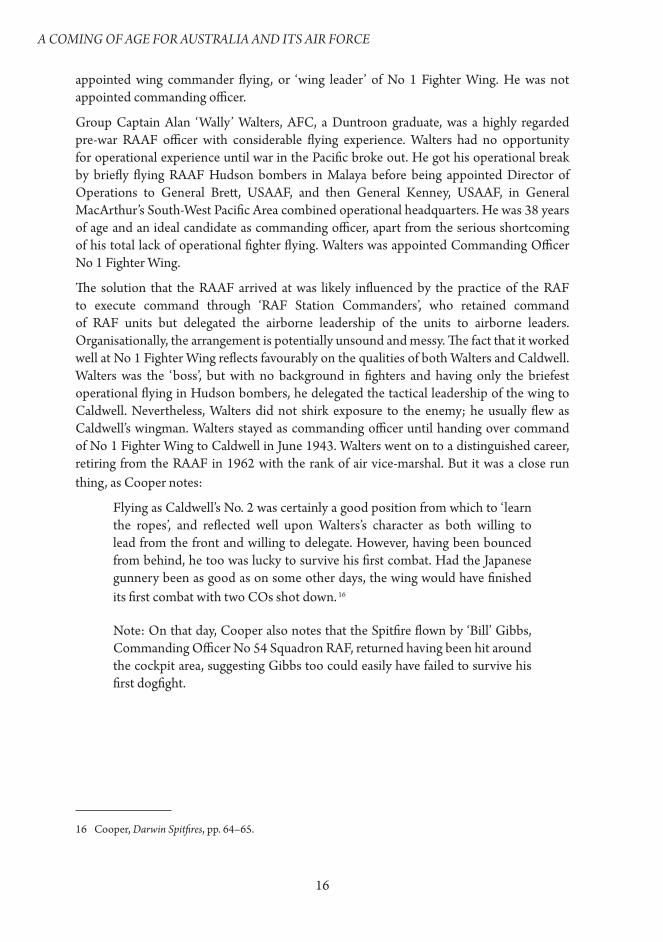
Clive Caldwell joined the RAAF in 1940. After EATS training he went to war in North Africa, initially flying Hurricanes then Curtiss P-40 Tomahawks/Kittyhawks. Caldwell was born in 1910 and was older than the maximum entry age for the EATS, but he falsified his application to gain entry into the RAAF. He also had the advantage of some previous flying experience. In 1941, Caldwell quickly racked up an impressive record of victories in air combat. His success reflected aspects of air combat that were not uncommon with other high-scoring fighter aces: be selective in attack, take opportune targets, close quickly to close range, shoot accurately if necessary at high deflection, and get out. In January 1942, he was appointed Commanding Officer No 112 Squadron RAF with the rank of squadron leader. Caldwell’s quick rise and his success in operations contrasted with the experience of the pre-war RAAF officers who remained at desks or led training units.
In 1942, Caldwell was recalled to Australia with 20 aircraft destroyed, becoming the highest scoring allied pilot in North Africa – he was also the highest scoring P-40 Tomahawk/Kittyhawk pilot of World War II. Wing Commander ‘Killer’ Caldwell, DFC and Bar, was
15 Joseph Hewitt, Adversity in Success: Extracts from Air Vice-Marshal Hewitt’s Diaries 1939-1948, Langate Publishing, South Yarra, Victoria, 1980.
SQNLDR Clive Caldwell 5 December 1941
16
A COMING OF AGE FOR AUSTRALIA AND ITS AIR FORCE
appointed wing commander flying, or ‘wing leader’ of No 1 Fighter Wing. He was not appointed commanding officer.
Group Captain Alan ‘Wally’ Walters, AFC, a Duntroon graduate, was a highly regarded pre-war RAAF officer with considerable flying experience. Walters had no opportunity for operational experience until war in the Pacific broke out. He got his operational break by briefly flying RAAF Hudson bombers in Malaya before being appointed Director of Operations to General Brett, USAAF, and then General Kenney, USAAF, in General MacArthur’s South-West Pacific Area combined operational headquarters. He was 38 years of age and an ideal candidate as commanding officer, apart from the serious shortcoming of his total lack of operational fighter flying. Walters was appointed Commanding Officer No 1 Fighter Wing.
The solution that the RAAF arrived at was likely influenced by the practice of the RAF to execute command through ‘RAF Station Commanders’, who retained command of RAF units but delegated the airborne leadership of the units to airborne leaders. Organisationally, the arrangement is potentially unsound and messy. The fact that it worked well at No 1 Fighter Wing reflects favourably on the qualities of both Walters and Caldwell. Walters was the ‘boss’, but with no background in fighters and having only the briefest operational flying in Hudson bombers, he delegated the tactical leadership of the wing to Caldwell. Nevertheless, Walters did not shirk exposure to the enemy; he usually flew as Caldwell’s wingman. Walters stayed as commanding officer until handing over command of No 1 Fighter Wing to Caldwell in June 1943. Walters went on to a distinguished career, retiring from the RAAF in 1962 with the rank of air vice-marshal. But it was a close run thing, as Cooper notes:
Flying as Caldwell’s No. 2 was certainly a good position from which to ‘learn the ropes’, and reflected well upon Walters’s character as both willing to lead from the front and willing to delegate. However, having been bounced from behind, he too was lucky to survive his first combat. Had the Japanese gunnery been as good as on some other days, the wing would have finished its first combat with two COs shot down. 16
Note: On that day, Cooper also notes that the Spitfire flown by ‘Bill’ Gibbs, Commanding Officer No 54 Squadron RAF, returned having been hit around the cockpit area, suggesting Gibbs too could easily have failed to survive his first dogfight.
16 Cooper, Darwin Spitfires, pp. 64–65.

17
PART ONE: THE AIR CAMPAIGN IN NORTHERN AUSTRALIA – 1943
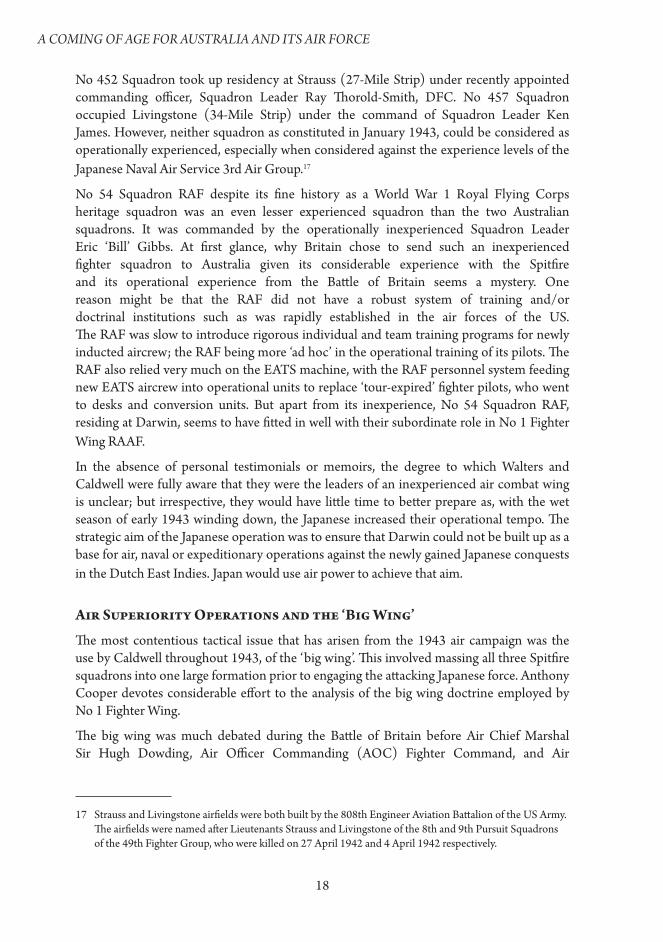
No 1 Fighter Wing comprised three Spitfire squadrons. The two RAAF fighter squadrons were No 452 Squadron and No 457 Squadron. Both were Article XV EATS squadrons formed by the RAF in Fighter Command. Anthony Cooper notes the generally solid performance of No 452 Squadron having seen nine months of operations over France, although he is sceptical about the over-claiming by its pilots later exposed by post-war access to German war records. He notes a similar less-than-claimed operational record for No 457 Squadron, which had been employed largely as a training unit.
Northern Territory Airfields, October 1945
18
A COMING OF AGE FOR AUSTRALIA AND ITS AIR FORCE
No 452 Squadron took up residency at Strauss (27-Mile Strip) under recently appointed commanding officer, Squadron Leader Ray Thorold-Smith, DFC. No 457 Squadron occupied Livingstone (34-Mile Strip) under the command of Squadron Leader Ken James. However, neither squadron as constituted in January 1943, could be considered as operationally experienced, especially when considered against the experience levels of the Japanese Naval Air Service 3rd Air Group.17
No 54 Squadron RAF despite its fine history as a World War 1 Royal Flying Corps heritage squadron was an even lesser experienced squadron than the two Australian squadrons. It was commanded by the operationally inexperienced Squadron Leader Eric ‘Bill’ Gibbs. At first glance, why Britain chose to send such an inexperienced fighter squadron to Australia given its considerable experience with the Spitfire and its operational experience from the Battle of Britain seems a mystery. One reason might be that the RAF did not have a robust system of training and/or doctrinal institutions such as was rapidly established in the air forces of the US. The RAF was slow to introduce rigorous individual and team training programs for newly inducted aircrew; the RAF being more ‘ad hoc’ in the operational training of its pilots. The RAF also relied very much on the EATS machine, with the RAF personnel system feeding new EATS aircrew into operational units to replace ‘tour-expired’ fighter pilots, who went to desks and conversion units. But apart from its inexperience, No 54 Squadron RAF, residing at Darwin, seems to have fitted in well with their subordinate role in No 1 Fighter Wing RAAF.
In the absence of personal testimonials or memoirs, the degree to which Walters and Caldwell were fully aware that they were the leaders of an inexperienced air combat wing is unclear; but irrespective, they would have little time to better prepare as, with the wet season of early 1943 winding down, the Japanese increased their operational tempo. The strategic aim of the Japanese operation was to ensure that Darwin could not be built up as a base for air, naval or expeditionary operations against the newly gained Japanese conquests in the Dutch East Indies. Japan would use air power to achieve that aim.
Air Superiority Operations and the ‘Big Wing’
The most contentious tactical issue that has arisen from the 1943 air campaign was the use by Caldwell throughout 1943, of the ‘big wing’. This involved massing all three Spitfire squadrons into one large formation prior to engaging the attacking Japanese force. Anthony Cooper devotes considerable effort to the analysis of the big wing doctrine employed by No 1 Fighter Wing.
The big wing was much debated during the Battle of Britain before Air Chief Marshal Sir Hugh Dowding, Air Officer Commanding (AOC) Fighter Command, and Air
17 Strauss and Livingstone airfields were both built by the 808th Engineer Aviation Battalion of the US Army. The airfields were named after Lieutenants Strauss and Livingstone of the 8th and 9th Pursuit Squadrons of the 49th Fighter Group, who were killed on 27 April 1942 and 4 April 1942 respectively.

19
PART ONE: THE AIR CAMPAIGN IN NORTHERN AUSTRALIA – 1943
Vice-Marshal Keith Park, AOC No 11 Group decreed, against vocal views to the contrary, that interceptions be conducted in squadron strength not as a big wing. Their decision was based on several factors: the time taken to assemble three squadrons of fighters into one tactical formation; the difficulty of holding such a large number of aircraft in formation; the need to climb at reduced power if the wing was to hold its tactical integrity; and the big wing’s cumbersome manoeuvrability. The big wing also precluded individual squadron commanders from exploiting tactical opportunities and it often translated into an all or nothing tactical gamble in that it risked delaying the interception of the bombing force until after they had attacked their target. Dowding and Park preferred the quicker and more flexible arrangement of committing RAF fighters to the battle in single squadrons. This was the practice during the Battle of Britain and over Malta. The argument within the RAF over the big wing continued, especially after both Dowding and Park moved on at the end of 1940 when elements of the RAF re-instituted the practice of flying these large, cumbersome formations of fighters.
As a precursor to him returning to Australia, Caldwell spent June and July 1942 at RAF Kenley where he flew some 30 hours on Spitfires with the Kenley Wing. That period was almost two years after the Battle of Britain, and a period when RAF Fighter Command was flying short-range fighter sweeps over occupied France. It was probably here that Caldwell was exposed to the use of the big wing by the RAF. When he returned to Australia he elected to employ what he had seen at Kenley – the big wing – in the defence of northern Australia. Despite difficulties, he persisted with the big wing throughout 1943; this in contrast to Wurtsmith’s 49th Fighter Group who preferred to climb to altitude and intercept using small formations.
Perhaps one aspect that influenced Calwell in 1943 was the very high altitude at which the fighting took place over northern Australia, far higher than had been typical of air operations earlier in the South-West and South Pacific. Certainly the high ingress altitude neutralised the threat to the raiders from the defending 3.7-inch AAA but, more significantly, the high ingress altitude was an attempt by the Japanese to minimise potential attrition from defending fighters; a product of their earlier experiences with their Mitsubishi G4M ‘Betty’ bombers when fighting USAAF Kittyhawks and US Navy (USN) Grumman F4F Wildcats.
The Japanese Naval Air Service had learnt early that their new land-based Betty bomber although fast, light and possessing excellent performance, was vulnerable to fighters. That was apparent as early as 20 February 1942, when in ‘The Battle off Bougainville’, 17 Bettys were despatched from Rabaul to attack the USS Lexington. Only two Bettys returned, a staggering loss rate.18
The first wave of nine Bettys were engaged by a division (flight) of six Wildcats. They shot down five Bettys. The remaining four Bettys, after bombing the Lexington, were brought down by pursuing Wildcats and a SBD Dauntless scout/dive-bomber. A second wave of eight Bettys followed. With most of the VF-3 Wildcats out of fuel or in pursuit of the
18 The USS Lexington air group included 18 Grumman F4F Wildcats from VF-3.
20
A COMING OF AGE FOR AUSTRALIA AND ITS AIR FORCE
retreating first wave, only one section of two Wildcats engaged the second raid. With his wingmen out of action with jammed guns, Lieutenant Edward O’Hare, with close and accurate deflection shooting, brought down three Bettys and crippled two more. Only two Bettys from the second wave returned to Rabaul. The Battle off Bougainville showed how vulnerable the Betty was to determined, close and accurate attacks from the beam and above. It also highlighted the effectiveness of the Betty’s 20-millimetre tail gun, as two Wildcats down on engine power, who decided to press their attacks from the rear, were both shot down.19
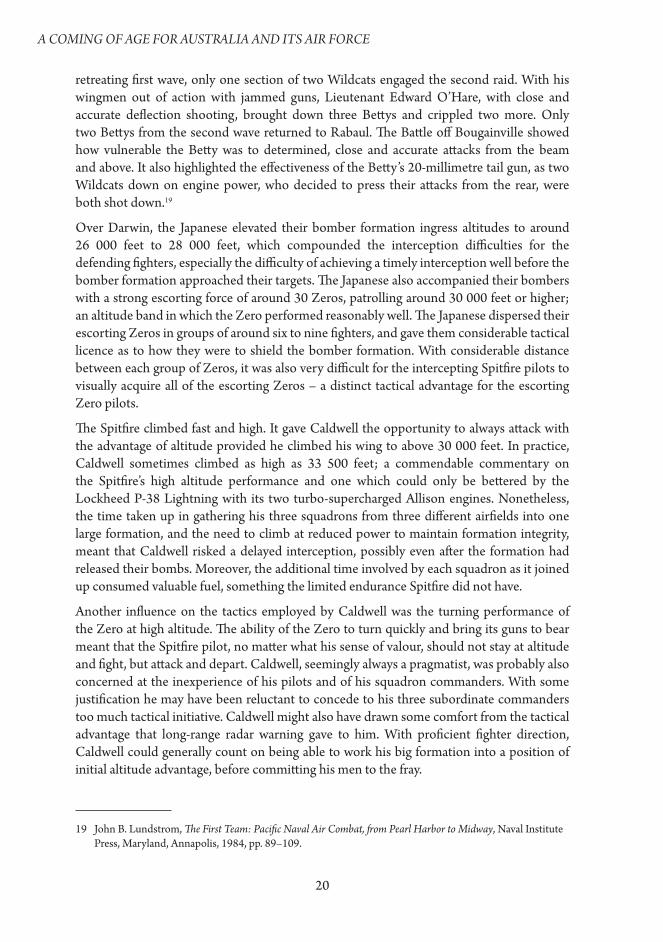
Over Darwin, the Japanese elevated their bomber formation ingress altitudes to around 26 000 feet to 28 000 feet, which compounded the interception difficulties for the defending fighters, especially the difficulty of achieving a timely interception well before the bomber formation approached their targets. The Japanese also accompanied their bombers with a strong escorting force of around 30 Zeros, patrolling around 30 000 feet or higher; an altitude band in which the Zero performed reasonably well. The Japanese dispersed their escorting Zeros in groups of around six to nine fighters, and gave them considerable tactical licence as to how they were to shield the bomber formation. With considerable distance between each group of Zeros, it was also very difficult for the intercepting Spitfire pilots to visually acquire all of the escorting Zeros – a distinct tactical advantage for the escorting Zero pilots.
The Spitfire climbed fast and high. It gave Caldwell the opportunity to always attack with the advantage of altitude provided he climbed his wing to above 30 000 feet. In practice, Caldwell sometimes climbed as high as 33 500 feet; a commendable commentary on the Spitfire’s high altitude performance and one which could only be bettered by the Lockheed P-38 Lightning with its two turbo-supercharged Allison engines. Nonetheless, the time taken up in gathering his three squadrons from three different airfields into one large formation, and the need to climb at reduced power to maintain formation integrity, meant that Caldwell risked a delayed interception, possibly even after the formation had released their bombs. Moreover, the additional time involved by each squadron as it joined up consumed valuable fuel, something the limited endurance Spitfire did not have.
Another influence on the tactics employed by Caldwell was the turning performance of the Zero at high altitude. The ability of the Zero to turn quickly and bring its guns to bear meant that the Spitfire pilot, no matter what his sense of valour, should not stay at altitude and fight, but attack and depart. Caldwell, seemingly always a pragmatist, was probably also concerned at the inexperience of his pilots and of his squadron commanders. With some justification he may have been reluctant to concede to his three subordinate commanders too much tactical initiative. Caldwell might also have drawn some comfort from the tactical advantage that long-range radar warning gave to him. With proficient fighter direction, Caldwell could generally count on being able to work his big formation into a position of initial altitude advantage, before committing his men to the fray.
19 John B. Lundstrom, The First Team: Pacific Naval Air Combat, from Pearl Harbor to Midway, Naval Institute Press, Maryland, Annapolis, 1984, pp. 89–109.

21
PART ONE: THE AIR CAMPAIGN IN NORTHERN AUSTRALIA – 1943
Certainly the tactics employed by No 1 Fighter Wing were the subject of much discussion, but as Caldwell did not write an autobiography, historians have no insight into his personal thoughts and reasoning. It is clear that he was a strong and assertive individual, possibly even a polarising individual, well used to going where he wished to go; but he was no romantic. He fully understood that air fighting was about life and death, as evidenced by two of his oft-quoted sayings: ‘kill or be killed’ and ‘use your head before your guns’. So despite the experience of others, including the American and Australian Kittyhawk units, Caldwell must have concluded that the big wing was advantageous to him.
The early omens for Caldwell and his big wing were poor, when in the raid of 15 March 1943, No 1 Fighter Wing lost three pilots killed. This was followed by a further damaging setback on 2 May 1943, when the wing lost five Spitfires, including two pilots killed, and wrote-off another seven Spitfires – a loss of 12 Spitfires in total. General George Kenney was not impressed. Had Caldwell been an American commander in an USAAF unit, he may well have been relieved of his wing leadership. However that option was not available to the RAAF as it had no credible replacement. It would also have created an unwelcome media furore given the enthusiasm with which the Australian media had initially greeted and publicised Caldwell’s appointment as wing leader.
Caldwell’s continued use of the big wing warrants scrutiny. He declined to use the three squadrons as discrete tactical entities and declined to break the squadrons down into flights, so as to feed them into the engagement as tactically opportune, largely as the 49th Fighter Group had done. A flight of four Spitfires could climb quickly, and with the support of the excellent early warning and fighter direction of No 5 Fighter Sector, could attack early and disengage with the option of reforming well clear of the escorting Zeros for a subsequent re-attack. Air Commodore Frank Bladin, Commander North Western Area, a competent officer who had witnessed the operations of the 49th Fighter Group, certainly raised questions about the effectiveness of the big wing and the degree to which it inhibited the tactical initiatives of the three squadron commanders. Neither Bladin nor Walters had sufficient operational experience to direct a change in the tactics of No 1 Fighter Wing.
From the Japanese perspective, Caldwell and his big wing presented a predictable defensive problem. All the 30 escorting Zeros had to do was counter one massed attack, and an attack that was easy to visually detect and pre-position against. The smaller formations of Zeros, spread some distance from each other, could also likely count on the fact that many Zeros had not been visually detected by the No 1 Fighter Wing pilots who were also hampered in their lookout by the need to hold a close tactical formation at high altitude. Had Caldwell divided his (typically) 36 Spitfires into nine flights of four, the escorting Zeros would have been harder pressed in anticipating and meeting attacks at different times and coming from different directions.
There also seems to have been an undercurrent of ‘not invented here’ syndrome regarding the tactics employed by No 1 Fighter Wing. That undercurrent suggested that Caldwell and his pilots, now equipped with the iconic Spitfire, knew more about air fighting than the previous defenders flying the inferior Kittyhawk. Certainly the Spitfire attracted great loyalty by virtue of its delightful flying characteristic – pilots loved to fly it – but air fighting
22
A COMING OF AGE FOR AUSTRALIA AND ITS AIR FORCE
tactics need to be determined not by the flying qualities of the aeroplane but by the combat effectiveness of the man and machine. Even so, Caldwell stuck with his big wing; it would have been nice to know why.
Kristen Alexander published a biography of Caldwell in 2006. The biography was informed considerably by Alexander’s access to some of Caldwell’s private papers. Notwithstanding, there is little on which to form a judgement about Caldwell’s continued use of the big wing, although it is clear that Caldwell was a realist – for him, air combat was kill or be killed. Certainly Caldwell seemed well aware that he was wing leader of a large group of young and generally very inexperienced fighter pilots. Perhaps that is why he kept his charges close until having gained an initially advantageous position, he let his pilots loose into the fray.20
Students of air warfare will find Anthony Cooper’s detailed analysis of the tactics employed by No 1 Fighter Wing engrossing, but in coming to judgement it should be remembered that Caldwell started the air campaign with only some 700 hours in his logbook, and even after flying throughout the 1943 air campaign, Caldwell still had accrued only 950 solo hours; a figure that these days would only qualify a junior pilot to lead the occasional flight of four fighters.
20 Kristen Alexander, Clive Caldwell: Air Ace, Allen & Unwin, Crows Nest, New South Wales, 2006.
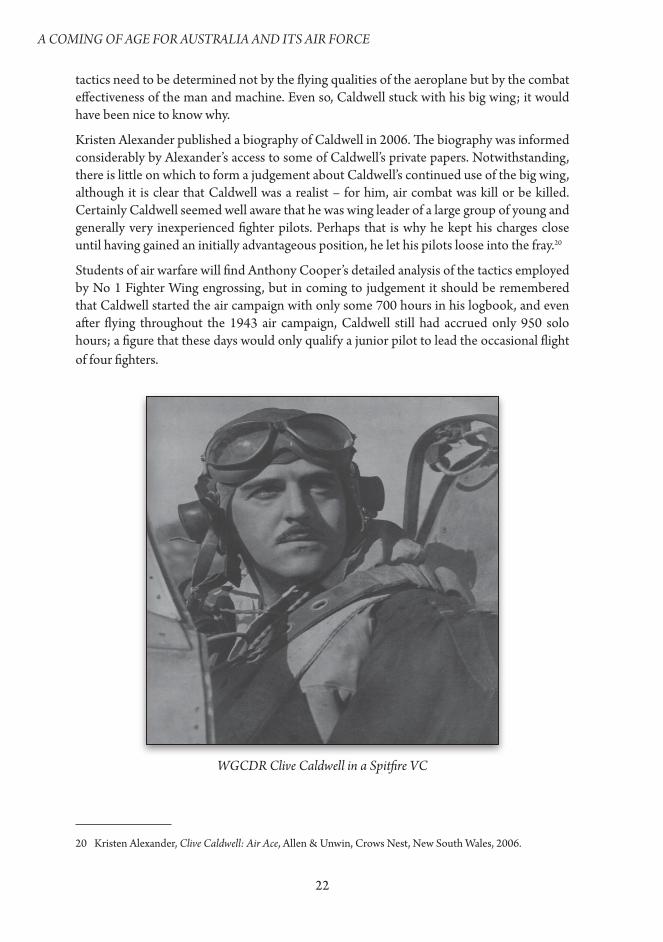
WGCDR Clive Caldwell in a Spitfire VC
23
PART ONE: THE AIR CAMPAIGN IN NORTHERN AUSTRALIA – 1943
No 1 Fighter Wing Tactics – Attack, Gunnery and Egress
Having positioned his wing with a height advantage, Caldwell would direct his three squadrons to dive past the escorting Zeros and attack the bomber formation. Caldwell rarely attempted to engage the escorting Zeros. The Zeros were numerous and observant; they were not caught off-guard by the big wing. A hard turn by a Zero would quickly negate an attack from a Spitfire, following which the Spitfire pilot would be compelled to disengage. So attacking an escorting Zero achieved little and only forced an early departure of the Spitfire from the fight, and given that the bomber formation posed the main threat to Darwin, it made good sense to attack the bomber formation.
The bombers were generally fast, usefully armed Bettys of the Japanese Naval Air Service. With a crew of seven, flying at high altitude and with a substantial fighter escort, they were no easy kill. If a Spitfire pilot executed the high percentage attack from line astern, it would expose the fighter to the Betty’s 20-millimetre cannon operated by a tail gunner. The Betty’s 20-millimetre cannon was a capable weapon made more effective by the tight formation flown by the bombers that enabled accompanying Bettys to bracket attackers. A rear attack on a Betty involved risk for a Spitfire, whose pilots understandably preferred to take their chances against the four 7.7-millimetre machine guns, one in the nose, one in each waist position and one in the top turret.
The safest approach for the Spitfire was the head-on attack. But this attack involved a high closing speed of around 450 to 480 knots (900 to 960 kilometres per hour), made even more difficult because of a lack of manoeuvrability at high altitude. To be effective, the attack had to be pressed to close range. Only the most skilled pilots and marksmen could execute a successful head-on attack, and Cooper’s dissection of the engagements leaves the reader with the impression that few head-on attacks by pilots of No 1 Fighter Wing resulted in bullets striking their targets. Most Spitfire attacks came from the beam.
The closing speed for a beam attack was less than that of the head-on attack and if executed well, the beam attack avoided the hazardous cone of defensive fire at the rear of the Betty. Again, the beam attack was not easy to execute unless it had been taught well and practised. If the attack was commenced too close or too far forward, the crossing speed of the target would become unacceptably high. If commenced too far out or too far behind the beam, the Spitfire would fall back into the bomber’s rearwards cone of fire. The beam attack also required shooting with a considerable deflection allowance. The high speed of the diving attack also aerodynamically loaded up the ailerons of the Spitfire. At high diving speeds the Spitfire lacked roll responsiveness which compounded the pilot’s ability to track and draw deflection lead on the bomber. Only well-taught and well-practised pilots could have been expected, at high altitude, to deliver accurate, lethal bursts of fire. Cooper’s analysis repeatedly shows the difficulty that the pilots of No 1 Fighter Wing had in hitting the Betty with sustained bursts of fire.
The gunnery problem was compounded by the unreliability of the Spitfire VC Hispano 20-millimetre cannon. Cooper’s tabular presentation of the after-mission armament reports from each Spitfire, in each air battle, makes the direness of the armament situation abundantly clear. It was a critical combat deficiency and it seems unfathomable that for most

24
A COMING OF AGE FOR AUSTRALIA AND ITS AIR FORCE
of 1943, the Spitfire squadrons defending northern Australia fought with malfunctioning cannon and guns. The failure of the 20-millimetre cannon reduced the armament of the Spitfire to, at best, four 0.303 machine guns. Even when fully operative, the 0.303 gun was not an overly effective weapon. It measured up poorly against the standard armament of an American fighter, the .50-calibre machine gun. A .50-calibre projectile is around four times heavier than a 0.303 projectile, so the weight of fire from a .50-calibre machine gun is considerably more potent than from a 0.303-calibre machine gun. Poor marksmanship and defective 20-millimetre cannons markedly detracted from the combat effectiveness of No 1 Fighter Wing.
Although Caldwell was usually successful in achieving the tactical ‘first move’, the escorting Zeros soon came into play. They had the luxury of shadowing the big wing and could preposition with the objective of achieving a firing position on a diving Spitfire before it closed on the bomber formation. If the Spitfire judged its attack well, it could reach the bombers unmolested; a poor attack would result in it being engaged before reaching the bombers. It was generally in the immediate aftermath of an attack on a Betty that many Spitfires took hits from unsighted Zeros who had used the brief period while the Spitfire pilots were concentrating on their firing pass to manoeuvre into firing range.
The Critical Factor – Radar Warning and Fighter Direction
Threading through Anthony Cooper’s analysis is the critical contribution made to the outcome of air battle by the RAAF radar warning and fighter direction capability. These radars were initially the air warning radar and later, the Australian designed and built Light Weight Air Warning (LWAW) radar; a most effective air warning radar that supported the RAAF Fighter Control Units across northern Australia and throughout the archipelago, as the RAAF advanced on its island hopping journey of 1943, 1944 and 1945.
Dripstone Radar, Darwin 1942

25
PART ONE: THE AIR CAMPAIGN IN NORTHERN AUSTRALIA – 1943
Small detachments of RAAF personnel manned the multiple LWAW radars that were deployed in isolated outposts across Australia and in the South-West Pacific. These detachments relayed the details of each radar contact to the fighter direction units where the radar contacts were consolidated and plotted for display to the fighter controllers. The fighter controllers used the data displayed on the plotting board to direct the fighters to intercept.
The RAAF radar warning and fighter direction system was at the leading edge of the technology of the day and was critical to the outcome of the air campaign. Cooper’s analysis and charts of each raid provides evidence of the excellent detection ranges achieved by the RAAF radar sites, while it is also clear that Caldwell had a most competent fighter direction capability guiding his intercepts. As 1943 went on, even the previously untouchable twin-engine, photo-reconnaissance Mitsubishi Ki-46 ‘Dinah’, over which the Spitfire VC had only the barest margin of speed and altitude advantage, had become vulnerable to the pilots of No 1 Fighter Wing under the guidance of No 5 Fighter Sector. This is evident in Cooper’s account of the 17 August 1943 action, where under the skilled direction of No 5 Fighter Sector, the Spitfire pilots downed four of seven high flying, unescorted reconnaissance Dinahs; a result that must have shaken the Japanese who responded on 7 September 1943 with a penetration of three reconnaissance Dinahs, but this time, escorted by a force of 36 Zero fighters.
The Japanese force of 7 September 1943 was more of an offensive fighter sweep than a raid and was met by 36 Spitfires. It was the last large-scale action of the Japanese air campaign over northern Australia. The approach of the 1943-1944 wet season, the inability of the Japanese to neutralise the air combat capability resident in No 1 Fighter Wing and its supporting radar warning and direction units, and the emergence of higher strategic priorities for the Japanese Naval and Army Air Services saw the frequency and intensity of the air war over northern Australia fade away.
The Japanese had failed in their military aim of ensuring that Darwin could not be used as a base for offensive air, naval and expeditionary operations, but at a significant cost for the three Spitfire squadrons of No 1 Fighter Wing.
Spitfires for Australia – Postscript
This phase of the war involving offensive air action by the Japanese against northern Australia had ended. In the face of mounting pressure from US forces in the Pacific, the Japanese no longer had the capacity to continue their suppressive air campaign against Darwin. After nine months of fighting, the air supremacy campaign led and directed by Australians and fought by Australia’s air force, was to wind down.
Anthony Cooper concludes his account of the campaign with some interesting observations and conclusions about the air war over northern Australia. He draws those conclusions with hindsight and with the advantage of a wider range of sources than were available to earlier historians. Suffice for this commentary to note that over the duration of the air campaign, No 1 Fighter Wing achieved roughly a one-for-one exchange ratio

26
A COMING OF AGE FOR AUSTRALIA AND ITS AIR FORCE
with their Japanese attackers – a mix of fighters, bombers, reconnaissance and floatplanes, fighting a long way from their home bases; at best, a sobering result.
As for the Japanese airmen, they were soon into action against the organisational and logistical might of the US, which exposed the limited training and logistical support capabilities of the two Japanese Air Services. Forced to fight frequently, the core of the Japanese air fighting capability, the veteran Japanese fighter pilots, began to take losses. These combat veterans could not be replaced and throughout 1944, the well-trained pilots of the USN, US Marine Corp (USMC) and USAAF flying their Grummans, Corsairs and Lightnings, began to cut the novice replacement pilots out of the air, until as a consequence of the June 1944 action over the Marianas, the phrase ‘turkey shoot’ entered the lexicon of World War II.
Caldwell finished the campaign over northern Australia with his tally of destroyed aircraft standing at 28.5 where it remained for the rest of the war. He went south to Mildura to command No 2 Operational Training Unit, the RAAF Spitfire training unit, but returned to Darwin in late 1943 as Commanding Officer No 80 Fighter Wing, comprising No 452 Squadron, No 457 Squadron and No 79 Squadron flying the Spitfire Mk VIII (Trop).
In December 1943, Group Captain Clive Caldwell, DSO, DFC and Bar, led No 80 Fighter Wing to the island of Morotai, north of Halmahera, where the wing was deployed as a unit of the RAAF First Tactical Air Force. No 80 Fighter Wing deployed via Darwin, Gove, Merauke in Dutch New Guinea, Noemfoor near Biak, and then to Morotai. The deployment alone was a demanding affair as even with its improved range and external belly tank, the Spitfire Mk VIII was tested by the distances involved – especially the 600 nautical mile (1200 kilometre) leg from Merauke to Noemfoor. But once at Morotai and with air superiority won, the Spitfires had few air combat opportunities and instead were used for air-to-ground strafing operations; a role much ill-suited to the high-altitude, short-range, interceptor fighter.
Regrettably, Morotai also saw the effective end of Caldwell’s distinguished career, as with a hint of Shakespearian tragedy, Caldwell was firstly, charged with trafficking liquor and secondly, was one of eight officers who submitted identically worded letters of resignation of their commission. Clive Caldwell left the RAAF in 1946 after having been reduced to the rank of flight lieutenant.
The final postscript to the air war over Darwin involved Britain’s commitment of two additional RAF Spitfire squadrons to join No 54 Squadron RAF at Darwin, following the deployment forward of No 80 Fighter Wing. Nos 548 and 549 Squadrons RAF were formed in Queensland in late 1943. They comprised RAF aircrew and RAAF technical personnel. In mid-1944, both squadrons deployed north to protect Darwin and the substantial allied forces in residence there. The RAF Spitfire squadrons were equipped with the Spitfire Mk V111 (Trop), and maintained a detachment at Truscott airfield in Western Australia. In the remaining 12 months of the war, the three RAF Spitfire squadrons saw little action and were disbanded in Melbourne in October 1945.

27
PART ONE: THE AIR CAMPAIGN IN NORTHERN AUSTRALIA – 1943
In April 1945 while at Morotai, Caldwell was investigated for trafficking liquor; a practice rampant in the First Tactical Air Force. Around the same time, the 25-year-old Group Captain Wilfred Arthur, DSO, DFC, Commanding Officer No 78 (Kittyhawk) Wing, instigated an affair that resulted in him and seven other RAAF officers tendering identically worded letters of resignation. Essentially, Wilfred Arthur was questioning why the RAAF had been ‘parked’ in the backwater at Morotai flying unproductive missions, while still losing aircraft and pilots for no purpose. Wilfred Arthur had raised an important issue that went to the heart of the Australia/US war strategy. Wilfred Arthur’s representations were not handled well by the RAAF higher command. Caldwell was drawn into the issue and was one of the officers tendering their resignations. The event subsequently became known as the Morotai Mutiny.
It was later investigated by Mr Justice John Vincent Barry, K.C., in The Report of the Barry Enquiry. The trafficking of liquor and the tendering of letters of resignation are detailed by George Odgers, the official RAAF War Historian. The views of Wing Commander Dick Creswell, wing leader of No 81 Wing have also been published. The events reflect a less-than-glorious period in the history of the RAAF, and despite the moderate findings of The Report of the Barry Enquiry, many observers would conclude that these events reflect a substantial failure in the command and leadership of the RAAF in World War II.*
*Alexander, Clive Caldwell: Air Ace, pp. 171–215 and Appendices B, C, D, E and F; and George Odgers, Mr Double Seven: A Biography of Wing Commander Dick Cresswell, DFC, Air Power Development Centre, Canberra, 2008, pp. 52–61.

Part Two
Observations about National Security, Air Power, Doctrine, Mastery, Leadership, and Training
Arising from the Air War over Northern Australia in 1943
Air Power Doctrine, Professional Mastery, Leadership and Training
No assessment of the performance of No 1 Fighter Wing in the skies over Darwin can be complete, or even relevant, without an understanding of the base on which that combat performance was built. How developed was the RAAF air power doctrine that shaped the air operations of No 1 Fighter Wing; how professional was the wing’s mastery of the air; how good were its leaders; how rigorous was the individual training of its pilots; and how progressive and diligent was the operational training of the wing’s three squadrons?
Assessing the performance of No 1 Fighter Wing against modern standards would serve little purpose, but it would be relevant to review how the Australian fighter wing measured up against other air forces of the period; and a good place to start would be to compare how No 1 Fighter Wing’s performance measured against its immediate predecessor, the USAAF 49th Fighter Group who defended Darwin over the period February to August 1942.
In the USAAF, a fighter group was an almost identical doctrinal equivalent to an RAF or RAAF fighter wing. The 49th Fighter Group and its three constituent squadrons, the 7th, 8th and 9th Fighter Squadrons, began assembling in the Darwin area in February 1942. Their deployments were conducted under extremely difficult circumstances with the Japanese forces sweeping all before them as they advanced through the Dutch East Indies. Allied losses were heavy, including in hastily assembled USAAF units attempting to reinforce Java. In these confusing and adverse circumstances, Major Paul Wurtsmith, USAAF, was appointed Commanding Officer 49th Fighter Group. He was immediately promoted to the rank of lieutenant colonel, the equivalent rank to that of an RAAF wing commander.
Lieutenant Colonel Wurtsmith took up his command during a period of heavy losses for the Allies. The defence of Java was crumbling and Darwin was bombed on the 19 February 1942. On that day, which opened the battle for Australia, 10 P-40 Kittyhawks of the newly activated 33rd Pursuit Squadron had been caught by the Japanese at Darwin while in transit to Java. Nine Kittyhawks were shot down and four pilots killed, including its commander Major Floyd Pell, USAAF. Only Lieutenant Robert Oestreicher was able to land his damaged P-40 fighter. Five P-40s had been airborne on a standing patrol while the

30
A COMING OF AGE FOR AUSTRALIA AND ITS AIR FORCE
remaining five scrambled as numerous Zero fighters swept down on them, the large raid having been launched from four Japanese aircraft carriers immediately north of Darwin. 21
On 27 February 1942, Japanese dive-bombers sank the USS Langley (CV-1) as it transported 32 Kittyhawks of the USAAF 13th Pursuit Squadron (Provisional) from Darwin to Java. All the Kittyhawks were lost, as was the squadron’s complement of pilots, including several pilots from the 33rd Pursuit Squadron who had not been able to join Major Pell at Darwin.
When the Langley went down, the USS Pecos, the USS Edsall and the tanker Whipple rescued most of the 13th Pursuit Squadron’s personnel. Subsequently, the Pecos and Whipple were sunk by Japanese air attack, and the Edsall was sunk by Japanese naval surface units – 33 USAAF Kittyhawk pilots were lost in these actions.22 Meanwhile, between 21 and 26 February, the USAAF 17th Pursuit Squadron (Provisional) together with several remaining Hurricanes and Buffaloes fought a valiant rear guard action in Java before sustained Japanese pressure reduced the squadron to non-effectiveness. Paul Wurtsmith could not have faced more daunting circumstances.
Paul Wurtsmith was born on 6 August 1906 and was 35 years of age when he assumed command of the 49th Fighter Group. He had joined the Air Corps in 1927 and specialised in ‘pursuit’ (fighter) flying. He was a graduate of the Air Corps Tactical School, which had been established in 1920. Wurtsmith had accumulated over 4800 hours flying pursuit aircraft. His executive officer of the 49th Fighter Group was Lieutenant Donald Hutchinson, who was immediately promoted to the rank of major and who had flown over 2500 hours in pursuit aircraft.
The United States Army Air Corps (USAAC) was the air force of the US Army. As a consequence of its army heritage it established doctrinal institutions and training schools. In 1941, the ‘army air force’ had become so large that it was reconstituted as the USAAF, and was commanded by General Henry ‘Hap’ Arnold. By law, it was still part of the US Army, but in practice it operated as a separate service with General Arnold having the status of ‘chief of service’. The United States Air Force (USAF) was established in 1947. (For a comprehensive outline of the development of the USAAC in the period 1919 to 1939, see Craven and Cate, especially Chapter Two. 23)
There is little doubt that Paul Wurtsmith was a master of his profession. He was a USAAC/USAAF career officer specialising in fighter flying, fighter operations, air training and command of air operations. After some early indecision caused by the rapid advance of the Japanese about where the 49th Fighter Group would fight, Wurtsmith and his group (wing) of Curtiss P-40E Kittyhawks were assigned responsibility for the air defence of northern
21 W.F. Craven, and Cate, J.L. (eds.), The Army Air Forces in World War II – Volume One, The Office of Air Force History, University of Chicago Press, Chicago, 1948, p. 393.
22 Craven and Cate, The Army Air Forces in World War II – Volume One, pp. 396–399; and Gillison, Royal Australian Air Force, 1939-1942, p. 436.
23 Craven and Cate, The Army Air Forces in World War II – Volume One, pp. 17–75.
31
PART TWO: OBSERVATIONS ARISING FROM THE AIR WAR
Australia. Paul Wurtsmith had not previously been to war but using the knowledge and doctrinal understanding that he had acquired in peacetime, Wurtsmith set about leading his men to war.
Working in concert with the rudimentary radar capability being put in place in northern Australia, Wurtsmith’s units patrolled and scrambled to intercept in small formations, generally of four aircraft. In accordance with USAAF doctrine these formations were called a ‘section’, and each was designated by a colour such as ‘blue section’. Certainly Wurtsmith’s fighter group took losses, but when he handed the air superiority task to Nos 77 and 76 Squadrons in August 1943 it would seem that the 49th Fighter Group had provided some resolute and quite effective air defence of Darwin. Wurtsmith reputedly lost only four pilots on combat operations – a commendable achievement given the superiority of the Zero over the Kittyhawk.24
Paul Wurtsmith went on to a distinguished career in the South-West Pacific, with General Kenney promoting him to the command of V Fighter Command with the rank of brigadier general and later to the command of 13th Air Force with the rank of major general. As an aside, Kenney also notes that when a member of General MacArthur’s staff queried Wurtsmith’s prospective promotion by reference to his relative youthfulness, MacArthur retorted, ‘We promote them out here for efficiency, not for age’.25
The contrast between how the USAAF employed its core of pre-war professionals in December 1941 and how the RAAF did not employ its small core of pre-war professionals in September 1939 is stark. Despite being blind-sided by the attack on Pearl Harbor, the USAAF took its best qualified pre-war officers, such as Wurtsmith, promoted them and sent them to war at the head of operational units – albeit hastily assembled units built out with incompletely trained young pilots. As a consequence of his maturing with the accumulation of wartime experience, Paul Wurtsmith developed into a fine wartime commander of airmen. There is no doubt that he was a professional master and a distinguished US airman.
The air power doctrine that the RAAF was most exposed to in the ‘between war years’ was that emanating from Britain. RAF doctrine was built on the concept of an independent air force projecting power directly against the key vulnerabilities of the enemy. Royal Flying Corps Major General (later Marshal of the RAF) Hugh Trenchard was the founder of the RAF and its doctrinal master. His thinking was strongly influenced by the strategic stalemate and the massive casualties that arose from the stagnant land operations in World War I. Trenchard, seeking to find a new way to overcome an industrialised enemy, argued that air power alone through bombardment could win a war. The RAF developed in accordance with Trenchard’s air power doctrine.26
24 Odgers, Mr Double Seven: A Biography of Wing Commander Dick Creswell, p. 26.25 George C. Kenney, General Kenney Reports: A Personal History of the Pacific War, Duell, Sloan and Pearce,
New York, 1949, p. 163.26 Charles Messenger, “Bomber Harris” and the Strategic Bombing Offensive, 1939-1945, Arms and Armour
Press, London, 1984, pp. 15–19; and, Max Hastings, Bomber Command, Penguin Group, 1979, see Chapter 1, In the Beginning, Trenchard: British Bomber Policy, pp. 37–58.

32
A COMING OF AGE FOR AUSTRALIA AND ITS AIR FORCE
RAF leaders between the wars, somewhat like their USAAC contemporaries, misread the potential influence that the fighter would have on bombardment operations. The importance of air superiority, indeed the very notion of air superiority, had not been grasped. As a result, the RAF invested little in the development of fighters nor in the understanding of their use. Even by the late 1930s, RAF Fighter Command doctrine had not evolved beyond a few myopic, regimented attack profiles. Had it not been for British industry’s involvement with technological stimulants such as the Schneider Trophy, and of related technological developments such as the reflector gunsight and radar, the fighter capability of the RAF would have been even less prepared for World War II than it was.
The early aerial encounters of World War II provided the RAF with some pointers as to the future of war in the air, especially when unescorted bombers such as the Bristol Blenheim were savaged by Luftwaffe day-fighters. The Battle of Britain quickly followed and provided a doctrinal catch-up opportunity, especially for RAF Fighter Command. Under Dowding and Park, Fighter Command quickly developed tactics around exploiting the new technology of radar, but at the lower organisational levels, the tactical doctrine was still ad hoc and left to be formulated by individual squadrons and wings.
At squadron level, the RAF still had a penchant for utilising flights of three fighters flying tight ‘vic’27 formations, or even a three aircraft line-astern formation. A squadron of 12 fighters would often fly into combat as four ‘vic threes’ in line astern. Flying in such tight formations made lookout by pilots difficult, and once engaged there was little emphasis on, or indeed ability to, keep a flight of RAF fighters together in some form of tactical formation. Faced with these RAF fighter tactical dispositions, it was not surprising that the Luftwaffe fighter pilots usually resorted to diving attacks on the tight RAF fighter formations, followed by a zoom back to altitude or a fast diving egress – tactics well suited to the Messerschmitt Bf 109 with its relatively high wing loading and excellent speed, altitude and diving capabilities.
27 This involved one lead plane and two wingmen, with the wingmen flying very close to the sides and slightly behind the lead plane to form the V shape.
The Schneider Trophy was an international speed contest for seaplanes. The event reached its peak in the late 1920s and early 1930s. Britain excelled in the last three Schneider events of 1927, 1929 and 1931, winning with Supermarine monoplanes. Shortly after winning the 1931 event, the Supermarine S.6B became the first aircraft to exceed 400 miles-per-hour. Technology from the streamlined Schneider monoplanes, with their in-line, V-configured liquid-cooled engines, found its way into fighters of the late 1930s.

33
PART TWO: OBSERVATIONS ARISING FROM THE AIR WAR
At the height of the Battle of Britain a debate arose within RAF Fighter Command about interception tactics. Air Vice-Marshal Leigh-Mallory, AOC No 12 Group, argued stridently for interceptions to be conducted as ‘big wings’, comprising three, four and five squadrons. Douglas Bader, Commanding Officer No 242 Squadron and later of the Tangmere Wing in No 12 Group, was concerned that single squadrons of fighters were not sufficient in numbers to tackle both the escorting fighters and penetrate to the bomber force. Bader was also frustrated that RAF fighter squadrons were being regularly attacked from above by escorting Luftwaffe fighters prior to engaging the Luftwaffe bomber formations. Bader’s aim was to overpower the Luftwaffe raids with mass, but regrettably, this debate over the big wing became intense and personal, which detracted from a rational assessment of its utility. It is also quite possible that the intensity of this disruptive, vociferous argument over the big wing retarded the development of RAF squadron, flight and individual tactics in contrast to what had happened in Luftwaffe fighter units.
Air Vice-Marshal Keith Park, AOC No 11 Group, while receptive to the concerns that RAF fighter pilots were always fighting outnumbered and generally being bounced from above, could not agree to such a change as it was already difficult enough to achieve interception with single squadrons. Park saw the big wing as playing into the hands of the attackers by delaying interception until after the Luftwaffe raid had struck their targets. As No 11 Group was bearing the brunt of the battle, Park’s views supported by AOC Fighter Command Air Marshal Dowding prevailed; at least until late 1940 when after the battle for air superiority over Southern England had been won, Park and Dowding moved on. Johnson records the intense debate within RAF Fighter Command about whether interceptions should be
After World War II, James ‘Johnnie’ Johnson, who was the top-scoring World War II Western Allied ace against the Luftwaffe (credited with 38 destroyed, mostly Messerschmitt Bf 109 and Focke-Wulf Fw 190 fighters) wrote a personal memoir about air superiority and fighter operations. He wrote on the paucity of thinking and artificiality behind RAF Fighter Command tactical doctrine of the late 1930s, and notes the observations of Luftwaffe fighter leader Gerhad Molders, who stated that RAF Spitfire pilots flying ‘their neat, tight vics’ over France in early 1940 often failed to see Molders diving upon them. Molders also noted that while the Spitfire could out-turn the Bf 109E, the small Luftwaffe fighter had an advantage in speed, height and diving speed. Air Vice-Marshal J.E. Johnson, CB, CBE, DSO & two Bars, DFC & Bar, was promoted to air vice-marshal in 1965 and retired from the RAF in 1966.*
*Air Vice-Marshal J.E. Johnson CBE, DSO, DFC, Full Circle: The Story of Air Fighting 1914-1953, Chatto & Windus Ltd, London, 1964, pp. 117, 134.
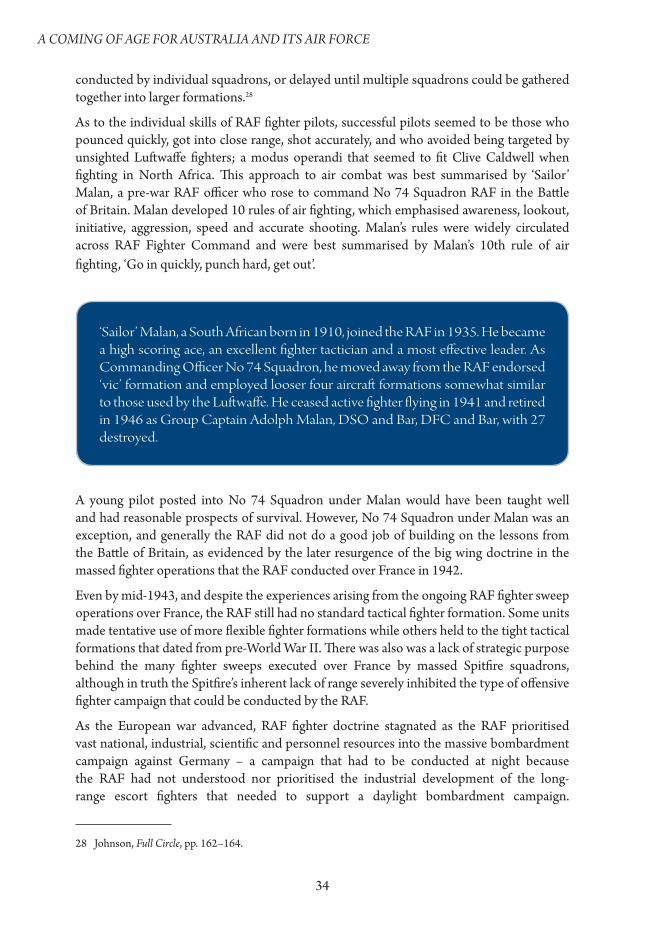
34
A COMING OF AGE FOR AUSTRALIA AND ITS AIR FORCE
conducted by individual squadrons, or delayed until multiple squadrons could be gathered together into larger formations.28
As to the individual skills of RAF fighter pilots, successful pilots seemed to be those who pounced quickly, got into close range, shot accurately, and who avoided being targeted by unsighted Luftwaffe fighters; a modus operandi that seemed to fit Clive Caldwell when fighting in North Africa. This approach to air combat was best summarised by ‘Sailor’ Malan, a pre-war RAF officer who rose to command No 74 Squadron RAF in the Battle of Britain. Malan developed 10 rules of air fighting, which emphasised awareness, lookout, initiative, aggression, speed and accurate shooting. Malan’s rules were widely circulated across RAF Fighter Command and were best summarised by Malan’s 10th rule of air fighting, ‘Go in quickly, punch hard, get out’.
A young pilot posted into No 74 Squadron under Malan would have been taught well and had reasonable prospects of survival. However, No 74 Squadron under Malan was an exception, and generally the RAF did not do a good job of building on the lessons from the Battle of Britain, as evidenced by the later resurgence of the big wing doctrine in the massed fighter operations that the RAF conducted over France in 1942.
Even by mid-1943, and despite the experiences arising from the ongoing RAF fighter sweep operations over France, the RAF still had no standard tactical fighter formation. Some units made tentative use of more flexible fighter formations while others held to the tight tactical formations that dated from pre-World War II. There was also was a lack of strategic purpose behind the many fighter sweeps executed over France by massed Spitfire squadrons, although in truth the Spitfire’s inherent lack of range severely inhibited the type of offensive fighter campaign that could be conducted by the RAF.
As the European war advanced, RAF fighter doctrine stagnated as the RAF prioritised vast national, industrial, scientific and personnel resources into the massive bombardment campaign against Germany – a campaign that had to be conducted at night because the RAF had not understood nor prioritised the industrial development of the long-range escort fighters that needed to support a daylight bombardment campaign.
28 Johnson, Full Circle, pp. 162–164.
‘Sailor’ Malan, a South African born in 1910, joined the RAF in 1935. He became a high scoring ace, an excellent fighter tactician and a most effective leader. As Commanding Officer No 74 Squadron, he moved away from the RAF endorsed ‘vic’ formation and employed looser four aircraft formations somewhat similar to those used by the Luftwaffe. He ceased active fighter flying in 1941 and retired in 1946 as Group Captain Adolph Malan, DSO and Bar, DFC and Bar, with 27 destroyed.

35
PART TWO: OBSERVATIONS ARISING FROM THE AIR WAR
The heavy work in the air battle for Germany through 1943 to 1944 was to fall to those USAAF fighter units who had the long-range fighters to challenge the Luftwaffe in the skies over Germany.
Johnson is critical of the RAF’s lack of vision in not seeing that to win in the air, an air force must have the ability to reach out and strike enemy fighters both in the air and on the ground. Johnson notes that RAF Fighter Command was a defensive force, and that to win air superiority an air force had to have the ability to take the fight to the enemy and dictate the terms of the engagements. Johnson believed that the RAF erred in not pursuing the development of a long-range fighter.29 Alternatively, Britain’s leadership had decided that the 7 per cent of Britain’s national effort that was being consumed by RAF Bomber Command was justified as a war-winning strategy, and that other priorities would have to take second place.30
The Luftwaffe, which was only reformed in 1935, developed on different doctrinal lines to the RAF. The Luftwaffe developed more as a ‘combined arms’ air force, conceived to operate in conjunction with Germany’s land forces. The development of the Luftwaffe was also no doubt influenced by the Prussian General Staff heritage of the German armed forces. With experience gained from the Spanish Civil War of 1936-1939 and technology lifted from the US, especially from the West Coast aviation companies, the Luftwaffe developed into an impressive military air arm with supporting doctrine, equipment, training systems and operational procedures in the space of four years. In 1936, Lawrence Wackett, prior to commencing his appointment as General Manager of the CAC, visited aircraft companies in the US, Britain, the Netherlands, France, Germany and Czechoslovakia. Wackett was particularly impressed with what he witnessed in both the US and Germany.31
Unlike the RAF, the Luftwaffe learnt that it needed better bombing accuracies than were inherent in level bombing. As a consequence, the Luftwaffe developed the dive-bomber as an effective instrument of air power. Operational experience gained in the Spanish Civil War and in the invasion of Poland demonstrated the effectiveness of the dive-bomber, especially when accurate dive-bombing attacks were coordinated with land operations. The notion of close air support and of interdiction to isolate the land battle area came into being, although the initial success of the dive-bomber over the land battle was soon to be modified such that these operations could only be conducted under an umbrella of air superiority. The dive-bomber was no match for the specialist air control fighter, which pointed to the significant role for fighter aircraft in establishing and maintaining air superiority over the battlefield. By the end of the Spanish Civil War, the Luftwaffe had recognised the advantages of combining units of fighters, bombers, dive-bombers, etc., into
29 ibid., pp. 241–244.30 Messenger, “Bomber Harris” and the Strategic Bombing Offensive, p. 214.31 Sir Lawrence Wackett, Aircraft Pioneer: An Autobiography, Lawrence James Wackett, Angus and Robertson,
Sydney, 1972, pp. 117–130.

36
A COMING OF AGE FOR AUSTRALIA AND ITS AIR FORCE
air fleets; the Luftwaffe introduced the organisational entity of the Luftflotten – an air fleet – into its tactical order of battle.32
The Luftwaffe had learnt early about the concept and importance of air superiority and set about developing the supporting tactical doctrine for air superiority operations. In this, they were greatly assisted in 1936 by the commitment of the Condor Legion, a small tactical air force of Luftwaffe volunteers, to the Spanish Civil War. Wolfram von Richthofen, a cousin of the World War I ace Manfred von Richthofen, was appointed chief of staff of the Condor Legion, later rising to command the Legion where he was instrumental in refining the Luftwaffe air/land battle doctrine. Hermann Goering, appointed Commander-in-Chief of the reformed Luftwaffe in 1935, determined that the Spanish Civil War was also a good learning opportunity and despatched several young officers for duty with the Condor Legion. One such officer was Adolf Galland, a promising young fighter pilot. Galland was replaced in 1938 by another promising fighter pilot, Werner Molders who arrived in Spain with the first batch of new Messerschmitt fighters, the Bf 109B.
Initially, the Messerschmitts flew in close formations with little distance between each fighter’s wingtips. It was quickly determined that this was an unsuitable formation for air fighting because it left little room for each fighter to manoeuvre and it restricted opportunities for pilots to look out. The new Luftwaffe had forgotten the lessons that the German Air Service had learnt in World War I. At the close of World War I, it was widely accepted by both British and German fighter pilots that the best air fighting formation was an open, largely abreast formation, with a spacing of around 55 metres – approximately the turning radius of a light, biplane World War I fighter – between each scout/fighter. This formation allowed easy station-keeping, lessened the risk of intra-formation collision, allowed individual pilots to search high, low and around for enemy fighters, and allowed each fighter to turn tightly to face an attack. Werner Molders and his pilots set about relearning old lessons and updating them to accord with the advance of aviation technology.
Johnson records the generally accepted air fighting wisdom from World War I and discusses, despite the existence of many World War I memoirs and memoranda, how the early air fighting lessons from World War I had been lost. He concludes that the disbandment of the German Air Service in 1919 was one possible reason for the loss of such hard-earned lessons in Germany; he also notes that on the reforming of the Luftwaffe many of its new young pilots were trained in Italy, and were probably influenced by the penchant for Italian pilots to indulge in flying in tight formations of three aircraft.33
Very quickly, the Luftwaffe fighter pilots developed an effective air fighting formation that was largely to be the basis of air fighting well into the jet age. The formation was built on the ‘rotte’; a pair of fighters flying substantially line-abreast some 200 metres apart. The leader led and navigated while monitoring his wingman; the wingman searched above
32 Johnson, Full Circle, pp. 108–109.33 ibid., pp. 99–105.
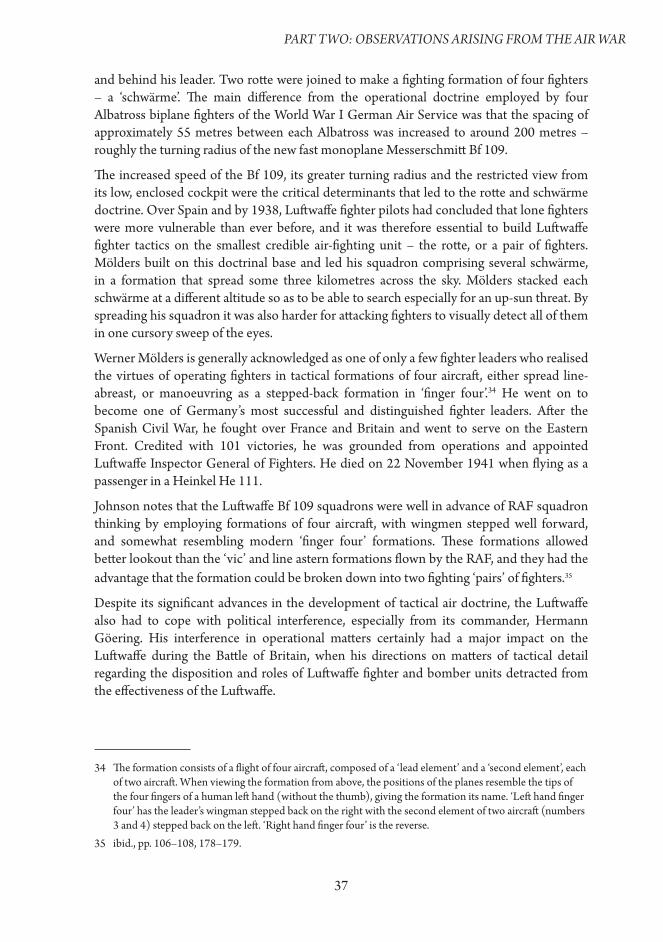
37
PART TWO: OBSERVATIONS ARISING FROM THE AIR WAR
and behind his leader. Two rotte were joined to make a fighting formation of four fighters – a ‘schwarme’. The main difference from the operational doctrine employed by four Albatross biplane fighters of the World War I German Air Service was that the spacing of approximately 55 metres between each Albatross was increased to around 200 metres – roughly the turning radius of the new fast monoplane Messerschmitt Bf 109.
The increased speed of the Bf 109, its greater turning radius and the restricted view from its low, enclosed cockpit were the critical determinants that led to the rotte and schwarme doctrine. Over Spain and by 1938, Luftwaffe fighter pilots had concluded that lone fighters were more vulnerable than ever before, and it was therefore essential to build Luftwaffe fighter tactics on the smallest credible air-fighting unit – the rotte, or a pair of fighters. Molders built on this doctrinal base and led his squadron comprising several schwarme, in a formation that spread some three kilometres across the sky. Molders stacked each schwarme at a different altitude so as to be able to search especially for an up-sun threat. By spreading his squadron it was also harder for attacking fighters to visually detect all of them in one cursory sweep of the eyes.
Werner Molders is generally acknowledged as one of only a few fighter leaders who realised the virtues of operating fighters in tactical formations of four aircraft, either spread line-abreast, or manoeuvring as a stepped-back formation in ‘finger four’.34 He went on to become one of Germany’s most successful and distinguished fighter leaders. After the Spanish Civil War, he fought over France and Britain and went to serve on the Eastern Front. Credited with 101 victories, he was grounded from operations and appointed Luftwaffe Inspector General of Fighters. He died on 22 November 1941 when flying as a passenger in a Heinkel He 111.
Johnson notes that the Luftwaffe Bf 109 squadrons were well in advance of RAF squadron thinking by employing formations of four aircraft, with wingmen stepped well forward, and somewhat resembling modern ‘finger four’ formations. These formations allowed better lookout than the ‘vic’ and line astern formations flown by the RAF, and they had the advantage that the formation could be broken down into two fighting ‘pairs’ of fighters.35
Despite its significant advances in the development of tactical air doctrine, the Luftwaffe also had to cope with political interference, especially from its commander, Hermann Goering. His interference in operational matters certainly had a major impact on the Luftwaffe during the Battle of Britain, when his directions on matters of tactical detail regarding the disposition and roles of Luftwaffe fighter and bomber units detracted from the effectiveness of the Luftwaffe.
34 The formation consists of a flight of four aircraft, composed of a ‘lead element’ and a ‘second element’, each of two aircraft. When viewing the formation from above, the positions of the planes resemble the tips of the four fingers of a human left hand (without the thumb), giving the formation its name. ‘Left hand finger four’ has the leader’s wingman stepped back on the right with the second element of two aircraft (numbers 3 and 4) stepped back on the left. ‘Right hand finger four’ is the reverse.
35 ibid., pp. 106–108, 178–179.
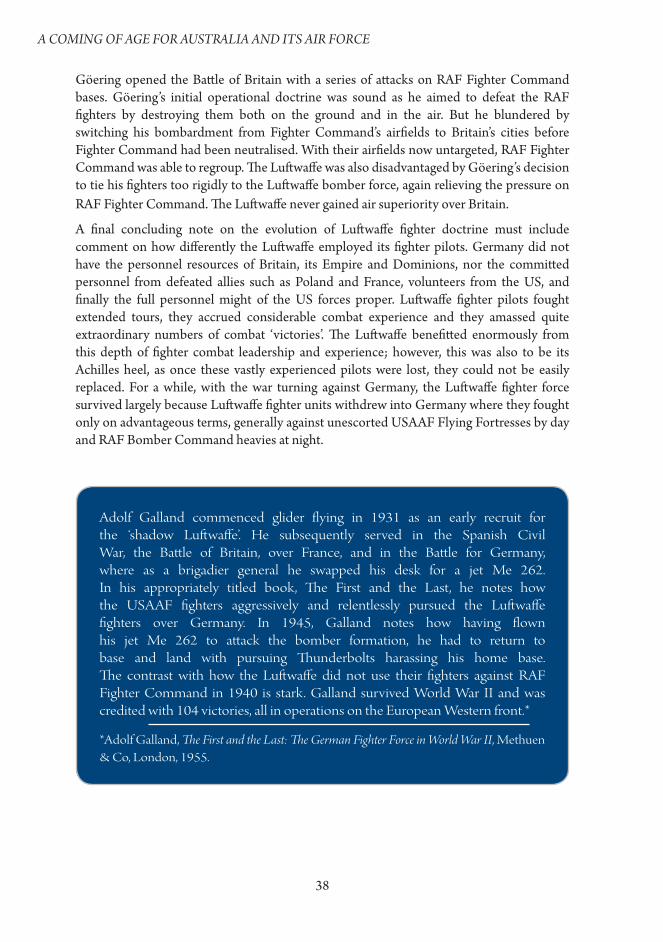
38
A COMING OF AGE FOR AUSTRALIA AND ITS AIR FORCE
Goering opened the Battle of Britain with a series of attacks on RAF Fighter Command bases. Goering’s initial operational doctrine was sound as he aimed to defeat the RAF fighters by destroying them both on the ground and in the air. But he blundered by switching his bombardment from Fighter Command’s airfields to Britain’s cities before Fighter Command had been neutralised. With their airfields now untargeted, RAF Fighter Command was able to regroup. The Luftwaffe was also disadvantaged by Goering’s decision to tie his fighters too rigidly to the Luftwaffe bomber force, again relieving the pressure on RAF Fighter Command. The Luftwaffe never gained air superiority over Britain.
A final concluding note on the evolution of Luftwaffe fighter doctrine must include comment on how differently the Luftwaffe employed its fighter pilots. Germany did not have the personnel resources of Britain, its Empire and Dominions, nor the committed personnel from defeated allies such as Poland and France, volunteers from the US, and finally the full personnel might of the US forces proper. Luftwaffe fighter pilots fought extended tours, they accrued considerable combat experience and they amassed quite extraordinary numbers of combat ‘victories’. The Luftwaffe benefitted enormously from this depth of fighter combat leadership and experience; however, this was also to be its Achilles heel, as once these vastly experienced pilots were lost, they could not be easily replaced. For a while, with the war turning against Germany, the Luftwaffe fighter force survived largely because Luftwaffe fighter units withdrew into Germany where they fought only on advantageous terms, generally against unescorted USAAF Flying Fortresses by day and RAF Bomber Command heavies at night.
Adolf Galland commenced glider flying in 1931 as an early recruit for the ‘shadow Luftwaffe’. He subsequently served in the Spanish Civil War, the Battle of Britain, over France, and in the Battle for Germany, where as a brigadier general he swapped his desk for a jet Me 262. In his appropriately titled book, The First and the Last, he notes how the USAAF fighters aggressively and relentlessly pursued the Luftwaffe fighters over Germany. In 1945, Galland notes how having flown his jet Me 262 to attack the bomber formation, he had to return to base and land with pursuing Thunderbolts harassing his home base. The contrast with how the Luftwaffe did not use their fighters against RAF Fighter Command in 1940 is stark. Galland survived World War II and was credited with 104 victories, all in operations on the European Western front.*
*Adolf Galland, The First and the Last: The German Fighter Force in World War II, Methuen & Co, London, 1955.
39
PART TWO: OBSERVATIONS ARISING FROM THE AIR WAR
In December 1943, the USAAF sent its first North American Aviation P-51B Mustang fighters on the 2200-kilometre journey to Berlin and back – the Luftwaffe fighter units could no longer dictate the terms of their aerial engagements. With the Mustangs supported by Republic P-47 Thunderbolts committed to aggressively seeking out Luftwaffe fighters, Germany began to lose the battle for air superiority as its combat-seasoned fighter pilots succumbed to steady attrition.
In the US, there were two air forces, that of the Army Air Corps and that of the USN. Both air forces invested resources in doctrinal development, education and training. The Army had the Air Corps Tactical School, which developed a strong emphasis on bombardment supported by the notion that ‘the bomber will always get through’. The Army Air Corps built its precision daylight bombing capability on that doctrinal base, as evidenced by the powerful B-17 Flying Fortress, B-24 Liberator and B-29 Superfortress bombardment forces, supported by technologies such as the Norden bombsight and flown by well-trained airmen. A concise summary of the theory of war as expounded by the Air Corps Tactical School, and which was heavily influenced by the air power theorists Trenchard and Mitchell, is provided by Craven and Cate.36
Notwithstanding the USAAC emphasis on bombardment doctrine, the USAAC doctrinal schools also covered observation, pursuit and attack doctrine, as well as extensive schooling in technical and administrative subjects and other military related topics. While USAAC ‘career pursuit’ officers might have felt they were lesser players to their bombardment brethren, they were nonetheless well-educated and well-trained. Paul Wurtsmith and his contemporaries were products of this US Army Air Corps system.
Subsequently, when USAAF units were committed to the European theatre, the doctrinal emphasis of the USAAF on bombardment operations needed tactical readjustment. As the USAAF precision daylight bombing offensive began to build from late 1942, it was brought home to USAAF leaders that flying even very well-armed B-17 Flying Fortress bombers on daylight bombardment missions without escorting fighters risked unacceptable losses.37 As the USAAF bombardment doctrine emphasised bombing accuracy, something that the USAAF believed was not be possible at night, the USAAF began to develop a doctrinal solution involving dedicated and capable long-range fighter escorts to accompany and protect the B-17 formations. This cemented air superiority as a central military strategy in air power doctrine for decades to come.
The foundation of the long-range USAAF fighter force was the three RAF ‘Eagle Squadrons’ of American volunteers flying Spitfires.38 In September 1942, these squadrons were transferred to the USAAF Eighth Air Force as the 4th Fighter Group, although it was to take some time until the Eighth Air Force could muster a credible force of long-range fighters. In the interim, and especially in August/September/October 1943, the unescorted USAAF Flying Fortresses suffered horrendous levels of attrition from a well-drilled
36 Craven and Cate, The Army Air Forces in World War II – Volume One, pp. 51–52. 37 ibid., pp. 660–668.38 ibid., pp. 659, 664.
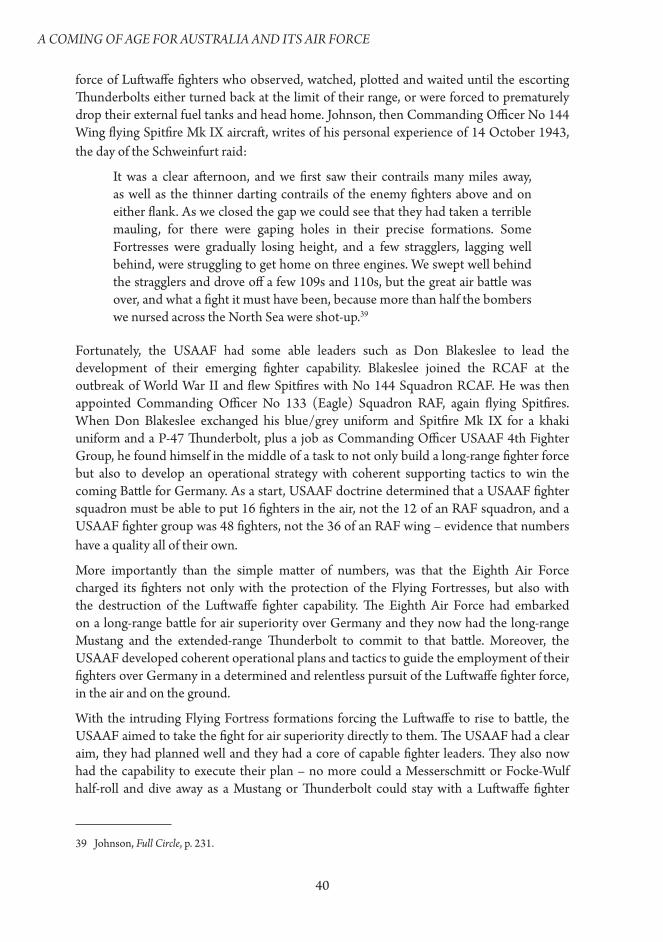
40
A COMING OF AGE FOR AUSTRALIA AND ITS AIR FORCE
force of Luftwaffe fighters who observed, watched, plotted and waited until the escorting Thunderbolts either turned back at the limit of their range, or were forced to prematurely drop their external fuel tanks and head home. Johnson, then Commanding Officer No 144 Wing flying Spitfire Mk IX aircraft, writes of his personal experience of 14 October 1943, the day of the Schweinfurt raid:
It was a clear afternoon, and we first saw their contrails many miles away, as well as the thinner darting contrails of the enemy fighters above and on either flank. As we closed the gap we could see that they had taken a terrible mauling, for there were gaping holes in their precise formations. Some Fortresses were gradually losing height, and a few stragglers, lagging well behind, were struggling to get home on three engines. We swept well behind the stragglers and drove off a few 109s and 110s, but the great air battle was over, and what a fight it must have been, because more than half the bombers we nursed across the North Sea were shot-up.39
Fortunately, the USAAF had some able leaders such as Don Blakeslee to lead the development of their emerging fighter capability. Blakeslee joined the RCAF at the outbreak of World War II and flew Spitfires with No 144 Squadron RCAF. He was then appointed Commanding Officer No 133 (Eagle) Squadron RAF, again flying Spitfires. When Don Blakeslee exchanged his blue/grey uniform and Spitfire Mk IX for a khaki uniform and a P-47 Thunderbolt, plus a job as Commanding Officer USAAF 4th Fighter Group, he found himself in the middle of a task to not only build a long-range fighter force but also to develop an operational strategy with coherent supporting tactics to win the coming Battle for Germany. As a start, USAAF doctrine determined that a USAAF fighter squadron must be able to put 16 fighters in the air, not the 12 of an RAF squadron, and a USAAF fighter group was 48 fighters, not the 36 of an RAF wing – evidence that numbers have a quality all of their own.
More importantly than the simple matter of numbers, was that the Eighth Air Force charged its fighters not only with the protection of the Flying Fortresses, but also with the destruction of the Luftwaffe fighter capability. The Eighth Air Force had embarked on a long-range battle for air superiority over Germany and they now had the long-range Mustang and the extended-range Thunderbolt to commit to that battle. Moreover, the USAAF developed coherent operational plans and tactics to guide the employment of their fighters over Germany in a determined and relentless pursuit of the Luftwaffe fighter force, in the air and on the ground.
With the intruding Flying Fortress formations forcing the Luftwaffe to rise to battle, the USAAF aimed to take the fight for air superiority directly to them. The USAAF had a clear aim, they had planned well and they had a core of capable fighter leaders. They also now had the capability to execute their plan – no more could a Messerschmitt or Focke-Wulf half-roll and dive away as a Mustang or Thunderbolt could stay with a Luftwaffe fighter
39 Johnson, Full Circle, p. 231.

41
PART TWO: OBSERVATIONS ARISING FROM THE AIR WAR
right down to ground level, with the USAAF fighter pilots given the freedom to pursue the Luftwaffe fighters right back to their airfields. The USAAF were not to repeat the mistakes of the Battle for Britain nor were they to repeat the often aimless, short-range RAF fighter sweeps over France of 1942. Johnson writes:
These American planners were high-calibre officers who saw air fighting on a big canvas. They were determined not to repeat Goering’s mistake in the Battle of Britain by failing to exploit the offensive capabilities of their fighters. They did not therefore restrict their escorting fighters by keeping them near the bombers. They devised a shuttle escort service where the fighters escorted the bombers only for part of their route, so that, when relieved of these duties by other fighters, they had plenty of fuel left to roam and hunt as their leaders thought best.40
The USAAF fighter pilots also brought with them a culture of teamwork. Indeed it was not unknown for a pair of USAAF fighter pilots to take turns at rotating the leadership of the pair from mission to mission. Whether it was a product of the American love for the ‘game plan’, or a product of their training, discipline or leadership, the successful ‘lone wolf ’ fighter pilot occasionally seen in the RAF and Luftwaffe was rarely evident in USAAF fighter operations. So as 1944 rolled on, with huge resources and commitment, the stage was set for the greatest air battle ever, as a large and battle-skilled Luftwaffe fighter force withdrew to Germany where it was forced to meet the challenge for air superiority.
The air combat was intense, claiming many lives. Indeed, the USAAF instituted a policy of grounding its best fighter pilots, possibly prematurely, on the basis that they had ‘done their fair share’ before the Luftwaffe, especially the anti-aircraft guns defending the Luftwaffe fighter bases, could bring them down. USAAF fighter casualities especially in attacking the Luftwaffe on the ground were high, but resources, cohesion, determination, skills and leadership saw the USAAF win air superiority over Germany and thus open the way for the concluding military campaigns of World War II. Johnson sums up one of the most salient lessons of air warfare well:
How we longed for more drop tanks, so that the many hundreds of Spitfires based in Britain could play their part in the great air battles over Germany, instead of being confined to the unprofitable sweeps over the familiar and now barren hunting grounds where a man could complete a tour of operations and never fire his guns in anger. We regretted this lack of vision about long range fighting... 41
Johnson was admirably placed to comment on the USAAF air campaign, as he was Commanding Officer No 144 Wing, flying the Spitfire Mk IX on support operations with the USAAF Eighth Air Force. He was later an operational planner at No 11 Group,
40 ibid., p. 234.41 ibid., p. 231.

42
A COMING OF AGE FOR AUSTRALIA AND ITS AIR FORCE
planning fighter operations, and after World War II he was posted to the RAF Central Fighter Establishment.42 Galland notes the intensity with which USAAF fighters pursued the Luftwaffe fighters, claiming highly decorated aces in the process. Luftwaffe casualties included Walter Nowotny, the veteran credited with 258 destroyed, and now the commander of the first jet fighter unit, who was brought down in his Me 262 adjacent to his base after engaging a USAAF raid.43
Between the wars, the USN and USMC developed their relatively small air capabilities around requirements for maritime warfare and amphibious operations. The USN had concluded that level bombing against manoeuvring ships was of limited effectiveness; their answer was to add the dive-bomber and the torpedo-bomber to the naval air force – something the Japanese Naval Air Service had also done. The USN also clarified the role of the fighter, probably well in advance of any other air force. The role of the USN fighter was twofold: first, to defend the aircraft carriers from attack, and second, to protect the airborne scouts, dive-bombers and torpedo-bombers when penetrating to their targets. Between the wars, the USN developed a robust air power doctrine aimed at winning local air superiority both over the US aircraft carriers and over their target areas, and it trained a small naval air force to meet that objective.
US naval air power centred on the fleet aircraft carrier, specifically the 38 000-tonne Lexington class carrier, which embarked up to 80 aircraft. The bulk of these aircraft were scout/bombers (observation/reconnaissance/dive-bombers), torpedo-bombers and dive-bombers, one squadron of each, with USN doctrine stipulating that the carrier air group be rounded out with one ‘fighting’ (fighter or VF) squadron of 18 fighters. This single fighting squadron fulfilled the two roles of escort fighter and of air defence fighter. Almost unnoticed outside of US naval circles, the USN had become a most doctrinally advanced air force, with a small air force that had invested heavily in the education and training of its fighter pilots.44
US naval pilots were well-led and well-taught. They were taught a range of attack profiles, including the vertical attack. They were taught deflection shooting and they practised what was taught. They flew extensive deflection shooting exercises against a towed sleeve target. They were taught the need to close into 200 yards or less before firing. The USN emphasis on deflection shooting resulted from an assessment that the stern attack, although easy to execute, exposed the fighter to fire from a rear gunner. Accordingly the USN doctrine emphasised beam attacks, which necessitated shooting at full deflection (defined as 90 degrees) and vertical attacks from overhead (difficult, but favoured as the fighter could easily counter the defensive turn of the target by performing an aileron roll while in the vertical plane).
With its diversity of roles and the need to maintain standing patrols, and with only one fighting squadron embarked, the USN did not have the luxury of flying all its fighters as
42 ibid., pp. 237–252.43 Galland, The First and the Last, p. 346.44 John B. Lundstrom, The First Team – Pacific Naval Fighter Combat from Pearl Harbor to Midway, Naval
Institute Press, Annapolis, Maryland, 1984.
43
PART TWO: OBSERVATIONS ARISING FROM THE AIR WAR
one squadron-sized fighting formation, hence USN fighter doctrine dictated that fighters operate in ‘divisions’ (flights) of four or six aircraft. Importantly, each division was led by a ‘career’ USN fighter pilot, the three divisions of a VF squadron being led by the commanding officer, executive officer and flight officer respectively; typically these three appointments were filled by graduates of the US Naval Academy.45
At the time of Pearl Harbor the front line fighter of the USN was the Grumman F4F-3 Wildcat powered by the Pratt & Whitney R-1830 Twin Row Wasp, a 14-cylinder, twin row, 1200 horsepower supercharged radial engine. The Grumman was gradually replacing the Brewster F2A Buffalo, a fighter powered by the Wright Cyclone R-1820, a nine-cylinder, single row radial engine of 950 horsepower. The Buffalo was well known to those RAAF squadrons caught in Malaya in December 1941.
The F4F-3 Wildcat was armed with four .50-calibre machine guns firing a mix of ball, tracer and semi-armour piercing ammunition, although its performance was considerably inferior to both the Spitfire and Zero. The upgraded F4F-4 came into service in early 1942 and was armed with six .50-calibre machine guns, including incendiary rounds, and was fitted with cockpit armour, armoured windscreens and self-sealing fuel tanks. Unfortunately, the added weight further degraded the performance of the F4F-4.
45 ibid., Appendix One – The Making of Carrier Fighter Pilots and Appendix Two – Fundamentals of Aerial Fixed Gunnery.
USN nomenclature for aircraft was based on three elements. The first element – a letter or letters – designated the role of the aircraft. The last element – a letter – designated the aircraft manufacturer. The middle element – a number – referred to the manufacturer’s design sequence. Hence the F2A was Brewster’s (A) second fighter design (F) and the F4F was Grumman’s (F) fourth fighter design (F) for the USN. The SBD was Douglas’s (D) first scout/bomber design (SB). The USN did not include the numeral 1 for a company’s first design.

44
A COMING OF AGE FOR AUSTRALIA AND ITS AIR FORCE
It was obvious that the USN pilot was flying a fighter of inferior speed, climb and manoeuvrability to the Japanese Zero. Yet at their first substantial air fighting engagement at the Battle of the Coral Sea on 7-8 May 1942, the pilots of VF-2 and VF-42 hung on creditably against a numerically superior force of Zero fighters. Theoretically, the two USN fighter squadrons, one each from the USS Lexington and the USS Yorktown tasked with defending the US carriers from air attack and with the escorting of strike formations, should have suffered badly in what for most of the US pilots was their first air combat against the Zero. Even so, four factors enabled the US pilots to survive: their thorough and rigorous training; their ability to shoot accurately at close range and at high deflection angles; their skill at using cloud and weather to escape an attacking Zero; and their rugged fighter, which the Japanese found so difficult to bring down (with a touch of black humour, USN pilots referred to their mount as being built at ‘the Grumman iron works’).46
After some initial disillusionment, and in a lesson applicable to any air force, the USN set about making the most of what it had and worked out in a documented and disciplined way how to fight the Zero. They introduced new spread formations and when under attack, generally from above, manoeuvred such that within 90 or 180 degrees of turn, at least one Wildcat was in a position to execute either a head-on or a full deflection (90 degree) attack on the Zero. In this they were aided by the high pilot seating position in the Wildcat, which not only facilitated visibility over the nose during carrier landings but also enabled the Wildcat pilot to hold large deflection lead angles without losing sight of the target aircraft under the Wildcat’s nose.
Two experienced US naval flyers aged in their mid-30s, Lieutenant Commanders John Thatch and James Flatley, were central to the development and leadership of USN air fighting tactics. Thatch and Flatley, graduates of US Naval Academy classes of 1927 and 1929 respectively, refused to countenance any defeatism or criticism of their F4F fighter. In revising USN fighter doctrine, Flatley wrote:
‘What the F4F lacks in climb and maneuverability is more than compensated for by its excellent armament, protective armor, protected fuel system, and greater strength.’
46 Lundstrom, The First Team, Chapters 10–12, ‘The Battle of the Coral Sea’.
Although Grumman moved on to the production of other aircraft for the USN, General Motors continued to produce the Wildcat throughout the war. It served on USN escort carriers and entered service with the Royal Navy as the Martlet. Clearly many thought its utility and virtues outweighed its deficiencies. The Wildcat should not be confused with the later Grumman F6F Hellcat powered by the Pratt & Whitney R-2800 Double Row Wasp of 2000 horsepower, which proved to be an exemplary fighter.
45
PART TWO: OBSERVATIONS ARISING FROM THE AIR WAR
‘Let us not condemn our requirement. It shoots the enemy down in flames and gets us back to our base.’
‘Remember the mission of the fighter plane; the enemy’s VF mission is the same as our own. Work out tactics on that basis. We should be able to outsmart him.’
‘The answer is to get our planes in the air, find out how best to protect another squadron, how best to manoeuvre when attacked from above. Learn to attack at high speed, shoot, and keep going in formation. Make your sections stay together under any and all circumstances.’
In his exhortation to ‘make your sections stay together under any and all circumstances’, Flatley, with great prescience, articulated what was to become one of the enduring doctrines of air warfare.47
The US naval air force was a fast learner. After its second major exposure to the Japanese Zero at Midway on 4-5 June 1942, the USN made more changes to its air fighting organisation and doctrine. First the strength of a VF squadron which had already been hastily increased to 27 fighters was further increased to 36 fighters; this in recognition of the experience at Midway when after allocating fighters for the air defence of the carriers, there were insufficient fighters remaining to escort the torpedo and strike packages. Second, the USN rushed through the acquisition of two 58-US gallon underwing external tanks for the Wildcat, which did nothing for the fighting performance of the fighter but which greatly increased its endurance to around five hours.
The USN had quickly recognised that a fighter with insufficient range to reach the combat zone was a pretty useless fighter.
Thirdly, and most importantly, Lieutenant Commander John Thatch was tasked with the rewrite of USN fighter doctrine. Specifically he rewrote the chapter on fighter tactics in the March 1941 edition of ‘Current Tactical Orders and Doctrine, US Fleet Aircraft, Volume One, Carrier Aircraft USF-74’. This rewrite saw all reference to the ‘three plane section’ in USN doctrine deleted. In July 1942, the USN adopted the ‘two plane section’ as the building block on which fighter formations were constructed. The ‘four plane division’ (a flight of two sections) also became the standard fighter combat formation of the USN.48
Following the Battle of the Coral Sea and the Battle for Midway, the USN reached a new watershed in fighter doctrine when Flatley articulated that the basic concepts of aerial combat had changed. The idea of fighter-versus-fighter combat – classic dogfighting – was obsolete. Formation tactics, teamwork and mutual support were the new keys to effectiveness in air combat. The effectiveness of this approach was demonstrated over Guadalcanal in the period August 1942 to January 1943, when despite flying a fighter of
47 ibid., p. 445.48 ibid., p. 447.
46
A COMING OF AGE FOR AUSTRALIA AND ITS AIR FORCE
inferior performance, USN pilots began to hold their own against the Zero; all by virtue of capable leadership, disciplined tactics, teamwork, thorough training and an ability to quickly learn lessons.
There can be little doubt that the air combat tactics and the individual gunnery skills of the RAAF’s No 1 Fighter Wing measured up poorly against the skills of USN fighter pilots flying Grumman F4F Wildcats in 1942. It would seem that despite the lessons of air warfare being rewritten close by in the Pacific, the RAAF, its senior officers and Clive Caldwell were largely unaware of the rapid progress being made by the USN in the development and revision of air fighting doctrine. Although Caldwell visited the US when returning to Australia from his attachment to the Kenley Wing in September 1942, it seems that Caldwell’s tour was linked more to publicity and morale-lifting objectives than to the advancement of RAAF air fighting doctrine. Caldwell spent time with the USAAF and visited the Curtiss factory in Buffalo, New York, but he failed to visit any USN headquarters or units, especially those in Hawaii.
Between the wars, the doctrinal base of the RAAF was mainly influenced by RAF thinking. Australian officers were sent to RAF staff colleges, which exposed them to the Trenchard-based doctrine of the RAF. But only two pre-war RAAF officers stand out as ‘air power thinkers or practitioners’, Richard Williams and Henry Wrigley. Williams, who had the added burden of leading a small and junior military service in times of economic stringency and in the face of adversity from army and navy, was more the strategic pragmatist. He viewed the Trenchard doctrine as beyond the aspirations of the RAAF and his writings and decisions reflect that he deduced the Australian need for air power was for the domination
A summary of the air fighting during the Guadalcanal campaign, including a ‘score sheet’ of losses between the respective combatants flying Grumman F4F Wildcats and Mitsubishi Zeros, updated by recent access to Japanese records, is given in John B. Lundstrom’s second book published in 1994.*
After an initial reverse in August 1942 when nine Wildcats were lost against a loss of two Zeros, the five USN Wildcat squadrons essentially went one-for-one in their air fighting with Zero fighters, flown by the most experienced Japanese fighter pilots. The Wildcats downed many other Japanese aircraft: dive-bombers, bombers, floatplanes, torpedo planes, etc., but after excluding these combats from the ledger, the outperformed Wildcat, utilising disciplined tactics and excellent deflection shooting, still managed a one-for-one fighter exchange ratio with the superior-performing Zero.*
*Lundstrom, The First Team, Naval Institute Press, Annapolis, Maryland, 1994, pp. 528–531.
47
PART TWO: OBSERVATIONS ARISING FROM THE AIR WAR
of Australia’s ocean approaches, especially to deny their use to sea-based aggressors. Hence, Williams tended to favour the acquisition of reconnaissance and general purpose aircraft of utility over Australia’s maritime environment. Much of this stemmed from his 1923-1924 visits to a range of countries, and from his 1925 aviation expedition to north-east Australia, Papua, New Guinea, Rabaul and the Solomon Islands.49
Henry Wrigley’s notes and papers, which only came to light some four decades after World War II, demonstrate a comprehensive grasp of air power; a grasp that would have been well ahead of its time. Wrigley did not subscribe to the notion of the independent application of air power. He saw air power being used in concert with other land- and sea-based capabilities. Unlike Williams, he foresaw that air superiority would be one of the keys to the future use of air power. The Decisive Factor: Air Power Doctrine by Air Vice-Marshal H.N. Wrigley, edited by Brendan O’Loghlin and Alan Stephens, is testimony that the RAAF had in its service one of the pre-eminent ‘air power thinkers’ of the pre-World War II period.
When war broke out in 1939, Wrigley was a group captain aged 47 years. In 1940, he joined the Air Board as Air Member for Personnel, and in September 1942 he was posted to London as AOC RAAF Overseas Headquarters although, in reality, he commanded nothing. It seems a waste that an Australian airman of Wrigley’s talent was denied a greater role in the conduct of World War II. One would have thought that his ability to think cogently at the strategic level would have been of considerable value in advising Australia’s government of the day.
As for RAAF tactical level doctrine: it was not well advanced; unsurprising for a small service of some 3000 personnel operating in a stringent financial environment. But it was therefore imperative that when war broke out in September 1939, the RAAF make up ground quickly. The RAAF needed to expose its best personnel to operations and put in place procedures and systems that ensured newly inducted Australians were as best prepared and trained as possible for operations. Regrettably, the decision by government to subordinate RAAF priorities to the support of the EATS made this impossible by precluding the immediate deployment of those relatively few experienced pre-war RAAF officers into operational appointments appropriate to their seniority and professional training.
On this topic, Gillison examines the RAAF Air Force List of 1925. It is clear that despite being a very small air force, the RAAF had a core of officers who could have been used as a basis for force expansion in 1939. Most of these officers were consigned by the EATS decision to training and administrative posts although after the attack on Pearl Harbor, a few had the opportunity to head newly formed RAAF operational units and headquarters in the South-West Pacific.50
It was not as if there was no alternative to the EATS. The RAAF had the ability to conduct basic and unit training in Australia and to form new RAAF units that once combat aircraft
49 Williams, These Are Facts, Chapters 11–13.50 Gillison, Royal Australian Air Force 1939-1942, see Appendix 2 – The Air Force List – 1925.
48
A COMING OF AGE FOR AUSTRALIA AND ITS AIR FORCE
became available, possibly Kittyhawks, could be committed to theatres such as North Africa. Those newly formed and trained units might also have been able to upgrade to their combat aircraft in the rear area of their operational theatre before going into action under Australian commanders (as did No 3 Squadron). The North African theatre was one such possibility particularly as it was the theatre where the 6th Australian Division, Australian Imperial Force, under the command of Major General Ivan Mackay, was deployed. Some of the new RAAF units could have also been held back as contingent units considering the deteriorating situation in Indo-China.
Once a ‘critical mass’ of one or two RAAF wings had been deployed, the RAAF would have set in place a command organisation whereby RAAF personnel could be deployed on operations under Australian commanders. It would have ensured that Australians on operations were deployed under a command and administrative umbrella that was responsible for their welfare, health, discipline, promotion, commendation and repatriation. That was the national policy under which the AFC deployed in World War I and it was a policy that worked well. It was a policy that would have returned a selection of several senior officers back to Australia with the experience to command No 1 Fighter Wing and its subordinate squadrons. It was also a policy that would have led to better operational feedback which would have enhanced RAAF training and doctrinal development.
The performance of No 1 Fighter Wing was therefore not so much a product of the individuals concerned but of the policies of the Australian government and the RAAF. The pre-war and early World War II policies had not developed Australian airmen sufficiently to lead or fly air superiority operations, nor had those policies instituted sufficiently capable training systems to equip the personnel of No 1 Fighter Wing with the skills necessary to meet the Japanese air threat. The pilots of the wing were particularly deficient in tactical training and they lacked proficiency in air-to-air gunnery. Throughout the campaign over northern Australia they demonstrated little ability to operate in cohesive flights or squadrons and as the campaign went on, the learning process was slow. In particular, Clive Caldwell’s continued use of the big wing sits at odds with what had been learnt in other earlier World War II air campaigns.
Granted, there were huge differences between what Australia’s seven million people – the population of the state of New South Wales today – could do in 1940 and what the US could do, but the fact remained that by 1944, Australia had still managed to put over 600 000 men and women into military service. So it was not a question of commitment, individual bravery or personal endeavour. It was more a question of whether Australia’s national leadership, including its political leadership and the higher command of the RAAF, performed as effectively as the warriors that Australia put on the front line.
Perhaps, only 43 years after federation, all this was simply a reflection of a maturing of Australia; but that does not explain why so little seemed to have been learnt from Australia’s experiences of World War I.

49
PART TWO: OBSERVATIONS ARISING FROM THE AIR WAR
The Primacy of National Interests
A recurring theme in Australian histories is that the 1930s are often considered a particularly low point in the quality and calibre of Australian political leadership. Many Australian leaders of that period had little comprehension of what Australia’s national interests might be, and what were the geostrategic imperatives for Australia, a nation living on the fringe of Asia.
Frequently, Australian policy came to an assessment that ‘what was good for the British Empire must be good for Australia’. It was also the practice of the Australian government to seek advice from Britain on a range of issues. Before acting on that advice, Australian policy makers needed to understand that advice received through the British High Commission was often, not unexpectedly, coloured with a view to supporting British political, strategic and mercantile interests. There is nothing strange or untoward about that; it is how the world works.
December 1941 provided Australia with a reality check on world realpolitik and a reminder that nations will always act in accordance with their own national interests. With many previously unknown documents from the late 1930s and early 1940s now becoming available, recent historians have been able to gain a greater insight into the thinking and performance of many Australian public figures of the period, and regrettably, these documents show that some were negligent in acting in the best interests of Australia.
Darwin Spitfires: The Real Battle for Australia demonstrates the consequences of failure to identify critical national interests and act in accordance with those national interests. Put simply, the Australian government neglected to fund even a rudimentary Australian defence capability, justifying the policy by effectively outsourcing Australia’s defence to a navy home-based 20 000 kilometres away. Even when war broke out in Europe, government was again negligent in failing to read the warning signs of a deteriorating situation in South-East Asia when it failed to hold in reserve some national defence capability to cover adverse contingencies to the immediate north of Australia.
Just how much worse would it have been for Australia and its air force had not those 75 Kittyhawks materialised on Australian wharves in March 1942? And what if Evatt’s unseemly rush to Britain had failed to secure the 75 Spitfires for No 1 Fighter Wing? Good fortune such as this should not be counted upon in managing a nation’s national interests. More recent historical analysis written with the advantage of documentary evidence that has now become available has become more critical of the between-war years, especially during the 1930s.51
In seeking explanations about Australia’s lack of defence preparedness, commentators might point to Australia’s small population in 1935 of only 6.76 million. But that does not explain policy failures such as Australia’s unsound reliance on Britain’s naval fortress at Singapore, the unpreparedness of the RAAF, the uncritical acceptance of the EATS, and of the inability of the government to appoint adequate leadership of the RAAF.
51 For a political perspective see Kelly, 100 Years: The Australian Story.

50
A COMING OF AGE FOR AUSTRALIA AND ITS AIR FORCE
A partial explanation might lie in Australia’s demographics. In the period 1914 to 1918, 416 000 Australians, mainly men, enlisted for military service in World War I; a remarkable percentage of Australia’s 1914 population of 4.97 million. Of these enlistees, Australia lost 60 000 killed and suffered another 156 000 wounded, gassed or injured. Such heavy losses decimated Australia’s menfolk, especially the 18-to-38-year-old cohort involved in World War I.
Some 20 years later, this cohort of now 38-to-58-year-old men was the group from which Australia’s leaders would be chosen. Demographically it was a much-reduced cohort. World War I, the inevitable delayed trauma from the war and the later deleterious impact of the Great Depression during which unemployment in Australia rose to 30 per cent, suggests cogent reasons for the lack of talent, intellectual rigour, vitality and leadership in Australia in the run up to World War II.52
For whatever reason, Australia was caught badly unprepared for World War II and it was an experience that still holds lessons for today; for while 2013 is well removed from the pre-World War II period, Australia’s regional geography remains unchanged. Concerns and complications about the British Empire are long gone but have been replaced by new geopolitical issues relating to Australia’s relationship and defence alliance with the US; Australia’s strategic and economic relationship with China; and of the impact on Australia of strategic competition between ‘Australia’s partners’ – China and the US. Add to that, Australia’s relationship with its growing and developing neighbours and of the potential for instability in South-East Asia, the Asia-Pacific and the Indo-Pacific and it is reasonable to conclude Australia faces a complex and largely unpredictable geopolitical future.
In this environment, a substantial measure of defence self-reliance is always a fundamental national obligation, and it must now be of concern that Australia’s defence spending on a comparative GDP basis has fallen to levels not seen since the 1930s.
The Need for Robust, Competent and Professional Military Leadership
Apart from an understanding of Australia’s national interests, the Australian government of the late 1930s lacked the benefit of well-considered advice on matters of defence and air warfare. Had such advice been available and listened to, the government of the day may have been able to formulate a better defence policy than it did. But instead of taking advice on matters of defence and air defence from an informed air force leadership, the Australian government of the day turned the leadership of the RAAF into a crisis of instability.
In early 1939 the government relieved, on less than convincing grounds, Air-Vice Marshal Richard Williams from his post as CAS. Williams was despatched for duty with the RAF and was replaced by Air-Vice Marshal Stanley Goble. In early 1940, Goble resigned as CAS over issues arising from the EATS; Goble’s views to government reflected the view
52 All figures quoted come from the Australian Bureau of Statistics and the Australian War Memorial.
51
PART TWO: OBSERVATIONS ARISING FROM THE AIR WAR
that rather than support for the EATS, local defence was more the immediate objective.53 Having despatched the two most experienced officers of the RAAF, Prime Minister Menzies, who had overseen the appointment of Englishmen as heads of the Australian Army and Australian Navy, determined that an RAF officer should now be appointed as RAAF CAS. Air Marshal Sir Charles Burnett RAF was accordingly appointed CAS and promoted to the rank of air chief marshal – two ranks higher than his two immediate predecessors.
The appointment of Burnett was contentious. It could only be justified if he was an unambiguously outstanding officer, and one who could understand and be sympathetic to Australian interests. Burnett was no such candidate. He had proceeded through an unspectacular RAF career and in 1939 was appointed an Inspector General of the RAF; an appointment that presaged his full retirement from the RAF. His health was not robust. On these grounds Williams and several other RAAF officers could lay claim to being considerably better appointees. Burnett’s greatest failing was his view that the only role for the RAAF in World War II was for it to be a training arm to stream Australians into RAF operational units via the EATS.54
The hallmark of Burnett’s two years as CAS was his single-minded focus on the use of the RAAF as a feeder of personnel through the EATS to the RAF. There is little evidence of him influencing government policy in any other way, nor of him taking steps to develop and maintain some contingent air power capability in Australia. His blindness to the deteriorating situation with Japan is illustrated when during the last days of the Menzies/Fadden government, and 10 months before Evatt went to London seeking Spitfires, Burnett dismissed out of hand an offer from the Australian trade mission in New York regarding Lockheed P-38 Lightning fighters.55
Higher Organisation and Clarity of Command
In late 1941, the Curtin government replaced the Menzies/Fadden government. Burnett failed to gain the confidence of Arthur Drakeford, the new Minister for Air, thus depriving the government of trusted and professional advice on air power matters. In short, both the Menzies/Fadden and Curtin governments were flying blind for most of Burnett’s appointment and unsurprisingly, Drakeford returned Burnett to England in May 1942.
So for the period May 1940 to May 1942, Australia’s political leadership had no avenue through which it might receive considered advice on Australian air defence cast from an Australian perspective. Regrettably, this encompassed the critical period from late 1941 to early 1942 when the grand strategy and the supporting command and control
53 John McCarthy, A Last Call of Empire: Australian Aircrew, Britain and the Empire Air Training Scheme, Australian War Memorial, 1988, p. 5.
54 Gillison, Royal Australian Air Force, 1939-1942, pp. 73–78; and Williams, These Are Facts, pp. 253–257.55 Ewer, Wounded Eagle, p. 187.
52
A COMING OF AGE FOR AUSTRALIA AND ITS AIR FORCE
arrangements for the war in the Pacific were decided. Burnett’s contribution to this epitomised his limitations, as illustrated by his poorly thought out proposal on how the RAAF might best be structured to work co-operatively with General MacArthur’s South-West Pacific Command.
Burnett’s proposals are reproduced by Sir Richard Williams in his autobiography. While it is clear that Williams had little regard for the competence of Burnett, the organisational and command proposals drafted by Burnett lacked logic and clarity. Little wonder that General Kenney unilaterally changed the arrangements when he replaced General Brett, but unfortunately, although Kenney’s quick fix worked well for him and the US forces, especially the USAAF, they left in place arrangements that effectively precluded any leveraged input from the Australian Government to General MacArthur.56
The situation was not helped when on their fourth attempt to appoint a head of the RAAF following Williams, Goble and Burnett, the government appointed George Jones as RAAF CAS. Jones was promoted from the acting rank of air commodore and substantive rank of group captain, to substantive air vice-marshal, superseding eight senior officers including Air Vice-Marshal William ‘Bill’ Bostock, who himself had been the beneficiary of a rapid elevation to Deputy CAS under Burnett only two years before. Under the agreed command arrangements with MacArthur, Bostock was appointed AOC RAAF Command, an appointment that effectively divided command of the RAAF between Jones and Bostock.
The command and organisational arrangements lacked clarity and were clouded with deep personal issues. Bostock and Jones began a war-long feud over their respective authorities; a matter that has been reported on extensively in Australia’s official war histories: Royal Australian Air Force 1939-1942 by Douglas Gillison and Air War Against Japan 1943-1945 by George Odgers, and subsequently in Going Solo: The Royal Australian Air Force 1946-1971 by Alan Stephens. It is also clear that these organisational arrangements and the acrimonious relationship between Jones and Bostock contributed to a deleterious fall in morale throughout the RAAF, especially in that part of the RAAF committed to the war with Japan. In this acrimonious higher command environment, was it any wonder that incidents such as trafficking in illegal grog and the ‘mutiny at Morotai’ occurred and damaged the reputation of Australia’s air force in World War II.
The arrangements that Prime Minister Curtin agreed with General MacArthur effectively divided the command of the RAAF. Although Drakeford eventually realised the debilitating nature of the divided command arrangements, and of the adverse implications of the Jones/Bostock feud, he found he was powerless to rectify the situation as Prime Minister Curtin had misguidedly conceded too much Australian authority to General MacArthur. Australia was finding that as with Britain, when the national interests of the US do not coincide with those of Australia, the national interests of the US come first.
So in mid-1942, a nation hopelessly prepared for war, with muddled strategic thinking, with a poor grasp of the importance of clarity of organisation, and with its two senior
56 Williams, These Are Facts, pp. 293–299.
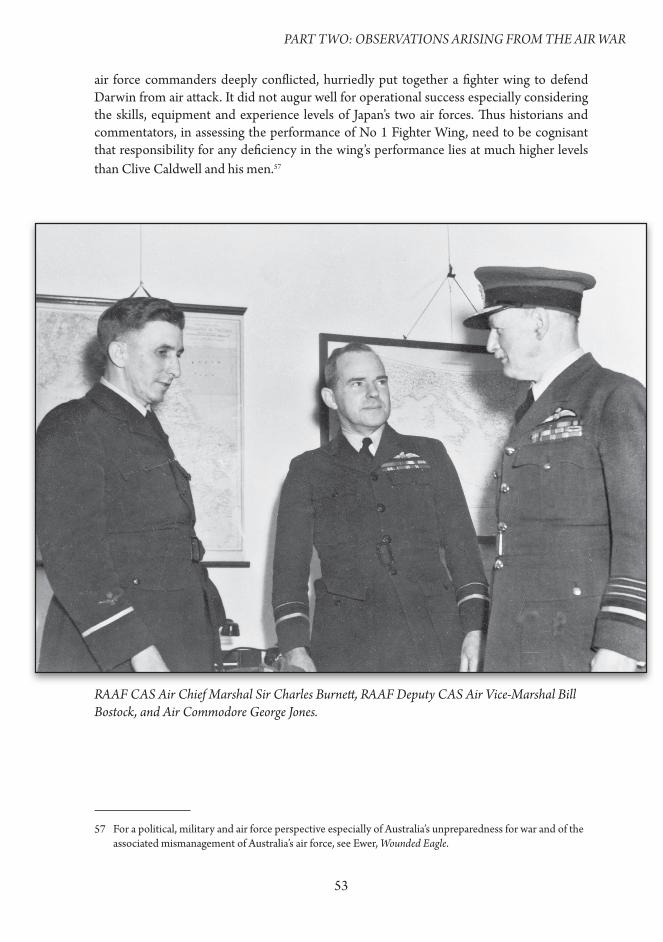
53
PART TWO: OBSERVATIONS ARISING FROM THE AIR WAR
RAAF CAS Air Chief Marshal Sir Charles Burnett, RAAF Deputy CAS Air Vice-Marshal Bill Bostock, and Air Commodore George Jones.
air force commanders deeply conflicted, hurriedly put together a fighter wing to defend Darwin from air attack. It did not augur well for operational success especially considering the skills, equipment and experience levels of Japan’s two air forces. Thus historians and commentators, in assessing the performance of No 1 Fighter Wing, need to be cognisant that responsibility for any deficiency in the wing’s performance lies at much higher levels than Clive Caldwell and his men.57
57 For a political, military and air force perspective especially of Australia’s unpreparedness for war and of the associated mismanagement of Australia’s air force, see Ewer, Wounded Eagle.

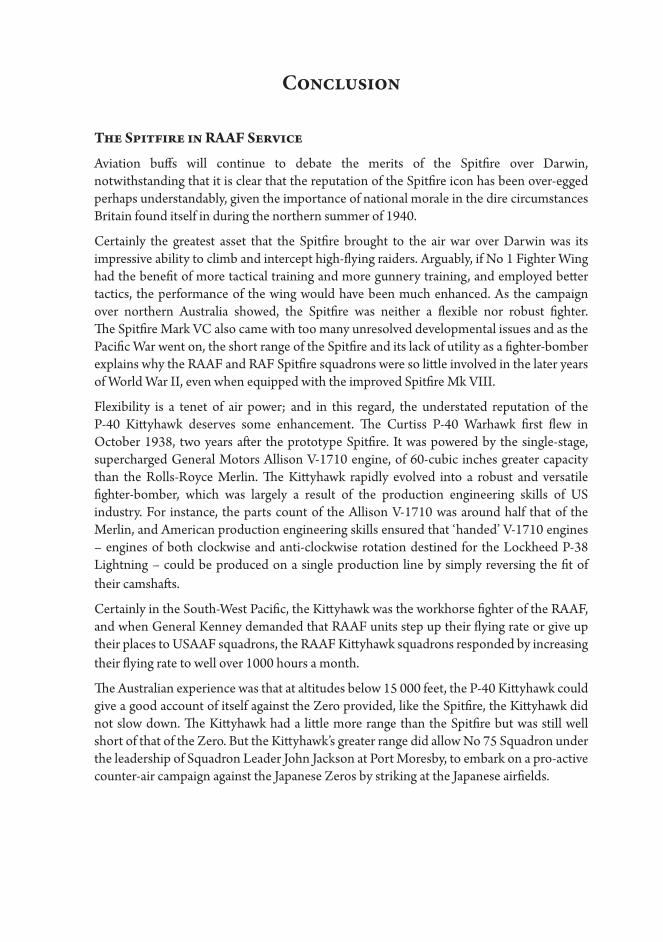
Conclusion
The Spitfire in RAAF Service
Aviation buffs will continue to debate the merits of the Spitfire over Darwin, notwithstanding that it is clear that the reputation of the Spitfire icon has been over-egged perhaps understandably, given the importance of national morale in the dire circumstances Britain found itself in during the northern summer of 1940.
Certainly the greatest asset that the Spitfire brought to the air war over Darwin was its impressive ability to climb and intercept high-flying raiders. Arguably, if No 1 Fighter Wing had the benefit of more tactical training and more gunnery training, and employed better tactics, the performance of the wing would have been much enhanced. As the campaign over northern Australia showed, the Spitfire was neither a flexible nor robust fighter. The Spitfire Mark VC also came with too many unresolved developmental issues and as the Pacific War went on, the short range of the Spitfire and its lack of utility as a fighter-bomber explains why the RAAF and RAF Spitfire squadrons were so little involved in the later years of World War II, even when equipped with the improved Spitfire Mk VIII.
Flexibility is a tenet of air power; and in this regard, the understated reputation of the P-40 Kittyhawk deserves some enhancement. The Curtiss P-40 Warhawk first flew in October 1938, two years after the prototype Spitfire. It was powered by the single-stage, supercharged General Motors Allison V-1710 engine, of 60-cubic inches greater capacity than the Rolls-Royce Merlin. The Kittyhawk rapidly evolved into a robust and versatile fighter-bomber, which was largely a result of the production engineering skills of US industry. For instance, the parts count of the Allison V-1710 was around half that of the Merlin, and American production engineering skills ensured that ‘handed’ V-1710 engines – engines of both clockwise and anti-clockwise rotation destined for the Lockheed P-38 Lightning – could be produced on a single production line by simply reversing the fit of their camshafts.
Certainly in the South-West Pacific, the Kittyhawk was the workhorse fighter of the RAAF, and when General Kenney demanded that RAAF units step up their flying rate or give up their places to USAAF squadrons, the RAAF Kittyhawk squadrons responded by increasing their flying rate to well over 1000 hours a month.
The Australian experience was that at altitudes below 15 000 feet, the P-40 Kittyhawk could give a good account of itself against the Zero provided, like the Spitfire, the Kittyhawk did not slow down. The Kittyhawk had a little more range than the Spitfire but was still well short of that of the Zero. But the Kittyhawk’s greater range did allow No 75 Squadron under the leadership of Squadron Leader John Jackson at Port Moresby, to embark on a pro-active counter-air campaign against the Japanese Zeros by striking at the Japanese airfields.

56
A COMING OF AGE FOR AUSTRALIA AND ITS AIR FORCE
Notwithstanding the success of the 49th Fighter Group and their Kittyhawks in 1942, had No 1 Fighter Wing been flying Kittyhawks they would have struggled to reliably intercept the high flying Japanese bombers, and they would have had to cope with consistently being attacked from above by escorting Zeros. Conversely, the Kittyhawk’s ability as a fighter-bomber ensured that it was not sidelined to the extent that RAAF (and RAF) Spitfires were in the latter phases of the war in the Pacific (and of the war in Europe).
RAAF Kittyhawk
In 1943, as the RAAF squadrons moved along the northern coast of New Guinea, they came under pressure from General Kenney to either perform or leave the theatre. Kenney had sent the RAAF Vultee Vengeance units at Nadzab back to Australia, on the basis that they took up too much space and the Kittyhawk could do everything a Vengeance could do. The RAAF Kittyhawk squadrons responded to Kenney’s challenge, by even outflying equivalent USAAF squadrons.*
*Odgers, Air War Against Japan 1943-1945, pp. 192–197 and p. 227.

57
PART TWO: OBSERVATIONS ARISING FROM THE AIR WAR
The Need for Flexibility and Versatility in Air Power
The acquisition by the RAAF of both the Kittyhawk and Spitfire were accidents of history. The Kittyhawk arrived almost unannounced on Australian wharves while Evatt, with little aviation knowledge, rushed to Britain to seek Spitfires. One aircraft turned out to be a rugged fighter-bomber, best in the lower altitudes, the other a short-range, fast climbing interceptor.
Since then, the RAAF has come a long way from the desperate acquisitions of World War II. Over the past decades the RAAF has moved steadily towards operating a fighter force of multi-role fighters. Initially it adapted the Avon Sabre to a fighter-bomber role by adding bombs and rockets; then it moved to the reasoned acquisition of the Mirage IIIOA, with an air-to-ground capability based on utilising the ground attack systems developed for the Mirage 111E; and finally to the acquisition of the best multi-role fighter of the 20th century – the (then) McDonnell Douglas F/A-18, supported by the ability to refuel its F/A-18 fighters while inflight.
With defence acquisitions now needing to anticipate possible changes in Australia’s defence circumstances for up to one, two, three and four decades hence, operational flexibility and the ability to operate across the vast expanse of Australia and its area of geostrategic interest, becomes an essential consideration.
To have the nation’s air defence fighters sitting on the ground when the contingency requires air-to-ground missions or vice versa, would be an expensive strategic mistake. Capable fighters that can be switched between a range of roles as the air campaign demands are the only answer for a small air force such the RAAF. Similarly it is essential that RAAF fighters have the range to be operationally effective. It is therefore quite unremarkable that despite pockets of criticism from some quarters, that there is strong support for the acquisition of the multi-role Lockheed Martin F-35 to replace the F/A-18.
But Spitfires alone did not defeat the Japanese over northern Australia in 1943. It was the combination of fighters plus the new technology of radar, and supported by a salvage and repair unit. Without the support of Australia’s radar warning and fighter direction units, which were at the leading edge of technology and skill for the day, No 1 Fighter Wing would have made few interceptions. Anthony Cooper has done a great service to Australian national and military history by helping expose the prominent role played by Australia’s radar warning and fighter direction units; a role which foreshadowed that air power was already no longer just about air platforms, but about air power systems.
Regrettably, this early lesson about the need for air power systems as distinct from air platforms was not well publicised even in informed defence circles, possibly because security classifications precluded for a long time the publication of the outstanding achievement involving the design, manufacture and operation of RAAF radar. Even today, few know that by the end of World War II, the RAAF had deployed 142 ground radar units into the field; a capability built upon the knowledge that Wing Commander Albert Pither had acquired in Britain in mid-1941.

58
A COMING OF AGE FOR AUSTRALIA AND ITS AIR FORCE
The lesson for the RAAF since is conceptually much the same, as demonstrated by the air force of the USN as long ago as 1942; pilots and aircraft without the complementary operational capabilities, support capabilities, leadership, training, doctrine and logistics do not constitute an operational capability. Certainly the RAAF after World War II was slow to comprehend this lesson, although over the last couple of decades, the realisation that air power is not just about air platforms but about combat air systems would appear to have been grasped.
Today, capabilities such as command and control, intelligence support, airborne warning and control, over-the-horizon radar, air-to-air refuelling and unmanned aerial systems are emerging in the RAAF of the 21st century.
The challenge for the nation today is to continue to fund the development of such complementary capabilities, supported by well-educated, well-trained professional airmen; who have a learning culture and are prepared to measure performance critically against the best air forces in the world, so as not to lapse into the delusions that so blinded Australia’s leaders of the 1930s.
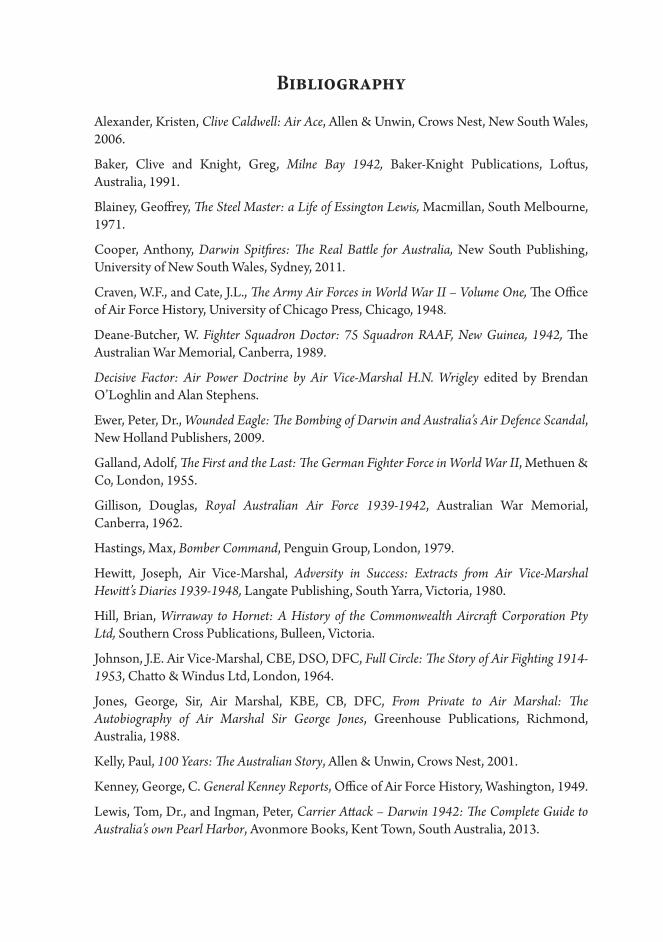
Bibliography
Alexander, Kristen, Clive Caldwell: Air Ace, Allen & Unwin, Crows Nest, New South Wales, 2006.
Baker, Clive and Knight, Greg, Milne Bay 1942, Baker-Knight Publications, Loftus, Australia, 1991.
Blainey, Geoffrey, The Steel Master: a Life of Essington Lewis, Macmillan, South Melbourne, 1971.
Cooper, Anthony, Darwin Spitfires: The Real Battle for Australia, New South Publishing, University of New South Wales, Sydney, 2011.
Craven, W.F., and Cate, J.L., The Army Air Forces in World War II – Volume One, The Office of Air Force History, University of Chicago Press, Chicago, 1948.
Deane-Butcher, W. Fighter Squadron Doctor: 75 Squadron RAAF, New Guinea, 1942, The Australian War Memorial, Canberra, 1989.
Decisive Factor: Air Power Doctrine by Air Vice-Marshal H.N. Wrigley edited by Brendan O’Loghlin and Alan Stephens.
Ewer, Peter, Dr., Wounded Eagle: The Bombing of Darwin and Australia’s Air Defence Scandal, New Holland Publishers, 2009.
Galland, Adolf, The First and the Last: The German Fighter Force in World War II, Methuen & Co, London, 1955.
Gillison, Douglas, Royal Australian Air Force 1939-1942, Australian War Memorial, Canberra, 1962.
Hastings, Max, Bomber Command, Penguin Group, London, 1979.
Hewitt, Joseph, Air Vice-Marshal, Adversity in Success: Extracts from Air Vice-Marshal Hewitt’s Diaries 1939-1948, Langate Publishing, South Yarra, Victoria, 1980.
Hill, Brian, Wirraway to Hornet: A History of the Commonwealth Aircraft Corporation Pty Ltd, Southern Cross Publications, Bulleen, Victoria.
Johnson, J.E. Air Vice-Marshal, CBE, DSO, DFC, Full Circle: The Story of Air Fighting 1914-1953, Chatto & Windus Ltd, London, 1964.
Jones, George, Sir, Air Marshal, KBE, CB, DFC, From Private to Air Marshal: The Autobiography of Air Marshal Sir George Jones, Greenhouse Publications, Richmond, Australia, 1988.
Kelly, Paul, 100 Years: The Australian Story, Allen & Unwin, Crows Nest, 2001.
Kenney, George, C. General Kenney Reports, Office of Air Force History, Washington, 1949.
Lewis, Tom, Dr., and Ingman, Peter, Carrier Attack – Darwin 1942: The Complete Guide to Australia’s own Pearl Harbor, Avonmore Books, Kent Town, South Australia, 2013.
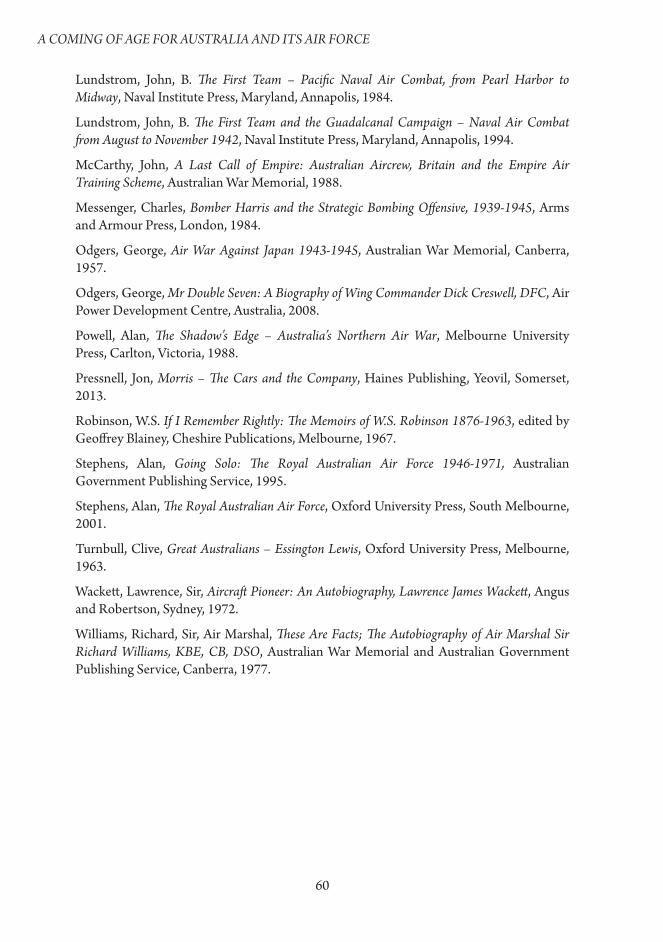
60
A COMING OF AGE FOR AUSTRALIA AND ITS AIR FORCE
Lundstrom, John, B. The First Team – Pacific Naval Air Combat, from Pearl Harbor to Midway, Naval Institute Press, Maryland, Annapolis, 1984.
Lundstrom, John, B. The First Team and the Guadalcanal Campaign – Naval Air Combat from August to November 1942, Naval Institute Press, Maryland, Annapolis, 1994.
McCarthy, John, A Last Call of Empire: Australian Aircrew, Britain and the Empire Air Training Scheme, Australian War Memorial, 1988.
Messenger, Charles, Bomber Harris and the Strategic Bombing Offensive, 1939-1945, Arms and Armour Press, London, 1984.
Odgers, George, Air War Against Japan 1943-1945, Australian War Memorial, Canberra, 1957.
Odgers, George, Mr Double Seven: A Biography of Wing Commander Dick Creswell, DFC, Air Power Development Centre, Australia, 2008.
Powell, Alan, The Shadow’s Edge – Australia’s Northern Air War, Melbourne University Press, Carlton, Victoria, 1988.
Pressnell, Jon, Morris – The Cars and the Company, Haines Publishing, Yeovil, Somerset, 2013.
Robinson, W.S. If I Remember Rightly: The Memoirs of W.S. Robinson 1876-1963, edited by Geoffrey Blainey, Cheshire Publications, Melbourne, 1967.
Stephens, Alan, Going Solo: The Royal Australian Air Force 1946-1971, Australian Government Publishing Service, 1995.
Stephens, Alan, The Royal Australian Air Force, Oxford University Press, South Melbourne, 2001.
Turnbull, Clive, Great Australians – Essington Lewis, Oxford University Press, Melbourne, 1963.
Wackett, Lawrence, Sir, Aircraft Pioneer: An Autobiography, Lawrence James Wackett, Angus and Robertson, Sydney, 1972.
Williams, Richard, Sir, Air Marshal, These Are Facts; The Autobiography of Air Marshal Sir Richard Williams, KBE, CB, DSO, Australian War Memorial and Australian Government Publishing Service, Canberra, 1977.