8. sql
47
Basics of SQL
-
Upload
khoahuy82 -
Category
Data & Analytics
-
view
165 -
download
1
Transcript of 8. sql

Basics of SQL

Table Definition
• A table is uniquely identified by its name and consists of rows that contain the stored information,
• each row containing exactly one tuple (or record ). A table can have one or more columns.
• A column is made up of a column name and a data type, and it describes an attribute of the
• tuples. The structure of a table, also called relation schema, thus is defined by its attributes.
• The type of information to be stored in a table is defined by the data types of the attributes
• at table creation time.

SQL
• STRUCTURED QUERY LANGUAGE.
• Non-Procedural Language.
• Language for any RDBMS.
• We can't Execute more than one statement at a
time
• Very simple. Easily understandable.

SQL
DDL
DML(DRL)
TCL
DCL
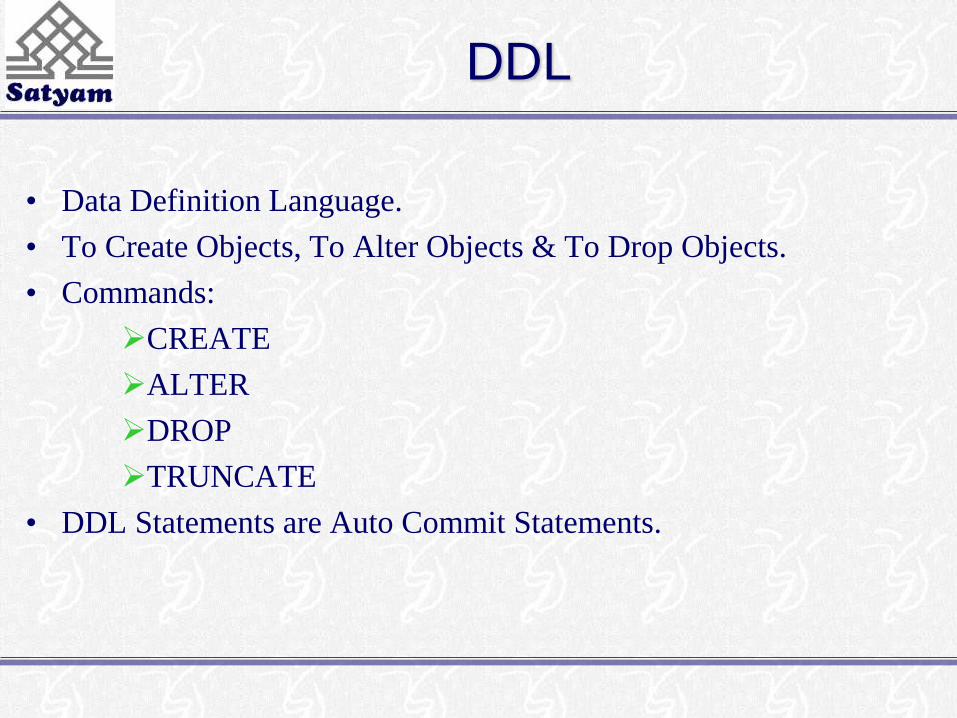
DDL
• Data Definition Language.
• To Create Objects, To Alter Objects & To Drop Objects.
• Commands:
CREATE
ALTER
DROP
TRUNCATE
• DDL Statements are Auto Commit Statements.

DML
• Data Manipulation Language.
• To Maintain information the following Commands:
INSERT
UPDATE
DELETE

TCL
• Transaction Control Language.
• Transaction is Nothing But DML.
• Transaction : A Series of INSERTs, UPDATEs, DELETEs etc.,
• Commands:
COMMIT
ROLLBACK
SAVEPOINT

DCL
• Data Control Language.
• To Deal with Privileges.
• Commands:
GRANT
REVOKE

DRL
• Data Retrieval Language.
• To retrieve data from the Database.
• Commands:
SELECT

CREATE
• DDL Command.
• To create Objects.
• Syntax : CREATE TABLE < TABLE_NAME >
( COLUMN_NAME 1 DEFINITION,
COLUMN_NAME 2 DEFINITION,
............
COLUMN_NAME n DEFINITION );
DEFINITION specifies DataType & Width.
• Syntax for creation of Objects :
CREATE < OBJECT > <OBJECT_NAME>

CREATE (...CONTINUED)
RULES FOR NAMING OBJECT
• Should start with Alphabet.
Error Message : Invalid Table Name
• Object name should have Maximum Length of 30
characters.
Error Message : Identifier too Long
• No special symbols and spaces except '_'
Error Message : Missing / Invalid option
• Reserved Words cannot be used.
Error Message : Invalid table name
• Case insensitive.
The above rules also apply to column names

CREATE (...CONTINUED)
• Example : CREATE TABLE EMP
( EMPNO NUMBER(4),
ENAME VARCHAR2(15),
JOB VARCHAR2(10),
DOB DATE,
SAL NUMBER(7,2),
DEPT NUMBER(7,2) );
• On completion of creation of the Table " Table created " Message will be displayed.
• Every SQL Statement is terminated by semicolon ';' .
• When ever SQL Statement is terminated it will be placed in " afiedt.buf ". Later if there are no errors Transaction will be carried out. Otherwise error message will be displayed.

INSERT
• DML Command.
• To insert rows in to Table.
• Syntax 1 : INSERT INTO < TABLE_NAME > VALUES (VAL1,VAL2, ...........,Val n);
Example : INSERT INTO EMP VALUES (1001,'BABU','MANAGER','20-JAN-2004',8000,20);
To insert Multiple rows in to a Table with this Syntax we have type the Command repeatedly.
• Syntax 2 : INSERT INTO < TABLE_NAME > VALUES (&VAL1,&VAL2, ...........,&VALn);
Example : INSERT INTO EMP VALUES (&ENO,'&ENAME','&JOB','&HDATE',&SAL,&DEPT);
To insert Multiple rows in to a Table with this Syntax we need not type the Command repeatedly, instead we have type / symbol repeatedly.

INSERT(…CONTINUED)
• Syntax 3 : INSERT INTO < TABLE_NAME > (COL1,COL2,..........,COLn) VALUES (&VAL1,&VAL2, ...........,&VALn);
Example : INSERT INTO EMP (EMPNO,ENAME,JOB) VALUES (&ENO,'&ENAME','&JOB');
To insert information regarding only few columns of the table.
• In any Syntax CHAR and DATE data types must be specified with in single Quotes.

SELECT
• DRL Command.
• To retrieve information from the Tables.
• Syntax : SELECT * FROM < TABLE_NAME >;
Example : SELECT * FROM EMP;

ALTER
• DDL Command.
• To Modify any Existing Tables.
• Syntax : ALTER TABLE < TABLE_NAME >
[ADD | MODIFY | DROP | DISABLE | ENABLE]
(COL_NAME1 DEFINITION,
COL_NAME2 DEFINITION,
........
COL_NAME n DEFINITION )

ALTER (...CONTINUED)
ADD
• Adding Column to Table by ADD Command.
• Example : ALTER TABLE EMP ADD (COMM
NUMBER(7,2), DOB DATE);

• Change Data type and Increase / Decrease width by MODIFY Command.
• We can’t Modify the column when there is already some information in the Column.
Error Message : Column to be Modified must be empty to Decrease precision / scale.
Error Message : Column to be Modified must be empty to Change Data type.
• We cannot Modify Table Name using Alter Command.
• Example : ALTER TABLE EMP MODIFY (JOB VARCHAR2(25), SAL NUMBER(9,2));
ALTER (...CONTINUED)
MODIFY

ALTER (...CONTINUED)
DROP
• Drop the Column by DROP Command.
• Example : ALTER TABLE EMP DROP COLUMN DOB;
• ORACLE 9 provides the feature of dropping Multiple Column.
Example : ALTER TABLE EMP SET UNUSED DOB COLUMN;
Example : ALTER TABLE EMP DROP UNUSED COLUMNS;
Drops all columns which are set to UNUSED.

ALTER (...CONTINUED) ENABLE /
DISABLE
• Enable and Disable Constraints by ENABLE and
DISABLE Commands respectively.
• Example : ALTER TABLE EMP ENABLE
CONSTRAINT PK1;
• Example : ALTER TABLE EMP DISABLE
CONSTRAINT PK1;

DROP
• DDL Command.
• To remove any object from schema.
• Drops both Information and Structure of the Table.
• Syntax : DROP < OBJECT_TYPE > <
OBJECT_NAME >;
• Example : DROP TABLE EMP;

TRUNC
• DDL Command.
• Removes rows in the Table Permanently.
• Syntax : TRUNC TABLE < TABLE_NAME >;
• Example : TRUNC TABLE EMP;
• WHERE Clause cannot be used with TRUNC.
• Only information deleted, Not Structure.
• Auto-Commit Command.
• EXIT and QUIT are Implicit Commit statements.

UPDATE
• DML Command.
• To Modify any existing information in the table.
• Syntax : UPDATE < TABLE_NAME > SET < COLUMN_NAME > = < VALUE > [ WHERE <CONDITION> ];
• Example : UPDATE EMP SET SAL = 9000 WHERE EMPNO=1002;
• To UPDATE multiple columns with in a row separate them by Commas.
• Example: UPDATE EMP SET SAL = 9000,COMM=1000 WHERE EMPNO=1002;

DELETE
• DML Command.
• To Delete rows from the Table.
• Syntax : DELETE FROM < TABLE_NAME > [ WHERE <CONDITION> ];
• If Condition not specified all rows of the table will be deleted.
• Example : DELETE FROM EMP;
• If Condition specified all rows of the table satisfying the Condition will be deleted.
• Example : DELETE FROM EMP WHERE JOB = 'MANAGER‘;

COMMIT & ROLL BACK
• TCL Commands.
• Whenever we update data it will be first placed in o buffer.
• If we COMMIT the buffer information will be stored permanently in physical location.
• If we ROLLBACK we get previous values.
• DDL Commands are AUTO-COMMIT statements.
• If DDL Commands are used after Transactions all those transactions will Automatically Commit.

SAVEPOINT
• Suppose there are 'N' transactions after COMMIT Point.
• If 'Nth' transaction is to be ROLLED BACK all previous N-1 transactions will also get ROLLED BACK.
• To avoid this we have SAVEPOINT.
• If we have SAVEPOINT in between Transactions, If we ROLLBACK only transactions after specified SAVEPOINT will be ROLLED BACK.
• On using COMMIT there will be no more SAVEPOINTs.

SAVEPOINT (...CONTINUED)
• Example :
• UPDATE EMP SET SAL = 9000 WHERE EMPNO=1002;
SAVEPOINT A;
UPDATE EMP SET SAL = 8000 WHERE EMPNO=1002;
SAVEPOINT B;
UPDATE EMP SET SAL = 7000 WHERE EMPNO=1002;
SAVEPOINT C;
UPDATE EMP SET SAL = 6000 WHERE EMPNO=1002;
SAVEPOINT D;
• If Error occurred in Third UPDATE statement we can ROLLBACK to c
• Example : ROLLBACK TO B;

GRANT
• DCL Command.
• To Grant Permission to user to any Table.
• The Data Dictionary Tables related to Privileges:
• USER_TAB_PRIVS_MADE : What privileges are given?
• USER_TAB_PRIVS_RECD : Who gave the privileges?

GRANT (...CONTINUED)
• To give all the privileges to user.
Syntax : GRANT ALL ON < TABLE_NAME > TO <USER_NAME >;
ALL means INSERT, DELETE, SELECT, ALTER & INDEX.
• To give single privilege to user.
Syntax : GRANT SELECT ON < TABLE_NAME > TO <USER_NAME >;
Read only permission Granted.
• To give privilege of GRANTing privileges to user by WITH GRANT OPTION.
Syntax : GRANT ALL ON < TABLE_NAME > TO <USER_NAME > WITH GRANT OPTION;
Example : GRANT ALL ON EMP TO USER1 WITH GRANT OPTION;

GRANT (...CONTINUED)
• If 'X' is the Owner of a particular table 'TABLE', all users who received privileges can access 'TABLE' by X.TABLE.
• Example : SELECT * FROM SCOTT.EMP;
SCOTT is Owner.
• OWNER: GRANT ALL ON EMP TO USER1 WITH GRANT OPTION;
USER1 : SELECT * FROM SCOTT.EMP;
GRANT ALL ON EMP TO USER2;
USER2 : SELECT * FROM SCOTT.EMP;

REVOKE
• DCL Command.
• To take back the privileges GRANTED.
• Syntax : REVOKE ALL ON < TABLE_NAME > FROM < USER_NAME >;
• Example : REVOKE ALL ON EMP FROM USER1;
• Example : REVOKE INSERT ON EMP FROM USER1;
• CASCADING REVOKE.
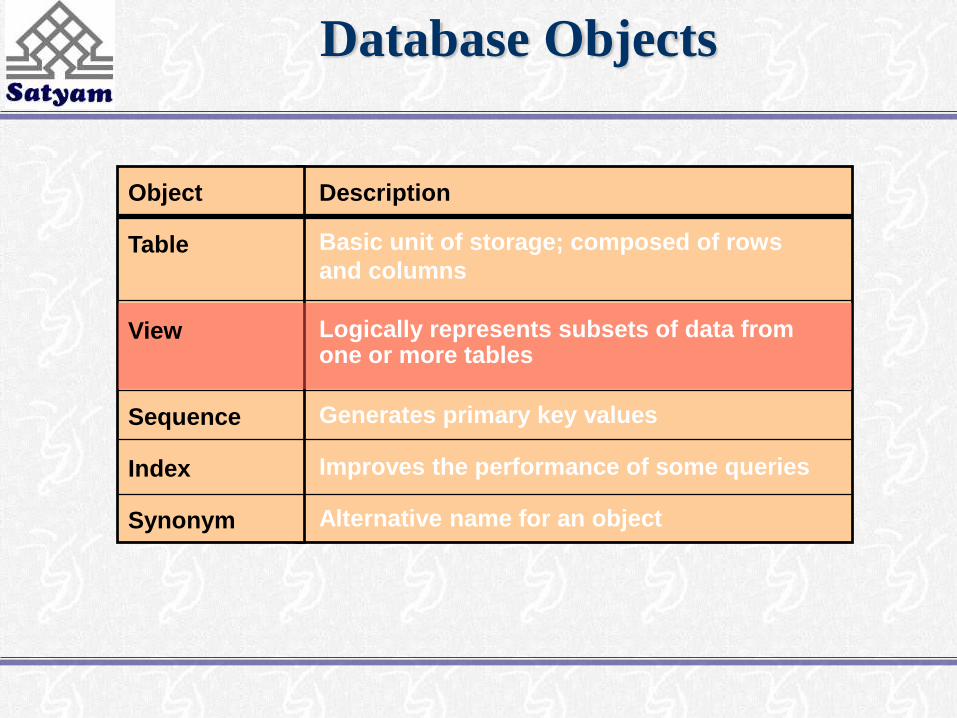
Database Objects
Description
Basic unit of storage; composed of rows
and columns
Logically represents subsets of data from one or more tables
Generates primary key values
Improves the performance of some queries
Alternative name for an object
Object
Table
View
Sequence
Index
Synonym

Querying a View
USER_VIEWS
EMPVU30
SELECT EMPNO,
ENAME, SAL
FROM EMP
WHERE DEPTNO=30;
iSQL*Plus
SELECT *
FROM EMPVU30;
EMP
Oracle Server

What is an Index?
An index:
• Is a schema object
• Is used by the Oracle server to speed up the retrieval of
rows by using a pointer
• Can reduce disk I/O by using a rapid path access method to
locate data quickly
• Is independent of the table it indexes
• Is used and maintained automatically by the Oracle server

How Are Indexes Created?
• Automatically: A unique index is created automatically when
you define a PRIMARY KEY or UNIQUE constraint in a
table definition.
• Manually: Users can create nonunique indexes on columns to
speed up access to the rows.

CONSTRAINTS
• NOT NULL
• UNIQUE
• PRIMARY KEY
• CHECK
• REFERENTIAL

LEVELS OF CONSTRAINTS
• COLUMN LEVEL
SYNTAX: CONSTRAINT <CONSTRAINT_NAME> <CONSTRAINT_TYPE>
• TABLE LEVEL
SYNTAX: CONSTRAINT <CONSTRAINT_NAME> <CONSTRAINT_TYPE> (COLUMN_NAME)
Functionally no difference between Column level and Table level constraints.

CONSTRAINTS(…Contd)
• NOT NULL is Column level constraint.
• To add NOT NULL constraint after table creation use MODIFY. For others we use ADD.
• If constraint name is not given, the system will provide its own name.
• The constraints information will be stored under USER_CONSTRAINTS ,USER_CONS_COLUMN.
• Only one Primary Key is allowed per table.
• On a single column four types of constraints can be enforced at a time
• Two or more check constraints can be enforced on a column at a time.

COLUMN LEVEL CONSTRAINT
• CREATE TABLE EMP
(EMPNO NUMBER(4) CONSTRAINT PK1 PRIMARY KEY,
ENAME VARCHAR2(15) CONSTRAINT N1 NOTNULL,
JOB VARCHAR2(15) CONSTRAINT N2 NOTNULL,
DOJ DATE,
SAL NUMBER(7,2) CONSTRAINT C1 CHECK(SAL>2000),
COMM NUMBER(7,2),
PHONENO NUMBER(10) CONSTRAINT U1 UNIQUE,
DEPTNO NUMBER(2));
NOT NULL IS THE ONLY COLUMN LEVELCONSTRAINT.

TABLE LEVEL CONSTRAINT
• CREATE TABLE EMP
(EMPNO NUMBER(4),
ENAME VARCHAR2(15) CONSTRAINT N1 NOTNULL,
JOB VARCHAR2(15) CONSTRAINT N2 NOTNULL,
DOJ DATE,
SAL NUMBER(7,2),
COMM NUMBER(7,2),
PHONENO NUMBER(10),
DEPTNO NUMBER(2)
CONSTRAINT PK1 PRIMARY KEY(EMPNO),
CONSTRAINT C1 CHECK(SAL>2000),
CONSTRAINT U1 UNIQUE(PHONENO));

CONSTRAINTS (…Contd)
• After creation of table if we want to enforce constraints
– If it is NOT NULL use MODIFY
– If other constraints use ADD
• Example:
ALTER TABLE EMP MODIFY
( ENAME VARCHAR2(15) CONSTRAINT N1 NOT NULL);
ALTER TABLE EMP ADD
(CONSTRAINT K1 PRIMARY KEY(EMPNO),
CONSTRAINT C1 CHECK(SAL>2000),
CONSTRAINT U1 UNIQUE(PHONENO));

COMPOSITE PRIMARY KEY
• If two or more attributes together form Primary Key then it is called Composite Key.
• The combination of columns values should be unique.
• Composite Primary Key is always a Table level constraint. We cannot go for column level.
• Example:
CREATE TABLE PRODUCT_DETAILS
( PRODUCT_NO NUMBER(5),
PRODUCT_NAME VARCHAR2(25),
PRODUCT_PRICE NUMBER(11,2),
CONSTRAINT PK1 PRIMARY KEY(PRODUCT_NO, PRODUCT_NAME, PRODUCT_PRICE));

DROPING CONSTRAINTS
• First find constraint name from USER_CONSTRAINTS.
• SELECTCONSTRAINT_NAME FROM USER_CONSTRAINTS;
• If name is given by us we can identify it easily.
• If it is system generated we have to know Table name from USER_CONSTRAINTS and column details from USER_CONS_COLUMNS.
• Then DROP that constraint by constraint name.
• Example : ALTER TABLE EMP DROP PRIMARY KEY;
• Example : ALTER TABLE EMP DROP CONSTRAINT U1;

ENABLE & DISABLE
• ALTER TABLE EMP DISABLE CONSTRAINT C1;
• ALTER TABLE EMP ENABLE CONSTRAINT C1;
• By Default constraint will be in enabled form.

REFERENTIAL INTEGRITY
• To create relationships between tables and avoiding redundancy.
• Example:
CREATE TABLE DEPT
(DEPTNO NUMBER(2),
DNAME VARCHAR2(20),
LOC VARCHAR2(25),
CONSTRAINT PK2 PRIMARY KEY(DEPTNO));

REFERENTIAL INTEGRITY
(…Contd)
• CREATE TABLE EMP
(EMPNO NUMBER(4) CONSTRAINT PK1 PRIMARY KEY,
ENAME VARCHAR2(15) CONSTRAINT N1 NOTNULL,
JOB VARCHAR2(15) CONSTRAINT N2 NOTNULL,
DOJ DATE,
SAL NUMBER(7,2) CONSTRAINT C1 CHECK(SAL>2000),
COMM NUMBER(7,2),
DNO NUMBER(2),
CONSTRAINT R1 REFERENCES DEPT(DEPTNO));
DNO,DEPTNO SHOULD BE OF SAME DATATYPE AND
WIDTH.

REFERENTIAL INTEGRITY
(…Contd)
• To enforce Referential Integrity constraint after table creation
• We cannot delete the master record without deleting the corresponding Detail records.
• ALTER TABLE EMP CONSTRAINT R1 FOREIGN KEY(DNO) REFERENCES DEPT(DEPTNO);
• If we delete the master record the corresponding dependent records should also be deleted.
• ALTER TABLE EMP CONSTRAINT R1 FOREIGN KEY(DNO) REFERENCES DEPT(DEPTNO) ON DELETE CASCADE;


![[8] 5-SQL-part2-new](https://static.fdocuments.us/doc/165x107/55cf857f550346484b8ea8d9/8-5-sql-part2-new.jpg)