Palintesten.redstarvietnam.com/media/...soil_management_kit... · 6.10 Soil Phosphorus 30 6.11 Soil...
44
Palintest ® SKW 400 Professional Soil Management Kit Operation Manual ZI INST SKW 400 EN Palintest ®
Transcript of Palintesten.redstarvietnam.com/media/...soil_management_kit... · 6.10 Soil Phosphorus 30 6.11 Soil...

Palintest ®
SKW 400 ProfessionalSoil Management KitOperation Manual
ZI INST SKW 400 EN
Palintest ®

Palintest®
2
Who We Are
“Palintest aim to be the best global provider of waterand environmental analysis equipment that enable criticalenvironmental decisions to be made with confidence.”Palintest develops, manufactures and supports a comprehensive range of advanced water andenvironmental testing equipment. From our United Kingdom headquarters we export to over 100countries across the globe. Our products are used in a wide variety of applications to protect theenvironment and safeguard public health.
The Palintest Soil Kit range benefits from 30 years of experience in developing simplified soil testingmethods for field and laboratory soil nutrient analysis.
To find out more about Palintest please visit www.palintest.com or contact your local Palintest partner.
Palintest is a registered trademark of Palintest Ltd.Bluetooth and Bluetooth SMART are registered trademarks of the Bluetooth Special Interest Group (SIG).

3
Contents
V1-05/15
4.1 Soiltest 10 Bluetooth Layout 104.2 Soiltest 10 Interface 104.3 Info Panel Icons 104.4 Starting up the Instrument 114.5 Mode Screen 114.6 System Mode 124.7 Analysing Samples 184.8 Calibration/Validation 21
5.1 Initial Use 235.2 Taking Readings 235.3 Set Up (General) 235.4 Calibration 245.5 Sensor Replacement 255.6 Battery Replacement 25
6.1 Overview 266.2 Soil Extraction 266.3 Soil Volume 276.4 Soil Temperature 276.5 Drying Soil Samples 276.6 Soil pH 276.7 Soil Lime Requirement(including Liming Tables forMineral Organic and Peaty Soils) 286.8 Soil Conductivity 296.9 Soil Nitrogen 296.10 Soil Phosphorus 306.11 Soil Potassium 316.12 Soil Magnesium 316.13 Soil Calcium 32
Hints and Tips for Soil Testing
Troubleshooting the SKW 400Professional Soil Management Kit
Technical Specifications
Spares and Consumables
Palintest Aqua Pal and the Palintest Portal
1 Kit Layout 4
Introduction 82
Chapter Page Chapter Page
3 Taking a Soil Sample 9
4 Soiltest 10 Bluetooth 10
5 Multiparameter Pocket Sensor 237 Appendix 1 34
8 Appendix 2 35
9 Appendix 3 38
10 Appendix 4 40
6 Soil Test Methods 26
11 Appendix 5 42

4
SKW 400 Professional Soil Management Kit - Layer 1
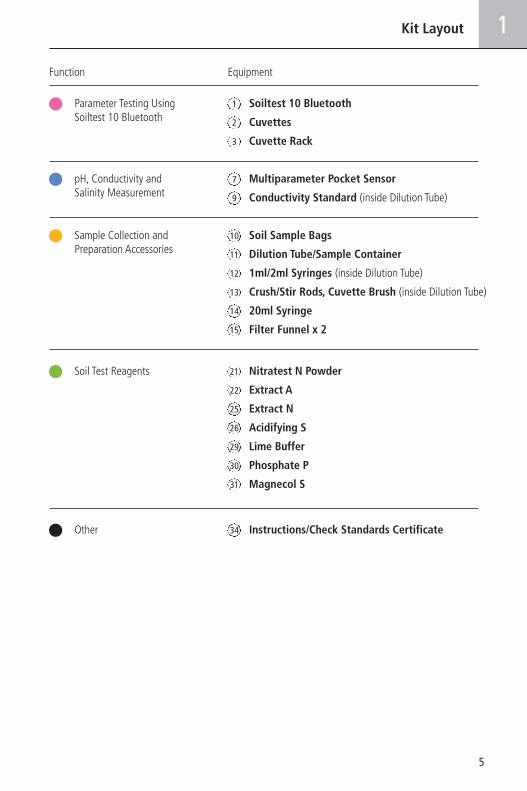
1 Kit Layout
Fig 1. SKW 400 Professional Soil Management Kit opened to show contents. Coloured circles indicate the chapter colour in which their use is explained.
5
1Kit Layout
Parameter Testing UsingSoiltest 10 Bluetooth
Soiltest 10 Bluetooth
Function Equipment
1
Cuvettes2
Cuvette Rack3
pH, Conductivity andSalinity Measurement
Multiparameter Pocket Sensor7
Conductivity Standard (inside Dilution Tube)9
Sample Collection andPreparation Accessories
Soil Sample Bags10
Dilution Tube/Sample Container11
1ml/2ml Syringes (inside Dilution Tube)12
Crush/Stir Rods, Cuvette Brush (inside Dilution Tube)13
20ml Syringe14
Filter Funnel x 215
Soil Test Reagents Nitratest N Powder21
Other Instructions/Check Standards Certificate34
Extract A22
Extract N25
Acidifying S26
Lime Buffer29
Phosphate P30
Magnecol S31

6
1 Kit Layout
SKW 400 Professional Soil Management Kit - Layer 2
Fig 2. SKW 400 Professional Soil Management Kit opened to show contents. Coloured circles indicate the chapter colour in which their use is explained.
Underneath De-ion Pack

7
1Kit Layout
Parameter Testing UsingSoiltest 10 Bluetooth
Light Cap
Function Equipment
4
Check Standards5
Waterproof USB Cable6
pH, Conductivity andSalinity Measurement
pH Calibration Buffers8
Sample Collection andPreparation Accessories
De-ion Pack16
Filter Papers17
2ml Soil Scoop18
10ml Soil Scoop19
2.5ml Extract Scoop20
Soil Test Reagents Extract K23
Extract P24
Calcium S28
Nitricol32
Potassium33
2 Introduction
8
2.0 Introduction
The Palintest SKW 400 Professional Soil ManagementKit is a soil management laboratory packagedwithin a waterproof robust case for field use.Based on simplified and rapid soil test methods, theSKW 400 uses a number of analytical techniquesto provide critical information for macronutrientsand micronutrients for effective soil and agronomymanagement.The key techniques used are provided by the Soiltest10 Bluetooth photometer, Multiparameter PocketSensor and the Palintest Tablet Count method.
Soiltest 10 BluetoothThe Soiltest 10 Bluetooth is a direct-reading,waterproof photometer for determining key soilfertility parameters. Designed for both portableand laboratory use, the Soiltest 10 Bluetoothshould always be used with genuine PalintestSoil Reagents for optimal performance.The fundamental operating techniques appliedto the Soiltest 10 Bluetooth are based on theprinciples of optical absorbance and scatteringof visible light of specific wavelengths.Optical absorbance techniques are based on creatingvisible colours with specific analytes upon reactionfollowing an extraction process. The intensity of colourproduced is measured with the Soiltest 10 andthe data compared to the stored calibration data.Optical scattering techniques produce smallparticles to scatter the source beam, the amountof scatter providing a result for the concentrationof parameter under test.For more information regarding the science behindboth photometric and turbidimetric analysistechnology please visit www.palintest.com/know.The Soiltest 10 is provided with programmed methodsfor a comprehensive range of soil fertility parameters.Upon choosing a test the instrument automaticallyselects the required parameters for accurate analysisincluding wavelength and reaction time. Uponcompletion of some tests optional follow-on testsare available and results can be converted to alternativeunits of expression e.g. mg/l to ppm, N or NO3.The Soiltest 10 Bluetooth offers a choice ofconnectivity to download all or selected results and/or upload up to 30 User Defined Tests. Choose from
Bluetooth 4.0 wireless connectivity or USB connection.Bluetooth 4.0 (also known as Bluetooth SMART or LowEnergy) connection allows seamless data exchangeusing the Palintest Aqua Pal app, available for iOSand Android devices. See Appendix 5 for more details.USB connection via the port located at the rearof the instrument provides a choice of either‘Hard Disk’ mode or serial communication mode.See Section 4.6 for more details.The Soiltest 10 Bluetooth offers a choice of eithermains power via the USB port or using three1.5V ‘AA’ batteries (supplied).The Soiltest 10 Bluetooth is supported witha two year warranty and a full range of service,calibration and technical support. Supportresources are available at www.palintest.comrelating to both products and applications.
Multiparameter Pocket SensorSoil pH, Conductivity and salinity are keyparameters for soil fertility management and aredetermined using electrochemical measurementtechniques with the Multiparameter Pocket Sensorincluded within the SKW 400 Professional SoilManagement Kit.The Multiparameter Pocket Sensor is a waterproofelectrochemical meter designed for portable orlaboratory use. The dual LCD display will showboth parameter (pH, conductivity or TDS) plusthe temperature of the sample under test.Operating using electrochemical techniques, theMultiparameter Pocket Sensor does not require afiltered sample but does require a ‘wet’ sample. Palintest methods for soil pH and conductivity arebased on a 5:1 extraction using Deionised water only.
Palintest Tablet Count MethodIdeal for higher concentrations the Tablet Countmethod from Palintest provides a simple visualapproach to determining the Calcium and Chlorideconcentration of soils following extraction.Adding tablets one at a time until a visible colourchange occurs is similar to standard laboratory titration,the tablets replacing the usual liquid format for thetitrant. Count the number of tablets required to effectthe colour change and calculate the result accordingly.

9
3Taking a Soil Sample
3.0 Taking a Soil Sample
The first critical step in any analysis is taking arepresentative sample, especially when testing soil.The effective management of soil fertility is subjectto a number of factors and nutrient distributionacross an area can be extremely variable.
It is good practise to test a composite of a numberof individual soil samples to develop an effective soilmanagement approach for a large area. Any areasof individual concern can be tested specificallyfor more detailed nutrient recommendations.
Some key points to follow when taking samplesfor soil testing:
• A soil sample should be collected from eachplot or area to be examined. Separate samplesshould be collected from each area, differingin soil type, previous cropping history or typeof soil management.
• Samples of soil should preferably be taken usinga soil sampling auger/corer which enables ‘cores’of soil to be taken from below the surface.Alternatively, a piece of narrow rigid tubing maybe used. Between 10 and 25 individual coresshould be taken from each area to make up thecomposite soil sample for analysis. The depthof penetration for soil cores should reflect thenature of the terrain and the nutrients under test.
• When sampling large areas of agricultural landtake cores along the shape of an imaginary ‘W’covering the area being sampled. Cores shouldnot be taken close to hedgerows, under treesor adjacent to buildings.
• To provide the sample for analysis, individualcores should be thoroughly mixed in a bucketor similar receptacle. Stones and foreignmaterials should be removed by hand. Thesoil can be passed through a 2mm sieve orsimilar if available.
• The composite sample can then be transferredto a Soil Sample bag (PT 301) and labelledfor reference.
• For field analysis, the tests can be conducteddirectly on the moist sample and in some casesthis is the desired approach. Where analysis isto be carried out at a later time (more than 24hours later), it is preferable to dry the sampleby spreading it out on a tray or plastic sheetand allowing it to dry in air.
• Ensure the sample point is safe to access andfollow all relevant/required local precautions.

4 Soiltest 10 Bluetooth
10
Numerical keys fordirect test access
and text entry
NavigationKeys
LCD screenwith backlight
On/Off
Light CapUSB PortAdaptive Cuvette Holder(do not insert finger!)
4.0 Soiltest 10 Bluetooth - Setup and Operation4.1 Soiltest 10 Bluetooth Layout
4.2 Soiltest 10 Interface
The LCD screen features a selectable backlightwith the screen separated into four clear, easy to read zones.
1 Mode or Test Identification.
2 Dialogue screen - prompts and choices will bedisplayed as a list. Select using up/down arrows.
3 Info Panel - displays status icons, date/timeand Sample/Operator ID.
4 Action select - choices are displayed as a row.Use left/right arrows to select.
4.3 Info Panel Icons1
2
34
DescriptionBattery statusBluetooth connectedBluetooth on, not connectedUpper/lower case text/number entryUSB connectedHard Drive/COM port mode
Icons

11
4Soiltest 10 Bluetooth
4.4 Starting up the Instrument
Power Supply
The Soiltest 10 Bluetooth is designed to be poweredeither from alkaline batteries or via the USB port.
When operating on battery power, the battery levelis indicated on the Info Panel. A minimum voltageof 3.0V is needed to operate the photometer anda flashing battery symbol indicates a critically lowbattery. Change batteries immediately or switch toalternative USB power. The Soiltest 10 Bluetooth willautomatically power down when power is no longercapable of providing acceptable performance.
To power via the USB port, use the supplied cableconnected either to the mains adaptor or a PC. TheUSB icon will appear when the USB connection ismade and battery power will no longer be consumed.
The Soiltest 10 Bluetooth has a back-up batterymounted internally to save instrument settings anddata during power loss and instrument idle periods.
Replacing Batteries
The battery compartment is located on the baseof the instrument and secured by four screws.Remove the cover and install a complete set ofnew batteries, observing the correct polarity asindicated. Use 3 x 1.5V ‘AA’ alkaline batteriesor equivalent. See Appendix 2 for more details.
To avoid corrosion damage through leakage,remove batteries from the instrument if it is tobe stored or left unused for a long period.
Start-up Screen
The default start-up screen on power up is the‘Choose a Test’ screen.
To access the Mode menu press the left arrowkey to highlight ‘Menu’ and OK.To choose a test use the up/down arrows to scroll through the list and press OK on thedesired parameter.
4.5 Mode Screen
The Soiltest 10 has three operating modesas follows:
Choose a Test
The Choose a Test mode is the standard operatingmode for taking photometer readings and is thedefault start-up screen on power up. See Section4.7 for more information.
System Mode
Personalise your Soiltest 10 Bluetooth andmanage stored data within the System mode.Options include setting Operator/Sample IDs,interrogating the result log and defining theinstrument operating conditions. See Section 4.6for further information.
Check Standard Mode
Validate performance of your Soiltest 10 Bluetoothusing Palintest Check Standards. See Section 4.8for more information.

4 Soiltest 10 Bluetooth
12
4.6 System Mode
Personalise your Soiltest 10 Bluetooth and accessthe data log via the System Mode.
Scroll up or down using the appropriate keysto see all available options. The options andavailable settings are as follows:
Log
The Soiltest 10 Bluetooth has an internal data log forup to 500 data points. The data is stored automaticallyupon completion of the test and automaticallyoverwrites the oldest result when the memory isfull. The data log is unaffected by power on/off.Each data point consists of the following informationand is stored in a comma-separated values (CSV) format:Date, time, Operator ID, Sample ID, Test Number,Result value, Result Units, Units of Expression.
Selecting Log offers two choices:
View - to view individual data points use theup/down keys. Data is stored in chronological orderwith the most recent result shown by default.Scroll through results using the up/down arrows.Select Back to return to the previous menu.
Clear - the entire log can be deleted from theSoiltest 10 Bluetooth if the instrument is notlocked (see System Lock). Selecting Clearproduces the following screen:
Choose Yes to delete all data, No to return tothe previous screen.
Data can be downloaded via either Bluetooth (seeBluetooth Log Transfer) or USB connection(see USB Interface).
Operator ID
The Soiltest 10 Bluetooth offers the option to createup to 12 unique alphanumeric Operator IDs. OperatorIDs are added to the result data automatically butdeleting IDs does not affect the result log.
To create a new Operator ID, select Operator IDand use the up/down keys to select a blank field. Select New and press OK.
Alphanumeric characters are entered/edited usingthe 0-9 keys or the up/down keys. Press and holdthe 1 key to toggle between upper case, lowercase and numeric characters.

13
4Soiltest 10 Bluetooth
After entering a character, the cursor automaticallymoves to the next position if no key is pressed.Alternatively press the right key.
Up to 10 characters can be added for Operator IDs,including spaces.
To edit characters use the left/right keys to selectthe desired character. Press and hold the left keyto delete the character or change the characterusing the entry mode.
When the Operator ID is correct press the OKkey to create the ID and return to the Operator IDlist. The new Operator ID will be displayed in theOperator list.
Choose the Operator ID to be used by scrollingthrough the list and pressing the OK key on thedesired choice. The instrument will return to theSystem menu.
To modify or delete an existing Operator ID,highlight the ID and select Edit. Choose eitherEdit to modify the existing entry or Delete toremove it from the list.
Sample ID
The Soiltest 10 Bluetooth offers the option to createup to 24 unique alphanumeric Sample IDs. SampleIDs are added to the result data automatically butdeleting IDs does not affect the result log.
To create a new Sample ID, select Sample IDand use the up/down keys to select a blank field.
Select New and press OK.
Alphanumeric characters are entered/edited usingthe 0-9 keys or the up/down keys. Press and holdthe 1 key to toggle between upper and lowercase characters.
After entering a character, the cursor automaticallymoves to the next position if no key is pressed.Alternatively press the right key.
Up to 10 characters can be added for Sample IDs,including spaces.
To edit characters use the left/right keys to selectthe desired character. Press and hold the left keyto delete the character or change the characterusing the entry mode.

4 Soiltest 10 Bluetooth
14
When the Sample ID is correct press the OK key tocreate the ID and return to the Sample ID list. Thenew Sample ID will be displayed in the Sample list.Choose the Sample ID to be used by scrolling throughthe list and pressing the OK key on the desired choice.The instrument will return to the System menu.To modify or delete an existing Sample ID, highlightthe ID and select Edit. Choose either Edit to modifythe existing entry or Delete to remove it from the list.
BluetoothThe Soiltest 10 Bluetooth features the latestBluetooth 4.0 (also known as Bluetooth LowEnergy or Bluetooth SMART) for wirelesscommunication with external devices. The Palintest Aqua Pal app provides seamlessdata exchange with the Soiltest 10 Bluetooth,provides data trend analysis and user-definedaction limits for key parameters.Additional data management functionality is providedby the Palintest Portal (www.palintestportal.com).Uploaded data can be shared with colleaguesand customers within your User Group(s) andintegrated into customised reports. See Appendix5 for more information on the Aqua Pal app andthe Palintest Portal.
There are four options available in the Bluetooth menu:• Bluetooth Communications ON - activate the
Bluetooth and make the Soiltest 10 Bluetoothvisible for connection/pairing
• Bluetooth Communications OFF• Bluetooth Log Transfer - transfer historical log data to
the Aqua Pal app when connected to a remote device• Bluetooth Device ID - create a unique device
name for the Soiltest 10 Bluetooth todiscriminate between multiple connections
Bluetooth Communication On
Select this option to enable Bluetooth communicationsallowing the instrument to be connected with asuitable Bluetooth SMART enabled device. Visitwww.palintest.com\know for more informationregarding available/suitable Bluetooth SMART devices.
The Bluetooth icon is shown in the Info Panelwhen Bluetooth is enabled. Connection statusis shown as follows:
indicates the Bluetooth is activatedand connected to an external device
indicates the Bluetooth is activatedbut the Soiltest 10 Bluetooth is notconnected to an external device
Bluetooth Communication Off
Selecting this option disables the Bluetoothcommunications module. The Bluetooth iconis not visible on the Info panel.
Bluetooth Log Transfer
Selecting this option transfers all or a selectedgroup of results stored in the log to the connectedmobile device.
The Soiltest 10 Bluetooth will validate the connectedconnection and confirm readiness to transfer.
Transferring selected data will require specificationof the result log window e.g. from result 40 toresult 100 to be transferred selectively.
Press OK to transfer the data log. The data willtransfer in series. Each data point is validated bythe Aqua Pal app prior to upload of the next.

If the connection is lost the Soiltest 10 Bluetoothwill prompt for re-connection. If connection is notrequired or possible press Exit to disable Bluetoothand cancel the log transfer.The message ‘Log transfer is complete’ will beshown when all data points have been uploadedsuccessfully. Press OK to return to the previous menu.
Bluetooth Device ID
A number of Soiltest 10 Bluetooth instrumentsmay be available to connect to a remote device,although only one active connection is possibleat any time. A user-defined Bluetooth Device IDensures simple pairing between the desired Soiltest10 Bluetooth and the Palintest Aqua Pal app.
Creating and/or editing Bluetooth Device ID isidentical to Operator and Sample ID creation.
USB Interface
The waterproof USB interface provides bothcommunication between the Soiltest 10 Bluetoothand a PC and an alternative mains power sourcevia the adaptor.
When connected the USB icon will appear, replacingthe battery icon in the Info Panel, as power will bepreferentially drawn from the external source.
The USB data interface has a choice of twooperating modes - Hard Drive and COM Port. Thecurrent status of the USB connection is shown onthe Info panel when the USB lead is connected.
Toggle between COM Port and Hard Disk mode in theSystem -> USB menu by selecting the desired option.
The USB connection supports software update anddata download through a simple ‘drag and drop’approach when operated in Hard Disk mode.
Hard Drive
The instrument appears as a removable harddrive when connected to a PC in Hard Disk mode.Upon connection the remote drive will have thefollowing files included:
• Soiltest10.afx.*** where * representversion numbers of software -this is the operating softwarefor the Soiltest 10 Bluetooth
• Log.txt - the data log file stored in acomma separated value (csv) format
Operating software or calibration library canbe updated by dragging a new version to theinstrument - contact [email protected] new software if this option is required. Anyupdates to operating software will be notifiedvia the www.palintest.com\know portal.Downloading the result log is carried out bydragging the LOG.txt to the local desktop andopening with any program that can open CSVformat files.
For more information regarding extracting andopening result logs using the Hard Disk modevisit www.palintest.com/know.
COM Port
The instrument behaves as if connected to the PCserial port via RS232 when connected in COMPort mode, allowing remote control from anexternal software system and data upload.
This allows backwards compatibility with softwarewritten for earlier models of Palintest instruments.In this mode, the PC requires installation ofa USB virtual COM Port driver, available fromwww.palintest.com/know, and the availabilityof software operating as a virtual com port.
A large number of third-party software systemsare available to provide data upload and remotecontrol of testing using the COM port mode.Please contact your local Palintest representativefor more details.
15
4Soiltest 10 Bluetooth

4 Soiltest 10 Bluetooth
16
Units
The Soiltest 10 Bluetooth offers the choice of resultexpressed in mg/l, ppm, mmol/l, µmol, g/l and µg/l.
Changing the result units will not affect the result log.
Dilution Factor
When samples are above the test range, indicatedby >> on the result screen, a dilution procedurecan be used. Setting Dilution Factor to On willprompt the Soiltest 10 Bluetooth to automaticallyrequest the dilution factor when carrying out a test.Change the dilution factor by using the up/downarrows or manually type the dilution factor. Theinstrument will automatically correct the resultfor the dilution and display the corrected result(which will also be stored in the result log).The maximum dilution factor permitted is 99. If the calculated result exceeds the available numberof permitted characters >> will be displayed.
NOTE: do not use sample dilutionwhen measuring pH or alkalinity.
System LockTo prevent unauthorised or inadvertent changesto the System settings or log deletion a four digitcode can be used to lock several options.The default code is set to 6812. To change theSystem Lock code, follow the on-screen promptsto choose a memorable four digit number. When the System Lock is applied, the itemsaccessible within the System Mode are limiteduntil the unlock code is entered. Access is limitedto viewing the result log, adjusting the backlight,contrast and Bluetooth settings.
To set a unique four digit code enter the master code(7910). The Set System Lock Code screen will appear.Enter the required four digit code and press OK to set.
To reset the unique system lock code, enter themaster code and select Reset.
User Defined Tests
In addition to the many available calibrations/methods,the Soiltest 10 Bluetooth provides additionalcapability for up to 30 User Defined Tests. A UserDefined Test is built using a table of calibrationdata consisting of up to 10 data pairs of absorbanceand concentration.
Download or request a copy of Usertestbuilder.exe(suitable for Windows operating systems) fromour websites to define the details and calibrationdata as shown below:
Connect the Soiltest 10 Bluetooth to the PC usingthe USB cable provided, ensuring the instrumentis set to Hard Drive mode.
Once data is complete press “Download this test” totransfer the method details and calibration. The Soiltest10 Bluetooth will respond with Test Data Accepted.
Alternatively save the test data as a *.txt file anddrag and drop onto the Soiltest 10 Bluetooth.
User Defined Tests are stored in Phot Numbers900 - 929 to avoid confusion with standardPalintest soil calibrations.

17
4Soiltest 10 Bluetooth
Press OK once the test has been uploaded toview the test in the User Defined Test list.
A number of options are available withinthe Edit User Defined Test menu:
Back return to the previous menuAdd add additional User Defined TestsEdit upload new data for the selected testDelete remove the test from the instrument
For more information regarding creation andupload of User Defined Tests please visitpalintest.com\know
Accessing User Defined Tests is carried out byscrolling through the list of tests or enteringthe required Phot Number.
Language
Select the desired local language for operation,choosing from English, French, Spanish, German,Italian and Chinese (Mandarin). The selection oflanguage will also adjust appropriate tests andunits to local convention as required.
Set Time/Set Date/Date Format
All test results are recorded automatically in theData Log and appended with date and time (plusadditional information). Date and time are stored onan internal clock, supported by a coin cell battery.To correct the time select Set Time from the System menu.Use the up/down keys to adjust the hour; pressthe right key to select and adjust the minutes.
Press OK when the correct time is set.To correct the date select Set Date from theSystem menu. Use the up/down keys to adjustthe day/month/year, using the left/right keys toselect the field.
Press OK when the correct date is set.
The Date Format can be set to DD/MM/YYYY orMM/DD/YYYY as required. To select the requiredformat highlight the desired choice and press OK.
Time Out
When operating using battery power the Soiltest10 Bluetooth provides automatic power-off as apower-saving measure. Three settings are provided:
Normal 5 minutes
Long 15 minutes
Off (disables Time Out)
The time intervals begin after the last key ispressed or activity takes place.
Time Out is automatically disabled when theinstrument is powered by USB supply and duringa Bluetooth data log transfer.
Back Light
The instrument display features a high intensitybacklight to support use in low light conditions.The backlight is designed to use minimal energybut activating the Backlight will naturally consumebattery power more rapidly. The settings availablefor Backlight are:
Backlight Auto-Dim Backlight activates on anykey press and dims after15 seconds automatically.
Backlight On Backlight is on permanently
Backlight Off Backlight is off permanently
4 Soiltest 10 Bluetooth
18
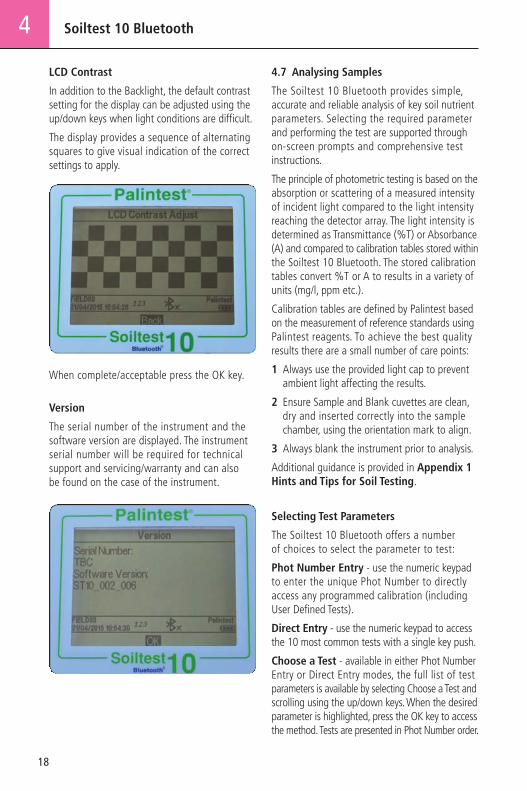
LCD Contrast
In addition to the Backlight, the default contrastsetting for the display can be adjusted using theup/down keys when light conditions are difficult.
The display provides a sequence of alternatingsquares to give visual indication of the correctsettings to apply.
When complete/acceptable press the OK key.
Version
The serial number of the instrument and thesoftware version are displayed. The instrumentserial number will be required for technicalsupport and servicing/warranty and can alsobe found on the case of the instrument.
4.7 Analysing Samples
The Soiltest 10 Bluetooth provides simple,accurate and reliable analysis of key soil nutrientparameters. Selecting the required parameterand performing the test are supported throughon-screen prompts and comprehensive testinstructions.
The principle of photometric testing is based on theabsorption or scattering of a measured intensityof incident light compared to the light intensityreaching the detector array. The light intensity isdetermined as Transmittance (%T) or Absorbance(A) and compared to calibration tables stored withinthe Soiltest 10 Bluetooth. The stored calibrationtables convert %T or A to results in a variety ofunits (mg/l, ppm etc.).
Calibration tables are defined by Palintest basedon the measurement of reference standards usingPalintest reagents. To achieve the best qualityresults there are a small number of care points:
1 Always use the provided light cap to preventambient light affecting the results.
2 Ensure Sample and Blank cuvettes are clean,dry and inserted correctly into the samplechamber, using the orientation mark to align.
3 Always blank the instrument prior to analysis.
Additional guidance is provided in Appendix 1Hints and Tips for Soil Testing.
Selecting Test Parameters
The Soiltest 10 Bluetooth offers a numberof choices to select the parameter to test:
Phot Number Entry - use the numeric keypadto enter the unique Phot Number to directlyaccess any programmed calibration (includingUser Defined Tests).
Direct Entry - use the numeric keypad to accessthe 10 most common tests with a single key push.
Choose a Test - available in either Phot NumberEntry or Direct Entry modes, the full list of testparameters is available by selecting Choose a Test andscrolling using the up/down keys. When the desiredparameter is highlighted, press the OK key to accessthe method. Tests are presented in Phot Number order.
19
4Soiltest 10 Bluetooth
When the required test is selected the Soiltest 10Bluetooth automatically selects the correct wavelengthand sets additional method parameters as required.
Test method protocols are defined in detail inSection 6, including the reagents and accessoriesthat may be required.
When a test is selected, the Soiltest 10 Bluetoothwill display a number of screens and options toguide the user through the testing process, asdescribed in the following pages.
Dilution Factor
If selected in the System menu, the initial screen willrequest the defined Dilution Factor to apply to results.
If Dilution Factor is not active this screen will notbe shown.
Results shown on the final screen have automaticallybeen corrected for dilution prior to display.Corrected results will also be stored in the log.
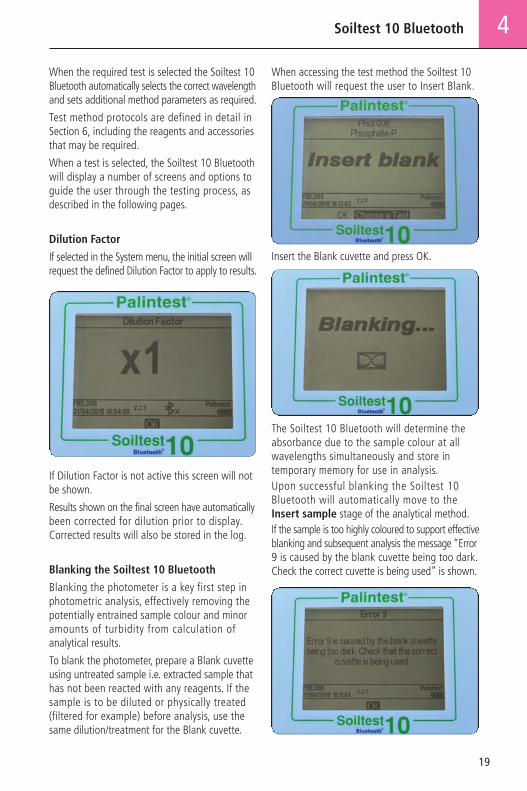
Blanking the Soiltest 10 Bluetooth
Blanking the photometer is a key first step inphotometric analysis, effectively removing thepotentially entrained sample colour and minoramounts of turbidity from calculation ofanalytical results.
To blank the photometer, prepare a Blank cuvetteusing untreated sample i.e. extracted sample thathas not been reacted with any reagents. If thesample is to be diluted or physically treated(filtered for example) before analysis, use thesame dilution/treatment for the Blank cuvette.
When accessing the test method the Soiltest 10Bluetooth will request the user to Insert Blank.
Insert the Blank cuvette and press OK.
The Soiltest 10 Bluetooth will determine theabsorbance due to the sample colour at allwavelengths simultaneously and store intemporary memory for use in analysis.Upon successful blanking the Soiltest 10Bluetooth will automatically move to theInsert sample stage of the analytical method.If the sample is too highly coloured to support effectiveblanking and subsequent analysis the message “Error9 is caused by the blank cuvette being too dark.Check the correct cuvette is being used” is shown.

4 Soiltest 10 Bluetooth
20
Ensure the blank cuvette is being used, not thesample plus reagent cuvette. Sample colour canbe reduced by dilution with clean water; thedilution selected should take account of theexpected concentration of parameter under test.
Blank results are stored in the temporary memoryof the Soiltest 10 Bluetooth and will be used forall subsequent tests until:
• The instrument is powered down (temporarymemory is lost/deleted)
• A new Blank reading is taken - this option isavailable on accessing any subsequent test atthe base of the screen. Repeat the blankingprocess if the sample changes significantlyor a new sample is under test
If the blank value generated in this step is notdetectable an error message will be displayed“Error 7 is caused by too much ambient light. Tryusing the light cover provided with the instrument”.
Reading Results withthe Soiltest 10 Bluetooth
Assuming a suitable blank has been recorded,the next step of the photometric analysis processis to carry out the reading step.
Prepare a Sample cuvette following the methodinstructions provided in Section 6.
Select Read at the base of the screen and press OK.
At the Insert sample prompt, insert the samplecuvette ensuring it is clean and dry and orientedcorrectly using the location mark.
Press OK to begin the measurement process.The screen will display Reading...
At the completion of the measurement processthe result is displayed on screen.

21
4Soiltest 10 Bluetooth
Timer
Many photometric methods require a reactiontime to develop completely, the recommendedtime period being documented in Section 6 andincluded as part of the method parametersprogrammed into the Soiltest 10 Bluetooth.Tests requiring a reaction time will have the optionto select an automatic timer to count down thereaction time required. While in the Insert samplescreen use the right key to move the cursor tohighlight Timer.
The programmed reaction time will be displayed.
Press OK to Start the countdown.
Three options will be displayed:
Stop cancel the countdown timer
Exit exits the countdown screen andreturns to the Insert samplescreen. The countdown willcontinue and the current time canbe seen by selecting Timer. At theend of the countdown an audiblealarm will sound to indicate thesample is ready to read. SelectOK to read the sample manually.
Exit and Read exits the countdown screen andautomatically reads the sampleat the completion of the allocatedtime period.
Changing Result Units of Expression
Many chemical species have a number ofalternative units that can be used for reportingresults e.g. Phosphate can be expressed as PO4
or P for example.
Where alternative units of expression for resultsare available the ▲▼ symbols will be displayednext to the current result units. Use the up/downarrows to change the units of expression asrequired. Values are modified automatically.
Results stored in the log will be in the unitsselected on screen, changing the chemical specieswill add an entry to the log showing the updatedresult and species parameter selected.
4.8 Calibration/Validation
Your Soiltest 10 Bluetooth is delivered with acalibration certificate validating the performanceof the instrument as it leaves Palintest.
We recommend annual service and calibrationof all photometric instruments in normal use.
The Soiltest 10 Bluetooth also includes anautomatic routine to validate analytical performanceusing certified Palintest Check Standards. Accessedvia the Mode menu, the Check Standard Modeprovides a field method of ensuring your instrumentis operating within defined specifications and alsoa troubleshooting method for unexpected results.
Every Palintest Check Standards set issupplied with certified values expressed as %T(Transmission), derived from traceable referencematerials. Acceptable tolerances are defined onthe certificate and are automatically specifiedwithin the Soiltest 10 Bluetooth.

4 Soiltest 10 Bluetooth
22
Check Standard Mode
Access Check Standard Mode from the Mode screen.Highlight Check Standard Mode and press OK.
Two choices are offered:
Enter Check use the up/down keys toStandard Values adjust the displayed values
to match the certificateCheck Standard insert the Check StandardsMeasurement in the defined order to
generate a validation report
Enter Check Standard Values
Each standard has two values assigned, for twoindividual wavelengths.
Use the up/down keys to adjust the values to matchthe certificate, following the order defined on thedisplay. Press OK when the correct value is shownand the prompt will forward to the next value.Upon completion the message Check StandardValues assigned successfully will be displayed.Press OK to return to the Check Standard Mode menu.
Check Standard Measurement
Follow the on-screen prompts to insert the CheckStandards in the defined order. The Soiltest 10Bluetooth will automatically measure theTransmittance at the required wavelength.
Upon completion of the sequence the resultsare displayed on screen with pass or fail status.
If the Check Standard Mode reports a failure,see Appendix 2 Troubleshooting for guidanceor contact your local Palintest supplier.

23
5Multiparameter Pocket Sensor
5.0 Multiparameter Pocket Sensor
5.1 Initial Use
The PT 162 Multiparameter Pocket Sensor isdelivered factory calibrated and can be usedimmediately if required. For best results soak thesensor tip in warm tap water or pH 7 buffer for afew minutes prior to re-calibrating with suppliedpH buffers and conductivity standards.
5.2 Taking Readings
1 Switch the Multiparameter Pocket Sensor onand insert into the sample to be measured.
2 Press MODE/ENT to switch between pH,conductivity, TDS and salinity parametersas required.
3 Readings are shown in the top part ofthe display for the required parameter.
4 To temporarily ‘store’ a result press ▼/HOLDto freeze the display. Press ▼/HOLD againto release and return to live display.
5.3 Set Up (General)Specific settings within the Multiparameter PocketSensor are accessed by entering the Set Up mode:5 Switch the sensor off.6 Press and hold the MODE/ENT key while
pressing and releasing the ON/OFF key.‘Setup’ will appear on the screen.
7 Release the MODE/ENT key and displaywill show PArA (Parameter Set Up).
8 Press ▲/CAL or ▼/HOLD to toggle betweenPArA (Parameter) and SYSt (System) set up. Parameter Set Up allows definition of aspectsrelated to the measurement parameters -pH, conductivity, TDS, salinity.System Set Up provides control for PocketSensor features such as units of temperaturedisplay, automatic shut-off and reset.
9 Press MODE/ENT to access the desired SetUp menu (see below for specific informationregarding Parameter and System Set Up).
10 Once satisfied with the configuration definedin the Set Up press and hold ▼/HOLD and▲/CAL until the display shows SA (Save).
11 The second line of the display will show YES.Press MODE/ENT to accept/save the changesand the Multiparameter Pocket Sensor willrestart with the new settings.
5.3.1 Parameter Set UpSelect PArA from the Set Up mode to customisethe parameter measurement settings as follows:1 Use MODE/ENT to select and/or confirm setting.2 Press ▲/CAL or ▼/HOLD to scroll through
the available parameter settings.Options Available:pH Choose either USA or NIST pH
buffer settings. Choose 5-pt or3-pt calibration mode.
Conductivity Select A.Cal (Automatic Calibration)or switch automatic calibration off.
TDS Adjust the FACt (factor) used forconductivity to TDS conversion.Default is 0.71.
Salinity Choose PPt (parts per thousand) orPer (% percentage) as recorded units.

5 Multiparameter Pocket Sensor
24
5.3.2 System Set Up
Select SYSt from the Set Up mode to customisethe system settings:
1 Use MODE/ENT to select and/or confirm.
2 Press ▲/CAL or ▼/HOLD to scroll throughthe available parameter settings.
Options Available:
Unit rSt Reset the Multiparameter PocketSensor settings. Choose PH or ECto reset either pH or Conductivity/TDS/Salinity settings. Choose CALto reset the calibration to defaultor FCt to reset to factory settings.
Set A.Off Choose YES for automatic switchoff after 8.5 minutes, NO todisable automatic switch off.
Set t.C Adjust the temperature coefficientfrom 0.0-10.0% (2.1% is default).
Set AtC Choose YES for AutomaticTemperature Compensation(ATC) or NO to disable.
Set °C °F Select °C for Celsius or °F forFahrenheit temperature units.
5.4 Calibration
The Multiparameter Pocket Sensor is deliveredwith a factory calibration but will require regularrecalibration to maintain optimal performance.
Three parameters are available for calibrationas follows:
• Temperature - usually only required on sensorreplacement as the factory calibration typicallylasts for the lifetime of the instrument.
• pH - recommended frequently due to the driftof electrodes over time, always use accuratepH buffers provided by a reputable company.
• Conductivity - providing the calibration forTDS and salinity, conductivity calibration againrequires the use of one or more standards.
Calibration is best performed in a controlledenvironment such as an office or laboratory priorto taking the SKW 400 into the field as care isrequired to generate best results.
5.4.1 Temperature Calibration
Items required: Reference thermometerTest Sample (usually warm water)
1 Switch on the Multiparameter PocketSensor and place in the test sample withthe Reference thermometer to stabilise.
2 Without removing from the test sample,press MODE/ENT until pH mode is selected.
3 Press ▲/CAL to enter the pH calibration menu.
4 Press ▼/HOLD for 5 seconds to begintemperature calibration mode. The dual displaywill show the measured temperature inthe top part of the screen and the defaultmeasured temperature in the lower part.
5 Use ▲/CAL or ▼/HOLD to adjust the measuredtemperature to the Reference thermometer value.
NOTE: this must be within 5°C/9°F of thedefault value.
6 Press MODE/ENT to confirm andreturn to pH measuring mode.
5.4.2 pH Calibration
Items required: USA pH Buffers (1.68, 4.01,7.00, 10.01 and 12.45)OR, NIST pH Buffers (1.68, 4.01, 6.86, 9.18 and 12.45)(Note: if 3-pt is selected only themiddle three buffers are required)Deionised water
1 Switch on the Multiparameter Pocket Sensorand press MODE/ENT to access the pHmeasurement mode.
2 Immerse the sensor end fully into the first pHbuffer and press ▲/CAL. The top part of thedisplay will show the current reading and thelower part of the display will automaticallyselect the correct buffer value to assign.
3 Allow the reading to stabilise with gentlestirring/rotating within the buffer and pressMODE/ENT to accept the result.
4 Either accept a single point calibration bypressing the ▲/CAL button to return to themeasurement mode or rinse the probe endwith Deionised water and repeat withadditional buffers as required.

25
5Multiparameter Pocket Sensor
5.4.3 Conductivity Calibration
Items required: Conductivity calibration standard(s)Deionised water
5.4.3.1 Automatic Calibration
NOTE: Use Conductivity Standards with valuesof 84µS/cm, 1413µS/cm and/or 12.88mS/cm.
1 Switch on the Multiparameter Pocket Sensorand press MODE/ENT until Conductivitymode is selected.
2 Rinse the sensor end with Deionised water andinsert into the first calibration standard. Press▲/CAL and the top part of the display willshow the current value while the lower partwill show the closest automatic standard value.
3 Allow the reading to stabilise with gentlerotation/stirring and press MODE/ENT toaccept the value. The screen will blink brieflyand return to measurement mode.
4 Repeat the process with further conductivitystandards if required.
5.4.3.2 Manual Calibration
Manual calibration can be used for conductivity,TDS and salinity. For best results use one standardper range defined below:
Conductivity 0 - 200µS/201 - 2000µS/2.01- 20.00mS
TDS 0.0 - 99.9ppm/100 - 999ppm/1.00 - 10ppt
Salinity 1.00 - 10ppt
1 Switch on the Multiparameter Pocket Sensorand press MODE/ENT to select Conductivity,TDS or Salinity mode as required for calibration.
2 Rinse the sensor end with deionised water andimmerse in the standard. The top part of thedisplay will show the current value and thelower part of the display will show the factorydefault calibration value.
3 Use ▲/CAL or ▼/HOLD to adjust the upper partof the display to match the standard value andpress MODE/ENT to confirm. The screen willblink briefly and return to measurement mode.
4 Repeat with additional standards as required.
5.5 Sensor Replacement
The Multiparameter Pocket Sensor containsa replaceable sensor should the tip becomedamaged or simply degrade over a period of time.
To remove the sensor part unscrew the lowercollar of the Pocket Sensor and pull the existingsensor straight out from the housing.
Replace the entire sensor and dispose of theredundant component in accordance with localwaste rules.
5.6 Battery Replacement
The Multiparameter Pocket Sensor is powered byfour LR44 batteries located in the top cap, abovethe dual display.
When the battery icon on the display shows no barsand blinks it is time to replace batteries immediately.
Replace all batteries at the same time, takingcare to observe the correct polarity is observed.

6 Soil Test Methods
26
6.0 Soil Test Methods
6.1 Overview
Soil testing for pH, Lime Requirement, macronutrients and micronutrients is carried out using a varietyof techniques and equipment within the SKW 400 Professional Soil Management Kit.
6.2 Soil Extraction
All soil test methods require an extraction step to ‘transfer’ the parameters of interest into water for furthermeasurement using the techniques identified above.Extraction methods can be as simple as mixing a fixed volume of soil with deionised water in a known ratiowith defined addition of specific Extract Reagents to promote release of nutrients from the soil sample.The extraction methods used are identical for some parameters and in these cases the same producedextract solution can be used for multiple parameter testing.
Specific sample preparation steps are required for each parameter, discussed further in the following section.The SKW 400 Professional Soil Management Kit features a fold-down worksurface for carrying out soiltest methods conveniently regardless of environment.
*pH meter method
Parameter Method Test Equipment
pH Electrochemical Multiparameter Pocket Sensor
Lime Requirement Electrochemical Multiparameter Pocket Sensor
Conductivity Electrochemical Multiparameter Pocket Sensor
Salinity Electrochemical Multiparameter Pocket Sensor
Nitrate Photometric Soiltest 10
Phosphorous Photometric Soiltest 10
Potassium Photometric Soiltest 10
Magnesium Photometric Soiltest 10
Calcium Tablet Count Visual
Parameter Soil Volume DI Water Volume Extraction Reagent
pH* 4ml 10ml Extract W
Lime Requirement 4ml 10ml Extract W
Conductivity 10ml 50ml Extract W
Salinity 10ml 50ml Extract W
Nitrate 2ml 50ml Extract N
Phosphate 2ml 50ml Extract P
Potassium 2ml 50ml Extract K
Calcium 10ml 50ml Extract A
Magnesium 10ml 50ml Extract A

27
6Soil Test Methods
For extraction solutions to be used with eitherphotometric or tablet count methods, filtrationmust be carried out.
The standard approach for filtration of extractis as follows:
1 Take one fresh filter paper circle, a filter funneland a spare Sample Container/Dilution Tube.
2 Fold the filter paper circle in half and foldagain to produce a quarter circle.
3 Insert a finger between the folds and openthe filter paper into a cone. Place into thefilter funnel.
4 Position the filter funnel over the SampleContainer/Dilution Tube and pour thesoil/water/Extract solution into the funnel.
5 Capture the filtrate in the second SampleContainer/Dilution Tube and use for analysisas soon as sufficient volume is available.
6 Discard the remaining slurry once sufficientfiltrate has been generated.
6.3 Soil Volume/Sampling
Two soil scoops are provided in the SKW 400Professional Soil Management Kit:
PT 302 Soil Scoop, 2ml
PT 310 Soil Scoop, 10ml
Select the required scoop size defined inthe specific parameter instructions.
Fill the selected scoop with a heaped scoop ofsoil. Discard any large particles such as stonesor insects. Using a straight edge level the scoopof soil to fix the soil volume.
6.4 Soil Temperature
All Palintest soil test have been developed withsoil samples at 20°C. For optimum results soilextraction and measurement should be carriedout at this temperature.
Low temperatures may reduce the effectivenessof extraction leading to low results.
6.5 Drying Soil Samples
Palintest soil methods can be carried out on freshor dried soil samples. For some parameters suchas soil nitrogen, immediate testing on damp soilsis recommended to prevent loss of nitrogen dueto biological activity.
If samples are to be transported some distanceor analysis is not possible immediately on samplecollection, the soil sample should be air dried ona tray or plastic sheet. Once dried the sample canbe stored in a soil sample bag for testing at amore convenient date or location.
6.6 Soil pH (Range pH 0.0 - 14.0)
Key to determining the availability of soil nutrients,soil pH usually lies between pH 4 and pH 8. Neutralsoils have a pH value close to 7.0, soils below pH5.0 are strongly acidic and will only support acid-loving plants.
A shortage of one or more trace elements may berelated to pH as the availability of most elements ispH related. These shortages lead to the appearance ofsymptoms in the plant, such as chlorotic, bronzed ormottled leaves, altered habit, or death of the growingtips, or there may be no visual symptoms at all.
Equipment Required:
PT 162 Multiparameter Pocket SensorPT 302 Soil Scoop, 2mlPT 512 Sample Container/Dilution TubePT 500 De-ion Pack
Test Procedure
1 Take two level 2ml scoops of soiland place in the sample container.
2 Add deionised water to the 10ml mark.
3 Cap container and shake gently for oneminute.
4 Transfer the 10ml sample/water mixtureto the Multiparameter Pocket Sensor cap
5 Switch on the Multiparameter Pocket Sensorand select the pH measurement mode.
6 Insert the pH electrode into the cap andallow the reading to stabilise. Record thereading as Soil pH.

6 Soil Test Methods
28
6.7 Soil Lime Requirement
The Lime Requirement of a soil is the quantity ofliming material required to raise the soil pH to avalue defined by soil type and crop requirements.The value given by the test is the amount ofCalcium Carbonate required to raise a 20cmdepth of soil to the required Soil pH. Standardtarget values for specific soil pH types are:
Mineral soil pH 6.5
Organic soil pH 6.2
Peaty soil pH 5.8
Equipment Required:
PT 162 Multiparameter Pocket Sensor
PT 302 Soil Scoop, 2ml
PT 512 Sample Container/Dilution Tube
PT 500 De-ion Pack
ST-2210 Palintest Lime Buffer Tablets
Test Procedure
NOTE: this test may be carried out as a continuationof Soil pH test by transferring the sample back tothe Sample Container/Dilution Tube and continuingfrom Step 3.
1 Take two level 2ml scoops of soiland place in the sample container.
2 Add deionised water to the 10ml mark.
3 Add one Lime Buffer tablet to the containerand shake gently for two minutes.
4 Transfer the 10ml sample/water mixtureto the Multiparameter Pocket Sensor cap.
5 Switch on the Multiparameter Pocket Sensorand select the pH measurement mode.
6 Insert the pH electrode into the cap andallow the reading to stabilise. Record themodified pH reading.
7 Refer to the Lime Requirement tables tocalculate the amount of lime required toincrease Soil pH to the required value.
The Lime Requirement values given in the followingtables should be regarded as maximum values.Over-liming should be avoided as this may giverise to trace element deficiencies.
Liming Materials
The result of the Palintest Lime Requirement testis given in terms of Calcium Carbonate (CaCO3,ground limestone or chalk).
Alternative liming materials may be used andattention must be paid to the neutralising capacityof these materials compared to Calcium Carbonate.
Mineral SoilsMineral soils contain less than 10% organic material.
Organic SoilsOrganic soils contain 10 - 25% organic material.
Peaty SoilsPeaty Soils contain greater than 25% organic material.
pH Reading
(Modified pH) tonne/ha gram/m2 cwt/acre oz/sq yard
4.0 30 3000 240 904.5 25 2500 200 755.0 20 2000 160 605.5 15 1500 120 456.0 10 1000 80 306.5 4 400 30 127.0 0 0 0 07.5 0 0 0 08.0 0 0 0 0
Lime Requirement (CaCO3)
pH Reading
(Modified pH) tonne/ha gram/m2 cwt/acre oz/sq yard
4.0 32 3200 225 954.5 26 2600 210 785.0 21 2100 165 615.5 15 1500 120 456.0 10 1000 75 286.5 4 400 30 127.0 0 0 0 07.5 0 0 0 08.0 0 0 0 0
Lime Requirement (CaCO3)
pH Reading
(Modified pH) tonne/ha gram/m2 cwt/acre oz/sq yard
4.0 34 3400 270 1004.5 28 2800 225 855.0 22 2200 180 655.5 17 1700 135 506.0 11 1100 85 326.5 5 500 40 157.0 0 0 0 07.5 0 0 0 08.0 0 0 0 0
Lime Requirement (CaCO3)

29
6Soil Test Methods
6.8 Soil Conductivity Soil conductivity provides a simple electrochemicalindication of the level of soluble salts present insoil, especially where soil is potentially affected bysalinisation or has been subject to prolonged irrigation.Various methods of determining soil conductivityare available. In the Palintest method the saltcontent of soil is extracted with deionised water.The resultant extract is measured using theMultiparameter Pocket Sensor.
Equipment Required:PT 162 Multiparameter Pocket SensorPT 310 Soil Scoop, 10mlPT 512 Sample Container/Dilution TubePT 500 De-ion Pack
Test Procedure1 Fill the Sample Container to the
50ml mark with Deionised Water.2 Add one level 10ml scoop of
soil to the Deionised Water.3 Shake the container for two minutes.4 Allow the soil to settle and insert the
Multiparameter Pocket Sensor into theliquid portion of the sample.
5 Switch the Multiparameter Pocket Sensorto conductivity mode and take the readingonce the value has stabilised.
6 Report the result as Soil Conductivity in eitherµS/cm or mS/cm (the Multiparameter PocketSensor will select the correct units for the result).
Soil SalinityTo express results as parts per thousand (ppt)as NaCl switch the measurement mode fromconductivity to Salt.
6.9 Soil Nitrogen (Range 0-25 mg/l N)One of the key macronutrients, nitrogen in soilis critical for foliar growth and increased yieldparticularly when growing legumes. Plant growthis more limited by nitrogen than any other nutrient.Soil nitrogen is very mobile through the soil matrixand will vary considerably with location across afield and with depth of soil sample. Testing for soilnitrogen should be carried out as soon as possibleon moist soil to prevent sample microbiologicalactivity adversely affecting results.
The Palintest Soil Nitrogen test provides a combinedvalue for soil nitrate and soil nitrite in a single test.The nitrate and nitrite are extracted from the soilmatrix using 1M Ammonium Chloride (Extract N) andnitrate reduced to nitrite using Nitratest™ powder.The resultant filtered extract is reacted with Nitricolreagent to produce a range of colours from pale pinkto deep violet depending on nitrogen concentration.
Equipment Required:PTB 7510 Soiltest 10 Photometer PT 595 Cuvette, 10mlPT 501 Cuvette rackPT 302 Soil Scoop, 2mlPT 512 Sample Container/Dilution Tube x 2PT 500 De-ion PackPT 607 Filter Funnel, 7cm diameterPT 618 Filter Paper, 11cm diameterPT 311 2.5ml Extract ScoopST-2106 Extract N PowderST-2237 Nitratest™ N PowderST-2240 Nitricol™ Tablets
Test Procedure1 Fill the Sample Container to the
50ml mark with Deionised Water.2 Add one level scoop of Extract N to the
deionised water using the PT 311 Long-handled Extract N Scoop.
3 Replace the lid and shake the containerto dissolve the Extract N powder.
4 Add one 2ml scoop of soil to the deionisedwater/Extract N solution, replace the lid andshake for 1 minute.
5 Add one level spoonful of Nitratest™powder to the soil/Extract N solution usingthe scoop contained within the Nitratest™container. Shake for one minute.
6 Fold a filter paper into quarters and insertinto the filter funnel. Place the filter funnelin a clean sample container.
7 Pour the soil/Extract N solution into the filterpaper and allow the extraction filtrate tocollect in the second container.
8 Once 10ml of filtrate is available fill a cleancuvette to the 10ml mark and select Phot 007Nitrogen or press key ‘7’ and blank theSoiltest 10 photometer.
6 Soil Test Methods
30
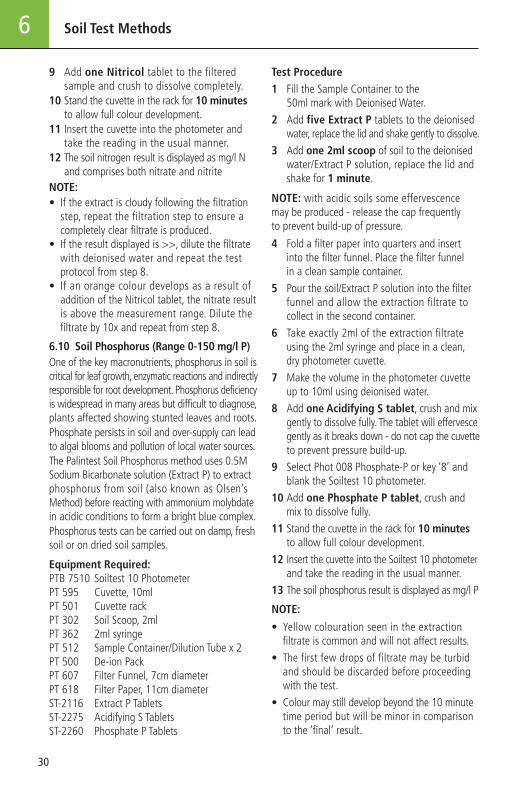
9 Add one Nitricol tablet to the filteredsample and crush to dissolve completely.
10 Stand the cuvette in the rack for 10 minutesto allow full colour development.
11 Insert the cuvette into the photometer andtake the reading in the usual manner.
12 The soil nitrogen result is displayed as mg/l Nand comprises both nitrate and nitrite
NOTE:• If the extract is cloudy following the filtration
step, repeat the filtration step to ensure acompletely clear filtrate is produced.
• If the result displayed is >>, dilute the filtratewith deionised water and repeat the testprotocol from step 8.
• If an orange colour develops as a result ofaddition of the Nitricol tablet, the nitrate resultis above the measurement range. Dilute thefiltrate by 10x and repeat from step 8.
6.10 Soil Phosphorus (Range 0-150 mg/l P)One of the key macronutrients, phosphorus in soil iscritical for leaf growth, enzymatic reactions and indirectlyresponsible for root development. Phosphorus deficiencyis widespread in many areas but difficult to diagnose,plants affected showing stunted leaves and roots.Phosphate persists in soil and over-supply can leadto algal blooms and pollution of local water sources. The Palintest Soil Phosphorus method uses 0.5MSodium Bicarbonate solution (Extract P) to extractphosphorus from soil (also known as Olsen’sMethod) before reacting with ammonium molybdatein acidic conditions to form a bright blue complex.Phosphorus tests can be carried out on damp, freshsoil or on dried soil samples.
Equipment Required:PTB 7510 Soiltest 10 Photometer PT 595 Cuvette, 10mlPT 501 Cuvette rackPT 302 Soil Scoop, 2mlPT 362 2ml syringePT 512 Sample Container/Dilution Tube x 2PT 500 De-ion PackPT 607 Filter Funnel, 7cm diameterPT 618 Filter Paper, 11cm diameterST-2116 Extract P TabletsST-2275 Acidifying S TabletsST-2260 Phosphate P Tablets
Test Procedure1 Fill the Sample Container to the
50ml mark with Deionised Water.
2 Add five Extract P tablets to the deionisedwater, replace the lid and shake gently to dissolve.
3 Add one 2ml scoop of soil to the deionisedwater/Extract P solution, replace the lid andshake for 1 minute.
NOTE: with acidic soils some effervescencemay be produced - release the cap frequentlyto prevent build-up of pressure.
4 Fold a filter paper into quarters and insertinto the filter funnel. Place the filter funnelin a clean sample container.
5 Pour the soil/Extract P solution into the filterfunnel and allow the extraction filtrate tocollect in the second container.
6 Take exactly 2ml of the extraction filtrateusing the 2ml syringe and place in a clean,dry photometer cuvette.
7 Make the volume in the photometer cuvetteup to 10ml using deionised water.
8 Add one Acidifying S tablet, crush and mixgently to dissolve fully. The tablet will effervescegently as it breaks down - do not cap the cuvetteto prevent pressure build-up.
9 Select Phot 008 Phosphate-P or key ‘8’ andblank the Soiltest 10 photometer.
10 Add one Phosphate P tablet, crush andmix to dissolve fully.
11 Stand the cuvette in the rack for 10 minutesto allow full colour development.
12 Insert the cuvette into the Soiltest 10 photometerand take the reading in the usual manner.
13 The soil phosphorus result is displayed as mg/l P
NOTE:
• Yellow colouration seen in the extractionfiltrate is common and will not affect results.
• The first few drops of filtrate may be turbidand should be discarded before proceedingwith the test.
• Colour may still develop beyond the 10 minutetime period but will be minor in comparisonto the ‘final’ result.
31
6Soil Test Methods
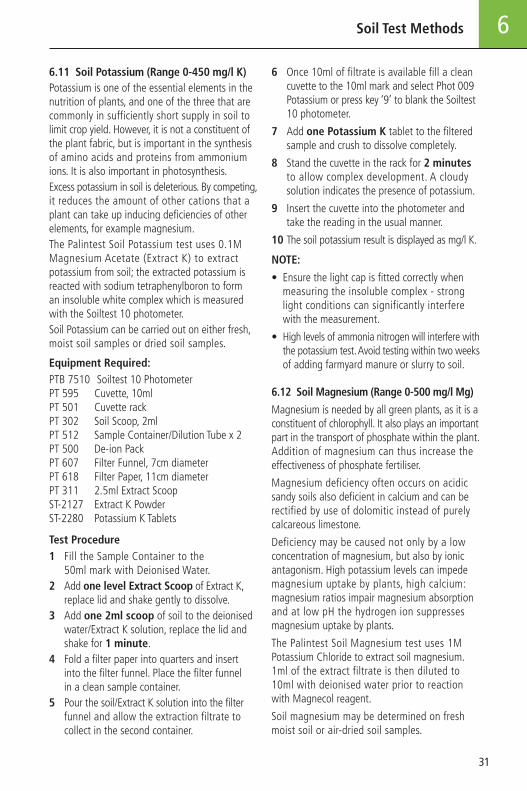
6.11 Soil Potassium (Range 0-450 mg/l K)Potassium is one of the essential elements in thenutrition of plants, and one of the three that arecommonly in sufficiently short supply in soil tolimit crop yield. However, it is not a constituent ofthe plant fabric, but is important in the synthesisof amino acids and proteins from ammoniumions. It is also important in photosynthesis.Excess potassium in soil is deleterious. By competing,it reduces the amount of other cations that aplant can take up inducing deficiencies of otherelements, for example magnesium.The Palintest Soil Potassium test uses 0.1MMagnesium Acetate (Extract K) to extractpotassium from soil; the extracted potassium isreacted with sodium tetraphenylboron to forman insoluble white complex which is measuredwith the Soiltest 10 photometer.Soil Potassium can be carried out on either fresh,moist soil samples or dried soil samples.
Equipment Required:PTB 7510 Soiltest 10 Photometer PT 595 Cuvette, 10mlPT 501 Cuvette rackPT 302 Soil Scoop, 2mlPT 512 Sample Container/Dilution Tube x 2PT 500 De-ion PackPT 607 Filter Funnel, 7cm diameterPT 618 Filter Paper, 11cm diameterPT 311 2.5ml Extract ScoopST-2127 Extract K PowderST-2280 Potassium K Tablets
Test Procedure1 Fill the Sample Container to the
50ml mark with Deionised Water.2 Add one level Extract Scoop of Extract K,
replace lid and shake gently to dissolve.3 Add one 2ml scoop of soil to the deionised
water/Extract K solution, replace the lid andshake for 1 minute.
4 Fold a filter paper into quarters and insertinto the filter funnel. Place the filter funnelin a clean sample container.
5 Pour the soil/Extract K solution into the filterfunnel and allow the extraction filtrate tocollect in the second container.
6 Once 10ml of filtrate is available fill a cleancuvette to the 10ml mark and select Phot 009Potassium or press key ‘9’ to blank the Soiltest10 photometer.
7 Add one Potassium K tablet to the filteredsample and crush to dissolve completely.
8 Stand the cuvette in the rack for 2 minutesto allow complex development. A cloudysolution indicates the presence of potassium.
9 Insert the cuvette into the photometer andtake the reading in the usual manner.
10 The soil potassium result is displayed as mg/l K.
NOTE:
• Ensure the light cap is fitted correctly whenmeasuring the insoluble complex - stronglight conditions can significantly interferewith the measurement.
• High levels of ammonia nitrogen will interfere withthe potassium test. Avoid testing within two weeksof adding farmyard manure or slurry to soil.
6.12 Soil Magnesium (Range 0-500 mg/l Mg)
Magnesium is needed by all green plants, as it is aconstituent of chlorophyll. It also plays an importantpart in the transport of phosphate within the plant.Addition of magnesium can thus increase theeffectiveness of phosphate fertiliser.
Magnesium deficiency often occurs on acidicsandy soils also deficient in calcium and can berectified by use of dolomitic instead of purelycalcareous limestone.
Deficiency may be caused not only by a lowconcentration of magnesium, but also by ionicantagonism. High potassium levels can impedemagnesium uptake by plants, high calcium:magnesium ratios impair magnesium absorptionand at low pH the hydrogen ion suppressesmagnesium uptake by plants.
The Palintest Soil Magnesium test uses 1MPotassium Chloride to extract soil magnesium.1ml of the extract filtrate is then diluted to10ml with deionised water prior to reactionwith Magnecol reagent.
Soil magnesium may be determined on freshmoist soil or air-dried soil samples.

6 Soil Test Methods
32
Equipment Required:
PTB 7510 Soiltest 10 Photometer
PT 595 Cuvette, 10ml
PT 501 Cuvette rack
PT 310 Soil Scoop, 10ml
PT 512 Sample Container/Dilution Tube x 2
PT 500 De-ion Pack
PT 607 Filter Funnel, 7cm diameter
PT 618 Filter Paper, 11cm diameter
PT 361 1ml syringe
ST-2136 Extract A Tablets
ST-2440 Magnecol S Tablets
Test Procedure
1 Fill the Sample Container to the50ml mark with Deionised Water.
2 Add five Extract A tablets, replacelid and shake gently to dissolve.
3 Add one 10ml scoop of soil to thedeionised water/Extract A solution, replacethe lid and shake for 2 minutes.
4 Fold a filter paper into quarters and insertinto the filter funnel. Place the filter funnelin a clean sample container.
5 Pour the soil/Extract A solution into the filterfunnel and allow the extraction filtrate tocollect in the second container.
6 Take exactly 1ml of the extraction filtrateusing the 1ml syringe and place in a clean,dry photometer cuvette.
7 Make the volume in the photometer cuvetteup to 10ml using deionised water.
8 Select Phot 005 Magnesium or press key‘5’ to blank the Soiltest 10 photometer.
9 Add one Magnecol S tablet and crushto dissolve fully.
10 Stand the cuvette in the rack for 5 minutesto allow full colour development.
11 Insert the cuvette into the Soiltest 10 photometerand take the reading in the usual manner.
12 The soil magnesium result is displayed as mg/l Mg
6.13 Soil Calcium (Range 0-2500 mg/l Ca)
Calcium is essential for the proper growth of stemand root tips, and is also present in plant cellwalls. Calcium deficiency causes stunting of theroots and affects the healthy growth of leaves. A high level of calcium, as seen on calcareoussoils, is not directly harmful but may depress theuptake of magnesium and potassium, requiringhigher levels of fertiliser to be applied. Soil Calcium is a key component in the determinationof Cation Exchange Capacity (CEC), along withpotassium, magnesium and ammonium plusother cations.The Palintest Soil Calcium test uses 1M PotassiumChloride to extract soil calcium which is thendetermined using the Palintest tablet count visualtitration method. Soil calcium may be determinedon fresh moist soil or air-dried soil samples.
Equipment Required:
PT 310 Soil Scoop, 10mlPT 512 Sample Container/Dilution Tube x 2PT 500 De-ion PackPT 607 Filter Funnel, 7cm diameterPT 618 Filter Paper, 11cm diameterST-2136 Extract A TabletsST-2297 Calcium S Tablets
Test Procedure
1 Fill the Sample Container to the50ml mark with Deionised Water.
2 Add five Extract A tablets, replacelid and shake gently to dissolve.
3 Add one 10ml scoop of soil to thedeionised water/Extract A solution, replacethe lid and shake for 2 minutes.
4 Fold a filter paper into quarters and insert into the filter funnel. Place the filter funnelin a clean sample container.
5 Pour the soil/Extract A solution into the filterfunnel and allow the extraction filtrate tocollect in the second container.
6 Take exactly 10ml of the extraction filtrateand add deionised water to the 50ml markon the sample container.

33
6Soil Test Methods
7 Add one Calcium S tablet and shake untilthe tablet dissolves/disintegrates.
8 Continue to add Calcium S tablets one at a time,keeping a note of how many are added, until thecolour of solution changes from pink to violet.
9 Note the number of Calcium S tablets andcalculate the result as follows:
Calcium (mg/l Ca) = (Number of tablets x 250)
NOTE:
For soils with a low Calcium content use a 50mlsample of extraction filtrate made up to 100mlwith deionised water. The result is then calculated:
Calcium (mg/l Ca) = (Number of tablets x 50)

Photometric analysis is a very powerful technique,providing accurate analysis of a wide rangeof critical drinking water, wastewater andenvironmental parameters.
A complete guide to the science behind photometric(also known as colorimetric) analysis can be foundin the Know portal at www.palintest.com/know/
Palintest has focused on simplifying the testmethods and equipment used for this techniquebut there are still a number of ways to ensure theresults you generate are as accurate as possible:
1 Always use genuine Palintest soil reagentswhen using the programmed test methods.Each parameter has a unique calibrationwhich has been generated using Palintest soilreagents. Alternative reagents may follow thesame general methodology but can differsubstantially in formulation and performancethereby rendering the calibration and henceresults inaccurate.
2 Always correct for the blank value - anyinherent colour in the sample (which may notbe visible to the naked eye) will offset theresult if the blank step is omitted. If the samplecolour is too intense for the photometer toblank use dilution with deionised water toreduce the intensity. Remember to dilute thesample to the same extent for analysis.
3 Always respect the reaction time specifiedwithin the instructions. Some methodsproduce instant colour whereas others requirea reaction time to reach full development.Taking a reading before the reaction timehas elapsed may lead to low results.
4 The presence of solids, either large or in the formof turbidity, can adversely affect the quality ofresults by preventing incident light from reachingthe detector. The blanking step can reduce theimpact of turbidity interference but large solidparticles must be removed prior to analysis.Solids can be removed by filtration prior toanalysis or, if the solids are settleable and will notlie in the optical path, allowing them to settlein the photometer cuvette can be acceptable.
5 Calibration curves relate transmission/absorbance to concentration to provide resultdata but not all calibration ranges are linear.Frequently at higher concentrations the curve‘flattens’ leading to higher potential variabilityin results. If greater accuracy is required thancan be achieved on neat samples then dilutioncan be used to improve performance.
6 Ensure the photometer cuvette is clean, hasno droplets on the outside and not excessivelyscratched. Good technique is to wipe theoutside surface of the cuvette prior toinserting into the optical chamber to preventcontamination of the optical system.
7 Always use good quality, genuine Palintestcuvettes. Use the orientation mark to ensurerepeatable positioning of the cuvette.
8 Maintain the cleanliness of the optical chamberby only inserting clean cuvettes. If the chamberbecomes fouled or sample is spilled the basecan be removed for cleaning access. Clean theoptical chamber with a soft cloth. Do not useabrasive chemicals or scouring agents.
9 Always use the light cap provided to preventambient light affecting results. This is especiallyrelevant when operating in strong sunlight orother light conditions.
10 Ensure your Soiltest 10 Bluetooth is operatingeffectively by using Palintest Check Standardsand the Check Standard Mode (see Section 9Calibration/Validation) and having the photometerserviced and calibrated at regular intervals.Calibration is recommended at 12 monthintervals for normal usage and can beprovided by your local Palintest distributor.
7 Appendix 1 - Hints and Tips for Soil Testing
34

35
8Appendix 2 - Troubleshooting
The Soiltest 10 Bluetooth features self-diagnosticsoftware and hardware to optimise performanceand battery life. The Info Panel indicates the statusof the Soiltest 10 Bluetooth and any specific faultconditions are defined and displayed on screen.
Optical Errors
I have an Error 9 message
Error 9 is caused by the blank cuvette being toodark to allow the blanking step to be carried out. Check that the correct cuvette is being usedi.e. ensure the sample cuvette is not being usedfor blanking.If the sample is too highly coloured or containssignificant solids, dilute and repeat the blanking step.If the problem persists and the blank cuvette is notthe issue, clean the optical chamber by removingthe access cover and cleaning with a soft cloth.Do not use corrosive or abrasive chemicals.
I have an Error 7 message
Error 7 is caused by too much ambient lightreaching the detector. Use the light coverprovided with the instrument.
Check Standard Issues
How do I maintain my Check Standards?
Check Standards are manufactured to precisevalues/tolerances, certified against traceablereference materials and provided in sealedcuvettes. Do not decant or remove the sealedcap from the Check Standard.Ensure the Check Standard cuvettes are cleanand dry using lint-free cloths before insertinginto the optical chamber.Insert the Check Standard aligning the orientationarrow towards the front of the optical chamber.Values assigned to calibration standards aredefined at 20-25°C. Extremely high or lowambient temperatures can affect Check Standardresults so ensure standards are at the definedtemperature to effectively validate.Check Standards have a two year shelf-life, afterwhich the colours will no longer be valid. Pleasedispose of the expired standards after this periodaccording to the MSDS.
My Check Standard validation has failed
Photometers may fail the Check Standardvalidation step due to the requirement forservice/calibration. Contact your local Palintestpartner for service and support.
Ensure the Check Standards are inserted correctly,using the orientation mark to align and insertedfully. Use the light cap to prevent any ambientlight interference.
Service/calibration is recommended at annualintervals in normal operation.
Bluetooth Issues
The Soiltest 10 Bluetooth features thelatest Bluetooth SMART connectivity.
I can’t connect the Soiltest 10Bluetooth to my device
Ensure your device is Bluetooth SMART ready andyou are using the Palintest Aqua Pal app. Previousversions of Bluetooth (also known as BluetoothClassic) will not connect to the Soiltest 10Bluetooth. Check your device specification or visitwww.bluetooth.com to see the latest list ofSMART ready devices.
I can’t download my resultsto my connected device
The Info Panel will show the connected status ofthe Soiltest 10 Bluetooth. Ensure the connectedicon is displayed.
If more than one remote device is running theAqua Pal app, check that the correct device isconnected to the Photometer.
The connected device is indicated at the baseof the Aqua Pal results screen.
I can’t upload my datato the Palintest Portal
Ensure you have a reliable internet connectionto exchange data with the Palintest Portal. Onceuploaded data can be shared within your secureuser group and downloaded for report generation.
8 Appendix 2 - Troubleshooting
36
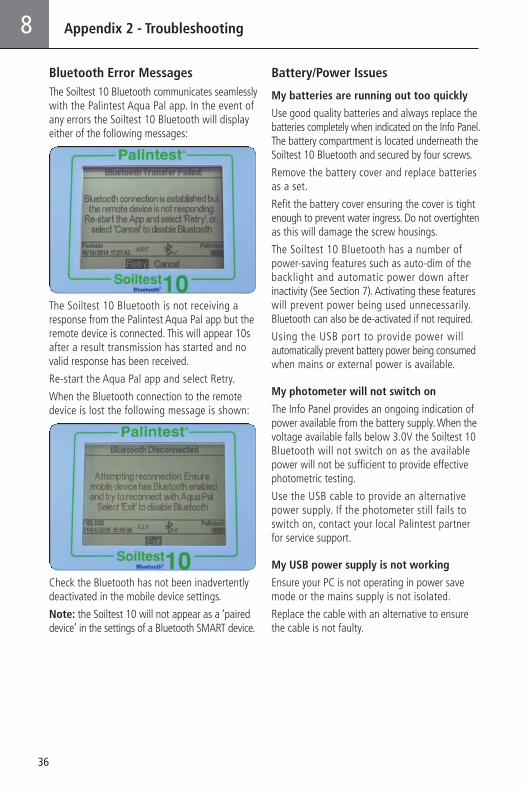
Bluetooth Error MessagesThe Soiltest 10 Bluetooth communicates seamlesslywith the Palintest Aqua Pal app. In the event ofany errors the Soiltest 10 Bluetooth will displayeither of the following messages:
The Soiltest 10 Bluetooth is not receiving aresponse from the Palintest Aqua Pal app but theremote device is connected. This will appear 10safter a result transmission has started and novalid response has been received.
Re-start the Aqua Pal app and select Retry.
When the Bluetooth connection to the remotedevice is lost the following message is shown:
Check the Bluetooth has not been inadvertentlydeactivated in the mobile device settings.
Note: the Soiltest 10 will not appear as a ‘paireddevice’ in the settings of a Bluetooth SMART device.
Battery/Power Issues
My batteries are running out too quickly
Use good quality batteries and always replace thebatteries completely when indicated on the Info Panel.The battery compartment is located underneath theSoiltest 10 Bluetooth and secured by four screws.
Remove the battery cover and replace batteriesas a set.
Refit the battery cover ensuring the cover is tightenough to prevent water ingress. Do not overtightenas this will damage the screw housings.
The Soiltest 10 Bluetooth has a number ofpower-saving features such as auto-dim of thebacklight and automatic power down afterinactivity (See Section 7). Activating these featureswill prevent power being used unnecessarily.Bluetooth can also be de-activated if not required.
Using the USB port to provide power willautomatically prevent battery power being consumedwhen mains or external power is available.
My photometer will not switch on
The Info Panel provides an ongoing indication ofpower available from the battery supply. When thevoltage available falls below 3.0V the Soiltest 10Bluetooth will not switch on as the availablepower will not be sufficient to provide effectivephotometric testing.
Use the USB cable to provide an alternativepower supply. If the photometer still fails toswitch on, contact your local Palintest partnerfor service support.
My USB power supply is not working
Ensure your PC is not operating in power savemode or the mains supply is not isolated.
Replace the cable with an alternative to ensurethe cable is not faulty.

37
8Appendix 2 - Troubleshooting
USB Connection Issues
I cannot download my data
Check the USB mode is set to Hard Disk, not COMport mode. In Hard Disk mode the data can be‘dragged and dropped’ as with a conventionalmemory stick and is available in CSV format.
Opening CSV data files can be accomplished by anumber of text editing or spreadsheet programs.
Where do I find the COM port drivers?
The latest drivers are available atwww.palintest.com
COM port drivers are provided for Windowsoperating systems (Windows Vista, XP and 7).
Care and MaintenanceThe Soiltest 10 Bluetooth contains no user-serviceable parts internally. User maintenanceis only recommended for cleaning of the opticalchamber, changing batteries and validatingperformance using the Check Standard Mode.
Cleaning the Optical Chamber
The optical chamber has been designed tosupport removal and cleaning with a lint-freecloth as required by removal of the access cover.
Do not use any of the following agentswhen cleaning this optical chamber:
• Abrasive cloths• Corrosive chemicals• Any organic solventsDo not overtighten the screws on re-assemblyto avoid damaging the access cover.
Replacing the Batteries
Remove the four retaining screws from thebattery cover and gently prise the cover free.
Replace all batteries at the same time.
Ensure on replacing the battery cover thatthe gasket is correctly located to prevent anywater ingress. Tighten the screws carefullybut do not overtighten.
BatteryCoverAccessScrews
AccessCoverScrews

9 Appendix 3 - Technical Specifications
38
Soiltest 10 Bluetooth
SKW 400 Professional Soil Management Kit
Instrument Type Dual light source photometer offering direct-reading ofpre-programmed test calibrations and Transmittance
Optical SystemOptical Source Dual LED sources with optical filtersOptical Detectors Silicon photodiodes Peak Wavelengths 450nm, 500nm, 550nm, 570nm, 600nm, 650nmWavelength Selection AutomaticBandwidth ±5nmRange 1 - 100%T (0 - 2.3 Abs)Accuracy ± 1.0% T
User InterfaceDisplay 320 x 240 pixel LCD with contrast adjustmentBacklight Timed, on key press with auto-dim and offUser Interface On-screen prompts available in English, French, Spanish,
German, Italian, Turkish and Mandarin (Chinese)Keypad Numeric keypad with direct access keys. Four navigation keys and OK key
PhysicalSize (W x L x H) 150 x 250 x 70mm Weight 975gIP Rating IP67
Power SupplyBatteries 3 x 1.5v ‘AA’ batteriesLifetime 40 hours (typical use, backlight off, ‘AA’ alkaline cells)Mains 5V DC, 900mA delivered via USB portPower Management Auto-switch off (user selectable between 5-15 minutes on battery) or continuous operationPower Saving User control for Backlight and Bluetooth to minimise battery consumption
Test MethodsTests Available Pre-programmed for Palintest soil reagents. Also operates in Absorbance and Transmittance modesUser Defined Tests Up to 30 user calibrations can be entered. Up to 10 points per calibrationTest Selection Test number entry, direct access key or selection from a listTest Cuvettes 12-20mm OD with automatic cuvette centeringResult Units g/l, mg/l, ppm, mmol/l, µmol/l, µg/l, ppbBlanking Automatic blanking at all wavelengths. Blank value
stored in memory until power off or new blank recorded
ConnectivityUSB USB Type B Connector. Waterproof connector availableWireless Palintest Bluetooth SMART profile
Data ManagementInstrument Memory Non-volatile storageMemory Capacity Up to 500 data sets. Each data set includes date, time, Sample ID,
Operator ID, method number, method name, result, unitsSample IDs Up to 24 at any timeOperator IDs Up to 12 at any timeData Download To computer via USB using Hard Disk or COM port mode. Wireless Bluetooth SMART
download, either instantly or as a data batch, using a connected device runningthe Palintest Aqua Pal app. Optional Palintest Portal data management available
Data Output Format Plain textSoftware Upload Software update by ‘drag and drop’ in USB Hard Disk Mode
Size (W x L x H) 555 x 428 x 211mmWeight 10.5kgCase IP Rating IP67

39
9Appendix 3 - Technical Specifications
Multiparameter Pocket SensorParameter Range Resolution (Accuracy)
pH 0.00 - 14.00 0.01 (±0.01)
Conductivity 0 - 199.9 µS/cm 0.1 µS/cm (1% FSD)200 to 1999 µS/cm 1 µS/cm (1% FSD)2.00 to 20.00 mS/cm 0.01 mS/cm (1% FSD)
TDS 0.0 to 99.9 ppm 0.1 ppm (1% FSD)100 to 999 ppm 1 ppm (1% FSD)1.00 to 10.00 ppt 0.01 ppt (1% FSD)
Salinity 0.0 to 99.9 ppm 0.1 ppm (1% FSD)100 to 999 ppm 1 ppm (1% FSD)1.00 to 10.00 ppt 0.01 ppt (1% FSD)0.0 to 1.00% 0.01% (1% FSD)
Temperature 0.0 to 50.0°C / 32.0 to 120.0 °F 0.1 °C/°F (±0.5°C/ ±0.9°F)
Display Dual LCD display 2.1 x 2.7cm
Power 4 x A76 batteries >150 hours lifetime
Size/weight 18cm x 6cm x 5cm 200g

9 Appendix 4 - Spares and Consumables
40
Hardware
PT 301 Soil Sample Bags (100 pack)
PT 302 Soil Scoop, 2ml
PT 310 Soil Scoop, 10ml
PT 311 2.5ml Extract Scoop
PT 361 1ml syringe
PT 362 2ml syringe
PT 370 20ml syringe, Luer fitting
PT 500 De-ion pack
PT 501 Cuvette Rack
PT 502 Crush/stir rods (pack of 10)
PT 595/5 Cuvette Pack
PT 512 Sample Container/Dilution Tube
PT 607 Filter Funnel
PT 618 Filter Paper
PT 663 Cuvette brush
SK 600 Soil Accessory Pack
Soil Combination Packs
SKR 001 Soil Nitrogen Pack
SKR 003 Soil Phosphorus Pack (P)
SKR 004 Soil Potassium Pack
SKR 005 Soil Magnesium/Calcium Pack

41
10Appendix 4 - Spares and Consumables
Individual Reagent Packs
ST-2106 Extract N Powder
ST-2116 Extract P
ST-2127 Extract K Powder
ST-2136 Extract A
ST-2146 Extract C
ST-2210 Lime Buffer
ST-2237 Nitratest N Powder
ST-2240 Nitricol N
ST-2260 Phosphate P
ST-2275 Acidifying S
ST-2280 Potassium K
ST-2297 Calcium S
ST-2440 Magnecol S
Multiparameter Pocket Sensor Consumables
SPT 105/1 pH 4 Buffer Solution, 500ml
PT 105/2 pH 10 Buffer Solution, 500ml
PT 105/3 pH 7 Buffer, 500ml
PT 142/3 Mid Range Conductivity Solution, 500ml

11 Appendix 5 - Palintest Aqua Pal App and the Palintest Portal
42
What is the Aqua Pal App?
Generating reliable and accurate test data is onlypart of the process of managing soil nutrientsand environmental impact.
Collating the data quickly and sharing withother members of the team can be the differencebetween effective control and failing to adhereto local regulatory standards.
The Palintest Aqua Pal app is intrinsic in theprocess of storing, sharing and managing dataproduced by the Soiltest 10 Bluetooth and alsoallows for additional data to be added manuallyfor the Big Data experience.
The Aqua Pal app is available for both iOS andAndroid (version 4.3 or later) devices that areequipped with Bluetooth SMART connectivity.
On first use the Aqua Pal app will require aregistration step for both the app and the securePalintest Portal. An internet connection is requiredto process the request as it will involve a secondstage authentication via the provided email address.
Once the sign up process is completed the AquaPal app and Palintest Portal are ready to go.
Connecting to the Aqua Pal App
Enable Bluetooth on the Soiltest 10 Bluetooth.The icon will appear on the Info Panel showingBluetooth is on but not connected.
Open the Aqua Pal app and log in using yourregistration credentials. Choose whether touse automatic or manual result addition.
To connect the Soiltest 10 Bluetooth press the ‘+’symbol in the top right hand corner of the devicescreen. This will produce the list of all locallyadvertising Bluetooth SMART devices.

43
11Appendix 5 - Palintest Aqua Pal App and the Palintest Portal
Select the Soiltest 10 Bluetooth you wish toconnect (see also Section 4.6 - Adding DeviceName) and Aqua Pal will link. The Info Panelwill display the connected Bluetooth icon.
Previously connected instruments are stored in the app for future selection.
Once connected, data can either be uploadedautomatically (if selected) or direct from thelog (all or a selected group).
Manual data entry is also possible for resultsgenerated with non-Bluetooth instruments orexternal devices such as TDS meters, flow metersor level sensors.
Connecting with the Palintest Portal
Also included with the Aqua Pal app isthe secure Palintest Portal found athttps://palintestportal.com
Data stored in the Aqua Pal app can be uploadedto the Palintest Portal when an internet connectionis available.
Data stored within the portal can be shared withteam members using the User Group functionality.Simply assign team members to the User Groupand they can view data generated by loggingin to the portal.
Results stored within the portal can be filteredby date, sample ID, Operator ID and parameter.
Data can be viewed graphically over time withthe status (in spec, nearing limit, out of spec)being indicated by a simple colour key.
Further InformationThe full guide to the Aqua Pal app and the PalintestPortal are available at www.palintest.comand available for download from the PalintestKnow portal.

Palintest LtdPalintest House, Kingsway, Team Valley,Gateshead, NE11 0NSTel: +44 (0)191 491 0808Fax: +44 (0)191 482 [email protected] (UK)[email protected] (International)
Palintest Australia and Asia Pacific1/53 Lorraine Street,Peakhurst Business Centre,Peakhurst, NSW 2210, AustraliaTel: +61 1300 131516Fax: +61 1300 [email protected]
Palintest USA1455 Jamike Avenue (Suite 100),Erlanger, Kentucky, 41018, USATel: +1 859 341 7423Toll Free: 800 835 9629Fax: +1 859 341 [email protected]
Palintest ChinaRoom 1711, Fanli Mansion,22 Chaowai Street, Chaoyang District,Beijing, 100020, PRCTel: +86 10 6588 6200Fax: +86 10 6588 [email protected]
Palintest Middle EastP.O. Box 27709,Engomi, 2432,Nicosia, CyprusTel: +357 22666080Fax: +357 [email protected]
ZI INST SKW 400 EN