3 Airbrush make-up (B12) ISTOCK/ © PIXELDIGITScws.cengage.co.uk/probeauty/19283_00_O3_p029-049.pdf3...
21
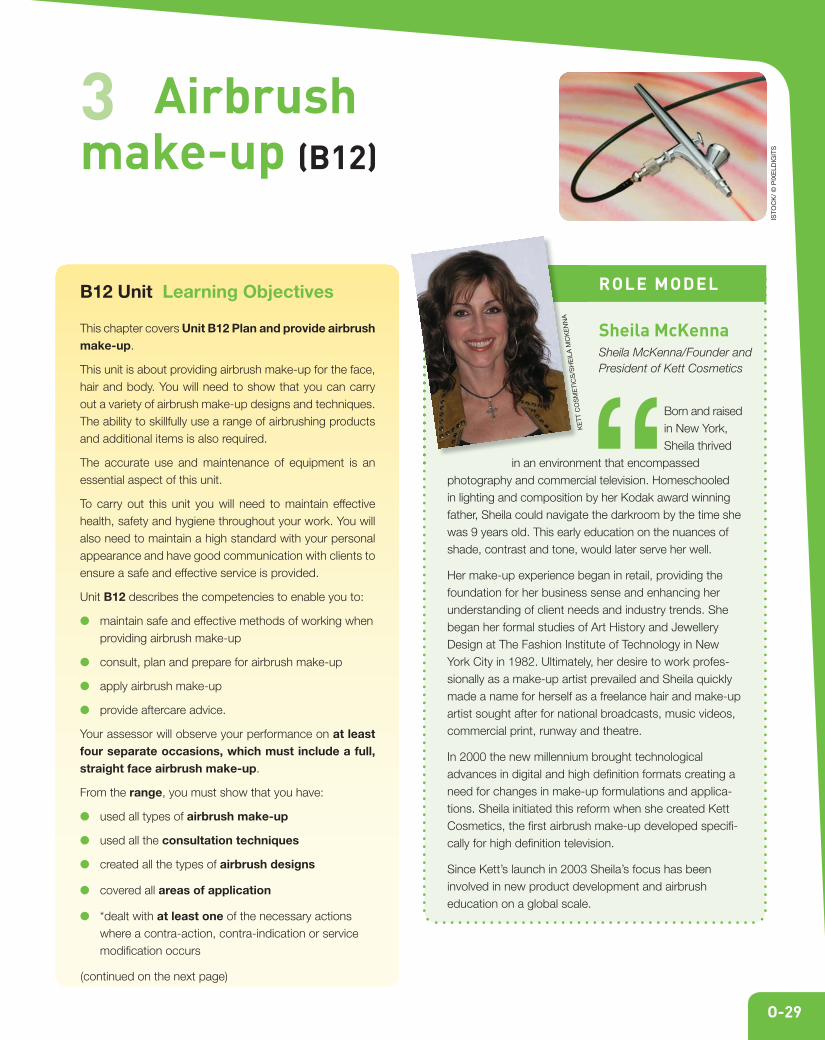
3 Airbrush make-up (B12) B12 Unit Learning Objectives This chapter covers Unit B12 Plan and provide airbrush make-up. This unit is about providing airbrush make-up for the face, hair and body. You will need to show that you can carry out a variety of airbrush make-up designs and techniques. The ability to skillfully use a range of airbrushing products and additional items is also required. The accurate use and maintenance of equipment is an essential aspect of this unit. To carry out this unit you will need to maintain effective health, safety and hygiene throughout your work. You will also need to maintain a high standard with your personal appearance and have good communication with clients to ensure a safe and effective service is provided. Unit B12 describes the competencies to enable you to: ● maintain safe and effective methods of working when providing airbrush make-up ● consult, plan and prepare for airbrush make-up ● apply airbrush make-up ● provide aftercare advice. Your assessor will observe your performance on at least four separate occasions, which must include a full, straight face airbrush make-up. From the range, you must show that you have: ● used all types of airbrush make-up ● used all the consultation techniques ● created all the types of airbrush designs ● covered all areas of application ● *dealt with at least one of the necessary actions where a contra-action, contra-indication or service modification occurs Born and raised in New York, Sheila thrived in an environment that encompassed photography and commercial television. Homeschooled in lighting and composition by her Kodak award winning father, Sheila could navigate the darkroom by the time she was 9 years old. This early education on the nuances of shade, contrast and tone, would later serve her well. Her make-up experience began in retail, providing the foundation for her business sense and enhancing her understanding of client needs and industry trends. She began her formal studies of Art History and Jewellery Design at The Fashion Institute of Technology in New York City in 1982. Ultimately, her desire to work profes- sionally as a make-up artist prevailed and Sheila quickly made a name for herself as a freelance hair and make-up artist sought after for national broadcasts, music videos, commercial print, runway and theatre. In 2000 the new millennium brought technological advances in digital and high definition formats creating a need for changes in make-up formulations and applica- tions. Sheila initiated this reform when she created Kett Cosmetics, the first airbrush make-up developed specifi- cally for high definition television. Since Kett’s launch in 2003 Sheila’s focus has been involved in new product development and airbrush education on a global scale. Sheila McKenna Sheila McKenna/Founder and President of Kett Cosmetics ROLE MODEL in an environme “ (continued on the next page) KETT COSMETICS/SHEILA MCKENNA ISTOCK/ © PIXELDIGITS O-29
Transcript of 3 Airbrush make-up (B12) ISTOCK/ © PIXELDIGITScws.cengage.co.uk/probeauty/19283_00_O3_p029-049.pdf3...
3 Airbrush make-up (B12)
B12 Unit Learning Objectives
Thi s chapter covers Unit B12 Plan and provide airbrush make-up.
This unit is about providing airbrush make-up for the face,
hair and body. You will need to show that you can carry
out a variety of airbrush make-up designs and techniques.
The ability to skillfully use a range of airbrushing products
and additional items is also required.
The a ccurate use and maintenance of equipment is an
essential aspect of this unit.
To ca rry out this unit you will need to maintain effective
health, safety and hygiene throughout your work. You will
also need to maintain a high standard with your personal
appearance and have good communication with clients to
ensure a safe and effective service is provided.
Unit B12 describes the competencies to enable you to:
● mai ntain safe and effective methods of working when
providing airbrush make-up
● con sult, plan and prepare for airbrush make-up
● app ly airbrush make-up
● pr ovide aftercare advice.
Your assessor will observe your performance on at least four separate occasions, which must include a full, straight face airbrush make-up.
From the range, you must show that you have:
● use d all types of airbrush make-up
● use d all the consultation techniques
● cre ated all the types of airbrush designs
● cov ered all areas of application
● *dea lt with at least one of the necessary actions
where a contra-action, contra-indication or service
modifi cation occurs
Born and raised
in New York,
Sheila thrived
in an environment that encompassed
photography and commercial television. Homeschooled
in lighting and composition by her Kodak award winning
father, Sheila could navigate the darkroom by the time she
was 9 years old. This early education on the nuances of
shade, contrast and tone, would later serve her well.
Her m ake-up experience began in retail, providing the
foundation for her business sense and enhancing her
understanding of client needs and industry trends. She
began her formal studies of Art History and Jewellery
Design at The Fashion Institute of Technology in New
York City in 1982. Ultimately, her desire to work profes-
sionally as a make-up artist prevailed and Sheila quickly
made a name for herself as a freelance hair and make-up
artist sought after for national broadcasts, music videos,
commercial print, runway and theatre.
In 20 00 the new millennium brought technological
advances in digital and high defi nition formats creating a
need for changes in make-up formulations and applica-
tions. Sheila initiated this reform when she created Kett
Cosmetics, the fi rst airbrush make-up developed specifi -
cally for high defi nition television.
Since Kett’s launch in 2003 Sheila’s focus has been
involved in new product development and airbrush
education on a global scale.
Sheil a McKennaSheil a McKenna/Founder and
President of Kett Cosmetics
ROLE MODEL
in an environme“
(continued on the next page)
KE
TT
CO
SM
ET
ICS
/SH
EIL
A M
CK
EN
NA
IST
OC
K/
© P
IXE
LD
IGIT
S
O-29
LEVEL 3 PR
OF
ES
SIO
NA
L B
EA
UT
Y T
HE
RA
PY
O-30
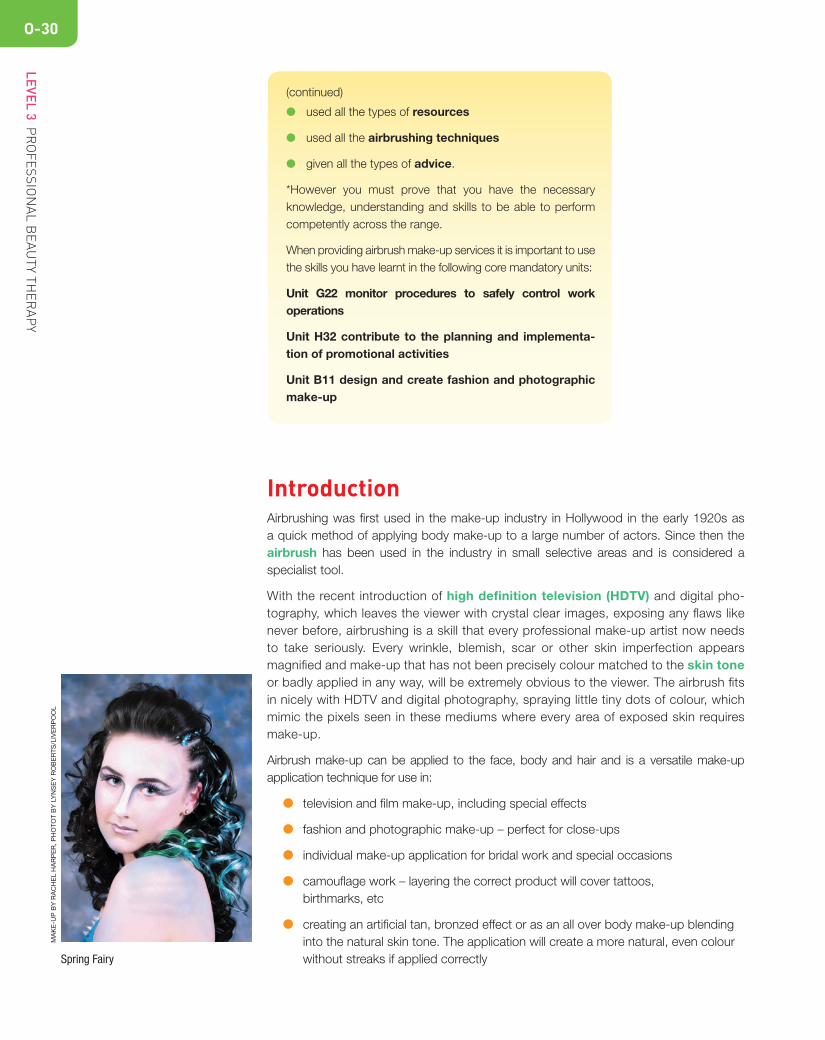
In troductionAirbr ushing was fi rst used in the make-up industry in Hollywood in the early 1920s as
a quick method of applying body make-up to a large number of actors. Since then the
airbrush has been used in the industry in small selective areas and is considered a
specialist tool.
With the recent introduction of high defi nition television (HDTV) and digital pho-
tography, which leaves the viewer with crystal clear images, exposing any fl aws like
never before, airbrushing is a skill that every professional make-up artist now needs
to take seriously. Every wrinkle, blemish, scar or other skin imperfection appears
magnifi ed and make-up that has not been precisely colour matched to the skin tone
or badly applied in any way, will be extremely obvious to the viewer. The airbrush fi ts
in nicely with HDTV and digital photography, spraying little tiny dots of colour, which
mimic the pixels seen in these mediums where every area of exposed skin requires
make-up.
Airbr ush make-up can be applied to the face, body and hair and is a versatile make-up
application technique for use in:
● telev ision and fi lm make-up, including special effects
● fashi on and photographic make-up – perfect for close-ups
● indiv idual make-up application for bridal work and special occasions
● camou fl age work – layering the correct product will cover tattoos,
birthmarks, etc
● creat ing an artifi cial tan, bronzed effect or as an all over body make-up blending
into the natural skin tone. The application will create a more natural, even colour
without streaks if applied correctly
● use d all the types of resources
● use d all the airbrushing techniques
● giv en all the types of advice.
*Howev er you must prove that you have the necessary
knowledge, understanding and skills to be able to perform
competently across the range.
When providing airbrush make-up services it is important to use
the skills you have learnt in the following core mandatory units:
Unit G22 monitor procedures to safely control work operations
Unit H32 contribute to the planning and implementa-tion of promotional activities
Unit B11 design and create fashion and photographic make-up
(continued)
Spring Fairy
MA
KE
-UP
BY
RA
CH
EL H
AR
PE
R, P
HO
TO
T B
Y L
YN
SE
Y R
OB
ER
TS
/LIV
ER
PO
OL
CH
AP
TER 3 (B
12
) AIR
BR
US
H M
AK
E-U
PO-31
● fanta sy body painting, temporary tattoos and henna applications. It is perfect for
highly detailed and pigmented pictures
● hair work – helping to hide root re-growth, putting in some highlights or with sten-
cils for fashion work.
Airbr ushing can be used to complement traditional make-up application techniques and
is mainly used in the industry for applying foundation base, contouring, highlighting and
blusher, but can also be used on the eyes and lips with the aid of masking techniques
and stencils.
It is important to consider the benefi ts and any limitations when preparing for and design-
ing any airbrush make-up. Below are some reasons to help you decide.
Ad vantages of airbrush make-up● creat es a lightweight, fl awless, long lasting fi nish (up to 18 hours)
● offer s perfection and precision
● is hy gienic, as you don’t have to touch the client’s face or body directly and it
prevents product contamination between clients
● no ne ed for sponges or powder puffs
● great for clients with sensitive skins as it reduces skin sensitivity which may be
created during manual make-up application techniques and most products used
are hypoallergenic having known skin sensitizers removed
● speed y application, especially when you have to work on several people or have
a large area to cover
● can b e used in conjunction with conventional make-up techniques and products,
enabling you, for example, to airbrush a base then continue with regular make-up
● price s of airbrush make-up products are comparable to any fi ne quality cosmetics
● recom mended by top fi lm producers for HDTV.
Di sadvantages of airbrush make-up● ini tial expense of purchasing the equipment and products
● is not as portable as your conventional make-up kit and is heavier to carry
● ele ctricity source is needed
● ext ra training and time is required to master the technique
● mai ntenance and cleaning of the airbrush is time-consuming.
Outcome 1: Maintain safe and effective methods of working when providing airbrush make-upB12 Maintain safe and effective methods of working when providing airbrush make-up by:
1 setting up the work area to meet legal, hygiene and service requirements
2 making sure that environmental conditions are suitable for the person on whom
you are working and the service
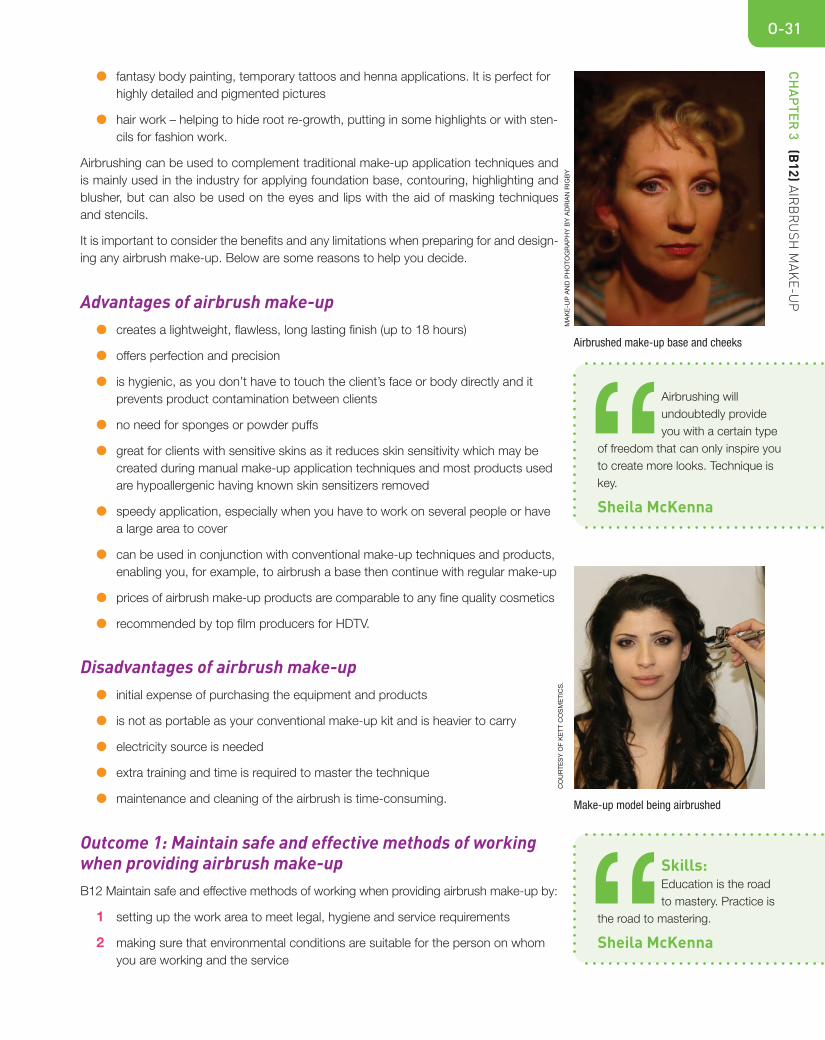
Airbrushed make-up base and cheeks
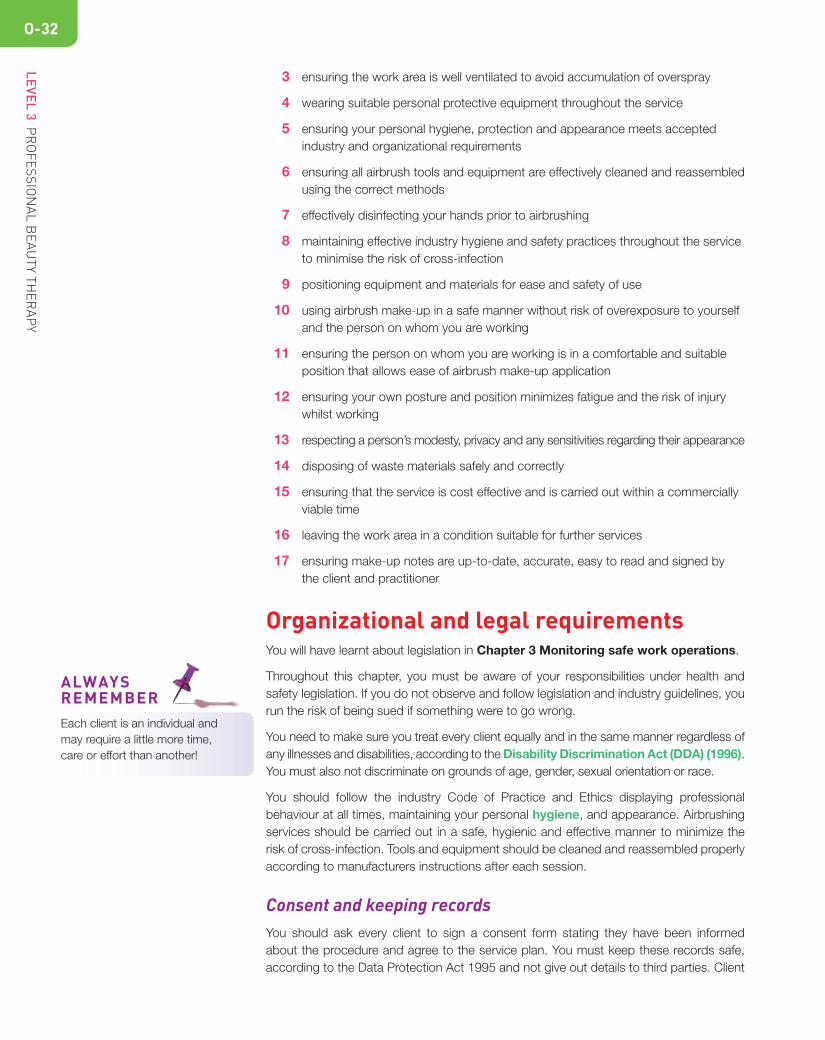
Make-up model being airbrushed
CO
UR
TE
SY
OF
KE
TT
CO
SM
ET
ICS
.M
AK
E-U
P A
ND
PH
OT
OG
RA
PH
Y B
Y A
DR
IAN
RIG
BY
“ Airbrushing will
undoubtedly provide
you with a certain type
of freedom that can only inspire you
to create more looks. Technique is
key.
Sheil a McKenna
“ Skil l s: Education is the road
to mastery. Practice is
the road to mastering.
Sheil a McKenna
LEVEL 3 PR
OF
ES
SIO
NA
L B
EA
UT
Y T
HE
RA
PY
O-32
3 ensuring the work area is well ventilated to avoid accumulation of overspray
4 wearing suitable personal protective equipment throughout the service
5 ensuring your personal hygiene, protection and appearance meets accepted
industry and organizational requirements
6 ensuring all airbrush tools and equipment are effectively cleaned and reassembled
using the correct methods
7 effectively disinfecting your hands prior to airbrushing
8 maintaining effective industry hygiene and safety practices throughout the service
to minimise the risk of cross-infection
9 positioning equipment and materials for ease and safety of use
10 using airbrush make-up in a safe manner without risk of overexposure to yourself
and the person on whom you are working
11 ensuring the person on whom you are working is in a comfortable and suitable
position that allows ease of airbrush make-up application
12 ensuring your own posture and position minimizes fatigue and the risk of injury
whilst working
13 respecting a person’s modesty, privacy and any sensitivities regarding their appearance
14 disposing of waste materials safely and correctly
15 ensuring that the service is cost effective and is carried out within a commercially
viable time
16 leaving the work area in a condition suitable for further services
17 ensuring make-up notes are up-to-date, accurate, easy to read and signed by
the client and practitioner
Or ganizational and legal requirementsYou w ill have learnt about legislation in Chapter 3 Monitoring safe work operations.
Throu ghout this chapter, you must be aware of your responsibilities under health and
safety legislation. If you do not observe and follow legislation and industry guidelines, you
run the risk of being sued if something were to go wrong.
You n eed to make sure you treat every client equally and in the same manner regardless of
any illnesses and disabilities, according to the Disability Discrimination Act (DDA) (1996). You must also not discriminate on grounds of age, gender, sexual orientation or race.
You s hould follow the industry Code of Practice and Ethics displaying professional
behaviour at all times, maintaining your personal hygiene, and appearance. Airbrushing
services should be carried out in a safe, hygienic and effective manner to minimize the
risk of cross-infection. Tools and equipment should be cleaned and reassembled properly
according to manufacturers instructions after each session.
C o nsent and keeping recordsYou s hould ask every client to sign a consent form stating they have been informed
about the procedure and agree to the service plan. You must keep these records safe,
according to the Data Protection Act 1995 and not give out details to third parties. Client
ALWAYSREMEMBER
Each client is an individual and
may require a little more time,
care or effort than another!
CH
AP
TER 3 (B
12
) AIR
BR
US
H M
AK
E-U
PO-33
record cards should also contain details of the service, contra-indications and actions,
any problems incurred and recommendations given. These and all make-up notes should
be kept up-to-date, be accurate, easy to read, and signed by yourself and the client.
M i norsIn th e case of working on minors under the age of 16, it is imperative that you have their
parent or guardian present during service and a written signed consent to service.
C o st-effectiveness, effi ciency and pricingAll s ervices should be carried out in a commercially acceptable time and pricing struc-
tures set. The information should be given to the client prior to the service to prevent any
misunderstandings occurring later. When setting prices, consider the time taken, cost of
products and amount of product to be used. Because airbrushing has so many advan-
tages to the client and the initial equipment is expensive, pricing structures are generally a
third to double the cost of a conventional make-up. An airbrush beauty make-up should
take around 2 minutes to apply the base, contouring, highlighting and blusher.
The l ength of time for application of body make-up will depend on the complexity of the
design. A full even colour wash of airbrush make-up will be a lot quicker than make-up
applied by conventional methods. However, time is taken up when having to clean the
airbrush in between changing colours.
Sa fe and effective working practicesYou m ay fi nd yourself airbrushing in a purpose built studio, on location or in a client’s own
home. Wherever you are you will need:
● Adequ ate light and heating in which to work. You need to see what you are creat-
ing clearly without shadows and the client may need to remove clothing if you are
working on the body, so they must be warm and comfortable.
● Adequ ate ventilation. To avoid accumulation of overspray, make sure there is a
constant fl ow of air throughout the premises or a ventilation system installed.
There may also be unpleasant odours generated from cleaning methods when
using alcohol-based airbrush make-up.
● An el ectricity source to plug in your compressor. Plugs and sockets should be
in good working order and equipment should be checked every 12 months by a
qualifi ed electrician meeting health and safety legislative requirements.
● A fl a t work surface large enough to accommodate your equipment and products,
which should be positioned for ease and safety of use. Note that hoses should
not be left dangling and compressors vibrate and can move if not steady! The
work surface should be cleaned and wiped down with disinfectant before equip-
ment and products are laid out. After the service, the work area should be wiped
down again and left clean and tidy ready for the next or other services.
● A sea ting area. The client should be at the correct height so you don’t have to
bend and are close enough to the equipment and products so there is no unnec-
essary reaching and twisting. Your own posture is important and you should take
great care to ensure that your working positions minimize fatigue and the risk of
injury to yourself and others. If you are working on the body, the client may need
to be in a reclining or standing position. Make sure you have enough space.
DIA
NA
ES
TR
AD
A
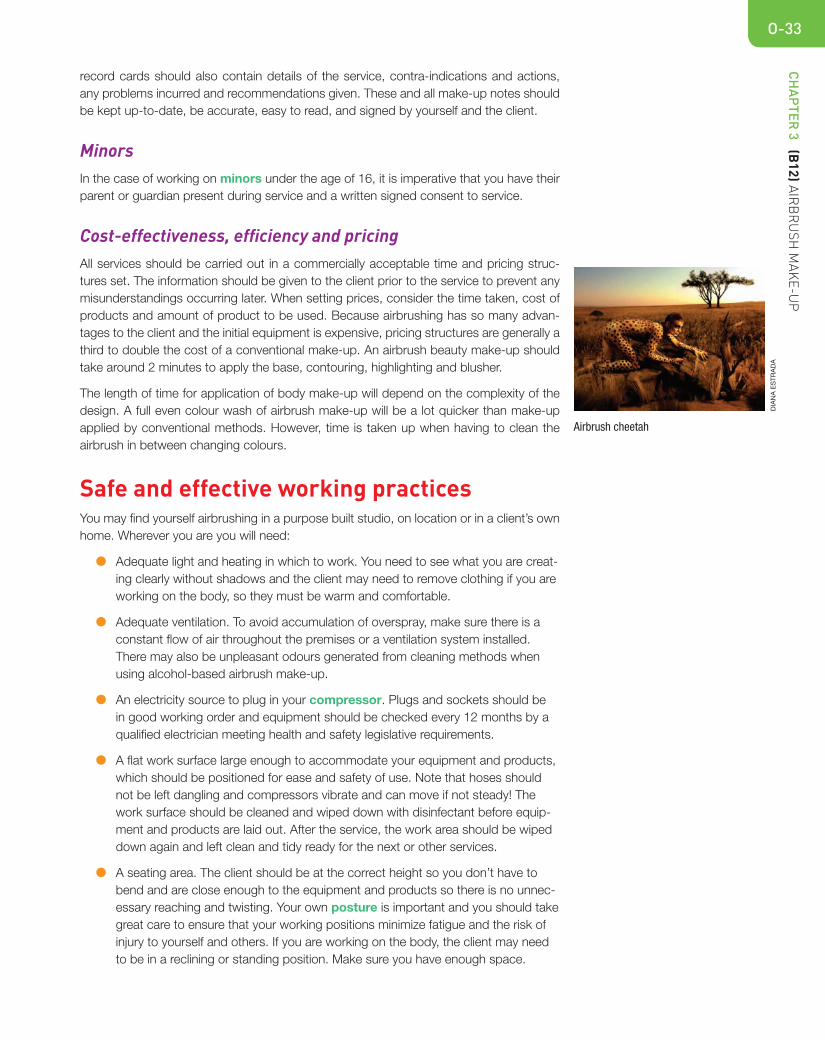
Airbrush cheetah
LEVEL 3 PR
OF
ES
SIO
NA
L B
EA
UT
Y T
HE
RA
PY
O-34
There should also be if possible:
● A sin k and water supply where you can wash your hands. Disinfectant hand
gel should be part of your kit, especially in the event of a non-existent water
supply.
● A mir ror, so you and the client can see the work in progress.
● A bin to dispose of waste from services. Consider that if you are using alcohol-
based products, during the cleaning process you will end up with tissues soaked
in alcohol. These should be placed in a sealed plastic bag to prevent fumes from
lingering.
Pe rsonal protective equipmentBoth you and the client should be protected from the risk of ‘overspray’ generated from
the airbrush service. When the airbrush is in use, there will be an amount of product which
will linger in the air as dust and eventually fall onto surfaces other than just the intended
face, body or hair.
For t his reason, your own clothing should be protected, depending on the situation,
by personal protective equipment (PPE) – an overall or apron. The client’s clothing
should be protected by an extra long gown which should cover all clothing and footwear
and tissues folded around the edge of clothing and hair. Steps should be taken to protect
anyone in the working environment from breathing in the overspray by having adequate
ventilation in place in the form of extraction fans or systems.
An op en window may be all that is required for low usage, such as creating a bridal make-
up in the client’s home. Disposable dust masks are also useful as they will block out most
of the dust and can be worn by yourself and the client when you feel the need. Every
airbrushing situation will be different and you will have to weigh up the risks presented
with each job, assess them and carry out suitable precautions for the health and safety
of everyone concerned.
Consultation, planning and preparationPrior to airbrush application, a consultation with the client should be carried out to:
● check for contra-indications
● deter mine their skin type, condition and tone
● speci fy necessary resources accurately
● decid e what type of products to use and create an appropriate design plan
● fi ll in and sign consent forms.
Suffi cient time must be allowed to explain the airbrushing procedure and to encourage
the client to ask questions and clarify any points. Be aware of differences in clients needs
infl uenced by culture, religion, age, gender and disabilities, which must be taken into con-
sideration and sometimes extra time should be allowed to meet their needs. Consultation
techniques should be carried out in a friendly and polite manner to determine the required
design and area(s) of application. The client’s modesty and privacy should be respected
at all times and any sensitivities they have about their appearance noted and dealt with
in an appropriate manner. What may feel like a huge problem for the client may seem
insignifi cant to you and vice versa.
HEALTH& SAFETY
● Whe n inhaled, fi nely dispersed
paint and solvents can produce
serious health hazards.
● Ask your client to keep their
eyes closed when applying the
airbrush make-up to the face.
Inform them of any requirements
before the procedure begins.
“ Using the power of
initiative is what makes
doers out of thinkers.
Sheil a McKenna
CH
AP
TER 3 (B
12
) AIR
BR
US
H M
AK
E-U
PO-35
HEALTH& SAFETY
Contr a-indications and contra-actions
1 Che ck your client for contra-indications. Ask questions to ascertain if they have any
respiratory problems such as asthma, bronchitis, lung problems or a common cold,
etc. as this could mean the airbrushing service may not be suitable for them. Visual
and manual techniques should be used to check the condition of the skin. Some con-
ditions such as herpes simplex for example, should not interfere with airbrush applica-
tion as there is absolutely no need to touch the client’s skin with your hands and as
long as you modify the service and take other precautions to avoid cross-infection
and secondary infection by using hygienic practices.
2 Use hygienic practices – wash hands regularly, and use anti-bacterial hand cleanser or
disposable tissue cloths when on location; use clean gowns and towels, disposable gloves
if working on someone with contra-indications; keep tools and equipment clean and
sterile, if combining conventional make-up with airbrushing – never dip tools straight into
make-up – remove with a spatula; wipe down working areas with anti-bacterial cleaner.
3 If contra-actions occur, carefully remove make-up immediately and advise your client
to seek medical advice if symptoms persist.
Creat e a design portfolio for reference purposes to give the client some ideas and promote airbrush make-up as a whole. You can keep one fi le with ideas from other peoples, work, plus another with examples of you own designs which you should continue to add to on a regular basis. Remember that airbrush make-up will be new to many clients and they need to understand its uses and limitations.
TOP
TIP
“ Believing in yourself and
the products that
you use will bring the
positive environment necessary
to enjoy what you are doing and
ultimately will provide your customer
with what they desire.
Sheil a McKenna
The c lient should be seated and any jewellery and accessories removed and put in a
safe place where the client has visible access. If employed follow your workplace policy
regarding this. The client’s clothes and hair should be protected and the skin cleansed and
checked for contra-indications. If you fi nd the client has contra-indications, you should
explain why the service cannot be carried out or may need to be modifi ed and encourage
them where relevant to seek medical advice. You should not name specifi c conditions
yourself, as you are not medically qualifi ed to do so and you could give the wrong advice
or worry the client unnecessarily.
After determining the client’s skin type, condition, tone and reasons for airbrush make-up,
you will need to decide on suitable products to create the desired effect for the design
plan. Time must be allowed to research ideas and themes for the design plan making
sure it meets all the criteria agreed upon. Try to create the make-up in the same lighting
conditions which the fi nal make-up will be viewed.
Depen ding on the media for which airbrush make-up has been chosen, you may need to
specify any resources that you require. Accurate prices for airbrush application should be
discussed and agreed with the client prior to any work commencing.
Essential equipment and materials Some airbrush manufacturers sell starter kits which usually consist of the equipment plus
a small selection of trial size airbrush make-up foundations. From here you can add extra
colours and sizes. When deciding which type of airbrush and compressor to purchase, do
your research carefully, consider its desired purpose and size, and speak to other make-up
artists for recommendations. Choose equipment, resources and airbrush make-up which
will be suitable for the agreed design plan and always follow manufacturer’s instructions.
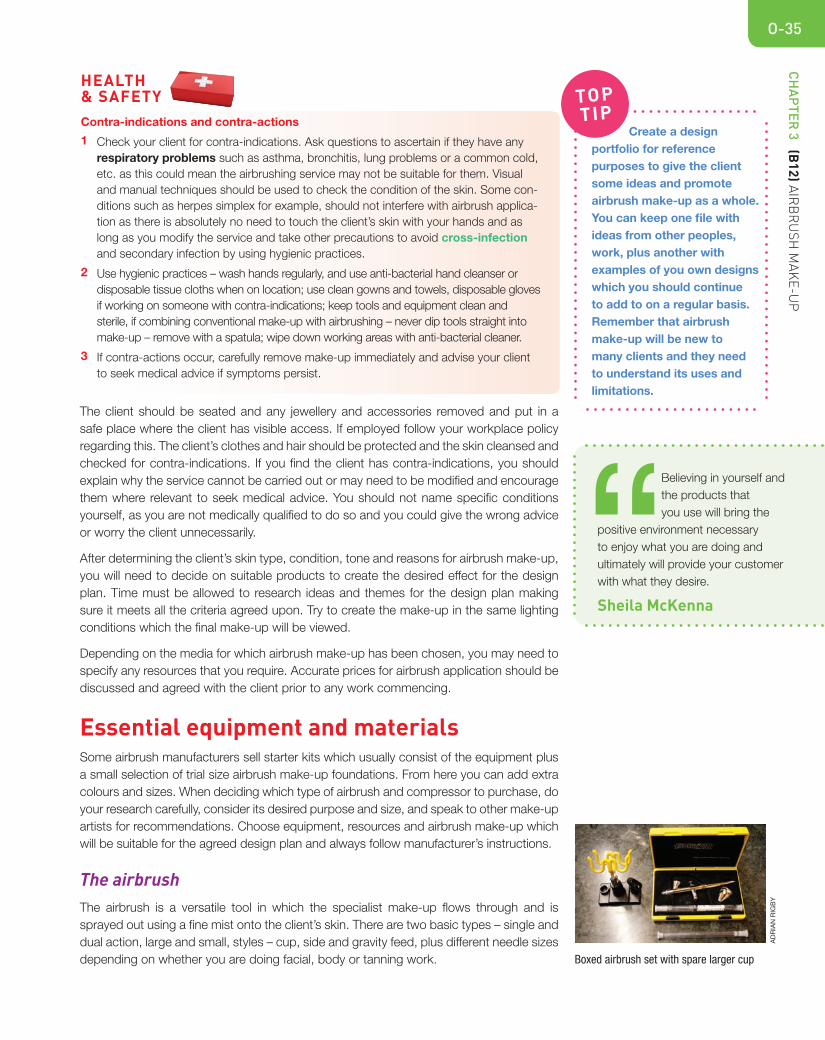
The airbrushThe a irbrush is a versatile tool in which the specialist make-up fl ows through and is
sprayed out using a fi ne mist onto the client’s skin. There are two basic types – single and
dual action, large and small, styles – cup, side and gravity feed, plus different needle sizes
depending on whether you are doing facial, body or tanning work. Boxed airbrush set with spare larger cup
AD
RIA
N R
IGB
Y
LEVEL 3 PR
OF
ES
SIO
NA
L B
EA
UT
Y T
HE
RA
PY
O-36
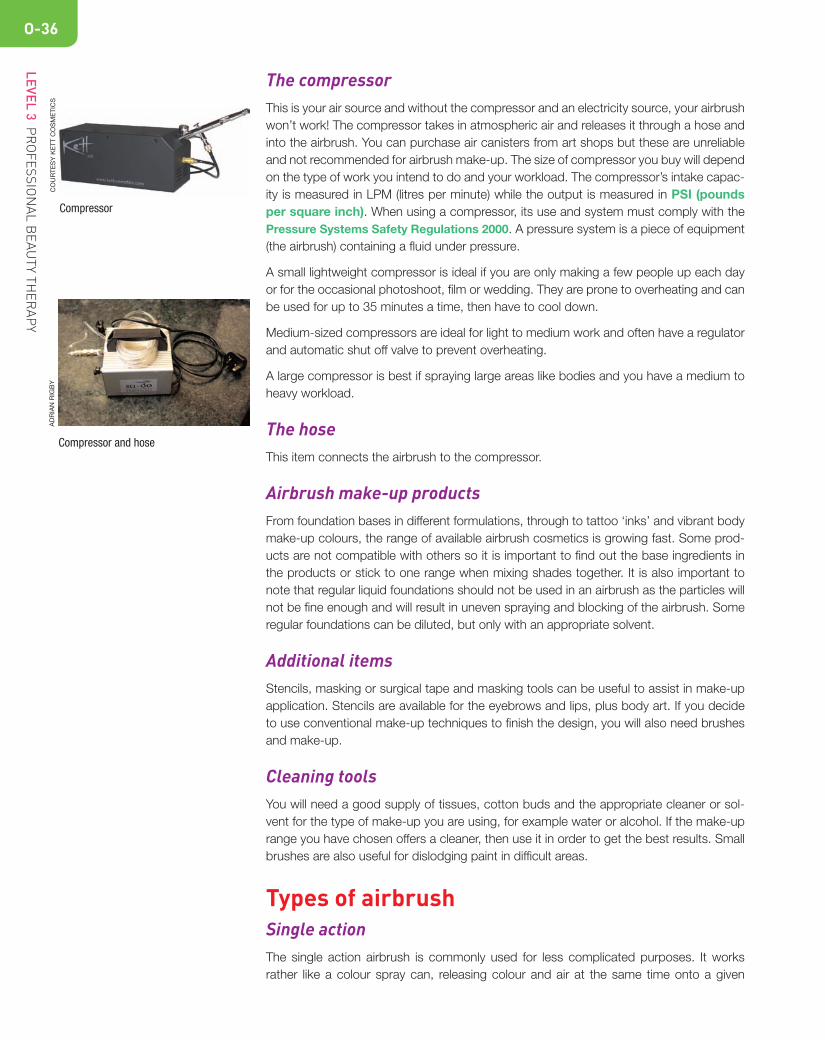
The compressorThis is your air source and without the compressor and an electricity source, your airbrush
won’t work! The compressor takes in atmospheric air and releases it through a hose and
into the airbrush. You can purchase air canisters from art shops but these are unreliable
and not recommended for airbrush make-up. The size of compressor you buy will depend
on the type of work you intend to do and your workload. The compressor’s intake capac-
ity is measured in LPM (litres per minute) while the output is measured in PSI (pounds per square inch). When using a compressor, its use and system must comply with the
Pressure Systems Safety Regulations 2000. A pressure system is a piece of equipment
(the airbrush) containing a fl uid under pressure.
A sma ll lightweight compressor is ideal if you are only making a few people up each day
or for the occasional photoshoot, fi lm or wedding. They are prone to overheating and can
be used for up to 35 minutes a time, then have to cool down.
Mediu m-sized compressors are ideal for light to medium work and often have a regulator
and automatic shut off valve to prevent overheating.
A lar ge compressor is best if spraying large areas like bodies and you have a medium to
heavy workload.
The hoseThis item connects the airbrush to the compressor.
Airbrush make-up productsFrom foundation bases in different formulations, through to tattoo ‘inks’ and vibrant body
make-up colours, the range of available airbrush cosmetics is growing fast. Some prod-
ucts are not compatible with others so it is important to fi nd out the base ingredients in
the products or stick to one range when mixing shades together. It is also important to
note that regular liquid foundations should not be used in an airbrush as the particles will
not be fi ne enough and will result in uneven spraying and blocking of the airbrush. Some
regular foundations can be diluted, but only with an appropriate solvent.
Ad ditional itemsStenc ils, masking or surgical tape and masking tools can be useful to assist in make-up
application. Stencils are available for the eyebrows and lips, plus body art. If you decide
to use conventional make-up techniques to fi nish the design, you will also need brushes
and make-up.
Cl eaning toolsYou w ill need a good supply of tissues, cotton buds and the appropriate cleaner or sol-
vent for the type of make-up you are using, for example water or alcohol. If the make-up
range you have chosen offers a cleaner, then use it in order to get the best results. Small
brushes are also useful for dislodging paint in diffi cult areas.
T y pes of airbrush
Si ngle actionThe s ingle action airbrush is commonly used for less complicated purposes. It works
rather like a colour spray can, releasing colour and air at the same time onto a given
Compressor
Compressor and hose
CO
UR
TE
SY
KE
TT
CO
SM
ET
ICS
AD
RIA
N R
IGB
Y
CH
AP
TER 3 (B
12
) AIR
BR
US
H M
AK
E-U
PO-37
subject, but with more control. The trigger on the airbrush is simply pushed down, and
the paint will fl ow. The amount of paint released can be adjusted by turning the nozzle
before the trigger is pressed.
Do uble actionThe d ouble action airbrush is the more obvious choice for the professional make-up art-
ist, offering much more control and accuracy. It will perform much more complicated
operations. It has a trigger which is pushed down to release air, then gently pulled back
to release the colour.
Small airbrushes are generally chosen for facial work, whereas the larger ones are good
for body painting and tanning.
St yles of airbrush
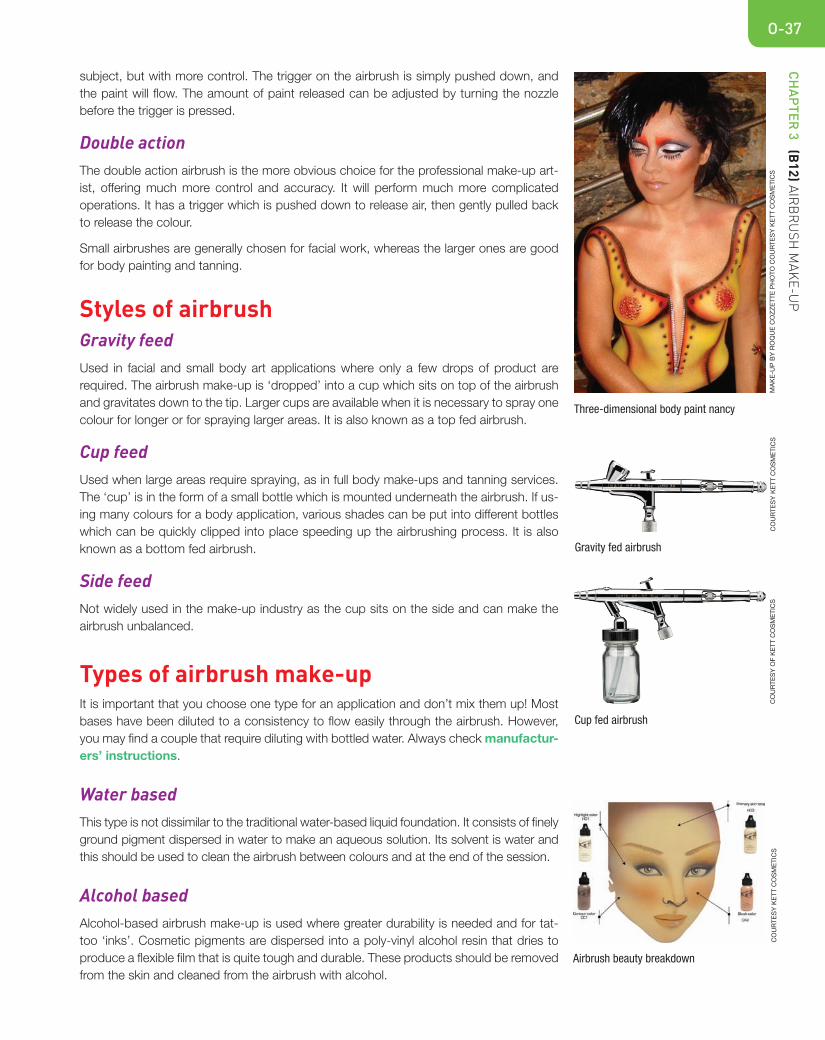
Gr avity feedUsed in facial and small body art applications where only a few drops of product are
required. The airbrush make-up is ‘dropped’ into a cup which sits on top of the airbrush
and gravitates down to the tip. Larger cups are available when it is necessary to spray one
colour for longer or for spraying larger areas. It is also known as a top fed airbrush.
Cu p feedUsed when large areas require spraying, as in full body make-ups and tanning services.
The ‘cup’ is in the form of a small bottle which is mounted underneath the airbrush. If us-
ing many colours for a body application, various shades can be put into different bottles
which can be quickly clipped into place speeding up the airbrushing process. It is also
known as a bottom fed airbrush.
S i de feed Not w idely used in the make-up industry as the cup sits on the side and can make the
airbrush unbalanced.
T y pes of airbrush make-upIt is important that you choose one type for an application and don’t mix them up! Most
bases have been diluted to a consistency to fl ow easily through the airbrush. However,
you may fi nd a couple that require diluting with bottled water. Always check manufactur-ers’ instructions.
Wa ter basedThis type is not dissimilar to the traditional water-based liquid foundation. It consists of fi nely
ground pigment dispersed in water to make an aqueous solution. Its solvent is water and
this should be used to clean the airbrush between colours and at the end of the session.
Al cohol basedAlcoh ol-based airbrush make-up is used where greater durability is needed and for tat-
too ‘inks’. Cosmetic pigments are dispersed into a poly-vinyl alcohol resin that dries to
produce a fl exible fi lm that is quite tough and durable. These products should be removed
from the skin and cleaned from the airbrush with alcohol.
Three-dimensional body paint nancy
MA
KE
-UP
BY
RO
QU
E C
OZ
ZE
TT
E P
HO
TO
CO
UR
TE
SY
KE
TT
CO
SM
ET
ICS
Gravity fed airbrush
Cup fed airbrush
CO
UR
TE
SY
KE
TT
CO
SM
ET
ICS
CO
UR
TE
SY
OF
KE
TT
CO
SM
ET
ICS
Airbrush beauty breakdown
CO
UR
TE
SY
KE
TT
CO
SM
ET
ICS
LEVEL 3 PR
OF
ES
SIO
NA
L B
EA
UT
Y T
HE
RA
PY
O-38
Si licone basedThis is the most recent formulation and addition to the range. Many make-up artists
believe that silicone-based cosmetics give the most fl awless fi nish and last the longest,
becoming the obvious choice for 12-hour-plus fi lming days.
Other formulations include dihydroxyacetone-based products which are used in artifi -
cial tanning, polymer water-based which is common and polymer-SD alcohol 40-based.
Polymers are found in traditional make-up items such as mascara and other eye products.
They dry to create a continuous fi lm of colour.
BEST PRACTICE
● Do not spray unnecessary
make-up into the air with the
airbrush – always direct it at
yourself, paper or the client to
prevent it from spreading out-
side the intended environment.
● Cor rectly test pressure and
operation prior to use on the
client.
● Alw ays test the pressure on the
back of your hand immediately
before applying it to the client’s
skin or hair.
● Try spraying the airbrush make-
up on yourself, or ask another
make-up artist to do it so you
can experience how it feels on
the skin.
● Use the airbrushing techniques
in a controlled way and at the
correct distance from the body
to achieve the desired effect.
● Adj ust air pressure to suit areas
of application. Set at between 3
and 8 PSI for facial application
and between 9 and 15 PSI for
body work. High pressures can
be dangerous and cause injury.
● You will only need to pull back
the trigger a short distance to
achieve subtle layers. If you
pull it back all the way, the
results are often too heavy and
unnatural.
Alway s use bottled water to dilute make-up and clean the airbrush as it is less likely to contain impurities that will cause airbrushing problems.
TOP
TIP
Narrow spray pattern
CO
UR
TE
SY
KE
TT
CO
SM
ET
ICS
Ai rbrush techniquesBefor e you attempt to master the art of airbrushing a face, you should fi rst practise on
paper. Experiment with lines and shapes using stencils and masking tape to create
a hard edge and then freehand to create colour fading and blending one colour into
another. Try creating a three-dimensional ball with highlighting and shading techniques
and circular passes with the airbrush to give it a defi nite hard shaded edge, fading the
colour gradually into a highlighted centre.
Plug in your compressor, adjust the PSI to between 3 and 6 PSI, push the trigger on your air-
brush down to release the air, then slowly begin to pull the trigger back to release the colour.
If you use the wrong type of compressor for the airbrush or the airbrush is dirty, pulsing may
occur as a result of improper airfl ow. Pulsing is also referred to as an application technique
where the trigger of the airbrush is intermittently pressed to create different textured results.
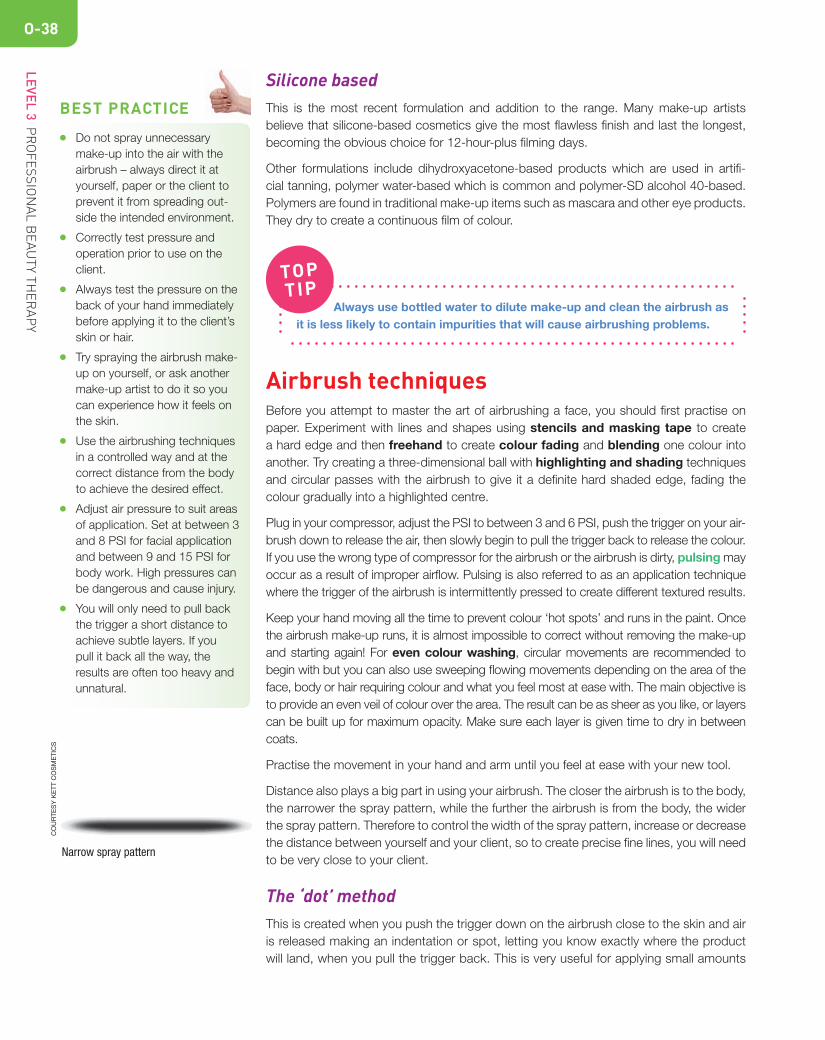
Keep your hand moving all the time to prevent colour ‘hot spots’ and runs in the paint. Once
the airbrush make-up runs, it is almost impossible to correct without removing the make-up
and starting again! For even colour washing, circular movements are recommended to
begin with but you can also use sweeping fl owing movements depending on the area of the
face, body or hair requiring colour and what you feel most at ease with. The main objective is
to provide an even veil of colour over the area. The result can be as sheer as you like, or layers
can be built up for maximum opacity. Make sure each layer is given time to dry in between
coats.
Pract ise the movement in your hand and arm until you feel at ease with your new tool.
Dista nce also plays a big part in using your airbrush. The closer the airbrush is to the body,
the narrower the spray pattern, while the further the airbrush is from the body, the wider
the spray pattern. Therefore to control the width of the spray pattern, increase or decrease
the distance between yourself and your client, so to create precise fi ne lines, you will need
to be very close to your client.
The ‘dot’ methodThis is created when you push the trigger down on the airbrush close to the skin and air
is released making an indentation or spot, letting you know exactly where the product
will land, when you pull the trigger back. This is very useful for applying small amounts
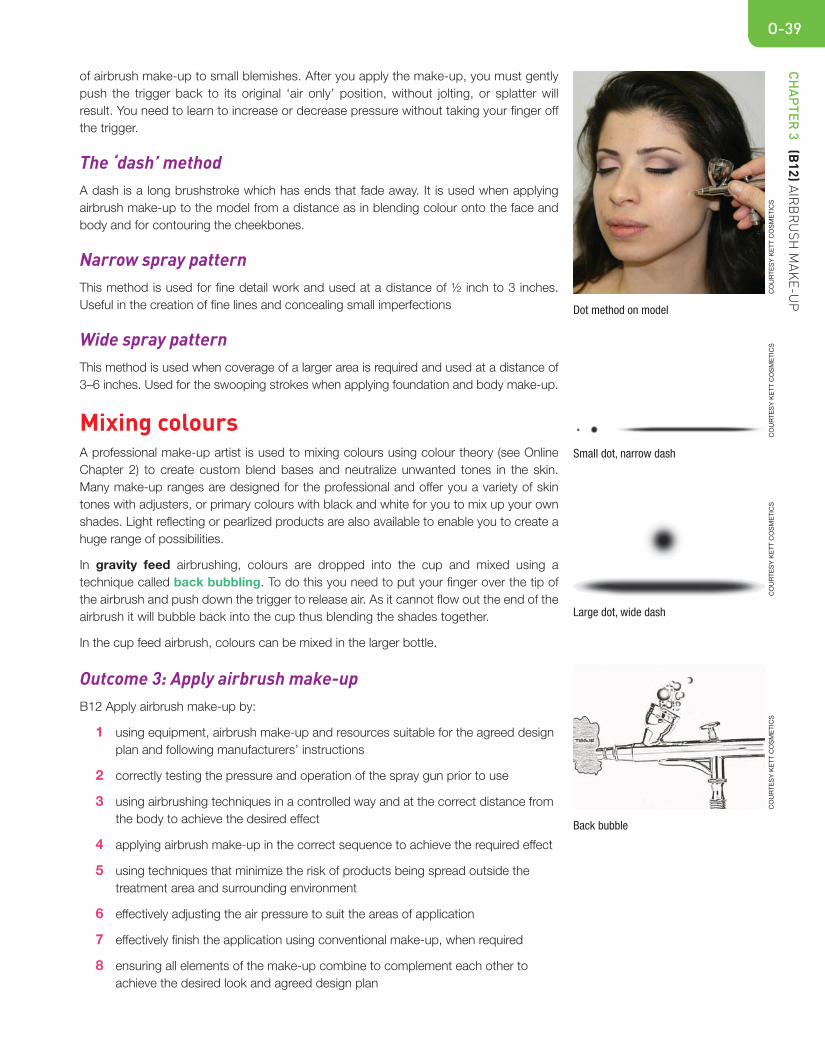
CH
AP
TER 3 (B
12
) AIR
BR
US
H M
AK
E-U
PO-39
of airbrush make-up to small blemishes. After you apply the make-up, you must gently
push the trigger back to its original ‘air only’ position, without jolting, or splatter will
result. You need to learn to increase or decrease pressure without taking your fi nger off
the trigger.
Th e ‘dash’ methodA das h is a long brushstroke which has ends that fade away. It is used when applying
airbrush make-up to the model from a distance as in blending colour onto the face and
body and for contouring the cheekbones.
N a rrow spray patternThis method is used for fi ne detail work and used at a distance of ½ inch to 3 inches.
Useful in the creation of fi ne lines and concealing small imperfections
W i de spray patternThis method is used when coverage of a larger area is required and used at a distance of
3–6 inches. Used for the swooping strokes when applying foundation and body make-up.
M i xing coloursA pro fessional make-up artist is used to mixing colours using colour theory (see Online
Chapter 2) to create custom blend bases and neutralize unwanted tones in the skin.
Many make-up ranges are designed for the professional and offer you a variety of skin
tones with adjusters, or primary colours with black and white for you to mix up your own
shades. Light refl ecting or pearlized products are also available to enable you to create a
huge range of possibilities.
In gr avity feed airbrushing, colours are dropped into the cup and mixed using a
technique called back bubbling. To do this you need to put your fi nger over the tip of
the airbrush and push down the trigger to release air. As it cannot fl ow out the end of the
airbrush it will bubble back into the cup thus blending the shades together.
In t h e cup feed airbrush, colours can be mixed in the larger bottle.
Outcome 3: Apply airbrush make-upB12 Apply airbrush make-up by:
1 using equipment, airbrush make-up and resources suitable for the agreed design
plan and following manufacturers’ instructions
2 correctly testing the pressure and operation of the spray gun prior to use
3 using airbrushing techniques in a controlled way and at the correct distance from
the body to achieve the desired effect
4 applying airbrush make-up in the correct sequence to achieve the required effect
5 using techniques that minimize the risk of products being spread outside the
treatment area and surrounding environment
6 effectively adjusting the air pressure to suit the areas of application
7 effectively fi nish the application using conventional make-up, when required
8 ensuring all elements of the make-up combine to complement each other to
achieve the desired look and agreed design plan
Dot method on model
CO
UR
TE
SY
KE
TT
CO
SM
ET
ICS
Large dot, wide dash
CO
UR
TE
SY
KE
TT
CO
SM
ET
ICS
Back bubble
CO
UR
TE
SY
KE
TT
CO
SM
ET
ICS
Small dot, narrow dash
CO
UR
TE
SY
KE
TT
CO
SM
ET
ICS
LEVEL 3 PR
OF
ES
SIO
NA
L B
EA
UT
Y T
HE
RA
PY
O-40
9 effectively sealing the fi nished make-up design, if required
10 ensuring the fi nished result meets the design plan
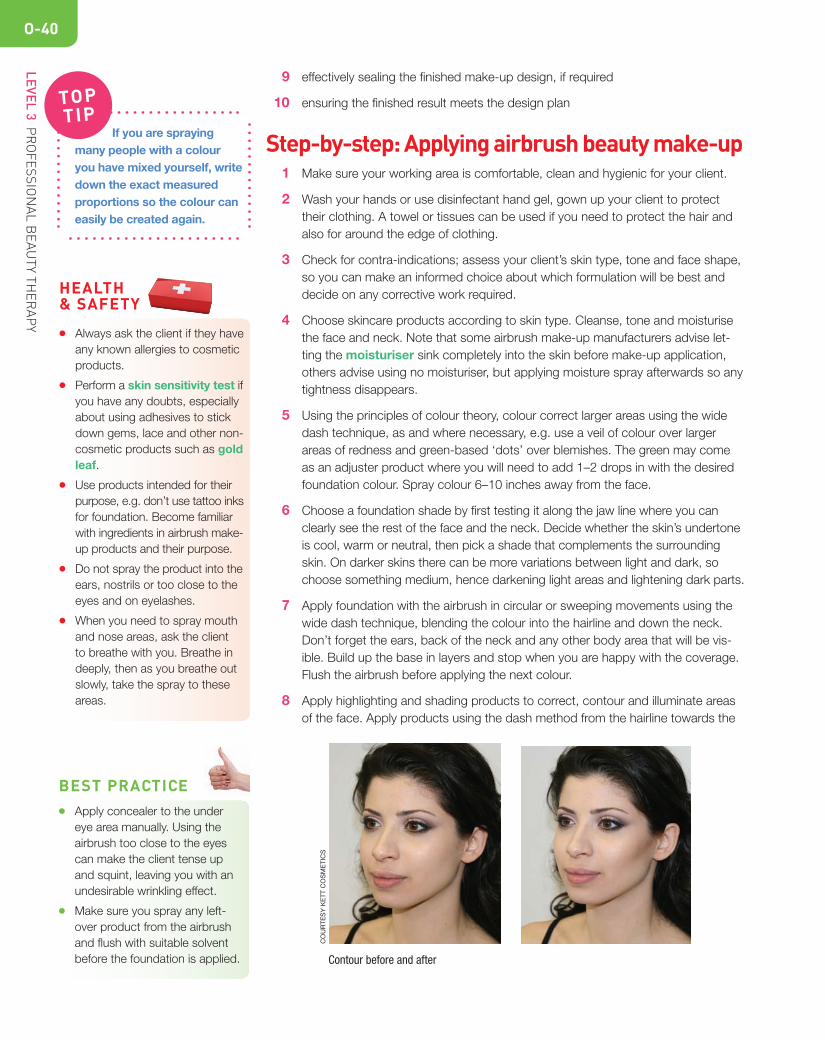
Step-by-step: A p plying airbrush beauty make-up 1 Make sure your working area is comfortable, clean and hygienic for your client.
2 Wash your hands or use disinfectant hand gel, gown up your client to protect
their clothing. A towel or tissues can be used if you need to protect the hair and
also for around the edge of clothing.
3 Check for contra-indications; assess your client’s skin type, tone and face shape,
so you can make an informed choice about which formulation will be best and
decide on any corrective work required.
4 Choos e skincare products according to skin type. Cleanse, tone and moisturise
the face and neck. Note that some airbrush make-up manufacturers advise let-
ting the moisturiser sink completely into the skin before make-up application,
others advise using no moisturiser, but applying moisture spray afterwards so any
tightness disappears.
5 Using the principles of colour theory, colour correct larger areas using the wide
dash technique, as and where necessary, e.g. use a veil of colour over larger
areas of redness and green-based ‘dots’ over blemishes. The green may come
as an adjuster product where you will need to add 1–2 drops in with the desired
foundation colour. Spray colour 6–10 inches away from the face.
6 Choos e a foundation shade by fi rst testing it along the jaw line where you can
clearly see the rest of the face and the neck. Decide whether the skin’s undertone
is cool, warm or neutral, then pick a shade that complements the surrounding
skin. On darker skins there can be more variations between light and dark, so
choose something medium, hence darkening light areas and lightening dark parts.
7 Apply foundation with the airbrush in circular or sweeping movements using the
wide dash technique, blending the colour into the hairline and down the neck.
Don’t forget the ears, back of the neck and any other body area that will be vis-
ible. Build up the base in layers and stop when you are happy with the coverage.
Flush the airbrush before applying the next colour.
8 Apply highlighting and shading products to correct, contour and illuminate areas
of the face. Apply products using the dash method from the hairline towards the
If yo u are spraying many people with a colour you have mixed yourself, write down the exact measured proportions so the colour can easily be created again.
TOP
TIP
HEALTH& SAFETY
● Alw ays ask the client if they have
any known allergies to cosmetic
products.
● Per form a skin sensitivity test if you have any doubts, especially
about using adhesives to stick
down gems, lace and other non-
cosmetic products such as gold leaf.
● Use products intended for their
purpose, e.g. don’t use tattoo inks
for foundation. Become familiar
with ingredients in airbrush make-
up products and their purpose.
● Do not spray the product into the
ears, nostrils or too close to the
eyes and on eyelashes.
● Whe n you need to spray mouth
and nose areas, ask the client
to breathe with you. Breathe in
deeply, then as you breathe out
slowly, take the spray to these
areas.
BEST PRACTICE
● App ly concealer to the under
eye area manually. Using the
airbrush too close to the eyes
can make the client tense up
and squint, leaving you with an
undesirable wrinkling effect.
● Mak e sure you spray any left-
over product from the airbrush
and fl ush with suitable solvent
before the foundation is applied. Contour before and after
CO
UR
TE
SY
KE
TT
CO
SM
ET
ICS

CH
AP
TER 3 (B
12
) AIR
BR
US
H M
AK
E-U
PO-41
centre of the face. Highlight under the eyes, across the top of the cheekbones
and down the centre of the nose. Shade around the hairline and under the
cheekbones. Apply corrective make-up to the areas where the client requires it.
Flush the airbrush before applying blusher.
9 Appl y blusher using circular movements on the apples of the cheeks, then sweep
the colour along and up the cheekbone. You can stand around 4 inches away
from your client this time. The style of blusher will be determined by the overall
design plan. Flush the airbrush before going onto the eyes, or stop here!
10 Apply setting powder if the airbrush make-up manufacturer advises it. Some
airbrush foundations don’t need it. Some clients with a very oily skin will require
powdering.
BEST PRACTICE
You c an stop airbrushing here and continue with conventional make-up products, or
continue. If you stop, make sure you fl ush out your airbrush with the suitable solvent to
clean it and don’t forget to dismantle it and give it a thorough cleaning at the end of the
session. You may also need to adjust the air pressure, distance from client and change
your needle for more precision work. Ensure that all elements of the make-up combine to
complement each other.
Pleas e note that some experienced make-up artists often choose not to airbrush make-up
around the eye area as they feel it can be dangerous. To attempt these next stages, you
and your client must feel happy to proceed.
“ Dependability and reliability are aspects of one’s personality that are
just as important as skill.
Sheil a McKenna
11 Brush through the eyebrows and choose an appropriate stencil for the shape
and size. Hold the stencil in place, or use masking tape to keep it on the skin,
thus preventing spraying paint underneath. Spray the desired eyebrow colour into
place. Carefully lift off the stencil, without sliding it sideways, or it may smudge.
12 Apply eye shadow colours with precision. Use acetate or tissues to mask off any
areas where you don’t want the colour to land, or require a sharp edge. With
experience, a lot of work can be done freehand such as eye shadow base and
socket lines where the colour will fade away into the foundation.
13 With great care and attention, apply eyeliner as close as you can along the base
of the eyelashes.
14 Br ush mascara onto the eyelashes, coating each eyelash from base of eyelash to
tip or point. Apply artifi cial eyelashes if the design brief requires them.
15 Ch oose a lip stencil and hold up to the lip area. Spray lip colour to outline and fi ll
in the lips in one go.
16 Ap ply lipstick, and/or gloss over the top if desired.
HEALTH& SAFETY
Some clients (such as very nervous
people) may be unsuitable for
airbrush application on the eye
area as they need to sit perfectly
still and not be phased by the
pulsating pressure of the air. The
PSI should be turned right down
and the client warned as soon as
you commence so they don’t jump
and end up with wonky liner!
Do no t ever attempt to do eyeliner or any work close to the eyes unless you and the client are completely at ease with the process and you have enough experience.
“ Successful teams don’t
have egos, struggling
teams have many.
Sheil a McKenna
ALWAYSREMEMBER
To c reate fi ne lines, you will need
low pressure, to be at a close
distance to your client, steady
hands and lots of practise!

LEVEL 3 PR
OF
ES
SIO
NA
L B
EA
UT
Y T
HE
RA
PY
O-42
Beauty make-up before and afterC
OU
RT
ES
Y K
ET
T C
OS
ME
TIC
S
Step-by-step: Airbrushing eye make-up and lipstick using stencils
17 Ad d any fi nishing touches such as glitter, gems, gold leaf, etc.
18 Ch eck the overall result meets with the design plan and make amendments as
necessary.
Snakeskin eyes
MA
KE
-UP
BY
BR
IDG
ET
TA
YL
OR
PH
OT
O B
Y
RO
B M
CG
RO
RY
1 Application of eye shadow base, socket and lid colour
2 Liner application using a stencil as a shield
3 Application of eyebrow colour using the stencil
ELLIS
ON
S
4 Application of eyeliner under the eyes
5 Lipstick application 6 The completed airbrush make-up
CH
AP
TER 3 (B
12
) AIR
BR
US
H M
AK
E-U
PO-43
Ap plying make-up for maximum coverageChoos e the appropriate formulation of airbrush make-up to carry out cosmetic camou-fl age work. Use an alcohol-based airbrush make-up if the client requests that the effects
last as long as possible. Water-based airbrush make-up can be used for shorter term
effects. The stages below cover the colour neutralization techniques for a tattoo, with
multiple layers of airbrush make-up to build up coverage.
Step-by-step: Tattoo coverage
Airbrush make-up
CO
UR
TE
SY
KE
TT
CO
SM
ET
ICS
CO
UR
TE
SY
KE
TT
CO
SM
ET
ICS
CO
UR
TE
SY
KE
TT
CO
SM
ET
ICS
CO
UR
TE
SY
KE
TT
CO
SM
ET
ICS
CO
UR
TE
SY
KE
TT
CO
SM
ET
ICS
MA
KE
-UP
AN
D P
HO
TO
BY
DIA
NA
ES
TR
AD
A
1 Choos e a foundation colour fi rst that will match the surrounding skin tone. This will be used in the fi nal coat(s). Put to one side.
2 Choos e a neutralizing colour with an orange undertone to cancel out the blue. Apply thin coats to the tattoo. Don’t apply it to the surrounding skin.
3 Powde r generously in between coats if using water-based make-up. If you are using alcohol-based products, this step is not necessary.
4 Build up layers until 90 per cent cover-age is obtained.
5 Flush the airbrush with solvent to clean out the colour.
6 Intro duce the skin tone selected in step 1 with broad sweeping dashes until full coverage is obtained.
7 If th e skin has freckles, use a stencil with small irregular dots cut out to simulate the freckle shapes.
8 Apply the freckle tone. Rotate the sten-cil until the number of freckles match the surrounding skin.
9 Finis h with no colour setting powder if required.
10 Clean up and disinfect the work area.

LEVEL 3 PR
OF
ES
SIO
NA
L B
EA
UT
Y T
HE
RA
PY
O-44
Te mporary body art using stencilsStenc ils can be purchased ready made or customized to your own design. If you decide
to make you own, invest in some sheets of clear acetate from an arts and craft shop plus
a sharp modelling knife. You can design your stencils from scratch or get ideas from the
Internet. There are lots available to download and print out.
Airbr ush ‘inks’ will last on the skin for a few days, depending on their position, environ-
ment and general care.
The use of masking tape and acetate for stencilling
JO
CR
OW
DE
R
Rose tattoo
Place stencil on the desired location
Powder with a no-colour setting powder
Paint details by hand Complete‚ fantasy look
Add secondary and tertiary colours
MA
KE
-UP
BY
SH
ELIA
MC
KE
NN
A/P
HO
TO
BY
ST
EV
E A
ZZ
AR
RA
CO
UR
TE
SY
KE
TT
CO
SM
ET
ICS
CO
UR
TE
SY
KE
TT
CO
SM
ET
ICS
CO
UR
TE
SY
KE
TT
CO
SM
ET
ICS
CO
UR
TE
SY
KE
TT
CO
SM
ET
ICS
CO
UR
TE
SY
KE
TT
CO
SM
ET
ICS
Have an assistant hold the stencil in place for you. Lifting or moving the stencil while spraying or before the airbrush make-up is dry will result in underspray and softened or smudged edges.
TOP
TIP
Step-by-step: Fa ntasy make-up application using stencils
1 use t he dash method while following the design of the stencil
2 build up layers until the desired opacity is achieved
3 powde r if using water-based airbrush products
4 add t he secondary and tertiary colours until the base colours in the design are
complete
5 caref ully lift the stencil from the surface of the skin without sliding
6 paint in details by hand
7 powde r if necessary.
CH
AP
TER 3 (B
12
) AIR
BR
US
H M
AK
E-U
PO-45
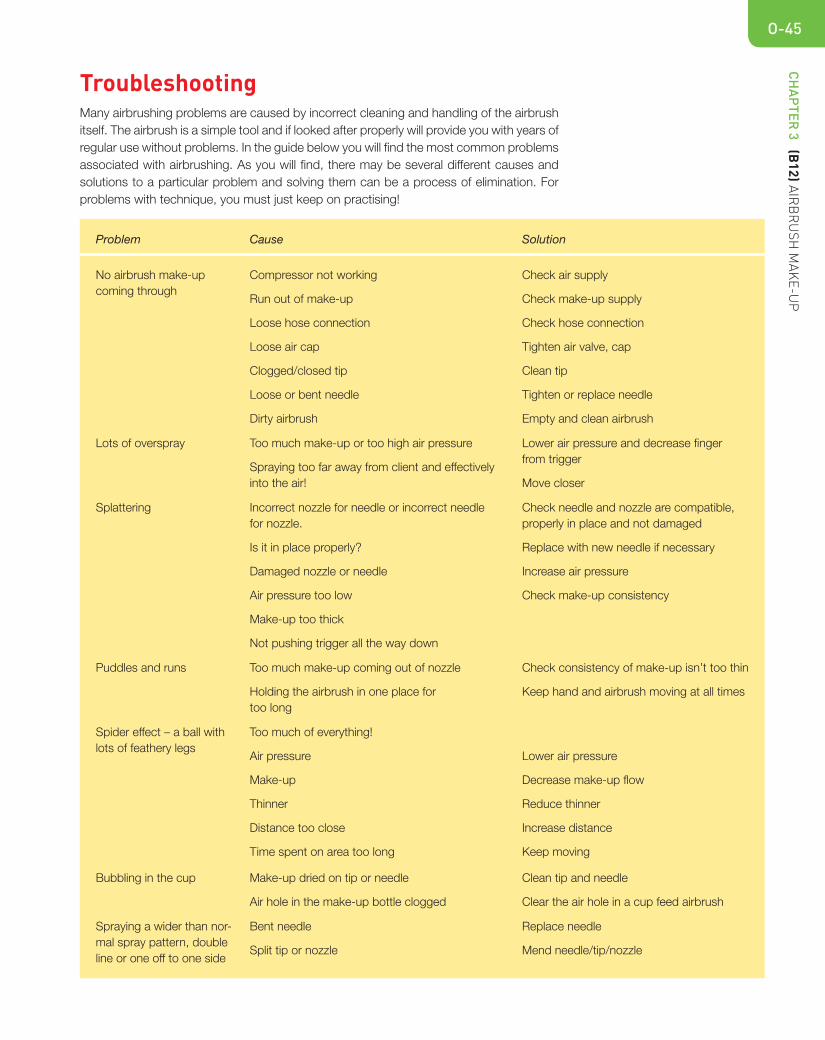
T r oubleshootingMany airbrushing problems are caused by incorrect cleaning and handling of the airbrush
itself. The airbrush is a simple tool and if looked after properly will provide you with years of
regular use without problems. In the guide below you will fi nd the most common problems
associated with airbrushing. As you will fi nd, there may be several different causes and
solutions to a particular problem and solving them can be a process of elimination. For
problems with technique, you must just keep on practising!
Problem Cause Solution
No airbrush make-up
coming through
Compressor not working
Run out of make-up
Loose hose connection
Loose air cap
Clogged/closed tip
Loose or bent needle
Dirty airbrush
Check air supply
Check make-up supply
Check hose connection
Tighten air valve, cap
Clean tip
Tighten or replace needle
Empty and clean airbrush
Lots of overspray Too much make-up or too high air pressure
Spraying too far away from client and effectively
into the air!
Lower air pressure and decrease fi nger
from trigger
Move closer
Splattering Incorrect nozzle for needle or incorrect needle
for nozzle.
Is it in place properly?
Damaged nozzle or needle
Air pressure too low
Make-up too thick
Not pushing trigger all the way down
Check needle and nozzle are compatible,
properly in place and not damaged
Replace with new needle if necessary
Increase air pressure
Check make-up consistency
Puddles and runs Too much make-up coming out of nozzle
Holding the airbrush in one place for
too long
Check consistency of make-up isn’t too thin
Keep hand and airbrush moving at all times
Spider effect – a ball with
lots of feathery legs
Too much of everything!
Air pressure
Make-up
Thinner
Distance too close
Time spent on area too long
Lower air pressure
Decrease make-up fl ow
Reduce thinner
Increase distance
Keep moving
Bubbling in the cup Make-up dried on tip or needle
Air hole in the make-up bottle clogged
Clean tip and needle
Clear the air hole in a cup feed airbrush
Spraying a wider than nor-
mal spray pattern, double
line or one off to one side
Bent needle
Split tip or nozzle
Replace needle
Mend needle/tip/nozzle
LEVEL 3 PR
OF
ES
SIO
NA
L B
EA
UT
Y T
HE
RA
PY
O-46
Maintenance and cleaning of the airbrushAfter the airbrush service is completed and the client is satisfi ed, it is time to clean your air-
brush. If you neglect this area, you will soon run into problems with your airbrush resulting in
dried up make-up inside, which will accumulate and cause uneven spraying and blockages.
The airbrush should fi rst be fl ushed out with a suitable solvent – water if you have used water-
based airbrush make-up and alcohol if you have used a lcohol-based make-up. To do this:
1 pour a small amount of solvent into the cup
2 hold a tissue over the tip to prevent air from coming out
3 create a back-bubble fl ow into the cup
4 tip out the make-up onto a tissue
5 spray the airbrush to get rid of the remaining make-up
6 repeat 2-3 times until the solvent is clear
Problem Cause Solution
Split tip or nozzle Make-up accumulation in tip or pushing needle
too far into the tip
Replace tip or nozzle with new
Spitting Dirty airbrush
Low air pressure
Needle bent
Tip clogged or damaged
Water in hose
Clean airbrush
Increase air pressure
Replace needle or tip
Clean or change needle
Empty compressor moisture trap
Pulsing - improper air fl ow Wrong type of compressor or dirty airbrush Change compressor and/or clean airbrush
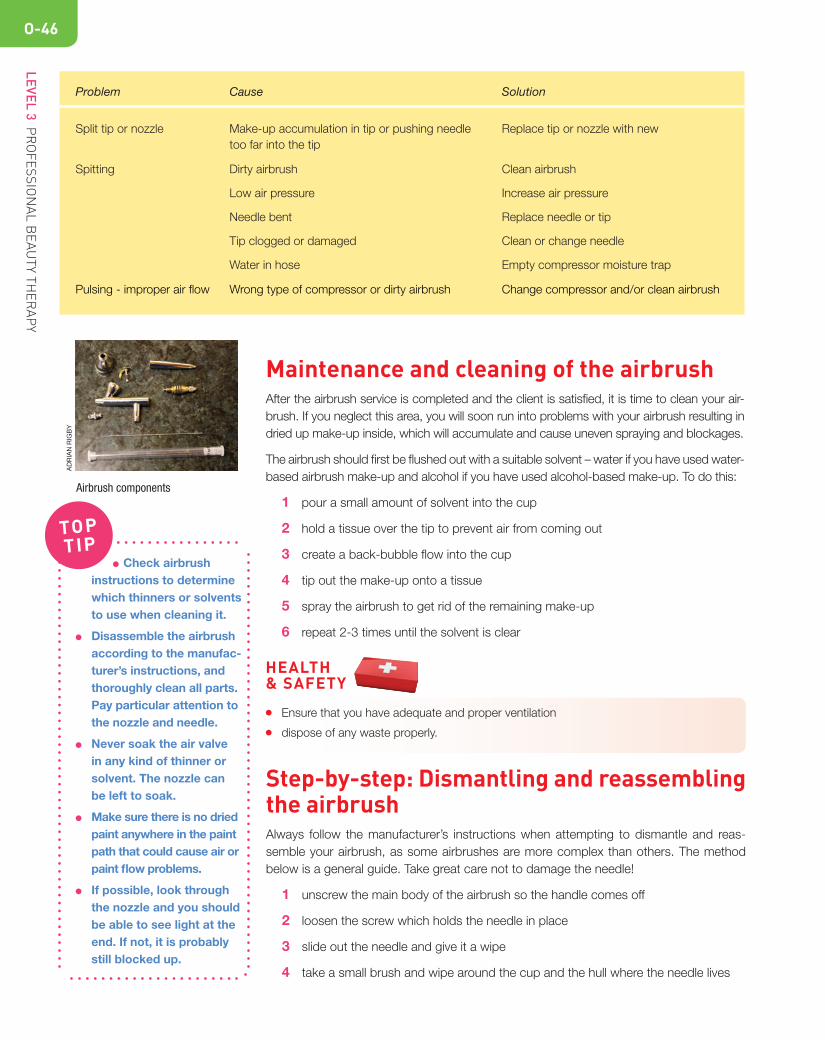
Airbrush components
AD
RIA
N R
IGB
Y
HEALTH& SAFETY
● Ensure tha t you have adequate and proper ventilation
● dispose of any waste properly.
● Check airbrush instructions to determine which thinners or solvents to use when cleaning it.
● Disassemble the airbrush according to the manufac-turer’s instructi ons, and thoroughly clean all parts. Pay particula r attention to the nozzle and needle.
● Never soak the air valve in any kind of thinner or solvent . The nozzle can be left to soak.
● Make sure there is no dried paint anywhere in the pain t path that could cause air or paint fl ow pro blems.
● If p ossible, look through the nozzle and you should be able to see light at the end. If not, it is probably still blocked up.
TOP
TIP
Step-by-step: Dismantling and reassembling the airbrushAlways follow the manufacturer’s instructions when attempting to dismantle and reas-
semble your airbrush, as some airbrushes are more complex than others. The method
below is a general guide. Take gre at care not to damage the needle!
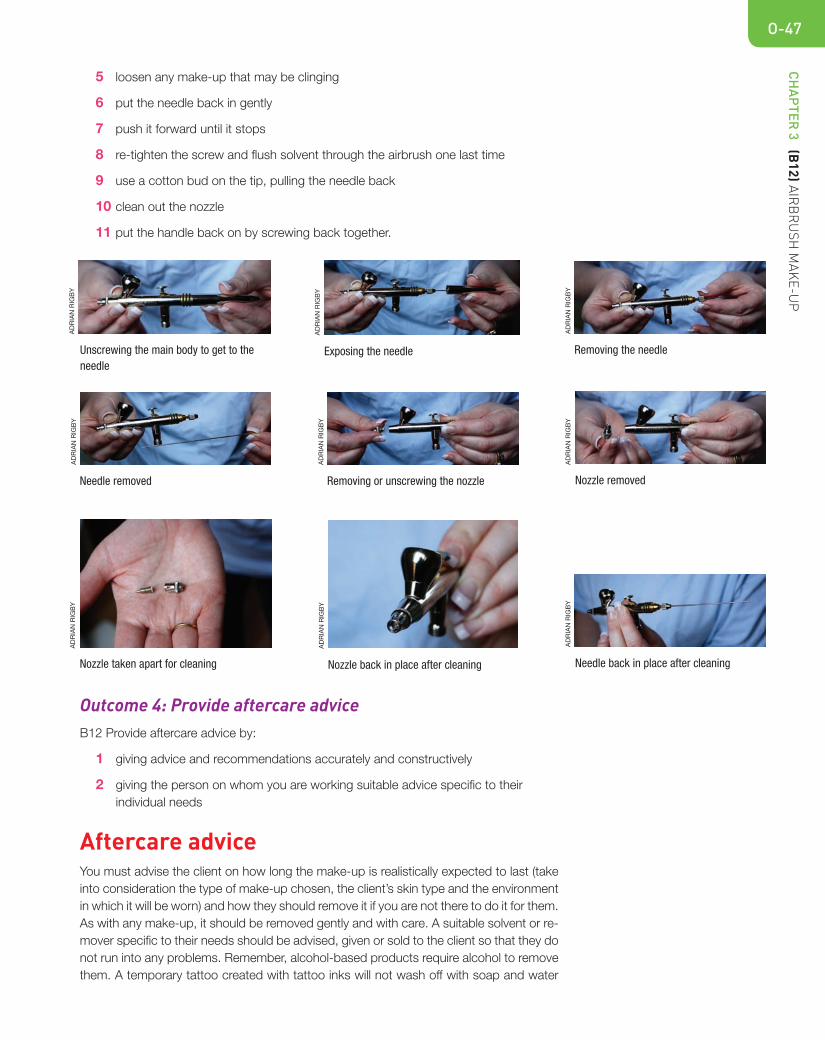
1 unscrew the main body of the airbrush so the handle c omes o ff
2 loosen th e scr ew which holds the needle in place
3 slide out the need le and give it a wipe
4 take a small bru sh and wip e around the cup and the hull where the needl e lives
CH
AP
TER 3 (B
12
) AIR
BR
US
H M
AK
E-U
PO-47
5 loosen any make-up that may be clinging
6 put the needle back in gently
7 push it forward until it stops
8 re-tighten the screw and fl ush solvent through the airbrush one last time
9 use a cotton bud on the tip, pulling the needle back
10 clean out the nozzle
11 put the handle back on b y screwing back together.
Exposing the needle Removing the n eedle
AD
RIA
N R
IGB
Y
AD
RIA
N R
IGB
Y
Unscrewing the main body to get to the needle
AD
RIA
N R
IGB
Y
Needle removed R emoving or unscrewing the nozzle Nozzle removed
AD
RIA
N R
IGB
Y
AD
RIA
N R
IGB
Y
AD
RIA
N R
IGB
Y
Nozzle taken apar t for cleaning Nozzl e back in place after cleaning Needle back in pl ace after cleaning
AD
RIA
N R
IGB
Y
AD
RIA
N R
IGB
Y
AD
RIA
N R
IGB
Y
Outcome 4: Provide aftercare adviceB12 Provide aftercare advice by:
1 giving advice and recommendations accurately and constructively
2 giving the person on whom you are working suitable advice specifi c to their
individual needs
Aft ercare adviceYou must advise the client on how long the make-up is realist i cally expected to last (ta ke
into consideration the typ e of make-up chosen, the cli e nt’s skin type and the env ironment
in which it will be worn) and how the y should remove it if you ar e not there to do it for th em.
As with any make-up, it should be removed gen tly and with care. A suitabl e solvent or re-
mover specifi c to their needs should be advised, given or sol d to the client so that they do
not run into any problems. Remember, alcohol-based products require alcohol to remove
them. A temporary tattoo created with tattoo inks will not wash off with soap and water
LEVEL 3 PR
OF
ES
SIO
NA
L B
EA
UT
Y T
HE
RA
PY
O-48
or regular cleanser and should never be ‘scrubbed off’, but will need dissolving with the
appropriate remover. Not observing the above can lead to contra-actions and referral for
medical advice. Advice should also be given on the action to take if an unwanted reaction
occurred following make-up application. Including the correct removal of the make-up.
Having covered the learning objectives for plan and provide airbrush make-up – test what you need to know and
understand by answering the following short questions be-
low. The information covers:
● organizational and legal requirements
● working safely and effectively when providing air-
brush make-up services
● consultation, planning and preparation for airbrush
make-up
● contra-indications and contra-actions
● airbrush equipment and pro d ucts
● airbrush make-up application
● aftercare advice.
Organizational and legal requirements
1 What are the health and safety requirements associ-
ated with airbrush make-up techniques?
2 What is the importance of not d iscriminating against
clients with illne sses and disabilities and why?
3 Why should minors not be given airbrush mak e-up
services without informed and signed parental or guard-
ian consent and why is it important to have t he parent
or guardian present when carrying out the service?
4 Why should you maintain your own personal hygiene,
protection and appea rance according to accepted
industry and organizational requirements?
5 Explain how to complete any records about people on
whom you have worked.
6 Give two reasons why it is important to correctly st ore
records in relation to the Data Protection Act.
7 Give two reasons why it is important to complete
airbrush make-up application in a commercially
acceptable time.
8 What are your pricing structures for airbru sh make-up?
ASSESSMENT OF KNOWLEDGE AND UNDERSTANDING
Working safely and effectively when providing airbrush make-up services
1 What are the necessary environmental co nditions for
airbrush make-up application?
2 Why is effective ventil ation important during the
airbrushing process?
3 What range of protective clothing should be available
f or those on whom you are working?
4 What type of personal protective equipment should be
available and used by your self?
5 Why is it important to maintain standards of hygi ene
and l ist fi ve principles of avoiding cross-infection.
6 Explain briefl y how you woul d safely and effectively set
up airbrush equipment and materials.
7 How would you avoid potentia l discomfort and injury to
yourself and the client while airbrushing?
8 Ho w would you minimize and dispose of waste from
services?
Consultation, planning and preparation for airbrush make-up
1 Why should you plan accurately prior to th e job and
how do you create a make-up design plan?
2 Why is it important to specify necessary resources
accur ately?
3 Why should you create a design portfolio to promote
airbrush make-up?
4 Explain how you w ould use effective consultation
techniques when communicating with clients of
different cultural a nd religious backgrounds, age,
disabilities and gender for this serv ice.
FUNCTIONALSKILLS
CH
AP
TER 3 (B
12
) AIR
BR
US
H M
AK
E-U
PO-49
5 Why is it important to respect a person’s modesty,
priva cy an d any sensitivities they may have relating to
their physical appearance when carrying out airbrush-
ing application?
Contra-indications and contra -actions
1 What is the importance of recognizing contra- indications
and what are the contra-indications would restrict
airbrush make-up?
2 What possible contra-actions could occur during
service and how would you deal with them?
3 W hat contra-indications would prevent you from
carrying out an airbrush make-up?
4 What is the importan ce of, and reasons for, not
naming specifi c contra-indications when
encouraging clients to seek medical
advice?
Airbrush equipment and products
1 Explain or show how you would dismantle, clean,
maintain and reassemble airbrush equipment and
associated accessories.
2 Stat e three p roblems that can occur with airbrush
eq uipme nt and how would you correct them?
3 Explain the meaning of PSI and state two potential
risks a ssociated with the use of pressurized airbrush
equipment.
4 What is the importan ce of using equipment with a
pressure gauge and where would you fi nd it?
5 What thr ee main t ypes of products are available f or
ai rbrushing, what are their features and how do you
use them?
6 What are the differences between cup and gravity fed
airbr ushes and when would you use them?
Airbrush make-up application
1 Explain how t o select, blend and mix products and
colours for two different clients with different needs,
skin types and tones.
2 E xplain how to correct excessive redness when using
airbrush make-up.
3 Name two circumstances w hen airbrush make-up
may be unsuitable and conventional make-up
techniques preferable.
4 Give two examples of when, how and why you would
vary the PSI according to the effect to be created, or
the part of the bo dy being airbrushed.
5 Explain how the d istan ce of the airbrush from the body
and its pressure can affect the coverage and density of
colour.
6 Which areas of the face should be omitted when
airbrushing make-up and why?
7 Explain the sequence in which airbrush make-up and
conventional make-up should be applied.
8 Name four types of problems that can happen during
airbrush make-up application and how to correct them.
Aftercare advice
1 What make-up removal techniques did you use on the
last person you worked on?
2 How long should airbrush make-up be expected to last?
3 What sort of activities should be avoided when
removing airbrush make-up and why?
With special thanks to the following who have generously provided their images:
Sheila McKenna/Kett Cosmetics (www.kettcosmetics.com)
Make-up artists: Andrea Perry-Bevan, Diana Estrada, Angela DiCarlo, Roque Cozzette, Sarah Perry, Alison
Smith, Bridget Taylor ([email protected]), Barney Nikolic, Rachel Harper, Adrian Rigby
Photographers: Zhang Jingna (www.zhangjingna.com), Steve Collinson ( www. stevecollinson.com), Lucy
Cartwright (www.lucyphotography.com), Rob McGrory (www.robmcgrory.com), Diana Estrada, Lynsey Roberts,
Adrian Rigby, Steve Azzarra, Ian Lea, Spike
Models: Lanie Wilson (www.bossmodelmanagement.com), Anne Van Sittern, Marcelle Skilton, Martina Goodin,
Carla Gugino, Gemma Harris, Anna Bessant
Every effort has been made to trace all copyright holders, but if any have been inadvertently overlooked the
publisher will be pleased to make the necessary arrangements at the fi rst opportunity. Please contact the pub-
lisher directly.