
2100_lc
57
StairMaster ® ClubTrack ® Treadmills User’s Guide for the 2100 LE Treadmill 2100 LC Treadmill THE RESULTS YOU WANT ™ Downloaded from www.Manualslib.com manuals search engine
-
Upload
jeremee-michael-tyler -
Category
Documents
-
view
4 -
download
3
description
NAUTILUS
Transcript of 2100_lc
StairMaster ®
ClubTrack® Treadmills
User’s Guidefor the
2100 LE Treadmill2100 LC Treadmill
THE RESULTS YOU WANT ™
Downloaded from www.Manualslib.com manuals search engine
2
StairMaster is a division ofNautilus Health & Fitness GroupCorporate Headquarters1886 Prairie WayLouisville, CO 80027
(800) 864-1270(303) 939-0100Fax (800) 898-9410www.stairmaster.com
Printed in the United States.© 2003 StairMaster® Health & Fitness Products, Inc. All rights reserved.
P/N 27483 Rev A
© 2003 StairMaster Health & Fitness Products, Inc. StairMaster and ClubTrack are registered trademarks or trademarks of Nautilus,Inc. in the United States and/or other countries. All other trademarks are trademarks of their respective companies.
Downloaded from www.Manualslib.com manuals search engine
3
TABLE OF CONTENTS:
SAFETY REQUIREMENTS ............................................................................................... 5
UNPACKING and INSTALLATION INSTRUCTIONS ...................................... 7
Accessories and Options ..............................................................................................................7
How to Reach Us ..............................................................................................................................7
Guidelines For Getting ON and OFF the Treadmill....................................... 8
LIMITED-ACCESS CONTROL ....................................................................................... 9
Activation .............................................................................................................................................9
Deactivation........................................................................................................................................9
Magnetic Key as an Emergency Stop ....................................................................................9
HEART RATE MONITORING....................................................................................... 10
Telemetry Heart Rate ..................................................................................................................10
Contact Heart Rate........................................................................................................................11
EXERCISE INTENSITY, FREQUENCY, & DURATION .................................. 12
Intensity .............................................................................................................................................12
Frequency and Duration .............................................................................................................12
OPERATING THE CLUBTRACK 2100LE/2100LC TREADMILL.............. 14
Turning on the Power ..................................................................................................................14
Understanding the Controller..................................................................................................14
Controller Displays and Keys ...................................................................................................15ClubTrack 2100 LC Display Windows ......................................................................................15ClubTrack 2100 LE Display Windows ......................................................................................15Numeric keypad ......................................................................................................................................17Incline UP [⇑] / DOWN [⇓] Keys .................................................................................................17Speed FASTER [+] / SLOWER [−] Keys..................................................................................18Start Key .......................................................................................................................................................18Cool Down Key .........................................................................................................................................18Stop Key ........................................................................................................................................................18Display LOCK / UNLOCK - Statistics Key ..............................................................................19Remote Operation Controls (ROC) ............................................................................................20Workout Program Keypad ...............................................................................................................20
The Quick Start Program ...........................................................................................................21
The Manual Program ....................................................................................................................22
The Fat Burner Program .............................................................................................................23
The Calorie Burner Program.....................................................................................................24
Downloaded from www.Manualslib.com manuals search engine

4
The Speed Intervals Program .................................................................................................26
Heart Rate (HR) Zone Trainer Program .............................................................................28
The Advanced Programs.............................................................................................................30StairMaster Fit Test ..............................................................................................................................32FireFighter Fitness Test .....................................................................................................................34Custom Speed Interval Program ................................................................................................36HR Control Interval Program ........................................................................................................385K Fun Run Program............................................................................................................................4110K Bolder Boulder Run Program ..............................................................................................42Custom Calorie Burn Program ......................................................................................................439-Hole Walk Program..........................................................................................................................44
Options During a Workout ........................................................................................................45Changing Speed, Incline or Target Heart Rate During a Workout ....................45Pausing Your Workout .......................................................................................................................46
COOL DOWN .....................................................................................................................................46Console Key Functions in Cool Down State ........................................................................47
End of Your Workout....................................................................................................................47
Auto Reset .........................................................................................................................................47
Instruction Page ............................................................................................................... 48
Using the ClubTrack® 2100 Treadmill ..............................................................................48
Heart Rate Priority on ClubTrack 2100 Treadmills ................................... 49
Error Codes ........................................................................................................................... 50
Viewing Maintenance Information ...................................................................... 50
Changing the Workout Default Values .............................................................. 51
Customizing the Treadmill ......................................................................................... 52
Maintenance ........................................................................................................................ 53
Cleaning ..............................................................................................................................................53
Treadmill Interior ..........................................................................................................................53
Treadmill Belt Adjustments ......................................................................................................54Belt Tension ..................................................................................................................................................54Belt Tracking ................................................................................................................................................55Belt Replacement ......................................................................................................................................55
Moving and Storing the Treadmill.........................................................................................56
Troubleshooting ................................................................................................................ 56
IMPORTANT PHONE NUMBERS .............................................................................. 57
Downloaded from www.Manualslib.com manuals search engine

5
SAFETY REQUIREMENTS
WHEN USING ELECTRICAL EQUIPMENT, ALWAYS FOLLOW THESE BASICPRECAUTIONS:
IMPORTANT SAFETY INSTRUCTIONSThe following definitions apply to the words “Danger” and “Warning” found throughout thismanual:
DANGER - Used to call attention to IMMEDIATE hazards which, if not avoided, will result inimmediate, serious personal injury or loss of life.
WARNING - Used to call attention to POTENTIAL hazards that could result in personal injuryor loss of life.
READ ALL INSTRUCTIONS BEFORE USING THE MACHINE.
DANGER To reduce the risk of electrical shock, always unplug the externalpower supply from the electrical outlet before cleaning,maintaining, or repairing.
WARNING To reduce the risk of burns, electric shock, or injury to persons:
Read this manual in full before operating the treadmill. Failure to follow these guidelines canproduce a serious or possibly fatal electrical shock hazard or other serious injury. Consult aqualified electrician as required.
1. The controller Power key does not turn off the electrical current to the treadmill. Thetreadmill continues to draw power, even when the controller is off. To avoid electricshock, do not remove treadmill hood or place hands beneath the treadmill while thetreadmill is plugged into a power source.
2. Do not start the treadmill when someone else is standing on the belt.
3. Keep speed and incline at the lowest settings when someone is getting on and off thetreadmill.
4. Keep the area underneath and around the treadmill clear.
5. Before each use of this equipment, check the power receptacle for signs of damage. Donot operate the equipment if the integrity of this item is in question.
Downloaded from www.Manualslib.com manuals search engine
6
SAFETY REQUIREMENTS (continued)
6. To avoid potential safety and electrical problems, replace with manufacturer’s specifiedparts only.
• IMPORTANT: Replace the drive belt with a StairMaster specified drive belt (P/N27458). Failure to do so could create hazardous leakage currents without thecorrect part.
7. This equipment is classified Class I, Type B, ordinary equipment. Not protected againstfluid ingress. Rated for continuous operation. Do not operate this equipment in thepresence of flammable anesthetic mixtures.
8. Do not let liquid enter the controller. If it does, the controller must be inspected andtested for safety by an approved technician before it can be used again.
9. Increased risk due to leakage current can result if this equipment is not groundedproperly.
10. The treadmill must be on an appropriate, dedicated electrical circuit. Nothing elseshould be connected to the circuit.
11. Incorrect installation by unauthorized personnel can lead to equipment damage and mayvoid the warranty.
12. Do not stand on treadmill hood or front trim cover.
13. Close supervision is necessary whenever the machine is used by or near children,invalids, or disabled persons.
Failure to follow the conditions set forth below shall limit, to the extent allowed by law,StairMaster Health & Fitness Products, Inc. responsibility for the safety, reliability, andperformance of this equipment.
• The operator manual must be read in full by each owner and trainer before theproduct is first used. Each user must be instructed in the proper use of thetreadmill and its accessories.
• Assembly operations, extensions, readjustments, modifications, or repairs mustbe carried out only by StairMaster-trained or StairMaster-authorized personnel.
• Do not remove the treadmill hood: dangerous voltages are present.Components are serviceable only by qualified service personnel.
• The electrical wiring within the treadmill setting and the electrical installation ofthe treadmill must comply with the applicable local or provincial requirements.
• The equipment must be used in accordance with the instructions for use.
SAVE THESE INSTRUCTIONS
Downloaded from www.Manualslib.com manuals search engine
7
UNPACKING and INSTALLATION INSTRUCTIONS
Please refer to the Treadmill Unpacking & Installation Instructions that shipped with thetreadmill. These instructions provide information regarding receiving your order, siterequirements, unpacking and installation steps, and testing the treadmill and controller.
The treadmill and controller must be installed correctly before being used. StairMaster®
recommends that you contact your treadmill dealer or sales representative when yourequipment arrives. The representative will help unpack, install, and demonstrate it, to ensurethat:
• The equipment is free from shipping damage.• The treadmill is connected correctly to the appropriate AC power source.• Installation and operation are in accordance with StairMaster standards.
Incorrect installation by unauthorized personnel can lead to equipment damage and may voidthe warranty.
WARNING
THE TREADMILL MUST BE ON A DEDICATED BRANCH CIRCUIT.NO OTHER DEVICE SHOULD BE CONNECTED TO THAT CIRCUIT.
EXCESSIVE RISK CURRENT (LEAKAGE) CAN RESULT IF THE EQUIPMENT IS NOTPROPERLY GROUNDED.
FAILURE TO FOLLOW THESE GUIDELINES WILL PRODUCE A SERIOUS OR POSSIBLYFATAL ELECTRICAL SHOCK HAZARD.
CONSULT A QUALIFIED ELECTRICIAN AS REQUIRED.
Accessories and Options
An operator manual (P/N 27483) is shipped with each treadmill. The following options areavailable:
Part No. Description36147-001 Left Handrail Kit36147-002 Right Handrail Kit36147-003 Left and Right Handrails34198-003 Transmitter Belt with strap (HRM)
• To avoid potential safety and electrical problems, use parts and accessoriesthat meet StairMaster specifications.
How to Reach Us
For Technical Assistance / Parts:North America: 800-331-3578International: 800-864-1270 x1603
See addresses and phone numbers listed at the end of this manual.
Downloaded from www.Manualslib.com manuals search engine

8
Guidelines For Getting ON and OFF the Treadmill
Instruct each user in the following guidelines for getting on and off the treadmill.
• The walking belt should be moving at minimum speed before the user steps onto thetreadmill.
1. Stand next to the treadmill and place both hands on the front handrail.
2. Straddle the walking belt or step onto the side of the deck. Step onto the moving beltand begin walking.
3. (Optional) To get the feel of the moving belt, place the foot nearest the treadmill on thewalking belt and let it move backwards. Lift it and repeat several times untilcomfortable with the treadmill speed.
4. When walking comfortably on the treadmill, let go of the handrail.
5. While walking on the treadmill:
• Face forward. Avoid looking down at the walk belt.
• Maintain speed by keeping a consistent distance from the handrail.
• Adjust the speed and incline as required. Hold the handrail as the speed andincline change.
6. Before stepping off the treadmill, place one hand on the handrail, wait for the belt tostop, then step off.
Downloaded from www.Manualslib.com manuals search engine
9
LIMITED-ACCESS CONTROL
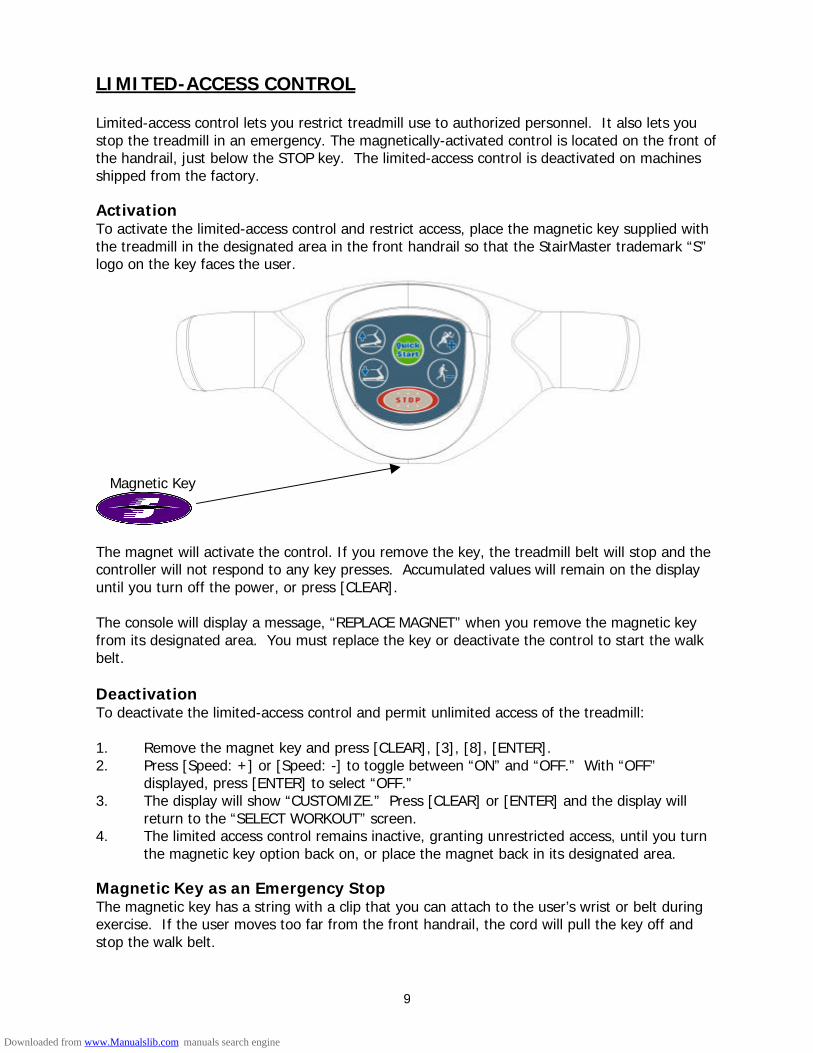
Limited-access control lets you restrict treadmill use to authorized personnel. It also lets youstop the treadmill in an emergency. The magnetically-activated control is located on the front ofthe handrail, just below the STOP key. The limited-access control is deactivated on machinesshipped from the factory.
ActivationTo activate the limited-access control and restrict access, place the magnetic key supplied withthe treadmill in the designated area in the front handrail so that the StairMaster trademark “S”logo on the key faces the user.
Magnetic Key
The magnet will activate the control. If you remove the key, the treadmill belt will stop and thecontroller will not respond to any key presses. Accumulated values will remain on the displayuntil you turn off the power, or press [CLEAR].
The console will display a message, “REPLACE MAGNET” when you remove the magnetic keyfrom its designated area. You must replace the key or deactivate the control to start the walkbelt.
DeactivationTo deactivate the limited-access control and permit unlimited access of the treadmill:
1. Remove the magnet key and press [CLEAR], [3], [8], [ENTER].2. Press [Speed: +] or [Speed: -] to toggle between “ON” and “OFF.” With “OFF”
displayed, press [ENTER] to select “OFF.”3. The display will show “CUSTOMIZE.” Press [CLEAR] or [ENTER] and the display will
return to the “SELECT WORKOUT” screen.4. The limited access control remains inactive, granting unrestricted access, until you turn
the magnetic key option back on, or place the magnet back in its designated area.
Magnetic Key as an Emergency StopThe magnetic key has a string with a clip that you can attach to the user’s wrist or belt duringexercise. If the user moves too far from the front handrail, the cord will pull the key off andstop the walk belt.
Downloaded from www.Manualslib.com manuals search engine

10
HEART RATE MONITORING
Heart rate monitoring helps users monitor their levels of exertion by displaying the heart rateduring exercise. There are two methods of monitoring heart rate on Clubtrack treadmills:
• Telemetry (e.g., Polar®) belt. A Polar-compatible heart rate chest belt transmitsthe heart beat signal to the receiver in the controller. The controller displays theheart rate in beats per minute and uses the heart rate value in heart rate controlmode.
• Contact heart rate (handgrip). Sensors on the handgrip detect heart rate anddisplay it on the controller.
Telemetry Heart Rate
The telemetry heart rate monitoring system consists of the receiver, located in the controller,and a transmitter belt (purchased separately) worn across your chest. The monitoring functionis activated as soon as you strap on the chest belt and step within range of the receiver in themachine. Two electrodes on the underside of the chest belt sense the heart rate signal andsend it to the receiver. The heart symbol on the controller pulses to indicate that the controlleris receiving a valid signal. A microprocessor in the controller calculates the heart rate anddisplays it, in beats per minute, on the controller.
WARNINGPACEMAKER USERS SHOULD NOT USE THE TELEMETRY TRANSMITTER
BEFORE CONSULTING WITH THEIR DOCTOR.
Before you put the transmitter belt on, wet the two electrode patches (the grooved rectangleson the reverse side of the belt). Secure the transmitter belt as high under the pectoral muscles(chest) as is comfortable (at the level of the xyphoid process). The transmitter belt should fitsnugly and comfortably, and allow normal breathing. When the controller detects a heart ratesignal, heart rate is shown in the display automatically. Your heart rate in beats per minute anda pulsing heart icon are displayed on the controller.
After the initial belt signal is detected, the controller will enter a validation phase in which fourgood heart beat signals lasting four seconds are required before locking on telemetry heart ratesignals for the duration of the workout session. During the validation phase the controller willnot recognize contact heart rate signals. If you do not see a heart rate on the controller, tryone of the following:
• Move closer to the controller.• Tighten the elastic part of the chest belt.• Adjust the belt higher or lower on your chest.• Remoisten the electrodes.• Test your chest strap with a machine that you know is working, or with a heart rate
watch that you know is working.• Check the heart rate priority setting for the ClubTrack 2100.
Downloaded from www.Manualslib.com manuals search engine

11
HEART RATE MONITORING (cont.)
Maintaining the Transmitter Belt
Clean the chest belt regularly with mild soap and water, then dry thoroughly — residual sweatand moisture keeps the transmitter active and will drain the battery in the transmitter. Do notuse abrasives or chemicals such as steel wool or alcohol for cleaning, as they can damage theelectrodes permanently. You can order replacement belts from StairMaster or your local fitnessstore.
Contact Heart Rate
The StairMaster® Treadmill exercise system features a digitized contact heart rate monitoringsystem. Through the use of stainless steel sensors built into the handle bar and usingsophisticated software, heart rate can be checked at any time during a workout. The heart rateis displayed on the controller.
The contact heart rate system’s ability to detect a heart rate signal is influenced by severalfactors. Movement of the muscles of the upper body produces an electrical signal (muscleartifact) that will interfere with the detection of the heart rate signal by the sensors. Movementof the hands while they are in contact with the sensors also produces interference. Callusesand hand lotion act as an insulating layer to reduce the signal strength. Also, the EKG signalgenerated by some individuals is not strong enough to be detected by the sensors. Theseindividuals should opt for the telemetry method of heart rate monitoring.
Contact heart rate input signals are acquired only during contact between your hands and thestainless steel sensors on the handrails. To use the contact heart rate feature, place yourhands around the handles so that your hands touch both the top and the bottom of thesensors. After the initial contact heart rate signal is detected, the controller will enter avalidation phase requiring a good heart beat signal within 10 to 15 seconds, or until the systemacquires a valid signal. During the validation phase the controller will not recognize telemetryheart rate signals. The controller will display a heart icon. If, during exercise, the heart ratedisplayed is erratic, it may be helpful to remove your hands from the handles, wipe them andplace them back on the handles. In all programs, the heart rate is shown automatically in thedisplay window the first time the sensors are touched.
Downloaded from www.Manualslib.com manuals search engine

12
EXERCISE INTENSITY, FREQUENCY, & DURATION
No single fitness program is suitable for all. All fitness programs should be designed by fitnessprofessionals who are trained to tailor the program to the individual goals and fitness levels ofeach client. The following information on exercise intensity, duration, and frequency is based onaverages and is included here only as a guideline for use by fitness professionals. Programsshould be altered for comfort and safety when necessary.
WARNINGDO NOT BEGIN AN EXERCISE PROGRAMWITHOUT CONSULTING A PHYSICIAN.
Intensity
Exercise intensity depends upon the capacity of the individual to do the specific type ofexercise. The exercise should exceed mild demand, but should not produce fatigue,breathlessness, or mental confusion. Choose a target zone according to personal fitness goals.
• A typical conditioning intensity for a healthy adult is from 50 to 80 percent of functionalcapacity, which is equivalent to 55 to 85 percent of maximal heart rate. For clientswanting to reduce body fat, who have been sedentary, who are in poor physicalcondition, or who are just starting an exercise program, an exercise intensity at 50 to 65percent of functional capacity or 55 to 70 percent of maximal heart rate isrecommended. For healthy, active clients wanting to improve their cardiovascularcondition, and intensity from 65 to 80 percent of functional capacity or 70 to 85 percentmaximal heart rate is recommended. Begin exercise at low intensity, especially forsedentary persons. As fitness improves, vary the exercise within the target zone. 1
Frequency and Duration
Fitness experts recommend that exercise be done at least three times a week and should lastbetween 15 and 60 minutes. Spread workouts throughout the week to let the body recoverproperly. Begin each workout slowly and let the body warm up for at least five minutes belowthe target zone. Gradually increase the intensity until the client is in the target zone. Maintainthe target zone for 15 to 20 minutes (15 to 60 minutes as fitness increase). Gradually reducethe intensity to let the heart rate fall below the target zone with a five minute cool-down period(see graph below). 1
Downloaded from www.Manualslib.com manuals search engine

13
EXERCISE INTENSITY, FREQUENCY, & DURATION (continued)
Intensity Levels (% of max. heart rate)
1. The American College of Sports Medicine, Guidelines for Exercise Testing and Prescription, 4th Edition, Lea & Febiger, Philadelphia, PA, 1991, pp. 93-120.
Downloaded from www.Manualslib.com manuals search engine

14
OPERATING THE CLUBTRACK 2100LE/2100LC TREADMILL
Follow the safety guidelines for using the treadmill given in the Safety Requirements section.
Turning on the Power
Turn on the circuit breaker switch on the bottom front panel of the treadmill to power on thetreadmill controller. If the limited-access control is on, place the magnetic key in thedesignated area at the front of the handrail. Attach the cord of the key to the user’s wrist orbelt if desired. The screen displays “SELECT WORKOUT” after the system runs a self-test.
Understanding the Controller
The treadmill controller, which is mounted above the front handrail, is a computerized panelused to operate the treadmill. All commands are entered by pressing a soft-touch key on thepanel. Visual indicators and displays show the operational status and exercise results. Thecontroller is divided into the following sections: the display windows, the workout options, theIncline keys, the Start Belt key, the Cool Down key, the Stop key, the Display Lock / Unlock key,the Speed keys, and the numeric keypad.
ClubTrack 2100 LE / 2100 LC Control Panel
Downloaded from www.Manualslib.com manuals search engine

15
Controller Displays and Keys
ClubTrack 2100 LC Display WindowsText Line
Incline Time SpeedInterval Timer Heart Rate
Workout Profile
ClubTrack 2100 LE Display Windows
Text Line
Incline Time Heart Rate Speed
Workout Profile
Downloaded from www.Manualslib.com manuals search engine

16
The following describes the displays, controller keys and their function on the ClubTrack 2100LE and ClubTrack 2100 LC treadmills:
Text Line - Message prompts and statistics are displayed in the text line that is located on thetop line of the upper display.
Incline – The treadmill incline is displayed in percent elevation in the left display area on thesecond line of the upper display. The ClubTrack 2100 LE / 2100 LC has an incline range of 0 to15% (optional incline range is –3 to 12%).
Time - The selected workout time is displayed in the upper left section of the display window.In most of the workouts, the timer will count down, in minutes and seconds, until the workoutis finished or stopped. In [MANUAL] workout or if [QUICK START] is entered, the timer willcount up. The timer will also count up if [START] is pressed without selecting a workoutprogram.
Speed - The treadmill speed is displayed in miles per hour (or kilometers per hour). TheClubTrack 2100 LE / LC has a speed range of 0.5 to 12.0 mph (0.8 to 19.2 kmh).
Heart Rate - Current heart rate is displayed next to the heart icon. On the ClubTrack 2100 LCthe heart rate is displayed to the upper right in the lower display area. On the ClubTrack 2100LE the heart rate is displayed on the second line in the upper display between the Time andSpeed displays.
Interval Timer – On the ClubTrack 2100 LC only, the interval timer is displayed to the upperleft in the lower display area. The interval timer counts down the remaining time within eachinterval. In heart rate control programs, the user’s heart rate zone is displayed in terms of % ofmaximum predicted heart rate.
Workout Profile - A profile of the selected exercise program appears in the lower section ofthe display window during a workout. The taller the column, the higher the intensity (METs) forthat interval. The flashing column shows your current interval. The flashing column movesfrom left to right across the display as you complete each interval.
Downloaded from www.Manualslib.com manuals search engine
17
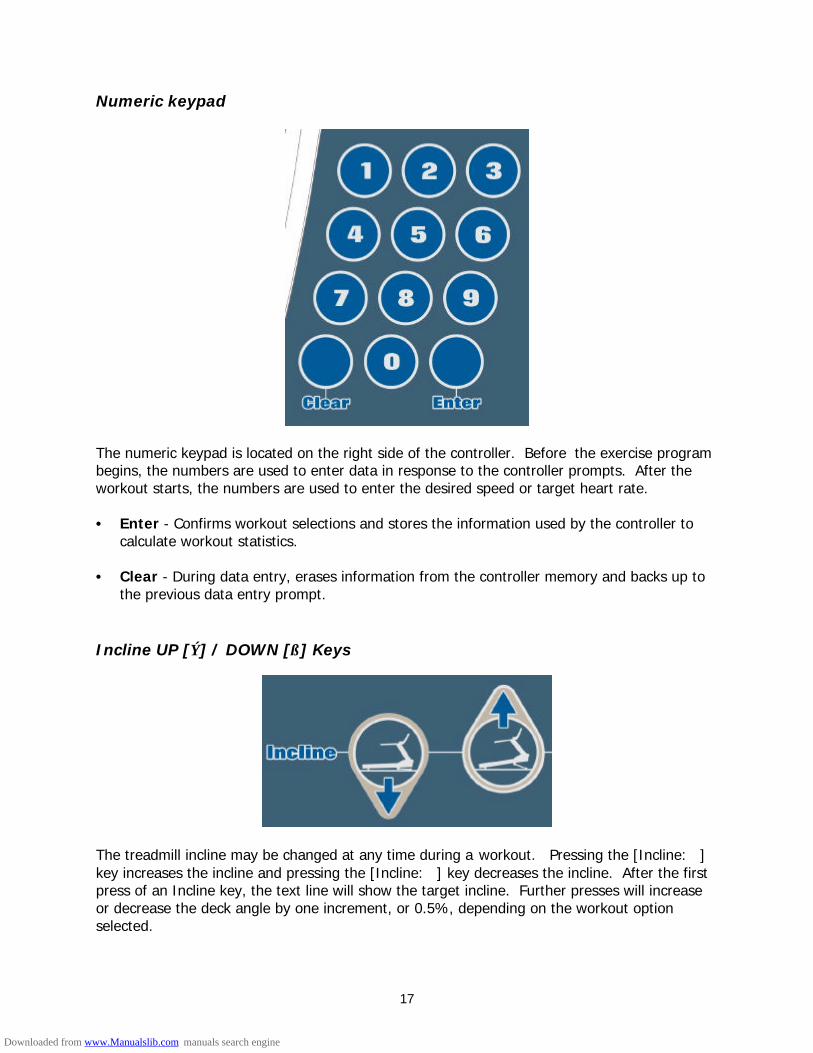
Numeric keypad
The numeric keypad is located on the right side of the controller. Before the exercise programbegins, the numbers are used to enter data in response to the controller prompts. After theworkout starts, the numbers are used to enter the desired speed or target heart rate.
• Enter - Confirms workout selections and stores the information used by the controller tocalculate workout statistics.
• Clear - During data entry, erases information from the controller memory and backs up tothe previous data entry prompt.
Incline UP [⇑] / DOWN [⇓] Keys
The treadmill incline may be changed at any time during a workout. Pressing the [Incline: ⇑]key increases the incline and pressing the [Incline: ⇓] key decreases the incline. After the firstpress of an Incline key, the text line will show the target incline. Further presses will increaseor decrease the deck angle by one increment, or 0.5%, depending on the workout optionselected.
Downloaded from www.Manualslib.com manuals search engine

18
Speed FASTER [+] / SLOWER [−] Keys
The treadmill belt speed may be changed at any time during a workout. Pressing the [Speed: -]key decreases the belt speed and pressing the [Speed: +] key increases the belt speed. Thebelt speed increases or decreases by 0.1 MPH (0.15 KM/H).
Start Key
The start belt key starts the walk belt with a gradual increase to the default start speed of theworkout selected. You can also use this key for an immediate start to a quick-start workoutsession. The timer will count up from 0:00 to 99:59, then repeat from 0.
Cool Down Key
The cool down key will cause the workout program to end. The treadmill incline returns to 0%and the speed decreases to 1.0 MPH if prior speed is less than 2.0 MPH. If the prior speed wasgreater than 2.0 MPH the speed decreases to 2.0 MPH. You can adjust the incline and speed atany time during the cool down.
Stop Key
Press the [STOP] key any time you want to pause the workout program for up to one minute.If the [STOP] key is pressed a second time, the workout statistics will be displayed, then thecontroller will return to the "SELECT WORKOUT" prompt.
Downloaded from www.Manualslib.com manuals search engine

19
Display LOCK / UNLOCK - Statistics Key
During the exercise program, the Display LOCK / UNLOCK key is used to track workout statisticswhich are shown in the text line of the upper display window. When a workout is started, thedisplay is in an unlocked mode and the various exercise statistics will scroll in order. Press the[DISPLAY] key once to turn off the scan feature and show the current statistic in the displaywindow. Press the [DISPLAY] key a second time and the scan feature will turn back on to scrollthrough the different statistics.
When in the Display Unlock mode, the controller will cycle through the following statistics inorder:
• Distance - Provides a cumulative total of the equivalent distance, in miles (orkilometers if your controller is set to metric units), you have traveled.
• Calories - Provides a current total of the number of Calories burned during aworkout.
• Calories/Hour - Provides the rate at which calories are burned per hour at thecurrent speed and incline.
• Pace - Displays the walking/running pace in minutes per mile (or minutes perkilometer).
• Watts - During a workout, this statistic displays the power output at the currentspeed and incline, displayed in watts (746 watts = 1 hp). Average power is shownduring the workout summary.
• METs - Gives you the relative energy cost of exercise. MET stands for multiples ofthe resting metabolic rate. While you are sitting quietly, your body consumesoxygen at the rate of about 3.5 milliliters per kilogram of body mass per minute.When you exercise, your body needs more oxygen in order to function. Forexample, exercising at 10 METs requires ten times the resting rate of oxygenconsumption, or about 35 milliliters per kilogram per minute. During a workout, thiskey shows the current MET level. During the workout summary, the average METlevel is displayed.
• Vertical feet (meters) Climbed - Provides the number of vertical feet (meters)climbed based on the elevation settings during the workout.
• Target Heart Rate - Available only during the Heart Rate Control programs (HRZone Trainer and HR Intervals). Shows the selected target heart rate.
Downloaded from www.Manualslib.com manuals search engine

20
Remote Operation Controls (ROC)
The Remote Operation Controls keypad is located on the front handrail. The treadmill can becontrolled from this keypad. The ROC keypad includes a Quick Start key, Speed FASTER andSLOWER key, Incline UP and DOWN keys, and a STOP key. These keys work exactly the sameas the keys on the controller. The Quick Start key works the same as the Start key on thecontroller. Refer to the explanation of the Start key, Speed FASTER and SLOWER keys, InclineUP and DOWN keys, and the STOP key previously defined.
Workout Program Keypad
The workout program keypad is located to the left of the display. There are six workoutprogram keys, including an Advanced Programs key with eight additional programs.
While the controller is in the “SELECT WORKOUT” mode, press one of the exercise programkeys to preview the desired workout. After selecting the desired workout, simply follow theprompts to enter the required user data for that program.
When entering data, the user can select the standard default values by pressing [ENTER] at thedisplay prompt without first typing data. This will set up the controller with the followingdefault data:
Downloaded from www.Manualslib.com manuals search engine

21
• Weight - 175 lbs.• Speed – 2.0 mph in Fat Burner, Calorie Burner, or HR Zone Trainer;
1.0 mph in Manual.• Age (HR Control programs only) - 40 years• Workout Time - The default time in the programmed workouts is 20 minutes.
The Quick Start program does not have a specified default time. In thisprogram, the controller timer will count up to the maximum time of 99 minutes,return to 0, and count up again.
Once you have selected a program, follow the controller prompts. • “ENTER BODY WEIGHT” -- type in your body weight in pounds (or kilograms if
your controller is set to metric units).• “ENTER SPEED” – type in your desired speed. The ClubTrack 2100 has a
speed range of 0.5 to 12.0 mph, in 0.1 mph increments (0.8 to 19.2 km/h).• “ENTER TIME 5 - 99” -- select the workout duration in one minute increments
from five to 99.
The Quick Start Program
Provides an immediate start, without having to enter any user information. This program usesthe standard default settings to calculate calories burned during a workout session.
To use the Quick Start program:
1. Press the [QUICK START] key. A message similar to the following will be displayed:
E N J O Y W O R K O U T
2. Begin the workout.
• The speed may be changed at any time during the workout or cool down bypressing the [Speed: +] key to increase the speed, or the [Speed: -] key todecrease the speed. Or, use the numeric keypad to enter the desired speed.
• The incline may be changed at any time during the workout or cool down bypressing the [Incline: UP] key to increase the incline, or by pressing the [Incline:DOWN] key to decrease the incline.
3. Press [COOL DOWN] to return the incline to 0%, and the speed to 1.0 mph if theworkout speed was less than 2.0 mph. If the prior speed was greater than 2.0 mph, thespeed decreases to 2.0 mph.
4. Press [STOP] to end the workout. The workout statistics will be displayed, and then thecontroller will revert back to the “SELECT WORKOUT” message.
Downloaded from www.Manualslib.com manuals search engine

22
The Manual Program
The Manual Program allows you to control the speed and incline of the treadmill during theworkout, while accurately calculating exercise statistics based on your weight. The defaultspeed is 1.0 mph unless changed during the data entry mode. The incline is 0%. The profile inthe display window is divided into 15 equal intervals within the selected workout time. Theprofile is based on the MET level, with every 2 METs equating to one vertical bar. MET level isbased on a combination of incline and speed.
To use the Manual program:
1. Press the [MANUAL] key. A screen similar to following will be displayed:
M A N U A L W O R K O U T
2. The controller will display “ENTER WEIGHT - LBS” (or “ENTER WEIGHT - KG” if in Metricmode). Enter your weight using the numeric keypad and press [ENTER]. Or, press[ENTER] to accept the default value.
• Your weight is used to calculate the number of calories burned for each minuteof exercise and the total number of calories burned for the exercise session.
3. The controller will display “ENTER SPEED MPH” (or “SPEED KM/H if in Metric mode).Enter the desired speed using the numeric keypad and press [ENTER]. Or, press[ENTER] to accept the default value.
4. Next, the controller will display “WORKOUT BASED ON 1:TIME 2:DISTANCE”. Press [1]if you want to enter an exercise time, or press [2] if you want to enter a workoutdistance (in miles or kilometers, if in metric).
If you press [1] for time, then the controller will display “ENTER TIME 5-99”. Enter thedesired time and press [ENTER]. Or, press [ENTER] to select the default time.
If you press [2] for distance, then the controller will display “ENTER DISTANCE”. Enterthe desired distance in miles (or kilometers if in Metric) and press [ENTER]. Or, press[ENTER] to select the default distance.
5. The controller will display “PRESS START”. Press [START] to begin your workout.
• The speed may be changed at any time during the workout by pressing the[Speed: +] key to increase the speed, or the [Speed: -] key to decrease thespeed. Or, use the numeric keypad to enter the desired speed.
• The incline may be changed at any time during the workout by pressing the[Incline: UP] key to increase the incline, or by pressing the [Incline: DOWN] keyto decrease the incline.
6. Press [COOL DOWN] to return the incline to 0%, and the speed to 1.0 mph if theworkout speed was less than 2.0 mph. If the prior speed was greater than 2.0 mph, thespeed decreases to 2.0 mph.
Downloaded from www.Manualslib.com manuals search engine

23
• The speed may be changed at any time during the cool down by pressing the[Speed: +] key to increase the speed, or the [Speed: -] key to decrease thespeed. Or, use the numeric keypad to enter the desired speed.
• The incline may be changed at any time during cool down by pressing the[Incline: UP] key to increase the incline, or by pressing the [Incline: DOWN] keyto decrease the incline.
7. Press [STOP] to end the workout. The workout statistics will be displayed, and then thecontroller will revert back to the “SELECT WORKOUT” message.
The Fat Burner Program
The Fat Burner program is a 60 interval workout designed with moderate changes in inclinedesigned to stimulate fat store assimilation for users on a weight control program. The profilein the center display indicates relative intensity. Any changes to the intensity level will notchange the look of the remaining profile; however, the new intensity level will continue throughthe rest of the workout.
• The default speed is 2.0 mph unless modified during data entry. Default time is20 minutes and default user weight is 175 lbs unless modified during data entry.Speed is entered by the user and can be manually changed by the user with theSpeed FASTER and SLOWER keys.
To use the Fat Burner program:
1. Press the [FAT BURNER] key. A message similar to following will be displayed:
F A T B U R N E R
2. The controller will display “ENTER WEIGHT - LBS” (or “ENTER WEIGHT - KG” if in Metricmode). Enter your weight using the numeric keypad and press [ENTER]. Or, press[ENTER] to accept the default value.
• Your weight is used to calculate the number of calories burned for each minuteof exercise and the total number of calories burned for the exercise session.
3. The controller will display “SPEED MPH” (or “SPEED KM/H if in Metric mode). Enter thedesired speed using the numeric keypad and press [ENTER]. Or, press [ENTER] toaccept the default value.
4. Next, the controller will display “WORKOUT BASED ON 1:TIME 2:DISTANCE”. Press [1]if you want to enter an exercise time, or press [2] if you want to enter a workoutdistance (in miles or kilometers, if in metric).
If you press [1] for time, then the controller will display “ENTER TIME 5-99”. Enter thedesired time and press [ENTER]. Or, press [ENTER] to select the default time.
If you press [2] for distance, then the controller will display “ENTER DISTANCE”. Enterthe desired distance in miles (or kilometers if in Metric) and press [ENTER]. Or, press[ENTER] to select the default distance.
Downloaded from www.Manualslib.com manuals search engine

24
5. The controller will display “PRESS START”. Press [START] to begin your workout.
• The speed may be changed at any time during the workout by pressing the[Speed: +] key to increase the speed, or the [Speed: -] key to decrease thespeed. Or, use the numeric keypad to enter the desired speed.
• The incline may be changed at any time during the workout by pressing the[Incline: UP] key to increase the incline, or by pressing the [Incline: DOWN] keyto decrease the incline.
6. Press [COOL DOWN] to return the incline to 0%, and the speed to 1.0 mph if theworkout speed was less than 2.0 mph. If the prior speed was greater than 2.0 mph, thespeed decreases to 2.0 mph.
• The speed may be changed at any time during the cool down by pressing the[Speed: +] key to increase the speed, or the [Speed: -] key to decrease thespeed. Or, use the numeric keypad to enter the desired speed.
• The incline may be changed at any time during cool down by pressing the[Incline: UP] key to increase the incline, or by pressing the [Incline: DOWN] keyto decrease the incline.
7. Press [STOP] to end the workout. The workout statistics will be displayed, and then thecontroller will revert back to the “SELECT WORKOUT” message.
The Calorie Burner Program
The Calorie Burner program is a 60 interval workout designed for users wanting to increasetheir aerobic capacity. The changes of the intensity in the intervals is greater than the intervalsin the Fat Burner program, and designed specifically to tax the cardiorespiratory system. Theprofile in the center display indicates relative intensity. Any changes to the intensity level willnot change the look of the remaining profile; however, the new intensity level will continuethrough the rest of the workout.
• The default speed is 2.0 mph unless modified during data entry. Default time is20 minutes and default user weight is 175 lbs unless modified during data entry.Speed is entered by the user and can be manually changed by the user with theSpeed FASTER and SLOWER keys.
To use the Calorie Burner program:
1. Press the [CALORIE BURNER] key. A message similar to the following will be displayed:
C A L O R I E B U R N E R
Downloaded from www.Manualslib.com manuals search engine

25
2. The controller will display “ENTER WEIGHT - LBS” (or “ENTER WEIGHT - KG” if in Metricmode). Enter your weight using the numeric keypad and press [ENTER].Or, press [ENTER] to accept the default value.
• Your weight is used to calculate the number of calories burned for each minuteof exercise and the total number of calories burned for the exercise session.
3. The controller will display “SPEED MPH” (or “SPEED KM/H if in Metric mode). Enter thedesired speed using the numeric keypad and press [ENTER]. Or, press [ENTER] toaccept the default value.
4. Next, the controller will display “WORKOUT BASED ON 1:TIME 2:DISTANCE”. Press [1]if you want to enter an exercise time, or press [2] if you want to enter a workoutdistance (in miles or kilometers, if in metric).
If you press [1] for time, then the controller will display “ENTER TIME 5-99”. Enter thedesired time and press [ENTER]. Or, press [ENTER] to select the default time.
If you press [2] for distance, then the controller will display “ENTER DISTANCE”. Enterthe desired distance in miles (or kilometers if in Metric) and press [ENTER]. Or, press[ENTER] to select the default distance.
5. The controller will display “PRESS START”. Press [START] to begin your workout.
• The speed may be changed at any time during the workout by pressing the[Speed: +] key to increase the speed, or the [Speed: -] key to decrease thespeed. Or, use the numeric keypad to enter the desired speed.
• The incline may be changed at any time during the workout by pressing the[Incline: UP] key to increase the incline, or by pressing the [Incline: DOWN] keyto decrease the incline.
6. Press [COOL DOWN] to return the incline to 0%, and the speed to 1.0 mph if theworkout speed was less than 2.0 mph. If the prior speed was greater than 2.0 mph, thespeed decreases to 2.0 mph.
• The speed may be changed at any time during the cool down by pressing the[Speed: +] key to increase the speed, or the [Speed: -] key to decrease thespeed. Or, use the numeric keypad to enter the desired speed.
• The incline may be changed at any time during cool down by pressing the[Incline: UP] key to increase the incline, or by pressing the [Incline: DOWN] keyto decrease the incline.
7. Press [STOP] to end the workout. The workout statistics will be displayed, and then thecontroller will revert back to the “SELECT WORKOUT” message.
Downloaded from www.Manualslib.com manuals search engine

26
The Speed Intervals Program
The Speed Intervals program is an interval workout containing 8 alternating rest intervals with 7exercise intervals. An interval cycle consists of an exercise phase and a recovery phase. Youmay scale the recovery speed and the exercise speed independently - which will be saved forthe remainder of the workout.
For example, if you decrease the speed during a recovery phase then subsequent recoveryphases will be the same speed. However, the speed in the exercise phase remains unchanged.To change the speed of the exercise phase, you must change the speed during an exercisephase. The two phases are independent of each other in regard to speed levels. The relativeintensity level is indicated on the profile and any changes to the intensity level will not changethe look of the remaining profile.
• The exercise and recovery phase speed is set by the user during data entry. Theincline is initially set at 0%, and must be changed manually by the user asdesired. During the workout, speed can be changed manually by the user withthe Speed FASTER and SLOWER keys.
To use the Speed Intervals program:
1. Press the [SPEED INTERVALS] key. A message similar to the following will be displayed:
S P E E D I N T E R V A L S
2. The controller will display “ENTER WEIGHT - LBS” (or “ENTER WEIGHT - KG” if in Metricmode). Enter your weight using the numeric keypad and press [ENTER]. Or, press[ENTER] to accept the default value.
• Your weight is used to calculate the number of calories burned for each minuteof exercise and the total number of calories burned for the exercise session.
3. The controller will display “ENTER EXERCISE SPEED” or “ENTER WORK SPEED”. Enterthe desired speed for the exercise phase of the interval using the numeric keypad andpress [ENTER]. Or, press [ENTER] to accept the default value.
4. The controller will display “ENTER REST SPEED”. Enter the desired speed for the restphase of the interval using the numeric keypad and press [ENTER]. Or, press [ENTER]to accept the default value.
5. The controller will display “ENTER TIME 5-99.” Enter the desired time and press[ENTER]. Or, press [ENTER] to start the timer counting up from 0.
• The exercise time entered will be divided by 15, so that each stage will be 1/15th
of the total exercise time. For example, if the user enters a 30 minute exercisetime, then each rest and exercise stage will be 2 minutes in length.
Downloaded from www.Manualslib.com manuals search engine

27
6. The controller will display “PRESS START”. Press [START] to begin your workout.
• The speed may be changed at any time during the workout by pressing the[Speed: +] key to increase the speed, or the [Speed: -] key to decrease thespeed. Or, use the numeric keypad to enter the desired speed. Remember –any speed changes will only affect the interval stage that you are in, rest orexercise, and not both.
• The incline may be changed at any time during the workout by pressing the[Incline: UP] key to increase the incline, or by pressing the [Incline: DOWN] keyto decrease the incline. Any incline changes will only affect the incline in the restor exercise stage that you are in, and any subsequent rest or exercise stages,not both.
7. Press [COOL DOWN] to return the incline to 0%, and the speed to 1.0 mph if theworkout speed was less than 2.0 mph. If the prior speed was greater than 2.0 mph, thespeed decreases to 2.0 mph.
• The speed may be changed at any time during the cool down by pressing the[Speed: +] key to increase the speed, or the [Speed: -] key to decrease thespeed. Or, use the numeric keypad to enter the desired speed.
• The incline may be changed at any time during cool down by pressing the[Incline: UP] key to increase the incline, or by pressing the [Incline: DOWN] keyto decrease the incline.
8. Press [STOP] to end the workout. The workout statistics will be displayed, and then thecontroller will revert back to the “SELECT WORKOUT” message.
Downloaded from www.Manualslib.com manuals search engine
28
Heart Rate (HR) Zone Trainer Program(requires chest strap)
The Heart Rate Zone Trainer program allows you to exercise at a selected target heart rate.Once a heart rate control method is selected (speed or incline), the controller adjusts thetreadmill’s speed or incline to maintain the target heart rate. You must use a transmitter belt(chest strap) to send a heart rate signal to the controller. This program does not work withcontact heart rate.
• If the heart rate control “Incline” method is chosen, the controller will adjust theincline to maintain the selected target heart rate. If the target heart rate has notbeen met at the maximum incline, you can use the [Speed: +] key to increasethe belt speed to reach the target heart rate.
If the actual heart rate exceeds the target heart rate, the controller will reducethe incline to slow your heart rate down. If the actual heart rate is still higherthan the target heart rate once the minimum incline has been reached, thecontroller will then reduce the belt speed to slow your heart rate down.
• If the heart rate control “Speed” method is chosen, the controller will change thebelt speed from the initial starting speed selected to maintain your target heartrate. Incline can be changed manually.
To use the Heart Rate Zone Trainer program:
1. Put the chest strap on. Remember to wet the electrodes underneath the chest strap.The controller must detect a heart rate signal to allow selection of the HR Zone Trainerprogram.
2. Press the [HR ZONE TRAINER] key. A message similar to following will be displayed:
H R Z O N E T R A I N E R
3. The controller will display “ENTER WEIGHT - LBS” (or “ENTER WEIGHT - KG” if in Metricmode). Enter your weight using the numeric keypad and press [ENTER].Or, press [ENTER] to accept the default value.
• Your weight is used to calculate the number of calories burned for each minuteof exercise and the total number of calories burned for the exercise session.
4. The controller will display “ENTER SPEED MPH” (or “ ENTER SPEED KM/H if in Metricmode). Enter the desired speed using the numeric keypad and press [ENTER].Or, press [ENTER] to accept the default value.
5. The controller will display “ENTER AGE 10 -99.” Enter your age using the numerickeypad and press [ENTER].Or, press [ENTER] to accept the default value of 40 years old.
Downloaded from www.Manualslib.com manuals search engine
29
6. The controller will display “TARGET HR.” A suggested target heart rate will bedisplayed, based on your age. Press [ENTER] to accept the calculated target heart rate,or enter a different target heart rate using the numeric keypad and then press [ENTER].Or, press [ENTER] to accept the default value.
• The target heart rate selected by the controller is based on age, and is equal to70% of your maximum heart rate which is calculated by the following equation:(215 – (Age * .75) x .70. If desired, change the target heart rate at this point byusing the numeric keypad to enter the new target heart rate, and then press[ENTER].
• Change to a new target heart rate that is between 80 and 180 beats per minuteat any time during a workout by using the numeric keypad to enter the newtarget heart rate, and then pressing [ENTER]. A change in target heart ratedoes not reset any speed or incline overrides made prior to the target change.
7. The 2100 LC controller will display “HR CONTROL BASED ON / 1 - SPEED : 2 - INCLINE.”The 2100 LE controller will display “HR CONTROL MODE / 1 – SPEED : 2 – INCLINE”.Select the type of heart rate control - either speed [1] or incline [2] - and press[ENTER]. Or, press [ENTER] to accept the default heart rate control of speed.
8. The controller will display “ENTER TIME 5-99.” Enter the desired time and press[ENTER]. Or, press [ENTER] to accept the default value.
9. The controller will display “PRESS START BELT.” Press [START BELT] to begin yourworkout.
The following messages may be displayed during a workout:• “CHECK HR BELT” - Indicates that the heart rate signal has been missing for
the last 30 seconds.
To change your target heart rate during the workout:• To change your target heart rate during the workout, use the numeric keypad to
enter the desired target heart rate and press ENTER to accept. The new targetheart rate will be used and either the speed or incline will change automaticallyto achieve the new target heart rate.
10. Press [COOL DOWN] to return the incline to 0%, and the speed to 1.0 mph if theworkout speed was less than 2.0 mph. If the prior speed was greater than 2.0 mph, thespeed decreases to 2.0 mph.
• The speed may be changed at any time during the cool down by pressing the[Speed: +] key to increase the speed, or the [Speed: -] key to decrease thespeed. Or, use the numeric keypad to enter the desired speed.
• The incline may be changed at any time during cool down by pressing the[Incline: UP] key to increase the incline, or by pressing the [Incline: DOWN] keyto decrease the incline.
11. Press [STOP] to end the workout. The workout statistics will be displayed, and then thecontroller will revert back to the “SELECT WORKOUT” mode.
Downloaded from www.Manualslib.com manuals search engine

30
The Advanced Programs
The Advanced Programs key allows the user to choose one of eight additional programs,including two Fit Test programs, a Custom Speed Interval workout, an Interval HR Controlworkout, 5K Fun Run, 10K Bolder Boulder Run, Custom Calorie Burn and a 9-Hole Walk.
StairMaster Fit Test – The StairMaster Fit Test is a program that estimates maximal aerobiccapacity based on heart-rate response to sub-maximal exercise.
Fire Fighter Fit Test – The Firefighter Fit Test is used by Fire Departments to determine thefitness capacity of a firefighter or potential firefighter. The test is comprised of a 3minute warm-up followed by an exercise session up to 13 minutes in length. After eachminute, the treadmill speed or incline is increased according to the predefined testprotocol. The subject’s heart rate is monitored throughout the test. The test iscomplete when the subject’s heart rate reaches 85% of their age-predicted maximumheart rate. A one minute cool down follows, after which a recovery heart rate is noted.
Custom Speed Interval – Workout with user-defined rest intervals and exercise intervalswith alternating speed changes. During data entry, user can define Rest interval speedand time, Exercise interval speed and time, and number of intervals. The default Restinterval speed is 2 mph and Rest interval time is 2 minutes. The default Exerciseinterval speed is 5 mph and Exercise interval time is 2 minutes. The default number ofintervals is 5. Therefore, a default Speed Interval workout is 20 minutes in length.During the workout, user may adjust the REST interval Speed and EXERCISE intervalSpeed independently, which is saved for remainder of the workout.
Interval HR Control – Workout that allows user to define the rest interval heart rate, thelength of time at the rest interval heart rate, the exercise interval heart rate, the lengthof time at the exercise interval heart rate, and the total number of intervals. After thefirst rest and exercise interval, the program will remember the workload (either speed orincline) that the user was exercising at the end of the interval. Then, during the nextinterval, the program automatically goes to that workload. The HR control algorithmmakes adjustments to maintain the user within that rest or exercise heart rate zone.
5K Fun Run – A fixed distance workout of 5K in length. Program does a 3-minute warm-upat user selected speed, then starts the workout prompting the user to input run speed.Program will count up from 0:00, and prompt the user at 0.5 K intervals as to progress.Program enters a 3-minute cool-down upon completion of 5K.
10K Bolder Boulder Run – similar program to 5K Fun Run with a fixed distance workout of10K in length. The program also has predefined incline levels to estimate the actualBoulder race. After a 3-minute warm-up, the program starts the Run by prompting theuser to input run speed. Program will count up from 0:00, and prompt the user at 0.5 Kintervals as to progress. Program enters a 3-minute cool-down upon completion of 10K.
Custom Calorie Burn – program allows user to enter the amount of calories they want toburn during the workout. The program also prompts the user to enter exercise speed.Once the workout starts, the calories count down from the entered amount, and thetime counts up from 0:00. Program enters a 3-minute cool-down upon completion ofthe calories entered.
Downloaded from www.Manualslib.com manuals search engine

31
9-Hole Walk – a fixed distance workout of 3,600 yards. Program does a 3-minute warm-upat user selected speed, then starts the workout prompting the user to input walk speed.Program will count up from 0:00, and prompt the user at pre-determined intervals as toprogress. Program enters a 3-minute cool-down upon completion of 3,600 yards.
To use one of the Advanced Programs:
1. Press the [ADVANCED PROGRAMS] key. The following messages will be displayed:
A D V A N C E D P R O G R A M S+ O R - T O V I E WE N T E R T O A C C E P T
2. To choose an Advanced Program, use the Speed + or Speed – keys to scroll through theselections. When the desired workout is displayed, press ENTER to accept.Or, use the numeric keypad to select the desired Advanced Program workout.
3. Follow the prompts for the selected workout to enter the appropriate user and workoutdata.
4. At the end of data entry, the controller will display “PRESS START”. Press [START] tobegin your workout.
Downloaded from www.Manualslib.com manuals search engine

32
StairMaster Fit Test
The StairMaster Fit Test is a program that estimates maximal aerobic capacity based on heart-rate response to sub-maximal exercise.
The StairMaster branching protocol is a series of 3-minute stages of continuous exercise atincreasing intensity. The first stage is a warm-up at approximately 4 METs. The intensity ofthe remaining stages is based on the heart rate response to the warm-up. The test is designedto raise the steady state heart rate of the subject to at least 115 beats/minute. It is importantto remember that two consecutive heart rate measurements must be obtained above 115beats/minute to predict VO2max. The test typically lasts from 6 to 15 minutes. The test willterminate if the heart rate does not continue to rise from state to stage.
In the StairMaster protocol, each work rate is performed for 3 minutes, with heart ratesrecorded during the final 4 seconds of the second and third minutes of each stage. If the heartrates are within 5 beats/min, then the heart rate during the last minute is plotted against thework rate, and the program advances to the next 3-minute stage. The program continues fortwo to four stages until two steady state heart rates above 115 beats/min are obtained in twoconsecutive stages. The line generated from the plotted points is then extended to the age-predicted maximal heart rate. A corresponding maximal work rate and VO2max can then becalculated.
At the end of the 3rd minute of each stage, if the heart rates at the end of the 2nd and 3rd minuteare not within 5 beats/min of each other, then that work rate is maintained for an additionalminute. At the end of the 4th minute, the heart rate is compared to the heart rate at the end ofthe 3rd minute. If the heart rates are within 5 beats/min, then the heart rate during the 4th
minute is plotted against the work rate. If the heart rate at the end of the 3rd and 4th minuteare not within 5 beats/min, then the work rate is maintained for one more additional minute. Ifthe heart rate at the end of the 4th and 5th minutes are within 5 beats/min, then the heart rateat the end of the 5th minute is plotted against the work rate. If the heart rate at the end of the4th and 5th minutes are not within 5 beats/min, then the test failed.
Once two consecutive heart rate measurements are obtained above 115 beats/min range, thenthe test ends successfully and the results are displayed. Estimated maximum aerobic capacityis shown in ml/kg/min and METs. Next, the results are compared to normative values forothers of the same age range and gender.
To use the Fitness Test program:
1. Put the chest strap on. Remember to wet the underneath of the chest strap, over theelectrodes.
2. Press [ADVANCED PROGRAMS] workout key, followed by the Speed UP key. Thecontroller will display “STAIRMASTER FIT TEST.”
3. The controller will then display “ENTER WEIGHT - LBS” (or “ENTER WEIGHT - KG” if inMetric mode). Enter your weight using the numeric key keypad.
4. The controller will display “ENTER AGE 10 -99.” Enter your age using the numerickeypad.
Downloaded from www.Manualslib.com manuals search engine

33
5. The controller will display “ENTER GENDER / 1 - MALE / 2 - FEMALE. Enter your gendercode using the numeric keypad.
6. The controller will display “PRESS START”. Press the [START] key to begin the test.Follow the onscreen prompts. The following messages may be displayed during a fitnesstest:
• “CHECK HR BELT” - Indicates that the heart rate signal has been missing forthe last 30 seconds.
7. The test will be terminated early, and the messages “TEST TERMINATED / TRY AGAINLATER” will be displayed if:
• The user stops exercising at any point during the test.• The [STOP] key is pressed.• The heart rate response to each work level is the same or less than the previous
work level.• The heart rate never reaches 115 beats/minute.• The heart rate continues to rise after the fifth minute.
8. The test is complete when two consecutive steady-state heart rates are obtained above115 beats/minute. The test can be as short as 6 minutes, or as long as 15 minutes.
• No cool down is done at the end of the test.
9. The estimated maximal aerobic capacity is displayed in METs, and VO2max . The resultsare compared to normative values of the same age and gender1 (see below), and givena fitness rating of “Low”, “Fair”, “Average”, “Good”, or “High.”
Fitness Rating Norms (VO2max) AGE
20 – 29 30 – 39 40 – 49 50 – 59 60 +Men
High 51.4 + 50.4 + 48.2 + 45.3 + 42.5 +Good 51.3 – 46.8 50.3 – 44.6 48.1 – 41.8 45.2 – 38.5 42.4 – 35.3Average 46.7 – 42.5 44.5 – 41.0 41.7 – 38.1 38.4 – 35.2 35.2 – 31.8Fair 42.4 – 39.5 40.9 – 37.4 38.0 – 35.1 35.1 – 32.3 31.7 – 28.7Low 39.4 or less 37.3 or less 35.0 or less 32.2 or less 28.6 or less
WomenHigh 44.2 + 41.0 + 39.5 + 35.2 + 35.2 +Good 44.1 – 38.1 40.9 – 36.7 39.4 – 33.8 35.1 – 30.9 35.1 – 29.4Average 38.0 – 35.2 36.6 – 33.8 33.7 – 30.9 30.8 – 28.2 29.3 – 25.8Fair 35.1 – 32.3 33.7 – 30.5 30.8 – 28.3 28.1 – 25.5 25.7 – 23.8Low 32.2 or less 30.4 or less 28.2 or less 25.4 or less 23.7 or less
1 The American College of Sports Medicine, Guidelines for Exercise Testing and Prescription, 6th Edition,Lippincott WIlliams & WIlkins, Philidelphia, PA, 2000, p. 77.
Downloaded from www.Manualslib.com manuals search engine

34
FireFighter Fitness Test
The Firefighter Fit Test has a total of 16 stages lasting one minute each. The first 3 stages area warm-up set with a speed of 3 mph and 0% incline. The following stages increase speed orincline from the previous stage. When the test terminates, the “Cool Down” mode will beentered. The “Cool Down” mode will set the speed to 1 mph and the incline to 0%.
Speed and Incline settings for Firefighter FIT TEST Stages
The Firefighter Treadmill Protocol is as follows:
Stage Speed Incline1 Warm-up 3 mph 0 %2 Warm-up 3 mph 0 %3 Warm-up 3 mph 0 %
4 Stage 1 Test 4.5 mph 0 %5 Stage 2 Test 4.5 mph 2 %6 Stage 3 Test 5.0 mph 2 %7 Stage 4 Test 5.0 mph 4 %8 Stage 5 Test 5.5 mph 4 %9 Stage 6 Test 5.5 mph 6 %10 Stage 7 Test 6.0 mph 6 %11 Stage 8 Test 6.0 mph 8 %12 Stage 9 Test 6.5 mph 8 %13 Stage 10 Test 6.5 mph 10 %14 Stage 11 Test 7.0 mph 10 %15 Stage 12 Test 7.0 mph 12 %16 Stage 13 Test 7.5 mph 12 %
To use the Firefighter Fit Test program:
1. Put the chest strap on. Remember to wet the underneath of the chest strap, over theelectrodes.
2. Press [ADVANCED PROGRAMS] workout key, followed by the Speed UP key. Thecontroller will display “FIREMAN FIT TEST.”
3. The controller will then display “ENTER WEIGHT - LBS” (or “ENTER WEIGHT - KG” if inMetric mode). Enter your weight using the numeric key keypad.
4. The controller will display “ENTER AGE 10 -99.” Enter your age using the numerickeypad.
5. The controller will display “ENTER GENDER / 1 - MALE / 2 - FEMALE. Enter your gendercode using the numeric keypad.
6. The controller will display “PRESS START”. Press the [START] key to begin the test.Follow the onscreen prompts. The first 3 stages represent a 3-minute warm-up at 3mph and 0% incline. The exercise time does not start until the warm-up is completed.At the beginning of the test, the timer will count up from 0:00.
Downloaded from www.Manualslib.com manuals search engine

35
The following messages may be displayed during a fitness test:
• “CHECK HR BELT” - Indicates that the heart rate signal has been missingfor the last 30 seconds.
7. The test will be terminated early, and the messages “TEST TERMINATED / TRY AGAINLATER” will be displayed if:
• The user stops exercising at any point during the test.
• The [STOP] key is pressed.
• 85% of the age predicted maximum heart rate is achieved.
• If after the 16 stages have been completed, the age predicted heart rate has notbeen achieved.
• The heart rate response to each work level must be greater than the heart rateresponse to the last level.
8. The test is complete when the subject’s HR reaches 85% of their age-predictedmaximum HR according to the following formula:
Max Heart Rate (MaxHR) = 215 – {0.75 * Age}Target Test Heart Rate = 0.85 * Max Heart Rate
9. Following the test, the program enters cool down, the treadmill speed decreases to 1mph and incline to 0%. The subject’s heart rate is measured at the end of one minute.
10. At the end of the 1 minute Cool Down, the “Test Complete” message is displayed andthe test statistics are scrolled twice as follows:
Total Exercise TimeTarget Heart RateTarget SpeedTarget InclineTarget METsRecovery Heart Rate
Downloaded from www.Manualslib.com manuals search engine

36
Custom Speed Interval Program
In the Custom Speed Interval workout, the user can create a custom speed interval program byentering Recovery Speed and Time, Exercise Speed and Time, and total # of Intervals.
To use the Custom Speed Intervals program:
1. Press [ADVANCED PROGRAMS] workout key, followed by the Speed UP key until thecontroller displays “CUSTOM INTERVALS”. Press ENTER to accept.
2. The controller will display “ENTER WEIGHT - LBS” (or “ENTER WEIGHT - KG” if in Metricmode). Enter your weight using the numeric keypad and press [ENTER]. Or, press[ENTER] to accept the default value.
• Your weight is used to calculate the number of calories burned for each minuteof exercise and the total number of calories burned for the exercise session.
3. The controller will display “ENTER REST SPEED”. Enter the desired speed for the restphase of the interval using the numeric keypad and press [ENTER]. Or, press [ENTER]to accept the default value of 2 MPH.
4. Next, the controller will display “ENTER REST TIME”. Enter the desired interval time forthe rest stage using the numeric keypad and press [ENTER] to accept. Or, press[ENTER] to accept the default value of 2 minutes.
5. The controller will display “ENTER WORK SPEED”. Enter the desired speed for the workphase of the interval using the numeric keypad and press [ENTER]. Or, press [ENTER]to accept the default value of 5 MPH.
6. The controller will display “ENTER WORK TIME”. Enter the desired interval time for theexercise stage using the numeric keypad, and press [ENTER] to accept. Or, press[ENTER] to accept the default value of 2 minutes.
7. The controller will display “ENTER # OF INTERVALS”. Enter the desired number ofspeed intervals using the numeric keypad, and press [ENTER] to accept. Or, press[ENTER] to accept the default value of 5.
• REMEMBER – one interval is equal to one rest phase and one exercise phase.
8. The controller will display “PRESS START”. Press [START] to begin your workout.
• The speed may be changed at any time during the workout by pressing the[Speed: +] key to increase the speed, or the [Speed: -] key to decrease thespeed. Or, use the numeric keypad to enter the desired speed. Remember –any speed changes will only affect the interval stage that you are in, rest orexercise, and any subsequent rest or exercise stages, not both.
• The incline may be changed at any time during the workout by pressing the[Incline: UP] key to increase the incline, or by pressing the [Incline: DOWN] keyto decrease the incline. Any incline changes will only affect the rest or exercisestage that you are in, and any subsequent rest or exercise stages, not both.
Downloaded from www.Manualslib.com manuals search engine
37
9. Press [COOL DOWN] to return the incline to 0%, and the speed to 1.0 mph if theworkout speed was less than 2.0 mph. If the prior speed was greater than 2.0 mph, thespeed decreases to 2.0 mph.
• The speed may be changed at any time during the cool down by pressing the[Speed: +] key to increase the speed, or the [Speed: -] key to decrease thespeed. Or, use the numeric keypad to enter the desired speed.
• The incline may be changed at any time during cool down by pressing the[Incline: UP] key to increase the incline, or by pressing the [Incline: DOWN] keyto decrease the incline.
10. Press [STOP] to end the workout. The workout statistics will be displayed, and then thecontroller will revert back to the “SELECT WORKOUT” mode.
Downloaded from www.Manualslib.com manuals search engine
38
HR Control Interval Program
In the HR Control Interval workout, the user can define an exercise Target HR, time at exerciseTarget HR, a recovery Target HR, time at recovery Target HR, and total # of HR intervals (1 HRinterval = 1 exercise Target HR interval + 1 recovery Target HR interval).
To use the HR Control Interval program:
1. Press [ADVANCED PROGRAMS] workout key, followed by the Speed UP key until thecontroller displays “HR CONTROL INTERVALS” (2100 LC) or “HR INTERVALS” (2100 LE).Press ENTER to accept.
2. The controller will display “ENTER WEIGHT - LBS” (or “ENTER WEIGHT - KG” if in Metricmode). Enter your weight using the numeric keypad and press [ENTER]. Or, press[ENTER] to accept the default value.
• Your weight is used to calculate the number of calories burned for each minuteof exercise and the total number of calories burned for the exercise session.
3. The controller will display “ENTER AGE 10 -99.” Enter your age using the numerickeypad and press [ENTER]. Or, press [ENTER] to accept the default value of 40 yearsold.
4. The controller will display “REST TARGET HR.” A suggested rest target heart rate will bedisplayed, based on your age and represents 65% of your age-predicted maximumheart rate. Press [ENTER] to accept the calculated target heart rate, or enter a differenttarget heart rate using the numeric keypad and then press [ENTER]. Or, press [ENTER]to accept the default value.
• The target heart rate selected by the controller is based on age, and is equal to65% of your maximum heart rate which is calculated by the following equation:(215 – (Age*.75)) x .65 (where Max HR = 215 – (Age*.75)). If desired, changethe target heart rate at this point by using the numeric keypad to enter the newtarget heart rate, and then press [ENTER].
• Change to a new target heart rate that is between 80 and 180 beats per minuteat any time during a workout by using the numeric keypad to enter the newtarget heart rate, and then pressing [ENTER]. A change in target heart ratedoes not reset any speed or incline overrides made prior to the target change.
5. Next, the controller will display “ENTER REST TIME”. Enter the desired interval time forthe rest stage using the numeric keypad and press [ENTER] to accept. Or, press[ENTER] to accept the default value of 2 minutes.
• NOTE: The Rest Time does not start until your heart rate is within 5beats/minute of the Target Rest Heart Rate.
• Valid Rest Times are between 30 seconds and 49 minutes.
Downloaded from www.Manualslib.com manuals search engine

39
6. The controller will display “WORK TARGET HR”. A suggested work target heart rate willbe displayed, based on your age and represents 80% of your age-predicted maximumheart rate. Press [ENTER] to accept the calculated target heart rate, or enter a differentwork target heart rate using the numeric keypad and then press [ENTER]. Or, press[ENTER] to accept the default value.
• The target heart rate selected by the controller is based on age, and is equal to80% of your maximum heart rate which is calculated by the following equation:(215 – (Age*.75)) x .80 (where Max HR = 215 – (Age*.75)). If desired, changethe target heart rate at this point by using the numeric keypad to enter the newtarget heart rate, and then press [ENTER].
• Change to a new target heart rate that is between 80 and 180 beats per minuteat any time during a workout by using the numeric keypad to enter the newtarget heart rate, and then pressing [ENTER]. A change in target heart ratedoes not reset any speed or incline overrides made prior to the target change.
7. The controller will display “ENTER WORK TIME”. Enter the desired interval time for theexercise stage using the numeric keypad, and press [ENTER] to accept. Or, press[ENTER] to accept the default value of 2 minutes.
• NOTE: The Work Time does not start until your heart rate is within 5beats/minute of the Target Work Heart Rate.
• Valid Work Times are between 30 seconds and 49 minutes.
8. The 2100 LC controller will display “HR CONTROL BASED ON / 1 - SPEED : 2 - INCLINE.”The 2100 LE controller will display “HR CONTROL MODE / 1 – SPEED : 2 – INCLINE”.Select the type of heart rate control - either speed [1] or incline [2] - and press[ENTER]. Or, press [ENTER] to accept the default heart rate control of speed.
9. The controller will display “ENTER # OF INTERVALS”. Enter the desired number ofintervals and press [ENTER]. Or, press [ENTER] to accept the default value of 2.
10. The controller will display “PRESS START”. Press [START] to begin your workout.
• The speed may be changed at any time during the workout by pressing the[Speed: +] key to increase the speed, or the [Speed: -] key to decrease thespeed. Or, use the numeric keypad to enter the desired speed. Remember –any speed changes will only affect the interval stage that you are in, rest orexercise, not both.
• The incline may be changed at any time during the workout by pressing the[Incline: UP] key to increase the incline, or by pressing the [Incline: DOWN] keyto decrease the incline. Any incline changes will only affect the incline in the restor exercise stage that you are in, and any subsequent rest or exercise stages,not both.
Downloaded from www.Manualslib.com manuals search engine

40
• NOTE – After the first Rest and Work interval, the program stores the Speedand Incline workloads at the end of the Rest and Work interval portion. Then,when the workout moves to the second interval, the program will automaticallychange speed and incline to the saved workloads. The HR Control Algorithm willadjust speed or incline to maintain the user at the desired Rest or Work HRrange after waiting for 30 seconds. At the end of the second Rest and Workinterval, the program will restore the Speed and Incline workloads at the end ofthe Rest and Work interval portion, to be used during the next interval. Thisrepeats until the workout time is reached and the program moves into the CoolDown stage.
11. Press [COOL DOWN] to return the incline to 0%, and the speed to 1.0 mph if theworkout speed was less than 2.0 mph. If the prior speed was greater than 2.0 mph, thespeed decreases to 2.0 mph.
• The speed may be changed at any time during the cool down by pressing the[Speed: +] key to increase the speed, or the [Speed: -] key to decrease thespeed. Or, use the numeric keypad to enter the desired speed.
• The incline may be changed at any time during cool down by pressing the[Incline: UP] key to increase the incline, or by pressing the [Incline: DOWN] keyto decrease the incline.
12. Press [STOP] to end the workout. The workout statistics will be displayed, and then thecontroller will revert back to the “SELECT WORKOUT” mode.
Downloaded from www.Manualslib.com manuals search engine

41
5K Fun Run Program
The 5K Fun Run workout is a fixed-distance workout. The user enters weight and treadmillspeed. Then, the program runs for a distance of 5K (or 3.125 miles). Time counts up from0:00. The user can adjust speed and incline as desired throughout the program.
To use the 5K Fun Run program:
1. Press [ADVANCED PROGRAMS] workout key, followed by the Speed UP key until thecontroller displays “5K FUN RUN”. Press ENTER to accept.
2. The controller will display “ENTER WEIGHT - LBS” (or “ENTER WEIGHT - KG” if in Metricmode). Enter your weight using the numeric keypad and press [ENTER]. Or, press[ENTER] to accept the default value.
3. The controller will display “ENTER SPEED”. Enter the desired exercise speed for theworkout using the numeric keypad and press [ENTER]. Or, press [ENTER] to accept thedefault value of 2 MPH.
4. Next, the controller will display “PRESS START”. Press [START] to begin your workout.The controller will then display “3 MINUTE WARMUP”.
• During the Warm-Up, the speed goes to 2 MPH and the user can adjust speedmanually using the Speed Faster and Slower keys. The stage timer counts downfrom 3:00. At the end of 3 minutes, the program displays “Enjoy Workout” andthe 5K Fun Run begins. The speed automatically increases to the speed the userentered during data entry. The timer starts counting up from 0:00 and stopswhen the distance reaches 5K, and program enters Cool Down.
• During the workout, the speed may be changed at any time by pressing the[Speed: +] key to increase the speed, or the [Speed: -] key to decrease thespeed. Or, use the numeric keypad to enter the desired speed.
• The incline may be changed at any time during the workout by pressing the[Incline: UP] key to increase the incline, or by pressing the [Incline: DOWN] keyto decrease the incline.
5. Press [COOL DOWN] to return the incline to 0%, and the speed to 1.0 mph if theworkout speed was less than 2.0 mph. If the prior speed was greater than 2.0 mph, thespeed decreases to 2.0 mph.
• The speed may be changed at any time during the cool down by pressing the[Speed: +] key to increase the speed, or the [Speed: -] key to decrease thespeed. Or, use the numeric keypad to enter the desired speed.
• The incline may be changed at any time during cool down by pressing the[Incline: UP] key to increase the incline, or by pressing the [Incline: DOWN] keyto decrease the incline.
6. Press [STOP] to end the workout. The workout statistics will be displayed, and then thecontroller will revert back to the “SELECT WORKOUT” mode.
Downloaded from www.Manualslib.com manuals search engine

42
10K Bolder Boulder Run Program
The 10K Bolder Boulder Run workout is a fixed-distance workout with automatic incline changesto simulate the famous Bolder Boulder 10K. The user enters weight and treadmill speed. Then,the program runs for a distance of 10K (or 6.2 miles). Time counts up from 0:00. The user canadjust speed and incline as desired throughout the program.
To use the 10K Bolder Boulder Run program:
1. Press [ADVANCED PROGRAMS] workout key, followed by the Speed UP key until thecontroller displays “10K BOULDER RUN”. Press ENTER to accept.
2. The controller will display “ENTER WEIGHT - LBS” (or “ENTER WEIGHT - KG” if in Metricmode). Enter your weight using the numeric keypad and press [ENTER]. Or, press[ENTER] to accept the default value.
3. The controller will display “ENTER SPEED”. Enter the desired exercise speed for theworkout using the numeric keypad and press [ENTER]. Or, press [ENTER] to accept thedefault value of 2 MPH.
4. Next, the controller will display “PRESS START”. Press [START] to begin your workout.The controller will then display “3 MINUTE WARMUP”.
• During the Warm-Up, the speed goes to 2 MPH and the user can adjust speedmanually using the Speed Faster and Slower keys. The stage timer in the centerdisplay counts down from 3:00. At the end of 3 minutes, the program displays“Enjoy Workout” and the 10K Boulder Run begins. The speed automaticallyincreases to the speed the user entered during data entry. The timer startscounting up from 0:00 and stops when the distance reaches 10K, and programenters Cool Down.
• During the workout, the speed may be changed at any time by pressing the[Speed: +] key to increase the speed, or the [Speed: -] key to decrease thespeed. Or, use the numeric keypad to enter the desired speed.
• The incline may be changed at any time during the workout by pressing the[Incline: UP] key to increase the incline, or by pressing the [Incline: DOWN] keyto decrease the incline.
5. Press [COOL DOWN] to return the incline to 0%, and the speed to 1.0 mph if theworkout speed was less than 2.0 mph. If the prior speed was greater than 2.0 mph, thespeed decreases to 2.0 mph.
• The speed may be changed at any time during the cool down by pressing the[Speed: +] key to increase the speed, or the [Speed: -] key to decrease thespeed. Or, use the numeric keypad to enter the desired speed.
• The incline may be changed at any time during cool down by pressing the[Incline: UP] key to increase the incline, or by pressing the [Incline: DOWN] keyto decrease the incline.
Downloaded from www.Manualslib.com manuals search engine
43
6. Press [STOP] to end the workout. The workout statistics will be displayed, and then thecontroller will revert back to the “SELECT WORKOUT” mode.
Custom Calorie Burn Program
The Custom Calorie Burn workout allows the user to enter a calorie expenditure amount (forexample: 300 calories). The user enters weight and treadmill speed. Then, the program runsfor the amount of time it takes to burn the entered calorie amount. Time counts up from 0:00.The user adjusts speed and incline as desired throughout the program.
To use the Custom Calorie Burn program:
1. Press [ADVANCED PROGRAMS] workout key, followed by the Speed UP or DOWN keysuntil the controller displays “CUSTOM CAL BURN”. Press ENTER to accept.
2. The controller will display “ENTER WEIGHT - LBS” (or “ENTER WEIGHT - KG” if in Metricmode). Enter your weight using the numeric keypad and press [ENTER]. Or, press[ENTER] to accept the default value.
3. The controller will display “ENTER SPEED”. Enter the desired exercise speed for theworkout using the numeric keypad and press [ENTER]. Or, press [ENTER] to accept thedefault value of 2 MPH.
4. The controller will display “ENTER CALORIES”. Enter the desired number of calories toburn for the workout using the numeric keypad and press [ENTER]. Or, press [ENTER]to accept the default value.
5. The controller will display “PRESS START”. Press [START] to begin your workout.
• The speed may be changed at any time during the workout by pressing the[Speed: +] key to increase the speed, or the [Speed: -] key to decrease thespeed. Or, use the numeric keypad to enter the desired speed.
• The incline may be changed at any time during the workout by pressing the[Incline: UP] key to increase the incline, or by pressing the [Incline: DOWN] keyto decrease the incline.
6. Press [COOL DOWN] to return the incline to 0%, and the speed to 1.0 mph if theworkout speed was less than 2.0 mph. If the prior speed was greater than 2.0 mph, thespeed decreases to 2.0 mph.
• The speed may be changed at any time during the cool down by pressing the[Speed: +] key to increase the speed, or the [Speed: -] key to decrease thespeed. Or, use the numeric keypad to enter the desired speed.
• The incline may be changed at any time during cool down by pressing the[Incline: UP] key to increase the incline, or by pressing the [Incline: DOWN] keyto decrease the incline.
7. Press [STOP] to end the workout. The workout statistics will be displayed, and then thecontroller will revert back to the “SELECT WORKOUT” mode.
Downloaded from www.Manualslib.com manuals search engine

44
9-Hole Walk Program
The 9 Hole Walk workout is a fixed-distance workout. The user enters weight and treadmillspeed. Then, the program runs for a distance of 2 miles (3,520 yards). Time counts up from0:00. The user can adjust speed and incline as desired throughout the program.
To use the 9-Hole Walk program:
1. Press [ADVANCED PROGRAMS] workout key, followed by the Speed UP key until thecontroller displays “9 HOLE WALK”. Press ENTER to accept.
2. The controller will display “ENTER WEIGHT - LBS” (or “ENTER WEIGHT - KG” if in Metricmode). Enter your weight using the numeric keypad and press [ENTER]. Or, press[ENTER] to accept the default value.
3. The controller will display “ENTER SPEED”. Enter the desired exercise speed for theworkout using the numeric keypad and press [ENTER]. Or, press [ENTER] to accept thedefault value of 2 MPH.
4. Next, the controller will display “PRESS START”. Press [START] to begin your workout.The controller will then display “3 MINUTE WARMUP”.
• During the Warm-Up, the speed goes to 2 MPH and the user can adjust speedmanually using the Speed Faster and Slower keys. The stage timer counts downfrom 3:00. At the end of 3 minutes, the program displays “Enjoy Workout” andthe 9 Hole Walk begins. The speed automatically increases to the speed theuser entered during data entry. The timer starts counting up from 0:00 andstops when the distance reaches 10K, and program enters Cool Down.
• During the workout, the speed may be changed at any time by pressing the[Speed: +] key to increase the speed, or the [Speed: -] key to decrease thespeed. Or, use the numeric keypad to enter the desired speed.
• The incline may be changed at any time during the workout by pressing the[Incline: UP] key to increase the incline, or by pressing the [Incline: DOWN] keyto decrease the incline.
5. Press [COOL DOWN] to return the incline to 0%, and the speed to 1.0 mph if theworkout speed was less than 2.0 mph. If the prior speed was greater than 2.0 mph, thespeed decreases to 2.0 mph.
• The speed may be changed at any time during the cool down by pressing the[Speed: +] key to increase the speed, or the [Speed: -] key to decrease thespeed. Or, use the numeric keypad to enter the desired speed.
• The incline may be changed at any time during cool down by pressing the[Incline: UP] key to increase the incline, or by pressing the [Incline: DOWN] keyto decrease the incline.
6. Press [STOP] to end the workout. The workout statistics will be displayed, and then thecontroller will revert back to the “SELECT WORKOUT” mode.
Downloaded from www.Manualslib.com manuals search engine
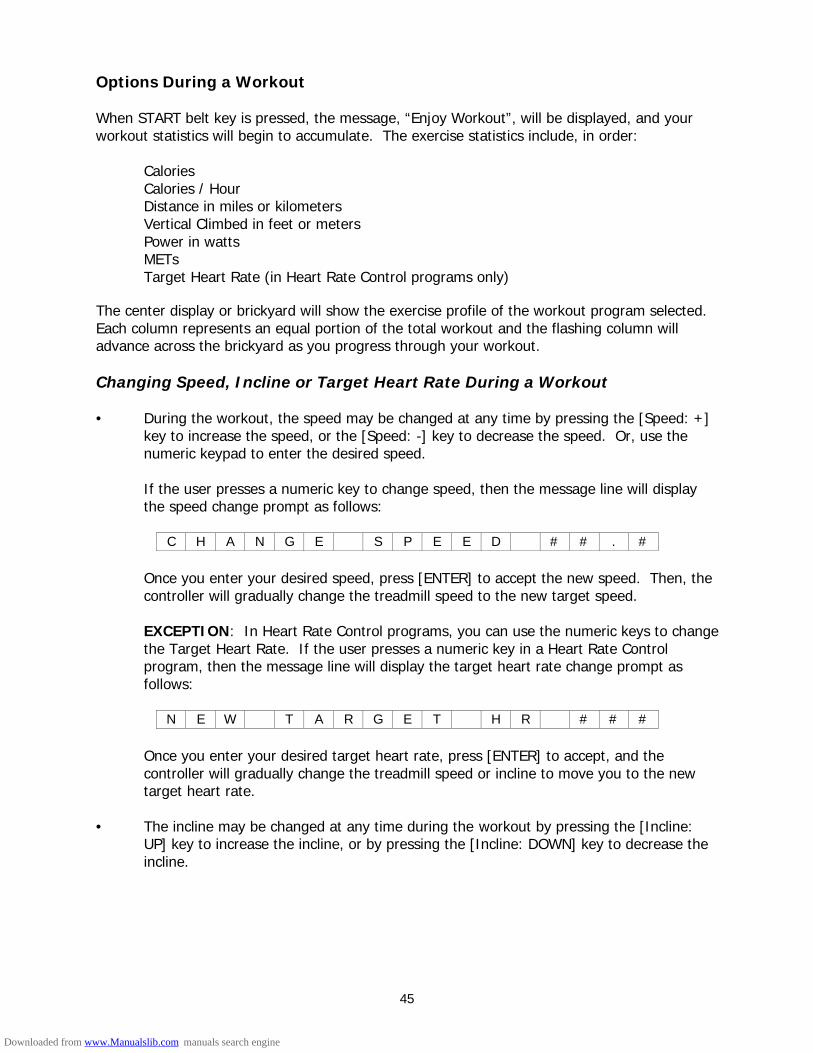
45
Options During a Workout
When START belt key is pressed, the message, “Enjoy Workout”, will be displayed, and yourworkout statistics will begin to accumulate. The exercise statistics include, in order:
CaloriesCalories / HourDistance in miles or kilometersVertical Climbed in feet or metersPower in wattsMETsTarget Heart Rate (in Heart Rate Control programs only)
The center display or brickyard will show the exercise profile of the workout program selected.Each column represents an equal portion of the total workout and the flashing column willadvance across the brickyard as you progress through your workout.
Changing Speed, Incline or Target Heart Rate During a Workout
• During the workout, the speed may be changed at any time by pressing the [Speed: +]key to increase the speed, or the [Speed: -] key to decrease the speed. Or, use thenumeric keypad to enter the desired speed.
If the user presses a numeric key to change speed, then the message line will displaythe speed change prompt as follows:
C H A N G E S P E E D # # . #
Once you enter your desired speed, press [ENTER] to accept the new speed. Then, thecontroller will gradually change the treadmill speed to the new target speed.
EXCEPTION: In Heart Rate Control programs, you can use the numeric keys to changethe Target Heart Rate. If the user presses a numeric key in a Heart Rate Controlprogram, then the message line will display the target heart rate change prompt asfollows:
N E W T A R G E T H R # # #
Once you enter your desired target heart rate, press [ENTER] to accept, and thecontroller will gradually change the treadmill speed or incline to move you to the newtarget heart rate.
• The incline may be changed at any time during the workout by pressing the [Incline:UP] key to increase the incline, or by pressing the [Incline: DOWN] key to decrease theincline.
Downloaded from www.Manualslib.com manuals search engine

46
Pausing Your Workout
The program automatically enters the PAUSE state from a workout when the STOP key ispressed. The workout will be suspended, and the program will display the following alternatingmessages every 3 seconds for up to 1 minute:
P R E S S S T O P T O E N DS T A R T T O R E S U M E
When the program enters a PAUSE state, a timer begins to count down from 1 minute to showyou the time remaining in the pause condition.
To leave the PAUSE state:• At the end of the one minute count down, the current workout ends, the accumulated
exercise statistics are scrolled twice, and the program returns to the opening message.• If the user presses STOP or CLEAR, then the program ends, the accumulated exercise
statistics are scrolled twice, and the program returns to the opening message.• If the user presses the START key, then the workout proceeds from where it was
suspended.
COOL DOWN
Your workout enters COOL DOWN under the following three conditions:
1) The COOL DOWN key is pressed during a workout;2) A workout is followed through to completion, then the program automatically enters
Cool Down;3) In a Manual workout, the workout time reaches the owner-defined maximum time limit,
then the program automatically enters Cool Down.
From a workout, pressing the COOL DOWN key will interrupt any workout program running, theincline will automatically return to 0% and the speed will return to 2 mph if prior speed wasgreater than 2 mph, or the speed will return to 1 mph if prior speed was 2 mph or less. Uponpressing the COOL DOWN key, a “COOL DOWN” message will be displayed.
If a workout program is completed, then the program automatically enters Cool Down, theincline returns to 0 % and the speed returns to 2 or 1 mph as described above. At thecompletion of a workout, a “GOAL ATTAINED” message will be displayed.
The Cool Down time is fixed at a default value of 2 minutes. The owner can modify thiscool down time between 1 and 10 minutes (see owner-defined custom console codes fordetails). The Cool Down time will count down in the Stage Time window.
When Cool Down time expires, the treadmill belt will STOP automatically, and a“WORKOUT COMPLETED” message will be displayed.
If the maximum time limit is defined by the owner and the user reaches this limit during aworkout, then the program automatically enters cool down, and the “COOL DOWN” messagewill be displayed.
Downloaded from www.Manualslib.com manuals search engine
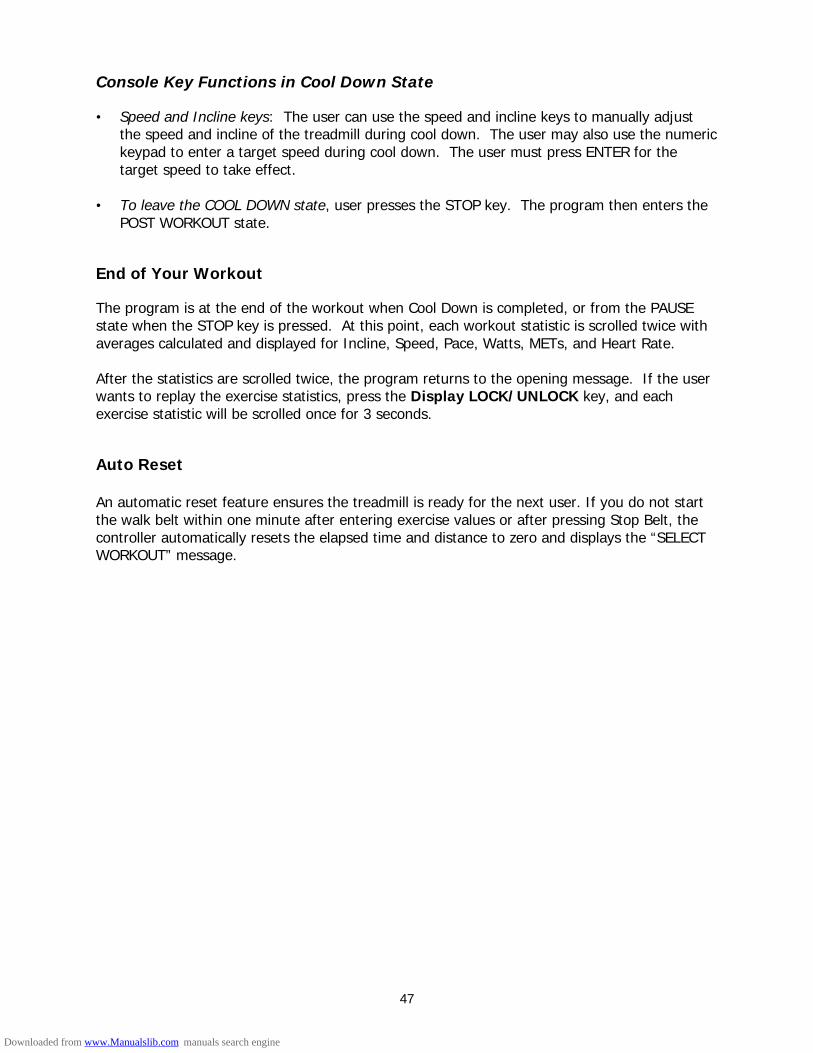
47
Console Key Functions in Cool Down State
• Speed and Incline keys: The user can use the speed and incline keys to manually adjustthe speed and incline of the treadmill during cool down. The user may also use the numerickeypad to enter a target speed during cool down. The user must press ENTER for thetarget speed to take effect.
• To leave the COOL DOWN state, user presses the STOP key. The program then enters thePOST WORKOUT state.
End of Your Workout
The program is at the end of the workout when Cool Down is completed, or from the PAUSEstate when the STOP key is pressed. At this point, each workout statistic is scrolled twice withaverages calculated and displayed for Incline, Speed, Pace, Watts, METs, and Heart Rate.
After the statistics are scrolled twice, the program returns to the opening message. If the userwants to replay the exercise statistics, press the Display LOCK/UNLOCK key, and eachexercise statistic will be scrolled once for 3 seconds.
Auto Reset
An automatic reset feature ensures the treadmill is ready for the next user. If you do not startthe walk belt within one minute after entering exercise values or after pressing Stop Belt, thecontroller automatically resets the elapsed time and distance to zero and displays the “SELECTWORKOUT” message.
Downloaded from www.Manualslib.com manuals search engine
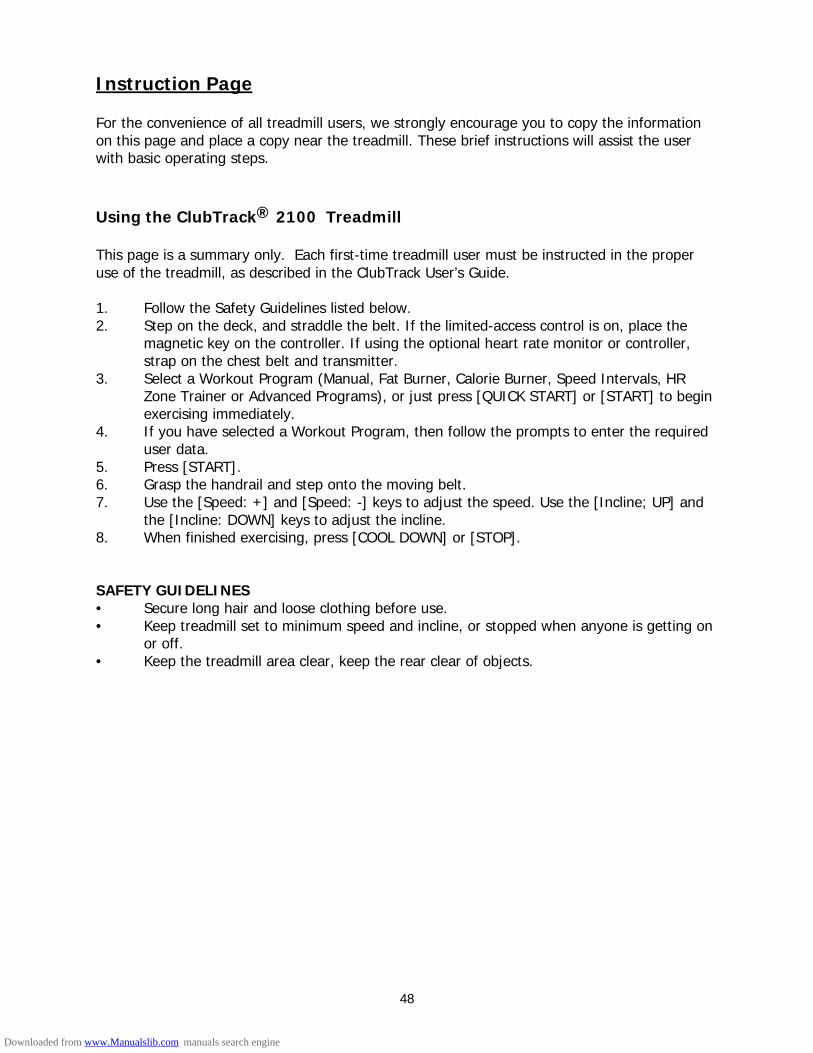
48
Instruction Page
For the convenience of all treadmill users, we strongly encourage you to copy the informationon this page and place a copy near the treadmill. These brief instructions will assist the userwith basic operating steps.
Using the ClubTrack® 2100 Treadmill
This page is a summary only. Each first-time treadmill user must be instructed in the properuse of the treadmill, as described in the ClubTrack User’s Guide.
1. Follow the Safety Guidelines listed below.2. Step on the deck, and straddle the belt. If the limited-access control is on, place the
magnetic key on the controller. If using the optional heart rate monitor or controller,strap on the chest belt and transmitter.
3. Select a Workout Program (Manual, Fat Burner, Calorie Burner, Speed Intervals, HRZone Trainer or Advanced Programs), or just press [QUICK START] or [START] to beginexercising immediately.
4. If you have selected a Workout Program, then follow the prompts to enter the requireduser data.
5. Press [START].6. Grasp the handrail and step onto the moving belt.7. Use the [Speed: +] and [Speed: -] keys to adjust the speed. Use the [Incline; UP] and
the [Incline: DOWN] keys to adjust the incline.8. When finished exercising, press [COOL DOWN] or [STOP].
SAFETY GUIDELINES• Secure long hair and loose clothing before use.• Keep treadmill set to minimum speed and incline, or stopped when anyone is getting on
or off.• Keep the treadmill area clear, keep the rear clear of objects.
Downloaded from www.Manualslib.com manuals search engine

49
Heart Rate Priority on ClubTrack 2100 Treadmills
Both contact heart rate and telemetry (e.g., Polar®) heart rate signal detection is available. Thedefault priority of heart rate input is “LOCKED INPUT.” If a telemetry signal is detected first,contact heart rate signals are inhibited from being detected throughout the rest of the workoutsession and vice-versa.
Locked/Non-Locked Heart Rate Signal Options
When the “EITHER INPUT” option is selected the heart rate source signal is not fixed during theworkout session (if the signal is lost either input will be valid). If the “LOCKED INPUTS” optionis selected then the heart rate source signal is locked on the first detected signal during theworkout. To set a heart rate signal input, or to turn off the heart rate option all together,perform the following steps:
1. On the controller keypad, press [CLEAR], [3], [2]. At this point the screen will display“HR INPUTS.” Press [ENTER] to select this option.
2. There are five options to handle heart rate input signals. Press the [SPEED: ?+] and[SPEED: -] keys to scroll through the options until you find the option that you want.Press the [ENTER] key to select that option.
The options are as follows:
“ LOCKED INPUTS“ - allows either telemetry or contact heart rate signals to bedetected. Once the controller has detected a valid input signal it will lock out theopposite type of signal for the duration of the workout session. For example, if you startout using contact heart rate then you are limited to using only contact heart rate duringyour workout session, even if the signal is lost while performing the workout, and vice-versa.
“ EITHER INPUT” - allows either telemetry or contact heart rate signals to bedetected. Does not lock out a particular input signal for the entire workout. This optionwill detect either input signal during a workout session, but only one at a time, and onlyuntil the other signal terminates.
“ TELEMETRY ONLY “ - locks out contact heart rate signals and will only detecttelemetry signals.
“ HAND ONLY “ - locks out telemetry signals and will only detect contact heart ratesignals.
“ BOTH HR OFF “ - turns off the ability to detect any heart rate signal. Used in raresituations where there is excessive interference with the heart rate signals.
• During workouts where heart rate is necessary, such as the HR Zone Trainer, HRInterval and the Fitness Test, the controller will pick up telemetry heart ratesignals so that the programs are not disabled.
Downloaded from www.Manualslib.com manuals search engine

50
Error Codes
If the controller finds a fault in the system, it displays an error code (example: “CONFIGREQRD”). If an error code appears, turn the circuit breaker off, and then back on to restart thesystem. If the error code appears again, record the code. Then, turn off the treadmill and call aStairMaster-trained service representative (see section “Troubleshooting”).
Viewing Maintenance Information
The total time and distance the treadmill has been used can be viewed under MaintenanceInformation. This information can help you schedule treadmill maintenance and check treadmillusage.
To view maintenance information:
1. Press [CLEAR], [4], [0], [ENTER]. The controller will display the machine run time inhours since last cleared. Press [CLEAR] to exit.
2. To view the total distance the treadmill has been used, or press [CLEAR], [4], [2],[ENTER]. Press [CLEAR] to exit.
Downloaded from www.Manualslib.com manuals search engine
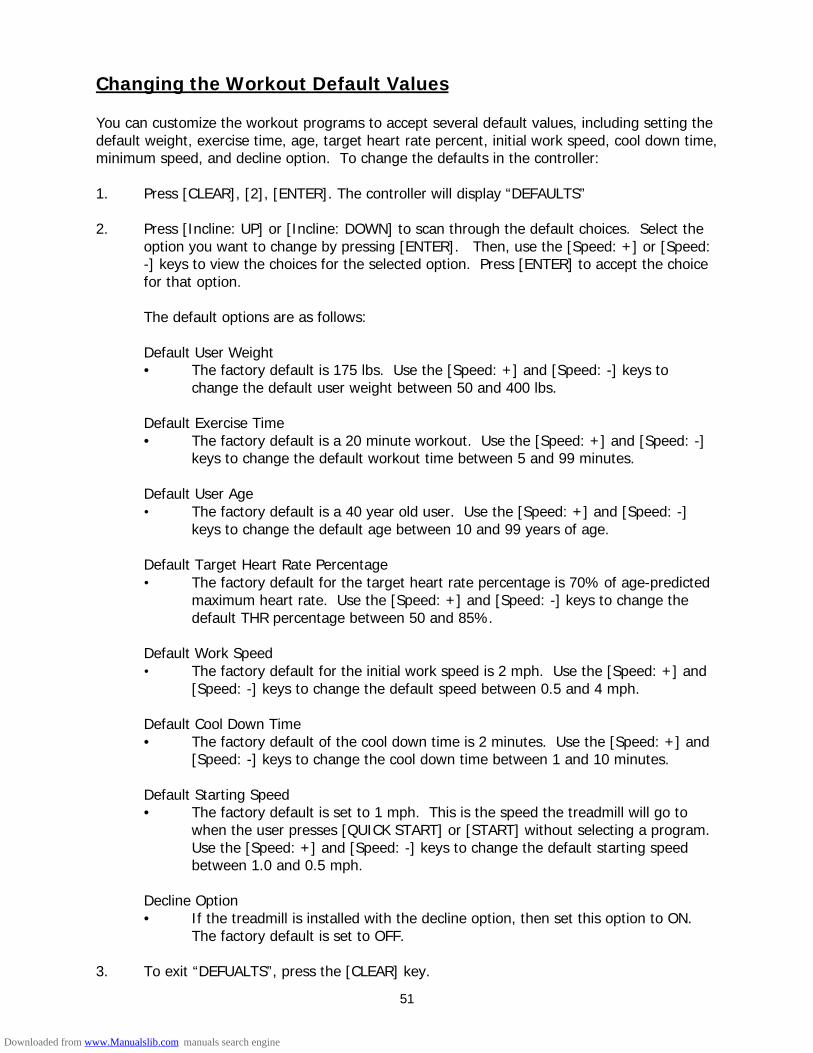
51
Changing the Workout Default Values
You can customize the workout programs to accept several default values, including setting thedefault weight, exercise time, age, target heart rate percent, initial work speed, cool down time,minimum speed, and decline option. To change the defaults in the controller:
1. Press [CLEAR], [2], [ENTER]. The controller will display “DEFAULTS”
2. Press [Incline: UP] or [Incline: DOWN] to scan through the default choices. Select theoption you want to change by pressing [ENTER]. Then, use the [Speed: +] or [Speed:-] keys to view the choices for the selected option. Press [ENTER] to accept the choicefor that option.
The default options are as follows:
Default User Weight• The factory default is 175 lbs. Use the [Speed: +] and [Speed: -] keys to
change the default user weight between 50 and 400 lbs.
Default Exercise Time• The factory default is a 20 minute workout. Use the [Speed: +] and [Speed: -]
keys to change the default workout time between 5 and 99 minutes.
Default User Age• The factory default is a 40 year old user. Use the [Speed: +] and [Speed: -]
keys to change the default age between 10 and 99 years of age.
Default Target Heart Rate Percentage• The factory default for the target heart rate percentage is 70% of age-predicted
maximum heart rate. Use the [Speed: +] and [Speed: -] keys to change thedefault THR percentage between 50 and 85%.
Default Work Speed• The factory default for the initial work speed is 2 mph. Use the [Speed: +] and
[Speed: -] keys to change the default speed between 0.5 and 4 mph.
Default Cool Down Time• The factory default of the cool down time is 2 minutes. Use the [Speed: +] and
[Speed: -] keys to change the cool down time between 1 and 10 minutes.
Default Starting Speed• The factory default is set to 1 mph. This is the speed the treadmill will go to
when the user presses [QUICK START] or [START] without selecting a program.Use the [Speed: +] and [Speed: -] keys to change the default starting speedbetween 1.0 and 0.5 mph.
Decline Option• If the treadmill is installed with the decline option, then set this option to ON.
The factory default is set to OFF.
3. To exit “DEFUALTS”, press the [CLEAR] key.
Downloaded from www.Manualslib.com manuals search engine
52
Customizing the Treadmill
You can customize several parameters on the ClubTrack 2100 to conform to your individualrequirements, including setting time limits, speed limits, changing screen contrast (2100 LConly), changing language, and changing units. To customize the controller:
1. Press [CLEAR], [3], [ENTER]. The controller will display “CUSTOMIZE.”
2. Press [Incline: UP] or [Incline: DOWN] to scan through the customize choices. Selectthe option you want to change by pressing [ENTER]. Then, use the [Speed: +] or[Speed: -] keys to view the choices for the selected option. Press [ENTER] to accept thechoice for that option.
The customize options are as follows:
Max time limit• For no time limit, press [0], [ENTER]. The screen will display “TIME LIMIT OFF.”• Use the numeric keypad to enter the desired time limit. Press [ENTER], [ENTER]
to accept the new time limit.
Change units• Use the [Speed: +] and [Speed: -] keys to toggle between USA units and Metric
units. Press [ENTER] to select your option.
Choose the type of heart rate input.• See the Heart Rate Priority section for details of the choices.
Adjust screen contrast (2100 LC only)• Use the [Speed: +] and [Speed: -] keys to increase or decrease the contrast
level. Press [ENTER] to select your option.
Max speed• Use the numeric keypad to enter the treadmill speed limit. Press [ENTER], to
accept the new speed.
Enable magnet key• Use the [Speed: +] and [Speed: -] keys to toggle between “ON” and “OFF.”
Press [ENTER] to select your option.
Reset Defaults• This code will reset all exercise parameters to the factory defaults. Press
[ENTER], to accept the default values.
3. To exit “CUSTOMIZE”, press the [CLEAR] key.
Downloaded from www.Manualslib.com manuals search engine

53
Maintenance
Visually inspect and clean the treadmill regularly. Daily visual inspection should include:
• Inspect the power cord and walking belt for wear.
• Check the position of the walking belt; be sure it is not rubbing against the frame. Thebelt should be evenly spaced on the deck within 0.25 inch; adjust if necessary.
• Check optional side handrails to be sure they are fastened securely.
• Remove potential hazards from the treadmill area.
Cleaning
Treadmill and Controller
• Daily: Keep the treadmill and controller free of dust and debris. Use a damp sponge towipe the exteriors and walking belt; do not soak surfaces. Dry all surfaces thoroughly.
WARNINGDRY MOP THE DECK UNDER THE BELT ONLY. DO NOT ADD ANY LUBRICANTS.ADDING LUBRICANTS CAN RUIN THE PROPRIETARY FRICTION-CONTROLSURFACE.
DO NOT USE DETERGENTS OR CLEANING AGENTS ON ANY PART OF THE DECK.
DO NOT LET LIQUID ENTER THE TREADMILL OR CONTROLLER. IF IT DOES,THE EQUIPMENT MUST BE INSPECTED AND TESTED FOR SAFETY BY ASTAIRMATER-APPROVED TECHNICIAN BEFORE IT CAN BE USED AGAIN.
• Weekly: Elevate the treadmill to maximum incline and vacuum the floor under it toprevent excess dust and dirt from interfering with operation.
Treadmill Interior
Depending upon the treadmill environment, dust and or lint can accumulate under the hood.Periodic internal cleaning should be done by a qualified service personnel.
WARNINGDO NOT REMOVE THE TREADMILL HOOD: DANGEROUS VOLTAGES AREPRESENT. COMPONENTS ARE SERVICEABLE ONLY BY QUALIFIED SERVICEPERSONNEL.
Downloaded from www.Manualslib.com manuals search engine
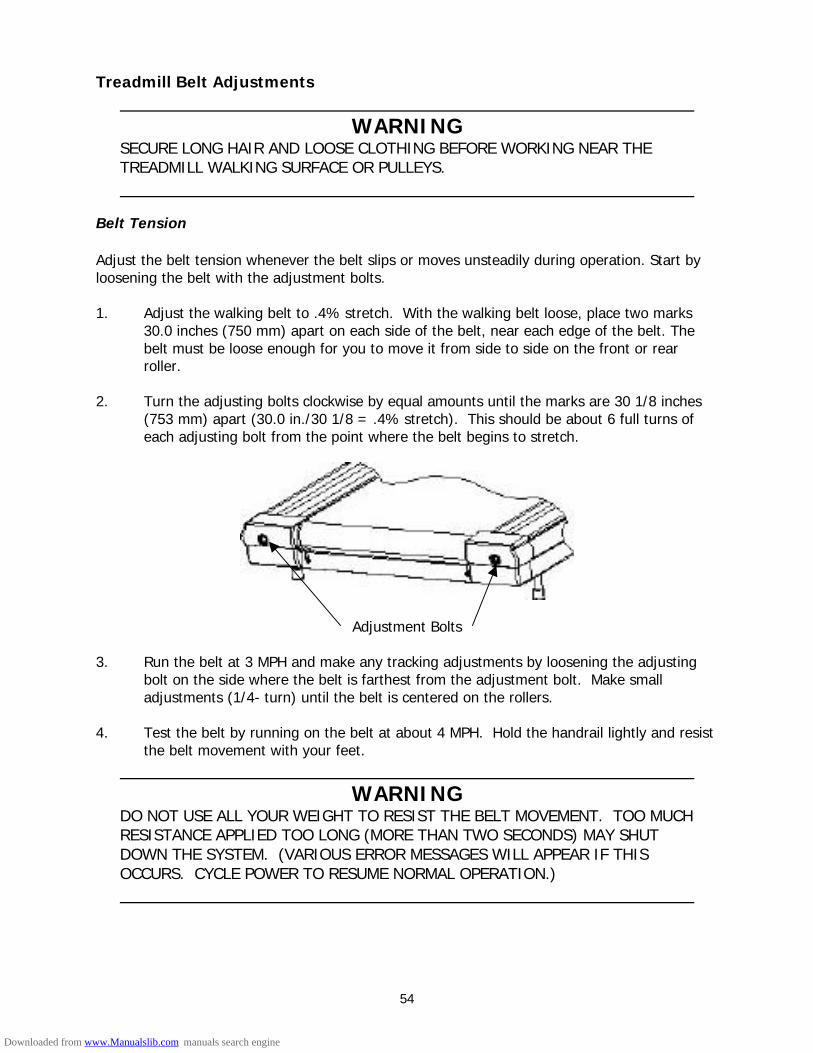
54
Treadmill Belt Adjustments
WARNINGSECURE LONG HAIR AND LOOSE CLOTHING BEFORE WORKING NEAR THETREADMILL WALKING SURFACE OR PULLEYS.
Belt Tension
Adjust the belt tension whenever the belt slips or moves unsteadily during operation. Start byloosening the belt with the adjustment bolts.
1. Adjust the walking belt to .4% stretch. With the walking belt loose, place two marks30.0 inches (750 mm) apart on each side of the belt, near each edge of the belt. Thebelt must be loose enough for you to move it from side to side on the front or rearroller.
2. Turn the adjusting bolts clockwise by equal amounts until the marks are 30 1/8 inches(753 mm) apart (30.0 in./30 1/8 = .4% stretch). This should be about 6 full turns ofeach adjusting bolt from the point where the belt begins to stretch.
Adjustment Bolts
3. Run the belt at 3 MPH and make any tracking adjustments by loosening the adjustingbolt on the side where the belt is farthest from the adjustment bolt. Make smalladjustments (1/4- turn) until the belt is centered on the rollers.
4. Test the belt by running on the belt at about 4 MPH. Hold the handrail lightly and resistthe belt movement with your feet.
WARNINGDO NOT USE ALL YOUR WEIGHT TO RESIST THE BELT MOVEMENT. TOO MUCHRESISTANCE APPLIED TOO LONG (MORE THAN TWO SECONDS) MAY SHUTDOWN THE SYSTEM. (VARIOUS ERROR MESSAGES WILL APPEAR IF THISOCCURS. CYCLE POWER TO RESUME NORMAL OPERATION.)
Downloaded from www.Manualslib.com manuals search engine
55
5. If you feel the belt slip on the front roller, then increase the tension of each adjustingscrew by 1/2 turn and retest. If you feel the belt slip again, check the tensioneradjustment.
WARNINGDO NOT OVERTIGHTEN THE WALKING BELT. DO NOT TORQUE ADJUSTMENTSCREWS BEYOND 80 IN-LBS (9 N-M) MAXIMUM. OVERTIGHTENING THE BELTWILL DAMAGE THE BELT AND ROLLERS.
Belt Tracking
Perform this procedure whenever the belt moves to one side or the other. Stay off the beltwhen adjusting the tracking.
1. Start the treadmill at minimum speed and incline.
2. Increase speed to 6 mph (9.5 km/h) and make the following adjustment. The figureabove shows the location of the bolts:a. If the belt moves to the right, turn the right tension bolt 1/4-turn clockwise.
b. If the belt moves to the left, turn the left tension bolt 1/4-turn clockwise.
3. After making an initial adjustment, run the treadmill for five minutes and observe howthe belt tracks. If the belt continues to move away from the center, adjust theappropriate side as in Step 2 until properly centered.
WARNINGDO NOT OVERTIGHTEN THE WALKING BELT. DO NOT TORQUE ADJUSTMENTSCREWS BEYOND 80 IN-LBS (9 N-M) MAXIMUM. OVERTIGHTENING THE BELTWILL DAMAGE THE BELT AND ROLLERS.
4. Stop the treadmill.
Belt Replacement
If the walking belt becomes worn from heavy usage, it may need to be replaced. CallStairMaster Technical Service if you have a question.
Downloaded from www.Manualslib.com manuals search engine

56
Moving and Storing the Treadmill
Moving the treadmill requires two people.
1. Set the treadmill to 3 to 5% incline.
2. To avoid electrical shock, turn off the circuit breaker on the treadmill hood, then removethe treadmill power cord from the power source before moving the treadmill.
WARNINGAS LONG AS THE TREADMILL IS PLUGGED INTO A POWERED OUTLET AND THETREADMILL CIRCUIT BREAKER IS ON, THE UNIT IS RECEIVING POWER, EVENIF THE CONTROLLER IS TURNED OFF.
3. Together, lift the rear of the treadmill, then roll it to the new site using the wheels onthe front of the treadmill.
When storing for prolonged periods, cover the treadmill with a dust cover. Do not storein damp areas. Do not store the treadmill on its end as it could fall on someone.
Using After Storage Period
Before using the treadmill again after moving or storage, check the power cord and allattachments to be sure they are undamaged and securely connected, then test the system forproper operation.
Troubleshooting
If there is a problem with the treadmill, cycle the power by turning the circuit breaker off andthen back on; this may eliminate the fault. If problems persist, refer to the TroubleshootingGuide at the end of this chapter. Problems beyond the scope of this table may require serviceassistance to isolate and correct. Contact StairMaster Technical Service at 800-331-3578.
• Servicing should be done only by qualified service personnel who should consultthe service manual before attempting any in-depth troubleshooting.
Downloaded from www.Manualslib.com manuals search engine

57
IMPORTANT PHONE NUMBERS
If you need assistance, please have both the serial number of your machine and the date ofpurchase available when you contact the appropriate StairMaster office listed below.
OFFICES IN THE UNITED STATES
CORPORATE HEADQUARTERS TECHNICAL SERVICENautilus Health & Fitness Group StairMaster Technical Service1886 Prairie Way 10757 East Ute StreetLouisville, CO 80027 Tulsa, OK 74116Phone: 800-864-1270 Phone: 800-331-3578Fax: 800-898-9410 Fax: 800-764-7380E-mail: [email protected] E-mail: [email protected]
INTERNATIONAL OFFICES
For technical assistance and a list of distributors in your area, please call or fax one of thefollowing numbers.
INTERNATIONAL CUSTOMER SERVICENORTH AMERICA OFFICE EUROPE HEADQUARTERSNautilus Health & Fitness Group Nautilus Health & Fitness Group International S.A.1886 Prairie Way Rue Jean Prouvé 6Louisville, CO 80027 1762 Givisiez / SwitzerlandTel: 800-864-1270 x1603 or 1658 Tel: + 41 26 460 77 77Fax: 303-402-4817 Fax: + 41 26 460 77 70E-mail: [email protected] E-mail: [email protected]
GERMANY OFFICE U.K. OFFICENautilus Health & Fitness Group GmbH Nautilus Health & Fitness Group UK LtdTel: 02204 61027 Tel: 01 908 267 345Fax: 02204 62890 Fax: 01 908 267 346E-mail: [email protected] E-mail: [email protected]
ITALY OFFICENautilus health & Fitness Group Italy s.r.l.Tel: 031 51 10 86Fax: 031 34 24 97
Downloaded from www.Manualslib.com manuals search engine


