20BTC502J MOLECULR BIOLOGY AND GENE MANIPULATION ...
42
20BTC502J MOLECULR BIOLOGY AND GENE MANIPULATION LABORATORY MANUAL DEPARTMENT OF BIOTECHNOLOGY SCHOOL OF BIOENGINEERING SRM INSTITUTE OF SCIENCE AND TECHNOLOGY KATTANKUALTHUR -603202 2020-2021
Transcript of 20BTC502J MOLECULR BIOLOGY AND GENE MANIPULATION ...

20BTC502J MOLECULR BIOLOGY AND GENE MANIPULATION
LABORATORY MANUAL
DEPARTMENT OF BIOTECHNOLOGY
SCHOOL OF BIOENGINEERING
SRM INSTITUTE OF SCIENCE AND TECHNOLOGY
KATTANKUALTHUR -603202
2020-2021

BONAFIDE CERTIFICATE
Register no:
Certified to be the bonafied record of work done by
-------------------------------------------------------------- of M Tech Biotechnology
Degree course in the 20BTC502J Molecular Biology and Gene manipulation
laboratory at SRM IST Kattankulatthur, during academic year 20 -20
Lab In charge
Head of Department
Submitted for End Semester Examination held in Molecular Biology Laboratory
at SRM IST, Kattankulathur
Date: Examiner I Examinaer II

INDEX
S.
NO
Title Date Date of
Submsiion
Signature

DATE:
EXPERIMENT NO. 1
ISOLATION OF PLASMID FROM E. coli CELLS
AIM:
To isolate the plasmid DNA from E. coli cells.
PRINCIPLE:
Bacterial plasmid DNAs are widely used as cloning vehicles in recombinant
DNA research. After new plasmids are constructed, they may be isolated and
characterized with respect to their size and restriction enzyme pattern by gel
electrophoresis. Plasmid-containing cells are suspended in Solution I which
provides alkaline pH. Divalent cations (Mg2+, Ca2+) are essential for DNase
activity and the integrity of the bacterial cell wall. EDTA chelates divalent cations
in the solution preventing DNases from damaging the plasmid and also helps by
destabilizing the cell wall. Plasmid containing cells are lysed completely solution
II. SDS is there to solubilize the cell membrane. NaOH helps to break down the
cell wall, but more importantly it disrupts the hydrogen bonding between the DNA
bases, converting the double-stranded DNA in the cell, including the genomic
DNA and also plasmid DNA to single stranded DNA. At an alkaline pH, OH-
groups are predominant. They remove the hydrogen- bonds-contributing protons
from guanine and thymine, thus breaking the hydrogen bonds between the two
oligonucleotides. Addition solution III decrease alkalinity. Under these conditions
the hydrogen bonding between the bases of the single stranded DNA can be re-
established, so the ssDNA can re-nature to dsDNA. This is the selective part.
While it is easy for the small circular plasmid DNA to re-nature it is impossible to
properly anneal those huge genomic DNA stretches. While the double-stranded
plasmid can dissolve easily in solution, the single stranded genomic DNA,
aggregates to form an insoluble network. Simultaneously, the high concentration of
potassium acetate causes precipitation of protein-SDS complexes and of high
molecular weight RNA. On phenol chloroform extraction, phenol keeps the protein
unfolded and chloroform increases the efficiency of phenol for denaturation of
the protein. Here, chloroform allows proper separation of the organic phase and
aqueous phase which keeps DNA protected into the aqueous phase. The
Plasmid DNA present in the aqueous phase is ethanol precipitated.
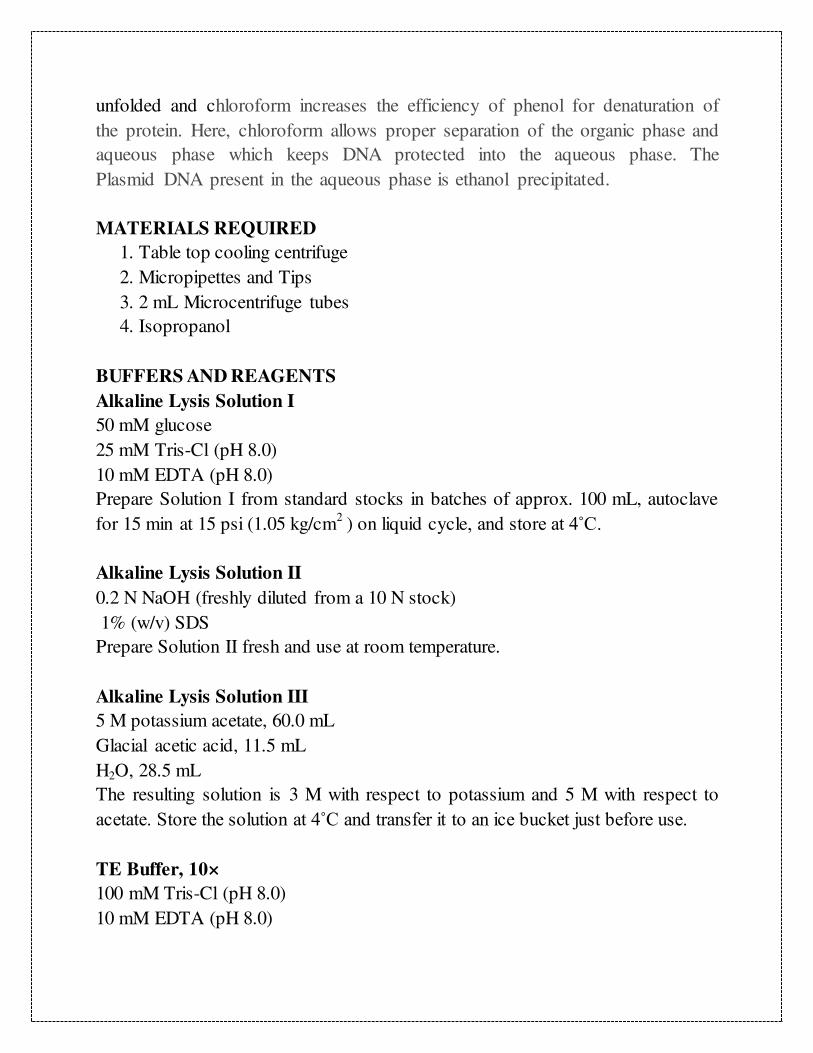
MATERIALS REQUIRED
1. Table top cooling centrifuge
2. Micropipettes and Tips
3. 2 mL Microcentrifuge tubes
4. Isopropanol
BUFFERS AND REAGENTS
Alkaline Lysis Solution I
50 mM glucose
25 mM Tris-Cl (pH 8.0)
10 mM EDTA (pH 8.0)
Prepare Solution I from standard stocks in batches of approx. 100 mL, autoclave
for 15 min at 15 psi (1.05 kg/cm2
) on liquid cycle, and store at 4˚C.
Alkaline Lysis Solution II
0.2 N NaOH (freshly diluted from a 10 N stock)
1% (w/v) SDS
Prepare Solution II fresh and use at room temperature.
Alkaline Lysis Solution III
5 M potassium acetate, 60.0 mL
Glacial acetic acid, 11.5 mL
H2O, 28.5 mL
The resulting solution is 3 M with respect to potassium and 5 M with respect to
acetate. Store the solution at 4˚C and transfer it to an ice bucket just before use.
TE Buffer, 10×
100 mM Tris-Cl (pH 8.0)
10 mM EDTA (pH 8.0)
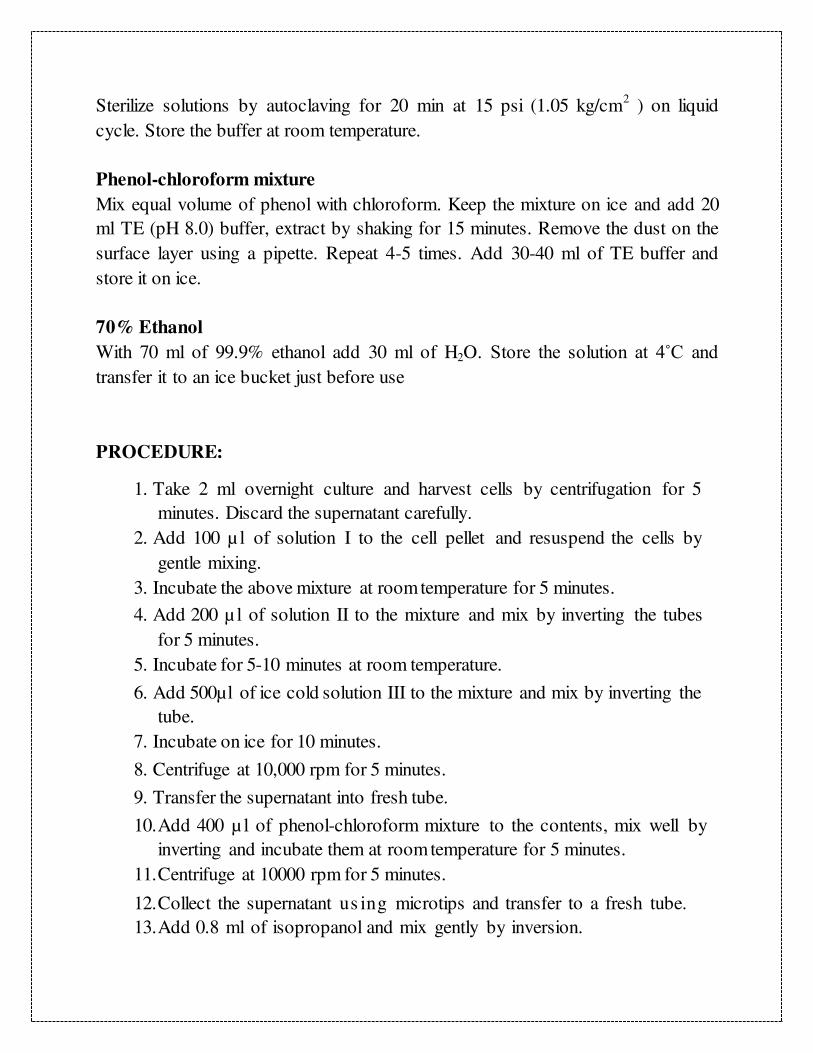
Sterilize solutions by autoclaving for 20 min at 15 psi (1.05 kg/cm2 ) on liquid
cycle. Store the buffer at room temperature.
Phenol-chloroform mixture
Mix equal volume of phenol with chloroform. Keep the mixture on ice and add 20
ml TE (pH 8.0) buffer, extract by shaking for 15 minutes. Remove the dust on the
surface layer using a pipette. Repeat 4-5 times. Add 30-40 ml of TE buffer and
store it on ice.
70% Ethanol
With 70 ml of 99.9% ethanol add 30 ml of H2O. Store the solution at 4˚C and transfer it to an ice bucket just before use
PROCEDURE:
1. Take 2 ml overnight culture and harvest cells by centrifugation for 5
minutes. Discard the supernatant carefully.
2. Add 100 µ l of solution I to the cell pellet and resuspend the cells by
gentle mixing.
3. Incubate the above mixture at room temperature for 5 minutes.
4. Add 200 µ l of solution II to the mixture and mix by inverting the tubes
for 5 minutes.
5. Incubate for 5-10 minutes at room temperature.
6. Add 500µl of ice cold solution III to the mixture and mix by inverting the
tube.
7. Incubate on ice for 10 minutes.
8. Centrifuge at 10,000 rpm for 5 minutes.
9. Transfer the supernatant into fresh tube.
10. Add 400 µ l of phenol-chloroform mixture to the contents, mix well by
inverting and incubate them at room temperature for 5 minutes.
11. Centrifuge at 10000 rpm for 5 minutes.
12. Collect the supernatant us ing microtips and transfer to a fresh tube.
13. Add 0.8 ml of isopropanol and mix gently by inversion.

14. Centrifuge the contents at 10,000 rpm for 10 minutes.
15. Discard the supernatant after centrifugation.
16. Add 0. 5 ml of 70% ethanol. Centrifuge the contents at 5,000 rpm for 5
minutes
17. Discard the supernatant
18. After air-drying for 5 minutes, add 30 µ l of TE buffer or autoclaved
distilled water to the pellet to resuspend the plasmid DNA.

RESULT:

DATE:
EXPERIMENT NO. 2
QUALTITATIVE ANALYSIS OF PLASMID DNA
AIM:
Analysis of Plasmid DNA by agarose gel electrophoresis
PRINCIPLE:
Electrophoresis through agarose gels is used to separate, analyze, identify, and
purify DNA fragments. DNA contain negative charges because of the back bone
PO4. This property is exploited to separate DNA based on their size in an electric
field with an agarose gel as a stationary phase. The location of bands of DNA
within the gel can be determined directly by staining with low concentrations of
fluorescent intercalating dyes, such as ethidium bromide; bands containing as little
as 20pg of double-stranded DNA can then be detected by direct examination of the
gel in ultraviolet (UV) light.
The agarose, for agarose gel electrophoresis is purified from agar. Agarose is
a linear polymer made up of repeating units of 1,3 –linked ß D galactopyranose
and 1, 4 linked 3,6 anhydro a L galactopyranose [ P-D –gal (1-4)-3,6 anhydro – a L
Gal (1-3) -]n
Agarose has an average MW of 12,000 and contains about 35-40 agarobiose units.
Agarose in solution exist as a left handed double helices. About 7 to 11 such
helices form bundles which extend as long rods and appear to intertwine with one
another, further strengthening the frame work of the gel. The cross links are held
together by hydrogen and hydrophobic bonds. By changing the gel concentration,
the pore size can be altered. Higher the concentration of agarose smaller the pore
size and vice versa.
Effect of agarose concentration on separation ranges
The following table describes the relationship between agarose concentration and
separation range of nucleic acid

Agarose Concentration (%) Separation range (Kb)
0.3 5 to 60
0.6 1-20
0.8 0.8 to 10
1.0 0.4 to 8
1.2 0.3 to 6
1.5 0.2 to 4
Running Buffer
TRIS Acetate EDTA (TAE) buffer, TRIS Borate EDTA (TBE) buffer both
slightly alkaline (pH 8.00 to 8.5) buffer are used in electrophoresis.
Electrophoresis that separates on the basis of charge, ions in the buffer transmit
the charge necessary for separation. The buffer, also keeps the pH within a
narrow range. This is important because the structure and charge nucleic acid
will change if subjected to significant pH changes, thus preventing proper
separation. The alkaline pH of the buffer keeps the DNA stable and EDTA
chelates di valent cations like Mg2+ which is required for DNAase activity.
Gel Loading Dye
Gel-loading buffers are mixed with the samples before loading into the slots of the
gel. These buffers serve three purposes: They increase the density of the sample,
ensuring that the DNA sinks evenly into the well; they add color to the sample,
thereby simplifying the loading process; and they contain dyes that, in an electric
field, move toward the anode at predictable rates and sued for tracking the sample.
Bromophenol blue migrates through agarose gels 2.2-fold faster than xylene cyanol
FF, independent of the agarose concentration
Staining the Gel
A convenient and commonly used method to visualize DNA in agarose gels is
staining with the fluorescent dye ethidium bromide which contains a tricyclic
planar group that intercalates between the stacked bases of DNA. Ethidium
bromide intercalates into double-stranded DNA in a sequence-independent fashion

at a maximum stoichiometry of about two dye molecules per turn of the helix.
Ethidium bromide can be used to detect both single-stranded and double-stranded
nucleic acids (both DNA and RNA). However, the affinity of the dye for single-
stranded nucleic acid is relatively low, and the fluorescent yield is comparatively
poor
Materials Required
Electrophoretic apparatus – Tank, Tray and Comb.
Power supply device
Micropipettes and Microtips
Buffers and Reagents
TBE buffer (5X)
54 g of Tris base
27.5 g of boric acid
20 mL of 0.5 M EDTA (pH 8.0)
To prepare EDTA at 0.5 M (pH 8.0): Add 186.1 g of disodium EDTA•2H2O to 800
mL of H2O. Stir vigorously on a magnetic stirrer. Adjust the pH to 8.0 with NaOH
(~20 g of NaOH pellets). Dispense into aliquots and sterilize by autoclaving. The
disodium salt of EDTA will not go into solution until the pH of the solution is
adjusted to ~8.0 by the addition of NaOH.
The 0.5X working solution is 45 mM Tris-borate/1 mM EDTA.
Gel Loading Buffer (6X)
3.9 mL glycerol
500 μL 10% (w/v) SDS
Dissolve 10g in 100 ml of water
200 μL 0.5 M EDTA
0.025 g bromophenol blue
0.025 g xylene cyanol
Bring to 10 mL total volume with H2O
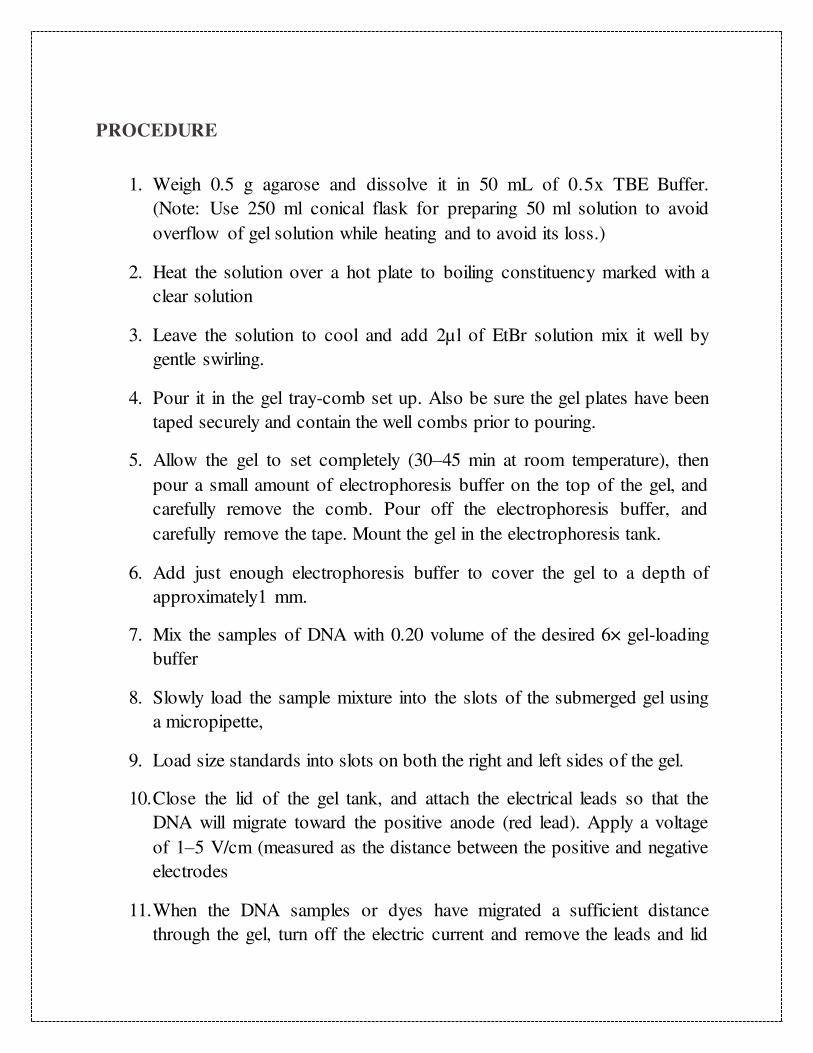
PROCEDURE
1. Weigh 0.5 g agarose and dissolve it in 50 mL of 0.5x TBE Buffer.
(Note: Use 250 ml conical flask for preparing 50 ml solution to avoid
overflow of gel solution while heating and to avoid its loss.)
2. Heat the solution over a hot plate to boiling constituency marked with a
clear solution
3. Leave the solution to cool and add 2µl of EtBr solution mix it well by
gentle swirling.
4. Pour it in the gel tray-comb set up. Also be sure the gel plates have been
taped securely and contain the well combs prior to pouring.
5. Allow the gel to set completely (30–45 min at room temperature), then
pour a small amount of electrophoresis buffer on the top of the gel, and
carefully remove the comb. Pour off the electrophoresis buffer, and
carefully remove the tape. Mount the gel in the electrophoresis tank.
6. Add just enough electrophoresis buffer to cover the gel to a depth of
approximately1 mm.
7. Mix the samples of DNA with 0.20 volume of the desired 6× gel-loading
buffer
8. Slowly load the sample mixture into the slots of the submerged gel using
a micropipette,
9. Load size standards into slots on both the right and left sides of the gel.
10. Close the lid of the gel tank, and attach the electrical leads so that the
DNA will migrate toward the positive anode (red lead). Apply a voltage
of 1–5 V/cm (measured as the distance between the positive and negative
electrodes
11. When the DNA samples or dyes have migrated a sufficient distance
through the gel, turn off the electric current and remove the leads and lid

from the gel tank.
12. Place the gel on the working surface of a UV illuminator. Capture an
image of the gel under UV transillumination on a CCD camera equipped
with the appropriate screens and emission filters.

RESULTS

DATE:
EXPERIMENT NO. 2
QUATITATIVE ANALYSIS OF PLASMID DNA
AIM:
Quantitative analysis of Plasmid DNA by spectrometry
PRINCIPLE:
Quantification of nucleic acids is commonly used in molecular Biology to
determine the concentration of DNA. DNA exhibit strong absorbance of UV due to
the presence of conjugated double bonds of the constant purine and pyramidine
bases and these have characteristics of OD (optical density) of absorbance
maximum at 260nm which is linearly related with the concentration of the DNA in
the solution up to the OD value of 2. The spectroscopic method is used to check
the purity of DNA. Proteins are the major contaminants in the nucleic acid extracts
and these have the maximum absorbance at 280nm. Value less than 1.8 signifies
the presence of proteins as impurities.
MATERIALS REQUIRED
DNA samples
UV Spectrophotometer
Reagents and Buffer
TE Buffer, 10×
100 mM Tris-Cl (pH 8.0)
10 mM EDTA (pH 8.0)
Sterilize solutions by autoclaving for 20 min at 15 psi (1.05 kg/cm2 ) on liquid
cycle. Store the buffer at room temperature.

PROCEDURE:
1. Take the DNA sample (10 ul) in TE buffer.
2. Now dilute the above sample by the factor of 100 i. e, by taking 10µl of
the sample in 990µl of TE buffer.
3. After doing this take the optical density value at A260 & A280 and
calculate the amount of DNA recovered.
4. Use the following formula to determine the concentration of DNA:
Total DNA (µg) = 50 mg/ml x Absorbance at A260 x dilution factor x 0.1
ml
Where 0.1 ml is the total volume of the DNA.
Quality: DNA quality measurement is based on the fact that OD at 260 nm
is twice that at 280 nm if the solution contains pure DNA. If there is a
contaminant, there is some additional OD, which decreases the OD ratio
between 260 and 280 nm.Clean DNA has a OD260/OD280 between 1.8 and
2.0

RESULTS

DATE:
EXPERIMENT NO. 3
RESTRCTION DIGESTION OF DNA
AIM:
To digest the λ DNA with EcoRI and pUC18 with EcoRI and Hind III restriction
enzymes.
PRINCIPLE:
Restriction enzymes are also called ‘molecular scissors’ as they cleave DNA at or near specific recognition sequences known as restriction sites. These enzymes
make one incision on each of the two strands of DNA and are also called restriction endonucleases. Viruses infect the host cells by injecting their DNA into
the cells. This viral DNA uses the host cell’s machinery for reproduction of viral progeny, resulting in the host cell’s death. To overcome the viral infection, many
bacteria and archaea have evolved several mechanisms. A major protective mechanism involves the use of restriction enzymes to degrade the invading viral
DNA by cleaving it at specific restriction sites. At the same time, the host cell protects its own DNA from being cleaved by employing other enzymes called
methylases, which methylate adenine or cytosine bases within host recognition sequences. For each of the restriction enzyme, the host cell produces a
corresponding methylase that methylates and protects the host DNA from degradation. These enzymes make up the restriction-modification (R-M) systems.The restriction enzymes catalyse the hydrolysis of the bond between the
3’-oxygen atom and the phosphorus atom in the phosphodiester backbone of DNA. The enzymes require Mg
2+ or other divalent ions for their activity. Restriction
digestion is accomplished by incubation of the target DNA molecule with restriction enzymes - enzymes that recognize and bind specific DNA sequences
and cleave at specific nucleotides either within the recognition sequence or outside of the recognition sequence. Restriction digestion can result in the production of
blunt ends (ends of a DNA molecule that end with a base pair) or sticky ends (ends of a DNA molecule that end with a nucleotide overhang).
By definition, 1 unit of restriction enzyme will completely digest 1 μg of substrate DNA in a 50 μl reaction in 60 minutes. However 5–10 fold over digestion is
recommended to overcome variability in DNA source, quantity and purity.

EcoRI,
E-genus Escherichia, co –Species coli, R –strain RY13, I- first endonuclease
isolated.
EcoRI 5’…….GAATTC…….3’
3’…….CTTAAG…….5’
HindIII
H-genus Haemophilus, in –Species influenza, d –strain Rd, III- third endonuclease
isolated.
HindIII 5’….AAGCTT….3’
3’….TTCGAA….5’
MATERIALS REQUIRED
λ DNA
pUC18
Restriction enzymes ( HindIII and EcoRI )
10X buffer (D)
1Kb or 0.5Kb DNA Ladder
Sterile water
Agarose
6X loading dye
BSA
Ethidium Bromide
1X TAE buffer
Electrophoresis Apparatus
Power supply
Micropipettes
Microtips

PROCEDURE:
1. Prepare the samples according to the following table
Single Digestion
λ DNA (1 µg)
Sterile water
Buffer (D) (10X)
EcoRI (1U/ µl)
Total 10 µl
Double Digestion
pUC18 DNA (1 µg)
Sterile water
Buffer (D) (10X)
EcoRI (1U/ µl)
HinD III (1U/ µl)
Total 10 µl
3. Incubate the tubes at 37℃ for 1 hr.
4. Add 2µl of 6X DNA loading dye
5. Load 10 µl of digested DNA onto 0.8% agarose gel
6. Load the undigested λ DNA and puC18 DNA as control

RESULTS

DATE:
EXPERIMENT NO. 4
LIGATION OF DNA
AIM:
To ligate λ DNA/EcoR1 with T4 DNA ligase
PRINCIPLE:
DNA ligase (EC 6.5.1.1) is the covalently joins the phosphate backbone of DNA
with blunt or compatible cohesive ends and it’s natural role is in repairing double
strand breaks in DNA molecules. In molecular biology it is commonly used for the
insertion of restriction enzyme-generated DNA fragments into vector backbones.
Commercial ligases are supplied with a reaction buffer containing ATP and Mg2+,
which are both essential for ligase activity.
Ligase can establish phosphor diester bond in 5’P and 3’OH both in DNA and
RNA
MATEIALS REQUIRED
λ DNA/EcoR1
T4 DNA Ligase
Ligase Buffer

1Kb or 0.5Kb DNA Ladder
Sterile water
Agarose
6X loading dye
Ethidium Bromide
1X TAE buffer
Electrophoresis Apparatus
Power supply
Micropipettes
Microtips
PROCEDURE
1. Prepare the sample according to the table
λ DNA/EcoR1 (1ug)
T4 DNA ligase
Ligase Buffer(10X)
Water
Total 10
2. Mix the samples and incubate them at 16℃ for 1 hr
3. Add 2ul of 6X gel loading buffer
4. Load the sample in 1% agarose gel
5. Load λ DNA/EcoR1 as control

RESULTS:

DATE:
EXPERIMENT NO. 5
ISOLATION OF RNA FROM MAMMLIAN CELLS
AIM:
To isolate RNA from mammalian cells
PRINCIPLE:
TRIzol solubilization and extraction is a relatively recently developed general
method for deproteinizing RNA. This method is particularly advantageous in
situations where cells or tissues are enriched for endogenous RNases or when
separation of cytoplasmic RNA from nuclear RNA is impractical. TRIzol (or TRI
Reagent) is a monophasic solution of phenol and guanidinium isothiocyanate that
simultaneously solubilizes biological material and denatures protein. After
solubilization, the addition of chloroform causes phase separation where protein is
extracted to the organic phase, DNA resolves at the interface, and RNA remains in
the aqueous phase. Therefore, RNA, DNA, and protein can be purified from a
single sample. TRIzol extraction is also an effective method for isolating small
RNAs, such as microRNAs, piwi associated RNAs, or endogeneous, small
interfering RNAs.
MATERIALS REQUIRED
TRIZol Reagent
Chloroform
Isopropanol
DEPC Treated water
70% Ethanol
Mortar & Pestel
Dry ice
Microcentrifuge tubes
Micropipettes

METHODS
1. Snap-freeze the tissue to be extracted. Powder on dry ice.
2. .Add 1 mL of TRIzol per 50-100 mg of tissue
3. Solubilize the samples for 5 min at room temperature.
4. Add 0.2 mL of chloroform per mL of TRIzol. Mix vigorously by hand or
vortex for 15 sec. Allow the mixture to stand for 2-3 min at room temperature.
5. Centrifuge at maximum speed in a microcentrifuge or at 14,000 RPM in a centrifuge for 10 min at room temperature
6. Transfer the upper clear phase to a fresh tube, taking care not to disturb the
interface
7. Add 0.5 mL of isopropanol per each milliliter of the clear phase. Mix
vigorously by rapid shaking or vortexing. Let stand for 10 min.
8. . Collect the precipitated RNA by centrifugation at maximum speed in a microcentrifuge or at 14,000 RPM in a centrifuge for 10 min at 4°C
9. Carefully decant the supernatant and wash with 70% Ethanol
10. Dissolve in 20ul of TE

RESULT:

DATE:
EXPERIMENT NO. 6
cDNA SYNTHESIS AND REAL TIME PCR
AIM:
To Perform Real time PCR for a given RNA sample
PRINCIPLE:
Quantification of gene expression levels is an important aspect of molecular
biological laboratories. By measuring the amount of particular mRNA, one is able
to determine to what extent that gene is being expressed. Expression of genes
change from gene to gene, cell to cell or during various experimental conditions.
Quantitative gene expression studies are done as a validation of protein levels;
extent of transcription of a gene; to study the difference in expression of a gene in
the diseased state compared to the normal state; change in gene expression during
cell differentiation or development; change in expression for cells that are exposed
to a chemical substance and quantification of noncoding RNA gene expression.
RT-qPCR is a combination of three steps: the reverse transcriptase (RT)-
dependent conversion of RNA into cDNA, the amplification of the cDNA using
the PCR and the calculating the fold change of amplification products in real time.
Real-time PCR (qPCR) uses fluorescent reporter dyes as a reporter to combine the
amplification and detection steps of the PCR reaction in a single tube format. The
assay relies on measuring the increase in fluorescent signal, which is proportional
to the amount of DNA produced during each PCR cycle.
MATERIALS REQUIRED:
Reverse transcriptase enzyme for RT-PCR,
0.2 ml tubes,
RNA samples,
RNase free water,
SYBR Green mix,
Primers

POCEDURE:
DNA Removal
1. Prepare the solution as below and incubate at 45°C for 3 Min
RNA (Total 5 ug or mRNA1 ug) 1ul
gDNA Removal 2
Rnase Free water 13 ul
cDNA synthesis
Reagents Volume (µl)
Tola RNA Mix 15
Reverse Transcriptase Mix 4
Reverse Transcriptase 1
Total 20µl
Temperature
Time
25°C 3 min
45°C 10 min
85°C 5 min
Followed by holding temperature at 4°C

Real Time PCR:
Place the capillaries in the cold block to pre- cool
Spin down enzyme and reaction mix SYBER Green I
Prepare master mix in the aluminum cold block as follows
Reagents Volume (µl)
Forward Primer 2.00 µl
Reverse Primer 2.00 µl
SYBR GREEN Mix 10.00 µl
DNA template 2 µl
RNase free Water 4µl
Total 20
Mix gently and aliquot 18 µl into each capillary
Seal the capillary and centrifuge for 5 seconds at 3000rpm.
Load the sample to the rotor of the light cycler.
Adjust the following PCR reaction conditions in the thermal cycler
Temperature Time
94°C 15 min
94°C 15 sec
48°C 30 sec
72°C 1 min

RESULT

DATE:
EXPERIMENT NO. 7
PROTEIN SEPARATION BY SDS- PAGE
AIM
To separate protein by SDS PAGE
PRINCIPLE
The separation of macromolecules in an electric field is called electrophoresis. A very common method for separating proteins by electrophoresis uses a discontinuous polyacrylamide gel as a support medium and sodium dodecyl sulfate
(SDS) to denature the proteins. The method is called sodium dodecyl sulfate polyacrylamide gel electrophoresis (SDS-PAGE). The most commonly used
system is also called the Laemmli method after U.K. Laemmli, who was the first to publish a paper employing SDS-PAGE in a scientific study.
SDS is an anionic detergent, meaning that when dissolved its molecules have a net
negative charge within a wide pH range. A polypeptide chain binds amounts of SDS in proportion to its relative molecular mass. The negative charges on SDS destroy most of the complex structure of proteins, and are strongly attracted toward
an anode (positively-charged electrode) in an electric field.
Polyacrylamide gels restrain larger molecules from migrating as fast as smaller
molecules. Because the charge-to-mass ratio is nearly the same among SDS-denatured polypeptides, the final separation of proteins is dependent almost entirely on the differences in relative molecular mass of polypeptides. In a gel of
uniform density the relative migration distance of a protein (Rf, the f as a subscript) is negatively proportional to the log of its mass. If proteins of known
mass are run simultaneously with the unknowns, the relationship between Rf and mass can be plotted, and the masses of unknown proteins estimated.
Protein separation by SDS-PAGE can be used to estimate relative molecular mass,
to determine the relative abundance of major proteins in a sample, and to determine the distribution of proteins among fractions. The purity of protein
samples can be assessed and the progress of a fractionation or purification

procedure can be followed. Different staining methods can be used to detect rare proteins and to learn something about their biochemical properties. Specialized
techniques such as Western blotting, two-dimensional electrophoresis, and peptide mapping can be used to detect extremely scarce gene products, to find similarities
among them, and to detect and separate isoenzymes of proteins.
MATERIALS REQUIRED
Vertical Electrophoresis apparatus
Gel plates, Spacers, Comb Ethanol
Vaseline Distilled water
BUFFERS AND REAGENTS
Acrylamide (30%)
Dissolve 290g of acrylamide and 10g of N,N'-methylbisacrylamide in 600ml of H2O. Adjust the volume to 1L with H2O.Sterilize the solution by filtration (0.45
micron pore size). Check the pH (should be 7.0 or less). Store in dark bottles at room temperature.
Gel casting Buffer
1.5 M Tris-HCl, pH 8.8 (to prepare resolving gel): Dissolve 18.15 g of Tris base in
80 mL distilled water. Adjust pH to 8.8 using 6N HCl. Make up the final volume to 100 mL with distilled water
0.5 M Tris-HCl, pH 6.8 (to prepare stacking gel): Dissolve 6 g of Tris base in 80 mL distilled water. Adjust pH to 6.8 using 6N HCl. Make up the final volume to
100 mL with distilled water
2X Loading Buffer
Bromophenol blue 0.004% 2-mercaptoethanol 10%
Glycerol 20% SDS 4%
Tris-HCl 0.125 M
10X Running Buffer
Tris-HCl 25 mM Glycine 200 mM
SDS 0.1% (w/v
SDS (10%)
Dissolve 10 g in 100 ml of distilled water.
APS (10%)
Dissolve 100 mg in 1 ml of distilled water (Need to be prepared fresh for every experiment)
Staining solution
Stain: Dissolve 0.4g of Coomassie blue R350 in 200 mL of 40% (v/v) HPLC grade methanol in water with stirring as needed. Filter the solution to remove any
insoluble material. Add 200mL of 20% (v/v) acetic acid in water. The final concentration is 0.1% (w/v) Coomassie blue R350, 20% (v/v) methanol, and 10% (v/v) acetic acid.
Distaining solution
Add 500mL of HPLC- grade methanol to 300 mL of HPLC grade water. Add 100 mL of reagent grade acetic acid and, after mixing, adjust the total volume to
1000mL with water. The final concentrations are 50% (v/v) methanol in water with 10% (v/v) acetic acid
TEMED
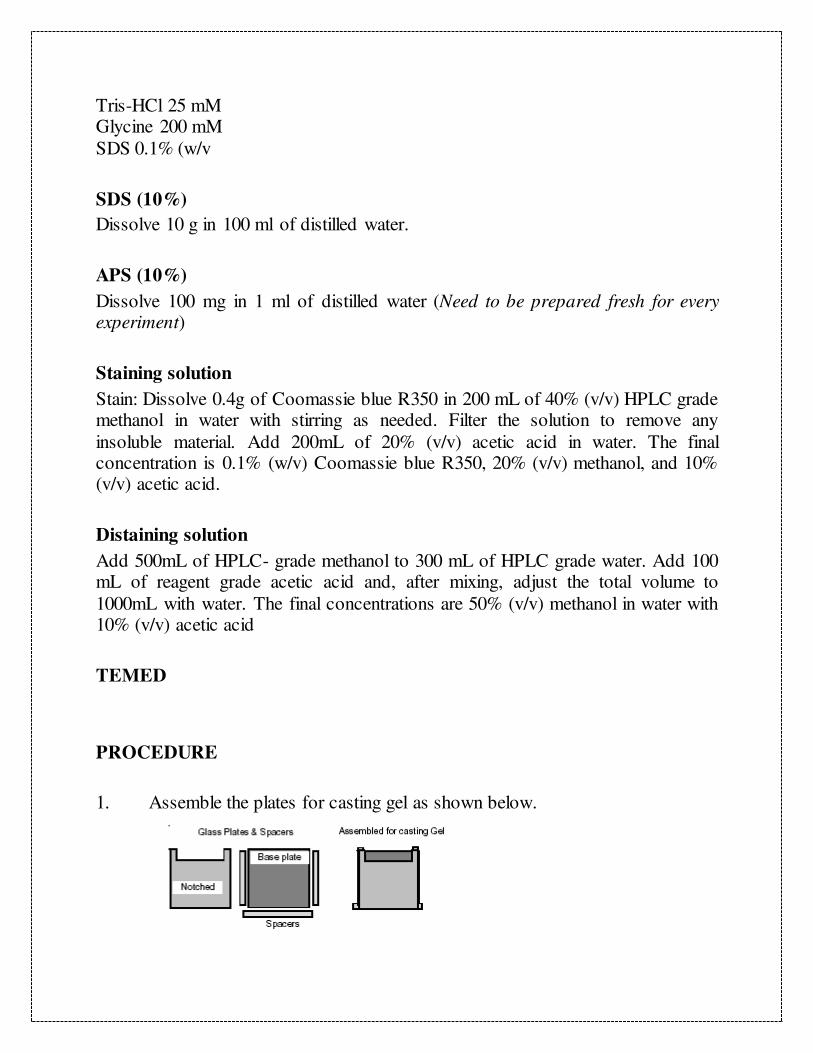
PROCEDURE
1. Assemble the plates for casting gel as shown below.

2. Clamp the assembly of plates to fix it in a gel casting apparatus. Ensure the
assembly is leak proof by filling water between the plates. Silicon grease can be
applied to spacer to make a water-tight seal.
3. Prepare the separation gel . Mix in the following order:
4. Pour gel, leaving ∼2 cm below the bottom of the comb for the stacking gel.
Make sure to remove bubbles.
5. Layer the top of the gel with isopropanol. This will help to remove bubbles at
the top of the gel and will also keep the polymerized gel from drying out
(In ∼30 min, the gel should be completely polymerized.
6. Remove the isopropanol and wash out the remaining traces of isopropanol
with distilled water.
7. Prepare the stacking gel (4%). Mix in the following order:
H2O 6.1 mL
Acrylamide/bis (30%, 37.5:1) 1.3 mL
Tris–HCl (0.5 M, pH 6.8) 2.5 mL
SDS, 10% 100 µL
TEMED 10 µL
Ammonium persulfate (APS), 10% 100 µL
Gel %
Water (mL)
30%
acrylamide (mL)
1.5
M Tris-
HCl, pH
8.8 (mL)
10%
SDS (µL)
10%
APS (µL)
TEMED*(µL)
8% 4.6 2.6 2.6 100 100 10
10% 3.8 3.4 2.6 100 100 10
12% 3.2 4.0 2.6 100 100 10
15% 2.2 5.0 2.6 100 100 10

8. Pour stacking gel on top of the separation gel.
9. Add combs to make wells. In ∼30 min, the stacking gel should become
completely polymerized.
10. Add 25 µl of sample loading buffer to protein sample. Add 25 µl of sample
loading buffer to 25 µl of protein marker. Place it in a boiling water bath for
5 minutes.
11. After the stacking gel has set, carefully remove the comb and the bottom
spacer. Wash the wells immediately with distilled water to remove non-
polymerized acrylamide. Fill the bottom reservoir with 1X reservoir buffer
and carefully fix the plate to the apparatus without trapping any air bubbles
between the buffer and the bottom of the gel. Fix the plates to PAGE
apparatus. Fill the top reservoir with 1X reservoir buffer.
12. Load samples and molecular mass protein markers into wells for separation
by electrophoresis.
13. Set voltage at 100 V and switch on the power supply.
14. When the dye front comes to 0.5 cm above the bottom of the gel, turn off the
power. This will take approximately 1 to 11/2 hours
15. Remove the gel plates and gently pry the plates apart using a spatula or similar
tool, not at the notch. Cut off the wells and the stacking gel and place the gen in
a water containing Tray
16. Wash the gel Gently and discard the water
17. Add 100 ml of staining solution and keep it in the rocker for overnight.
18. Remove the staining solution and add 100 ml of distaining solution and
change the distaining solution for every one hr till the bands are visible.

RESULTS

DATE:
EXPERIMENT NO. 8
WESTERN BLOTTING
AIM
PRINCIPLE
Western blotting is an important technique used in cell and molecular biology. By
using a western blot, researchers are able to identify specific proteins from a complex mixture of proteins extracted from cells. The technique uses three
elements to accomplish this task: (1) Electrophoresis -separation by size, (2) Blotting - transfer to a solid support, and (3) Immunodetection - marking target
protein using a proper primary and secondary antibody to visualize.
Electrophoresis
Mixture of proteins is separated based on molecular weight, and thus by type, through gel electrophoresis. (Experiment No 8)
Blotting
Blotting is transfer of resolved proteins from the gel onto a surface of a suitable
membrane, done commonly by electrophoresis and referred to as electroblotting. The gel is placed in contact with nitrocellulose membrane which is then
sandwiched between filter paper, two porous pads and two plastic supports. The entire set up is then placed in an electrophoretic tank containing blotting buffer.
The proteins get transferred to the corresponding position on the membrane as resolved on the polyacrylamide gel, forming a mirror image of the gel.

Immunodetection
Protein of interest on the membrane is further located by immunodetection.The membrane is then incubated with labels antibodies specific to the protein of
interest. The unbound antibody is washed off leaving only the bound antibody to the protein of interest. The bound antibodies are then detected by developing the
film. As the antibodies only bind to the protein of interest, only one band should be visible. The thickness of the band corresponds to the amount of protein present; thus doing a standard can indicate the amount of protein present. The electroblotted
sample will then be detected using anti-mouse GAPDH IgG (Cell signaling) as primary antibody and corresponding secondary antibody labeled with Horse
Radish Peroxidase (HRP). HRP is then detected using hydrogen peroxide as a substrate and Dimethylamino benzidine (DAB) as a chromogen. HRP acts on
hydrogen peroxide to release oxygen, which oxidizes the DAB to DAB oxide. The DAB oxide is deposited wherever enzyme is present and appears as a light brown
band on the NC membrane
Fig 9.1 Principle of Immunodetection

MATERIALS
Gel Rocker
Conical flask, measuring cylinder, Petri dish, Staining tray. Distilled water.
Micropipettes, Tips, Water bath.
BUFFERS AND REAGENTS
PBS 10X
1.37 M NaCl, 27 mM KCl, 100 mM Na2HPO4, and 18 mM KH2PO4.
Transfer buffer (1X)
Tris 3 g
Glycine 14.4 g
Methanol 200 ml
Dissolve Tris and Glycine in 700 ml of distilled water, adjust the pH to 8.3 and
make it up to 800 ml. Add methanol before the experiment
Blocking solution
Skimmed milk powder - 10 g
Tween 20 - 200 µl
Glycerol – 10 ml
PBS – 10 ml
Sodium azide – 20 mg
Dissolve the above contents in 100 ml of millipore water

ASSA
PROCUDEURE
1. Electroblotting:
2. Assemble the blotting sandwich within the blotting cassette as shown in the
figure. Take care to avoid air bubbles between the gel and NC membrane.
3. Insert the cassette into the apparatus filled with blotting buffer and connect
blotting unit to power supply as per the convention,
red: anode,
black: cathode
4. Electrophoreses the sample at 50 V for 2 hours for blotting to occur.
5. Remove the NC membrane gently from the cassette and place the membrane
in 10 ml of freshly prepared blocking buffer taken in a petri dish. Leave it
overnight at 4°C.
Day 2 : Immunodetection
6. Discard blocking buffer.
7. Immerse blot in 10 ml of primary antibody solution and mix gently and
incubated for 4 to 5 hours in a rocker (gentle). The primary antibody solution
can be used atleast 5 to 6 times.
8. Wash the blot by immersing in 10 ml of 1X PBS for 3-5 minutes. Repeat the
wash three times. Discard the buffer each time.
9. Immerse the blot in 10 ml of 1X HRP labeled secondary antibody. Mix gently
and incubate for 45 minutes. Discard the HRP labeled antibody.

10. Wash the blot by immersing in 10 ml of T-TBS and TBS for 3-5 minutes.
11. Immerse the washed blot in 10 ml of substrate solution, mix gently for 5-10
minutes, within this time coloured band will appear.
12. Remove the blot, wash with distilled water, discard and dry.
Note: Although the colored band fades with time, the rate of color loss can
be retarded if the blots are kept in dark.
13. Compare the SDS-Polyacrylamide gel with the developed NC membrane.