2012 Cadillac Escalade For Sale NY | Cadillac Dealer Near Buffalo
2000 Cadillac Escalade
2002-2014 Cadillac Escalade
2003-2014 Cadillac Escalade ESV
2002-2013 Cadillac Escalade EXT
2007-2013 Chevorlet Avalanche
2003-2006 Chevorlet Avalanche 1500
2003-2006 Chevorlet Avalanche 2500
2000-2013 Chevorlet Surburban 1500
2000-2013 Chevorlet Surburban 2500
2000-2014 Chevorlet Tahoe
2000-2014 GMCVukon
2000-2014 GMCVukon XL 1500
2000-2013 GMCVukon XL 2500
Rear Air Shocks ZSS Autoride Suspension - WI Bypass
109G-14-R
Installation Guide
BEFORE YOU BEGIN THE REMOVAL OR INSTALLATION, PLEASE READ ALL OF THE INSTRUCTIONS THOROUGHLY!
THE WARRANTY WILL BE VOID IF INSTRUCTIONS ARE NOT FOLLOWED EXACTLY. DO NOT WORK UNDER A VEHICLE SUPPORTED BY A JACK.
ALWAYS SUPPORT THE VEHICLE ON SAFETY STANDS.
FOR TECHNICAL SUPPORT, PLEASE CALL THE TECHNICAL DEPARTMENT TOLL FREE: 1.800.260.5175
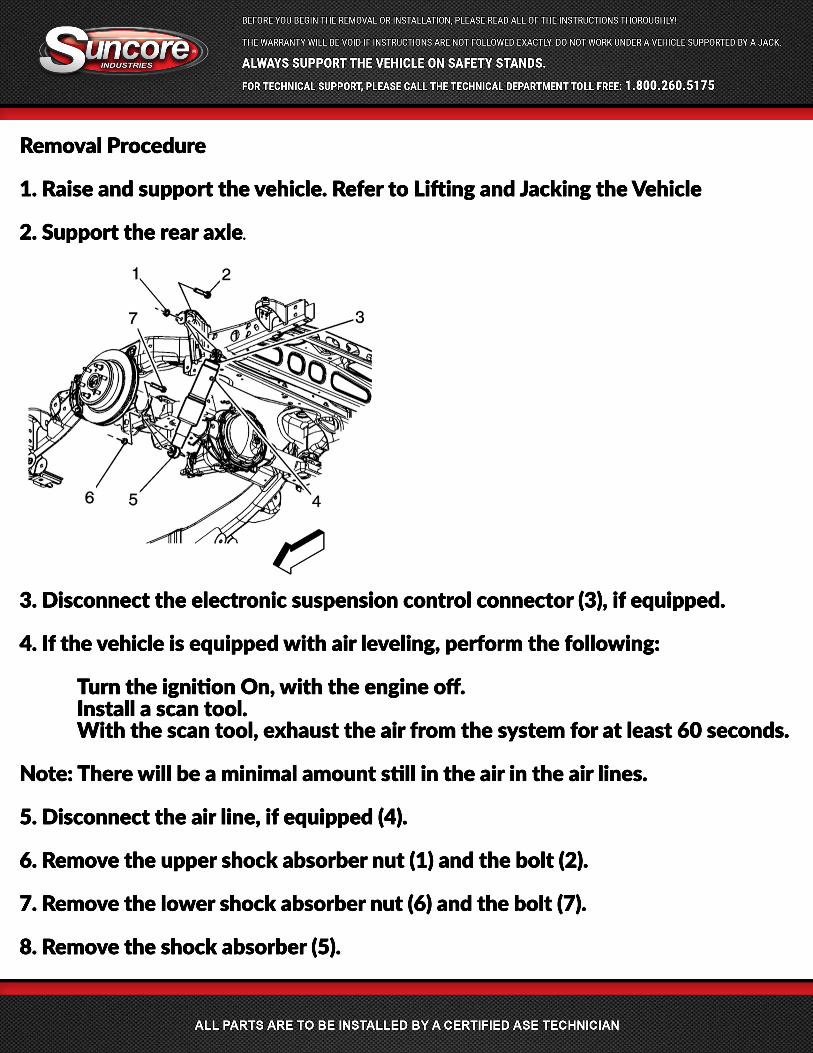
Removal Procedure
1. Raise and support the vehicle. Refer to Liing and Jacking the Vehicle
2. Support the rear axle.
3. Disconnect the electronic suspension control connector (3), if equipped.
4. If the vehicle is equipped with air leveling, perform the following:
Turn the ignion On, with the engine off. Install a scan tool. With the scan tool, exhaust the air from the system for at least 60 seconds.
Note: There will be a minimal amount sll in the air in the air lines.
5. Disconnect the air line, if equipped (4).
6. Remove the upper shock absorber nut (1) and the bolt (2).
7. Remove the lower shock absorber nut (6) and the bolt (7).
8. Remove the shock absorber (5).
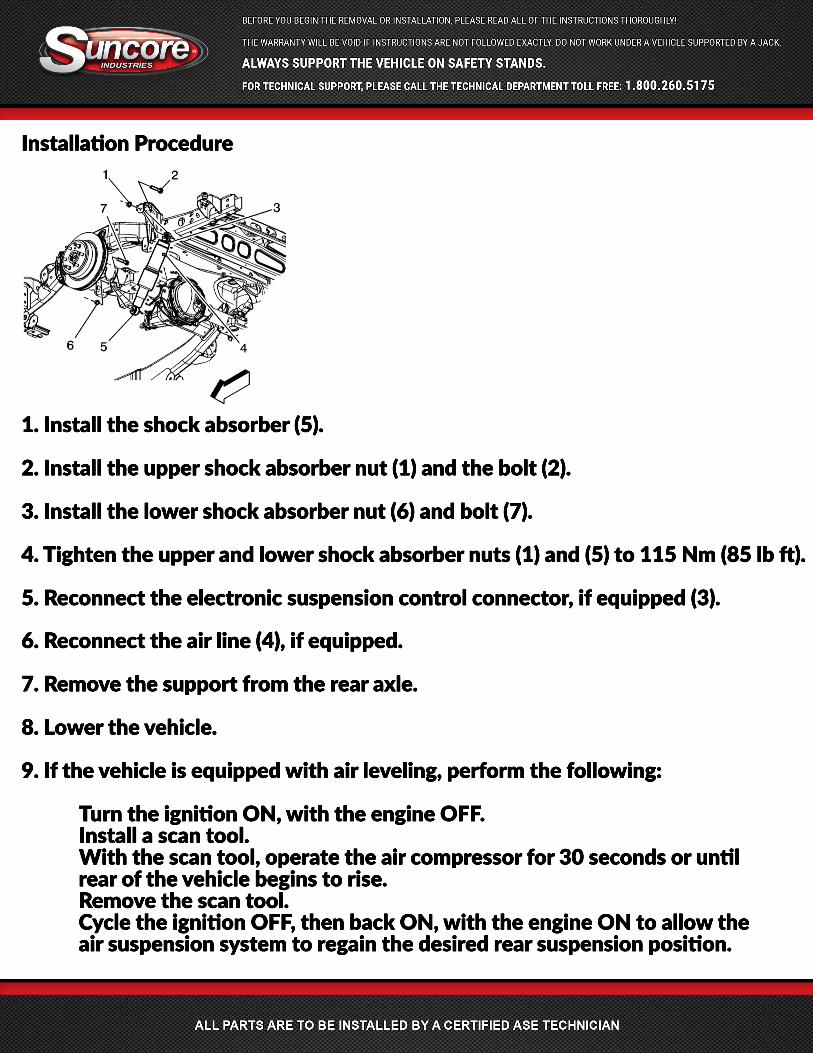
Installaon Procedure
1. Install the shock absorber (5).
2. Install the upper shock absorber nut (1) and the bolt (2).
3. Install the lower shock absorber nut (6) and bolt (7).
4. Tighten the upper and lower shock absorber nuts (1) and (5) to 115 Nm (85 lb ).
5. Reconnect the electronic suspension control connector, if equipped (3).
6. 6. Reconnect the air line (4), if equipped.
7. Remove the support from the rear axle.
8. Lower the vehicle.
9. If the vehicle is equipped with air leveling, perform the following:
Turn the ignion ON, with the engine OFF. Install a scan tool. With the scan tool, operate the air compressor for 30 seconds or unl rear of the vehicle begins to rise. Remove the scan tool. Cycle the ignion OFF, then back ON, with the engine ON to allow the air suspension system to regain the desired rear suspension posion.