
1911 Scratch Frame Tutorial
22
Making a 1911 frame from scratch the “easy” way. 7 parts make up the frame in a 1911 pistol, The rails and fire control block- needs to be as strong as a standard one piece frame The grip sides (2 off) - the top of the side panels form the lower ledge of the trigger bow slot The filler plate at the rear of the magazine well- this spaces the 2 grip panels correctly as well as provides the sear spring locating slot A curved grip front- again for spacing of the side panels other wise self explanatory Dust cover- self explanatory Trigger guard- self explanatory This can be done with a minimal number of machine tools; a drill press would be a good idea to keep holes straight and of course a welder of some sort. I see methods of cutting rails using dremels discussed occasionally as well, so where there is a will there is a way. A mini mill makes the whole thing a hell of a lot easier but the drill press and files can do a lot if you are patient. The trigger slot might be a problem without a mill though. The best thing is if you make a blunder you are not left with a frame shaped paperweight. Discard the buggered sub section and have another try at it. Gratuitous shot of my mill. I will assume that anyone attempting this will have a fair knowledge of metal working ability and what each part of a 1911 does to start with, so wont delve to in depth on the descriptions; I just hope the pictures tell the story.
Transcript of 1911 Scratch Frame Tutorial
7/31/2019 1911 Scratch Frame Tutorial
http://slidepdf.com/reader/full/1911-scratch-frame-tutorial 1/22
Making a 1911 frame from scratch the “easy” way.
7 parts make up the frame in a 1911 pistol,
The rails and fire control block- needs to be as strong as a standard one piece frameThe grip sides (2 off) - the top of the side panels form the lower ledge of the trigger bow slot The filler plate at the rear of the magazine well- this spaces the 2 grip panels correctly as wellas provides the sear spring locating slotA curved grip front- again for spacing of the side panels other wise self explanatoryDust cover- self explanatoryTrigger guard- self explanatory
This can be done with a minimal number of machine tools; a drill press would be a good idea tokeep holes straight and of course a welder of some sort. I see methods of cutting rails usingdremels discussed occasionally as well, so where there is a will there is a way.
A mini mill makes the whole thing a hell of a lot easier but the drill press and files can do a lot ifyou are patient. The trigger slot might be a problem without a mill though.
The best thing is if you make a blunder you are not left with a frame shaped paperweight. Discard
the buggered sub section and have another try at it.
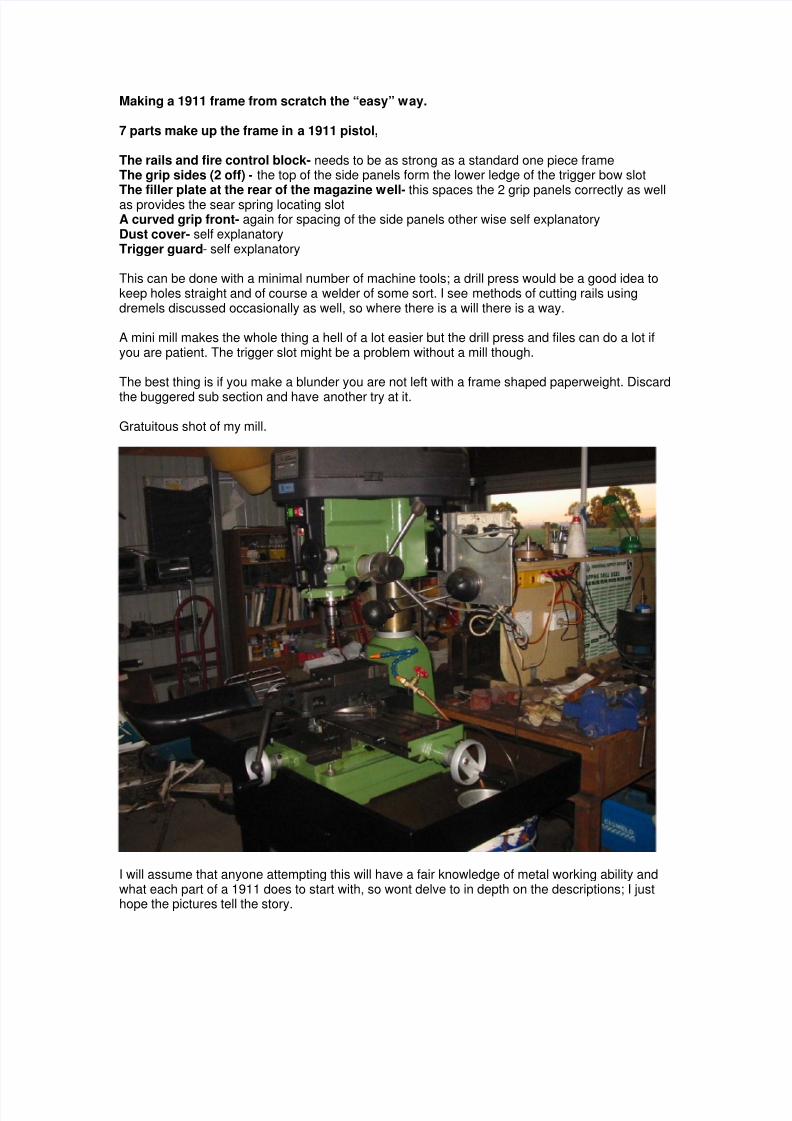
Gratuitous shot of my mill.
I will assume that anyone attempting this will have a fair knowledge of metal working ability andwhat each part of a 1911 does to start with, so wont delve to in depth on the descriptions; I justhope the pictures tell the story.
7/31/2019 1911 Scratch Frame Tutorial
http://slidepdf.com/reader/full/1911-scratch-frame-tutorial 2/22
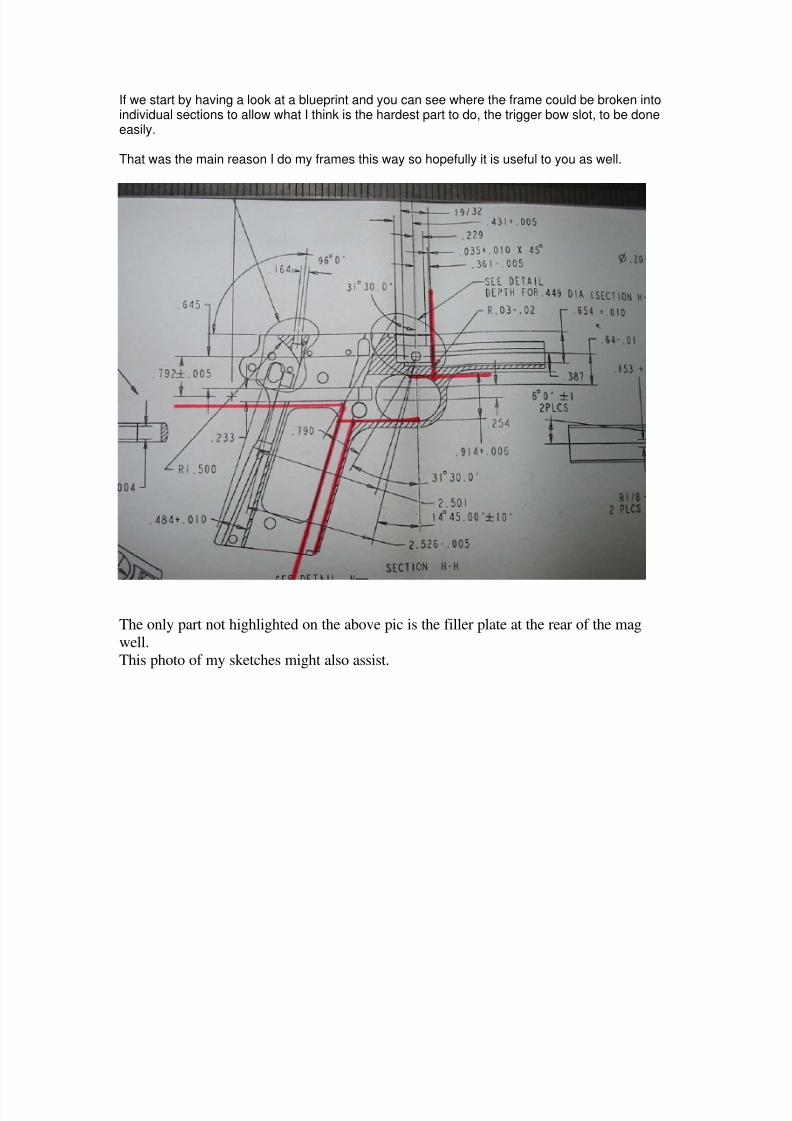
If we start by having a look at a blueprint and you can see where the frame could be broken intoindividual sections to allow what I think is the hardest part to do, the trigger bow slot, to be doneeasily.
That was the main reason I do my frames this way so hopefully it is useful to you as well.
The only part not highlighted on the above pic is the filler plate at the rear of the mag
well.
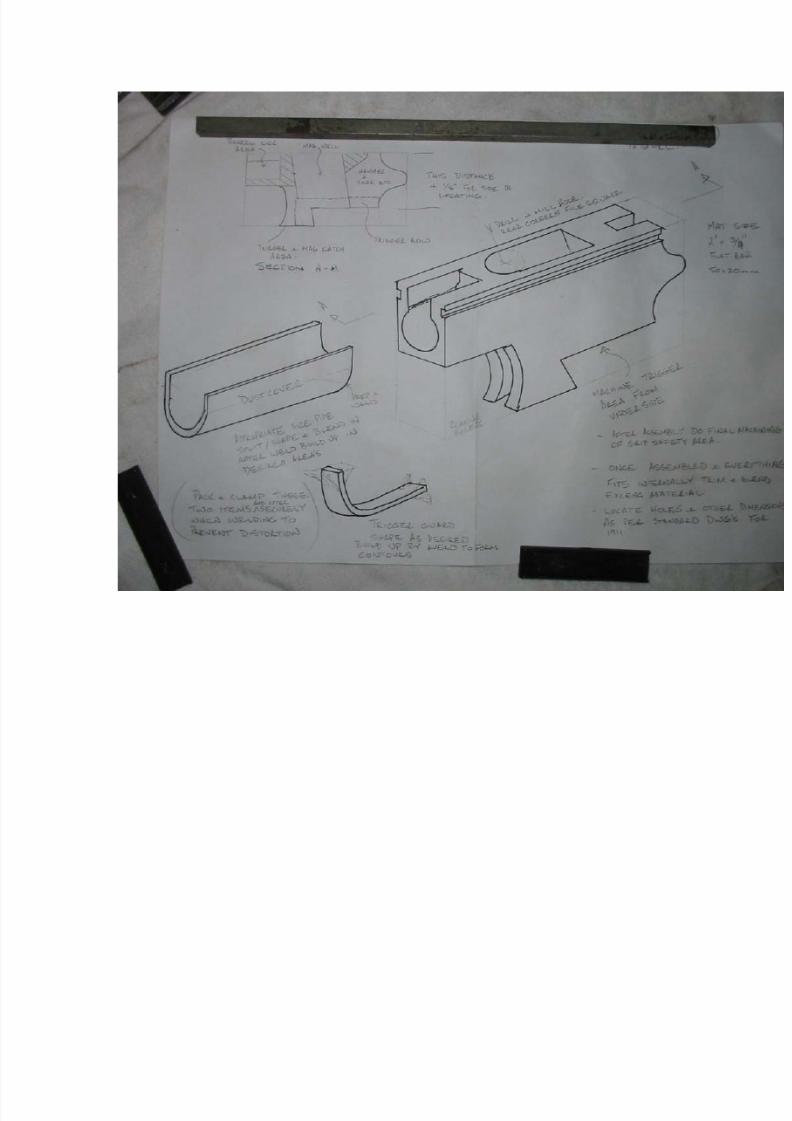
This photo of my sketches might also assist.
7/31/2019 1911 Scratch Frame Tutorial
http://slidepdf.com/reader/full/1911-scratch-frame-tutorial 3/22
7/31/2019 1911 Scratch Frame Tutorial
http://slidepdf.com/reader/full/1911-scratch-frame-tutorial 4/22
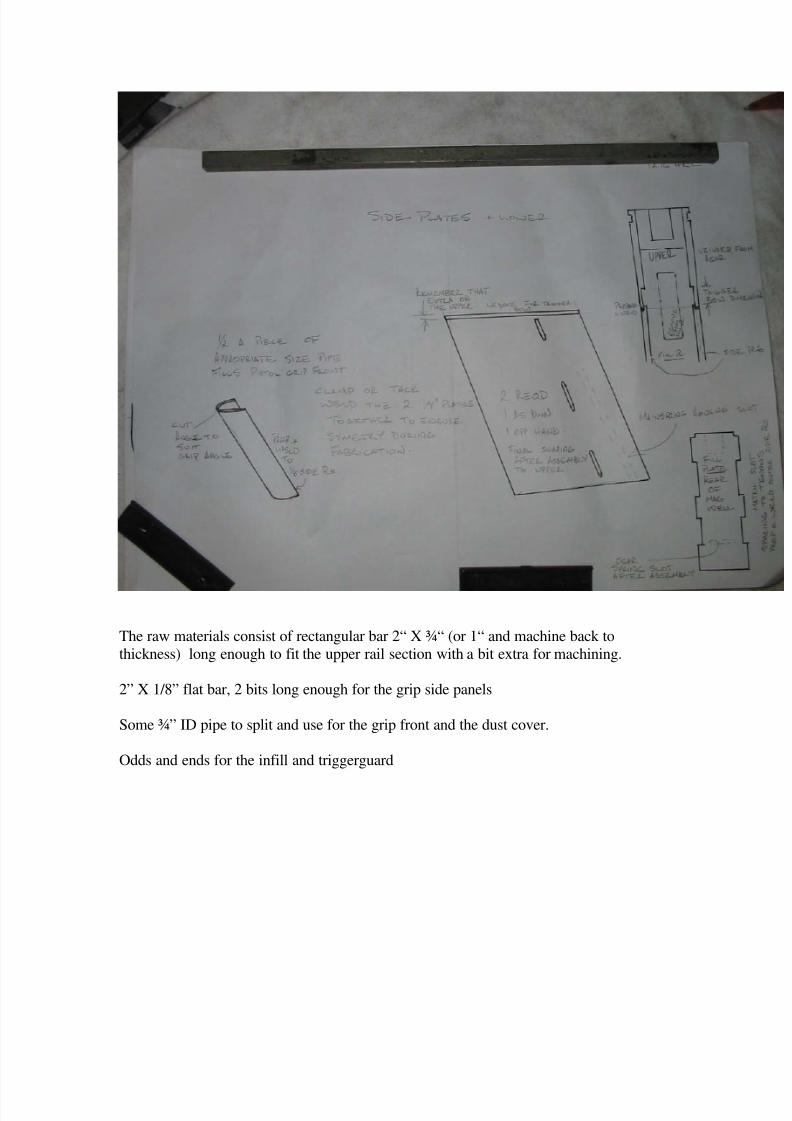
The raw materials consist of rectangular bar 2“ X ¾“ (or 1“ and machine back to
thickness) long enough to fit the upper rail section with a bit extra for machining.
2” X 1/8” flat bar, 2 bits long enough for the grip side panels
Some ¾” ID pipe to split and use for the grip front and the dust cover.
Odds and ends for the infill and triggerguard
7/31/2019 1911 Scratch Frame Tutorial
http://slidepdf.com/reader/full/1911-scratch-frame-tutorial 5/22
I start of by squaring up the top and the front of the rail block in the mill to provide
surfaces to measure from.
7/31/2019 1911 Scratch Frame Tutorial
http://slidepdf.com/reader/full/1911-scratch-frame-tutorial 6/22
Then put some light layout lines for the barrel link pin position or measure it all from the
front edge and then mill the start of the mag slot to give a flat surface at the required 17.5
degrees, drill the front of the mag slot and mill out the remaining material with a longseries mill cutter.
You can just make out the light centre pop marks for the mag well and hammer slot.
7/31/2019 1911 Scratch Frame Tutorial
http://slidepdf.com/reader/full/1911-scratch-frame-tutorial 7/22
Getting your measurements from the blueprints remove the excess materials to leave you
with the shape as per the sketch. I use a 9” grinder with cut off wheels to remove most of the materials and to get a lot of the slots hogged out undersized before final milling to
save a bit of time.
Don’t worry about getting it to close to finished sizes yet, that all comes much later.
(pretend the trigger slot isn’t cut yet and you get the idea, note the angle of the cut behind
the trigger slot is the 17.5 degrees for grip angle.)
7/31/2019 1911 Scratch Frame Tutorial
http://slidepdf.com/reader/full/1911-scratch-frame-tutorial 8/22
Back to the mill and now is the time to mill out the barrel link area and then cut the
trigger bow slot in the bottom side of the upper rail block as well as the trigger slot itself.
Actual sequence you use is up to you; sometimes I do the barrel link area just before the
dustcover goes on.
7/31/2019 1911 Scratch Frame Tutorial
http://slidepdf.com/reader/full/1911-scratch-frame-tutorial 9/22
7/31/2019 1911 Scratch Frame Tutorial
http://slidepdf.com/reader/full/1911-scratch-frame-tutorial 10/22
All going well your trigger should now fit in the slot you just cut and the “top” edge of the trigger bow is thecorrect distance from the top edge of your block where the rails will be. (IE, 0.64 below the link pin holecentre)
Note the lip sticking above the bow in the shot below, this will match the ledge cut on the side panels toprovide the slot when they are completed.The high section angling toward the camera at the trigger bow front correlates to the transition point of theside panels as they start to curve around the grip front, the excess material above the trigger itself is alsoremoved now and the rails can be cut as well as the hammer and sear areas by repositioning the block inyour vice to suit each operation you are doing.
7/31/2019 1911 Scratch Frame Tutorial
http://slidepdf.com/reader/full/1911-scratch-frame-tutorial 11/22
After the hammer/ sear slots are done you can use a file to square up the rear of the mag
slot and get it fitting up through the block.I usually leave the part at that point and move onto the side panels and grip area.
Side panels and infill plates
Starting with the 1/8” flat stock mark the 17.5 degree angle and cut 2 pieces long enough
to encase the mag that now fits in the upper block.

7/31/2019 1911 Scratch Frame Tutorial
http://slidepdf.com/reader/full/1911-scratch-frame-tutorial 12/22
Measure from the curvy transition point of the magazine well and mark where the infill
plate will be, as well as the angle for the slot of the mainspring housing.
I use the rule to get the slot position pretty close.Scribe the MS housing slot position heavily as it is needed later.
(These pics are not of an actual side plate but just trying to get the idea across)
7/31/2019 1911 Scratch Frame Tutorial
http://slidepdf.com/reader/full/1911-scratch-frame-tutorial 13/22
Cut the infill piece/ rear of mag well, as per the sketch with little tenons on them,
distances of the tenons don’t matter here, what ever looks good, and match the tenon
points with the side plate.Width of the fill plate is from the blueprints, easy uh?
Sorry no piccies of this stuff but the sketches tell the story.
I tack weld the 2 grip halves together to do all of this to make sure they both end up being
exactly the same.
Use a small drill through each end of a tenon slot and than a dremel gets the slots in the
side plates.
The side panels are then put in the mill to cut the ledge for the trigger bow to run on whenthe side plates are located to the upper. Measure how high the block is above the trigger
bow in your slot will give the depth of the side plate ledge. (facing off the top and front
edges so they are even doesn’t hurt either.)

7/31/2019 1911 Scratch Frame Tutorial
http://slidepdf.com/reader/full/1911-scratch-frame-tutorial 14/22
Once the ledge is cut the side plates are then separated and a bit of filing here and therewill let the fill plate sit in the tenons and a magazine should run smoothly in the 3 sided
box you just made. Ideally, use a vice to squeeze the side plates onto the tenons for a tight
fit if they are a bit stubborn.
The “box” then gets fitted to the upper rails block and lined up so a mag runs up throughthe upper rail block easily and the trigger bow is a nice fit and the angle cut on the upperblock matches the side plate angle.
Clamp it all as best you can and dremel a little groove at the joints to give the weld a
chance to penetrate well. Groove the tenon slots at this time so good weld penetrationoccurs as well. Don’t have the welder turned up to high, just enough to give good
penetration, any over penetration can still be cleaned out with a file but ideally the slot
inside should be clean as a whistle after welding. Grind or file any excess weld so it isflush to the surface and it starts to look like something other than strange shapes of steel.
This shot shows a finished unit, you can just make out the difference in parkerise colorbetween the hot roll material of the upper block and the cold rolled 1/8” plate of the side
panels. Mostly covered by the grips anyway so it doesn’t worry me.
7/31/2019 1911 Scratch Frame Tutorial
http://slidepdf.com/reader/full/1911-scratch-frame-tutorial 15/22
By this time you should be able to see how everything else is pretty easy, that was thehardest part.
Fill the front grip area with a piece of pipe split length wise, use a magazine to get theright distance, prepare the edges, clamp and weld to the side plates. Again, all left over
long for trimming later. This shot shows one prepared earlier you can see the join line
inside the magazine well area, I could have welded it internally as well but again I wasn’t
over fussy.
7/31/2019 1911 Scratch Frame Tutorial
http://slidepdf.com/reader/full/1911-scratch-frame-tutorial 16/22
Dustcover
Similar to the grip front, split a piece of the pipe length wise but leave enough tostraighten the sides out a little bit so it is sort of U shaped and will let the slide return
spring section fit in it.
Put the slide on your upper and after you look down the sights and say pow, pow a few
times and pull the slide back and forward like a kid admiring your handiwork, mark the
front of the block where the spring cover of the slide meets the upper block. This is the
inside face limit of the dustcover so leave a bit more clearance when you set up thedustcover.
Measure the distance from the top of the rails to the mark where the slide meets the block and cut the pipe section to be deep enough to get to the mark if possible. If some packing
plate is needed later that’s OK. Prepare the end that goes on the upper block and the
block as well if possible for welding at this point.
7/31/2019 1911 Scratch Frame Tutorial
http://slidepdf.com/reader/full/1911-scratch-frame-tutorial 17/22
Clamp the upper down to a very solid and flat surface, do it well so it doesn’t move at all,do the same for the dustcover and align the sides of the rails with the parallel sides of the
dustcover. The dustcover should “bulge” out either side of the rails because the pipe wall
will be shaved of to give the flat side similar to a one piece frame. Pack the dustcover toget the height you want to clear the slide spring cover and clamp it all down tight.
Weld the dustcover to the upper block and be prepared to have the weld mess up yourrails on the upper block, its unavoidable sorry and even if you use a brass plate in the rail
groove some cleanup will be needed.
This is probably the hardest bit to weld as access to the area is restricted by the clamps
that are holding everything.Here is a finished one, you can just make out a little bit of over penetration of the weld in
the corners but that can be cleaned out with the ½” long series end mill later so the slide
return spring guide fits.
7/31/2019 1911 Scratch Frame Tutorial
http://slidepdf.com/reader/full/1911-scratch-frame-tutorial 18/22
Once it is welded leave it alone. Don’t remove the clamps we are not finished yet. Finalcleanup and trimming the excess comes soon.
Trigger guard
If you have made it this far then the trigger guard is a piece of cake. Cut and shape toyour hearts desire and position the trigger guard on the still clamped down frame.
Clamp the trigger guard down and weld it onto the dustcover and the grip front. Prepare
before welding any areas that will be become visible during the final shaping process and
build up using the welder to deposit enough materials for curving and blending the guardto the frame.
Again a bit of weld will get in the trigger slot but clean out with file is fairly easyafterwards.
Don’t get carried away and get the whole thing glowing red hot, take your time and buildit up bit by bit.
Let it all cool down before removing clamps.
What you now have is a very ugly looking frame that has the trigger bow slot done and
the magazine well is usable.
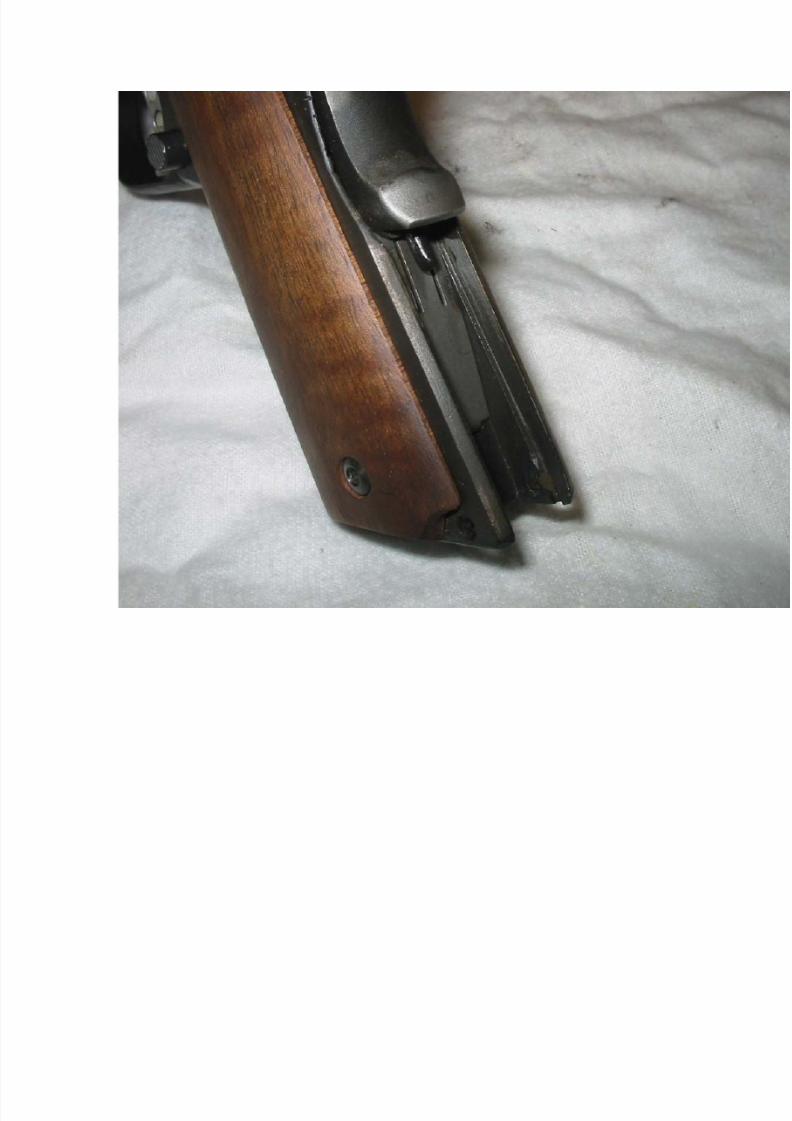
The only thing I will add is that the main spring housing slots can now be done using theheavily scribed line from our initial marking out to guide us and with a modified mill
cutter to slot them out.
7/31/2019 1911 Scratch Frame Tutorial
http://slidepdf.com/reader/full/1911-scratch-frame-tutorial 19/22
7/31/2019 1911 Scratch Frame Tutorial
http://slidepdf.com/reader/full/1911-scratch-frame-tutorial 20/22
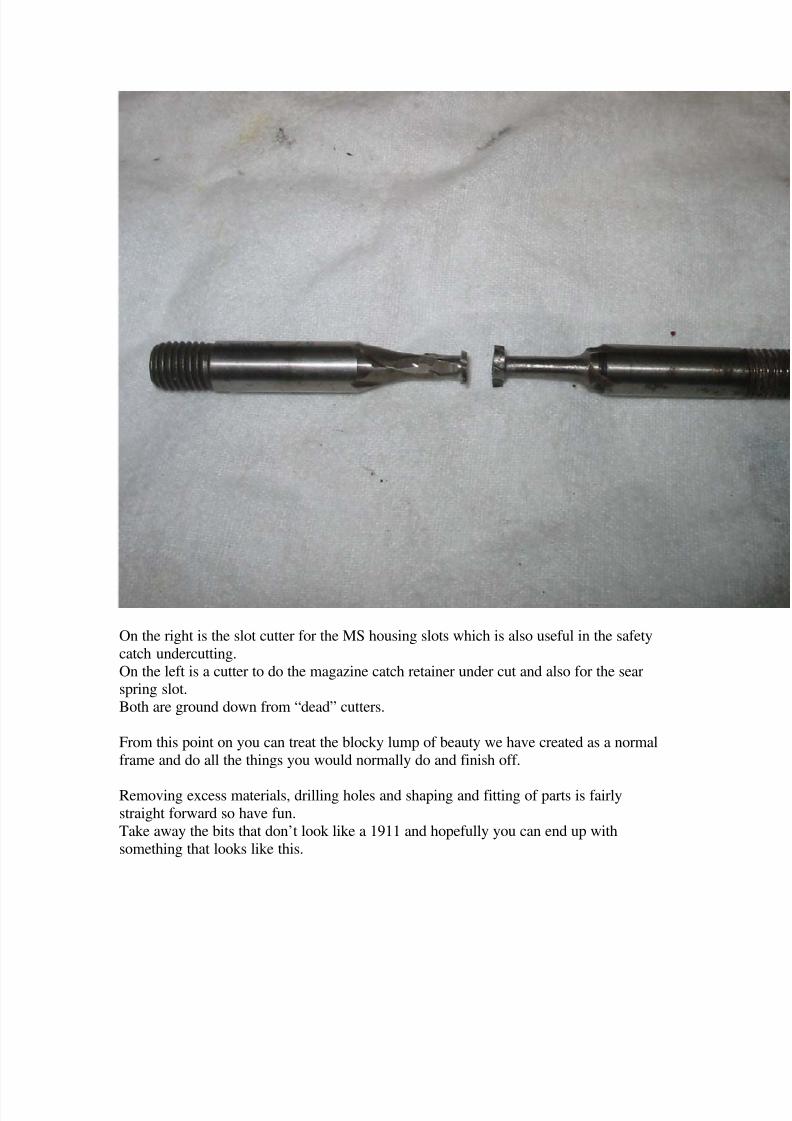
On the right is the slot cutter for the MS housing slots which is also useful in the safety
catch undercutting.
On the left is a cutter to do the magazine catch retainer under cut and also for the searspring slot.
Both are ground down from “dead” cutters.
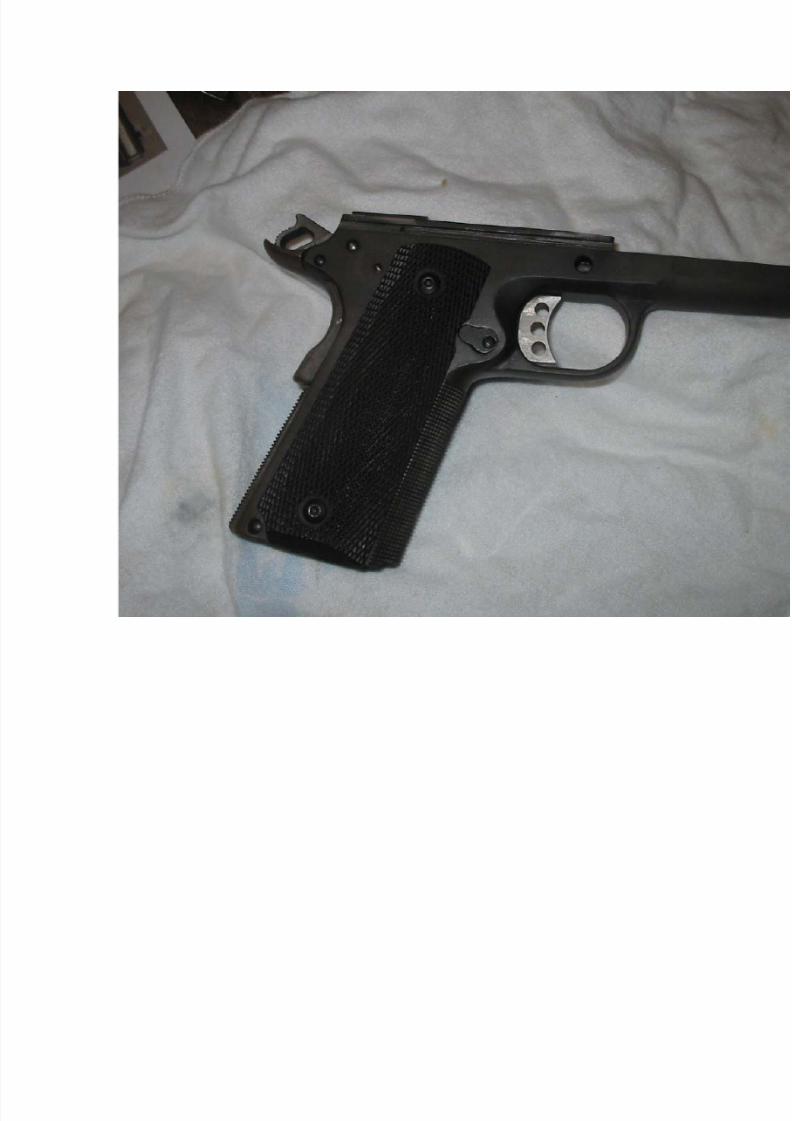
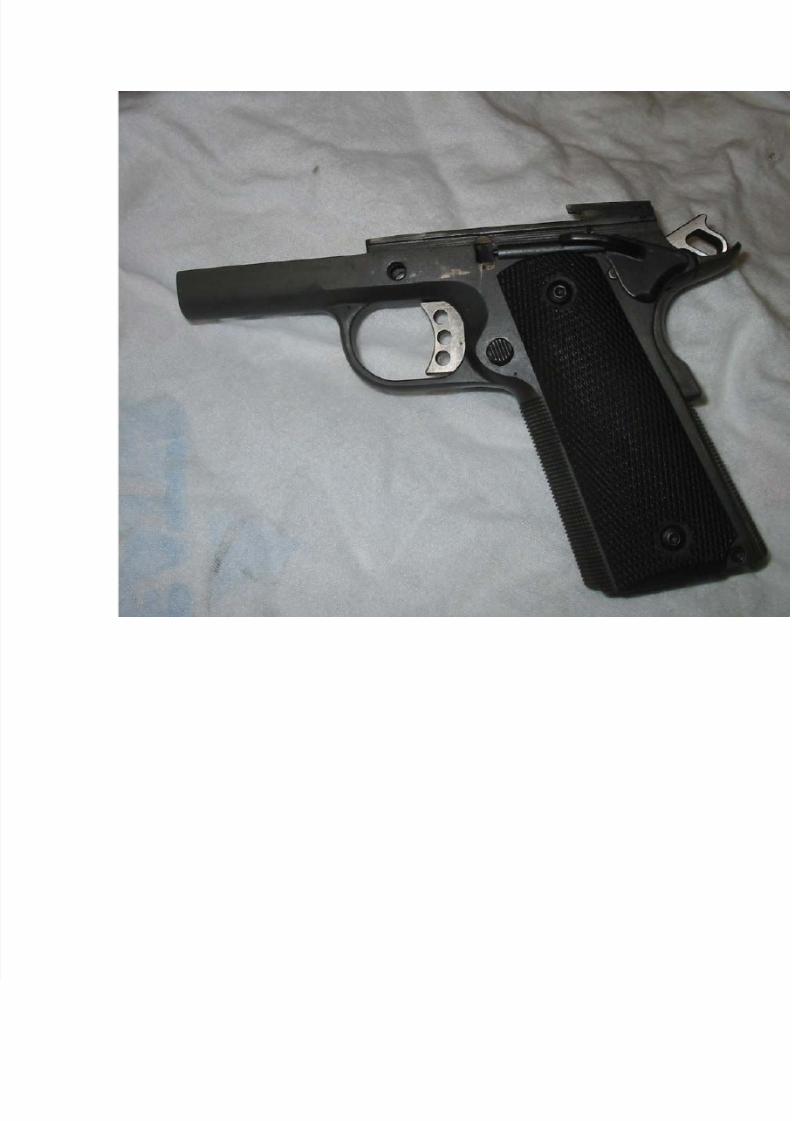
From this point on you can treat the blocky lump of beauty we have created as a normal
frame and do all the things you would normally do and finish off.
Removing excess materials, drilling holes and shaping and fitting of parts is fairly
straight forward so have fun.
Take away the bits that don’t look like a 1911 and hopefully you can end up with
something that looks like this.
7/31/2019 1911 Scratch Frame Tutorial
http://slidepdf.com/reader/full/1911-scratch-frame-tutorial 21/22
7/31/2019 1911 Scratch Frame Tutorial
http://slidepdf.com/reader/full/1911-scratch-frame-tutorial 22/22


![1911 Frame Tutorial[1]](https://static.fdocuments.us/doc/165x107/577d236c1a28ab4e1e99bf82/1911-frame-tutorial1.jpg)